
Friends, this is the motherlode. Or, if you’ll forgive the terrible pun, the Mother loaf.* In that same red binder of recipes I received as a wedding gift that contains my Nana’s sweet roll dough recipe, my mom included her “secret” recipe for challah (in my recipe collection, Mom promises that she’s only given this challah recipe to one other person. This, as it turns out, has become a lie. Both my Aunt Nancy and my cousin Julie have this recipe. Who knows how many other people do too, by now!). When she was much younger (read: before two children kept her waking hours a blur of busy), Mom baked bread a lot. I don’t know where she got this recipe for challah, that wonderful, doughy, braided loaf of egg bread traditionally prepared for Jewish holidays and the sabbath, but even in our gentile household it became a holiday essential for us.
For the past few years, my sister has taken up the challah mantle and has been preparing it, with Mom’s help, on Christmas Eve so we could slather it with apple butter or cinnamon sugar or honey to enjoy on Christmas morning. It’s not an easy bread (are any of them, really?). With an incredibly sticky dough, not one or two, but three rises, and a tendency to overbake, it has always intimidated me. At any phase of the process, something could go wrong! If I could master challah, I thought privately, I would really have a handle on this bread thing.
So, a number of loaves under my belt, with Easter coming up, and this month’s Twelve Loaves challenge of holiday breads, it seemed like the right time. Friday morning, after quizzing my mom on a few details, I pushed my sleeves up, swallowed the disparaging warnings of that little gargoyle of doubt who often sits on my shoulder, and dove into Mom’s recipe.


This is, as I mentioned above, a sticky dough. After kneading it becomes elastic and smooth, but there is still a tackiness about it that leaves your bowl streaked with gummy strands and your hands, if not well floured, stringy with delicious remnants. It takes a long time – with three rises averaging over an hour each, you aren’t starting this loaf in mid afternoon and expecting it to be ready for dinner.

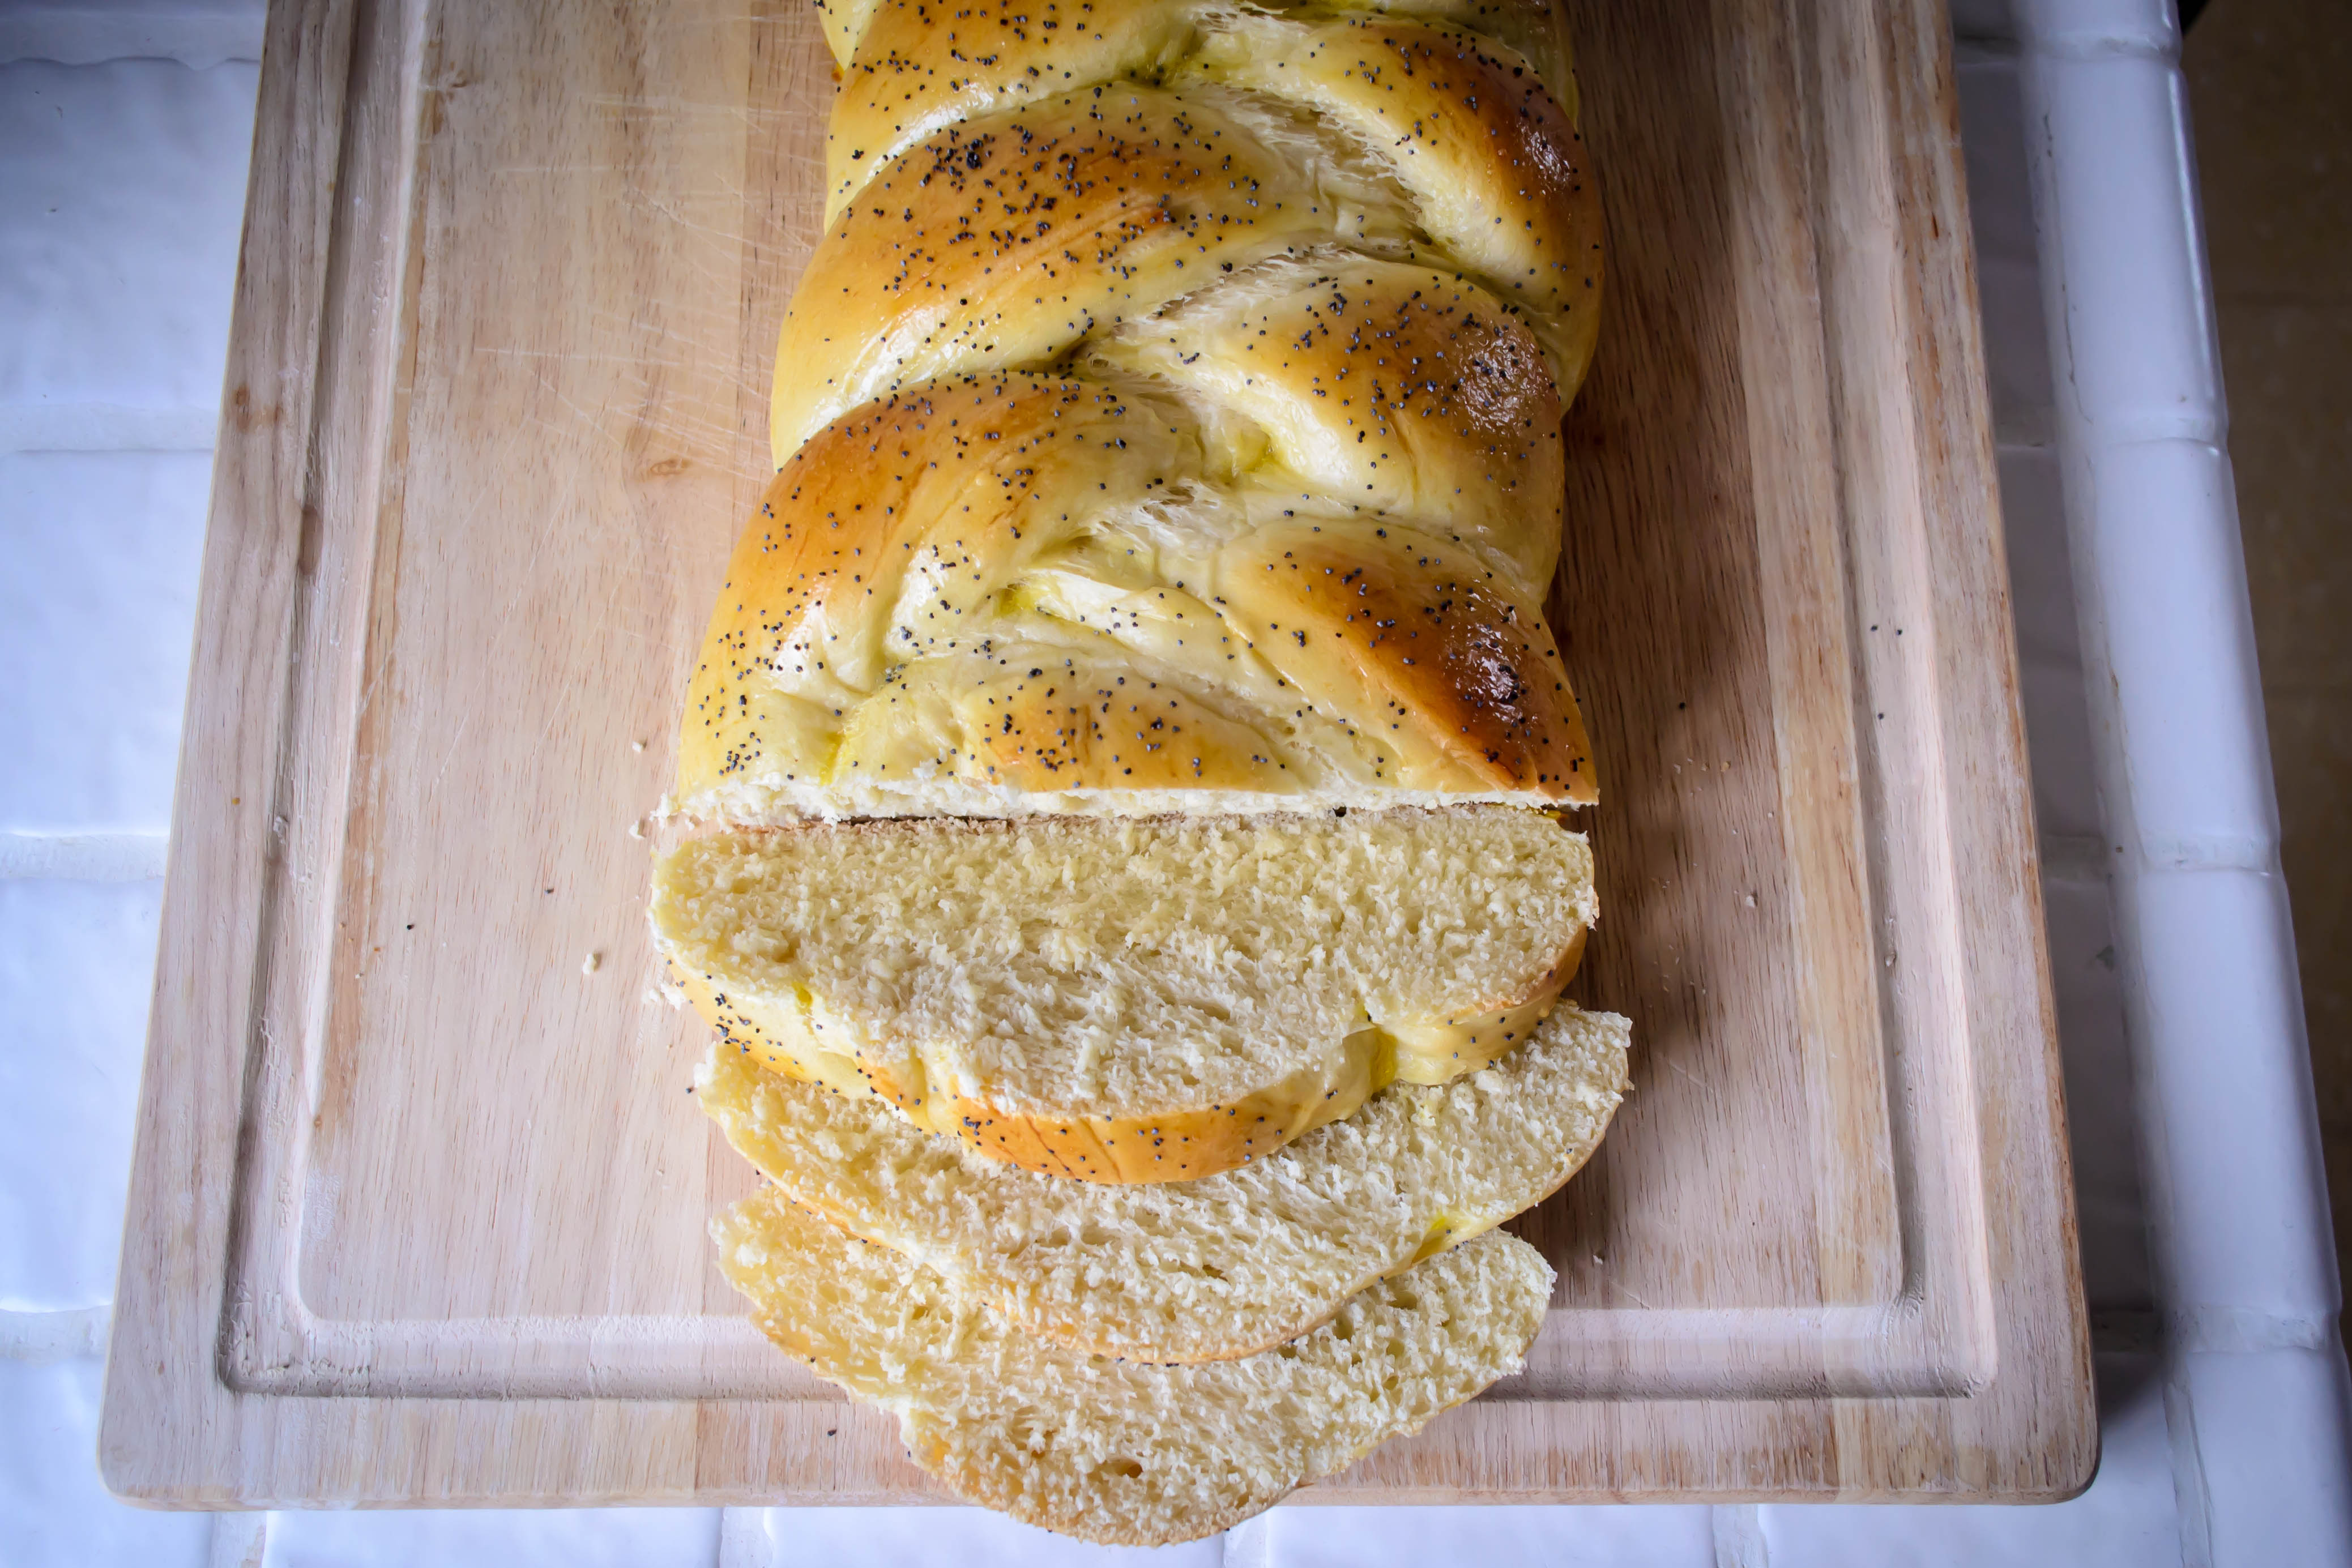
I’ve seen plenty of recipes suggesting overnight refrigeration time – Michael Ruhlman’s blog, in fact, has a guest post on challah by Marlene Newell that begins the night before it is baked – but Mom has never done it that way. If you’ve scheduled a lazy day at home, or perhaps a day punctuated by laundry, tidying up, and the odd brief errand carefully placed during a rise, this could just become your best friend. It’s soft, it’s rich and tasty, it looks impressive (even if, like me, you only do a three strand braid instead of the more traditional six strand), and it keeps fairly well, provided you wrap it well in aluminum foil. I find plastic storage gives the crust an unpleasing texture. Of course, it’s so tasty that I can’t imagine it needing to keep well – it will be gone within a day or two. On that topic, I’ve never understood the comments that it makes wonderful french toast. In our house, the full loaf has dwindled to half by lunch time, and as the afternoon wears on slice after slice seemingly evaporate, until the bread board contains only a lonely half heel and a small pile of crumbs. This is the first time I can remember, with only N. and me indulging (Lucy asked with pleading eyes of liquid velvet, but it’s too good to share), that the loaf has made it to day three of existence.

Despite my lingering doubt, I had only a few moments of anxiety as I put together this loaf. The stickiness of the dough stressed me out a little – even after adding the full amount of flour in the recipe (as I will note again below, you only incorporate part of the flour at first, adding in additional ¼ cups at a time as needed to work the dough), thick gobbets clung to the sides of my mixing bowl, my dough hook, and my fingers. One rise down, however, and the stickiness diminished.
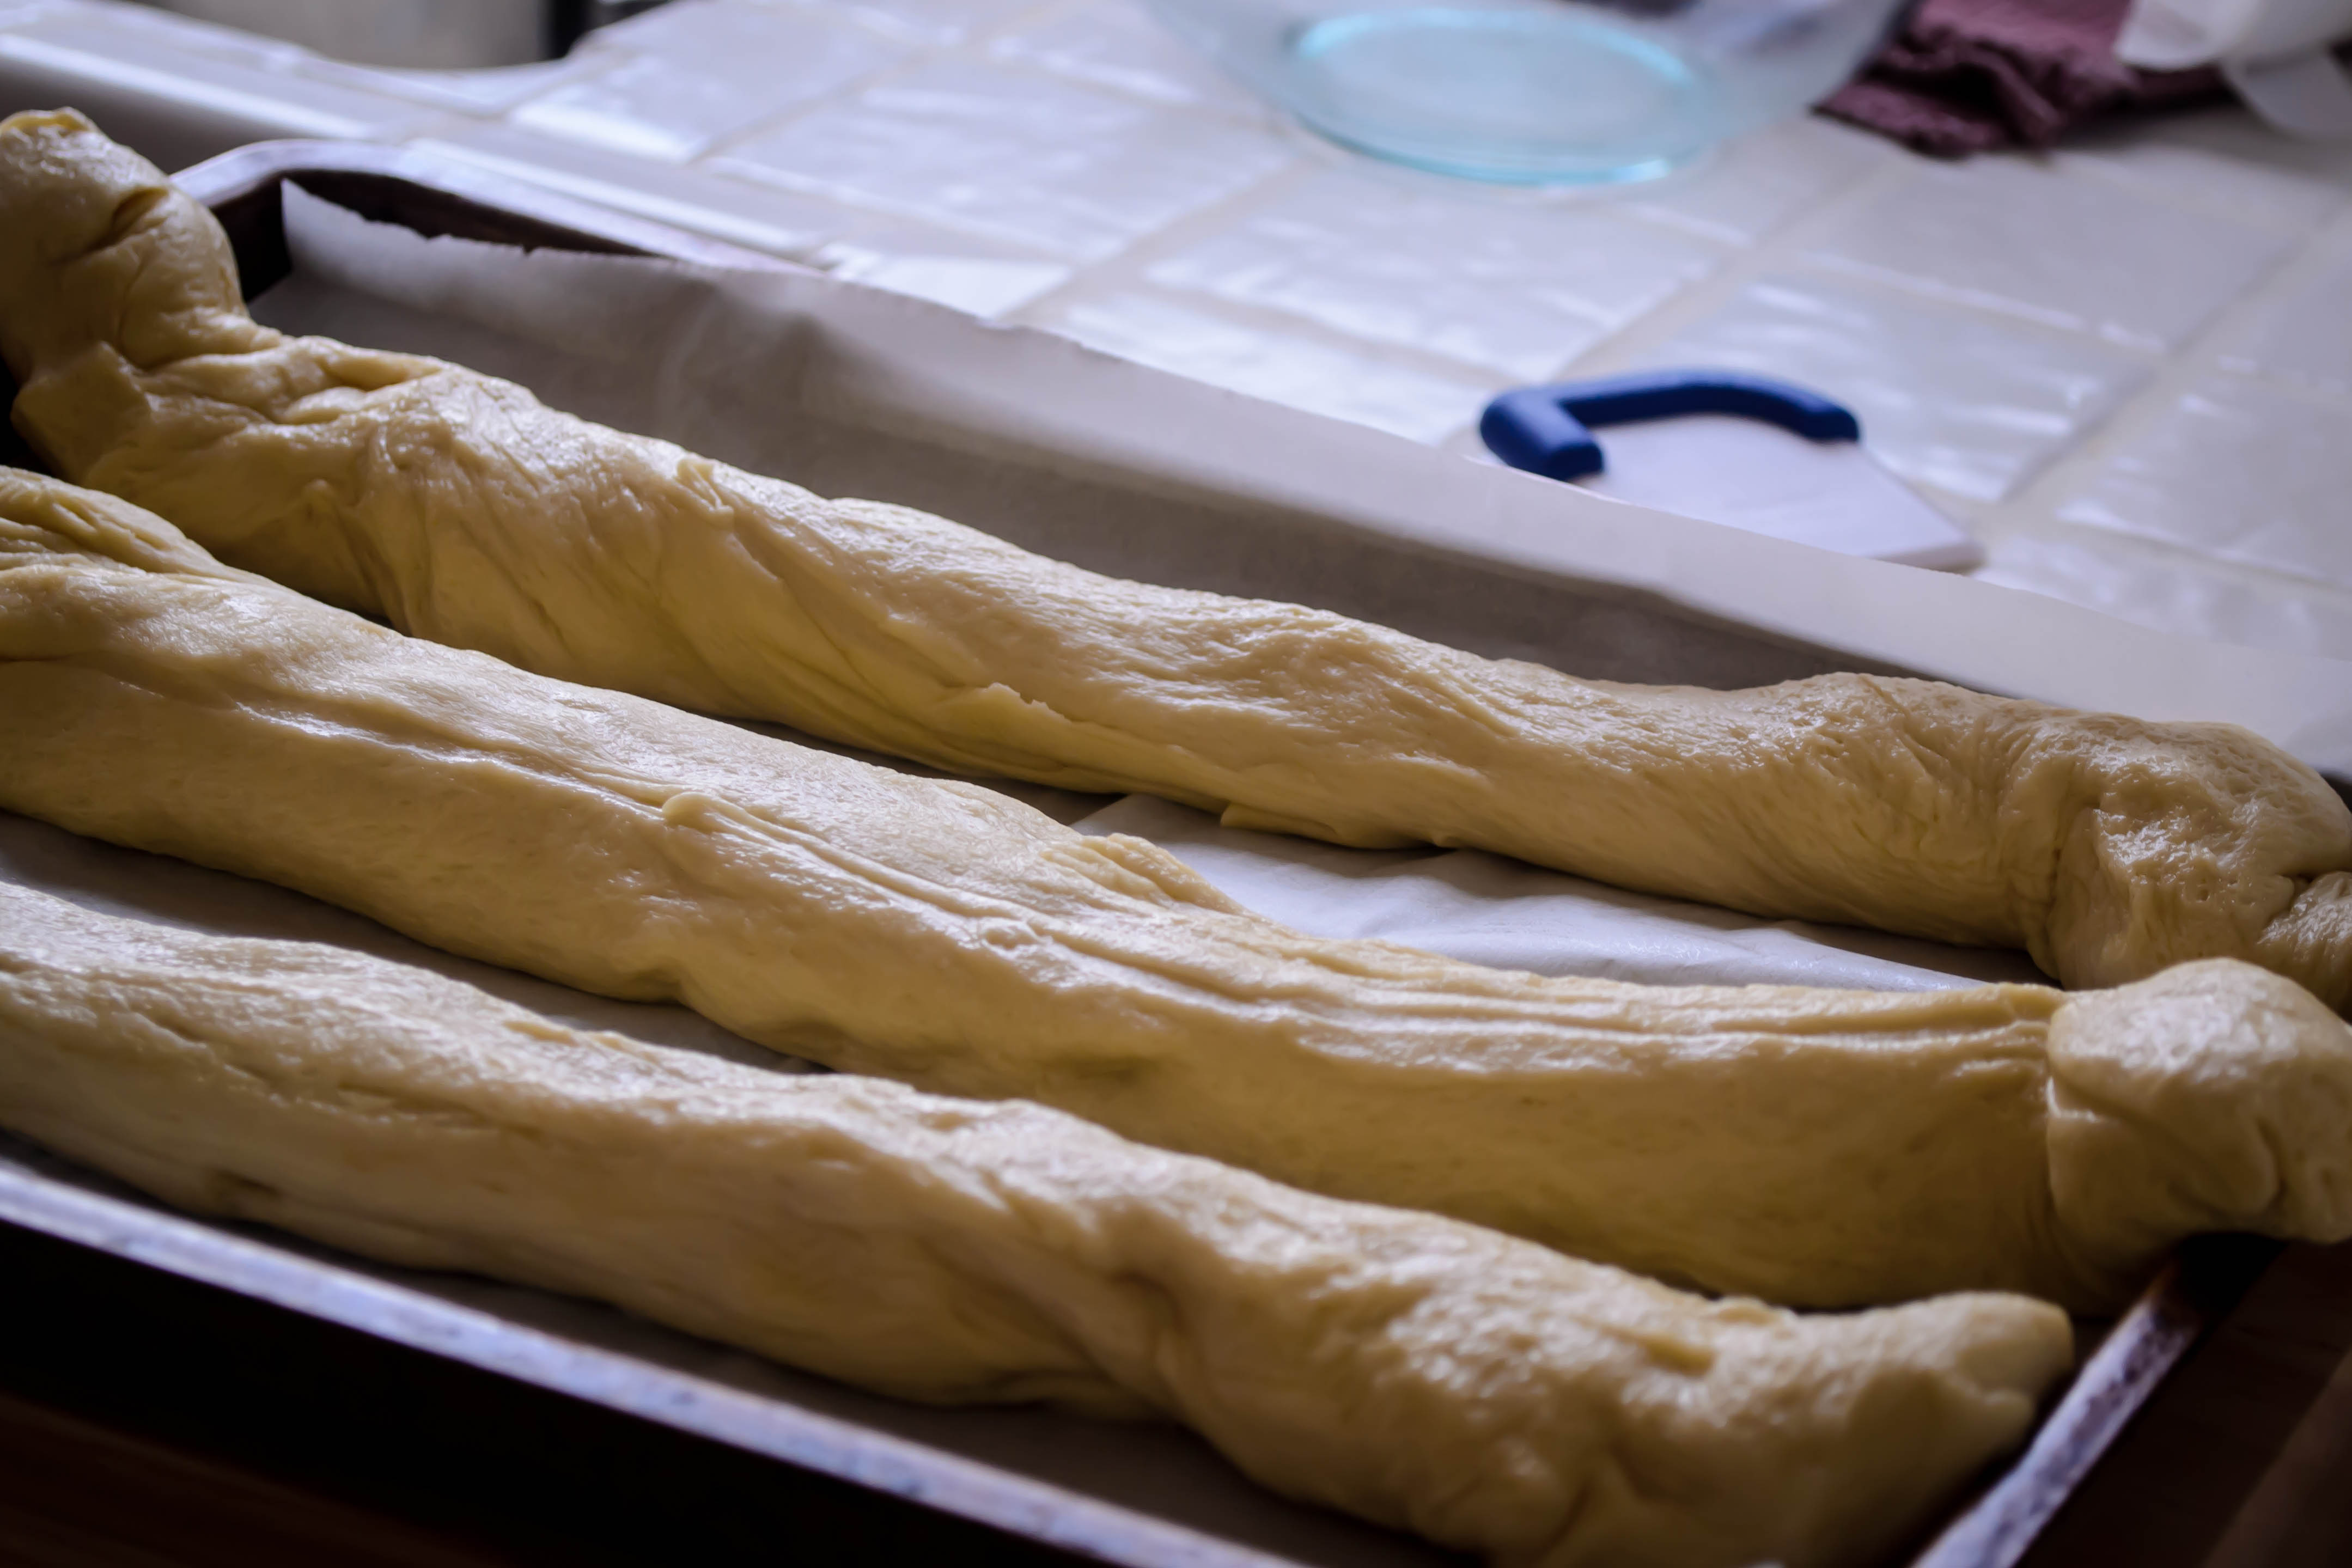
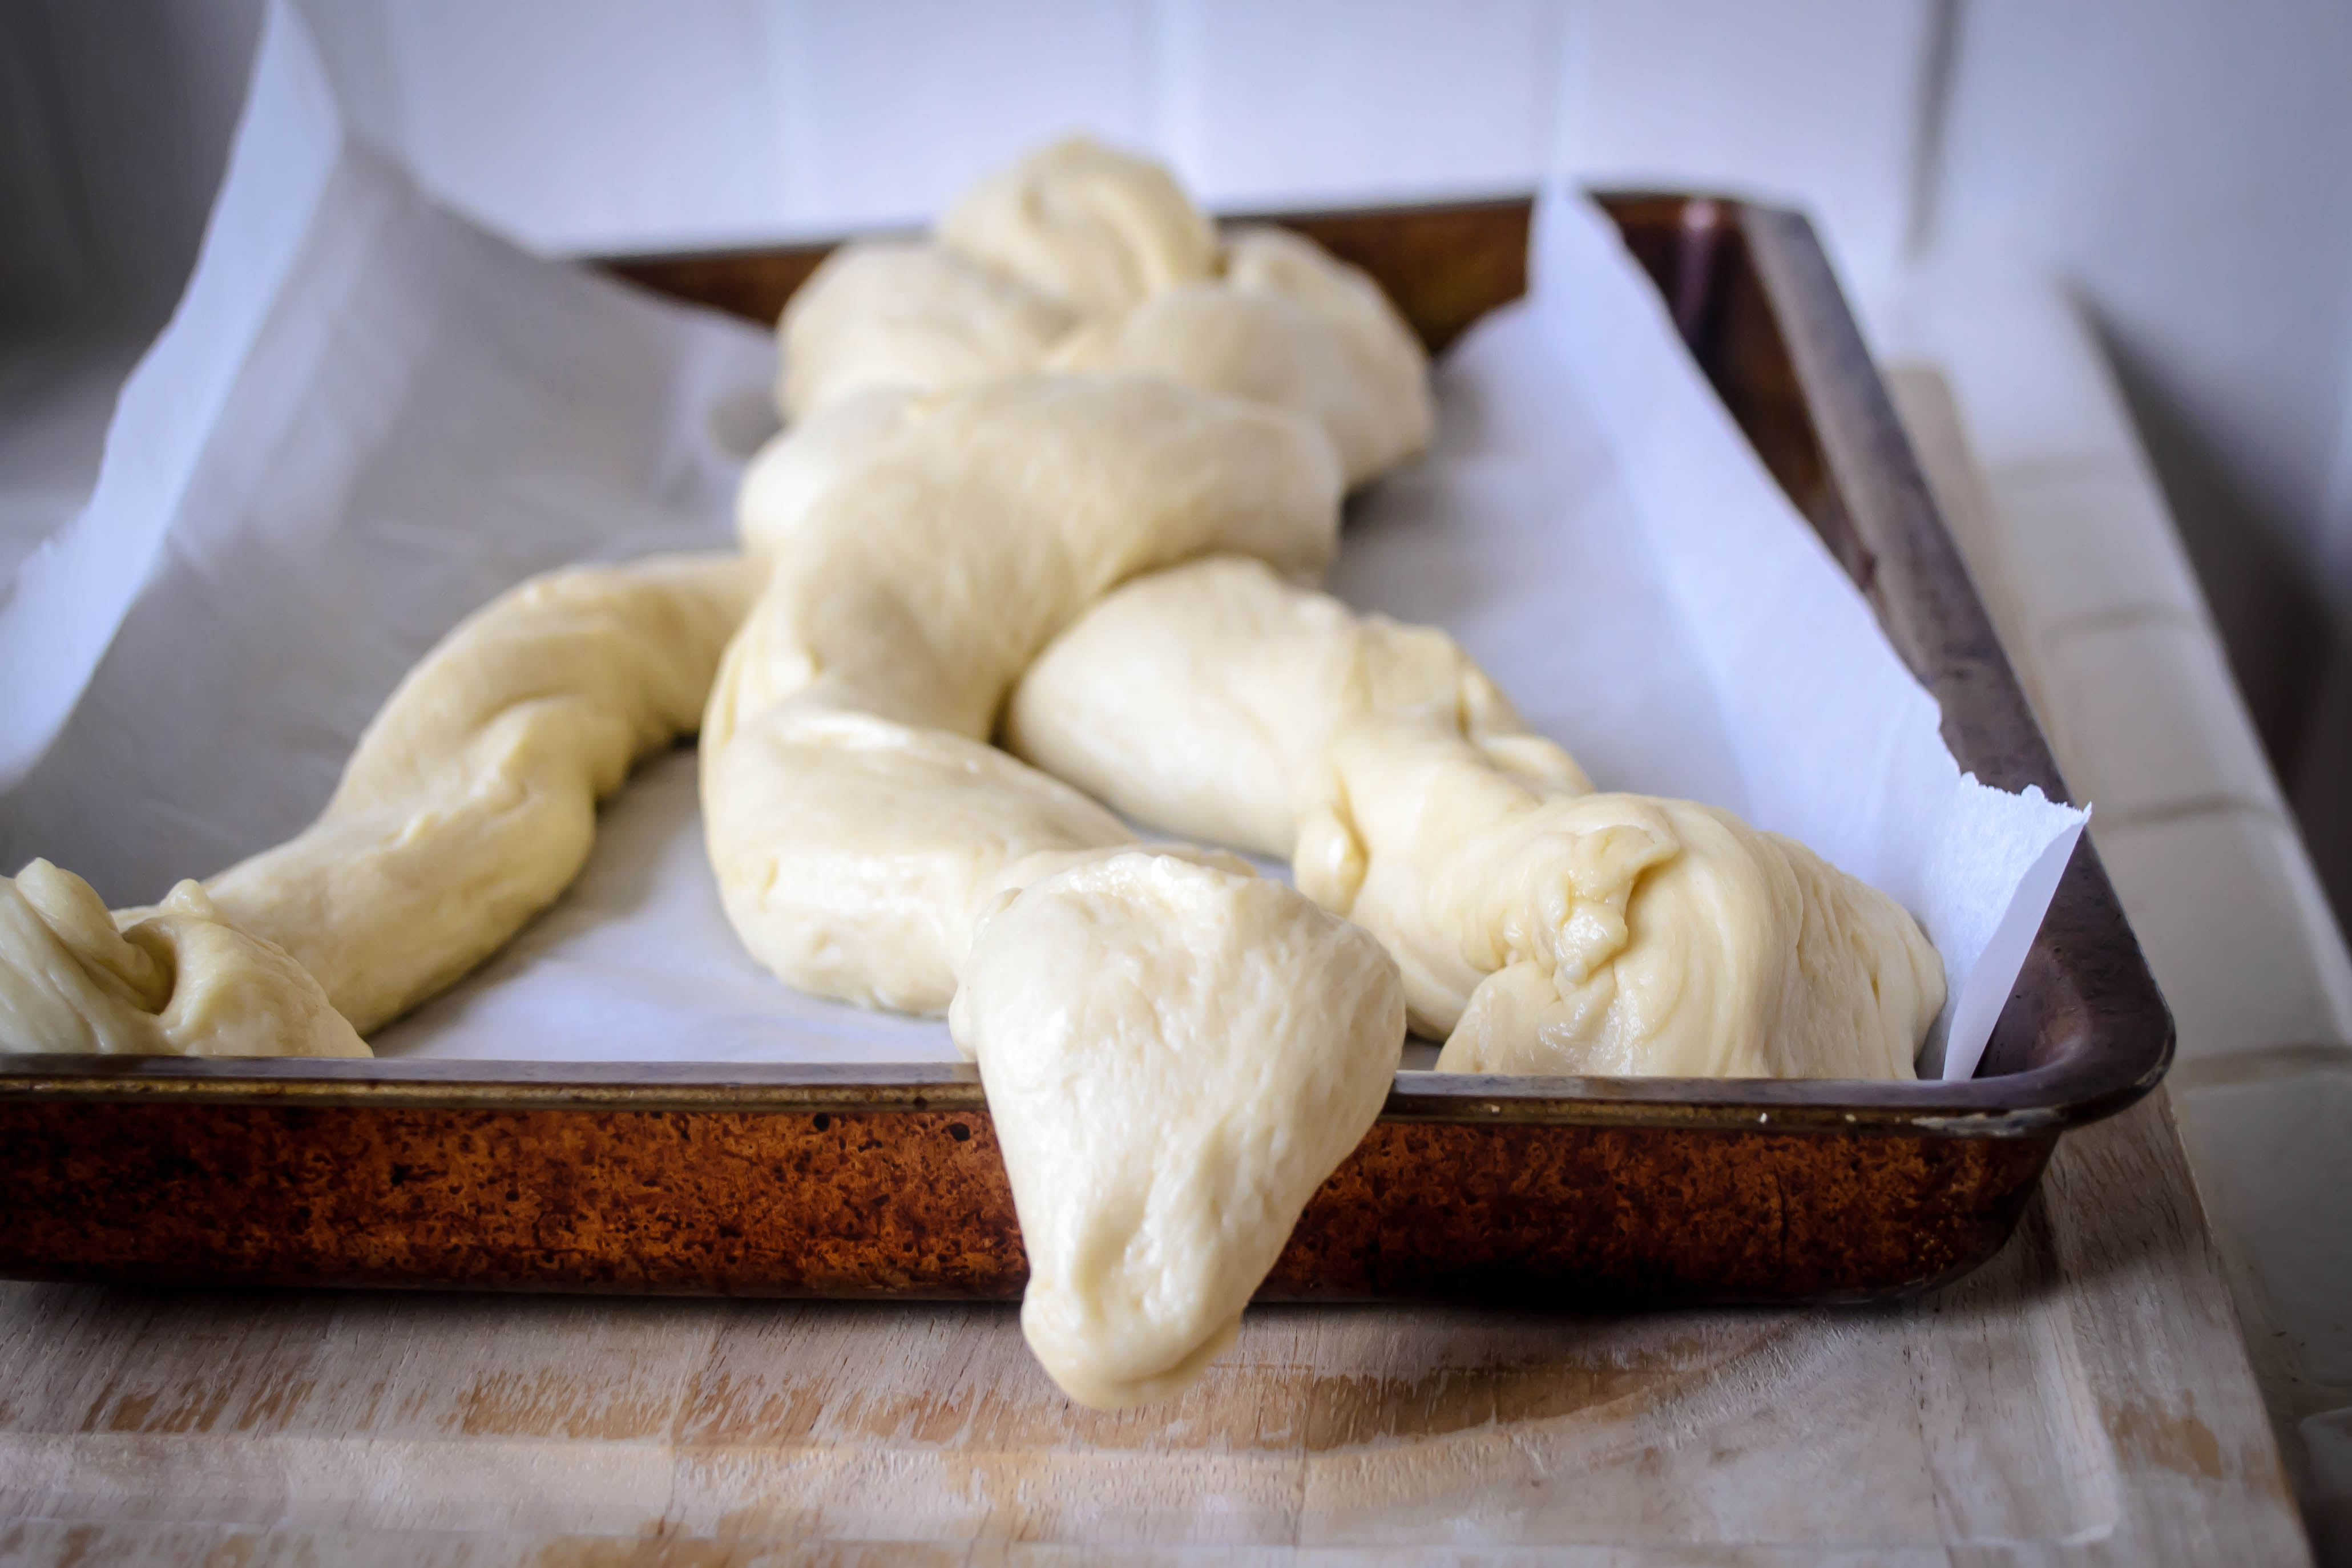

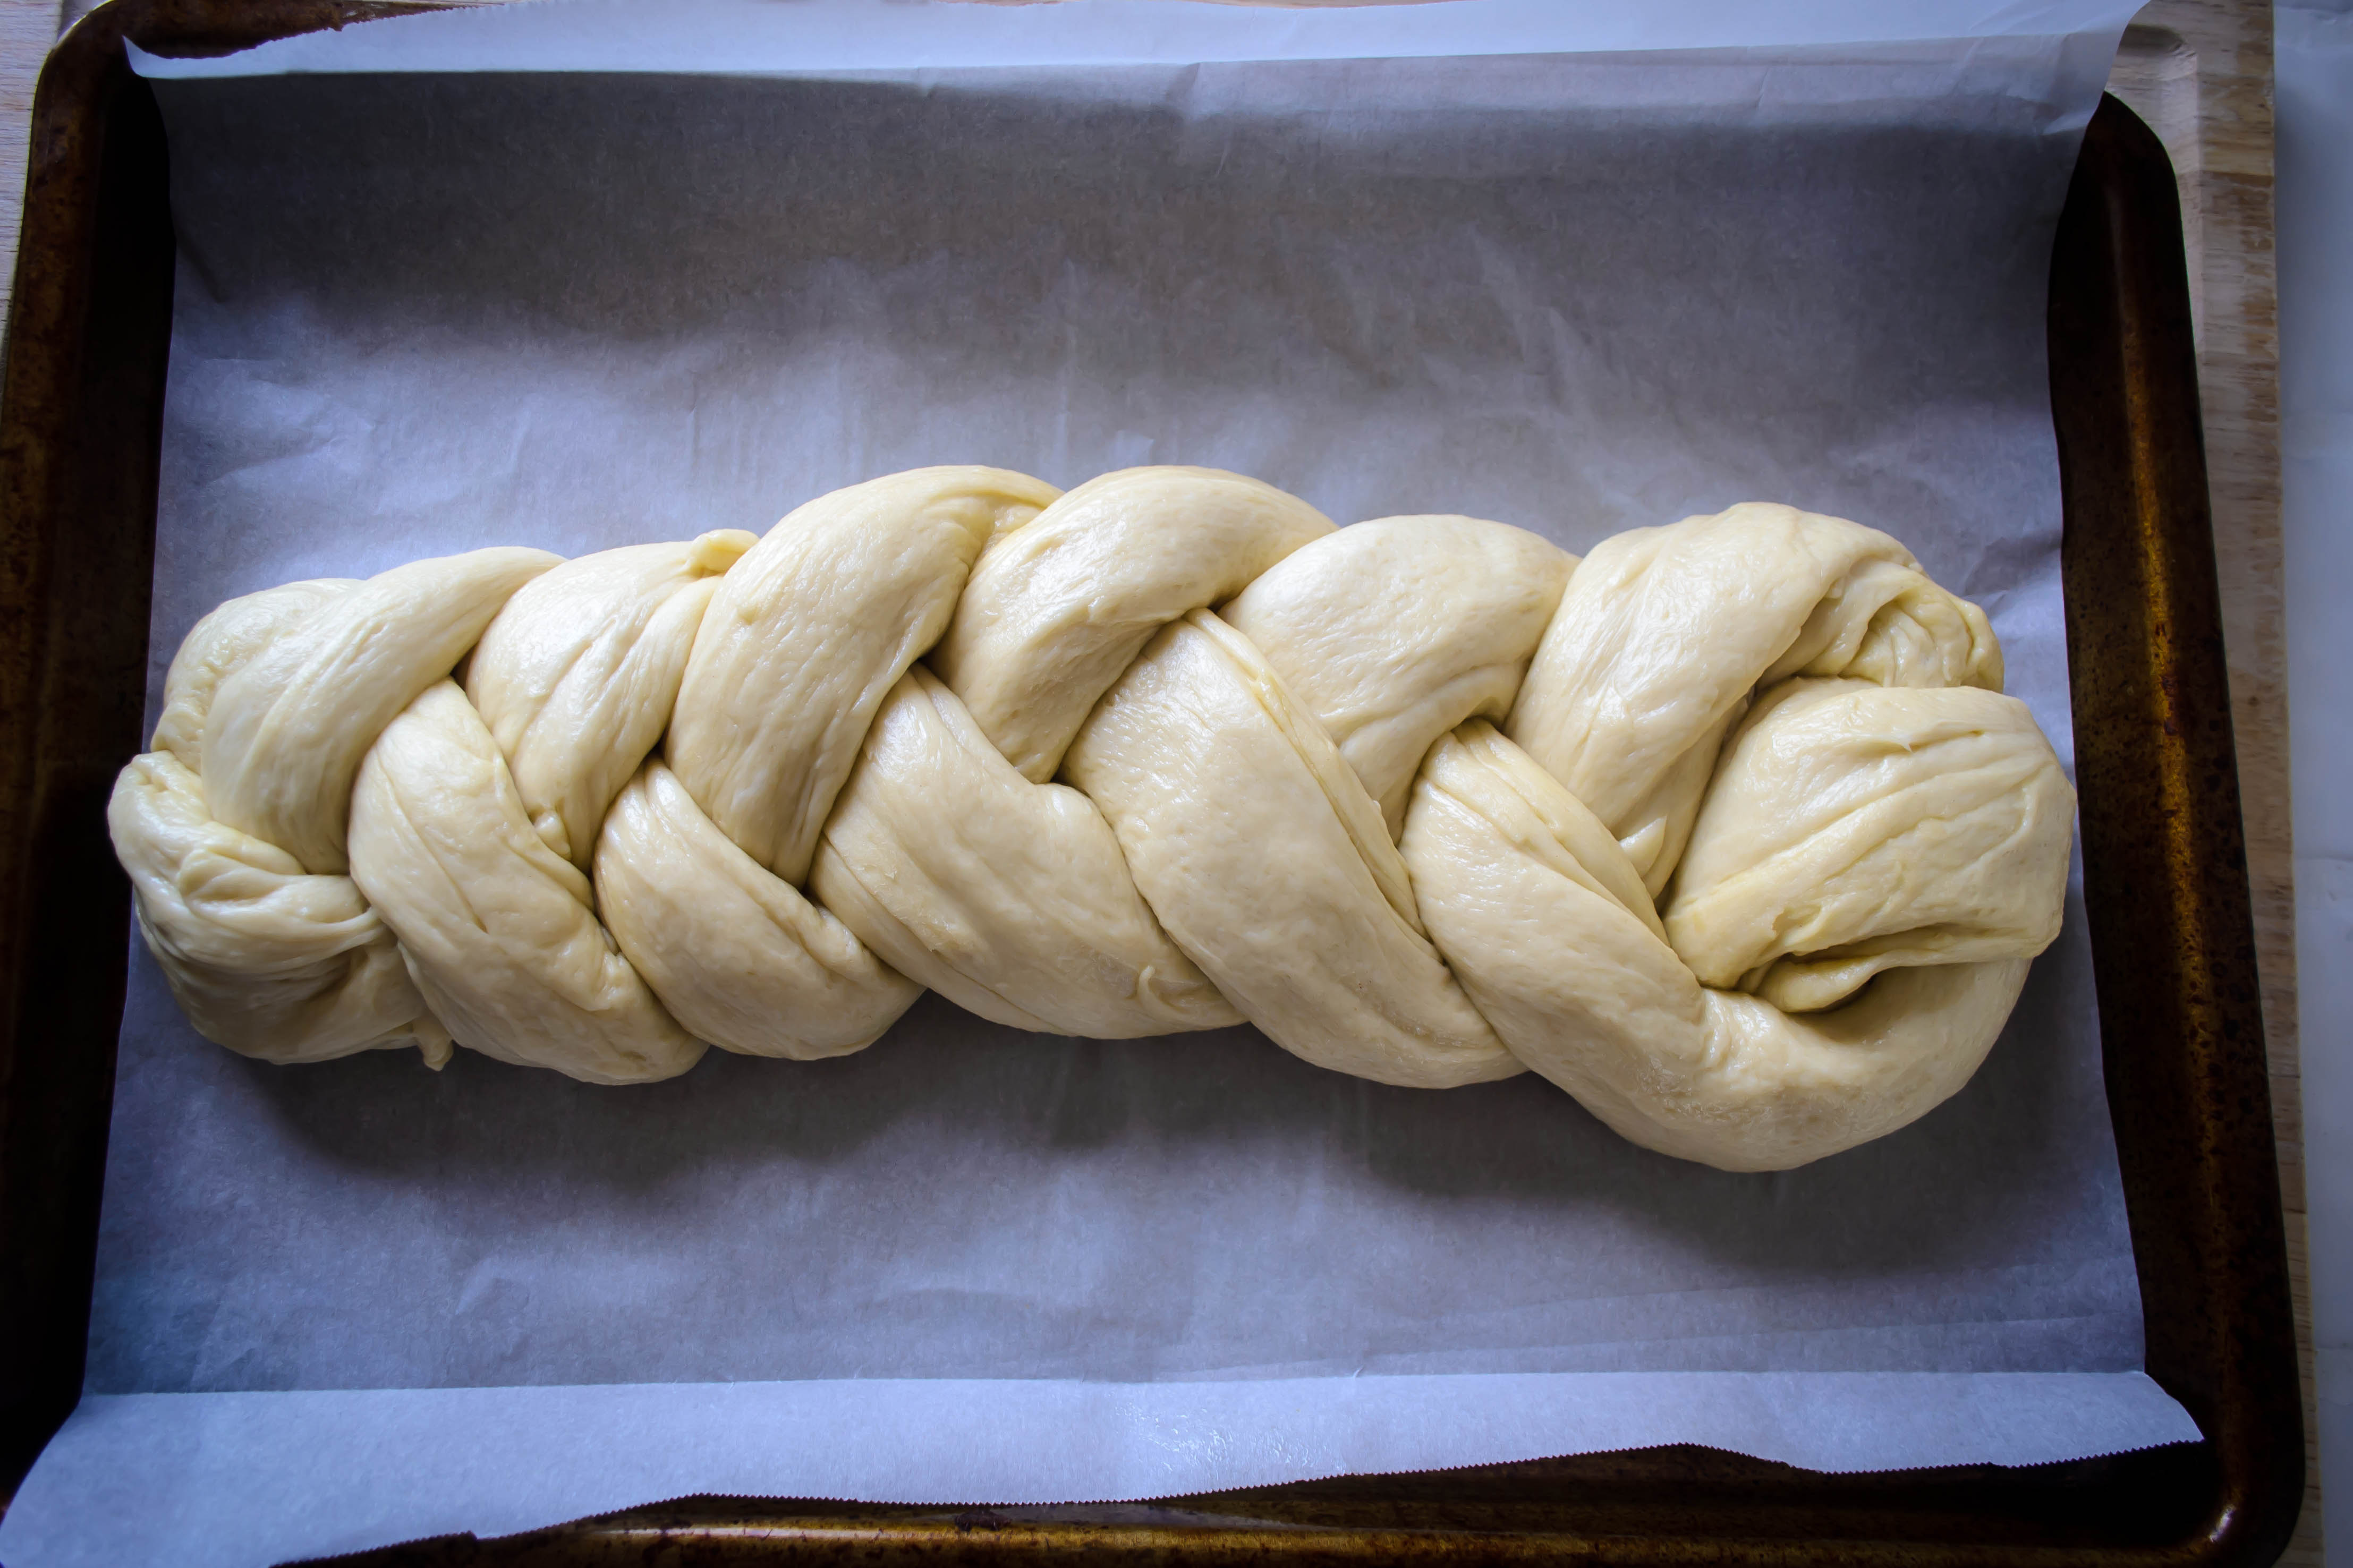
Faced with three thick strands of dough, I forgot how to braid for a moment. Heavy, stretchy worms of raw dough are a far cry from pigtails or Barbie hair, my braid targets in a past life. But braid made and ends tucked under, I had something that actually looked like my mom’s longed for loaf.

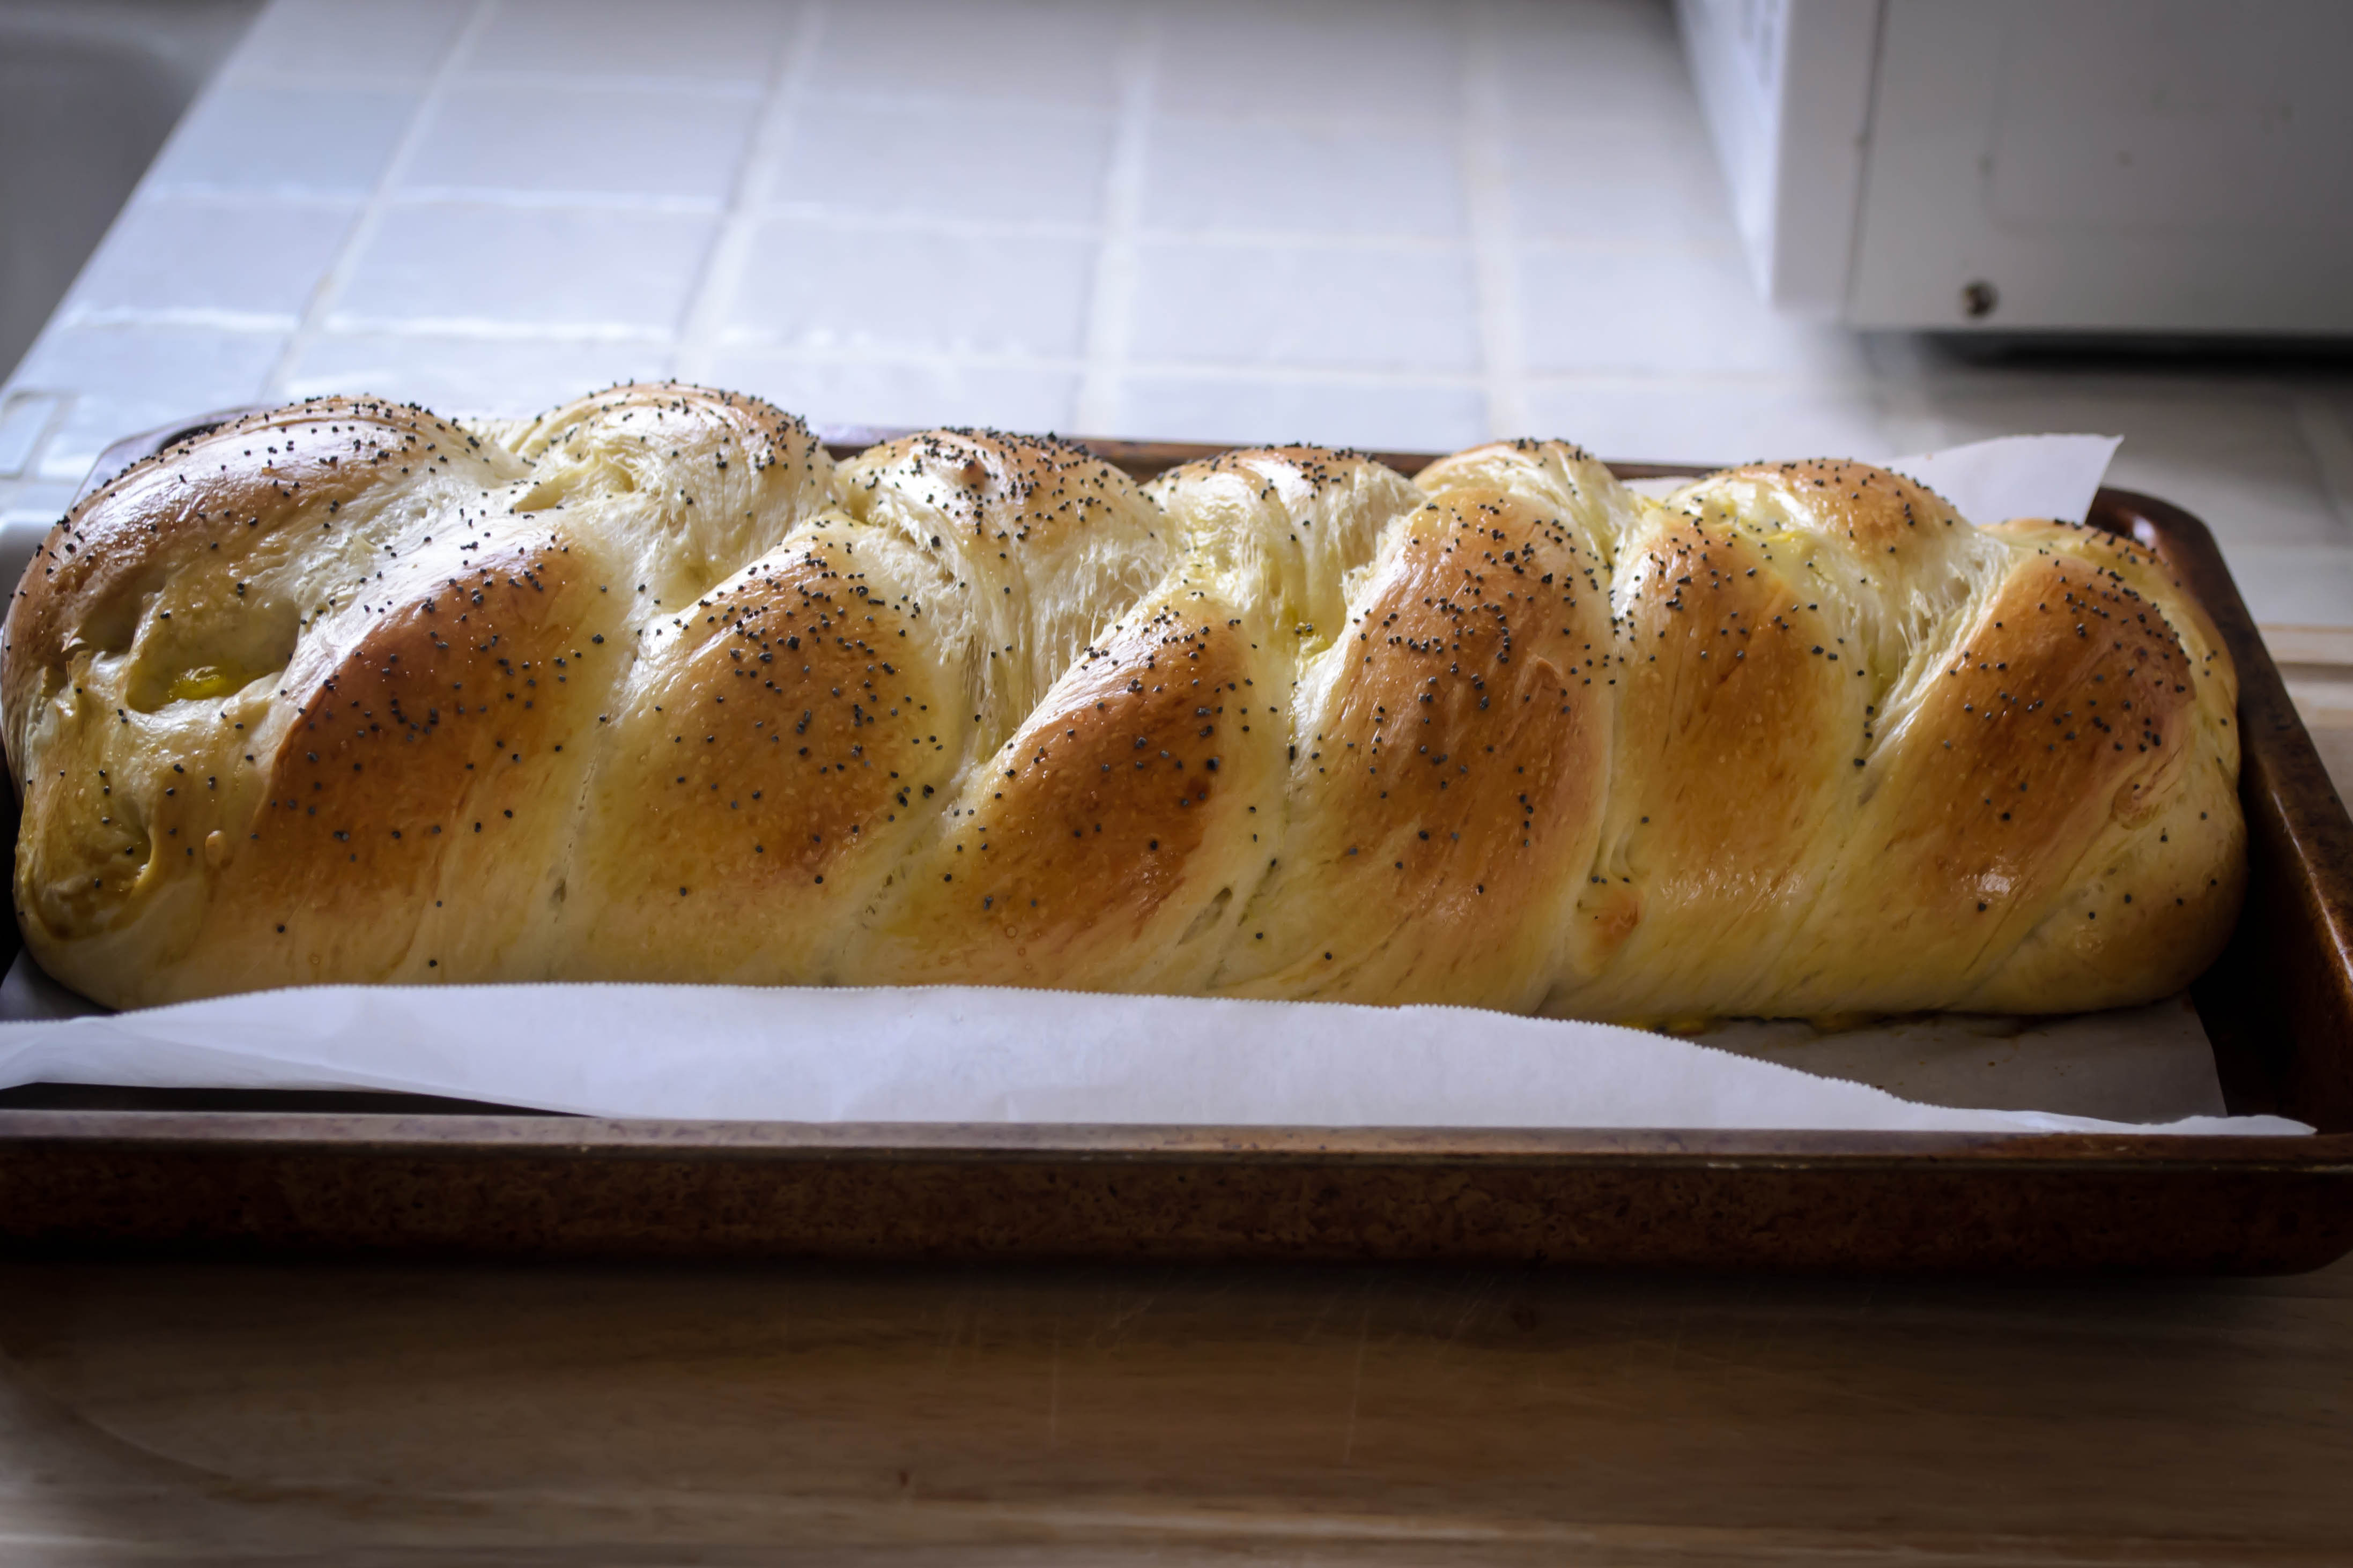
A quick glaze of egg wash and a generous sprinkle of poppy seeds, and I started getting excited. A quick, almost half hour in the oven later (the loaf goes from moist and springy to overbaked in what feels like an instant), and I was staring at a near perfect replica of Mom’s bread.
It’s hard to wait the requisite 15-20 minutes to let the bread cool and the internal structure solidify, but you should. It makes slicing much more successful. And once you have waited, you should cut thick slices, and garnish them with butter or jam or just your own teeth and tongue. Happy Sunday, whatever you might be celebrating.

Mom’s Challah
1 tsp + 1/4 cup sugar, divided
½ cup warm water
2 tsp active dry yeast (or 1 package, which contains 2 ¼ tsp)
½ cup vegetable oil
½ cup warm water (again)
2 tsp salt
2 eggs, lightly beaten
3 ¾ – 4 cups flour (I used bread flour, but Mom has always used all-purpose)
Poppy seeds or sesame seeds for sprinkling
1 egg yolk beaten with 1 TB water
-
Dissolve the sugar in the first ½ cup warm water in a large bowl (or the bowl of your stand mixer, if you are using one). Sprinkle yeast on top and let it stand to burble and breathe for about 10 minutes.
-
When your yeast has woken, and smells like bread and beer, use your paddle attachment (if you are using a stand mixer) to incorporate the oil, second ½ cup of warm water, sugar, salt, and beaten eggs.

-
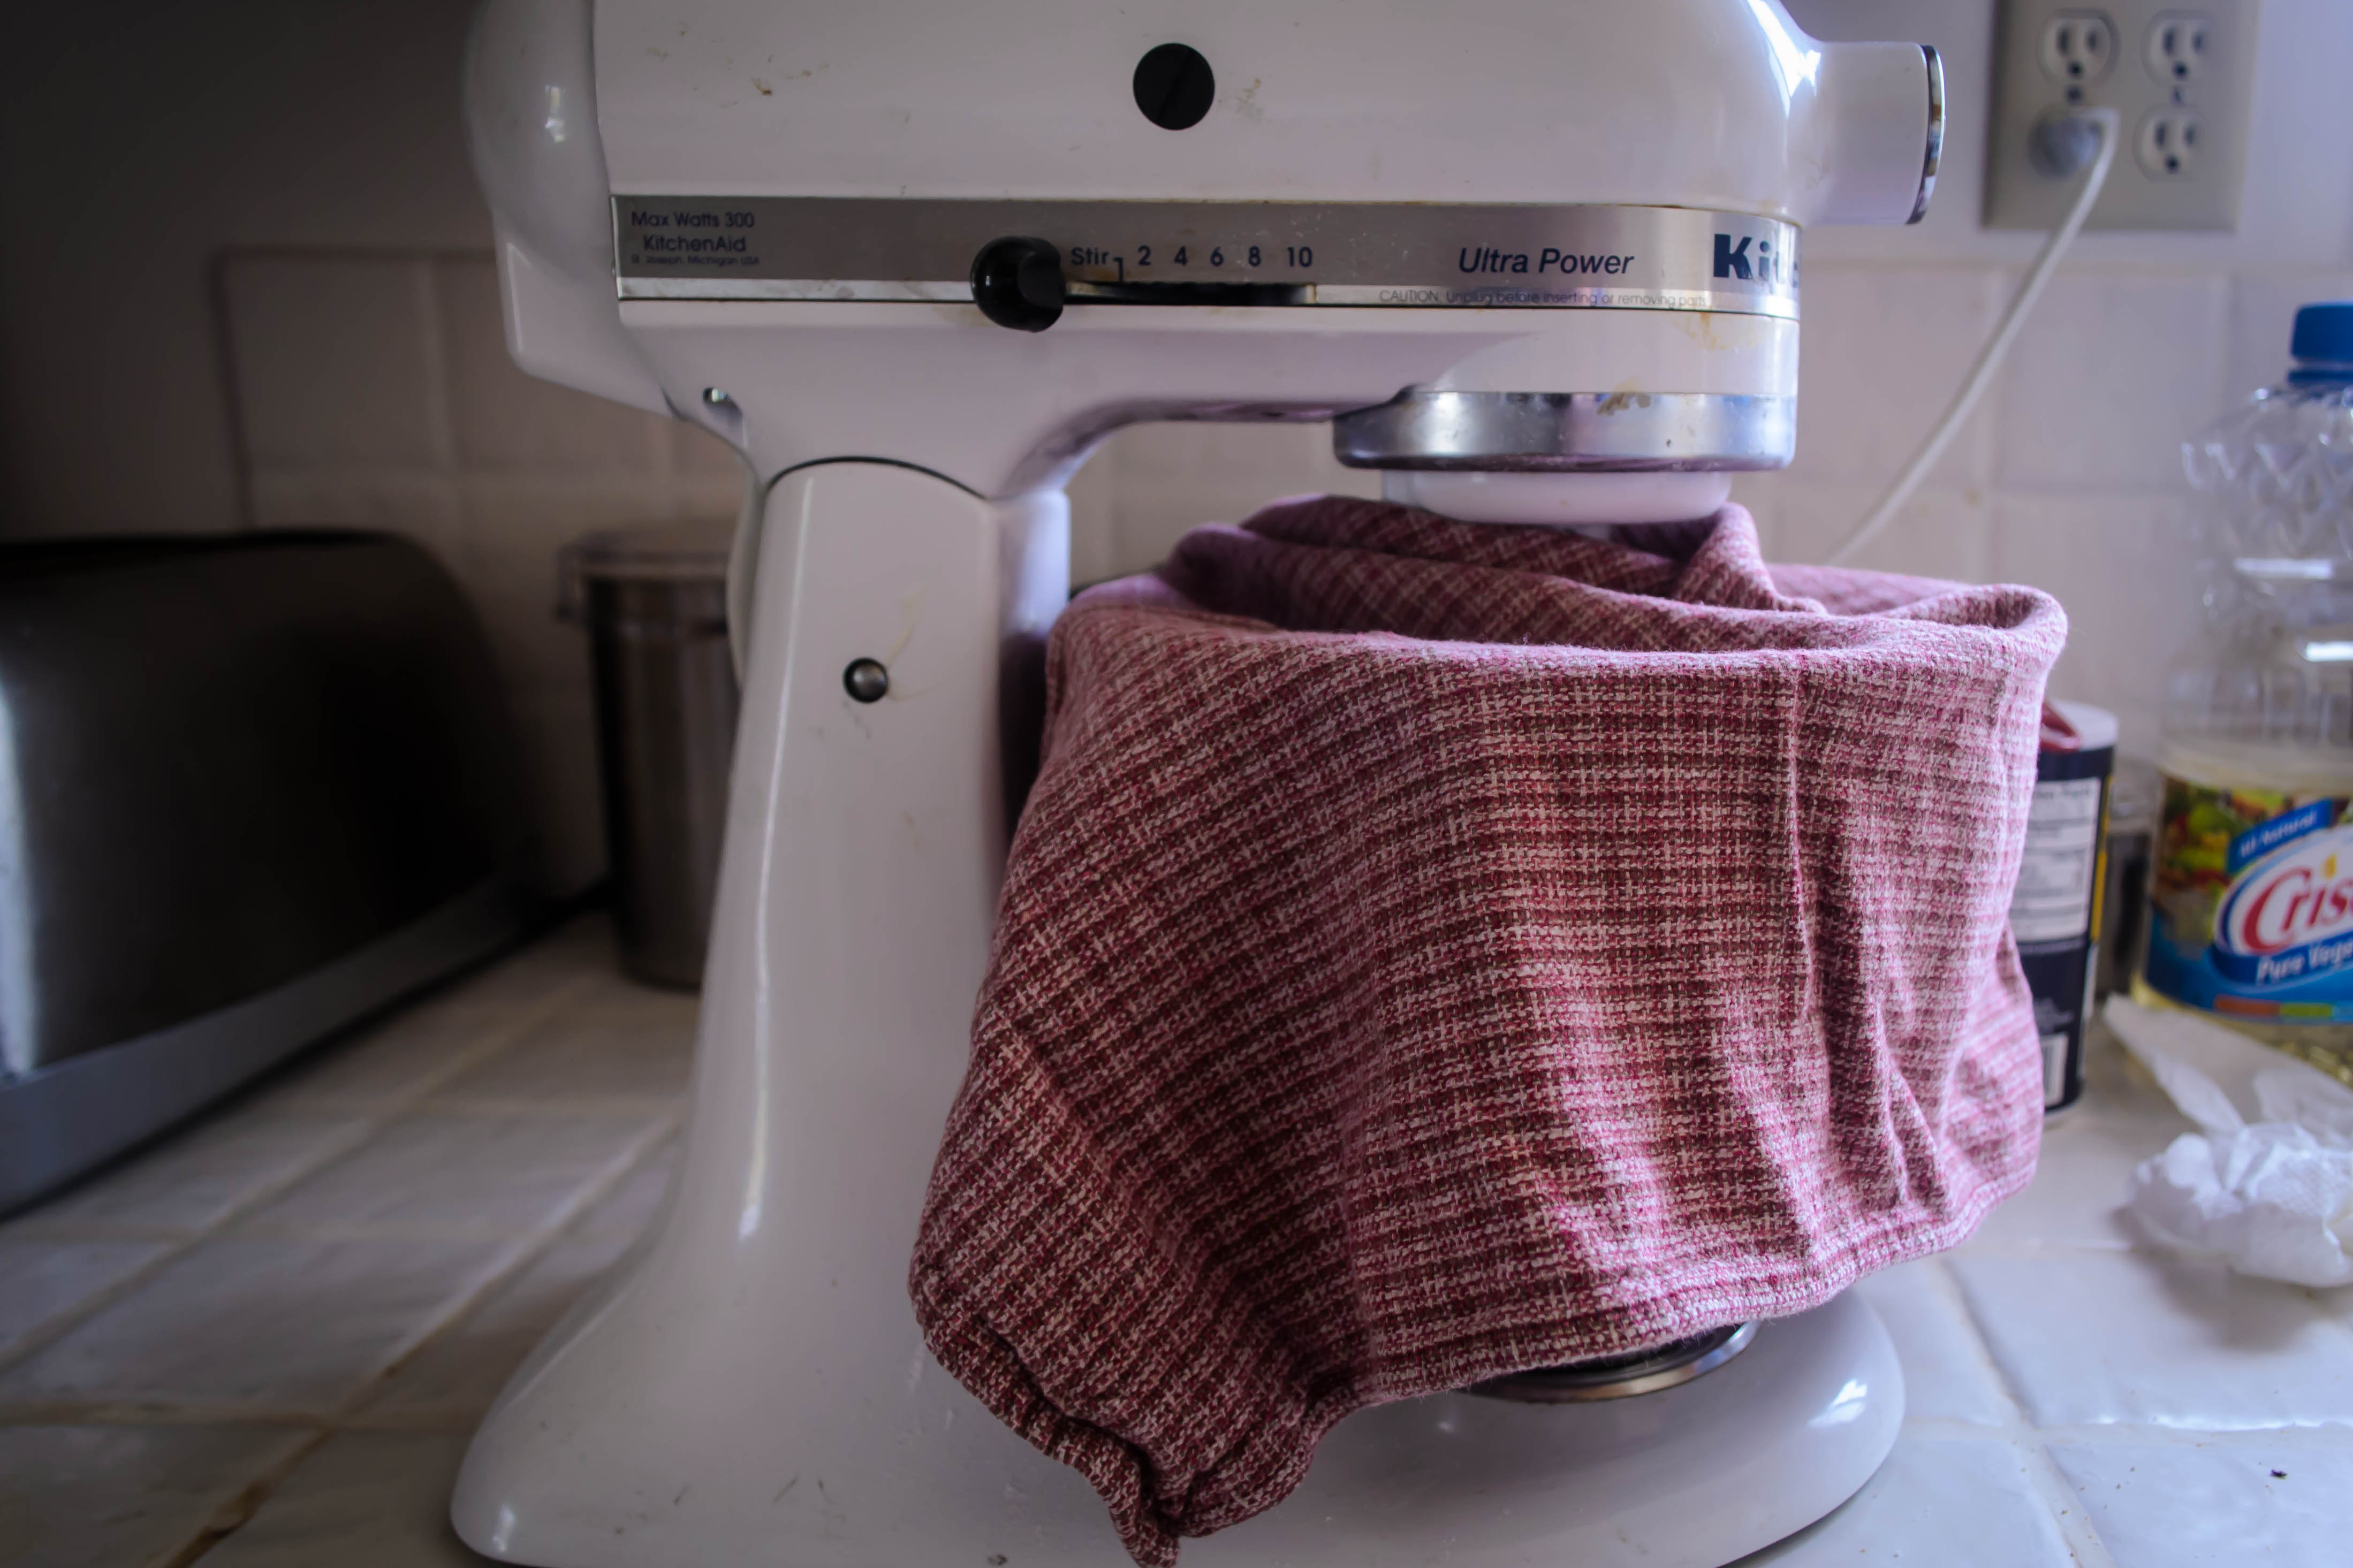
Add 3 cups of the flour and beat well. The dough will be very sticky, but as Mom says, that’s okay. Cover the sticky mass with a cloth and let it rest for 10-20 minutes.
-
If you are using a stand mixer, exchange your paddle attachment for the dough hook and begin kneading at low to medium speed. As needed, add the additional flour by ¼ cups at a time. Knead for 8-10 minutes or until the dough passes the windowpane test. When I asked Mom about this, she looked at me like I was speaking a different language, then said “I always use the baby’s bottom test,” which got the same look back from me. She was talking about smoothness and texture, but considering she often gives the dough a little smack when she’s done kneading it, I wondered about the ethics of this measuring device…
-
If you are kneading by hand, turn the sticky mass out onto a well floured board. With equally well-floured hands, knead for 10 minutes, incorporating more flour as needed, until the dough is smooth and has a shiny surface (and feels, apparently, like a baby’s bottom).
-
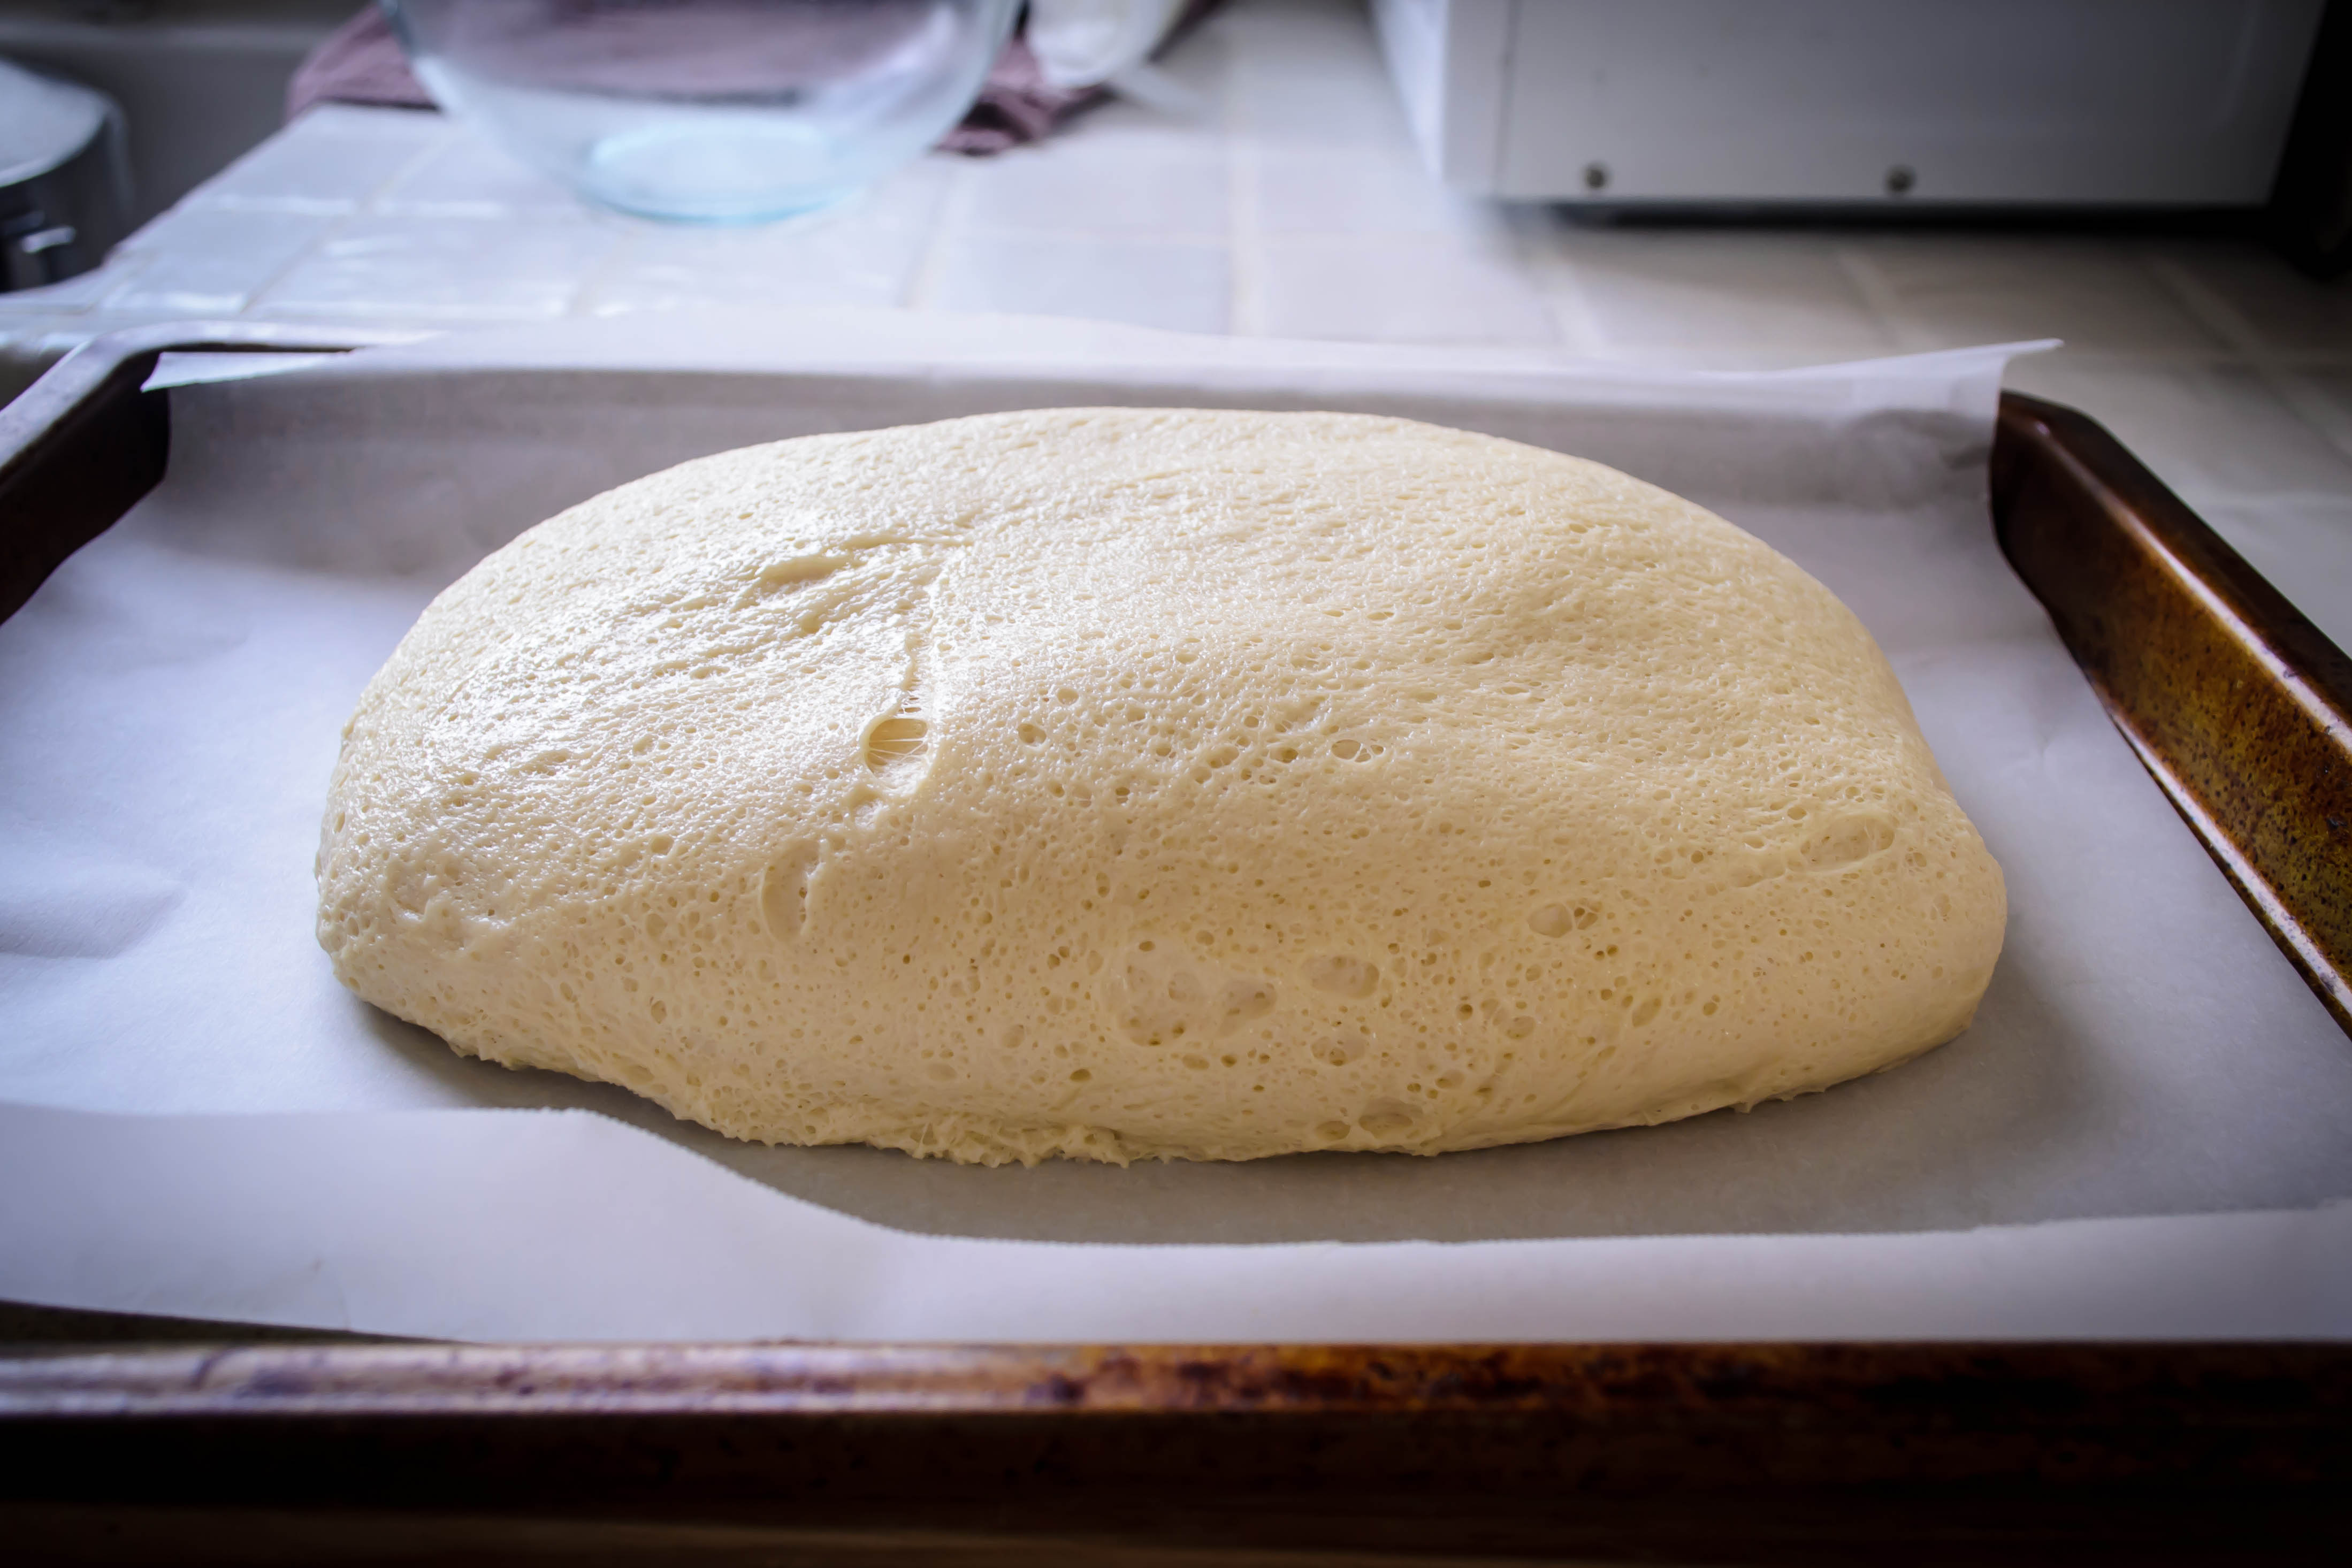
In either case, now is the time to place the ball of dough into a lightly oiled bowl and stow it in a warm place to rise for 1-2 hours. I like to use my oven, letting it heat for 5 minutes and then turning it off for 5 minutes before putting the dough inside.
-
After the dough has risen to double in size, punch it down (Mom notes “this is fun!”), cover it with a clean cloth, and let it rise again until doubled again – about 45 minutes.
-
Divide the dough into three equal parts. Shape each third into a long rope, place on a greased or parchment lined baking sheet and braid together loosely, pinching the ends firmly and tucking them under on each side. Cover with a cloth or kitchen towel and, once again, let it rise for 45 minutes to an hour. See why you need all day for this loaf?

-
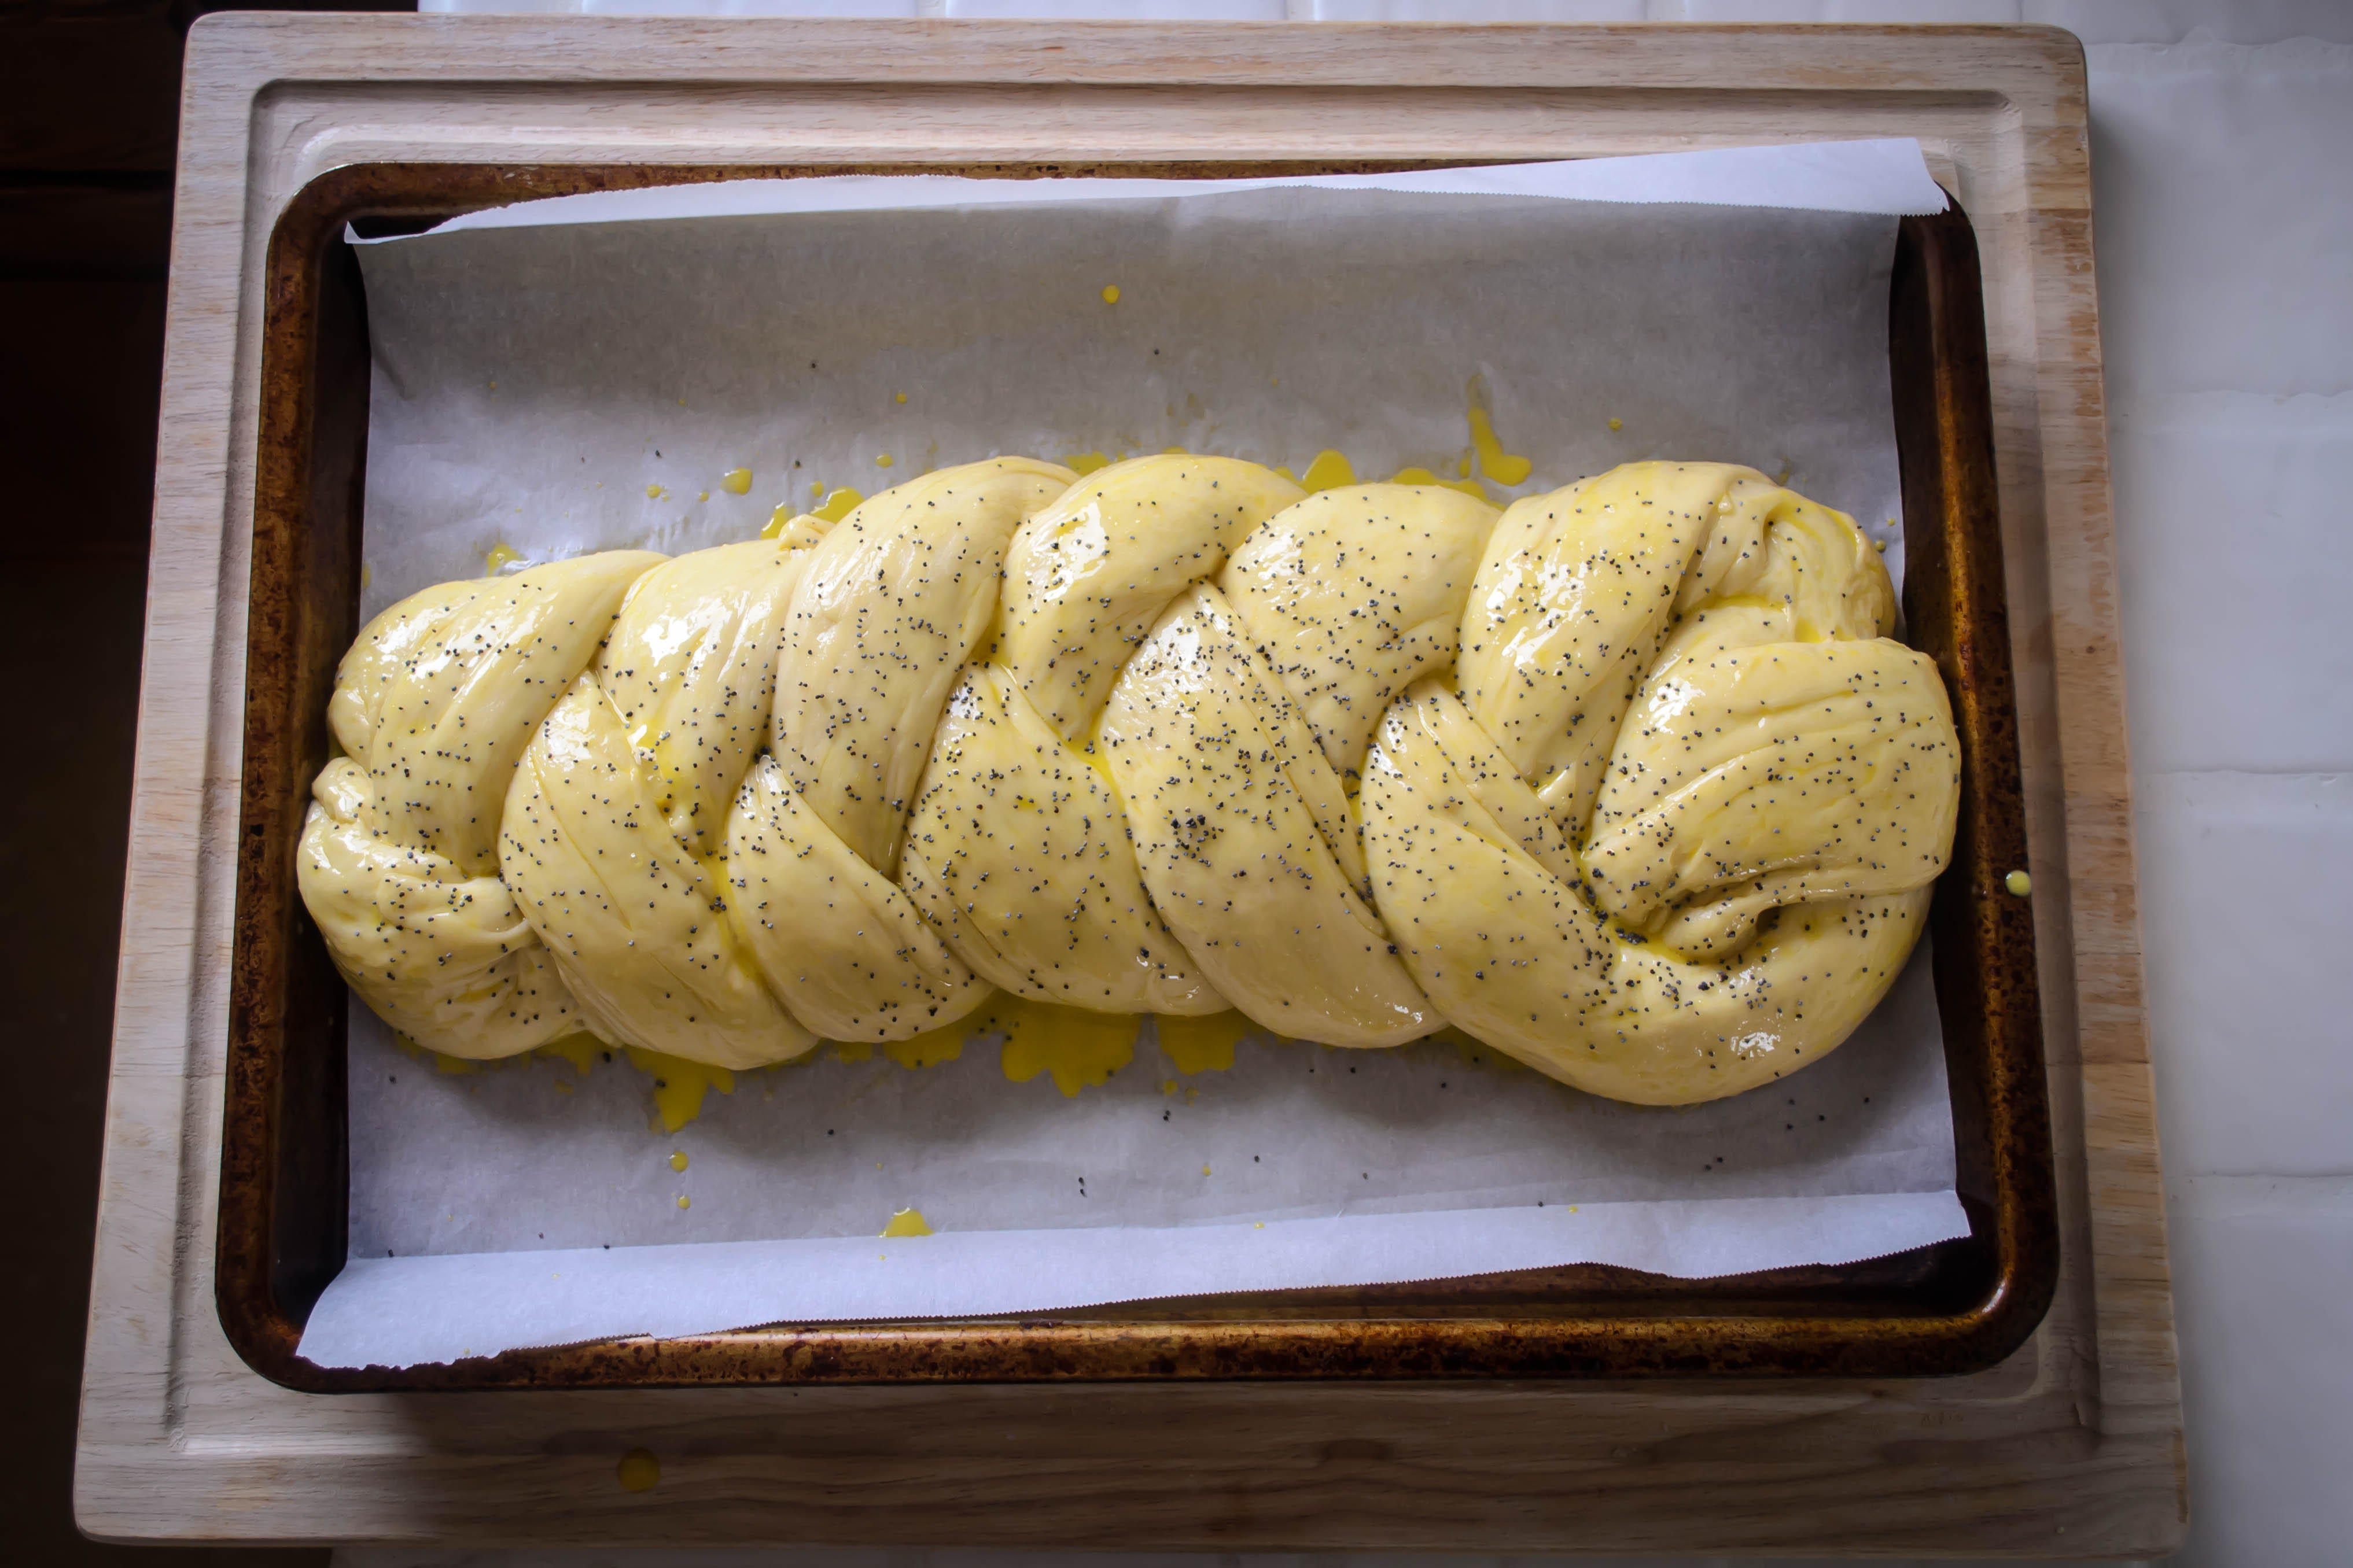
When the braid has swollen again, preheat the oven to 350F. While you wait, beat an egg yolk with about a tablespoon of water to make an egg wash. Brush the top and sides of the braid with your egg wash, then sprinkle with poppy or sesame seeds (we prefer poppy, in our house).
-
Bake in your preheated oven for 30 minutes, or until the internal temperature of the bread is 180-190F. The top will be golden brown and the bottom will feel delicately hollow when thumped. Hot ovens tend to overbake this bread, so be sure to check at 30 minutes, or even just before.
-
When the bread tests done, take it out of the oven and let it cool on its baking sheet for 15-20 minutes, to allow the delicate internal crumb structure to firm up a bit. This will make for easier slicing.

Thanks, Mom!

Mom got the recipe from the mother of the two boys she babysat for before she had us! It’s not a very hard bread once you give it a go, right?
You know, I’m sure Mom has told me where the recipe came from, but I’d forgotten. Yes, it was easier than I thought it would be, though the stickiness did intimidate me a bit.
Doesn’t your mom know where she got the recipe?
The story I remember hearing is that when your dad was getting his Master’s at the University of Toronto, a Jewish neighbor gave the recipe to your mom. That’s my story and I’m sticking to it! Ask your mom if this story dings a bell.
Nancy
You caught me: I didn’t do my research before posting! I’m sure you’re right about the source of the recipe – it sounds very much like what Rachel mentioned as well.
I truly love your website.. Pleasant colors & theme.
Did you build this web site yourself? Please reply back as I’m attempting to create my very own blog and want to know where you got this from or what the theme is called. Appreciate it!
Hi Korey,
Thanks for your kind words. I use the twenty eleven theme on WordPress. This is just one of many free themes they have for their users.