Depending upon who you are, when you think of bread, you probably don’t immediately think of Africa. There are a number of reasons for this. For one thing, wheat is not a common crop in West Africa, which means bread and bread-like products in West African countries are made from other grain bases, like millet or sorghum, and sometimes don’t read as “bread” to someone more accustomed to a sliced loaf of white or wheat bread. But wheat does grow very well in Northern and some Eastern African nations, so wheat-based breads are more prevalent there.


 Another reason might be that the European and North American standard of yeast-risen loaves baked in an oven is not the standard in most African cuisines, which more commonly cook their bread products on a griddle or pan or other heated flat surface. Many, many African breads are flatbreads. For me, and for this project, that meant I had to consider one of my early questions about how I wanted to categorize bread, because some flatbreads are leavened and some are not. Did the product need to be leavened to count as bread? Yeast is available almost world-wide, and in fact leavening with wild yeast was used for bread-baking at least 4000 years ago in Egypt. But there are other ways for bread to rise, and so many traditional African breads (and others) depend more on the application of heat than they do on chemical leavening agents, so maybe it’s more about the product being a dough (as opposed to batter – that’s cake) than about it being leavened. They serve the same (or similar) purpose in the eating, after all. Thus chapatis, tortillas, and today’s offering – sabaayad – are bread. And there are dozens of others.


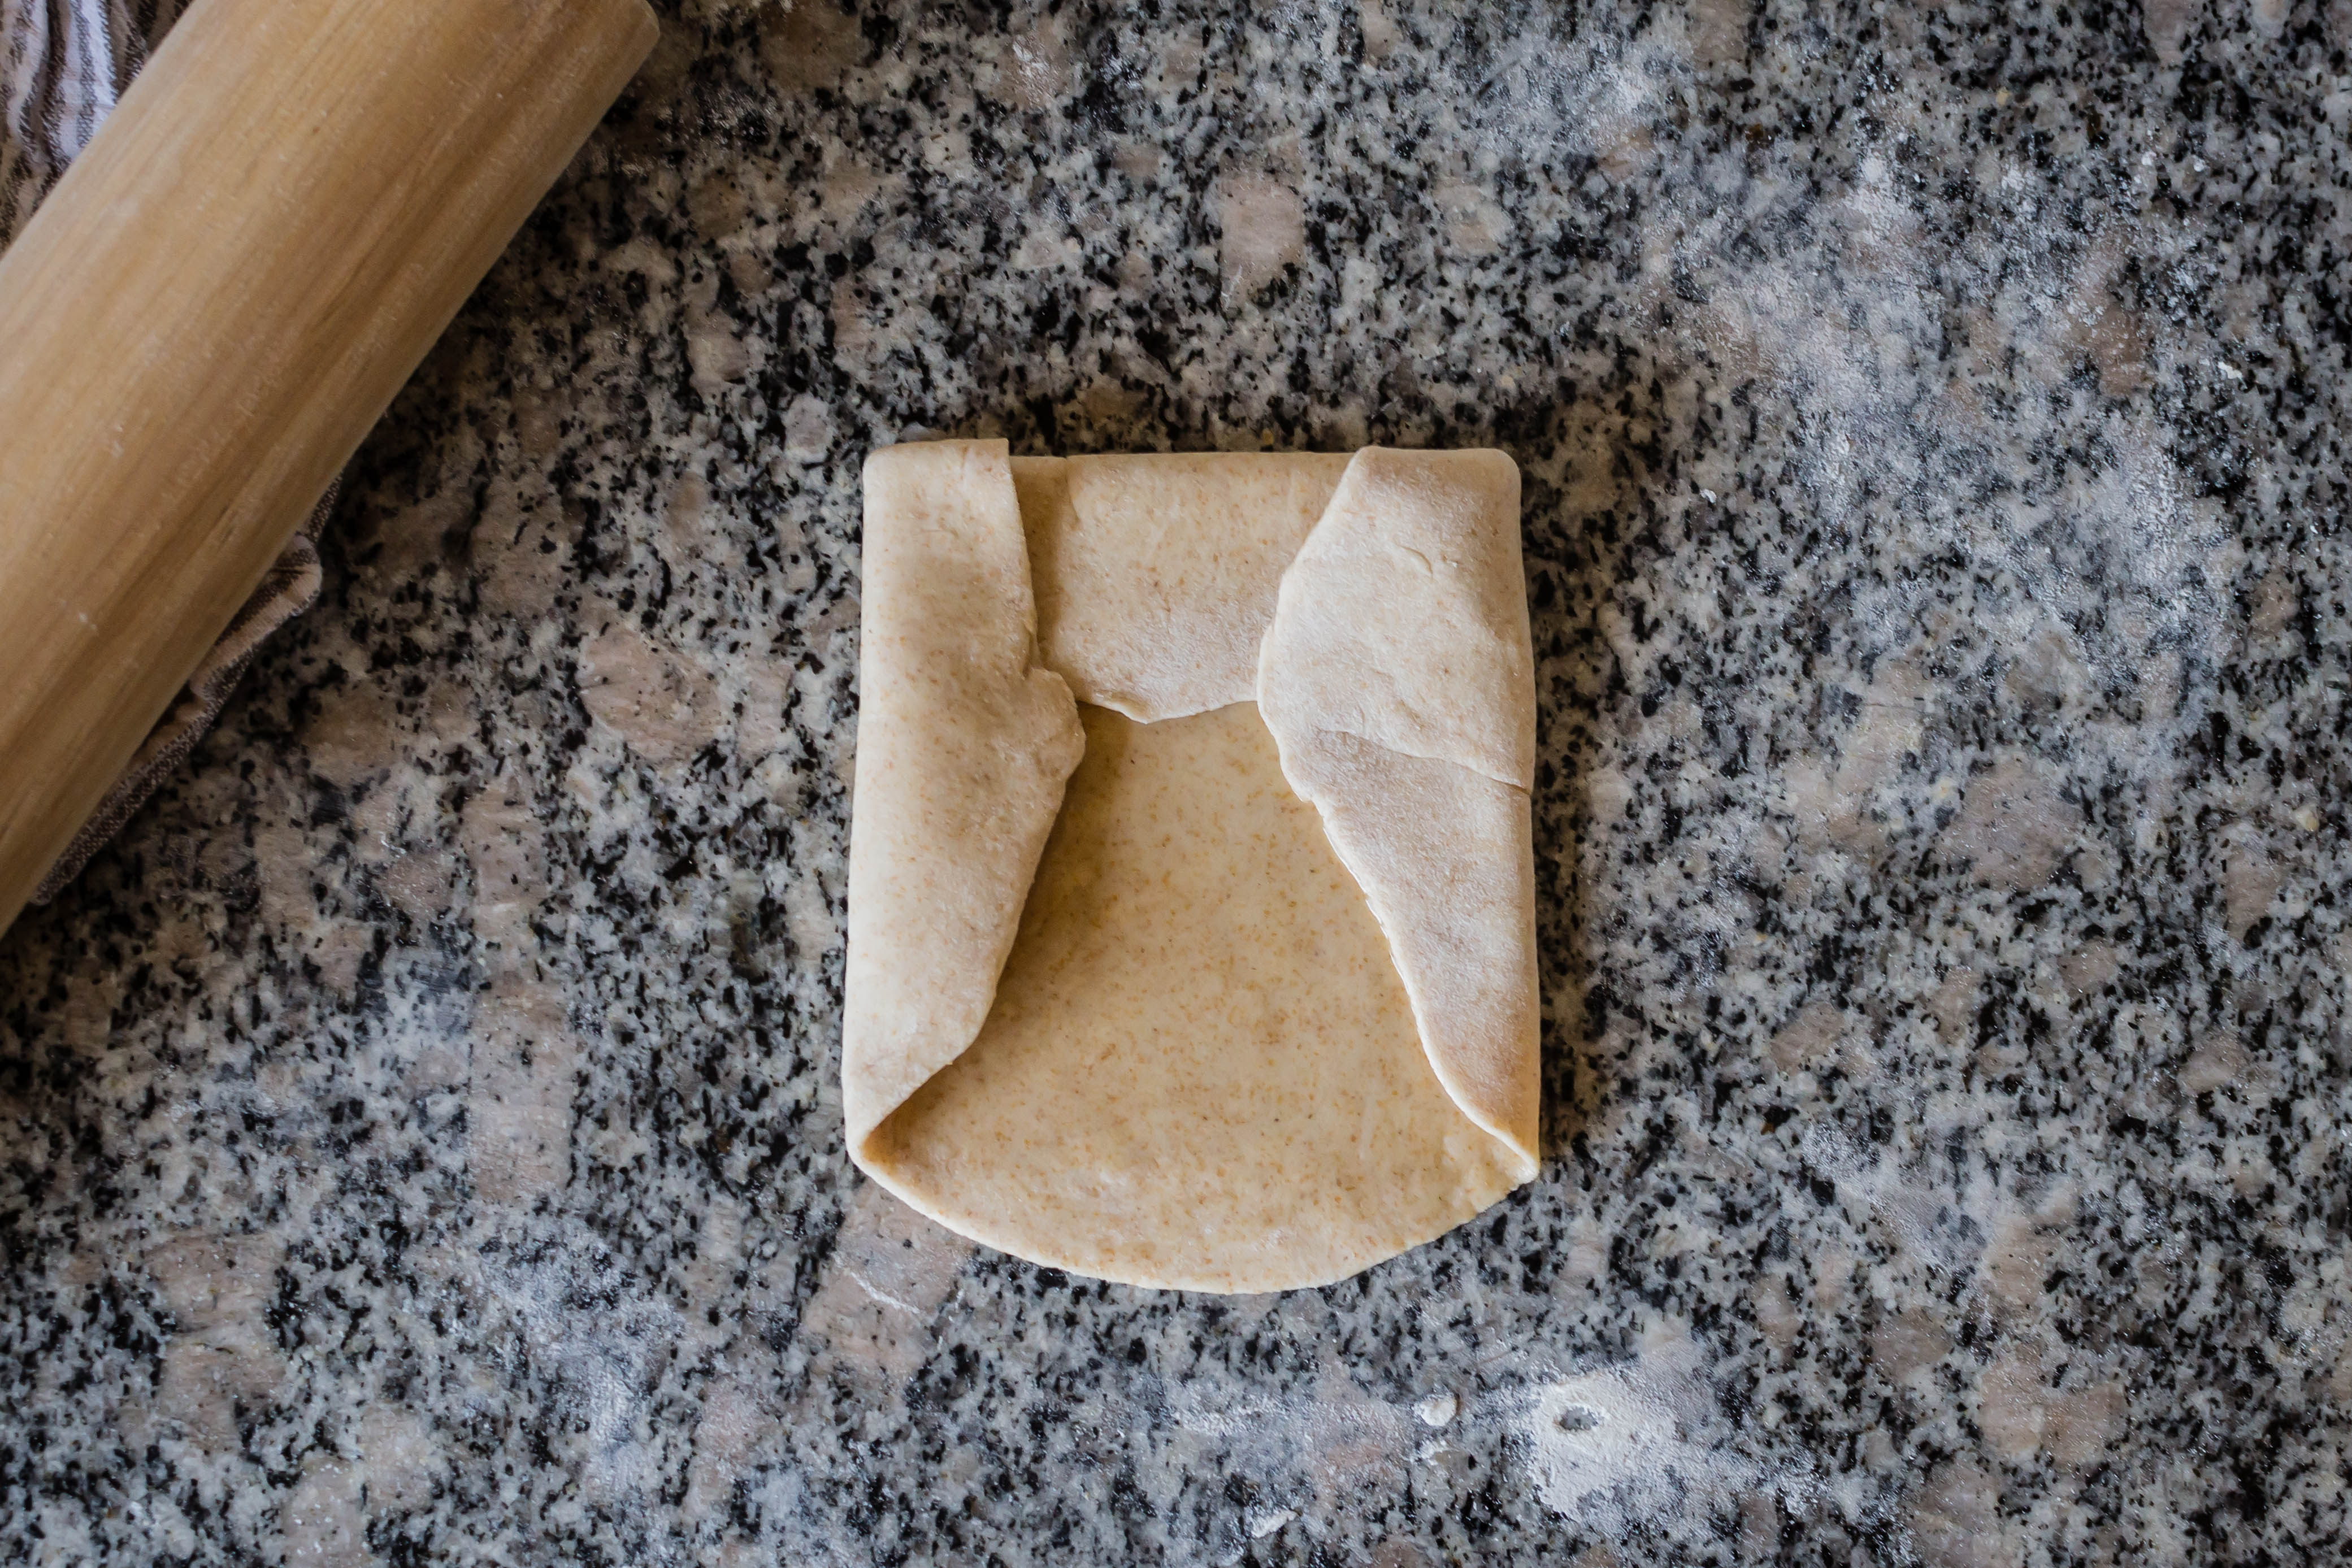

I think my folds were too…shallow?… My sense after cooking is that the “sides” should meet in the center so the whole portion of dough is two layers thick.
There are, however, other African breads more similar to European loaves in terms of ingredients and appearance. In many cases this is the result of colonization – there’s a reason when you search for South African breads, you turn up a series of products with suspiciously Dutch-sounding names. That doesn’t make them bad, but they certainly aren’t, let’s say, indigenous to the region.


 But things get complicated when you start to talk about indigeneity. Like people, food travels. Whether that travel is intentional, through migration, or unintentional, through forced labor or refugees fleeing persecution, people bring their food with them. Sabaayad, the rolled, folded, flattened, and pan-fried flatbread I’m offering today, is very similar to parathas: buttery, flaky flatbreads common to the Indian subcontinent. They are also sometimes called East African chapatis. According to the Immaculate Bites blog, there’s a fair bit of Indian influence in Somalian cuisine because the British brought over Indian laborers, which explains the similarities in their flatbread names and procedures.
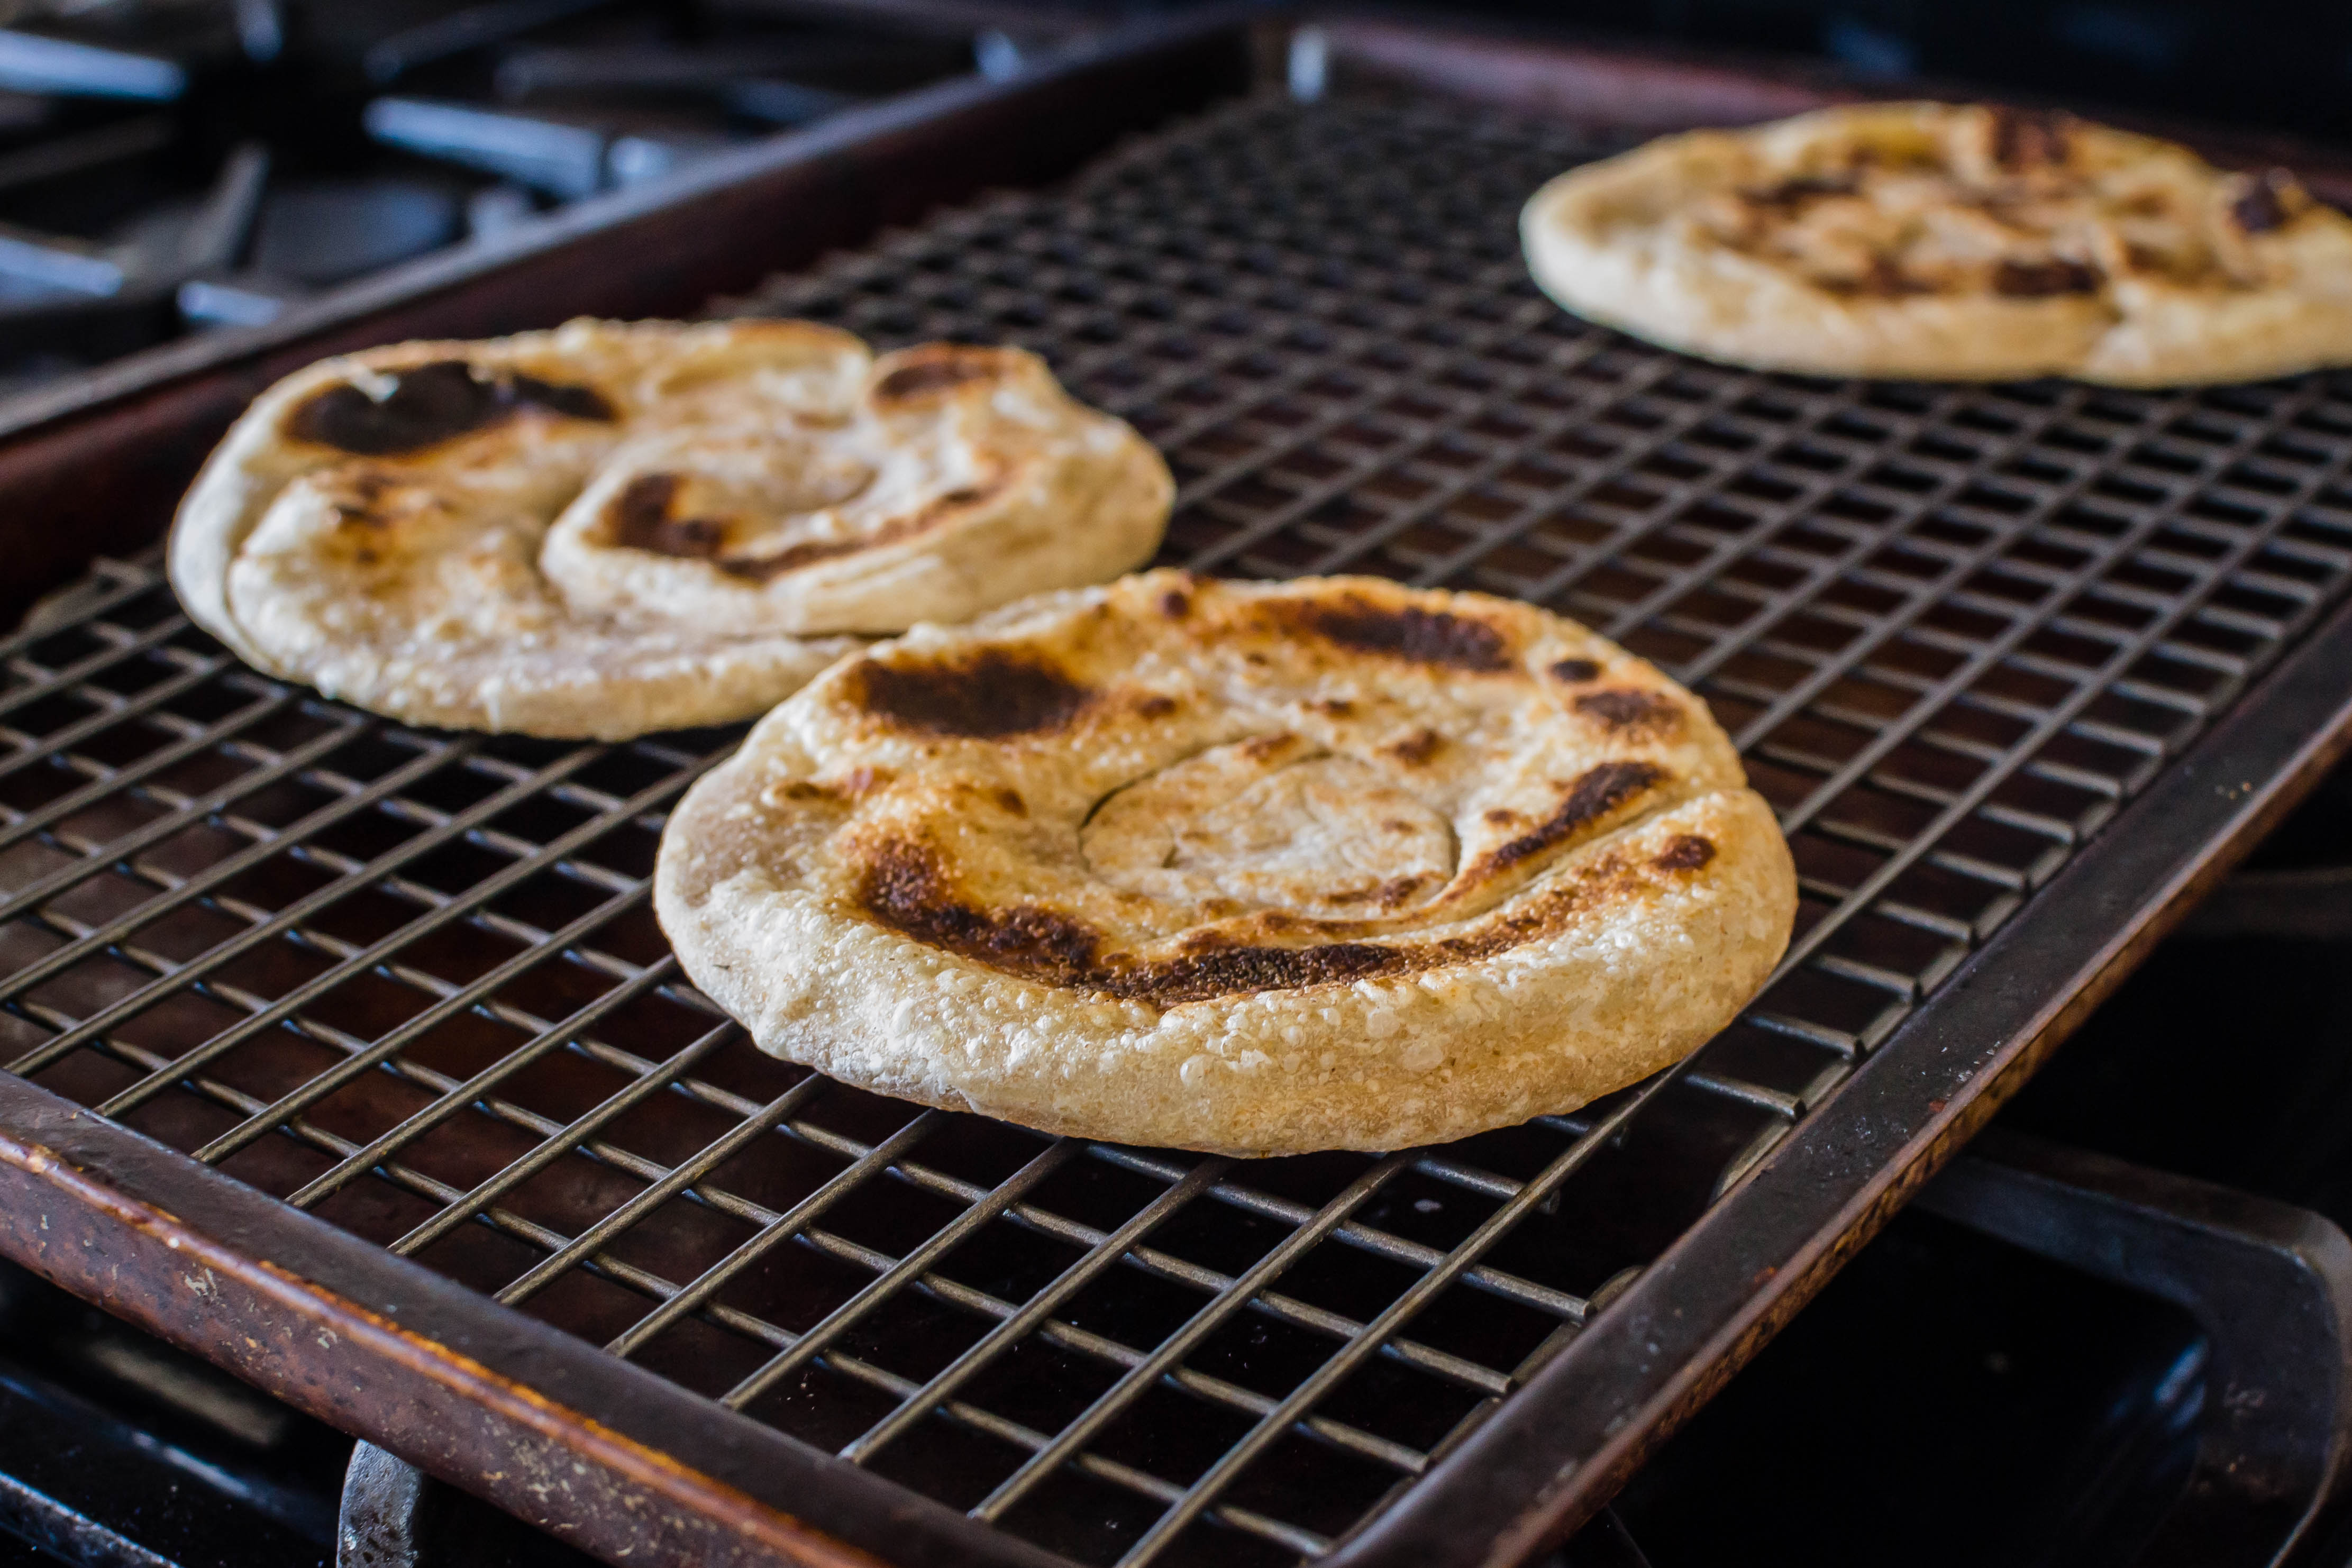
 It turns out that Somalis love bread. Sabaayad is just one example, but it’s an interesting one. Like parathas, Chinese scallion pancakes, and others, sabaayad is formed through several repetitions of rolling. First, you roll out your dough portion into a thin circle and apply an even layer of oil or ghee. Then you have a few options, all of which involve folding and then re-rolling the dough. This process, usually lubricated with another application or two of oil or ghee in between, is what helps create the flaky layers of the finished product. I tried several options in my batch, as you can see above, and found the final result not hugely different, so I’ll describe both methods in the procedure section and you can choose which you prefer.
 By some accounts sabaayad is not an everyday bread, but a treat enjoyed at breakfast, sometimes with meat like dried camel or beef jerky, and sometimes with fried eggs. By others, it is a lunchtime dish eaten with stew. Some prefer a sweet accompaniment like honey or jam. The idea of hot, flaky, well-oiled bread with a drizzle of honey entranced me, so that’s how we opted to have ours. Other variations add a leavener like baking powder or sourdough starter, and some go an extra step and incorporate eggs or milk for a richer, more tender product. I decided to go simple, thinking it might best show us what this bread is about, and stuck with the four ingredient recipe I’d found: all-purpose flour, whole wheat flour, salt, and oil.
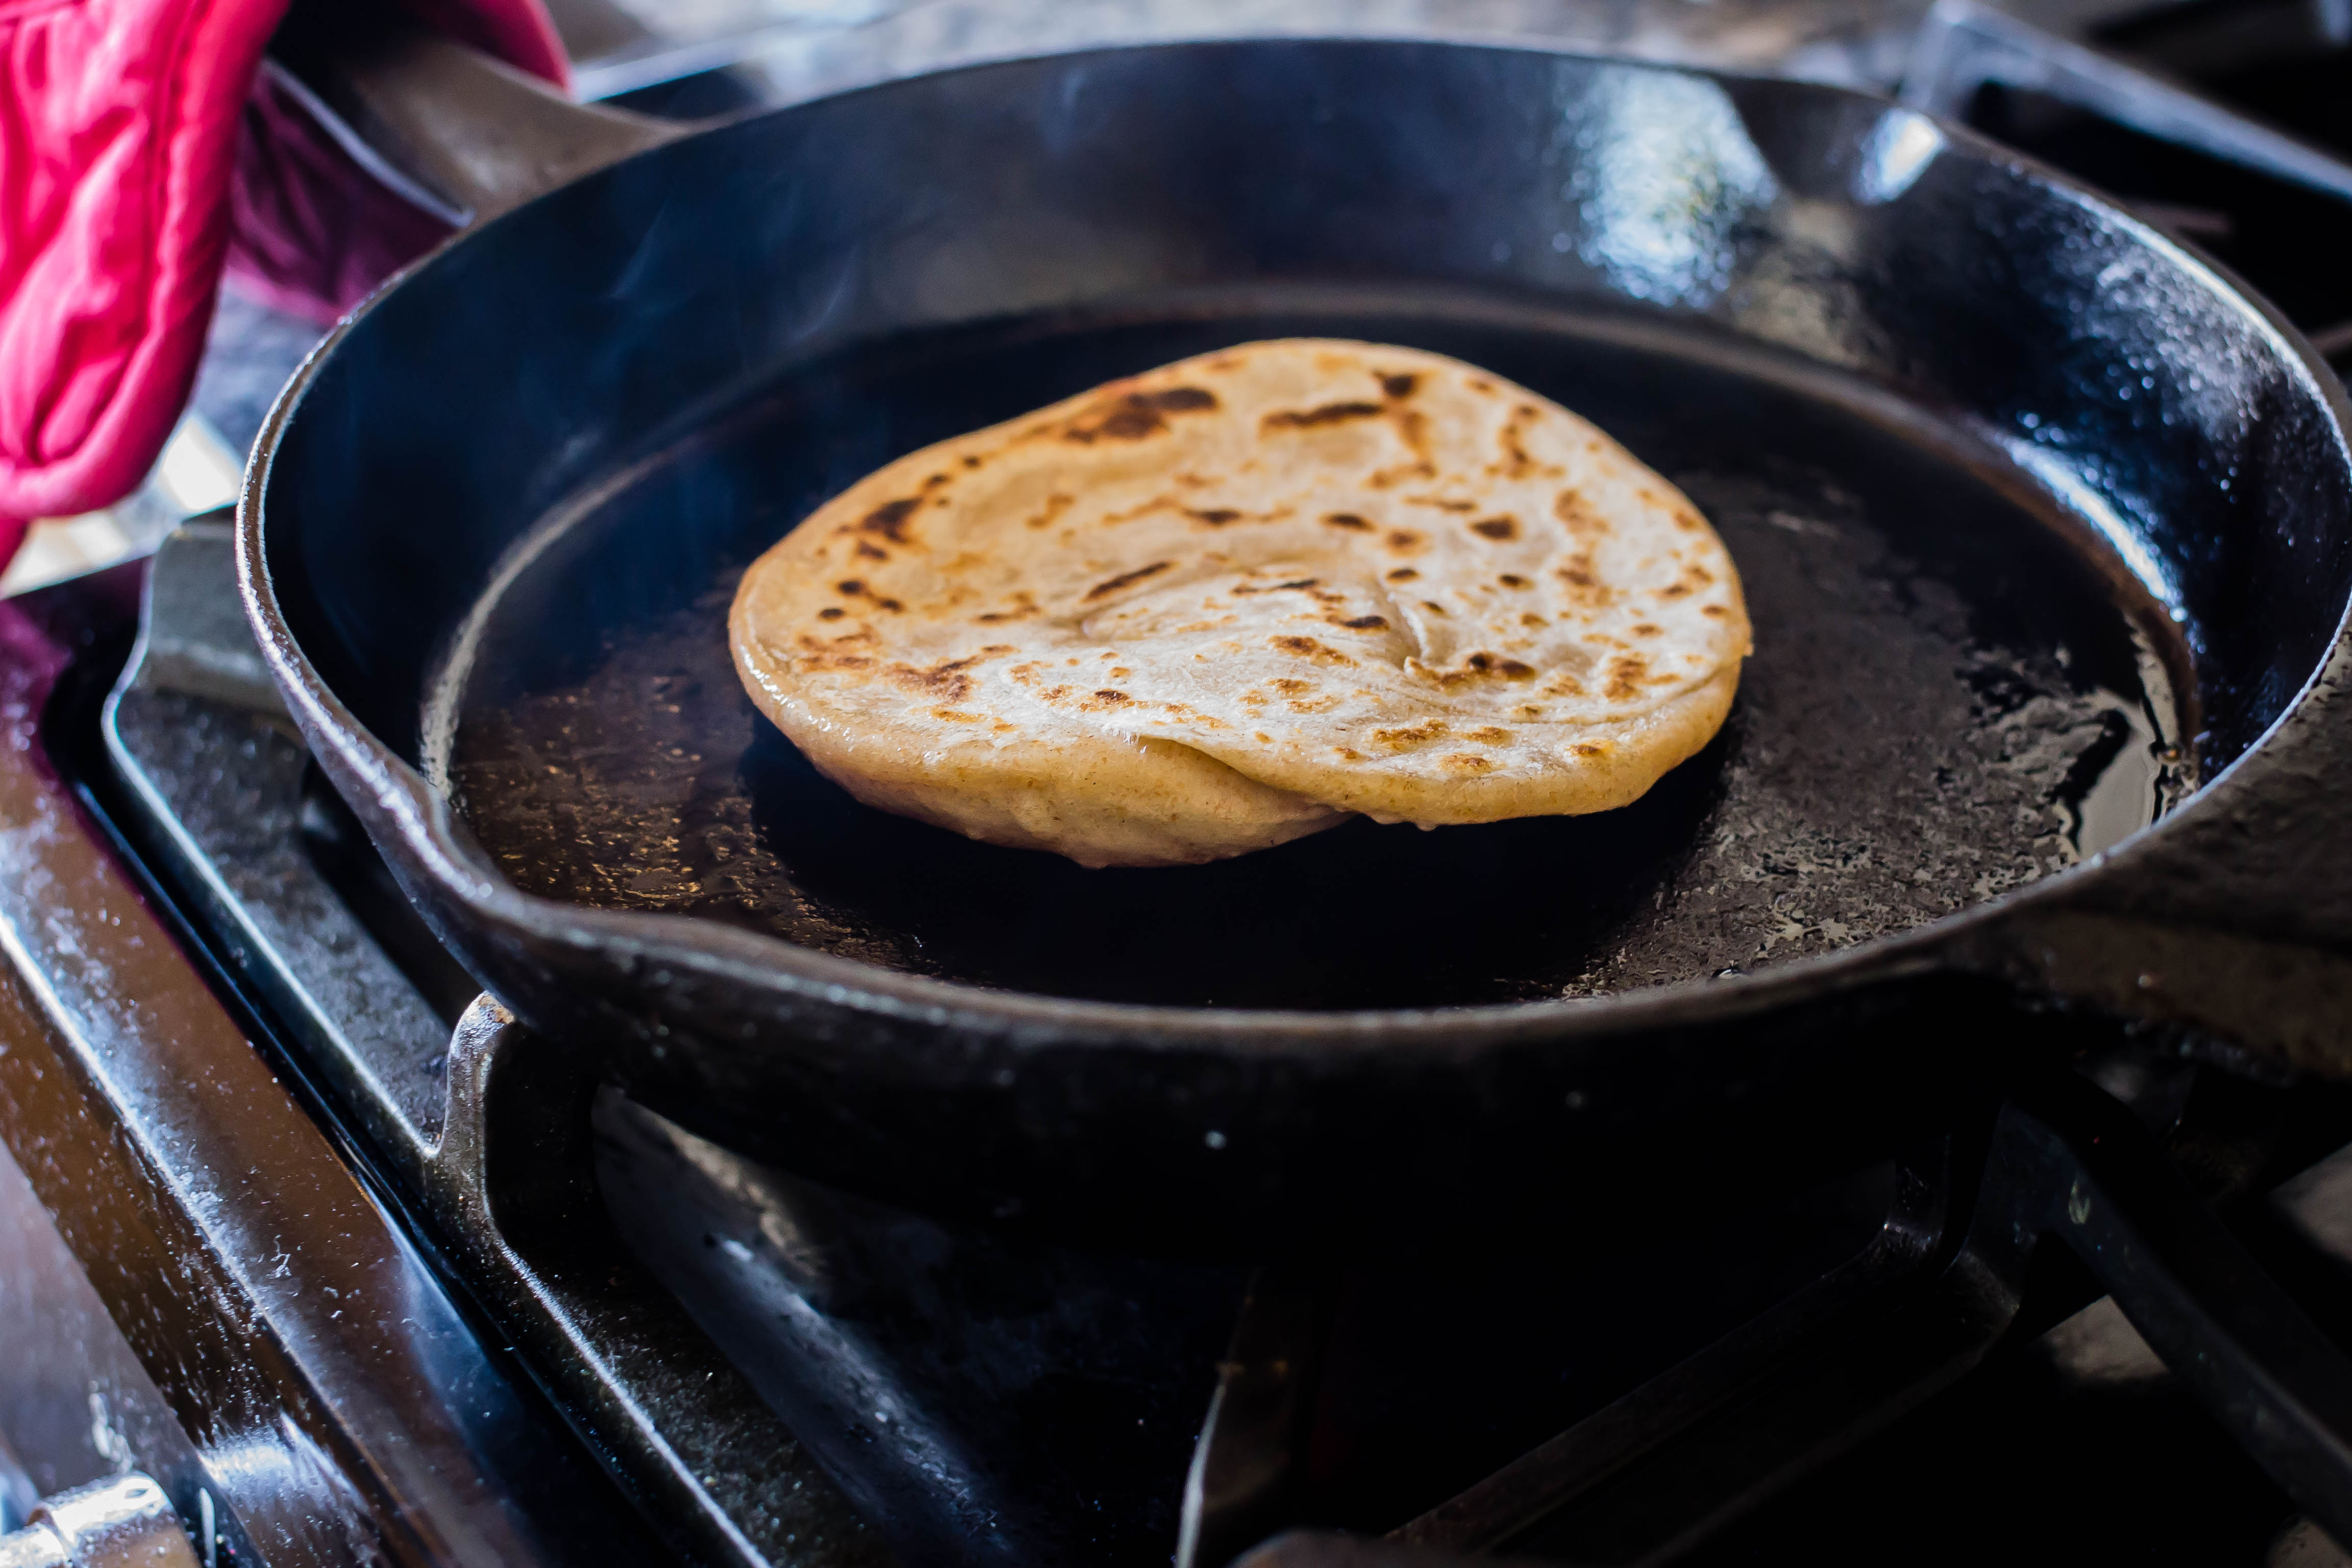
 We liked these – the honey route was the way to go, from my perspective, though I think I undercooked them a bit because I used a cast iron skillet and too high a flame. It sounds perverse to end up with undercooked product because your heat is too hot, but this is a question of insides and outsides. The outer edges were beautifully puffed, and the parts with flake were outstanding: crisp and shattering. The inside, though, was still on the doughy side, meaning it just wasn’t on the fire long enough (though I will say the one I popped into the toaster later in the afternoon was improved by its second round of “cooking”!). I’ll need to work on my balance of heat and cooking time as I explore other griddled flatbreads, and given what I’ve found thus far, I’ll have plenty of opportunity!
 Once you start looking for examples of bread traditional or common to African nations, a tremendous number of options crop up – it’s not just injera, the fermented, scoopable, wrappable standard from Ethiopia. There are semolina loaves from Morocco, a rolled loaf from Tunisia with Italian roots, puff puff from Nigeria, and a whole host of others. I could easily spend a year just on African breads!

 So I think the real reason many Americans – especially those of European ancestry – might not know much about the bread of various African cuisines is that they (and I must include myself here) just don’t know much about various African cuisines. As Marcus Samuelsson notes in the introduction to his cookbook The Rise, “We know more about ricotta than we know about ayib” (xix). There are many reasons for this, some of them ugly. But we can – and should – learn about these cuisines. Samuelsson goes on to say, “embracing a people’s food in your home is one aspect of recognizing the value of that culture… Black chefs’ names need to be sung” (xix-xx). And so does their food. There are dozens of distinct cuisines in the various regions and nations of Africa to celebrate. This flatbread is barely scratching the surface.
Sabaayad
I used two recipes for this: one from Priya’s Versatile Recipes, and The Somali Kitchen, which was Priya’s source. The procedure directions for both were fairly sparse, so I’ve estimated based on my own understanding of bread and my own results.
Makes 8 sabaayad
1-1½ hours, depending on resting time
2 cups all-purpose flour + a few TB for rolling the dough
1 cup whole wheat flour
2 TB vegetable oil or ghee + about ½ cup for brushing and frying
1 scant teaspoon salt
~ 1 cup water (you might not use all of it)
- In a medium bowl, combine the flours and the salt. Add the 2 tablespoons oil (or ghee) and incorporate thoroughly. Begin to add the water, about ¼ cup at a time, kneading right in the bowl in between additions to bring the dough together. You are looking for a firm, not-too-sticky dough; it shouldn’t be too wet.
- When the dough has come together, turn it out onto a lightly floured board (I went right for my countertop) and knead until it forms a smooth, slightly elastic dough. By hand, this will probably take 7-8 minutes (I did 5 and I think that wasn’t enough).
- Let the kneaded dough rest in a bowl, covered for 30-45 minutes. Since it isn’t leavened, it won’t rise, but it needs that resting time for the gluten strands to relax so it will roll out.
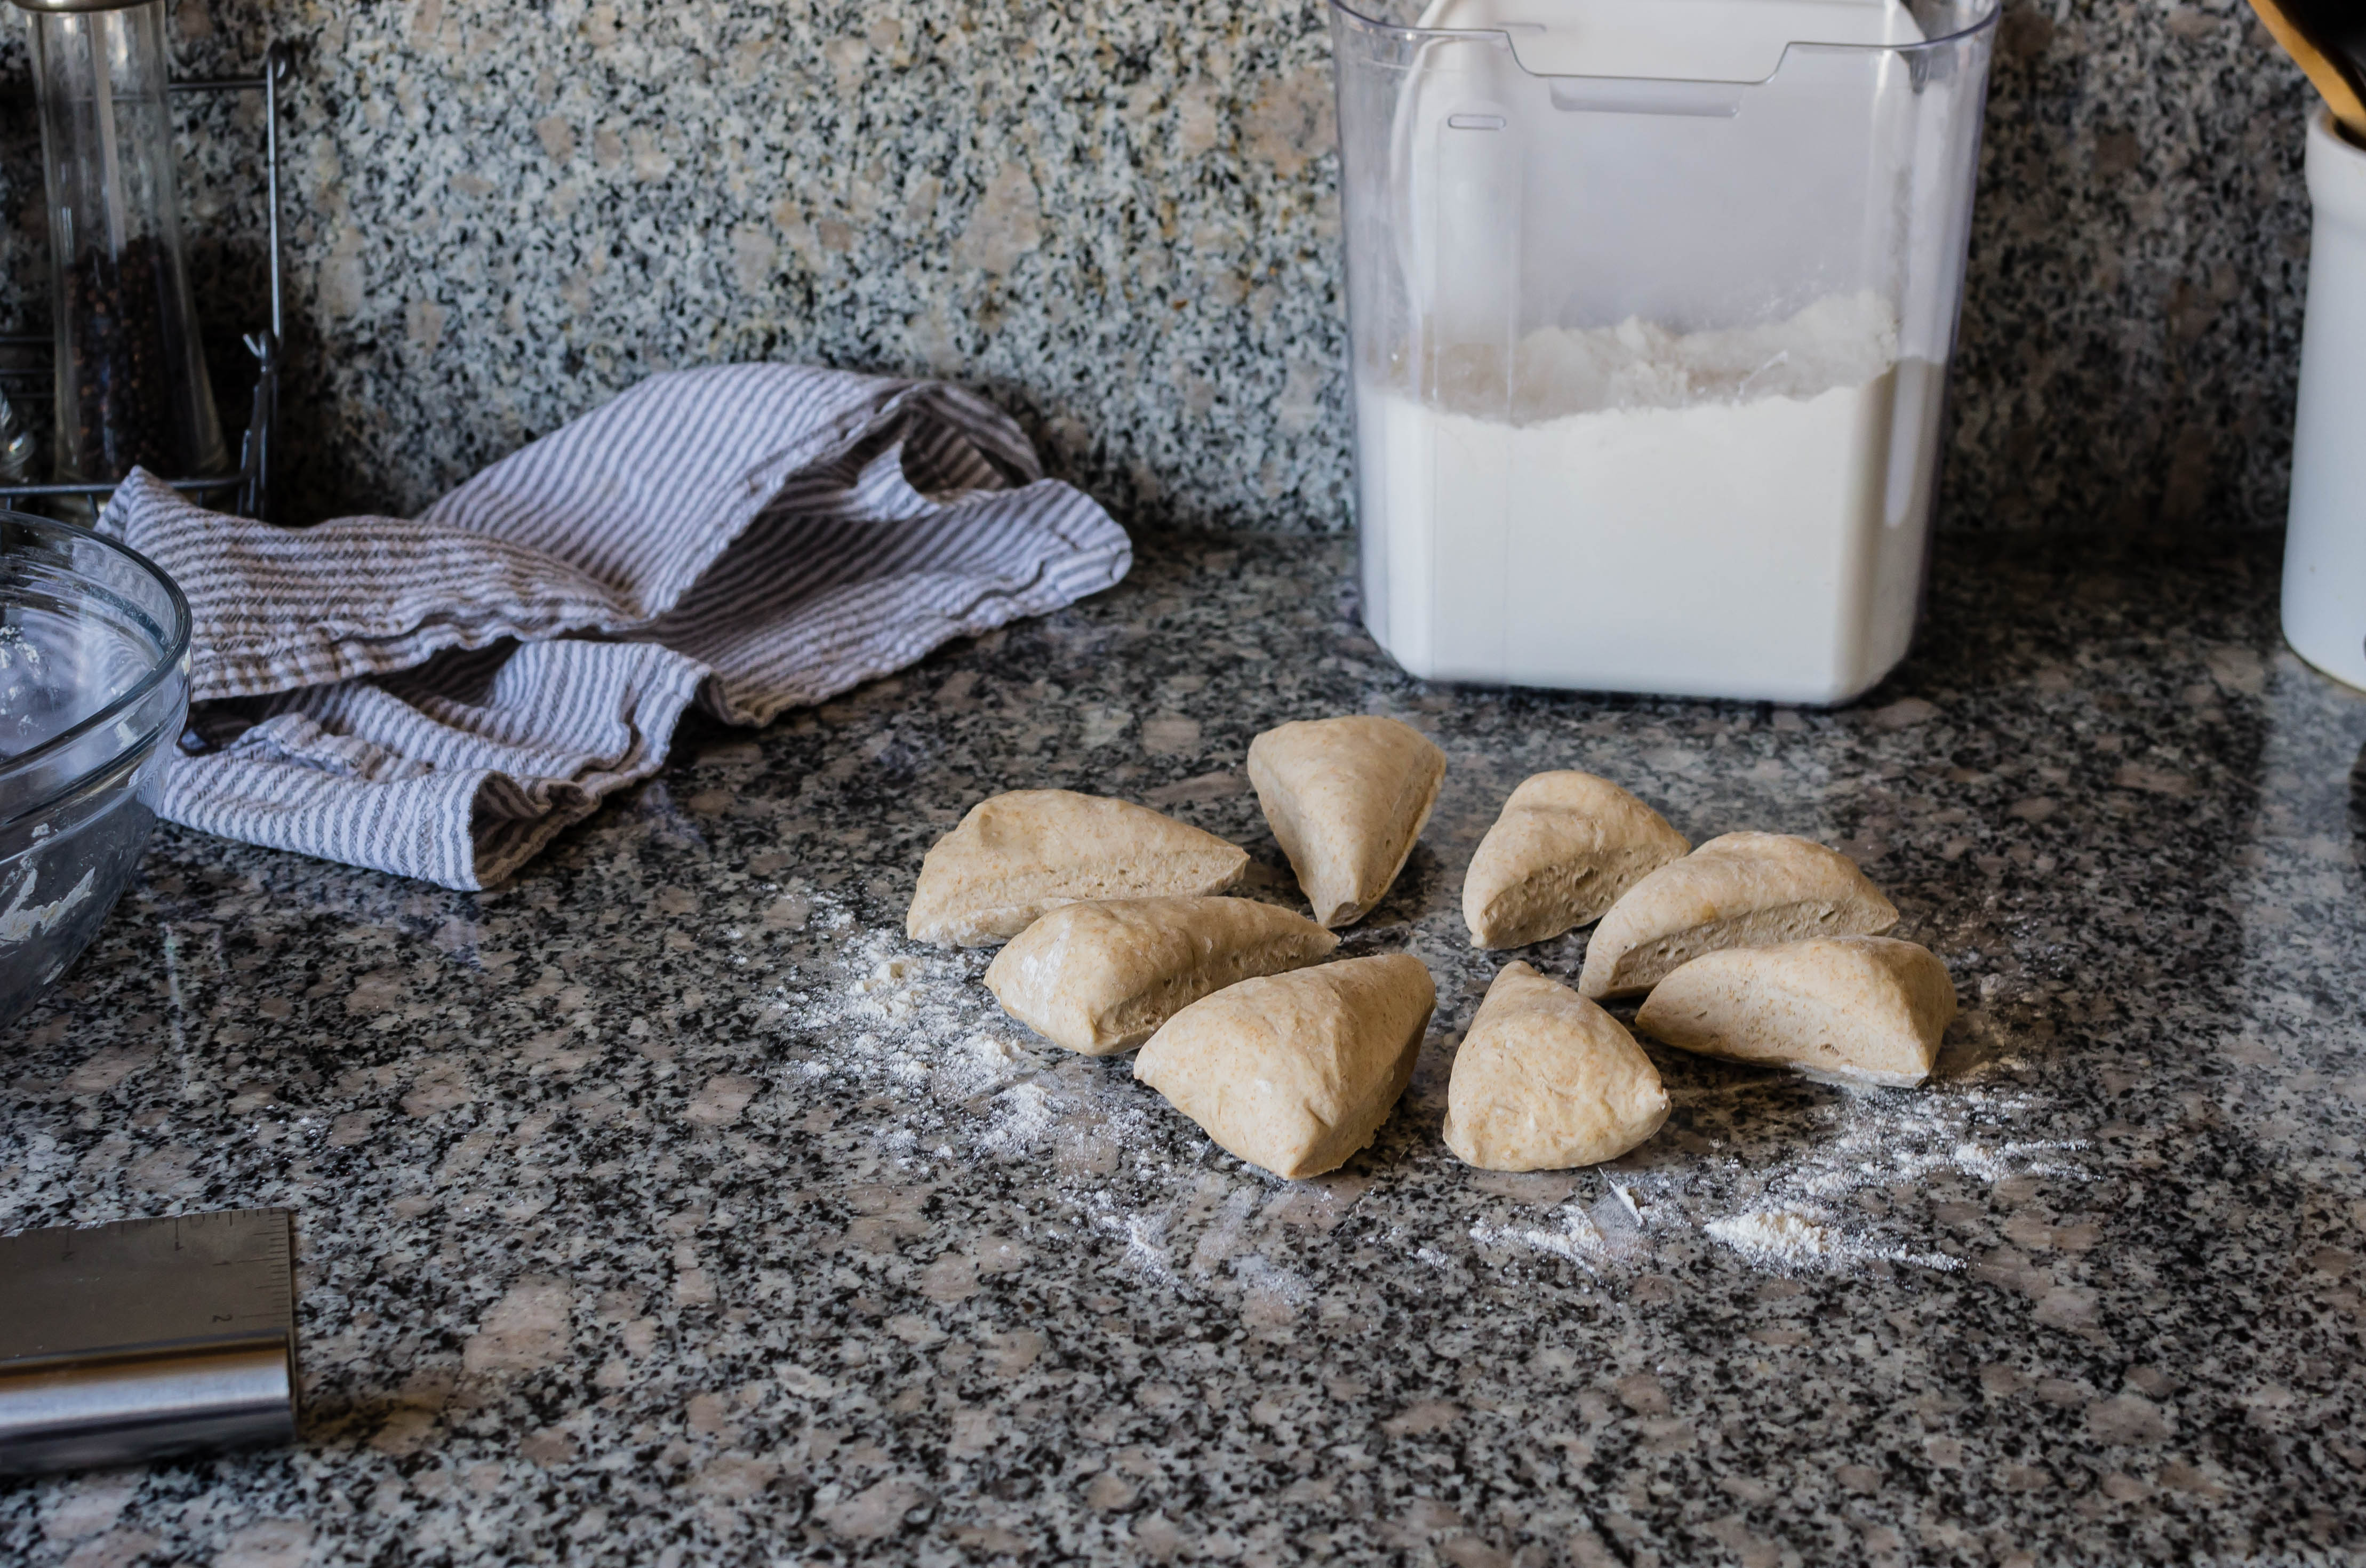
- After the dough has rested, turn it out onto a lightly floured surface and divide into 8 equal portions. Working one at a time, roll the portion into a thin circle 7-8 inches in diameter.
- Now you have two options for shaping. For a square bread, lightly brush the surface of your circle with oil or ghee. Starting with the top, fold down each “edge” toward the center. I think you want these folded portions to overlap a bit to cover the whole exposed portion of dough – in the photos above I have not folded in the “edges” enough.
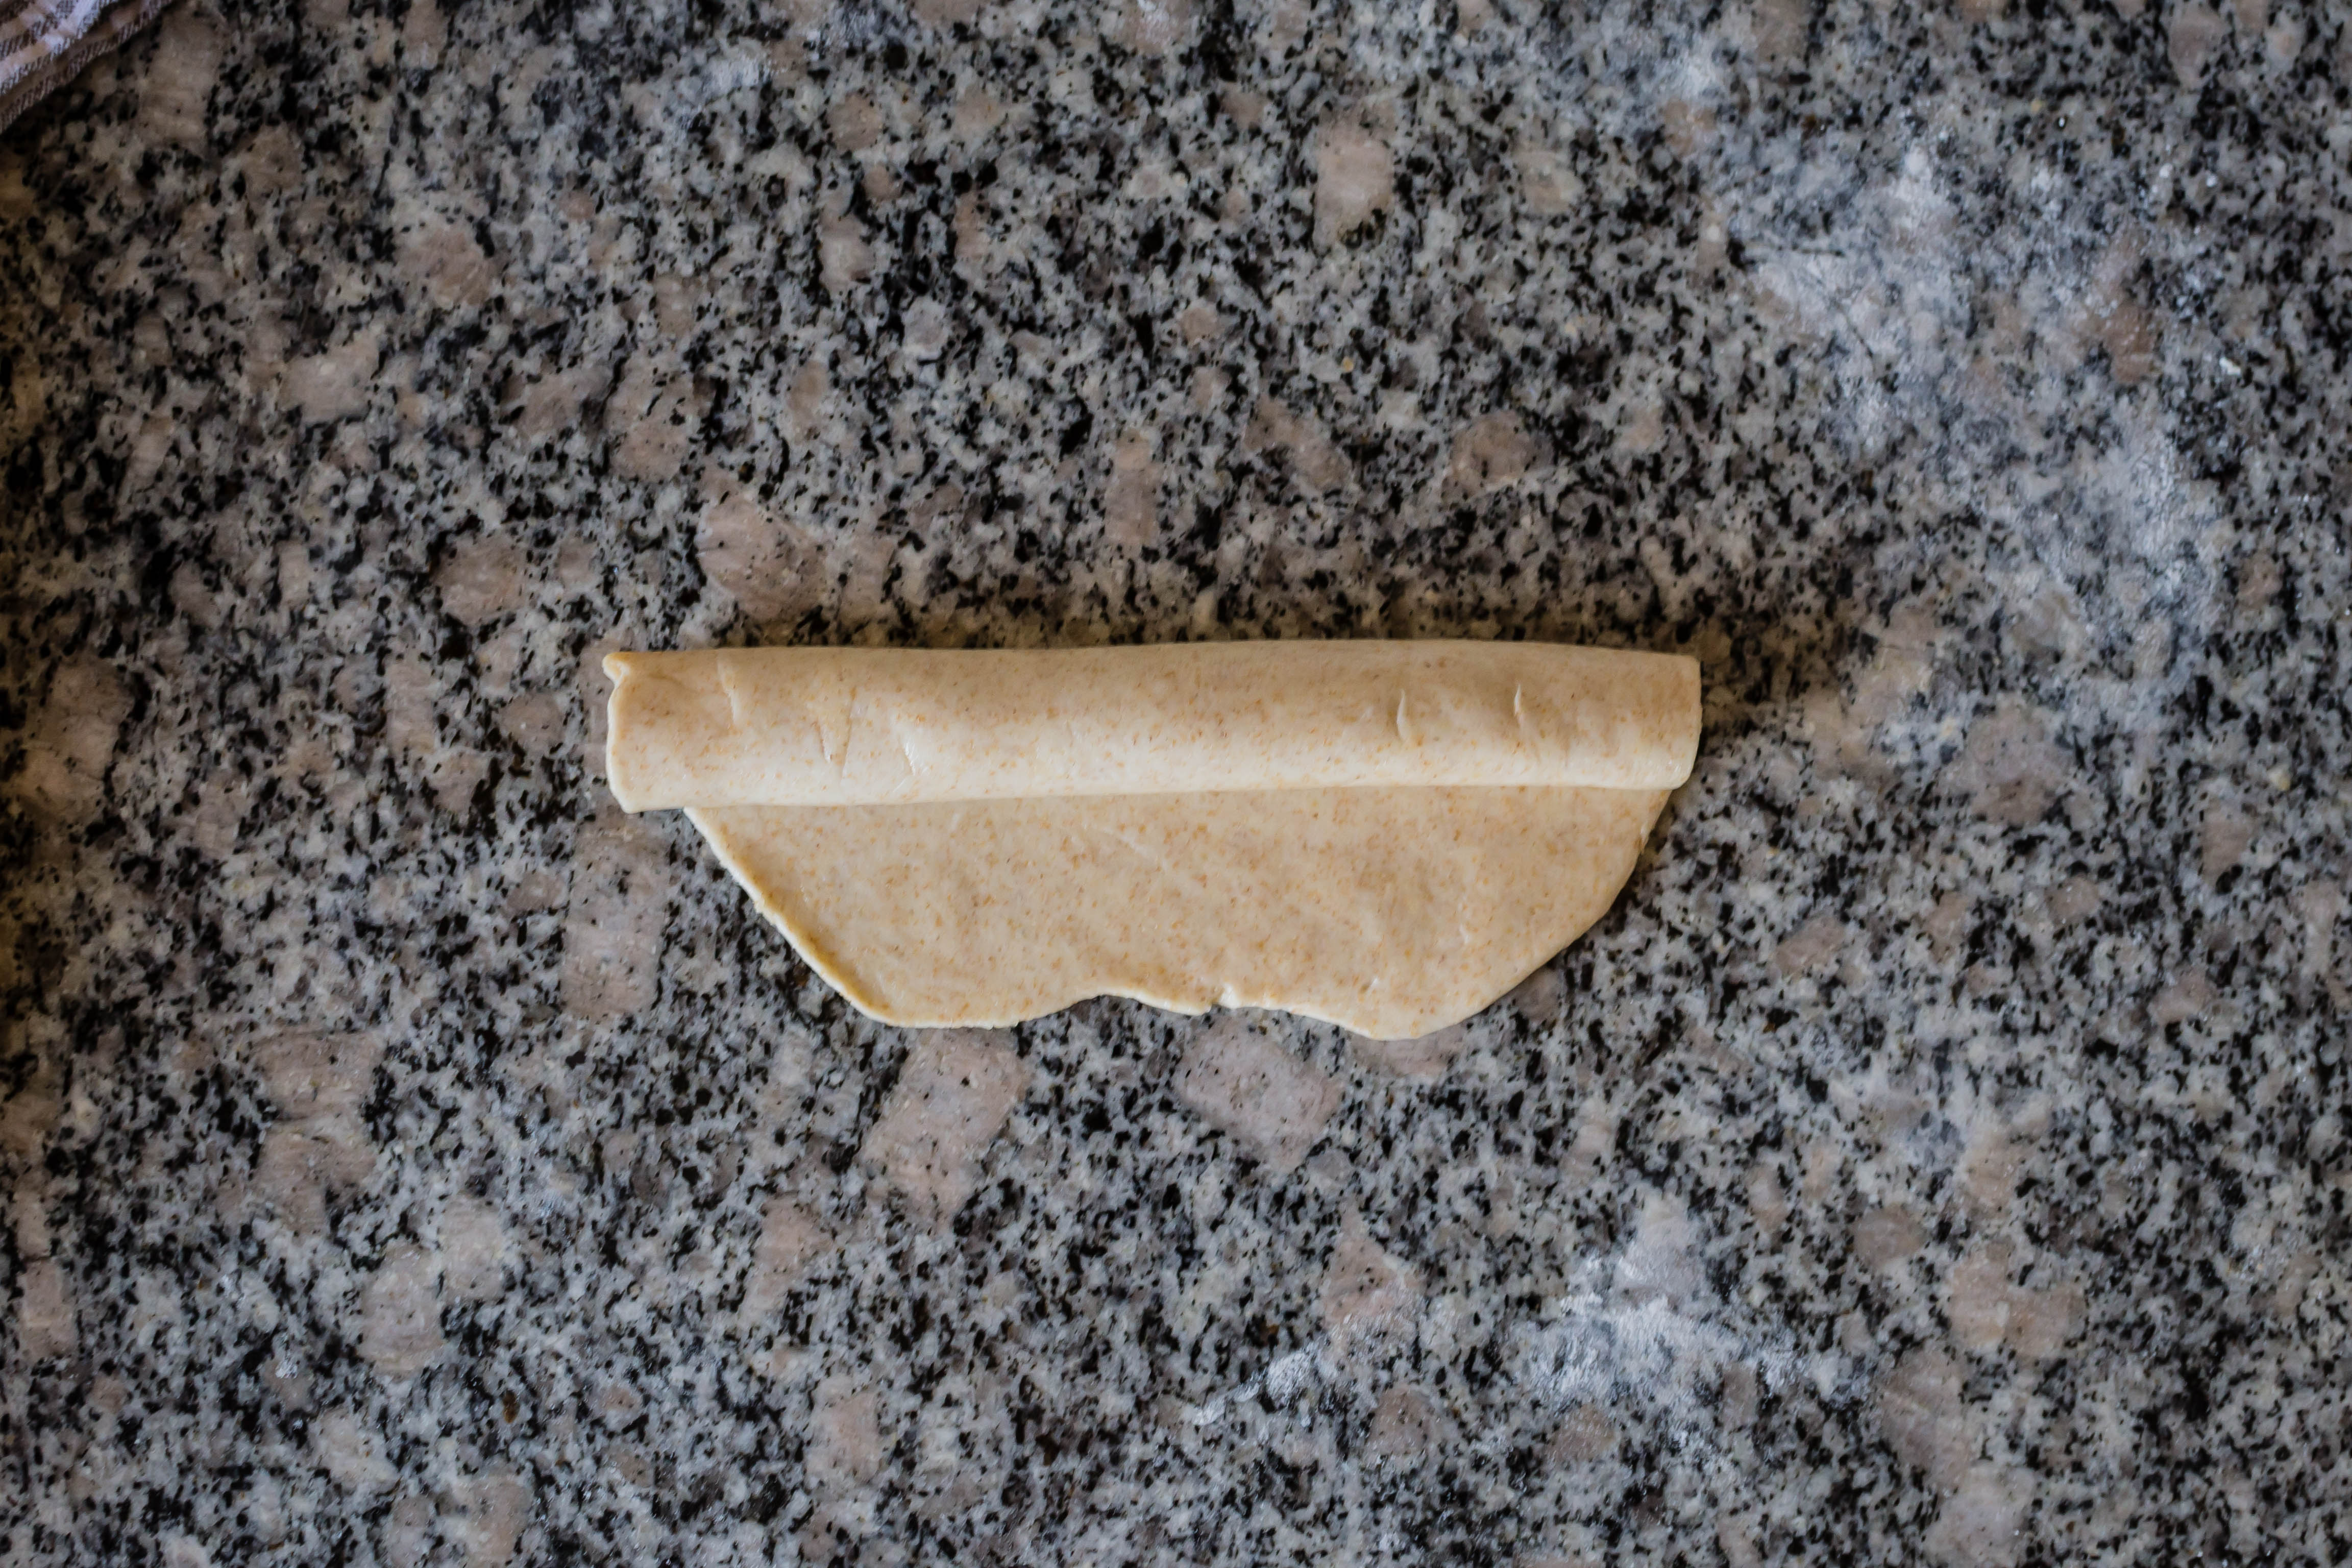
- For a round bread, lightly brush the surface of your thin circle with oil or ghee, then roll it up into a log as you would for cinnamon rolls (some recipes instead call for a series of pleats or folds). Then coil up this “log” you’ve created like a snail shell, tucking in and securing the exposed end.
- For both, let rest about 15 minutes after folding, then roll gently but firmly to flatten.
- To cook, heat about 2 teaspoons of oil or ghee in a skillet or griddle over medium heat. Again working one at a time, add each flattened circle or square of dough to the heated oil and cook about 2 minutes. Brush the uncooked side lightly with more oil or ghee and flip. Immediately press down on the browned side of the bread with a spatula – this helps all of the bottom surface area brown, but it also seems to help the flatbread puff up evenly. Cook another 2 minutes, until both sides are well browned and the flatbread is fully cooked inside – this took longer than I expected, which is why I’m calling for only medium heat.
- Like most fried items, these are best eaten immediately. If you need to keep them warm while you fry off the rest of the batch, however, you can stow them in a 300F oven on a baking tray lined with a wire rack.