 I’ve put off writing this post. I wasn’t sure how to begin. Every time I sit down to think about it, I end up surfing the net, scrolling through Facebook, seeing more and more headlines, reading more and more articles about the terrible things our world has been going through recently. As one of my friends and former colleagues put it recently, “the entire internet needs a trigger warning.”
 I don’t often offer political or moral commentary on this site. That’s not its job. And I don’t often try to convince you that seeing things my way is the way you should see. My truths are mine, and yours are yours. But when terrible things happen, and when death and tragedy are instigated and framed through questionable motives – sometimes on both sides of the event – I question my own job here.
 I’m not going to espouse to you what I think. Not today, and probably not ever, unless it’s something frivolous and food-related. I’m just going to say, with caution, that unless you have cut off access to emotions, to moral codes, or to the internet itself (I know, gasp!), over the past week or two – certainly over the past month – the world has been pretty depressing.
 So that makes a food blogger wonder where she stands. When people are suffering, when people are angry and dying and struggling, for me, there is uncertainty: is it disrespectful or willfully unaware to coo over the cuteness of a cupcake or speckle my posts with just the right adjectives to describe the lusciousness of a sauce? I’ve considered this before, written about it before, and I always come back to the same conclusion: no. Food is important. Food means things, not just about nurturing our bellies but nurturing our hearts and our minds and, depending on what you believe, our souls. I talked to N. about this the other day, thinking again of how to write this post, and he said “we have to have some things to be happy about.” Food seems like one of those things.
 Finally, what helped me figure out what to write so as to be aware of, respectful of, but not overwhelmed by these events I’ve found troubling, was the introduction to Yotam Ottolenghi and Sami Tamimi’s cookbook Jerusalem. Looking back through this lovely book, I was struck by a short section they have titled “A comment about ownership.” In a place – whether that is a city, or a nation, or the world itself – where we feel a need for the power that ownership and control bring us, it is hard to share. We pull ourselves apart from one another in an effort to feel safe, or right, or justified. Ottolenghi and Tamimi argue that searching out the true “owner” of a dish through its national or personal origin is not only difficult, but futile. Either it has been made before, or there exists another, or three, or a dozen, similar dishes claiming different origins: a “variation on a theme” (16).
 Though Ottolenghi and Tamimi are commenting on dish origination – which makes sense, as they like to provide a little background about the meals they offer – what struck me was not just where a dish comes from, but where it goes. For a long, long time, sitting down at a table, or a fire, or a bowl, has meant something more than filling your stomach. It means trust, or love, or a forging of bonds. You eat together and you end up sharing more than a meal. I’m not sure that’s still true, but I think it should be.
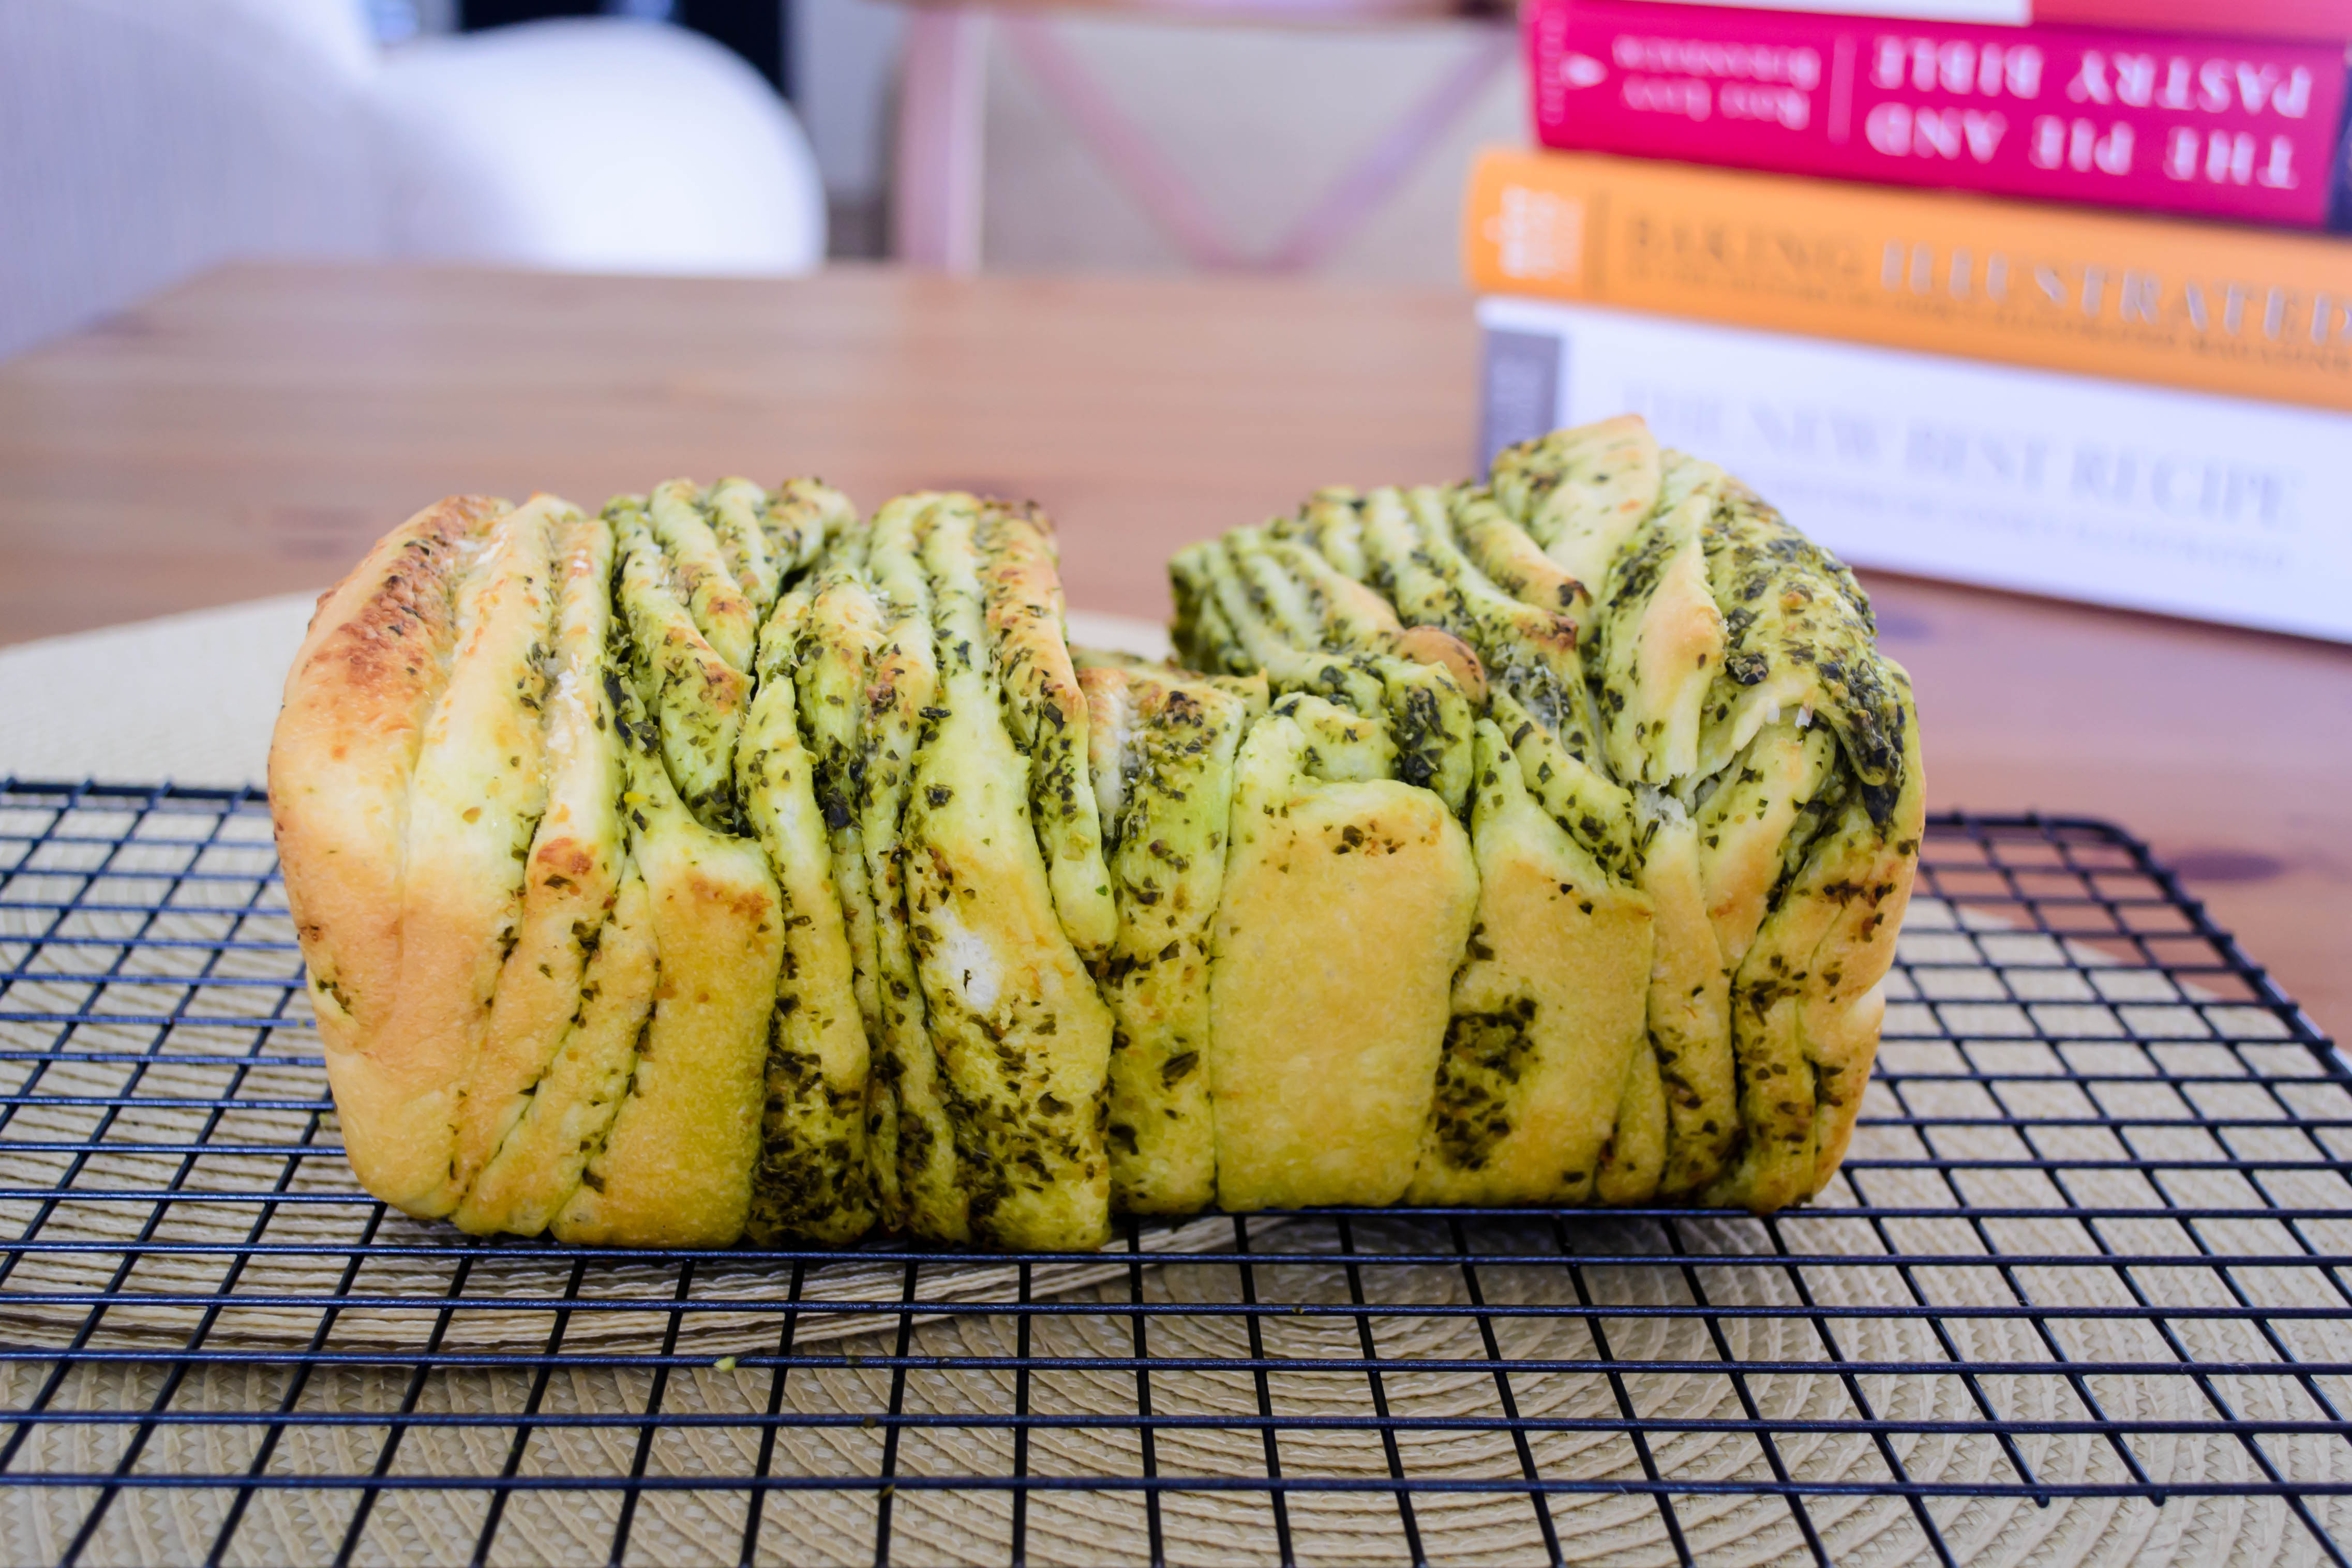
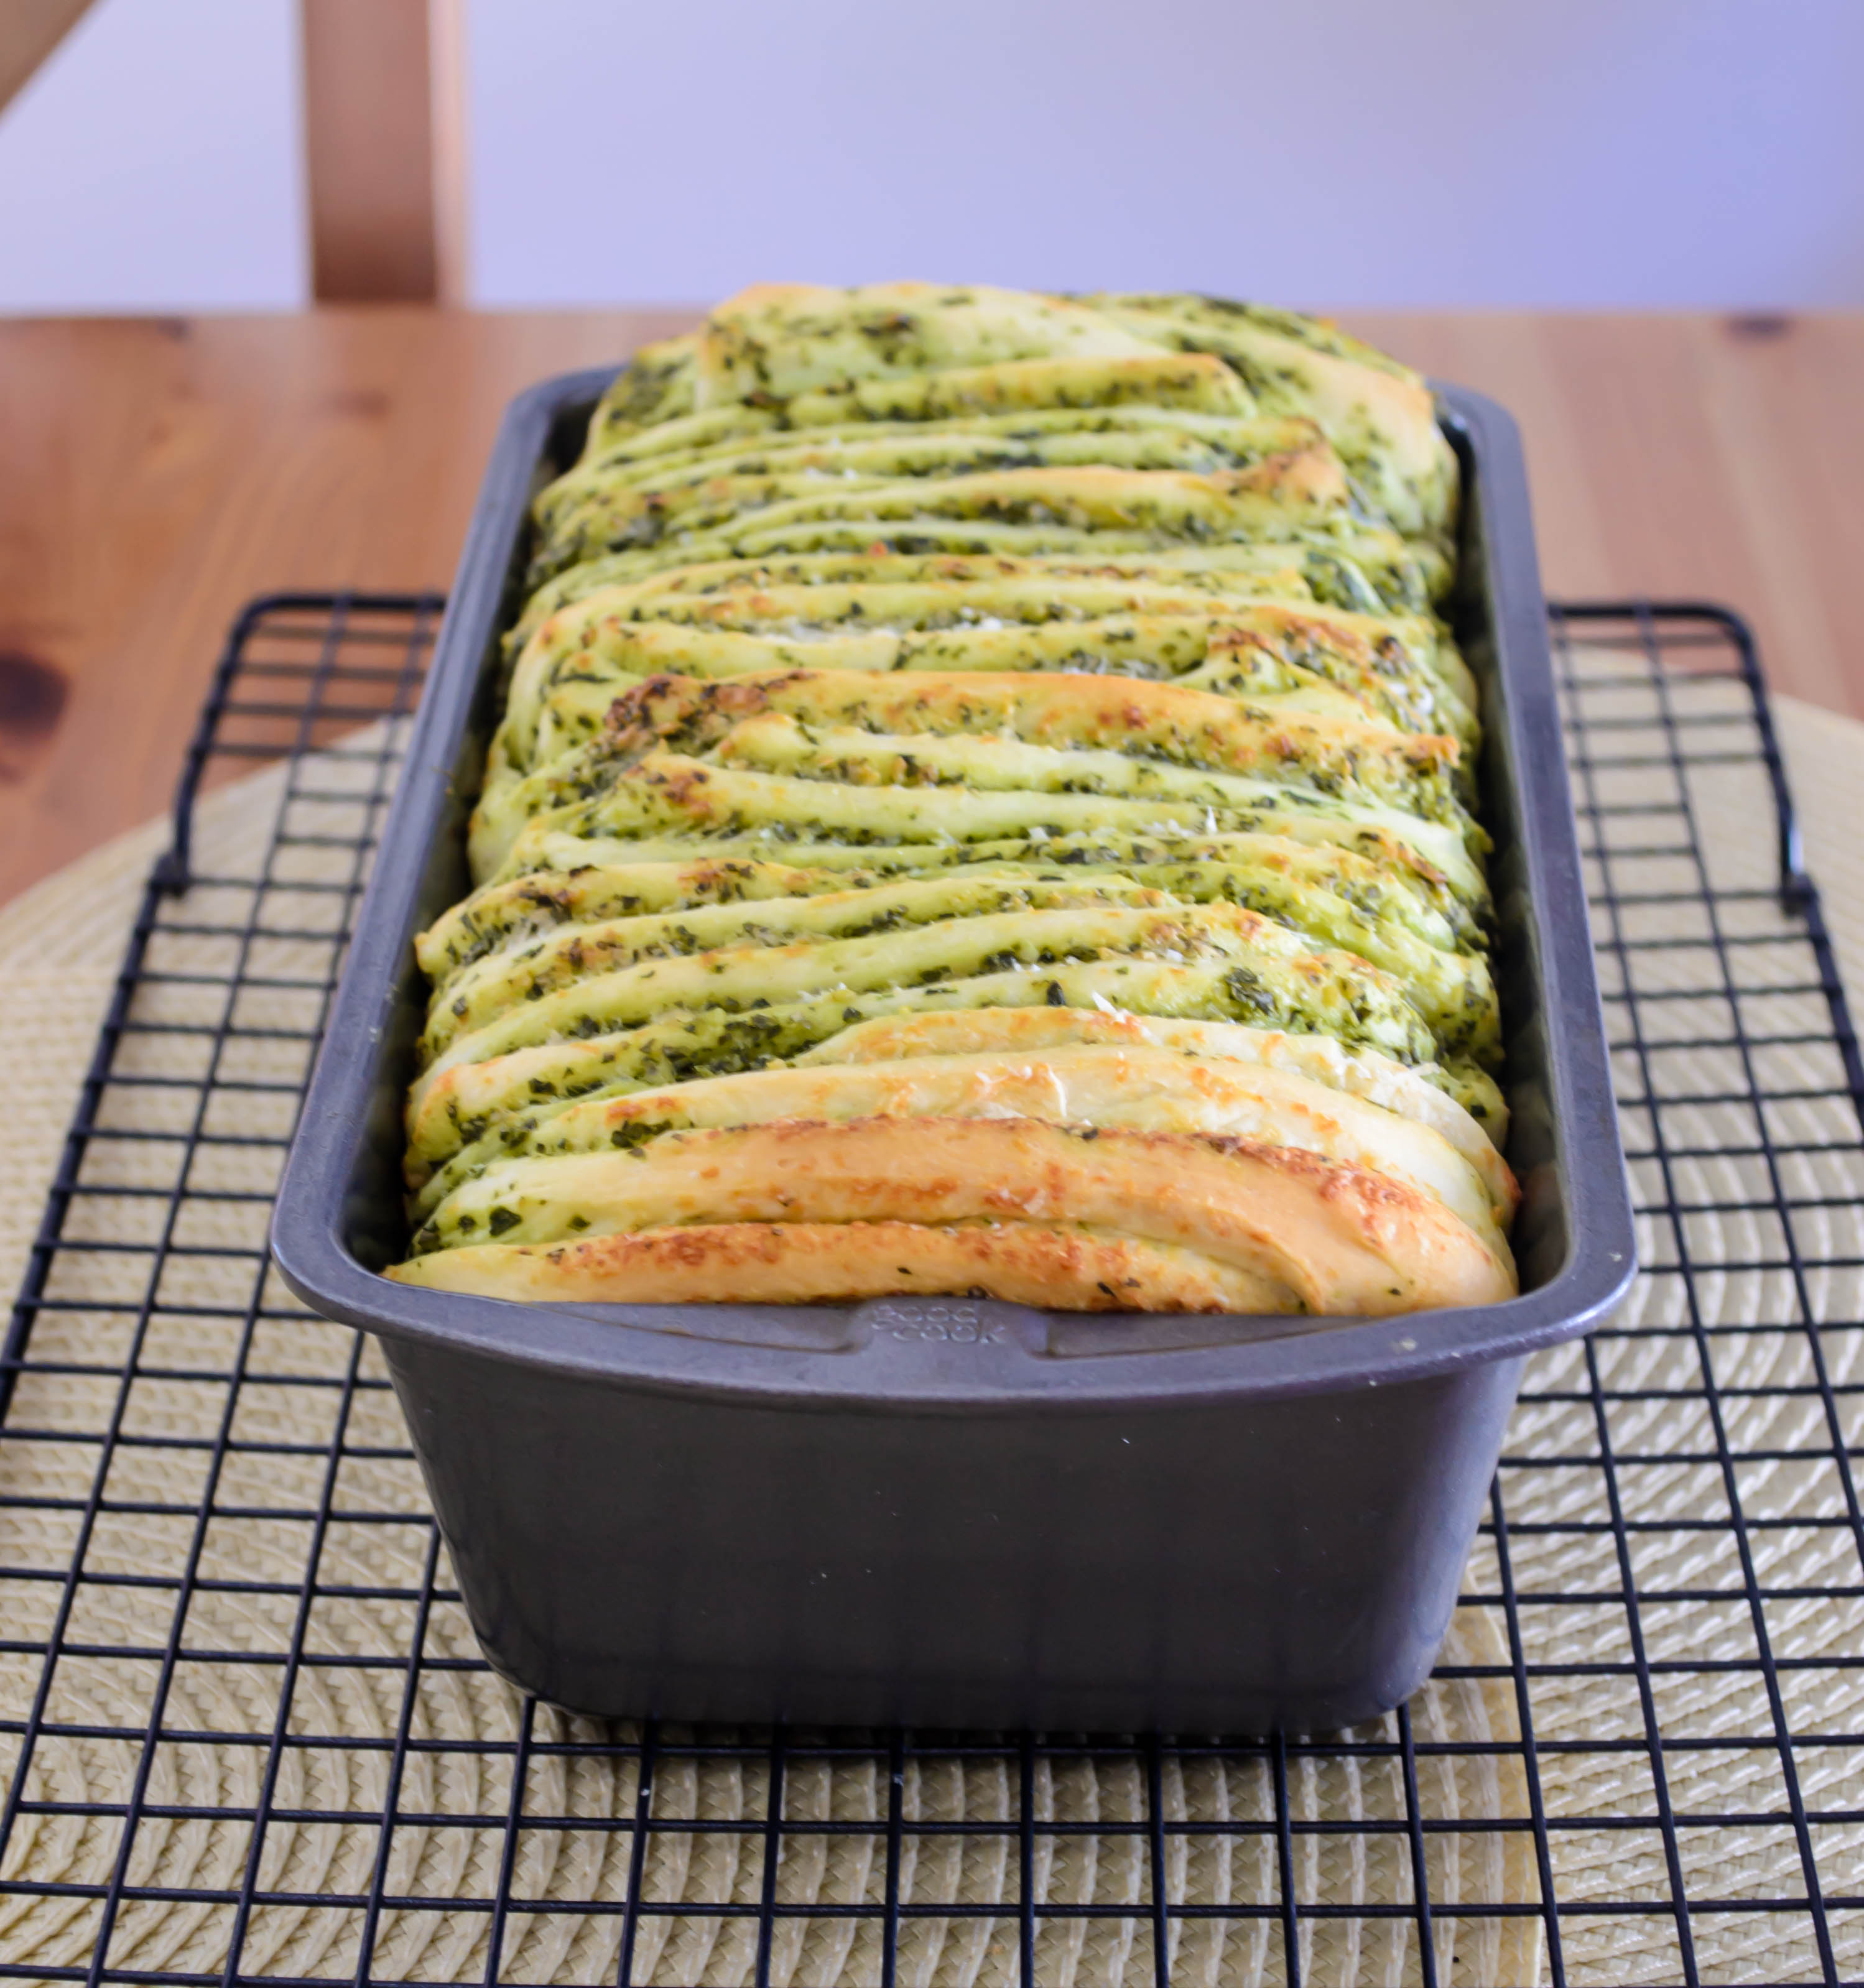
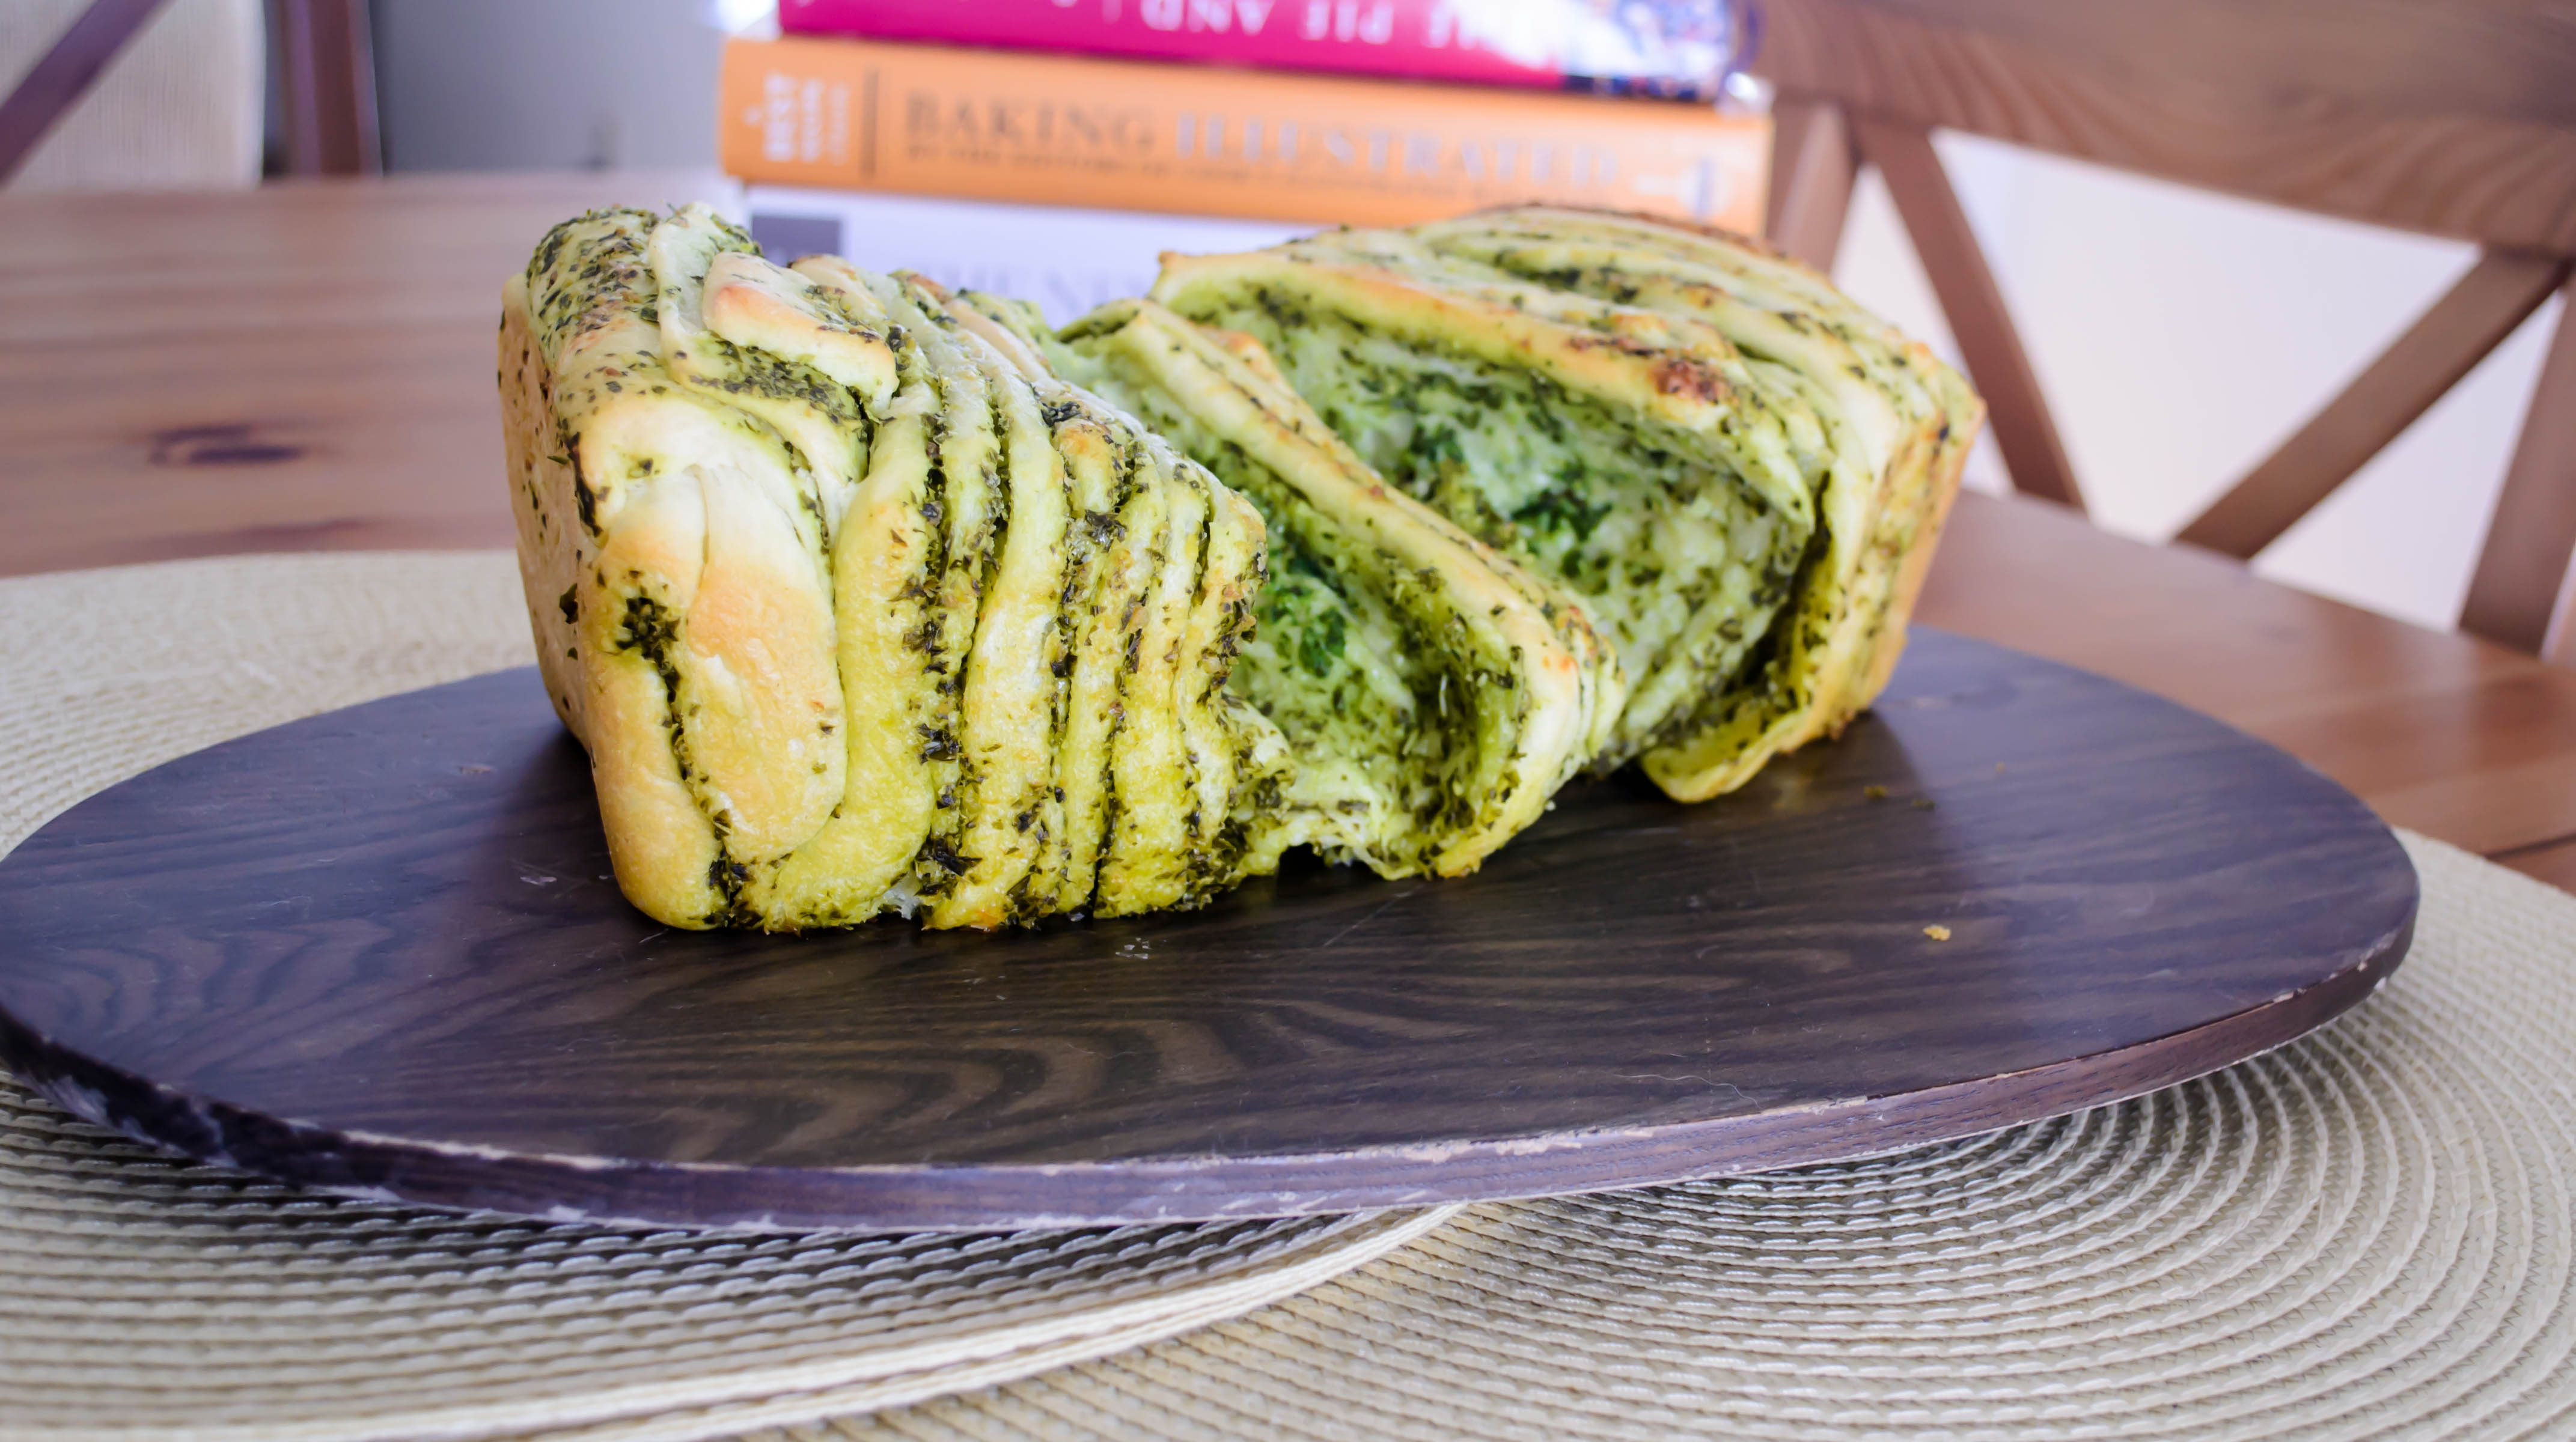
 So weirdly, when it came time to sample this month’s loaf for the Twelve Loaves project, I had chosen something divisive in its very name: pull-apart bread. When you tear into it, this loaf peels into separate bits, as I see happening so often in our world. Yet its richness, its docile tendency to give up layers and hunks and edges, suggests it is meant to be shared. We pull it into soft fragrant pieces, but we’re doing that together, and the act of sharing brings us comfort and happiness.
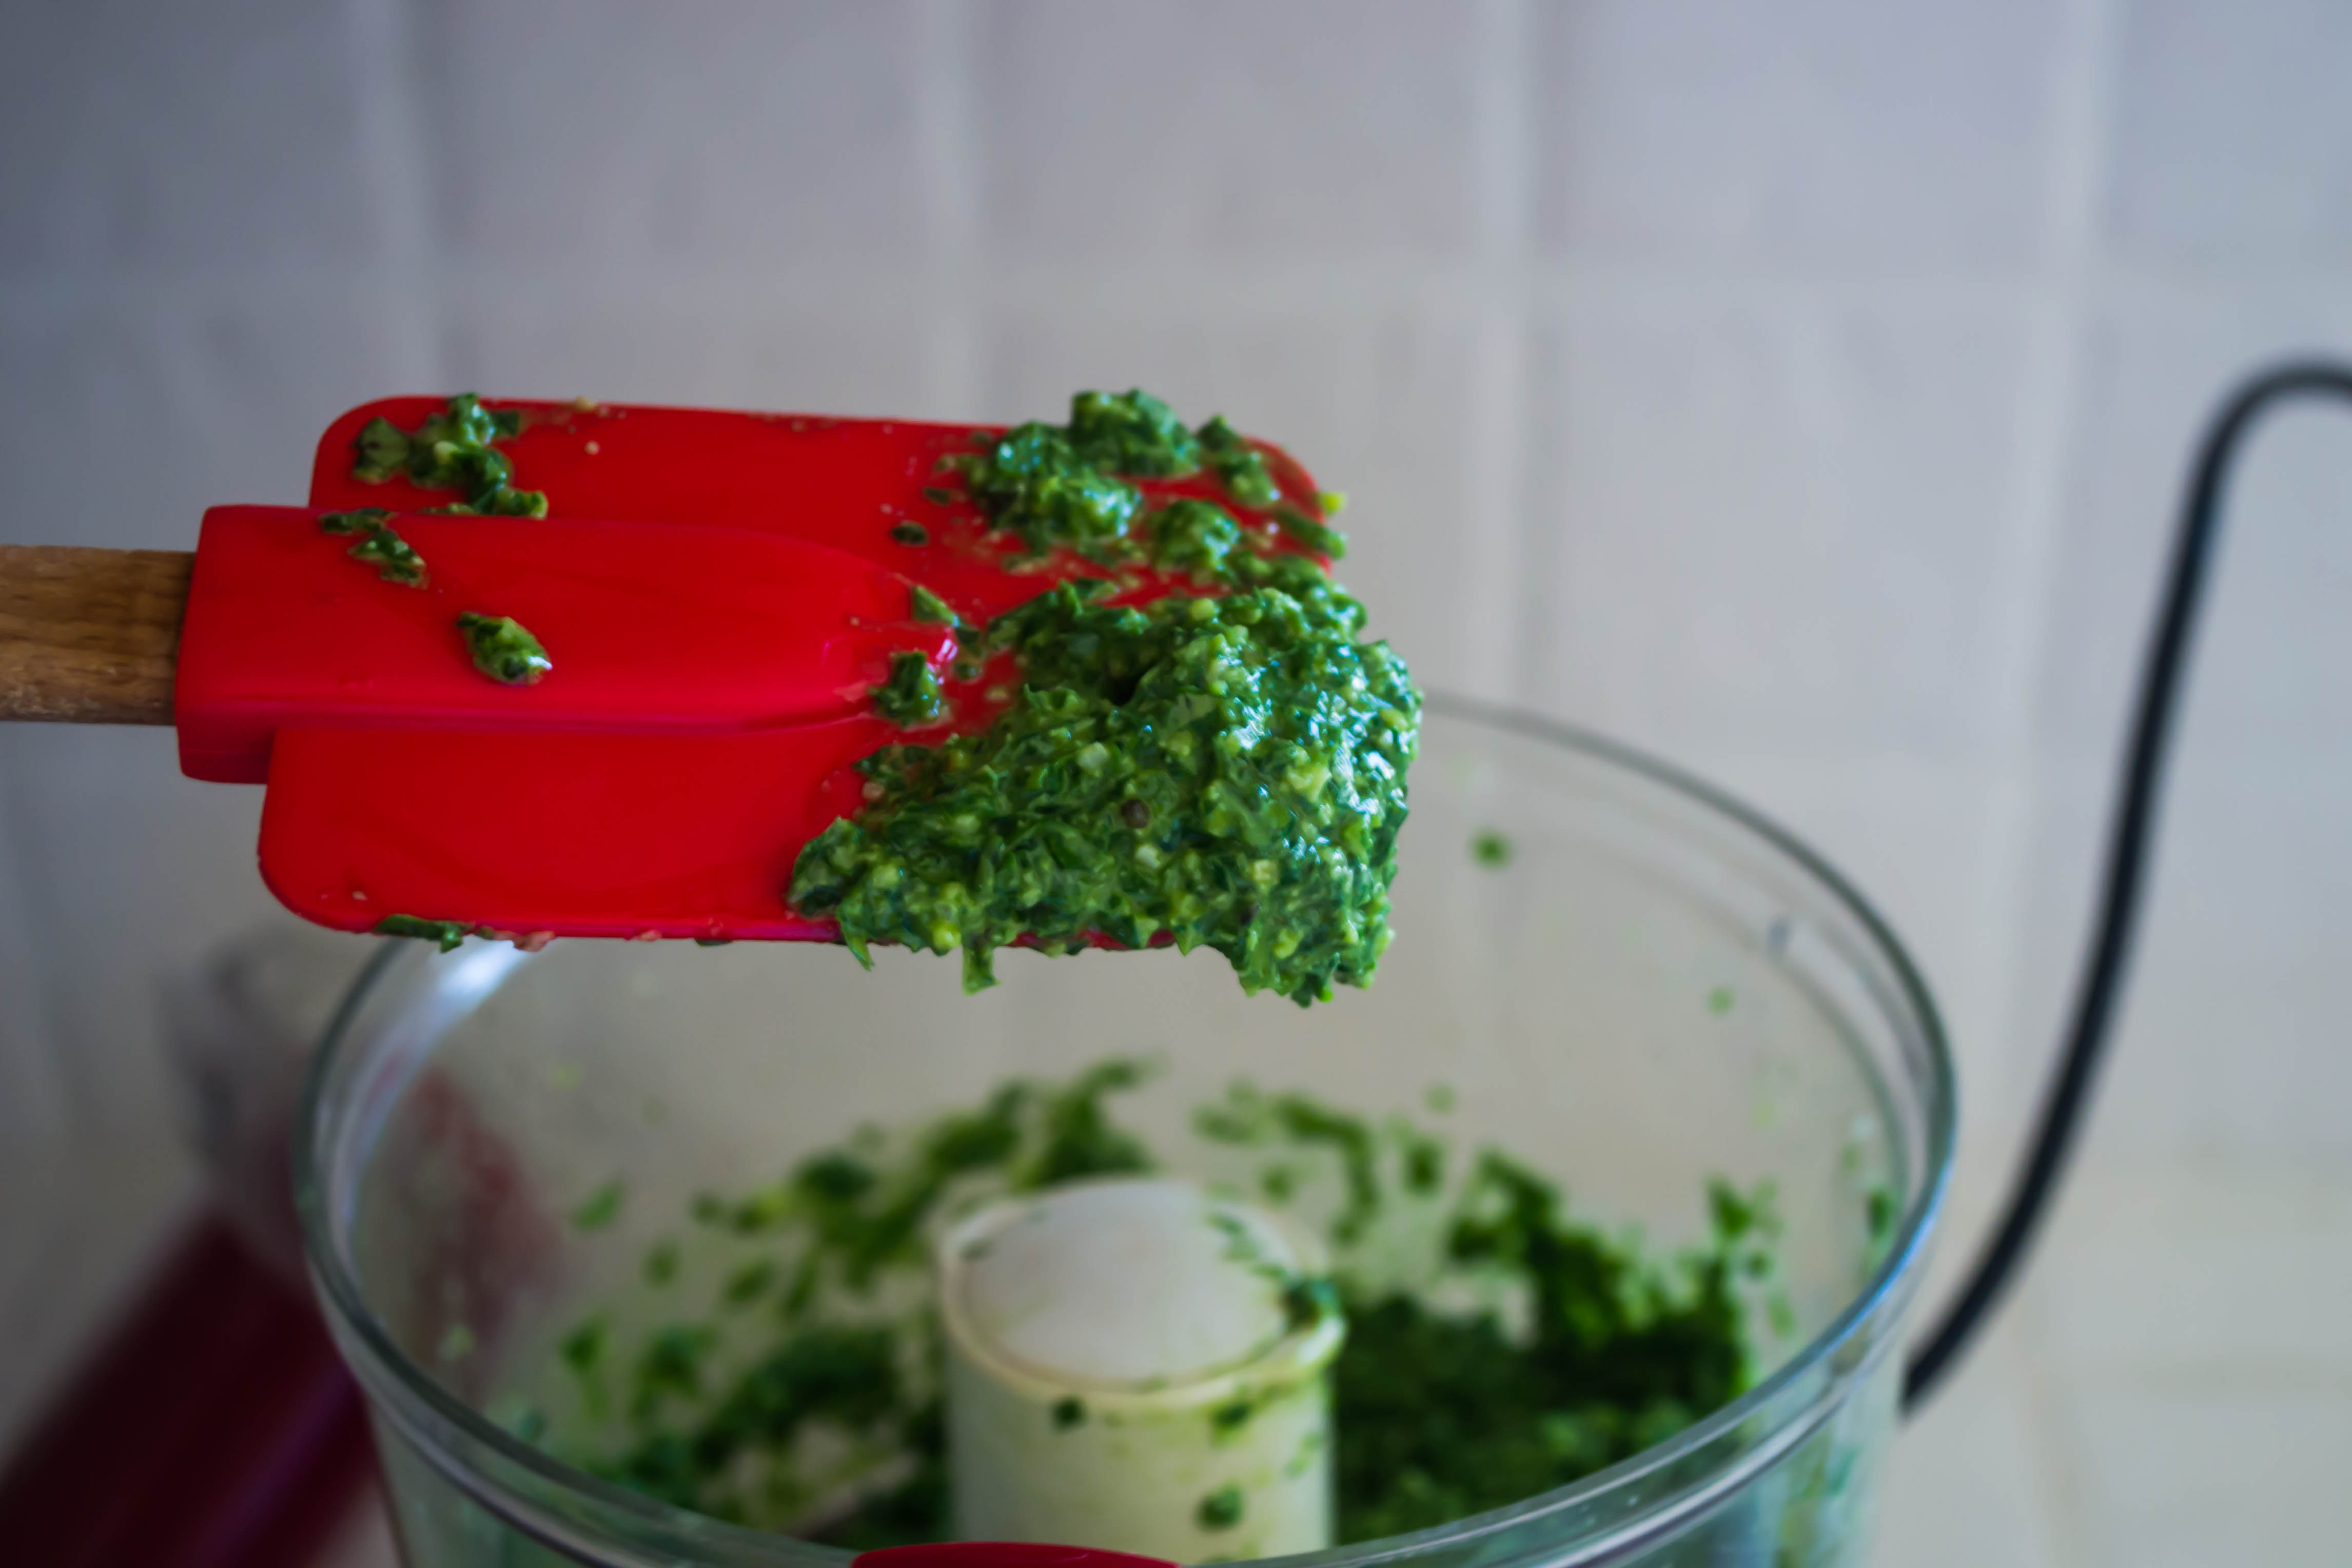
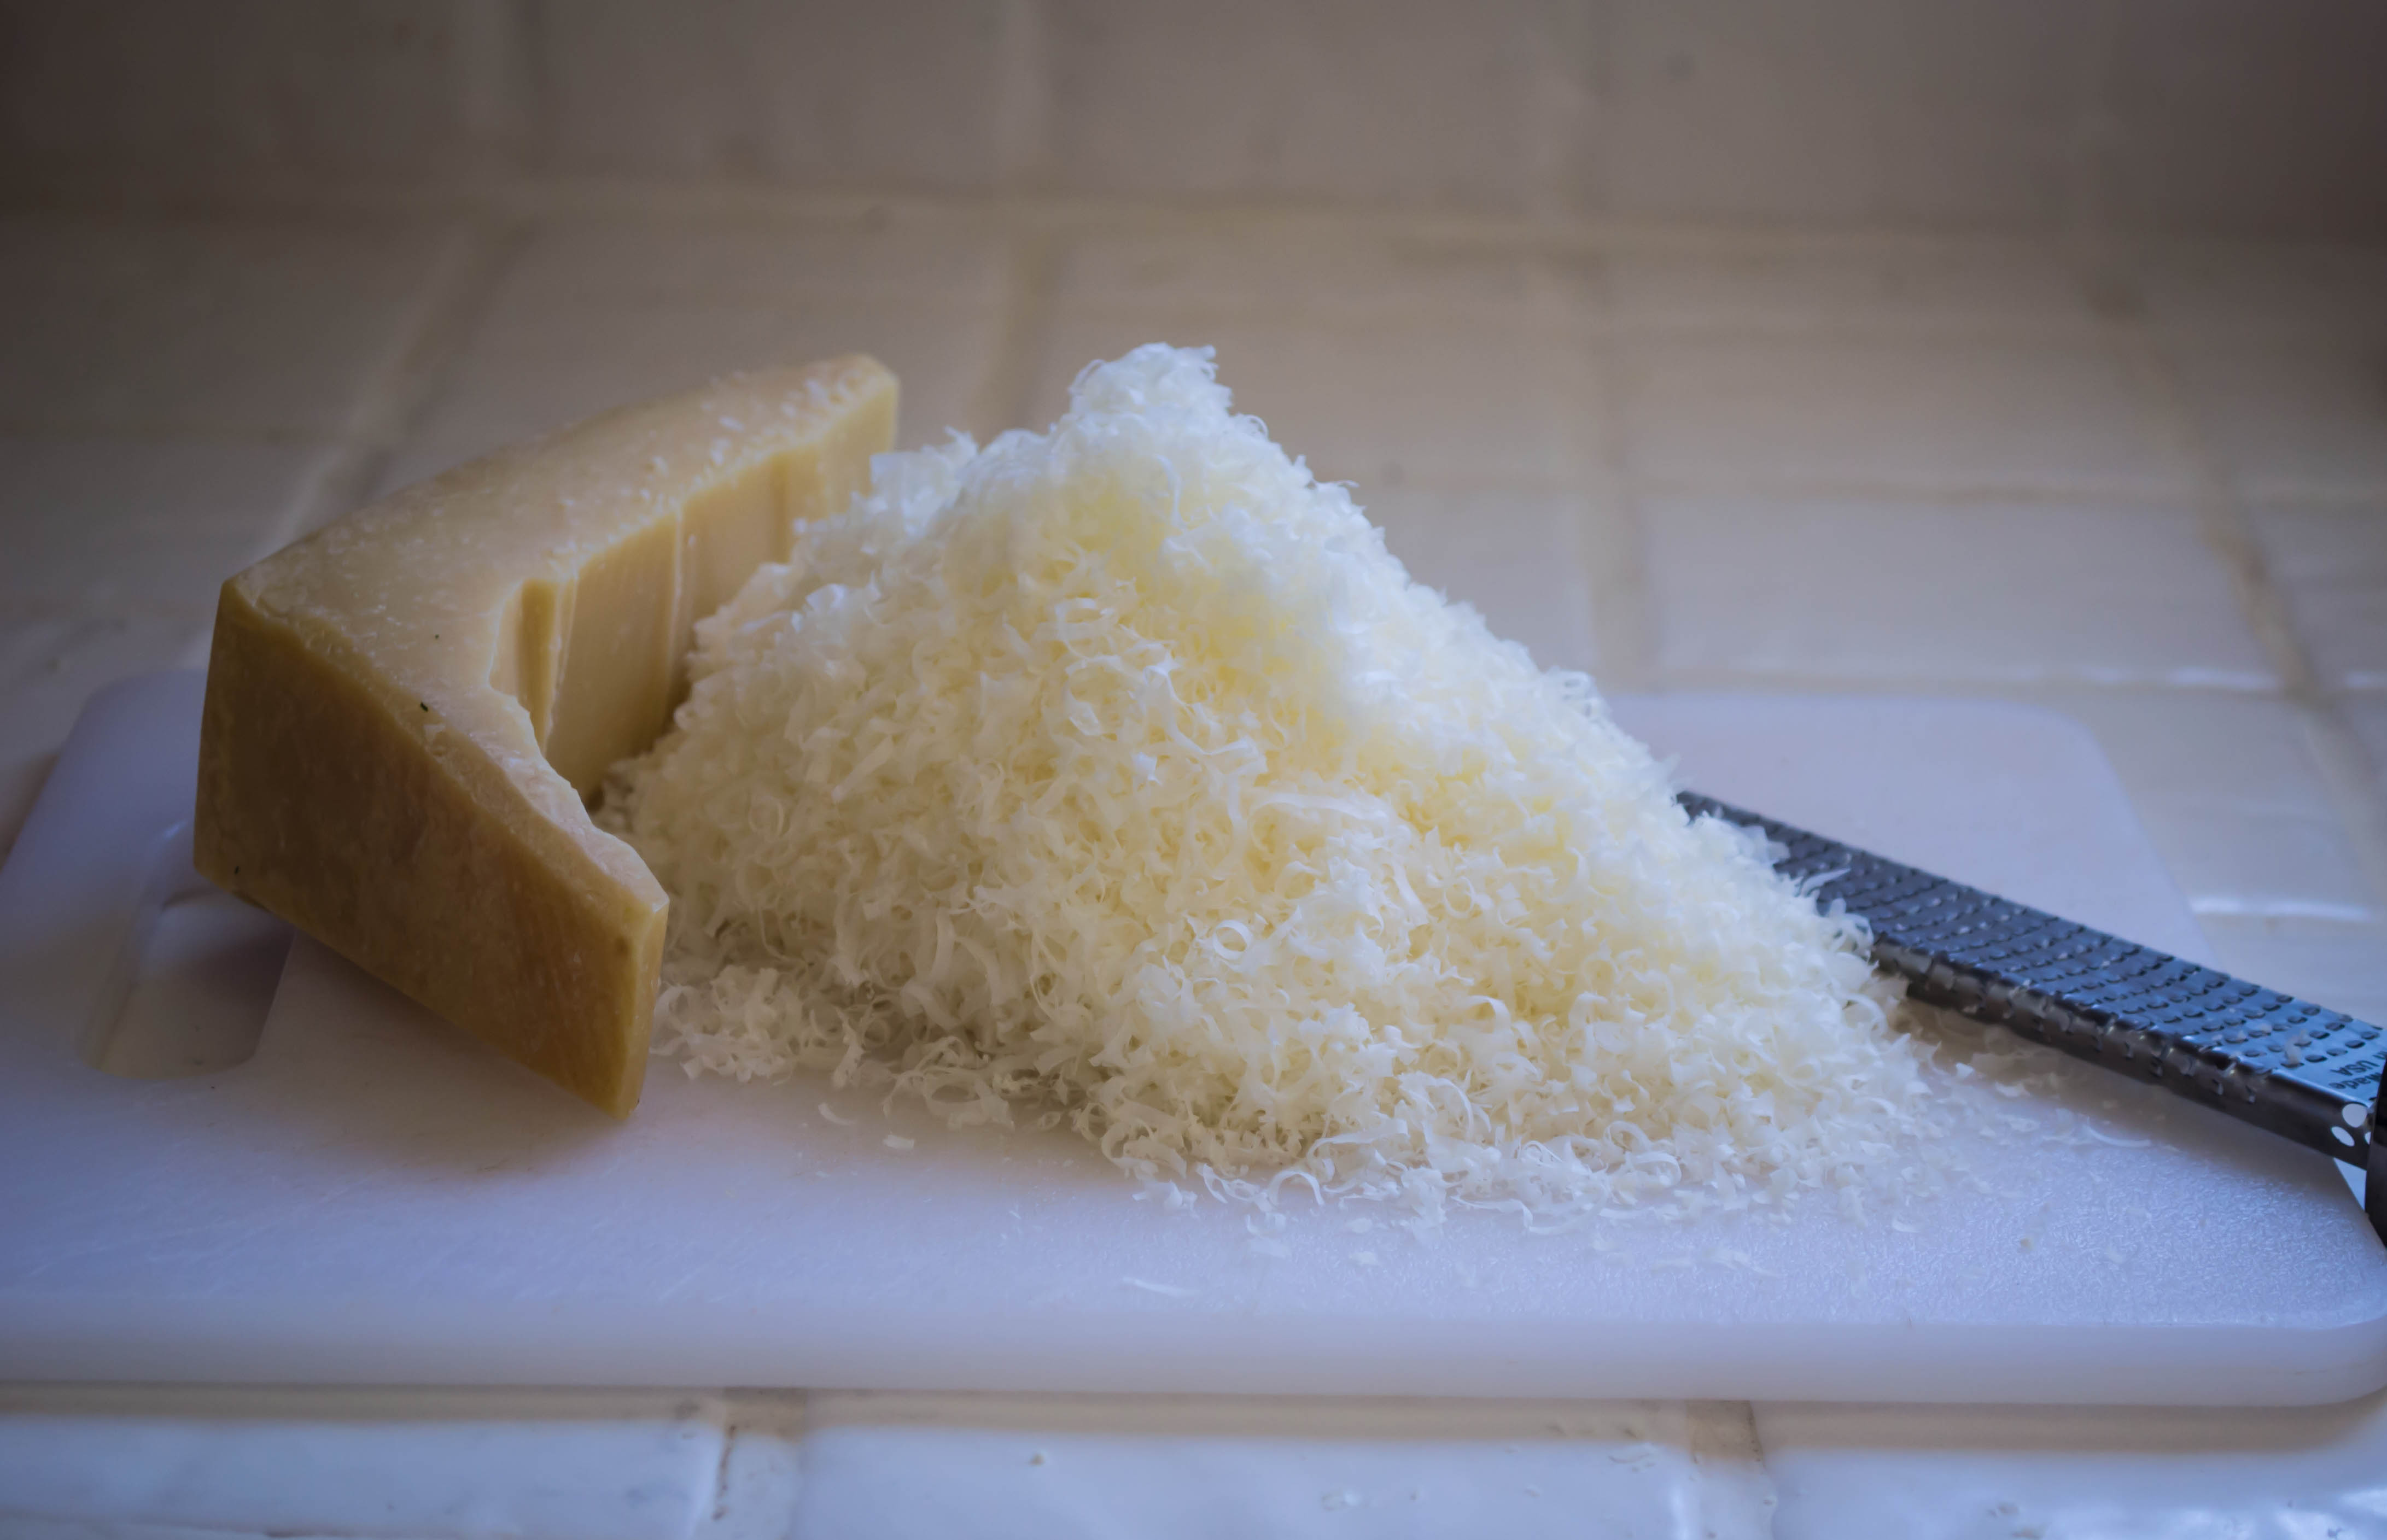
 I’ve wanted to try a pull-apart bread for a long time, particularly after seeing Deb’s nod to Welsh Rarebit on Smitten Kitchen. To answer the call of summer herbs for Twelve Loaves, I settled on pesto, blending the sharp-sweet, fresh licorice scent of basil with the usual garlic, pine nuts, and lemon juice. I amped up the parmesan quotient and included it not in the spread itself, but as a separate layer to melt and cling.
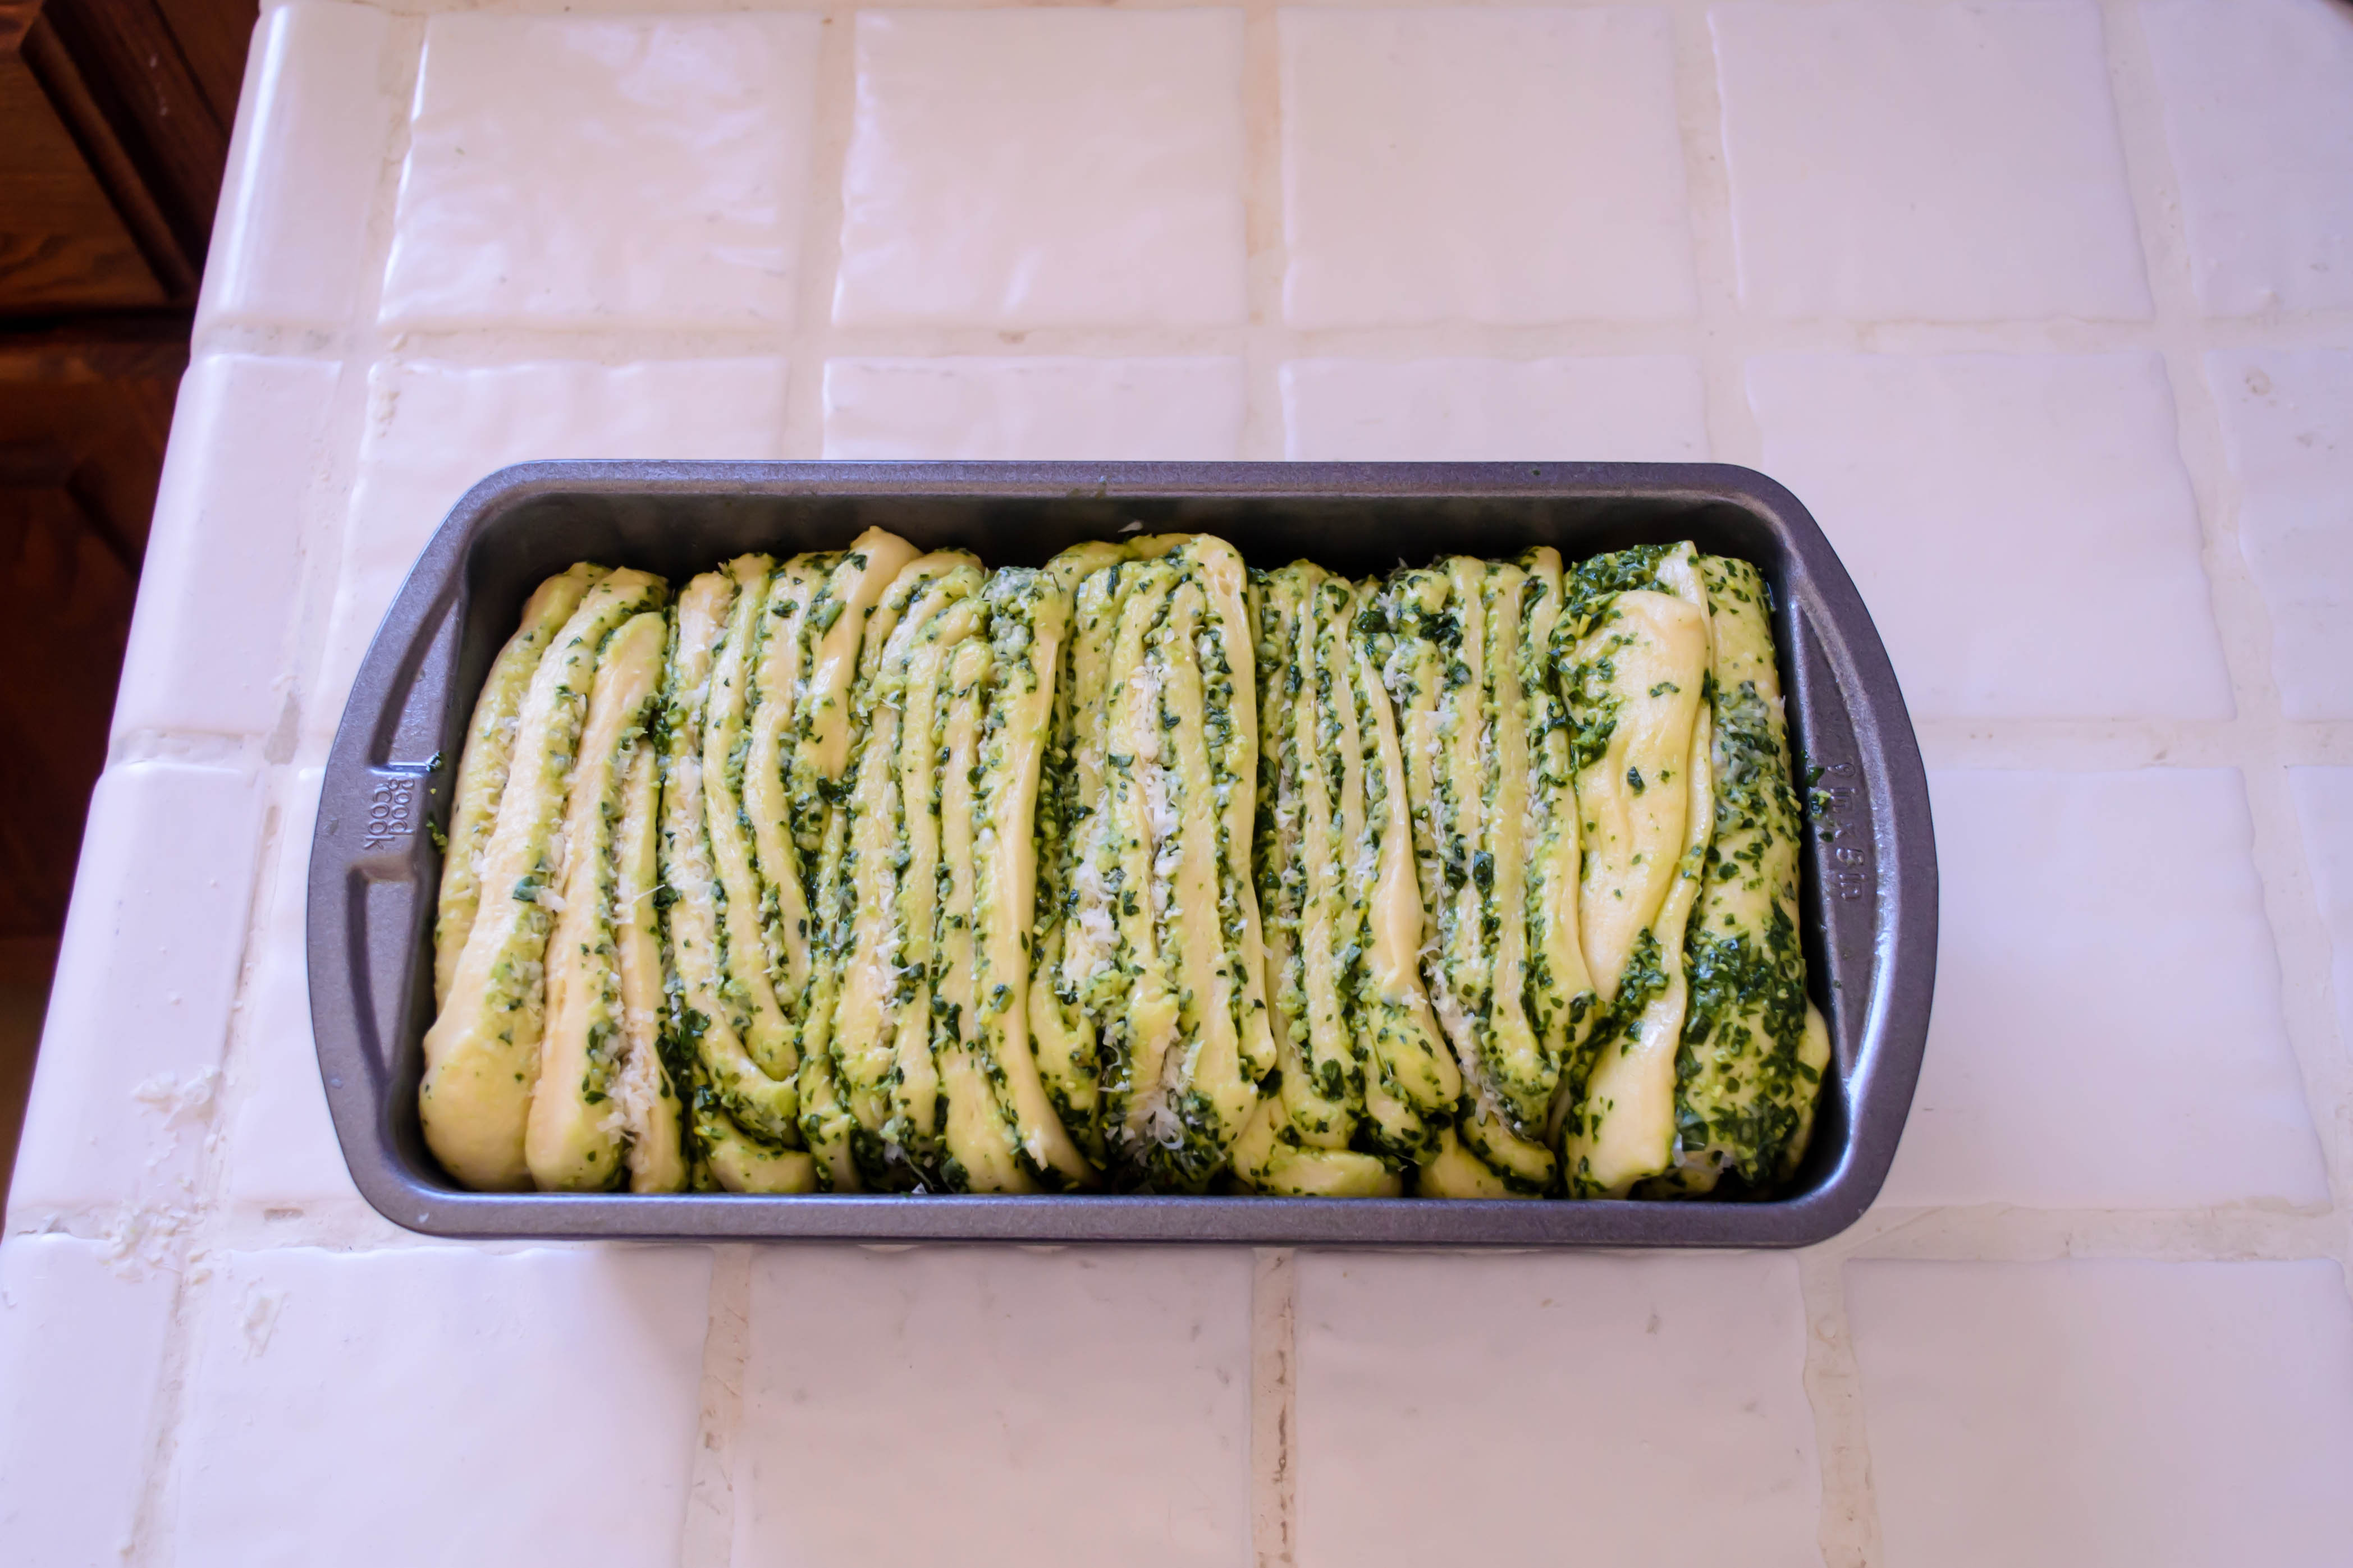 There seem to be two schools on pull-apart bread. One involves rolling little spheres of dough and jamming them into a pan together, so when they cook they swell into one another and form tenuous ties. This is also commonly called Monkey Bread, especially when it is sweet. The other, which I haven’t seen as frequently but which I chose to work with after seeing Deb’s offering, results in something more like a Pillsbury Grands biscuit or puff pastry stood on end. It involves rolling the dough thin, slicing it in long strips, layering those strips and slicing them into squares, then levering those stacked squares – like servings of lasagna or birthday cake – sideways into a loaf pan like a deck of cards to rise into one another and smash together during baking. As you peel the warm layers apart, you get the bite of pesto and the salty richness of parmesan.
 I want you to make this. It’s a bit of a project, but it’s so, so delicious. And when you make it, I want you to share it. Pull it apart, by all means. But let that action by extension pull you together.
Pesto Parmesan Pull-Apart Bread
Makes a single 9×5 inch loaf
Adapted heavily from Smitten Kitchen
For dough:
2 teaspoons yeast
2 teaspoons sugar
½ cup milk, warm but not hot
2 ½ – 3 cups bread flour, divided
1 teaspoon salt
4 tablespoons soft butter
2 eggs
For filling:
3 garlic cloves, skins removed
¼ cup pine nuts
2 tablespoons lemon juice, or to your taste
4-5 cups packed basil leaves
½ cup (approximately) olive oil
salt and pepper to taste
2 cups parmesan cheese (I know, but it’s so fluffy! 2 cups is practically nothing… besides, you’re sharing…)
- In a glass measuring cup, warm the milk. I like to pop it into the microwave for 20-30 seconds. When it is just warmer than body temperature (poke your fingertip in – it should feel just warm to the touch), add the sugar and the yeast and stir it up. Let this sit for 5 minutes or so while the yeast wakes up and begins to bubble.
- Meanwhile, combine the salt and 2 cups of the flour in the bowl of a stand mixer and stir to combine. When the yeast and milk mixture is bubbly and smells like bread, add it to the flour and salt and mix on low speed using the paddle attachment until damply crumbly. Add the butter and the eggs and mix on low speed again.
- Add an additional ½ cup flour and mix to combine. As soon as the dough starts to come together and there are no longer dry swaths of flour, switch from the paddle attachment to the dough hook.
- Knead for 3-4 minutes until a soft dough the consistency of play-dough forms. If it looks really sticky or is not coming together or pulling away from the sides of the bowl at all, begin adding the additional flour 2 tablespoons at a time, kneading for a bit in between each addition. You may not need all of the additional flour – I only used 2 ½ cups total.
- Lightly grease the inside of the bowl (or switch to a clean, lightly oiled one), flip the dough over a few times to ensure it is lightly greased as well, then cover the bowl with plastic wrap and set it aside for 50-60 minutes to rise. We are looking for the ball of dough to double in size.
- While the dough rises, make the filling. Drop the garlic and the pine nuts into the belly of your food processor and let it run for a few seconds, until the garlic and pine nuts become a fragrant crumble. There is still some blending to go, so they don’t have to be a smooth paste yet.
- Add the lemon juice and as many of the basil leaves as will comfortably fit, and turn on the processor. Most of the basil will almost instantly be shredded into tiny bits. If it isn’t, or if nothing seems to be happening, take out the lid from the food chute and begin pouring in the olive oil through this chute in a slow, steady stream.
- Once there is room in the food processor bowl again, add the remaining basil leaves, if there are any. Repeat the olive oil streaming process until you have a thick paste. I usually end up adding my basil in two or three batches. You may use more or less olive oil – this is somewhat according to preference, but you do want a fairly thick pesto that you can spread, not pour.
- Taste for seasoning; add salt and pepper and pulse to combine. Set aside until dough is finished rising.
- When the dough has doubled in size, punch it down by gently depressing your fist into the center. Let it rest for a minute or two, then turn it out onto a well-floured board and, using a floured rolling pin, roll it out to a rectangle of about 12×20 inches.
- Spread pesto over the entire rectangle of dough, right up to the edges. We don’t need a bare margin for this loaf.
- Cut the rectangle crosswise into 5 strips of 12×4 inches (so the short edge of the initial big rectangle becomes the long edge of each of the 5 strips). Sprinkle one with about ½ cup parmesan cheese – this will be the bottom of the stack.
- Carefully, using a spatula with a long blade or a dough scraper to help you, top your parmesan covered base with another strip of dough. Sprinkle another ½ cup parmesan atop this new layer.
- Repeat until you have a stack of five layers, though the final layer will not have cheese on top, which is fine.
- Gently, exceedingly gently, use a serrated knife to cut the dough layers into 6 segments of about 2 inches each. Turn each segment layer-side up (showing off its stratigraphy) and snug it into a greased 9×5 inch loaf pan. You can turn the pan up on its short end to make this a bit easier – take a peek at Deb’s images (link above) for a visual. Follow this with another segment, and so on, to create a stack of layers. When you finish and set the loaf pan back on its base, Deb says this looks a bit like a full card catalog drawer, and I think this is a good assessment.
- Cover your strange, layered loaf with plastic wrap and set it aside to rise again for 30-45 minutes. Preheat the oven to 350F so it is ready when you are.
- Once the dough has risen again, which will squash the layers together a bit, remove the plastic wrap and stow your loaf it in the 350F oven for 25-35 minutes until it is puffy and nicely bronzed on top.
- Cool a minimum of 10 minutes in the pan (though 15 or even 20 is probably safer; mine collapsed upon removal), then carefully flip it out and serve warm for best flavor and “pull-apart” effect.


