Plantains with lime, cotija, and honey

If you are working from home during this pandemic, you have probably thought more than once since March about the weirdness of time passing. On one hand, we’ve been doing this foreverrrrrrrrrrr. On the other hand… no, it’s been forever.

But within that space of Marchunetember, or whenever we are, time passes oddly. Sometimes I can’t believe it’s already Thursday (I know, it’s Monday. But you know what I mean). Sometimes the afternoon just will. not. end. We are feeling the first hints of fall here in Southern California: two beautiful overcast mornings in which the gloom was not smoke, thank-you-very-much, cool enough that I wanted pants on my dog walk. Yet later this week we are supposed to rocket back into temperatures in the 90s. There’s a bit of everything at once.

So this is a little dish that speaks to all of those things. It makes a nice lunch for one, but it would be an equally delightful afternoon snack for two. It could easily be doubled or tripled to feed your pod.  It’s sweet and salty and sour and a little spicy – in fact, it would go so well with this kicky, smoky, spicy mix that you might as well plan to serve them up for a happy hour together, whether that means margaritas, palomas, or puckeringly good lemonade.

I like a mostly-ripe plantain for this, yellow with streaks of brown on the peel, because I enjoy the mix of textures: crisp, fried exterior with cushiony softness inside. But you could also do them tostones-style, frying less-than-ripe plantain slices over medium-low heat first to soften, then smashing them flat and frying again over higher heat on both sides for even brownness.

I ate mine with a fork, as you can see from my not-quite-in-focus close-up, but if you want to go nachos style and use the plantain pieces as scoops, I say go for it.

Plantains with lime, cotija, and honey

Serves 1 as a light lunch or 2 as a snack

15-20 minutes

1 large, yellow plantain, peel removed, cut into about ½ inch slices (I like mostly ripe, but see above for another option)

1 tablespoon vegetable oil

2 tablespoons butter

salt and red pepper to taste – I like the fruity heat of aleppo pepper

1 lime, which you’ll use for zest, supremes, and juice

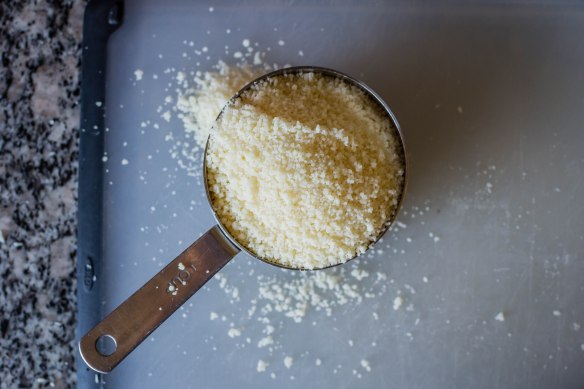
1-2 tablespoons crumbled cotija cheese

1-2 teaspoons honey

about 1 tablespoon chopped cilantro


  • In a cast iron or other skillet, heat the vegetable oil and butter over medium-low heat until the butter is melted. Add the plantain slices, dust with salt and pepper, and continue to cook over medium-low for 4-6 minutes, or until they are nicely golden brown on the bottom. Don’t rush it. Don’t turn up the heat. They need to cook inside but not burn on the outside.
  • As plantains brown, flip, dust the other side with salt and pepper, and cook on the second side until it is also nicely browned, around 4-5 minutes this time.
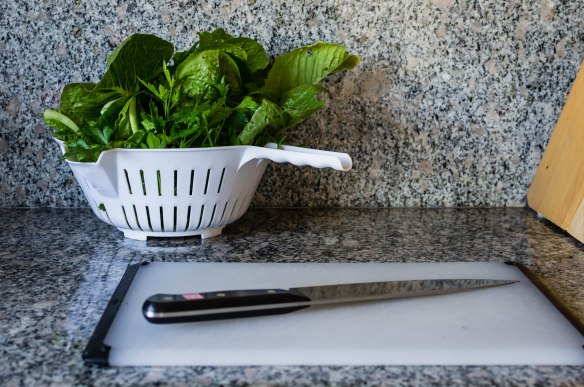
  • While the plantains are cooking, zest the lime and reserve that zest for serving. Then use a sharp knife to cut a thin slice off the top and bottom. Remove the remaining skin and pith by cutting it off in strips from top to bottom, following the curve of the fruit. When you have removed the skin all the way around, cut supremes: slice between the fruit and the membrane that separates each segment. This is a useful step-by-step as well.
  • To serve, pile the fried plantains on a plate or in a shallow bowl. Add the lime supremes and cotija crumbles. Squeeze on some juice from the remaining carcass of the lime. Drizzle on the honey, then scatter the cilantro and the reserved lime zest over the top.

Pandemic Potato Salad

This is a recipe born out of need and change and a series of odd connections. I bought a bag of red potatoes intending to make a gratin, but a sudden upswing in temperature made the idea of roasted anything feel oppressive. Meanwhile, my beautiful heads of romaine lettuce in my garden started to bolt, and my parsley was already flowering. I thought of salad, of course, and then of potato salad, and then of likely ways I could combine them. A potato salad with green beans and parmesan I had in Eugene crept back into my mind, and parmesan reminded me of pesto. Pesto is such a convenient way of using excess greens, even when they are getting bitter, so I wondered if lettuce pesto would be tasty. The garlic and parmesan of pesto along with the lettuce reminded me of Caesar salad, and suddenly I was adding anchovies and mayonnaise and hard-boiled eggs for good measure, and this franken-potato-salad was born.*

This is not one of those “not your average gloopy potato salad” iterations. I must admit, as an ardent mayonnaise lover, I resent those complaints about gloopiness. This one is gloopy. It is unapologetically gloopy. It is a potato salad for mayonnaise aficionados. But I have an important secret when it comes to those “gloopy” mayonnaise based summer salads, whether their bases are potato or pasta: you have to add the dressing while the starch base is still warm. If the potato chunks or noodles are cold, the dressing just weakly sits beneath and around them. If it’s stirred in while they are warm – or even hot – the dressing soaks in. The texture is better, the flavor is better, and you can get the hot part of the process out of the way hours before you intend to serve anything. At least 2 hours in the fridge after everything is combined ensures nicely melded flavors – the anchovy mellows, the garlic relaxes, the lettuce emerges not as a strong presence but as a juicy green background taste we found quite pleasant.

Because I’m me, I couldn’t quite leave well enough alone: since the lettuce and anchovy and parmesan allude to Caesar salad, and since lately we’ve been all about crunch and texture, I wanted to give a nod to the crouton component. A shower of panko crumbs well toasted in olive oil right over the top added crunch, though if you wanted to be a little less excessive, you could probably used well-toasted almonds instead. I’d suggest a rough chop for rubbly texture.

* As I wrote this, I was weirdly reminded of my most recent and ongoing scholarly project, which suffers from organizational stress. A few weeks ago a fellow academic tweeted “How has anybody ever structured a piece of writing? It’s an impossible con, all the things to be said must be said at exactly the same time or none of them will make sense” (Jones). I felt that as I tried to explain the intersecting idea strands for this salad: in my brain, the connections happened nearly instantaneously. Here, which do you mention first? The potato salad with parmesan that reminded me of pesto? The lettuce that evoked Caesar? Words prohibit the all-at-once-ness that feels so natural when we think…

Pandemic Potato Salad
Serves 6-8 as a side, not that you’re having anyone over right now…
2 ½-3 hours, including chilling time
6-8 ounces green beans or haricot verts
10-12 medium red potatoes
4-6 cloves garlic
5-9 anchovy filets (wide range, but adjust according to how much you love anchovies)
zest and juice from 1 lemon
1 head romaine lettuce, core removed, leaves roughly torn
1 cup packed parsley leaves and stems
1 cup mayonnaise
1 cup grated parmesan cheese
3 hard-boiled eggs, peeled and roughly chopped
salt and pepper to taste
Optional: 2 tablespoons olive oil and ½ cup panko breadcrumbs or ½ cup roughly chopped almonds


  • Blanch the green beans in a large pot of boiling salted water. This will take 2-3 minutes for large size beans, or about 90 seconds for skinny little haricot verts. Remove from the pot and douse in cold water to stop them from cooking further. Reserve the salted cooking water. Quarter the potatoes (or if they are gigantic, cut down into large bite-sized pieces) and place them in the same pot. Fill the pot with more water if needed to cover the potatoes, then bring back to a boil over high heat. Turn down to medium and simmer until the potatoes are just tender when pierced with a fork. Drain and set aside while you make the dressing.
  • If you need to grate the cheese, load the belly of your food processor with small chunks of parmesan, then run on high speed until the cheese is adequately broken down. Empty the processor, measure out the required cup of cheese, and set aside to add later.
  • Process the garlic cloves, anchovy filets, and lemon zest and juice together first into a clumpy paste. Use a rubber spatula to scrape down the sides of the processor, then add about half of the torn lettuce leaves and the parsley and pulse a few times to break them down. When there is enough room in the processor, add the remaining lettuce and parsley and process on high until the mixture is finely chopped.
  • Scrape down the sides of the processor again and add the mayonnaise and reserved parmesan cheese. Process on high speed until well combined. Taste for seasoning; add salt and pepper as needed. It’s important to wait until now to add the salt, since the anchovy, mayonnaise, and cheese are all salty already.
  • Add the still-warm potatoes and the drained green beans to a large bowl. Stir in about ¾ of the dressing until the vegetables are evenly coated. Gently fold in the chopped hard-boiled eggs. Add more dressing, if needed.
  • At first this will probably taste too salty. Refrigerate for at least 2 hours to allow the flavors to mellow and combine. Bring back to room temperature before serving.
  • This is ready to serve as is. But if you like a little excess (or if crunch is important to you), heat the optional 2 TB olive oil in a small skillet, then stir in either ½ cup panko breadcrumbs or ½ cup roughly chopped raw almonds and toast until deeply golden. Sprinkle over the top of the potato salad just before serving.

Project Cook: Garden Focaccia

A garden path sentence is one in which the reader is misled, usually by a word or two that function(s) as a different part of speech than the reader expects, making the rest of the sentence seem incomplete or nonsensical when it is in fact grammatically correct. It takes its name from the idiom “to lead [someone] down the garden path”: essentially, to mislead or deceive them.

Here’s an example: “the old man the boat.” We initially see the phrase “the old man” and think that’s the subject of the sentence. Therefore, the ending “the boat” makes the sentence feel incomplete. But when we realize “man” is actually the verb and the subject is “the old,” suddenly it makes sense: this ship is being sailed by retirees.

Here’s another: “the horse raced past the barn fell.” Here, everything makes sense up until the last word if we’re reading the sentence with “the horse raced” as an active phrase. But it’s not, and it’s not the barn that fell either: the sense of the sentence only emerges if we understand what’s really being said is “the horse [that was] raced past the barn fell.”

Garden path sentences were introduced to me by one of my students a few years ago, and they blew my mind a little, but they shouldn’t have. Not only do I know full well as a student (and teacher) of words that sentences haven’t truly completed their meaning until their final punctuation mark is reached, but as a lover of food, I know that an expected direction, or perhaps being “led down the garden path” with an illusion or a twist, sometimes makes the dish that much more enjoyable.

It seems a bit cruel, perhaps, in a world in which the baking aisle of so many grocery stores has been ransacked, to show you a loaf of bread, but I was so taken with the images of decorated focaccias my Pinterest page was suddenly showing me, as taken as I was with the idea of garden path sentences, that here we are: a loaf literally studded with deceptive visuals, turning carefully placed herbs and vegetables into an edible flower garden.

I started with Anne Burrell’s recipe, making only the smallest of adjustments: she uses AP flour; I went with bread flour, reduced the olive oil a touch, and subbed in honey for the sugar used to start up the yeast. As for process, I added a step I’ve always done with my mom’s challah, letting the mixture – more batter than dough at that point – rest for 15-20 minutes after adding about half the flour. I think this gives a truer sense of how much flour is really needed, since the initial addition has a chance to start hydrating. It’s not 100% necessary, but I notice it means I wind up using a bit less flour overall, and that’s not a bad thing these days.

The real magic here – where we verge into complexity and deception – is during the rising: while the first rise is standard, letting the dough swell and double in a bowl, the second requires more unusual methods. You spread the risen dough out on an oil-drenched baking sheet (be sure yours has sides!), coaxing it with your fingers to spread reluctantly all the way into the corners. You press and stab your fingers all the way – all the way! – through the dough, making dozens of small holes straight down to the baking sheet below, to create that characteristic bubbled texture of a focaccia, before allowing it to rise again.

Halfway through this second rise comes the fun part – or the fiddly part, depending on who you are. Assorted herbs, thinly sliced vegetables and citrus zest, get pressed gently but firmly into the partially risen dough to form whatever patterns you desire. I used chives, parsley, and dill for “stems” and leaves, and then slender segments of olives and cherry tomatoes for “flowers,” and some curls of lemon zest for extra flair. I tried to roll a few tomato roses, but for me at least, cherry tomato skins provided not quite enough material to work with.

The finished loaf is quite the spectacle – the brightness of your “garden” fades a bit in the baking (there’s a metaphor here for spring into summer, perhaps), but the bake isn’t quite long enough for the delicate herb stems and leaves to burn – instead they crisp and frizz as residual oil soaks into the bread. You have to saw carefully with a bread knife to keep everything in place as you carve off big slices perfect with a salad, or a bowl of soup, or the base of a sandwich, or just straight out of hand. There’s a joke here about a garden variety of options, but I’ll leave you only with this: as he baked the bread disappeared.

It must have been delicious.

Project Cook: Garden focaccia
Adapted from Anne Burrell
Makes 1 large 9×13 inch loaf
1¾ cups warm water
2 teaspoons yeast
1 TB honey
4 ½ – 5 cups bread flour
½ + ⅓ cup olive oil
1 TB kosher salt + more for sprinkling
Assortment of herbs, vegetables, and/or edible flowers to decorate
  • Mix yeast, water, and honey in the bowl of a stand mixer and let sit 10-15 min, until the yeast is foamy and puffed. Add 3 cups of the bread flour and ½ cup of the olive oil, beat on slow speed with the paddle attachment just until the mixture comes together, then loosely drape with a clean kitchen towel and let sit 15-20 min. This allows the flour to begin hydrating and the yeast to start working.
  • Add 1 cup more flour and 1TB salt, then knead at medium speed with the dough hook 5-7 min until smooth and elastic. Sprinkle in remaining flour ¼ cup at a time if dough seems very sticky while kneading. I ended up using the full 5 cups of flour.
  • Cover with a clean kitchen towel or plastic wrap and let rise until doubled, about 1 hour in a warm spot. “Punch down” the risen dough by gently depressing your fist into the middle.
  • Pour the remaining ⅓ cup olive oil onto a 9×13 inch cookie sheet with sides and tilt the sheet back and forth until the bottom and sides are well oiled. Flop the risen, punched down dough onto the oiled sheet, then use your fingertips to coax it toward the sides. As you stretch the dough, create focaccia’s characteristic dimples by pressing and stabbing all the way through the dough all over its surface. You have to create actual holes, not just depressions, to retain the texture. Some of the olive oil from the baking sheet will lap up over the surface of the dough – that’s okay.
  • Cover the dough with your towel again and let it rise for another hour.
  • 30 minutes into the second rise, preheat the oven to 425F and add your decorations to the loaf: press in herbs, vegetables, and/or flowers in a pleasing pattern. Finish the rise, sprinkle on some kosher or coarse salt, then bake in the preheated 425F oven for 25-30 minutes until bronzed and crusty. Mine was quite well browned after 25 minutes.
  • Remove to a wire rack to cool before slicing carefully and devouring.

Banh mi salad (no recipe)

I don’t have a recipe for you today, but I do have a suggestion that, like my almost-too-late discovery of the aperol spritz in Venice, has probably already occurred to you. But just in case. It turns out that banh mi, that beloved Vietnamese sandwich that, along with pho, is probably the nation’s most well-known dish in the United States, translates amazingly well into a salad. You chop or stack all the ingredients from the sandwich – well seasoned and seared tofu, or pork, or chicken, fresh cucumbers, wafer-thin jalapeno slices, assorted vegetable pickles, soapy-fresh cilantro sprigs – atop crisp, juicy romaine or crunchy shredded cabbage (or a combination of both). You toss it gently with a dressing made from mayonnaise, sriracha, fish sauce, and lime juice or rice vinegar. Finally, since banh means “bread” in Vietnamese, so it couldn’t be banh- anything without a bread component, you fry the torn innards of a baguette in a generous quantity of oil, sprinkle them with a little salt, and pile them to precarious heights on top.

And if you already have some of these items lying around – like, say, you had banh mi sandwiches a few day before – it comes together in the time it takes you to fry the croutons.

Boom. Lunch is served.

Project Cook: Herbed Fougasse (no recipe)

There’s a new season of a certain baking show out on Netflix which, at least in the US, they are releasing only week by week. I’m salivating to watch it, but because I know I can’t control myself, I’m not letting myself start until I have a good backlog of episodes built up. Instead, I’m watching… wait for it… older seasons of the same show. Surprise!

In a recent episode I watched, the bakers were tasked with making two fougasse loaves as their technical challenge. A fougasse is a bread hailing from southern France, usually flavored with herbs, shaped and slashed to resemble a leaf or an ear of wheat, with a chewy interior and a lightly crunchy crust. It is a bit oily, and is best – in my humble opinion, anyway – when it is topped with some coarse, crunchy salt. It’s the bread N. and I gravitate toward whenever we pick up a loaf from Whole Foods’ bread counter.

If the bakers on the show could do it, even not knowing what the final loaf was or how it should look, I determined I could too. I went for that wonderful, reliable text that is Shirley O. Corriher’s Bakewise, and slightly adapted her recipe for Fougasse with Biga. A biga is a pre-fermentation starter, like a poolish, that adds flavor and helps create a light texture. I subbed in some of my sourdough starter.

Corriher’s recipe doesn’t include any flavoring beyond what’s in the bread itself, but I opted for some mixed herbs – chopped rosemary and dill, and some tiny thyme leaves – to amp up the flavoring.

This is a project cook because the bread requires not one, not two, but three rises before baking. Corriher doesn’t knead much, but uses a stretching and folding method in between rises called autolysis. The dough that results is quite soft and sticky, but results in beautifully chewy, tearable cords of finished bread all the way around the leaf (except, as you can see, in a few spots where the dough stretched a bit too thin – these were aggressively crunchy instead, though still delicious).

All told, these were worth a morning of rises and folds and stretches, and despite that the original intention was to have bread with our dinner, since I wound up with two and they were still warm at lunchtime, we had to at least sample the goods… Next time I will add a little bit more salt to the dough itself – sprinkled on top was good, but the interior was a touch bland – and will not follow Corriher’s instruction to sprinkle the tops with cornstarch before their final rise. I’m not sure what it accomplished, and I didn’t love the look on its way out of the oven. I will add the herbs again, and I certainly will repeat the still-oven-hot drizzle of olive oil and coarse salt, as I did in this iteration.

* quality note: all photos this week taken with my iPhone.

Triple Play Deviled Eggs Crostini

When I planned out this post, I had big dreams: I was on spring break, and I was going to do research and offer you a big history lesson into the tradition of “deviled” foods (short version: in savory items this indicates something heavily spiced, i.e. the mustard or paprika of a deviled egg or the hot sauce of deviled ham). I did a thoroughly scientific examination of which kind of fat – unsalted butter [below, left], mayonnaise {below, right], or olive oil [below, center] – would be best for the crostini (short version: I liked mayonnaise the best. It toasted evenly, it had a mild flavor, and it was easiest since I was going to use it anyway for the egg filling. The butter had a pleasant toasty flavor from the browned solids, and the olive oil not only had the most assertive flavor, which I deemed potentially distracting from the egg, but took the longest to toast). I came up with three filling options to tickle your fancy and your taste buds, and decided I didn’t have to choose – we would talk about them all: how the classic is simple and perfect, but then I thought about tuna salad as inspiration for the vegetable-forward version, and an herby, punchy latke spread for the one with horseradish…

But then I stepped into my “outdoor photo studio” the day of and got so excited about the photography part of this self-imposed assignment that I must confess I ran out of steam a bit. Instead of overloading you with information, I’ll invite you to sink deeply into the Alice in Wonderland garden setting and indulge me my fussy fanciness (though you must admit: these would be lovely as an Easter brunch item, or a bridal or baby shower, or some other spring… thing…).

These made a delicious, extravagant lunch. In addition to being “highly spiced,” I think a good deviled egg needs some acidic component, and these did not disappoint. Despite my love for my “classic” recipe, I found I liked the “Herbaceous” version the best, with its subtle but peppery horseradish tang.

Just a few things before I let you get on to the rest of the exhibit and the recipe itself: one key to making lovely, heaping deviled eggs is to boil one egg more than you want to serve. One of the whites gets discarded, so you wind up with the equivalent of one extra yolk to pile high. Here, I have offered quantities for one crostini of each type, which means you need 4 eggs, but you could easily double or triple the amounts in each individual variety, and you could certainly serve them as traditional deviled eggs, which would entail just halving the whites instead of slicing them. You also certainly don’t have to provide all the intricate little garnishes; I went a touch overboard because I had time and wanted to play. Any of these would be fine without the little toppers. Now on with the show…

Triple Play Deviled Egg Crostini
Makes 4 eggs; enough for 3 crostini (one of each type)
About 30 minutes
For all:
4 eggs
1½ tablespoons mayonnaise
Seeded bread, thinly spread with fat of your choice, broiled until golden
1.) The Classic
½ teaspoon whole grain mustard + additional, to garnish
¼ teaspoon cider vinegar
dash Worcestershire
salt and pepper to taste
2.) Crunchy Vegetable
1 heaping teaspoon finely minced celery
1 heaping teaspoon finely minced radish
6-8 thinly cut radish spears, to garnish (cut a thin slice into thin sticks, as in the photos)
1 scant teaspoon finely minced pickled onion + extra to garnish
salt and pepper to taste
assorted celery leaves to garnish, if desired
3.) Herbaceous
¼ teaspoon horseradish
1 teaspoon finely minced dill + additional sprigs, to garnish
1 teaspoon finely minced chives + additional longer spears, to garnish
¼ teaspoon lemon juice, or to taste
salt and pepper to taste


  • First, hard boil the eggs: bring a small pot of water to a rolling boil, then use a spoon to carefully place each egg into the water one at a time, allowing them to roll off the spoon gently onto the bottom of the pot (that is, don’t just drop them in from the top of the water; they will break). When all eggs are added, start the timer for exactly 12 minutes. As soon as the timer sounds, remove the eggs to a small bowl or plate and set them aside until they are cool enough to handle. You can put them in the refrigerator or freezer to hasten this process.
  • When the eggs are cool enough to handle, tap their shells gently all over on a flat, hard surface, peel and rinse to be sure you’ve removed all shell fragments. With a very sharp knife, cut the hard-boiled eggs into slices; I did 4-5 slices per egg. Remove the yolk pieces carefully and put them into a small bowl. Keep the empty whites.
  • To make the deviled egg base, use a fork to mash up the yolks into a fluffy texture. Add the 1½ tablespoons mayonnaise and mash again with the fork until the mixture is smooth. You don’t want any big remaining pieces of yolk.
  • If you are making only one of these options, multiply ingredient amounts by 3 and proceed, adding them to the yolk and mayonnaise mixture and mixing well. If you are making all three, divide the yolk and mayonnaise mixture evenly between three ramekins or other small bowls, and add the quantities specified above.
  • To make the crostini, spread slices of seeded bread with your choice of butter, mayonnaise, or olive oil, place on a broiler pan or wire rack over a baking sheet, and broil until golden brown and crisp on top. In my broiler on high with mayonnaise, this took about three minutes. When toasted, set the bread aside to cool slightly.
  • To serve, arrange 3-4 slices of egg white atop each crostini. Use either a spoon or a piping bag (the easiest is a zip-top bag with one small corner cut off) to pile the deviled filling into each egg white circle.
  • For fancy garnish, top each “The Classic” yolk filling with a few grains of the whole grain mustard. Top each “Crunchy Vegetable” yolk filling with two crossed radish spears and a small piece of pickled onion – mine are the very central slices. If desired, add a few celery leaves to the bread itself, tucked in and around the whites. Top each “Herbaceous” with a sprig of dill. If desired, add a few longer chives and/or chive blossoms to the bread itself, tucked in and around the whites.
  • Serve at room temperature.