Seared Salmon with Pea Pesto and Celery Root Puree

If you are a certain type of food blogger, one who is interested in trends of the food and restaurant world, not just the backdrop and vintage props Pinterest tells us are all the rage this month, then you care about and try to integrate sustainability, and seasonality, and local foods into your cooking. You are all about ramps and rhubarb in the spring, you plan zucchini dishes for late summer and early autumn when that crop is glutted. You wouldn’t dream of presenting a heavy stew or cream-based soup unless the weather has been cold. You let the year and its turning rule your kitchen.

2015 Blog August-0298I try to be that kind of blogger. I try to keep my food in tune with the seasons and plan vegetable dishes according not just to what appears at my farmers’ market, but to be sensitive to the fact that not everyone is in Southern California, so not everyone has the same plethora of options I do. I even try to plan for holidays, and get appropriate dishes out there ahead of time (sometimes barely) in case you want to make them. Sometimes it works, sometimes it doesn’t.

2015 Blog August-0286
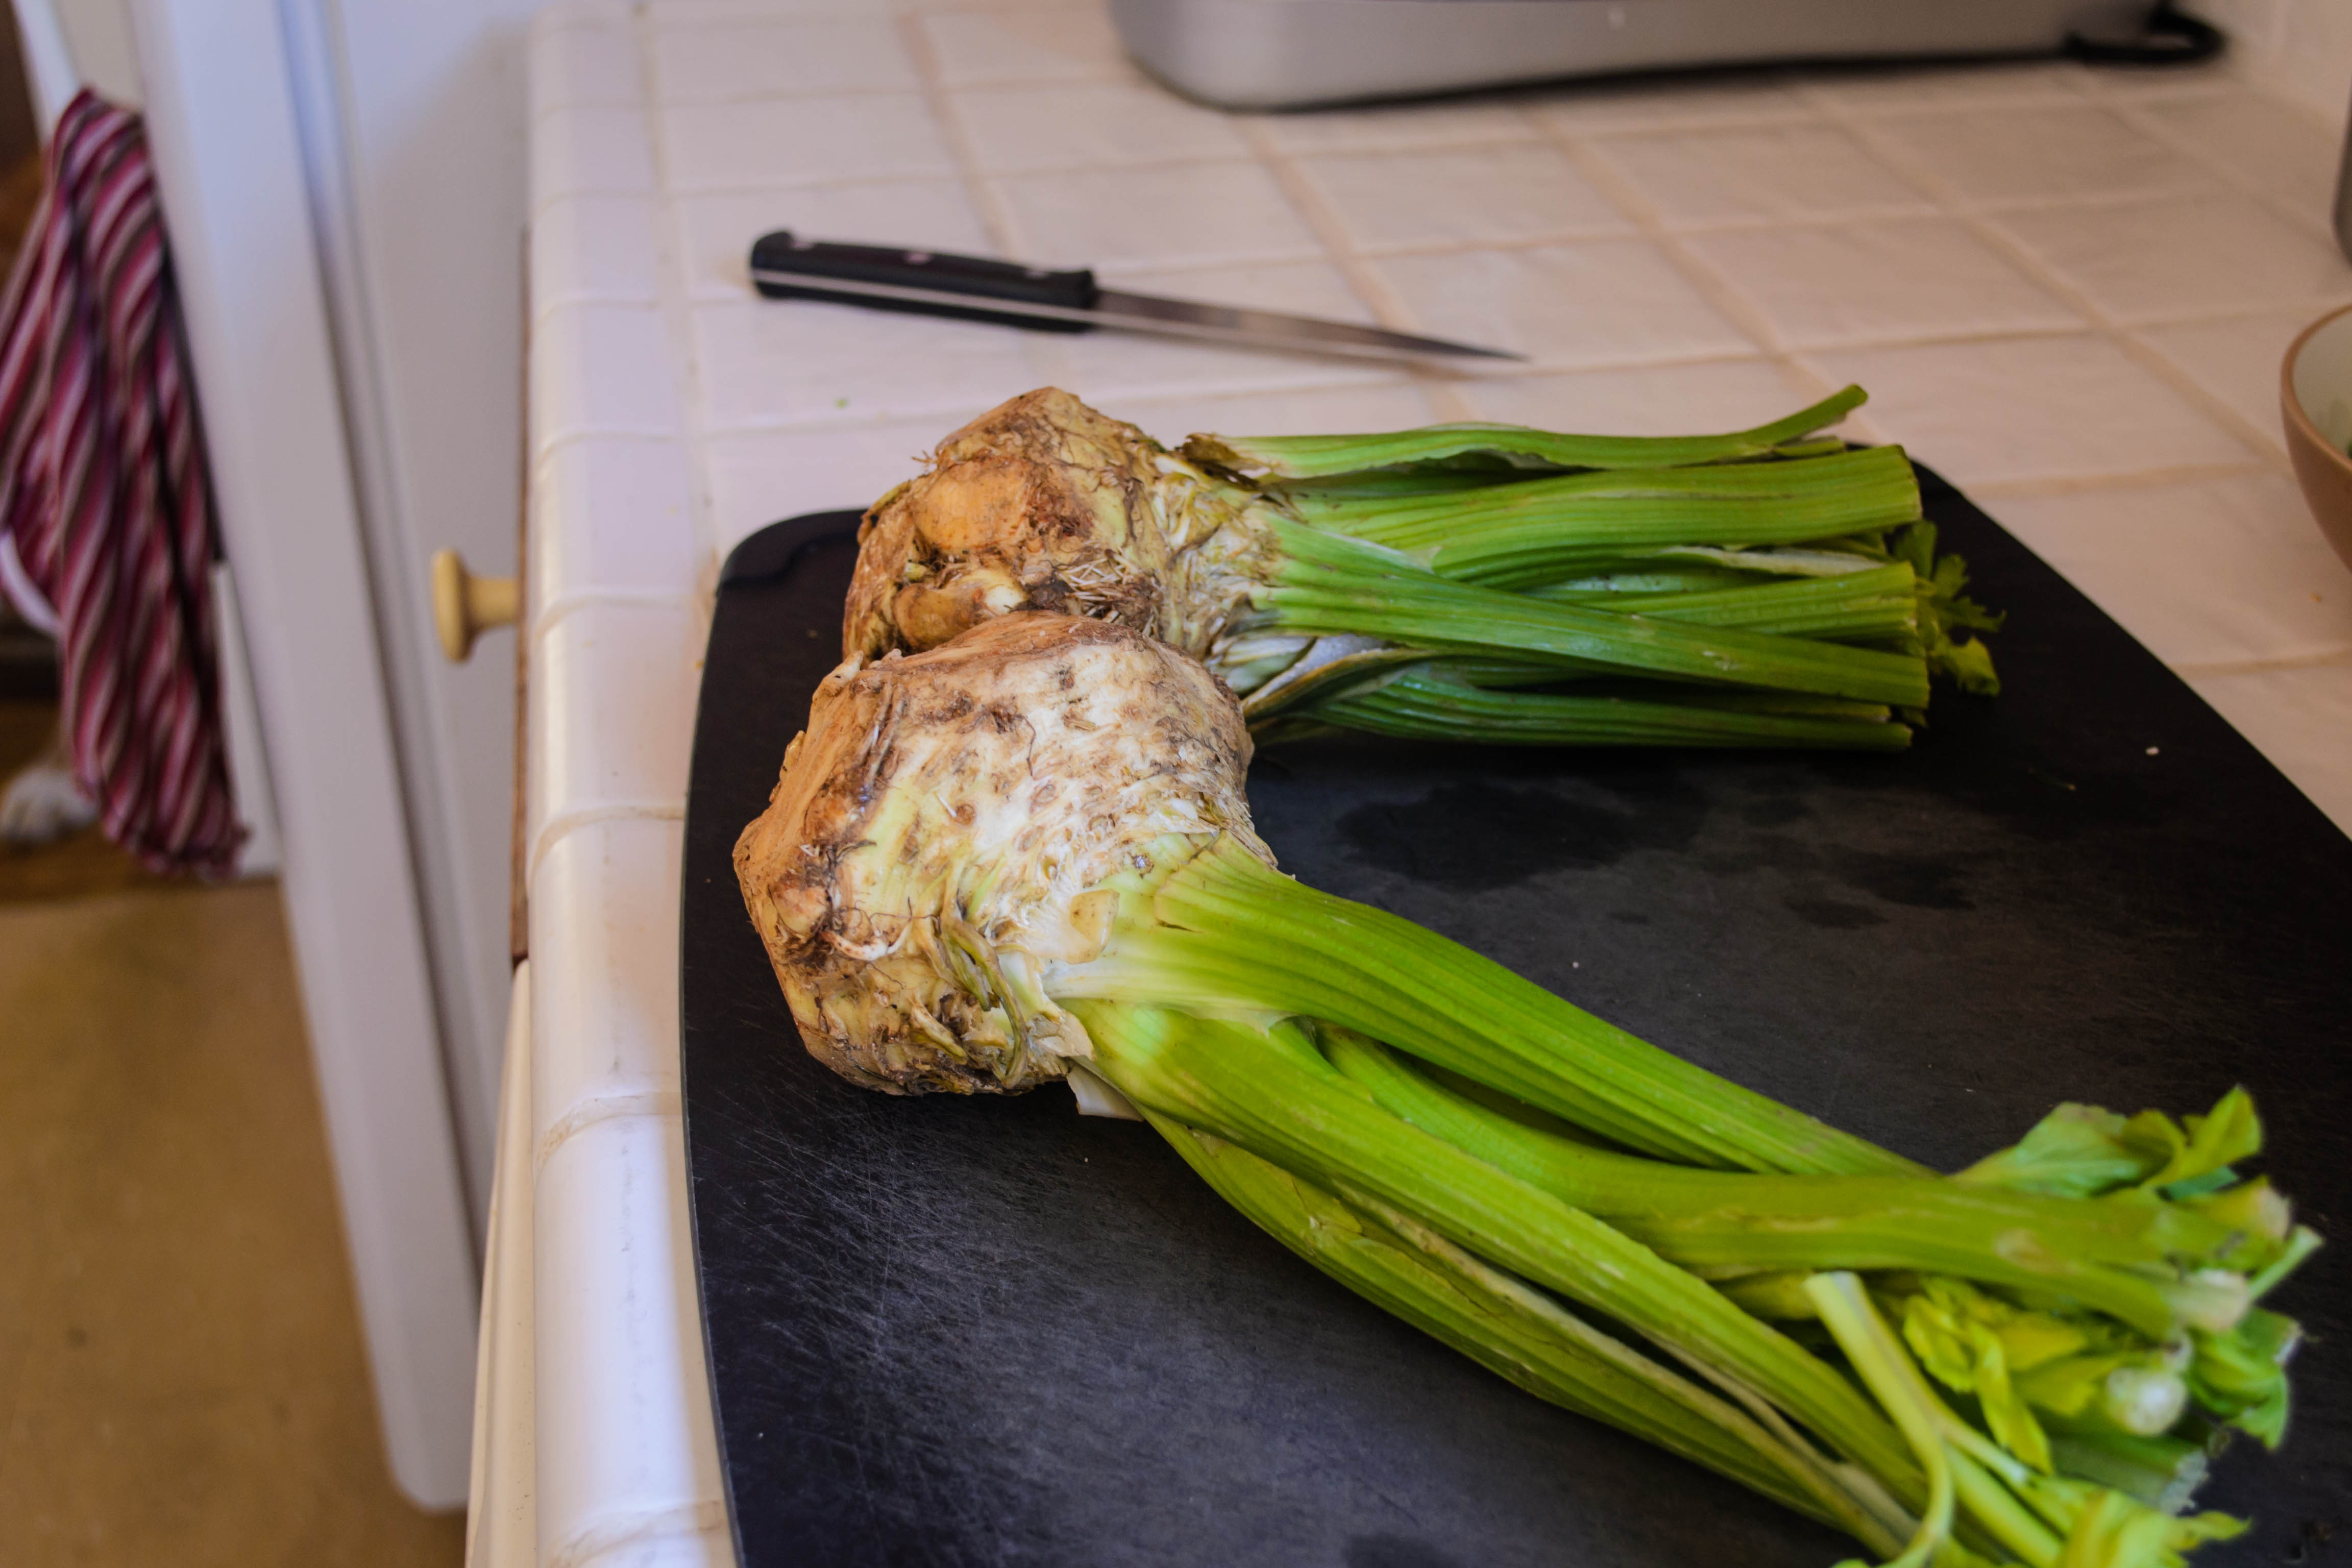
But here’s the thing: I’m also ruled by my stomach. Sometimes I don’t want zucchini. Sometimes I would rather roast than grill. Sometimes there’s a combination I dream up that sounds so good I don’t want to wait until the “right” time to cook it and present it to you. That’s the case this week. This is, if I were being a responsible food person, without question a spring dish. The peas could be fresh out of the pod, the dill is all about feathery fronds and new shoots. I cook the salmon so the skin is crispy, then balance the flesh side atop lemon slices in the pan to keep it moist and tender, all freshness and brightness. The celery roots, on the other hand, are the last dregs of winter, knobbly and earthy and strange, adding pale richness to complement the salmon and tame the sprightly sharpness of the pesto.

2015 Blog August-0292But when I thought of it – a nutty pesto of peas and walnuts, seasoned with dill instead of basil or mint and almost on the verge of being too salty, sitting atop a piece of moist, pink salmon with crisp skin, all surrounded by the creamy celery-scented puree, I couldn’t wait half a year. It had to happen now.

There’s not much to say about this dish, story-wise. No childhood memory or restaurant meal inspired it. I just thought the combination sounded good, and it was. The pesto, in particular, though admittedly not the most appealing shade of green, is a surprising and intriguing punch. Dill works very well with peas as well as lemon, and the tannic bitterness of toasted walnuts tames the sweetness of the peas enough to keep them in the savory realm.

2015 Blog August-0295Note: the puree does take the longest time to create, since the starchy roots can take up to half an hour to soften. If you’re very efficient, you’ll be able to prep the remainder of the components while the hunks of celery root are simmering. I am not all that efficient, so I made the pesto first just in case. You know you best, so plan accordingly.

2015 Blog August-0298

Seared Salmon with Pea Pesto and Celery Root Puree
45-50 minutes prep and cook time
Serves 4
For celery root puree:
2 medium celery roots, any attached stalks removed, peeled and chopped into small chunks
1-2 cups milk
1 clove garlic, skin removed
1 teaspoon salt
¼ teaspoon pepper (use white pepper if you don’t want flecks)
6 ounces mascarpone cheese, at room temperature
For pea pesto:
1 cup (4 ounces) peas, fresh or frozen
⅓ cup walnut pieces
1 clove garlic, skin removed
2 tablespoons lemon juice
2-3 tablespoons chopped fresh dill
½ teaspoon salt (or to taste)
¼ teaspoon fresh black pepper (or to taste)
¼ cup olive oil
For salmon:
4 filets of salmon, 4-6 ounces each
½ teaspoon salt
¼ teaspoon fresh black pepper
2 tablespoons olive oil
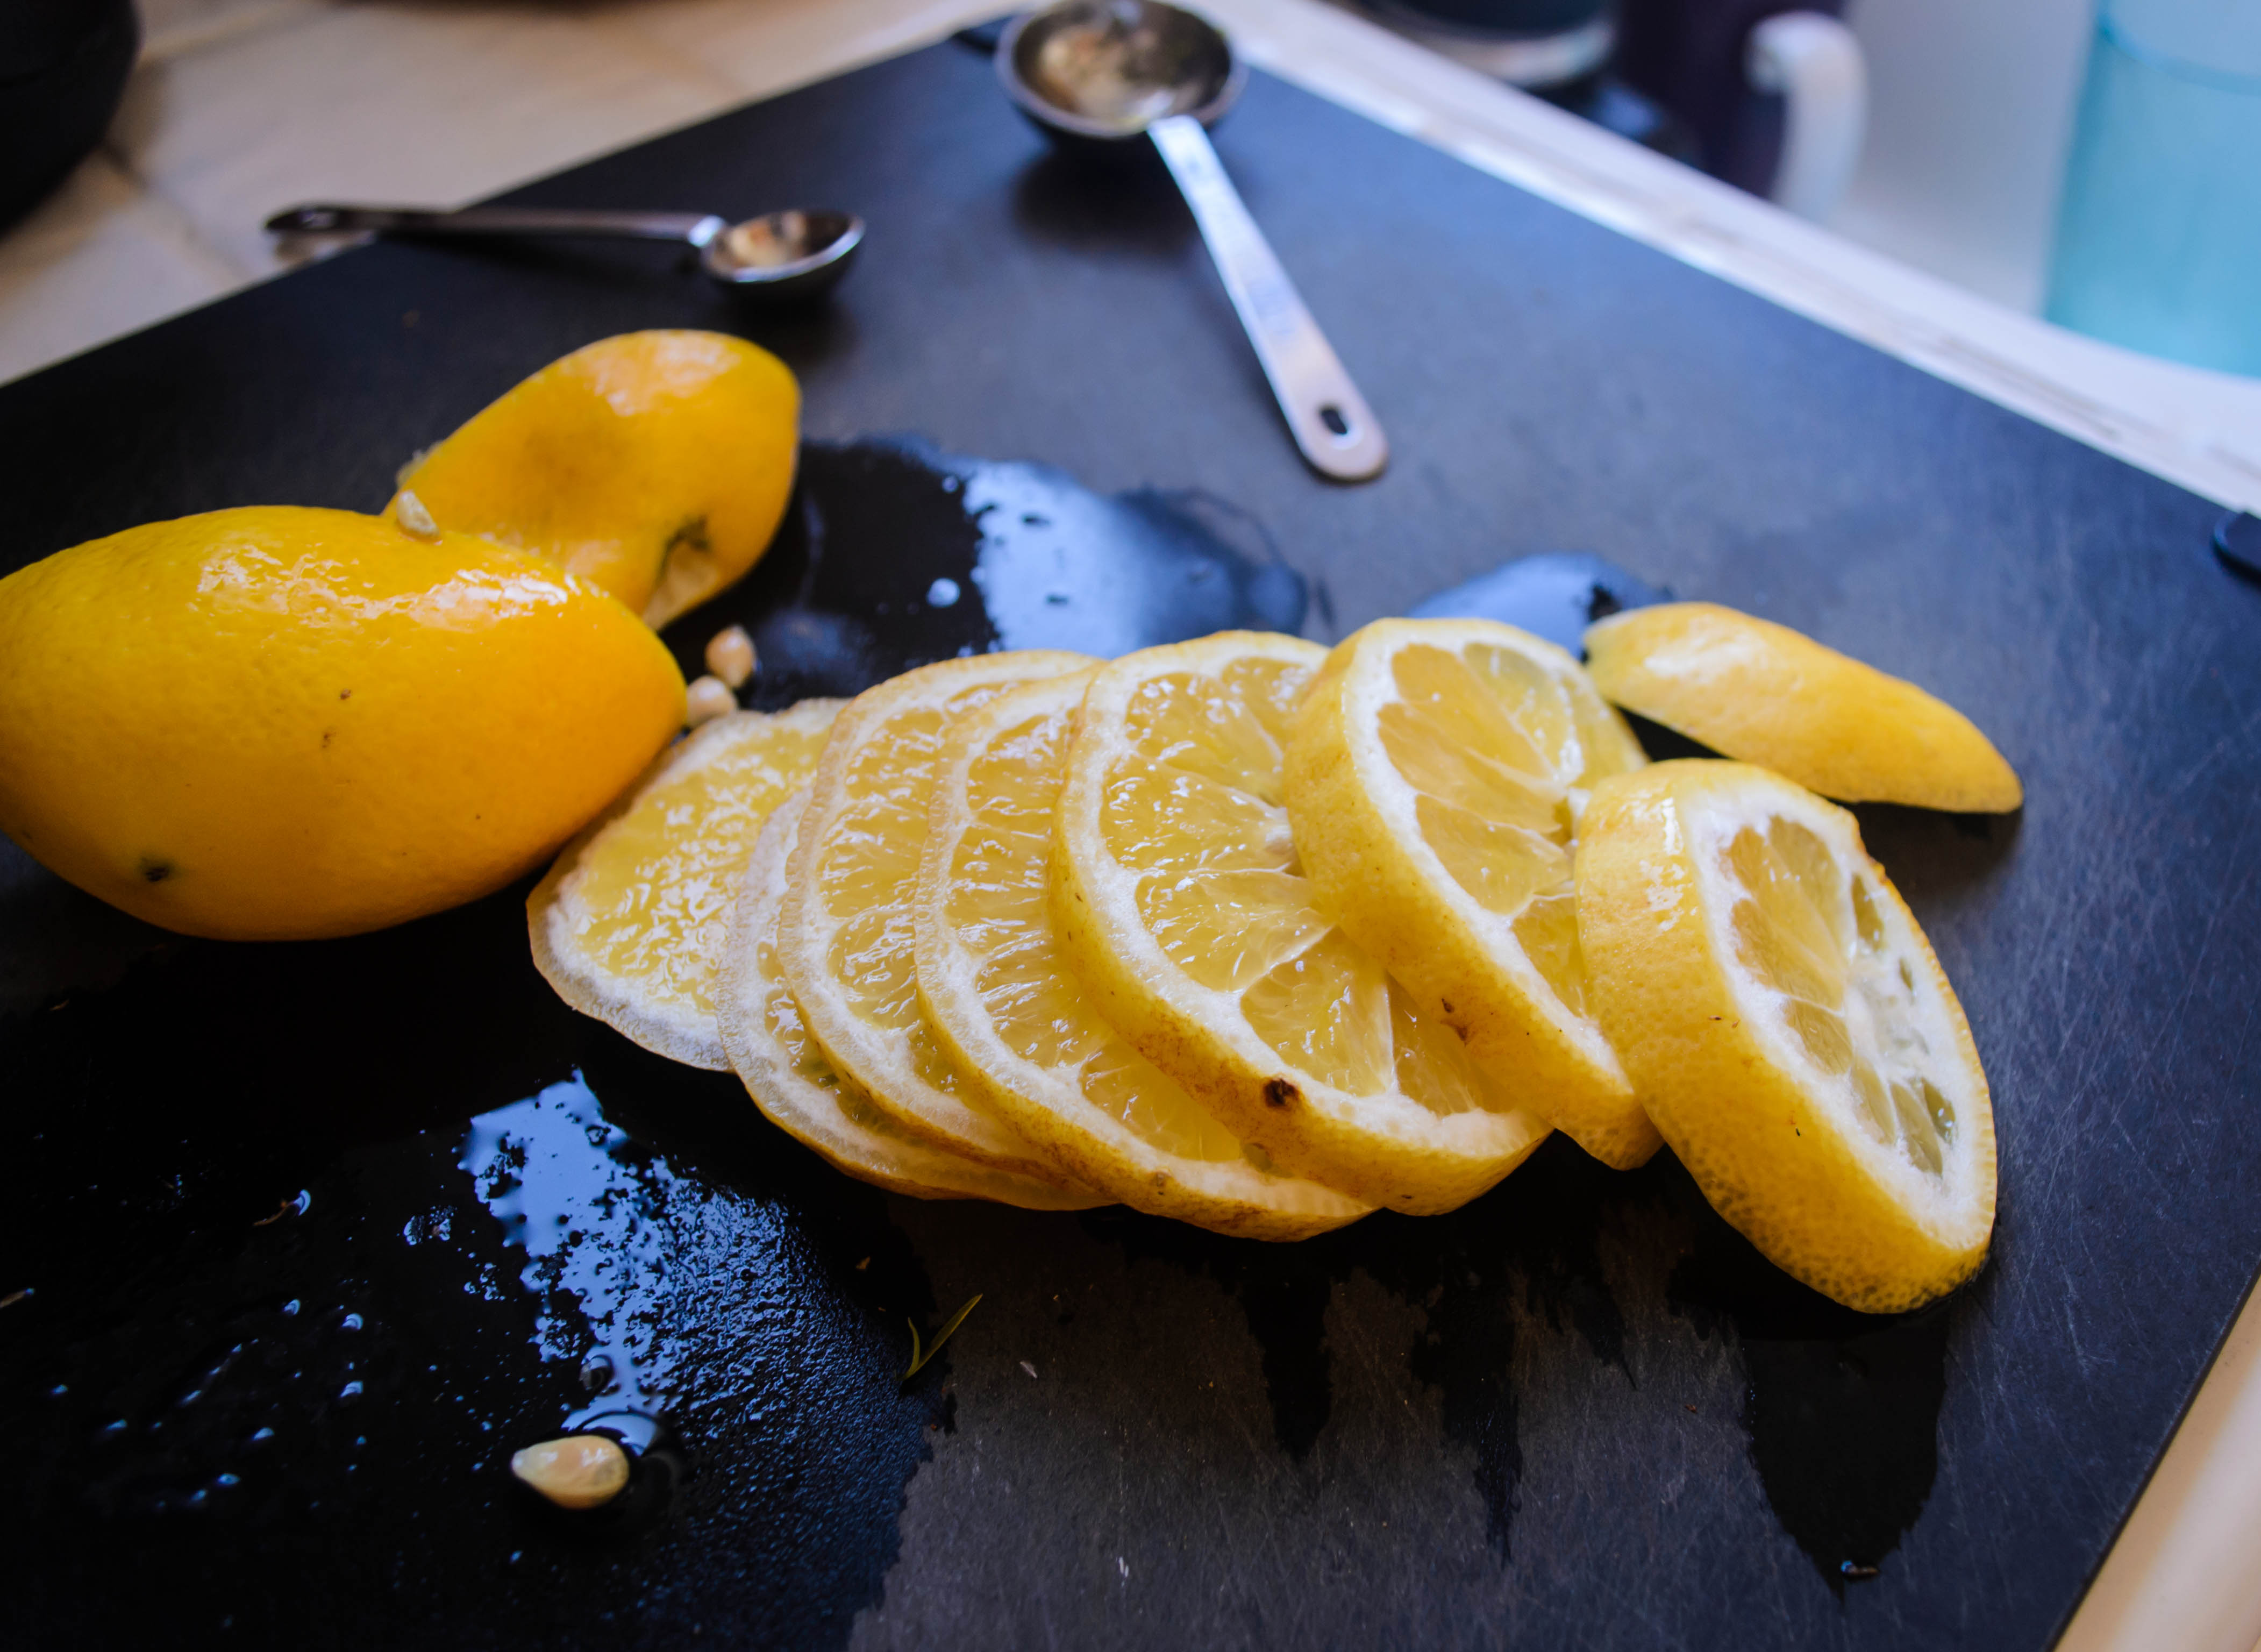
1 lemon, cut into ¼ inch slices


  • To make the celery root puree, place the chunks of chopped celery root in a medium pot and pour in enough milk just to cover. Add salt and pepper and toss in the garlic clove. Bring to a boil over medium-high heat, then immediately turn down the heat, and cook at a bare simmer until celery root pieces are fork tender, 20-30 minutes.
  • Once roots are tender, remove the pot from the heat, add the mascarpone cheese, and let sit for 5-10 minutes just to cool. Use an immersion blender or a regular blender (be VERY careful with the hot liquid) to blend to a smooth puree.
  • While the celery root chunks are simmering, remove the salmon from the fridge and its packaging and sprinkle it with the ½ teaspoon salt and ¼ teaspoon pepper. Then set it aside. We want it to come up to room temperature so it cooks evenly.
  • To make the pea pesto, either blanch your fresh peas by dropping them into boiling water for 1-2 minutes before a quick drain, or defrost your peas if they are frozen.
  • Toast the walnut pieces in a dry pan just until they smell roasty and are slightly darker brown. Let them cool, then toss them into a food processor with the garlic and whir these together into damp crumbs. Add in the dill and whir again to break up the fronds.
  • Dump the cooled peas into the processor and pulse at 2-second intervals 3-4 times to create a chunky, clumpy mixture that is not quite a paste.
  • Finally, add the lemon juice, salt, pepper, and olive oil, and pulse again in 2-second intervals until you have a thick, barely emulsified paste. You want this to be spoonable, not pourable, so keep your eye on the texture.
  • When you are ready to cook the salmon, heat 2 tablespoons of olive oil in a large skillet over medium heat until the oil is rippling and shimmering in the heat. Carefully add the salmon skin-side down (oil will likely spatter a bit in excitement when you do, so stand back!), and let it cook undisturbed for 5 minutes. Really! Don’t mess with it!
  • After 5 minutes, top each salmon piece with 2-3 lemon slices and carefully flip over so that the lemon slices, not the flesh of the salmon, are in contact with the pan. Again, this may cause some spattering of the oil, so be careful. Let the salmon cook atop the lemon slices for another 2-3 minutes, or until just done in the center.
  • To serve, pour ⅓–½ cup celery root puree into the base of a small plate or a shallow bowl. Place a piece of salmon skin-side up atop in the center of the pool of puree (leave the lemon slices in the skillet, or serve one off to the side if desired). Top the salmon with 1-2 tablespoons of the pea pesto, and serve immediately.

Chocolate Stout Floats with Bourbon Caramel

2015 Blog September-0416Labor Day deserves to be celebrated. The reason we have not just a three-day weekend this week, but a weekend at all, is a result of the hard work and fighting of workers, federations, and labor unions demanding reasonable working conditions and time off. In many industries, they helped us get fair working conditions. Their efforts should be commemorated.

2015 Blog September-0420I think, though, on Labor Day we should treat ourselves more than fairly. We should treat ourselves well. We should celebrate what has been fought for and allow ourselves not an indulgence, but a reward we deserve. After all, we work hard!

real shoes: crucial caramel-making equipment!

real shoes: crucial caramel-making equipment!

In my case, of course, this reward is food. I’m not completely devoted to the Labor Day barbecue tradition (in fact, tonight we are having arroz con pollo), but I do think a special dish is an appropriate method of celebration. Let’s do dessert.

2015 Blog September-0399

dissolved sugar, rapid bubbling

2015 Blog September-0401

sugar caramelizing around pot edges

2015 Blog September-0402

approaching dark amber color; almost time to add the cream.

Like Labor Day, this dessert of just rewards has several origin stories. The first is simple: as I noted here, a few months ago my friend B. asked for my tips on bourbon dessert sauces. One of her attempts involved a bourbon caramel to douse over ice cream, and terrified as I am of the whole boiling sugar thing that is required for caramel, I couldn’t pass up the challenge. I wasn’t quite satisfied, though, with presenting a recipe for caramel sauce enrobing a simple scoop of ice cream. I wanted something a bit more exciting.

2015 Blog September-04042015 Blog September-04052015 Blog September-04062015 Blog September-0409The answer came during our summer trip to Oregon. The night of our reunion with our dissertation crew, we had chocolate stout floats for dessert: tooth-achingly cold scoops of vanilla bean ice cream drowning in a bitter fizzing cocoa bath of cold, black beer. With each spoonful, you can moderate the combination, choosing just a fleck of ice cream, or mixing the whole thing into a pale, drinkable swirl. The following day, we repeated the dessert with a new set of friends, and one of them judiciously declared the need to slosh in a shot of bourbon.

Mic drop.

There it was.

2015 Blog September-0411So what I have for you today, in celebration of our hard work, is a chocolate stout float drizzled with bourbon caramel. It’s a perfect dessert for a hot day, because though it’s far from light, it’s gloriously cold. You can make the caramel sauce earlier in the day, so by the time your belly is ready for dessert, it will have had ample time to cool (and, if you’re doing the barbecue thing, you won’t have had to deal with the stove for several hours). The ice cream and beer are in lovely, tenuous balance with one another – almost too sweet, almost too bitter – and the just-shy-of-bitter notes in the caramel (which is, after all, almost-burnt sugar), play off of both. The bourbon here is noticeable, especially after the caramel cools down, but it isn’t overwhelming. It’s a light, floral, vanilla note that capitalizes on the toasty flavors already created by making the caramel.

2015 Blog September-0413You can serve this in whatever quantities, by whatever process you like. I followed my usual method in considering the caramel and adapted several recipes, but mostly this one, along with several sensible suggestions by David Lebovitz. He’s right – you really do have brave the smoke and the suspiciously-close-to-burning smell of the sugar cooking, lest you end up with something that’s just sweet, not developed and complex. And warming your cream before adding it to the vat of boiling sugar makes good sense for easier integration, but you should still take precautions and wear shoes no matter how hot it is in your kitchen. Boiling sugar burns are serious business.

2015 Blog September-0417When it comes to serving, we like to scoop in some ice cream first, then top it up with the beer. As this delicious experiment explains, this nets you a lovely, creamy foam on top, on which you can drizzle as much caramel sauce as you want. The sauce thickens as it cools, so what barely coats a spoon while hot will pour even thicker than maple syrup once it’s had time to chill for a while. The layer that sinks and coats the bottom of the glass makes for a lovely last few sips, too.

2015 Blog September-0420

Chocolate Stout Floats with Bourbon Caramel Sauce
Makes about 1 cup caramel sauce
Approximately 20 minutes active cook time, plus an hour (or more) for the sauce to cool
For bourbon caramel:
1 cup sugar
¼ cup water
½ cup room temperature or warm heavy cream (helps it incorporate faster)
¼ cup bourbon
½ teaspoon salt
For float:
Vanilla ice cream
Chilled chocolate stout


  • For the bourbon caramel, stir the sugar and water together in a medium pot that is heavy in weight and light in color (the light color lets you see the color change in the caramel sauce – very important). Cook over medium high heat, stirring, until the sugar dissolves and the mixture becomes clear.
  • Now, stop stirring. If you have one, use a wet pastry brush to brush down any sugar crystals that have adhered to the sides of the pot so they can melt along with the rest of the mix.
  • Without stirring, let the melted sugar simmer over medium or medium-high heat until the outside edge starts to darken, about 7-8 minutes. Bubbles will be very fast. It’s important not to stir because you don’t want any unmelted sugar crystals falling in and marring the perfect smooth texture.
  • As the edges darken, swirl the mixture gently and keep cooking until the whole bubbling pot is the color of dark maple syrup, another 2-5 minutes. The bubbling will slow and thicken, and the mixture will smoke a bit and may begin to smell burnt – don’t be afraid! It really does need to cook to this dark amber color, or the final product will taste overly sweet (besides, as Lebovitz points out, if you do end up burning it, you’ve only lost 1 cup of sugar which, though bothersome, is not a huge financial disaster).
  • Remove from heat (I mean it!) and, with a whisk at the ready, add both the cream and the bourbon. Stand back! It will bubble up vigorously, and the bubbles will continue to form quite quickly for the rest of the cooking process. Whisk in the salt and set the pot back over medium heat, whisking until the sauce is smooth. Cook for an additional minute, just to ensure smooth texture (and to cook off some of the alcohol in the bourbon!). The sauce will remain thin at this point.
  • Remove from heat and cool – it will thicken to the texture of cold honey while at room temperature, and even to something more like dulce de leche when refrigerated.
  • To serve, place a scoop or two of vanilla ice cream in a tall glass. Pour in 6-8 ounces of cold chocolate stout, pausing as needed to avoid overflow. Atop the thick, rich foam that forms, drizzle a tablespoon or two of the caramel sauce and dig in.

Five-Seed Loaves

2015 Blog September-0394Growing up, my sister and I ate a lot of reasonably healthy food. Mom wasn’t the “crunchy granola type,” especially not by the time my sister showed up, but her waffle recipe involved wheat germ, and my lunchtime sandwich bread always had a measure of whole wheat in it. When I got a little older, it seemed like the more seeds and nuts a loaf contained, the more likely my mom was to buy it. Nine grains? Hearty nuts and seeds? R. and I wouldn’t always eat it, but it was probably in our freezer.

2015 Blog September-0359Thus I felt a certain fondness when I started to consider this month’s Twelve Loaves assignment of seed breads. I knew I wanted multiple seeds, and I knew I wanted them on the inside and outside of my loaves. A bit of internet research led me to Suzanne’s lovely little site Flour Arrangements, and even if she hadn’t had a great seeded loaf recipe to work with and adapt, I would have been enticed by her blog’s clever title (not the mention how many great sounding loaves she’s made – I can’t wait to adapt her multigrain pumpkinseed loaf as the weather cools – I’m thinking of adding some pumpkin puree and rye flour, and maybe some oatmeal).

2015 Blog September-03642015 Blog September-0366I kept her recipe mostly the same, only replacing oil with butter and adding a few additional seeds for a total of five: sesame, poppy, sunflower, pumpkin, and flax.

2015 Blog September-03672015 Blog September-0369I’ve been baking mainly sourdough loaves lately, trying different ratios of starter and flour, comparing notes with S. about various stirring or folding techniques instead of kneading the dough, tipping in just enough whole wheat flour to make a nutty loaf that isn’t too dense, and getting used to long, slow rise times and overnight rests in the refrigerator to develop a tangier sour flavor. Imagine my delight, then, when my bowl of dough, bolstered by its full tablespoon(!) of yeast, agreeably puffed enough to press against its plastic wrap lid in a little over an hour. Not only that, but after carefully pressing and rolling the lovely tight loaves I’d formed through a jumble of seeds, they swelled again in their pans to triumphant heights. Sourdough is delicious and tends to be my go-to for everyday toast, but it is an exercise in patience and in long-term benefits. These loaves, though they do require two rises, expand so eagerly it feels like a reward for a job well done.

2015 Blog September-0376And really, these are a reward. Yes, the seeds you’ve so carefully pressed into the surface of the dough go everywhere – when you turn the baked loaves out of the pans, when you slice into them, when you bag and store them – but those that stay affixed offer a really nice set of flavors and textures. The heat and time in the oven toasts and crisps them lightly, and the flax seeds in particular take on a roasted taste and a slippery crunch I find incredibly appealing. And that’s just the surface. Inside, the crumb is tender and light and barely sweet, as soft as a commercially made pre-sliced loaf, but with the hearty, toasty, wholesome feel and flavor that comes with homemade.

2015 Blog September-0384You could certainly trade out the seeds here if you wanted – caraway would give a stronger anise-y feel, tiny nigella or black onion seeds would make for a more savory flavor, maybe good for meat or tomato based sandwiches. But I am devoted to sweet breakfast toast, and this bread, toasted or not, welcomes salted butter and cinnamon sugar so nicely I must admit I never explored beyond that combination.

2015 Blog September-0390

Five-Seed Loaves
Adapted from Seeded Wheat Bread on Flour Arrangements
Makes 2 9×5 inch loaves
4-5 hours, approximately (including rising/resting time)
¾ cup warm water
1 tablespoon active dry yeast
pinch white sugar
1 ½ cups warm milk
2 cups whole wheat flour
5 tablespoons poppy seeds, divided
5 tablespoons sesame seeds, divided
3 tablespoons very soft or melted butter
¼ cup molasses
1 tablespoon salt
3-4 cups bread flour
¼ cup sunflower seeds
¼ cup pumpkin seeds
3 tablespoons flax seeds


  • In the bowl of your stand mixer, or in a large bowl if you aren’t using a mixer, combine the warm water with the yeast and the pinch of sugar. Stir and let it sit for about 10 minutes until the mixture smells bread-like and the yeast has foamed up a bit.
  • Add the milk, whole wheat flour, butter, molasses, and salt to the yeast mixture. Add two tablespoons each of the poppy seeds and sesame seeds. Mix with the paddle attachment or with a wooden spoon until well combined.
  • With the mixer running on low speed, add the bread flour ½ cup at a time until you have a soft dough that pulls and tears away from the sides of the bowl. I needed all 4 cups of the flour, as it was a bit humid in my kitchen – you might need less depending on the day.
  • If you are using a stand mixer, switch to the dough hook. If you are mixing by wooden spoon, now is the time to turn the dough out onto a floured surface. Knead on medium speed for about 5 minutes if you are working by machine, or about 7-8 minutes by hand, to form a smooth and elastic but still sticky dough. It will still droop and pull when you stop kneading, not sit firmly in a cohesive ball. That’s okay. This ensures a more tender loaf.
  • Lightly grease the sides of a large bowl (I just use the stand mixer bowl; you don’t even have to clean it out) and position your dough in the middle of it. Cover tightly with plastic wrap and let it rise until doubled – 1½-2 hours, depending on how warm your house is.
  • As the rising period nears its end, combine the remaining 3 tablespoons poppy seeds, 3 tablespoons sesame seeds, and the sunflower, pumpkin, and flax seeds on a baking tray. Butter or grease two 9×5 inch loaf pans and set aside.
  • Punch down the risen dough to release trapped gas by gently depressing your fist into its center, then turn it out onto a very lightly floured board (too much flour and the seeds won’t stick). Divide the dough in equal halves, shape into tight loaves and roll each one in seeds, turning to coat the ends, or just pushing a palmful of seeds against the ends of the loaves.
  • Set the seed-coated loaves gently in the prepared loaf pans, pat remaining seeds on top and drizzle down into the corners. Drape lightly with plastic wrap and let rise again for about 45 minutes, until doubled once more. They swell beautifully.
  • About twenty minutes before the rising period ends, preheat your oven to 375F. When the loaves are fully risen, remove the plastic wrap and place them gently into the oven to bake for 30-40 minutes. To test for doneness, either use a digital thermometer and check for a temperature between 180-200F, or thump the bottom lightly for a hollow sound.
  • Cool loaves in pans at least 20 minutes, then turn out onto wire racks to cool completely before slicing. At all manipulation, seeds will scatter everywhere, but the flavor and texture are worth the mess.


Check out what our other awesome Twelve Loaves bakers made this month, below:

#TwelveLoaves is a monthly bread baking party created by Lora from Cake Duchess and runs smoothly with the help of Heather of girlichef, and the rest of our fabulous bakers.

Our host this month is Lora from Cake Duchess and our theme is Seeds. For more bread recipes, visit the #TwelveLoaves Pinterest board, or check out last month’s selection of #TwelveLoaves Malt Breads!

For more bread recipes, visit the #TwelveLoaves Pinterest board, or check out last month’s selection of #TwelveLoaves Malt Breads!

If you’d like to bake along with us this month, share your Seed Bread using the hashtag #TwelveLoaves!

Reuben Meatballs

When I wax on about some deeply held, sentimental food memory, it’s usually in reference to one of the women in my family. My mom and my aunts are great cooks, my Nana was a powerhouse in the kitchen, and my sister is always my sounding board for dish ideas and inspiration.

2015 Blog August-0349But this one really originates from my dad. Dad doesn’t cook much. He is a master of coconut French toast, and he mans the grill for our family, but he isn’t often stirring a pot over the stove or pushing something into the oven. One of his specialties, though, is the reuben. He builds the sandwich, packs four of them tightly into my parents’ ancient, stained electric skillet, and somehow manages to flip each one perfectly.

2015 Blog August-0320When I was little, I though Dad had invented this sandwich. I mean, if you stop and think about it, it’s a strange collection of ingredients: corned beef and swiss cheese are reasonably normal, yes, but then you add a layer of sauerkraut and douse it with Russian or Thousand Island dressing straight out of the bottle? And dark rye is such a dad-bread, isn’t it? Only a dad would make you a school sandwich on rye bread. These reuben things must have been one of my dad’s concoctions – his own weird, elevated version of a grilled cheese sandwich.

2015 Blog August-03302015 Blog August-0336Imagine my astonishment, then, when I started seeing reubens on restaurant menus. This was a real thing! This wasn’t just a weird Dad-dish! I already liked reubens, as odd as I thought they were, but as an adult it’s hard for me to pass one up when it appears on a sandwich menu. One of our favorite haunts in Eugene had a tempeh version I’m working on recreating. I love a grilled sandwich, and the savory, meaty, melty business, along with the sagging pickle of the sauerkraut and the tangy sweetness of the dressing makes this worth the 5-6 napkins it usually requires.

2015 Blog August-0338It’s no great surprise, then, that reubens became an inspiration for a meatball. Here, I’ve borrowed and shifted a bit, but tried to capture the essential elements of the classic sandwich in these compact packages. Ground beef is lightly mixed with finely diced pastrami, a bit of ketchup and mayonnaise to echo the dressing, some roughly chopped capers or diced pickle, chopped dill, and, if you like (I don’t), a minimal sprinkle of caraway seeds as a nod to the traditional rye bread of the original sandwich.

2015 Blog August-03392015 Blog August-0343Though I originally thought of just jamming all the essentials into the meatball itself, I couldn’t imagine presenting this meatball in any other format than a sandwich. Thus, the cabbage, here lightly pickled rather than deeply brined (which, if you’re keeping track, needs to sit for a few hours before you make the sandwich), and the cheese, remain outside the meatball itself. As for the dressing, I spice up the original by adding sriracha and grated garlic to the standard ketchup and mayonnaise blend, and throw in some minced capers instead of the dill pickles. And I know, this is an affront to authenticity, but I couldn’t picture a quartet of meatballs sitting easily between two slices of rye bread, so I exchanged, keeping the depth of color but not the precise flavor, and went with a pretzel roll.

And if a regular pretzel roll isn’t enough for you, I found these at my Whole Foods:

2015 Blog August-0326That’s right, mini pretzel rolls. Pretzel roll meatball sliders. I know. But I couldn’t help myself.

2015 Blog August-0358Our assessment? These are some goooood meatballs. The bits of pastrami mixed in with the beef makes them incredibly flavorful, and you can definitely taste the dill and the mild pickled essence of the capers in the final product. I love the crispness of the cabbage – it’s not as strongly briny as sauerkraut, but it is bright with flavor and retains some texture, which is a nice addition. As we finished our sandwiches, N. turned to me and declared that these were his favorite meatball thus far. I asked him why, and he said “they’re just so… so savory!” So there you are. A most savory meatball, for my own twist on the ultimate dad-sandwich.

2015 Blog August-0355

Reuben Meatball Sandwiches
Makes 4 sandwiches or 16 sliders
For cabbage:
2 cups finely sliced or shredded red or green cabbage
1 teaspoon kosher salt
1 teaspoon sugar
½ teaspoon celery seeds (optional)
1 teaspoon apple cider vinegar
2 teaspoons olive oil
For meatballs:
¼ cup minced red onion
1 pound ground beef (I recommend at least 85% lean, 15% fat. Less fat could result in a dry meatball)
¼ pound pastrami or corned beef, finely diced
2 tablespoons capers or dill pickles, coarsely chopped
1 tablespoon finely chopped fresh dill
2 tablespoons mayonnaise
2 tablespoons ketchup
1 teaspoon caraway seeds, optional
¼ teaspoon salt
¼ teaspoon pepper
3-4 tablespoons olive oil
2-3 cups beef or chicken broth
For sandwich:
4 pretzel rolls or rye rolls of about 8 inches in length, or 16 slider buns
¼ cup mayonnaise
¼ cup ketchup
1 tablespoon sriracha, or to taste
2 cloves garlic, finely minced and then crushed into paste with the flat of a knife
2-3 tablespoons minced capers
black pepper to taste
sliced or grated swiss cheese (as much as desired for each sandwich)


  • In a medium bowl, toss the cabbage with the other slaw ingredients: the salt, the sugar, the celery seeds, the vinegar, and then the olive oil. Let sit at room temperature for at least two hours, tossing occasionally, or refrigerate overnight.
  • For the meatballs, heat 1 tablespoon of olive oil in a large skillet and add the onions. Cook over medium-low heat until the onions are quite tender and just starting to take on some color – about 15 minutes. Set aside to cool.
  • Combine remaining meatball ingredients in a large bowl and mix lightly with your fingertips to combine evenly. The pastrami will want to stick together, so be sure to mix attentively so it integrates well. Add the onions last, once they’ve had time to cool.
  • Heat up 1-2 teaspoons of the olive oil in a large skillet over medium-high heat. When it shimmers and spreads easily, drop in a teaspoon of the meatball mixture, flatten it out, and fry about a minute on each side, or until cooked through. Taste for seasoning, and adjust salt and pepper accordingly for the rest of the mix.
  • Wet your hands for less sticking, and roll the meat mixture into 16 meatballs of equal size – they will be somewhere between a walnut and a golf ball in diameter.
  • In the same large skillet in which you fried the tester, heat the remaining olive oil over medium-high heat. When it is shimmering and spreads easily in the pan, add the meatballs in a single layer, not touching one another (you will likely need to fry in two batches). Brown on all sides (about 2 minutes on each surface), then remove to a clean plate and repeat with the remaining meatballs.
  • You will likely have a lot of residual fat in your skillet. Wipe it out (no need to wash – a paper towel will do) and then return it to the heat. Add the broth and bring it to a simmer, then carefully relocate the meatballs back into the skillet. You want enough broth to come about halfway up the meatballs. Clamp on the lid, turn the heat down to medium or medium-low, and simmer for 15 minutes, turning each meatball once about halfway through.
  • While the meatballs simmer, start your sandwich construction. Split the rolls you’ll be using and scrape out some of the fluffy interior – we need to make room for the meatballs to nestle. Set the open rolls on a baking sheet and preheat your broiler.
  • In a small bowl, combine the ¼ cup mayonnaise, ¼ cup ketchup, the sriracha if desired, the pasted garlic and the finely minced capers. Add black pepper to taste. Spread about a tablespoon on each side of your sandwich rolls (or about a teaspoon, if you are using slider buns).
  • Pour off any liquid your lightly pickled cabbage may have exuded, then add a few tablespoons of the cabbage to one side of your sandwich roll, right on top of the sauce. Top the cabbage layer with a thin layer of swiss cheese.
  • When the meatballs are done, wedge four per sandwich (or 1 per slider) into the space you made by scraping out some of the roll’s interior. Top them with a thin layer of cheese as well, then carefully insert the baking tray of sandwiches into the broiler and cook, watching carefully, just until the cheese is nicely melted.
  • Squash the sandwich closed and serve immediately, ideally with a good, dark beer.