Pan Roasted chicken with kale and cauliflower puree

I’ll confess, I wasn’t going to post a THING today, but then my friend J. saw a photo on Instagram of the dinner I made on Saturday night and asked for a recipe. So here we are!

This is such a cheat post I can hardly stand it, since I have only my phone photo and I measured nothing. It also isn’t (quite) an NYT recipe recreation, though I will admit the inspiration for the cauliflower puree does come from there: I had planned to make the same dish, using the puree recipe as my bloggable item, and then I just wasn’t happy with the recipe as-is, so I scrapped it and went my own way. Feel free to do the same with any part of this, and note: all quantities here (except for the butter) are approximate. You do you.

Continue reading

Breads of the World: pão de queijo

For my first foray into breads of the Americas, I went south, to Brazil, for an addictive little puff called pão de queijo – literally “bread of cheese” or “cheese bread.” There’s some debate over whether this strictly counts as bread – the base is tapioca flour and the “dough,” such as it is, is formed in a method similar to pâte à choux pastry batter, the base for eclairs, cream puffs, gougeres, and the like. But based on both name and desire, I’m saying it counts.

Based on minimal research (the weekend of Week 4 in my world means a lot of paper grading and not a lot of time for culinary history), I’ve learned that pão de queijo was a product of colonization and the ingenuity of indigenous groups and later enslaved Africans.

When Portuguese colonizers arrived in the 1500s, they found many areas ill-suited to wheat production, so they – and the people they enslaved – learned from indigenous groups how to process manioc, or yuca. When this root is processed, it leaves behind an edible white powder. This was considered an undesirable byproduct by slaveholders, but slaves used it to make balls of starch that they baked and ate to supplement their diets.

In the 18th century, the states of Minas Gerais and Goias in southeastern Brazil became big cattle- and therefore also dairy-producing states, and cheese, along with eggs and milk, were added to the starchy mix to create these delicate crisp-on-the-outside-gooey-on-the-inside puffs. Olivia’s Cuisine suggests these little puffs may have been served to slaveholders as part of afternoon coffee service.

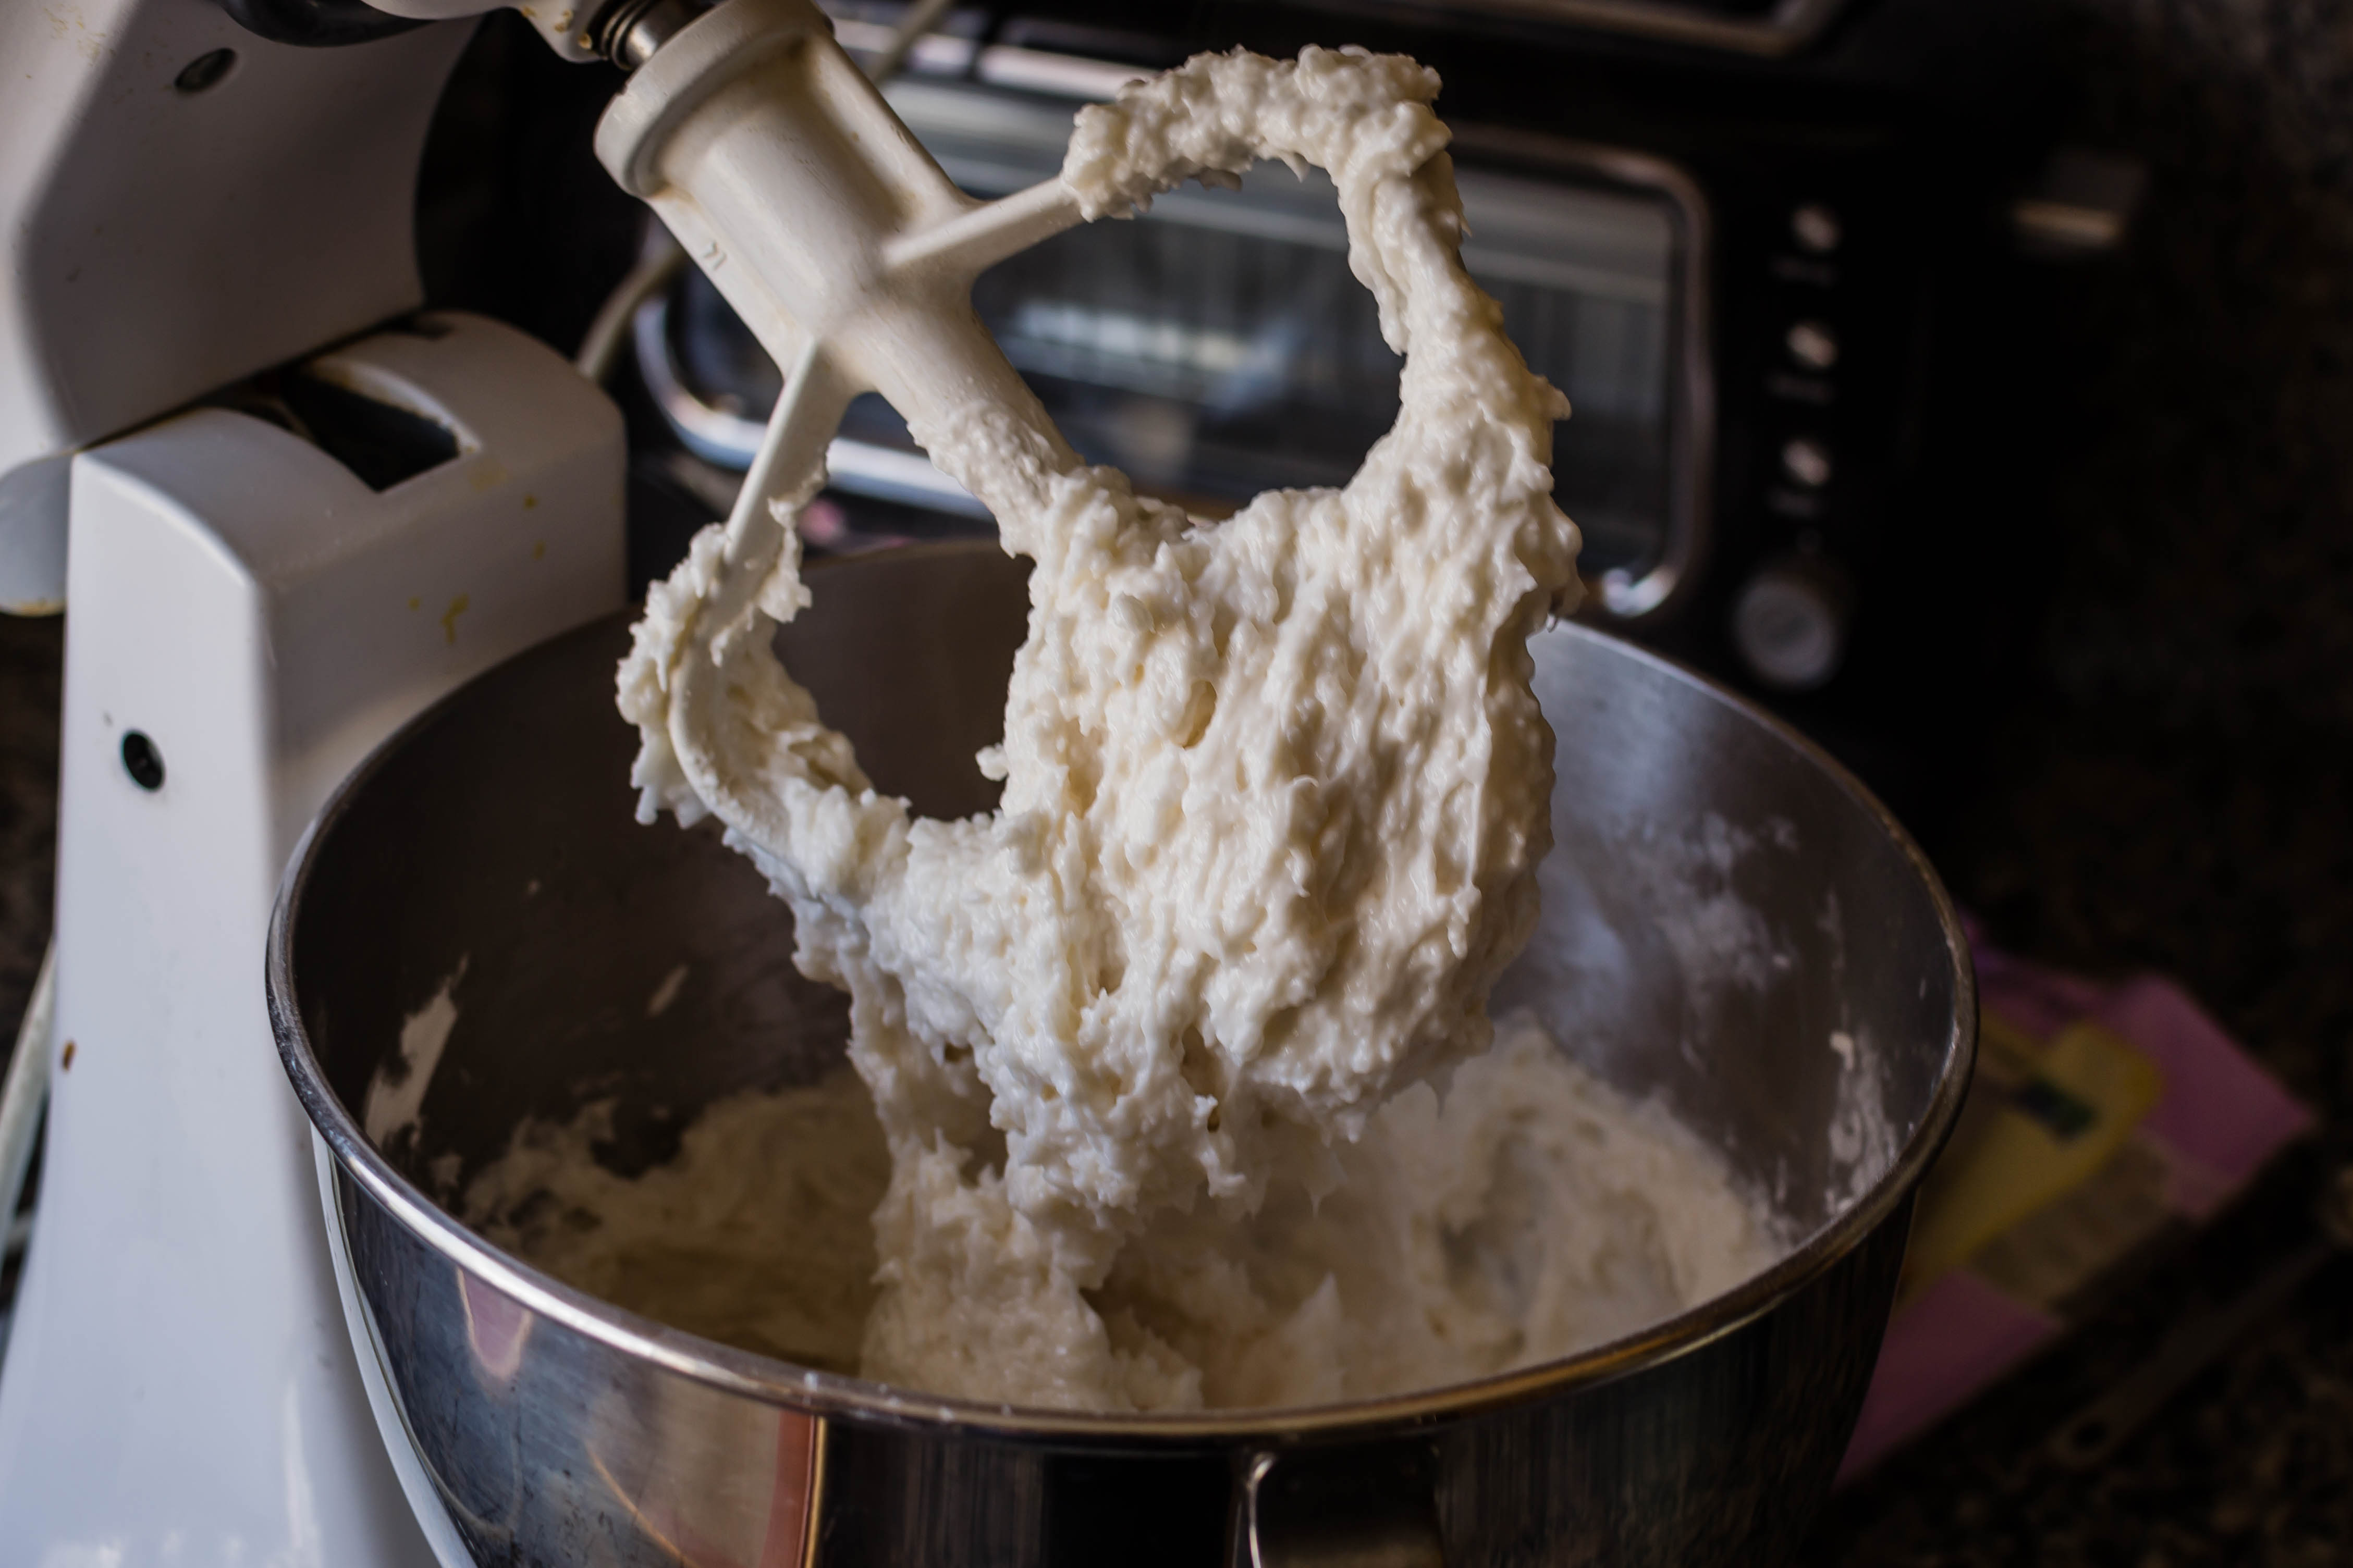
In the U.S., the traditional manioc is most frequently replaced with tapioca flour, and the traditional cheese from the Minas region – a mild, slightly salty soft cheese – with parmesan and mozzarella or queso fresco. Though it is not quite the same product, tapioca flour (also marketed as tapioca starch) has the same origin: the starchy yuca, or manioc, or cassava root, can be processed into a powder that, with the barest touch of liquid, becomes an incredibly sticky, glutinous mass that takes expertise and patience to work with. I noted to a friend while I was mixing up this dough that the combination of water, milk, oil, and tapioca flour already looked and felt like melted mozzarella cheese, and I hadn’t added any cheese to it yet.

My two base recipes for these, from Olivia’s Cuisine and Brazilian Kitchen Abroad, show much greater dexterity in working with the gluey batter/dough that forms these little puffs. I was unable to roll gorgeous little spheres like Aline shows in her recipe (although to be fair, my quantities were slightly different), and since I only had a single one pound bag of tapioca flour, I couldn’t add more. By my second sheet tray full of dough blobs, I was able to manipulate the mix a little better with very wet hands, but the next time I attempt these little treats I’m going to try for a slightly dryer dough.

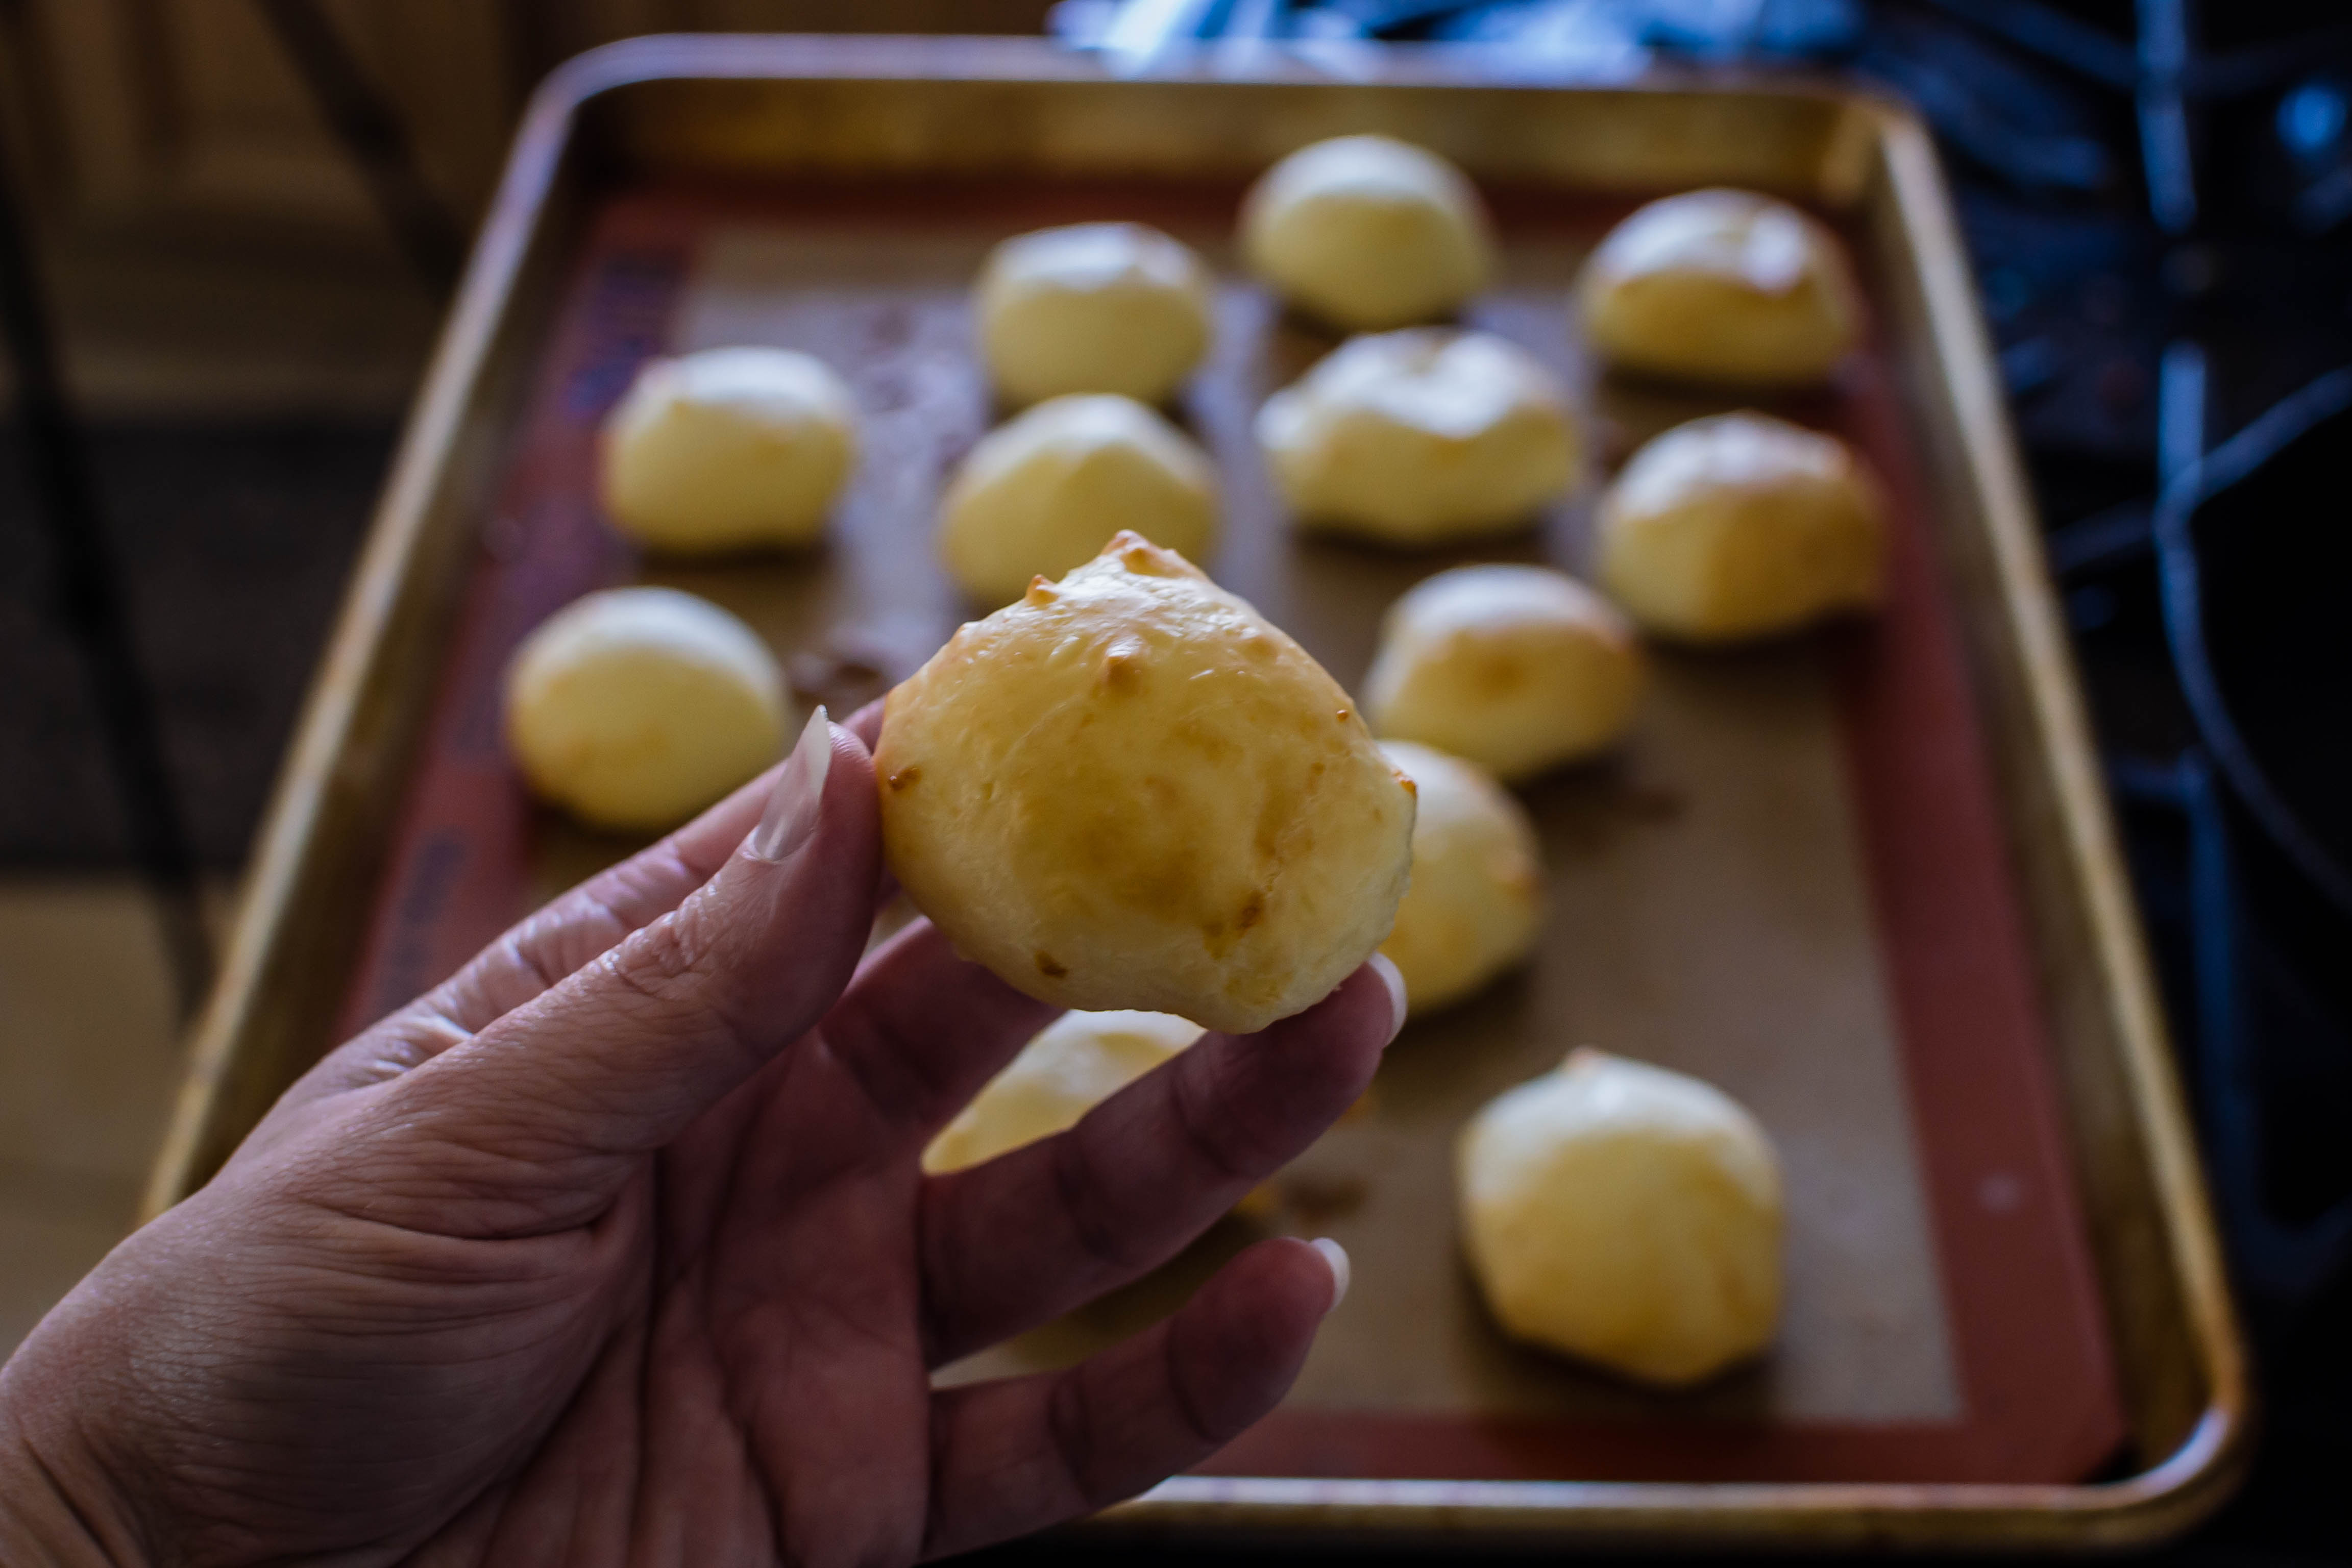
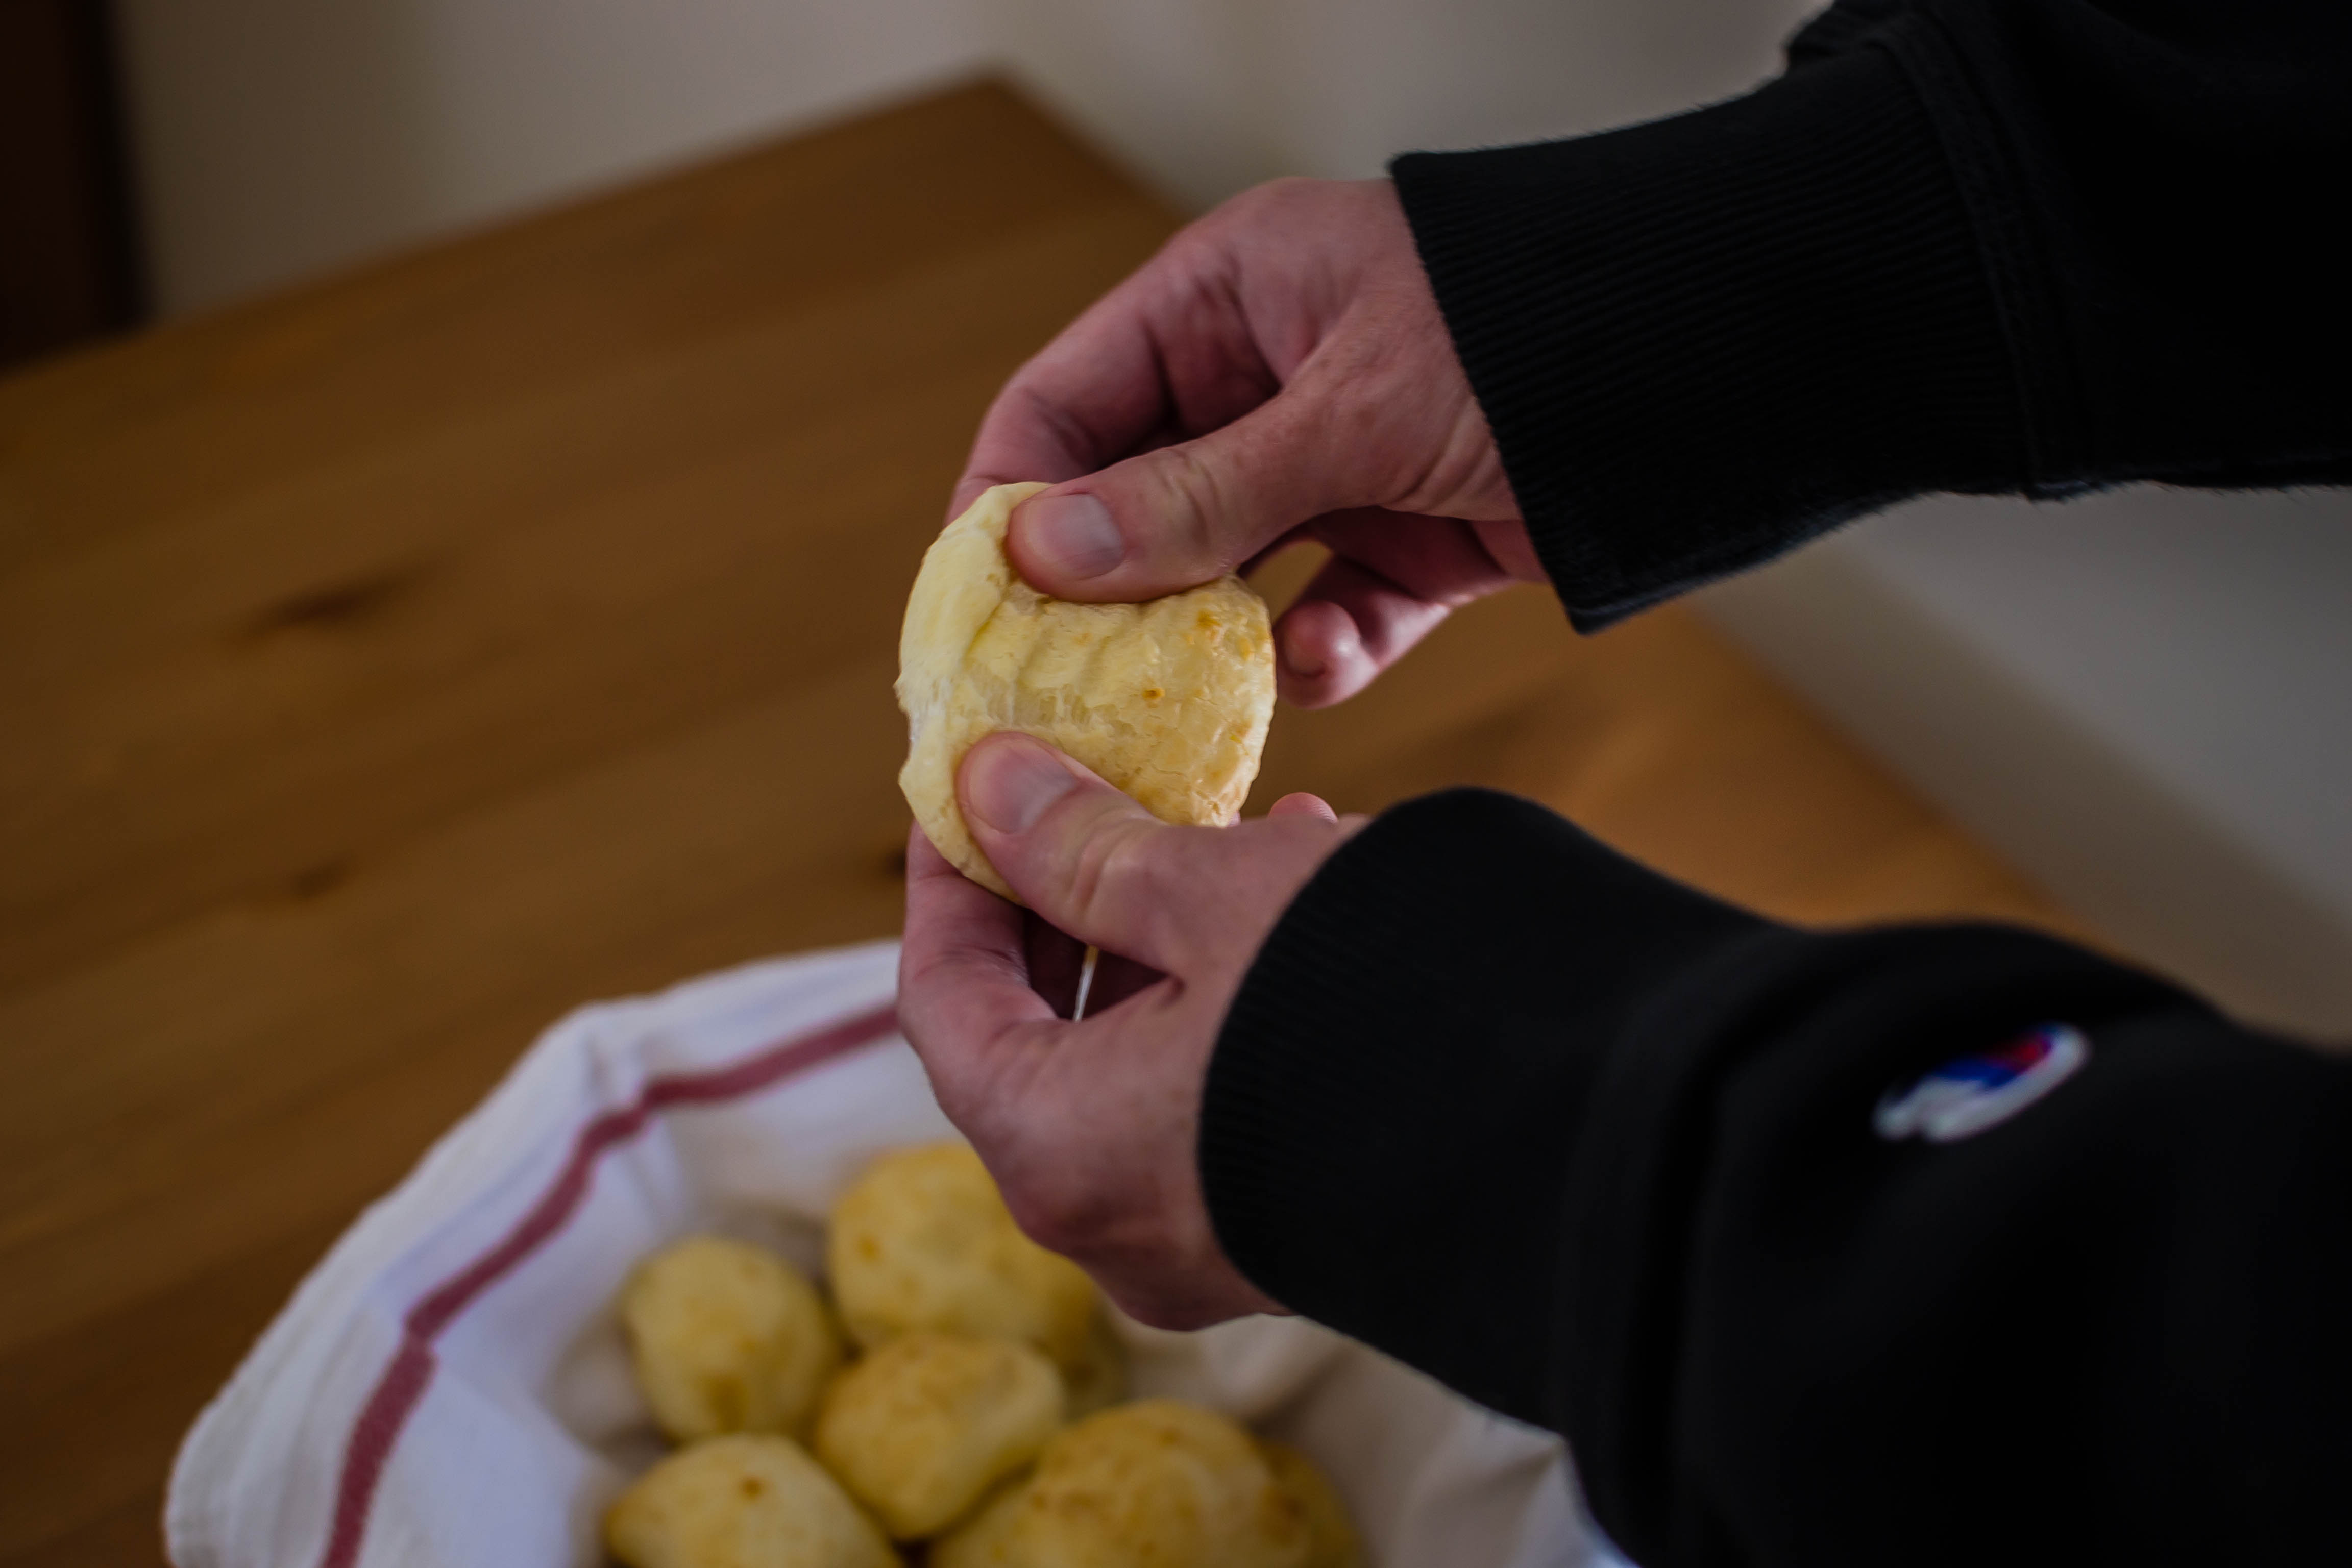
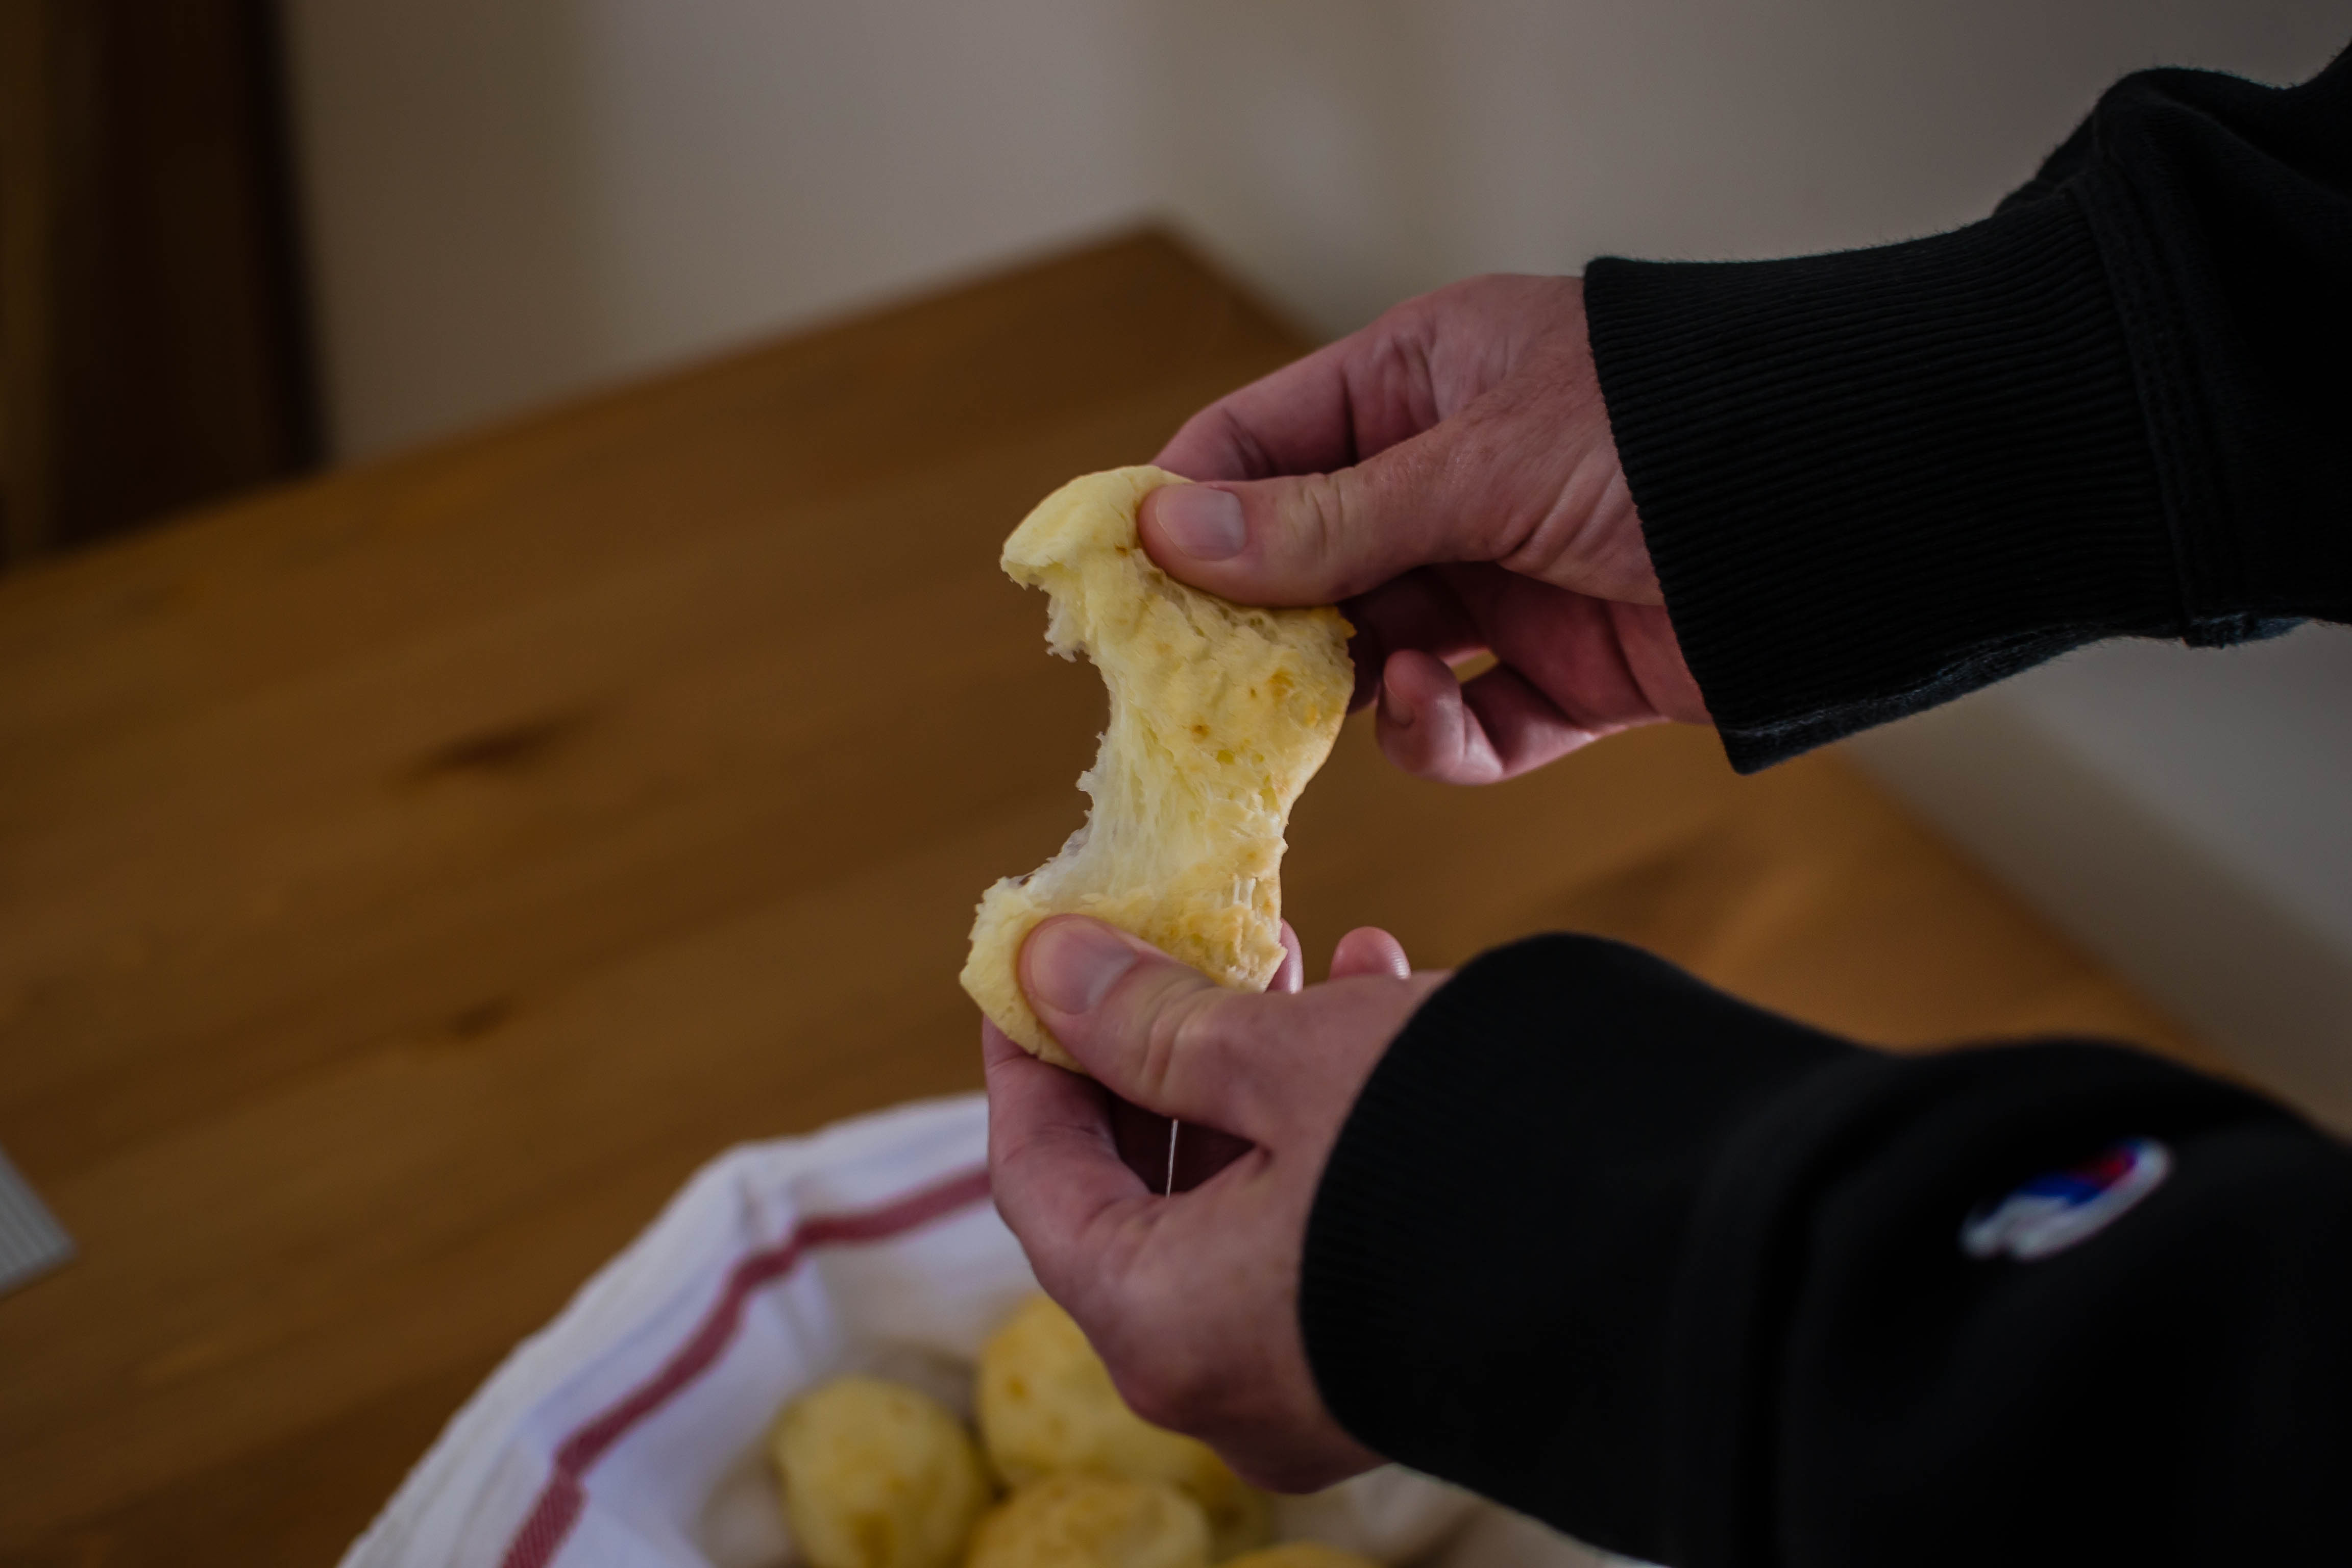
Despite the difficulties in shaping, we could see easily why these are so well loved. They baked up into delicate, puffy rounds with golden cheese freckles. They are mildly cheesy in flavor but, when still hot, offer the same tempting cheese-pull as a good grilled cheese sandwich. After the first one (or two), I thought maybe I wanted them to have some herbs as well for additional flavor, but when I suddenly realized I’d eaten at least six little puffs, I decided maybe that wasn’t necessary, since I was clearly addicted without any additions.

The recipes I worked from claim to make about 30 little puffs, enough to bake up half for indulgent snacking and freeze the other half for a week or two down the road. I made slightly smaller “rounds” than they did, so I’m guessing I ended up with around 3 dozen, but the truth is I snatched the first one hot off the sheet tray, and then the next, and then N. had one… and an hour later I realized I’d never counted.

Holly the cheese hound sticking a curious ear out from under the table


* I suppose I really should have gone with Irish soda bread this week, though as I noted previously, I’m typically not very good at timing my seasonal dishes – I blame my day job, which often makes it a challenge to post here at all. Additionally, I do have several soda bread recipes here already, so if you’re looking to celebrate St. Patrick’s Day with a loaf, consider these!


Pão de queijo
Adapted from Olivia’s Cuisine and Brazilian Kitchen Abroad
Makes… 36? (see above explanation/excuse)
About 1–1 ½ hours, counting resting and baking time
1½ cups milk
½ cup water
6 tablespoons vegetable oil
2½ teaspoons kosher salt, or 2 teaspoons table salt
1 pound tapioca flour (also labeled tapioca starch)  * as noted above, mine were fairly wet so you might ultimately need more flour. Unfortunately it is most frequently sold in 1 pound bags.
2 large eggs
1½ cups grated parmesan cheese
1 cup shredded mozzarella cheese


  • Preheat your oven to 400F and line 2 baking trays with parchment paper or silicone mats.
  • In a medium saucepan, combine the milk, water, oil, and salt and bring to a simmer over medium heat.
  • If you are using a stand mixer, add the tapioca flour and then pour over the liquid mixture. Combine with the paddle attachment into a thick, sticky, pasty mass. If you don’t have a stand mixer, you are in for a workout. Dump the flour right into the saucepan and mix it into the liquid with a sturdy wooden spoon.
  • For either method, let the mixture sit for 10-15 minutes to cool before adding the eggs. You can run the mixer for some of this time to cool even faster – you may notice that mixing at this point produces a texture similar to melted cheese.
  • After the mixture has cooled for at least 10 minutes, add the eggs one at a time and combine fully – this will take some effort. Add the cheese a small handful at a time, again mixing well to incorporate, into a soft, sticky dough.
  • To shape and bake, I found wet hands the best tool. Dip your hands and a tablespoon into a small bowl of cool water, then scoop out tablespoonfuls of dough. If you can, shape them into a ball by rolling gently between your hands, then transfer to your prepared baking tray. If your dough is too wet to work with, you can either plop unshaped scoops onto the baking tray, or try adding more tapioca flour to the dough and mixing again.
  • When you have a full tray of dough blobs, move to the oven and bake at 400F for 15-18 minutes. They will be dry on top, with uneven speckles of browning from the cheese. We found them best eaten still warm and puffy, within minutes of emerging from the oven.

Reflections: Jubilee Red Beans and Rice (no recipe), and Bread in a Pandemic

Jubilee Red Beans and Rice:

I don’t have any bread to share with you today, based in part upon some complications I’ve realized my “Breads of the World” project poses. More on that below if you’re interested, but first, instead of a typical recipe post I thought I’d share a few images and considerations about the meal we ate on Saturday. In an effort to diversify my cookbook shelves, one of my recent acquisitions is the beautiful volume you see above: Jubilee: Two Centuries of African American Cooking by Toni Tipton-Martin. As numerous Black cooks and food historians have in recent years, Tipton-Martin wants to acknowledge the tremendous role of Black cooks in “soul food” and “Southern food.” But she also wants to push beyond that – to restrict African American food to stereotypes is to perpetuate caricatures and poor representation. Tipton-Martin’s recipes come with history lessons – not all are extensive, but she recognizes and shares the background and development of the dishes she offers, sometimes with original recipes from centuries-old collections, and then her updated or adapted version.

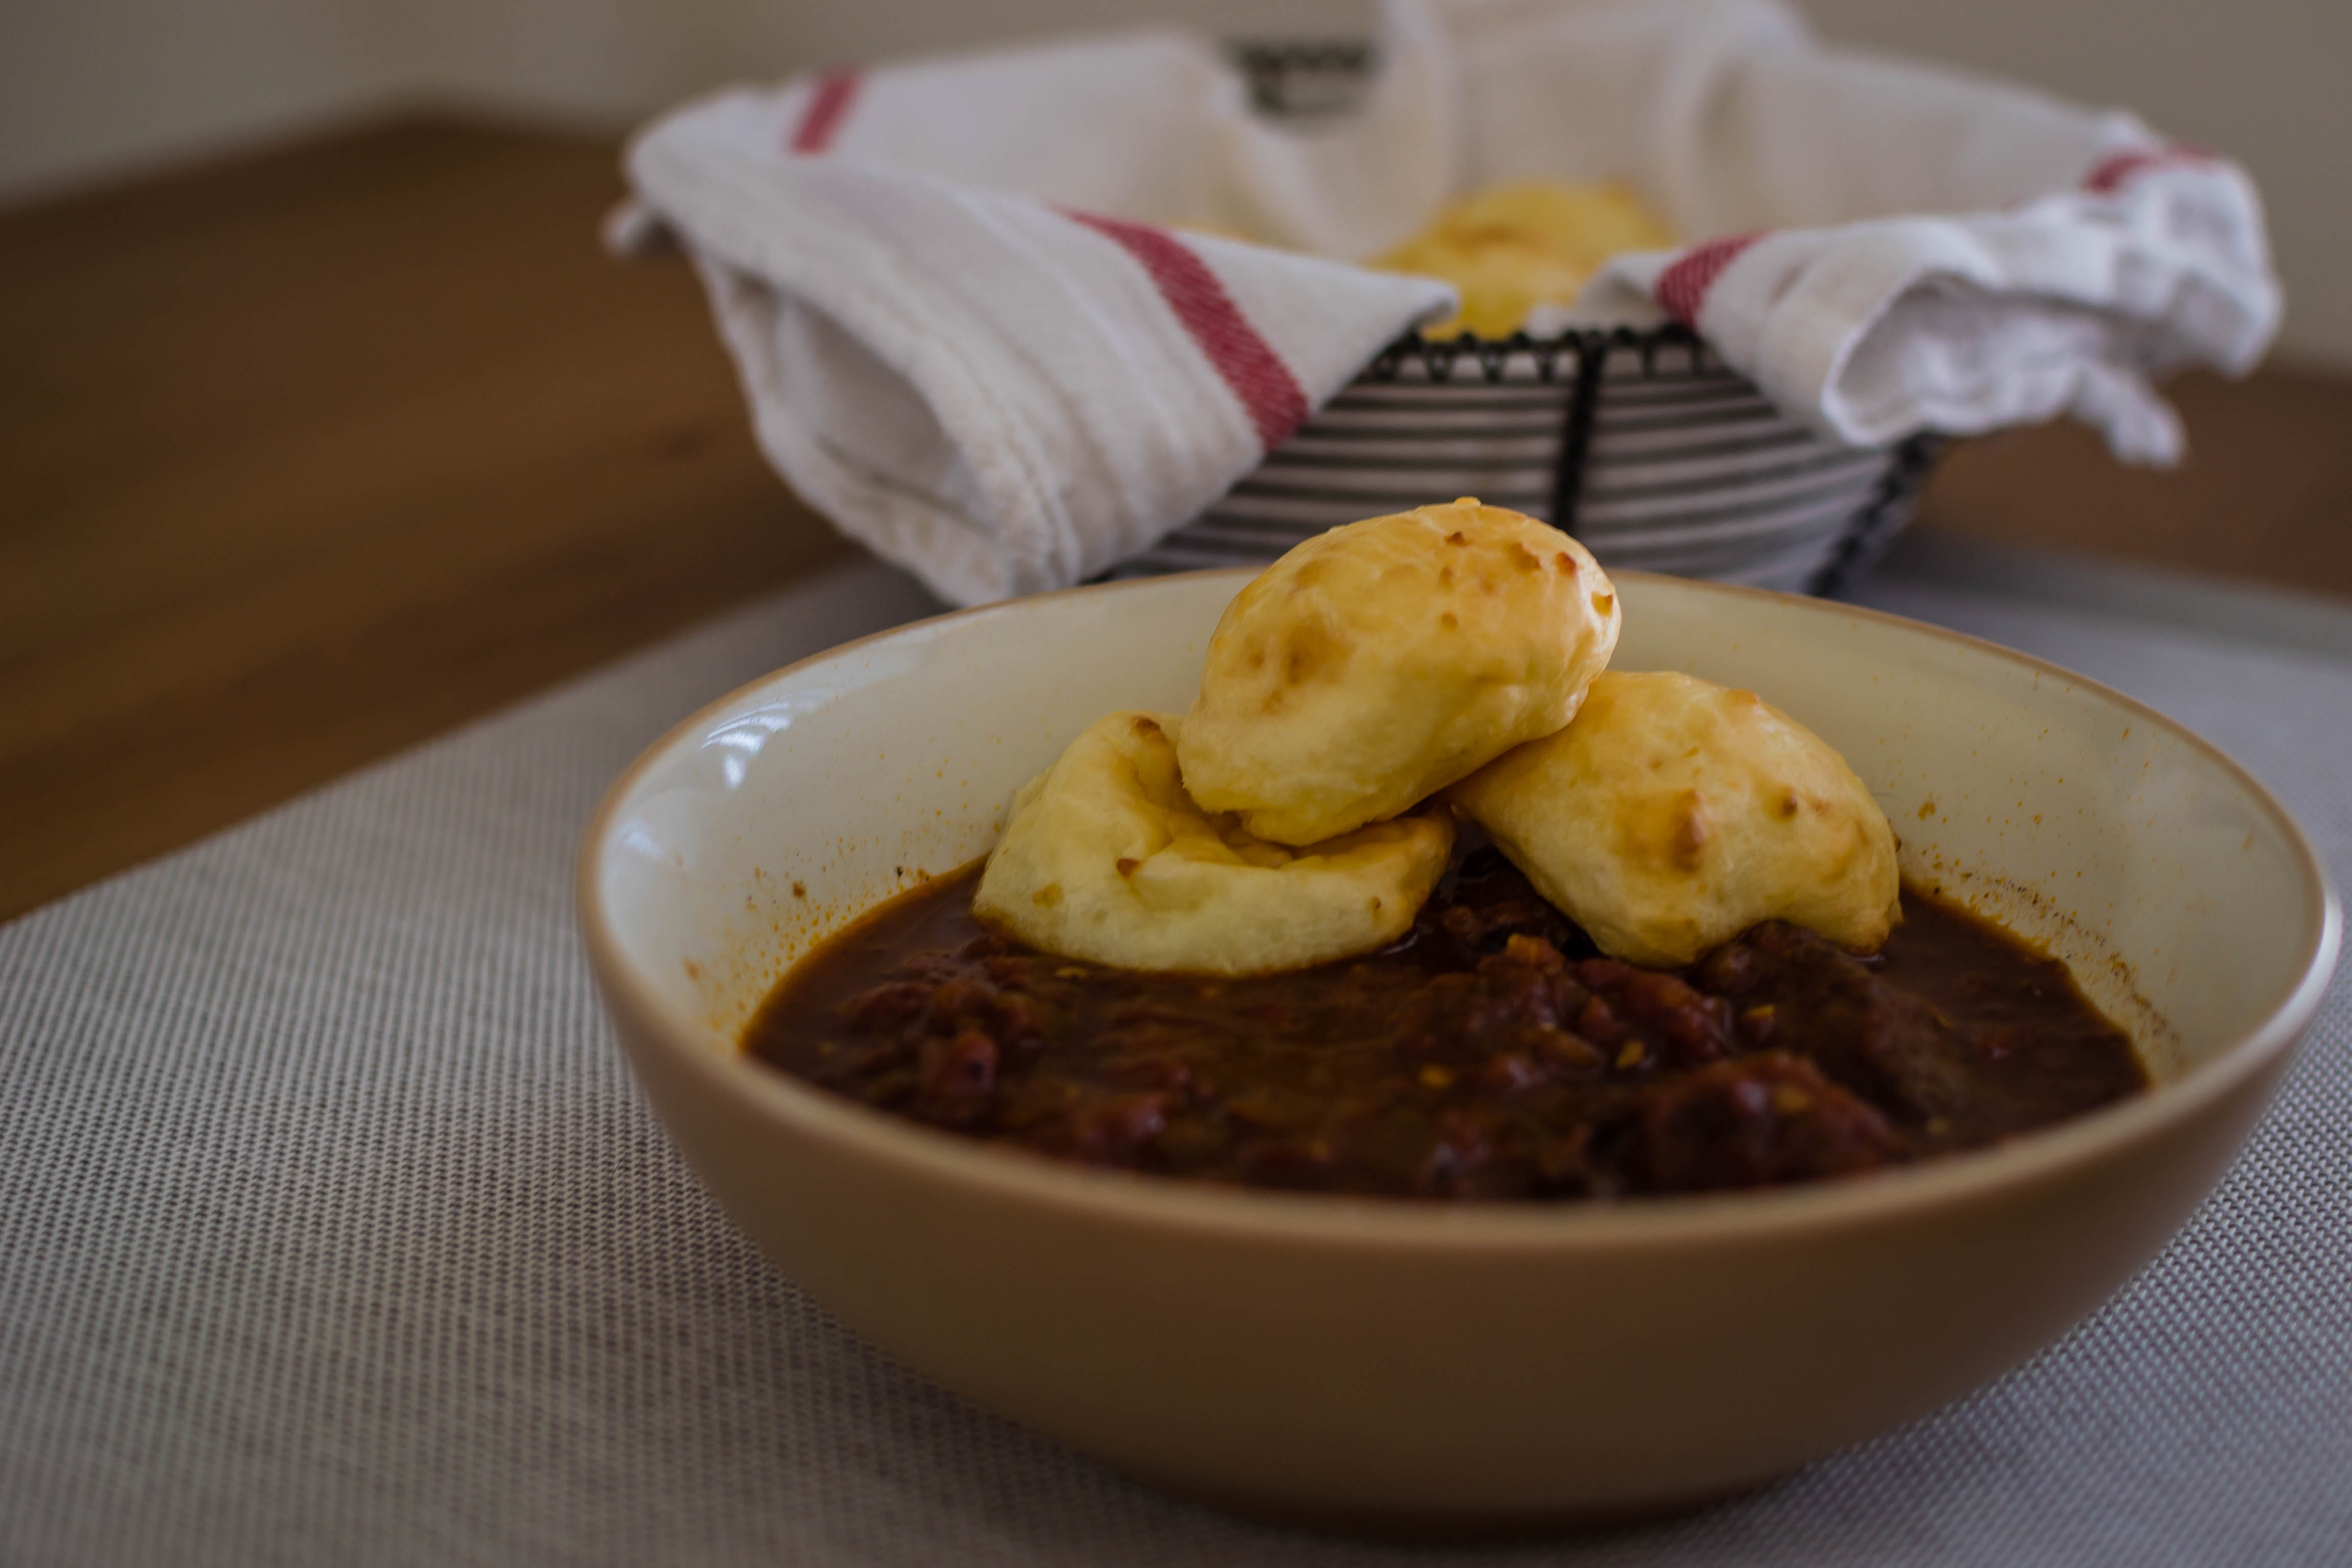
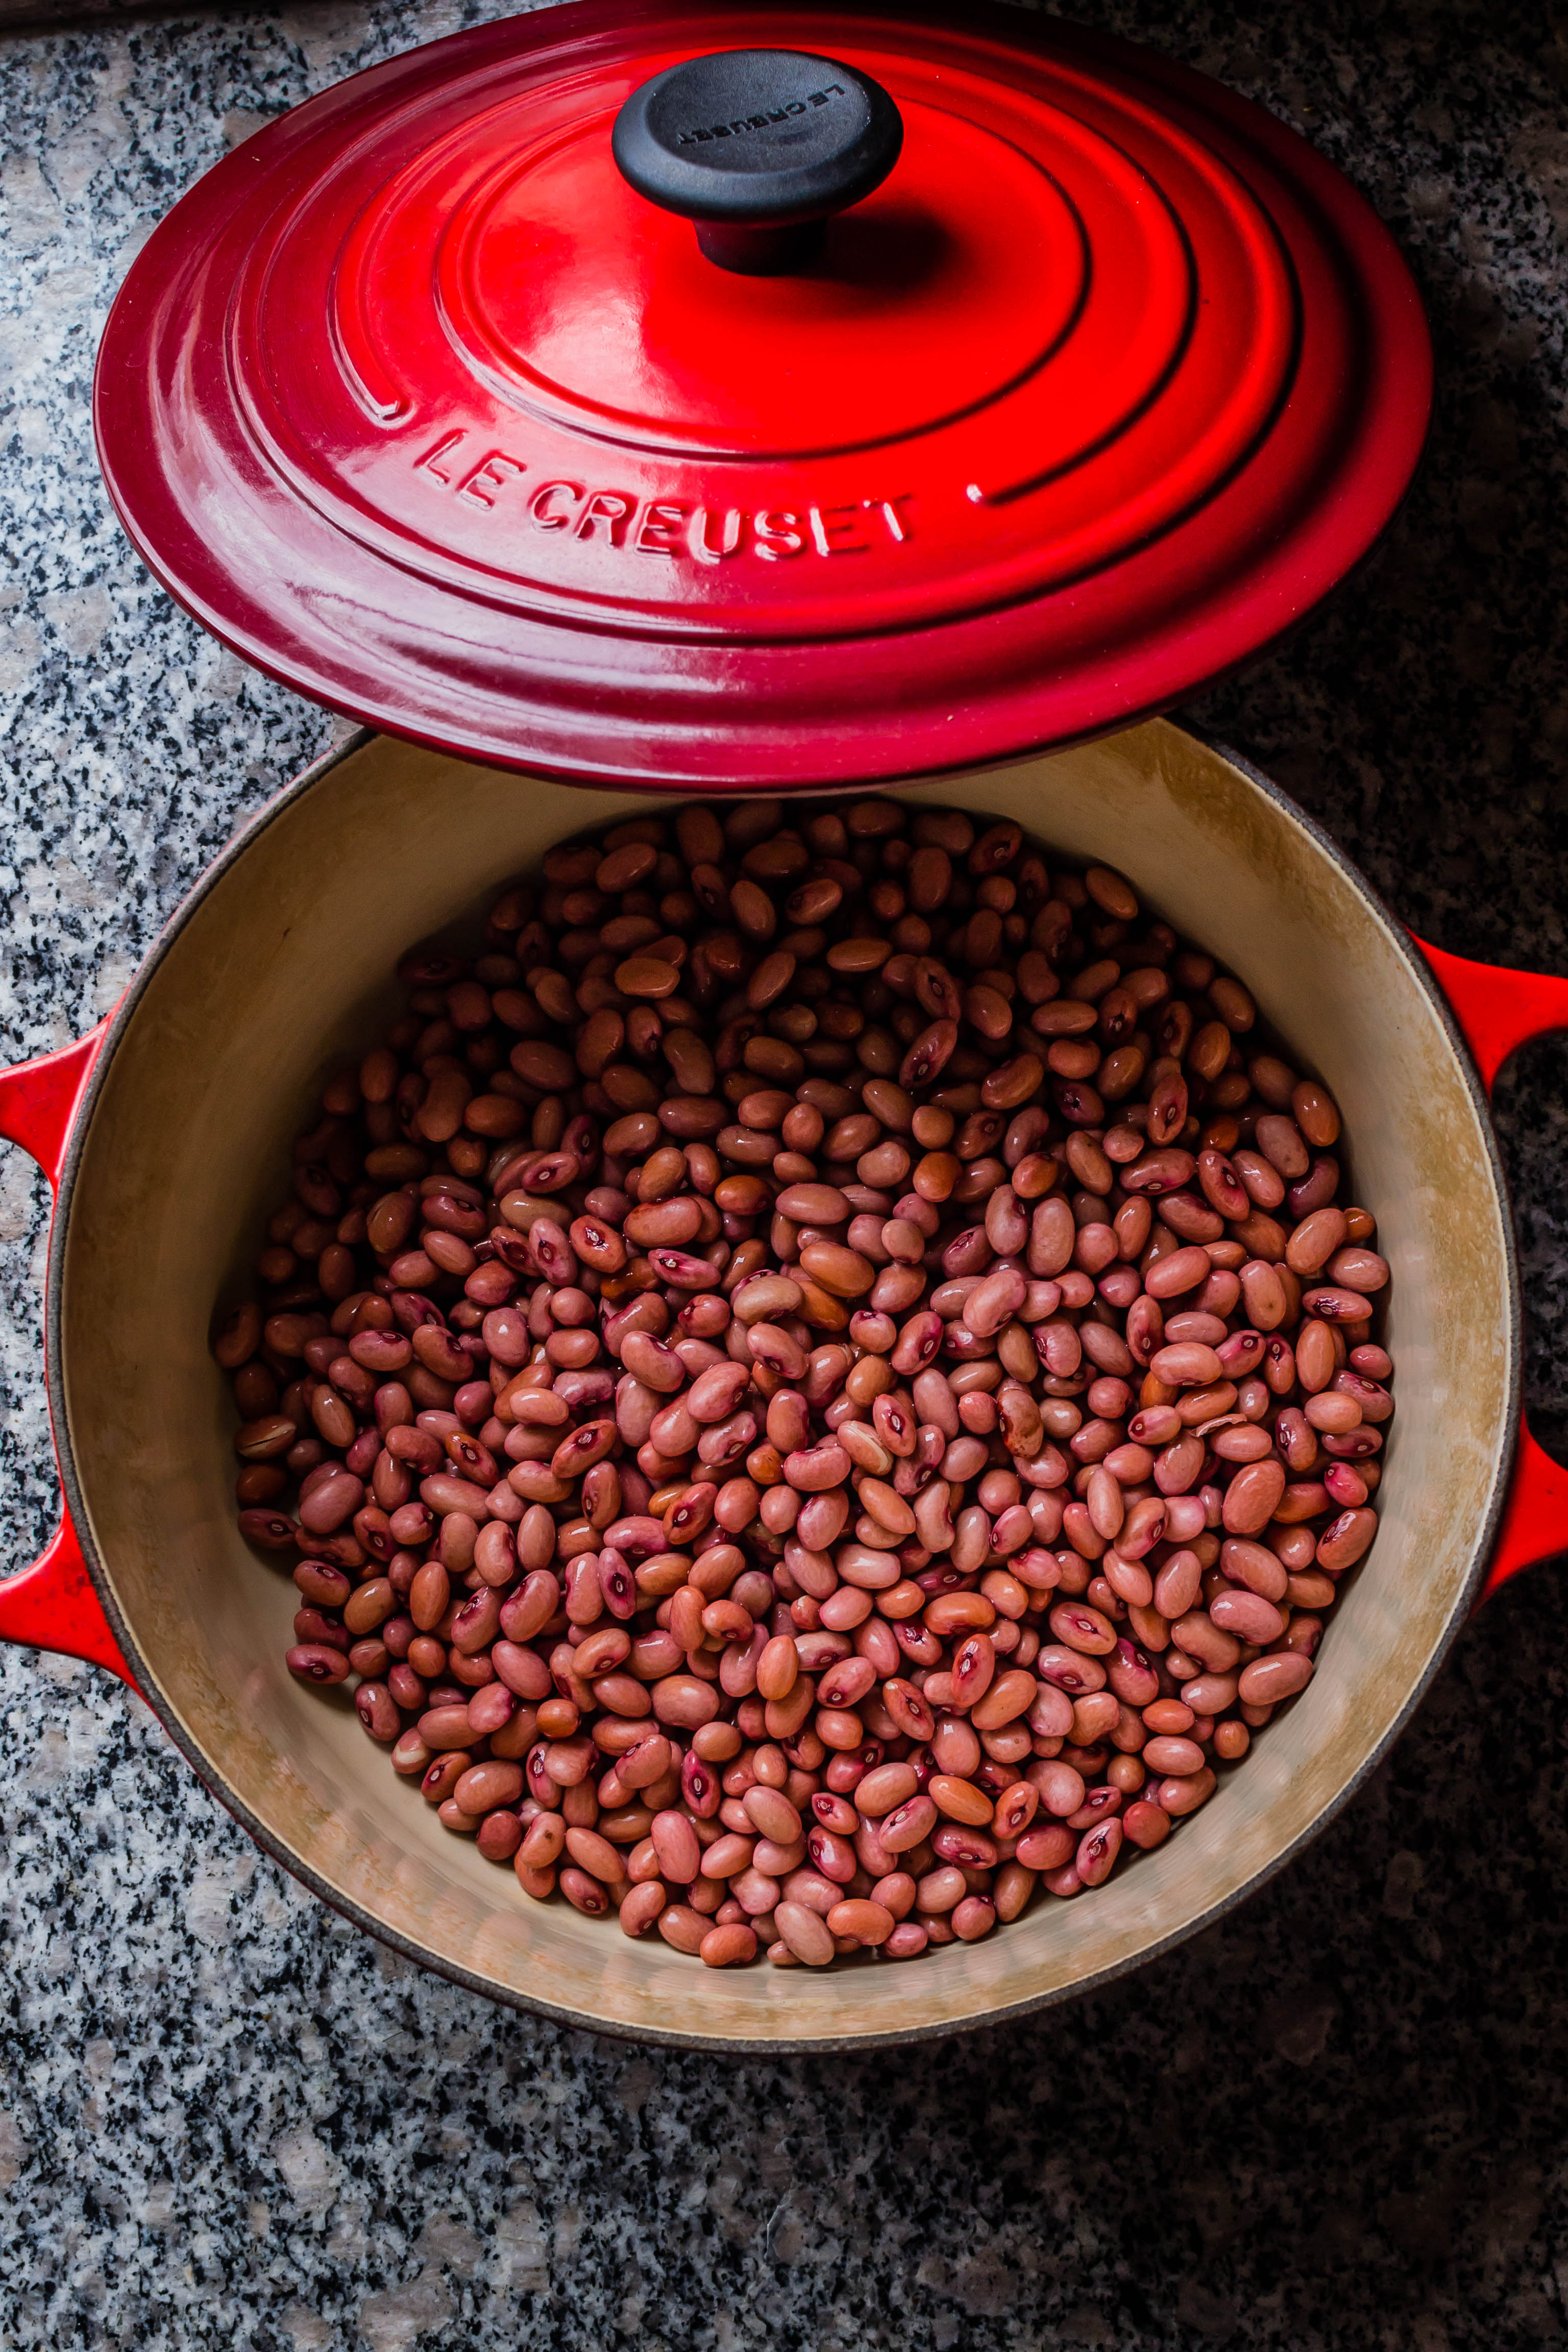
Although the book certainly pushes beyond the borders of “The South,” on a cold, rainy day in Los Angeles I wanted something deep and warm and spicy I could spend the afternoon checking on, so I went with red beans and rice. Tipton-Martin’s recipe headnote is about Louis Armstrong and his devotion to the dish despite changing circumstances, a consideration of how traditions are sustained even as they undergo adaptation. Unless I’m baking, these days I tend to see recipes as guidelines rather than rules, but this one I followed to the letter, and it was basically perfect. A mound of hot, buttered rice underneath and a final sprinkle of cayenne pepper on top, and we were the happiest of quarantine campers.

Bread in a Pandemic:

Speaking of quarantine, while I continue to be enthusiastic about my “Breads of the World” project, I’m starting to realize it carries a few distinct challenges, emphasized thanks to pandemic conditions. First and perhaps most obvious: N. and I are going to eat a lot of bread this year. That doesn’t sound like a big or particularly intelligent revelation, I know, but it is a blessing-curse I hadn’t quite realized the magnitude of when I started collecting ideas. As my friend D. commented the other day, when you are a happy household of two working from home, baked goods weigh more heavily (all puns intended) in your day-to-day. Were this a typical year, I would just bring my bread of the moment to work and leave it in the department mail-room. It would be gone by mid-afternoon, and I’d be headed home ready to think through the next one. Now, although I certainly could (and probably should) engage in some bread-drops for local friends (what would you call a drive-by bread drop? A roll-out? A loafing?), the reality of making a loaf or a batch of buns is that most of the time N. and I will wind up eating them all. “We’re going to be having a lot of bread and salad this year,” I told him yesterday. He was delighted, but I can imagine weekly dosings might become less appealing than the panem et circensus alternative.

Second, there are a lot of breads to choose from! Again, not exactly an epiphany, but I could easily bake one or even two a week and still have pages of recipes to sift through in December. I don’t agree with all of their choices, but the list of breads on Wikipedia is both an entertaining read-through and a fair example of what I mean. I’m not obsessed with authenticity (and I don’t want every selection to turn into the intensive research I did for the naan-e-komaj I made earlier this month), but because I do want this project to be representative in both its scope and its recipes, I do want to look into the breads I’ve chosen at least a little bit, and if possible, to find a recipe or an overview from someone of or familiar with the culture or region that produced the bread. That takes time. Especially when the semester begins, my imaginary second career as a culinary historian will resume its usual status as unpaid-side-hustle, which means less time for exploring and writing about the breads I decide to recreate.

Third, and related to the point about being representative, breads from areas that are typically less well represented also often use less typical, and thus less accessible, flours. Cassava, teff, and millet flour are certainly not impossible to locate, especially with the whole internet at my literal fingertips, but they aren’t on the shelves at my usual grocery store. And since I’m not shopping as often as I would be under non-COVID conditions, I can’t just decide on a whim to make, say, pao de queijo one afternoon unless I already have tapioca flour on hand. That’s not a complaint, per se, but it is a realization that I’m going to have to plan around. You know, like everything else these days!

Until next time, then…

Smoked salmon sushi rolls

This is one of those meals we have all the time but it never occurs to me to post here. It’s just a weeknight meal. It doesn’t feel “impressive” or “blogworthy,” but as I was making it the sixth-or-so time in so many months, I finally asked myself why. Well, because, I answered (what? You don’t have these kind of conversations with yourself?), it’s so… simple. There’s not much to actually cook, it doesn’t take long, the ingredients are (mostly) really easy to find, and… why did I think this wasn’t worth posting again?

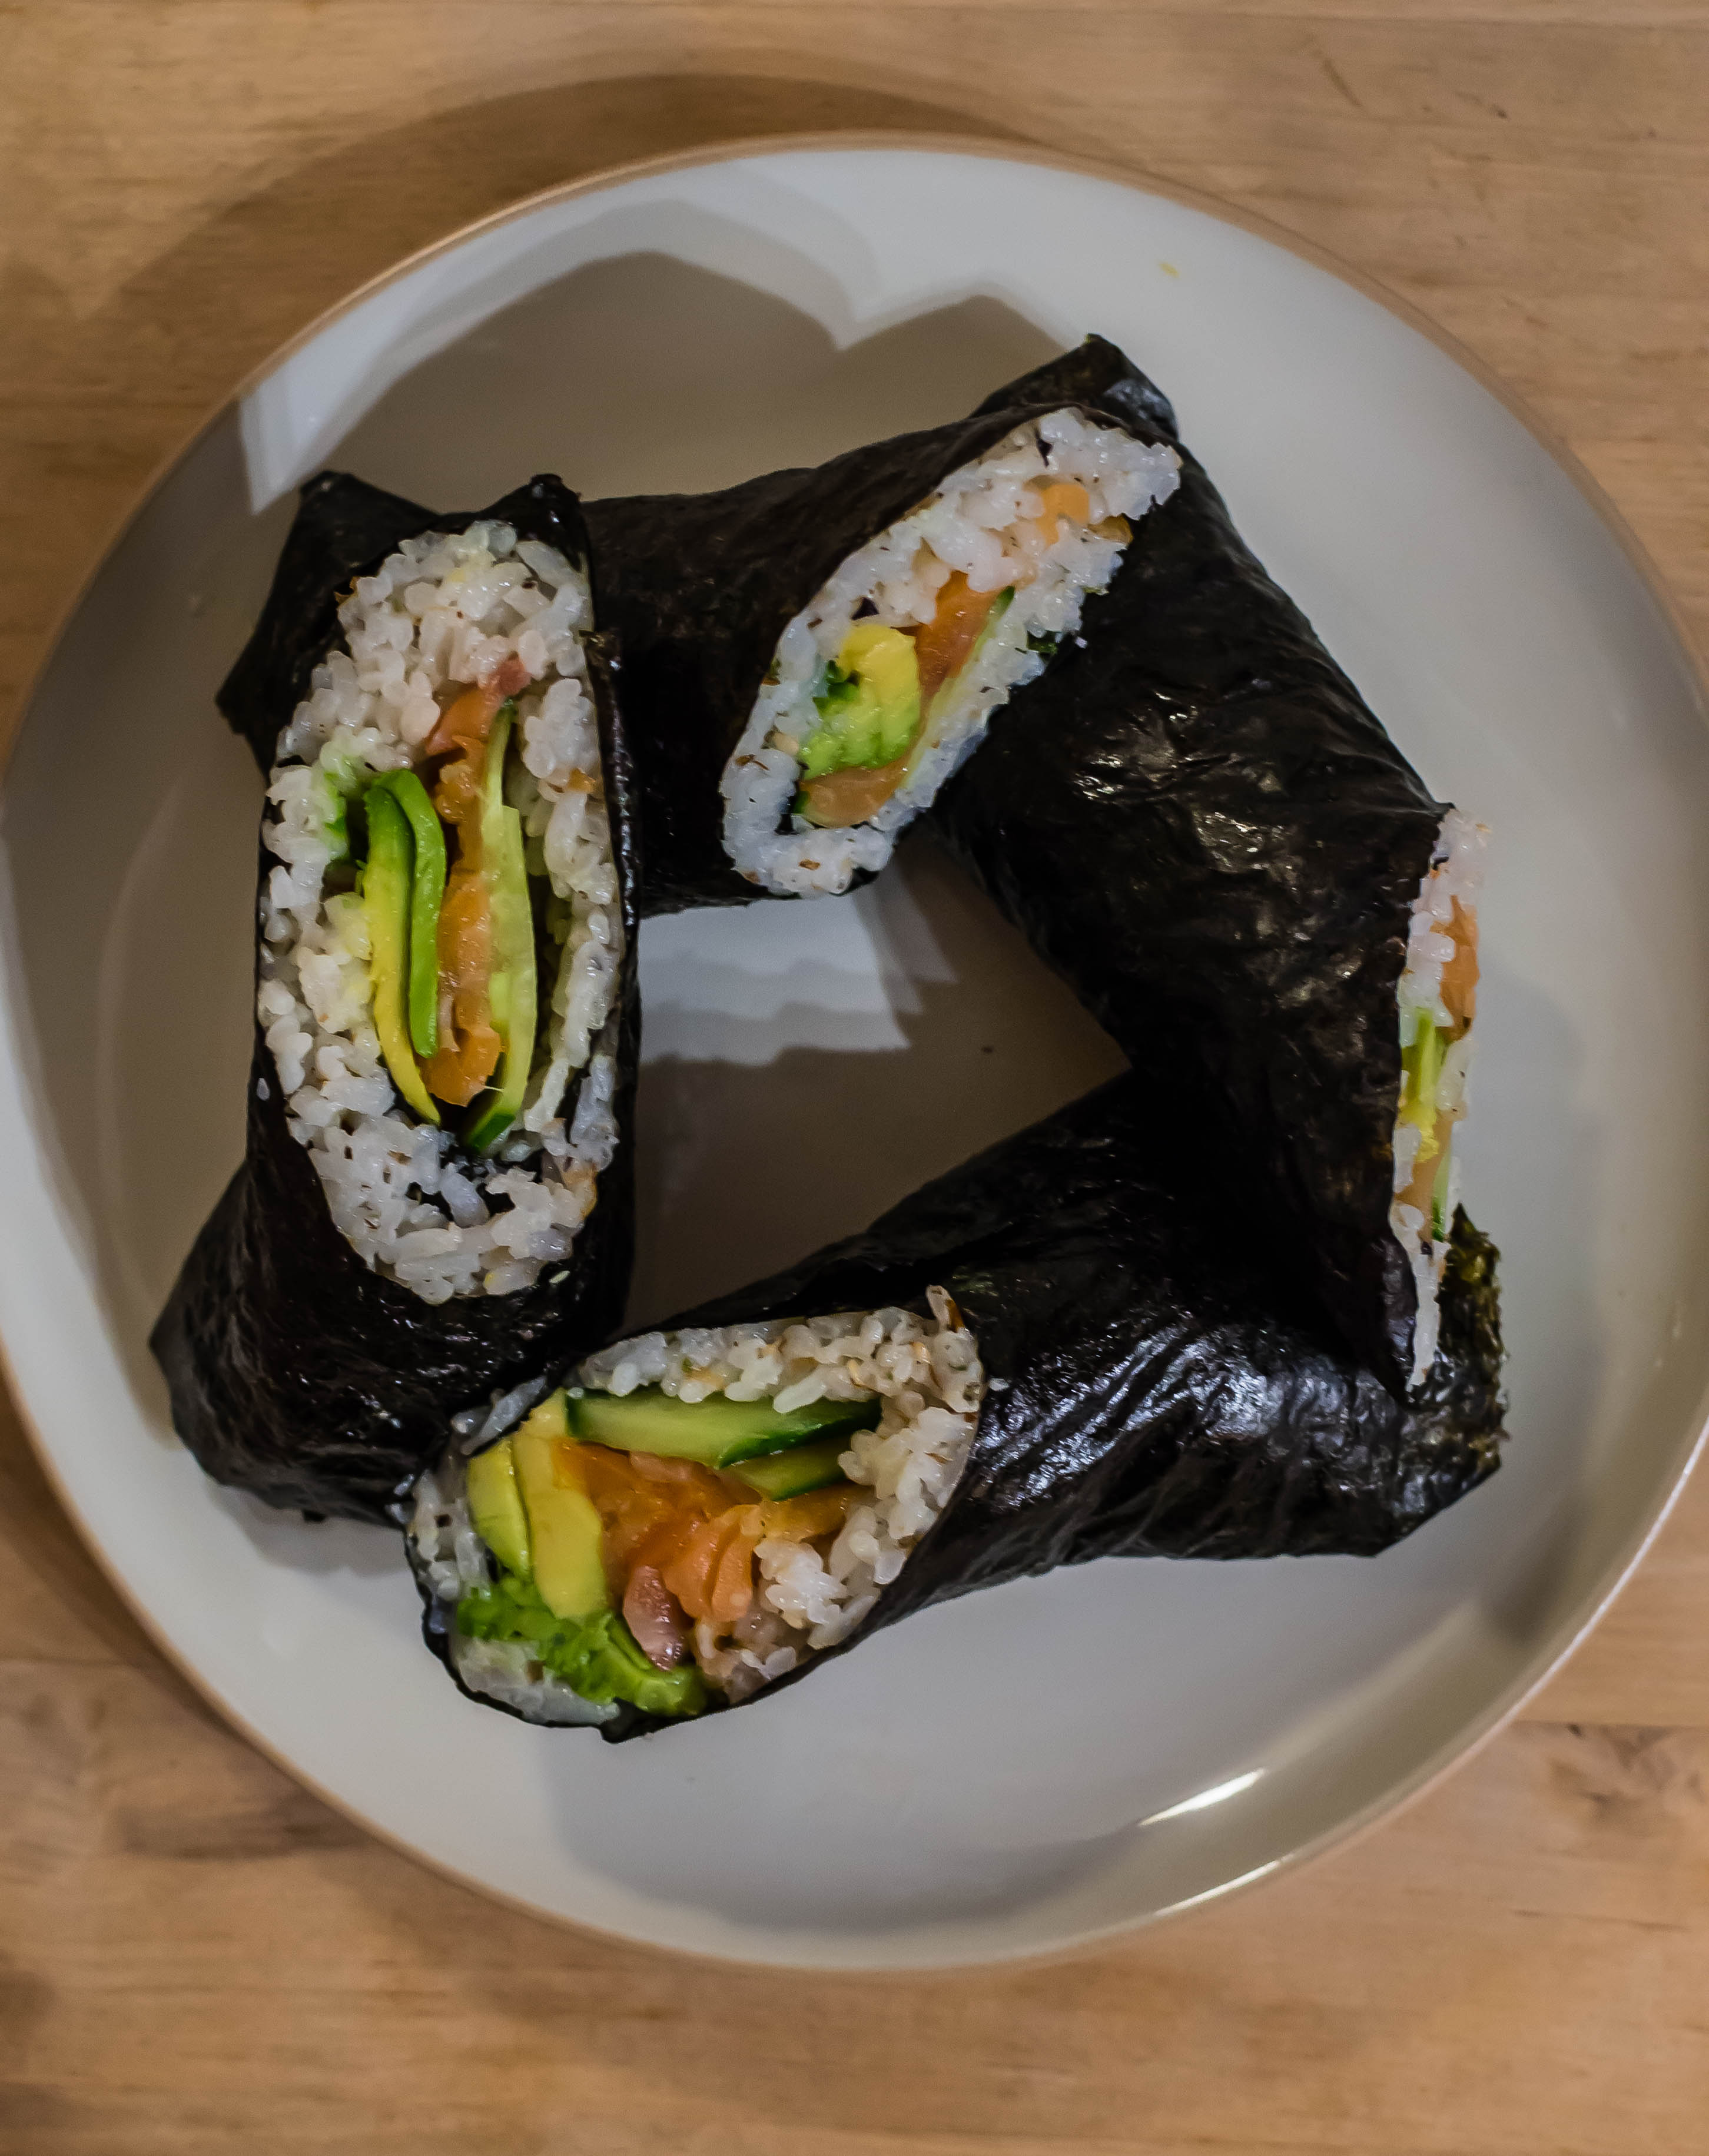
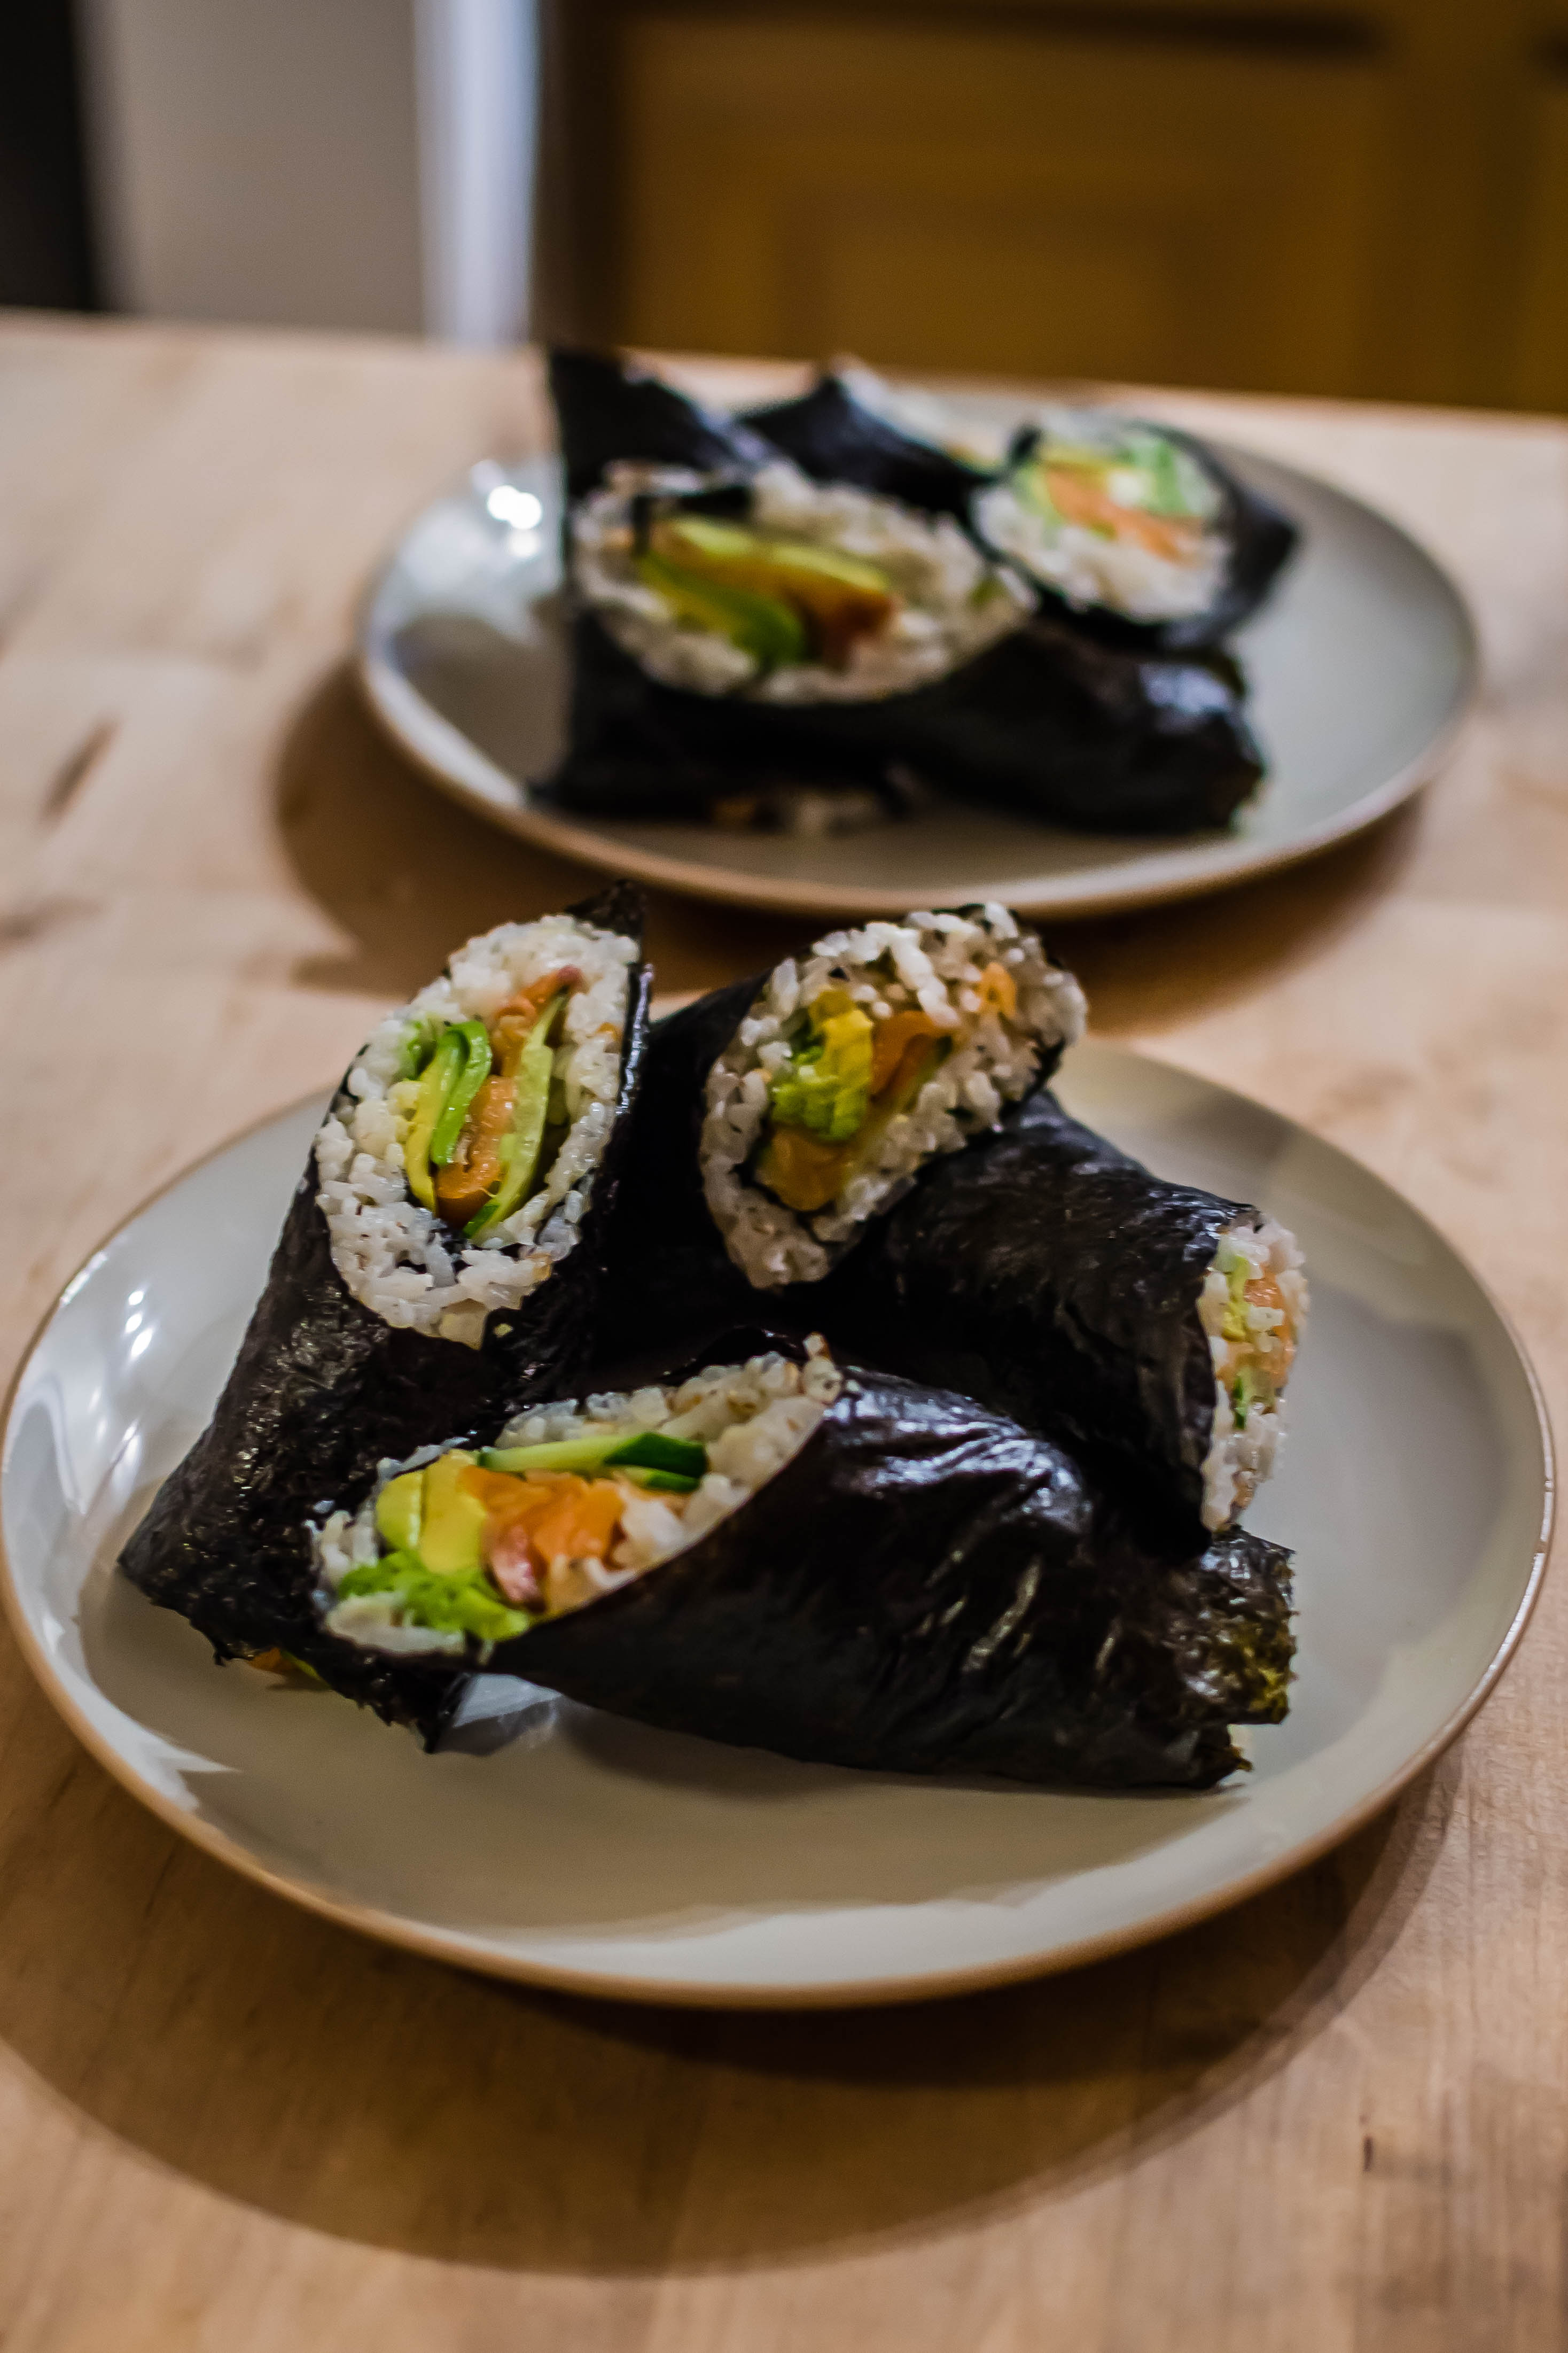
We’ve been calling these “sushi burritos” mainly due to size and shape, but they really are just unsliced maki rolls, filled with avocado, cucumber, pickled ginger, and a generous portion of smoked salmon. “No raw fish?” you’re thinking, “so how is that sushi?” Ah, but “sushi” refers not to the fish – though that is probably what many of us call to mind first when we hear the word – but the rice: short grain, combined with (usually) seasoned rice vinegar, and then wrapped, covered, or rolled with other ingredients.
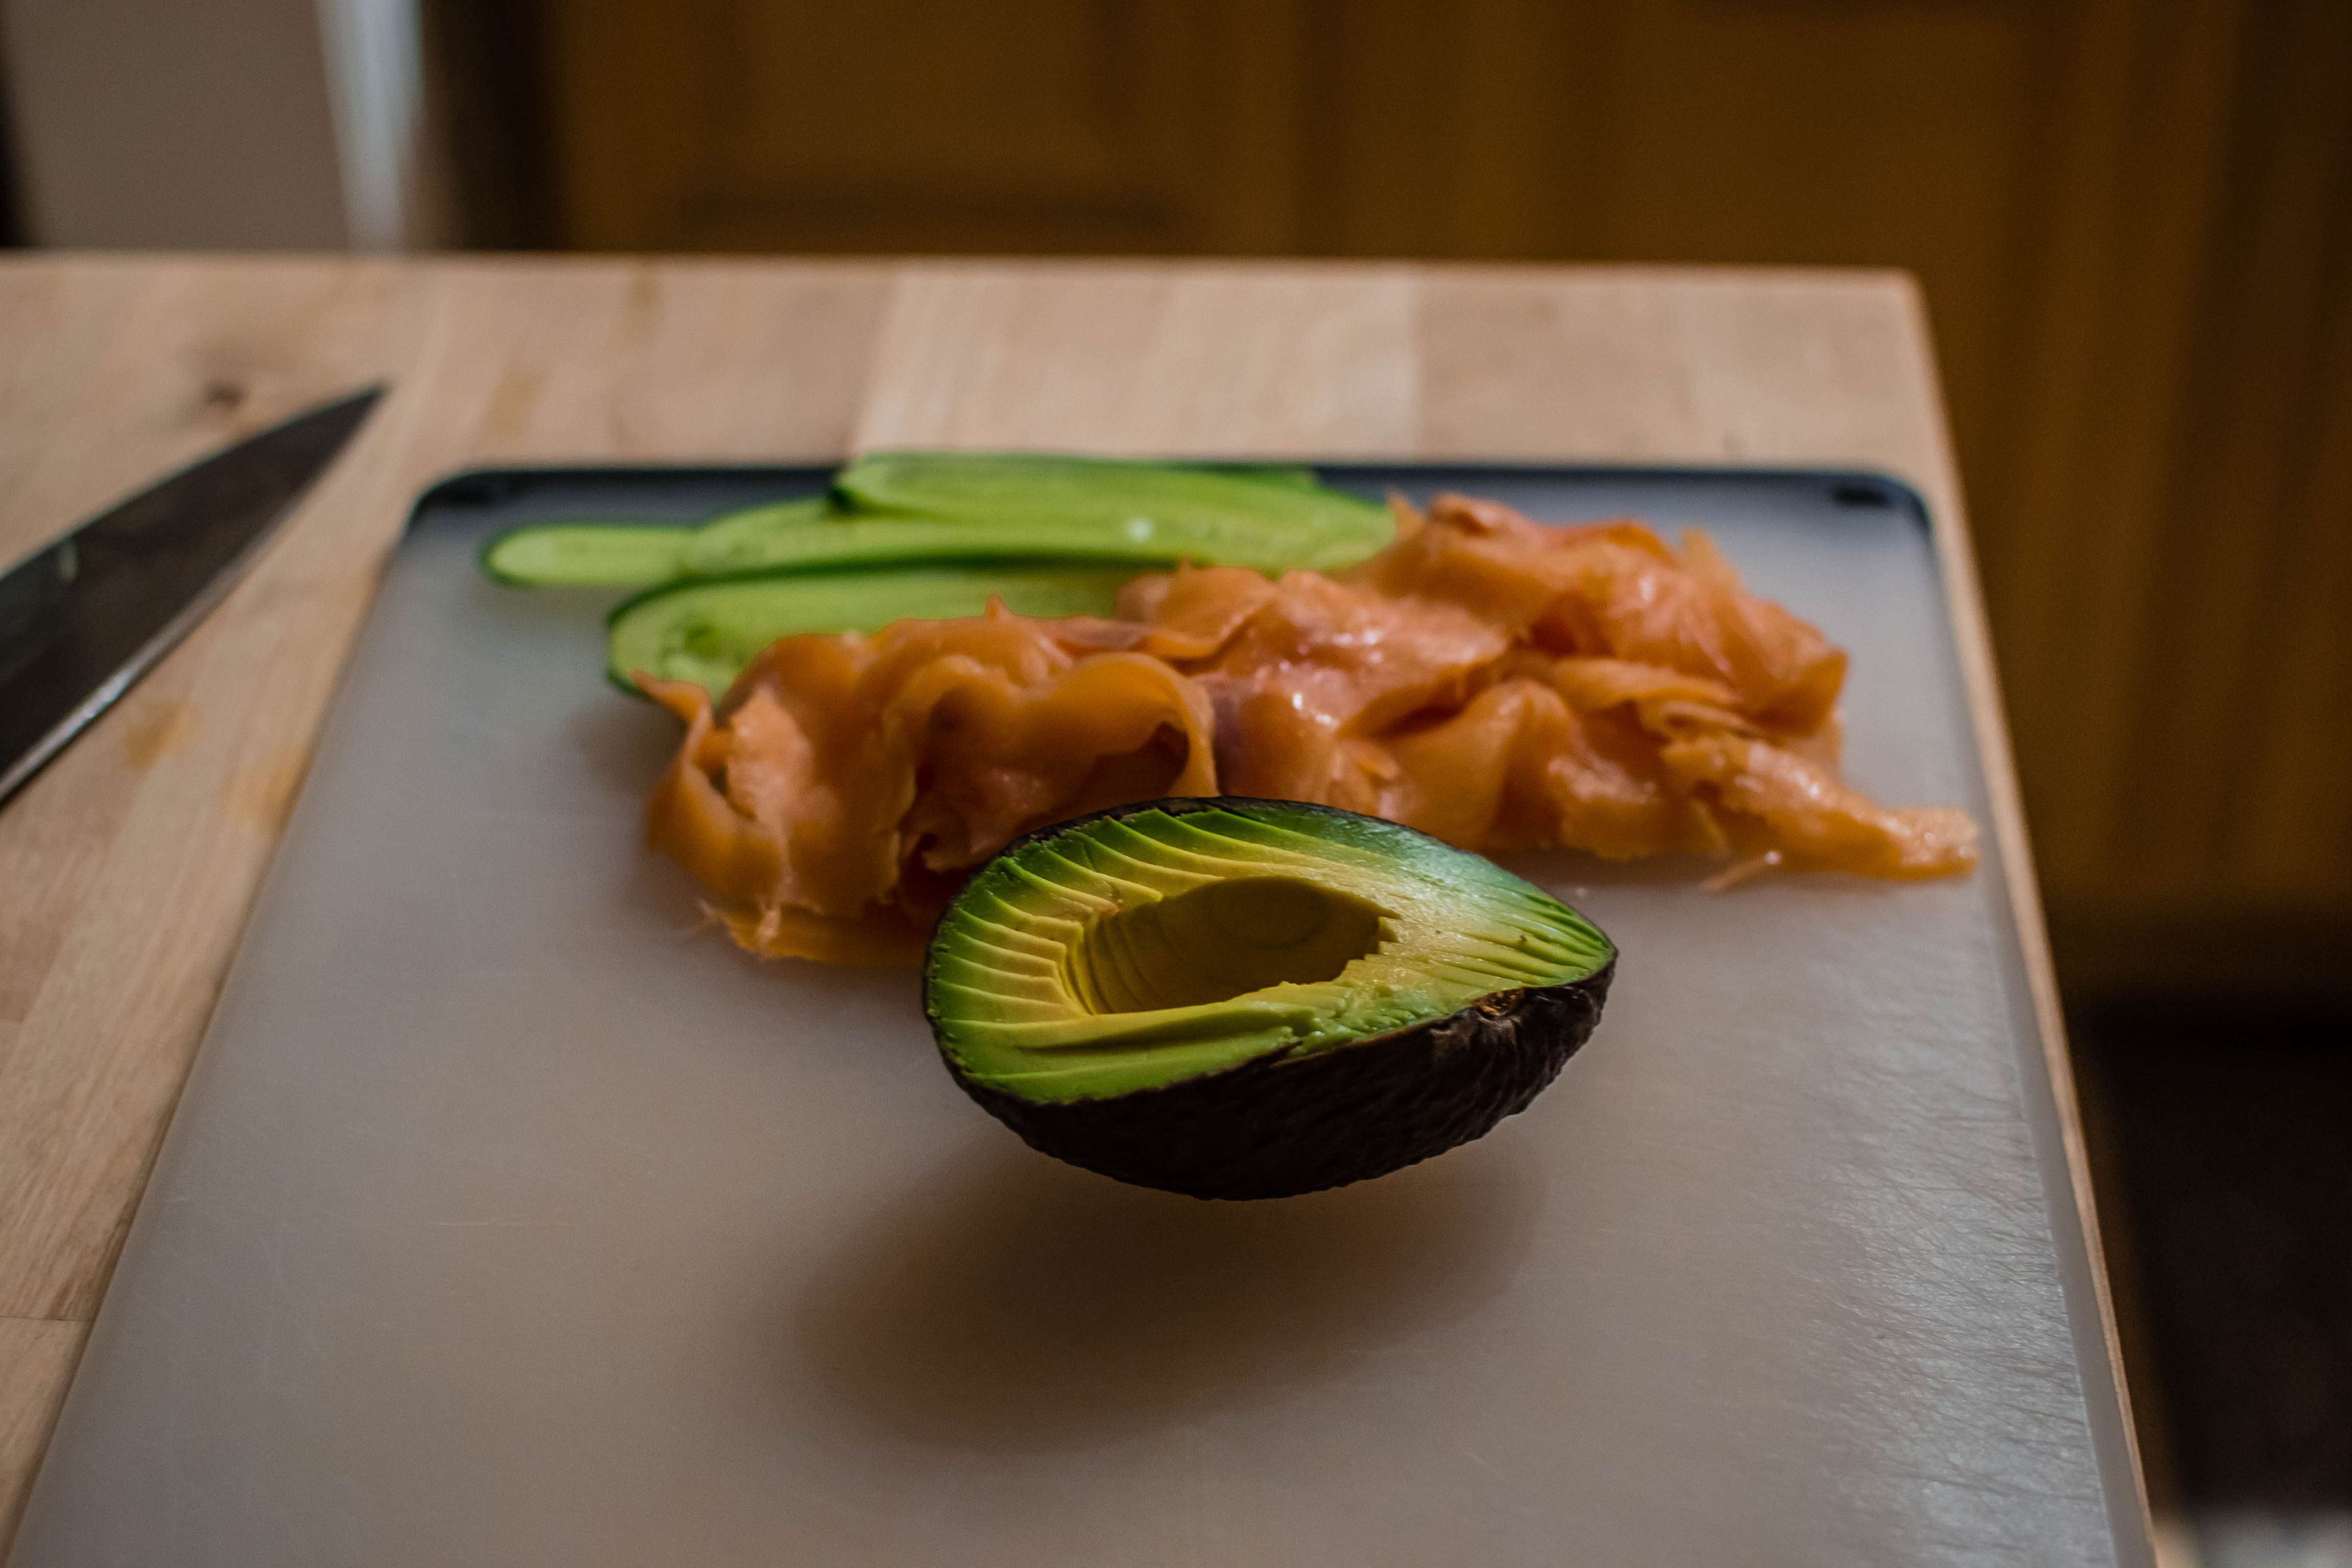
Here I’m using smoked salmon instead of the more traditional uncooked fish. Though I agree it would never stand up against a beautiful slice of raw ahi, the substitution is nice for a few reasons. First, especially if you are limiting your trips to the grocery store right now, you don’t have to worry about using it immediately – convenient if your avocado is less ripe than you’d hoped. Second, it tends to be much less expensive. Third, the texture is not quite the same, but it is comparable – on the tongue this does not feel like cooked fish, and if you can find one that is not particularly smoky, the salmon flavor comes through nicely. You could also use a cured product like gravlax for an even purer salmon-y flavor. And if you aren’t comfortable purchasing or consuming raw fish at all, this is an easy workaround.

Aside from acquiring the ingredients, the most intimidating component of sushi for many people is the rolling: spreading the rice evenly over the nori, trying to keep all those central components together, ending up with a nice, tight roll and good shape. For me, though, it’s the slicing. That’s when things start to come apart: when you disrupt the structural integrity of the nori, now nice and flexible after absorbing some of the moisture and warmth of the rice, by running a usually-not-sharp-enough knife through it. Here I forgo all but one slice, drawing my sharpest knife just once through each long roll, on a diagonal, and calling it a day. We get to the eating part faster that way.
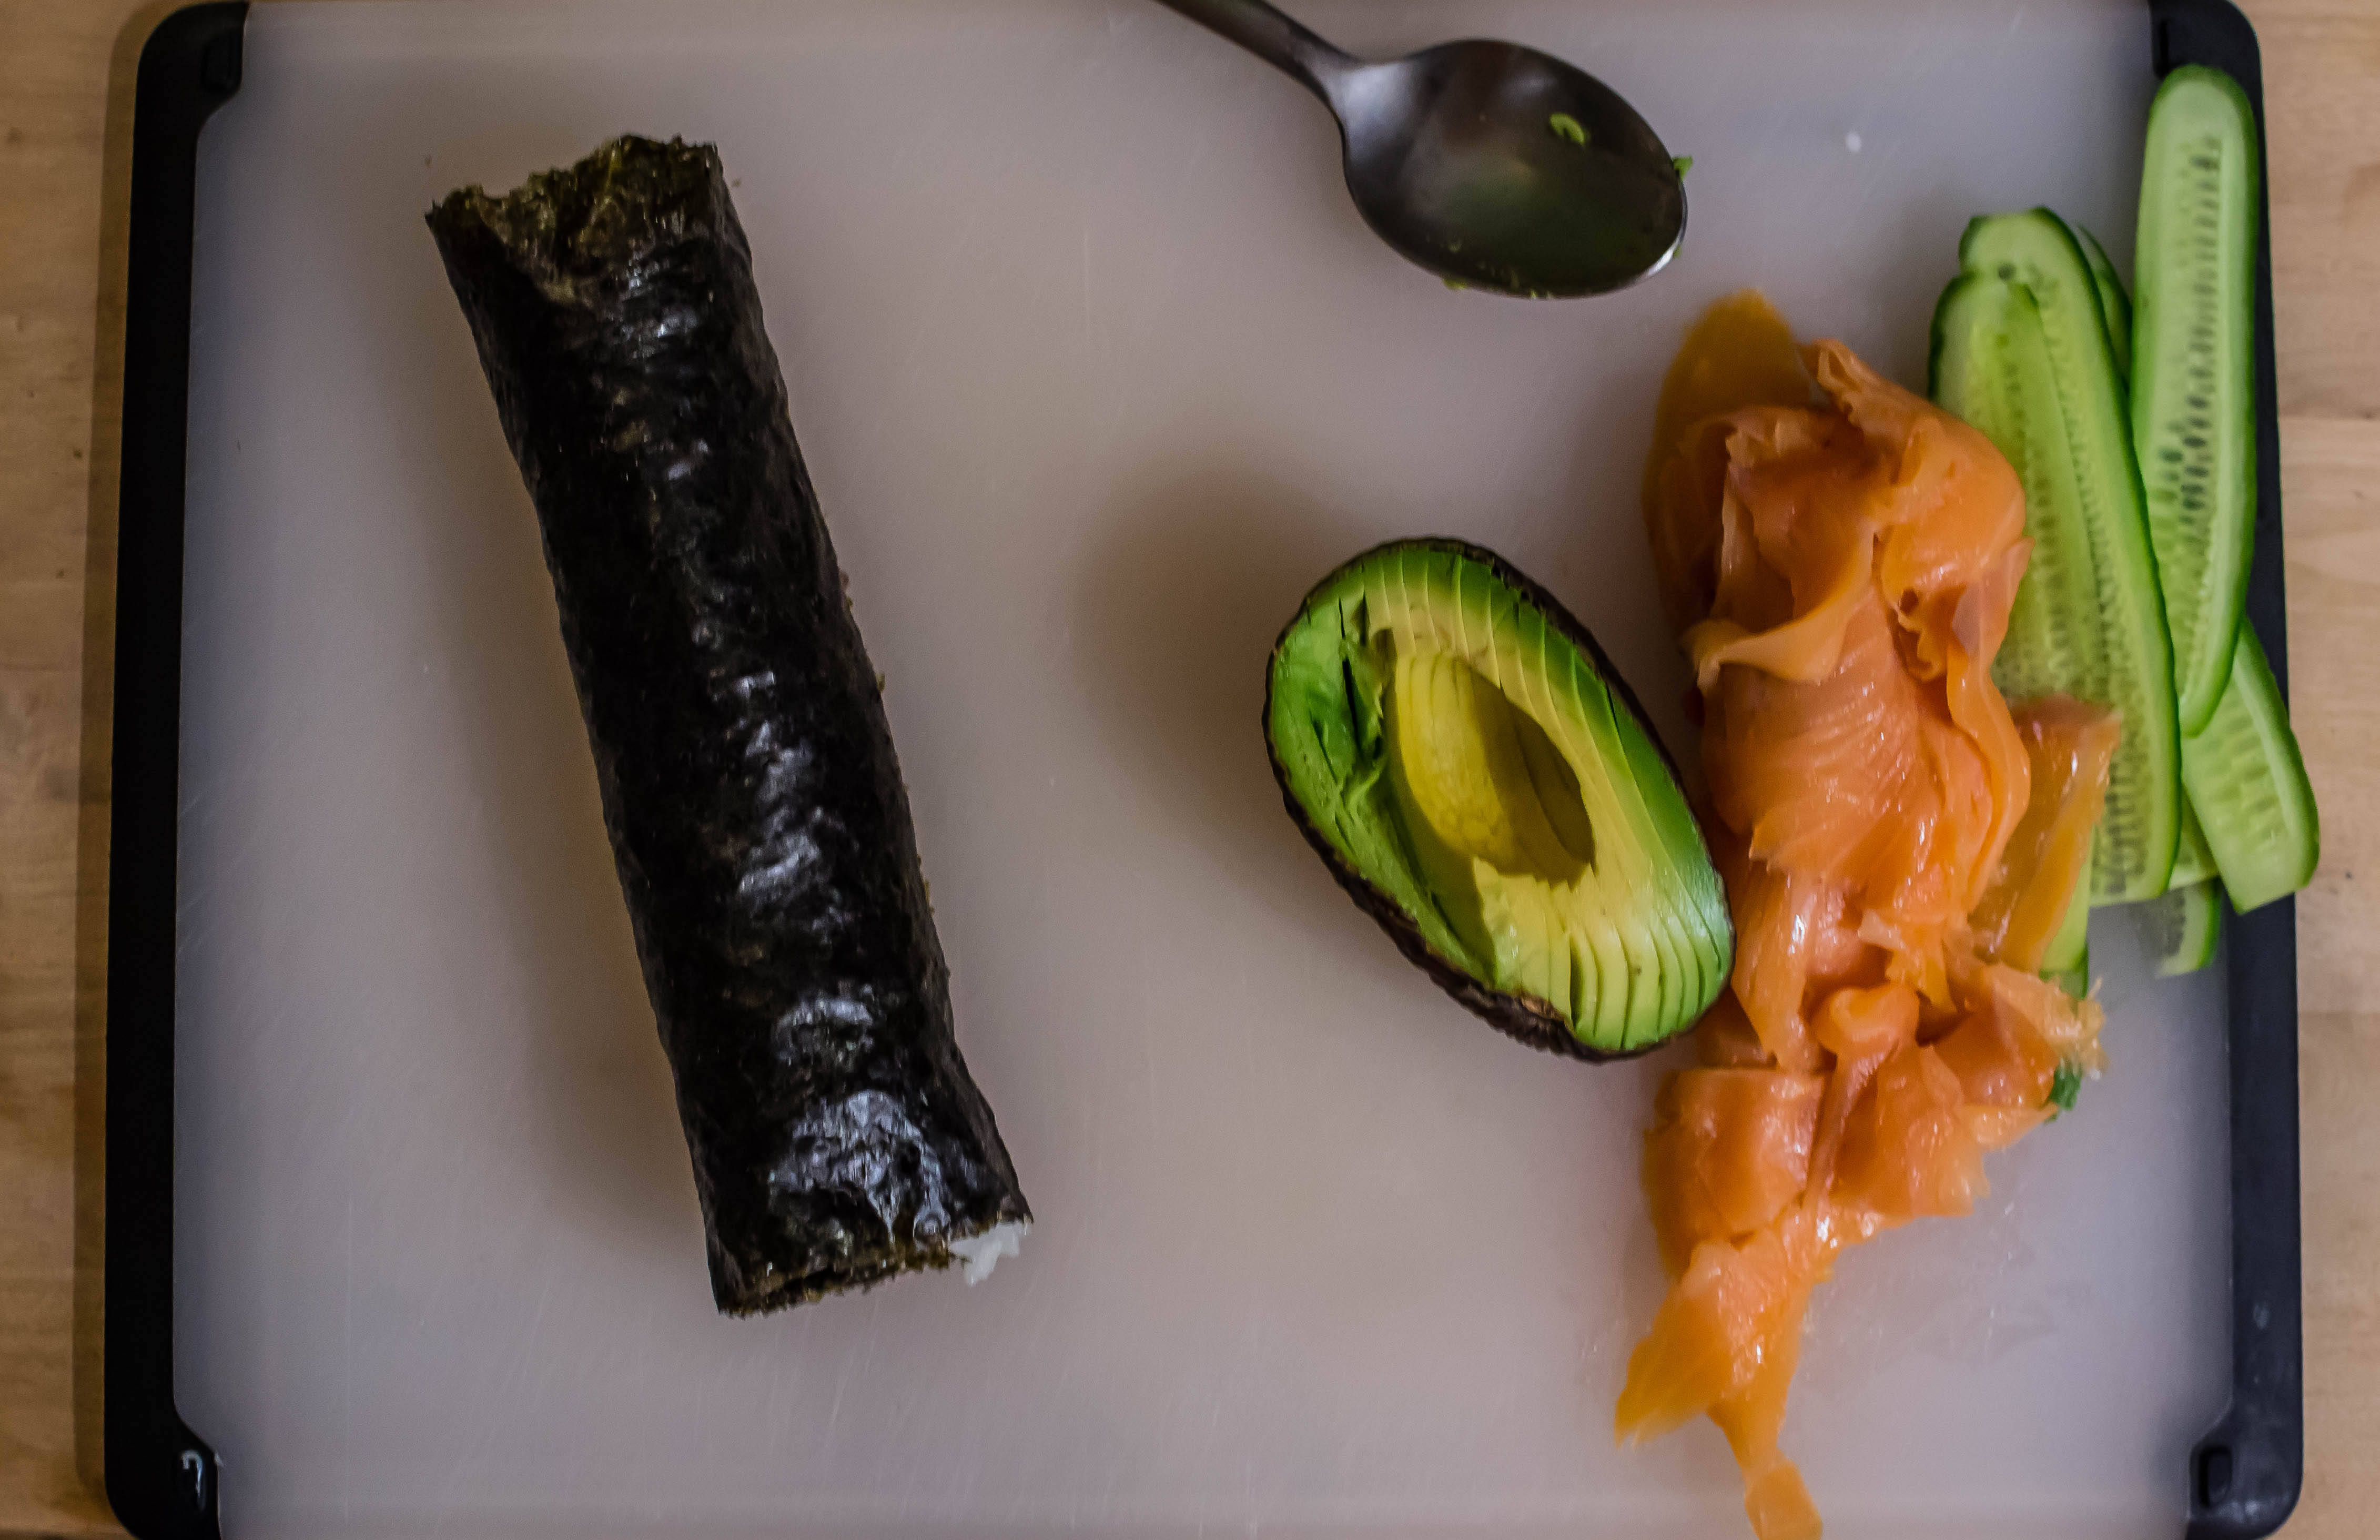
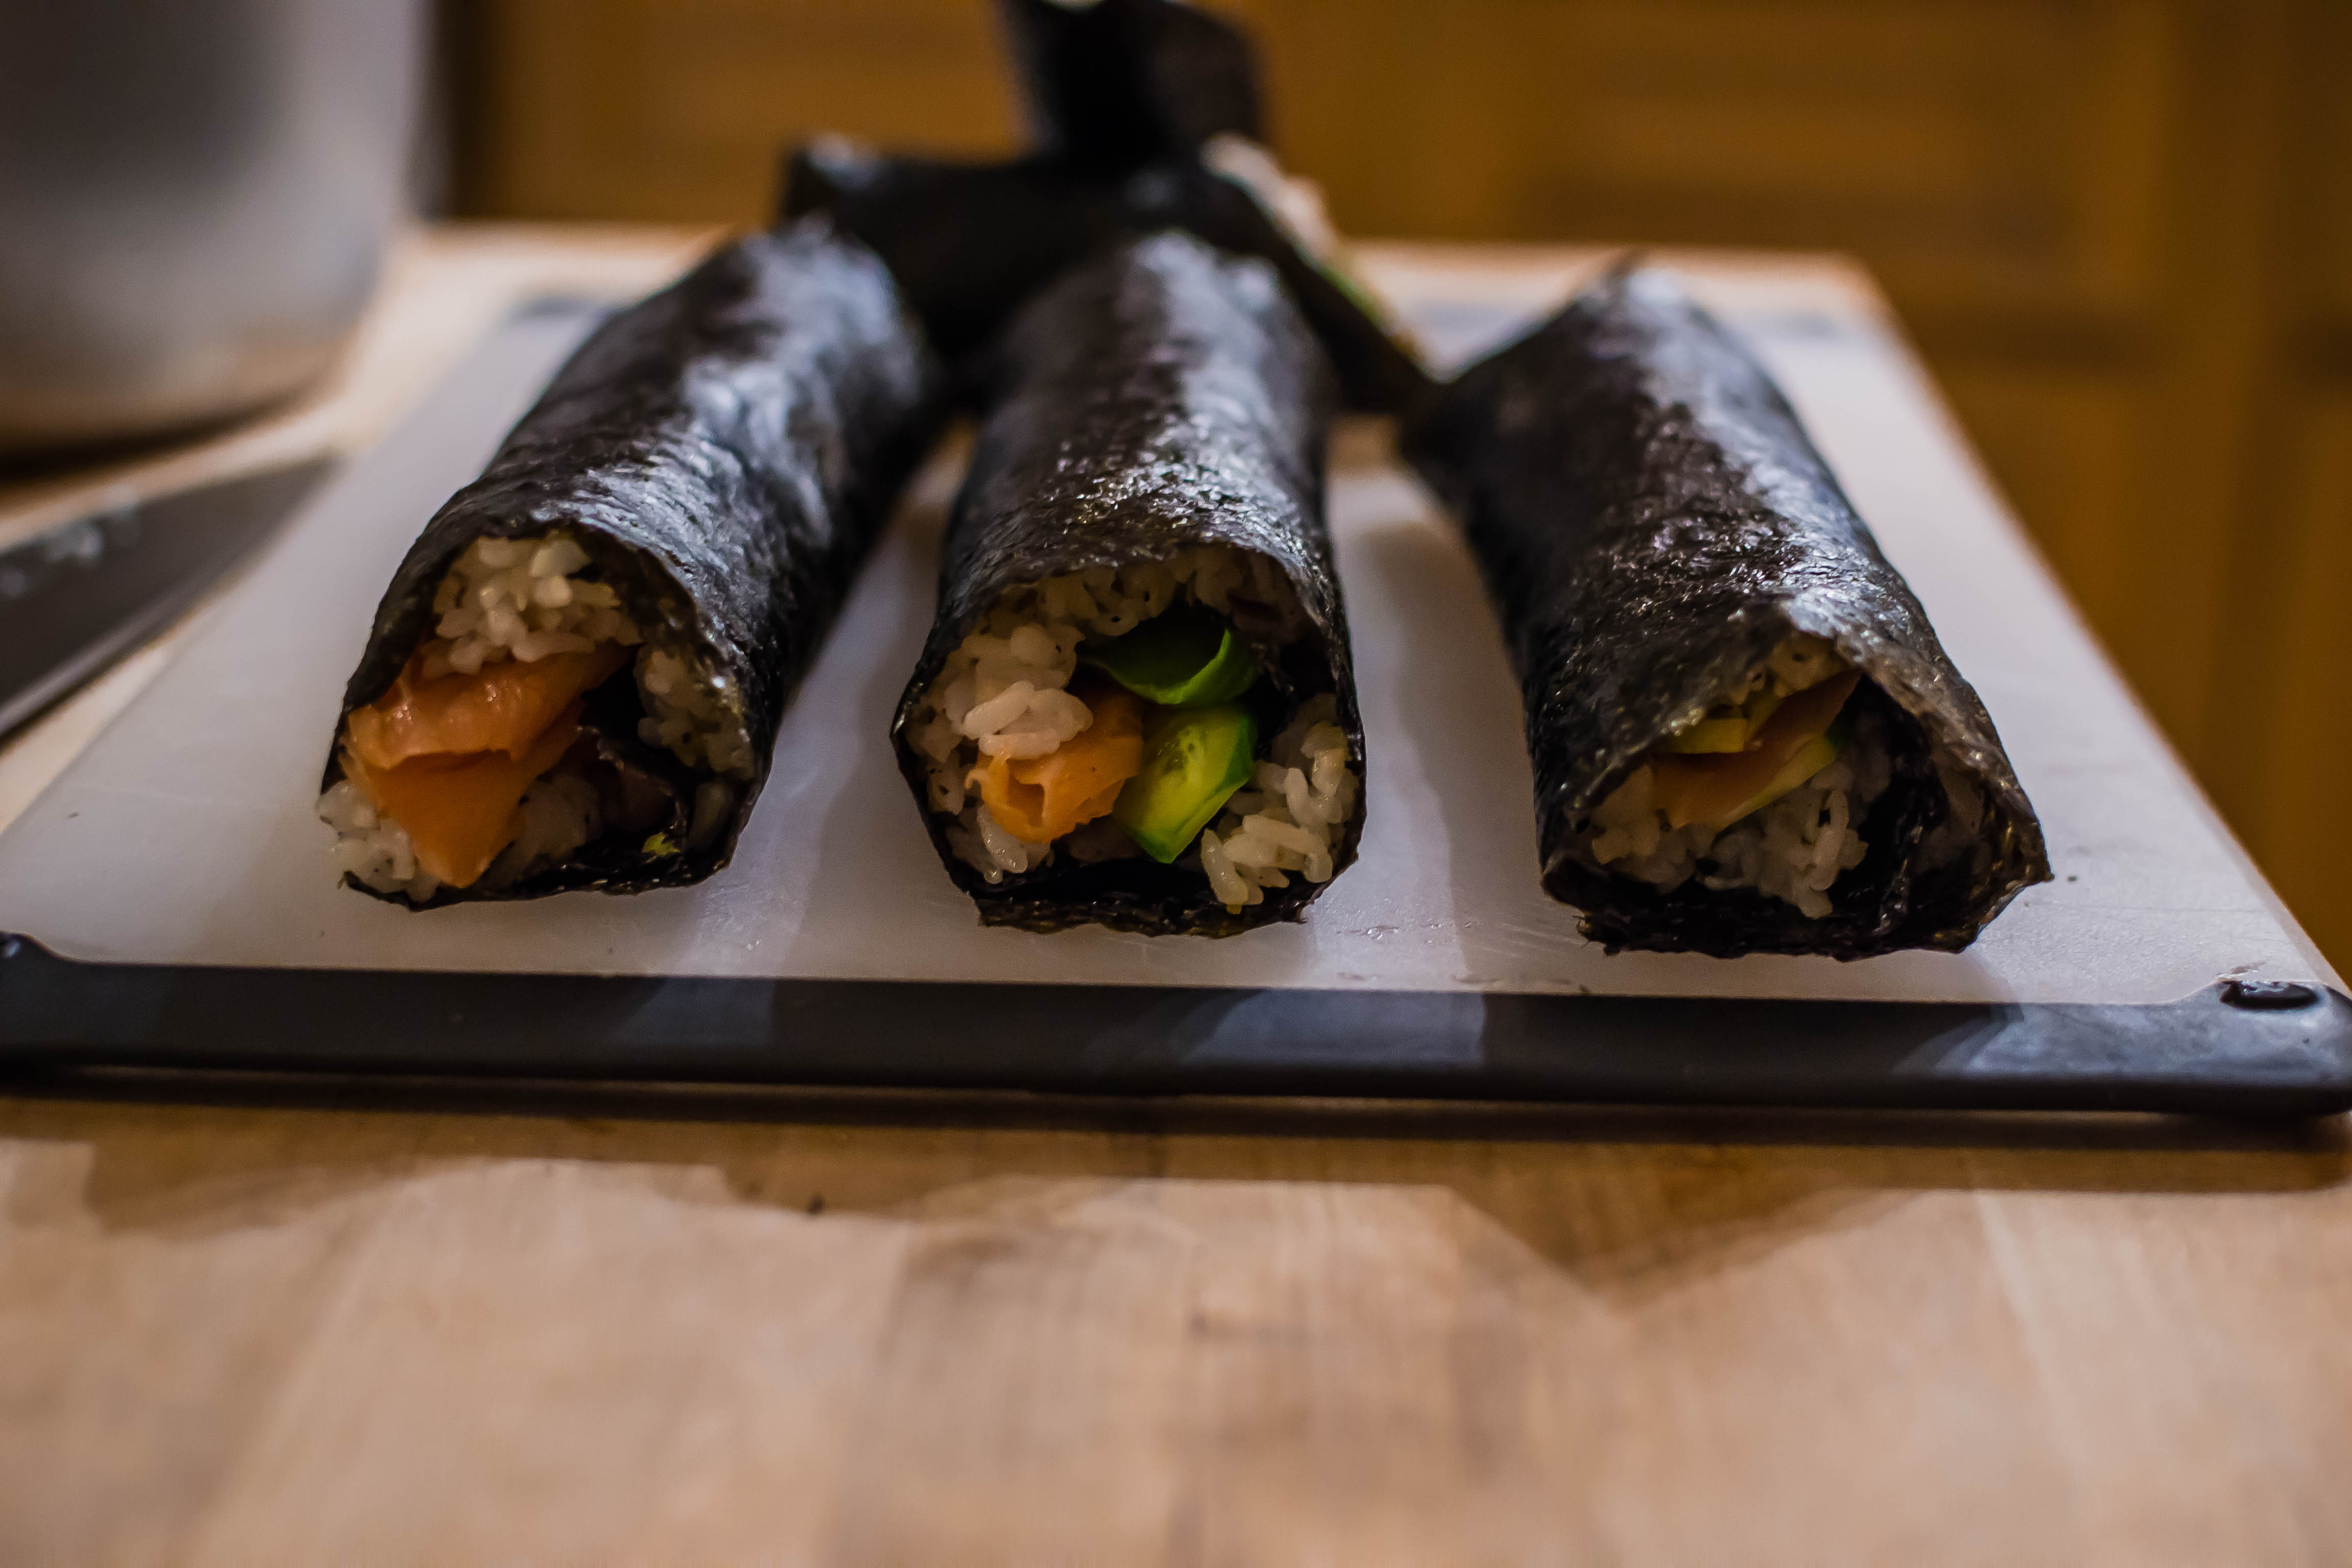
I noted above that the ingredients for this meal are mostly easy to find. If you have an Asian market nearby, they are very easy to locate. If you don’t, your grocery store probably has an “ethnic foods” aisle with most of these ingredients: the rice vinegar, nori sheets, and pickled ginger (the same stuff, often lightly pink, that comes on your plate next to the blob of wasabi at your local sushi joint) will more than likely be there. If you can’t find wasabi mayonnaise, that same aisle will probably have various options for prepared wasabi – I just get a tube of it and add it to regular mayonnaise until the degree of nostril-tingling spice suits my fancy.

I’m also using furikake here (same aisle), a rice seasoning that is basically a mixture of sesame seeds and finely diced nori, seasoned with salt and sugar. My current container also has bonito flakes, and there are spicy varieties too. Bonus: furikake is also a madly delicious seasoning mixture for popcorn.

If you are efficient about all this, you can prep your vegetables and get everything else ready in the time it takes the rice to cook. My rice cooker usually requires about 25 minutes, and I find I can usually have everything else prepped and laid out in that time span. (Yes, I use a rice cooker for this instead of cooking my rice on the stove. I like the insurance that it offers, since it switches to “keep warm” when it’s done instead of, you know, continuing to cook into a blackened mess because I forgot to set a timer and got busy with other tasks…).
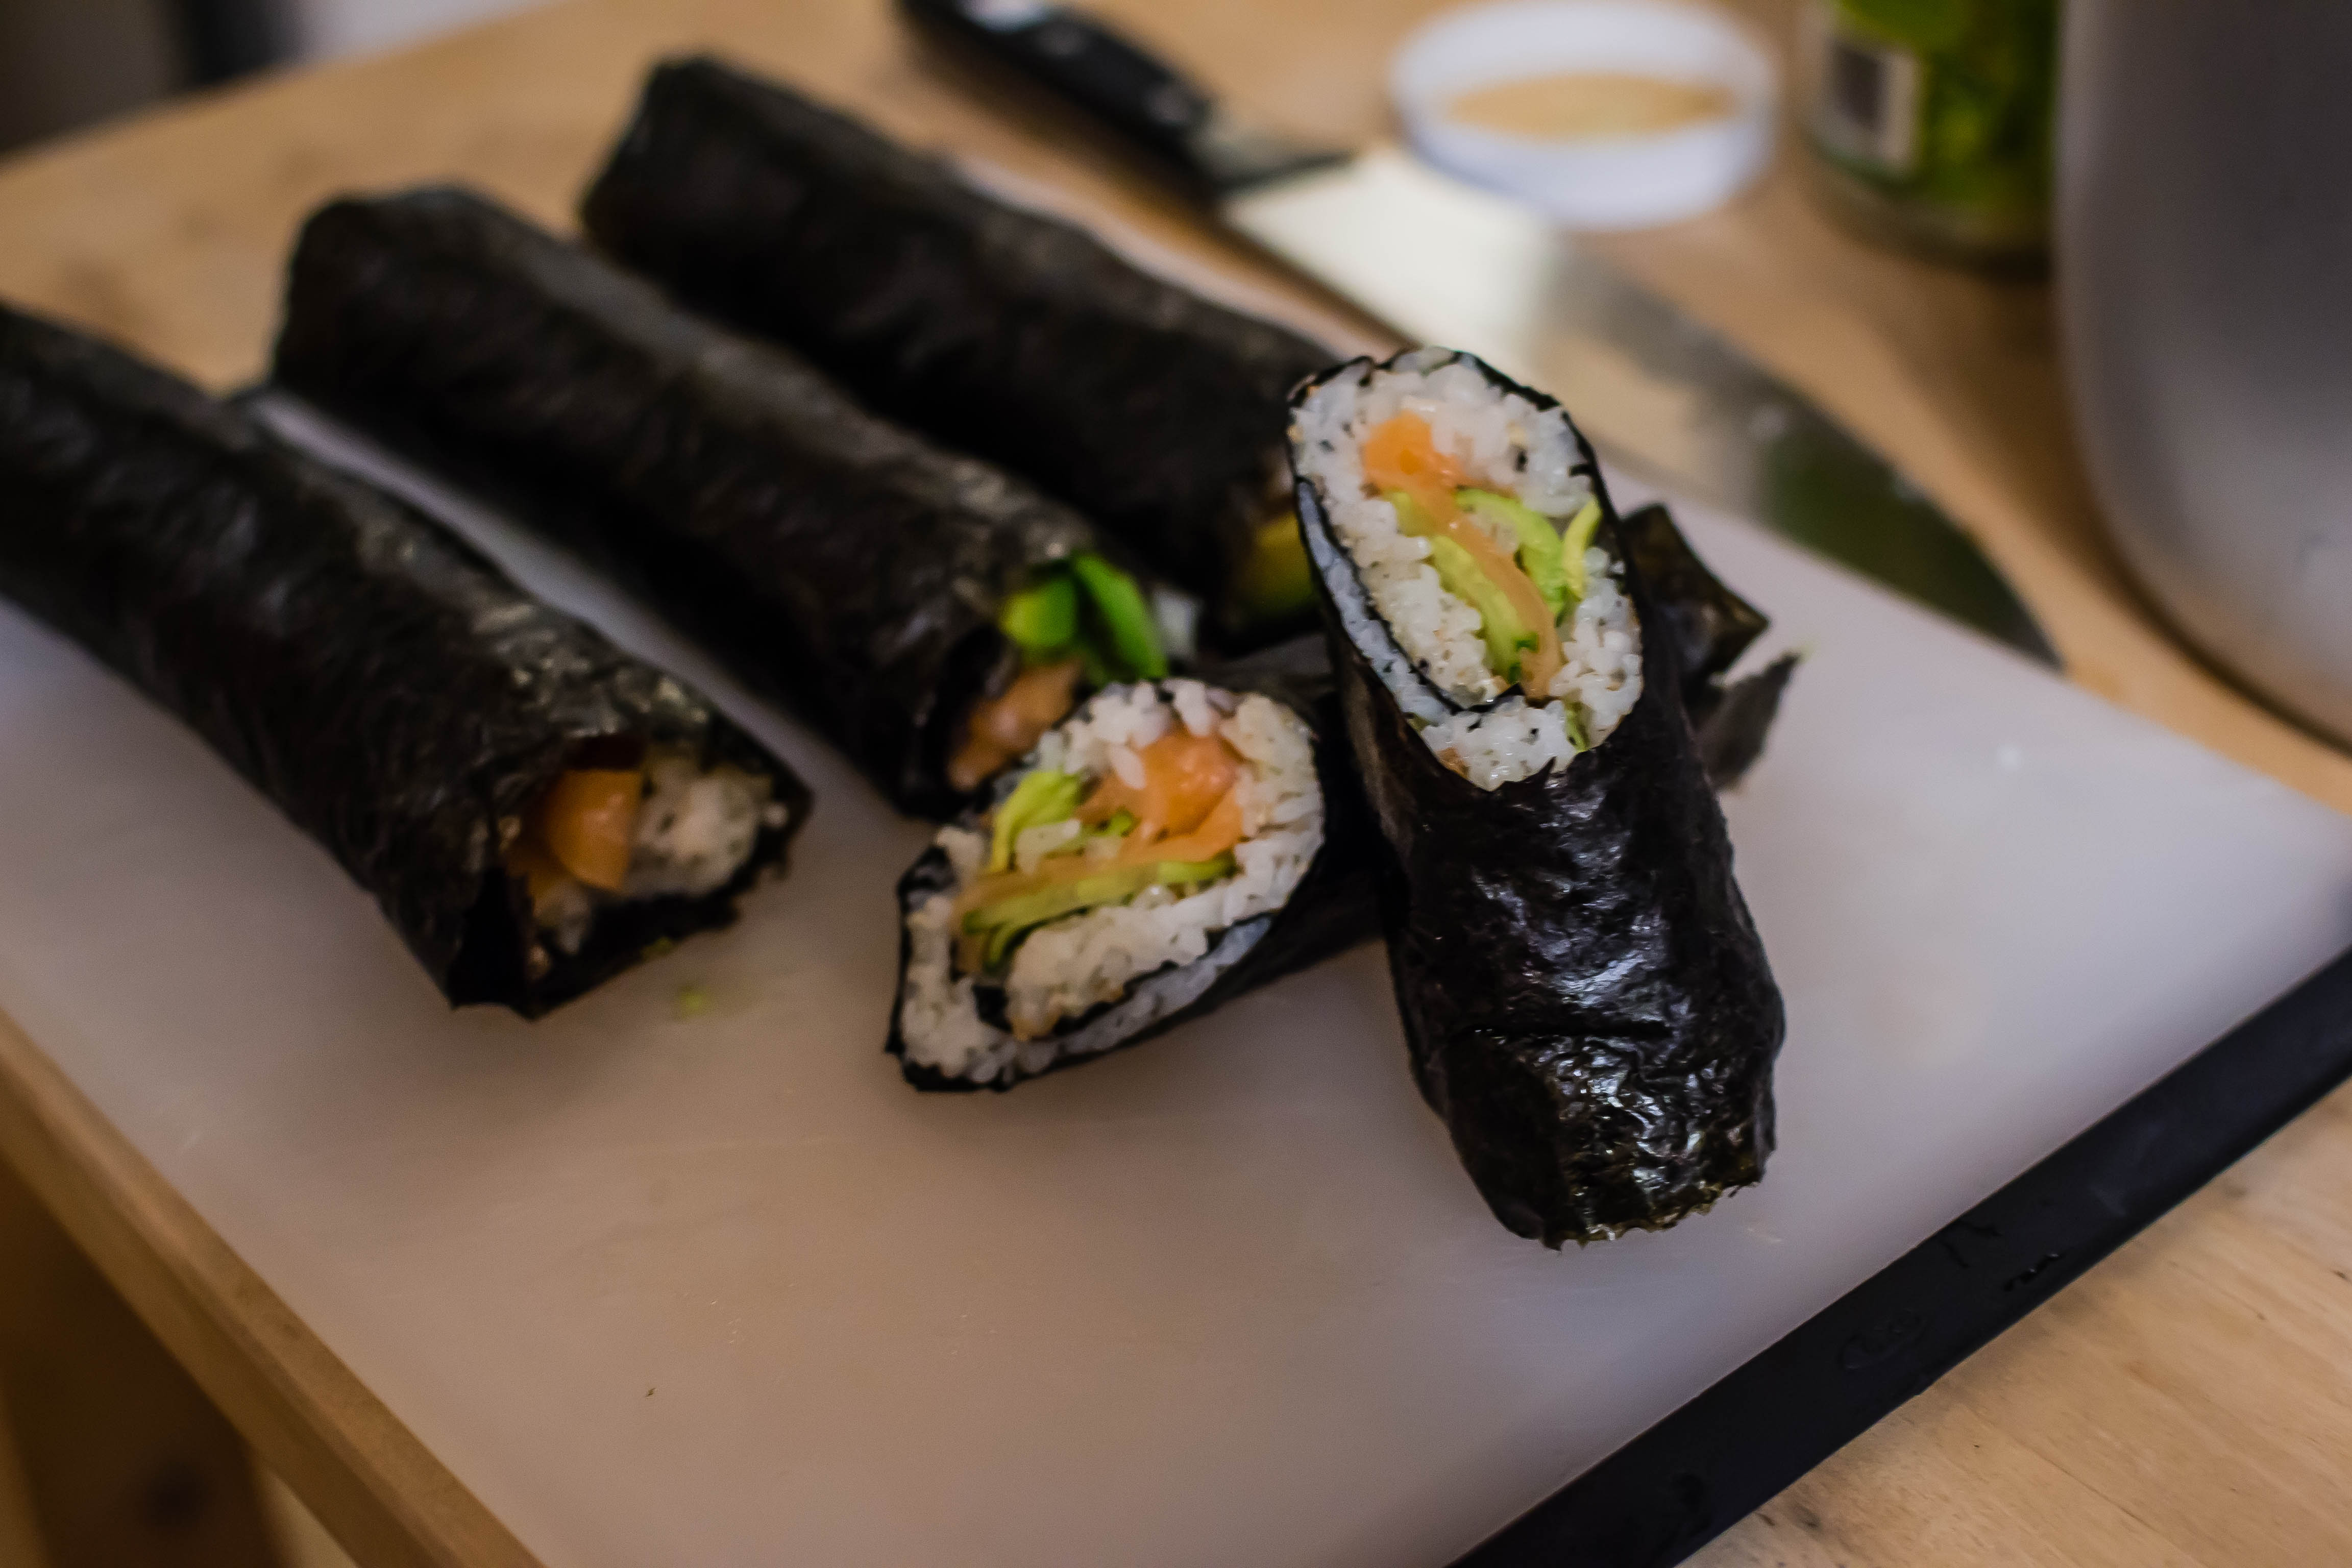
The play of flavors here, as you know if you enjoy sushi, is so comforting and so, just, good. The avocado and salmon are rich and fatty, so the watery crunch of cucumber and the pickled ginger punch provide a nice foil. The wasabi mayonnaise is just background spiciness, and the nori, warmed and moistened by the rice, takes on a chewiness I really like against the seasoned rice. You could serve this however you want, though we like two rolls a-piece, each one sliced in half at a steep angle. No need for utensils here – we just pick them up, pinch the uncut ends together a bit to avoid anything escaping, and enjoy the resistance of the chewy nori wrapper with each bite. You could likely also wrap them into cones for a more traditional hand roll shape, though I’ll admit I haven’t tried it that way yet, and thus I’m including instructions only for my method.

Smoked salmon sushi rolls
4 whole rolls (serves 2)
30-40 minutes, depending on how fast your rice cooks (some rice cookers take longer than others, and can differ from the speed at which rice cooks on the stove)
2 cups short grain white rice, cooked on the stove or in a rice cooker
¼ cup seasoned rice vinegar (if yours is unseasoned, stir in 1 teaspoon sugar and 1 teaspoon salt)
optional: 2-3 tablespoons furikake seasoning
about ½ a small cucumber, cut into long planks as thin as possible
4-6 ounces lightly smoked salmon, cut or torn into small pieces
½ ripe avocado, very thinly sliced
1-2 tablespoons pickled ginger (also called sushi ginger)
4 sheets nori
1-2 teaspoons wasabi mayonnaise


  • First, cook your rice. Use the time as it cooks to prep the other ingredients: thinly slice the cucumber using a knife or y-shaped vegetable peeler. Cut the avocado into very thin slices. Cut or tear the salmon into small pieces (this makes for easier eating). Fish out the appropriate amount of ginger from the container. Get everything laid out for easier construction.
  • When the rice is done, immediately mix in the vinegar and, if using, the furikake seasoning. It will be extremely tart at first, but the vinegar flavor will mellow as the rice cools. Set it aside until it is cool enough to handle.
  • To build the rolls, lay a piece of nori on your work surface, rough side (if there is one) facing up, short end toward you (most nori I’ve worked with is slightly rectangular, not exactly square). Spread a small amount of wasabi mayonnaise evenly over the nori, leaving a small border on all sides.
  • Scoop on about ⅓ cup of rice and use your fingers to spread/sprinkle it somewhat evenly over the nori sheet, leaving a half inch or so border at the far edge. About half an inch in from the edge closest to you, place two slices of cucumber, then about a quarter of the salmon pieces, then a few thin slices of avocado, then a few pieces of ginger. As you can see in my photos above, these should be arranged horizontally from your perspective, and all fairly tightly together.
  • Begin to roll the nori sheet by folding the short end closest to you up and over the row of fish and vegetables, then continue to roll until you get to the opposite side. The half-inch border you left rice-free will ensure a clean closure of sorts.
  • I like to slice these just once, on a diagonal, with a very sharp knife. Then we pinch the uncut ends together a bit and eat them out of hand, like a small burrito.

Plantains with lime, cotija, and honey

If you are working from home during this pandemic, you have probably thought more than once since March about the weirdness of time passing. On one hand, we’ve been doing this foreverrrrrrrrrrr. On the other hand… no, it’s been forever.

But within that space of Marchunetember, or whenever we are, time passes oddly. Sometimes I can’t believe it’s already Thursday (I know, it’s Monday. But you know what I mean). Sometimes the afternoon just will. not. end. We are feeling the first hints of fall here in Southern California: two beautiful overcast mornings in which the gloom was not smoke, thank-you-very-much, cool enough that I wanted pants on my dog walk. Yet later this week we are supposed to rocket back into temperatures in the 90s. There’s a bit of everything at once.

So this is a little dish that speaks to all of those things. It makes a nice lunch for one, but it would be an equally delightful afternoon snack for two. It could easily be doubled or tripled to feed your pod.  It’s sweet and salty and sour and a little spicy – in fact, it would go so well with this kicky, smoky, spicy mix that you might as well plan to serve them up for a happy hour together, whether that means margaritas, palomas, or puckeringly good lemonade.

I like a mostly-ripe plantain for this, yellow with streaks of brown on the peel, because I enjoy the mix of textures: crisp, fried exterior with cushiony softness inside. But you could also do them tostones-style, frying less-than-ripe plantain slices over medium-low heat first to soften, then smashing them flat and frying again over higher heat on both sides for even brownness.

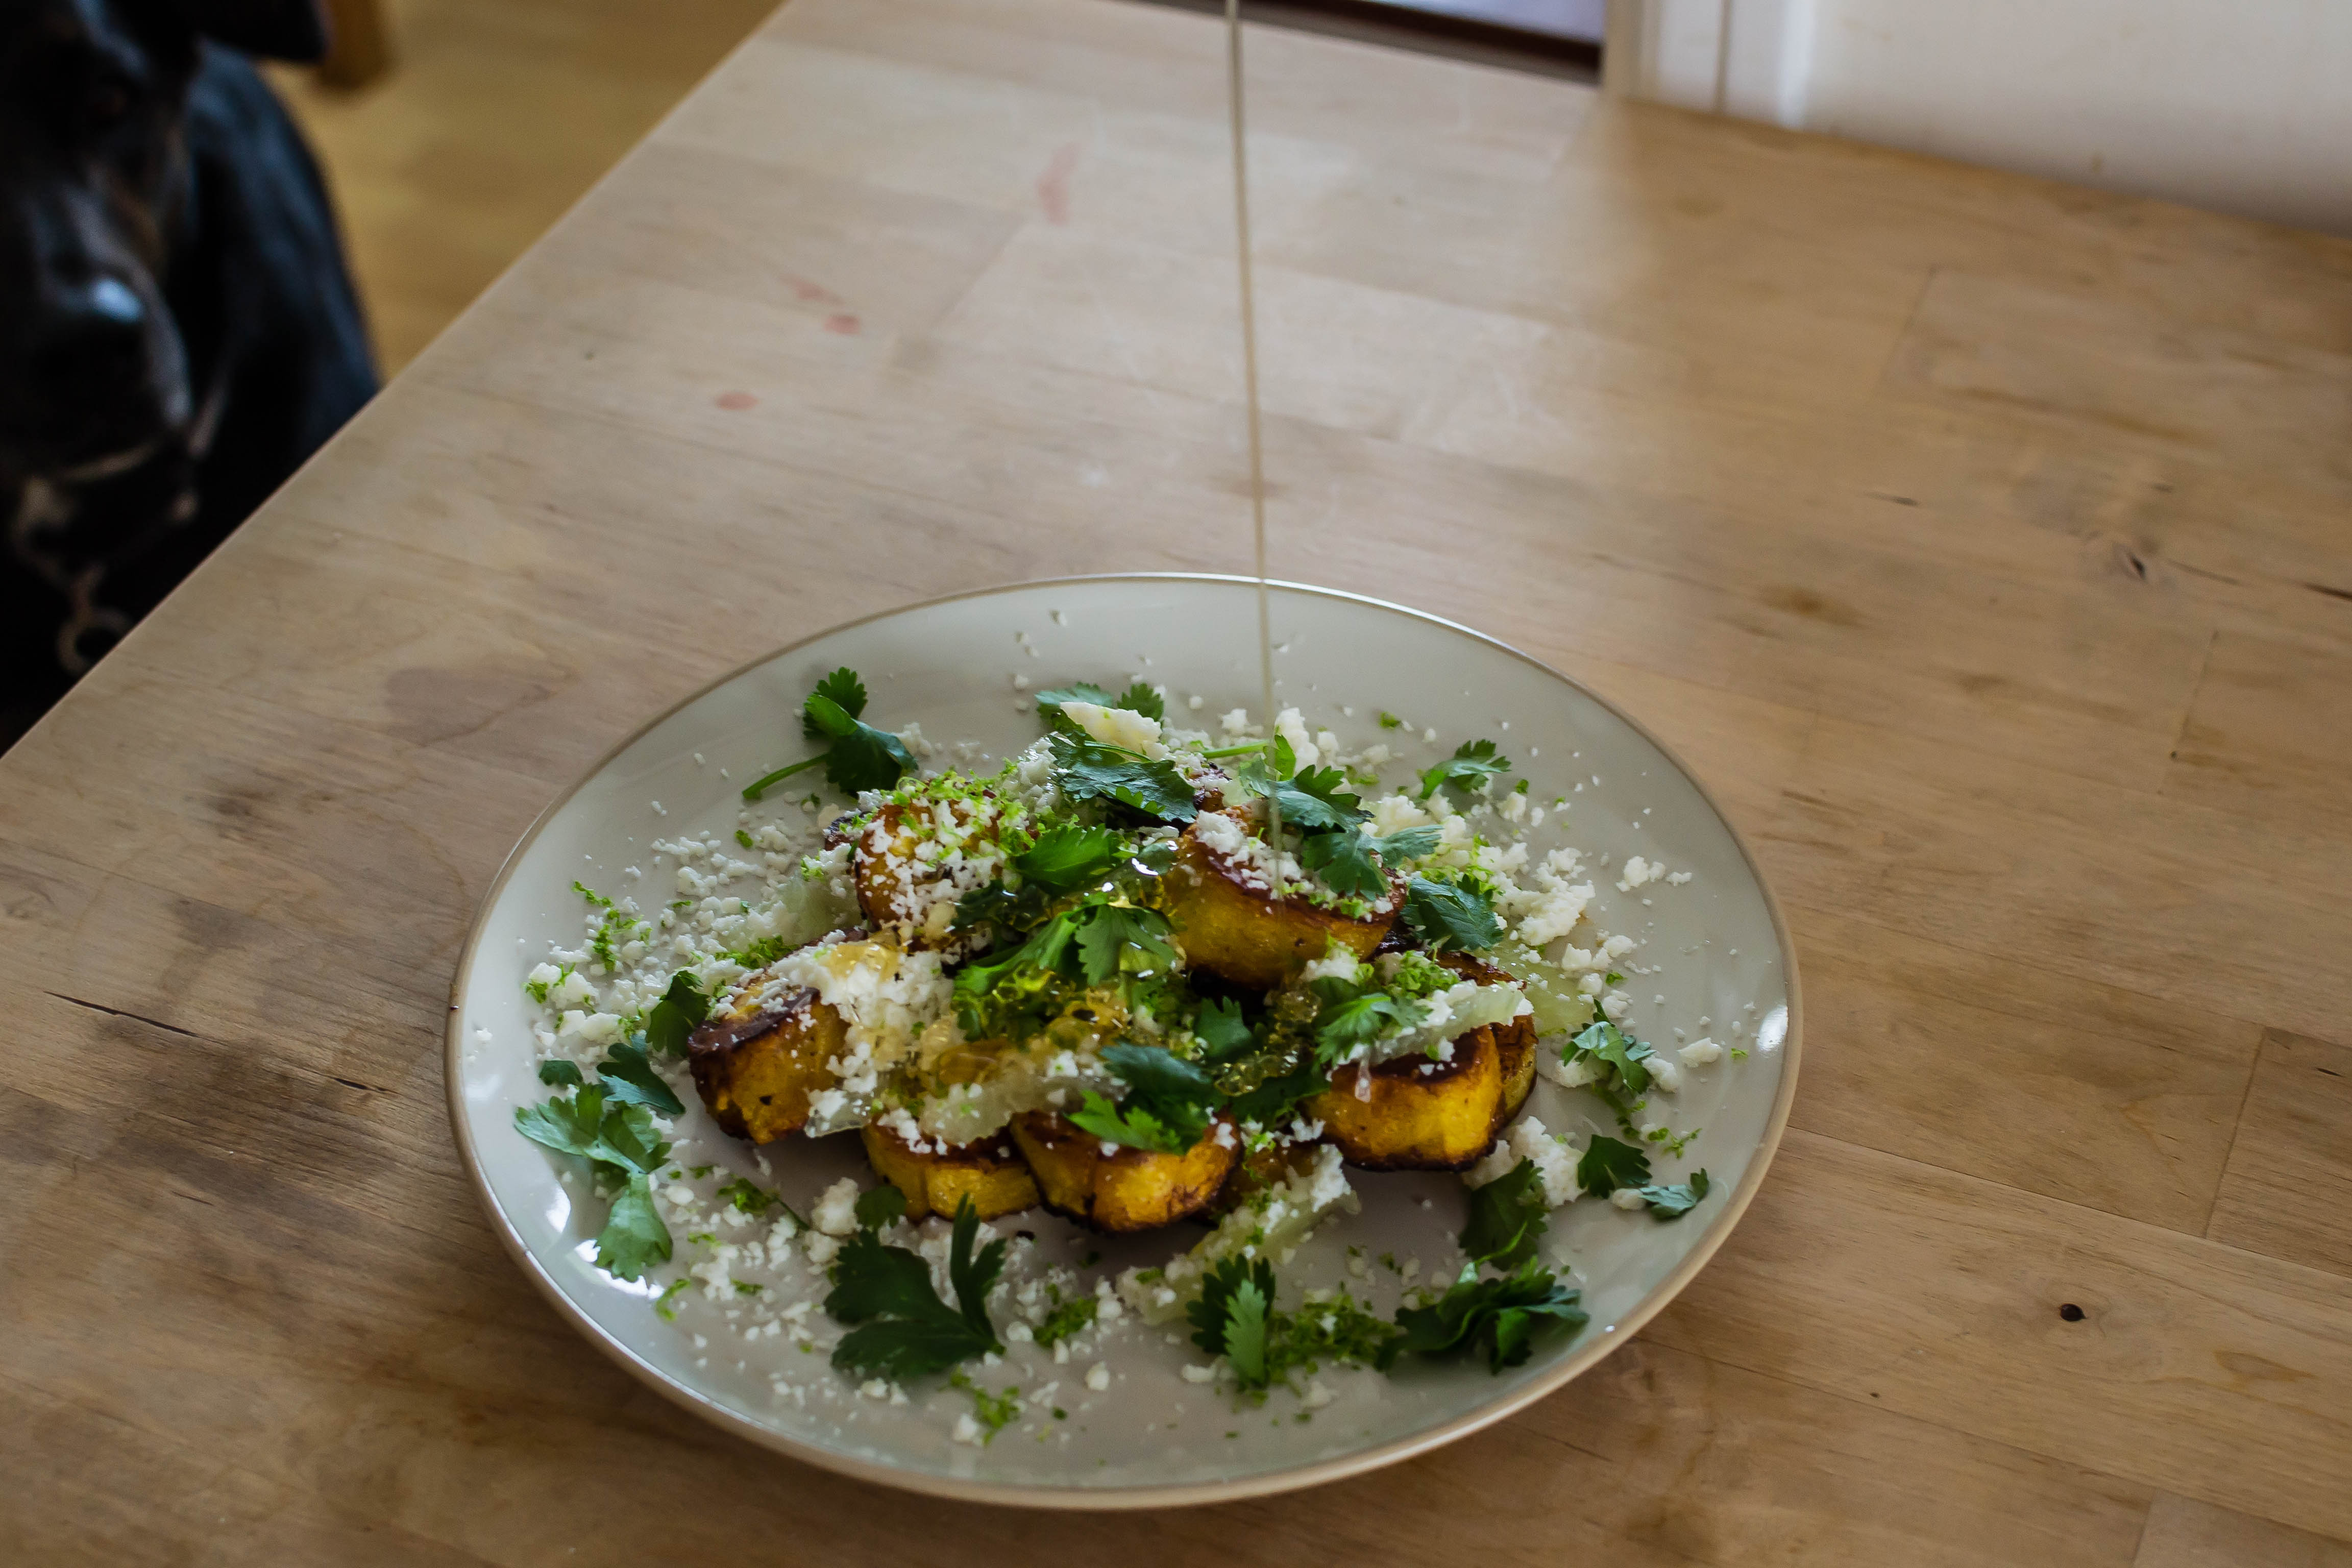
I ate mine with a fork, as you can see from my not-quite-in-focus close-up, but if you want to go nachos style and use the plantain pieces as scoops, I say go for it.

Plantains with lime, cotija, and honey

Serves 1 as a light lunch or 2 as a snack

15-20 minutes

1 large, yellow plantain, peel removed, cut into about ½ inch slices (I like mostly ripe, but see above for another option)

1 tablespoon vegetable oil

2 tablespoons butter

salt and red pepper to taste – I like the fruity heat of aleppo pepper

1 lime, which you’ll use for zest, supremes, and juice

1-2 tablespoons crumbled cotija cheese

1-2 teaspoons honey

about 1 tablespoon chopped cilantro


  • In a cast iron or other skillet, heat the vegetable oil and butter over medium-low heat until the butter is melted. Add the plantain slices, dust with salt and pepper, and continue to cook over medium-low for 4-6 minutes, or until they are nicely golden brown on the bottom. Don’t rush it. Don’t turn up the heat. They need to cook inside but not burn on the outside.
  • As plantains brown, flip, dust the other side with salt and pepper, and cook on the second side until it is also nicely browned, around 4-5 minutes this time.
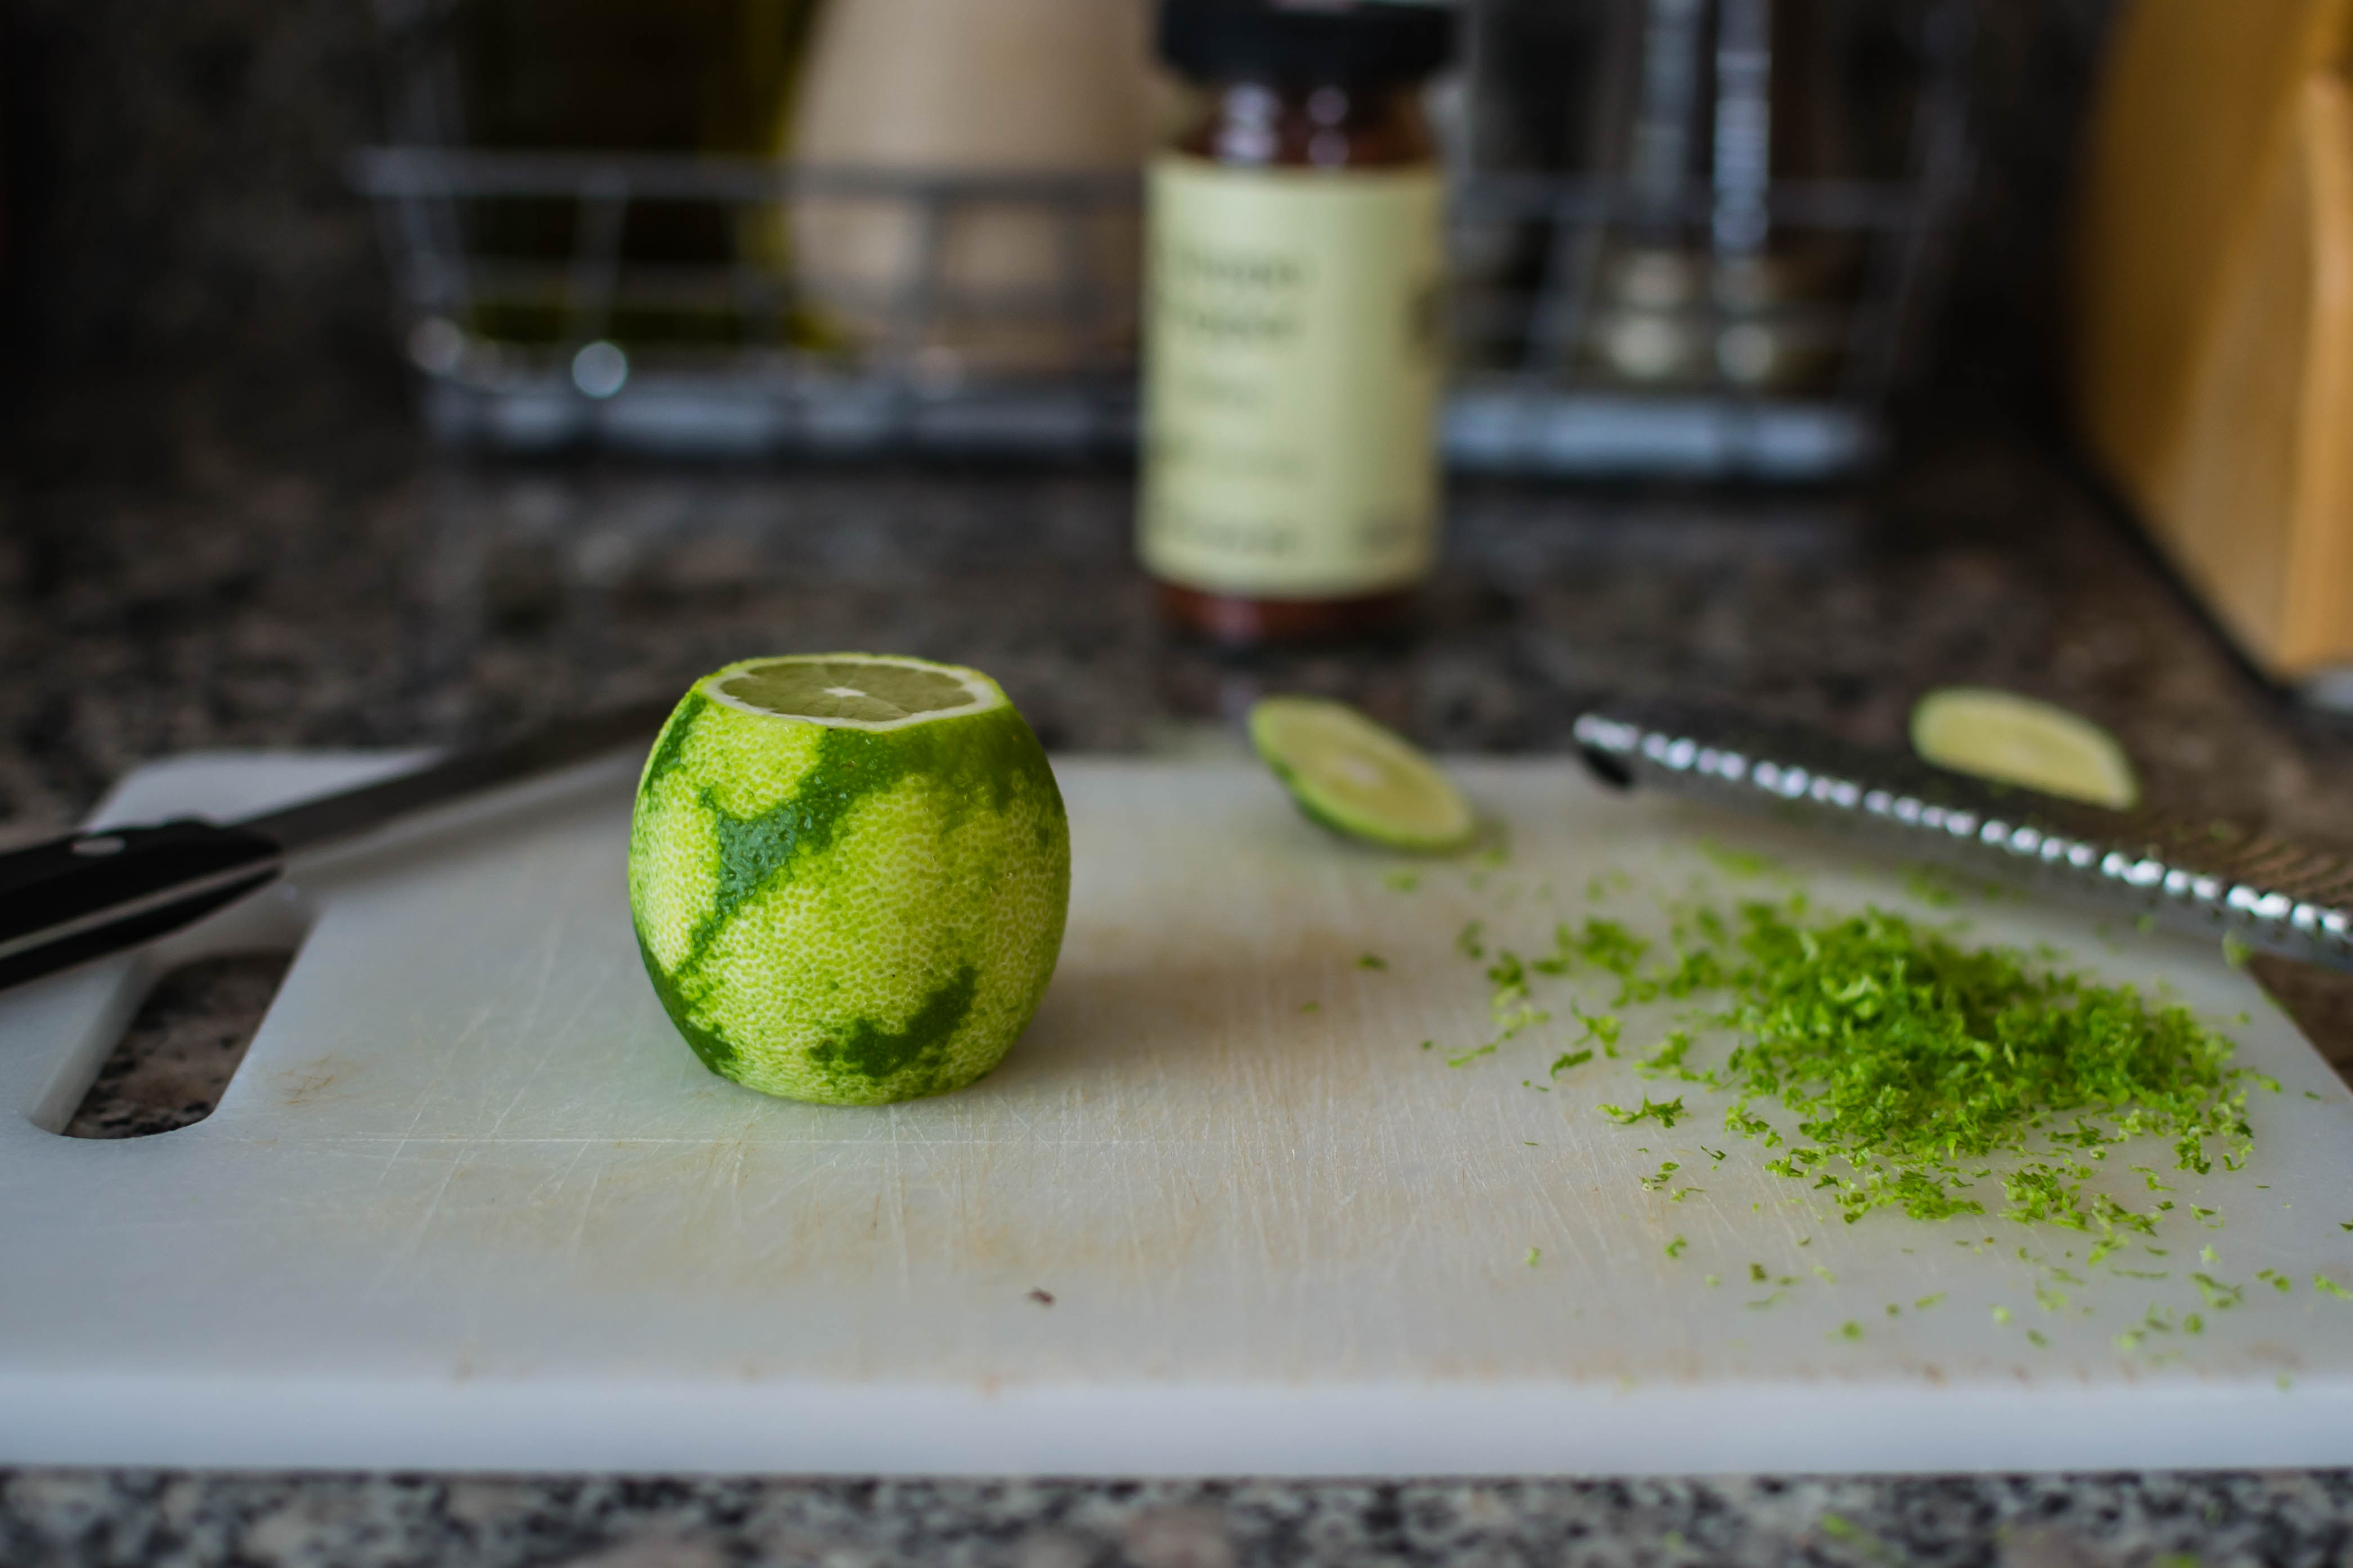
  • While the plantains are cooking, zest the lime and reserve that zest for serving. Then use a sharp knife to cut a thin slice off the top and bottom. Remove the remaining skin and pith by cutting it off in strips from top to bottom, following the curve of the fruit. When you have removed the skin all the way around, cut supremes: slice between the fruit and the membrane that separates each segment. This is a useful step-by-step as well.
  • To serve, pile the fried plantains on a plate or in a shallow bowl. Add the lime supremes and cotija crumbles. Squeeze on some juice from the remaining carcass of the lime. Drizzle on the honey, then scatter the cilantro and the reserved lime zest over the top.

Pandemic Potato Salad

This is a recipe born out of need and change and a series of odd connections. I bought a bag of red potatoes intending to make a gratin, but a sudden upswing in temperature made the idea of roasted anything feel oppressive. Meanwhile, my beautiful heads of romaine lettuce in my garden started to bolt, and my parsley was already flowering. I thought of salad, of course, and then of potato salad, and then of likely ways I could combine them. A potato salad with green beans and parmesan I had in Eugene crept back into my mind, and parmesan reminded me of pesto. Pesto is such a convenient way of using excess greens, even when they are getting bitter, so I wondered if lettuce pesto would be tasty. The garlic and parmesan of pesto along with the lettuce reminded me of Caesar salad, and suddenly I was adding anchovies and mayonnaise and hard-boiled eggs for good measure, and this franken-potato-salad was born.*

This is not one of those “not your average gloopy potato salad” iterations. I must admit, as an ardent mayonnaise lover, I resent those complaints about gloopiness. This one is gloopy. It is unapologetically gloopy. It is a potato salad for mayonnaise aficionados. But I have an important secret when it comes to those “gloopy” mayonnaise based summer salads, whether their bases are potato or pasta: you have to add the dressing while the starch base is still warm. If the potato chunks or noodles are cold, the dressing just weakly sits beneath and around them. If it’s stirred in while they are warm – or even hot – the dressing soaks in. The texture is better, the flavor is better, and you can get the hot part of the process out of the way hours before you intend to serve anything. At least 2 hours in the fridge after everything is combined ensures nicely melded flavors – the anchovy mellows, the garlic relaxes, the lettuce emerges not as a strong presence but as a juicy green background taste we found quite pleasant.

Because I’m me, I couldn’t quite leave well enough alone: since the lettuce and anchovy and parmesan allude to Caesar salad, and since lately we’ve been all about crunch and texture, I wanted to give a nod to the crouton component. A shower of panko crumbs well toasted in olive oil right over the top added crunch, though if you wanted to be a little less excessive, you could probably used well-toasted almonds instead. I’d suggest a rough chop for rubbly texture.

* As I wrote this, I was weirdly reminded of my most recent and ongoing scholarly project, which suffers from organizational stress. A few weeks ago a fellow academic tweeted “How has anybody ever structured a piece of writing? It’s an impossible con, all the things to be said must be said at exactly the same time or none of them will make sense” (Jones). I felt that as I tried to explain the intersecting idea strands for this salad: in my brain, the connections happened nearly instantaneously. Here, which do you mention first? The potato salad with parmesan that reminded me of pesto? The lettuce that evoked Caesar? Words prohibit the all-at-once-ness that feels so natural when we think…

Pandemic Potato Salad
Serves 6-8 as a side, not that you’re having anyone over right now…
2 ½-3 hours, including chilling time
6-8 ounces green beans or haricot verts
10-12 medium red potatoes
4-6 cloves garlic
5-9 anchovy filets (wide range, but adjust according to how much you love anchovies)
zest and juice from 1 lemon
1 head romaine lettuce, core removed, leaves roughly torn
1 cup packed parsley leaves and stems
1 cup mayonnaise
1 cup grated parmesan cheese
3 hard-boiled eggs, peeled and roughly chopped
salt and pepper to taste
Optional: 2 tablespoons olive oil and ½ cup panko breadcrumbs or ½ cup roughly chopped almonds


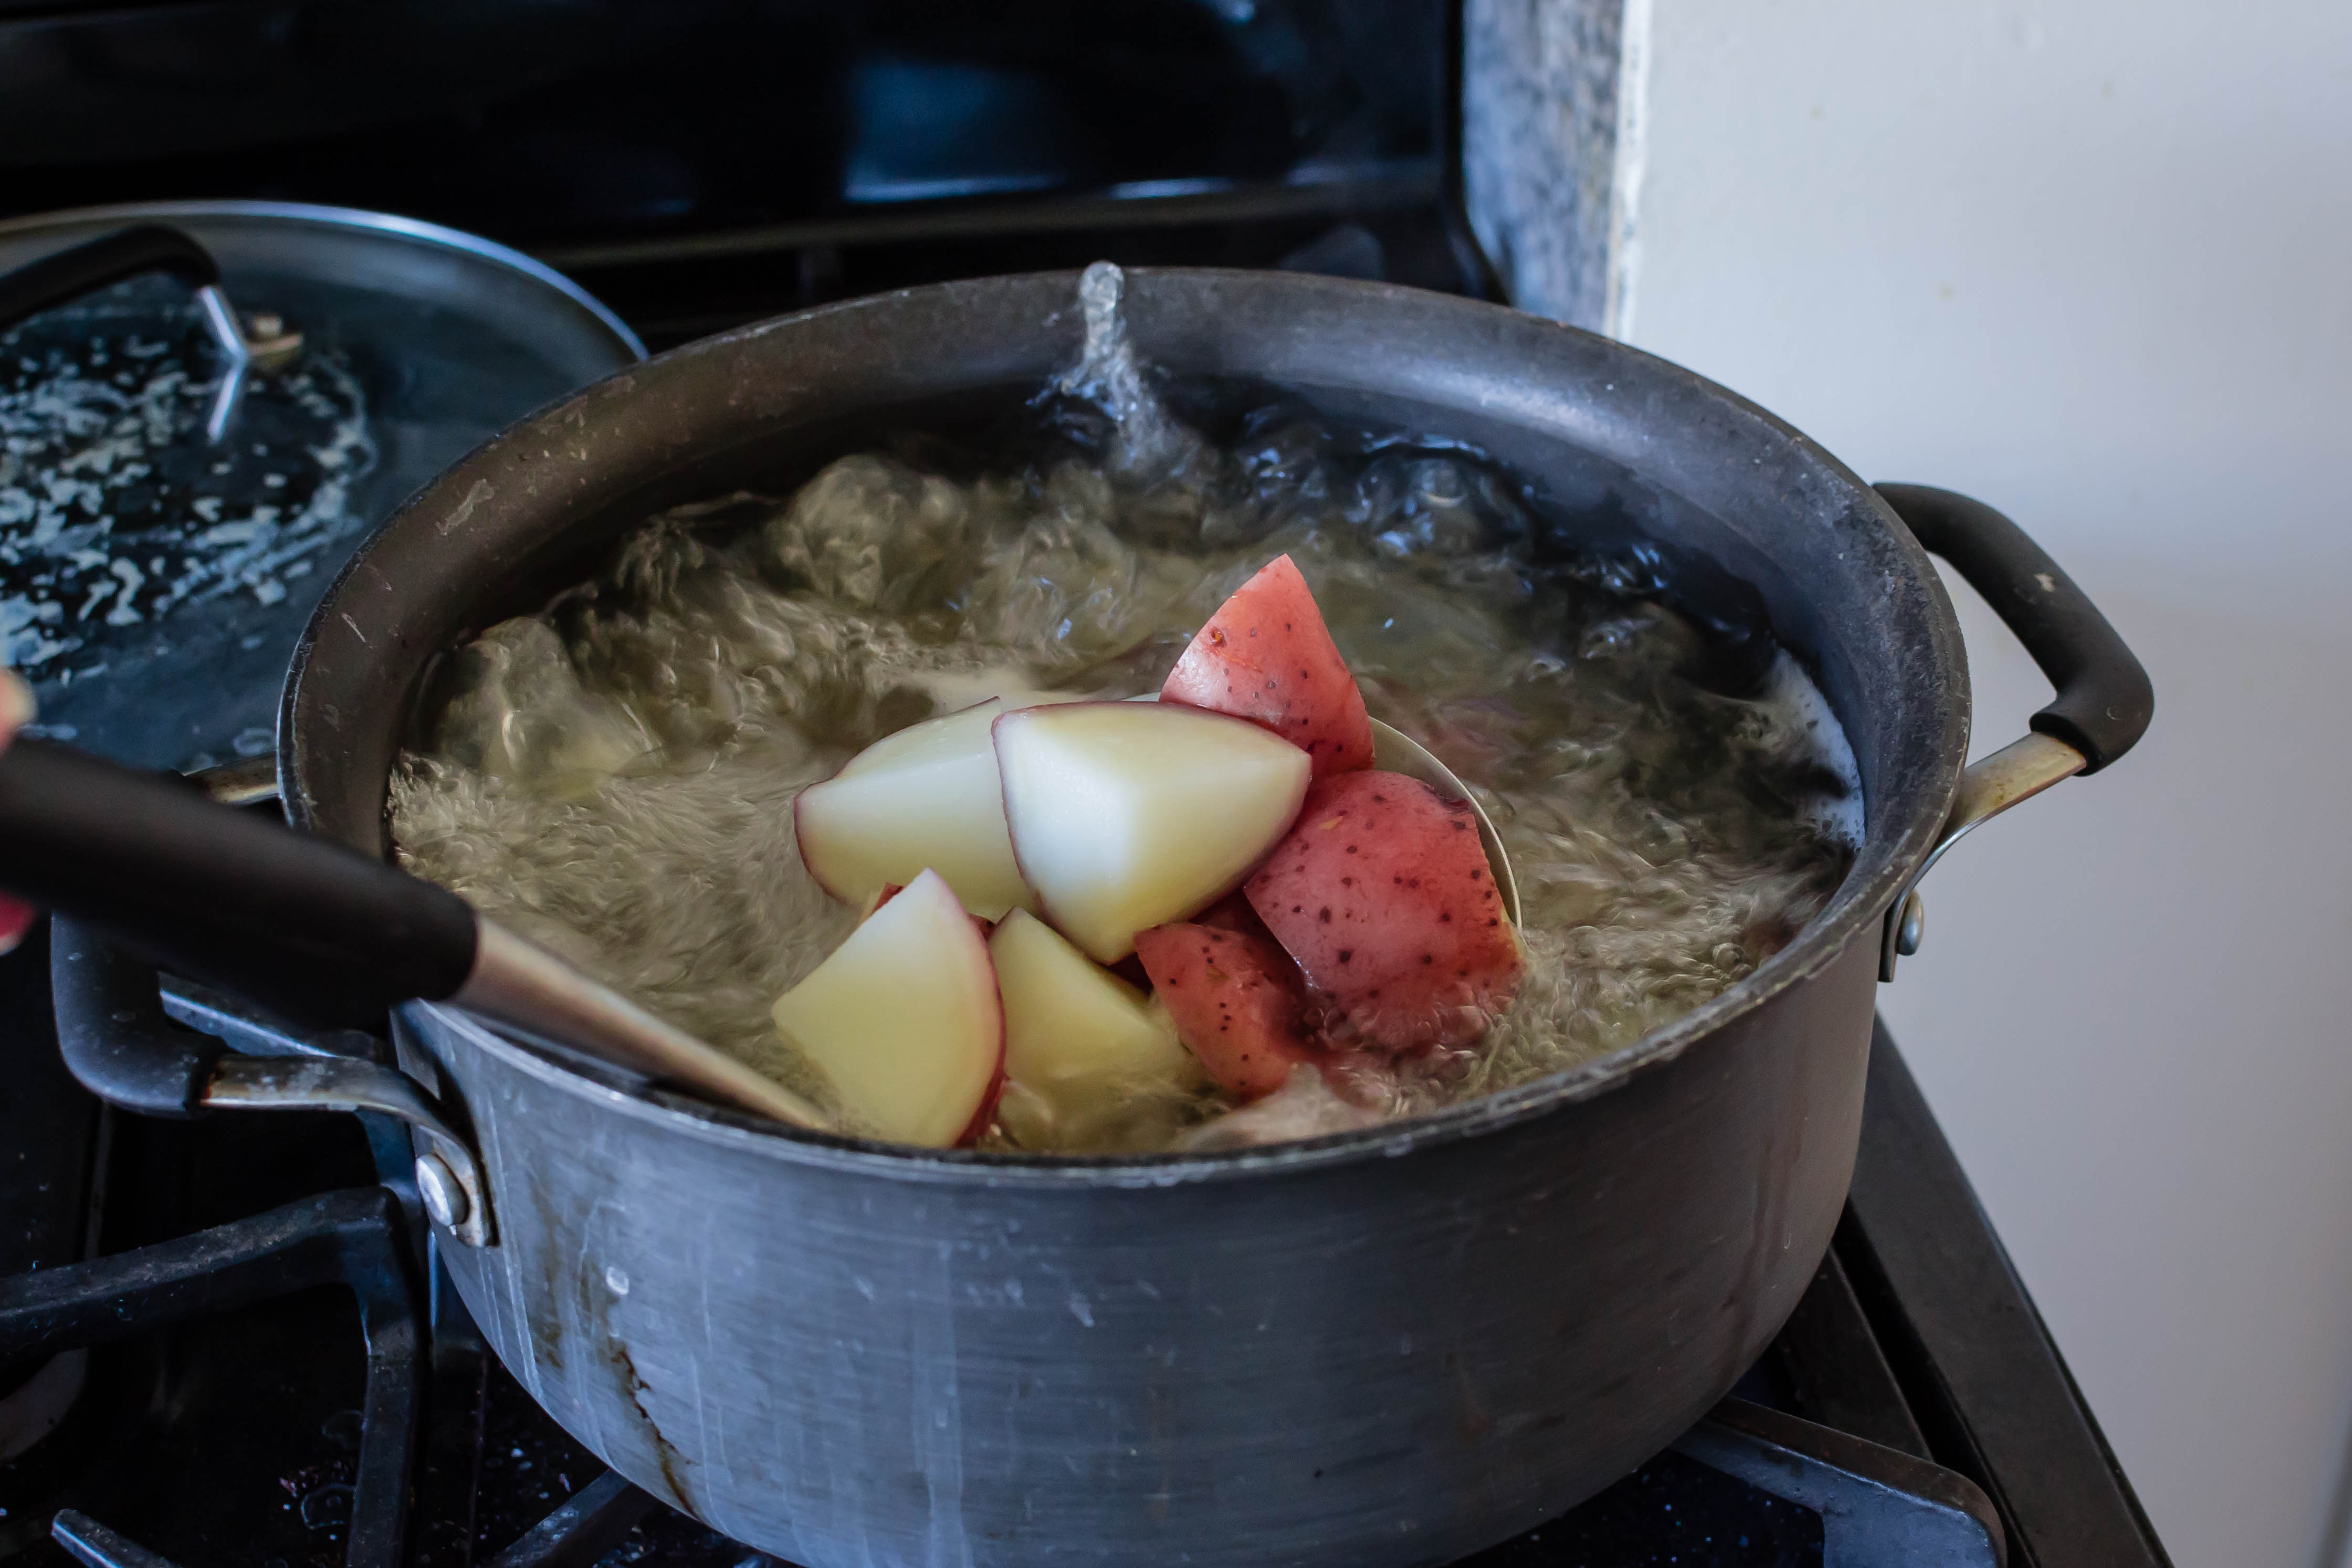
  • Blanch the green beans in a large pot of boiling salted water. This will take 2-3 minutes for large size beans, or about 90 seconds for skinny little haricot verts. Remove from the pot and douse in cold water to stop them from cooking further. Reserve the salted cooking water. Quarter the potatoes (or if they are gigantic, cut down into large bite-sized pieces) and place them in the same pot. Fill the pot with more water if needed to cover the potatoes, then bring back to a boil over high heat. Turn down to medium and simmer until the potatoes are just tender when pierced with a fork. Drain and set aside while you make the dressing.
  • If you need to grate the cheese, load the belly of your food processor with small chunks of parmesan, then run on high speed until the cheese is adequately broken down. Empty the processor, measure out the required cup of cheese, and set aside to add later.
  • Process the garlic cloves, anchovy filets, and lemon zest and juice together first into a clumpy paste. Use a rubber spatula to scrape down the sides of the processor, then add about half of the torn lettuce leaves and the parsley and pulse a few times to break them down. When there is enough room in the processor, add the remaining lettuce and parsley and process on high until the mixture is finely chopped.
  • Scrape down the sides of the processor again and add the mayonnaise and reserved parmesan cheese. Process on high speed until well combined. Taste for seasoning; add salt and pepper as needed. It’s important to wait until now to add the salt, since the anchovy, mayonnaise, and cheese are all salty already.
  • Add the still-warm potatoes and the drained green beans to a large bowl. Stir in about ¾ of the dressing until the vegetables are evenly coated. Gently fold in the chopped hard-boiled eggs. Add more dressing, if needed.
  • At first this will probably taste too salty. Refrigerate for at least 2 hours to allow the flavors to mellow and combine. Bring back to room temperature before serving.
  • This is ready to serve as is. But if you like a little excess (or if crunch is important to you), heat the optional 2 TB olive oil in a small skillet, then stir in either ½ cup panko breadcrumbs or ½ cup roughly chopped raw almonds and toast until deeply golden. Sprinkle over the top of the potato salad just before serving.