 chive blossoms
Photo Friday
Reply

chive blossoms
 Not long ago, I finished Cooked, Michael Pollan’s latest, in which he seeks to elucidate the magic of our kitchens. He looks at the transformative power of each of the four elements when applied to ingredients, and works to understand the connections we draw from and through what we eat as it ceases to be raw materials and becomes food. I couldn’t put it down. I tore through it like a fluffy bedtime novel, as my friend S. probably knew I would when she sent me a copy.
 In a number of ways, Pollan’s investigation reminded me of my own scholarly work a few years ago when I was a graduate student. Though I was focused on medieval literature, I was intensely interested in what we could learn about human – and not-so-human – beings by examining the literary depictions of how and what they ate. Dietary habits, I thought, along with sexual practices, might be what determines humanness within this field of literature. Too much, too little, or too weird, and your food habits moved you outside what we think of as human, and into something else.
 Unsurprisingly, as anyone who has researched food and its cultural impacts deeply knows, this led me to anthropologist Claude Levi-Strauss and The Raw and the Cooked, the first volume of his elaborate, complex exploration of human myth and culture. Without getting too academic, I’ll just say that Levi-Strauss thinks a great deal of the development of culture happens as – and as a result of – foodstuffs transforming from raw to cooked. His analogy equates the wild to the raw, and the civilized to the cooked.
 Pollan pulls on and plays with this idea, considering that if indeed cooked food represents culture or civilization, then there must be something about the cooking process itself that is civilizing and bridging. The four elements he examines are aligned with four types of cooking methods: fire explores the tradition of barbecue; water looks at stews and braising; air relates his adventures in the magic/science of bread baking; and earth digs into fermentation, the weird, marginally repulsive transformation of fresh food into pickles, or beer, or cheese – food that is prized and yet impacted by earth and death and rot.
 This, too, reminded me of my own work (and don’t worry, we’re getting to the recipe part here soon), particularly an article I ran across as I was working on the Chaucer chapter of my dissertation. Subtitled “The Raw, the Cooked, and the Rotten,” the article took on Levi-Strauss’s nature/culture formulation and added a step to accommodate one of the characters in Chaucer’s The Canterbury Tales. If raw food is wild and cooked food is civilized, what happens when that cooked food goes bad? This seemed to equate to my idea of people who had exceeded the limits of humanness through their eating habits, turning food into waste.
 But I was looking at food habits from a perspective of too little as well as too much. What about superhuman beings who survived without eating, or whose bodies remained impenetrable, and un-penetrated, by the eventual corruption of food? I hypothesized making this triangle a square: adding preservation as a fourth corner. Suspended in limbo by sealing oneself against the external corruption consumption and digestion can bring, you remain preserved. This is not humanly possible, but it is not considered with disgust in medieval literature. Rather, such individuals hang closer to the divine than to the monstrous or subhuman.
 Though this is not quite the four-some Pollan presents, I think fermentation and preservation have some similarities. In being preserved by their “cooking” process, fermented foods and preserved foods are mysterious blends of human and natural magic. Jams and jellies, preserved by being cooked with sugar, are the sweet side of this equation. Pollan opts to explore sauerkraut and cheese and beer. Today, I’m taking on pickles: simple raw, sliced vegetables transformed, “cooked,” and held in briny limbo by vinegar, sometimes sugar, and salt.
 When N. and I got serious, we started using pickles as a metaphor for our relationship. In most refrigerators, there is a jar of pickles shoved way in the back, often on the top shelf, getting in the way of the orange juice and the milk and the mayonnaise. When you finally pull that jar out and peer inside, it’s almost never full. There are one or two pickles in there, floating around in the dill-and-peppercorn-laced brine, warty and sour and beautiful. The ubiquity of that pickle jar became our metaphor. As long as there were pickles in our fridge, we would be okay.
 As with most Americans, I would wager, the pickles I was accustomed to when I was younger were always cucumber based, and usually dill (though I am a fiend for bread and butter pickles). I had no real sense that other sorts of vegetables could be pickled (aside from beets, thanks to my Nana) until I started frequenting the McMenamins pubs, an Oregon and Southern Washington chain of sorts featuring decent beer, good burgers, and remarkably slow service. Our little graduate crew went often – there were three different locations in the city of Eugene alone. Their hummus platter, ever present on the appetizer menu, came with a variety of vegetables along with triangles of pita, and often the spears of green bean and carrot, and the occasional nub of cauliflower, were pickled. Of course I had little thought of doing this myself until, chasing after an elusive potato salad that included pickled green beans, I started noticing how expensive these various vegetable pickles were in the grocery store. Recreating that potato salad required pickled green beans, dammit, and as a poor graduate student I was both unable and morally opposed to spending $7.99 on a slender little jar.
 Fortunately, vegetable pickles are easy and fall within even a humanities graduate student’s budget. Vinegar, sugar, and a healthy shower of salt, heated to a simmer to dissolve the crystals. Jam as many vegetables as you can into a jar, shove in some flavoring agents: bay leaf, mustard seeds, dill, fennel, and pour on the vinegar. Cap, relocate to the fridge, and remember them a few days later when they’ve had a chance to sour up.
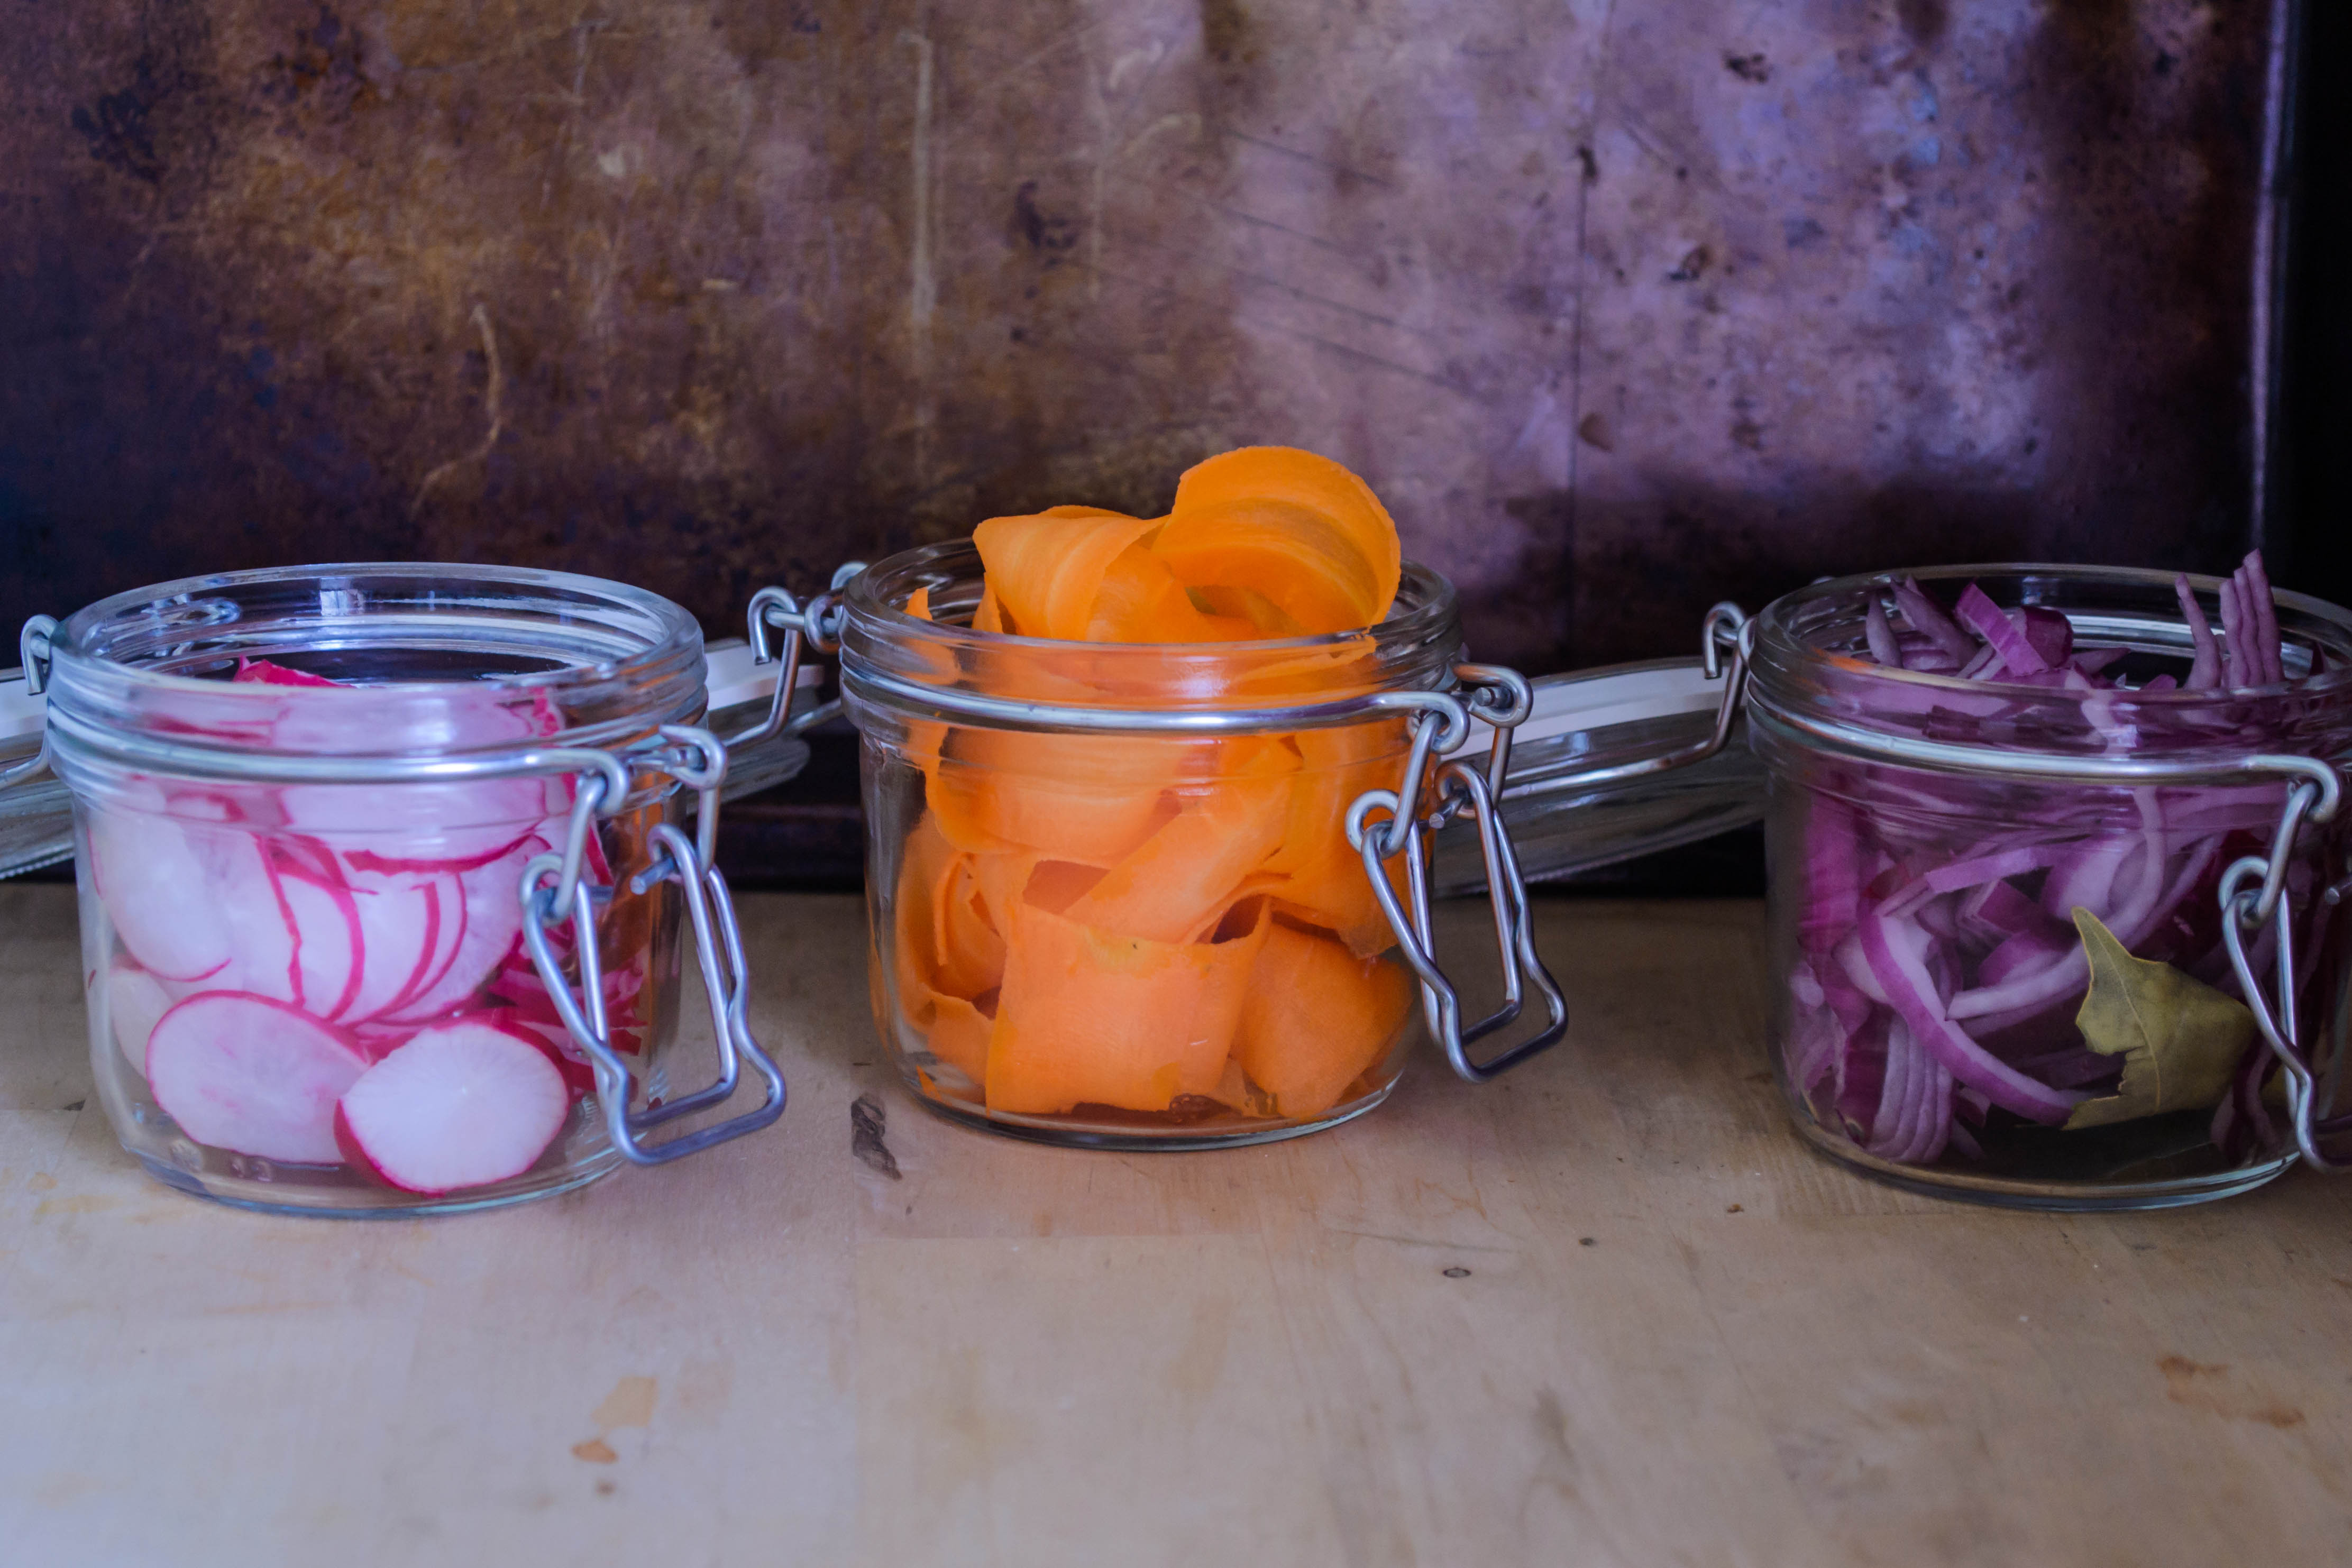
 Vegetable pickles seem entirely suitable for the season. Fresh, young vegetables are great for pickling, especially while they are still small in size, so the vinegar can penetrate faster. Slender carrots, or plump radishes, or the tiny lanterns of young peppers, are a sign of spring that is often gone too fast. Pickles, though, hold that spring forever, jarred and capped and safe on the top shelf lurking behind the orange juice. Though they are not unaltered – the raw crispness is indeed transformed – in that way too they are like a spring gone by, or perhaps the memories of that spring that remain. It’s not that perfect, warm day anymore, but you remember its brightness – you need only uncap the jar and fish out a crisp briny souvenir.
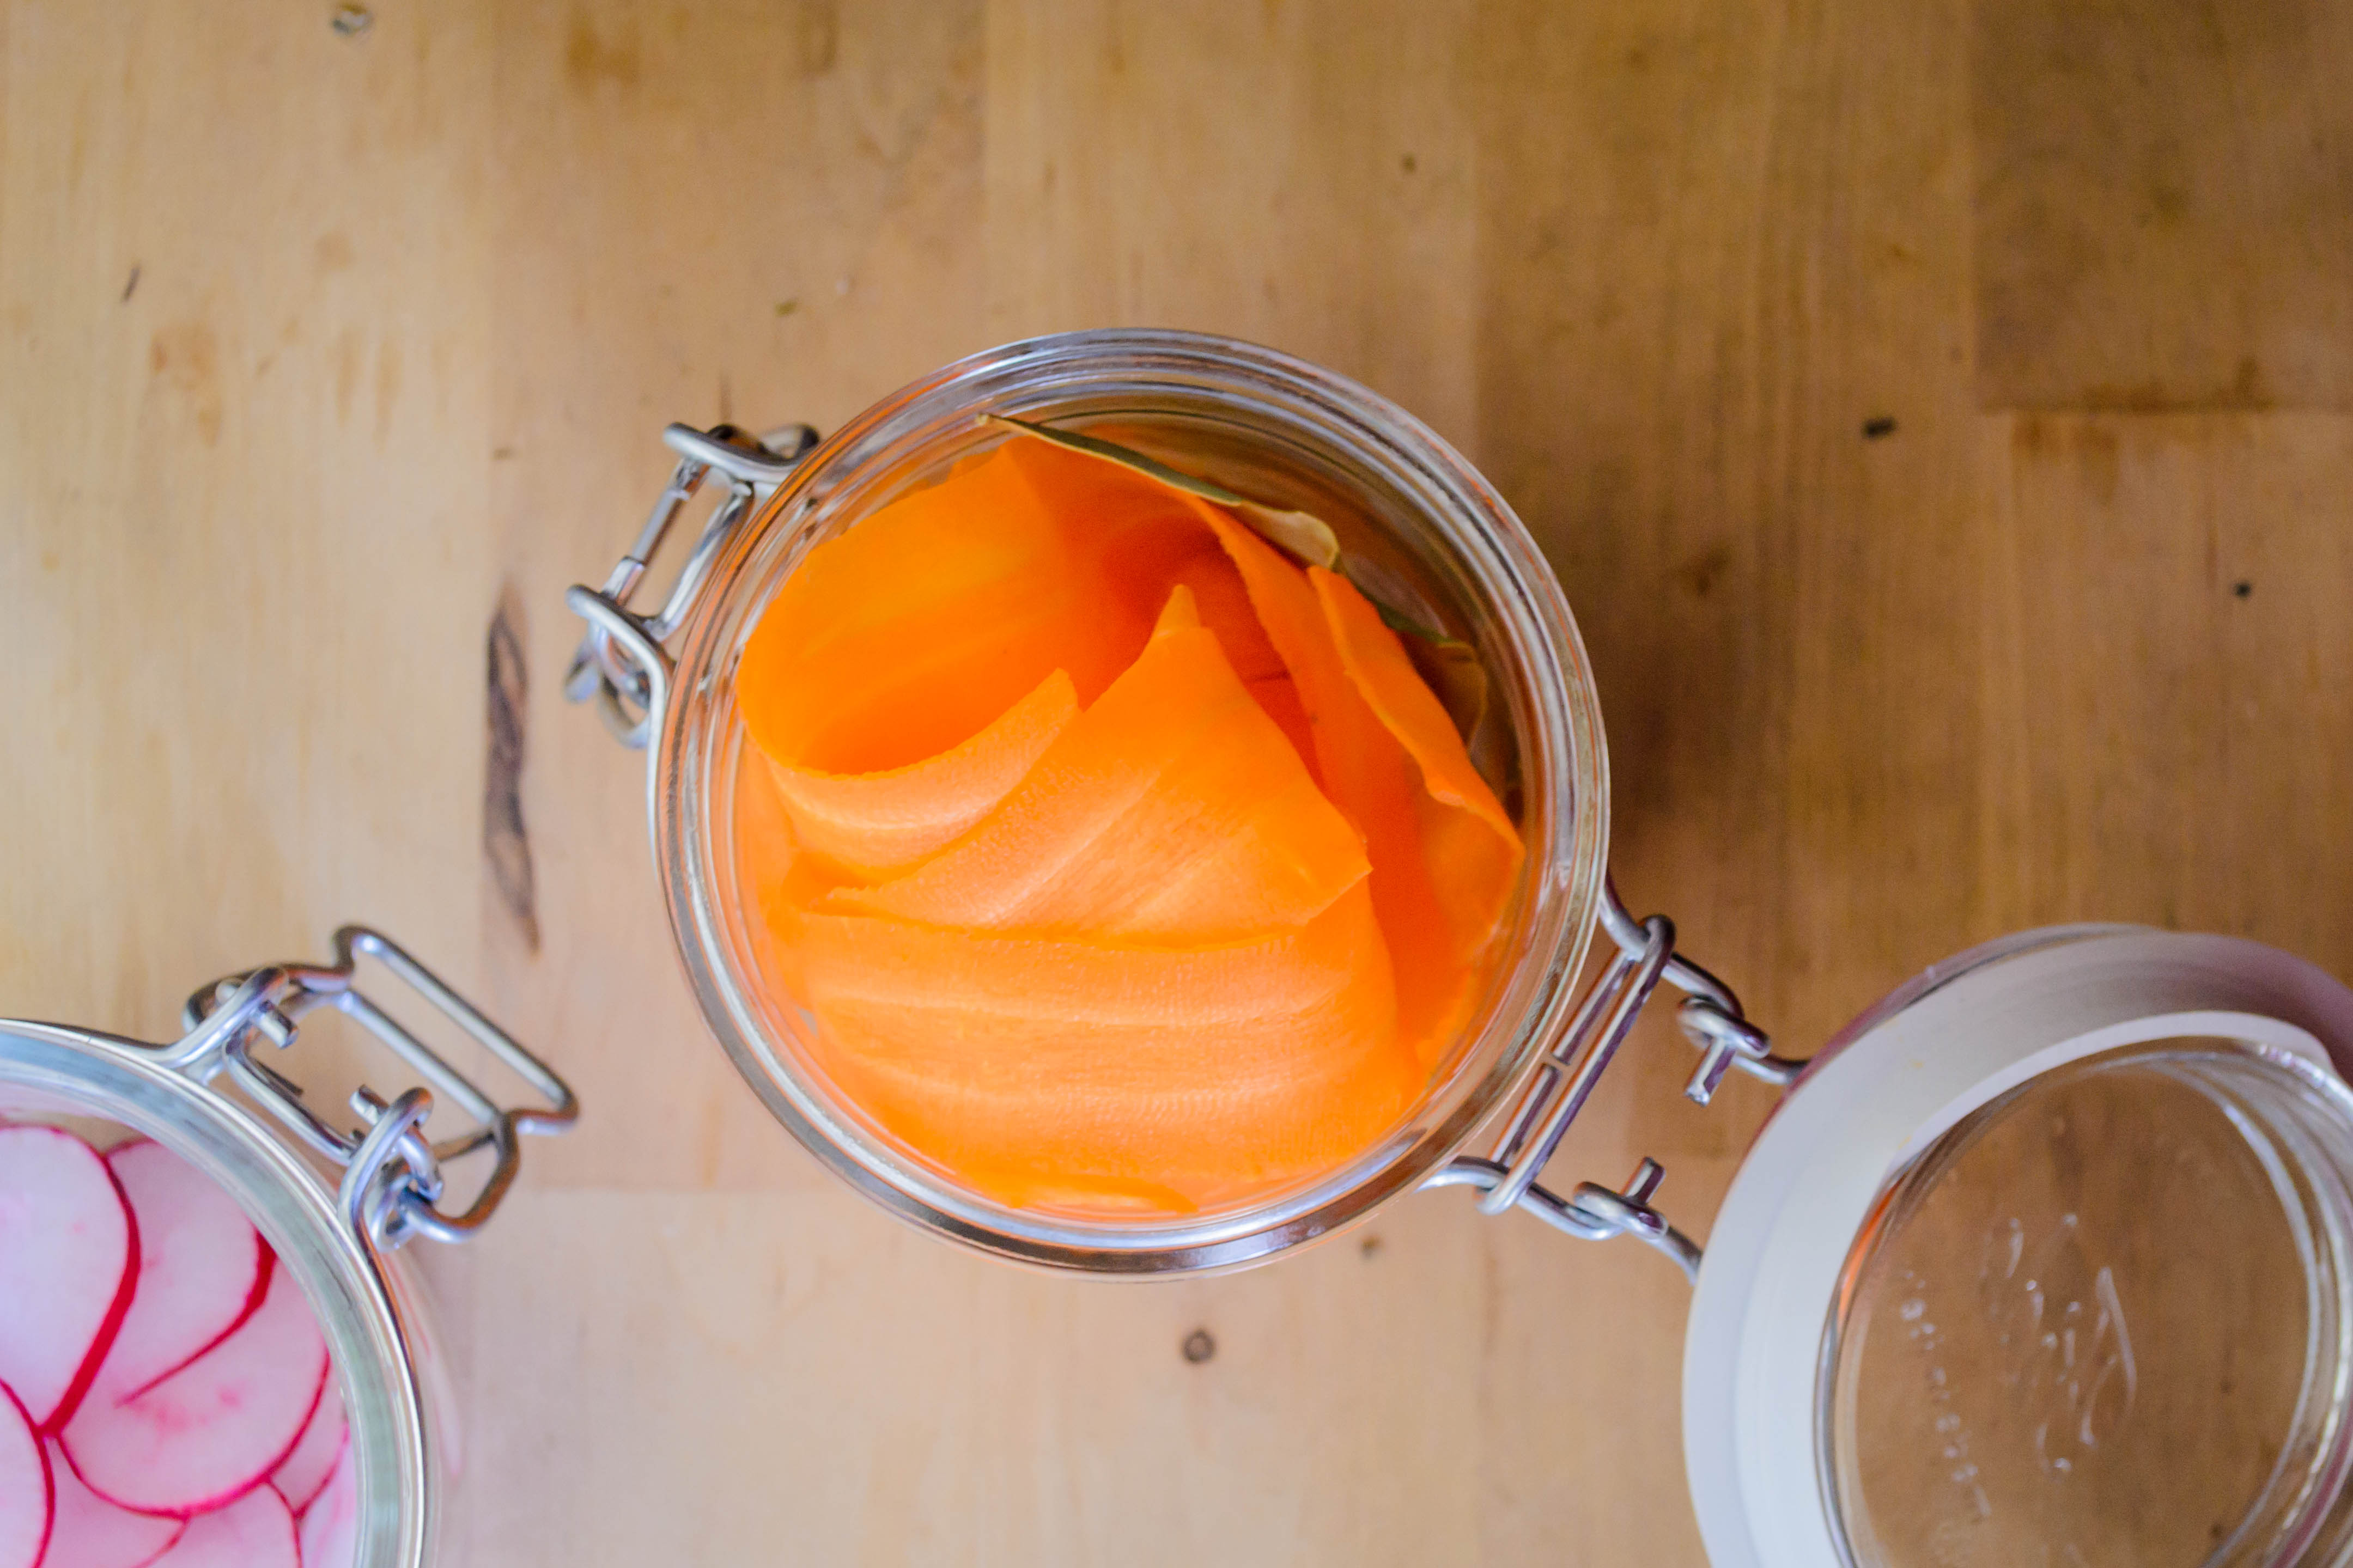
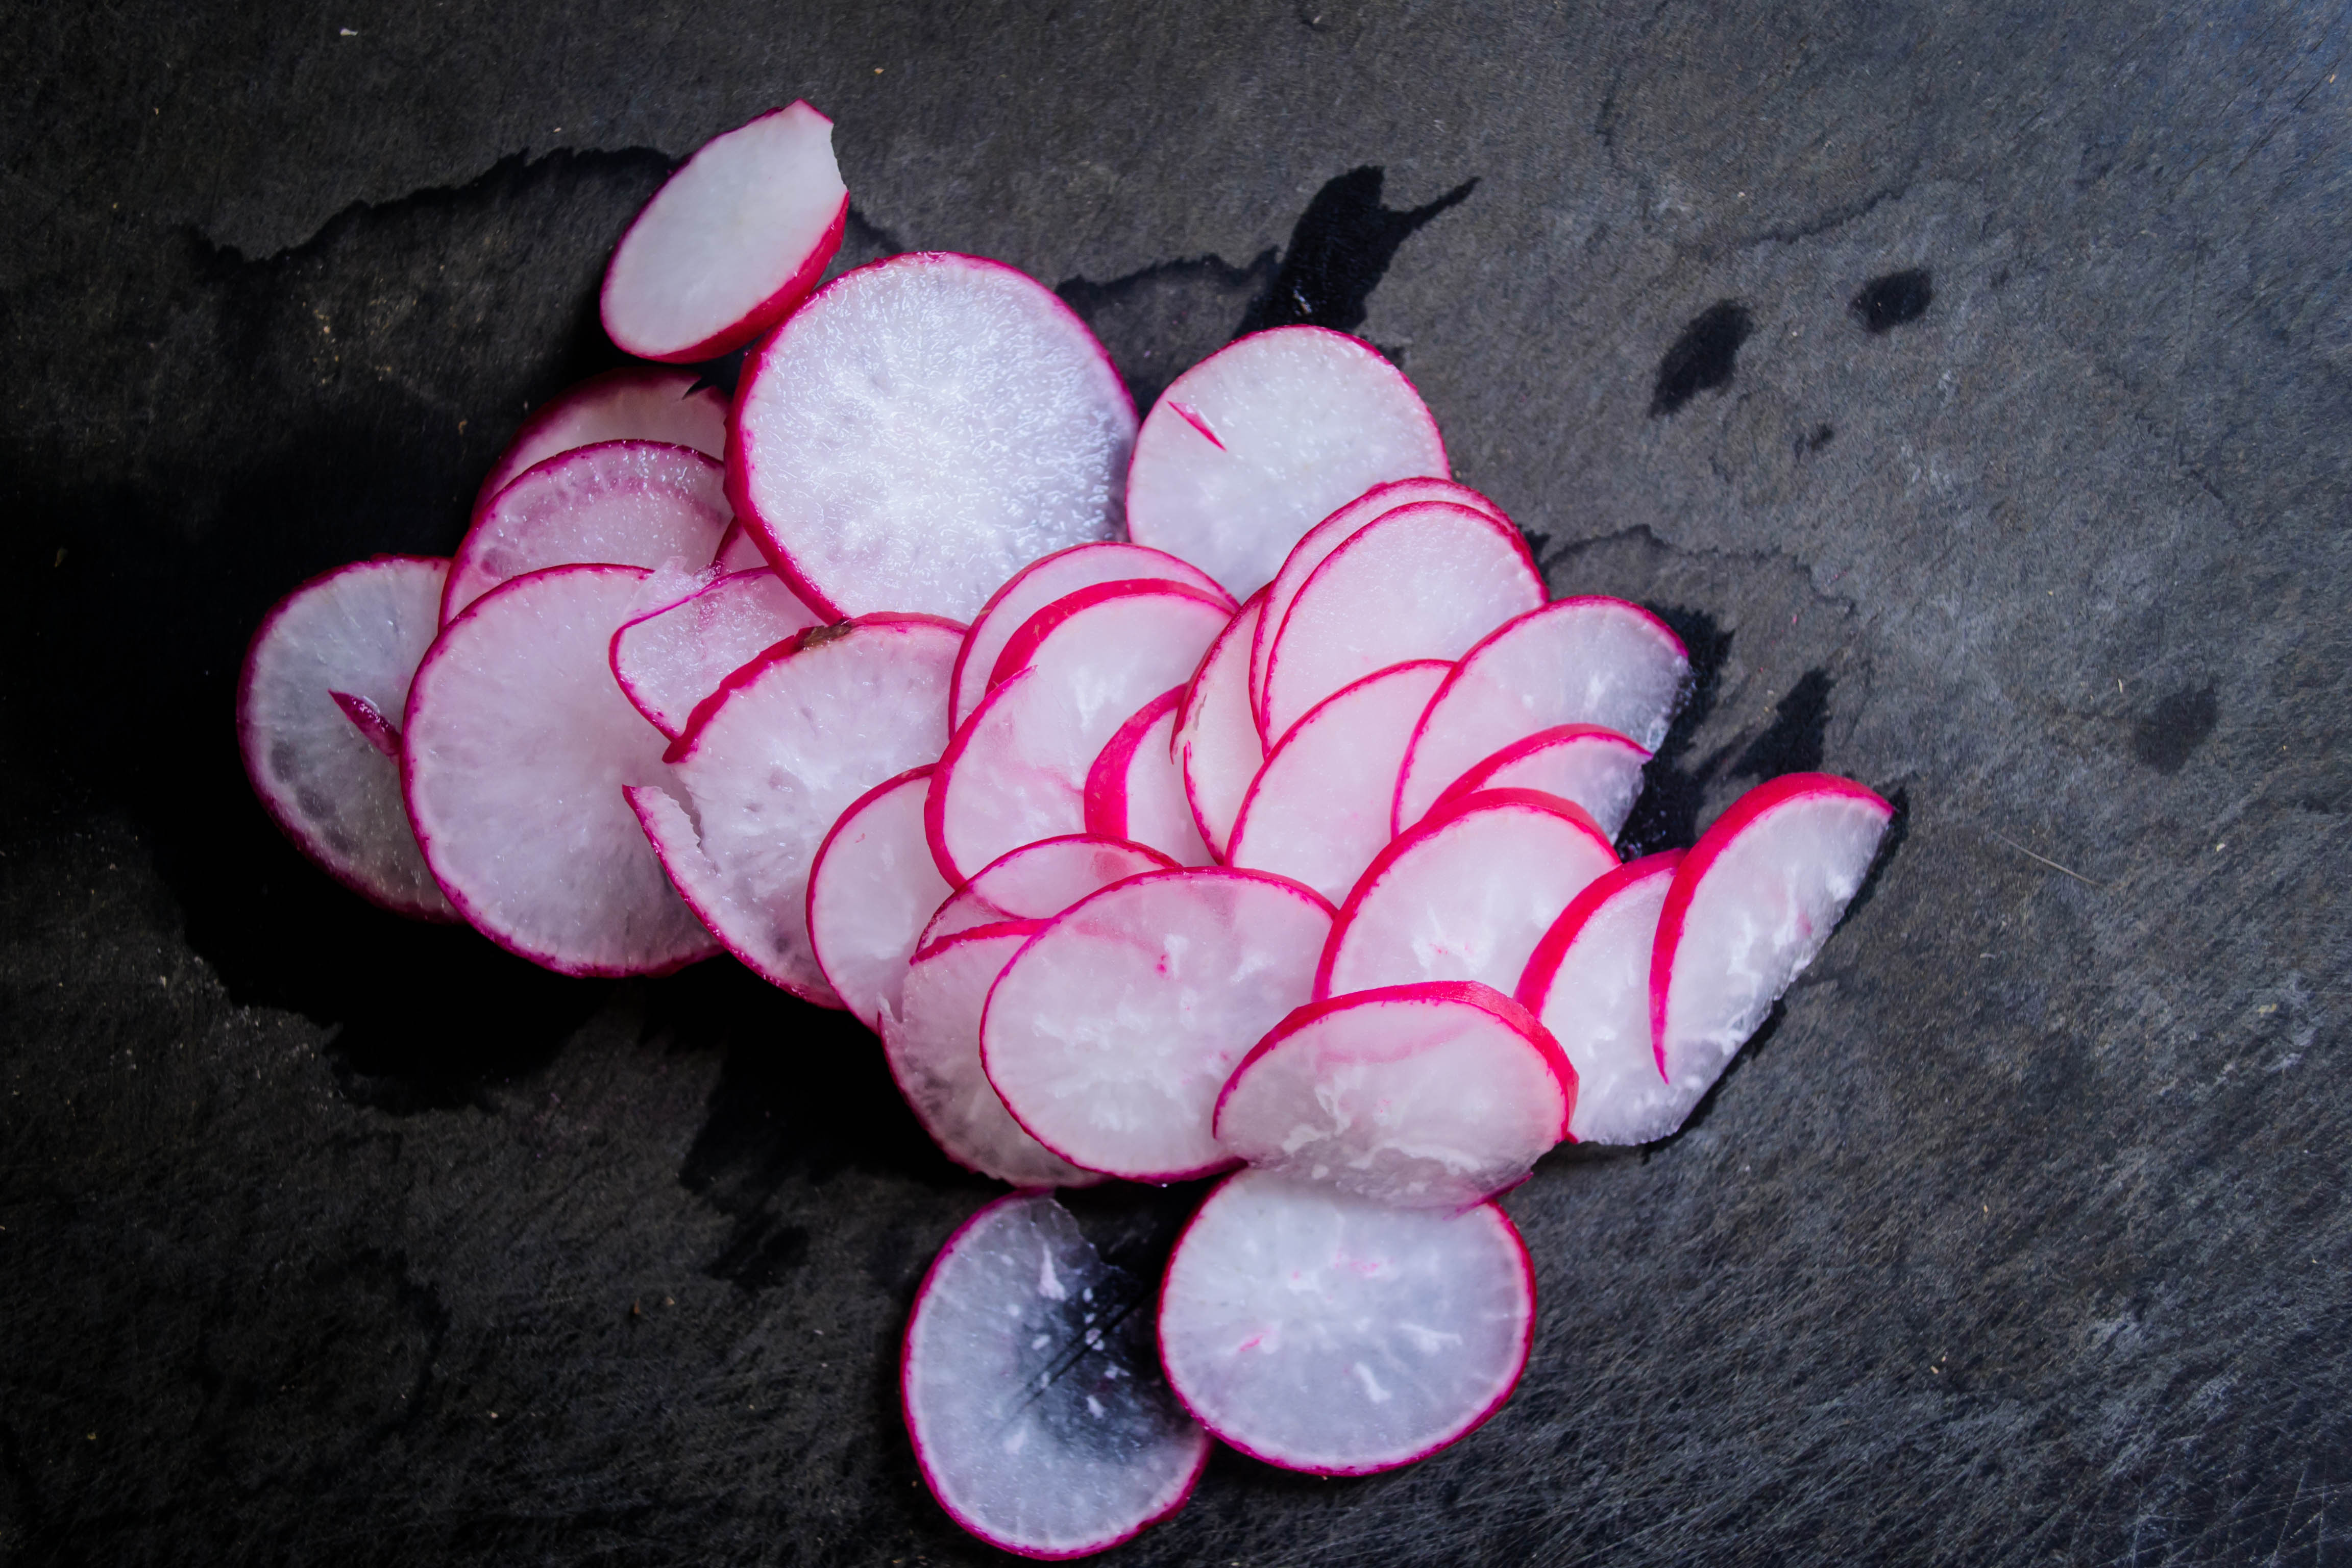
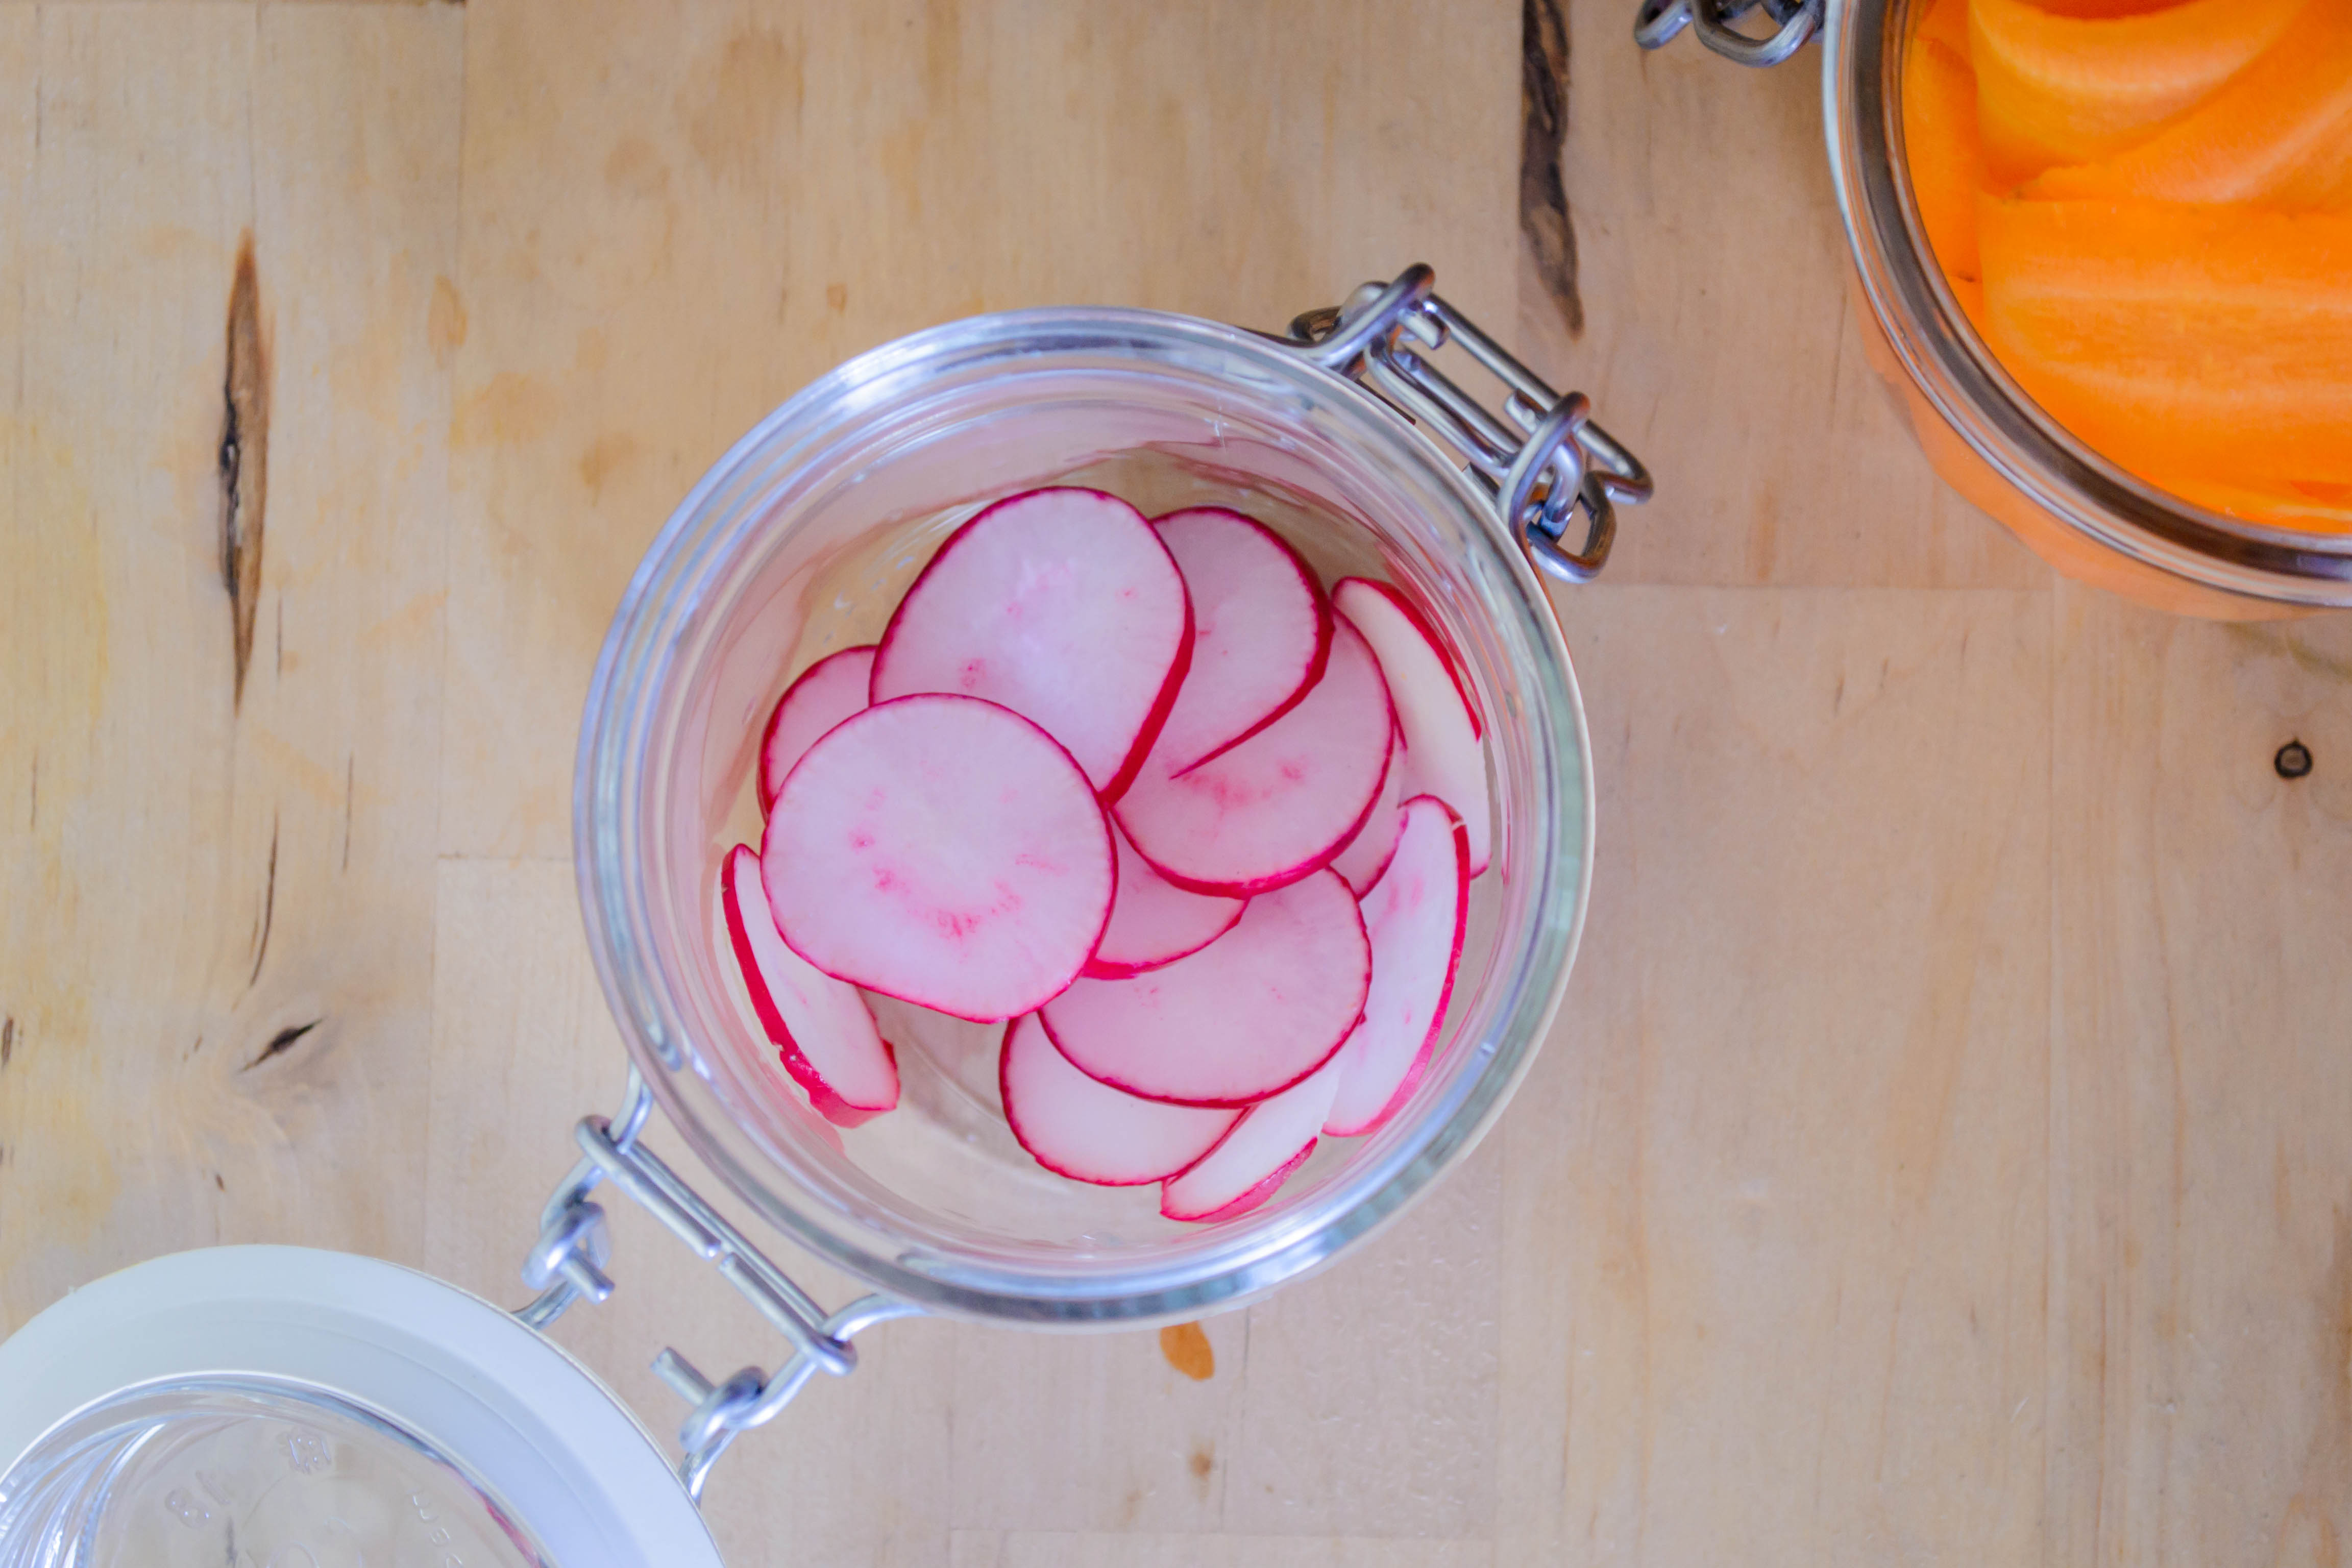
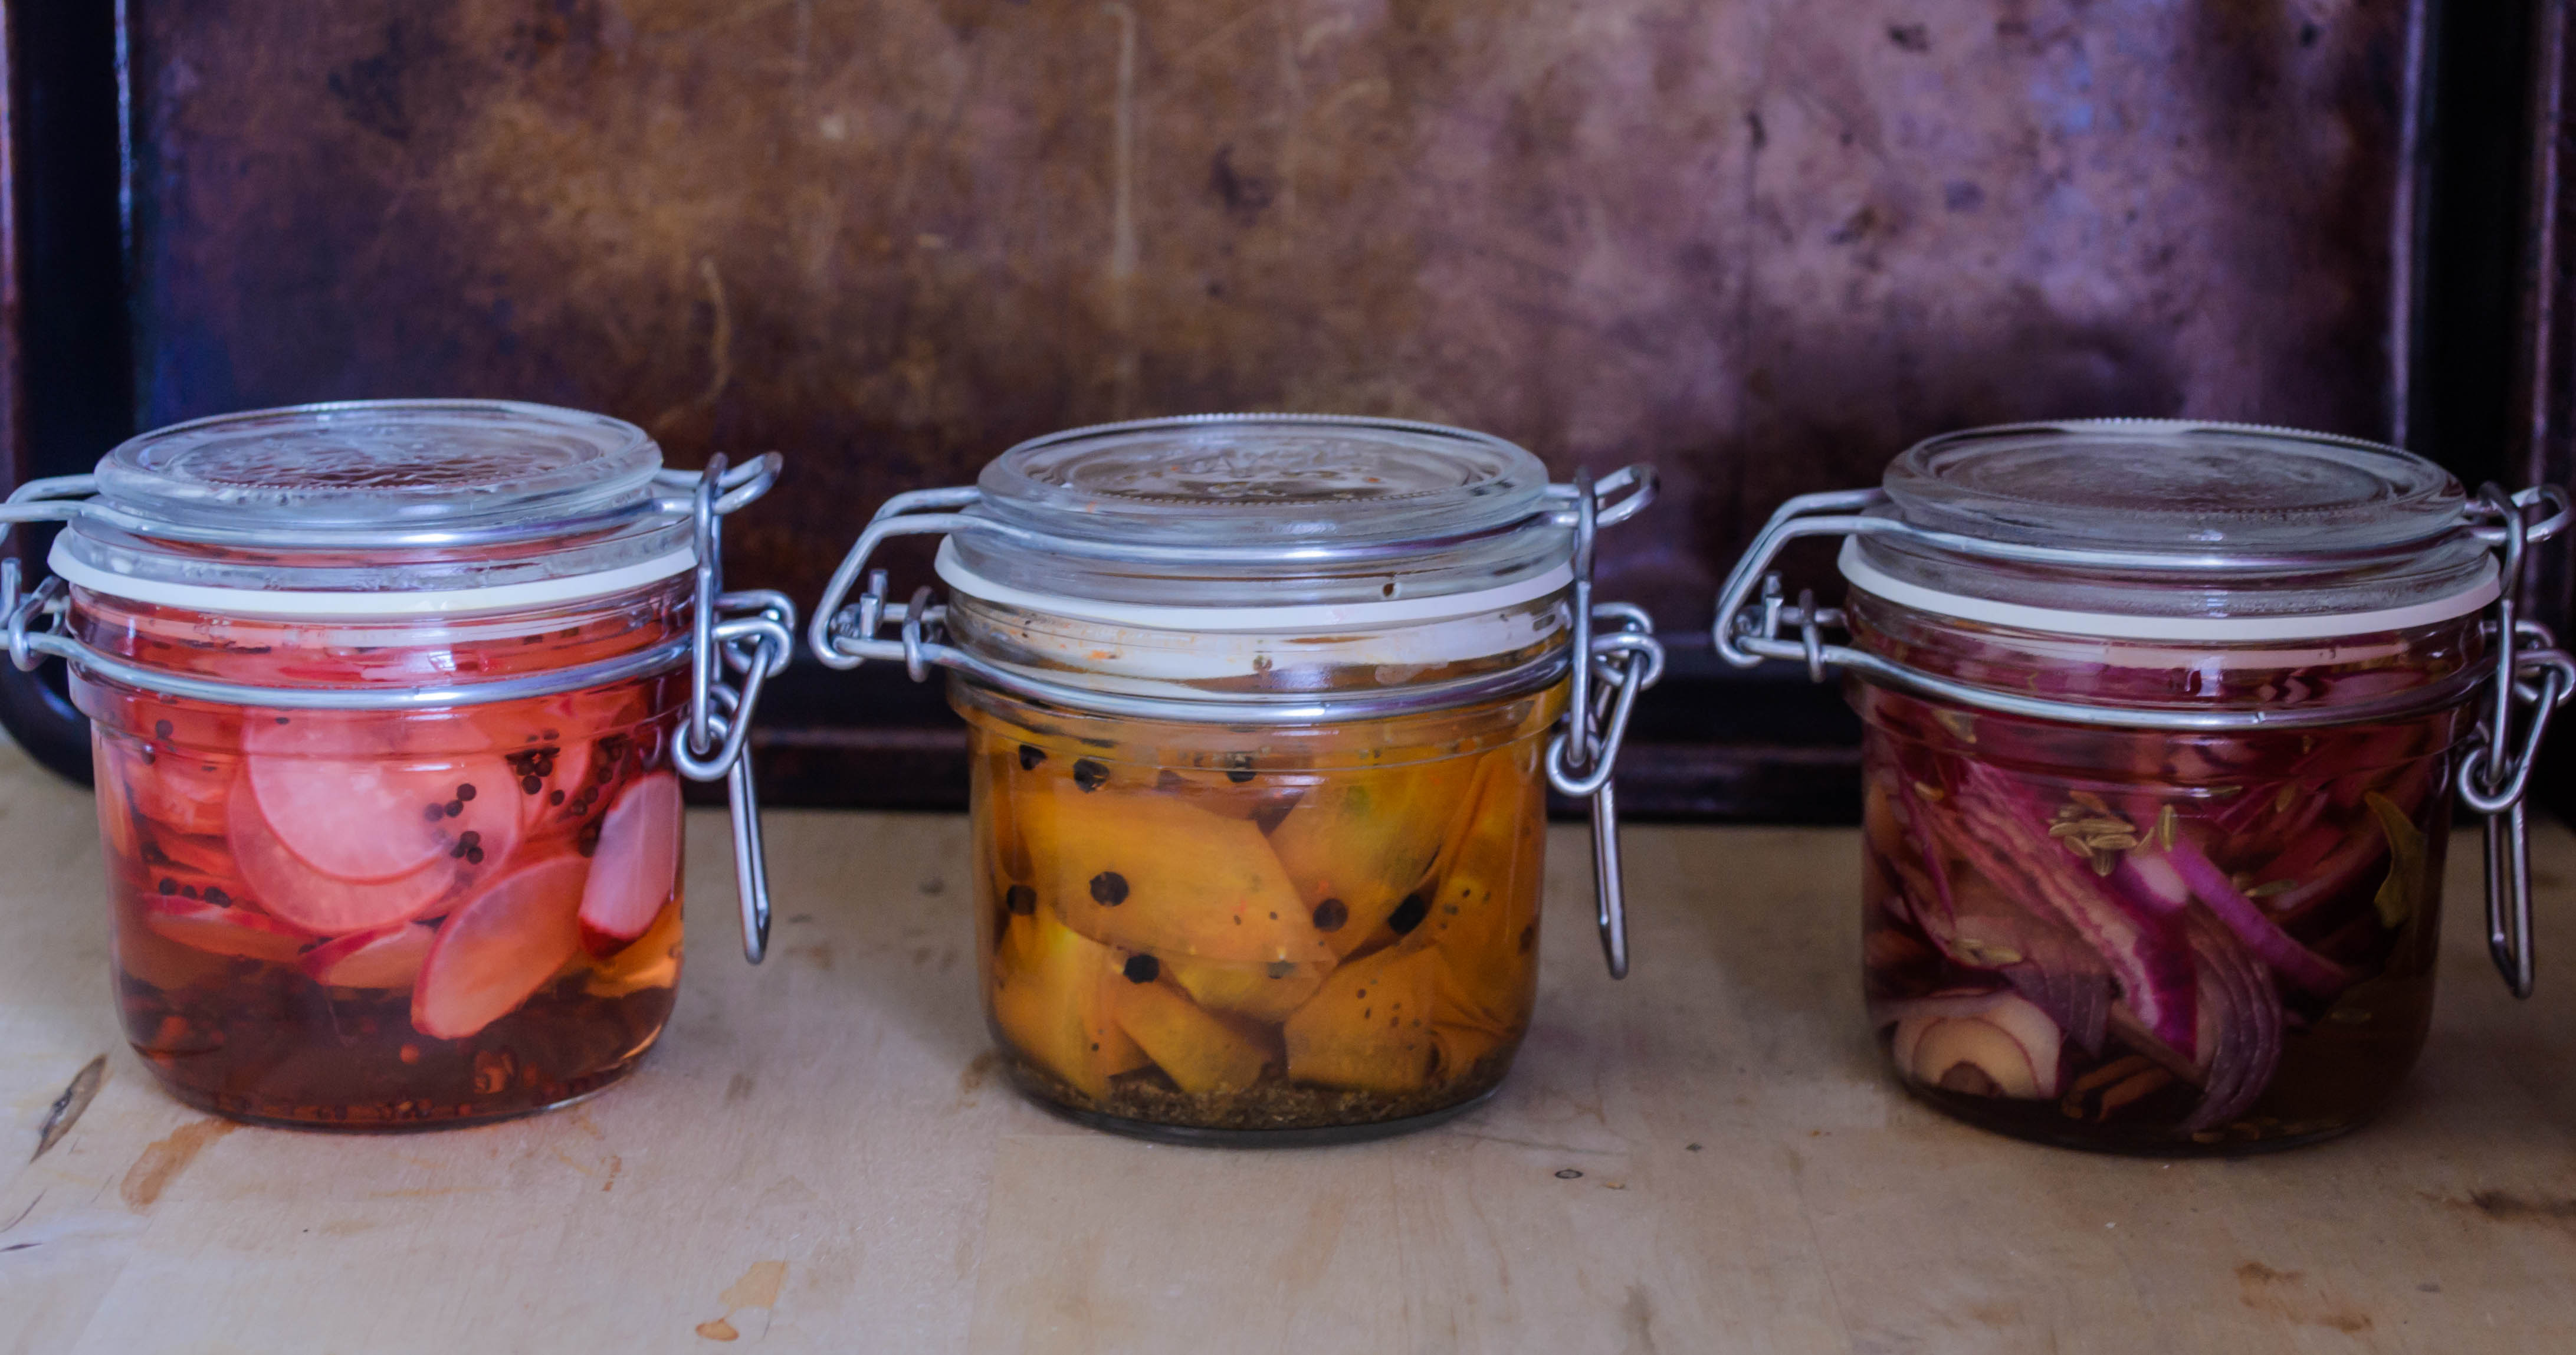
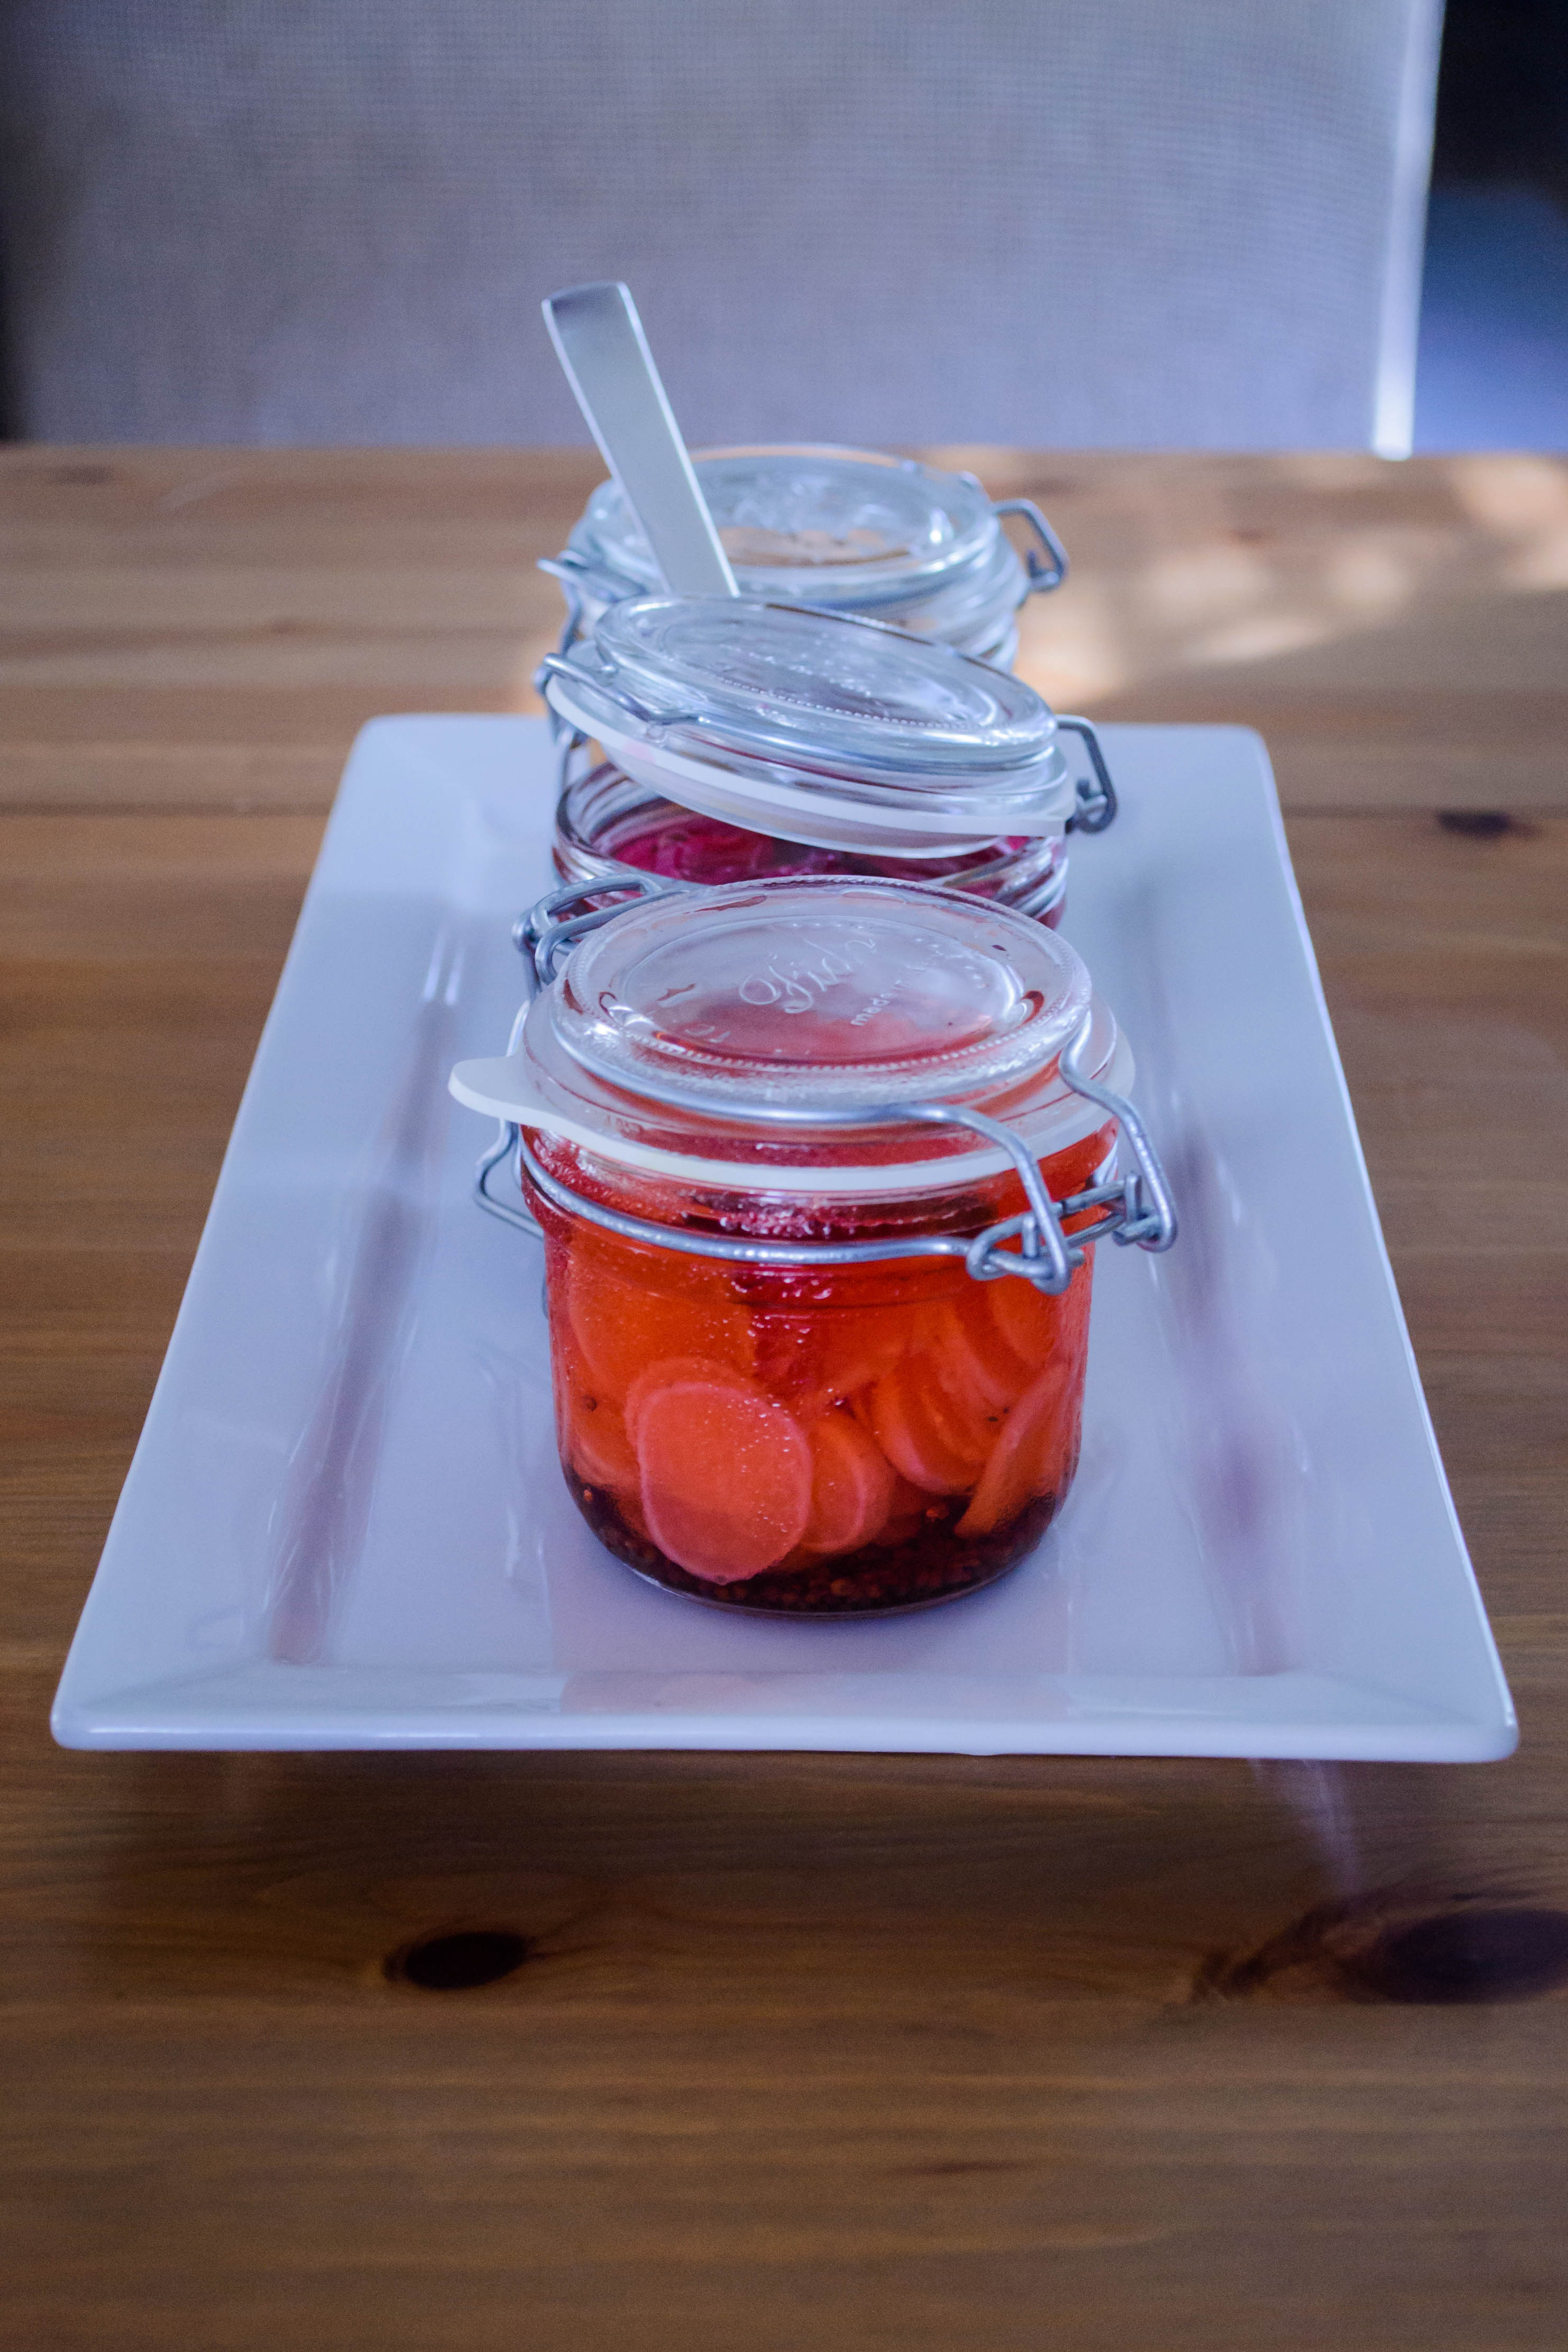
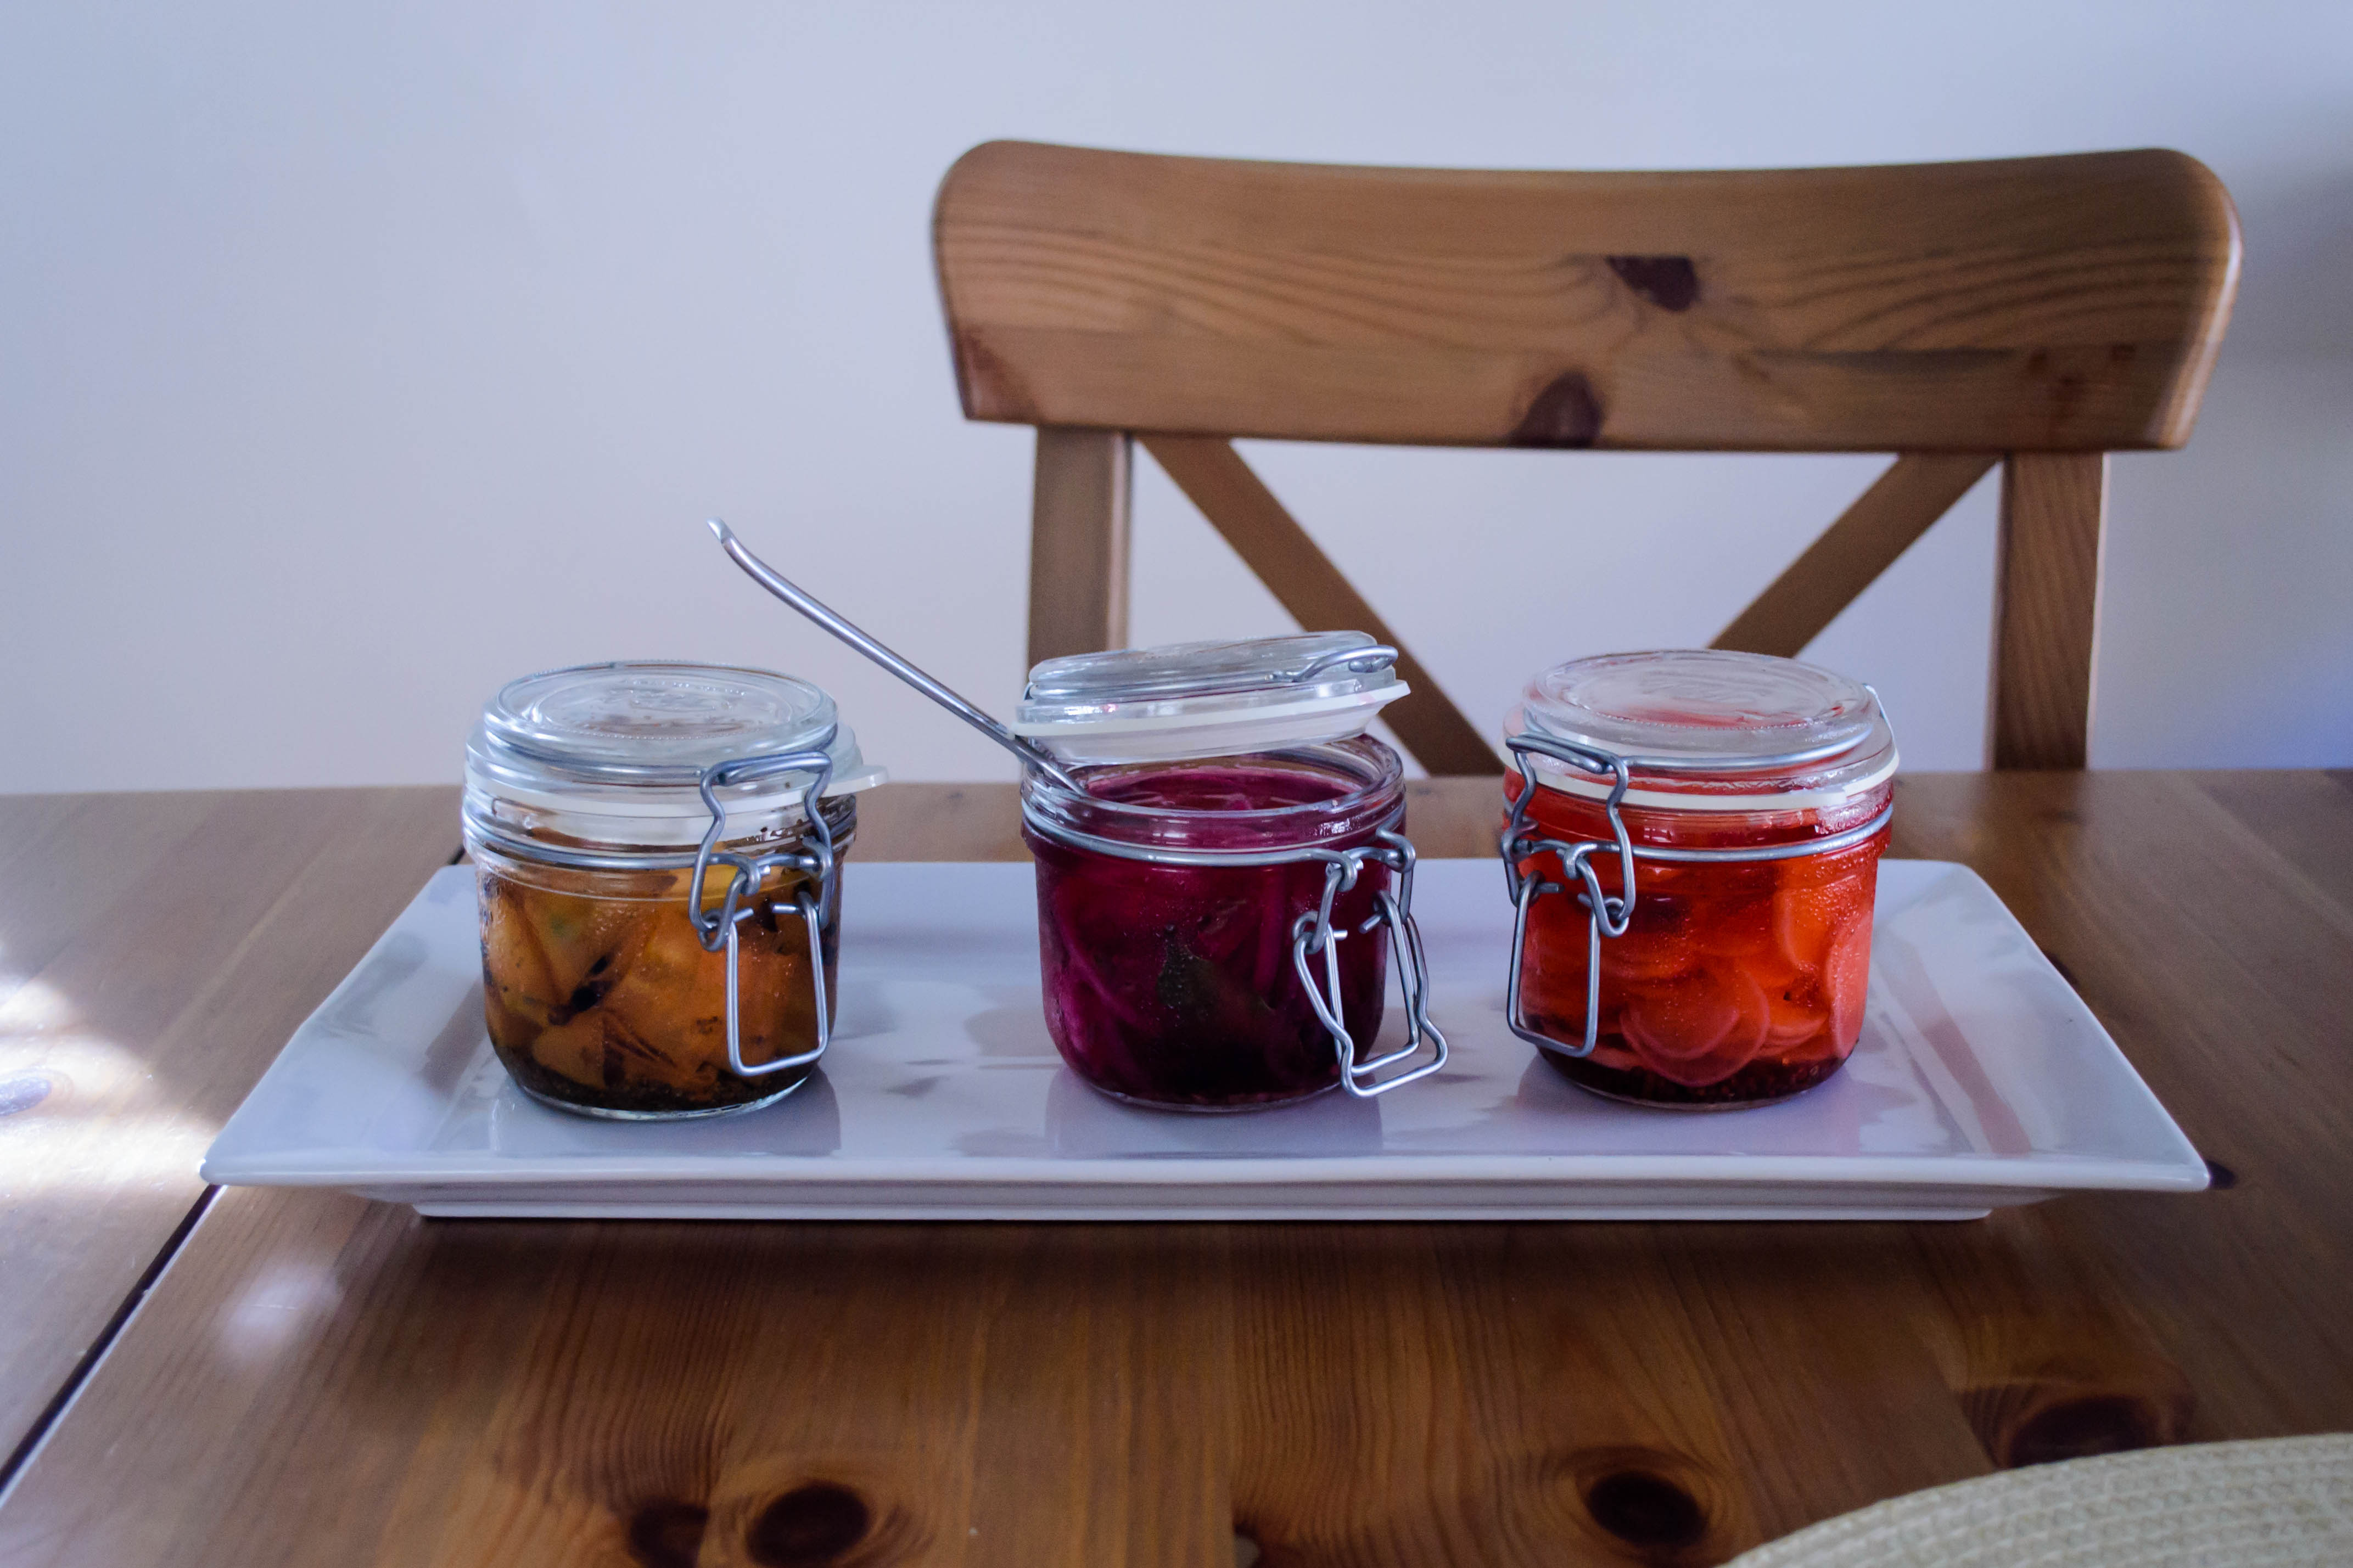 I’ve done three types of pickle here: onion, carrot, and radish. Each is seasoned with a different combination of spices, and because I like to be fancy, I’ve used a different variety of vinegar. The radishes, I must admit, are my favorite. To play on their peppery flavor, I’ve added mustard seeds and a dried chili, but teased them as well with a heaping helping of sugar for the sweet-hot kick.
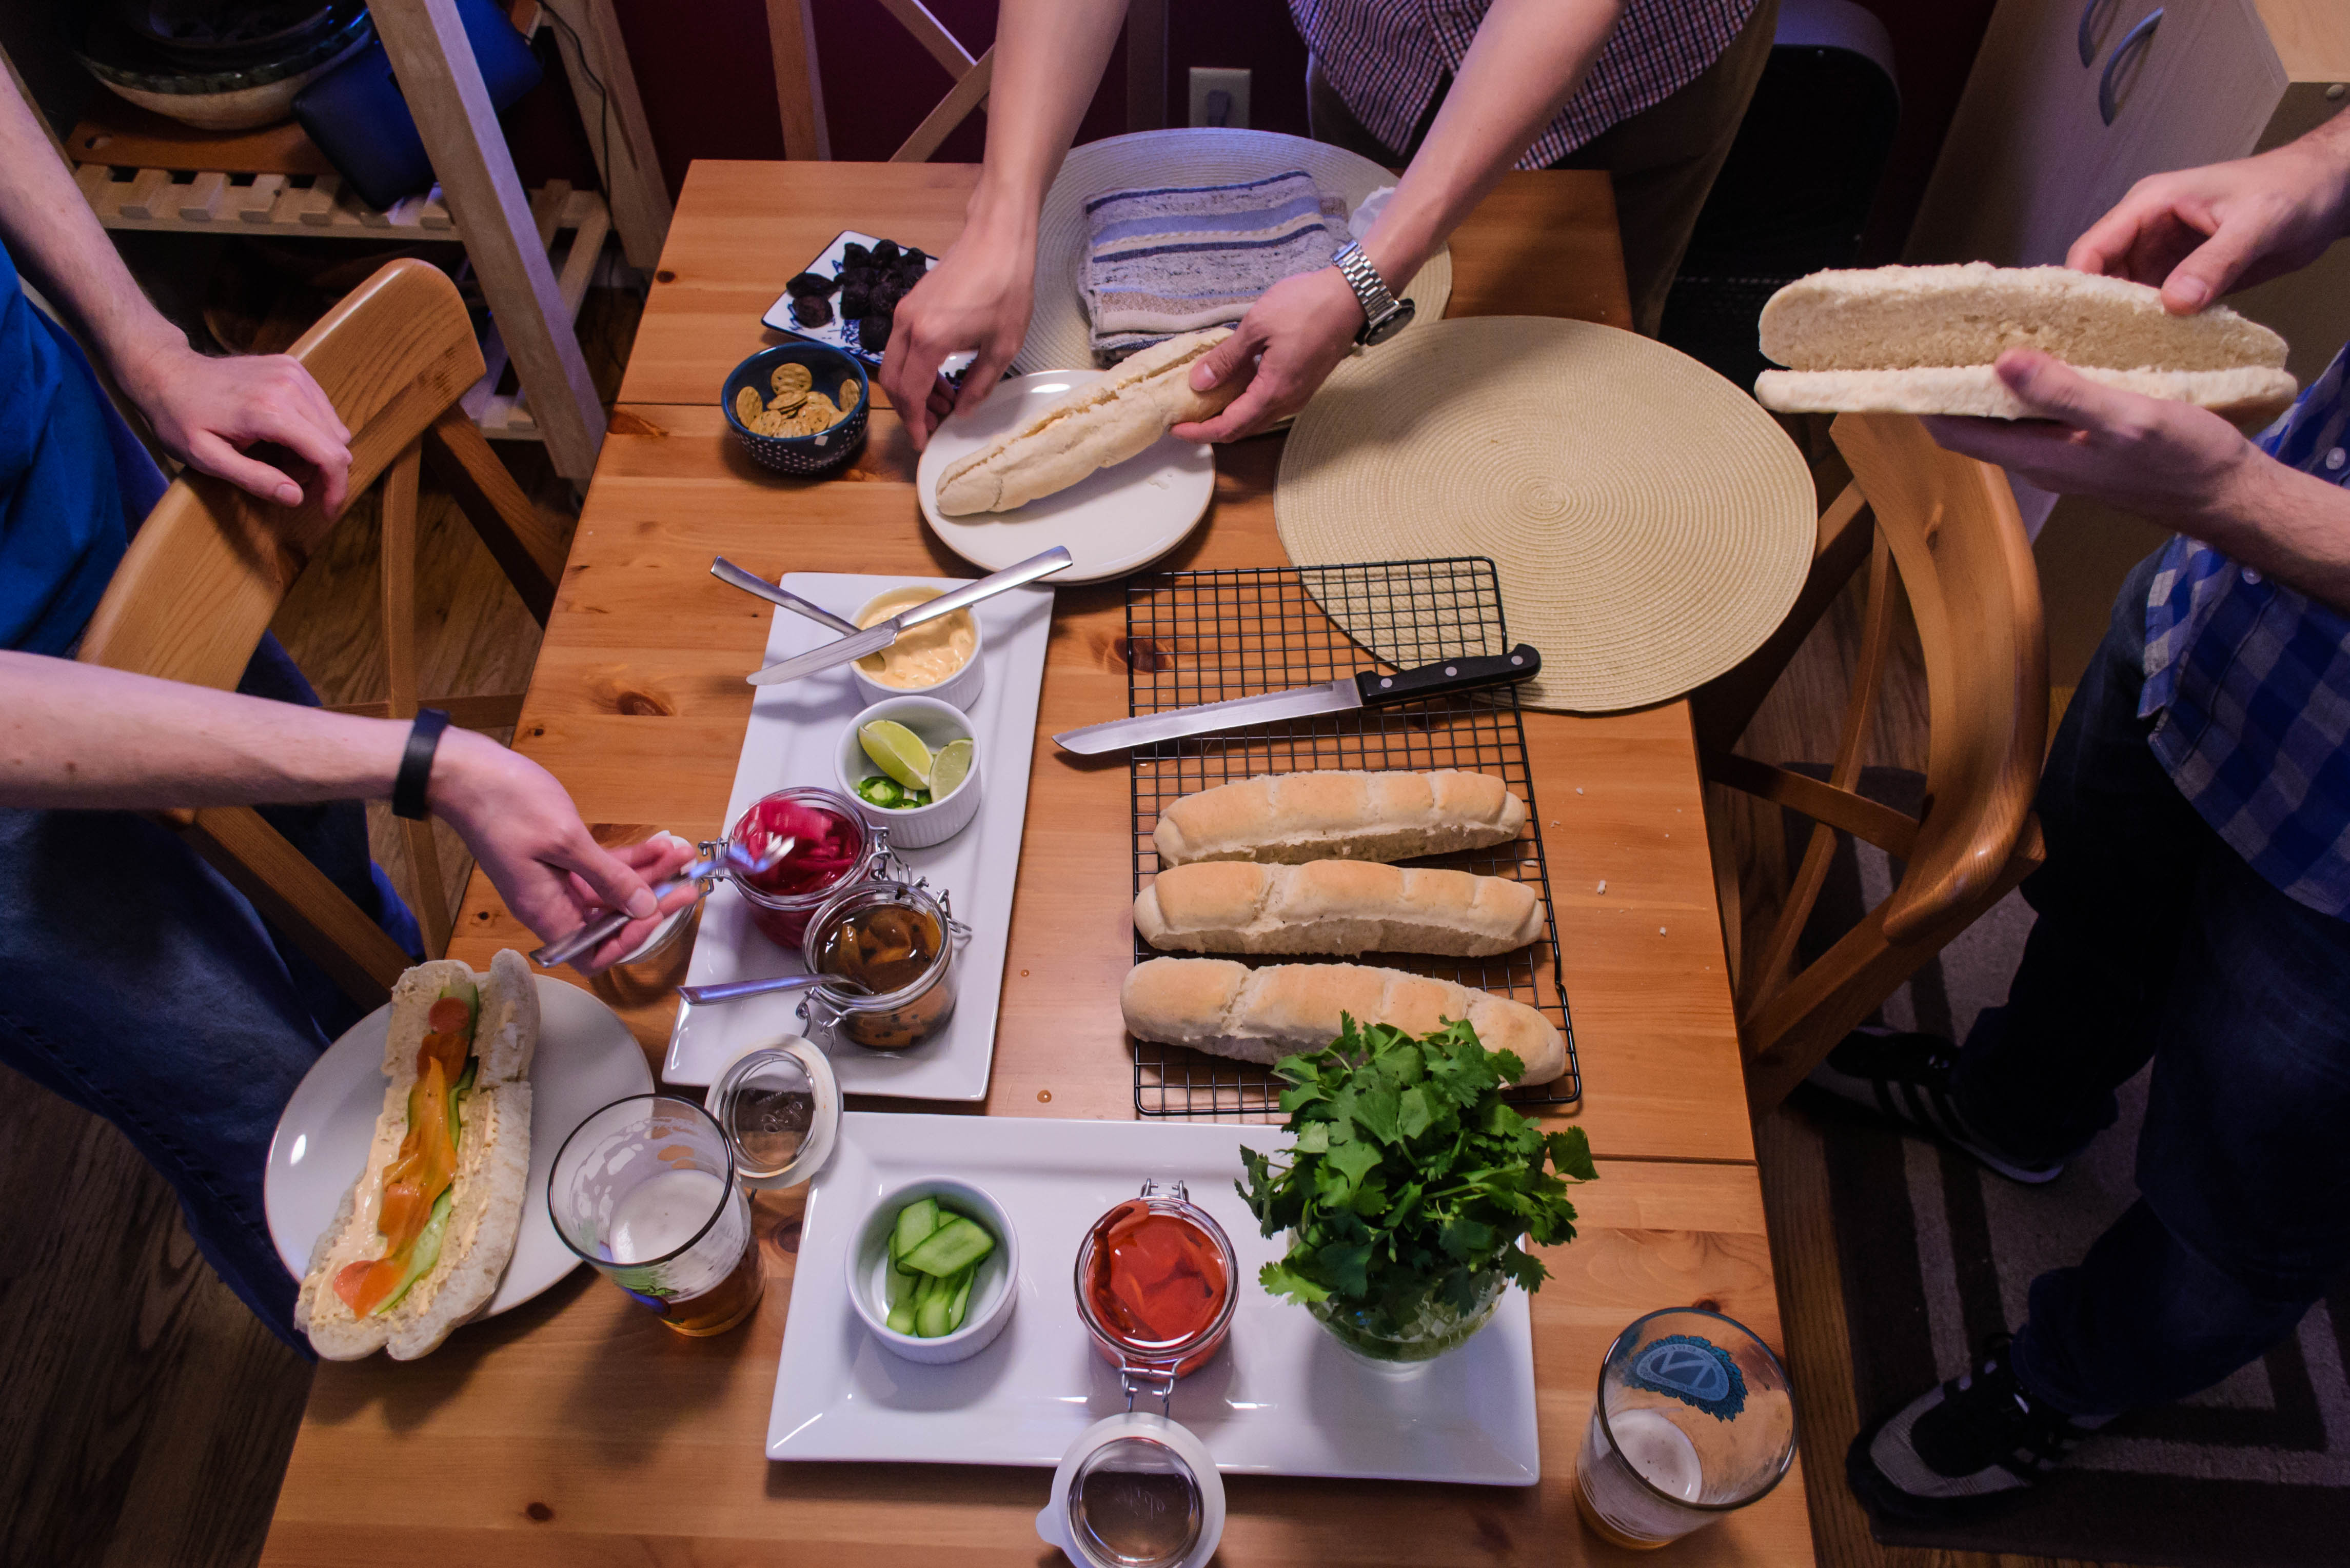 While these are lovely in salads, as part of a cheese or hummus plate, or just bright and sour on a fork, they are dynamite on a sandwich. And as the above photo suggests, it is on a sandwich that they found their sprightly home for us. Specifically, on a banh mi sandwich, that fresh, crisp Vietnamese invention. Even more specifically, on the idea that spawned my whole 2015 project: a banh mi-tball. There are essentially three components to this sandwich. These pickles are the first. Next week we’ll look at the bread (the true banh mi), and in the third and final installment, pork meatballs awash in aromatics, simmered in a miso-spiked broth I wanted to drink all on its own.
But for the moment, let’s just revel in the transformative magic of pickles. You’ll need the week for them to get good and sour before you can properly enjoy the sandwich anyway.
 It seems fitting that I should do my first post along with the Twelve Loaves bakers during a month that celebrates cheese. On any given day, you can find between three and six different kinds of cheese in the tiny drawer in my refrigerator. My last two posts have featured it as a key ingredient, and in both I’ve waxed eloquent about using not just some, but MOAR. I seriously love cheese. It’s the primary reason I could never go completely vegan. I could give up meat with very little trouble (though I would miss bacon, I must admit). I could wave a cheerful goodbye to fish, to beef, to chicken, and stock my cupboards with vegetable broth and my freezer with coconut based ice cream. I already use soy rather than regular milk on my cereal and in my weekend chai. But I would have serious problems bidding farewell to cheese.

 Even though I know this isn’t true – they had their ingredient chosen long before I came into the picture – it feels almost like the Twelve Loaves baking group planned this month’s post just for me. Bake with cheese. Yes. I. Will. Cooking with cheese is exciting because the ingredient offers such variety. Do you want something mild, or so sharp it makes your mouth water? Do you want a familiar flavor, or something tart or funky or stinky like last month’s socks? And then there’s texture. Cheese already runs the gamut from so soft it seems already melted to the firmness of parmesan that requires a knife point to dismantle. Add to that the different reactions it has to heat: some cheeses sigh into liquid. Some pull into foot-long strings. Some – and this is one of my favorite results – some flatten and solidify and transform into crunchy little cheese crisps suitable for nothing fancier than jamming into your mouth as quickly as you can.
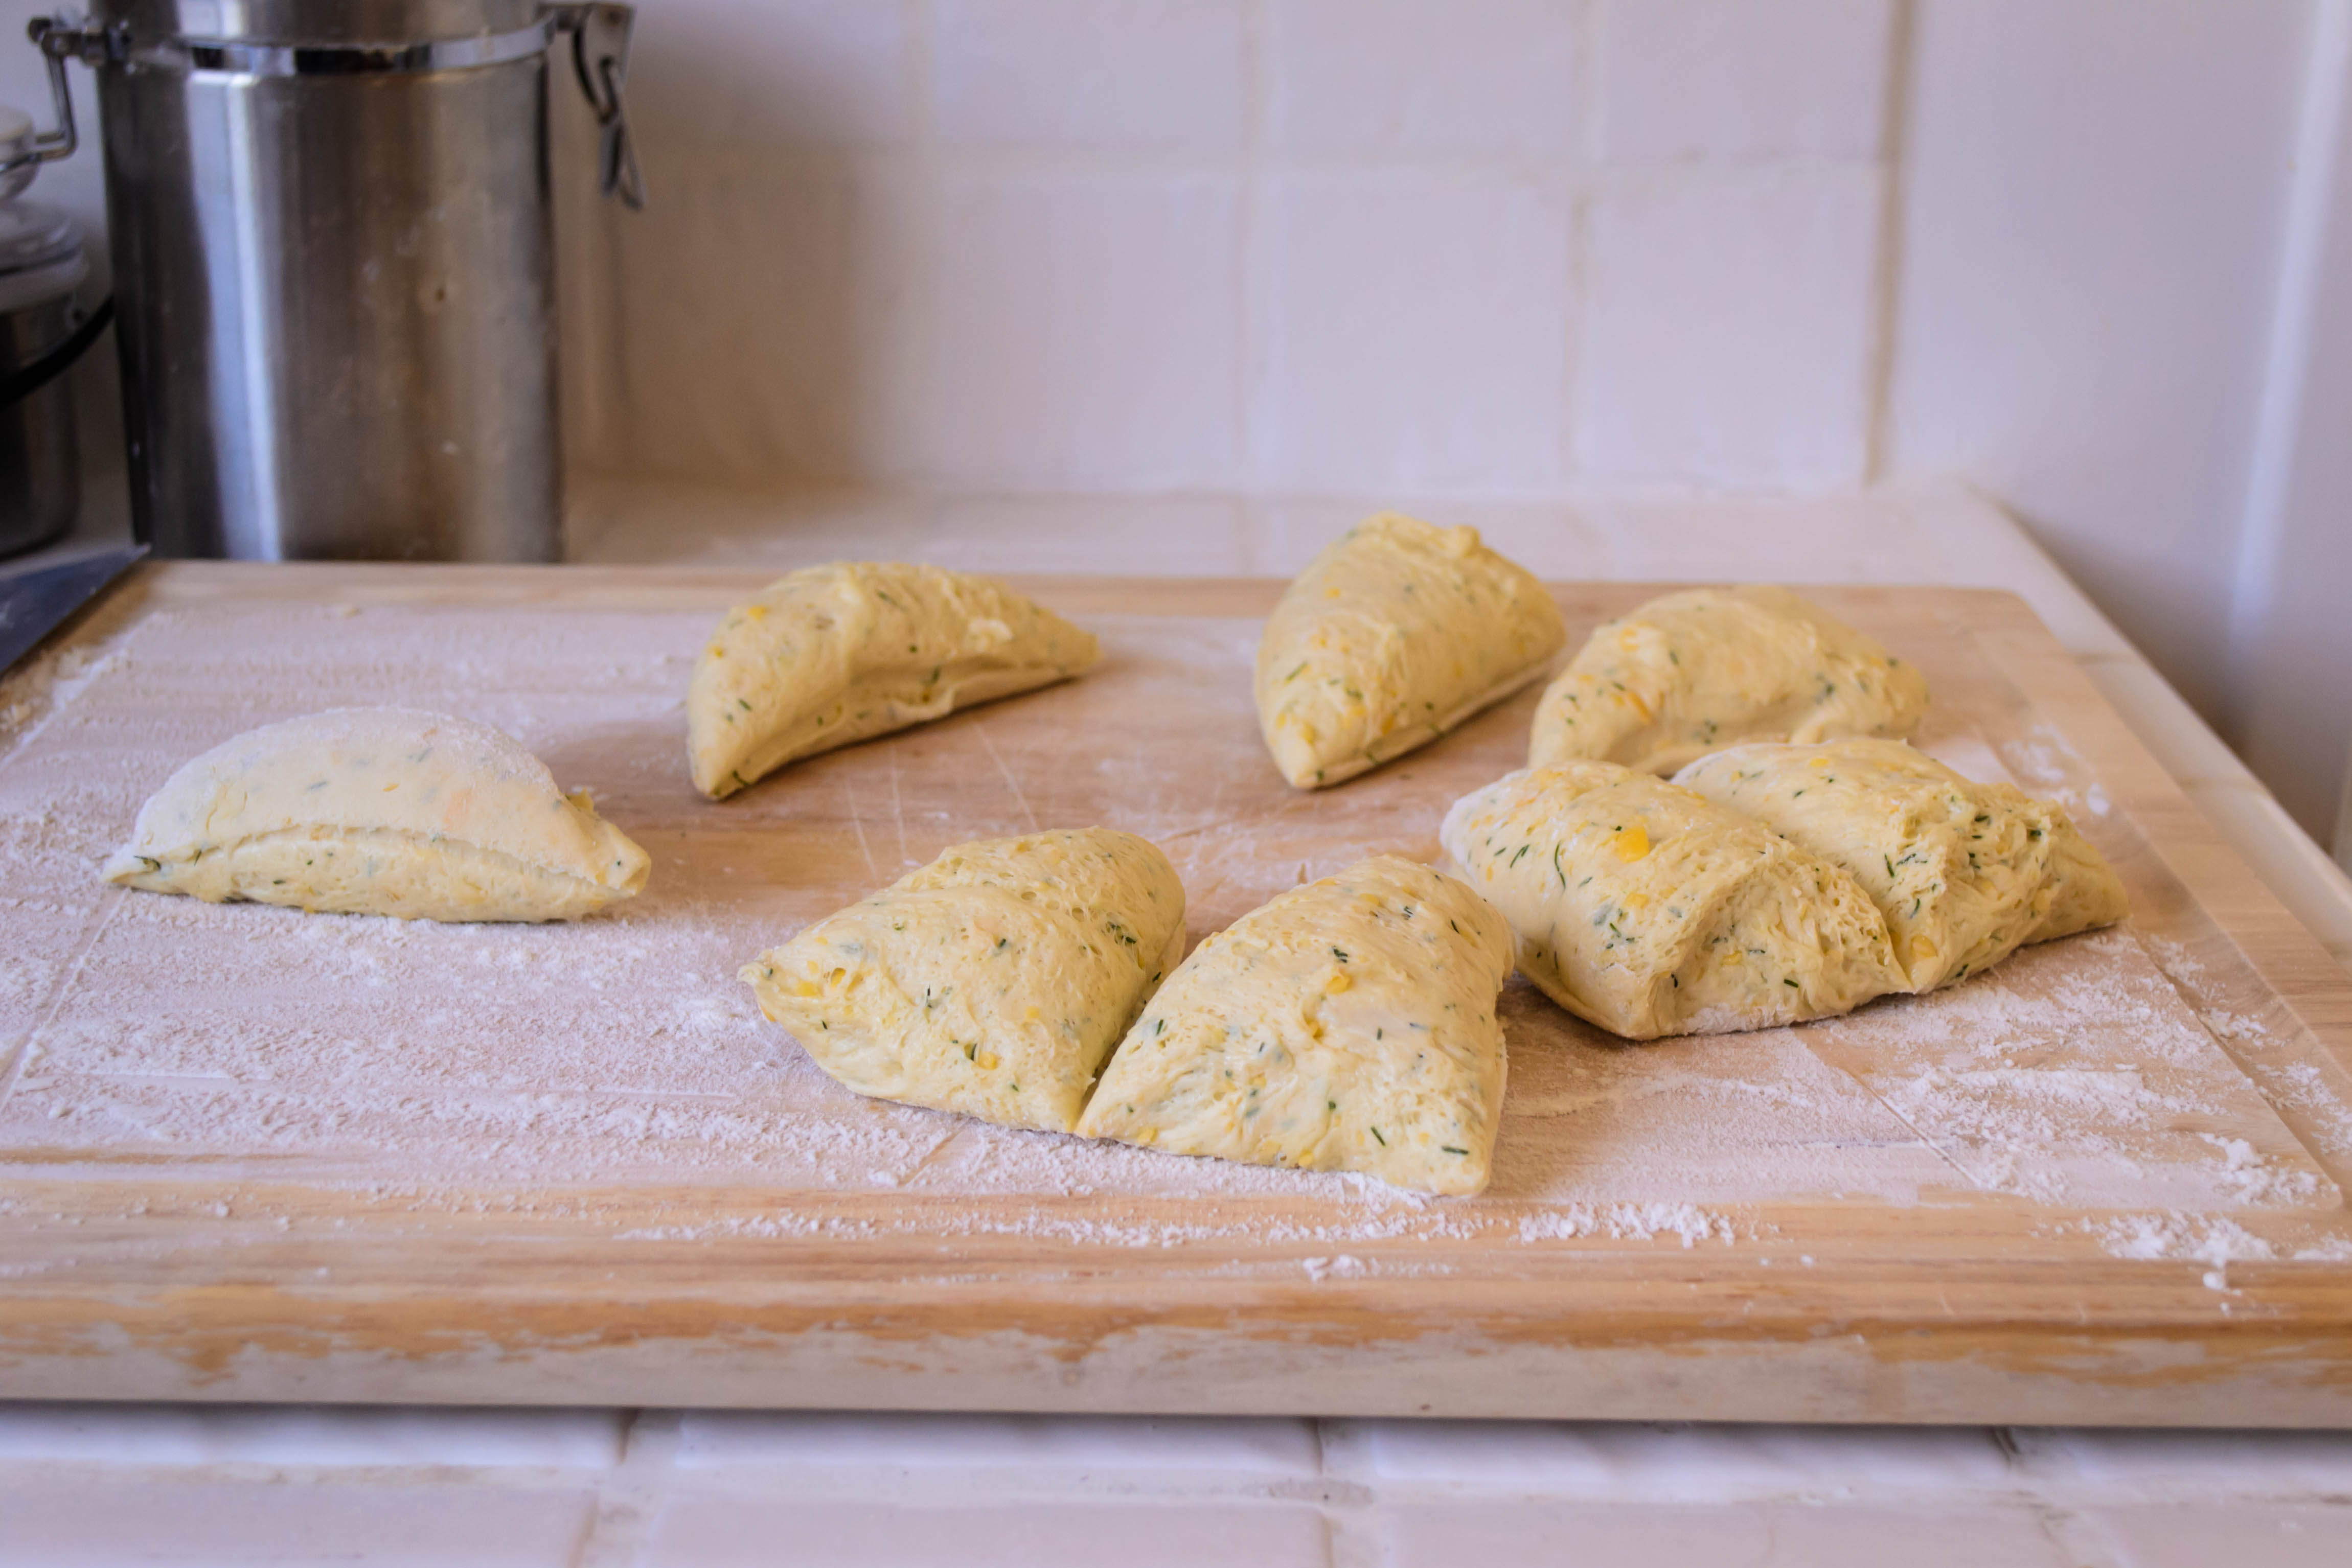
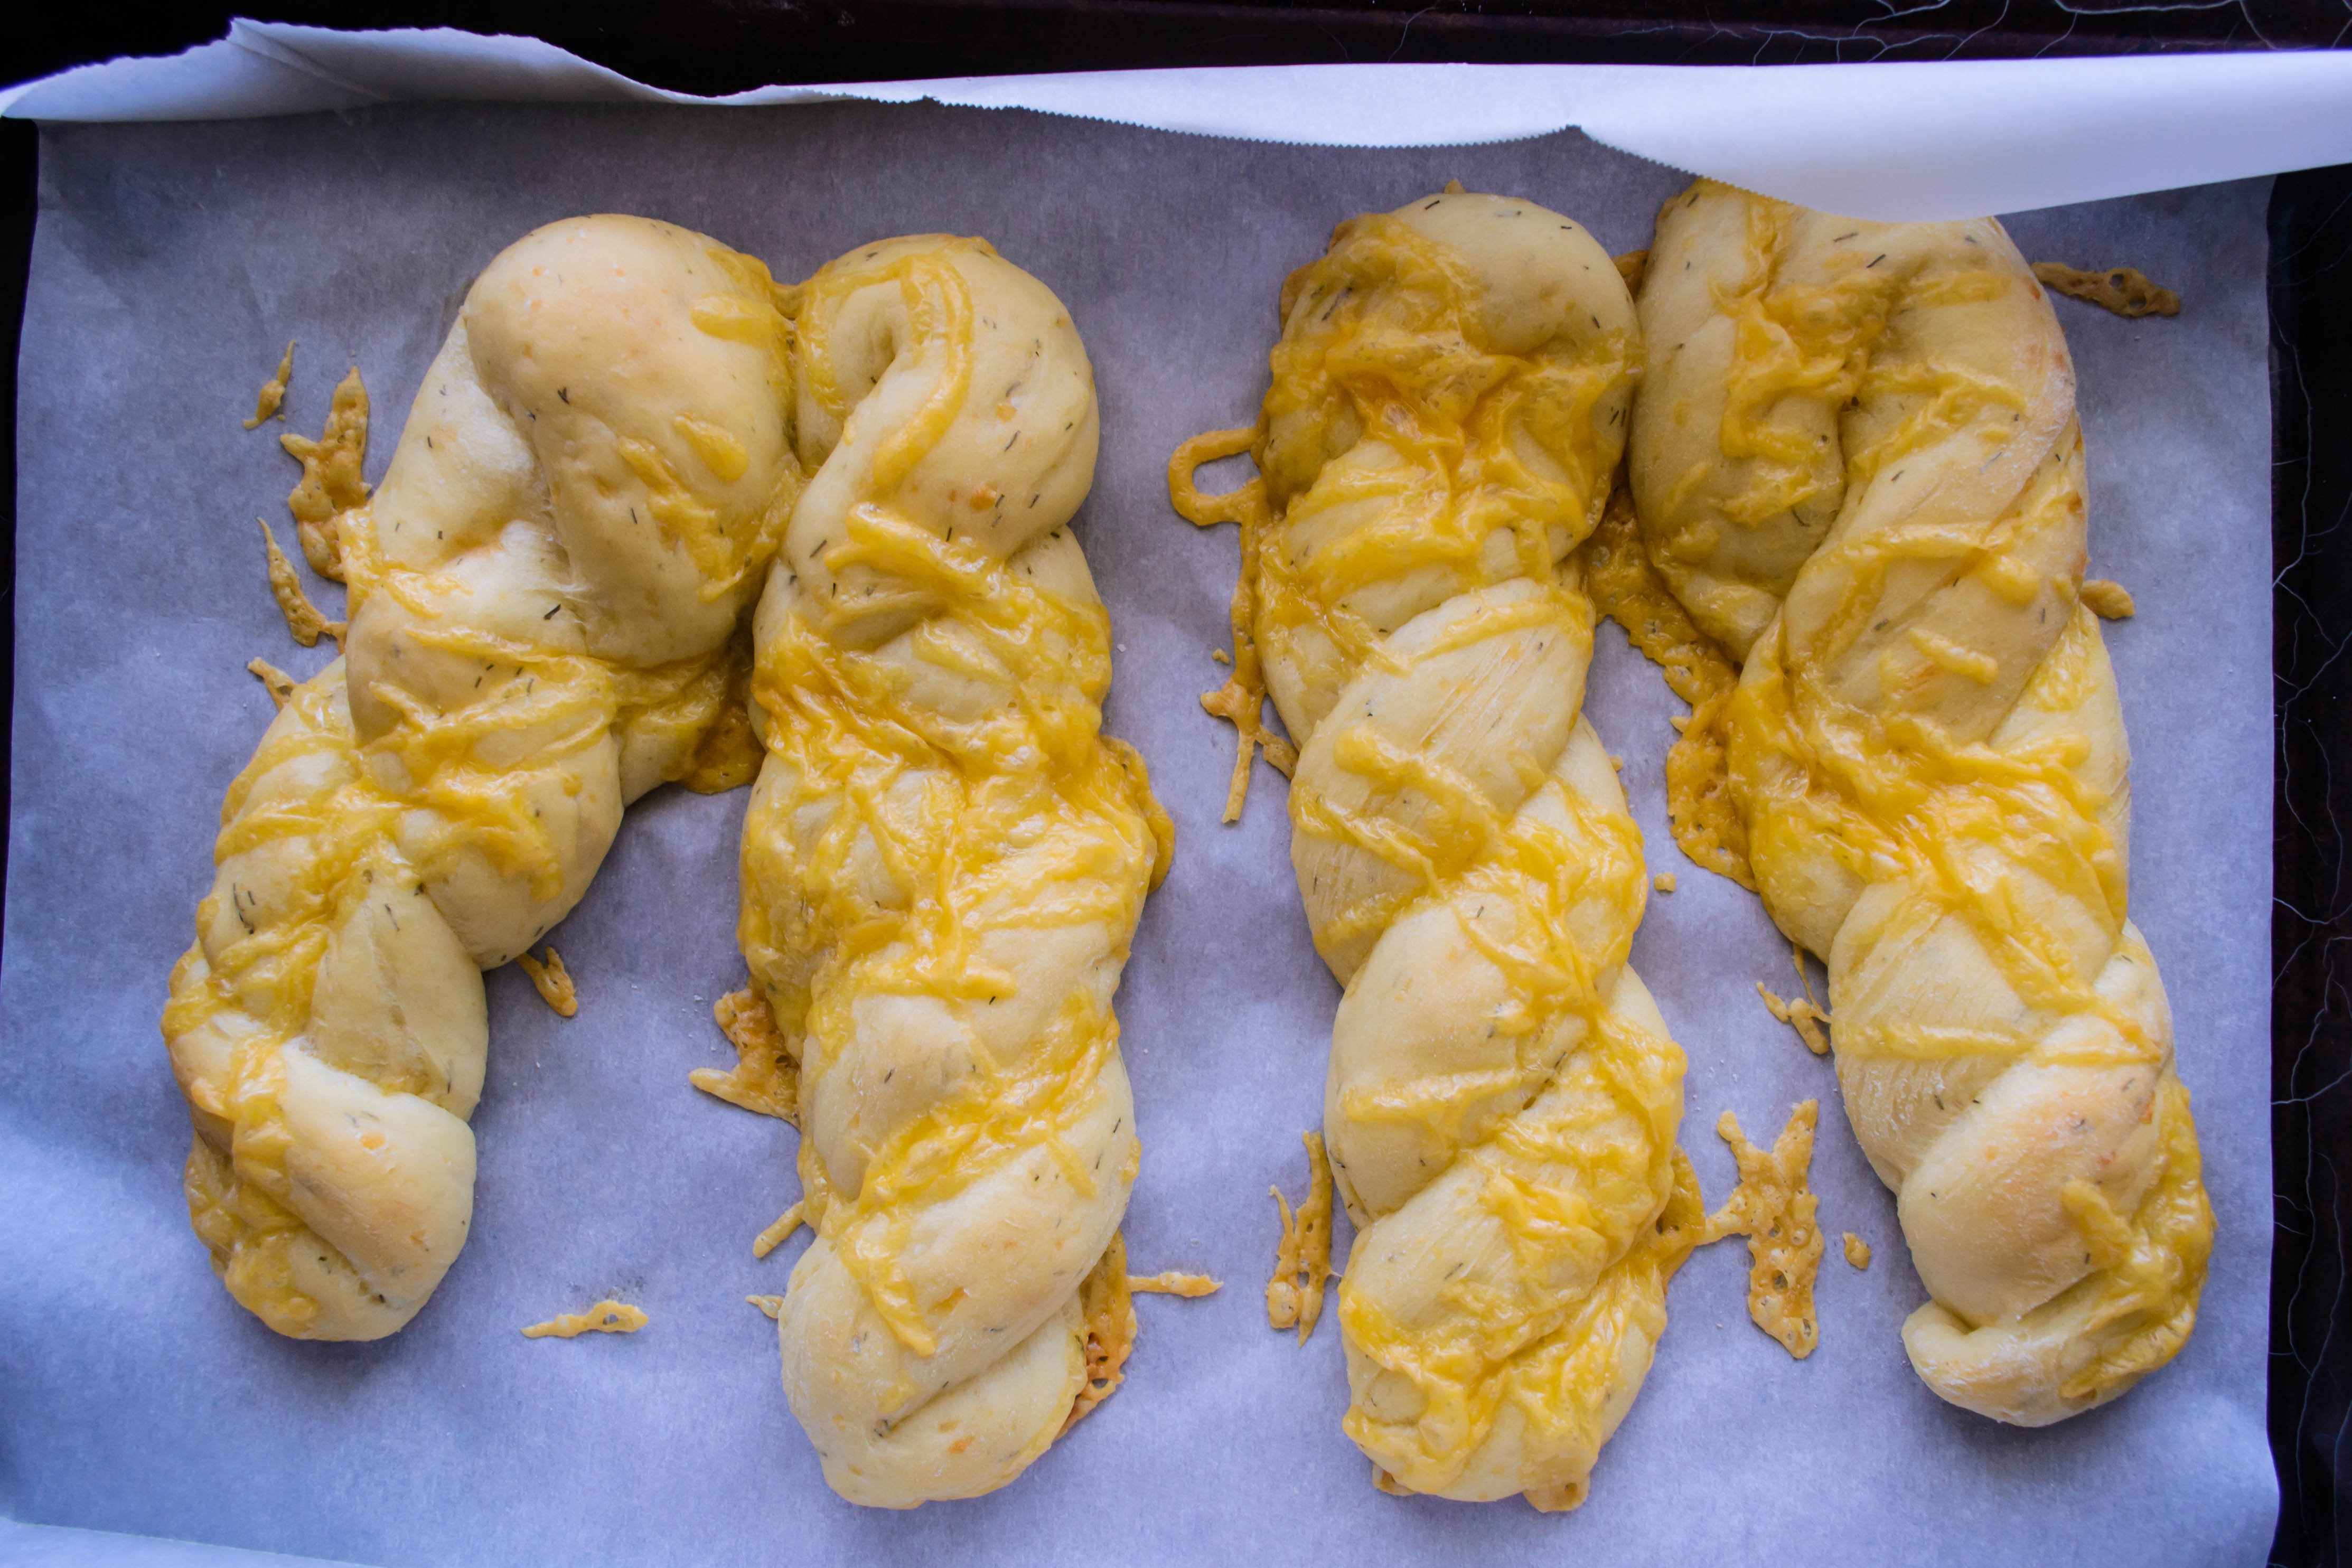
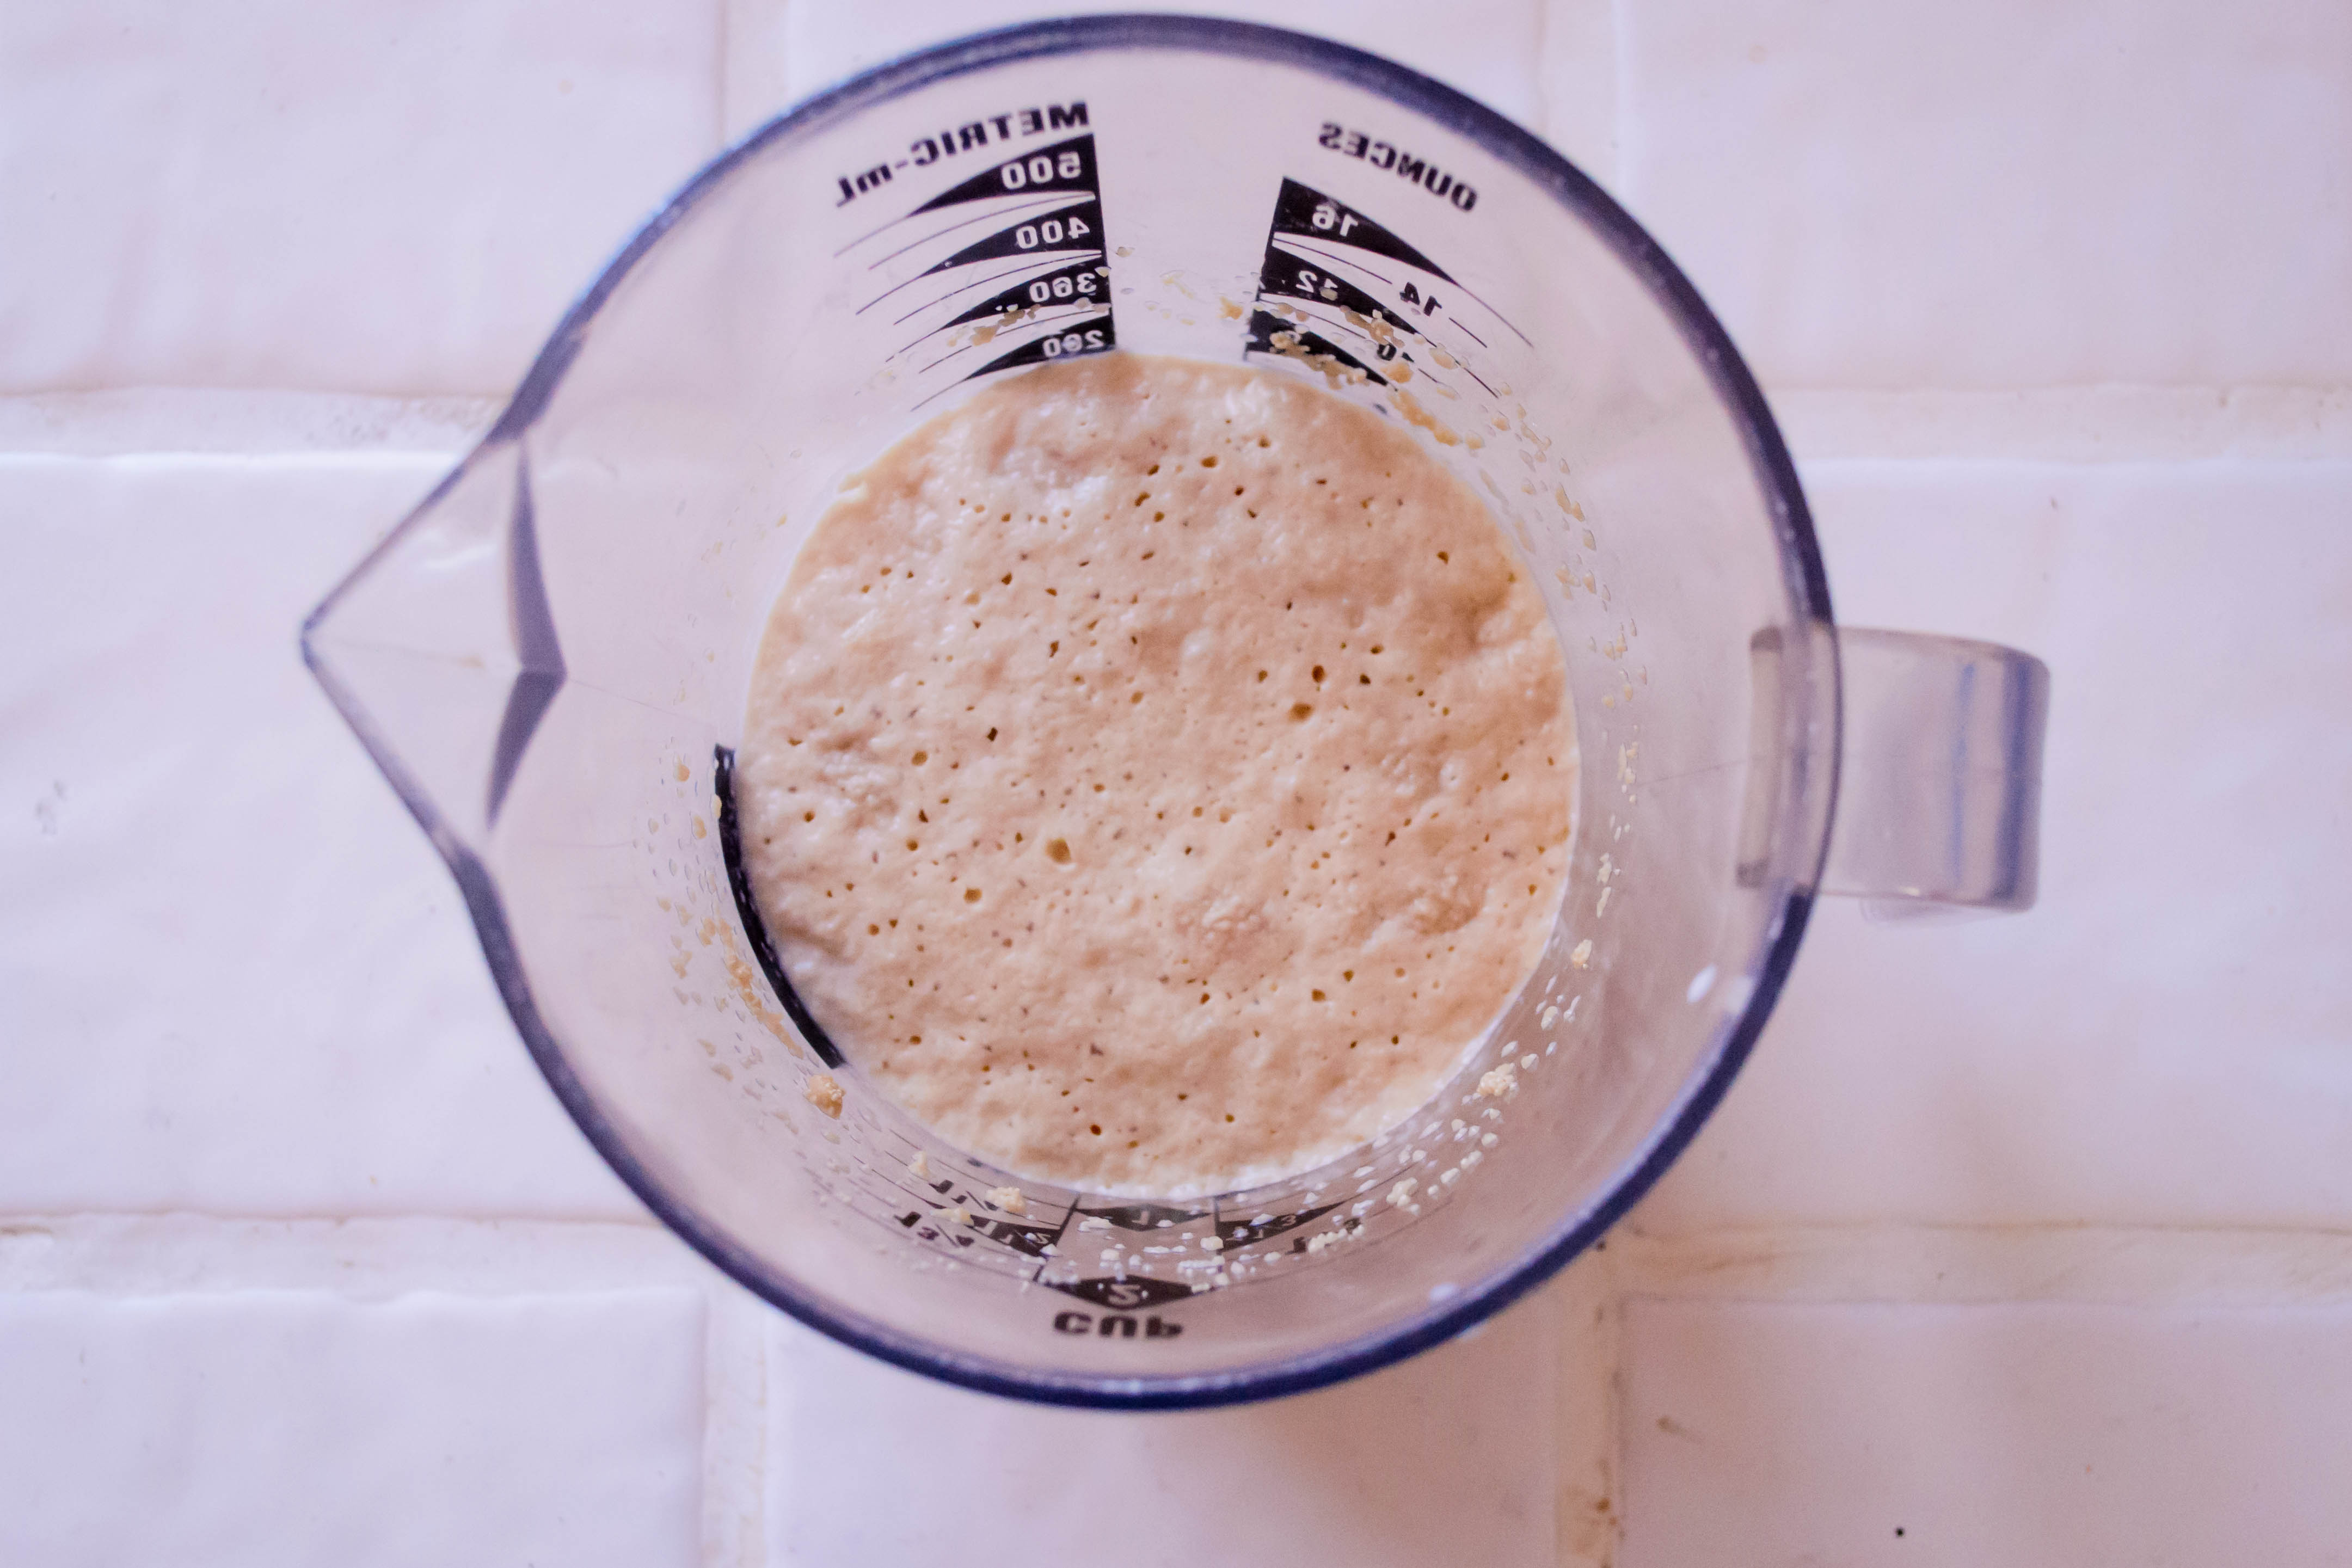
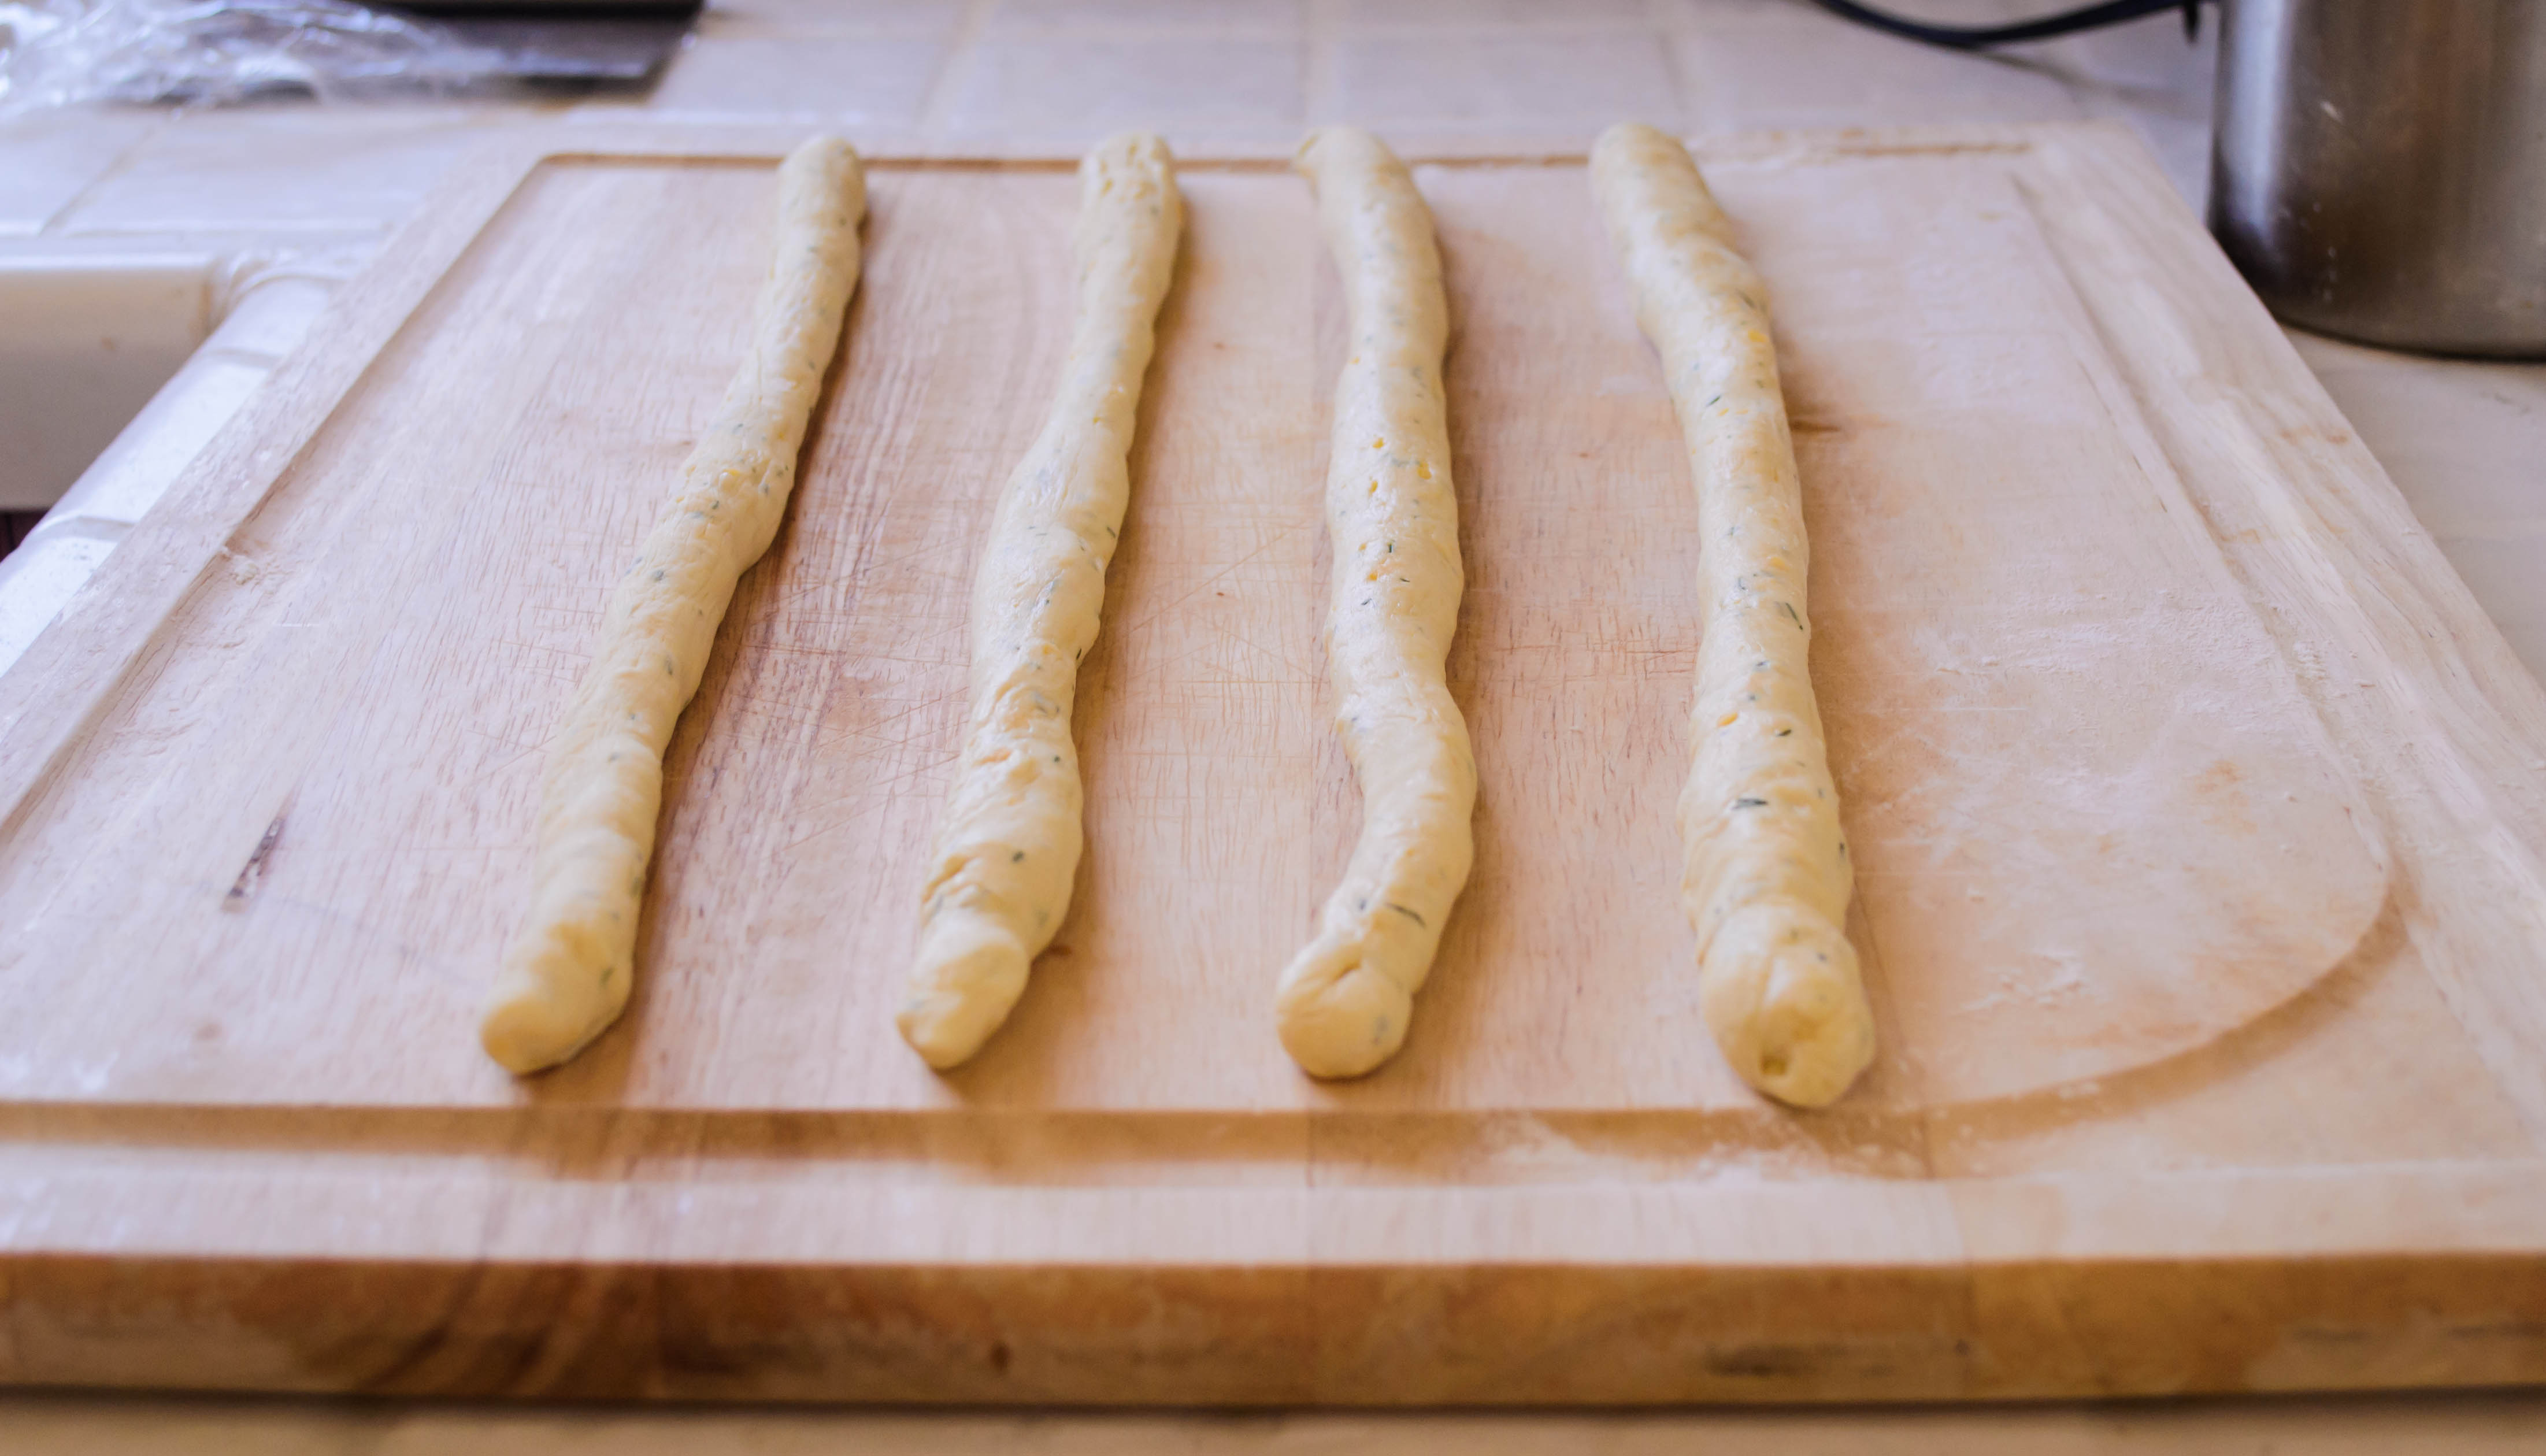 With all of these options to work with, I was surprised by how quickly I landed on a choice. I’ve been playing around with a pairing of dill and cheddar, and this seemed like the perfect opportunity to showcase it. Dill goes really well with yogurt, so for a different source of fat and moisture, I decided to use some thick, tangy Greek yogurt instead of butter in my dough. The tartness of the yogurt would be nice with the rich sharpness of the cheddar. And since I like to be fancy, I decided to make little twists, rather than a standard loaf.

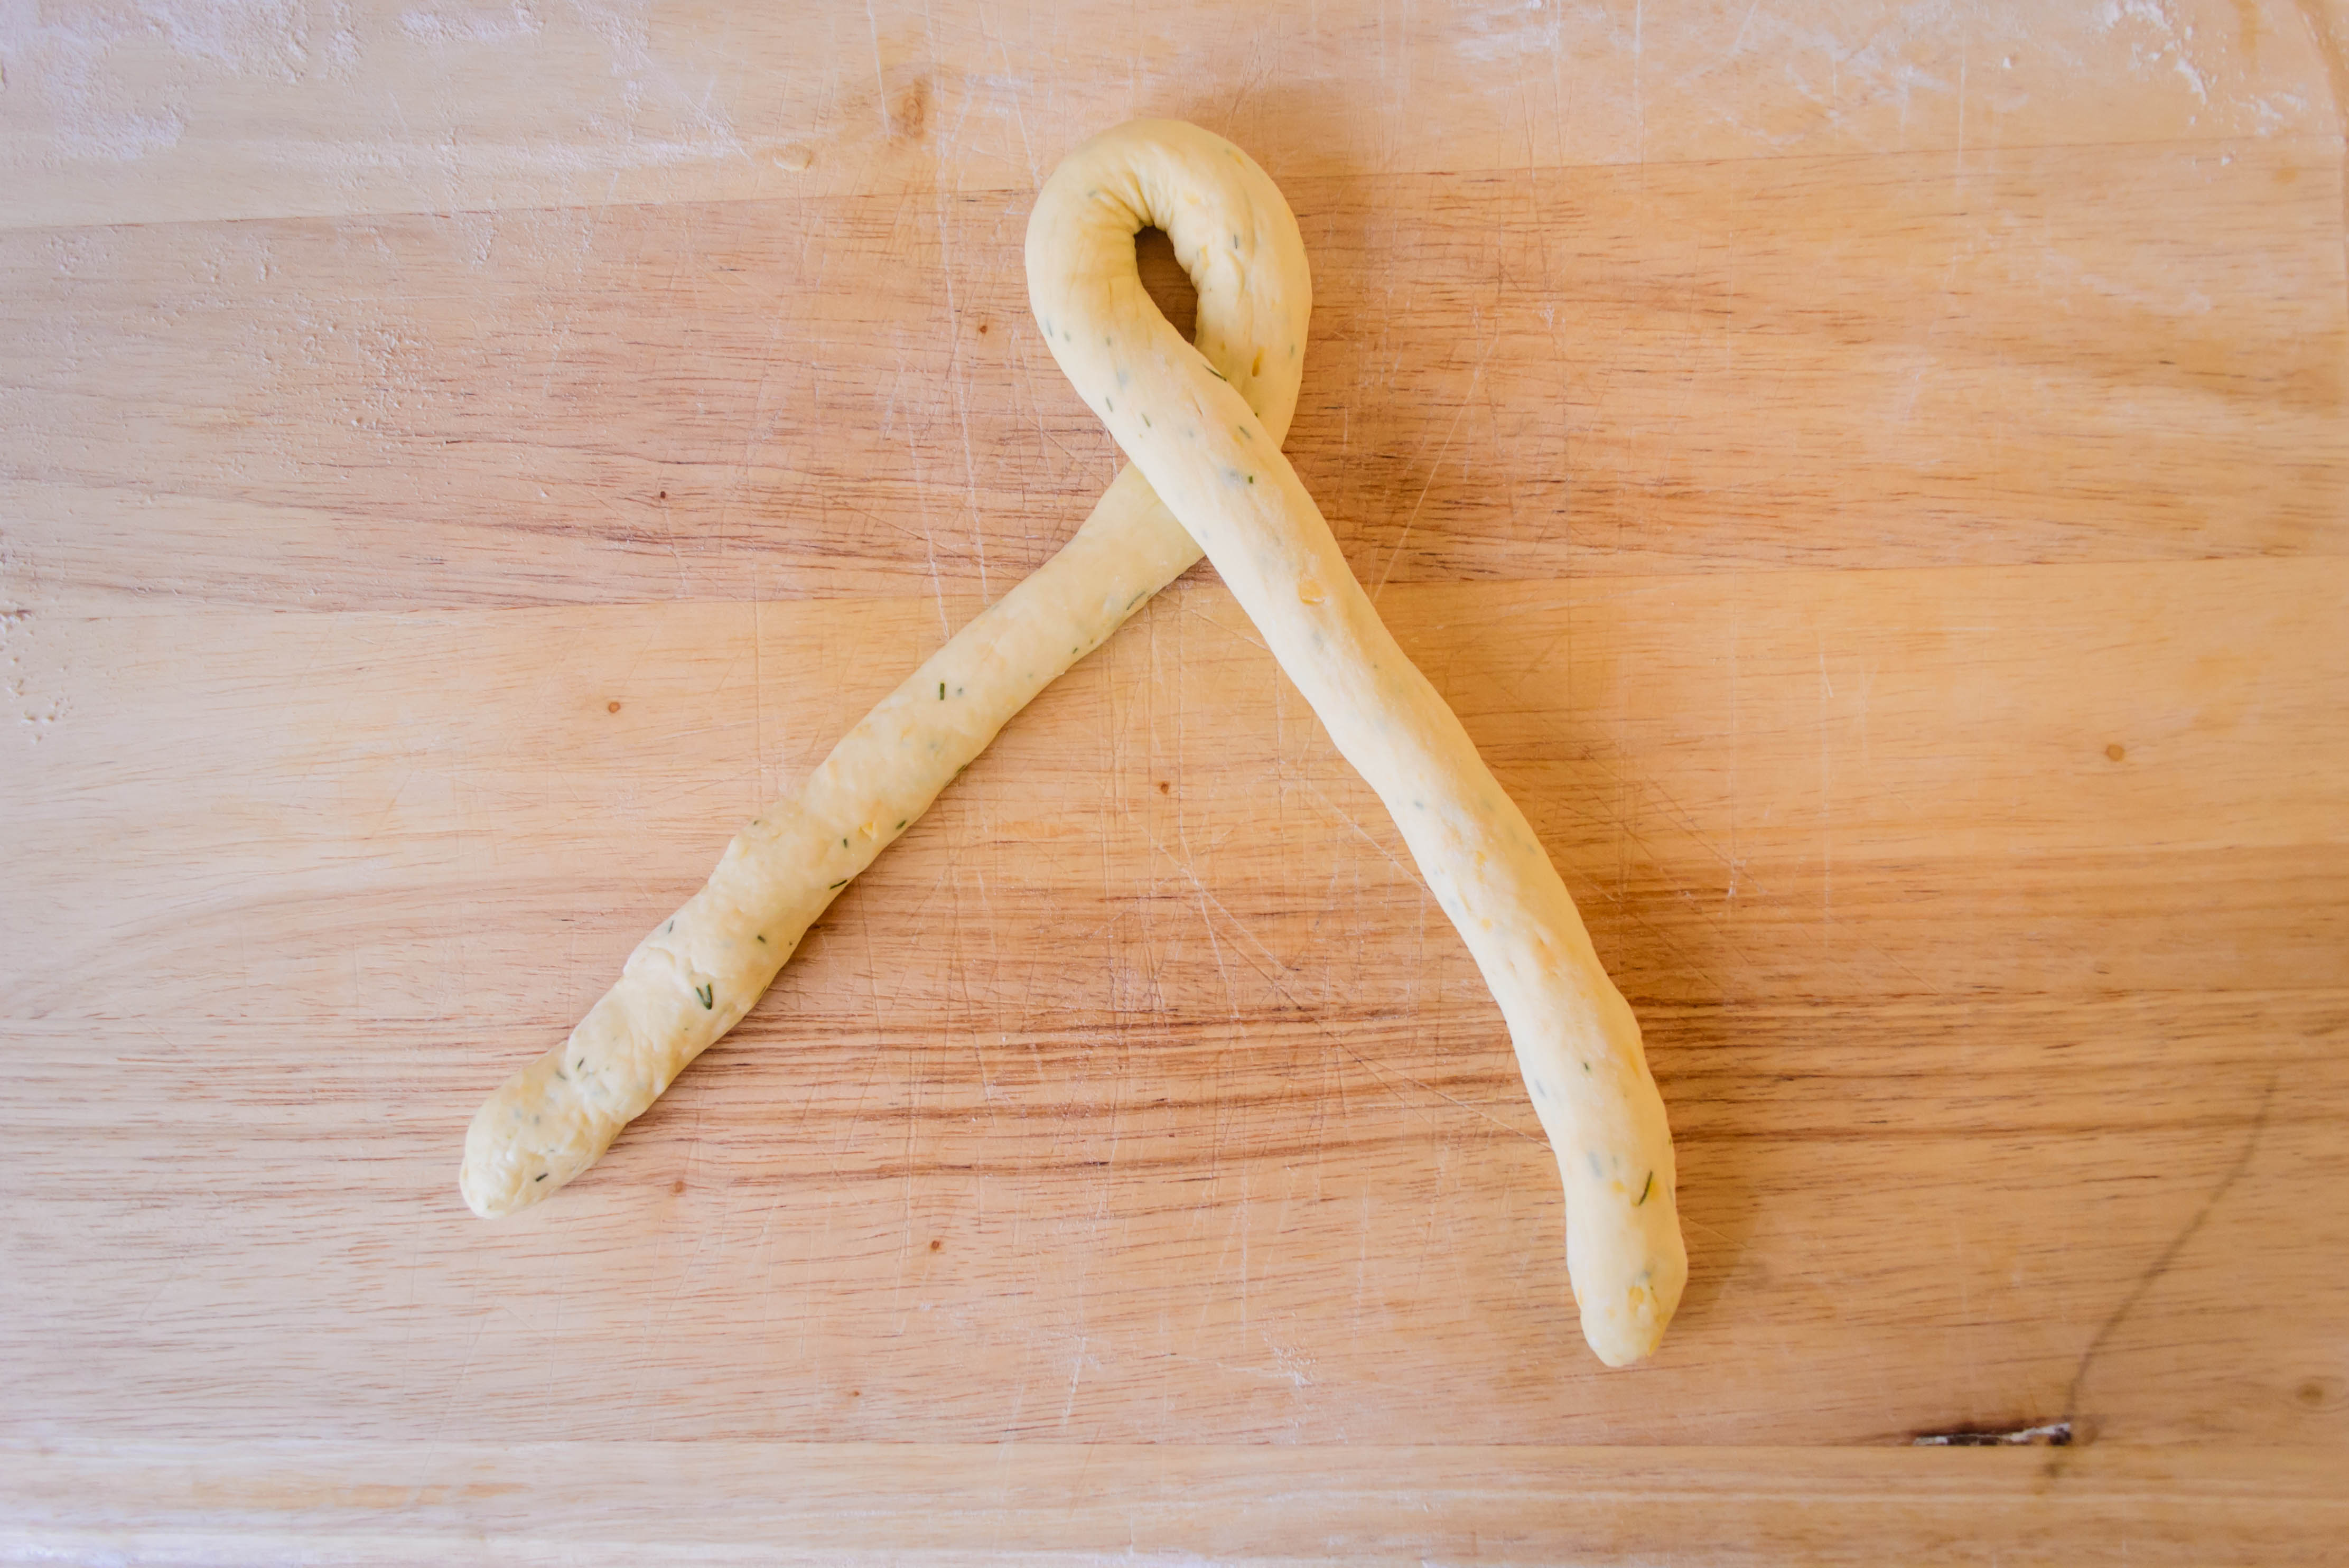

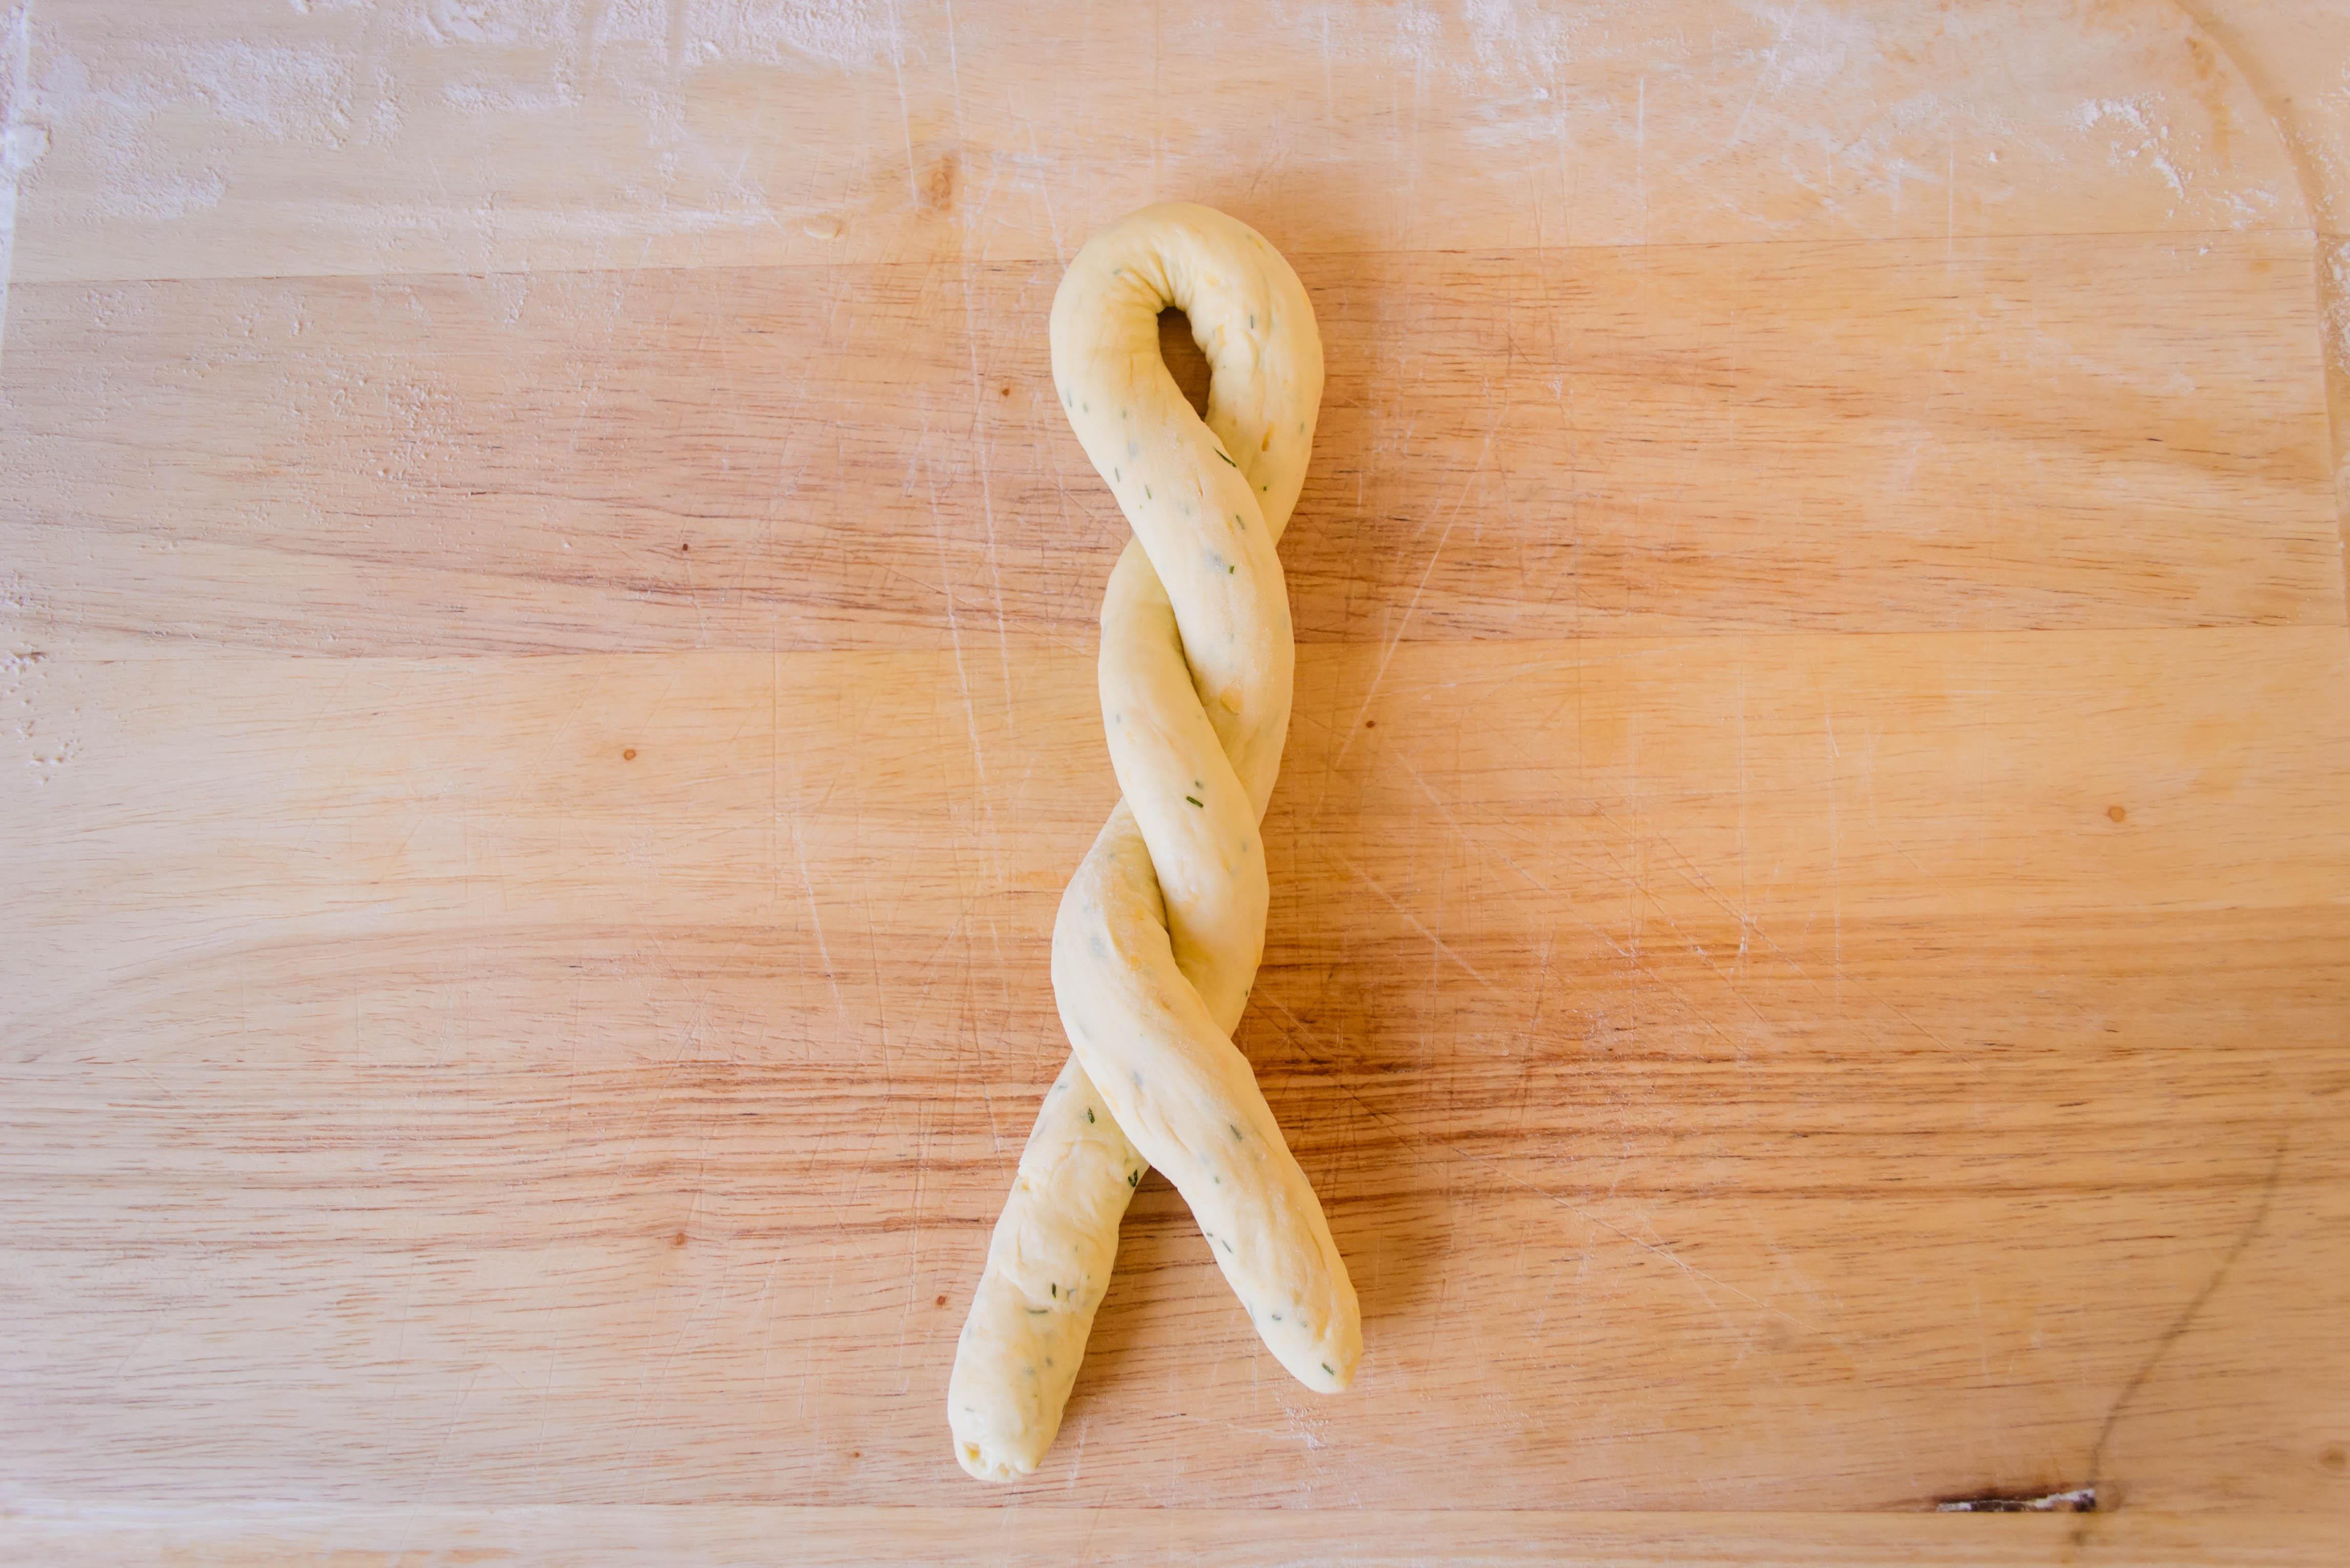
 Guys, these are definitely the right thing to do. The dill-cheddar-yogurt trio is a chamber group on a good night. They bounce off each other in such a lovely way. But it can’t be denied that the star here is the cheese. It melts into little orange pockets while the dough turns into bread, and the smell of it while cooking makes a better homecoming than much else I can think of. I made one tray of twists with cheese sprinkled on top and one without, just to see which was better. As you might expect, more cheese won the day. It drips over the edges into crisp little crackered pieces you can snap off and crunch through before you dive into the main event.

 I had the idea that these would make fantastic extra-large tea sandwiches: halve them into long pieces, toast lightly, slather with cream cheese, then layer with long strips of cucumber. Cheese on cheese is rarely a bad thing, and the cucumber would nod to the dill and provide a crisp freshness and a lightness for the perfect spring lunch. Alas, when I reached into the fridge drawer jammed with vegetables, not cheese, my cucumbers were past their prime. So I had to settle for cream cheese alone, with a side of Caesar salad. I can’t say I ended up disappointed.
 Serving suggestion: these are perfect all on their own straight out of the oven. But they do make a nice, roll-sized vehicle for anything sausage shaped, and I can’t see many people objecting to using this as the base for a good solid cheesesteak sandwich. If you really wanted to get decadent, the twists could be split lengthwise, spread with a garlic butter, and broiled into a dreamy take on garlic bread.
To capitalize on the tea sandwiches idea, you could make them even smaller, dividing into 16 or even 24 pieces, and creating miniature twists to serve as part of an appetizer spread with the requisite cream cheese and cucumber filling. I haven’t tested this smaller size so I can’t be sure how much to reduce the baking time – start with 12 minutes and go from there.


#TwelveLoaves is a monthly bread baking party created by Lora from Cake Duchess and runs smoothly with the help of Heather of girlichef, and the rest of our fabulous bakers.
Our host this month is Robin from A Shaggy Dough Story, and our theme is CHEESE. For more bread recipes, visit the #TwelveLoaves Pinterest board, or check out last month’s mouthwatering selection of #TwelveLoaves enter last month’s Italian Breads!
If you’d like to bake along with us this month, share your CHEESE bread using hashtag #TwelveLoaves!
I’ve joined a secret society. At least, I feel like I have. After baking along with the Twelve Loaves group for a year or so, last month its creator Lora invited me to join. Now, instead of just seeing the theme for the month and making a bread to fit, I’ll be one of the bakers who presents the month’s assignment with my own variation. It’s all very official. We have our own Facebook page and everything.
Here’s the deal, though. Since we all have to post on the same day within the same time range, these Twelve Loaves posts aren’t always going to appear according to my regular posting schedule. In fact, based on the April and May posting schedule, I’m pretty sure they always post on Tuesdays.
Until tomorrow, then…

 buttermilk pancakes in morning light.
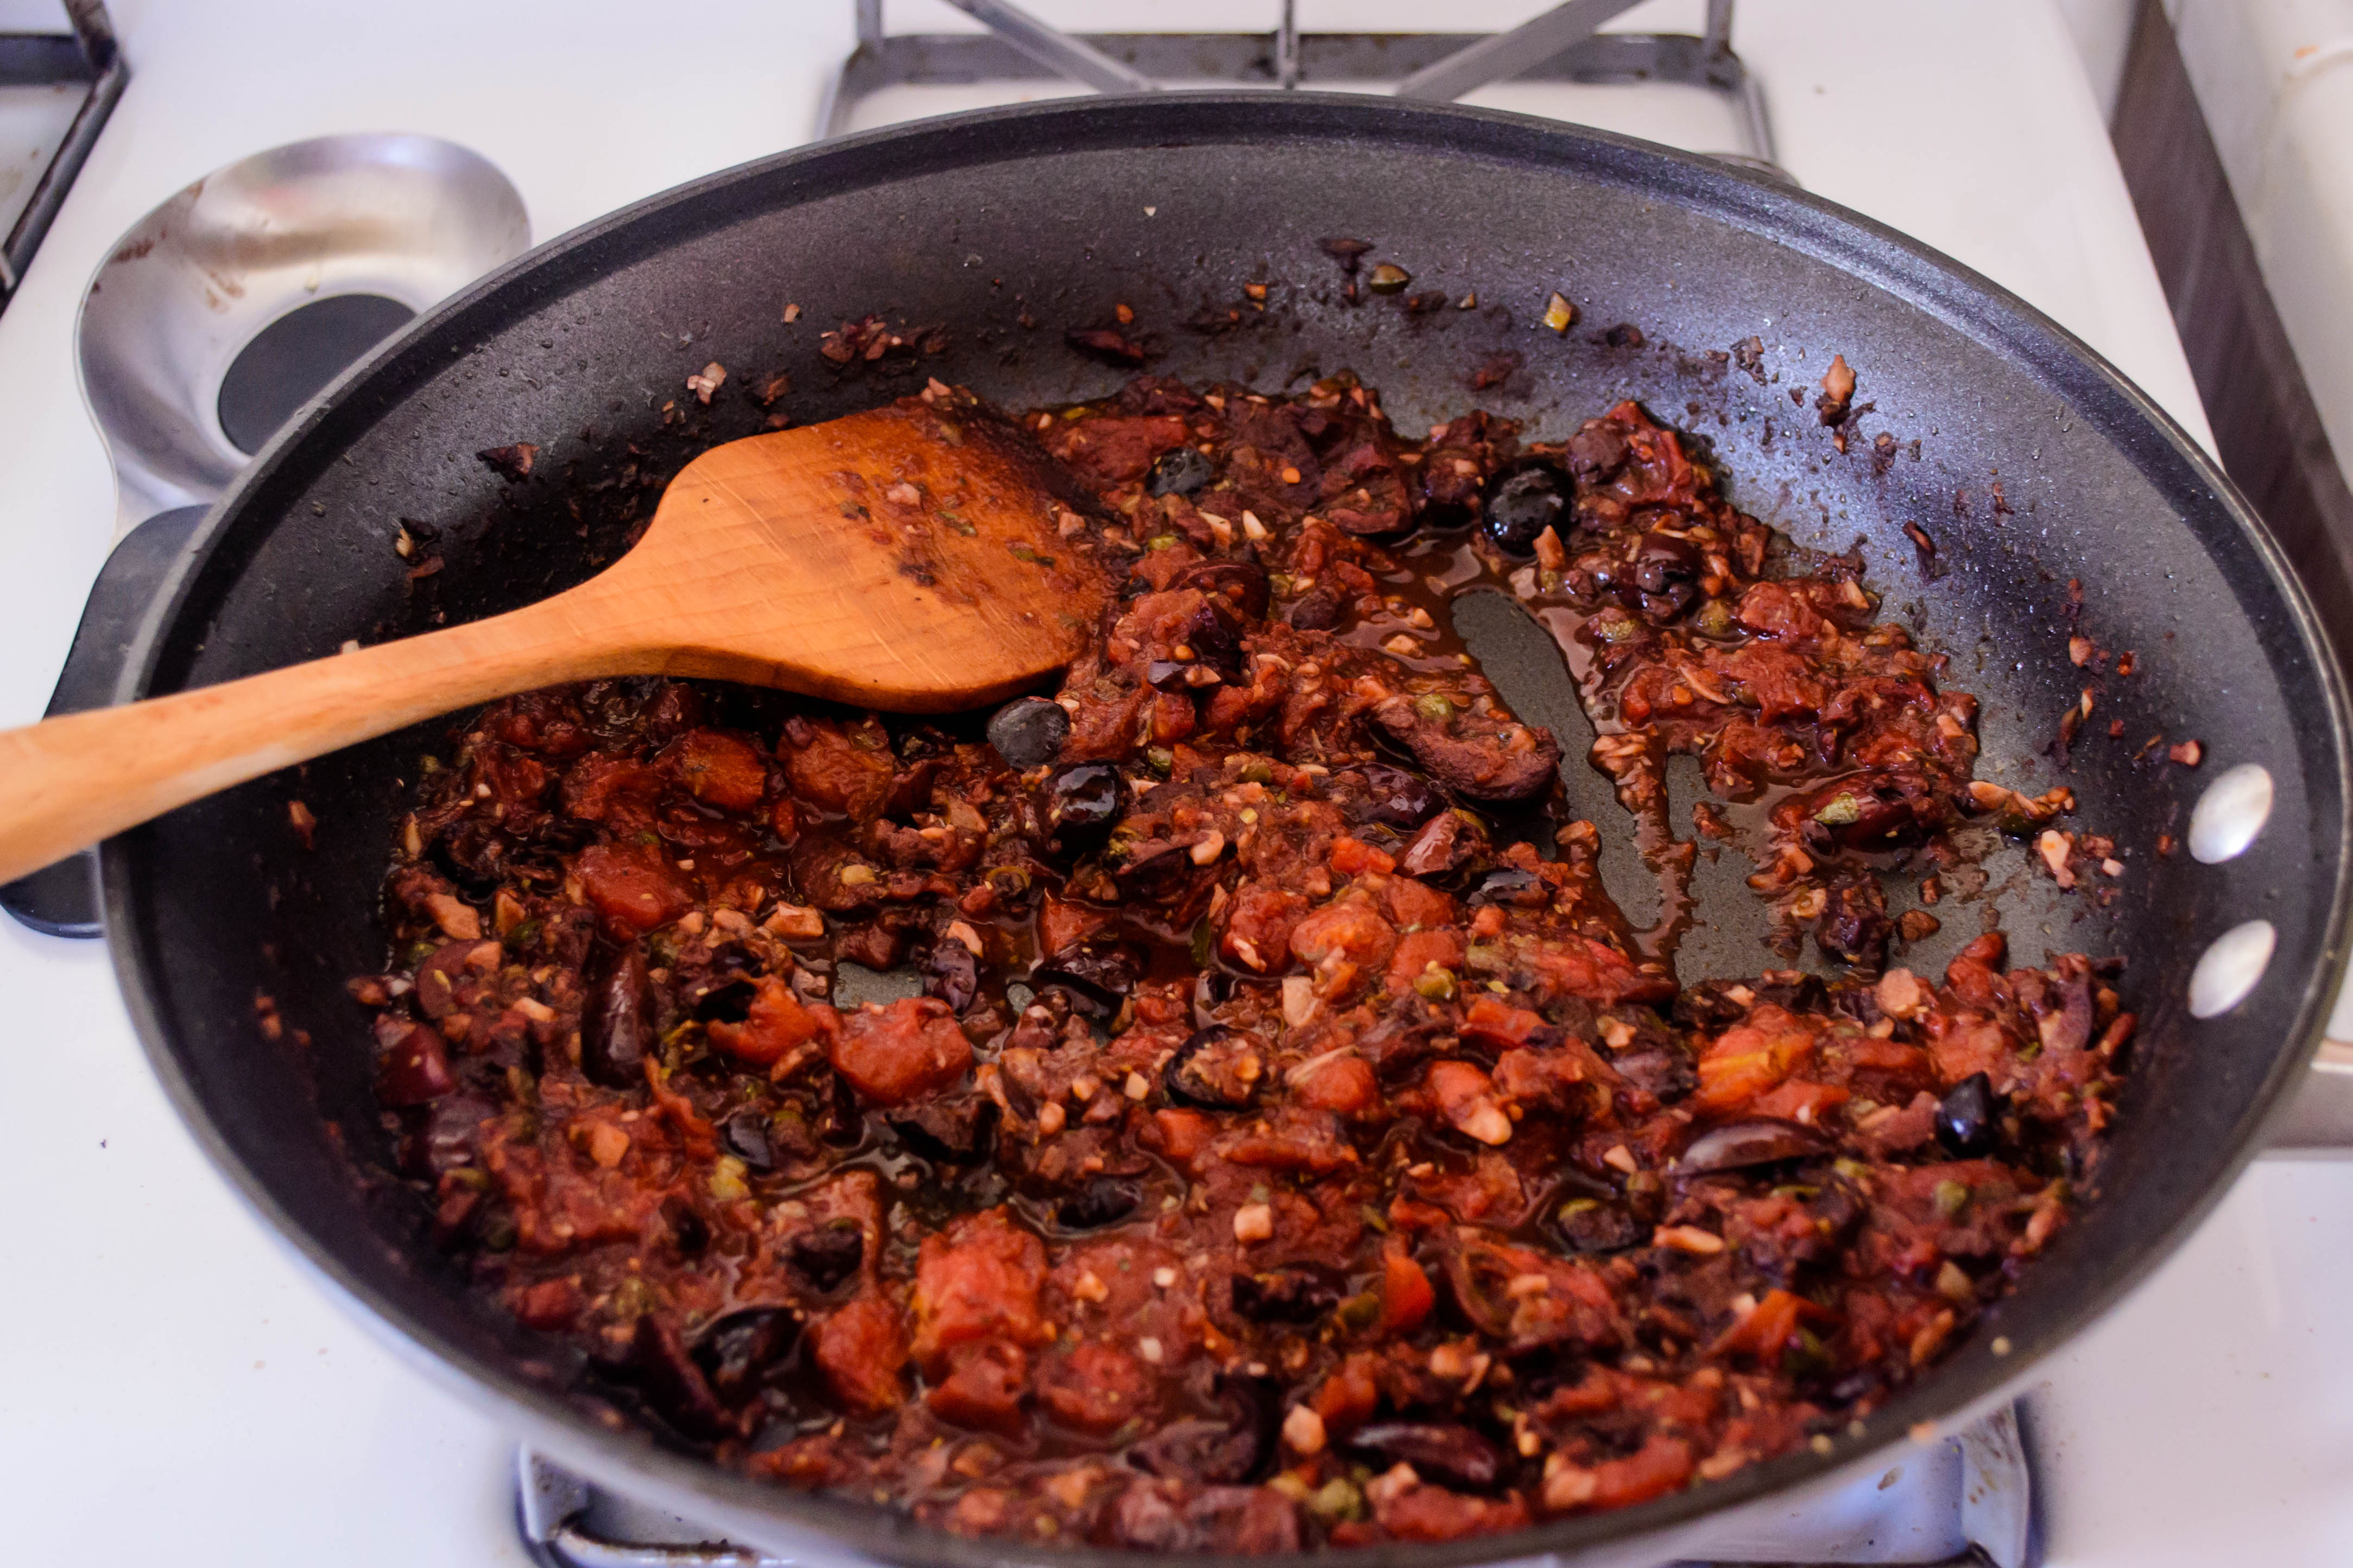
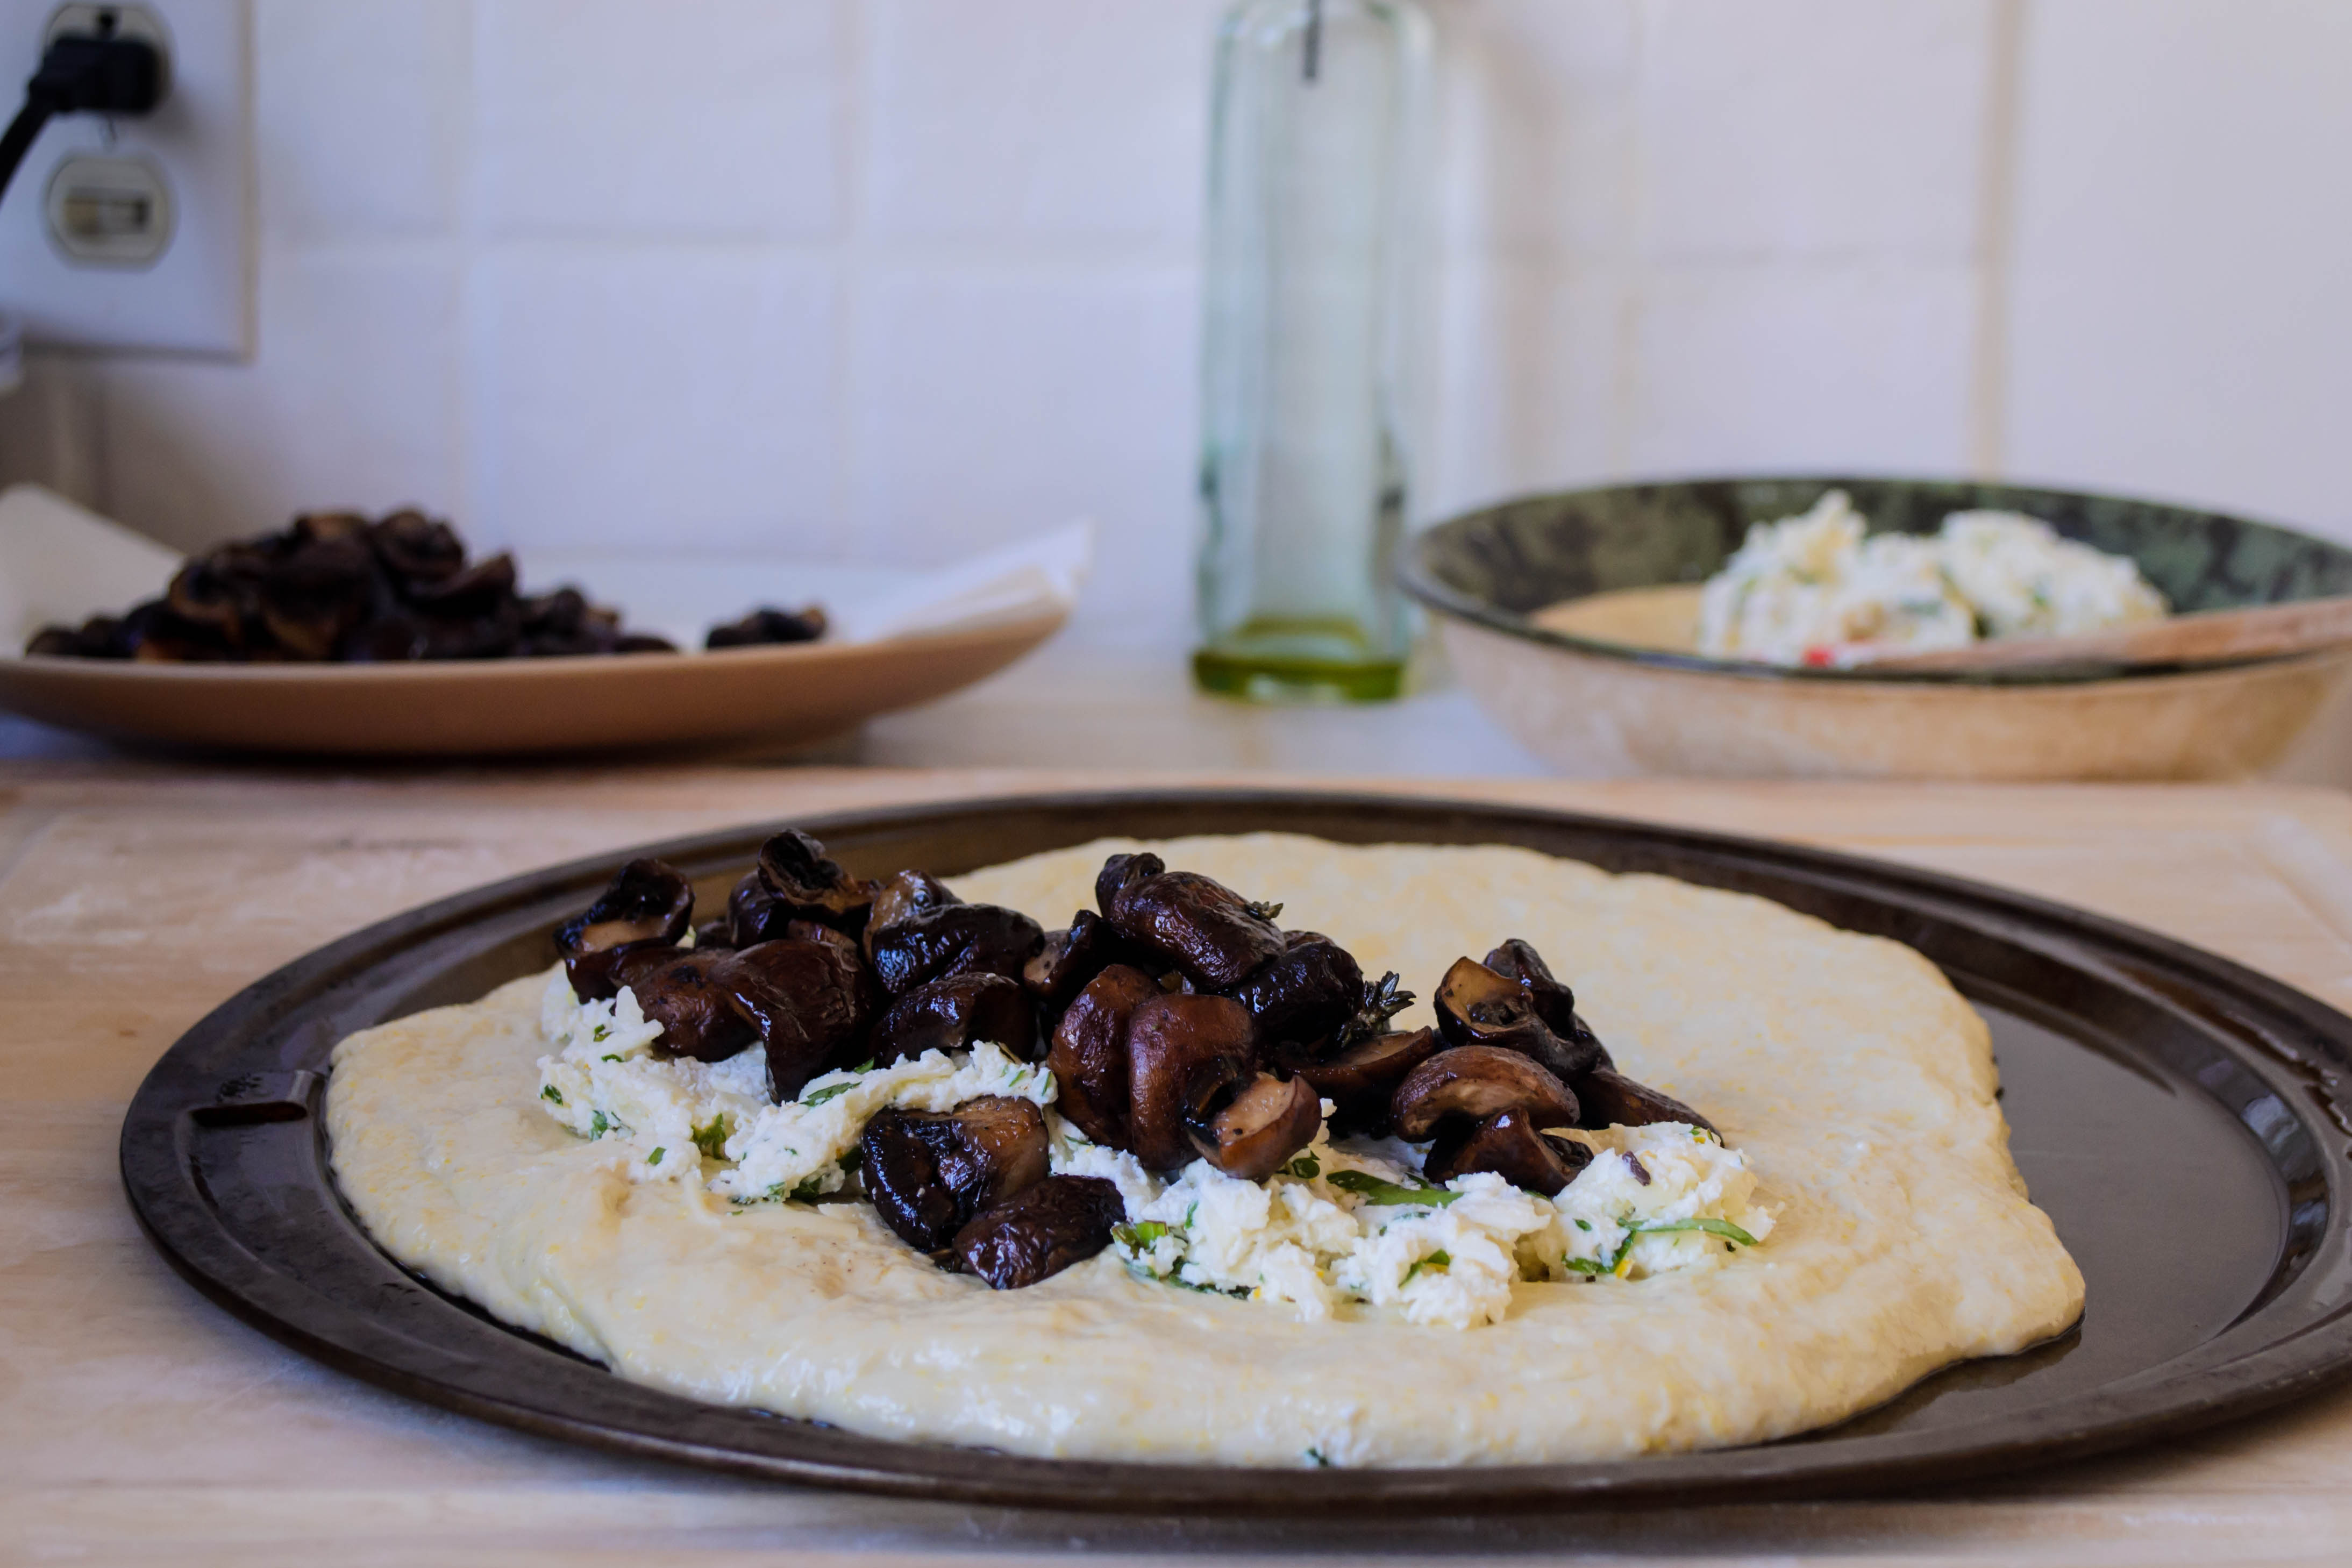
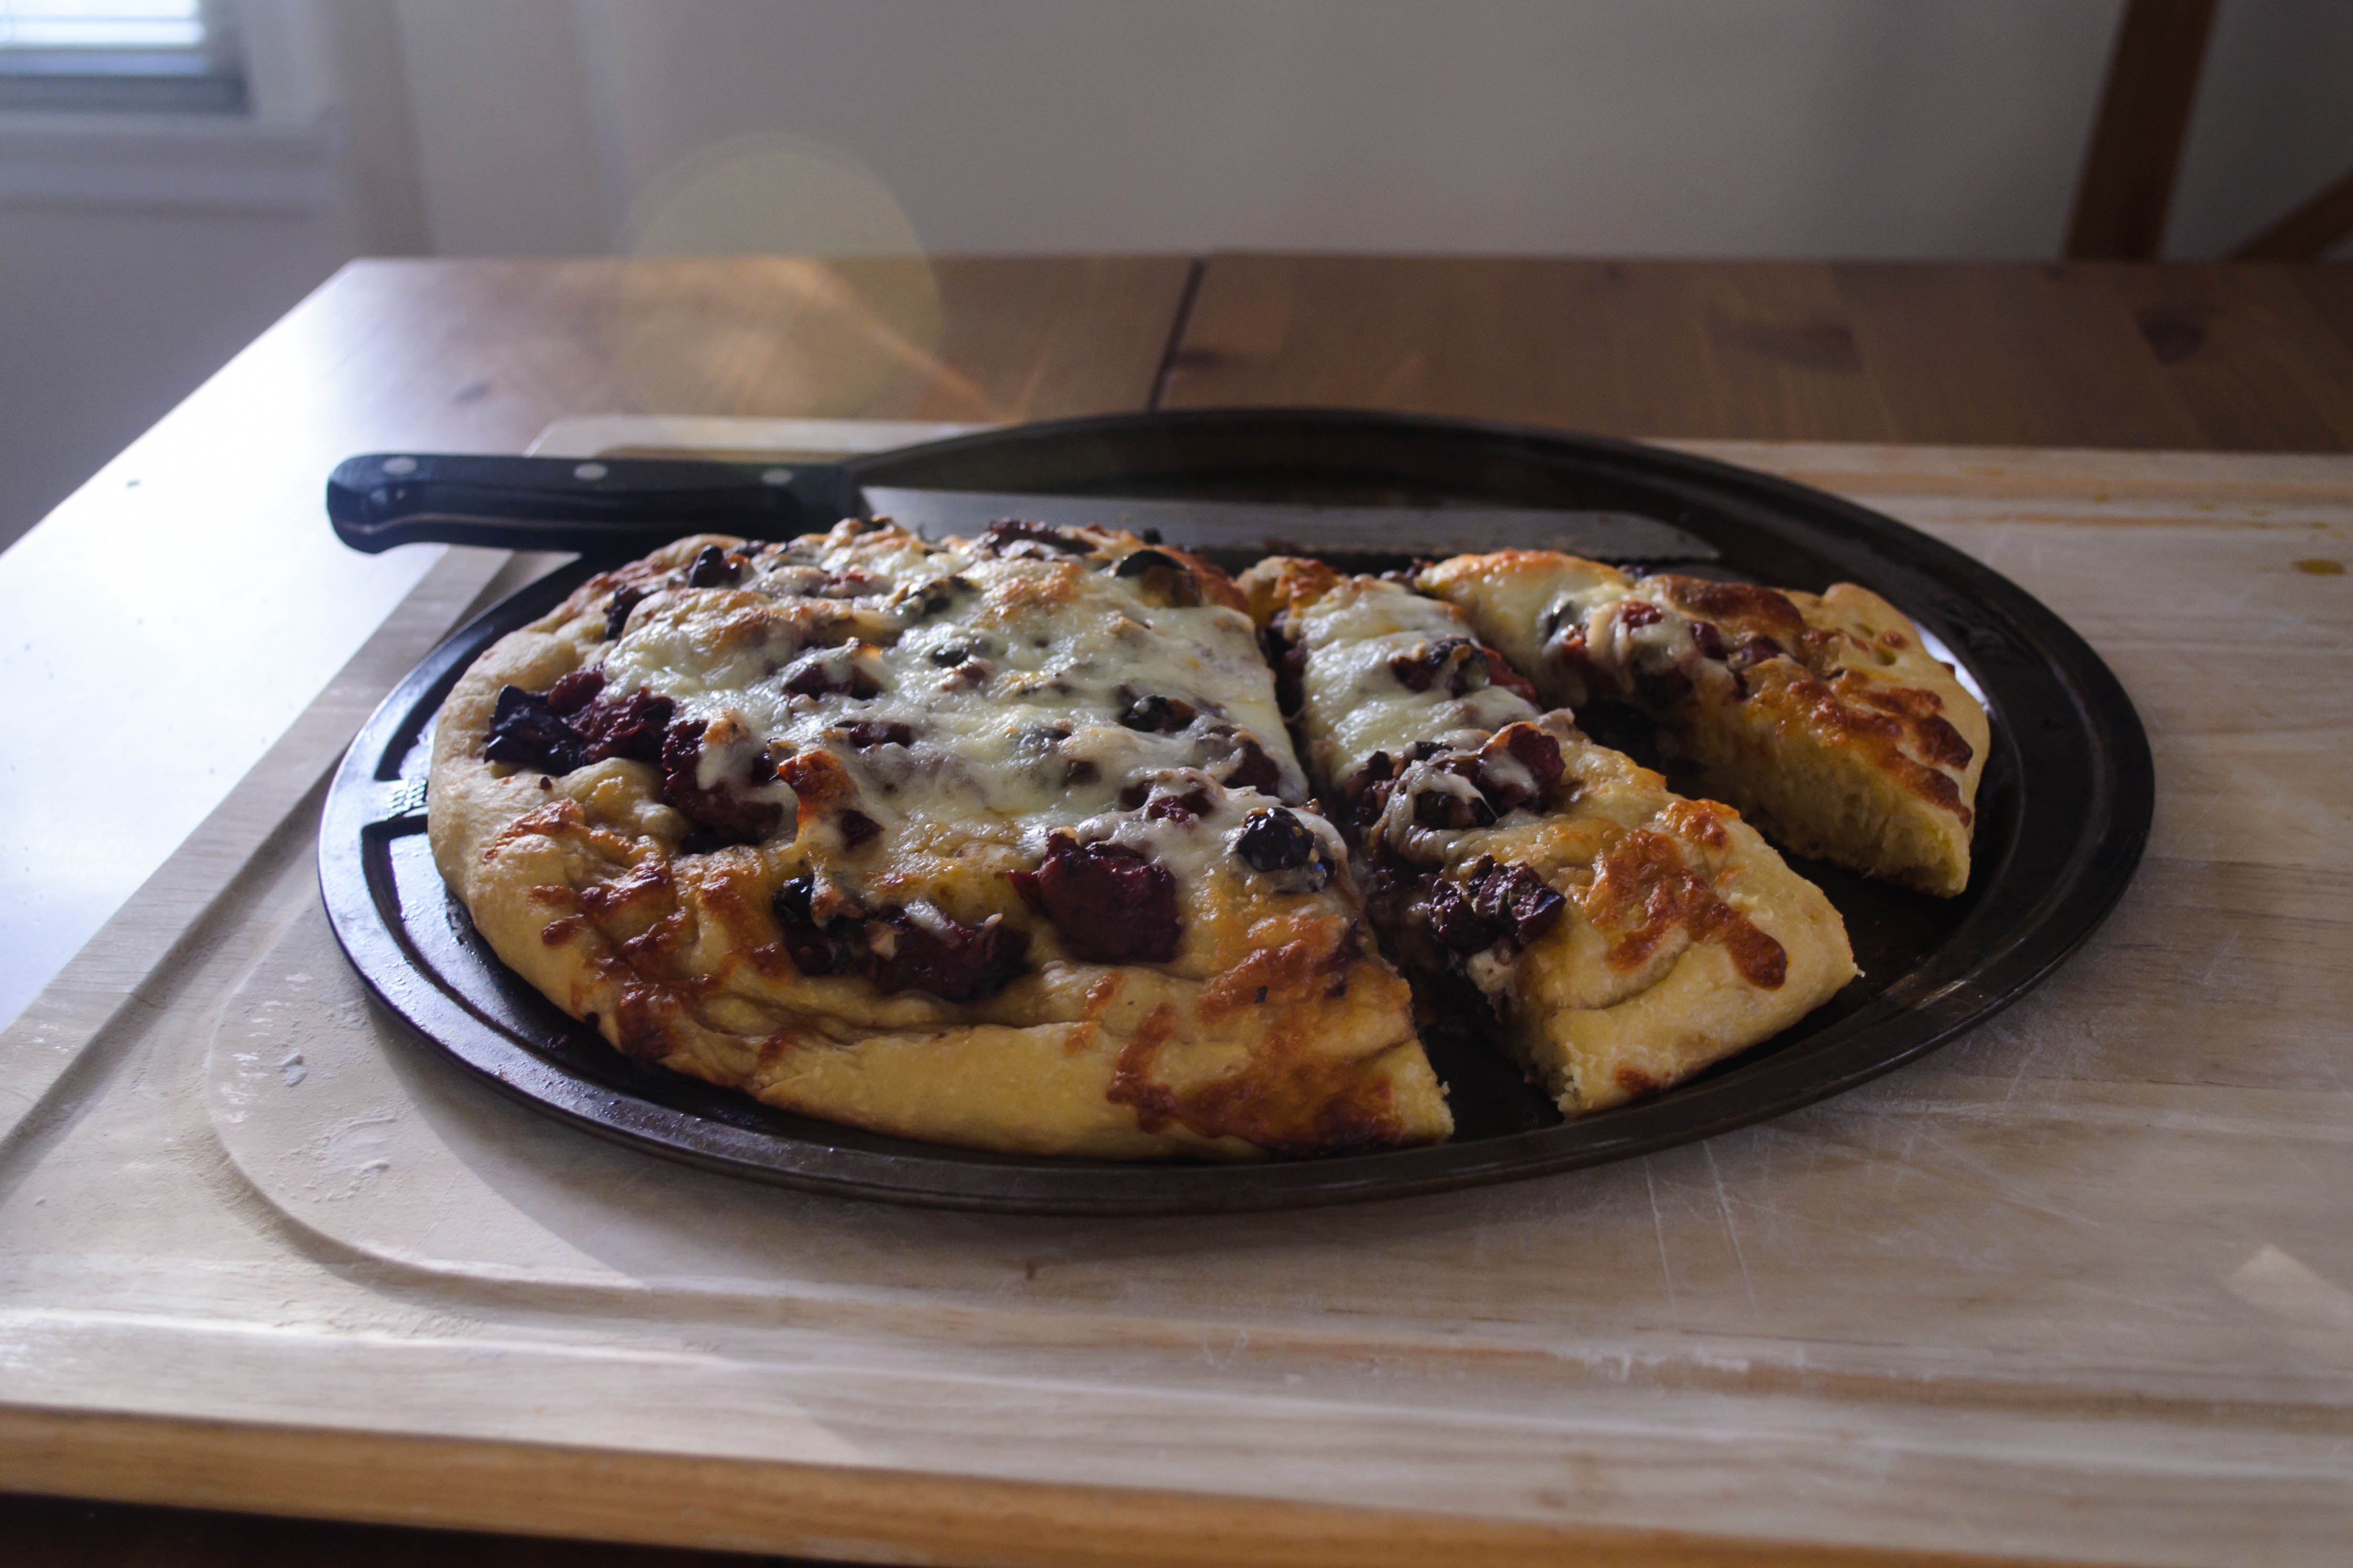 It would seem that I’m developed a bit of an obsession with well-oiled, aggressively seasoned mushrooms, patiently pan-roasted until deeply, deeply browned and edging toward crisp. Still bouncy on the inside, these golden crusted, meaty little nuggets are finding their way into my cooking more and more frequently. This would be, I think, an entirely good thing in terms of health and waistlines, except I keep drowning them in small mountains of cheese. Last week it was the quintessential quesadilla (which, if you’re wondering, is also stellar in taco format with the addition of tempeh, per my friend S.). This week, a calzone filled with deeply caramelized mushroom quarters, a chunky adaptation of my favorite puttanesca sauce, and of course, the requisite cheese all folded up and pinched inside a swollen half moon of dough.

 I love a good calzone, but N. is a little resistant for the same reason he is resistant to lasagna: the not-smooth-enough texture of ricotta cheese. Its strange milky loyalty to both savory and sweet applications is not quite cheese-flavored enough, and the slight graininess of the tiny, tiny residual curds lingering in there weirds him out. Fortunately, in this case as with most cheese-related conflicts, the answer is more. Mashing a healthy dose of grated mozzarella in with the ricotta adds a stronger cheese flavor and ups the salt content, which I think ricotta often needs. Here, I’ve bumped up the flavor and interest even more by folding in a small pile of chopped herbs and some lemon zest. This provided welcomed brightness against the deep earthy mushrooms and puttanesca.

 The trick with calzones, as you might expect, is moisture. Because you are sealing up this lovely little packet, it should be baked at a lower temperature than a pizza – the dough tends to be a bit thicker, and because half of it is on the inside, it needs more time to cook all the way through without burning the outside. But what you’ve stacked up inside also has more time to release its own juices, which can result in a bottom crust which is a bit, well, mushy is such an ugly word. Let’s call it soft. Ours certainly was. Calzone dough should be chewy and slightly pillowy but still, there’s a reason it’s called crust.

 My thoughts on preventing this are as follows: ensure you are using only the chunky vegetable bits from the puttanesca sauce for the inside. Save the sauce component to spread over the top of the calzone. Additionally, if you have the time, drain the ricotta lump in a strainer lined with cheesecloth or paper towels. Even an hour would allow some of that moisture to escape, which means it would end up in the sink rather than the bottom crust of your dinner.

 But even if you do end up with a bottom crust that isn’t as, well, crusty as you might like, you won’t be hurting for flavor. Mushrooms and ricotta – particularly a ricotta jazzed up with mozzarella and aromatics – play incredibly well together, and somehow both hold up to the briny strength of the sauce.
 It’s a good dish, then, with which to bid March farewell: still those dark, warm notes of winter, but a lovely springy freshness too, all wrapped up in a chewy, melty package, and just as delicious the next day.

A fabled land of farmers, farm shares, fancy (and not so fancy) restaurants, family meals, food projects and more.
cooking my way through my dissertation, one egg at a time
Fearless cooking from a tiny NYC kitchen.
food, in so many words.
Recreating the famous dishes of famous writers. Part recipe blog, part historical discussion, entirely unabashed love of books.
Epicurean Adventures from Eugene, Oregon
Celebrating the Harvest
Modern Iranian aka Persian Food & Culture Blog - Cuisine, Recipes, Stories , Photos, Pictures, DIY tutorials
Exploring Culinary Traditions of Africa, African America and the African Diaspora
food, in so many words.
food, in so many words.
food, in so many words.
Food-Stories-Recipes-Love
WordPress.com is the best place for your personal blog or business site.
