Brown Butter Apple Pound Cake

I’ve tried to start this post three or four times now. The first time I tried to skirt the events of the last week entirely, but that felt like lying. The second time I was overtly political, explaining exactly how I felt and why. That felt more honest, but it didn’t feel like the right move. The third time I tried to be conciliatory, citing concerns on both sides.

2016-food-blog-november-0385In the face of change, particularly because it is not the sort of change I agree with or was hoping for, I retreated to comfort. I know this is not particularly useful. I know I am reasonably safe for a number of reasons, and closing the blinds and wallowing is not helping the people who are – or soon may be – not so safe, but I did it anyway. Finally, I decided I need more time to process what I want to say, so I’ll offer this instead, as unhelpful and uninspiring as it might be: this week was rough. Let’s have cake.

2016-food-blog-november-03382016-food-blog-november-0329For me, the deepest and firmest food comfort is baking. It makes me think of being a child, it makes me think of warmth and sweetness; it makes me feel sound. In his examination of sugar and its coming to and impacts on Europe, particularly England, Sidney W. Mintz suggests that perhaps the reason we are so attracted to sugar, especially when we are young, is because human breast milk is sweet. So it makes sense that when we are troubled, or we feel that we need safety and security, we turn to sweet foods.

2016-food-blog-november2016-food-blog-november-0356The original inspiration for this cake came from Starbucks. A few years ago as part of their fall line-up of baked goods, Starbucks rolled out a brown butter pound cake spiked with Washington apples, and after sampling the dense crumb and the wet, almost too sweet apple chunks, I wanted to do my own version. For the base recipe, I went with that great baking bible Baking Illustrated, by the same cooks and recipe testers as Cooks Illustrated. Their pound cake uses cake flour for a tight but tender crumb, plenty of butter, and the richness and color and emulsifying power of extra egg yolks, rather than all whole eggs. Mine adds the extra step of browning the butter first (which then necessitates refrigerating it back into solidity before creaming it with the sugar), and a generous two cups of apple cubes – granny smith, for the tartness and minimal juice expelled during baking.

2016-food-blog-november-03462016-food-blog-november-0352
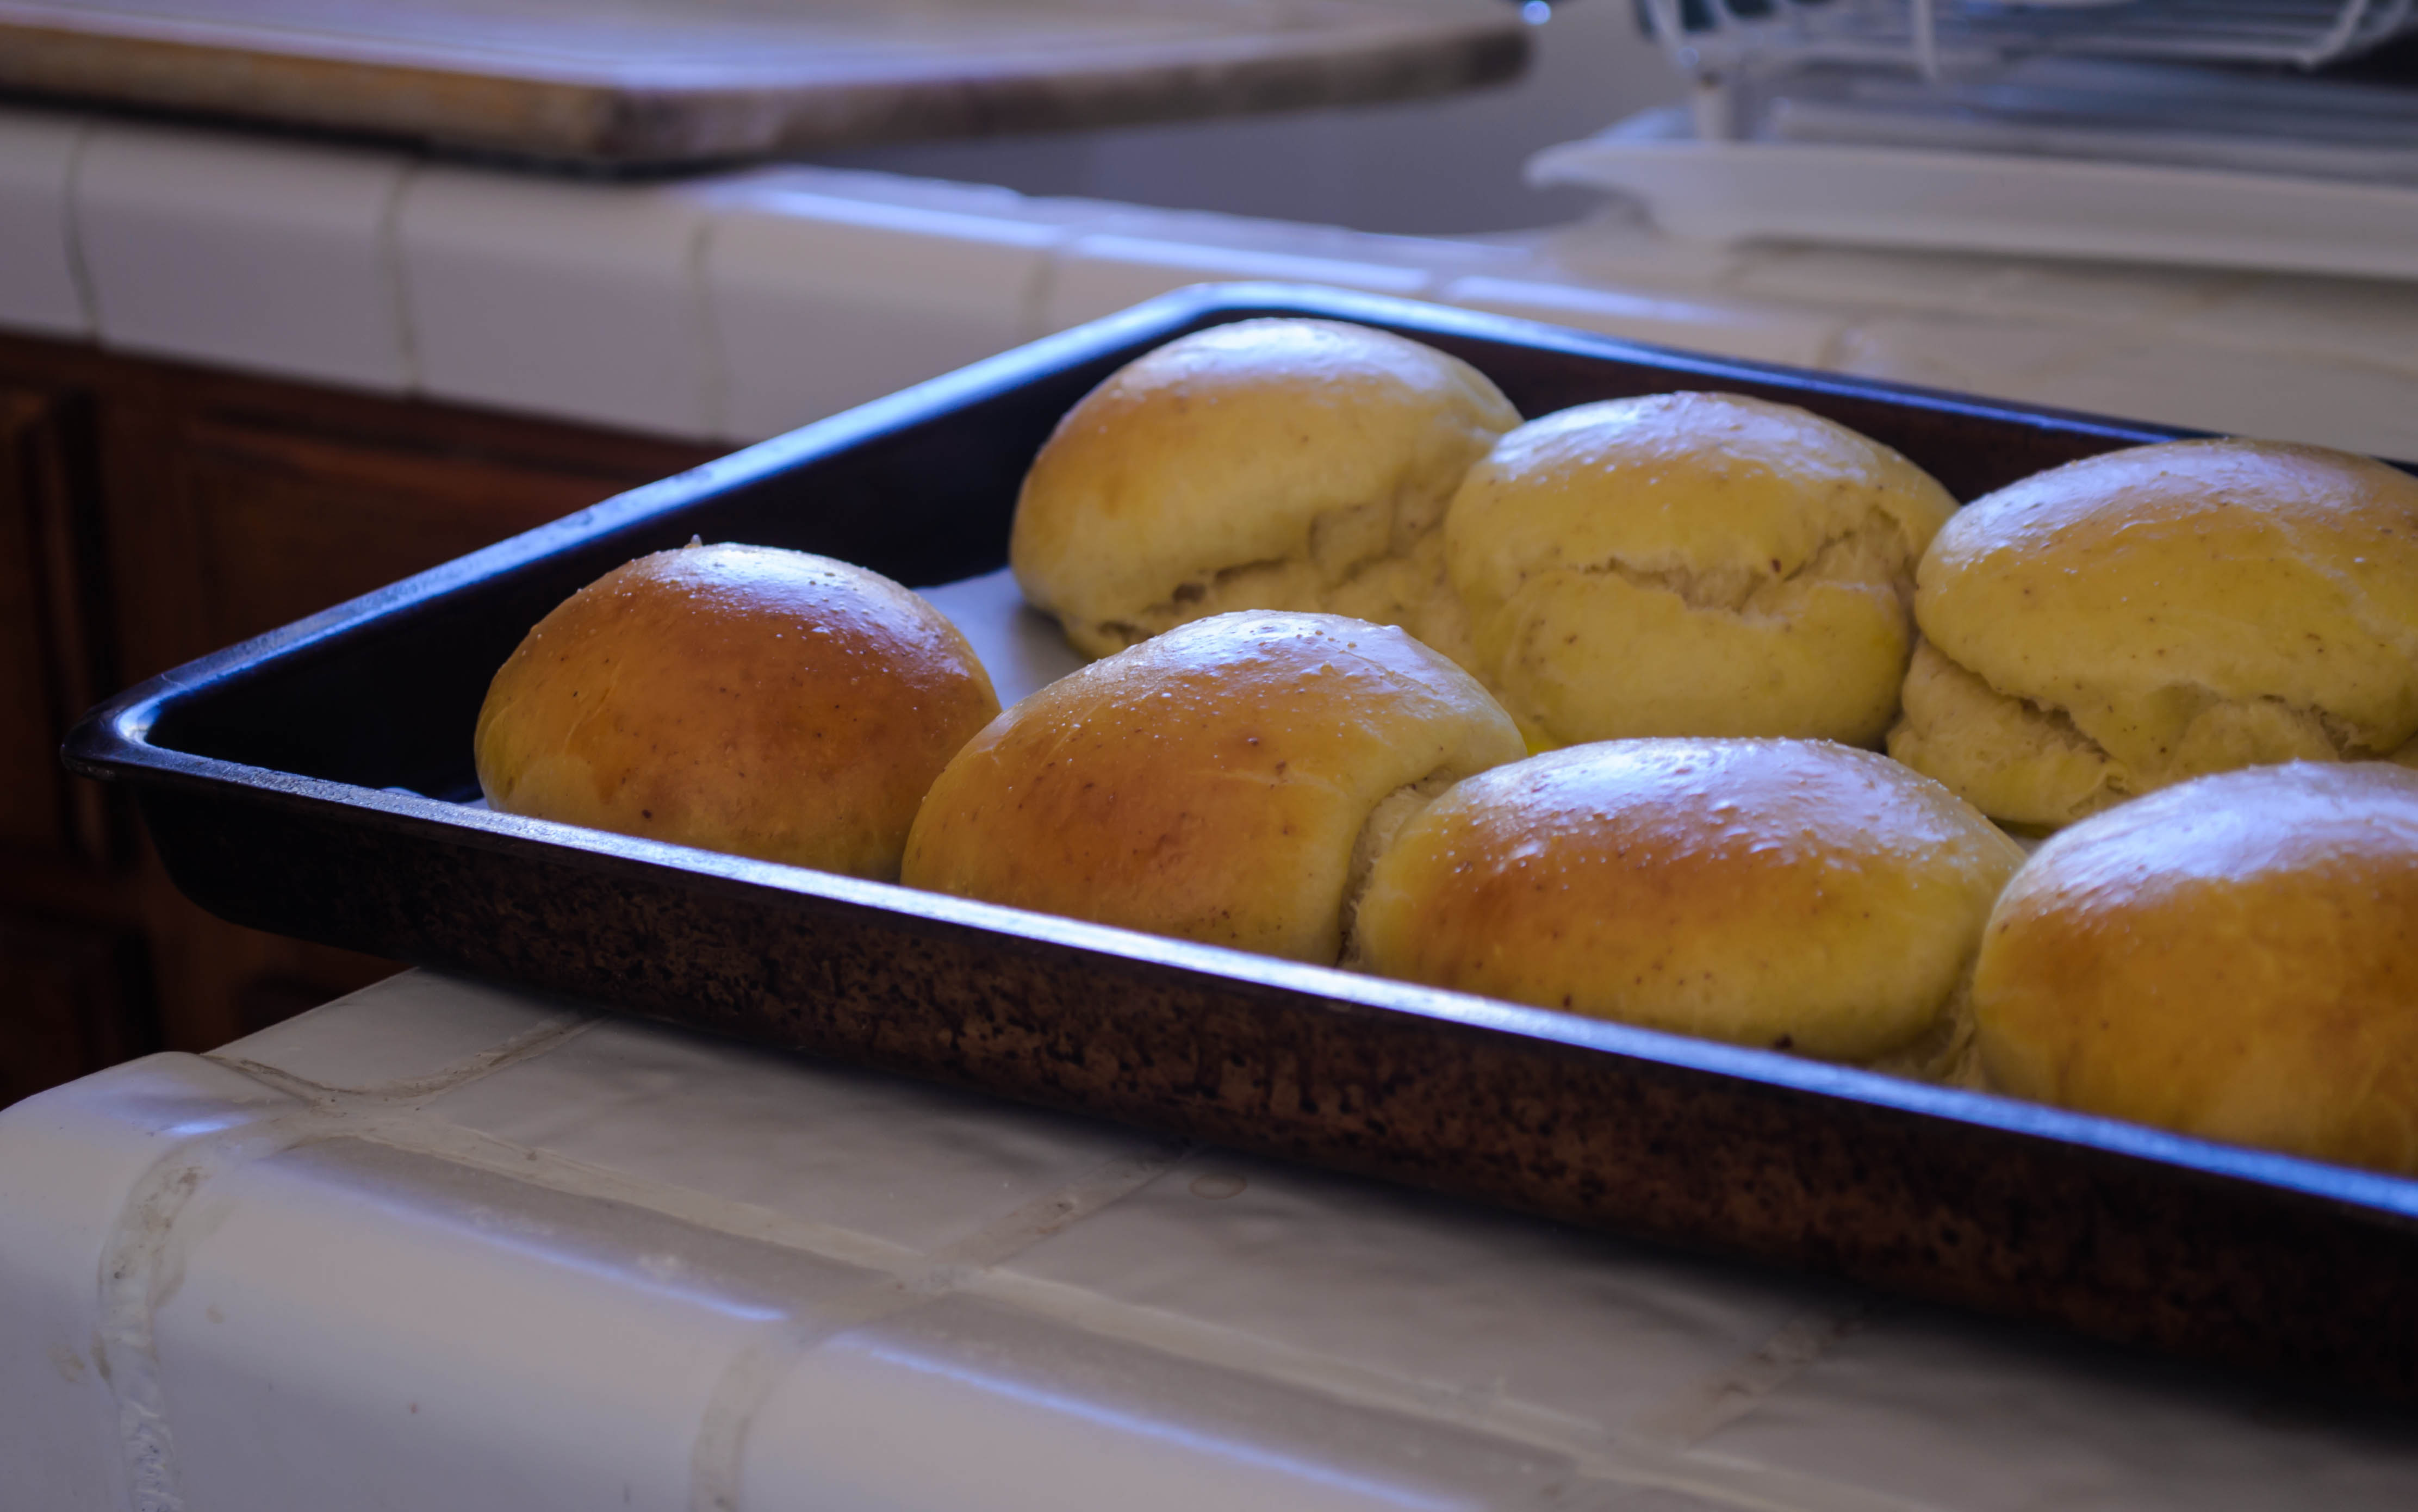
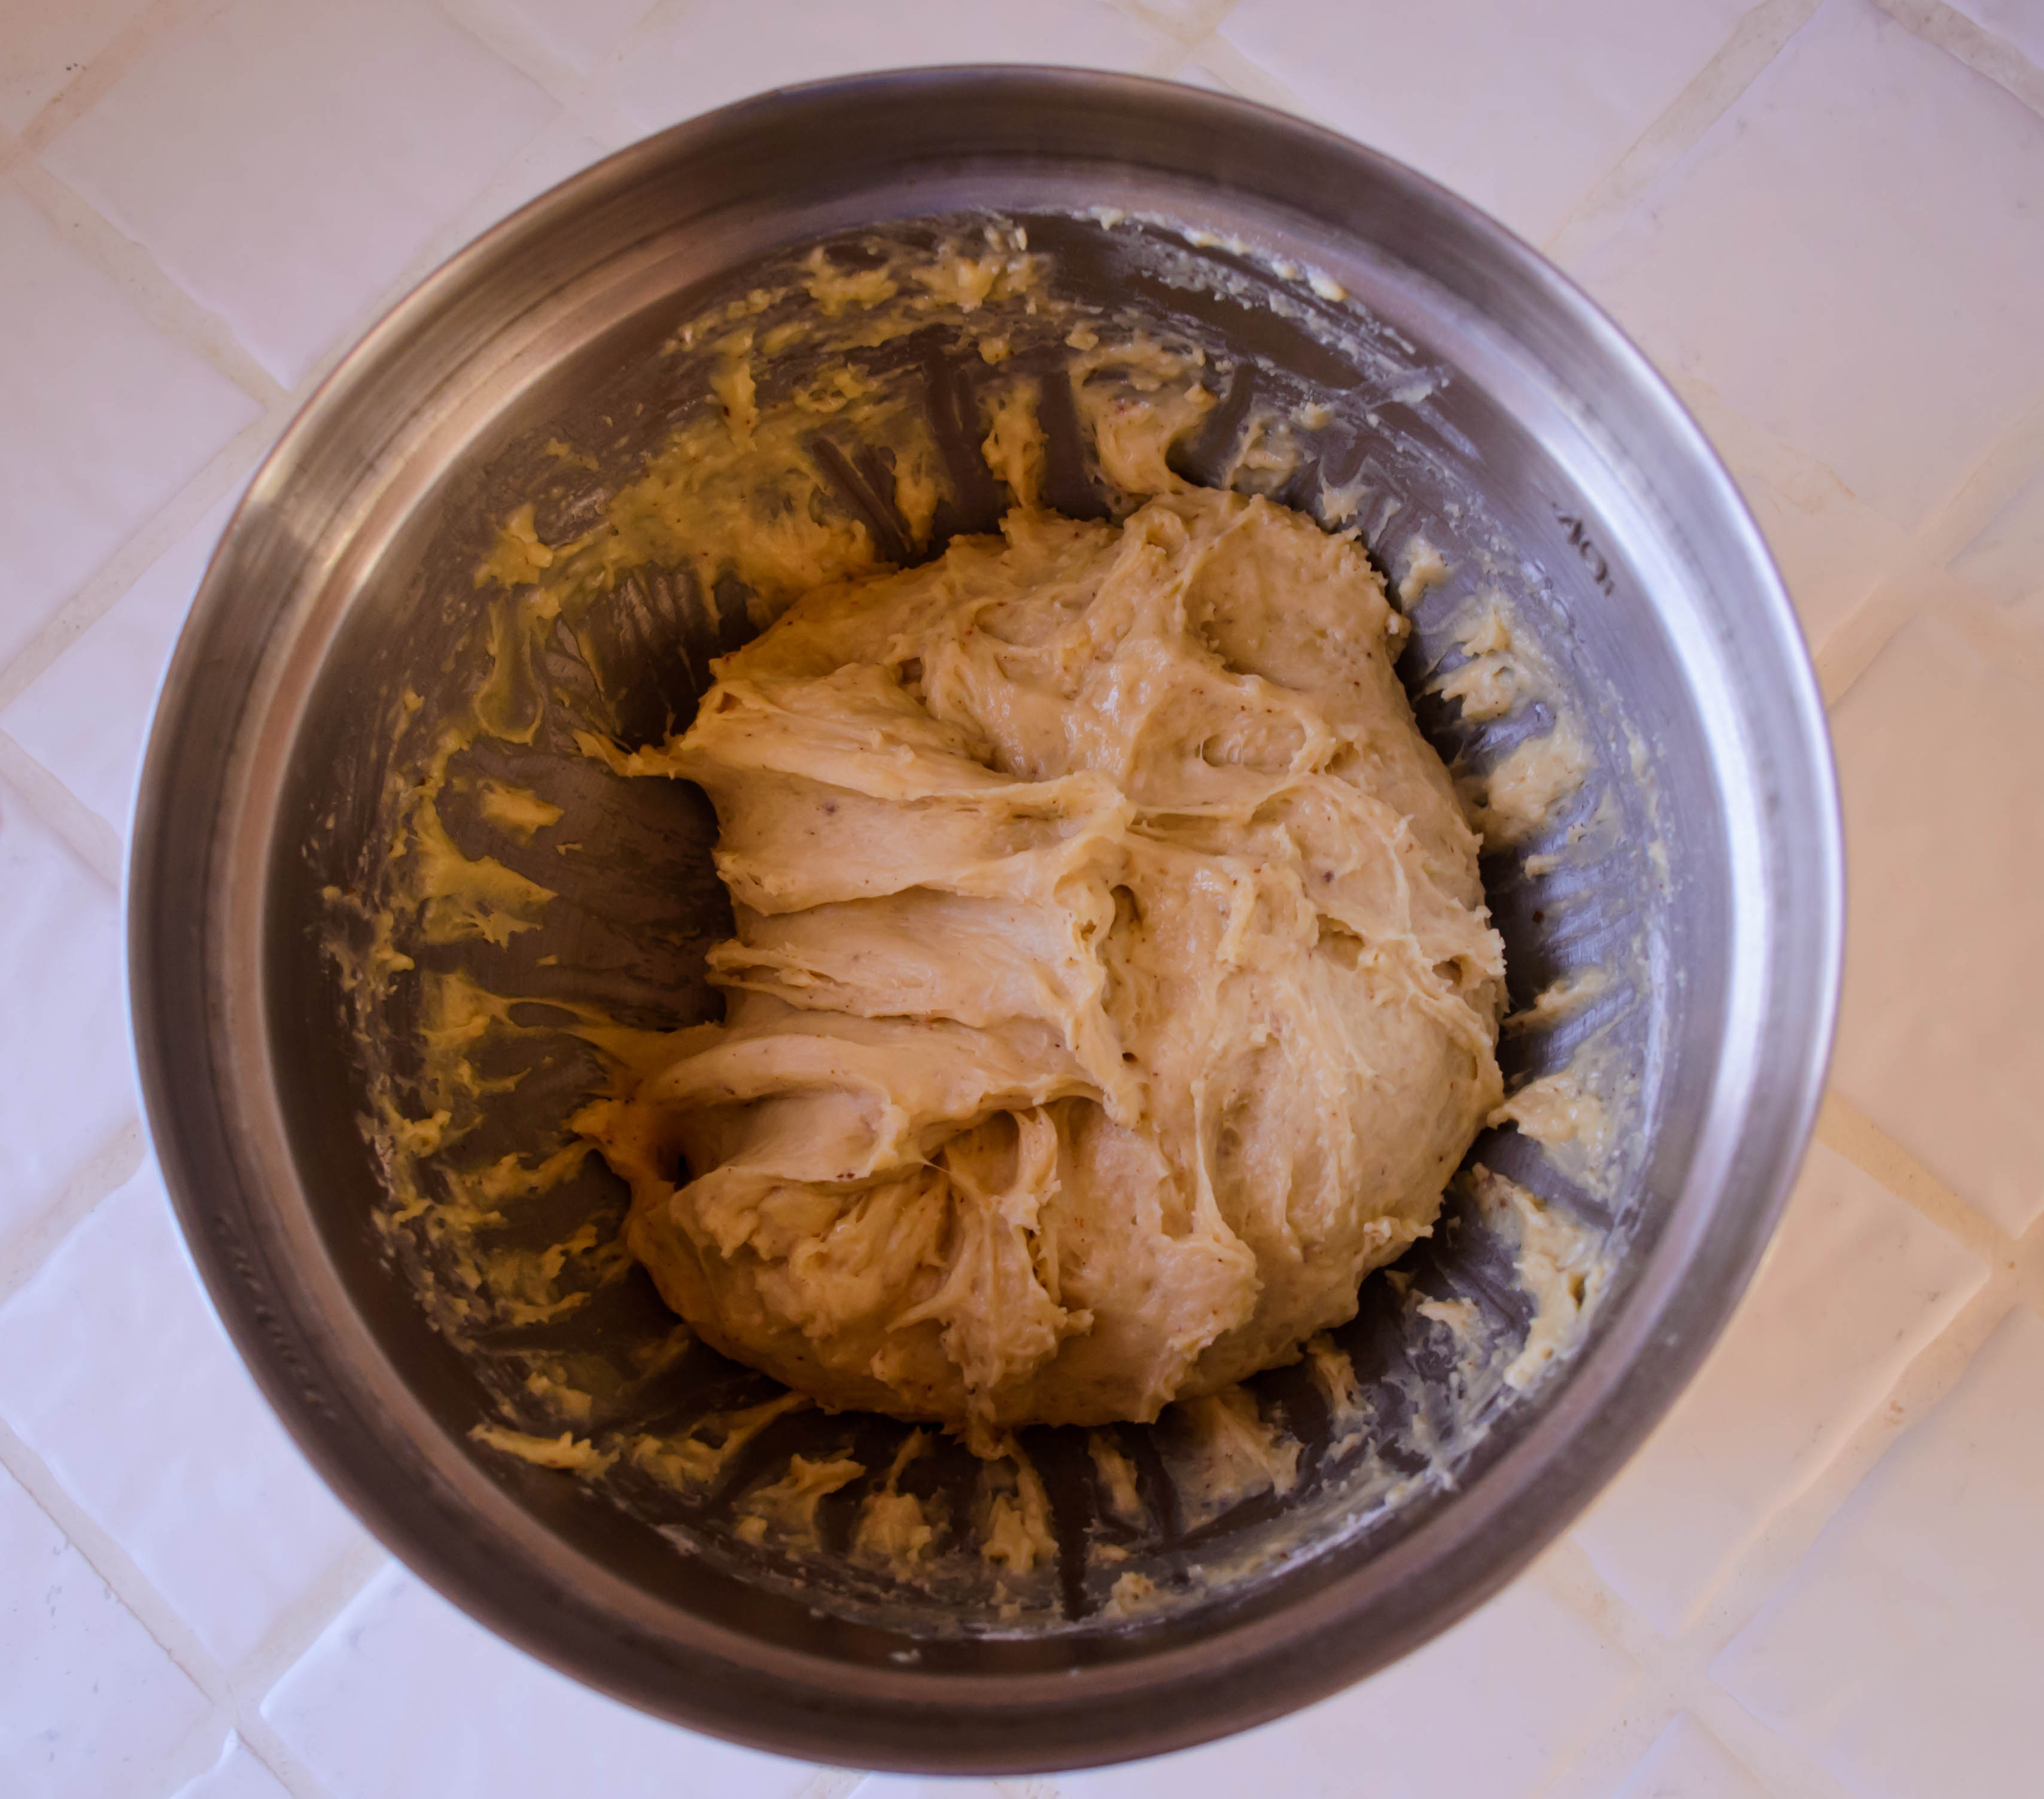
Most pound cakes have a soft top that splits as it bakes, and this one did offer that classic cleaving in the center, but the rest of the top – the browned exterior on either side of that tender split, was crisp and delicate and almost wafer-like – think of the top shiny, flaky layer of an excellent pan of brownies – perhaps because I was so enthusiastic in creaming the butter and sugar and then beating in the eggs. My batter looked like a good fluffy buttercream in its initial stages.

2016-food-blog-november-0363I usually bring my baked offerings to work with me, leaving only a serving or two to enjoy at home, and this was no exception, but we were sorry about that. Especially as the week wore on, we wanted more of this comforting, moist-but sturdy, not-too-sweet confection, preferably in thick slices. But alas, it lasted only a few hours in our mailroom.

2016-food-blog-november-0368It’s funny in that uncomfortable way, but the last time I made a pound cake was also a heavy time. It’s an uncomfortable metaphor – perhaps I should start perfecting an angel-food cake recipe instead – but hindsight is what it is, and here we are. Cake.

2016-food-blog-november-0371Maybe the best way I can conclude today is with Kurt Vonnegut. In his novel God Bless You, Mr. Rosewater, one character offers the following as a baptismal statement to a pair of brand new twins: “Hello babies. Welcome to Earth. It’s hot in the summer and cold in the winter. It’s round and wet and crowded. On the outside, babies, you’ve got a hundred years here. There’s only one rule that I know of, babies – ‘God damn it, you’ve got to be kind.’”

2016-food-blog-november-0386

Brown Butter Apple Pound Cake
Makes 1 9x5x3 inch loaf
About 90 min
16 tablespoons unsalted butter (2 sticks)
1⅓ cups sugar
3 large eggs + 3 large egg yolks, all at room temperature
1½ teaspoons vanilla
1½ teaspoons water
½ teaspoon salt
1½ cups cake flour
2 cups ½-inch cubes of granny smith apple; 1 large apple or 2 small

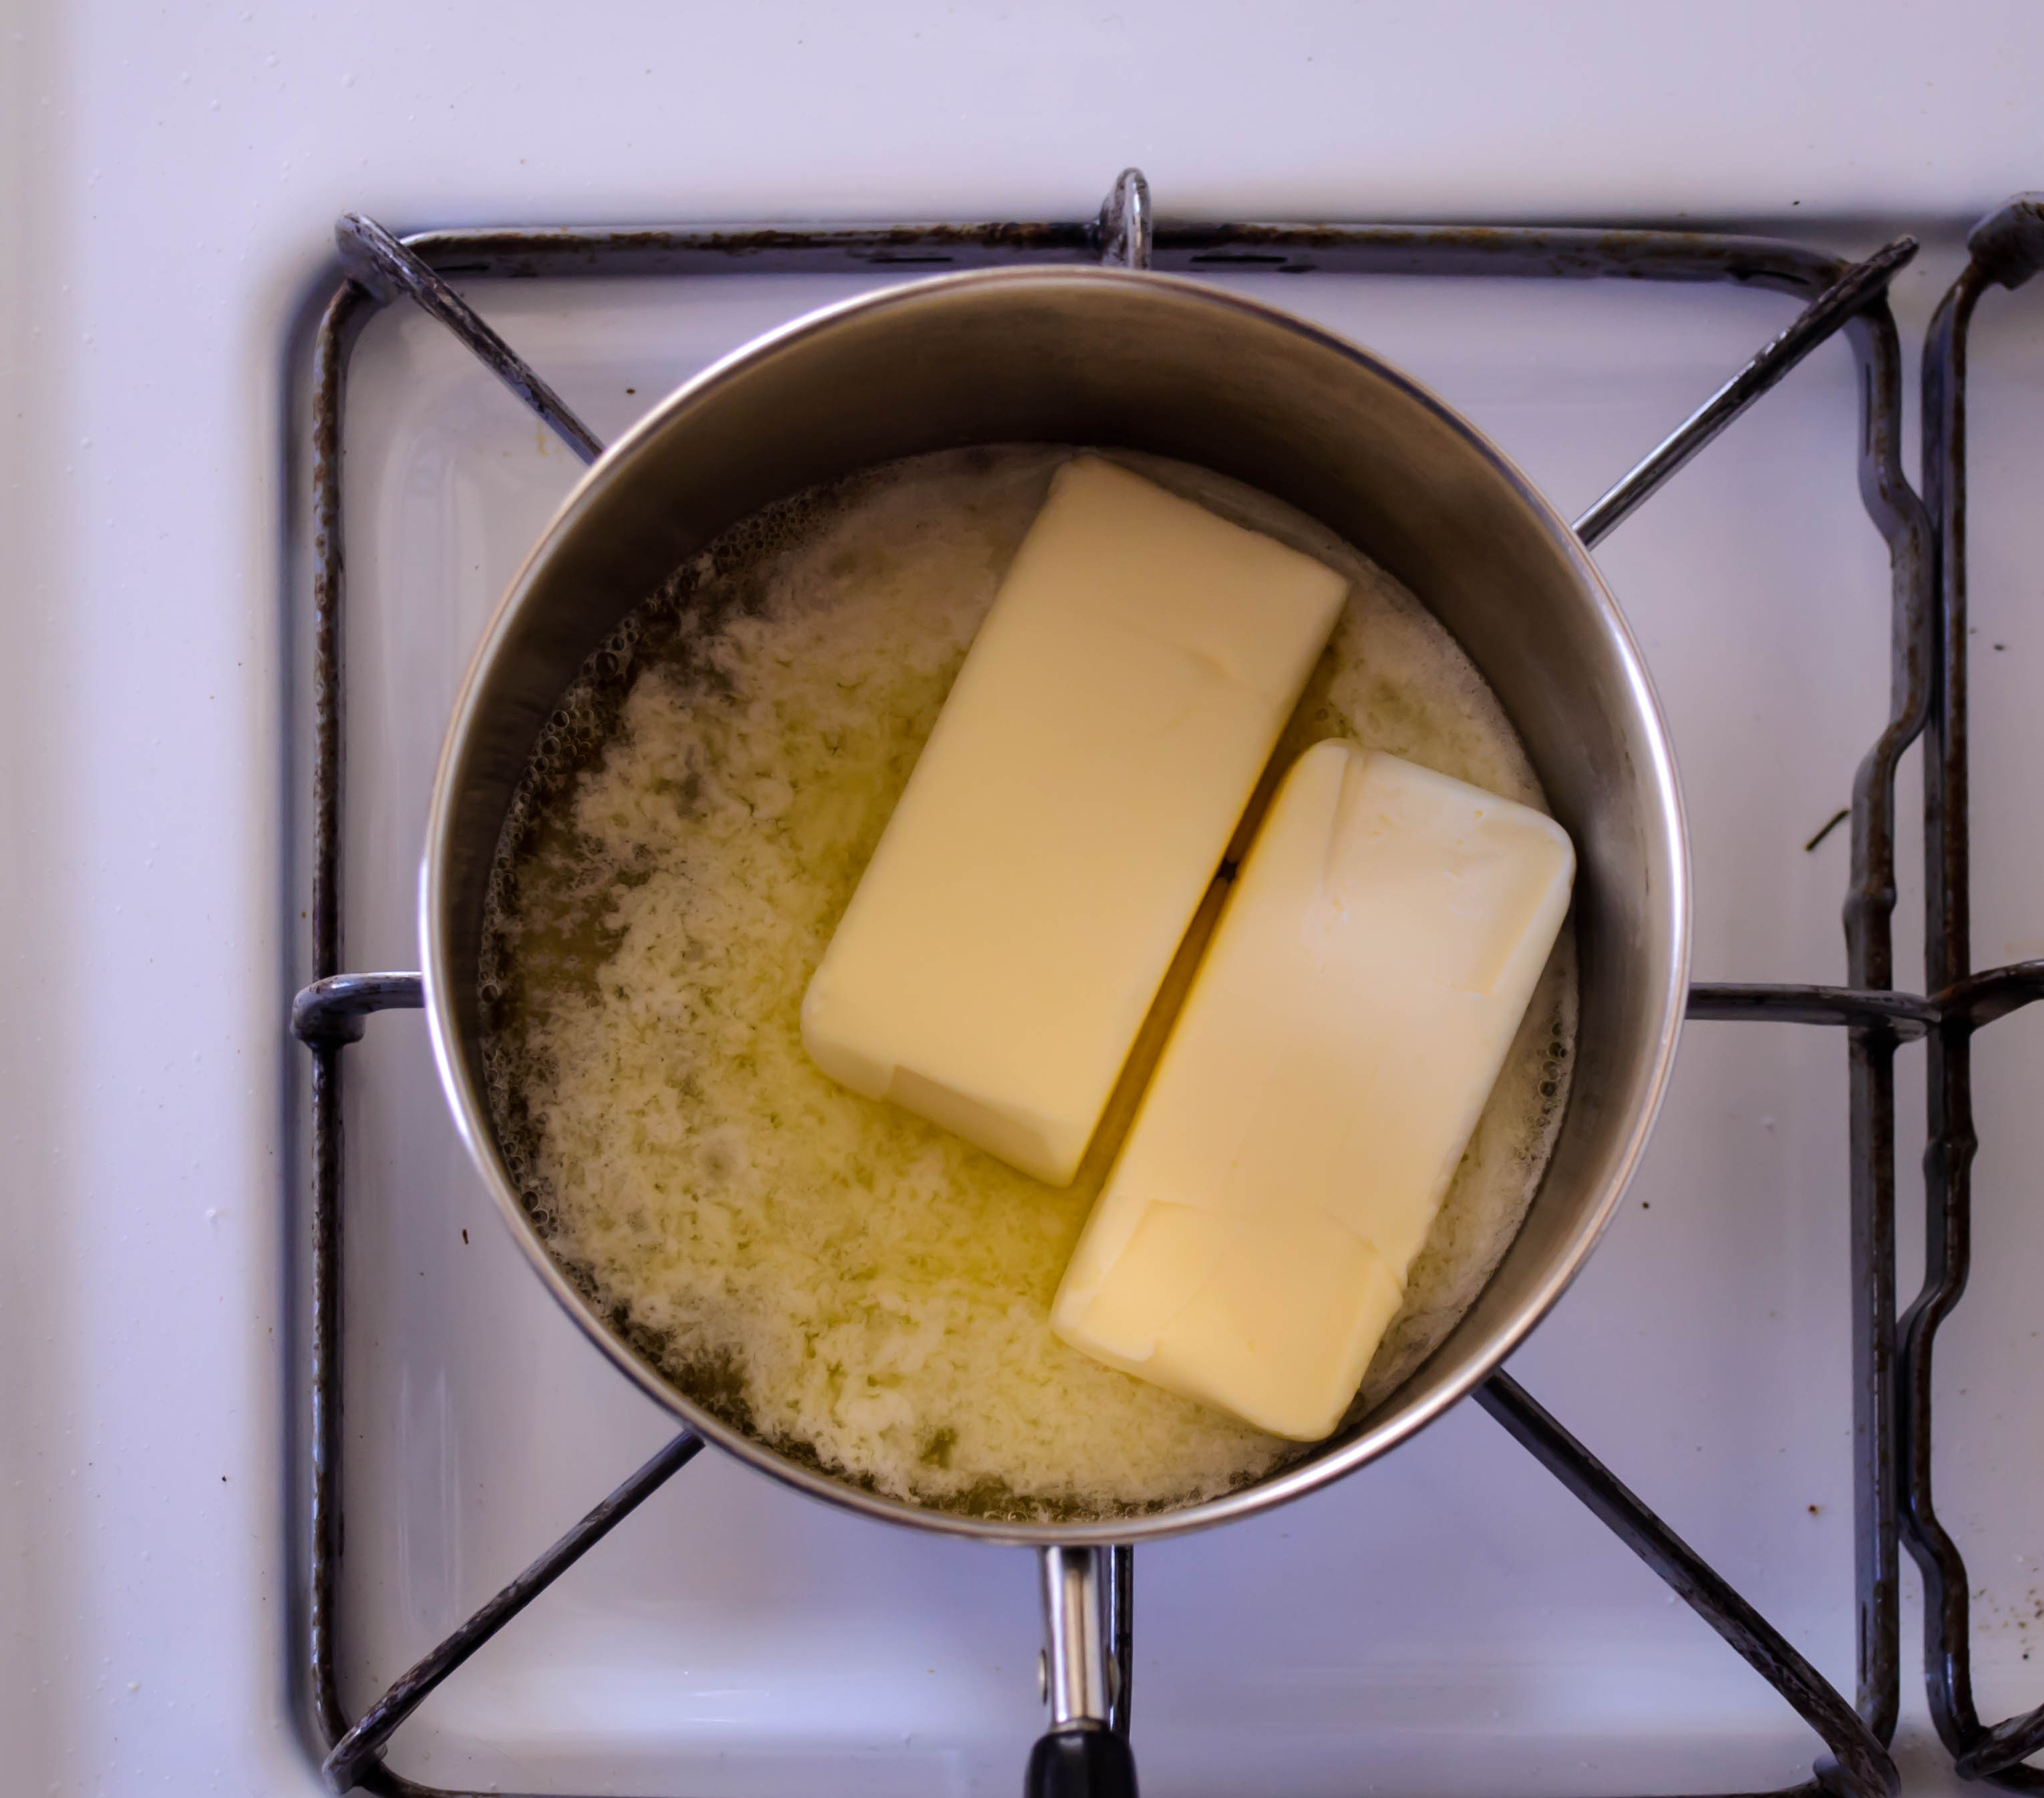
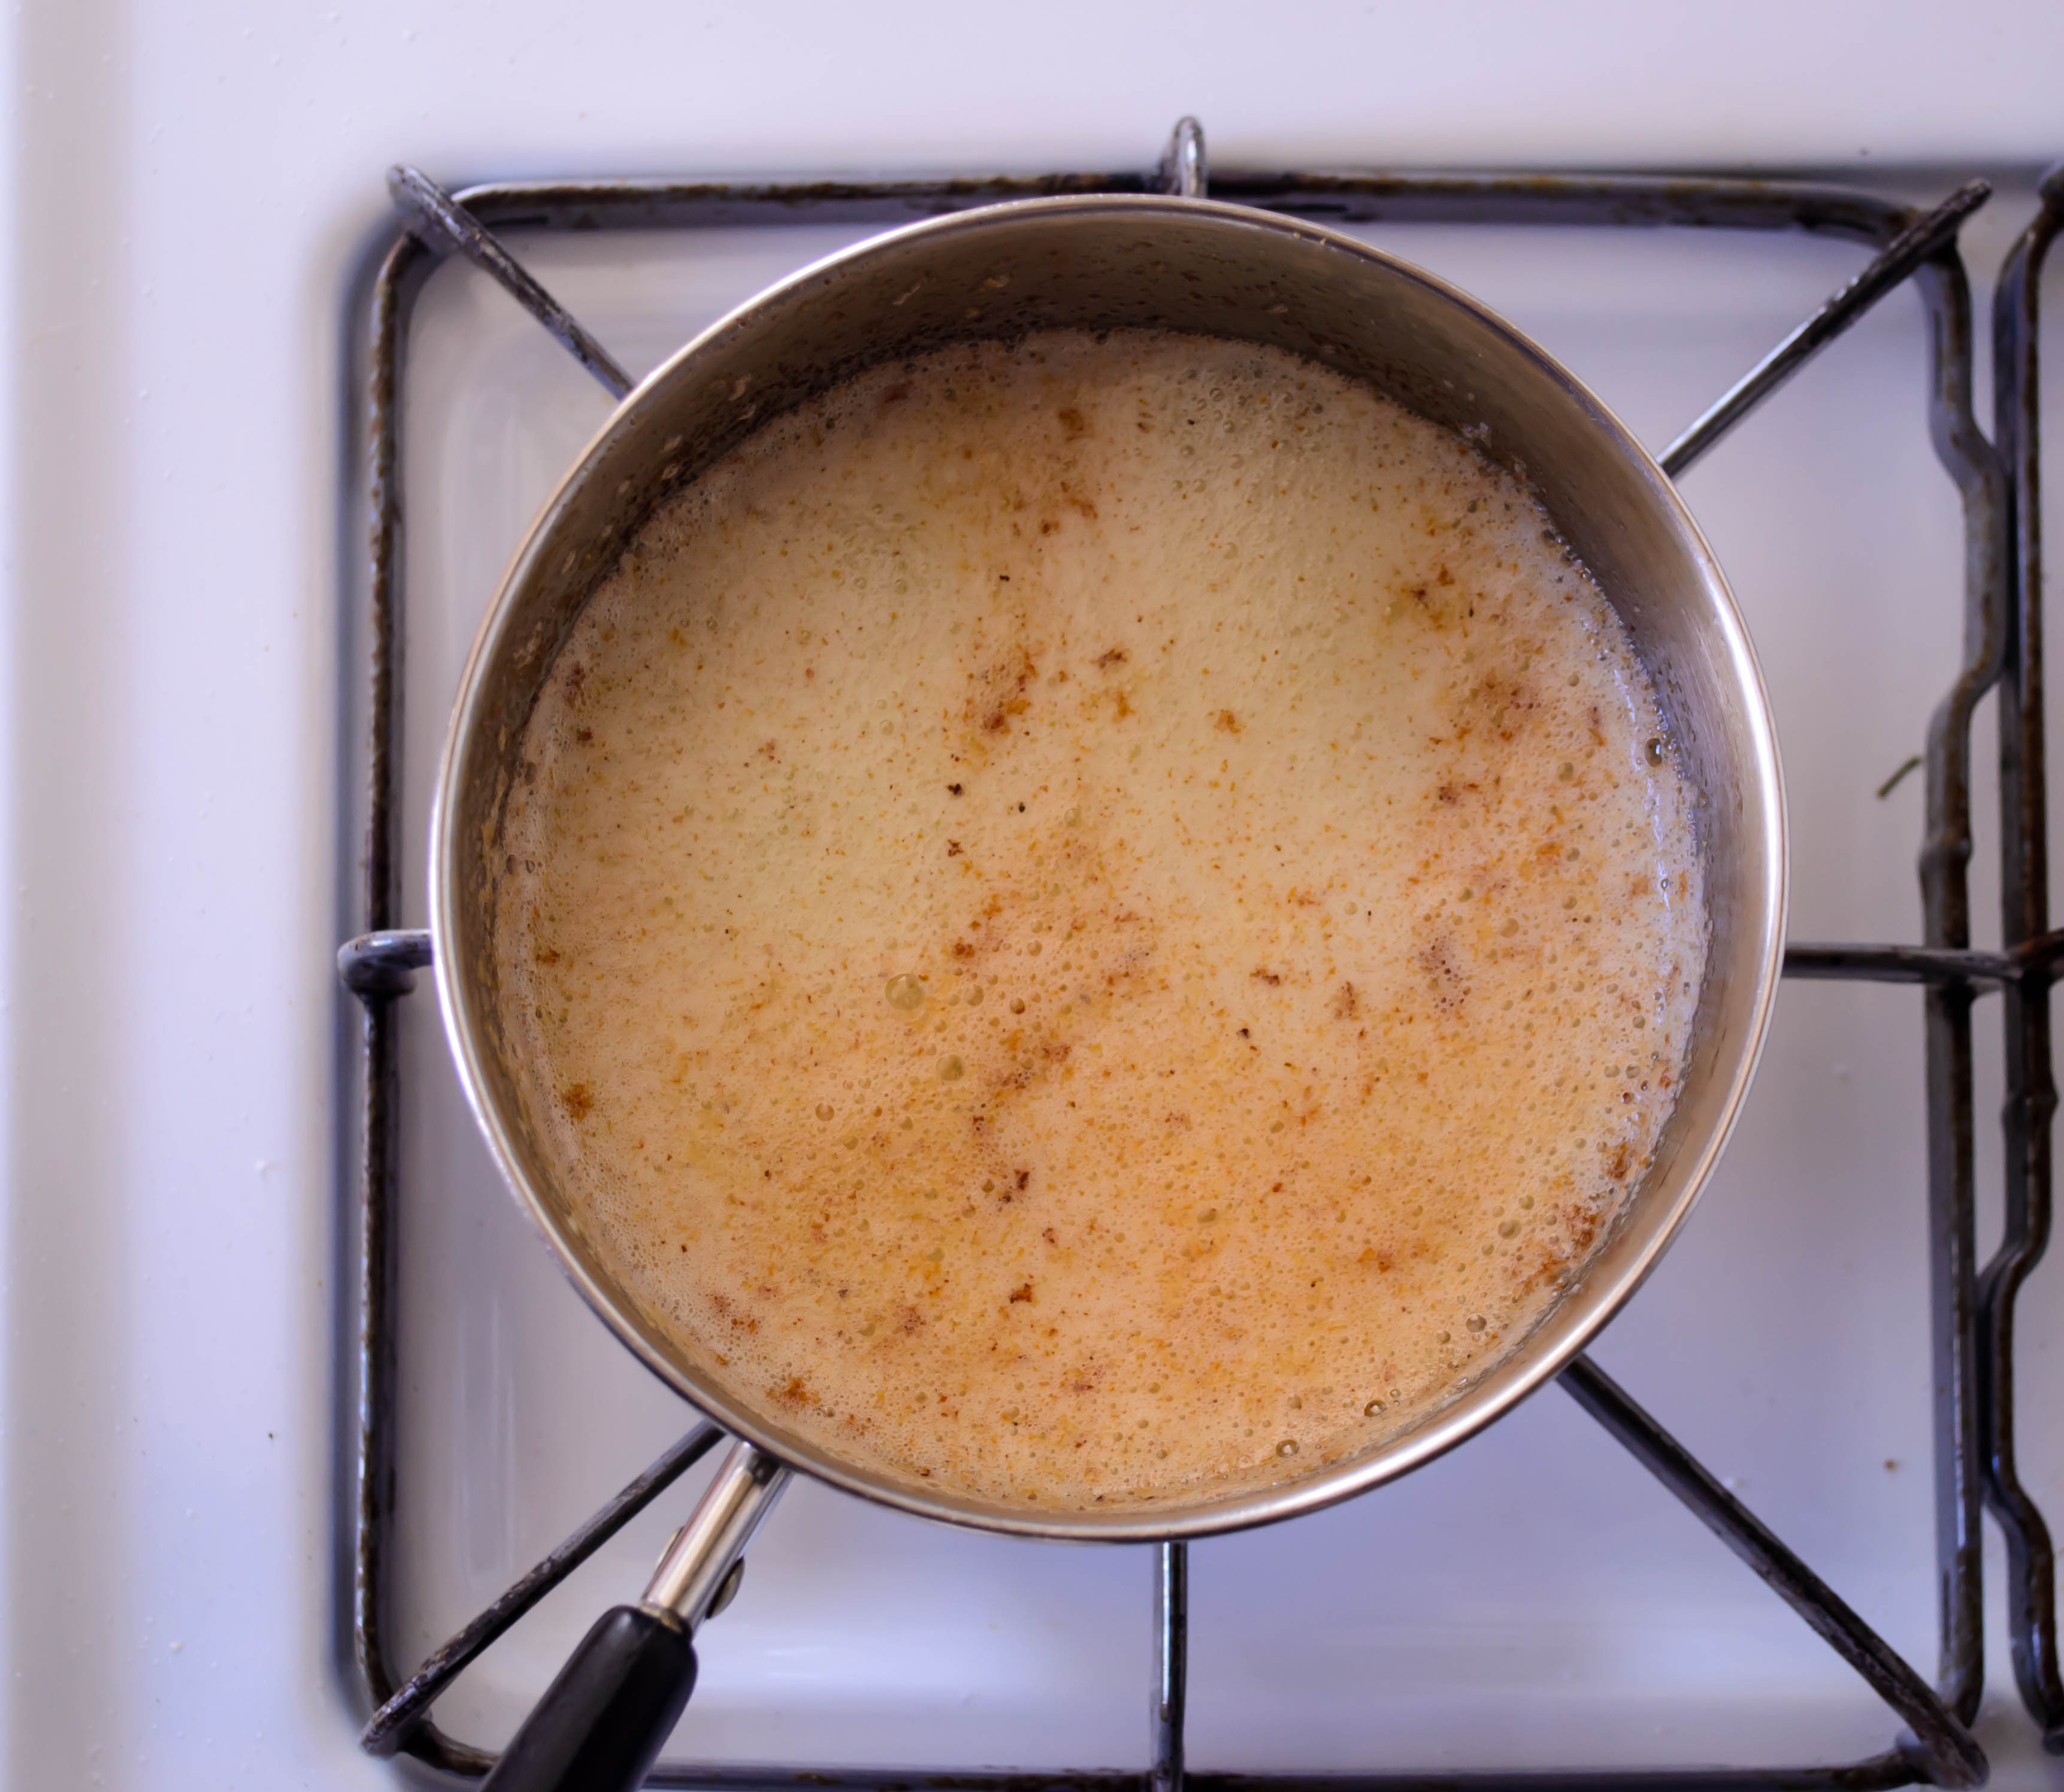
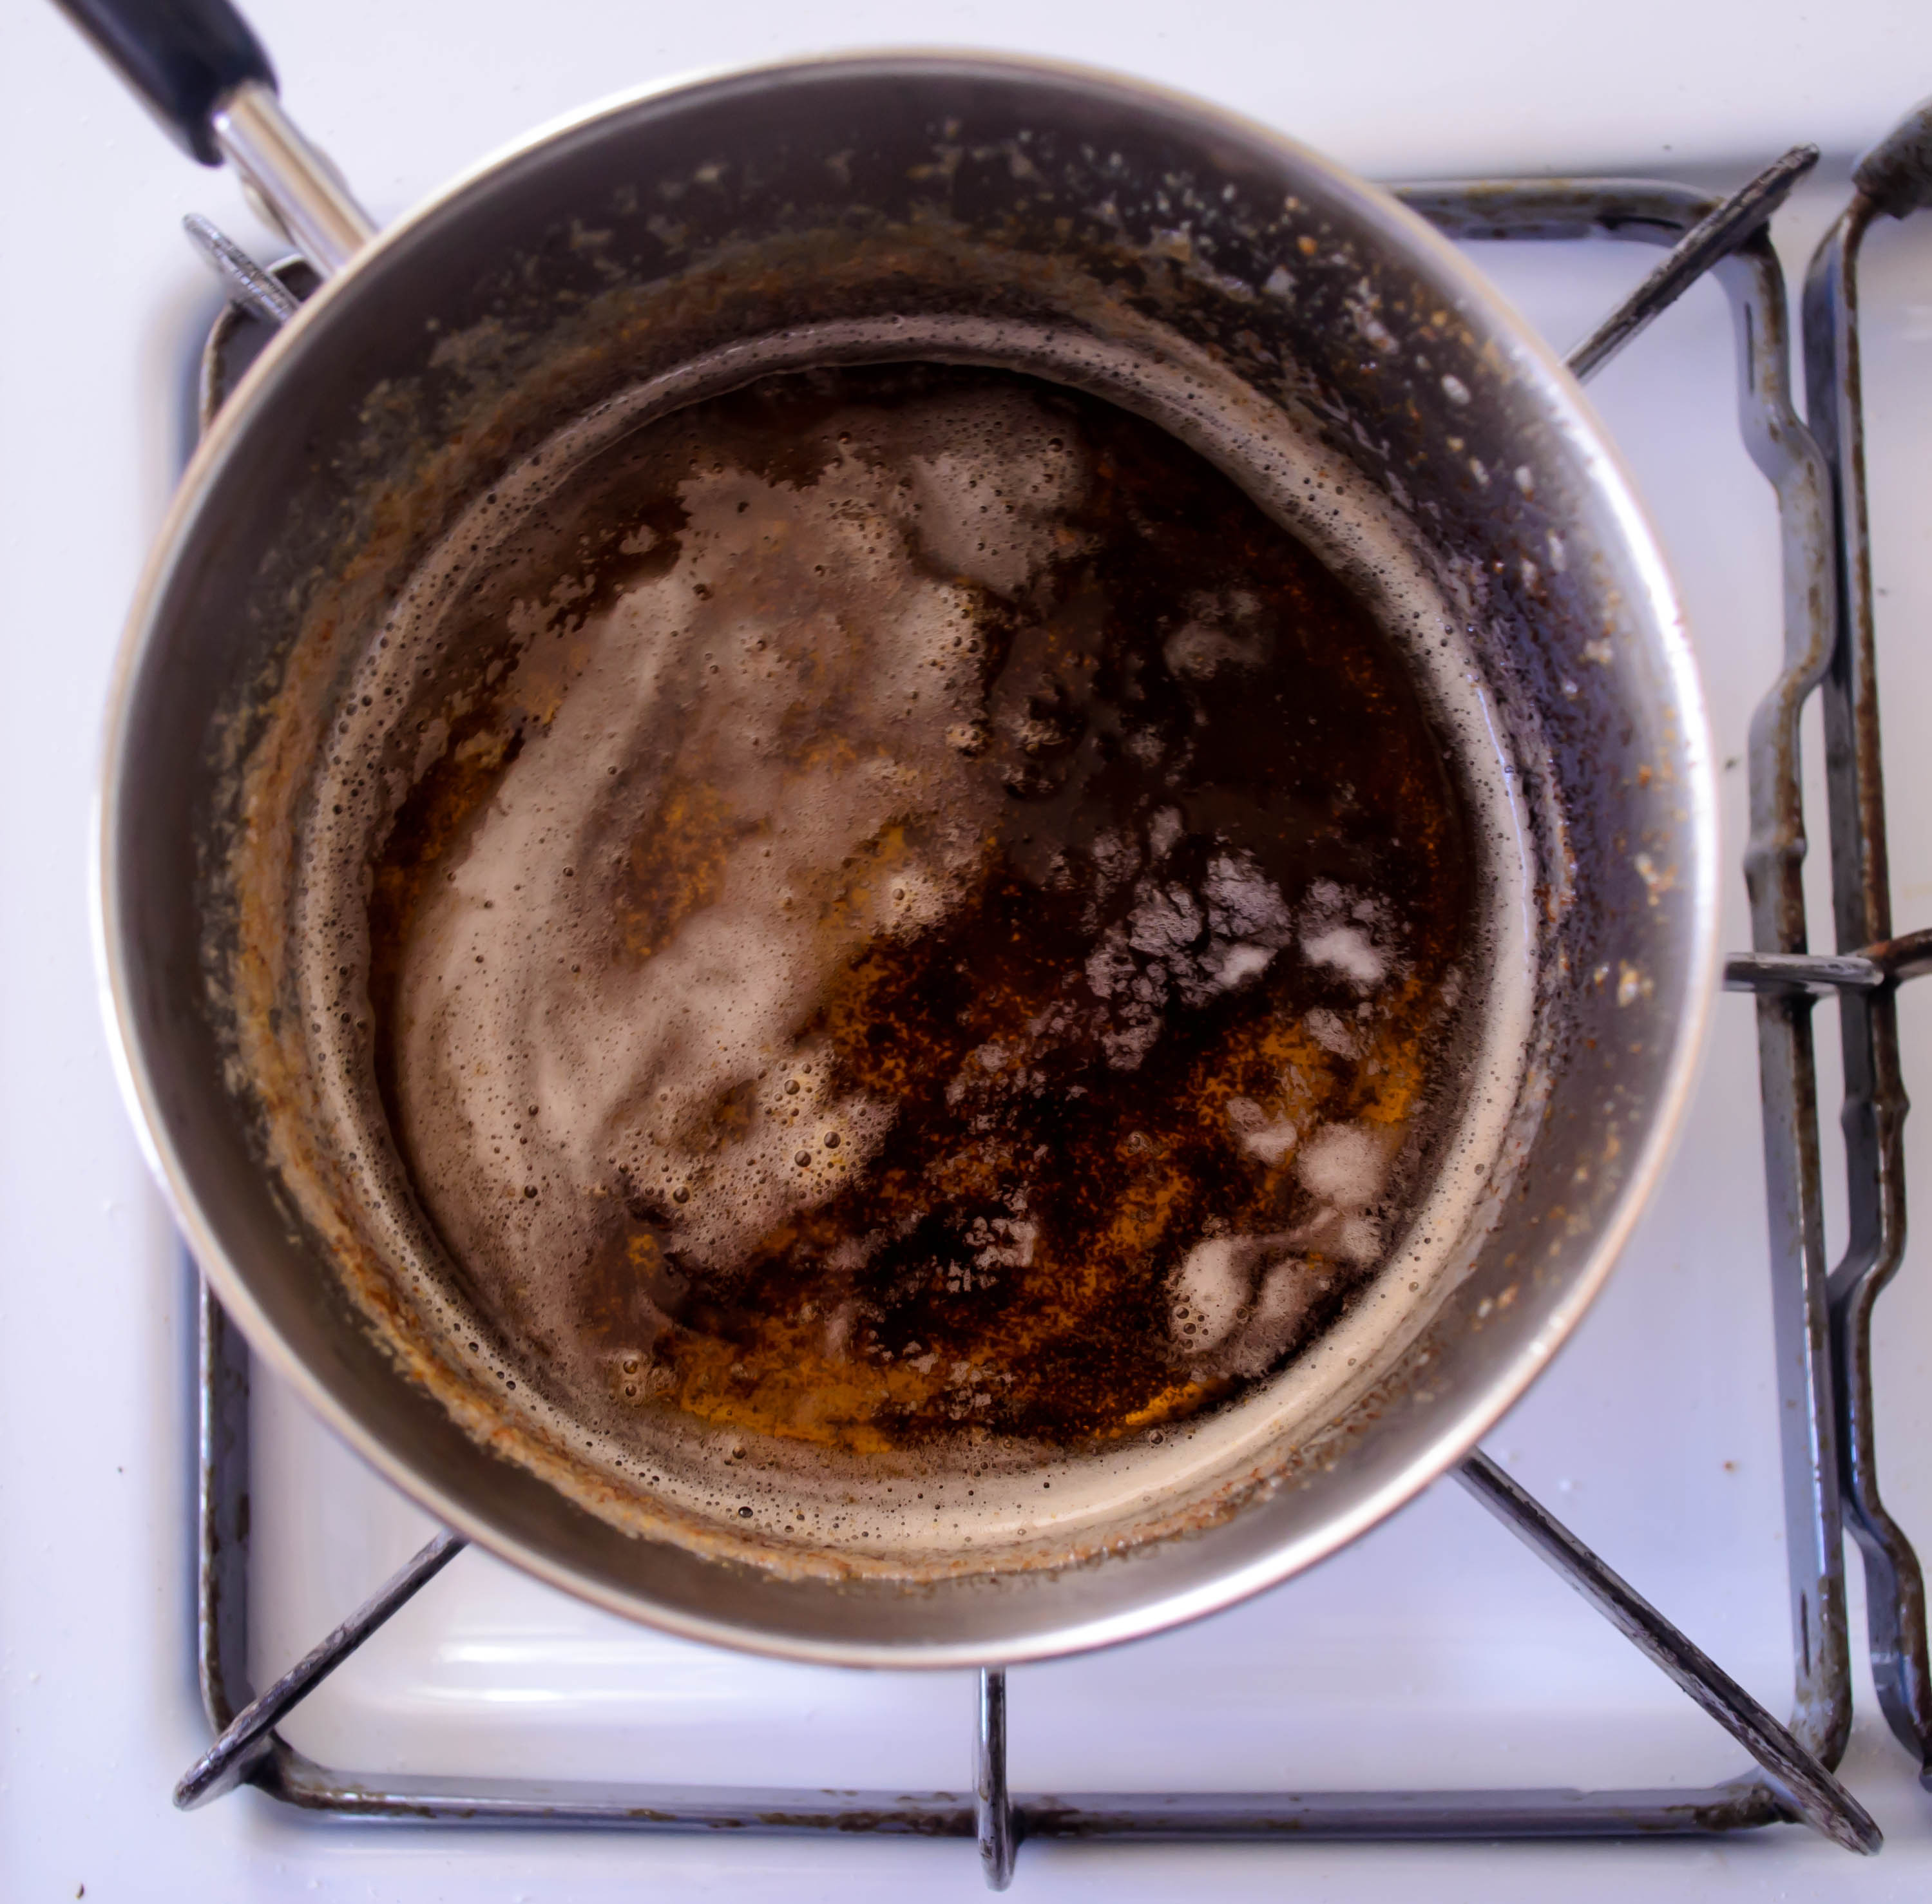
  • First, brown the butter. In a small saucepan, preferably with a light colored bottom so you can see what is happening, melt the butter over medium heat. As it melts, it will foam up. Keep swirling and checking the color underneath that foam; it will gradually darken from yellow to golden, and the foam will recede a bit. Watch very closely at this point, occasionally tipping the pot to see the bottom – little white solids will have collected. When these begin to turn brown, the butter will smell toasted and nutty. Take it off the stove and stow it in the refrigerator until it has solidified but is not too hard – your thumb should still press in easily.
  • While the butter cools down again, preheat the oven to 375F and prepare a loaf pan by spraying with non-stick spray and lining with parchment paper. Prep the apple by peeling it, quartering and coring it, and then slicing and cubing into ½ inch pieces.
  • In a mixing bowl (Baking Illustrated recommends using a stand mixer, but I used a glass bowl and my regular electric mixer and it was fine), combine the re-solidified butter and all of the sugar. Mix at medium speed until very light and fluffy, at least 3-4 minutes. Really. That long. It will take on a texture much like a slightly grainy buttercream frosting.
  • Beat the eggs with the egg yolks, the water, and the vanilla and, with the mixer still running, dribble in this egg mixture until all is well combined. At this point the batter will be very thick and glossy and still a bit reminiscent of frosting.
  • Now, sift in ½ cup of the flour with the salt right over the top of the batter. Once it is all snow-drifted on top there, use a rubber spatula to fold it in. Once fully combined, repeat the sifting and folding with the second ½ cup of flour.
  • Sprinkle the apple cubes over the batter, then dust with the remaining ½ cup flour. Giving the apple chunks a little flour coating helps them stay suspended in the batter during baking, rather than sinking to the bottom. Repeat the folding process one final time, being sure the flour is fully incorporated and there are no dry pockets.
  • With your rubber spatula, pour and scrape the batter carefully into the prepared loaf pan. Smooth off the top if you like, then stow in the preheated oven for 45-55 minutes, or until a toothpick insertted comes out with just a few damp crumbs.
  • Let the loaf cool in the pan on a wire rack for 5 minutes, then use a second wire rack placed over the top of the pan to invert. The loaf will plop right out, upside down, onto this second rack. Carefully remove the pan from the loaf and flip the loaf back over top-side-up to cool completely. Peel off the parchment paper, transfer to a cutting board, and slice up thickly to eat.

Save

Save

Save

Trying-to-be-patient Brown Butter Brioche

Food Blog Jaunary 2015-0297It’s always interesting to see what the Twelve Loaves baking group decides on as a January theme. This is a time of renewal, of fresh beginnings, of starting again or trying again or reestablishing. Last year they asked for simplicity, prompting me to try my hand at sourdough, made by weight rather than volume measurements. This year, they asked for something a little more poetic but just as abstract: bake a loaf inspired by a New Year’s resolution.

Food Blog Jaunary 2015-0292I knew immediately I would make brioche. One of my New Year’s resolutions for 2015 is to be more patient. While this would be a good goal in any area of life (or perhaps all of them), for me, it’s very specific. I want to be more patient with Lucy when we take our daily walk. My dog-daughter will be twelve years old in the spring, and though she’s still very energetic and quite healthy, she has slowed down over the years. Some of this is age, but some is insistence on getting what she wants. For her, our outing is not a walk. It’s an extended sniff. She wants to stop at every bush, at every bench, at every blade of grass, it sometimes seems. This can easily push a two mile walk into an hour-long endeavor.

Fall and Winter 2014-0915Like most of us, though, I’m a busy person. At least I feel like I am. When I get home from work, after a brief decompression (read: Facebook and a snack), I want to walk Lucy, do a final check of my email inbox, and get on with cooking dinner. Ultimately, I want to get these things done so I can changed into pajamas and deposit myself on the couch. Sniffing every blade of grass impinges on this plan, so over the past year or so I found myself getting frustrated, and even quite angry when Lucy stopped, and stopped, and stopped again.

Food Blog Jaunary 2015-0265Food Blog Jaunary 2015-0266Food Blog Jaunary 2015-0267Food Blog Jaunary 2015-0268In November I was getting ready to snap at her about such a stop, and instead I stopped. Chelsea, she’s a dog. This is her daily chance to get outside and experience the world. She doesn’t understand what I’m even asking, let alone why I’m asking, and all my impatience is doing is making us both feel bad. And really, what’s the damage to my schedule if I do let her have an extended nasal examination of the things she’s most interested in? All told, three, maybe five minutes.

Food Blog Jaunary 2015-0269I can handle that.

So I am trying to be more patient with her, gently encouraging her to hustle along rather than snapping at her. I’m delivering commands in a calmer voice, and letting the sniff session go on an extra few seconds before delivering that command at all. I’m not at total karmic peace with the extra time spent yet, but I’m working on it.

Food Blog Jaunary 2015-0275Brioche is my bread project, then, because it’s a loaf that requires patience. Rich with eggs and loaded with butter, brioche is the “cake” from the famous quote misattributed to Marie Antoinette. To integrate the massive quantities of butter the loaf requires, most recipes detail a process of bringing the fat to just the right temperature and incorporating it into the dough a maddening single tablespoon at a time. Too cold, and the butter won’t mix in. Too warm, and it will collapse the dough into a soupy mess. Too much at once, and the dough will get greasy and separate unpleasantly. It takes, typically, a 20-30 minute knead time to get the gluten chains in the flour tangling nicely and then incorporate all of that butter. After this, a long, slow, cool rise time is required, in part to build flavor, in part to develop structure, and in part just to make it easier to handle – that butter has to chill down before the dough can be manipulated successfully.

Food Blog Jaunary 2015-0270Food Blog Jaunary 2015-0271Food Blog Jaunary 2015-0272By the time you are finally ready to bake the thing, a brioche has usually been under construction for the better part of a day, if not two (sponges and overnight refrigerated rises are common). But the result – a spongy tender, light-as-air crumb inside a deeply browned crunchy crust – is remarkable. It reminds me of challah, another egg-laden loaf requiring multiple rises, but is more finely textured and even a bit richer. If your gourmet burger arrives on a deeply, perfectly rounded bun so shiny it looks lacquered and leaves a sheen of fat on your fingertips when you set it back down on the plate with a sigh, you’ve had brioche. It’s a frequent choice for a truly decadent french toast, and I was prepared, with a cringe, to sink myself into making it.

Food Blog Jaunary 2015-0273When I looked around at recipes for points of comparison, I came back, as I often do, to Cooks Illustrated, which featured a practically fool-proof take on brioche. To combat the frequent problems associated with the quantity and temperature of the butter, recipe developer Andrew Janjigian opts for a no-knead approach, relying on a combination of gentle folding of the dough (see photo series above), and time, to stimulate gluten production. The very wet dough brioche requires works well for this method, because the moister the dough, the better the enzymes in there activate the gluten. Janjigian explains that this no-knead method leads to another benefit: since we aren’t kneading the dough, we can’t spend 20 minutes mixing in all the butter. Melting it and stirring it in all at once works just fine.

Food Blog Jaunary 2015-0277As I read his explanation of the changes he’d made from the original and recognized the ease involved compared to the traditional procedure, I was almost sold. A small part of me protested that this might be cheating – that if I was really making something to represent the resolve to be more patient, I should go with the typical long knead, slow-and-steady incorporation of butter, and force myself to avoid shortcuts. But in reading the recipe again, I realized this was still going to be a long process. Even before chilling the dough overnight, I would need to perform a series of folds on the sticky, wet mass I’d created to help activate the gluten. Using large chunks of my Friday and Saturday to put this together, attend to timers, coordinate myself through the rising and proofing process, and get through the agonizing final two hours of waiting for the baked loaves to cool enough for slicing, was going to take plenty of patience. I’m only human, and it’s only January. If I’m going to be successful in this resolution, baby steps might be the way to go.

Food Blog Jaunary 2015-0278Food Blog Jaunary 2015-0279Food Blog Jaunary 2015-0280Food Blog Jaunary 2015-0281The nail in the coffin, though, was when I checked Joe Pastry’s version of brioche. He suggests pumping up the flavor by using brown butter. Since I was already going to be melting the butter, this was clearly the right thing to do. Tiny speckles of toasted nuttiness running through my dough? Yes, thanks. Now, please.

Food Blog Jaunary 2015-0282Food Blog Jaunary 2015-0283Food Blog Jaunary 2015-0284Food Blog Jaunary 2015-0285Well, not now. Two long, patient days from now. But at the conclusion of those days, slicing through a softly shattering crust into a pillowy yellow interior laced with bits of brown butter, it was all I could do to eat each slice in more than one bite. Because, you know, patience.

Food Blog Jaunary 2015-0288Food Blog Jaunary 2015-0289Serving suggestions: there’s not much you shouldn’t do with brioche. It can be a bit soft for a sandwich, but makes glorious toast and french toast. My recipe is for one regular loaf and 8 small or 6 large buns, and we used the bun shape for veggie burgers. Because they are more compact, the buns hold up to rough handling a bit better than the slices, so feel free to load them with pulled pork, or crab cakes, or egg salad, or whatever moves your taste buds most deeply.
Food Blog Jaunary 2015-0296

Trying-to-be-Patient Brown Butter Brioche
barely adapted from Cooks Illustrated
makes 1 loaf and 8 small or 6 large buns
16 tablespoons unsalted butter (2 sticks)
½ cup room temperature or slightly warm water
⅓ cup sugar
2 ¼ teaspoons active dry yeast
7 large eggs, divided (but not separated!)
3 ¼ cups bread flour
1½ teaspoons salt + a pinch
  • Day one: melt the butter over medium heat in a small saucepan, preferably not with a dark bottom (it makes it easier to see the butter browning). As it melts, it will sputter and foam up. The foam will eventually subside, but shortly thereafter it will get foamy again. At this point, tilt the pan a little bit (carefully) to see the bottom – little specks of solids should be getting golden-brown. Let them get golden and then chestnut brown, then turn off the heat and set the pan aside to cool. These little dark bits are what makes it brown butter.
  • While the brown butter cools (pop it in the fridge for a few minutes if you are nervous about the temperature), combine the water, sugar, and yeast in a large glass measuring cup or a medium bowl. Stir well, then set aside for 10 minutes to allow the yeast to activate.
  • Meanwhile, whisk together the flour and salt in one bowl (a large one), and 6 of the eggs in another (a small one will do). When the yeast mixture is bubbly and smells like warm bread, add the whisked eggs and stir to combine. Whisk in the cooled brown butter, then dump the whole wet mess into the bowl with the flour and salt. Stir with a wooden spoon until no flour streaks remain. It will be a damp lump that looks more like thick cake batter than like dough.
  • Cover the bowl of dubious dough with plastic wrap and let it sit for 10 minutes.
  • Uncover the dough and pull up one edge with your fingertips (sprayed with non-stick spray or lightly coated with oil, if you’re concerned about stickiness), then fold that edge over the middle of the dough ball (see photo series above). Turn the bowl 45 degree and fold again. Repeat the process until you have made 8 folds.
  • Cover with plastic wrap and let rise for 30 minutes. Repeat this folding and rising process every 30 minutes for 3 more times (so you’ll do this folding process 4 times over the course of 2 hours). This helps activate the gluten without the labor intensive kneading process. After the fourth and final folding circuit, replace the plastic wrap and stow the bowl in the refrigerator overnight.
  • Day two: remove the dough from the refrigerator and relocate it to a well-floured board. Divide it into four pieces. Working one at a time, pat two of the pieces of dough into about a 4-inch round. Around the circumference of the dough, fold in the edges toward the center to form a clumpy ball (see photo series above). Turn the dough ball over and form your hand around it like a cage, then roll gently with very little pressure in light circles on the board to form a smooth, taut round (see Joe Pastry’s excellent tutorial if you need help with this). Repeat with the second piece of dough.
  • The remaining two pieces are for the buns. Divide each of them into equal thirds or quarters, depending upon whether you want 6 or 8 buns. Repeat the flattening, folding, and shaping process with each of these smaller dough pieces, then cover all dough rounds with plastic wrap and let them rest for 5 minutes.
  • Grease one loaf pan and one baking tray (or line it with parchment paper). After the dough balls have rested for 5 minutes, flip them to expose the seam side and repeat the flattening, folding, and shaping process with each one. This creates a finer, more uniform texture in the final product – a step worth doing.
  • Place the two larger balls into the loaf pan, pressing them gently into the corners. They will rise and merge into each other while baking. Place the 6 or 8 smaller rounds on the prepared cookie sheet. Cover both loosely with plastic wrap and leave to rise until almost doubled in size – this should take 1½ – 2 hours. Even after this rise, the loaf may look a bit puny. Don’t worry; it rises quite impressively in the oven.
  • Half an hour before baking, be sure your oven rack is in the middle position and preheat the oven to 350F. Cooks Illustrated suggests placing a baking stone on the rack to preheat along with the oven, perhaps to create a more even shot of heat.
  • When the loaf and the buns have nearly doubled, beat the final egg with the pinch of salt. Remove the plastic wrap and brush the loaves with the egg mixture. Set the pans in the oven (on the stone, if you’re using one), and bake until the tops are golden brown and the internal temperature registers 190F. This will take 18-20 minutes for the buns, and 35-45 minutes for the loaf. If you can remember, rotate the pans halfway through baking.
  • Once cooked through and shiny golden on top, transfer pans to a wire rack and cool for 5 minutes. Then remove from pans, return to wire rack, and cool at least 2 hours before slicing and serving.

Project Sauce Conclusion: Classic Béarnaise

As the culminating entry in this sauce project, where else could we end up but drowning in butter? I realize it’s after Christmas, which means you might balk at this, but it’s not January just yet, which I think means it’s safe to endure one more indulgence before we resign ourselves to a month or three of crisp winter salads, pickled vegetables, and herb soups (actually, all of that sounds pretty good… maybe I’m just hungry).

Food Blog December 2014-0989But before we get to all that, reflections are in order. As the Parson in Geoffrey Chaucer’s Canterbury Tales promises in introducing his sermon, it is time to “knit up all this feast and make an end.” This is a meal of endings. The month is almost over, and the year is fast on its way out after that. Even my camera battery decided to go with the theme, running out of juice mere moments after I snapped the top photo.

Food Blog December 2014-0978I chose sauce as the subject for this year’s project because I knew only basics about it. It struck me as mysterious – puddled round or gently but surely emulsified over various restaurant and food-TV displayed dishes, deeply flavored and succulent, providing a link between the otherwise fractured components on the plate. I was acquainted with some – the kind of softly thickened, creamy concoctions resulting from a roux – but terrified of others – hollandaise and mayonnaise and this final entry, béarnaise, seemed outside the arsenal of an ordinary home kitchen. Why else would eggs benedict always cost so much on a brunch menu? Yet they weren’t as frightening as I’d expected. In fact, despite being prepared to make multiple versions of each and frantically fix broken or greasy sauces, I had little trouble. And as I wound my way through the project, some lessons became clear:

1.) Butter is king. Though there are some recipes that rely on simple reduction as their method for producing thick, glossy pours, most require fat to add shine and to help emulsify, and because so many of these classic sauces are French in origin, there is no other fat even under consideration besides butter. It makes sense, too. Bringing a sauce together frequently requires emulsification, which means suspending together insoluble droplets together to thicken the liquid. Whole butter is a combination of fat and water, which means as it sits there all innocent and golden in that paper-wrapped stick, it is already an emulsion all on its own. If you’re going to work with sauces, be prepared to go through a lot of butter. Just remember you’re usually making enough sauce for a crowd, so it’s not quite like you’re chowing down on that whole stick all by yourself…

Food Blog December 2014-09822.) There are three main methods of thickening: eggs, flour or starch, or reducing. The eggs help thicken the sauce because they cook, transforming from a viscous goop into supernatural, temperamental velvet. The flour and starch work by expanding as they heat in the liquid you whisk them fervently into – they swell and absorb and, if you’re assiduous in your stirring, result in an evenly thickened mixture, not a soup full of doughy clumps. Saving these, however, the simplest method of thickening is reducing. Since in most cases a sauce is a pot of liquid suspended over heat, enough simmering is going to result in loss of water, and the more water evaporates from the pot, the less there is left in the sauce. Evaporation, though, takes time, which leads me to lesson three.

3.) Don’t rush. While these sauces are not particularly difficult to make, they do take time. Bringing a pot full of liquid even to a light simmer takes a while, and if you want a thick, glossy reduction in less than five minutes, you’re going to be disappointed. Much of the rich savoriness achieved by something like a veloute or a barbecue sauce comes from simmering away the water in your mixture to concentrate the flavors. As for the egg-based incarnations, mayonnaise just doesn’t come together in an instant. Be prepared for the long haul before you can spread it on that sandwich.

Food Blog December 2014-09854.) Get ready to stir. While we’re considering the long haul, it’s not enough to just throw a pot of sauce on the stove and walk away for a while. In almost every case, a successful sauce is the result of determined and consistent whisking for long minutes at a time. Eggs scramble, flour lumps, and milk curdles if left unattended. Since the objective of sauce is a smooth texture, be prepared for the stirring this requires. Relatedly, this also means having your ingredients pretty much prepped before starting the process – there’s just not time to finely mince a shallot at the same time you’re vigorously stirring a pot of slowly expanding egg yolks.

5.) Carnivore-friendly. Vinaigrettes and dessert offerings excepted, most of these sauces to seem to be intended for consumption with flesh of some sort, whether that be fowl, fish, or four-footed. Some are based around meat broths or stocks, while others just classically pair with specific cuts. This month’s offering, for example, is a classic steak-house luxury. I suppose this is reflective of an era in which meat is the focal point of a meal. But we found that, far from a necessity, many of these sauces are just as enjoyable puddled over a pile of lightly steamed vegetables or roasty starches. Because really, a thick emulsion of butter and egg yolks should be poured over almost anything, as far as I’m concerned.

So let’s get to that whole butter and egg yolks thing, shall we? As sauces go, béarnaise is not so different from last month’s beurre blanc. In fact, as restaurant legend goes, beurre blanc was an accident, created by a chef who was intending to make béarnaise, but forgot to add the egg yolks. That tells you much of what you need to know about this fluffy, decadent concoction. Reduced wine and vinegar, some aromatics, egg yolks tenderly and assiduously whisked like a hollandaise, and then an embarrassing amount of melted butter carefully dribbled in. It emulsifies into a pale, almost foamy lemon-colored sauce that is a bit strong on its own, but utterly lovely enrobing everything from red meat to barely blanched green beans.

Food Blog December 2014-0986I wasn’t sure I would love béarnaise sauce at first, because in order to be a classic béarnaise, it has to be flavored with a hefty note of tarragon, an herb with lush, pointed leaves redolent of that most repulsive of flavors: black licorice. The anise-y taste it imparts in its dried form exiles it from my spice cabinet, and I was worried that stirring a whopping three tablespoons of it into my sauce would render it inedible. Surprisingly though, despite the strong aroma, the final flavor is delicate and inoffensive. It’s noticeable, yes, but in the final product it’s just an herby freshness not so different from basil.

Because this was sort of an occasion, being the final sauce and all that, we decided to make it celebratory and eat béarnaise with its classic pairing. In addition to the crisp-tender green beans and smashed potatoes, we inhaled thick slices of seared chateaubriand, a thick cut from the tenderloin similar to filet mignon. Over this, the béarnaise dribbles and foams and mixes, and the richness is decadent and heroic, and we didn’t lay our forks down until every molecule of food was gone from those plates.
I hope you are enjoying the holiday season. Project Sauce may be over, but with New Year’s Eve just around the corner, there is one more sort of sauce I think you should consider. And in this case, you don’t even have to make it. You just have to hit it. And then let someone else take you home and tuck you in. Happy New Year, friends. I can’t wait to tell you about the project for 2015.

Food Blog December 2014-0989

Pretty Classic Sauce Béarnaise
Makes a little over 1 cup
8 tablespoons unsalted butter (1 stick; 4 ounces)
1 shallot, minced (1/4 cup?)
1/4 cup white wine
1/4 cup white wine vinegar
3 tablespoons finely chopped tarragon leaves, divided
1 teaspoon crushed peppercorns
3 egg yolks
salt to taste
  • In a small pot, melt the butter, skimming off and discarding the bubbly scum that forms at the surface.
  • Meanwhile, simmer the wine, vinegar, peppercorns, shallots, and 2 tablespoons of the tarragon leaves until only a tablespoon of the liquid remains. Strain into a glass or metal bowl and let cool for a minute or two.
  • Set the bowl over a pot half full of water and begin warming it up over medium heat. Before it has a chance to heat up much, add the three egg yolks to the bowl with the wine mixture and whisk vigorously. Continue to whisk as the water comes to a bare simmer.
  • Continue whisking the yolk mixture until it is doubled – about 5 minutes. It will become pale and fluffy.
  • When yolk mixture has doubled, turn the heat down to low and begin dribbling in the melted butter a few drops at a time. If the mixture begins to look curdled or really shiny, remove from the heat for a minute, whisking constantly. This will slow down the speed at which the eggs cook. If you’re really nervous about it, add about a teaspoon of water and whisk vigorously to bring things back together.
  • Continue whisking and dribbling in the melted butter, on and off the heat, until all the butter is added and the sauce is thick. Add the final tablespoon of chopped tarragon, season to taste with salt, and set aside in a warm spot until ready to serve – a thermos works very nicely.