Breads of the World: Naan-e-komaj

Last week I took you on my own rabbit-hole investigation of a Persian bread called komaj or naan-e-komaj that I had chosen as the inaugural bread for my 2021 project. This week, I present the end result: a set of soft, pillowy, sunshine-yellow date-stuffed buns, and the recipe I used to make them. Since you’ve already got the potential history behind them – I’ll admit, the trail I followed last week could just be a set of coincidences; sometimes different dishes are called the same thing – I’ll try to keep my introductions here short and just give you some thoughts on process and flavor, and plenty of photos to enjoy.

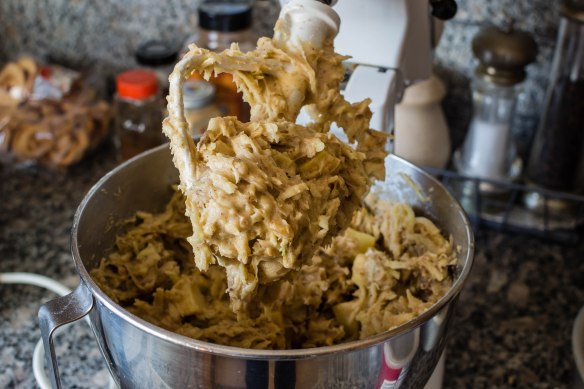
Stretching the dough for the “windowpane test”

Almost there…

These are definitely a “project cook” item, as I suspect most of the breads I offer this year will be. Yeast-risen bread needs time, and these require not the usual two, but three rises before they are ready to bake. I tried to streamline a bit: unable to compromise the length of the rises much, even in my unseasonably warm Southern California kitchen, I settled instead for simplified shaping. The Maloufs, and the baking group who led me to their recipe, shape their buns with a cookie cutter, rolling out a rectangle of dough, brushing with water, milk, or egg to ensure adherence, placing the filling, folding the dough over itself to encase the filling, and stamping out a round or heart shape. I decided instead to go with my usual bun shaping method, which consists of folding, pinching, and rolling a rectangle of dough into a ball using the slight tacky tension between dough and board to seal the seam. You can see this process in my photos below or, if you need a more detailed step-by-step, check out yesterday’s instagram post for a short (awkward, one-handed) video demo of the folding and rolling: over there I’m just blackberryeating.

The only disadvantage to my method is that it can, if you’re not careful, result in the filling starting to protrude through the now-overly-thin top layer of dough. The solution is, I think, to flatten the corners rather than the middle of your dough rectangle before filling and folding, and to execute the roll-to-seal process fairly quickly. The good news is, since you’re making 16 buns you do have ample opportunity to perfect your method.

Shaping the buns: place about 1 teaspoon date filling in the center of a dough rectangle. Keep the center thicker than the corners, if you can.

Fold the corners of the dough rectangle up over the filling, then pinch together into a little purse.

Roll the ball, pinched side down, in little circles on a barely floured board with your fingers in a cage shape.

Rolling in a little circle between your fingers and palm helps close up the bottom seam.

This was my bottom seam – now it’s starting to seal together. A few more rolls and it will be ready!

Ultimately, these were 100% worth the time and the research. They are delicious. The date and cardamom filling, to which I couldn’t resist adding some orange zest, is rich and sweet, but each bun holds only a teaspoon or so, which means it’s also not overwhelming. The bun itself is soft with a slight chew, not too sweet, and on the edge of doughy inside, which makes me think of an almost-underbaked challah, or the perfectly moist interior of a Hawaiian roll. Yours will be slightly less bright yellow than mine – my hand slipped as I was measuring out turmeric and I ended up with a fair bit more in the mix than my recipe calls for. It may seem a bit odd to have cumin – a decidedly savory flavor – along with a sweet date filling, but don’t skip it. The play between the toasty, almost smoky cumin and the sugary dates is lovely, and makes these buns less a dessert item, perhaps, but a definite contender for breakfast, and perfect as a mid-morning or mid-afternoon snack with tea or coffee.

(Naan-e-)komaj
Makes 16 buns
About 3½ hours
This recipe is my version of two interpretations: it starts with the recipe from Saraban: A Chef’s Journey Through Persia, Greg and Lucy Malouf’s recreation of the bread they loved in southern Iran, and pulls in some suggestions from SaffronAmbrosia, the site of a participant in the baking group who auditioned and adapted the Maloufs’ recipe. The addition of the orange zest is my own; given the love of rose- and orange-blossom water in Persian cooking, I couldn’t resist a bit of citrus flavor to brighten the date filling.
For dough:
2 teaspoons active dry yeast
2 tablespoons warm water
pinch + ¼ cup sugar, divided
⅔ cup warm milk (or water)
1½ tablespoons olive oil
1 egg
3¾ cups bread flour
1 teaspoon turmeric
1 tablespoon whole cumin seeds, toasted and lightly crushed, divided
¾ teaspoon kosher salt (or ½ teaspoon table salt)
For filling:
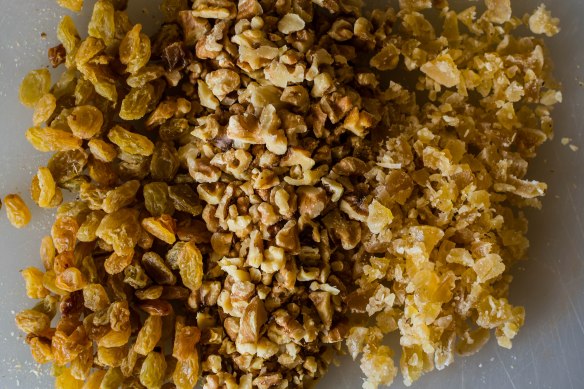
12-15 medjool dates, pitted and cut into chunks (if they are firm rather than soft and sticky, soak them in hot water for about 10 minutes before chopping)
2 tablespoons unsalted butter, softened
1-2 teaspoon(s) ground cardamom (start with 1; cardamom is strong!)
zest of ½ an orange, optional
pinch of salt, optional
To finish:
Milk, cream, or egg yolk to brush on top before baking
Optional: powdered sugar to dust after baking


  • Combine the yeast and 2 tablespoons warm water in a large bowl (I used the bowl of my stand mixer) and let sit for 10-15 minutes, until the yeast is bubbly and smells like bread. Using a wooden spoon or the paddle attachment, stir in the remaining sugar, warm milk (or water), olive oil, and egg.
  • Now add 3 cups of the bread flour, the turmeric, 2 teaspoons of the cumin seeds, and the salt. Stir with a spoon or the paddle attachment until the dough is starting to come together – it will have a rough, shaggy consistency. Switch to the dough hook or, if you aren’t using a stand mixer, tip the mixture out onto a well-floured board and knead until the dough becomes smooth and pliable and is no longer sticky. If it seems too wet, add the remaining flour ¼ cup at a time as needed – you might not use the whole amount. I ended up using only 3¼ cups total. When your dough is smooth and elastic, set it in a lightly oiled bowl, cover it with a clean cloth or plastic wrap, and set it aside until it has doubled – about an hour, depending on how warm your kitchen is.
  • At the end of the first rise, when the dough has doubled in size, “punch it down” by deflating it gently with your fist, then re-cover and set it aside to rise again for another hour. During this second rise, make the filling: combine the dates, butter, cardamom, orange zest, and optional pinch of salt. You can just mix them in a bowl if you want a chunky filling, or if you want something smoother, like a paste, use a food processor and pulse until the filling reaches your desired consistency.
  • When the dough has finished its second rise, turn it out onto a lightly floured board and divide it into 16 even pieces. I find this is easiest by first dividing into 4 large pieces, then cutting each in half and then in half again. Working with one piece at a time, roll or gently pull to flatten into a rough rectangle. There are two approaches you can use to shaping these. My method is to roll round buns, which I think is slightly easier but your filling may end up off-enter. The Maloufs and the baking group stamp out theirs with a round or heart-shaped cookie cutter, which is pretty and results in a centered filling, but requires rerolling the scraps. If you’d like to use that method, go here for instructions.
  • If you’re using my method, working with one piece of dough at a time, add a teaspoon of filling into the center of the dough rectangle. Fold each corner up and over the filling, trying not to stretch the dough too much. Pinch together the folded corners into a seam, but don’t press too hard, or the filling may start to poke through the top. Turn the dough ball over and form your hand around it like a cage, then roll gently with very little pressure in light circles on the board to form a smooth, taut round (see Joe Pastry’s excellent tutorial if you need help with this, or check my  instagram post from yesterday for a video demo). Let the shaped, sealed buns rise, covered, on the cookie sheet for about 15-20 minutes.
  • While the buns have their final rise, preheat the oven to 400F. After this final rise, paint the tops of the buns lightly with milk, cream, or an egg wash (egg yolk combined with 1-2 teaspoons water). Sprinkle the remaining 1 teaspoon cumin seeds over the top of each one, then bake in your preheated 400F oven for 8-10 minutes.
  • Let the finished buns cool on a rack for at least 10-15 minutes, then dust with powdered sugar if you wish. Serving with tea, like a spicy-sweet chai, or a cup of Turkish coffee would be ideal. Like many sweet buns these are best the day they are made, but leftovers are easily and deliciously reheated.

A small hungry helper who protests that she did not get any komaj to sample…

Project Cook: Apple Spice Cake with Walnuts and Ginger

Sometimes dishes emerge from nowhere – no set, traceable inspiration; just an idea baked or simmered into existence. Philosophical. Cartesian cooking. Sometimes they are more geographical, linked to location and experience – blogs are rife with this, aren’t they? “This cake reminds me of my pilgrimage to…” But sometimes they are more narrative: visible evolution, each major ingredient or element its own origin story, entering the room at a moment that changes the direction of the final dish.

No surprise that the narrative method is one I favor. This magnificent stack began life as a carrot cake. That is, I wanted to make a cake, and after seeing (and resisting) a container of crystalized pineapple at the grocery store, carrot cake with crystalized pineapple sounded perfect. And then I thought about adding crystalized ginger too. And then I wondered whether some apple along with the carrot would be good, because fall, and pineapple turned into a third wheel that rolled away from the party. And then, inspired by old episodes I was watching of The Great British Bake Off, I wondered about adding dried apple, and maybe finely chopped, toasted walnuts to the filling instead of just plain cream cheese frosting, and suddenly the carrots – the very namesake of the cake! – started to feel out of place.

Suddenly I was planning an apple walnut cake. I tore through several cookbooks and a recipe site or two looking at various apple cake recipes – most rely on applesauce for both flavor and moisture, which I wasn’t interested in using – and came upon Deb’s roasted apple spice sheet cake, which does have a fair amount of applesauce, but also chunks of pre-cooked apples that, as she puts it, transform into “soft pillows of apple pie-like puddles.” I didn’t read much past that before deciding I, too, must have such puddles in my cake.

But I still wanted the moisture and freshness I knew shreds of raw apple would bring, and so while I dithered over recipes and quantities I remembered the cake’s initial origins and adapted my favorite carrot cake recipe: a triple layer extravagance from The Bon Appetit Cookbook that calls for pre-toasted nuts and a thick, rich, almost too sweet cream cheese frosting. Not much changes in the cake itself, aside from the significant shift from carrot to apple, except that I subbed in brown butter instead of the as-written vegetable oil, and as usual, it was a worthwhile extra effort.

This cake winds up so packed with threads of grated raw apple, toasted and chopped nuts, crystalized ginger, and the soft chunks of roasted apple, that it almost doesn’t feel like enough batter to encase the additions. The layers when you spread them into the pans are thin, but they do puff as they bake, into lovely, spicy, delicate layers you really do have to let cool for at least 15 minutes before taking them out of the pan. What became my middle layer, which emerged from the pan in six or seven moistly crumbling pieces, is proof positive of this. (Worth noting: if that kind of disintegration happens to you, reform the layer to the best of your ability on a sheet of plastic wrap, enclose it tightly, and put it in the freezer for half an hour or so before stacking and frosting. I was amazed by how well the pieces magically re-adhered.) If you’re worried about the fragility, I think you could get away with adding an additional ¼ cup flour to the recipe and still retain adequate moistness, but I haven’t tried this. If you do, let me know how it works out.

There are all sorts of other fun things you could do with the cake itself to change it up. Tart dried cherries would be lovely along with or instead of the golden raisins I’ve called for. Those raisins could easily be re-plumped in rum or brandy, a step I’m sorry I didn’t think of until my layers were already in the oven. The walnuts could be swapped out for pecans. You could play with the variety of apples you use – I almost always tend toward Granny Smiths or another tart green apple for cooking because I like their flavor and sturdiness, but you could mix and match as you please.

What I really want to talk about here, though, is the filling and the frosting. When I frost a cake, with a few notable exceptions, I typically put the same thing between the layers that I do around the outside. Here, though, whether it was thanks to Bake Off (likely) or just lightening strike inspiration, I wanted some texture in the filling, and the finely chopped mixture of dried apples and toasted walnuts woven through the cream cheese frosting was delightful.

As for that cream cheese frosting, it’s serviceable, easily pipe-able, and as rich and delicious as you could ever want. But N. and I noticed that, at least on the first day and despite the tablespoon of lemon juice I added for mitigation purposes, it is very, very sweet. Not surprising, given the number of cups of powdered sugar my recipe called for, but challenging for an insomniac to consider for an afternoon snack. So I have some thoughts, which I’ll admit I’ve tried exactly none of.

  1. You could decrease the quantity of powdered sugar down from 4 to 3 cups (you might end up wanting to add less vanilla as well, if you do this). This will produce a wetter frosting that might be harder to pipe, if that’s what you’re going for, but I think it would probably still spread successfully and stay where you put it.
  2. You could make the frosting a day ahead (would that make a difference? I don’t know…). Or, perhaps more logically, you could plan to make the whole thing a day before you serve it. We thought the whole cake tasted great – maybe even a bit better – after a night in the fridge.
  3. You could add a dried spice or herb to the frosting for an additional, not-so-sweet flavor. I thought first of ginger, which would make sense with the spices in the cake, but then, quite unconventionally, I thought of sage. Good with apples, decidedly savory, and about as stereotypically Fall as you can get, would a teaspoon or so of dried sage, finely crumbled and beaten into the frosting, tamp down that sweetness a bit?
  4. You could go the “naked” or “semi-naked” route, using only a small amount of frosting and spreading it on such that the sides of the cake artfully show through. You’ll have a fair bit of frosting left over if you opt for this route, but cream cheese frosting freezes quite well so I don’t see that as a bad thing. Emergency back-up frosting feels like a good idea.

Since I’m sure you’re limiting your social gatherings at this point and thus you might not be sure you really want a triple layer cake sitting around, you’ll be happy to know that this cake is a good candidate for freezing. We ate, over the course of I’m-ashamed-to-admit-how-few-days-it-was, about half of it, and then I carefully plastered over the cut portions with some extra frosting so no cake was exposed. Leaving the fully frosted cake in the fridge overnight ensures the frosting crusts a little bit, which makes it easy to wrap securely in plastic wrap and deposit in the freezer until you next need a rich, spicy, sweet reminder of fall.

Apple Spice Cake with Walnuts and Ginger
Adapted from The Bon Appétit Cookbook
Makes 3 9-inch layers, serves 10-12
About 90 minutes, plus cooling and frosting time
For the cake:
1 cup walnuts, divided (see filling and frosting ingredients, below)
4 large, tart apples, like Granny Smiths, peeled, divided
1½ cups unsalted butter (3 sticks)
2 cups granulated sugar
4 large eggs
2 cups all-purpose flour (as noted above, if you’re worried about very fragile layers, you could probably get away with 2¼ cups flour, but I haven’t tried that yet)
2 teaspoons baking soda
2 teaspoons baking powder
1 teaspoon salt
1 teaspoon ground cinnamon
½ teaspoon ground nutmeg
¼ teaspoon ground cloves
¼ teaspoon ground ginger
½ cup golden raisins (optional: soak in warmed rum or brandy for 10-20 minutes to rehydrate, then drain)
¼ cup chopped crystalized ginger
For the filling and frosting:
½ cup dried apples, finely chopped or cut with kitchen scissors
¼ cup finely chopped walnuts, from the 1 cup total listed above
½ cup unsalted butter (1 stick), at room temperature
16 ounces cream cheese, also at room temperature (I prefer Philadelphia brand)
1 tablespoon vanilla extract
1 tablespoon lemon juice
4 cups powdered sugar (see numbered thoughts on frosting sweetness, above recipe)
Optional: extra dried apples, crystalized ginger, and cinnamon, for decoration
  • To make the cake, preheat the oven to 375F and put the walnuts on a baking tray in the oven to toast while it is preheating. When they smell fragrant and have darkened slightly in color, they are ready. Remove and set aside until cool, then chop roughly.
  • Quarter and core 2 of the peeled apples, arrange on a foil-lined baking sheet and roast in the preheated 375F oven until they are browned underneath and dry to the touch, about 20 minutes. When done, set them aside to cool, then chop them roughly into chunks of your desired size.
  • Meanwhile, brown the butter and prepare the remaining apples. For the butter, melt all 3 sticks in a medium saucepan and let cook over medium heat until the solids on the bottom take on a toasty brown color. First it will foam up, then subside, then brown. It’s easiest to use a pot that does not have a dark surface, since you can see color changes in the butter more easily. Once those bits have browned, remove the pot from the heat and let cool.
  • For the remaining two apples, grate on the large holes of a box grater or use the shredding disc of a food processor (be careful to avoid stems and seeds). Gather the shreds into a clean kitchen towel and give them one good squeeze, then set aside. Don’t squeeze them out too much; we want some of that moisture for the cake.
  • Once all your pre-cooked ingredients have cooled down, lower the oven temperature to 325F and make the batter. In a large bowl (I used the bowl of my stand mixer), beat the sugar and the cooled brown butter together. Be sure to scrape in all of those browned bits from the bottom of the pot – that’s where much of the toasty flavor resides! Add the eggs one at a time, beating well.
  • Add the dry ingredients, sifting if you want to bother. I never do.
  • Stir in the golden raisins, ¾ cup of the toasted, roughly chopped walnuts, the crystalized ginger, and the grated apple. Finally, gently fold in the chunks of roasted apple.
  • Divide the mixture evenly between 3 well-greased 9-inch round baking pans. You can line with parchment paper too, if you want the extra insurance. The layer of batter in each will be thin. If you, like me, only have two 9-inch pans, bake two layers first, then use one of those pans again for the final layer after the first batch has cooled a bit.
  • Bake in the preheated 325F oven until a toothpick inserted comes out with just a few moist crumbs, 30-35 minutes.
  • Cool layers in pans for at least 15 minutes, then remove from pans and cool completely. I’m serious about that 15-minute thing, by the way. Trying to take them out before that could result in disintegration!
  • To make the frosting and filling, finely chop the remaining ¼ cup of walnuts and combine with the finely chopped dried apples in a small bowl.
  • In a large bowl, beat together the room temperature butter, cream cheese, vanilla, and lemon juice until well combined. Scrape down the sides of the bowl and the beaters to ensure full integration.
  • Add the powdered sugar ½ cup at a time, to prevent cough-inducing clouds, and beat well after each addition, until the frosting reaches your desired thickness.
  • Scoop out about 1 cup of the frosting and add it to the small bowl with the walnuts and dried apples; use a flexible spatula to mix in. This is your filling.
  • To fill and frost the cake, position one fully cooled cake layer on a plate or cake stand. (If you are messy like me, you might want to arrange strips of wax paper to cover the exposed parts of the cake stand or plate while you frost.) Using a flexible rubber or an off-set icing spatula, spread about ½ of the filling evenly over this first layer of cake, going all the way to the edges. Add the next layer of cake and repeat, then top with the final layer of cake.
  • Use the remaining cream cheese frosting to frost the cake as desired. If you want to do a crumb coat, use a small amount of frosting to coat the entire cake, not worrying about full coverage. When done, pop it in the fridge for a few minutes to let any crumbs that have come unstuck from the cake set into the frosting as it chills. Then remove from the fridge and continue. I usually scoop about two thirds of the frosting right onto the top layer of cake, then use an off-set spatula to gently push it toward the edges of the cake and down the sides, filling in any uneven gaps and creating as smooth a surface as I can. You may end up with extra frosting, which is convenient if you are thinking of freezing part of the cake, as explained above.
  • This looks lovely with just the frosting, but if you want to decorate a little, consider artfully arranging a few dried apple rings and chunks of crystalized ginger in the center of the cake, then dusting the top edge with cinnamon before slicing and serving.

Raw brussels salad with pecorino and panko

Perhaps you thought, given election results and my Halloween wordplay in last week’s post, that this week would offer something sweet. I hope, then, you won’t think a salad composed mainly of raw brussels sprouts a horrible trick.

I had in my files an idea for a brussels sprouts salad with wafer-thin slices of radish and apple tossed with buttery bread crumbs, and then I saw an instagram picture of a salad by LA chef Antonia Lofaso, which looked to be a huge mound of shredded brussels sprouts studded with grapes and pecorino cheese, and everything clicked together.

Here, you’ll process a full pound of brussels sprouts: a few large leaves will likely fall off or be easily peeled away while you trim the stem end and clean up the sprouts; reserve those – they make lovely little cups in the salad itself that collect showers of cheese and panko. In fact, you could likely do the entire salad of individually harvested brussels sprout leaves, but I didn’t have the patience for that. Instead, I turned to my food processor, where I see two possible choices: for a texture like a fine coleslaw, you could shred. For some variation in size and texture, you can pulse, which is what I opted for. This results in some very small leafy bits, and some more substantial chunks.

The sprouts, the transparently thin slices of radish and apple, tossed together in a lemon and honey vinaigrette, would themselves make a perfectly serviceable and somewhat virtuous salad course. But of course that’s not really me. All of those vegetables – and you, about to consume them – deserve a glorious topper. In this case, that takes the form of bread and cheese. First, a generous shower of pecorino romano cheese – you could certainly grate or microplane it, but I find I like the impact of what Deb from Smitten Kitchen calls “rubble-like” cheese so appealing and so easily done in the food processor already used for the sprouts, that I will always choose it over the wispier option produced by grating (at least for this salad). The final coup de grace is almost a full cup of panko bread crumbs deeply browned in butter. If you can’t do bread, you can easily make this gluten- and wheat-free by subbing in ground almonds or hazelnuts and get roughly the same effect, I’d wager.

In either case, what you’re left with is a glorious mountain of veg, topped with a deep snowcap of cheese and crumbs. With a seasonal brew or a glass of something sparkling on the side, perhaps, I think that’s a tremendous treat.

Raw brussels salad with pecorino and panko
Serves 2 generously, 3 more moderately
20-30 minutes
3 TB unsalted butter
¾ cup panko bread crumbs
½ teaspoon salt
1 pound brussels sprouts
3-4 radishes
1 small granny smith apple
2 teaspoons honey
2 teaspoons whole grain or Dijon mustard
zest of 1 lemon
¼ cup (4 TB) lemon juice
2-4 TB olive oil (I like my dressing very acidic)
salt and pepper to taste
½ cup grated or ground pecorino romano cheese


  • In a medium skillet, melt the butter over medium heat and add the panko and ½ teaspoon salt. Stir frequently until the panko is uniformly dark golden, then turn off the heat and set the panko aside to cool completely.
  • For the vegetables, first trim the brussels sprouts stems and remove any wilted or damaged leaves. Peel off a few easily removed leaves whole and set aside. If you want the sprouts shredded, like a fine coleslaw, use the shredding disc and feed the whole sprouts into the tube until all are reduced to tattered ribbons. If you prefer a more varied texture, as pictured, put the whole sprouts into the food processor bowl with the regular blade and pulse at 2 second intervals until they are mostly chopped but a few larger chunks remain. Dump and scrape all the brussels spouts, including the whole leaves you reserved, into a large bowl.
  • Trim the stem ends off of the radishes, then use the tails to hold them steady while you slice them as thinly as possible. Quarter and core the apple, then slice it thinly. Add the apples and radishes to the bowl with the brussels sprouts.
  • To make the dressing, stir together the honey, mustard, and lemon zest with a small whisk or a fork. Stir in the lemon juice, then add 2 TB of olive oil in a slow stream, whisking constantly, until the dressing emulsifies. Taste for seasoning and adjust as desired, adding salt, pepper, and more olive oil as you wish. Pour the dressing over the vegetables and mix well.
  • If you haven’t already, grate or grind your pecorino cheese. I like to use the food processor for this: once it is empty of brussels sprouts (no need to wash in between), add the cheese in small chunks, then run the processor on high until the chunks are ground down into a fine rubble similar in size to the panko.
  • If you want to serve the salad in individual portions, use tongs or your hands to create a tall pile of dressed vegetables on plates or shallow bowls. Sprinkle on a healthy snowcap of cheese, then a mountain of panko right on top.
  • If you want to serve the salad in a large serving bowl, use the tongs or your hands to push the dressed vegetables together in the center, creating a tall pile. Top with the cheese, then the panko, for a thick drift of golden crunchiness right on top.


Project Cook: Fig Olive Stout Country Loaf

Well. I know it’s been a while, and I know Halloween is over, but here we are just one agonizing day away from a nation-altering election that promises to be either a trick or a treat. If you’re an American, I hope you’ve voted. It’s too late now to mail in your ballot, but you can still drop it off at an official collection station, and you can still go in person tomorrow.

This loaf, too, which I baked on Halloween, has elements of trick and treat. The inspiration came from a snack we had a few years ago at a local brewery: a fig and olive version of that perfect Trader Joe’s savory-sweet raincoat cracker, spread with brie, was perfect with our nearby Scholb Brewery’s then-on-tap Contemplation Porter. I dutifully recorded this as an idea for a loaf in my “blog ideas” file, and promptly forgot about it until a week or so ago, when I decided it was time to see what kind of crackly crust I could get baking in my dutch oven.

The treat is, of course, the sweet and savory combination, surprisingly good, of dried figs and briny kalamata olives. In a nod to its brewery muse, to help out the yeast and amp up the roasty flavors of the finished product I’ve used stout in the dough instead of water (but you could certainly sub water back in if you prefer). The final loaf is dense but still bouncy, with a lovely chewy interior and bursts of sweet and salt from the olives and figs. Baking in the dutch oven results in a wonderful crust – thin but still crisp, with none of the leathery heaviness a homemade boule can sometimes produce.

The trick came, at least for me, in the handling. I adapted this recipe from Baking Illustrated’s basic Country Loaf. It’s a wet dough from the outset, not one I’d want to attempt without my stand mixer – kneading by hand would be quite sticky. It starts with a biga or sponge for overnight rise (a biga, sponge, or poolish is a form of a leavening method that operates similarly to sourdough, except you offer a bit of yeast for the flour and water to start with and only allow it to work overnight so there’s no true sourness. Depending on how long it works and how active the yeast is, this can affect moisture levels). On top of that, I went and added more than a cup of fruit. This rendered the shaping and scoring all but impossible, yet I still somehow wound up with a nice boule, its crust flour-dusted like a good artisan loaf, such that you’d never know the first rise produced a worryingly floppy puddle of goo. You’ll notice there are no photographs of the folding and shaping procedure. That’s why.

Lots of heaviness in this recipe – fruit aside, it also has a healthy dose of rye flour – means rising and baking take a good while, not to mention that whole starting the night before business. Baking Illustrated recommends a final internal temperature of a staggering 210F, and then you’ve got to twiddle your thumbs while it cools so the crumb structure inside can set up nicely. But accompanied by a pint of the same beer I used inside it, with a smear of triple cream brie on top, it was a late afternoon treat worth both the wait and the trickery.

Fig Olive and Stout Country Loaf
Adapted from Baking Illustrated
This is a 2-day project: day 1 = about 20 minutes, plus overnight rise. Day 2 = about 6 hours, including rising times + 2 hours to cool
Makes one large, round loaf
Sponge/biga
½ teaspoon instant or active dry yeast
1 cup room temperature water
1 cup bread flour
1 cup whole wheat flour
Dough
3–3½ cups bread flour, plus plenty of bread flour or all-purpose flour for shaping
¾ cup rye flour
1⅓ cups room temperature stout or porter (or water)
2 tablespoons honey
2 teaspoons salt
½ cup quartered (if you’re feeling fussy) or coarsely chopped (if you’re not) kalamata olives, patted dry on a paper towel
¾ cup stemmed and sliced (again, if you want to fuss) or coarsely chopped (if you don’t) dried figs


  • The night before you bake the bread, stir together the biga/sponge ingredients in a large mixing bowl. I used the bowl of my stand mixer, since that’s where I made the dough. Cover with plastic wrap and leave overnight.
  • The next day, the biga should look bubbly and smell slightly fruity. Add 3 cups of the bread flour, all of the rye flour, the beer, and the honey, to the biga and stir it together with a rubber spatula. Switch to the dough hook of a stand mixer and knead on the lowest speed for 15 minutes, adding the salt, the olives, and the figs during the final 3 minutes. If the dough is extremely sloppy, add the remaining ½ cup bread flour 2 tablespoons at a time, until it reaches a consistency you feel more comfortable with. It should be smooth, but still fairly relaxed and sticky. Cover with plastic wrap and let rise until tripled, at least 2 hours.
  • To prepare for shaping, flour a surface extremely well. Line a baker’s brotform, a basket, or a colander with a heavily-floured square of muslin or linen (I used a linen napkin). Flour your hands too; this is going to be sticky.
  • Turn out the dough onto the floured surface. If it’s anything like mine, it will puddle out somewhat distressingly. Be brave. Dust the top with flour, then lightly encourage it into a round by folding the edges of the dough into the middle from the top, right, bottom, and let, sequentially. Gather it loosely together. With the help of a bench scraper, if needed, transfer it quickly to your lined vessel, smooth-side down. Cover loosely with a large sheet of aluminum foil (we want the dough to be able to breathe a bit), and let it rise again until almost doubled in size, at least 45 minutes.
  • While the dough is rising, preheat the oven to 450F with a pizza stone or the bottom of a dutch oven on a rack in the middle position.
  • For baking on a pizza stone: place a small, empty baking pan on the bottom rack or the bottom of the oven, and prep 2 cups of water in an easy-to-pour container. Cover a pizza peel or the back of a large baking sheet with a large piece of parchment paper. Invert the risen dough onto the peel and remove the muslin or linen cloth carefully. Use a razor blade or very sharp knife to score the top of the dough. With scissors, trim the excess parchment until there is just an inch or so on all sides. Slide the dough, still on the parchment round, from the peel onto the preheated pizza stone, removing the peel with a quick backward jerk. Pour the 2 cups of water into the preheated pan at the bottom of the oven, being careful to avoid the steam, and close the oven door quickly. Bake until the internal temperature of the bread reaches 210F and the crust is very dark brown, 35-40 minutes.
  • For baking in a dutch oven: remove the preheated pot from the oven and set carefully on the stove. Place a large piece of parchment paper over the bottom of the dough in the colander. Hold the excess edges of the parchment and quickly, carefully invert so the round of dough drops directly into the dutch oven with the parchment underneath it. Don’t worry about the excess parchment edges. Use a razor blade or very sharp knife to score the top of the dough. Put the lid on and place the whole thing in the oven. Bake for 25 minutes with the lid on, then remove the lid and bake another 15-20 minutes, until the internal temperature of the bread reaches 210F and the crust is very dark brown.
  • For both methods: after the bread reaches an internal temperature of 210F, turn off the oven, open the door, and let the bread remain in the oven for 10 more minutes. Remove to a cooling rack and let it sit for at least two hours before slicing.
  • Serve with beer and creamy, spreadable cheese, or as desired.

Plantains with lime, cotija, and honey

If you are working from home during this pandemic, you have probably thought more than once since March about the weirdness of time passing. On one hand, we’ve been doing this foreverrrrrrrrrrr. On the other hand… no, it’s been forever.

But within that space of Marchunetember, or whenever we are, time passes oddly. Sometimes I can’t believe it’s already Thursday (I know, it’s Monday. But you know what I mean). Sometimes the afternoon just will. not. end. We are feeling the first hints of fall here in Southern California: two beautiful overcast mornings in which the gloom was not smoke, thank-you-very-much, cool enough that I wanted pants on my dog walk. Yet later this week we are supposed to rocket back into temperatures in the 90s. There’s a bit of everything at once.

So this is a little dish that speaks to all of those things. It makes a nice lunch for one, but it would be an equally delightful afternoon snack for two. It could easily be doubled or tripled to feed your pod.  It’s sweet and salty and sour and a little spicy – in fact, it would go so well with this kicky, smoky, spicy mix that you might as well plan to serve them up for a happy hour together, whether that means margaritas, palomas, or puckeringly good lemonade.

I like a mostly-ripe plantain for this, yellow with streaks of brown on the peel, because I enjoy the mix of textures: crisp, fried exterior with cushiony softness inside. But you could also do them tostones-style, frying less-than-ripe plantain slices over medium-low heat first to soften, then smashing them flat and frying again over higher heat on both sides for even brownness.

I ate mine with a fork, as you can see from my not-quite-in-focus close-up, but if you want to go nachos style and use the plantain pieces as scoops, I say go for it.

Plantains with lime, cotija, and honey

Serves 1 as a light lunch or 2 as a snack

15-20 minutes

1 large, yellow plantain, peel removed, cut into about ½ inch slices (I like mostly ripe, but see above for another option)

1 tablespoon vegetable oil

2 tablespoons butter

salt and red pepper to taste – I like the fruity heat of aleppo pepper

1 lime, which you’ll use for zest, supremes, and juice

1-2 tablespoons crumbled cotija cheese

1-2 teaspoons honey

about 1 tablespoon chopped cilantro


  • In a cast iron or other skillet, heat the vegetable oil and butter over medium-low heat until the butter is melted. Add the plantain slices, dust with salt and pepper, and continue to cook over medium-low for 4-6 minutes, or until they are nicely golden brown on the bottom. Don’t rush it. Don’t turn up the heat. They need to cook inside but not burn on the outside.
  • As plantains brown, flip, dust the other side with salt and pepper, and cook on the second side until it is also nicely browned, around 4-5 minutes this time.
  • While the plantains are cooking, zest the lime and reserve that zest for serving. Then use a sharp knife to cut a thin slice off the top and bottom. Remove the remaining skin and pith by cutting it off in strips from top to bottom, following the curve of the fruit. When you have removed the skin all the way around, cut supremes: slice between the fruit and the membrane that separates each segment. This is a useful step-by-step as well.
  • To serve, pile the fried plantains on a plate or in a shallow bowl. Add the lime supremes and cotija crumbles. Squeeze on some juice from the remaining carcass of the lime. Drizzle on the honey, then scatter the cilantro and the reserved lime zest over the top.

Watermelon Gin Slushies

As I’m sure is true for many of you, over these past couple of weeks I’ve been discovering hidden treasures (and also “treasures”) in corners of my pantry, fridge, and freezer. One of the latter was a jar of apple butter I don’t want to talk about that I uncovered while cleaning up a spill on the top shelf of my refrigerator. One of the former was a small jar of instant coffee granules that allowed me to experiment with the recent “Dalgona coffee” trend various parts of the internet are extolling. Short story: you need equal parts of each component, it really does whip up like that, and it really is delicious (I’ve heard some people complain that “it still tastes like instant coffee, though.” So it’s only fair, I guess that I confess I’m not a coffee connoisseur). Next time I’m adding in some cocoa powder for a mocha version.

As I’m also sure is true for many of you, I’ve been very careful lately – much more careful than normal – about not letting food go to waste. If it’s in the fridge, it needs to be eaten. Even if I’m tired of it or it wasn’t my favorite. This has led to some creative triumphs – potatoes and lentils cooked with warm Indian-inspired spices, chard from the backyard stirred in to wilt, and topped with a scoop of yogurt and some of the char stems, thinly sliced and pickled – and some creative… well… one-time-only (features) – a pot pie with overly herbed filling and under-salted crust.

Most recently, I combined these two truths in a cocktail: it emptied the remaining few swallows in the bottle of gin I discovered unceremoniously jammed under several bags of almonds at the back of the freezer, and it allowed me to use up some chunks of watermelon from a pre-cut fruit medley N. really wanted but that wasn’t particularly ripe or flavorful.

This is not the most original, or seasonal, or precise of recipes. How’s that for a convincing argument? But honestly, I’m sure the internet has gushed widely about combining watermelon, some sort of alcohol, and ice in a blender and piling it into a tall, frosty glass for a perfect summer afternoon. I did the same (except it’s April, and my watermelon was on the edge). And I’d encourage you to do the same as well! These were bright, they were tasty (at first I wasn’t convinced, but then I realized that even though I knew they were gin and watermelon, I really wanted them to taste like strawberry margarita), and best of all, they are easily adaptable, and offer one small, boozy way to ensure you aren’t letting a single precious (or not-so-precious) item in your well-stocked fridge go unused.

Watermelon Gin Slushies
For 2 small cocktails
About 1 cup frozen watermelon chunks (or other fruit of your choice)
About 1 cup ice cubes
2 shots gin (or other alcohol of your choice)
2 TB simple syrup, or to taste *
juice of half a lime, or to taste
lime wedges, to serve


  • Once the watermelon has frozen quite solid, add it, along with everything else except the lime wedges, to a blender. Blend to combine using about 3-second pulses. My blender has a smoothie setting, which does effectively the same thing: short, high-speed pulses until the mixture has become an even-textured, pale pink slush.
  • Taste and adjust quantities of lime juice and sugar syrup to your liking. Blend again briefly to combine if needed, then pour into glasses, garnish with a thin lime wedge, and serve. We had ours with lemon and pepper spiced popcorn and wouldn’t change a thing.

* If you don’t have simple syrup, you can easily make up a batch while the watermelon freezes: just combine equal parts sugar and water in a small pot, bring to a simmer, stir briefly, and when all of the sugar has dissolved and the liquid is clear and just barely thickened, you’re done, and need only cool it down and find a suitable storage container.