Cinnamon Mocha Swirl Bread

Food blog June 2015-0938Around here, we take afternoon snack time very seriously. During the school year, it’s an opportunity to sit down together for a few minutes and work our way through notable moments from the day. During the summer, it’s a good way to reconnect from whatever individual projects we might have lost ourselves in. It feels like a restart, in a lot of ways, which can be important if the day hasn’t gone all that well.

Food blog June 2015-0916
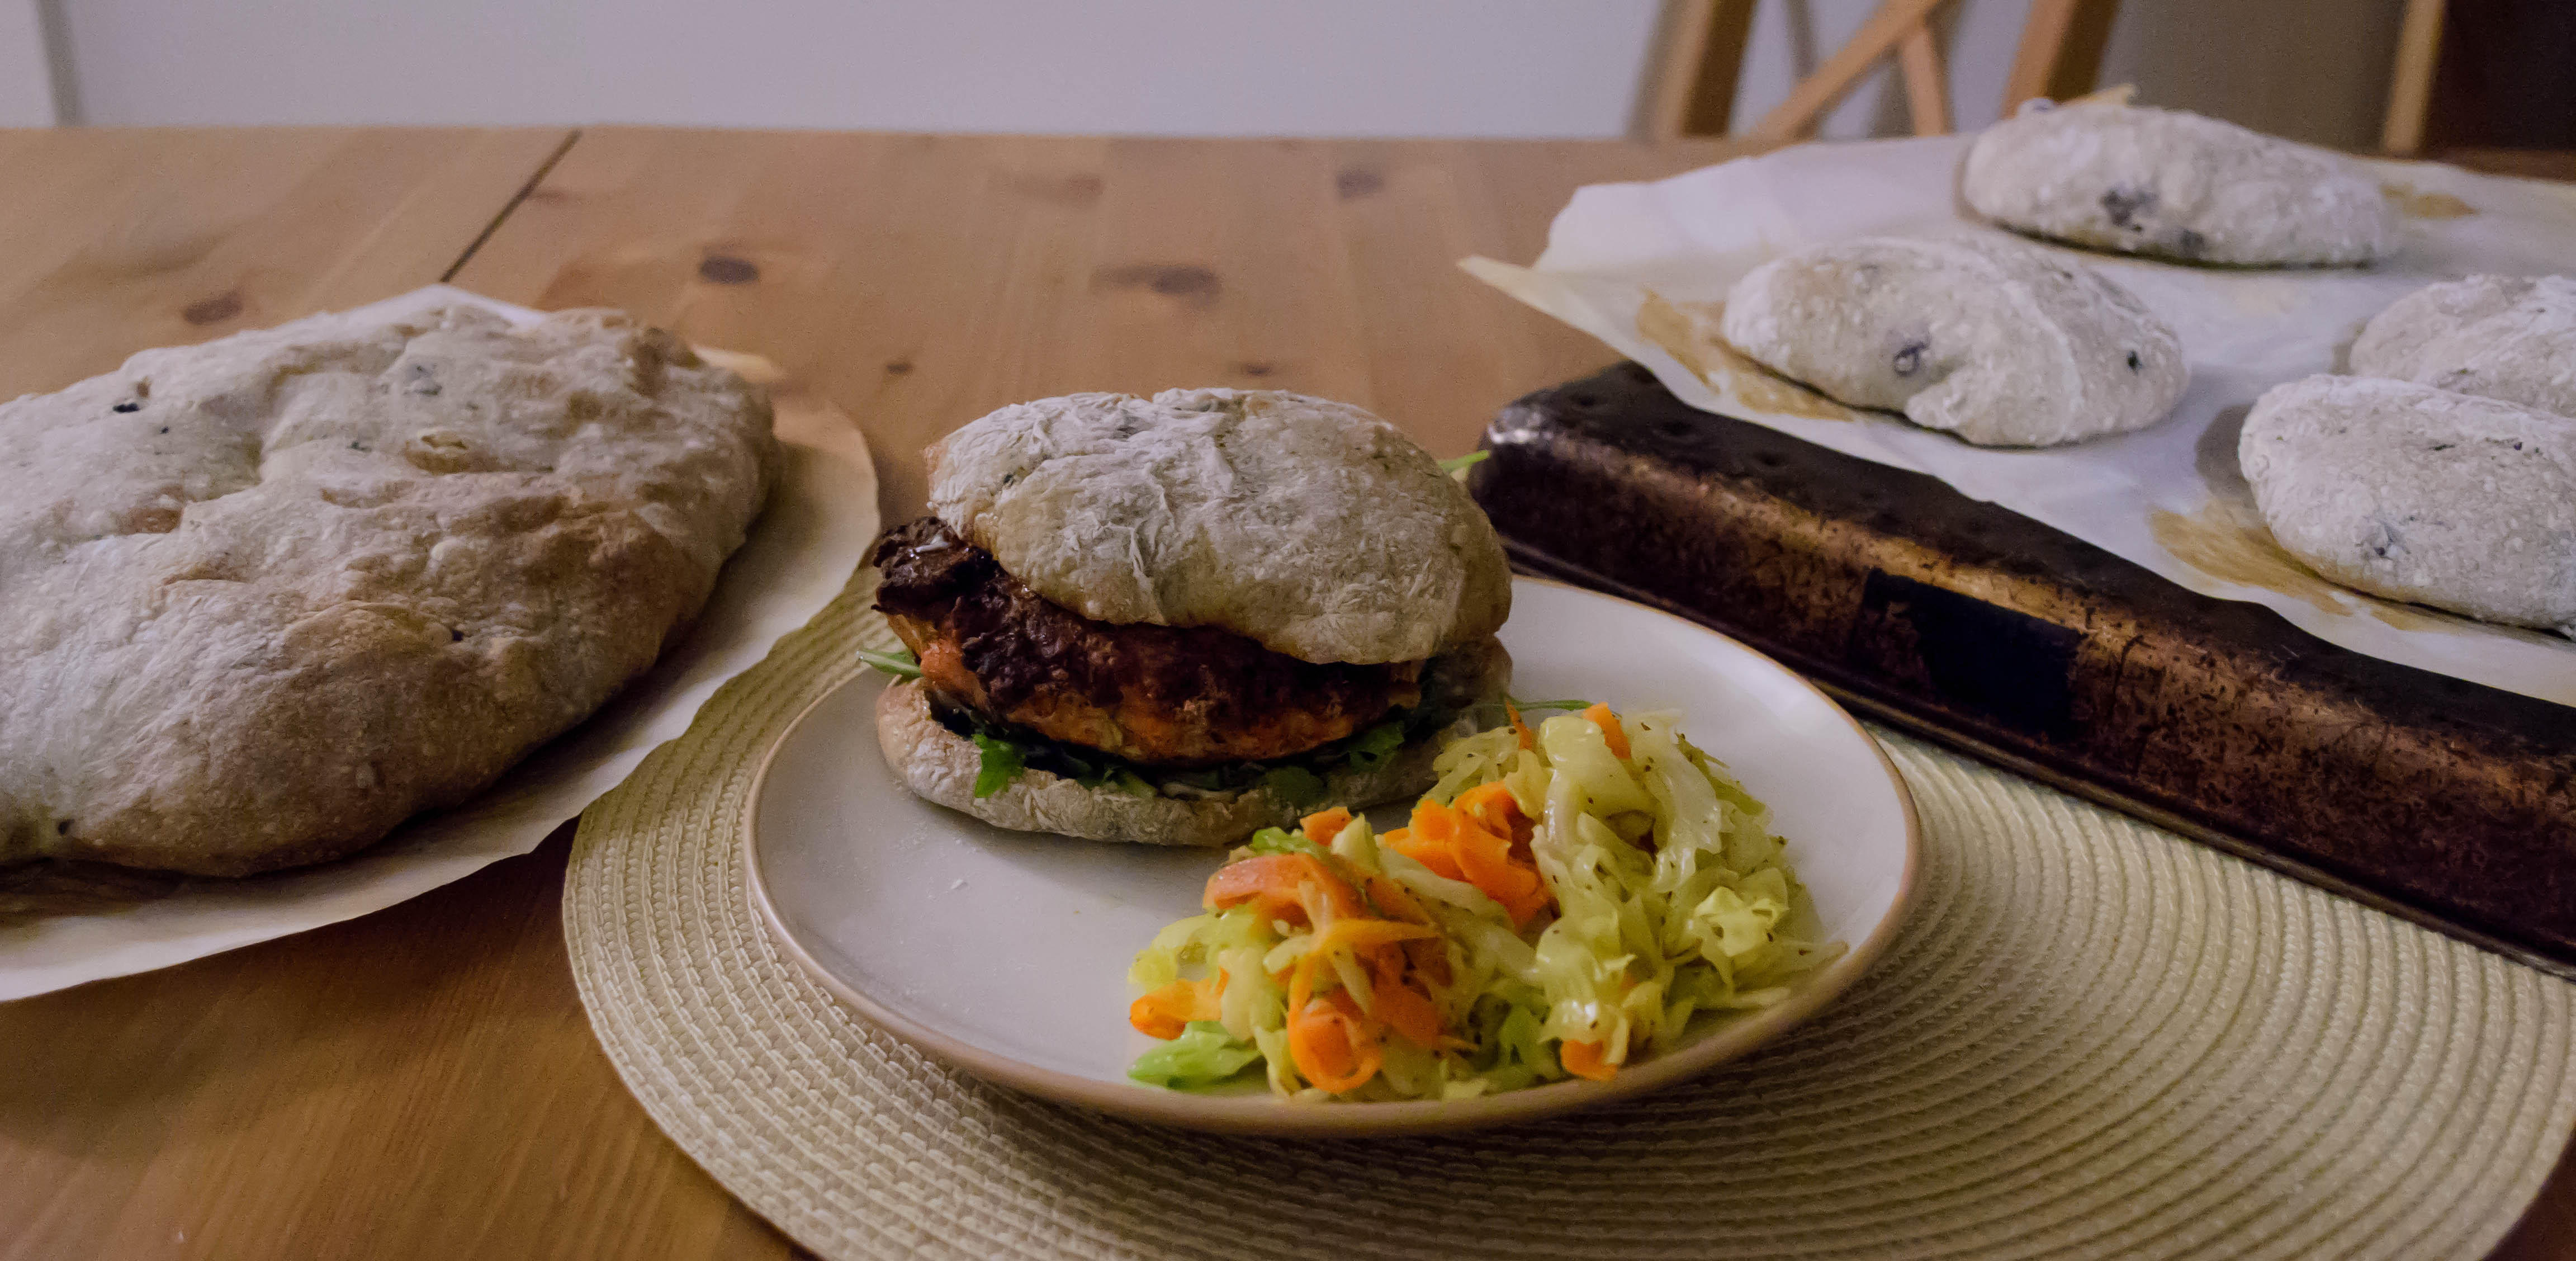
More than that, though, we are gluttons, and our mid-afternoon snack, or “teatime” as my wannabe Londoner husband likes to call it, is a sacred few minutes reserved for cramming something delicious into our mouths. Usually this is something quick: chips and salsa, or crackers and cheese; on Fridays it often dovetails into an impromptu happy hour of some sort (stay tuned for snack-y developments on this front, by the way…). But sometimes I like to get fancy.

Food blog June 2015-0911
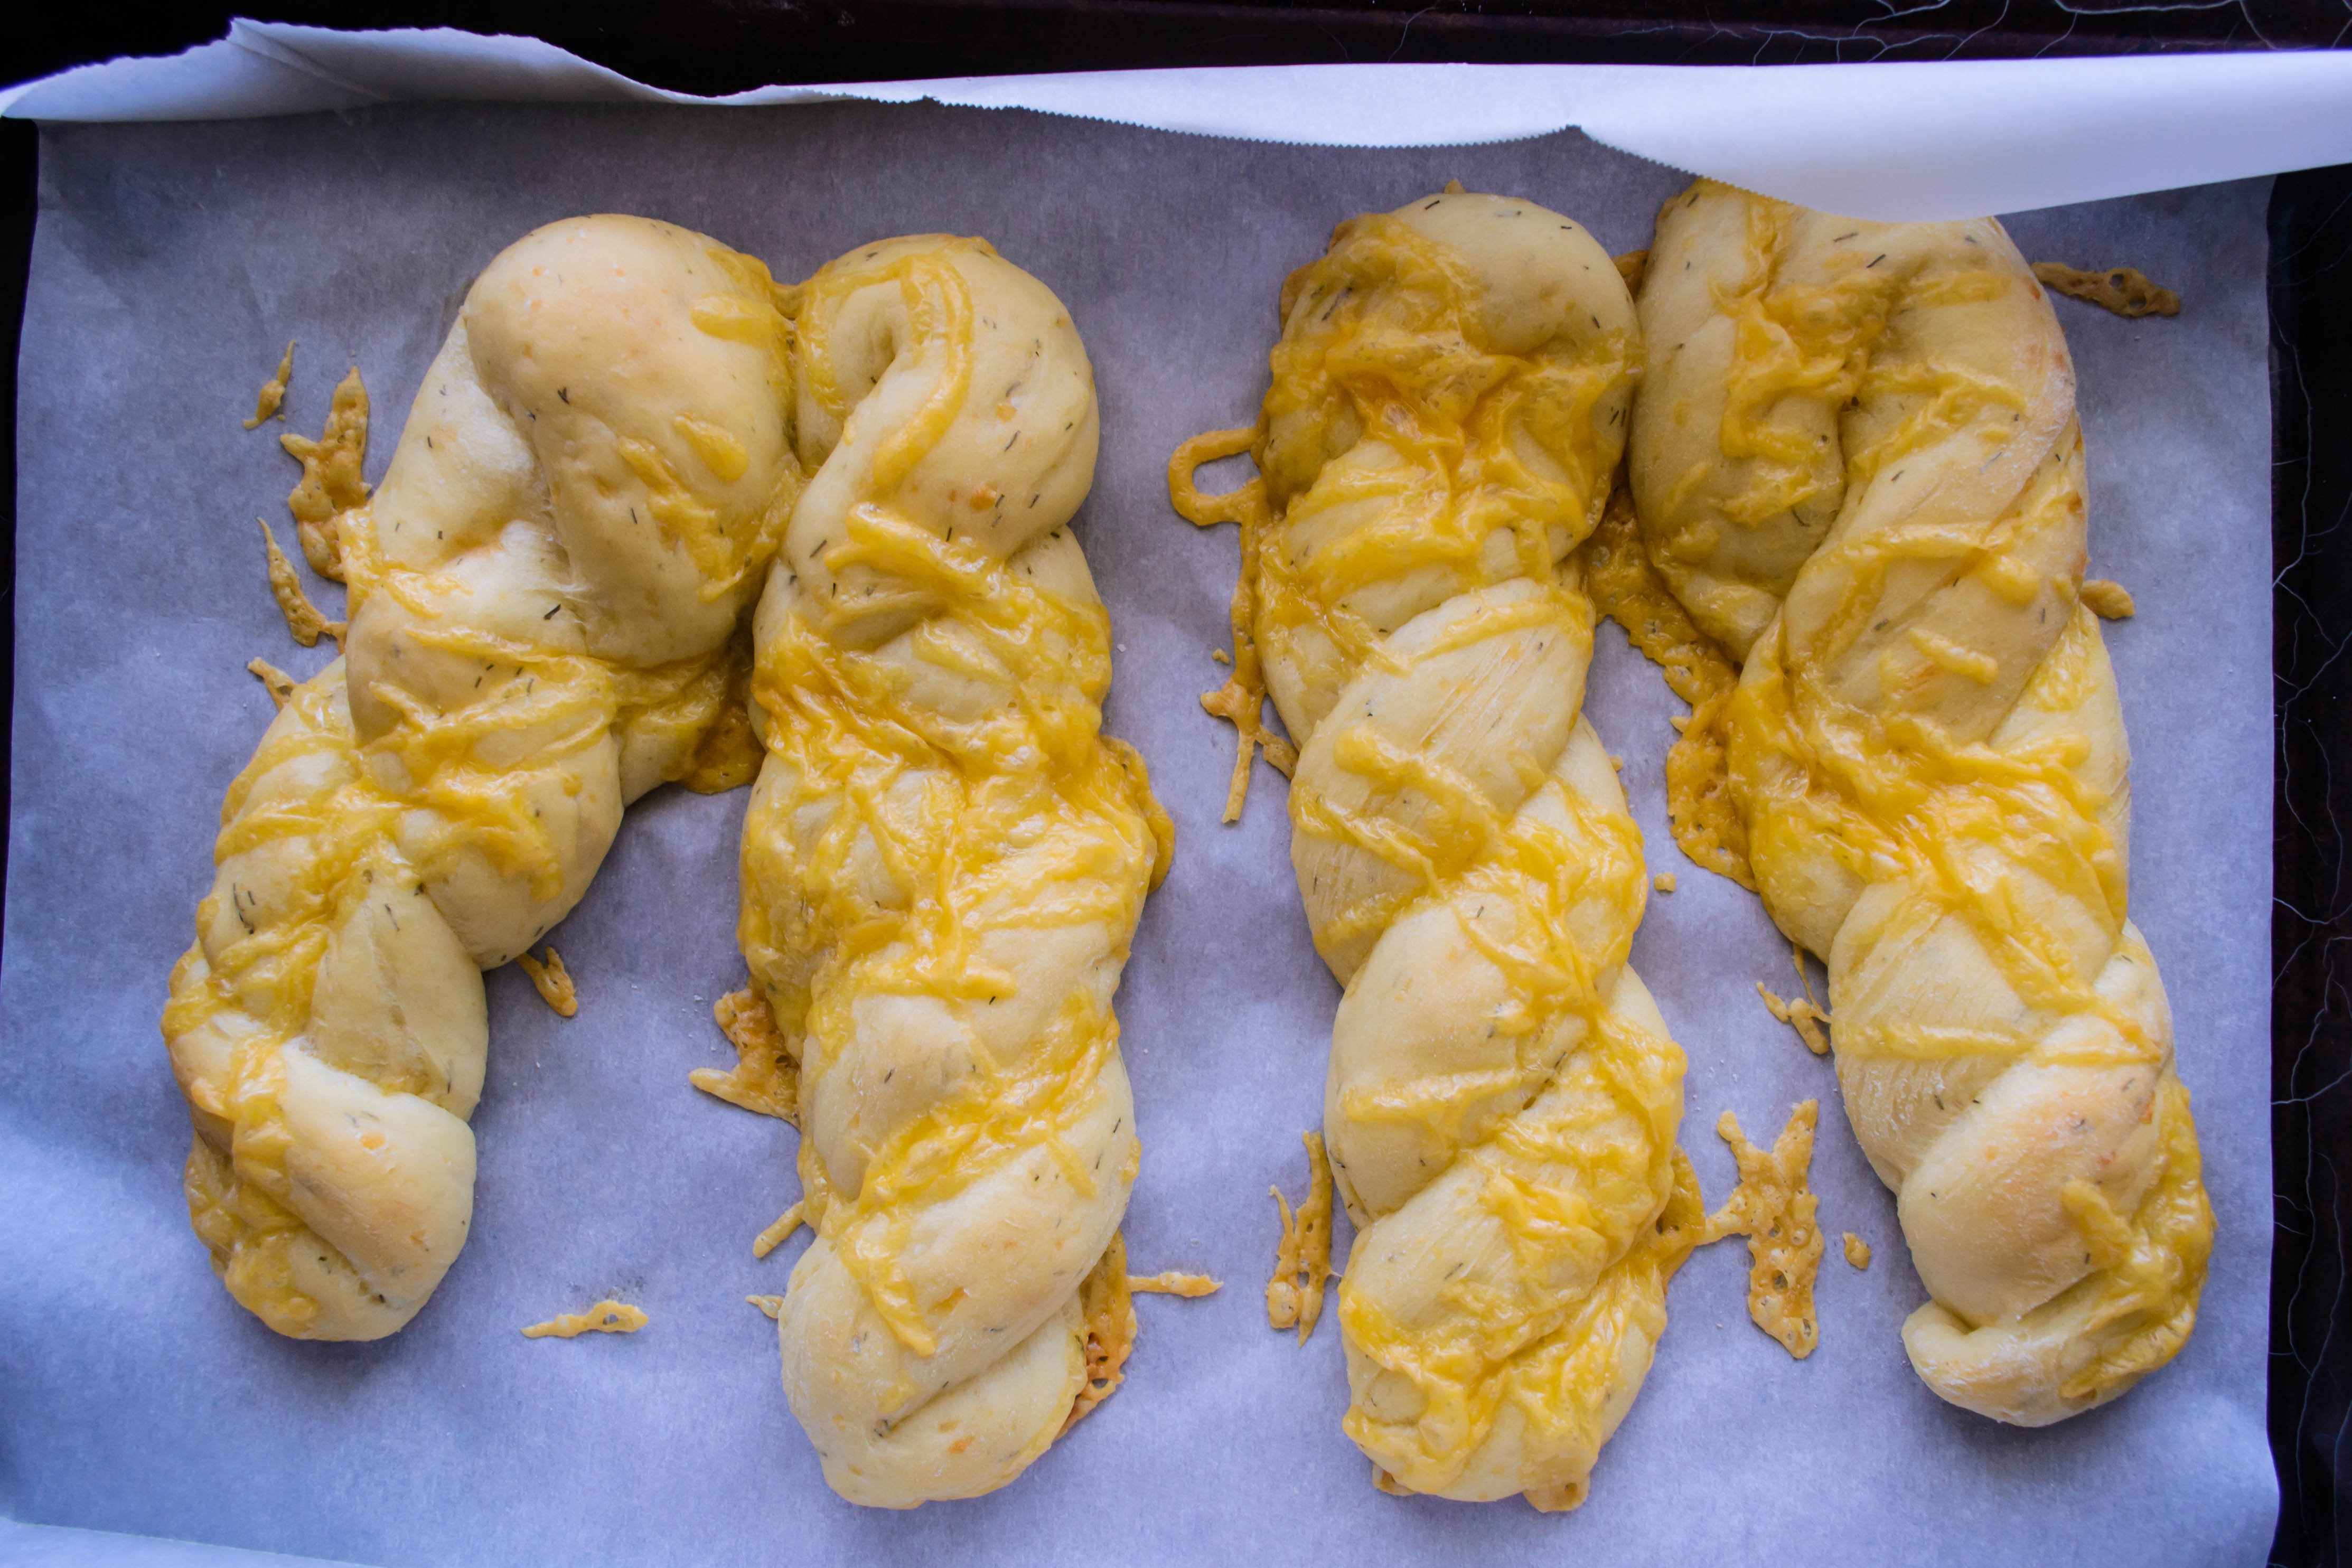
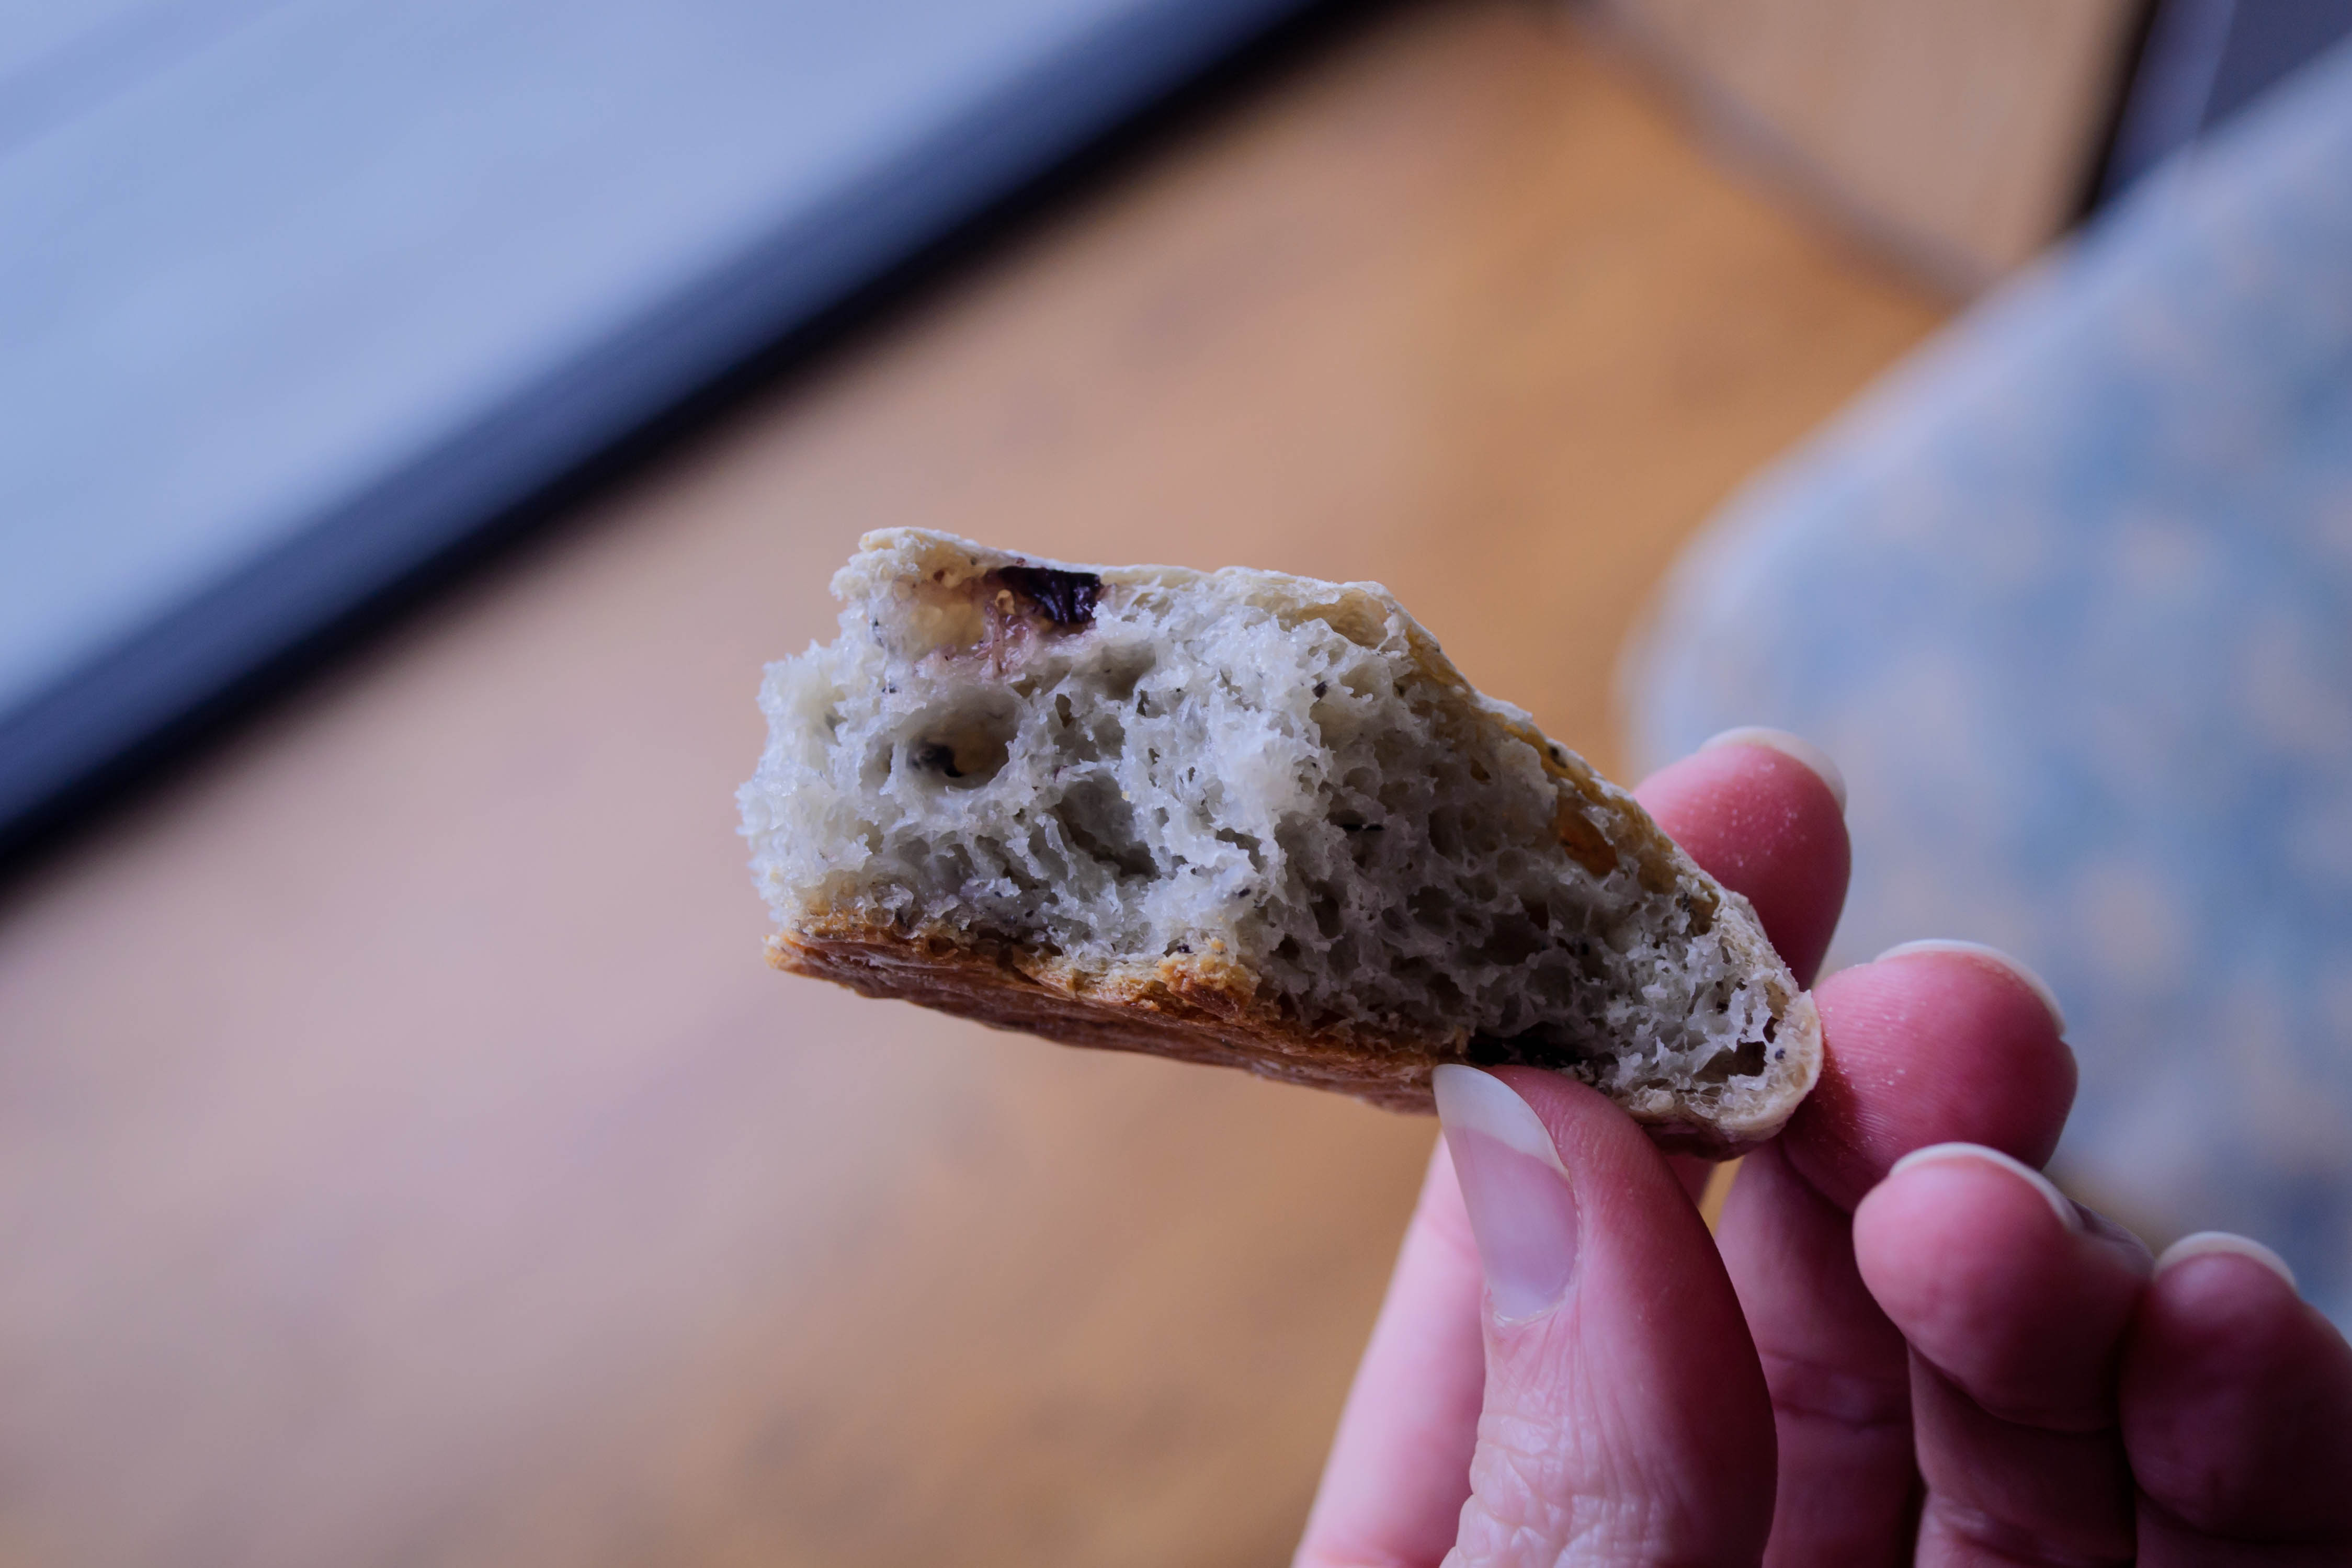
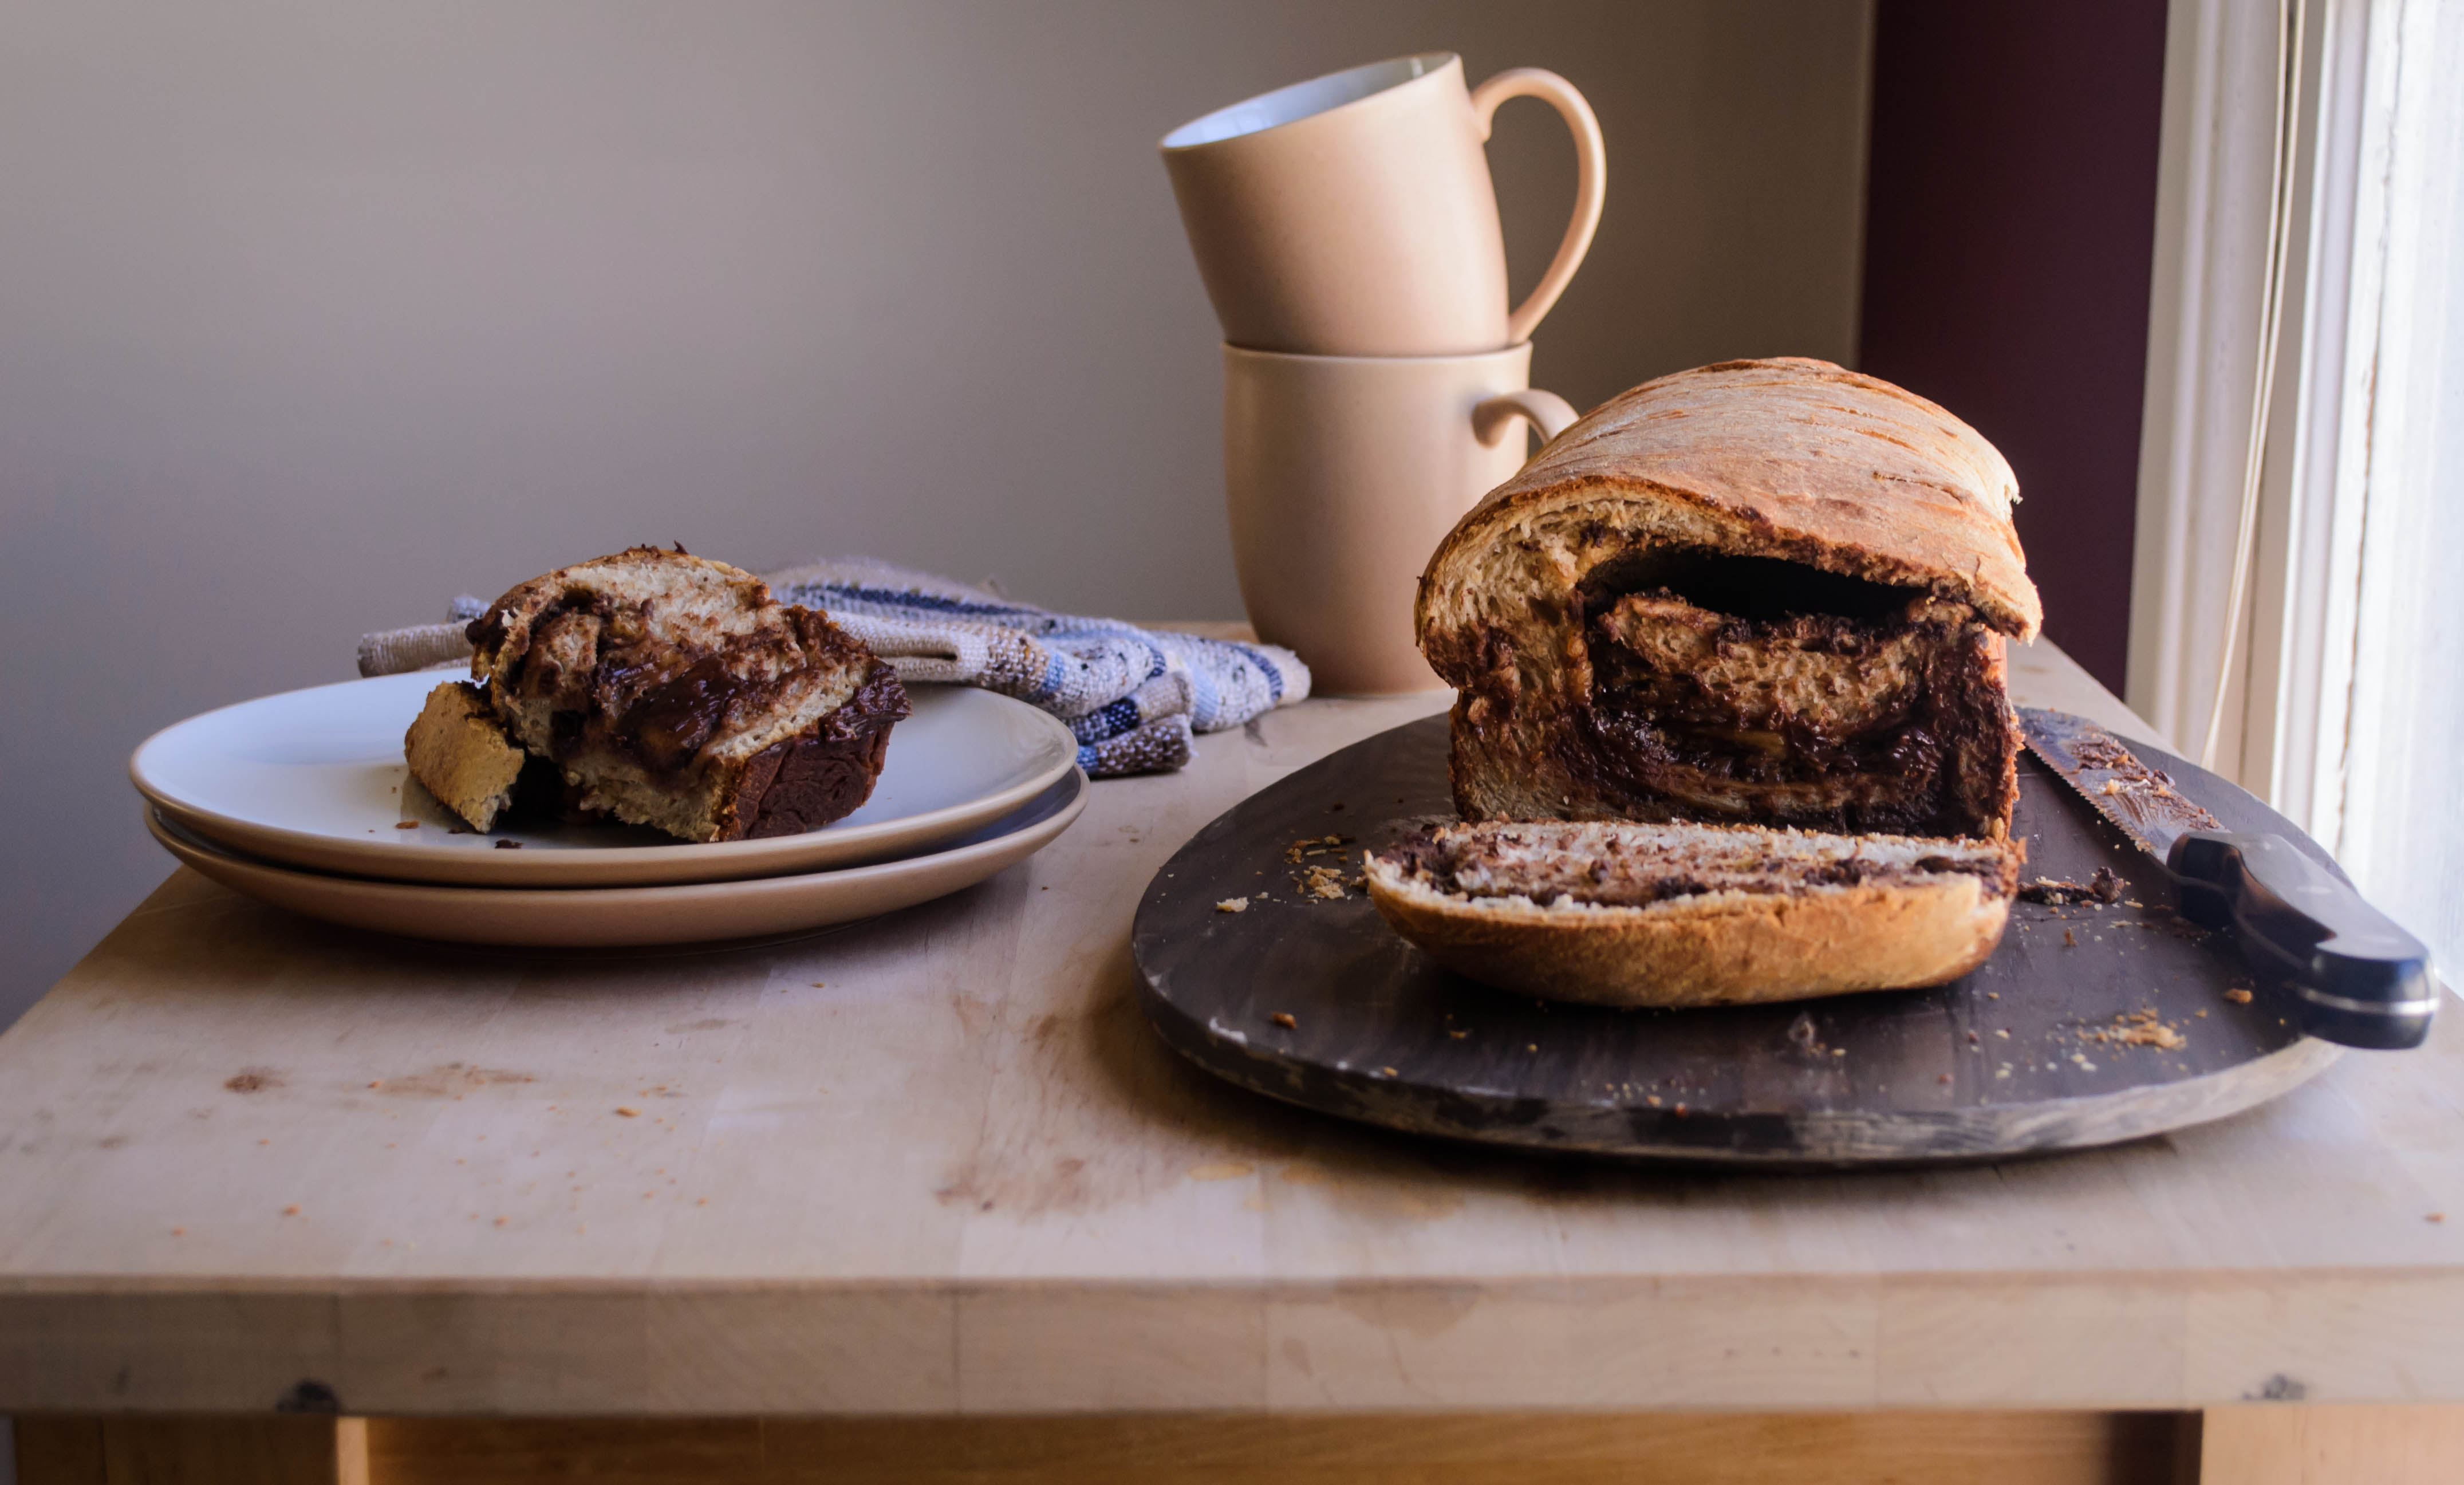
Spurred by this month’s Twelve Loaves theme “A Little Something Sweet,” I decided a special “teatime” loaf was in the works: I wanted a swirled bread, and since N. was working his way through his very last week of school, I decided something with a bit of pick-me-up was called for. Playing with flavors of Mexican chocolate and tiramisu, with a block of cream cheese thrown in for good measure, I ended up with this stunner: a lightly sweet cinnamon spiced loaf, with an unapologetically thick filling of sweetened cream cheese, espresso powder, and chopped semi-sweet chocolate. Yes, please.

Food blog June 2015-0910
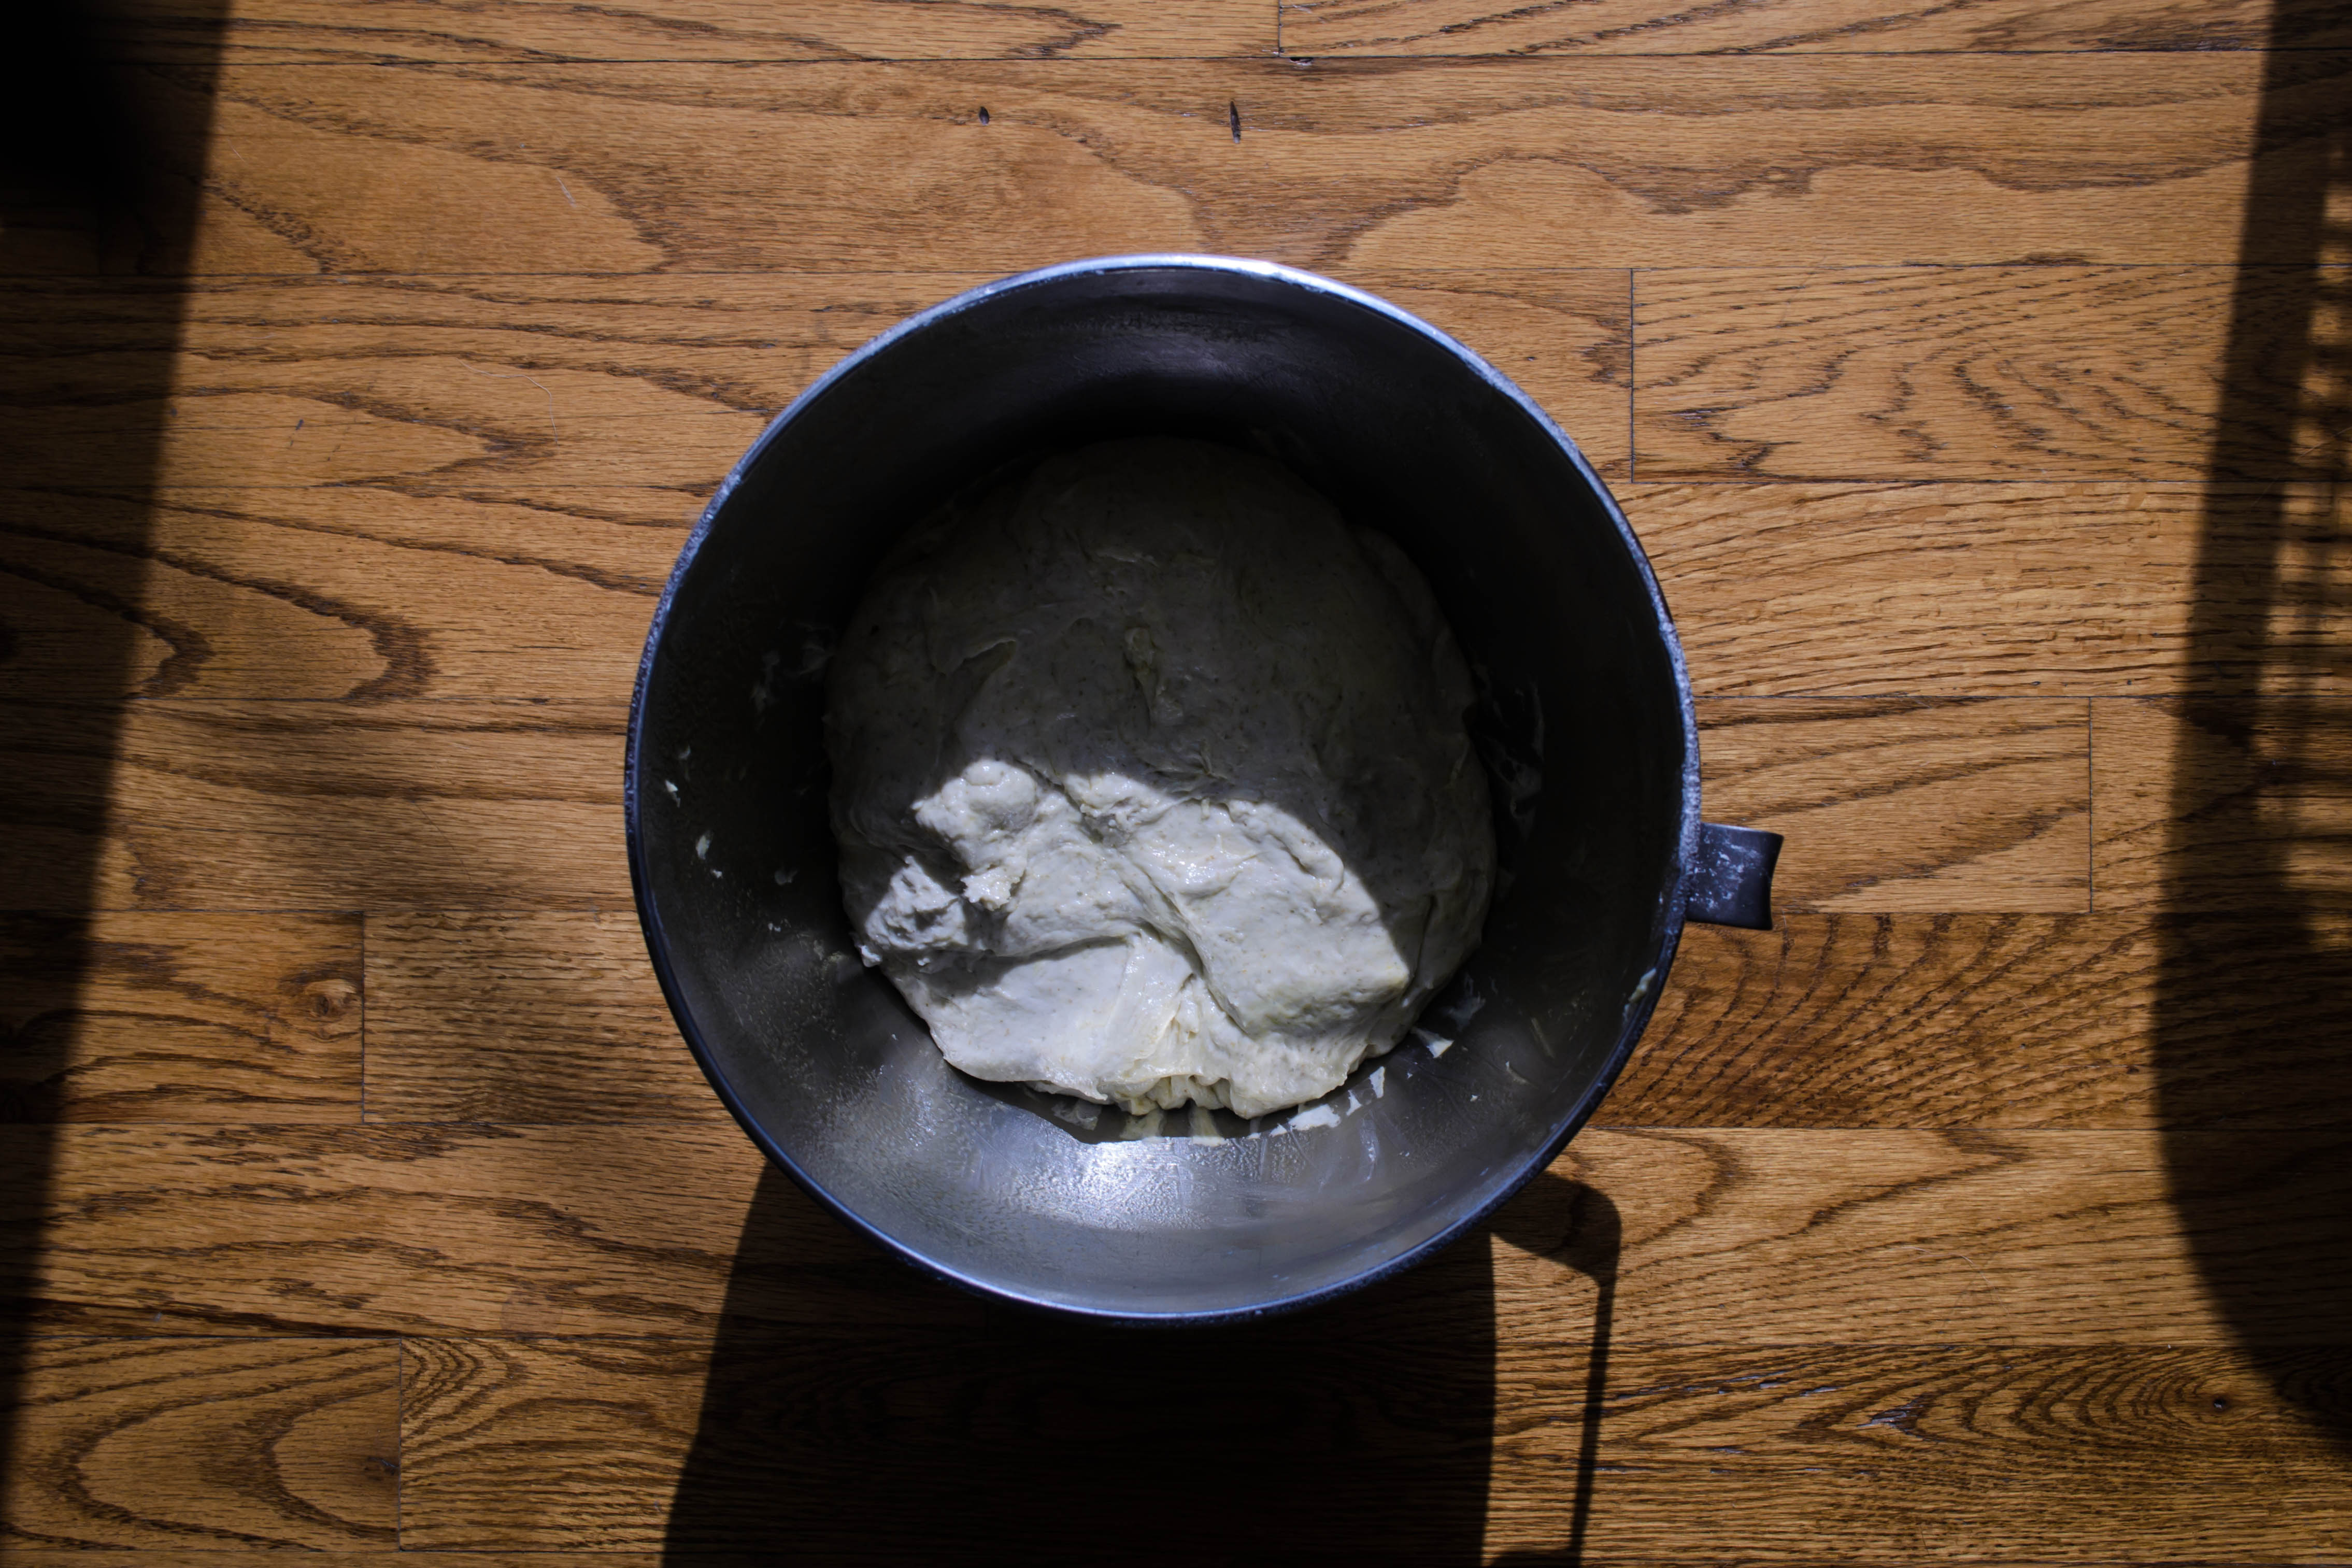
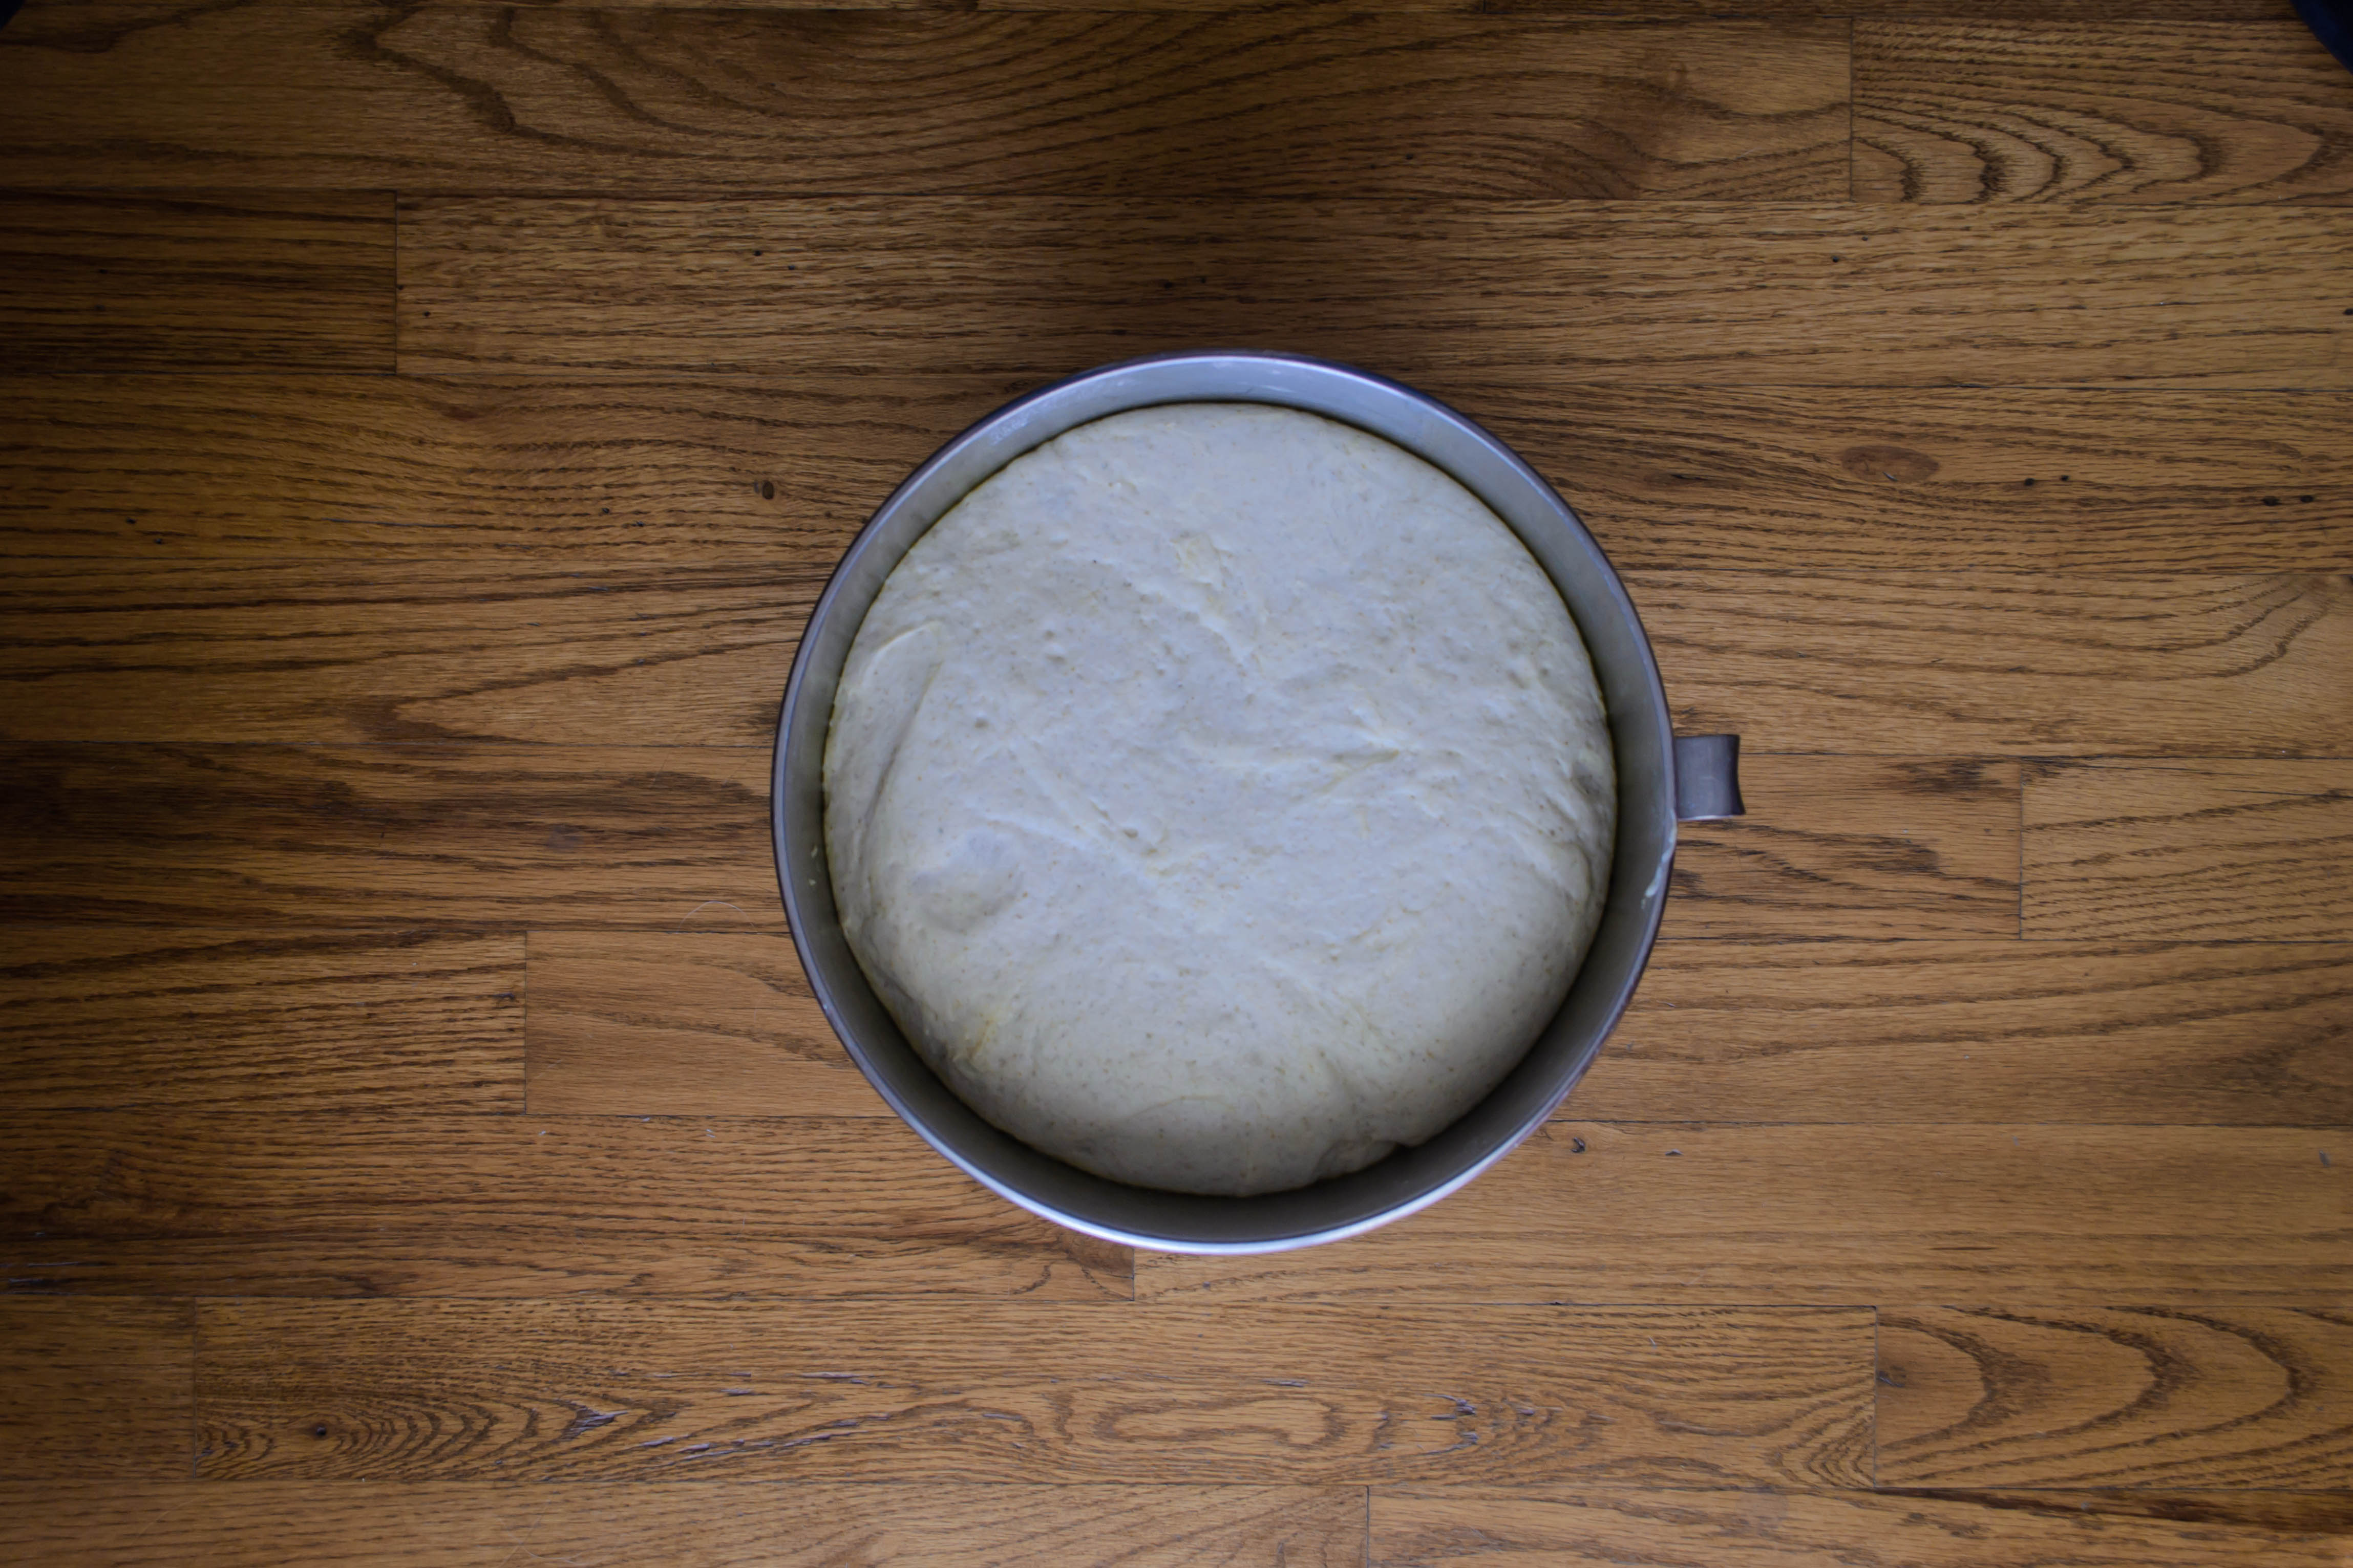
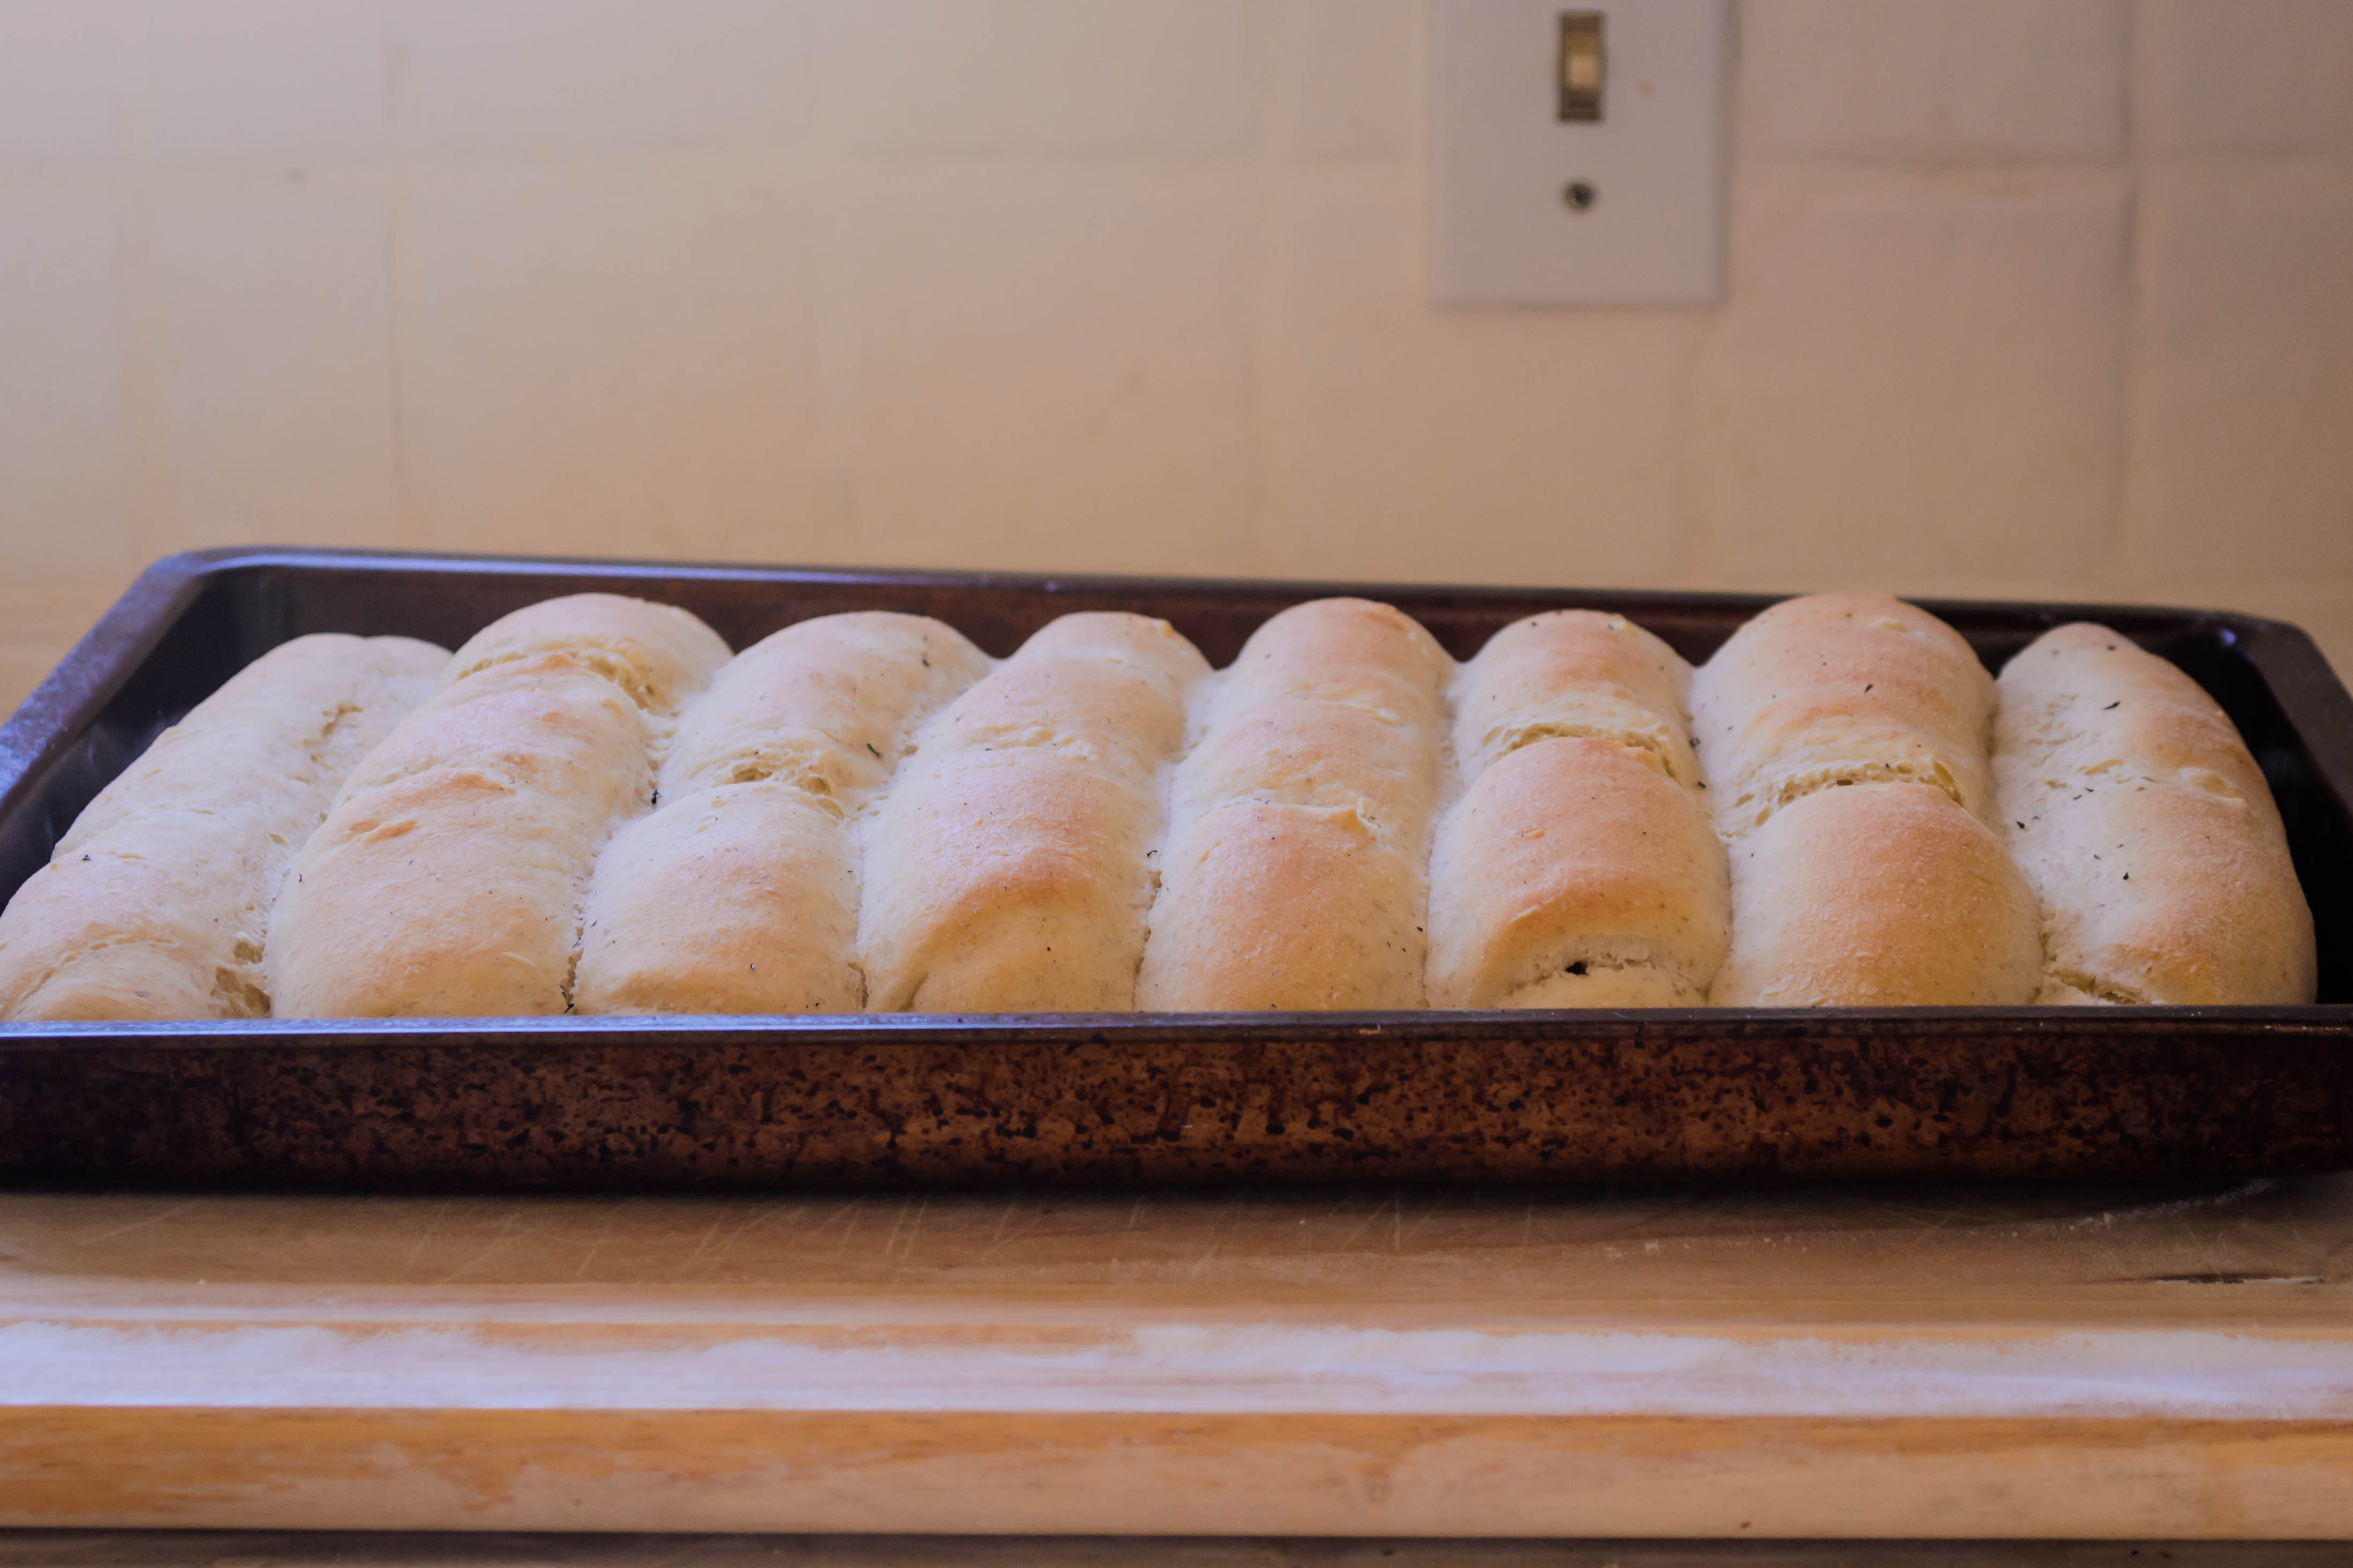
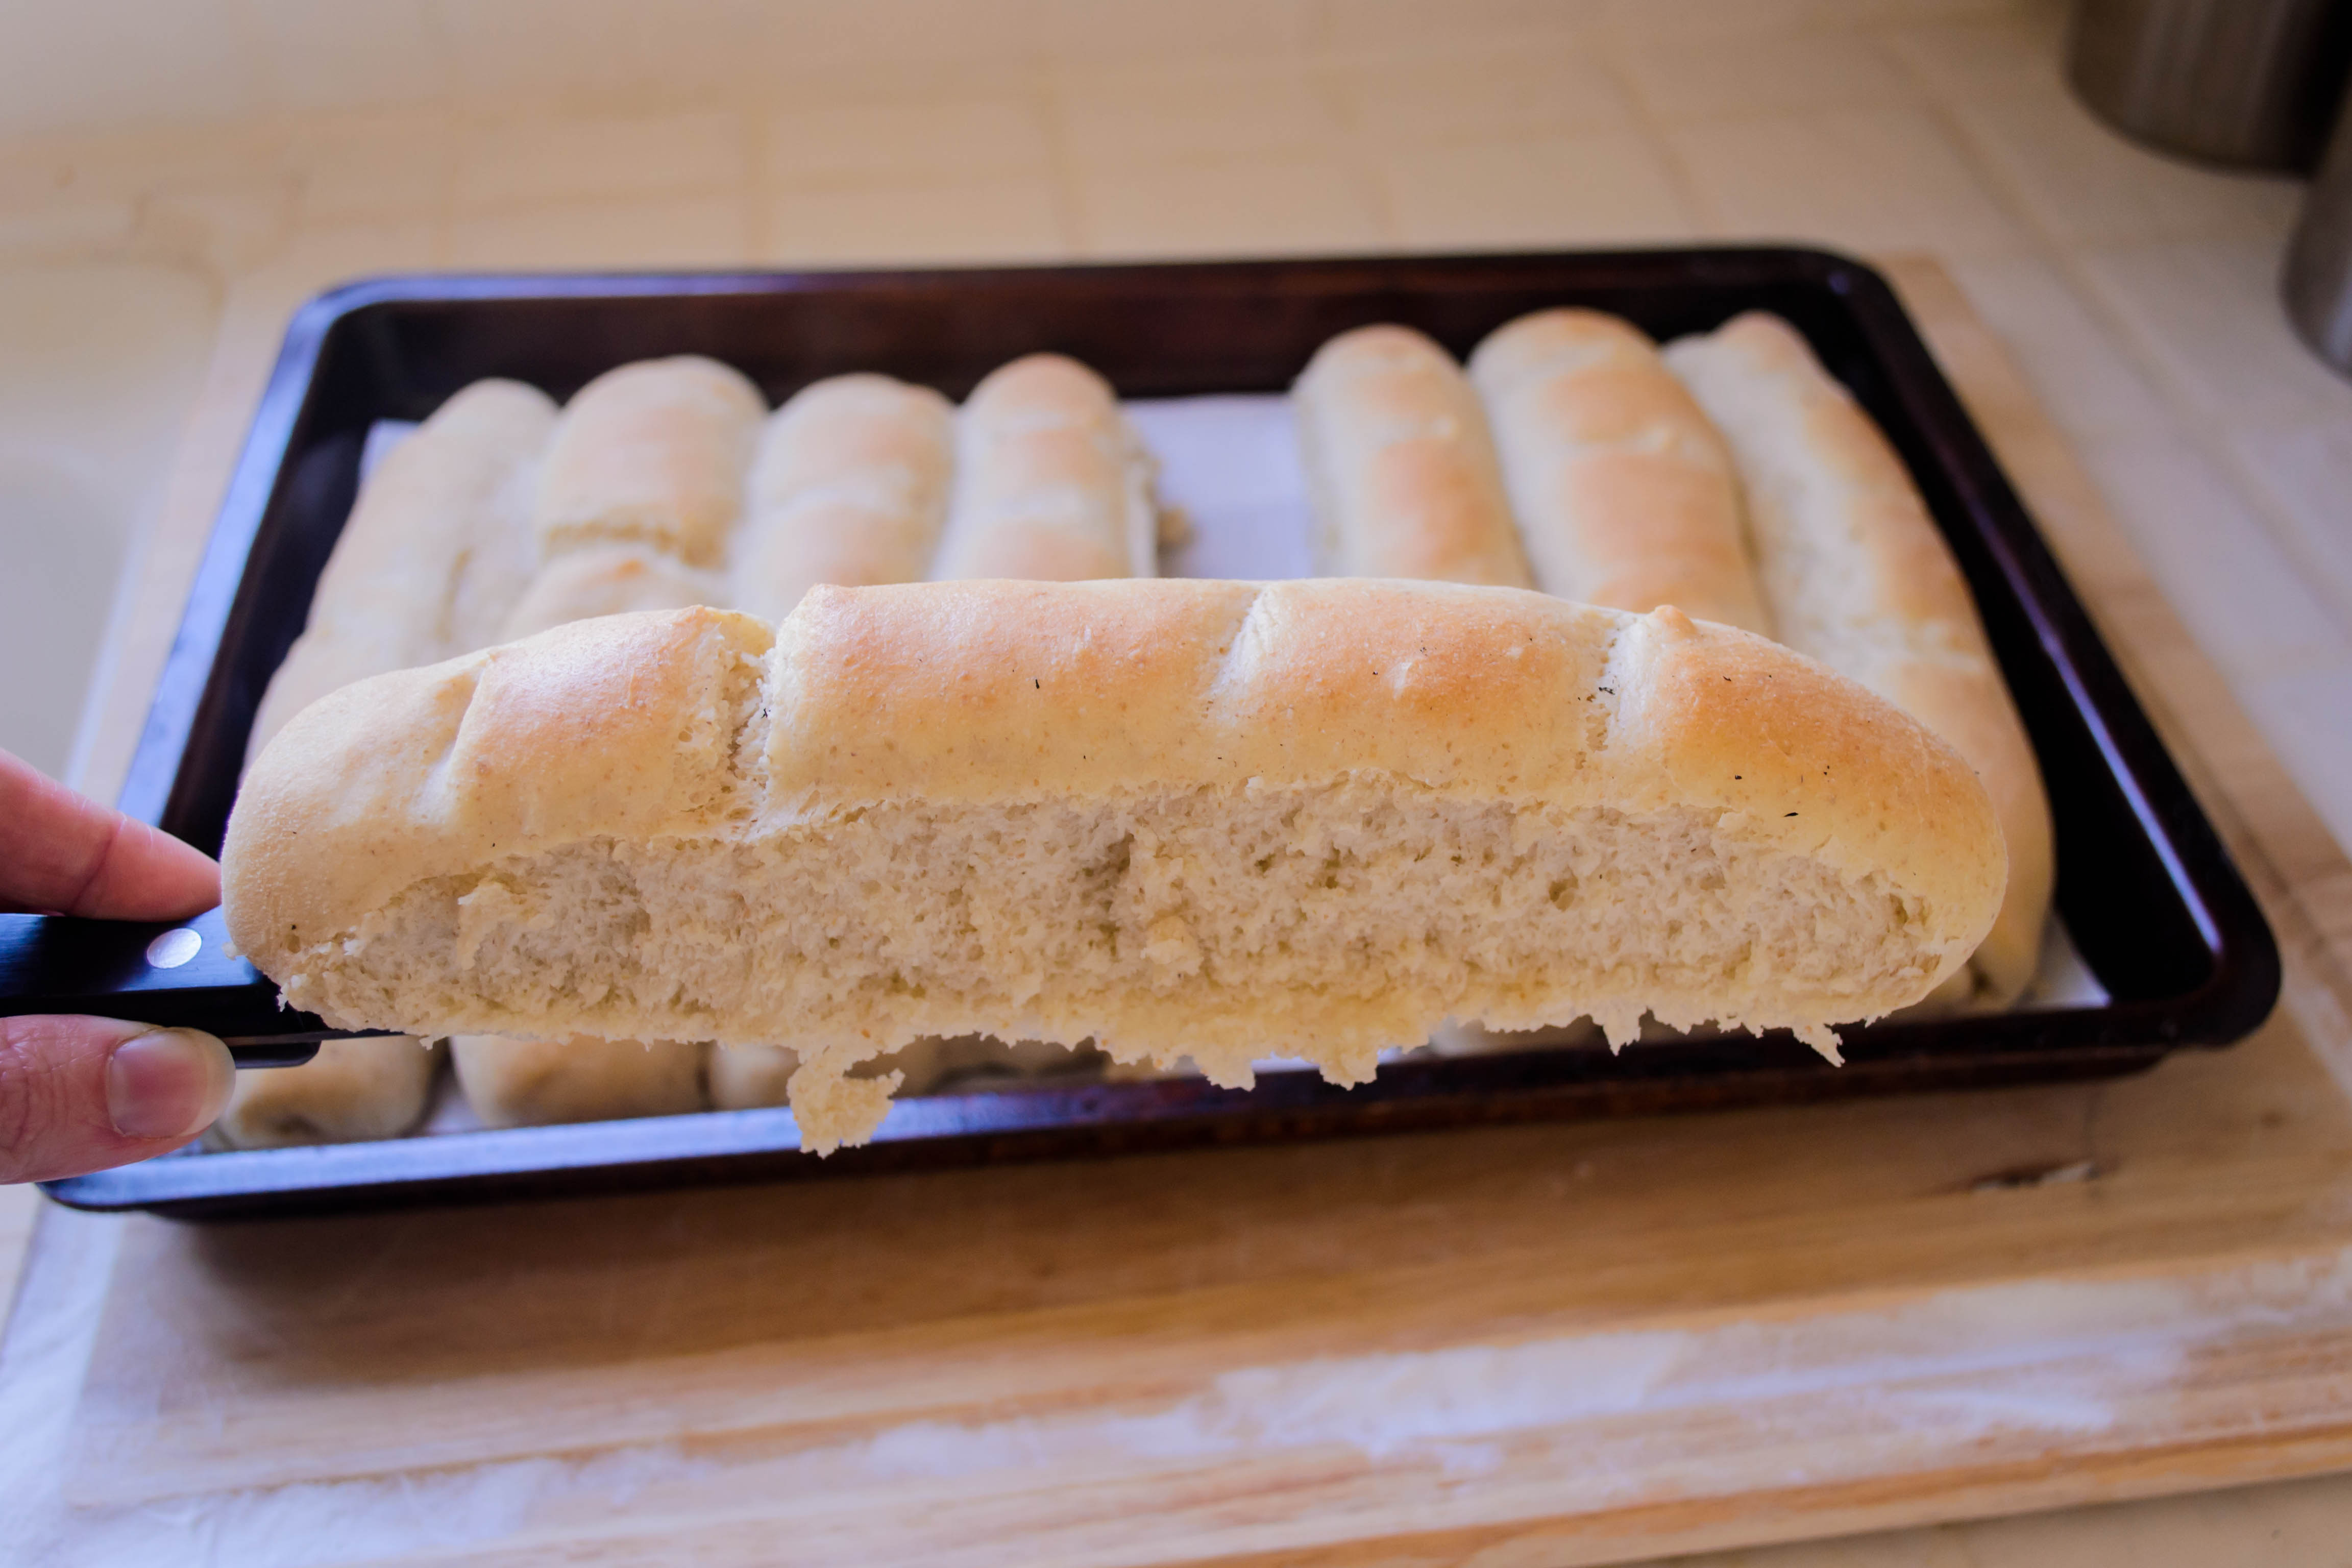
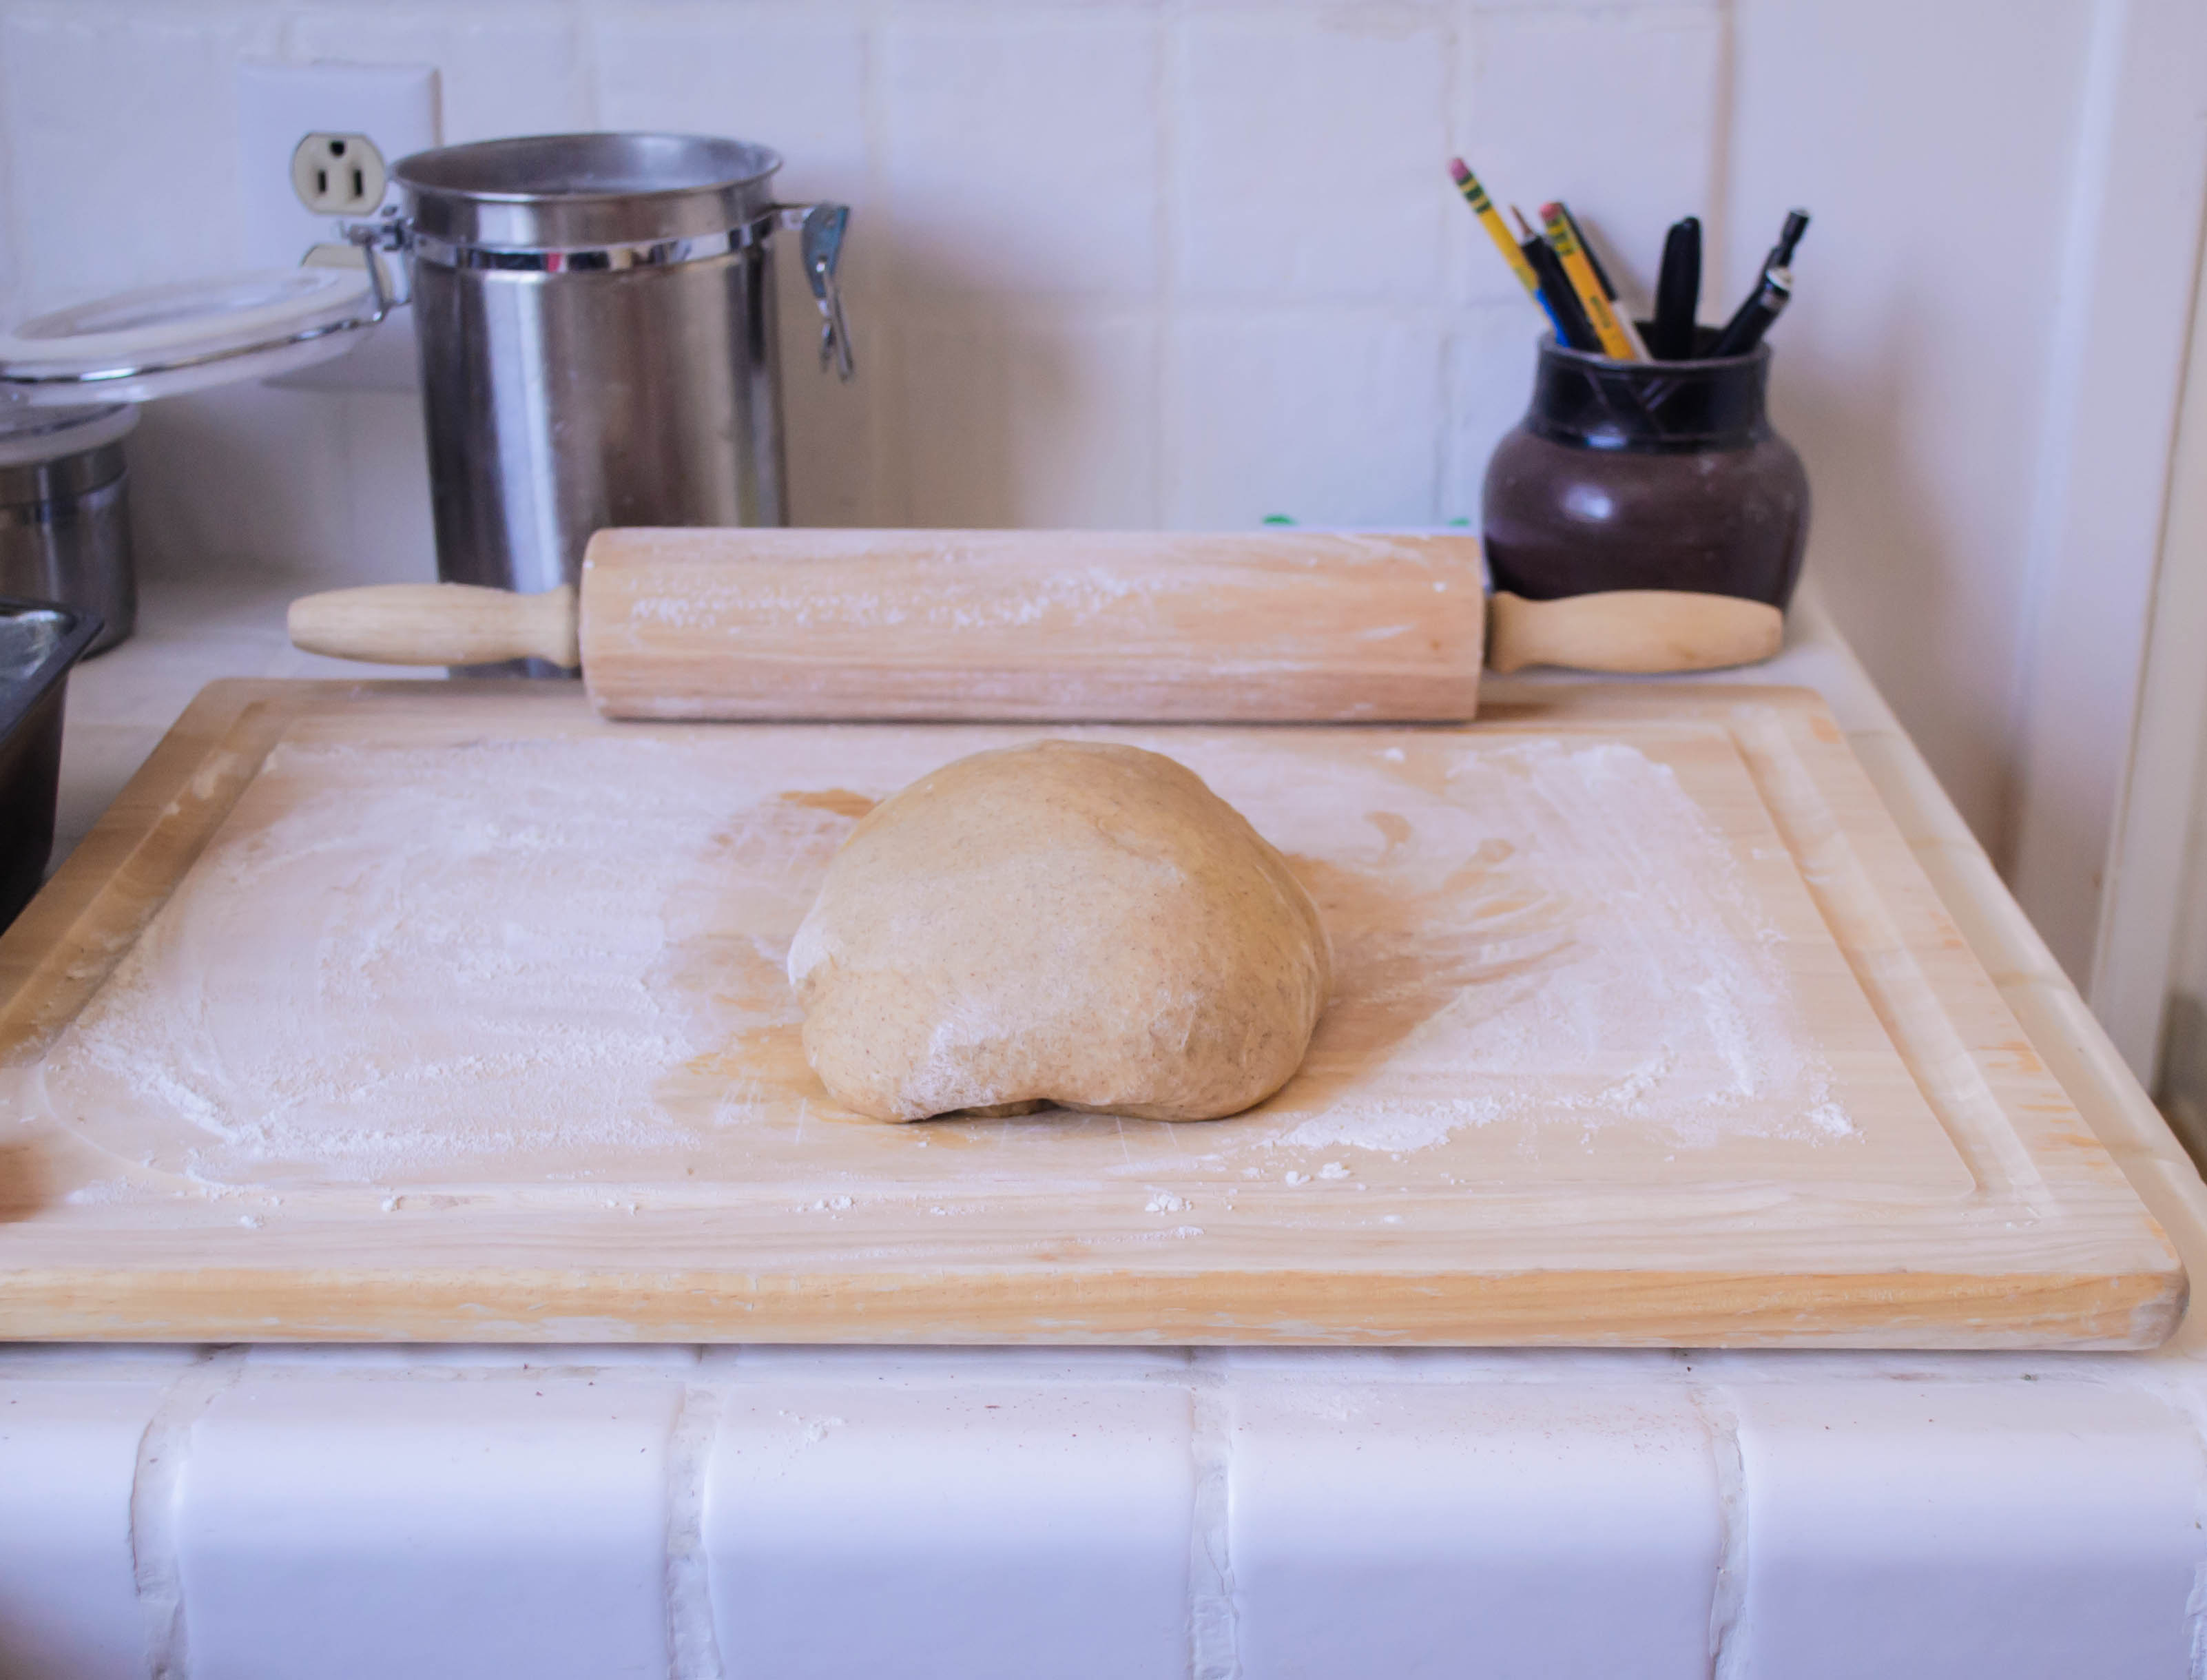
The production of this loaf is fairly standard: a good knead, two rises, with the application of the filling in between, and the better part of an hour in the oven. The most difficult part, honestly, is waiting for the finished loaf to cool enough to slice into it without making a mess. I waited almost long enough.

Food blog June 2015-0915Oddly, despite the Mexican and Italian dessert inspirations, what this reminded me of more than anything else was mocha chip ice cream. You know, the luscious, rich brown scoops with just the right amount of coffee flavor, studded with chunks of dark chocolate. Except in my version, it’s a soft swirl through a moist slice, and the chocolate pieces melt easily on your tongue (one of my biggest complaints about “chip” anything ice cream: the cold, hard chunks of chocolate. I know, I know, first world problems).

Food blog June 2015-0920Food blog June 2015-0921Obviously, this is a rich bread. I’d say it’s more than a “little” something sweet, but let’s indulge anyway. Unless caffeine doesn’t disrupt your sleeping patterns, I’d stay away from it as a bedtime snack. But as a pick-me-up in mid-afternoon, or mid-morning for that matter, it’s solid. I can imagine thick slices on a brunch table as well, maybe even as part of a bridal shower (colors: espresso and vanilla?) since the presentation is so pretty. But then, I’ve got weddings on the brain this summer.

Food blog June 2015-0933
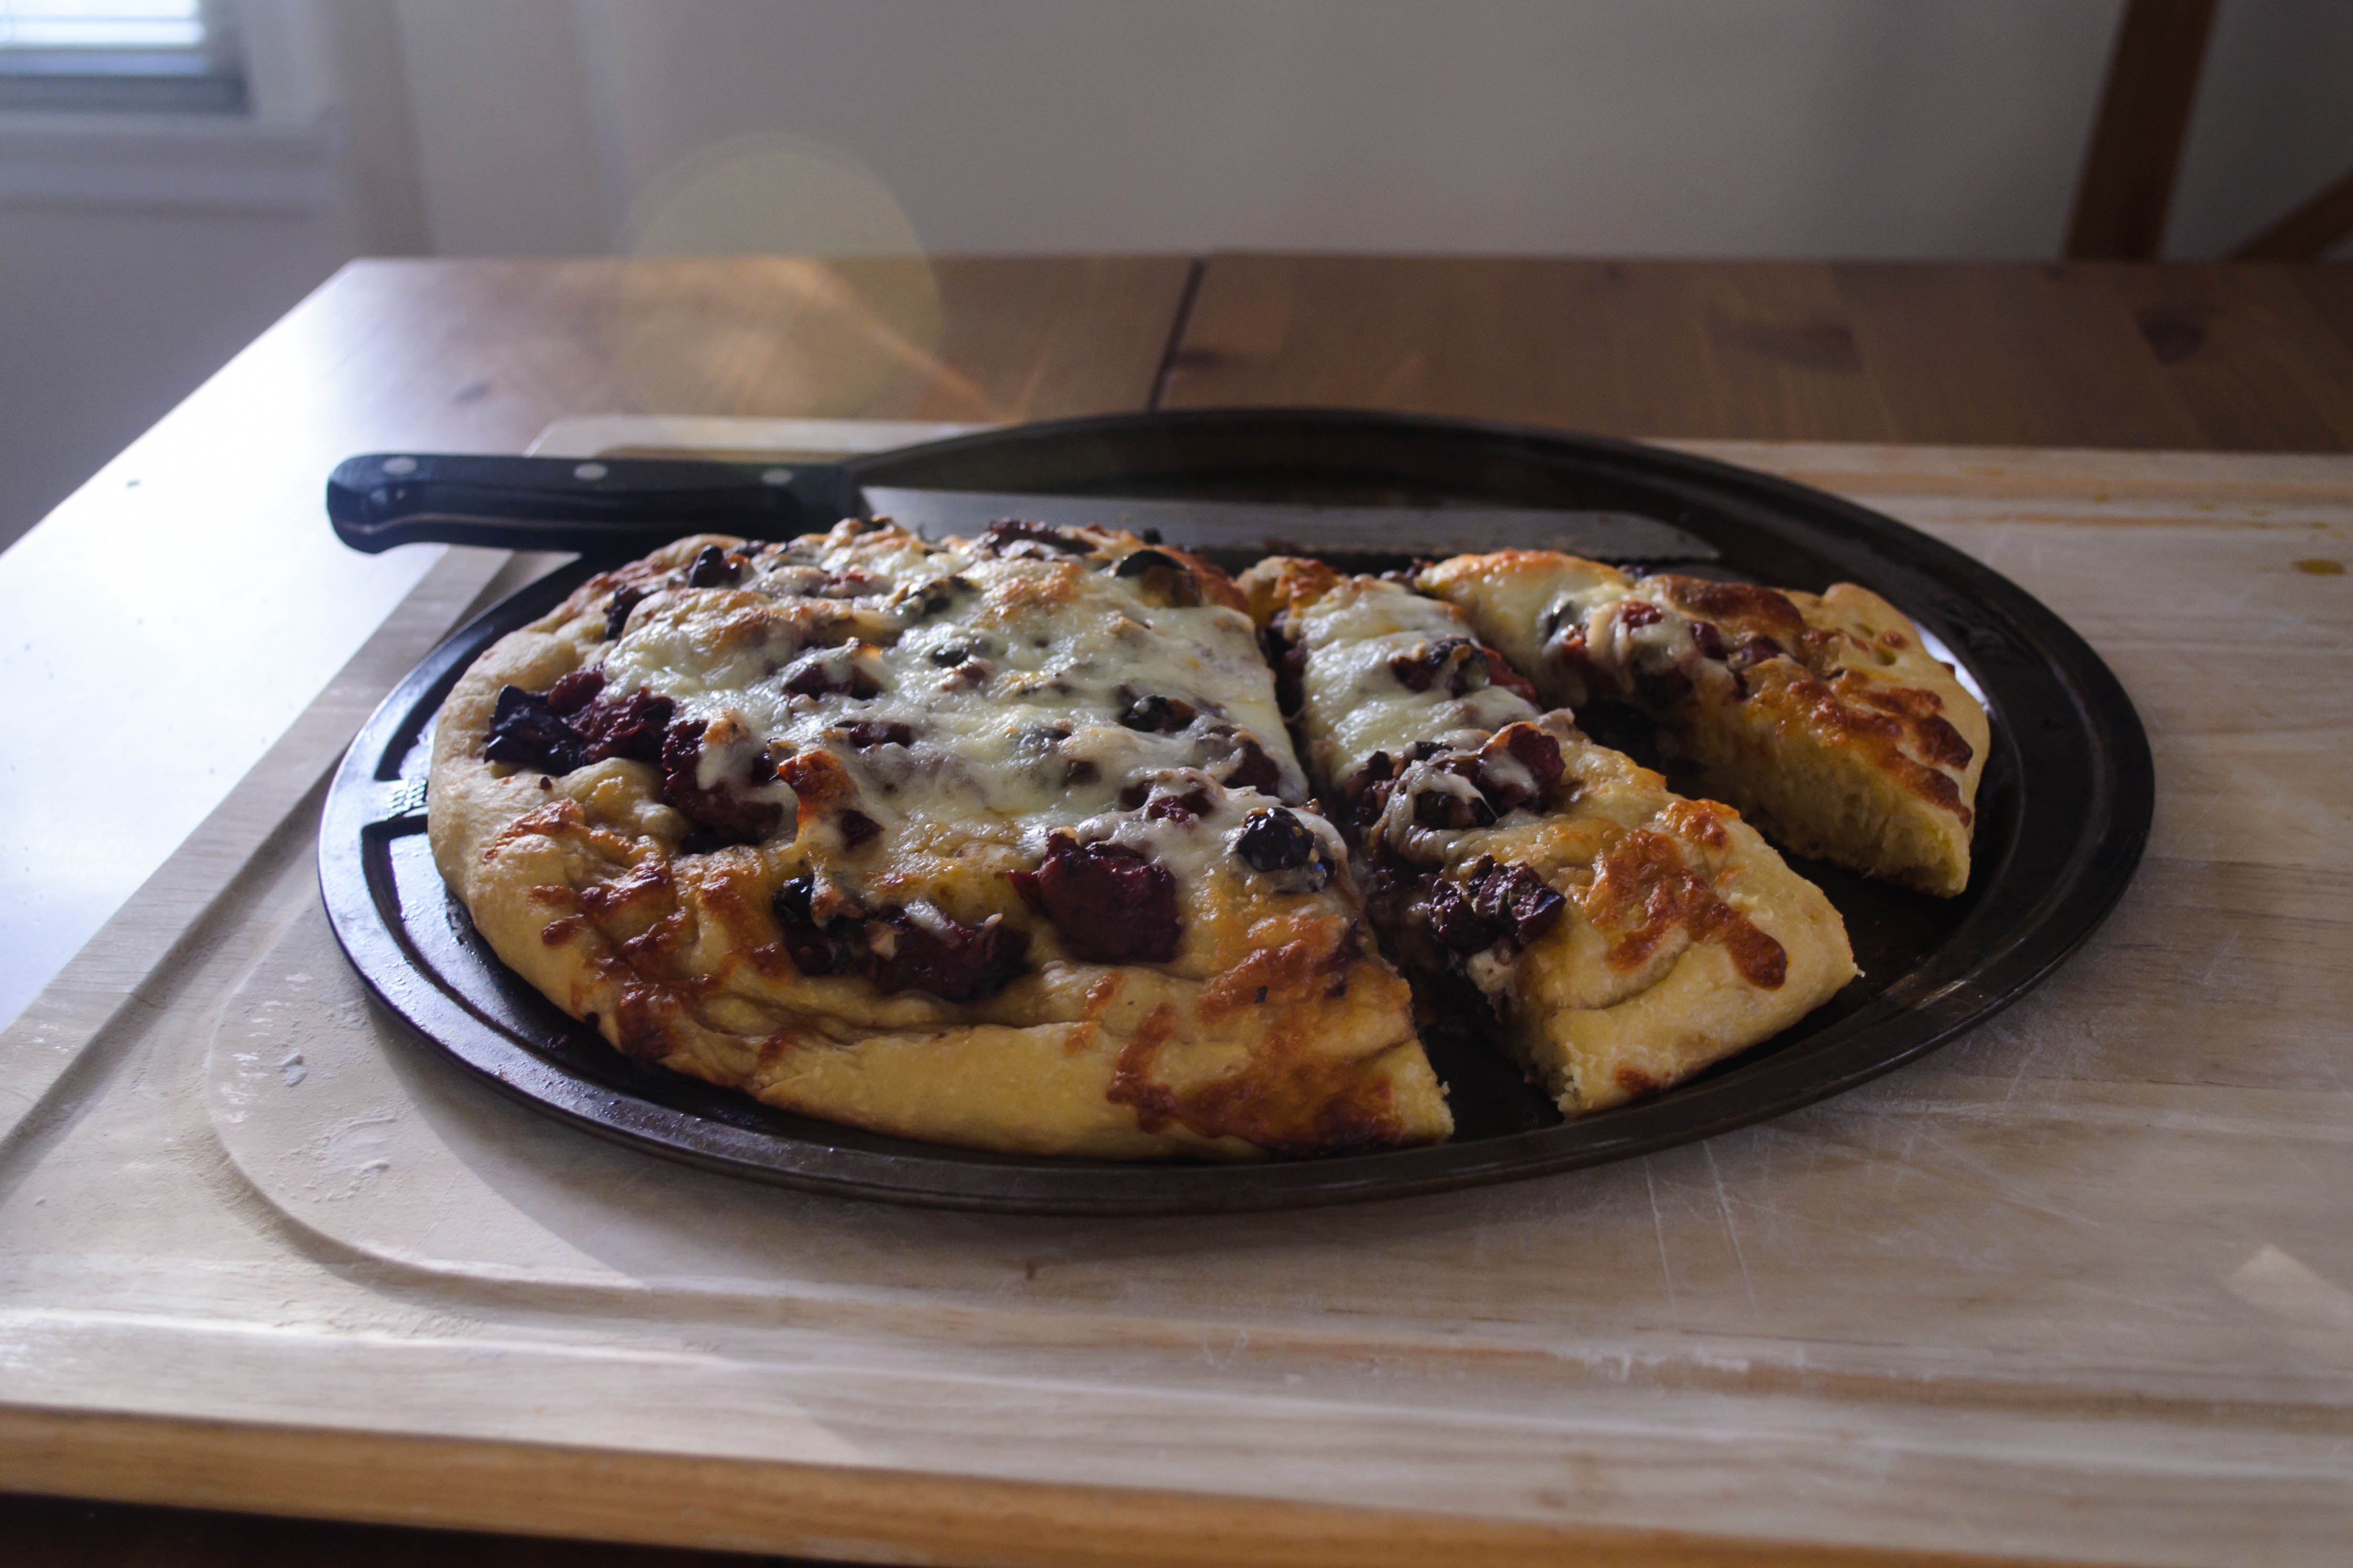
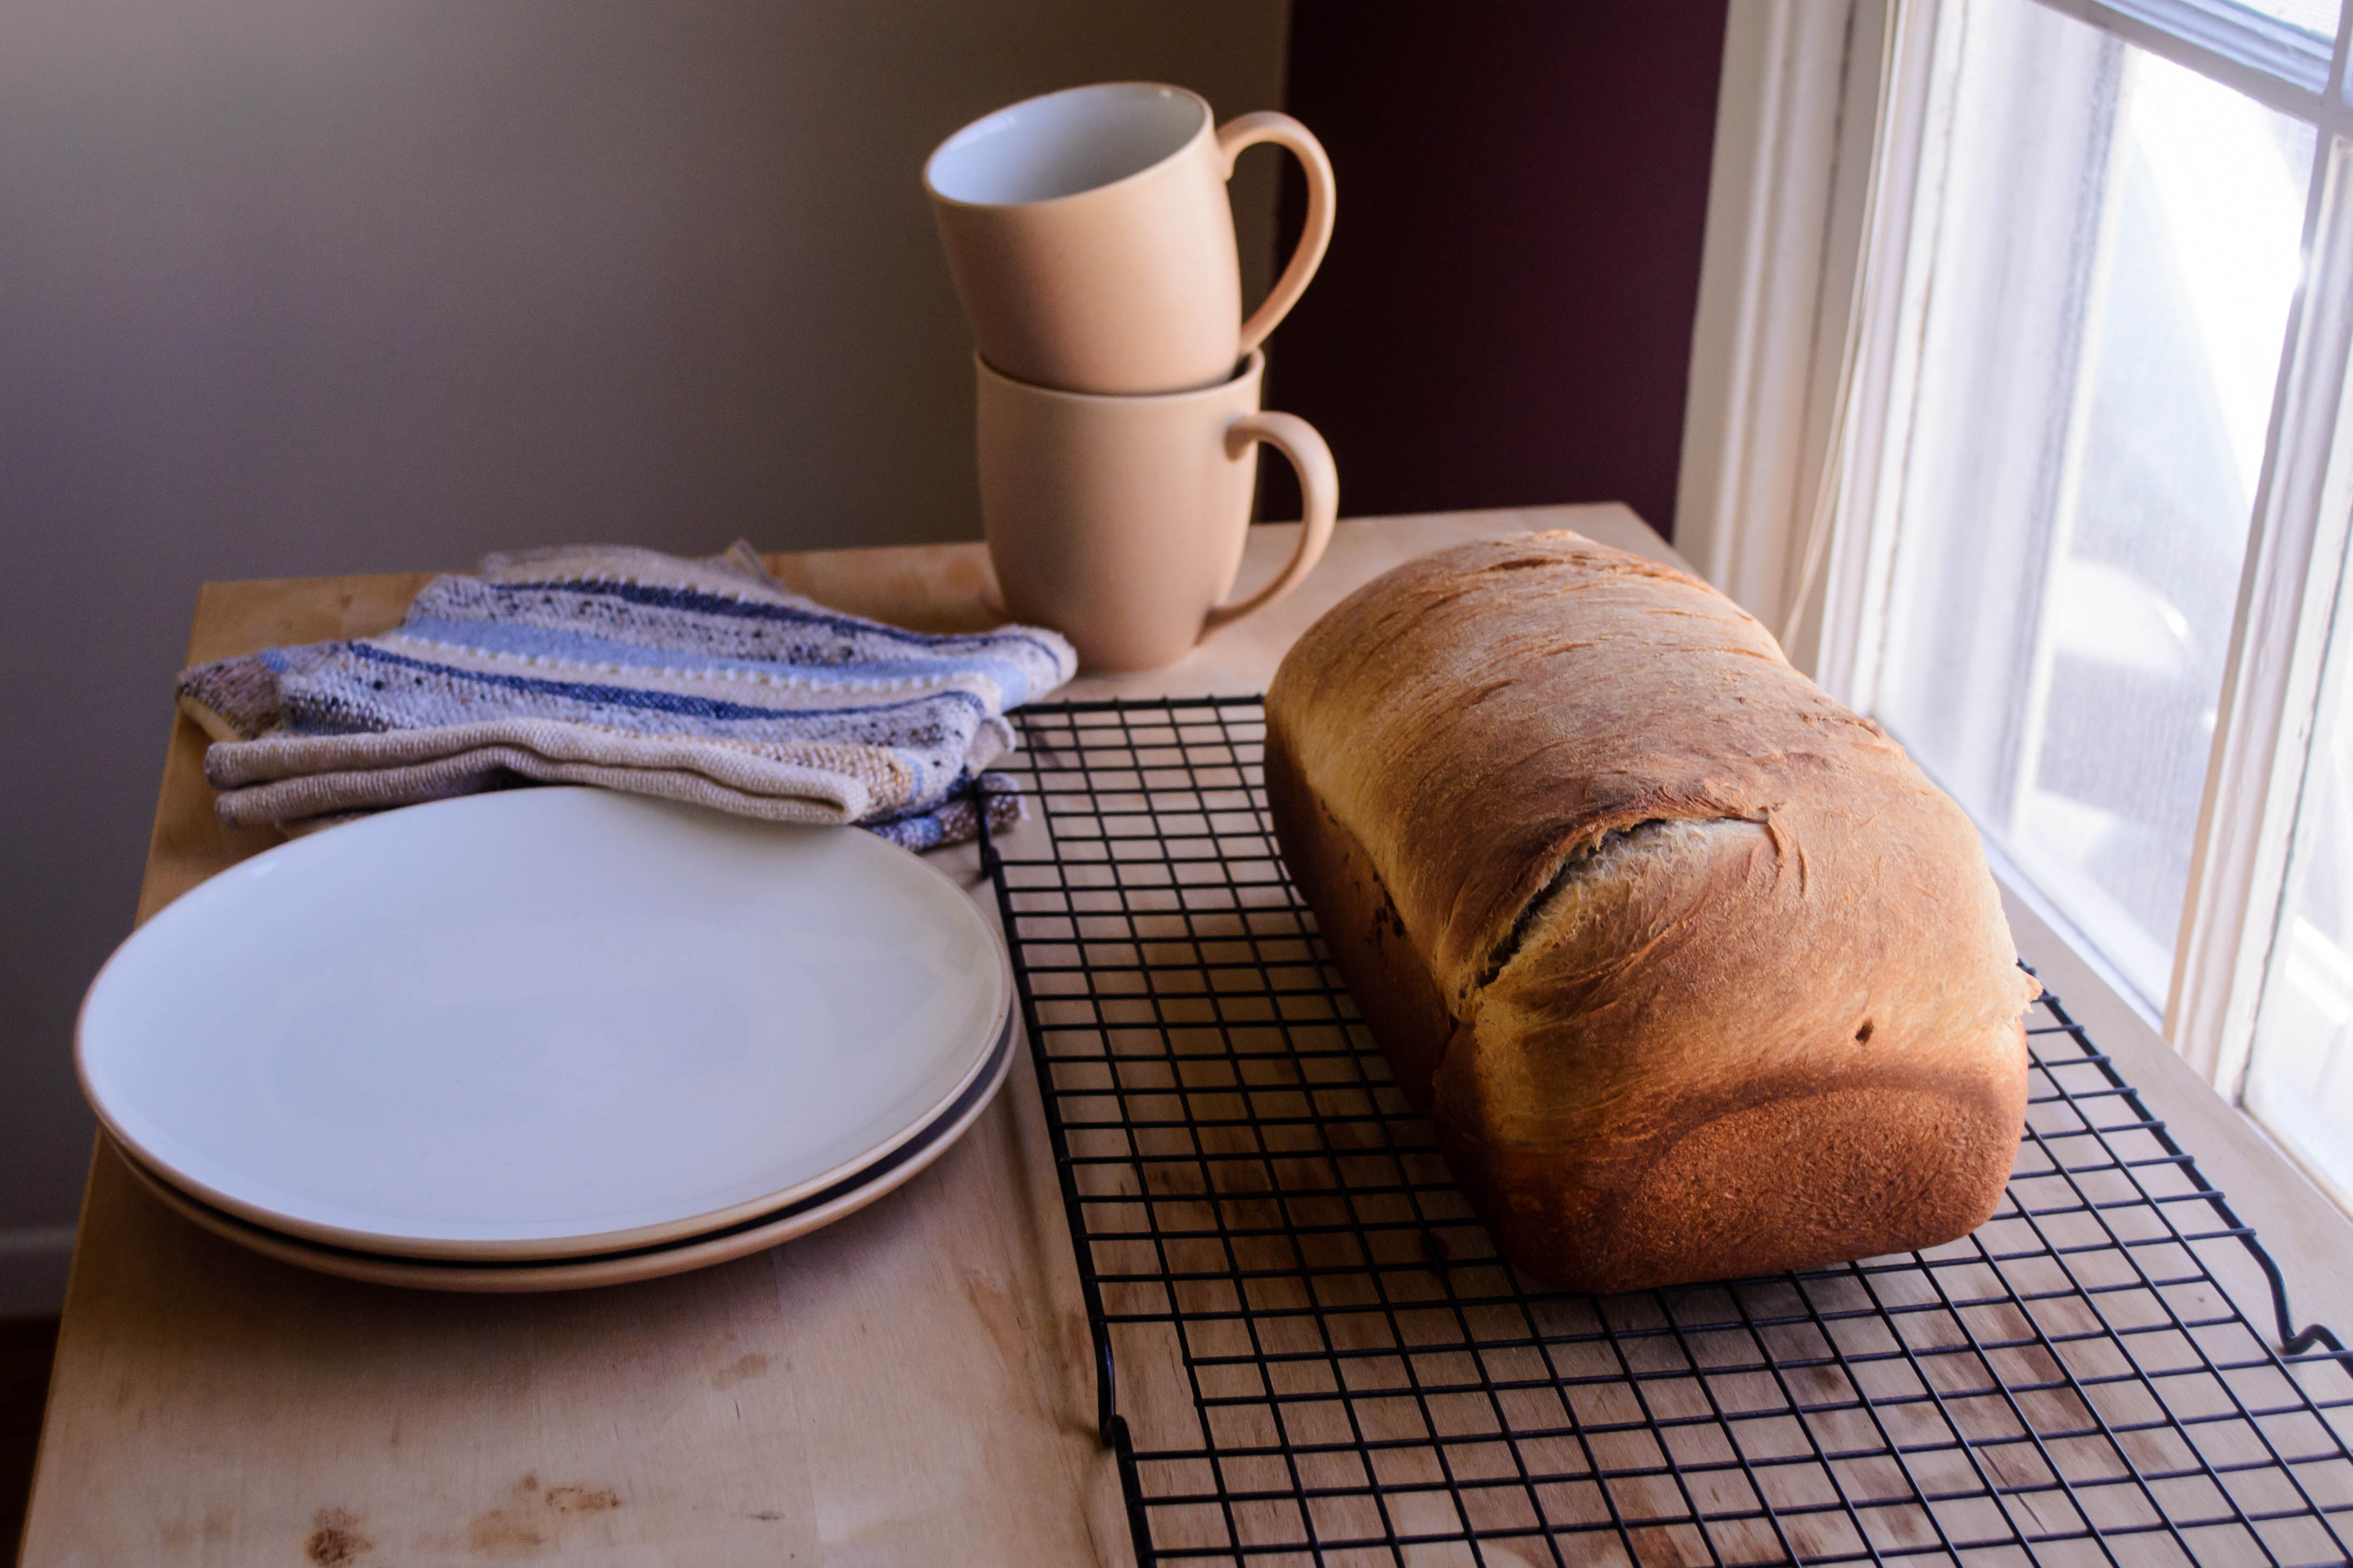
Oh, p.s., like my new “studio” set-up next to the window? My Photo Friday post from the other week had such lovely lighting I decided to make it a more regular shoot location. I’m looking forward to playing more with angles and light at different times of day.

Food blog June 2015-0942

Cinnamon Mocha Swirl Bread
Makes 1 large 9×5 inch loaf
For dough:
2 teaspoons active dry yeast
½ cup lukewarm milk (I use whole milk)
¼ cup granulated sugar
2 teaspoons cinnamon
½ teaspoon salt
1 teaspoon vanilla
2 eggs
¼ cup + 1 tablespoon unsalted butter, soft or melted and cooled, divided
2-3 cups bread flour
For filling:
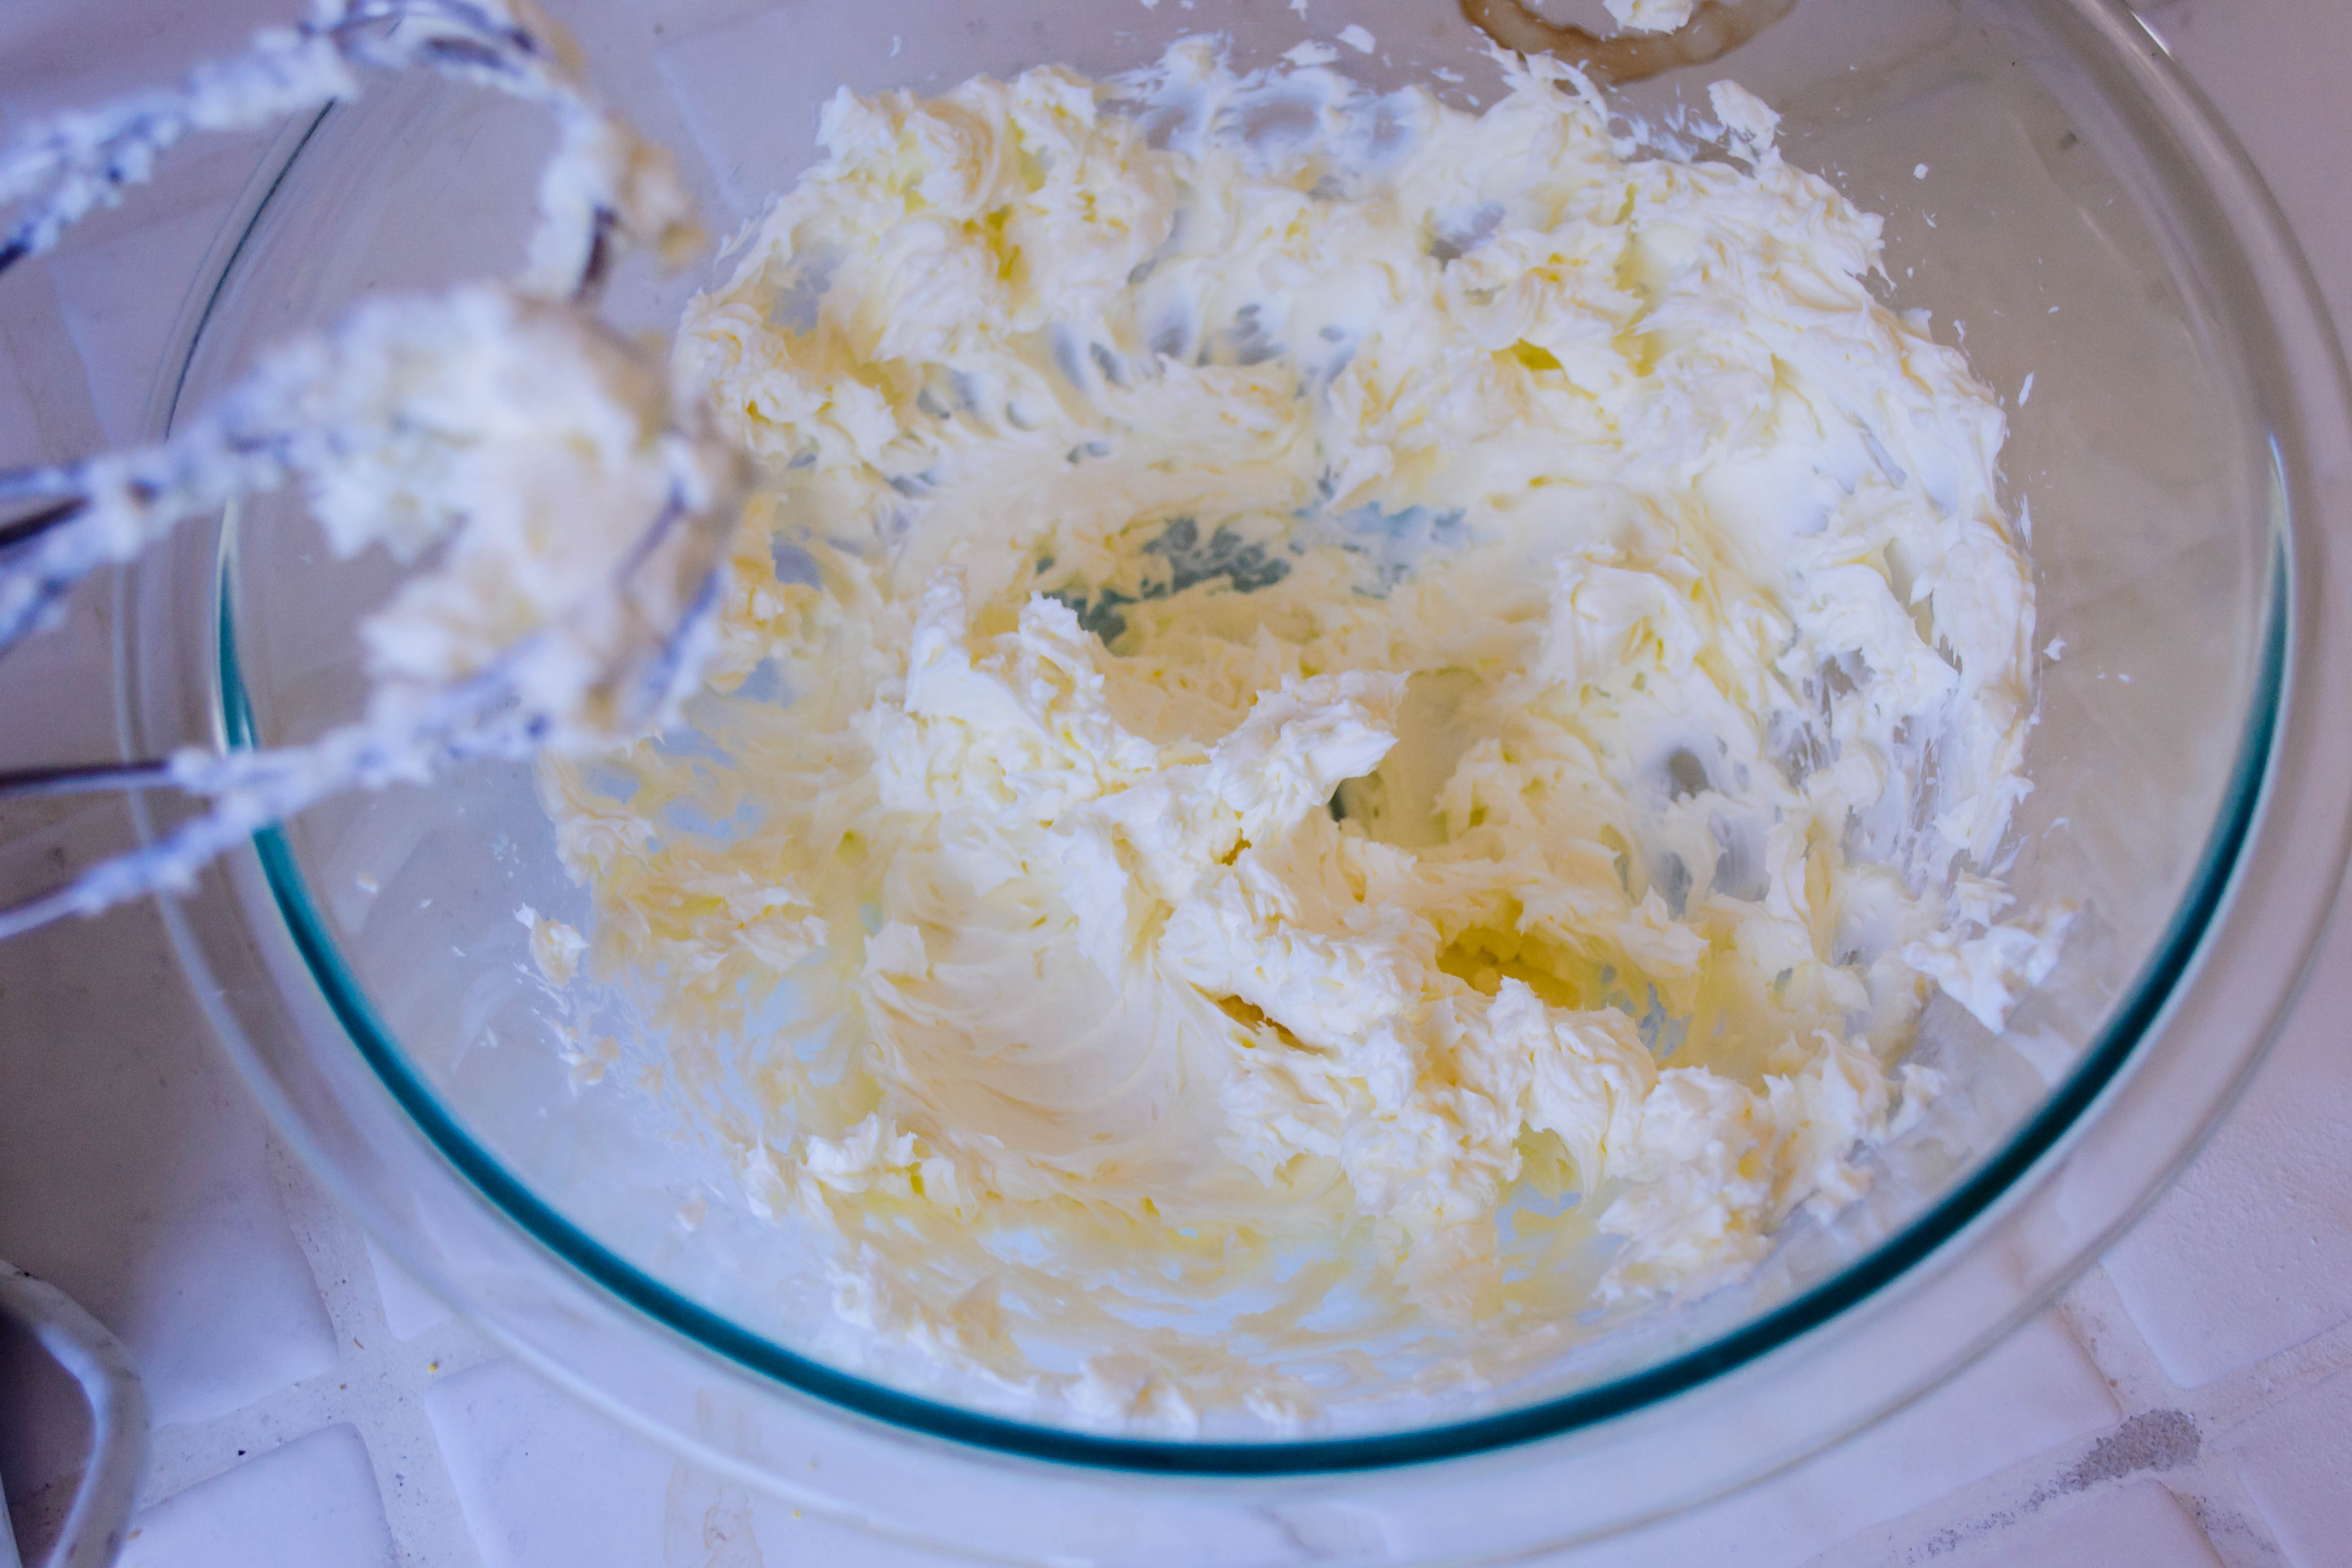
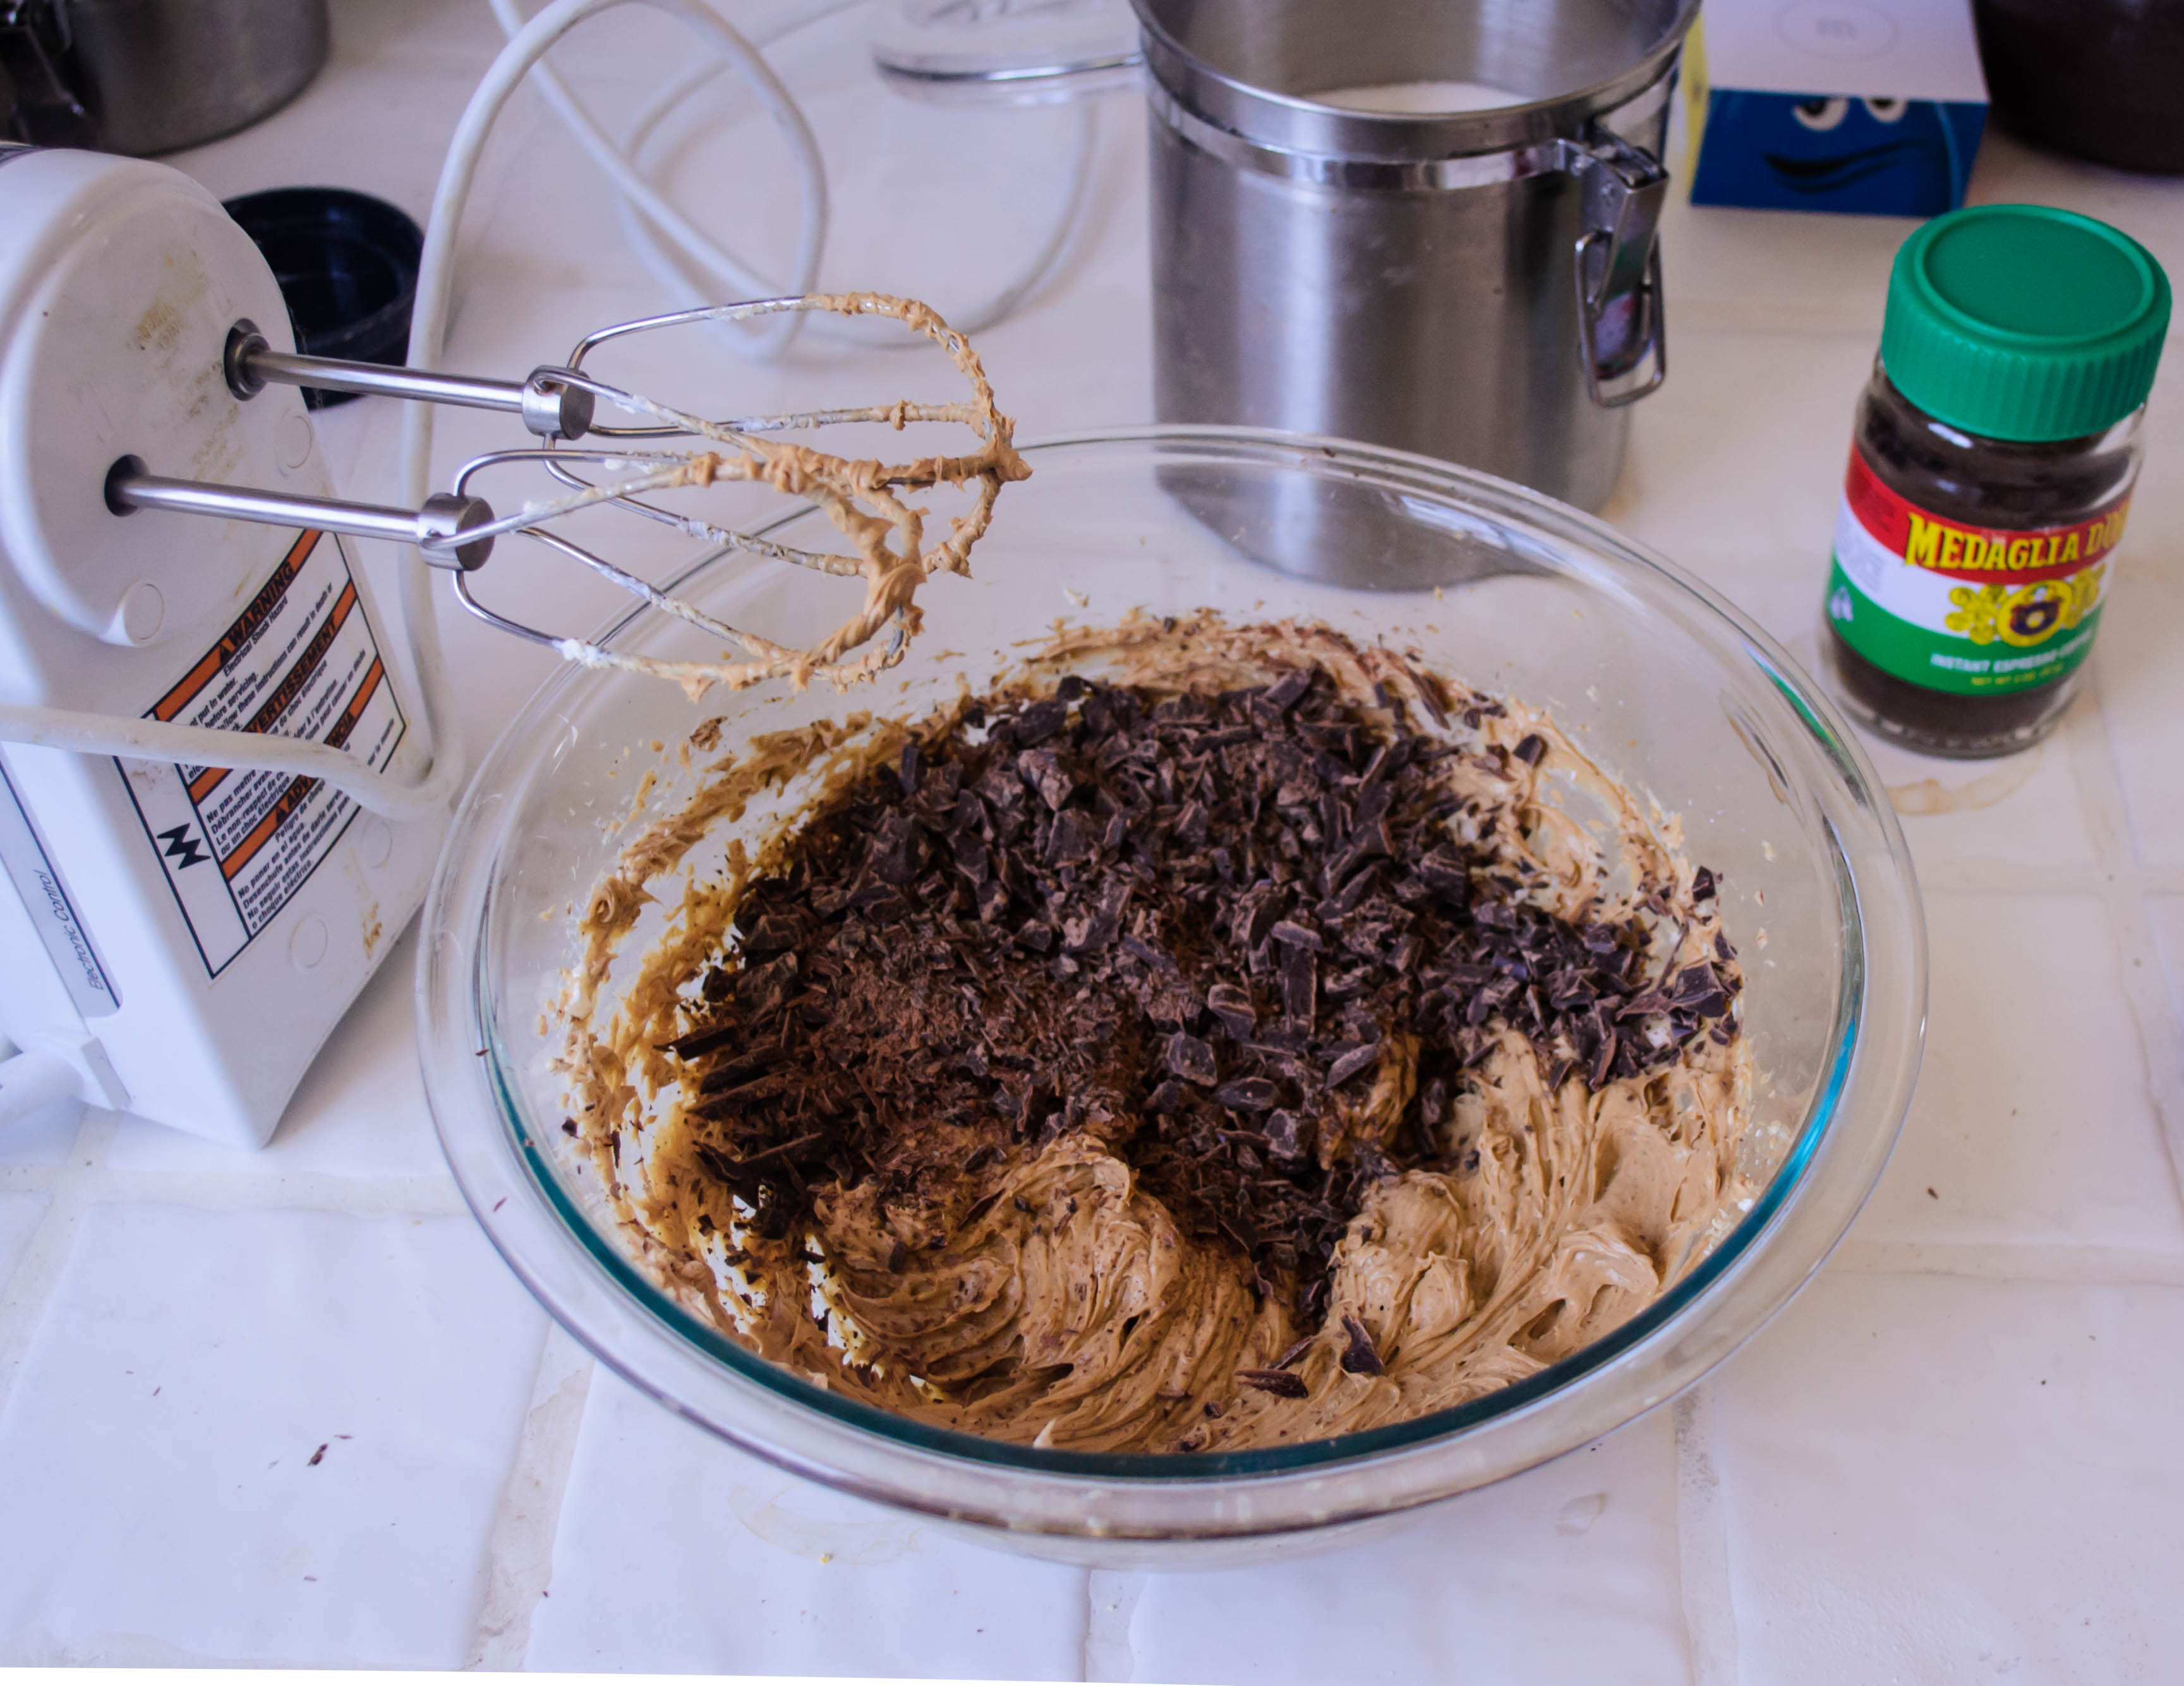
8 ounces cream cheese, at room temperature
2 tablespoons instant espresso powder
5 tablespoons granulated sugar
4 ounces semi-sweet or bittersweet chocolate, chopped or broken into small pieces
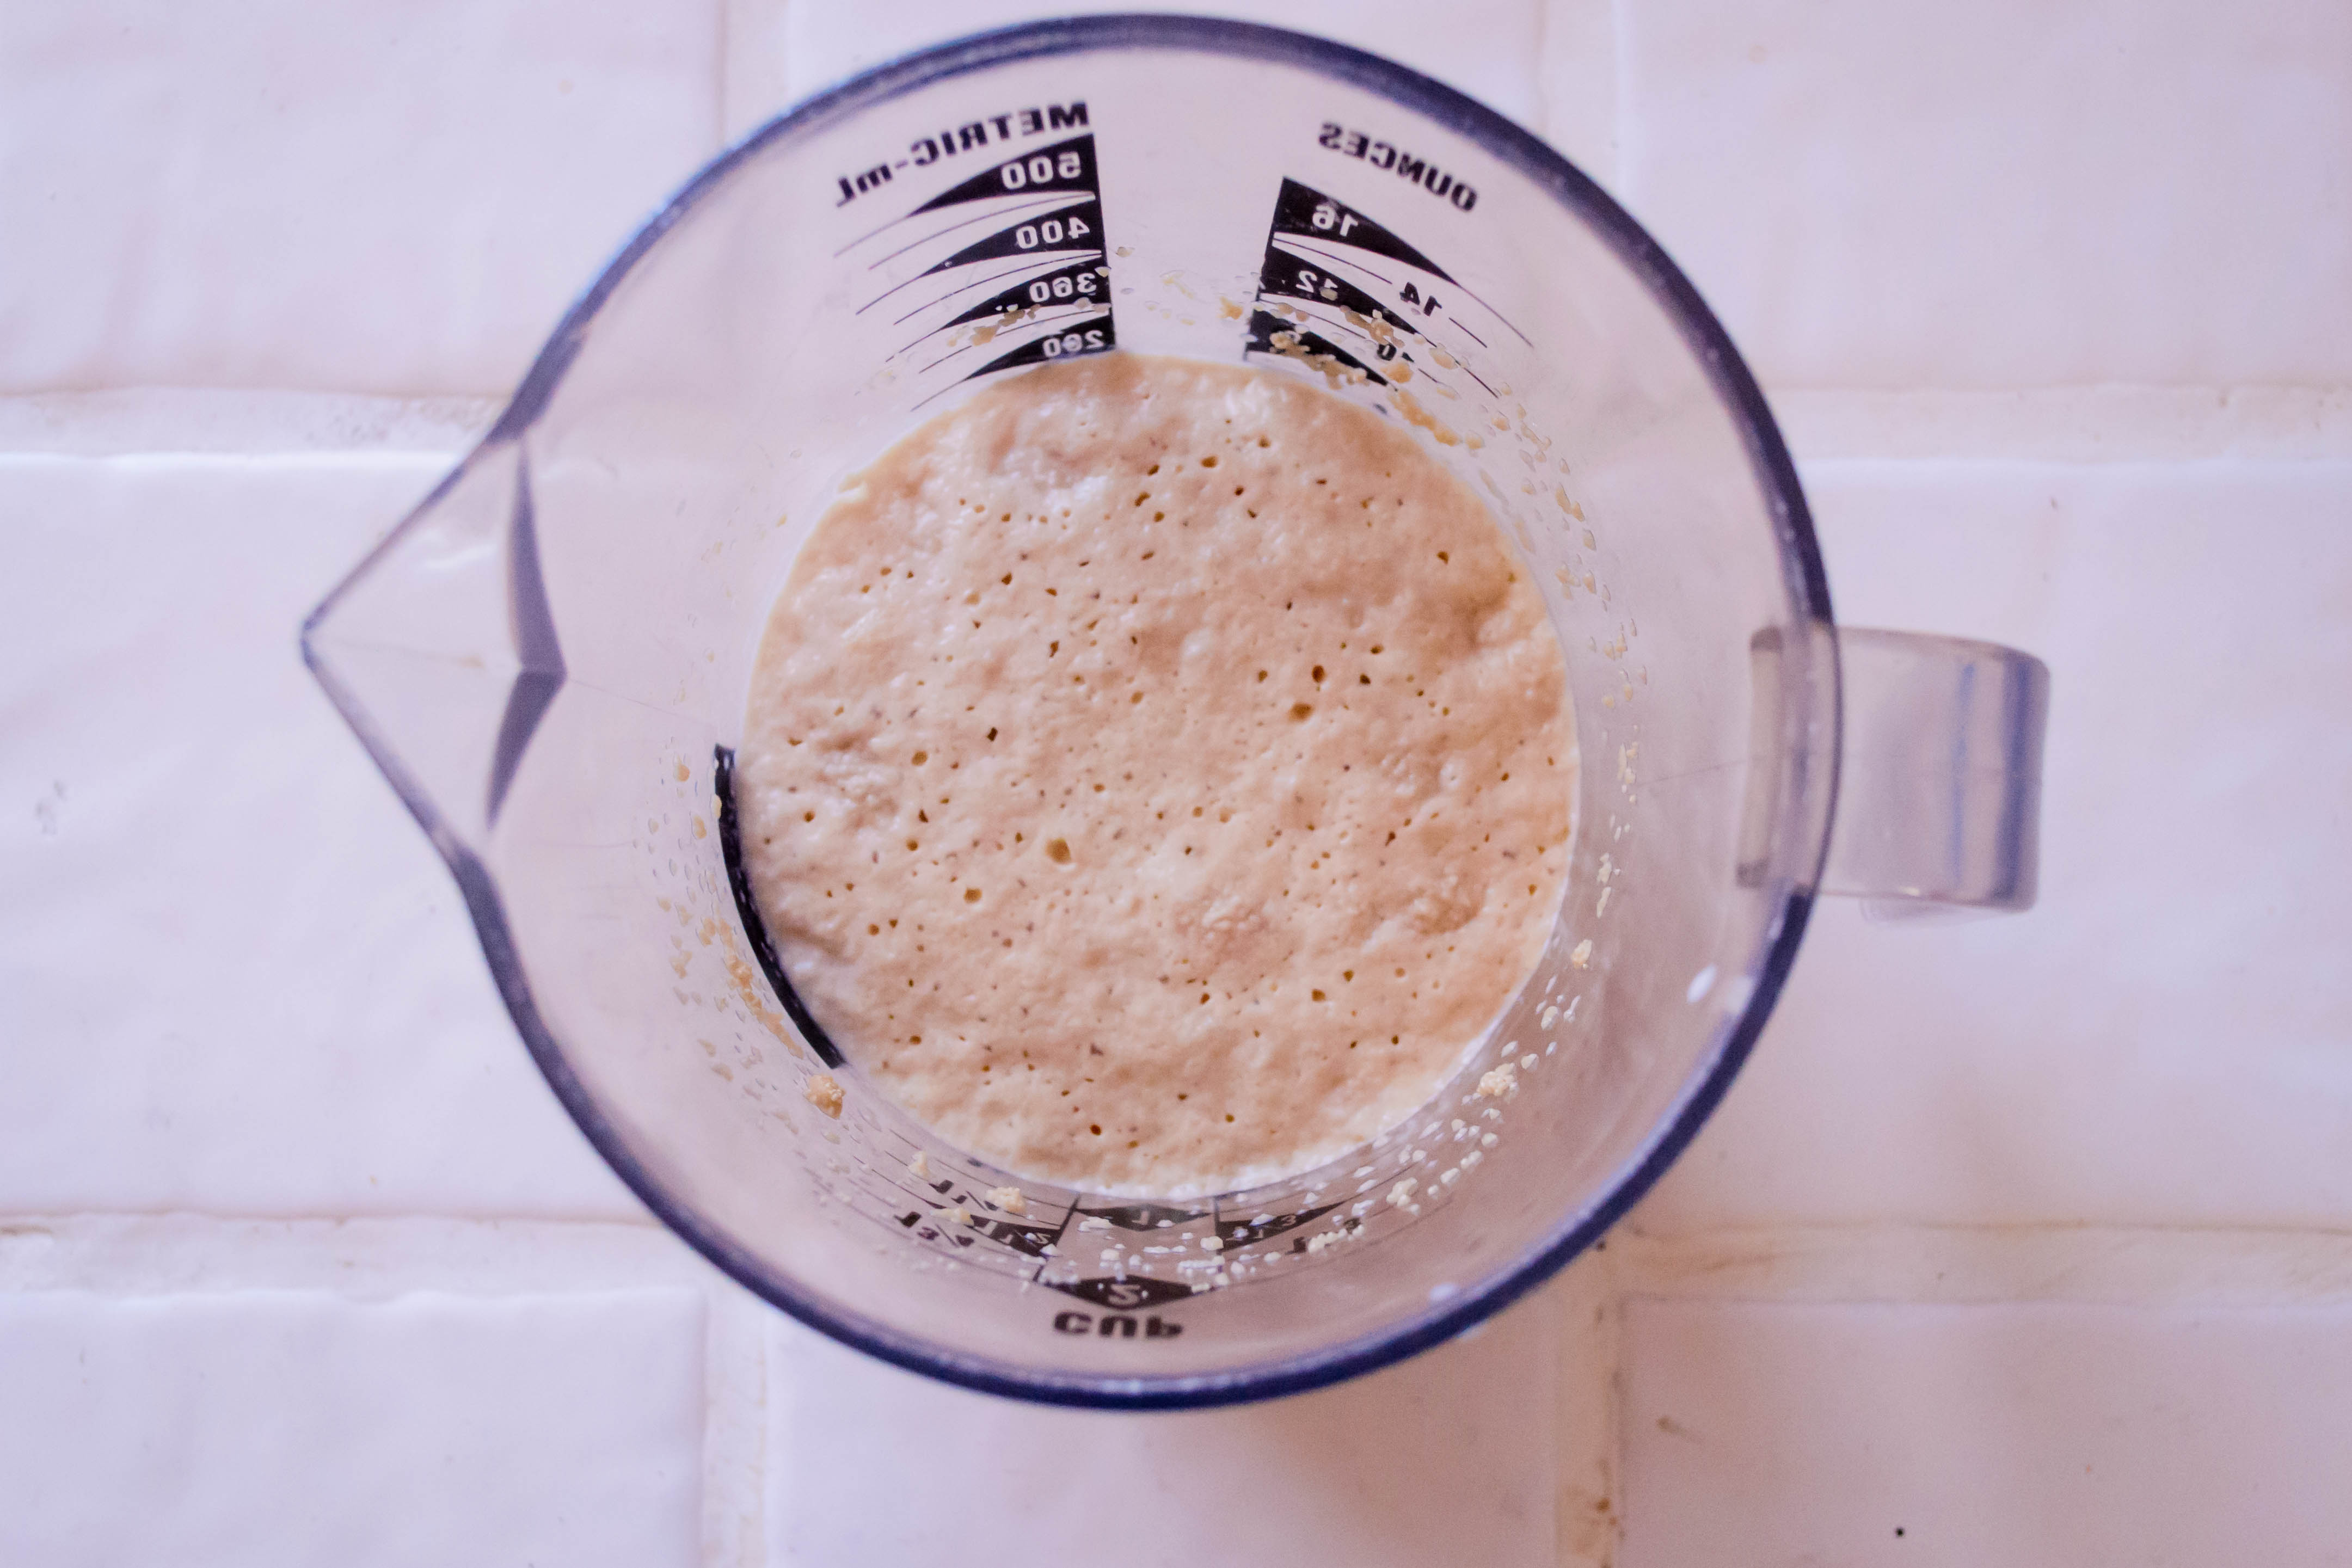
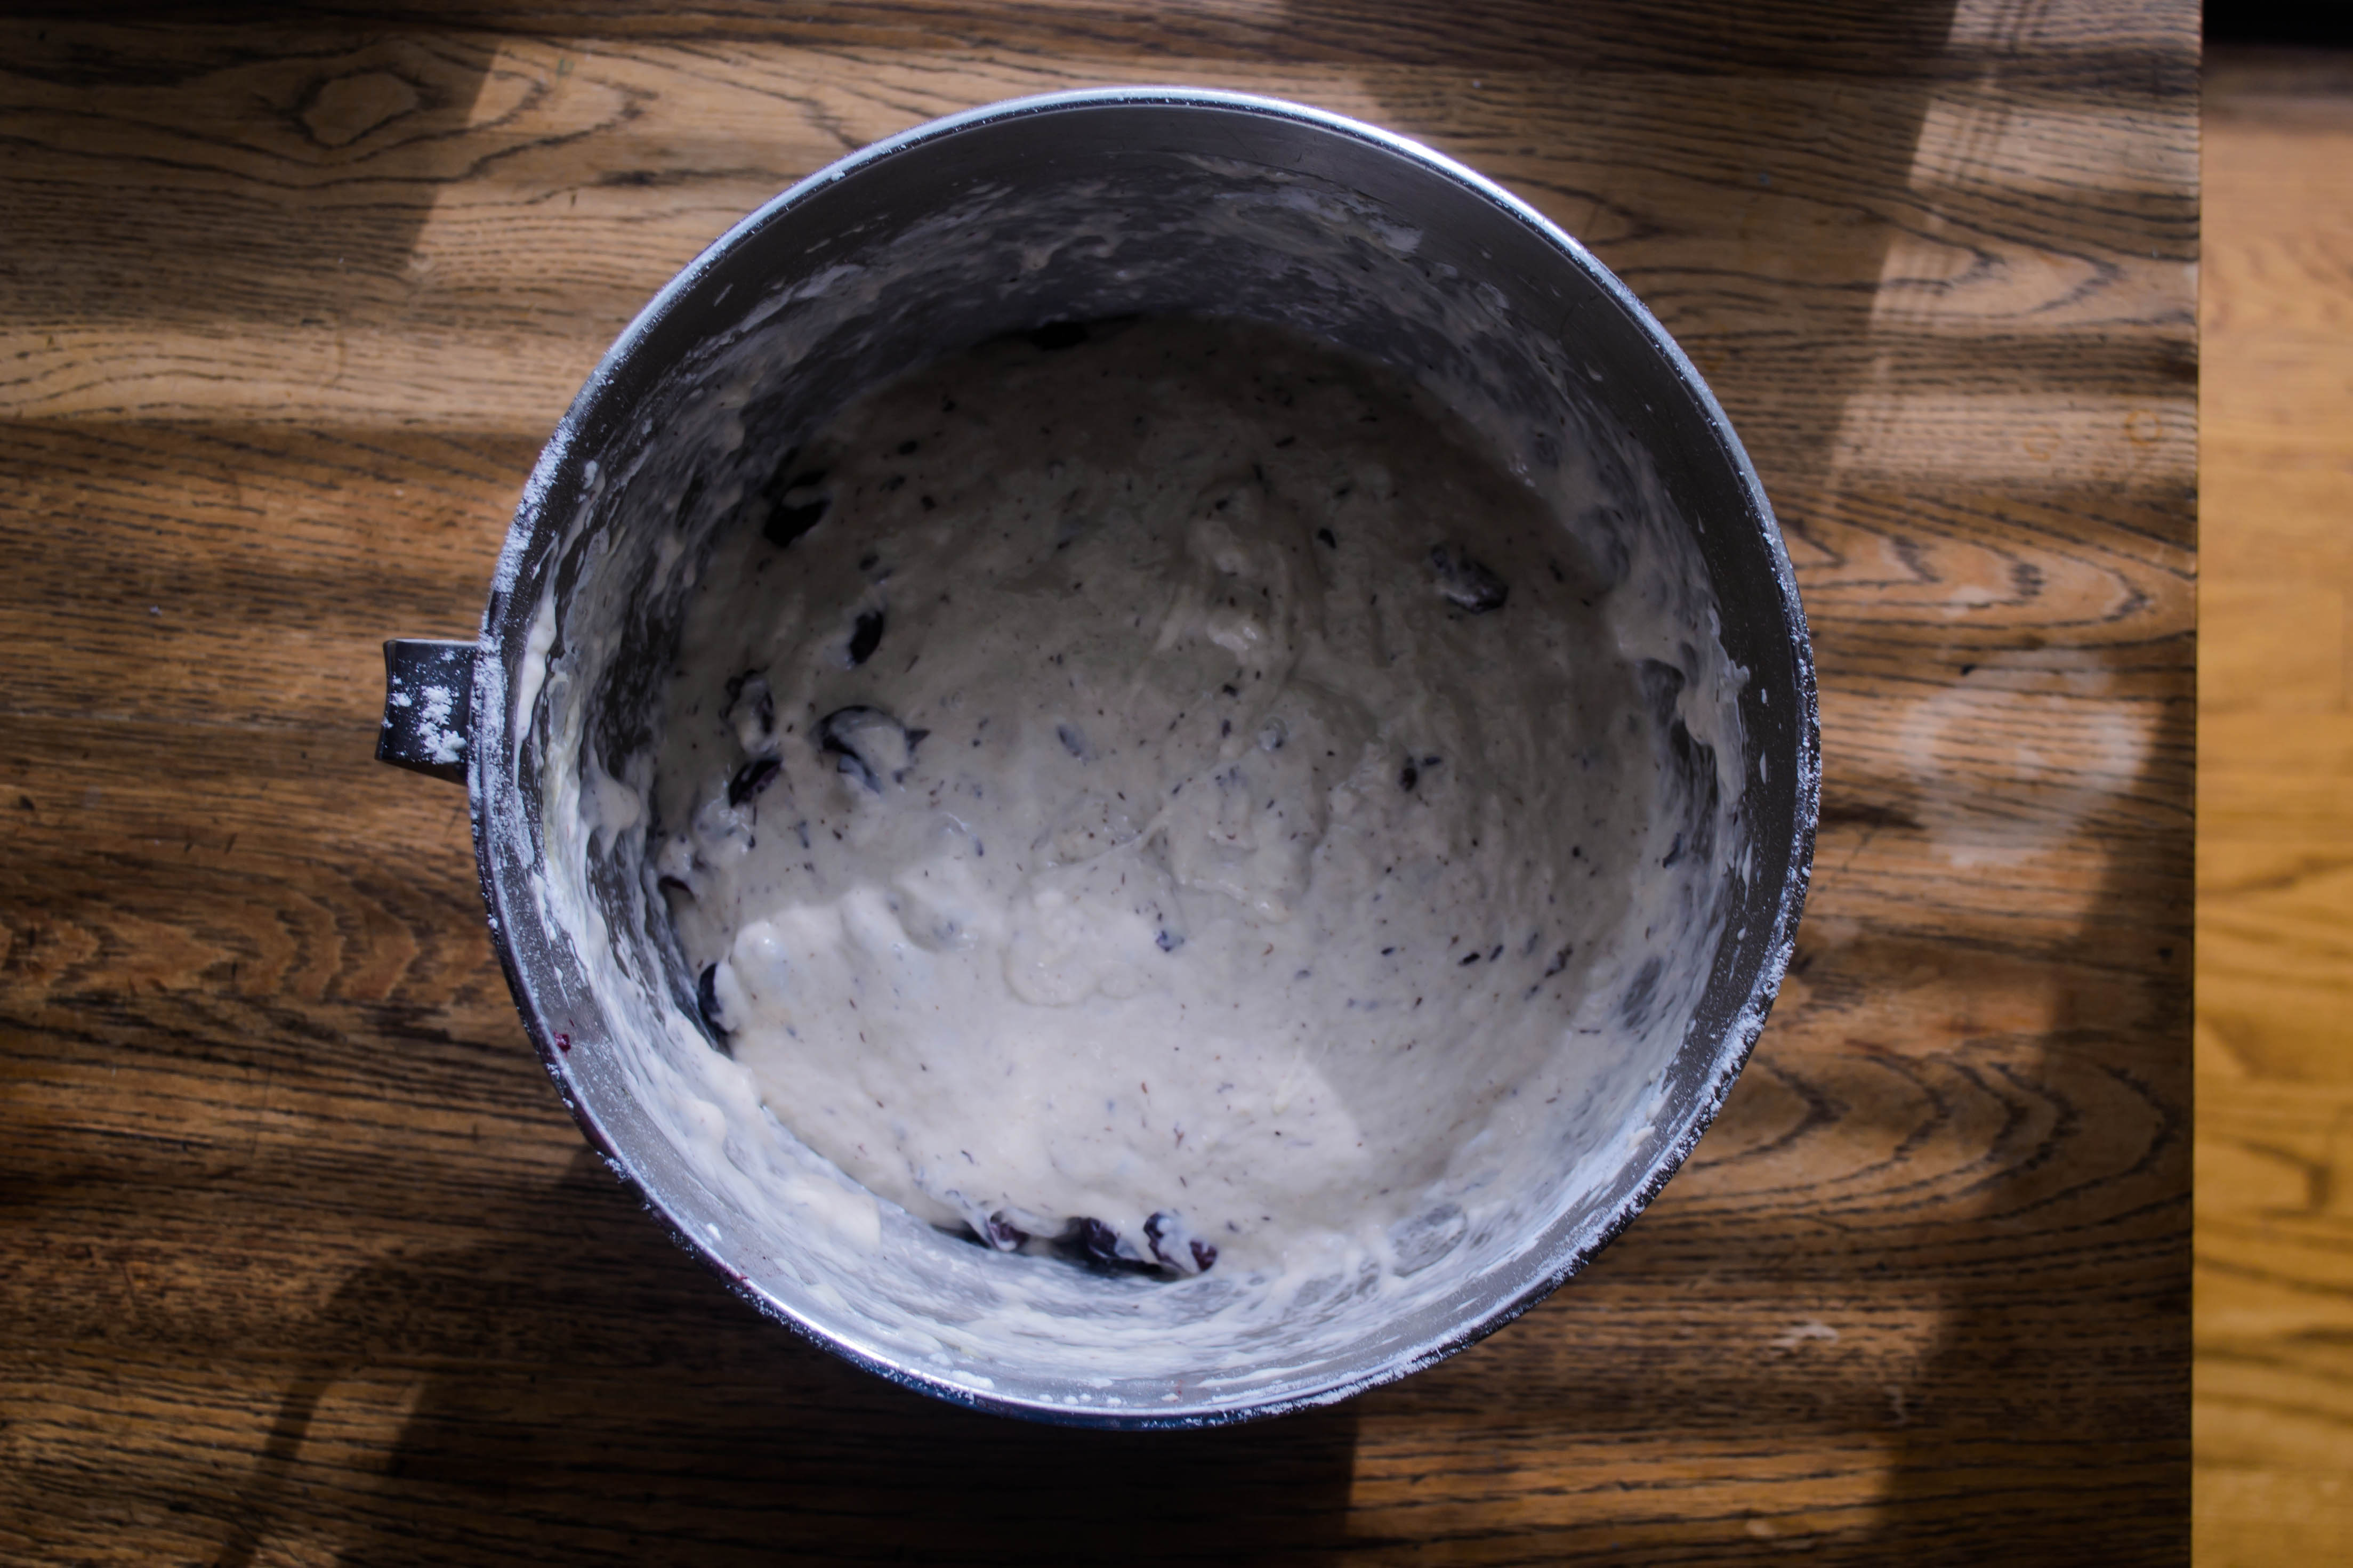
  • In a glass measuring cup, combine the lukewarm milk and the yeast, and let sit for 5-10 minutes to allow the yeast to wake up a bit. While you wait, combine the sugar, cinnamon, salt, vanilla, eggs, and ¼ cup of butter in the bowl of a stand mixer (or just a large mixing bowl).
  • When the yeast and milk mixture is bubbly and smells like bread, add it into the egg and butter mixture and stir well to combine. Add 2 cups of the flour, and stir well to combine again.
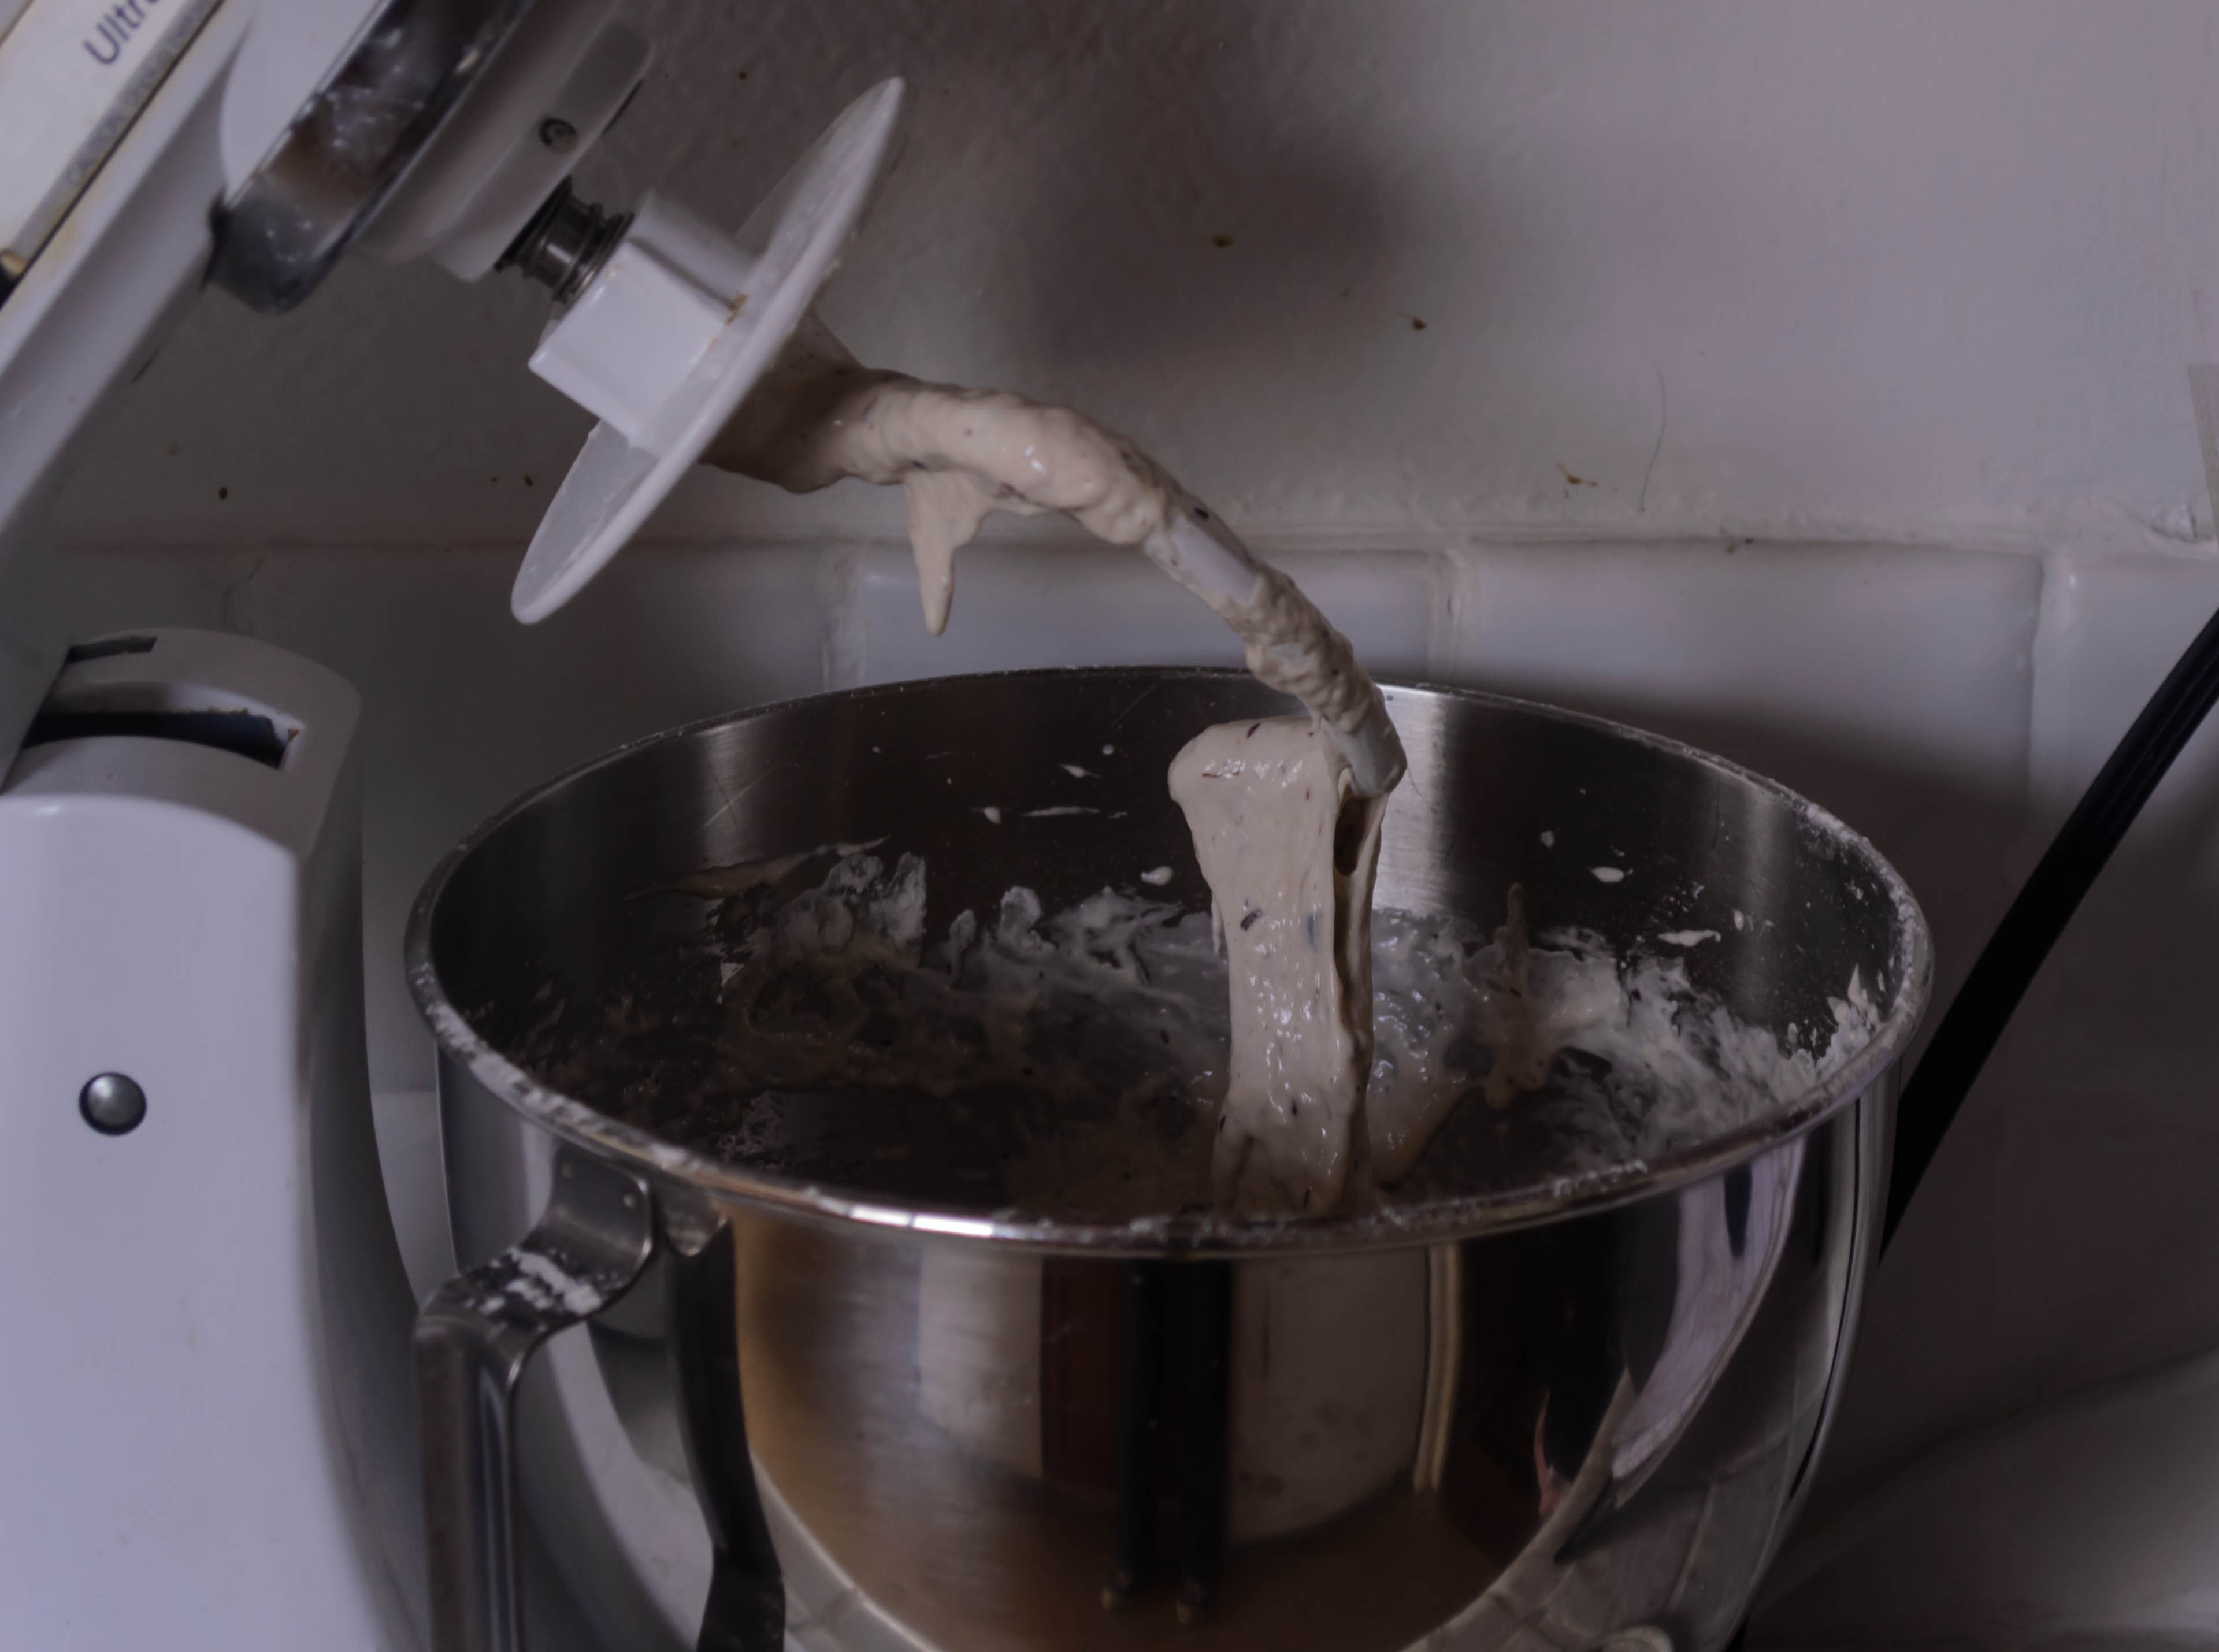
  • If you are using a stand mixer, fit with the dough hook attachment and begin to knead on medium speed. If you are working by hand, dump the dough out onto a floured board and knead for about 5 minutes. As needed, work in more flour ¼ cup at a time until the dough is easy to handle. I ended up using about 2 ¾ cups total. In the stand mixer bowl, it will start to pull away from and then slap the sides.
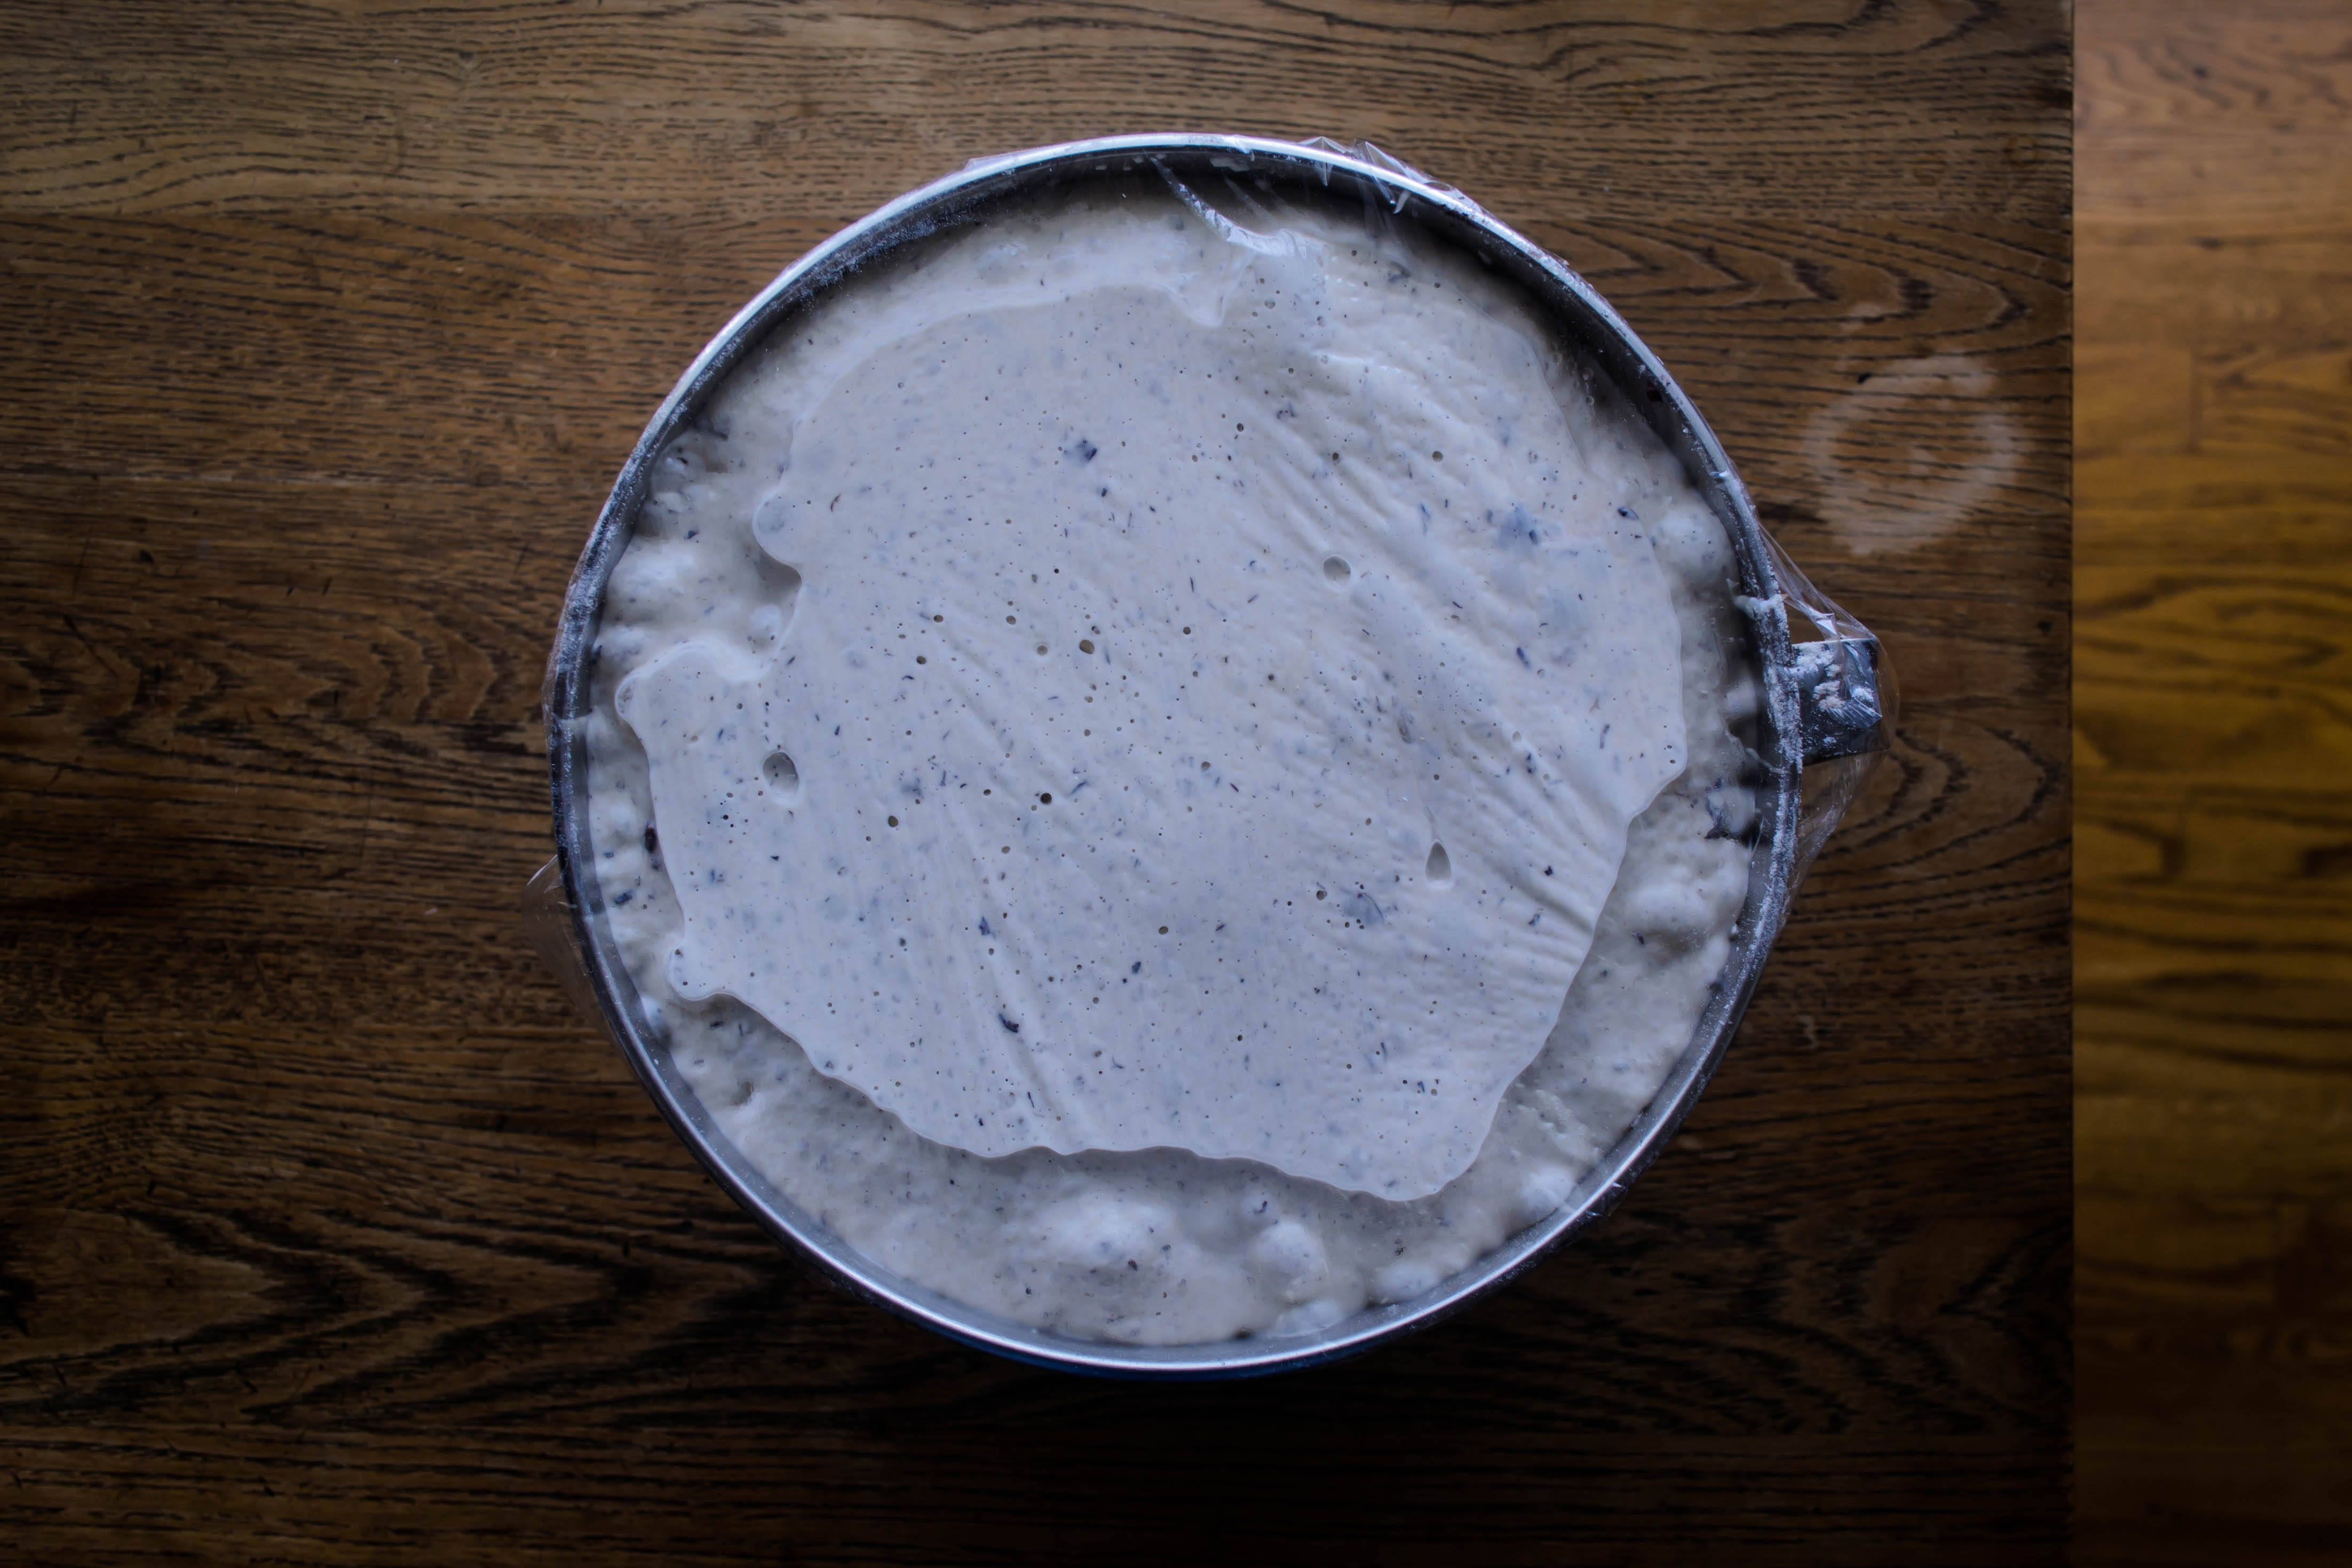
  • After you’ve kneaded for about 5 minutes, the dough should feel smooth and stretchy and be texturally reminiscent of play-dough. At this point, lightly oil the inside of a large bowl (I use the stand mixer bowl for this – you don’t even need to clean it out), flip the dough around in it to coat all sides, then cover with plastic wrap and set aside to rise until doubled; about 90 minutes.
  • While you wait for the dough, make the filling: in a medium bowl, beat together the cream cheese, espresso powder, and granulated sugar until light and fluffy; 1-2 minutes. Then gently incorporate the chopped chocolate, and set aside.
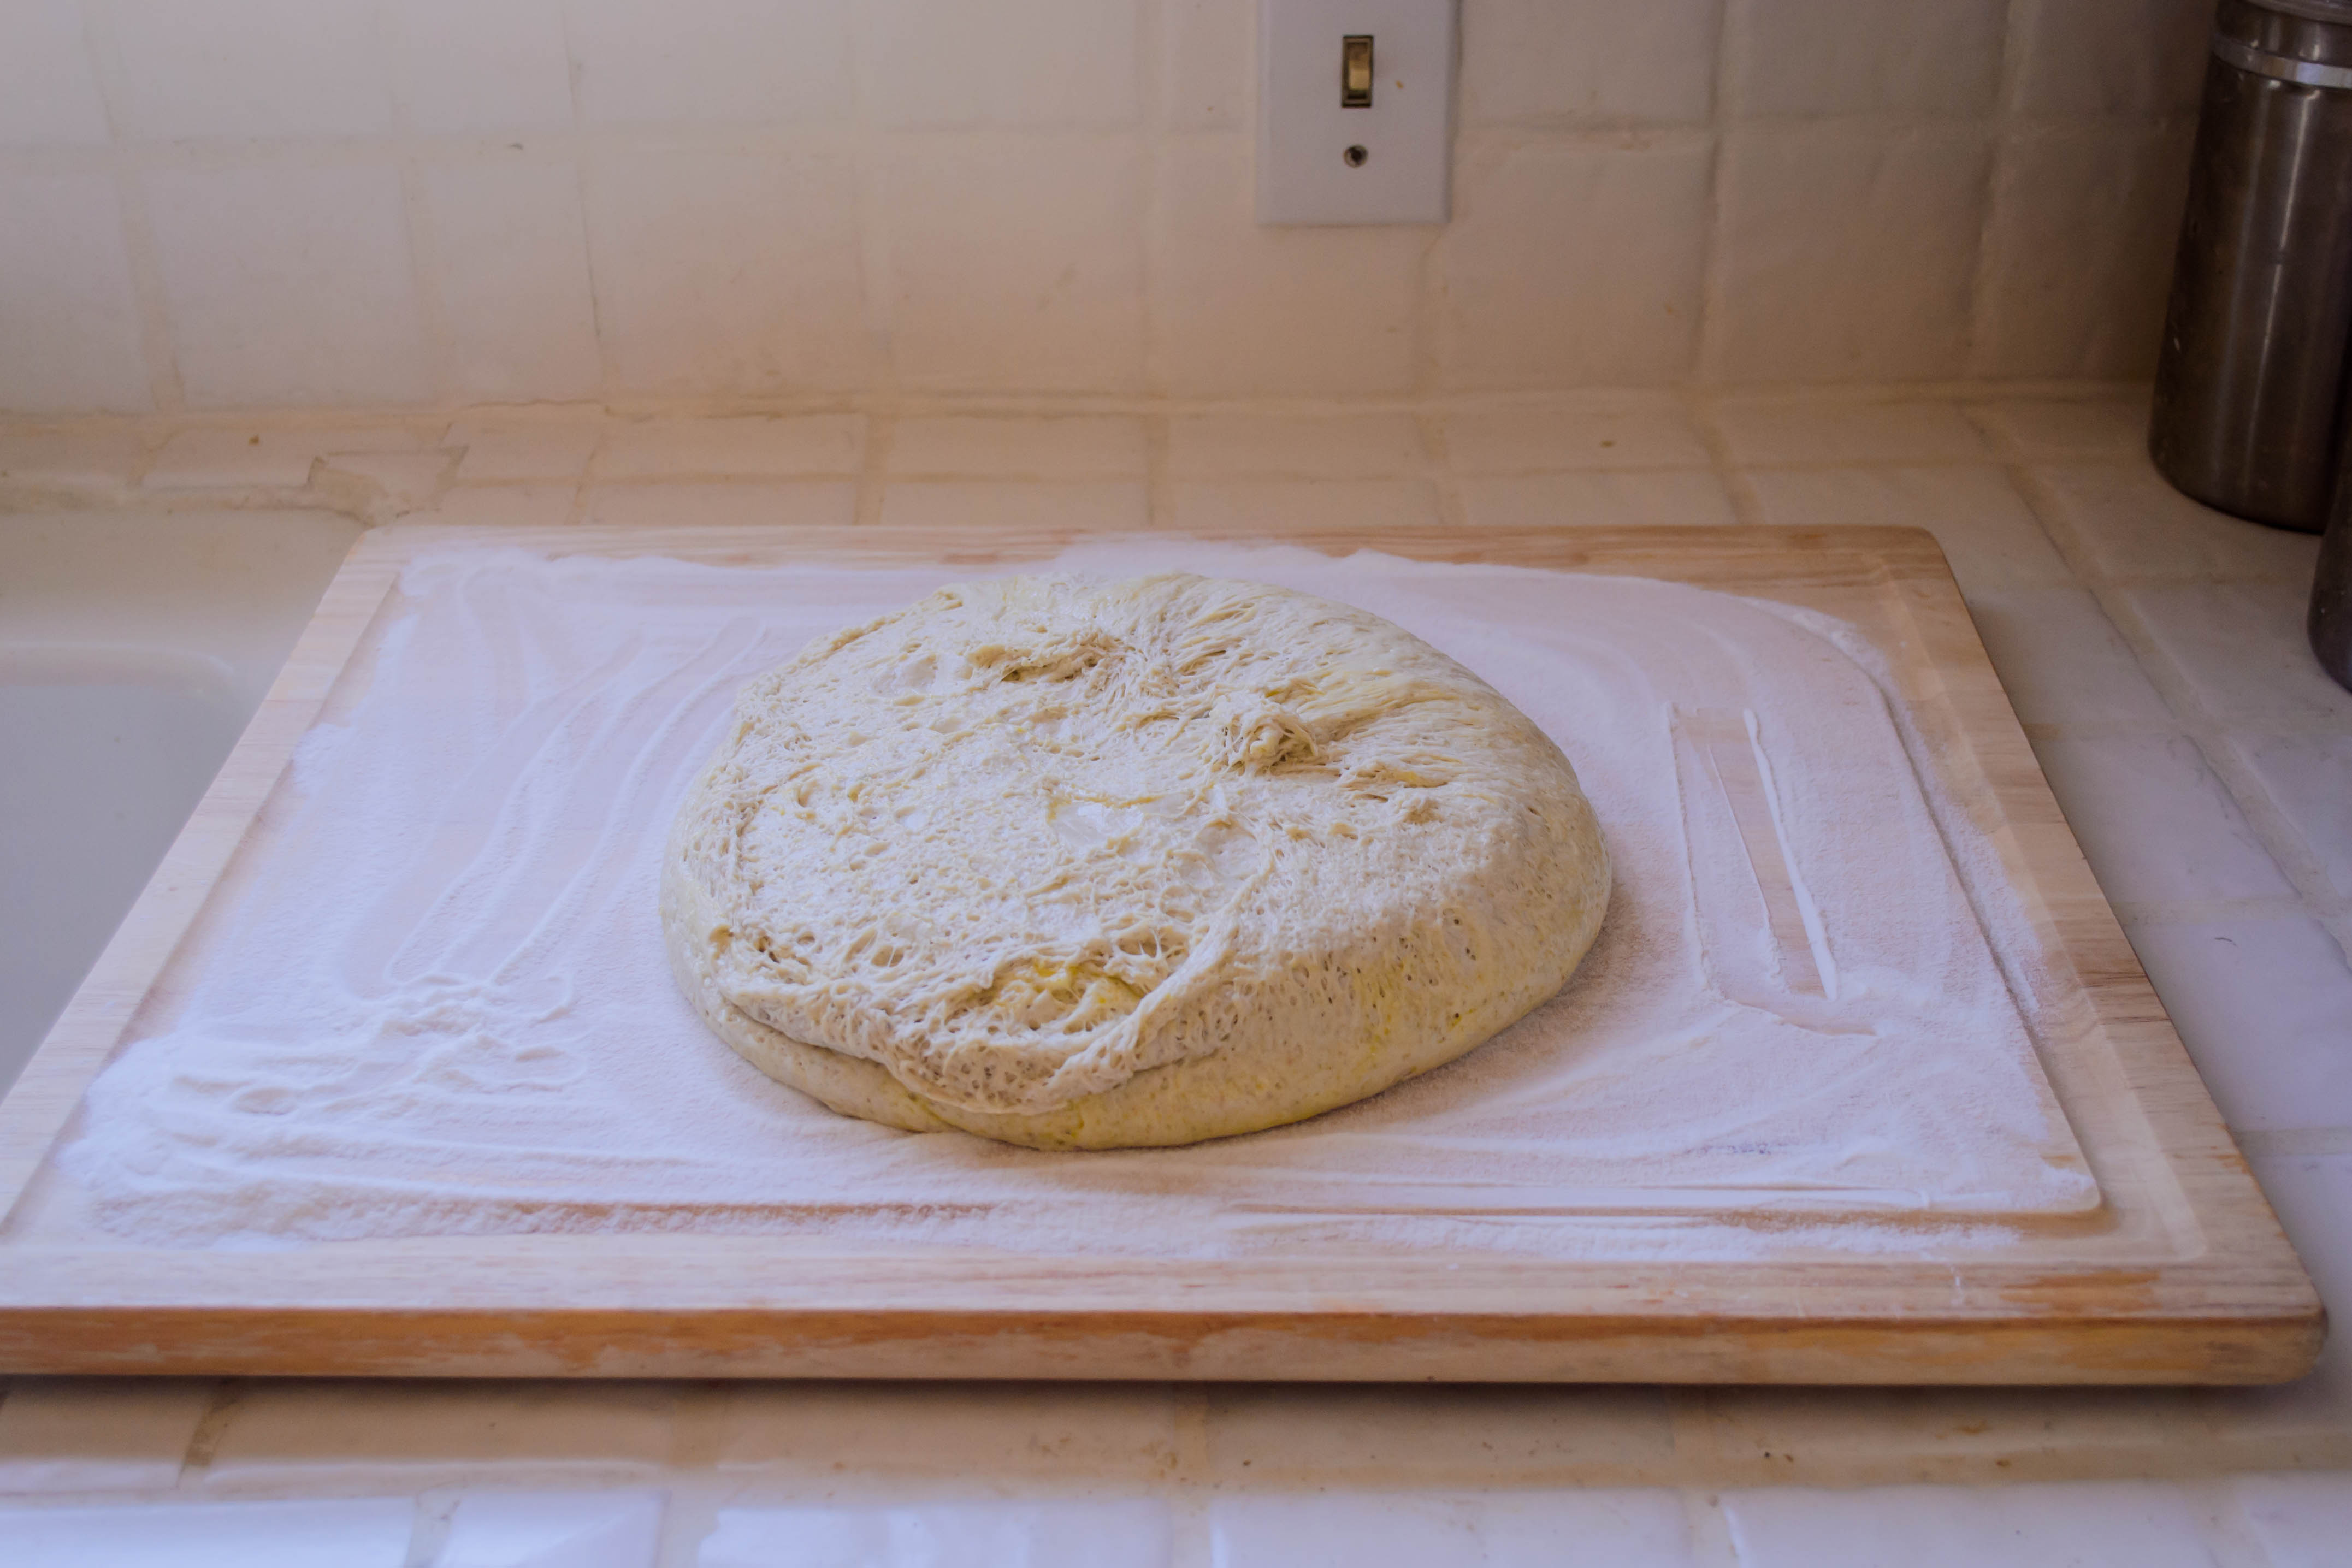
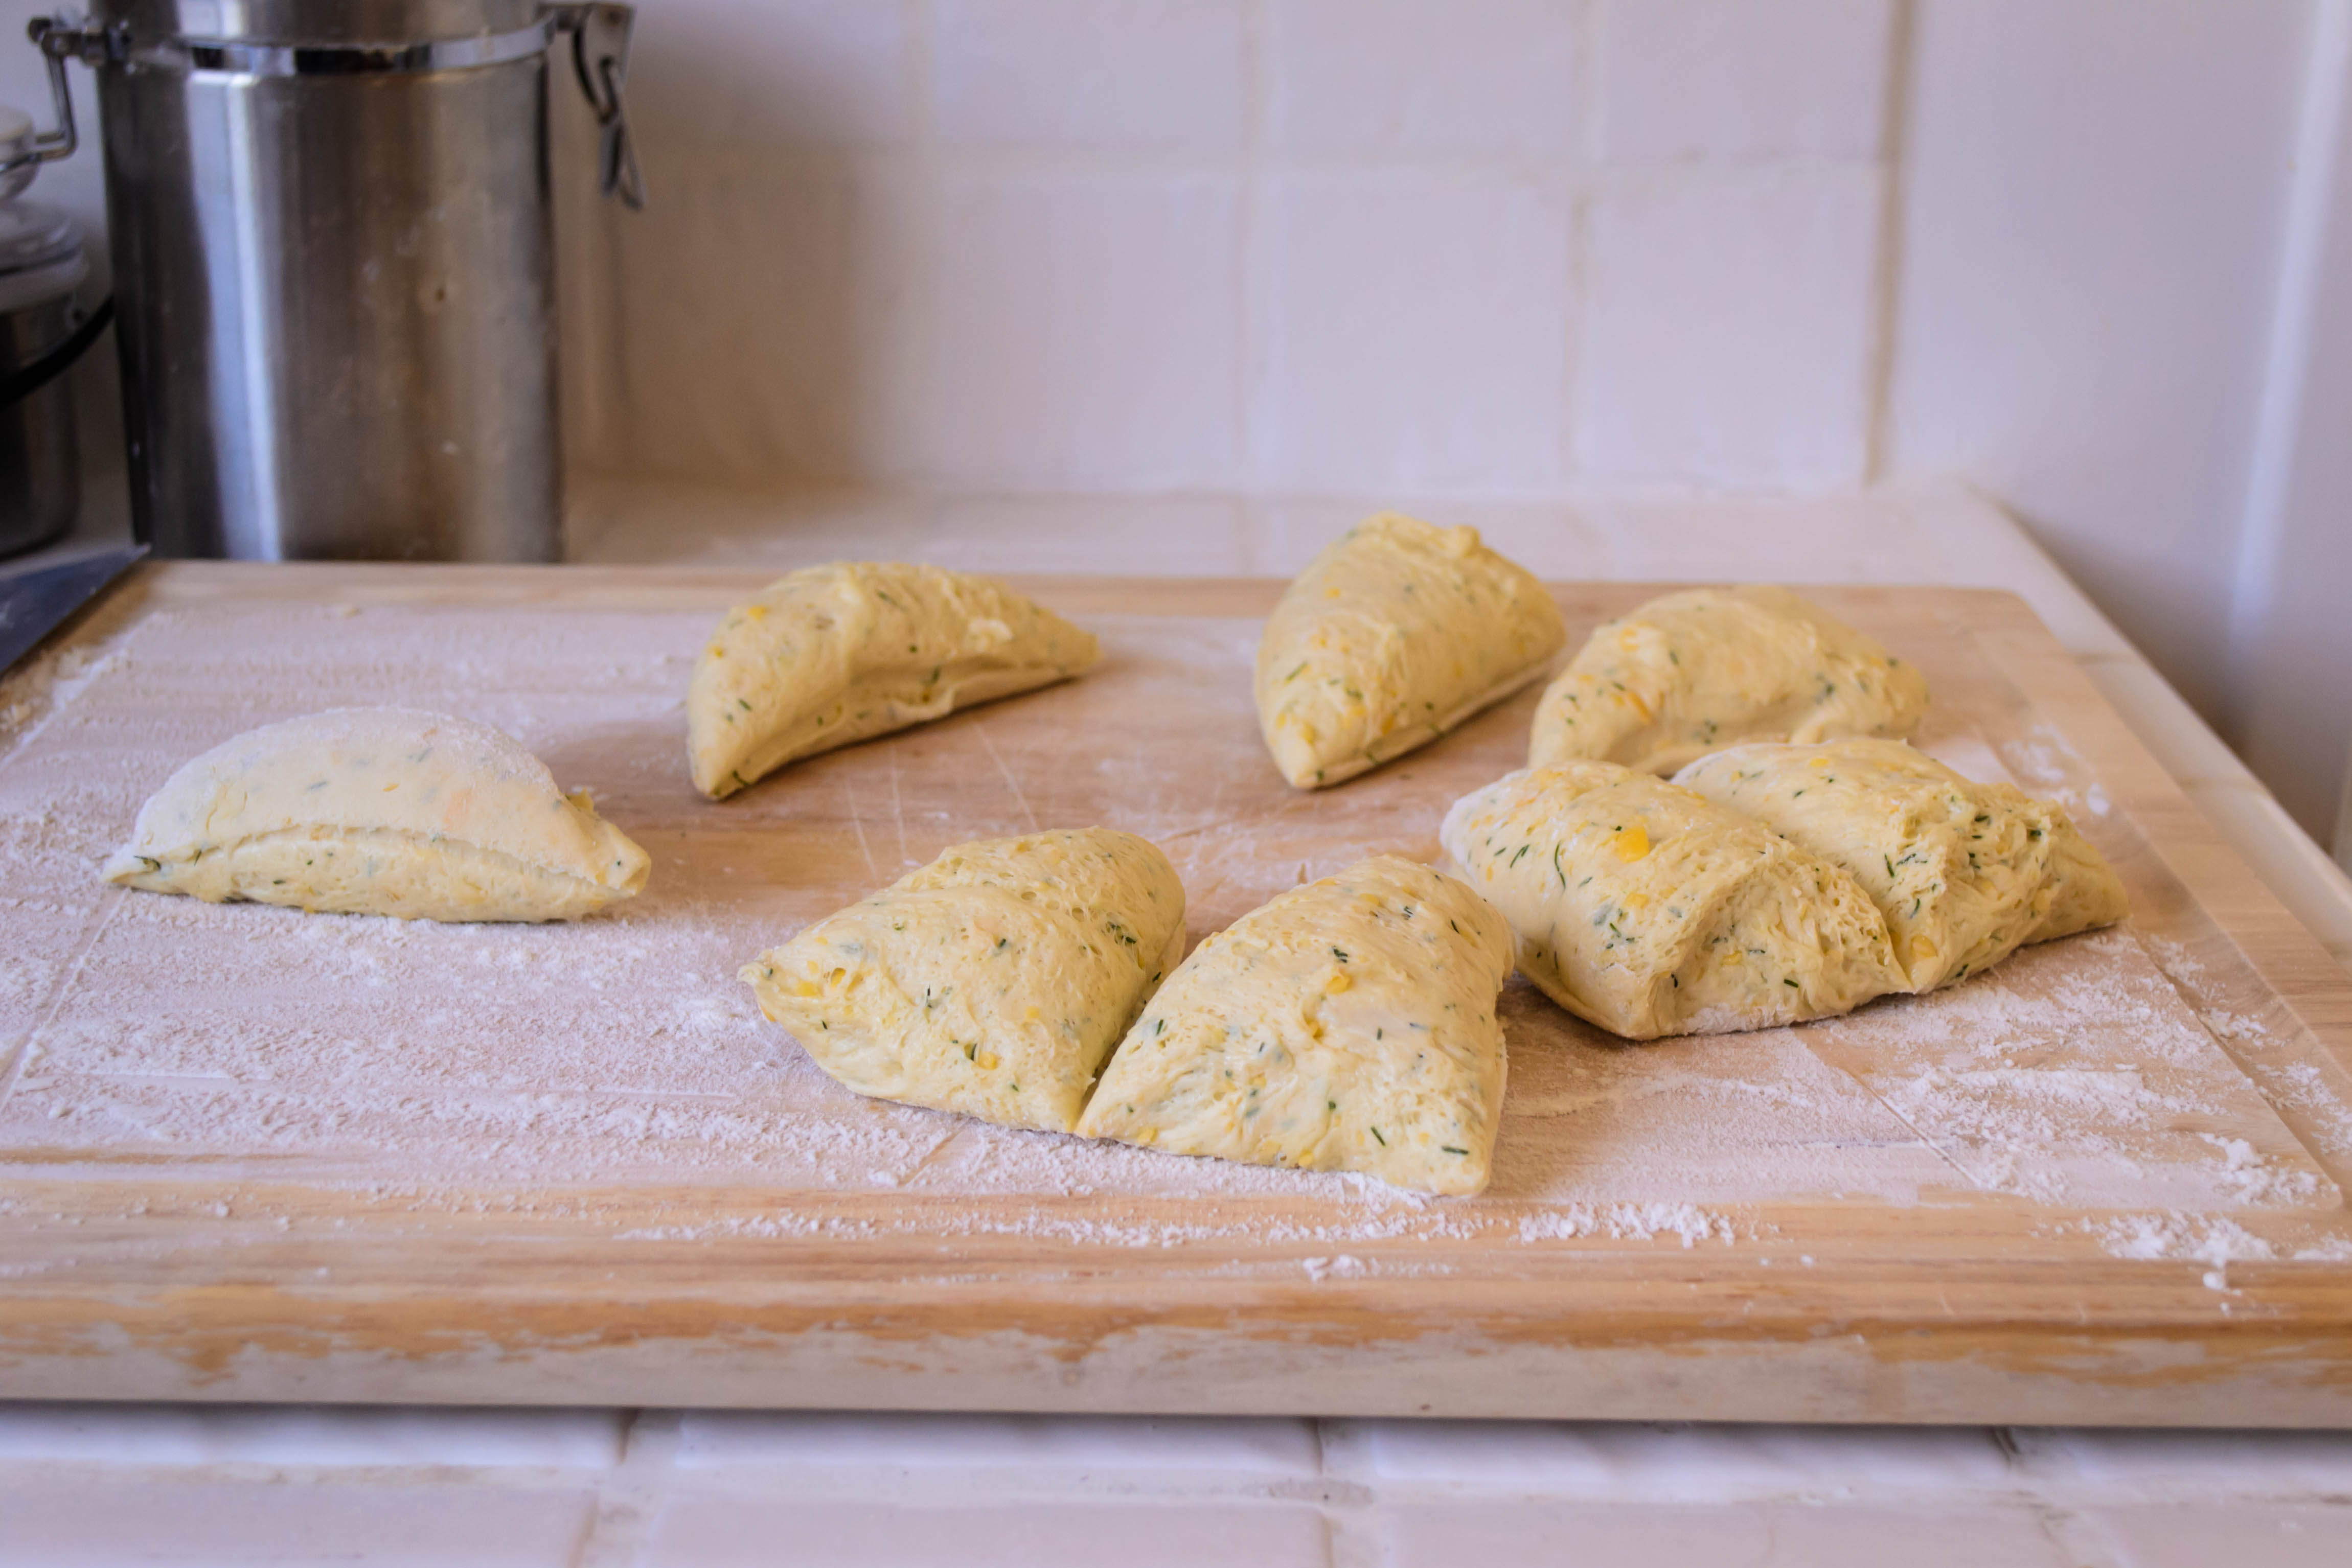
  • When the dough has doubled, punch it down by depressing your fist gently into its center to release trapped air, then let it rest for 5 minutes to get its breath back. Turn it out onto a floured board and roll into a rectangle of roughly 9×16 inches.
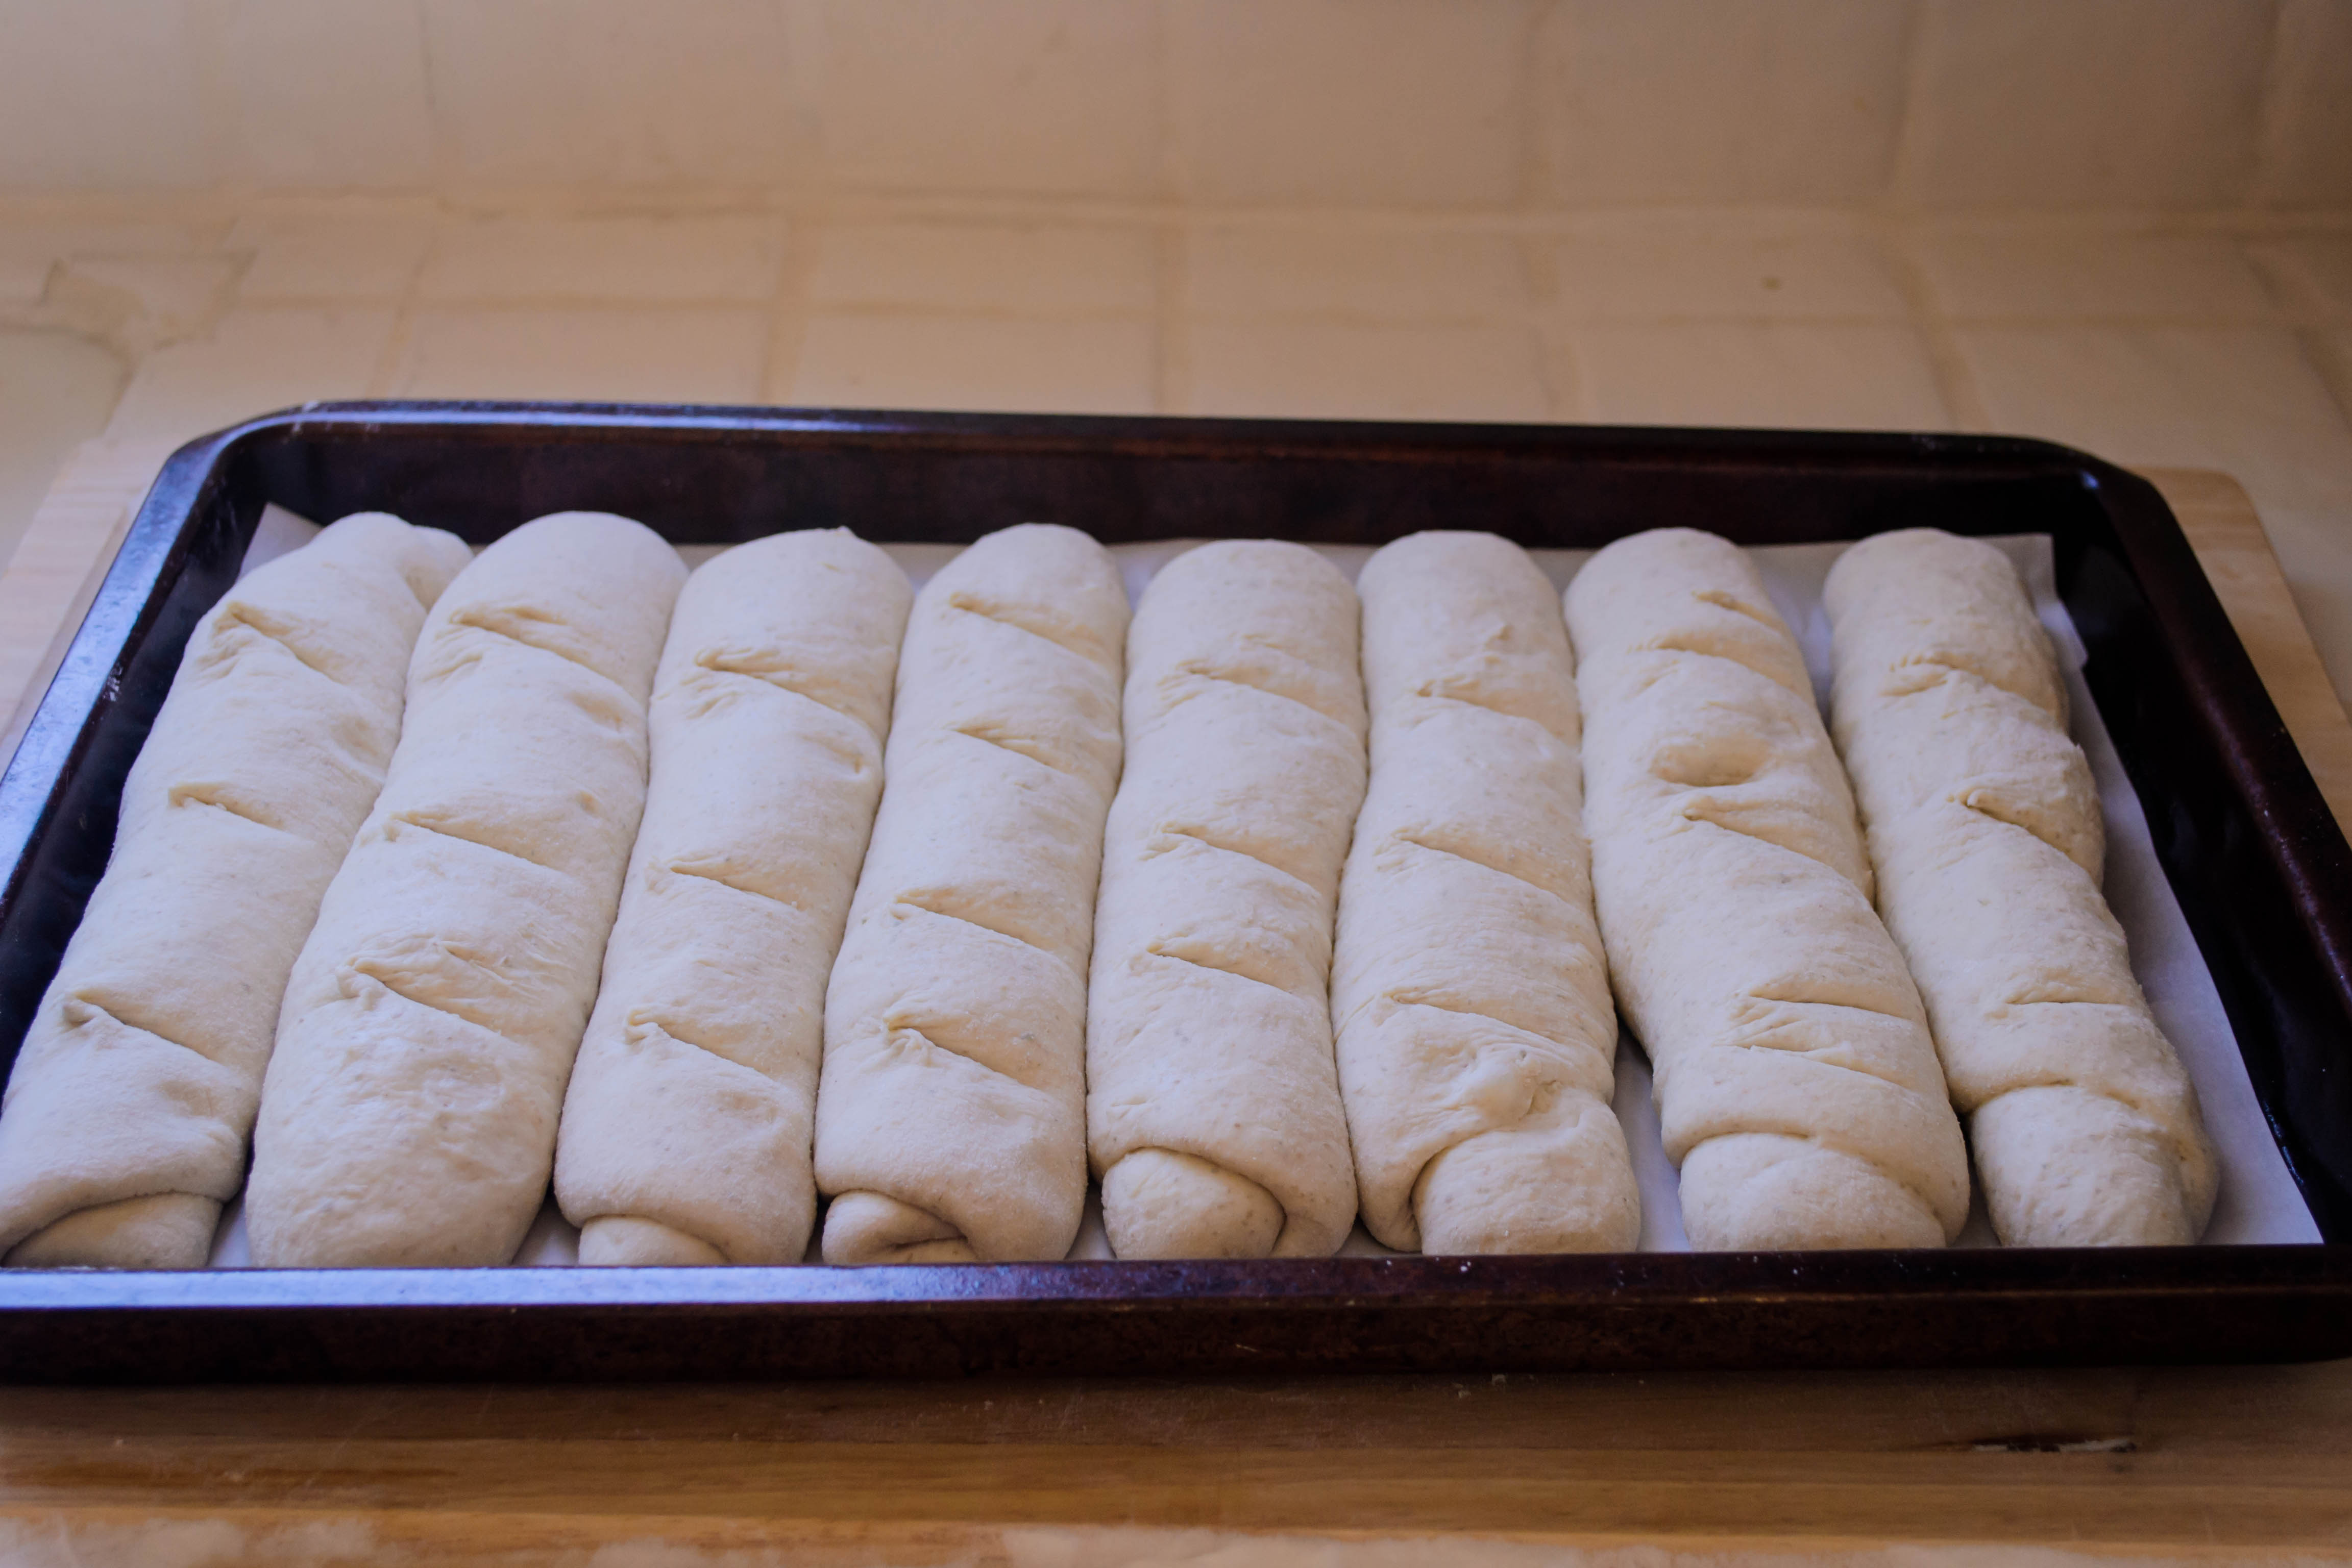
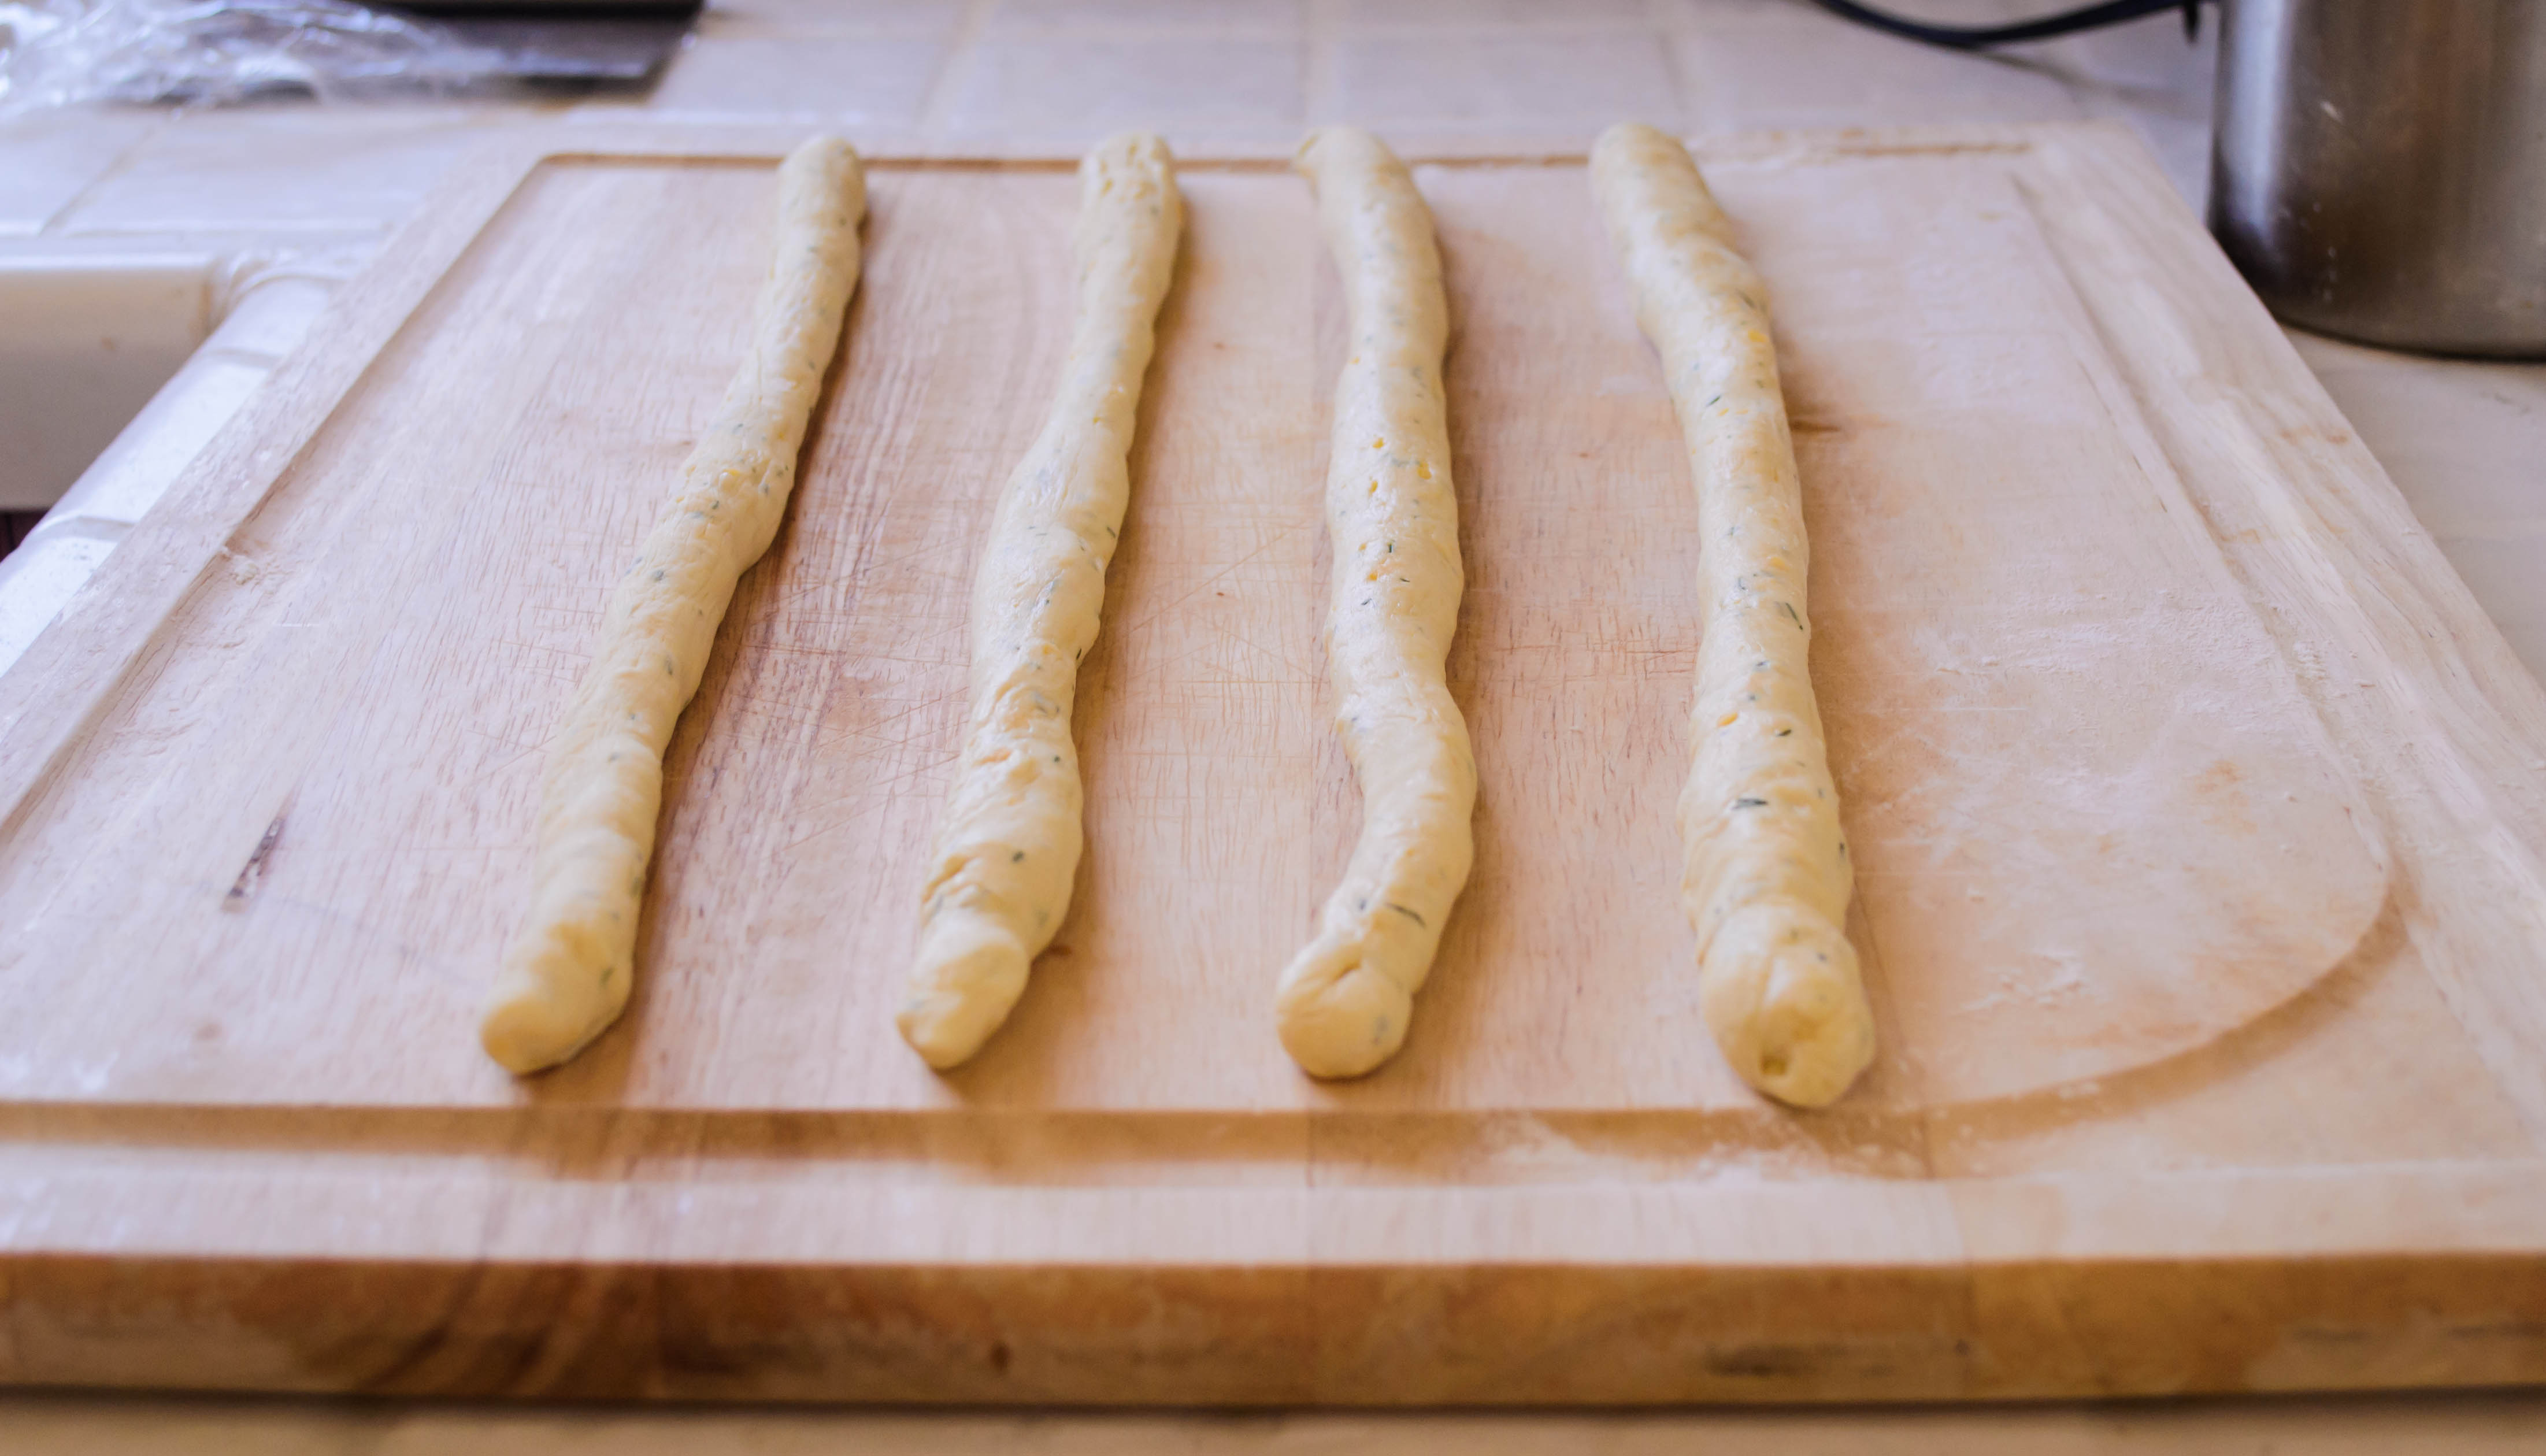
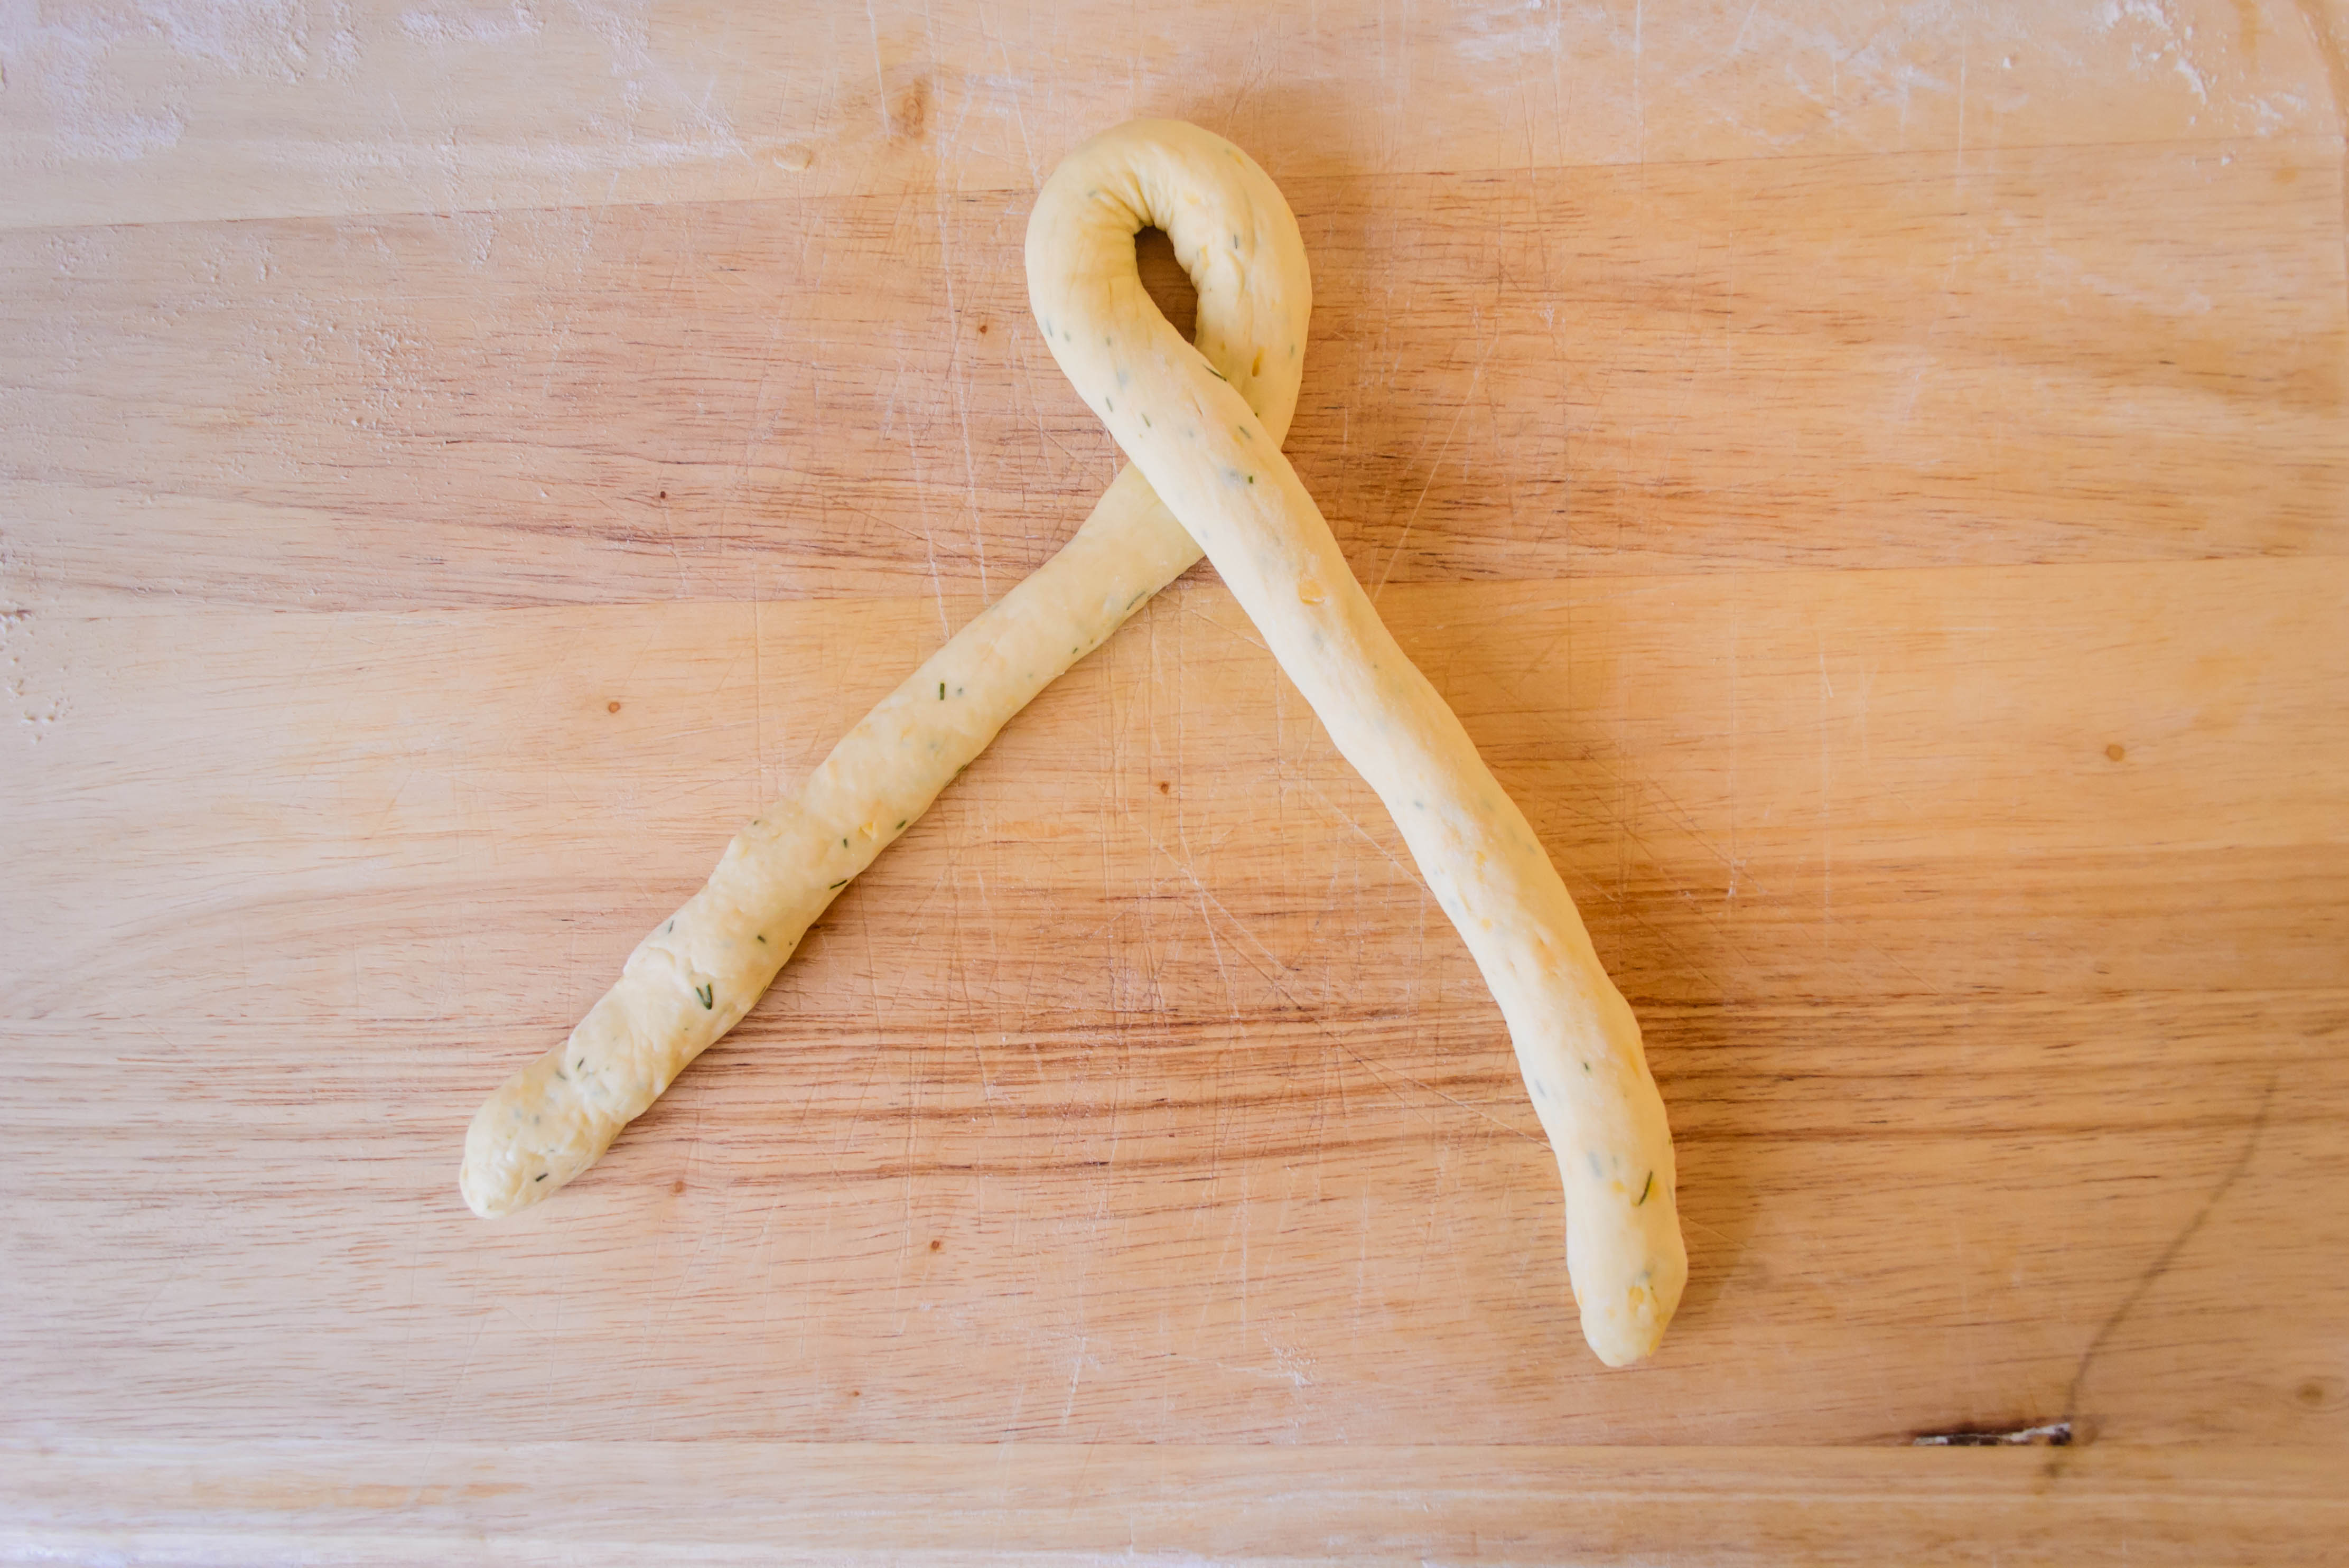
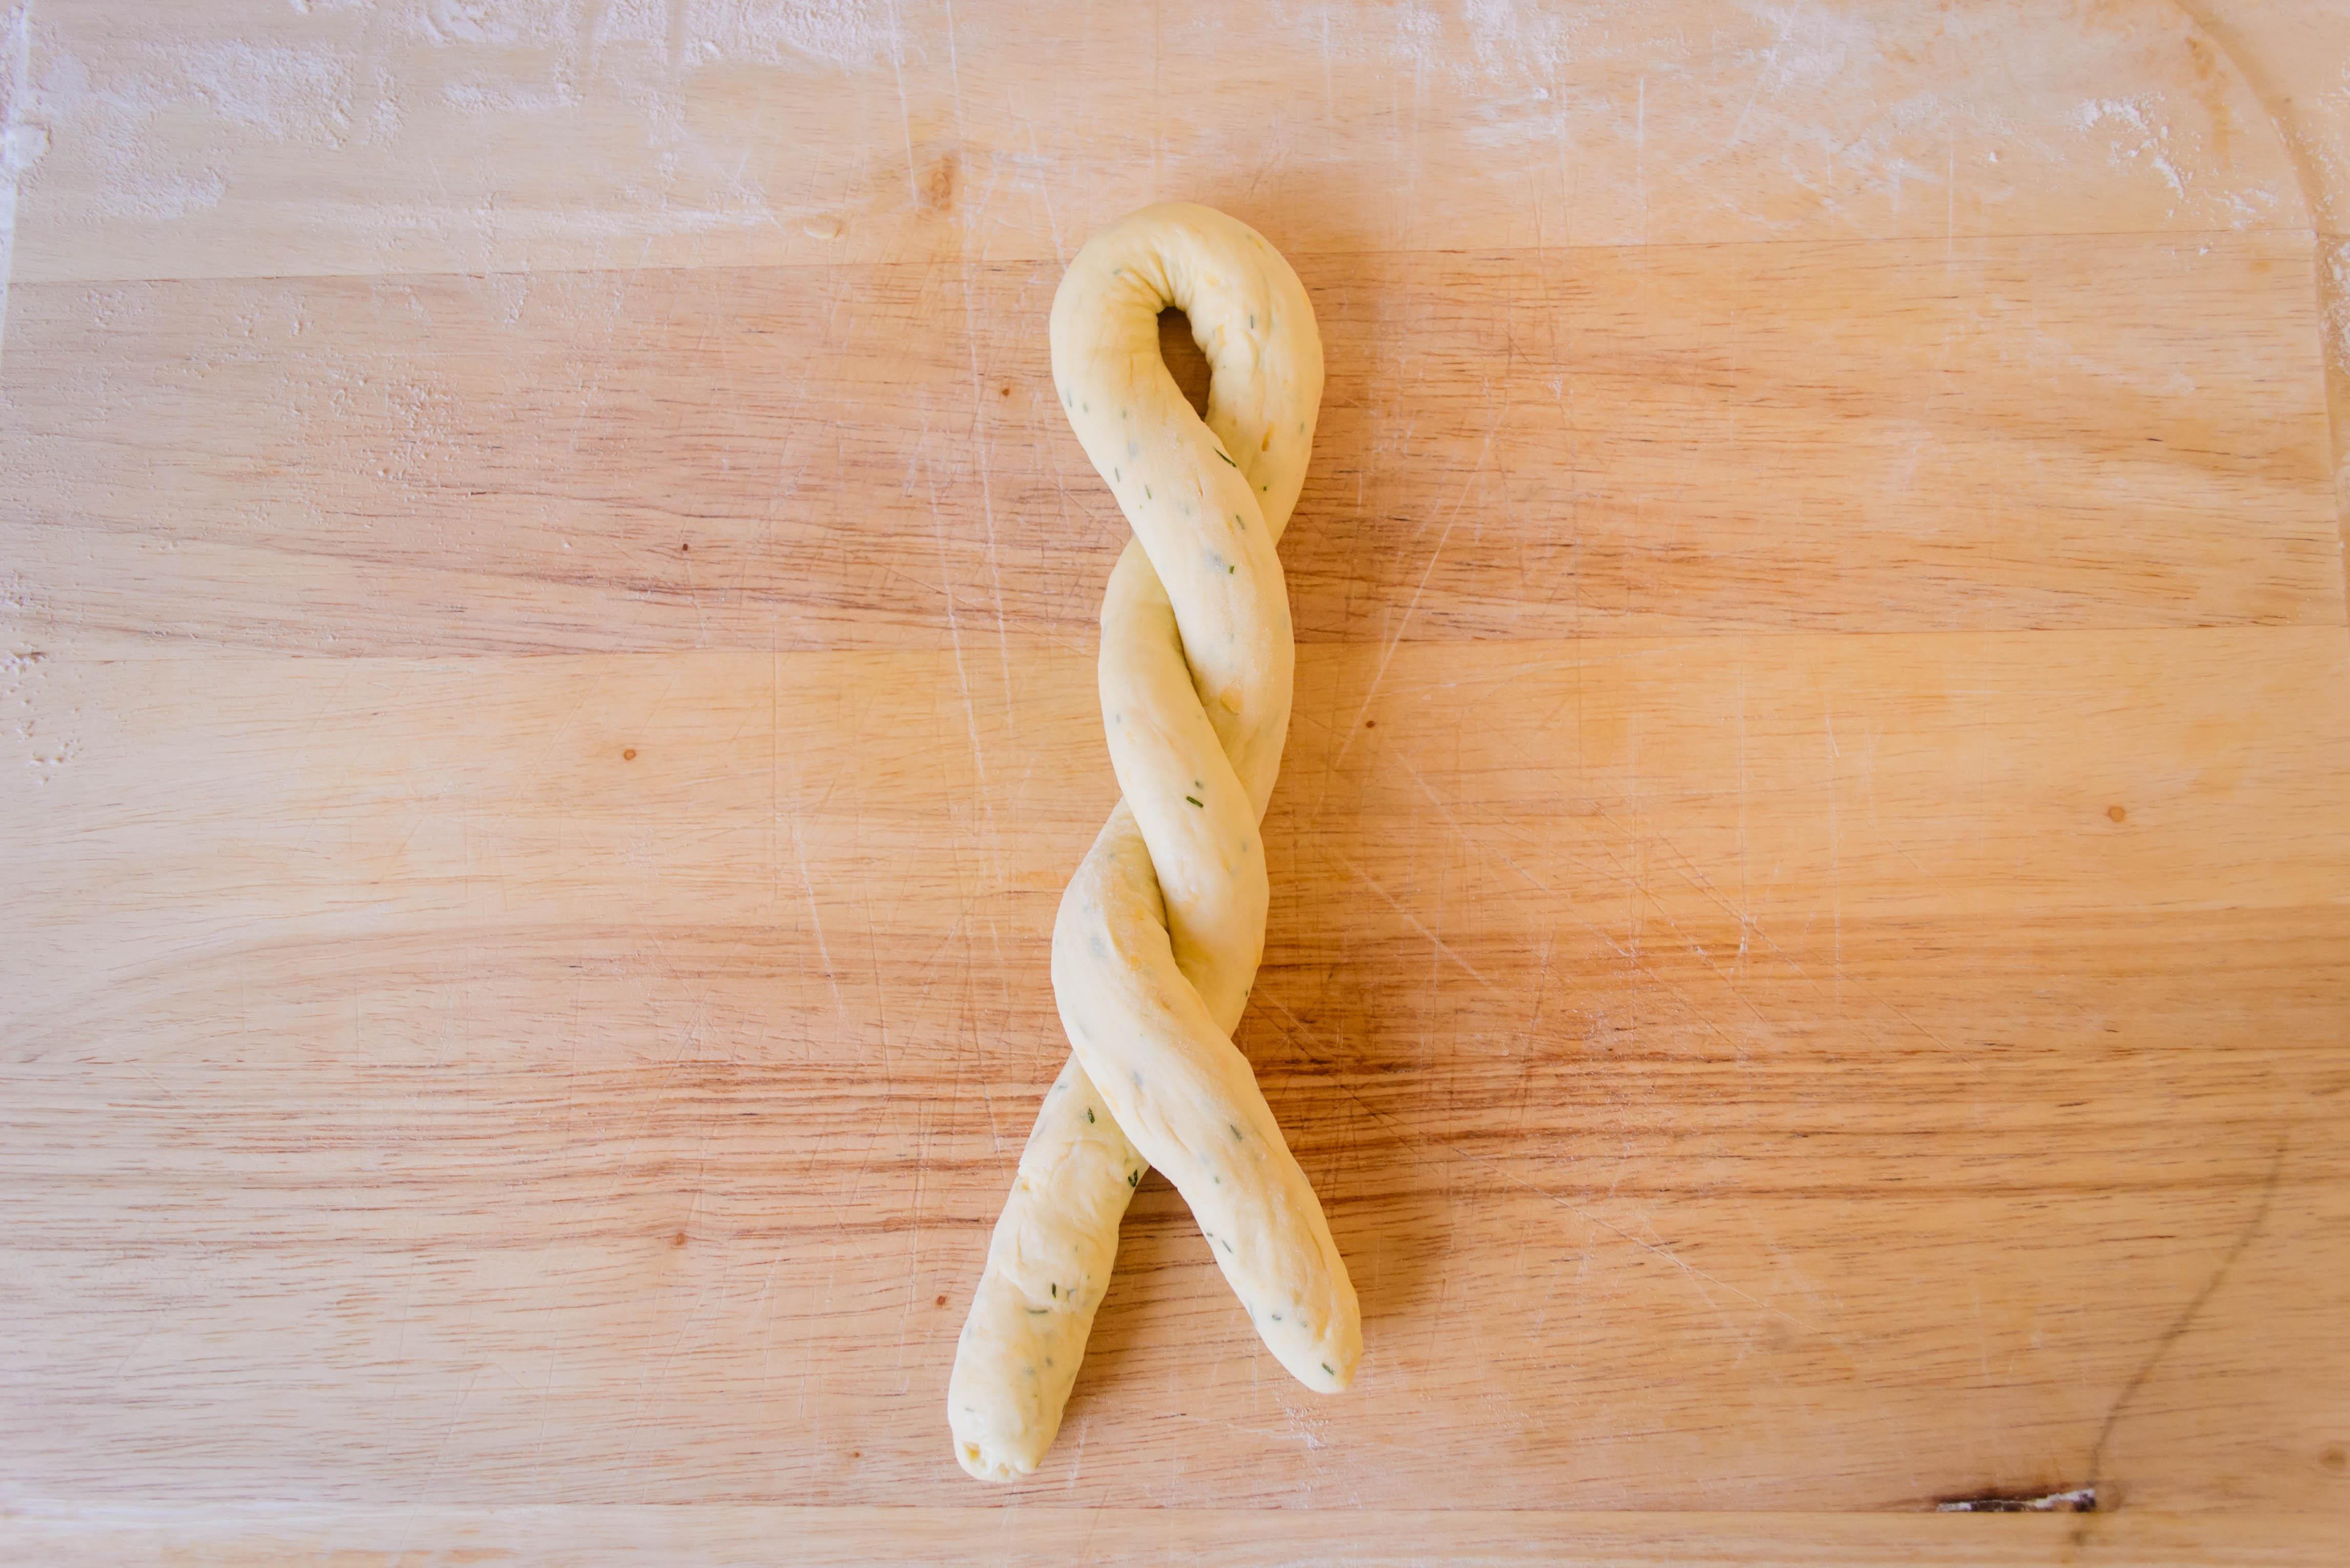
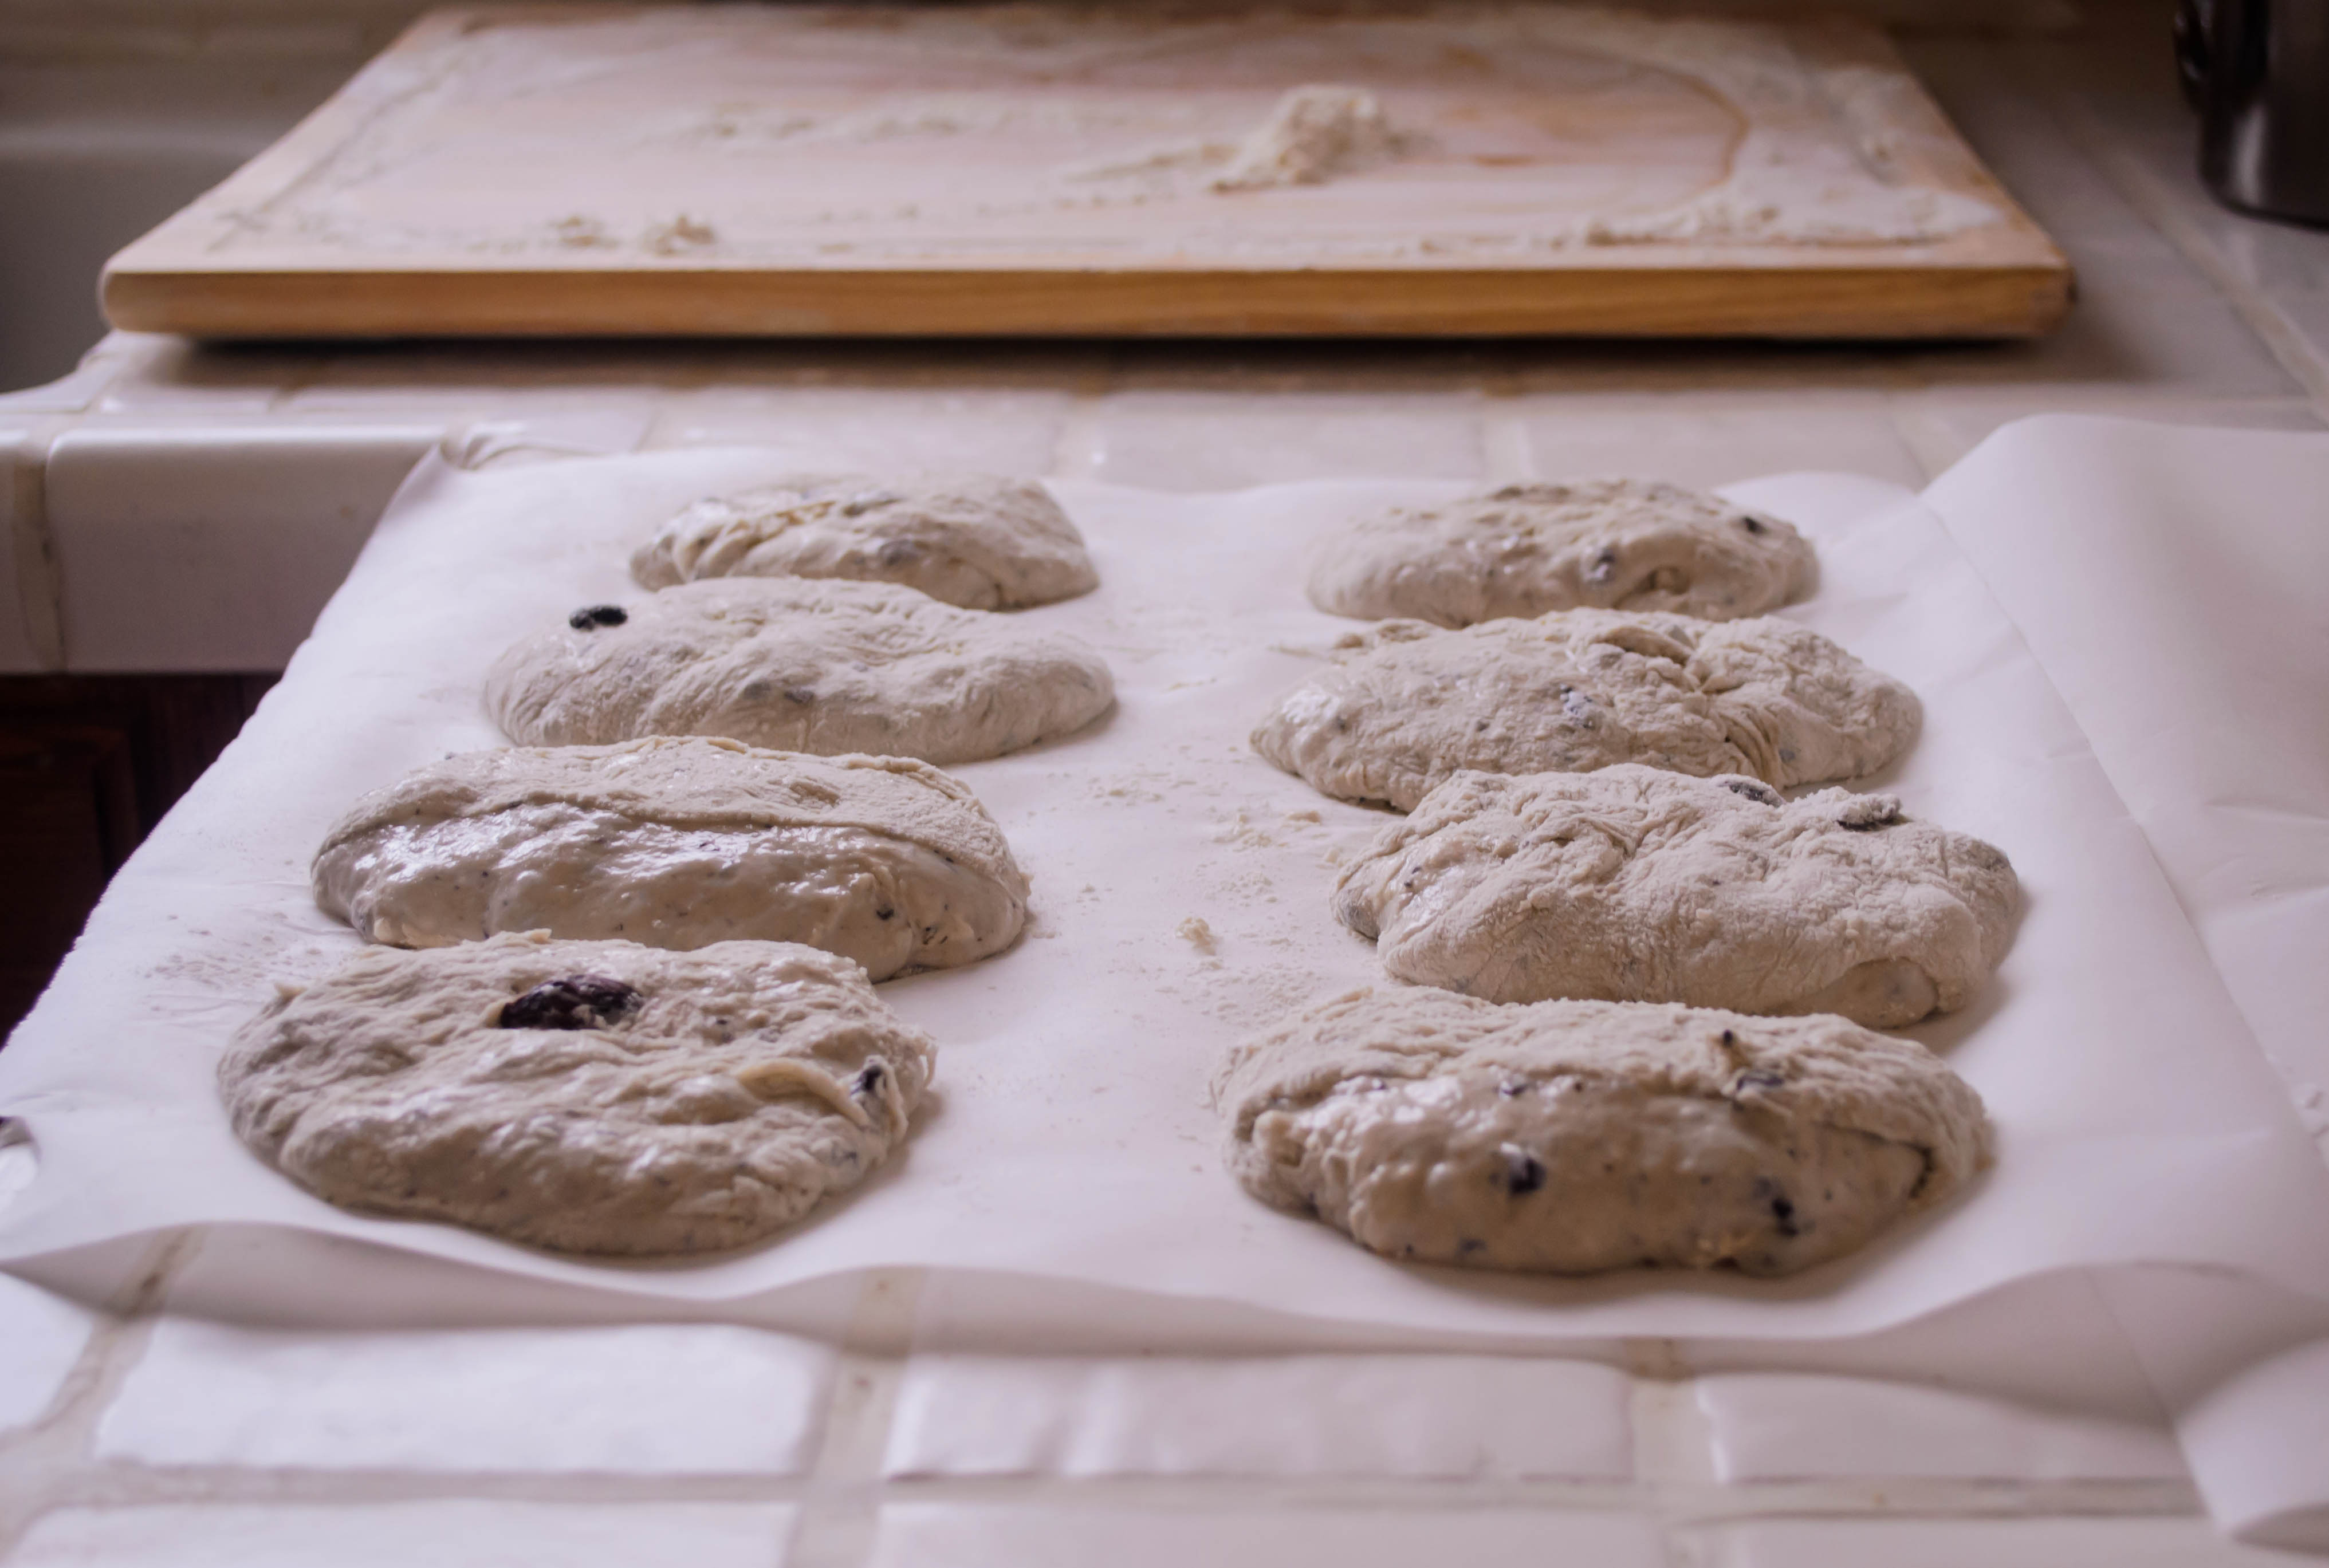
  • Spread the dough rectangle with the filling, leaving a border of about 1 inch on all sides to ensure minimal overflow. Working gently, roll up into a log starting from the short edge (so you’ll end up with a fat log about 9 inches long). Crimp the edges at the end to seal it – be aggressive! The dough might not want to stick to itself at first.
  • Now that you have your fat log, well-sealed, twist it 4 or 5 times to disperse the swirl. This may stretch it out a bit, so when you carefully wedge it into a buttered 9×5 inch loaf pan, just tuck the ends underneath.
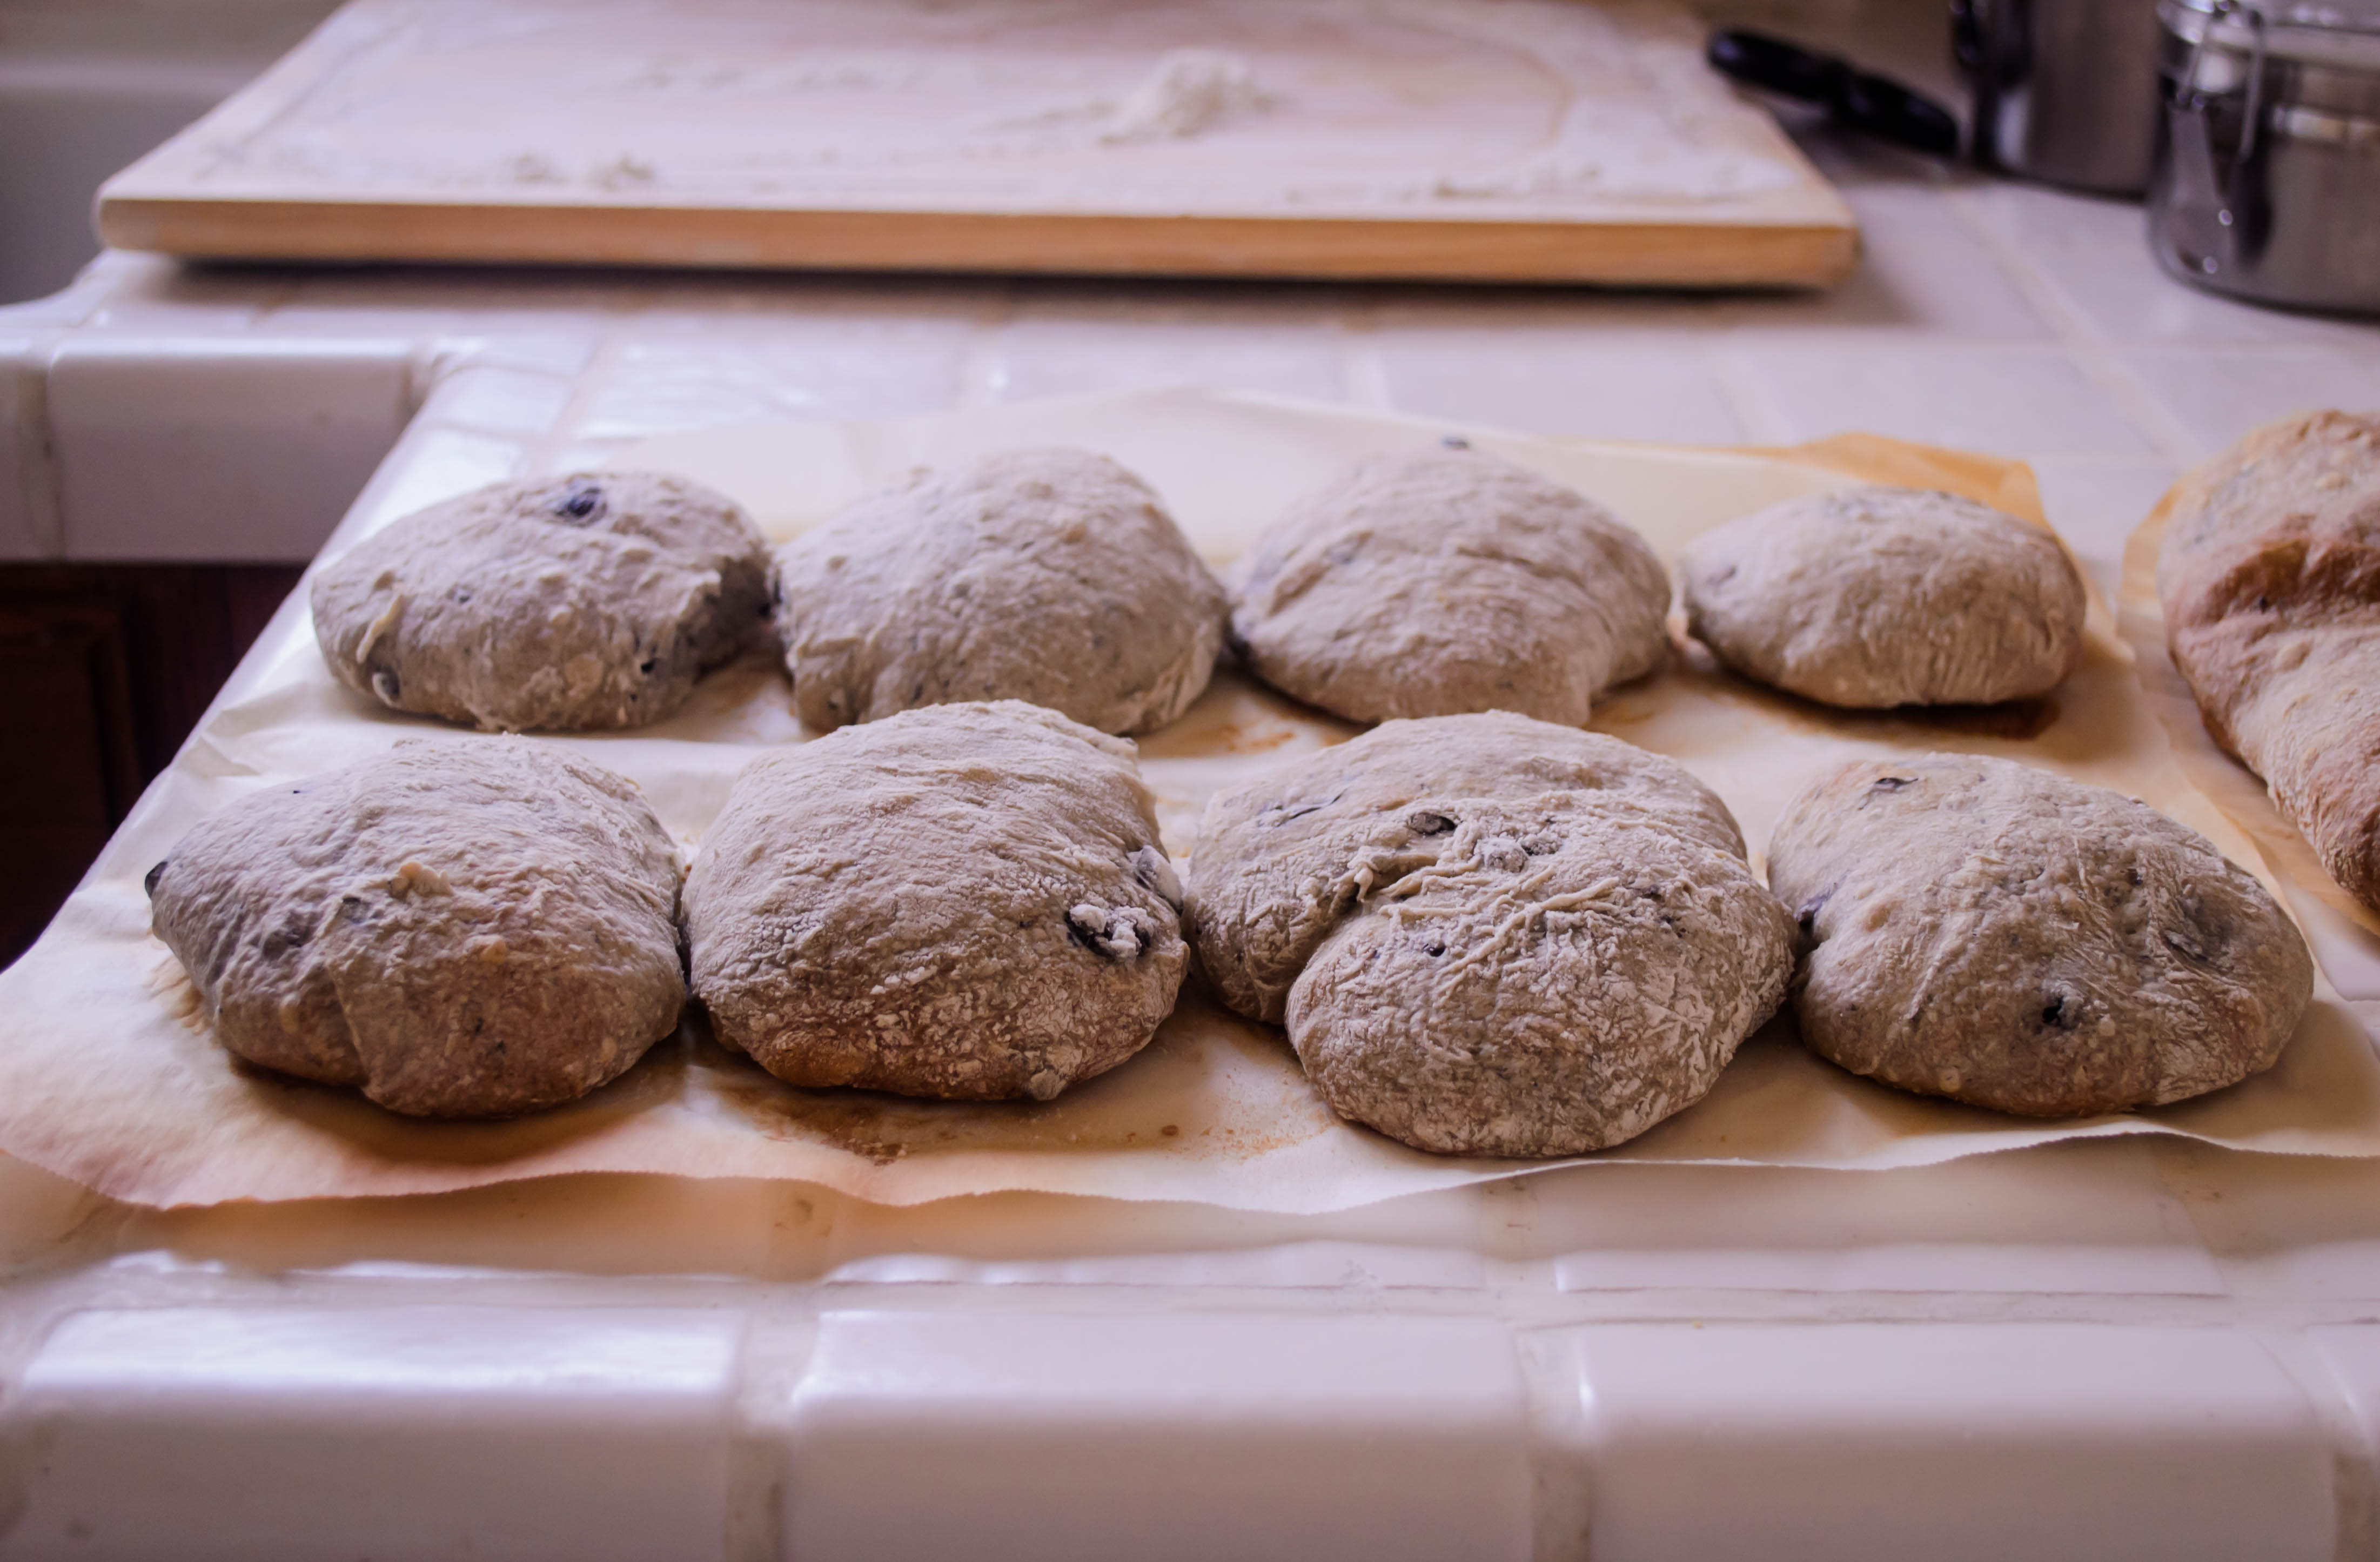
  • Once the loaf is settled in the pan, rub the top with the remaining 1 tablespoon of soft or melted butter, then cover lightly with plastic wrap, set aside for another 30 minutes, and preheat the oven to 375F.
  • By the time your loaf has risen for another 30 minutes, it should have come close to doubling in size again, and your oven should be fully preheated. Bake the loaf in the preheated 375F oven for 35-40 minutes, until the exterior is nicely burnished and the interior tests 180-200F (A skewer that comes out clean works too, though be careful, because the cream cheese filling will remain gloopy).
  • Cool loaf in pan for at least 10 minutes, then remove from pan and cool on a wire rack for at least another 10 minutes. The cream cheese and chocolate need time to solidify a bit, or the layers within the loaf will threaten collapse.
  • Enjoy with coffee, or tea, or milk, or your fingers. Keeps well in the fridge for 4 or 5 days (probably more would be fine, but ours didn’t last longer than that). Bring to room temperature before eating for best leftovers.

#TwelveLoaves is a monthly bread baking party created by Lora from Cake Duchess and runs smoothly with the help of Heather of girlichef, and the rest of our fabulous bakers.

Our theme this month is A LITTLE SOMETHING SWEET. For more bread recipes, visit the #TwelveLoaves Pinterest board, or check out last month’s mouthwatering selection of #TwelveLoaves Mexican Breads!

If you’d like to bake along with us this month, share your “A Little Something Sweet” Bread using hashtag #TwelveLoaves!

Rice Rolls

Food blog April 2015-0598As I revealed last week, my trio of vegetable pickles are just one part of a larger project: a meatball banh mi. These rice rolls are part two. Banh mi, in Vietnamese, really refers not to the wonderful sandwich layered with pate or pork or tofu and stacked with vegetables, pickles, and spice, but to bread itself. Colonization brought the French baguette to Vietnam, and the blending of flavors is a much nicer postcolonial remnant than such occupations frequently bring.

Food blog April 2015-0567Food blog April 2015-0570Though the culinary melding is quite harmonious, banh mi bread brings with it a great deal of internet controversy. Though most shops that sell the popular sandwich buy their baguettes from Vietnamese bakeries rather than making them in-house, crazy people people like me who want to re-craft the “genuine article” share their complaints, secrets, and professed revelations all over forums and comment threads, arguing over proportions and procedure and shape, and at some point, the argument usually involves discussion of flour type, gluten development, and protein content.

Food blog April 2015-0572Food blog April 2015-0574Food blog April 2015-0580The main debate when it comes to banh mi bread is the texture and composition. Though I’ve had these sandwiches on bread ranging from baguette or french roll to essentially a toasted hot dog bun, the ideal is a crisp, thin crust with a soft interior. The phrase “shatteringly crisp” is used with reverence. The internal structure should be light and soft and more delicate than the spongy chew of ciabatta. Rice flour is supposed to be the answer. Because it does not contain gluten, it will not result in the formation of the chewy texture a well-kneaded baguette can produce. However, food writer Andrea Nguyen, who knows a thing or two about Vietnamese food, asserts (assertively, even!) that rice flour is not a necessity, and in fact may even hinder the lightness and delicacy of the bread interior. However, without access to her cookbook or the combination of vital wheat gluten and vitamin C tablets she makes use of, I stuck with my usual method: a combination of promising-looking recipes plus my own instinct. Despite the to-rice-or-not-to-rice controversy, I decided to use a small percentage of rice flour. After all, I had some. Why not give it a shot.

Food blog April 2015-0581I also decided, veering far from tradition, to add some rye flour to the mix. According to Simply a Food Blog, a little bit of rye flour adds a compelling flavor and some additional sugars to the dough for the yeasts to gobble up. I like the gentle toastiness of rye flour, so I incorporated some of that as well.

Food blog April 2015-0586Food blog April 2015-0588In addition to the Simply a Food Blog suggestion, I also used Rice and Wheat and A Bread A Day in my recipe creation, and ended up with an ingredient list and procedure that created something much closer to a sausage roll or a bun than a crisp crusted baguette.

Food blog April 2015-0589Yes, I’ll admit, these are not the banh mi wrappers of your dreams (well, at least not if you are bivouacked in the “shatteringly crisp” camp). Though these rolls have a thin crust, it is just enough for the teeth to play with, not a staggering crunch you can hear across the table. At first I was perturbed by this, but it only took splitting one open, still warm and fluffy from the oven, and slicking the interior with butter to show me that while this might not be a traditional Vietnamese baguette, it is a delicious piece of bread. Though I filled ours with the meatballs I’ll show you next week, it would be more than welcome at any summer grilling event, whether your intended fillings are kielbasa or veggie dogs.

Food blog April 2015-0590As I thought more about this issue of inexactness, I decided I didn’t care. After all, this is my sandwich. A thin crust that shatters upon impact is fine, but my version keeps the roof of your mouth unscraped and your placemat a lot less crumb-scattered. As Joe Pastry pointed out just recently, tender bread is a boon for a sandwich. Mine offers a pleasant depth of flavor from the addition of the rye flour, and its soft, fluffy interior is exactly the kind of squashy that I favor in a sandwich. Besides (I compellingly convinced myself), the crisp crunch of the vegetables stacked up between the halves of the roll provide sufficient textural contrast. Why not, then, surround them with something a bit on the softer side?

Food blog April 2015-0594These rolls are best just cooled from the oven. They are okay on the second day, but I highly recommend toasting them for consumption on any day following the one they were made.
Food blog April 2015-0596

Banh Mi Rice Rolls
Makes 8
1 tablespoon active dry yeast
1 teaspoon sugar
2 cups (16 ounces) lukewarm water
1 cup rice flour (about 5 ounces)
½ cup rye flour (about 2.5 ounces)
2 teaspoons salt
3-4 cups all-purpose flour (we don’t want the extra chewiness of bread flour)
2 tablespoons soft butter
  • Combine the yeast and sugar with the water and stir, then let sit for 5-10 minutes until it is bubbly and smells like warm bread.
  • In the bowl of your stand mixer, combine the rice flour, rye flour, butter, and water and yeast mixture with the paddle attachment. It will be very, very wet – basically a liquid. Let it sit for 10-20 minutes – rice flour needs extra time to absorb water. It will seem a bit floppier when you return.
  • After 10-20 minutes resting time, add 2½ cups of the all-purpose flour and all of the salt, then mix with the dough hook attachment on medium speed to form a soft but not overly sticky dough. After about 5 minutes, the dough will start to gather into a ball and stretch to slap the sides of the bowl as it whizzes around. If the dough is not coming together after about 5 minutes, add an additional ¼ cup of flour as needed. I ended up with a little more than 3 cups of all-purpose flour in the mix. Knead on medium speed until the dough is smooth and elastic, a total of 7-10 minutes.
  • Oil the bowl and turn the dough ball over to lubricate on all sides, then cover with plastic wrap and let rise until doubled; 45-60 minutes. In my warm home office, it only took 45 minutes.
  • Turn the risen dough out onto a board dusted with rice flour and cut into 8 equal pieces. Roll each into a ball, flatten into a disc with the heel of your hand, then let rest 5-10 minutes.
  • Roll each flattened piece of dough into an oval about 8 inches long by 6 inches wide. Working from the long side, roll up each oval into a cylinder of about 8 inches long (the dough will want to stretch – try to keep it at the 8 inch mark). Pinch the exposed edge into the side of the cylinder to create a seam.
  • Place each dough cylinder seam-side down on a parchment lined baking sheet. (If you don’t mind the buns touching, all 8 will fit on the same sheet. If you want them to remain separate, don’t put more than 4 on the same baking sheet). Cover lightly with plastic wrap or a clean kitchen towel and let rise 30-45 minutes until puffy. To determine whether they’ve risen enough, poke gently; the depression made by your finger should recover about halfway – if the depression disappears completely, it has not risen long enough.
  • While the dough is rising, preheat the oven to 450F with a baking stone inside for even heating. Prepare a spray bottle full of water to spritz the loaves.
  • When risen, slash the loaves at a 45 degree angle (or angle of your choosing; mine are clearly not 45) with a razor blade or serrated knife, then spray lightly with water and quickly place into the preheated oven. Bake for 2 minutes, then spray loaves again lightly with water. Bake 3 minutes more, then spray lightly again.
  • Reduce the oven temperature to 400F and bake an additional 10-15 minutes, or until loaves register 200-210F inside.
  • Let cool at least 10 minutes before splitting, spreading, or just going in for a big bite.

Cheddar Dill Twists

Food blog April 2015-0691It seems fitting that I should do my first post along with the Twelve Loaves bakers during a month that celebrates cheese. On any given day, you can find between three and six different kinds of cheese in the tiny drawer in my refrigerator. My last two posts have featured it as a key ingredient, and in both I’ve waxed eloquent about using not just some, but MOAR. I seriously love cheese. It’s the primary reason I could never go completely vegan. I could give up meat with very little trouble (though I would miss bacon, I must admit). I could wave a cheerful goodbye to fish, to beef, to chicken, and stock my cupboards with vegetable broth and my freezer with coconut based ice cream. I already use soy rather than regular milk on my cereal and in my weekend chai. But I would have serious problems bidding farewell to cheese.

Food blog April 2015-0666Food blog April 2015-0670Food blog April 2015-0674Even though I know this isn’t true – they had their ingredient chosen long before I came into the picture – it feels almost like the Twelve Loaves baking group planned this month’s post just for me. Bake with cheese. Yes. I. Will. Cooking with cheese is exciting because the ingredient offers such variety. Do you want something mild, or so sharp it makes your mouth water? Do you want a familiar flavor, or something tart or funky or stinky like last month’s socks? And then there’s texture. Cheese already runs the gamut from so soft it seems already melted to the firmness of parmesan that requires a knife point to dismantle. Add to that the different reactions it has to heat: some cheeses sigh into liquid. Some pull into foot-long strings. Some – and this is one of my favorite results – some flatten and solidify and transform into crunchy little cheese crisps suitable for nothing fancier than jamming into your mouth as quickly as you can.

Food blog April 2015-0677Food blog April 2015-0680With all of these options to work with, I was surprised by how quickly I landed on a choice. I’ve been playing around with a pairing of dill and cheddar, and this seemed like the perfect opportunity to showcase it. Dill goes really well with yogurt, so for a different source of fat and moisture, I decided to use some thick, tangy Greek yogurt instead of butter in my dough. The tartness of the yogurt would be nice with the rich sharpness of the cheddar. And since I like to be fancy, I decided to make little twists, rather than a standard loaf.

Food blog April 2015-0681 Food blog April 2015-0682 Food blog April 2015-0683 Food blog April 2015-0684 Food blog April 2015-0685Guys, these are definitely the right thing to do. The dill-cheddar-yogurt trio is a chamber group on a good night. They bounce off each other in such a lovely way. But it can’t be denied that the star here is the cheese. It melts into little orange pockets while the dough turns into bread, and the smell of it while cooking makes a better homecoming than much else I can think of. I made one tray of twists with cheese sprinkled on top and one without, just to see which was better. As you might expect, more cheese won the day. It drips over the edges into crisp little crackered pieces you can snap off and crunch through before you dive into the main event.

Food blog April 2015-0687 Food blog April 2015-0689I had the idea that these would make fantastic extra-large tea sandwiches: halve them into long pieces, toast lightly, slather with cream cheese, then layer with long strips of cucumber. Cheese on cheese is rarely a bad thing, and the cucumber would nod to the dill and provide a crisp freshness and a lightness for the perfect spring lunch. Alas, when I reached into the fridge drawer jammed with vegetables, not cheese, my cucumbers were past their prime. So I had to settle for cream cheese alone, with a side of Caesar salad. I can’t say I ended up disappointed.

Food blog April 2015-0699Serving suggestion: these are perfect all on their own straight out of the oven. But they do make a nice, roll-sized vehicle for anything sausage shaped, and I can’t see many people objecting to using this as the base for a good solid cheesesteak sandwich. If you really wanted to get decadent, the twists could be split lengthwise, spread with a garlic butter, and broiled into a dreamy take on garlic bread.

To capitalize on the tea sandwiches idea, you could make them even smaller, dividing into 16 or even 24 pieces, and creating miniature twists to serve as part of an appetizer spread with the requisite cream cheese and cucumber filling. I haven’t tested this smaller size so I can’t be sure how much to reduce the baking time – start with 12 minutes and go from there.
Food blog April 2015-0693

Cheddar Dill Twists
Makes 8 sandwich sized twists
2 teaspoons yeast
1 tablespoon brown sugar
½ cup lukewarm milk
½ cup plain, unsweetened Greek yogurt (you could use regular yogurt too, but you might need additional flour)
1 large egg
2 – 2½ cups bread flour
1 teaspoon salt
2 tablespoons finely minced fresh dill
1 cup grated cheddar cheese, if not topping the twists. 1-½ cups grated cheddar, divided, if topping the twists
  • In a bowl or a 2-cup glass measuring cup, combine the yeast, brown sugar, and lukewarm milk. Stir, then set aside for 5-10 minutes until bubbly and smelling of bread.
  • In the bowl of your stand mixer, or another large bowl, stir together the egg and the yogurt (use the paddle attachment, if you are working with a stand mixer). Add in the milk and yeast mixture, stirring well, then add 2 cups of the flour, the salt, the dill, and 1 cup of the cheddar cheese. Mix until the dough comes together into a rough ball.
  • Switch from the paddle attachment to the dough hook and set to medium, if you are using a stand mixer. If you are mixing by hand or with a wooden spoon, turn the dough out onto a floured board. In either case, knead into a smooth, slightly sticky ball with some elasticity. If it seems too sticky to work with, add more flour 2 tablespoons at a time. This unfortunate stickiness may increase as the cheese softens; don’t despair.
  • Plop the kneaded dough in an oiled bowl (I just spray down the sides of my stand mixer bowl and flip the dough ball over a few times), cover tightly with plastic wrap, and leave it to rise for 60-90 minutes, until doubled. Punch it down by gently pressing your knuckles into the center, then let it rest for 5 minutes.
  • Turn the dough out onto a lightly floured board and divide into 8 equal pieces. Using the palms of your hands, roll into 18-inch long ropes. As you roll, the middle will get thin and the ends will plump up. Prevent this by pushing outwards toward the ends of the rope (so your hands are moving slightly away from each other) as you roll.
  • Fold the rope over into a long horseshoe shape, then twist or “braid” it by lifting one side over the other in 3 or 4 tight twists, as in the photos above. When you reach the ends, crimp them together and tuck them under for neatness.
  • Transfer each twist to a baking sheet lined with parchment paper, settling them at least 2 inches apart, and let rise again for 45-60 minutes, until noticeably plumped but not quite doubled.
  • At least 30 minutes before cooking, preheat the oven to 350F.
  • When you are ready to bake, if you want to top the twists with cheese, sprinkle the remaining ½ cup of cheddar in equal amounts over each – this will be about a tablespoon per twist.
  • Bake at 350F for 18 minutes, until the twists are golden and the top layer of cheese is melted and slightly crisp.
  • Cool for 5-10 minutes, if you can, before removing to a rack or directly to your mouth.


#TwelveLoaves is a monthly bread baking party created by Lora from Cake Duchess and runs smoothly with the help of Heather of girlichef, and the rest of our fabulous bakers.

Our host this month is Robin from A Shaggy Dough Story, and our theme is CHEESE. For more bread recipes, visit the #TwelveLoaves Pinterest board, or check out last month’s mouthwatering selection of #TwelveLoaves enter last month’s Italian Breads!

If you’d like to bake along with us this month, share your CHEESE bread using hashtag #TwelveLoaves!


Mushroom Puttanesca Calzone

Food Blog March 2015-0498It would seem that I’m developed a bit of an obsession with well-oiled, aggressively seasoned mushrooms, patiently pan-roasted until deeply, deeply browned and edging toward crisp. Still bouncy on the inside, these golden crusted, meaty little nuggets are finding their way into my cooking more and more frequently. This would be, I think, an entirely good thing in terms of health and waistlines, except I keep drowning them in small mountains of cheese. Last week it was the quintessential quesadilla (which, if you’re wondering, is also stellar in taco format with the addition of tempeh, per my friend S.). This week, a calzone filled with deeply caramelized mushroom quarters, a chunky adaptation of my favorite puttanesca sauce, and of course, the requisite cheese all folded up and pinched inside a swollen half moon of dough.

Food Blog March 2015-0464Food Blog March 2015-0479I love a good calzone, but N. is a little resistant for the same reason he is resistant to lasagna: the not-smooth-enough texture of ricotta cheese. Its strange milky loyalty to both savory and sweet applications is not quite cheese-flavored enough, and the slight graininess of the tiny, tiny residual curds lingering in there weirds him out. Fortunately, in this case as with most cheese-related conflicts, the answer is more. Mashing a healthy dose of grated mozzarella in with the ricotta adds a stronger cheese flavor and ups the salt content, which I think ricotta often needs. Here, I’ve bumped up the flavor and interest even more by folding in a small pile of chopped herbs and some lemon zest. This provided welcomed brightness against the deep earthy mushrooms and puttanesca.

Food Blog March 2015-0471Food Blog March 2015-0476The trick with calzones, as you might expect, is moisture. Because you are sealing up this lovely little packet, it should be baked at a lower temperature than a pizza – the dough tends to be a bit thicker, and because half of it is on the inside, it needs more time to cook all the way through without burning the outside. But what you’ve stacked up inside also has more time to release its own juices, which can result in a bottom crust which is a bit, well, mushy is such an ugly word. Let’s call it soft. Ours certainly was. Calzone dough should be chewy and slightly pillowy but still, there’s a reason it’s called crust.

Food Blog March 2015-0481Food Blog March 2015-0482My thoughts on preventing this are as follows: ensure you are using only the chunky vegetable bits from the puttanesca sauce for the inside. Save the sauce component to spread over the top of the calzone. Additionally, if you have the time, drain the ricotta lump in a strainer lined with cheesecloth or paper towels. Even an hour would allow some of that moisture to escape, which means it would end up in the sink rather than the bottom crust of your dinner.

Food Blog March 2015-0484Food Blog March 2015-0485Food Blog March 2015-0488But even if you do end up with a bottom crust that isn’t as, well, crusty as you might like, you won’t be hurting for flavor. Mushrooms and ricotta – particularly a ricotta jazzed up with mozzarella and aromatics – play incredibly well together, and somehow both hold up to the briny strength of the sauce.
Food Blog March 2015-0492It’s a good dish, then, with which to bid March farewell: still those dark, warm notes of winter, but a lovely springy freshness too, all wrapped up in a chewy, melty package, and just as delicious the next day.

Food Blog March 2015-0499

Mushroom Puttanesca Calzone
Serves 6-8
16 ounces pizza dough, homemade or store bought
8 ounces crimini or button mushrooms, stemmed and quartered
2 tablespoons olive oil
pinch of pepper
sprig of thyme (optional)
4 ounces ricotta cheese, drained if desired
8 ounces (1 cup) low moisture mozzarella cheese, grated and divided
2 tablespoons fresh parsley, minced
1 tablespoon fresh basil, minced
pinch of salt
1 teaspoon lemon zest
For sauce:
2 tablespoons olive oil
4-6 cloves of garlic, minced
1 tablespoon capers, minced
¼ cup coarsely chopped kalamata olives
2 anchovy fillets
pinch of red pepper flakes, to taste
1 teaspoon dried basil
½ cup dry red wine
8-10 ounces diced canned tomatoes, with their juice
  • On an oiled pizza pan, spread out the pizza dough in a rough circle 12 inches in diameter. If it springs back, no worries; let it rest for ten minutes and then stretch it out again. At least half an hour before you are ready to bake, preheat the oven to 375F with a rack in the middle position.
  • In a large skillet, heat the 2 tablespoons olive oil over medium heat. Add the mushrooms, the pinch of pepper, and the thyme sprig if desired and cook until the mushrooms are well-browned. This should take 8-10 minutes with occasional stirring, during which time the mushrooms will suck up the oil, release their liquid, and then accept some of that liquid back again.
  • While the mushrooms cook, combine the ricotta and ½ cup of the mozzarella cheese in a small bowl with the fresh parsley, fresh basil, lemon zest, and pinch of salt to taste. I find a rubber spatula works well for this. Reserve the remaining ½ cup of mozzarella for the top of the calzone.
  • When the mushrooms are done, set them aside in a small bowl and discard the thyme sprig, then put the skillet back over medium heat. Add the remaining 2 tablespoons of olive oil and the minced garlic. Saute for 1-2 minutes, until the garlic is soft and aromatic and edging toward golden. Add the anchovy fillets and mash them around with a wooden spoon to break down. Scrape in the capers and olives and saute for an additional 1 minute.
  • Toss in the red pepper flakes, the basil, and the ½ cup of red wine and bring to a simmer. Add the tomatoes with their juice and simmer over medium heat for 15-20 minutes, until the liquid has reduced a bit and the flavors are well combined. Remove from heat and let cool for a few minutes.
  • To assemble, spread the cheese mixture over half of the stretched dough, leaving a healthy inch margin around the edge. Pile the mushrooms on top of the cheese, and then use a slotted spoon to add the chunky portions of the sauce – the tomato and olive and caper bits – on top of the mushrooms (again, keep and respect that inch margin).
  • With slightly moistened or lightly oiled hands (especially if your dough is sticky), grab the edge opposite the area you’ve been filling and pull up, folding over to meet the half-circle edge along your margin. You’ll form a half-moon shape with the dough. Crimp the edge by pulling the bottom layer of dough up slightly over the top layer in a series of small segments. Press and pinch each one tightly into the top layer of dough about a half inch from the edge. This will form a seal to prohibit the top from opening up during baking. It also looks pretty. Because we care about that.
  • With the calzone fully sealed along the circular edge, brush the top with some of the remaining puttanesca sauce, then sprinkle on the remaining ½ cup of mozzarella cheese. Carefully place into the preheated oven and bake for 30-35 minutes, until the cheese on top is melted and crusty, and the dough is golden and cooked through. After removing from the oven, wait 5-10 minutes before slicing, then serve hot with any remaining puttanesca sauce, if desired.

Olive Ciabatta for #TwelveLoaves February

Food Blog February 2015-0394The February assignment for Twelve Loaves left me stumped for a few weeks. Olives. What bread would I bake with olives? I couldn’t think of much that fit and sounded delicious. I mean, there was olive ciabatta of course, but apart from that… bagels? Pull-apart bread? Nothing sounded too inspiring except… oh. Well. I could make olive ciabatta. Sometimes the first ideas – the immediate ideas – are the best.

Food Blog February 2015-0375I tried making ciabatta once before, in the early days of my dough challenge. Though the rolls tasted fine, they were not the crunchy crusted, flour dusted, chewy, bubbly, homely smash of a loaf that makes a good ciabatta what it is.

Food Blog February 2015-0370Ciabatta is a reasonably recent Italian response to French baguette, and means “slipper,” which refers to the elongated, flattish shape – I imagine a well-loved pair of house slippers worn by an old man as he shuffles through his day. The lovely contrast of ciabatta loaves – the crisp exterior hiding a honeycomb of fat holes in a lovely chewy center – is achieved through several challenges: an overnight ferment of flour, water, and a touch of yeast called a biga (I kept saying it out loud. Biga. Bee-gah. Beeeeeegah), an extremely wet dough, and quite high oven heat.

Food Blog February 2015-0376For mine, I settled on the extremely clear directions from the kitchn. I’ve made only very minor adaptations, adding olives (as you might expect), and a glug of olive oil to pump up the olive flavor and add a touch of richness. A bit of fat in the loaf also prevents it from going stale quite so quickly, though you likely won’t need to worry about these loaves hanging around long.

Food Blog February 2015-0378Food Blog February 2015-0379Apart from the biga, which transforms overnight from a strange, unappealing paste to a bubbling puddle that smells vaguely alcoholic and is quite clearly alive, this bread follows the standard process: knead, rise, shape, rise again, bake. Here’s the deal, though. Above I mentioned “extremely wet dough.” I mean it. I wouldn’t make this bread without a stand mixer. Though it collects together a bit around the dough hook during its long knead, it never forms a real ball, before or after the rise. When you dump it out onto a board, it sticks to everything. I mean everything. That whole dusting of flour that makes a ciabatta so recognizable? That’s not aesthetic. That’s necessary. “Well-floured board” has never been such a serious statement of setting.

Food Blog February 2015-0381Fortunately, I’ve been making sourdough lately with a fairly wet dough, so the look of the olive-speckled, bubbly mass after three hours of expansion didn’t unnerve me too much. When it came time to shape the loaves (I opted for eight sandwich-sized rolls and one large loaf), I picked up the first one and just laughed. “Shaping” is a word you can use, but without a banneton or brotform of some sort, the dough just sort of sighs into the form it wants to be and stays there, a slightly contained puddle oozing its way threateningly toward the edges of the parchment paper you’ve so carefully flopped it onto. When I handled the rolls, in texture they reminded me bizarrely of – don’t laugh – a fresh oyster or an egg yolk sitting in my hand.

Food Blog February 2015-0383Despite the dicey textural proceedings, as bread so often and comfortingly does, it did what it was supposed to do in the oven. The loaves didn’t spring up all that high, but they did retain a network of lovely bubbles, and they did develop that moist, almost tacky texture that I, at least, require in a good ciabatta.

Food Blog February 2015-0387When I considered how to serve these, after I got past the urge to just tear into them and eat four or five (I stopped at one), I decided to go back to the first, unsuccessful attempt. In our previous, not-ciabatta meal, I’d used the rolls as vehicles for salmon burgers inspired by an old favorite restaurant in Eugene. Salmon burgers, then, it would have to be: a mixture of fresh and smoked salmon kneaded with egg and flour to help hold them together, parsley, a bit of garlic, and some salt and pepper. The olives in the bread were a nice addition, lending some light brininess to the burger appropriate to its marine origins.

Food Blog February 2015-0396I have to admit, though, as civilized as we were with those initial rolls, the remainder got packed into a Ziploc bag, stowed in the backseat of the car, and torn into just as they were when we needed a snack during this past weekend’s mini vacation. And that way – a day old, unheated, unadorned – they were just as good. Food Blog February 2015-0402

Olive ciabatta
Makes 2 large loaves, 16 sandwich-sized rolls, or 1 large loaf and 8 rolls
Adapted (barely) from the kitchn
For biga:
4 ounces (1/2 cup) room temperature water
½ teaspoon active dry yeast
5 ounces (about 1 fluffed cup) all-purpose flour
For dough:
17 ounces (just over 2 cups) water
1 teaspoon active dry yeast
Rested biga
20 ounces (about 4 fluffed cups) all-purpose flour
2 teaspoons kosher salt
1 tablespoon olive oil
1 cup drained, rinsed, and coarsely chopped kalamata olives


  • To make the biga, combine the ½ teaspoon of yeast and the 4 ounces of water in the bowl of your stand mixer. Stir and let sit to dissolve for 5-10 minutes. Add the flour (I highly recommend using weight measurements, as does the kitchn recipe) and stir by hand or with the paddle attachment for 1-2 minutes to start the gluten chains working. It will form a thick gluey goo. Cover with plastic wrap and let it sit at room temperature overnight.
  • The next day, the biga will look bubbly – rather like the top of a pancake when it’s ready to flip – and smell slightly fruity or alcoholic.
  • For the ciabatta, combine the 17 ounces of water and 1 teaspoon of yeast in a small bowl and stir to combine. I used my 2-cup glass measuring cup for this. Let sit for 5-10 minutes until the mixture is slightly bubbly and smells like bread. Then, dump the yeast and water into the rested biga and use a spoon or your hands to break it up a bit – this will feel disgusting but it’s necessary to ensure smooth integration.
  • Add the 20 ounces of flour, the salt, and the olive oil, and stir to form a thick, wet dough (though it’s more like a batter). Leave it to rest for 10-20 minutes to give the water time to hydrate the flour.
  • After 10-20 minutes, add the chopped olives to the dough/batter and knead on medium speed with the dough hook attachment for 15-18 minutes. On my stand mixer (brand KitchenAid), this was level 6. As the kitchn notes, keep an eye on your mixer, as it tends to walk its way across the counter at this speed.
  • The dough will remain very wet and fairly loose, sticking to the bowl, though the kitchn’s procedure says it will start to pull away from the sides of the bowl and begin slapping the sides around the 7 minute mark. Mine didn’t start this slapping pattern until I turned up the speed to medium-high for a minute or two. (If your machine seems to be heating up a lot and you are worried about it, pause halfway through the knead and let it cool down a bit – this won’t hurt the dough at all; it will simply collapse back into a wet batter while you wait.)
  • After 15-18 minutes, the dough will still turn into a loose puddle when you turn off the machine, but it should be smooth and shiny with bits of olives scattered through it. Cover it with a layer of plastic wrap and set it in a slightly warm place (70-75F) for 2-3 hours, until it triples in size.
  • Before we get into the messy part, preheat your oven to 475F and, if you have one, stow a baking stone inside. If you don’t, turn a cookie sheet upside down and place that on one of the racks instead. I used one baking stone and one inverted cookie sheet.
  • Now, here’s where the “well-floured surface” comes in. Scrape and pour the dough out of the bowl onto a very well-floured board, trying not to deflate it too much (we want those bubbles), then set two pieces of 9×13 inch parchment paper near your work surface. Sprinkle another layer of flour on the top surface of the dough. Use a pastry scraper or a pizza cutter, again dusted with flour, to cut the dough in half. If you are making rolls, cut each half into the desired number.
  • With floured hands, gently but quickly scoop the loaves or rolls one at a time from the board to the parchment paper. To achieve a dimpled, textured surface, press your fingers lightly into the dough. This will also flatten it into the expected “slipper” shape.
  • Let the loaves or rolls rise, uncovered, 30-40 minutes. They will puff a bit, but more out than up, and more big bubbles may develop.
  • When it’s time to bake, use the parchment sheets to slide the loaves right onto the baking stone or inverted baking sheet, parchment and all. Keeping them on the parchment ensures their bubbly structure won’t be disrupted by the relocation. Bake 20 minutes for rolls, 25 minutes for loaves, until golden brown, lightly crusty, and puffed. Remove from parchment to a wire rack to cool.

Grapefruit Bars

Food Blog February 2015-0311It’s citrus season. The trees are heavy. An amble through my neighborhood right now would send you past oranges, mandarins, tangerines, lemons, and who knows what other hybrids and splices, all sagging on their branches, almost unable to bear their own weight. When we first moved here in the summer of 2012, I couldn’t believe how much fruit was wasted. Who in their right mind could let it just fall to the ground and rot? And yet as I type, my own lemon tree – sequestered away in its little corner of our backyard – is groaning with a load I can’t reach, its thick, sharp tangle of twigs protecting it from an invading ladder.

Food Blog February 2015-0237So when I cast about for a subject to post about this week, you’d think I would have wandered out and reached up, pulling what fruits I could reach down from my own harvest. But lemons aren’t my favorite. Oh I love a fresh, pulpy lemonade. I could eat lemon curd straight out of the jar. And a tiny, hangnail-puckering squeeze into a chicken or a bean dish is almost essential. But if I’m going to celebrate citrus season and its glories, I’m going to go with my favorite: grapefruit.

Food Blog February 2015-0303Sometimes maligned for its stubborn, bitter pith and its curious ability to render certain drugs either useless or too effective, it is my favorite because it is so complex. Sweet, tangy, sour, infernally juicy, it, and not orange juice, is my choice of beverage when I’m sick. I love the smell of the peel under my fingernails. I could eat grapefruit (and have) until my tongue stung and my lips swelled with the tartness.

Food Blog February 2015-0304But if grapefruit is a bit testy as a raw product, it’s equally challenging in a dish. There are (at least compared to other citrus fruits) a paucity of grapefruit dessert recipes out there, which has always seemed like a shame to me. The lovely play of sweet and sour with that beautiful color (I prefer a red grapefruit myself) seems perfect to match with sugar.

Food Blog February 2015-0306Tired of the standard, tried-and-true lemon bar, then, I set out to conquer a grapefruit version. My first time through yielded highly positive results – grapefruit zest and lemon zest in the shortbread crust, just for some extra bright punch, a silky smooth custard layer of pale salmon pink, and a careful dusting of powdered sugar across the top. A few adjustments, a bit less flour, and it would be perfect.

Food Blog February 2015-0307Of course, I didn’t take any photographs of this perfect little bar, because I was only experimenting. Yesterday, when I made the batch to share with you, I learned what can go wrong. You see, the basic recipe for a fruit bar like this is to make a shortbread crust – flour, butter, sugar, a breath of salt and maybe a little flavoring agent or two – and bake it just until it starts to turn a bit golden. Then you let it cool a bit until the butter, now molten, solidifies to make a firm layer. You pour on a mixture of fruit juice, eggs, more sugar, and possibly some kind of thickening agent (cornstarch, in this case), and then carefully lever the quavering thing back into the oven to cook through.

Food Blog February 2015-0308The middle step – letting the crust cool – is important. Yesterday I forgot about that step. Here’s what happens when you don’t: the beautiful, pale pink liquid filling plunges straight down, bursts through the crust, and breaks it up into floating islands of mush. You despair. You yell. You say some words that make you glad the windows weren’t open. Then you put it in the oven anyway, and even though what comes out isn’t exactly what you were intending, it still looks passable and it tastes perfect.

Food Blog February 2015-0312Curiously, as my grapefruit bars baked, the disrupted crust layer floated up above the (apparently) heavier “filling” layer. What came out of the oven looked more like a cake than the bars format I was expecting, but aside from making it a bit harder to cut (the grapefruit filling smooshes out as you press the blade down), they were fairly acceptable. Tangy, sweet, a play of light crunch and velvet curd, and a huff-inducing layer of powdered sugar over the top to keep you from inhaling too fast.

Food Blog February 2015-0314So the directions I’m providing you are what you should do. They will give you the expected format: a layer of shortbread-like crust on the bottom, topped by a thick layer of soft, slightly jiggly essence of grapefruit. Just don’t forget to let the crust cool. Unless you’d prefer, to echo the persnickety challenge of grapefruit itself, my upside down version. Food Blog February 2015-0320

Grapefruit bars
Makes 9×9 inch pan
Crust:
8 tablespoons butter (½ a cup or 1 stick), at room temperature, cut into cubes
½ cup sugar
1 cup all-purpose flour
¼ teaspoon salt
zest of 1 grapefruit (for extra punch in the crust, add the zest of 1 lemon as well)
Filling:
3 eggs
1 cup sugar
zest of 1 grapefruit
1 cup freshly squeezed grapefruit juice (2-3 large grapefruits)
4 tablespoons butter, at room temperature, cut into cubes
2 tablespoons cornstarch
powdered sugar, for dusting


  • Preheat the oven to 350F and prepare your baking pan: cut two 15-inch sheets of parchment paper and arrange them in a cross shape, then insert this cross shape into a 9×9 inch baking dish with the edges hanging out. This forms a kind of sling that will help you remove the bars from the baking dish without breaking them apart. Spray the inside of the dish (including the parchment paper) with non-stick spray, for extra insurance.
  • To make the crust, place the butter, sugar, flour, salt, and zest into a food processor and let run until the ingredients are combined and begin to clump together a bit.
  • Dump and scrape the clumpy crust bits straight into the prepared baking dish, and use your fingers or the smooth bottom of a measuring cup or a glass to gently but firmly tamp the crust down into an even layer.
  • Bake at 350F for 15-20 minutes, until it is pale golden brown and has a tender crust. If it puffs up while baking, stab it a few times with a fork to deflate it. Remove from oven and let cool for at least 10 minutes.
  • While the crust cools, make the filling. In the same food processor bowl (you don’t even have to wash it; so many of the ingredients are the same), place the eggs, sugar, butter, cornstarch, and grapefruit zest. Whiz to combine.
  • Add the grapefruit juice and whiz to combine again. The mixture will be quite liquid and will look curdled, but it will bake up just fine.
  • Note: there isn’t quite enough fat in this mixture to emulsify fully, which means if you leave it sitting for a while it will separate. Whir it up once more just before pouring onto the crust, or make and pour on immediately, and it should be fine.
  • Carefully pour the filling over the crust, then just as carefully, return it to the oven (the filling will slosh around a bit if you are too hasty about this) and bake for 40 minutes, or until the filling is just set. It may leave the barest sticky bit of grapefruit-y curd on your finger when you test it.
  • Let cool completely (seriously), then dust with a healthy layer of powdered sugar, if desired. If you dust it while hot, the bars will immediately absorb all the powdered sugar.
  • To slice for serving, use the parchment paper sling to hoist the whole square out of the baking dish onto a cutting board. Trim off the edges if you wish, then use a very sharp knife or a pizza cutter to slice into squares or rectangles of desired sizes. If the knife or pizza cutter gets gummed up along the way, dip it into a dish of hot water in between slices.