Pumpkin Oatmeal Rye Bread

2016-food-blog-november-0522I’ve felt pressed since summer, when it comes to posting – I’ve been, all too often, a negligent blogger. There are many reasons for this, especially in the past few weeks, but I realized part of the reason lately, and that reason is the absence of a group. I liked the challenge of a monthly bread assignment, and between the dissolution of the Twelve Loaves baking party, heat, and busyness, I haven’t been doing as much experimental bread baking as I used to. I looked back, for another cooking project a week or two ago, at the notes I’d made about Suzanne’s site in my Five Seed Loaves post, and was reminded of the idea for a bread – inspired by hers – that incorporated rye flour, and canned pumpkin, and maybe some rolled oats for heft. With a long weekend looming and the season of pumpkin upon us, it seemed like the right thing to do.

2016-food-blog-november-05012016-food-blog-november-0504The problem with canned pumpkin, as anyone knows who has grown frustrated by repeated testing of that pumpkin chocolate chip bread that just will not finish baking, is its incredible water content. It keeps baked goods amazingly moist, but it also is a sopping, wet, hard-to-deal-with mess if you aren’t careful, especially in dough.

2016-food-blog-november-32016-food-blog-november-0498Irvin helped me solve this problem, with the ingenious tip he discovered of cooking down your canned pumpkin first, to eliminate some of that pesky moisture and concentrate the flavor. A quick, hot fifteen minutes of near-constant stirring and folding results in a thick, deeply sunset orange pan of something the texture of thick frosting that adds flavor and richness, but won’t bog down your mixture. I foresee many pumpkin-centric baking projects in the future, now that I know this helpful little extra step.

2016-food-blog-november-0507
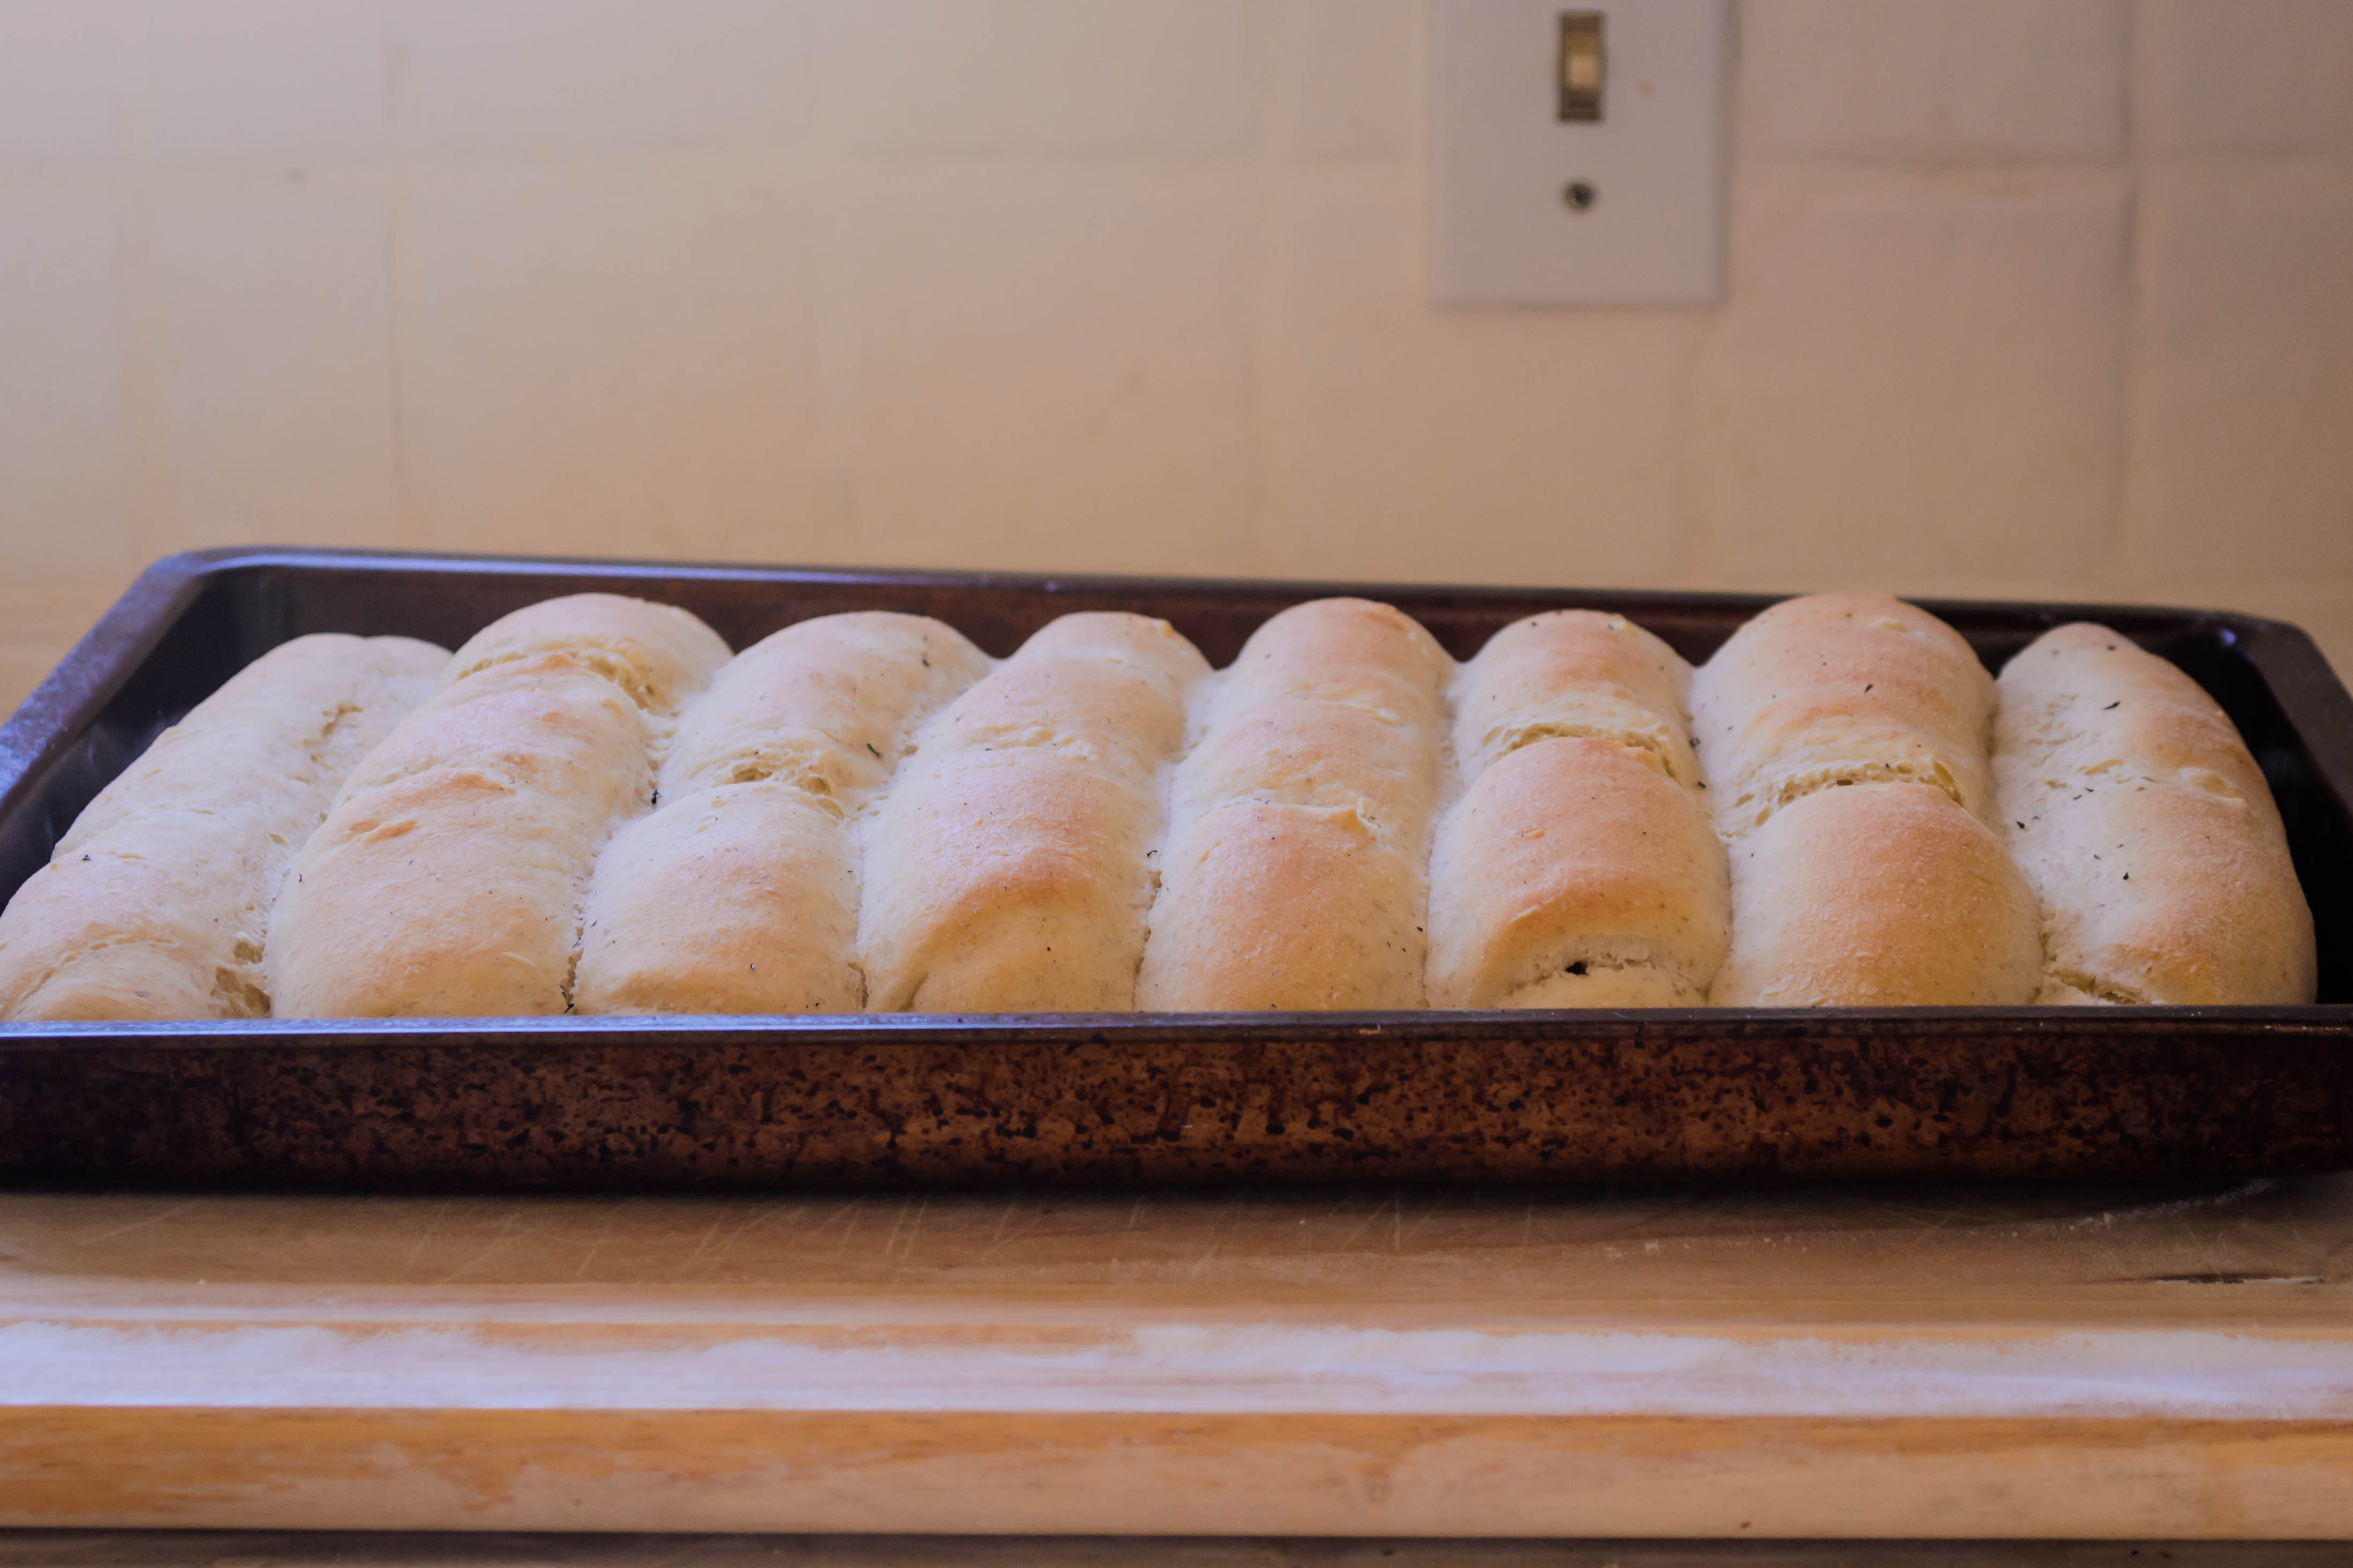
As with most breads, this one involves a substantial knead, a long first rise, a punch and a shape and – after a roll in some pumpkin seeds and rolled oats for texture and indication of predominant ingredients – a second rise before baking for a little over half an hour. These loaves incorporate some molasses for sweetness and color, and milk rather than water.

2016-food-blog-november-0525
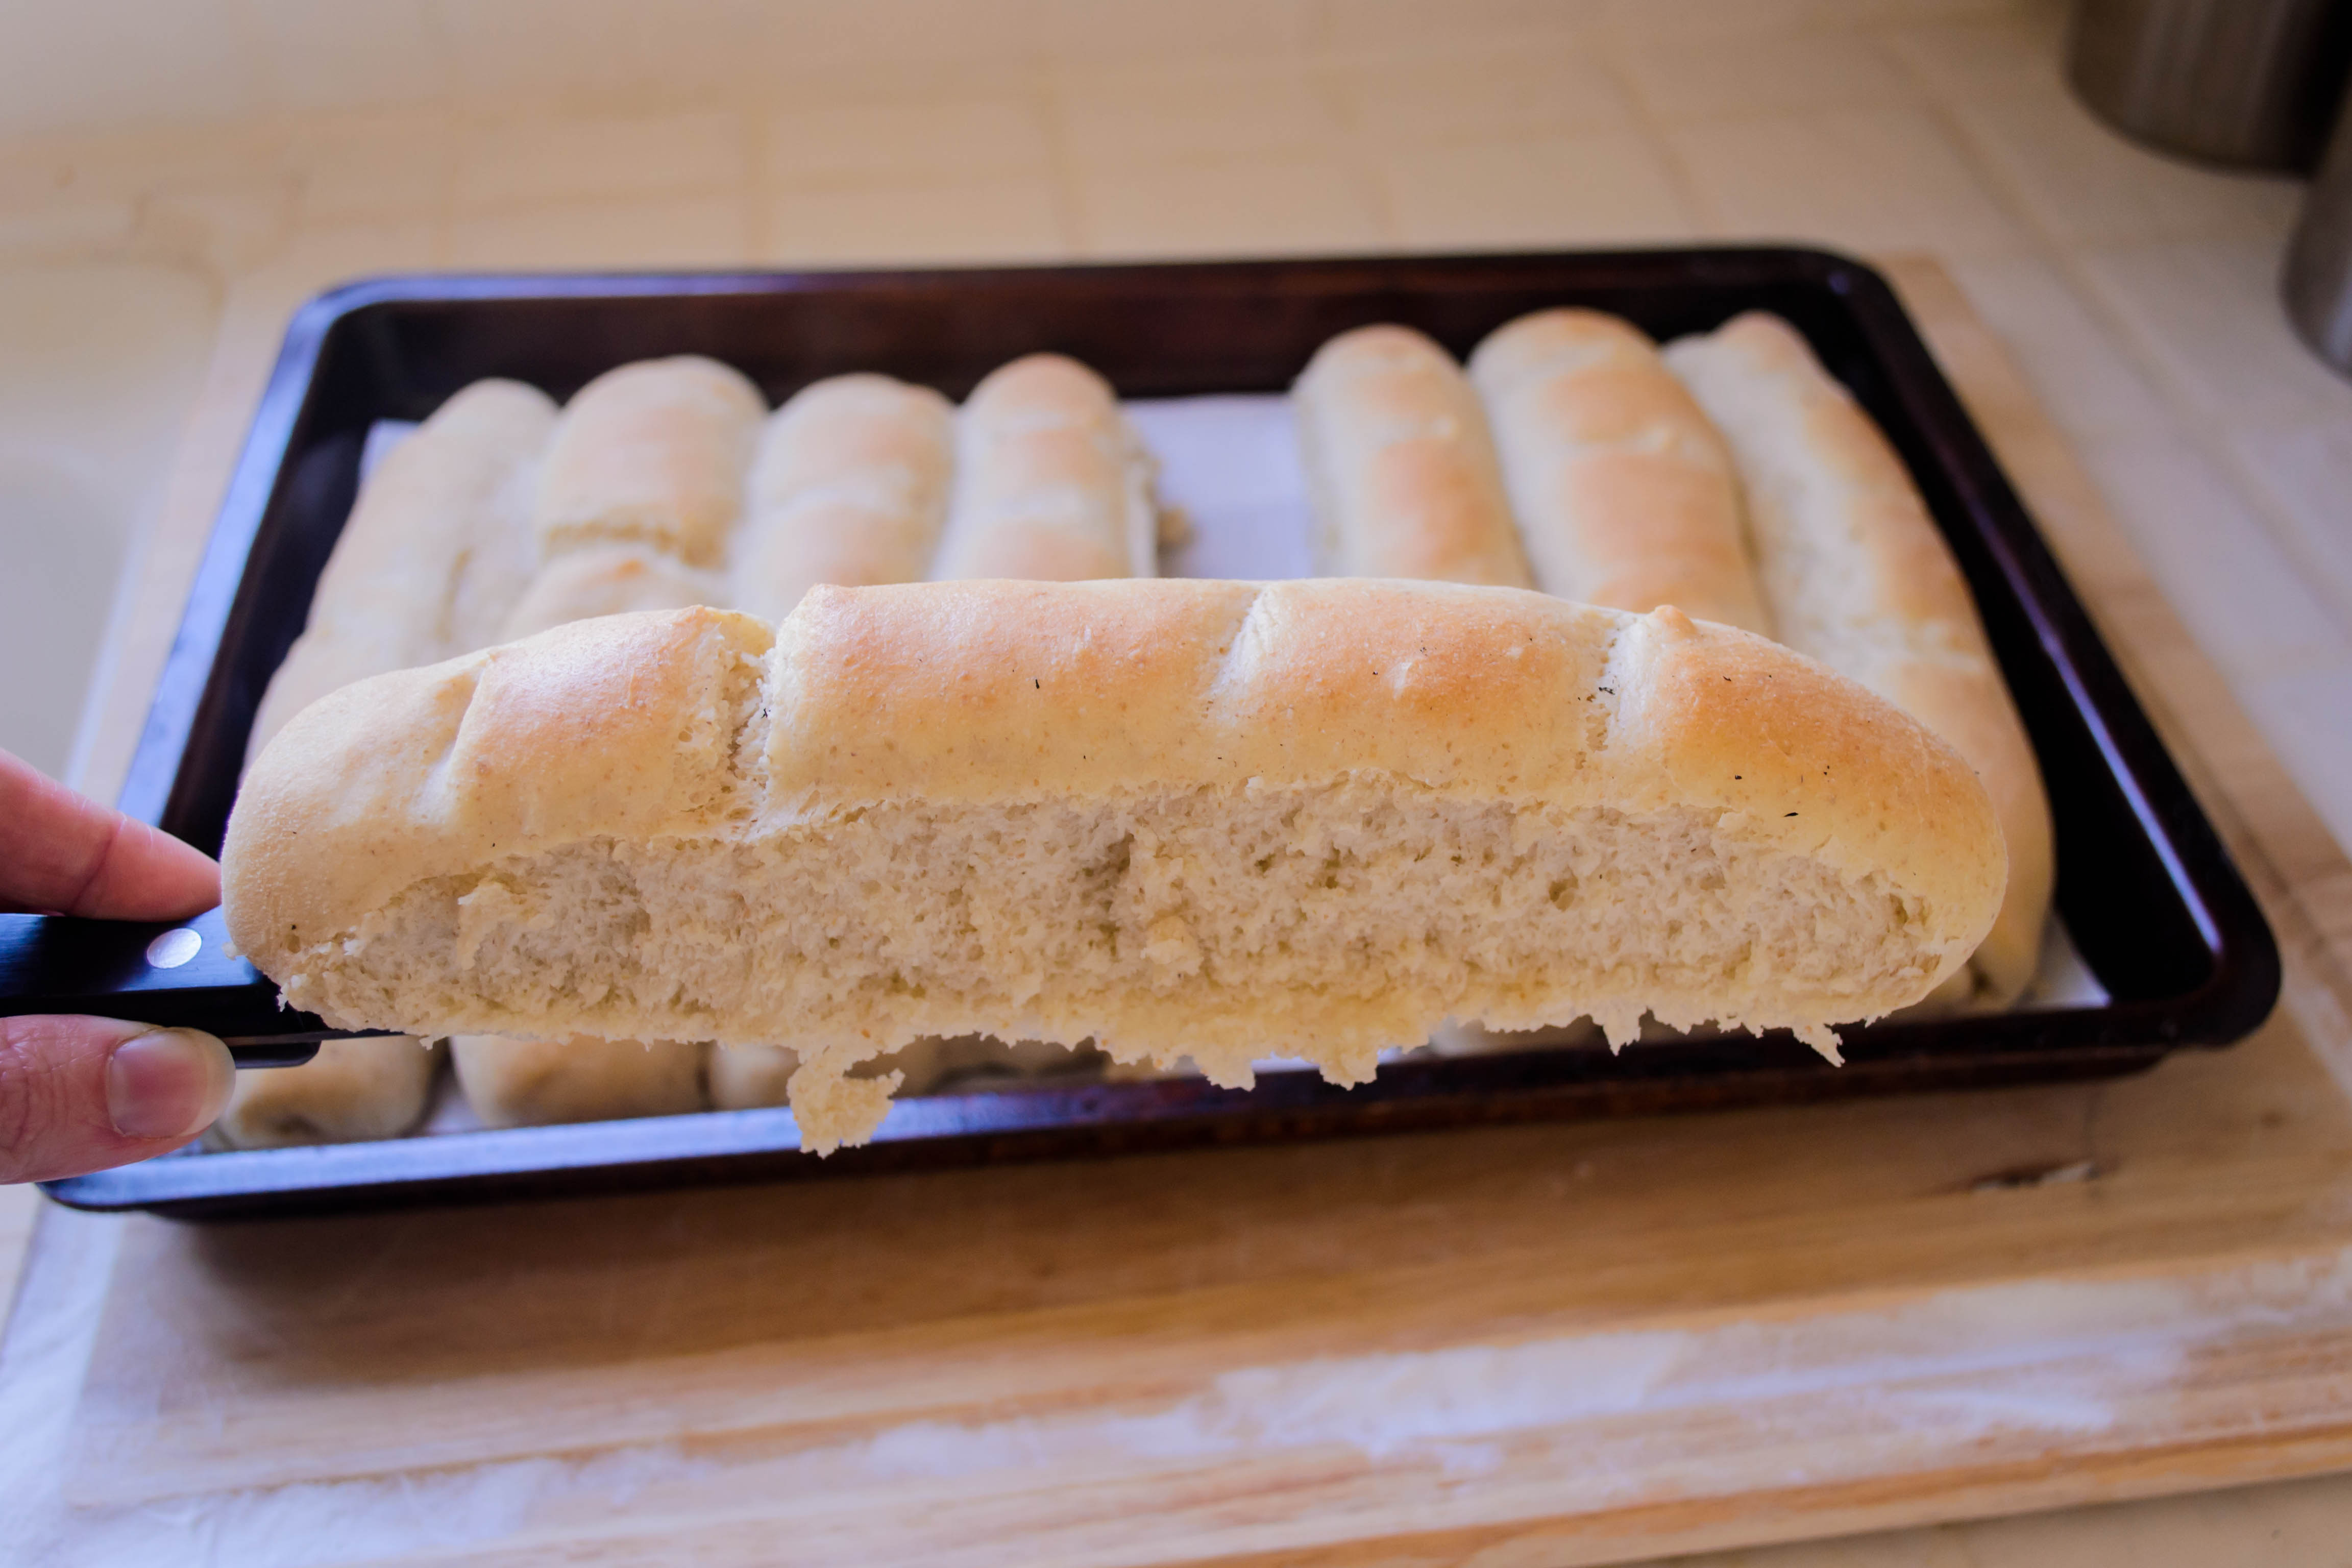
I must admit, the rye flavor doesn’t come through overly much here, though I suspect it added to the substance and of course to the lovely toasty color of the finished loaf. The pumpkin is mild as well, but you can taste it despite the absence of the telltale wintry spices that usually accompany this big squash. It’s satisfyingly orange inside (which makes photo editing tricky, by the way!), and it is a rich autumnal flavor I already want to taste again. The oats all but disappear into the dough as it bakes, and they contribute to the pleasant, spongy density of the thick slices you’ll be carving off to slather with cream cheese.

2016-food-blog-november-0529

Pumpkin Oatmeal Rye Bread
Makes 2 9×5 inch loaves (though mine were a little stubby from overly tight loaf shaping)
4-5 hours, approximately
15 ounce can of pumpkin puree (not pumpkin pie filling)
1½ cups warm milk
small pinch white sugar
1 tablespoon active dry yeast
1½ cups rolled oats, divided
2 cups dark rye flour
¼ cup molasses
1 tablespoon salt
2 tablespoons melted butter
2-3 cups bread flour
½ cup raw pumpkin seeds


  • Cooked the canned pumpkin in a skillet over high heat for 10-15 minutes, stirring frequently to avoid burning, until it is thick and reduced and takes on the consistency of a thick, spreadable frosting. You should wind up with only about ¾ cup left. Let it cool to room temperature.
  • While the pumpkin cools, combine the warm milk with the yeast and sugar, stirring briskly, then let sit for about 10 minutes to allow the yeast to activate. The surface of the milk will get bubbly and smell bread-y.
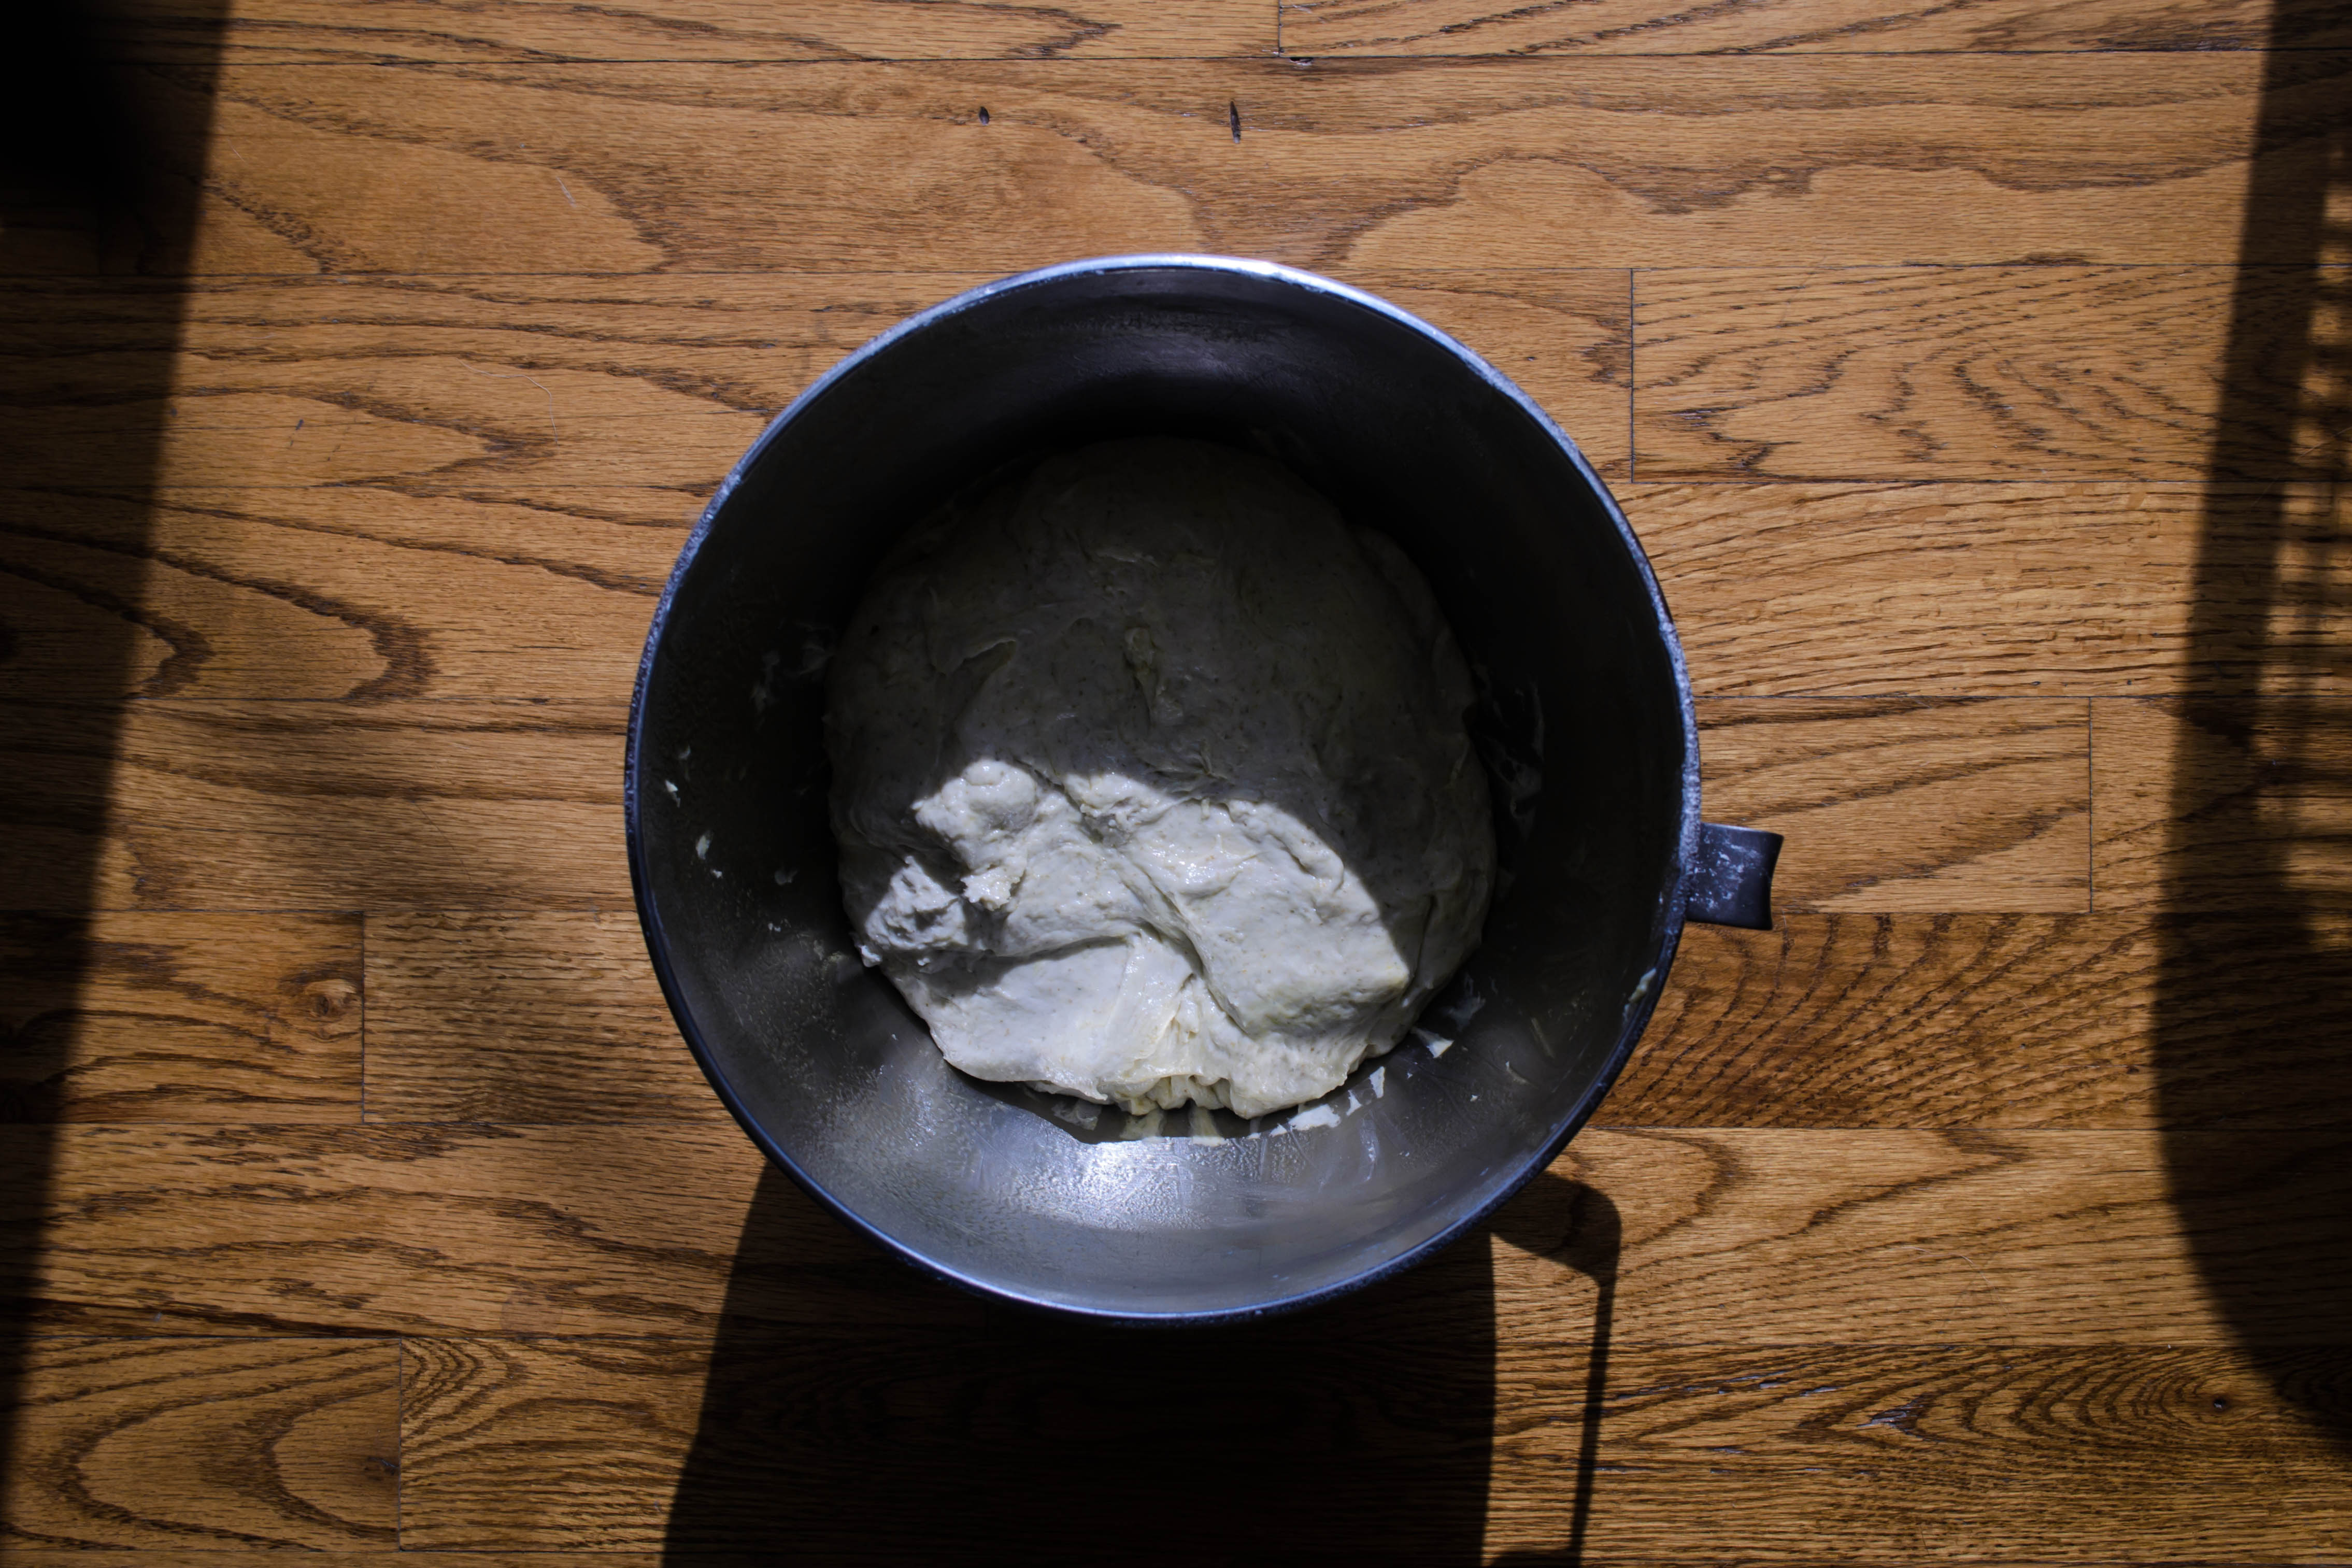
  • In the bowl of a stand mixer, combine the yeasted milk, 1 cup of the oats, the rye flour, the molasses, the melted butter, the salt, and the cooled pumpkin. Use the paddle attachment on low to medium speed to combine.
  • Now begin adding the bread flour ½ cup at a time, paddling in each addition, until a soft dough forms that pulls and tears away from the side of the bowl. You may not need the entire 3 cups of flour – I ended up using about 2½ cups total.
  • Switch to the dough hook and knead on medium speed for about 5 minutes. The resulting dough will be soft and sticky – a play-dough that clings to your fingers – but that’s okay. The oats need time to absorb the liquid so it will become less tacky as it rises.
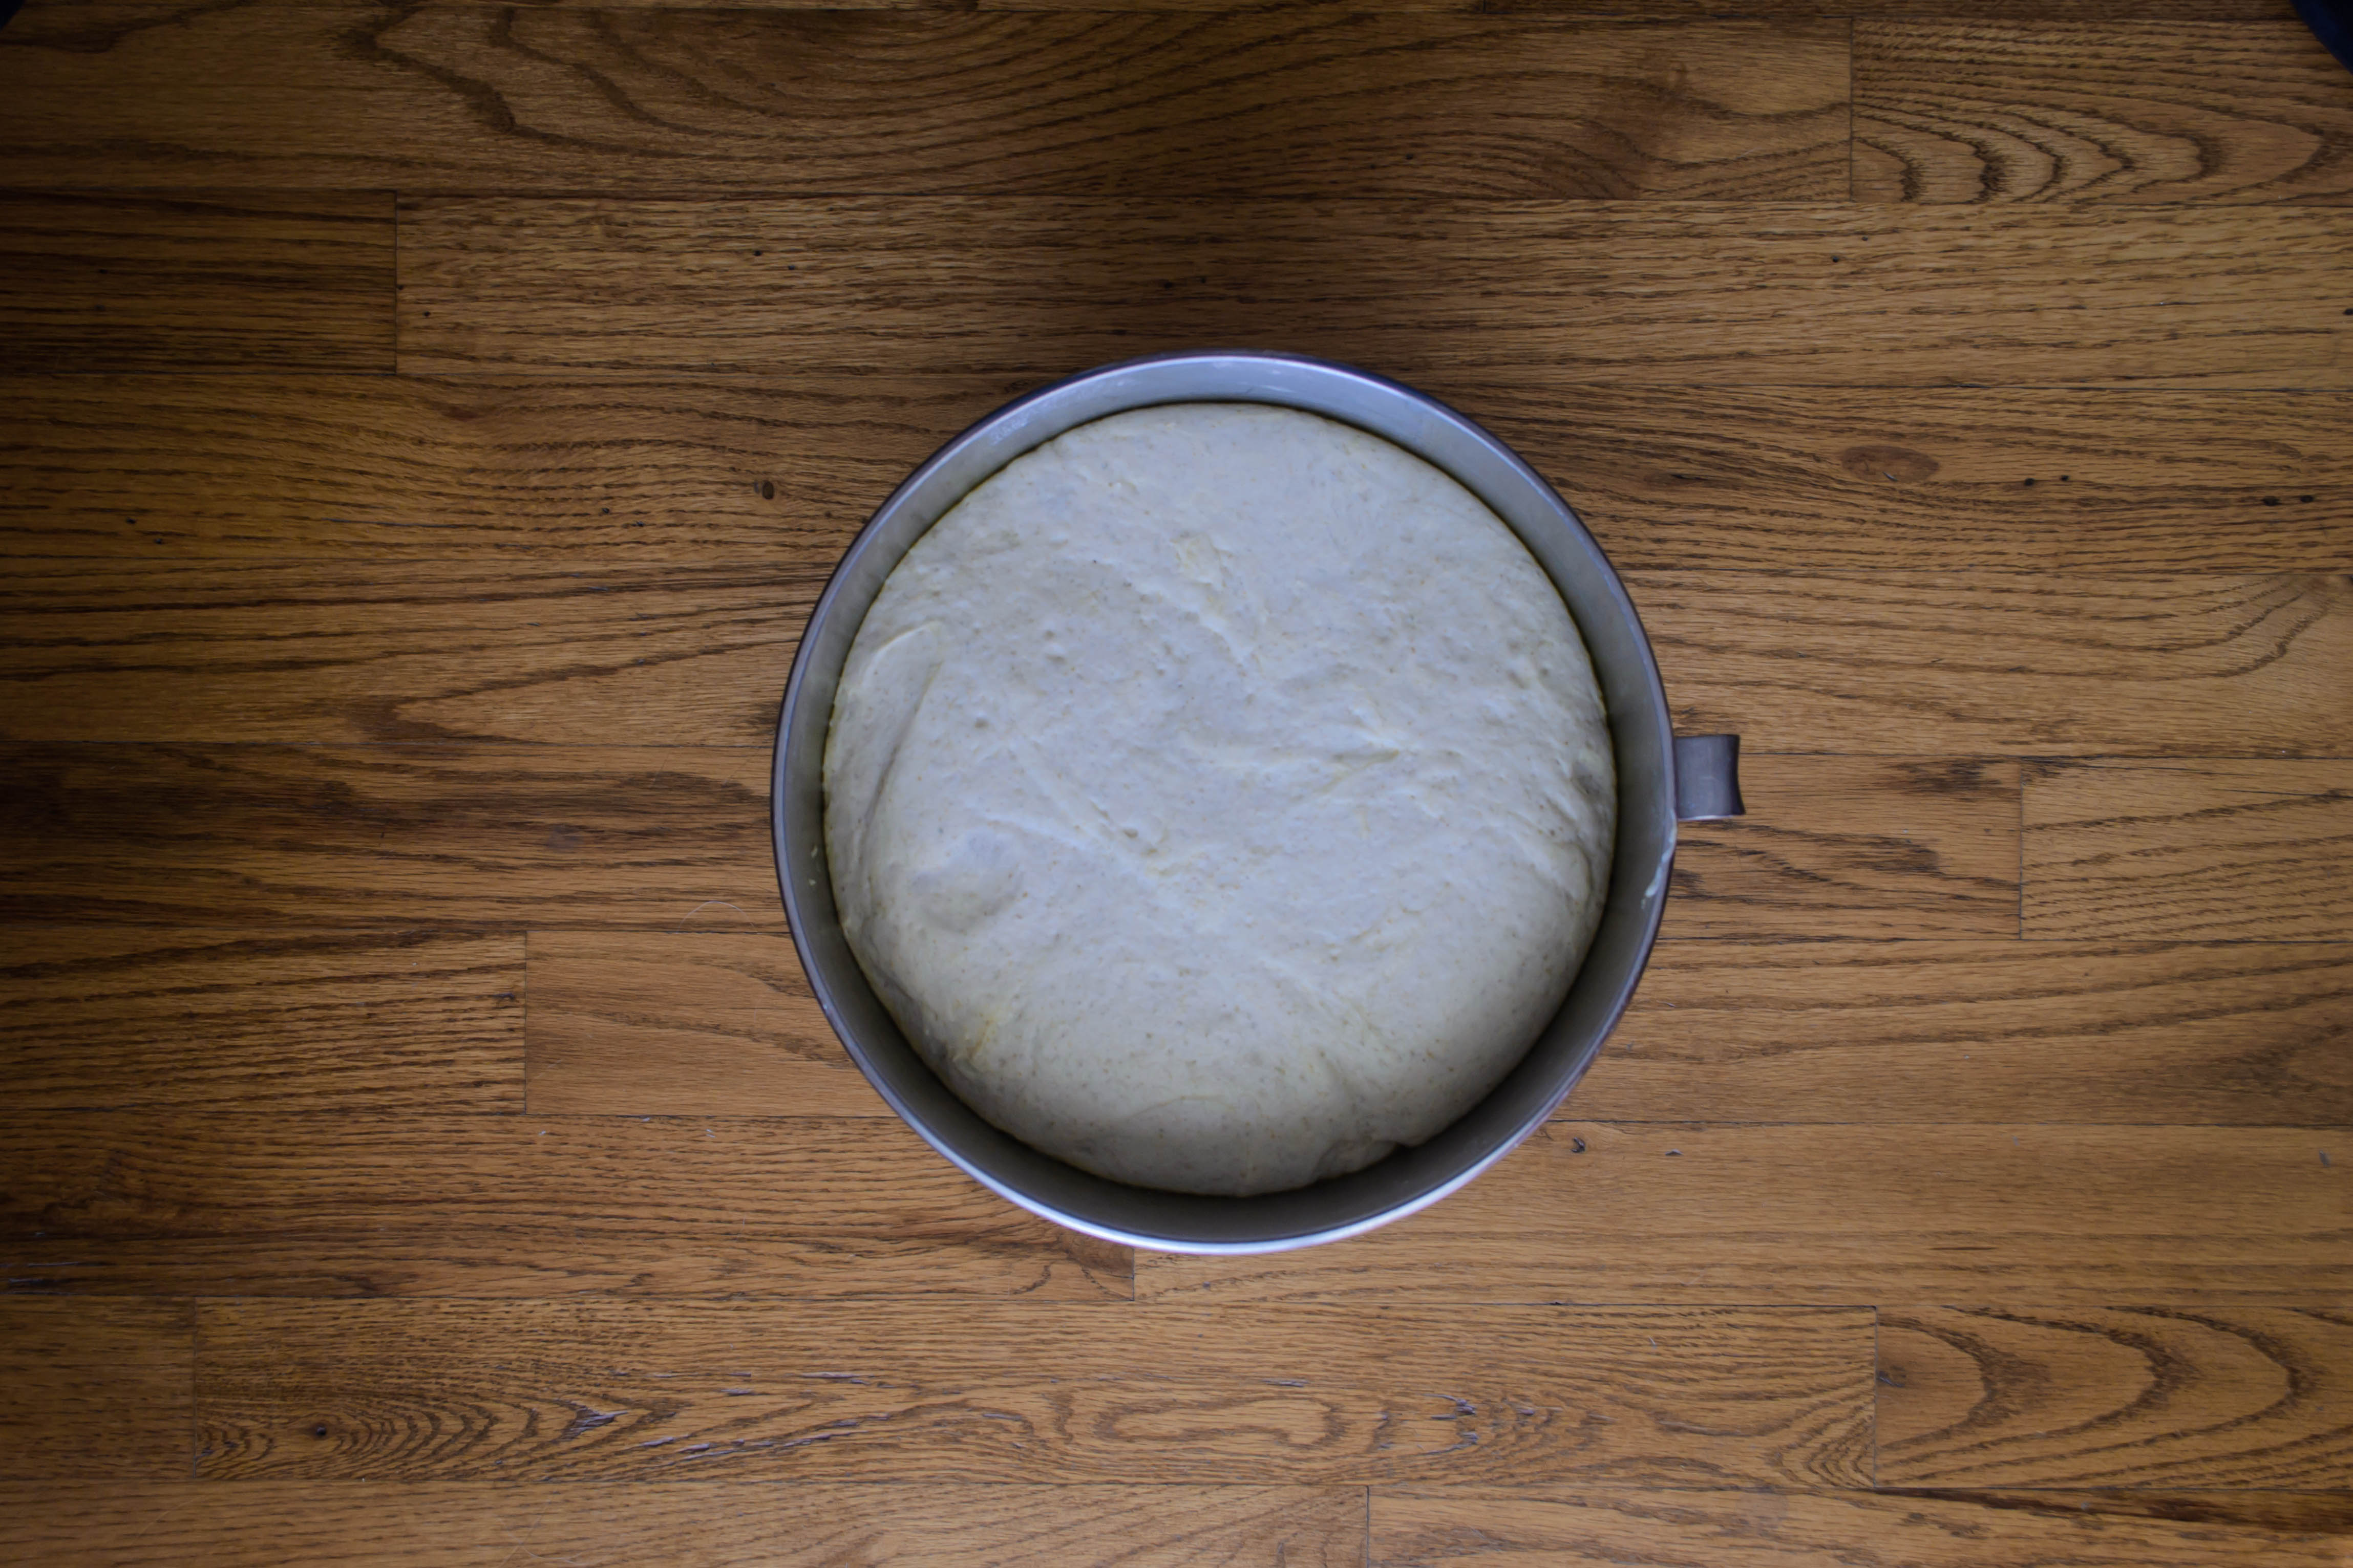
  • Spray the inside of the bowl with a non-stick spray or olive oil, flipping over the dough so both sides are coated. Cover the bowl with plastic wrap and set it in a warm place to rise until doubled; 60-90 minutes.
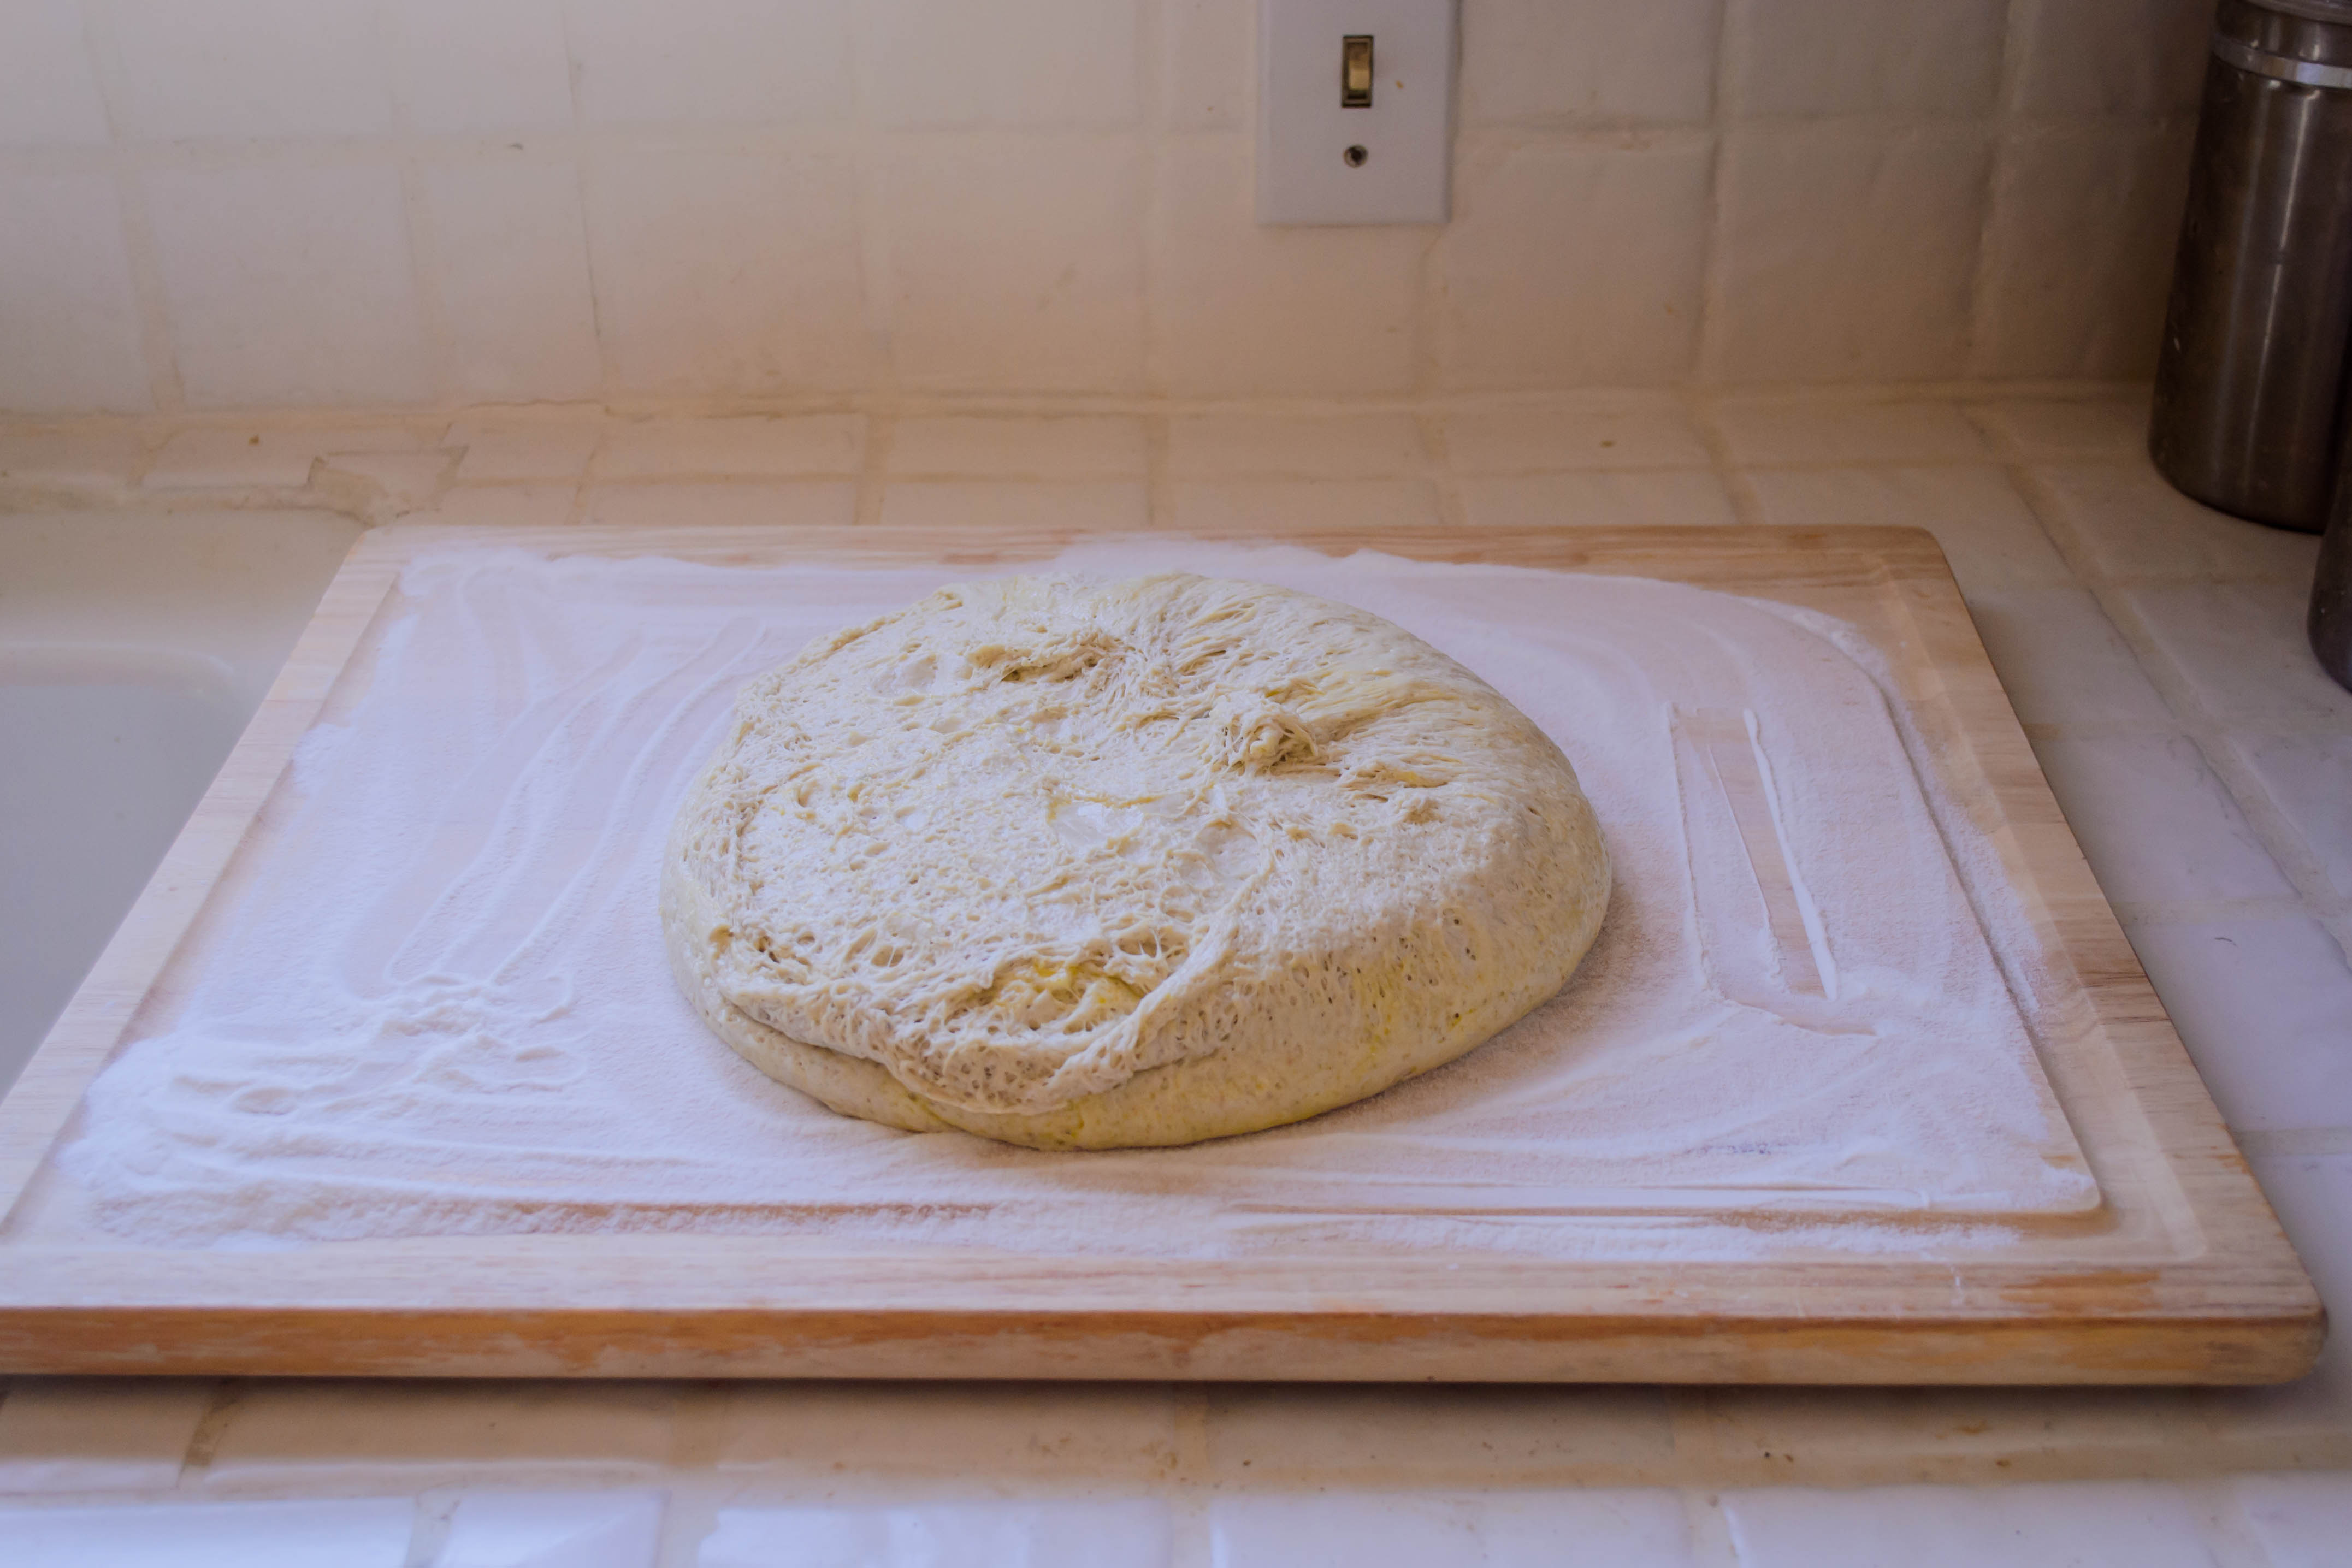
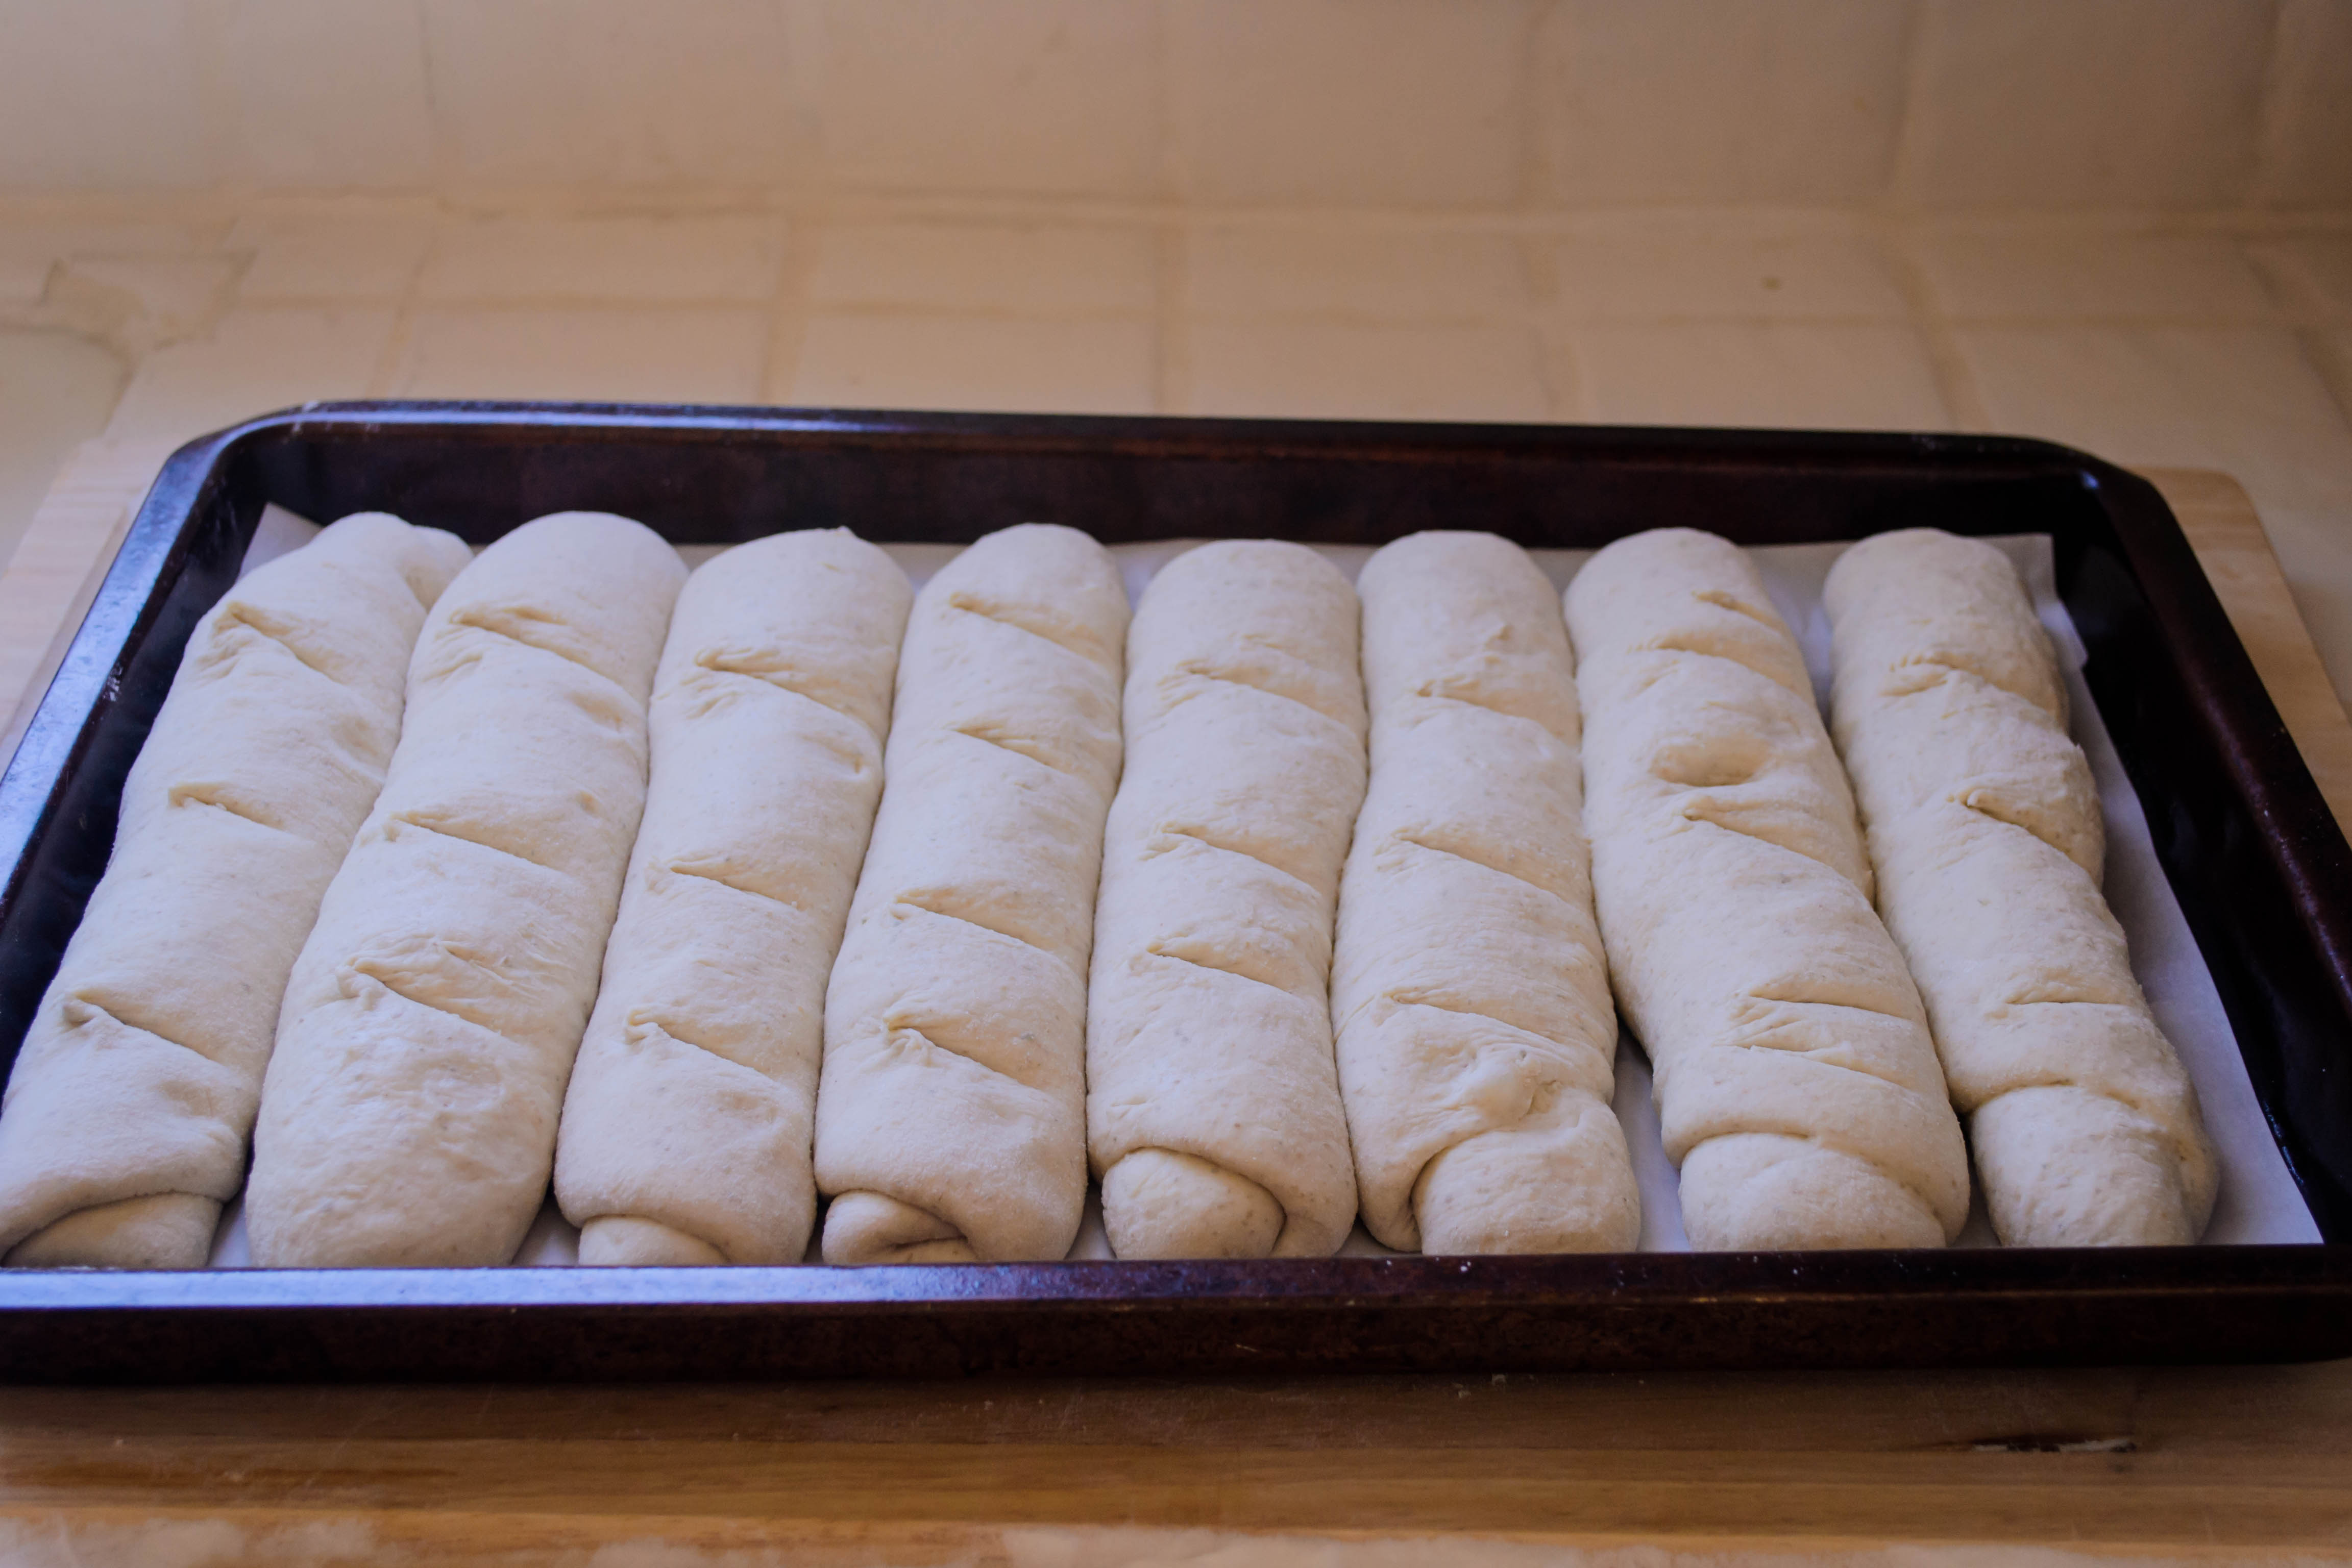
  • When the dough has doubled, punch it down by depressing your fist gently into the middle, then let it sit to get its breath back for about 10 minutes. While it rests, spray two 9×5 inch loaf pans with non-stick spray and start the oven preheating at 375F. Combine the pumpkin seeds with the remaining ½ cup of oats and spread out on a flat, rimmed surface like a cookie sheet.
  • Carefully dump the risen dough out onto a very lightly floured board. The more flour you use, the more trouble you’ll have getting the seeds and oats to stick. Divide the dough into two equal hunks, then form each into a loaf and roll it through the seed and oat mixture before settling it into its respective loaf pan. If you have a lot of trouble getting the oats and seeds to stick, spray the loaf with nonstick spray or olive oil first, then have another go.
  • Cover the loaf pans with plastic wrap and set the loaves aside to rise again for about 45 minutes.
  • When the loaves have just about doubled in size again, remove the plastic wrap covering them and carefully set them into your preheated oven to bake until their central temperature reaches 180-200F; about 35 minutes.
  • Let the loaves cool in their pans about 10 minutes, then remove to a wire rack to cool completely.

Save

Save

Rice Rolls

Food blog April 2015-0598As I revealed last week, my trio of vegetable pickles are just one part of a larger project: a meatball banh mi. These rice rolls are part two. Banh mi, in Vietnamese, really refers not to the wonderful sandwich layered with pate or pork or tofu and stacked with vegetables, pickles, and spice, but to bread itself. Colonization brought the French baguette to Vietnam, and the blending of flavors is a much nicer postcolonial remnant than such occupations frequently bring.

Food blog April 2015-0567Food blog April 2015-0570Though the culinary melding is quite harmonious, banh mi bread brings with it a great deal of internet controversy. Though most shops that sell the popular sandwich buy their baguettes from Vietnamese bakeries rather than making them in-house, crazy people people like me who want to re-craft the “genuine article” share their complaints, secrets, and professed revelations all over forums and comment threads, arguing over proportions and procedure and shape, and at some point, the argument usually involves discussion of flour type, gluten development, and protein content.

Food blog April 2015-0572Food blog April 2015-0574Food blog April 2015-0580The main debate when it comes to banh mi bread is the texture and composition. Though I’ve had these sandwiches on bread ranging from baguette or french roll to essentially a toasted hot dog bun, the ideal is a crisp, thin crust with a soft interior. The phrase “shatteringly crisp” is used with reverence. The internal structure should be light and soft and more delicate than the spongy chew of ciabatta. Rice flour is supposed to be the answer. Because it does not contain gluten, it will not result in the formation of the chewy texture a well-kneaded baguette can produce. However, food writer Andrea Nguyen, who knows a thing or two about Vietnamese food, asserts (assertively, even!) that rice flour is not a necessity, and in fact may even hinder the lightness and delicacy of the bread interior. However, without access to her cookbook or the combination of vital wheat gluten and vitamin C tablets she makes use of, I stuck with my usual method: a combination of promising-looking recipes plus my own instinct. Despite the to-rice-or-not-to-rice controversy, I decided to use a small percentage of rice flour. After all, I had some. Why not give it a shot.

Food blog April 2015-0581I also decided, veering far from tradition, to add some rye flour to the mix. According to Simply a Food Blog, a little bit of rye flour adds a compelling flavor and some additional sugars to the dough for the yeasts to gobble up. I like the gentle toastiness of rye flour, so I incorporated some of that as well.

Food blog April 2015-0586Food blog April 2015-0588In addition to the Simply a Food Blog suggestion, I also used Rice and Wheat and A Bread A Day in my recipe creation, and ended up with an ingredient list and procedure that created something much closer to a sausage roll or a bun than a crisp crusted baguette.

Food blog April 2015-0589Yes, I’ll admit, these are not the banh mi wrappers of your dreams (well, at least not if you are bivouacked in the “shatteringly crisp” camp). Though these rolls have a thin crust, it is just enough for the teeth to play with, not a staggering crunch you can hear across the table. At first I was perturbed by this, but it only took splitting one open, still warm and fluffy from the oven, and slicking the interior with butter to show me that while this might not be a traditional Vietnamese baguette, it is a delicious piece of bread. Though I filled ours with the meatballs I’ll show you next week, it would be more than welcome at any summer grilling event, whether your intended fillings are kielbasa or veggie dogs.

Food blog April 2015-0590As I thought more about this issue of inexactness, I decided I didn’t care. After all, this is my sandwich. A thin crust that shatters upon impact is fine, but my version keeps the roof of your mouth unscraped and your placemat a lot less crumb-scattered. As Joe Pastry pointed out just recently, tender bread is a boon for a sandwich. Mine offers a pleasant depth of flavor from the addition of the rye flour, and its soft, fluffy interior is exactly the kind of squashy that I favor in a sandwich. Besides (I compellingly convinced myself), the crisp crunch of the vegetables stacked up between the halves of the roll provide sufficient textural contrast. Why not, then, surround them with something a bit on the softer side?

Food blog April 2015-0594These rolls are best just cooled from the oven. They are okay on the second day, but I highly recommend toasting them for consumption on any day following the one they were made.
Food blog April 2015-0596

Banh Mi Rice Rolls
Makes 8
1 tablespoon active dry yeast
1 teaspoon sugar
2 cups (16 ounces) lukewarm water
1 cup rice flour (about 5 ounces)
½ cup rye flour (about 2.5 ounces)
2 teaspoons salt
3-4 cups all-purpose flour (we don’t want the extra chewiness of bread flour)
2 tablespoons soft butter
  • Combine the yeast and sugar with the water and stir, then let sit for 5-10 minutes until it is bubbly and smells like warm bread.
  • In the bowl of your stand mixer, combine the rice flour, rye flour, butter, and water and yeast mixture with the paddle attachment. It will be very, very wet – basically a liquid. Let it sit for 10-20 minutes – rice flour needs extra time to absorb water. It will seem a bit floppier when you return.
  • After 10-20 minutes resting time, add 2½ cups of the all-purpose flour and all of the salt, then mix with the dough hook attachment on medium speed to form a soft but not overly sticky dough. After about 5 minutes, the dough will start to gather into a ball and stretch to slap the sides of the bowl as it whizzes around. If the dough is not coming together after about 5 minutes, add an additional ¼ cup of flour as needed. I ended up with a little more than 3 cups of all-purpose flour in the mix. Knead on medium speed until the dough is smooth and elastic, a total of 7-10 minutes.
  • Oil the bowl and turn the dough ball over to lubricate on all sides, then cover with plastic wrap and let rise until doubled; 45-60 minutes. In my warm home office, it only took 45 minutes.
  • Turn the risen dough out onto a board dusted with rice flour and cut into 8 equal pieces. Roll each into a ball, flatten into a disc with the heel of your hand, then let rest 5-10 minutes.
  • Roll each flattened piece of dough into an oval about 8 inches long by 6 inches wide. Working from the long side, roll up each oval into a cylinder of about 8 inches long (the dough will want to stretch – try to keep it at the 8 inch mark). Pinch the exposed edge into the side of the cylinder to create a seam.
  • Place each dough cylinder seam-side down on a parchment lined baking sheet. (If you don’t mind the buns touching, all 8 will fit on the same sheet. If you want them to remain separate, don’t put more than 4 on the same baking sheet). Cover lightly with plastic wrap or a clean kitchen towel and let rise 30-45 minutes until puffy. To determine whether they’ve risen enough, poke gently; the depression made by your finger should recover about halfway – if the depression disappears completely, it has not risen long enough.
  • While the dough is rising, preheat the oven to 450F with a baking stone inside for even heating. Prepare a spray bottle full of water to spritz the loaves.
  • When risen, slash the loaves at a 45 degree angle (or angle of your choosing; mine are clearly not 45) with a razor blade or serrated knife, then spray lightly with water and quickly place into the preheated oven. Bake for 2 minutes, then spray loaves again lightly with water. Bake 3 minutes more, then spray lightly again.
  • Reduce the oven temperature to 400F and bake an additional 10-15 minutes, or until loaves register 200-210F inside.
  • Let cool at least 10 minutes before splitting, spreading, or just going in for a big bite.

Rye and Mushroom Stuffing with Chestnuts and Hazelnuts

Food Blog December 2014-0936A few months ago, my sister and her boyfriend engaged in a Whole 30 food challenge to help them feel healthier and more in control of their diets before the holiday season. As part of the challenge, and to silence naysayers convinced this would mean a barrage of boring, bland food, my sister took photos of almost every meal they ate. Some of these looked so good I was ready to hop on the bandwagon myself (though, as she admitted, going without cheese for that long was a hardship. First world problems, I know).

Food Blog December 2014-0930One dish in particular caught and held my imagination. R. called it “hazelnutted mushrooms.” The combination of two much beloved, earthy, woodsy ingredients made me think of Oregon and long for its damp autumnal glory as Los Angeles cycled through week after week of 80 degree days.

Food Blog December 2014-0929As the idea simmered in my mind, I kept thinking of other ingredients that would pair well with hazelnuts and mushrooms. Sage, certainly, with its dusty sharpness. Whiskey, to deglaze with that sear of burning honey. Maybe even chestnuts, with their curious texture and meaty sweetness.

Food Blog December 2014-0932Once chestnuts entered the picture, there was no doubt this was destined to become a stuffing. With half a loaf of dark pumpernickel rye bread in the fridge longing for an application, I took action. Butter, onions, celery, deeply caramelized mushrooms, and the crunch and odd sweetness of chestnuts bolstering the broth-moistened bread and toasted hazelnut bits. The whiskey adds just a gentle flavor and a great smell to the stuffing that backs up the flavor of the chestnuts and somehow makes them make more sense as an ingredient – I wouldn’t do without it, but you can if you wish.

Food Blog December 2014-0935You’ve likely noticed there are fewer photos here than usual – it turns out that though “brown food tastes goooood” as Anne Burrell is apt to note in her throaty growl, it doesn’t always produce the most flattering or interesting photograph. Regardless, this brown food is indeed good, and deserves your attention. Though we weren’t willing to put this on the Thanksgiving menu (we are boring sticklers, and this big a shift in the sides might cause turmoil), it has considerable promise as a winter companion to roasted meats at other cold-weather holidays, especially if you tend to go with pork or beef. I think stuffed pork chops would be a particularly nice application. We kept it simple, though, and went (almost) vegetarian, pairing moist, heaping spoonfuls with mashed sweet potatoes and salty, crispy roasted brussels sprouts.

Food Blog December 2014-0936

Rye and Mushroom Stuffing with Chestnuts and Hazelnuts
Serves 6-8 as a side
6-8 slices dark rye bread, preferably stale
¾ cup raw, unsalted hazelnuts
6 tablespoons butter
½ a red onion, diced
2 large ribs of celery, diced
¾ pound (12 ounces) crimini mushrooms, stemmed and quartered
½ cup (6-8 ounces) cooked, peeled chestnuts, roughly chopped
8-12 fresh sage leaves, minced
¼ cup whiskey (I used Jack Daniels – you use what you like, or omit it and use extra broth instead)
2 – 2 ½ cups broth, chicken or vegetable
Salt and pepper to taste (how much salt you use will depend on the sodium content of your broth)


  • Preheat your oven to 350F and position a rack in the middle slot. Fill a baking sheet with your hazelnuts. Place a wire rack in the tray (it should fit over the hazelnuts) and spread out your rye bread on a single layer atop it. Toast in the preheated oven until the bread is quite dry and the hazelnuts are starting to look slightly oily; 10-15 minutes. Remove and set aside to cool.
  • Meanwhile, heat your broth in a small pot or in the microwave – it doesn’t need to be boiling, but it should be quite hot. If it does boil, turn it down to avoid losing too much through evaporation.
  • Melt the butter in a large skillet over medium heat. Add the diced onions and celery and cook until softened and translucent; 5-8 minutes.
  • Add the mushrooms and cook for an additional 5-8 minutes, until the mushrooms have soaked up much of the moisture in the pan and are soft. They may begin to brown a bit; that’s a good thing.
  • Add the chopped chestnuts and the sage and let them warm through for 1-2 minutes.
  • While the vegetables are cooking, chop your hazelnuts into rough chunks (it’s wise to wait until they are cool enough to handle), then add them to the vegetable mixture in the skillet.
  • Turn off the heat and immediately add the whiskey, which should bubble furiously when it hits the surface of the pan. Stir to combine – much of the whiskey will evaporate.
  • Tear or cut the rye bread into small pieces or cubes. It should be quite dry. Add the bread cubes to the pan and stir well to combine.
  • Now, add 2 cups of the hot broth and stir to combine. If the bread still seems fairly dry, add the remaining ½ cup. Season with salt and pepper to taste, then put a lid on the skillet and let the mixture sit for five minutes to allow the bread to absorb the broth.
  • After five minutes (or more – allowing it to sit a while at this stage is fine), deposit the stuffing mixture into a greased 9×9 inch baking dish, spread or pat into an even layer, and bake in your preheated 350F oven for 30-35 minutes, until the top layer is crusty but the interior is still nice and moist.
  • Serve hot, as an accompaniment for meat or veg.