Roasted Tomato and Red Pepper Bisque with Herb Puree and Cheese Toast

Just under the wire: your October soup! I debated between this and tortilla soup for several weeks, then it was too hot to think even remotely about soup, and when I came out on the other end, almost time for Halloween and without a single container of chicken stock in my freezer nor an ounce of impetus to make any, all I could think about was a tomato bisque with a swirl of pesto I had at a surprise Friday lunch date with N. last month at a little bistro we like, and the decision was made. Bisque is traditionally a soup made with seafood stock to which cream is added – lobster bisque is of course the poster child. However, it has evolved, as food so often does, and now seems to just indicate a soup that has been blended to smooth consistency and finished with cream. Tomato seemed like a good way of making it a vegetarian option, and I have a soft spot for tomato soup. For extra interest, I wanted to add roasted red pepper to mine, to evoke that dry, smokiness fall can sometimes carry with it. As for the tomatoes, I dithered: did it make sense to look for lingering heirlooms at my Farmers’ Market, or settle for grocery story options, and should I peel or not peel? And would it be cheating if I just grabbed a jar of fire-roasted and called it a day?

Then my friend S. sent me Deb’s new book, and of course she already had the answer, which she says came from Cook’s Illustrated: gently split and drain the canned tomatoes, and roast them until dried and lightly colored. This concentrates their flavor, saves you the headache of deciding on perfect tomatoes, makes this an any-time-of-year option, and gives you time to prep the rest of the ingredients while the tomatoes are in the oven. Yes, it probably makes the soup take a little longer to come together, and yes, if you don’t line your baking sheet with aluminum foil first you’ll be every so sorry, but the flavor difference is noticeable, so I think it’s worth doing. The roasted flavor is evened and enriched by the cream we add at the end, and I think it also combats that too-acidic bite tomatoes sometimes have. But if you find yours are still a touch sour at the end, add a quick squeeze of honey.

A tomato soup is a comforting standard, but the trick – and treat – of this one is the herb puree I made to imitate that pesto from the bistro. A quick whizz of basil along with whatever other soft stemmed herbs you like – parsley, dill, I threw in some sage, but it’s such powerful stuff you really only need a few leaves of it – a clove of garlic, some lemon juice if you dig that sourness, and enough olive oil to bring it all together.

The herb puree can be dolloped on or mixed in, but I wanted to be fancy, so I carefully dribbled a swirl through the center of my bowl. And then, because imagining a bowl of tomato-based soup without melted cheese on toasted bread is impossible for me, I broiled some sharp cheddar onto a few leftover slices of baguette and settled in for dinner.

*This recipe includes charring a fresh pepper and roasting a can of tomatoes, but you can also make it easy on yourself and sub in roasted red peppers and fire-roasted tomatoes, and I bet your results will be similar, and cut down about half an hour of the time it takes to make this. If you try that way, let me know how it turned out.


Roasted Tomato and Red Pepper Bisque with herb puree and cheese toasts
About an hour, if your tomatoes and peppers are not pre-roasted. About half an hour if they are.
Serves 4 as a light dinner
For soup:
1 large red bell pepper (or 1 jar roasted red peppers, drained)
1 tablespoon olive oil
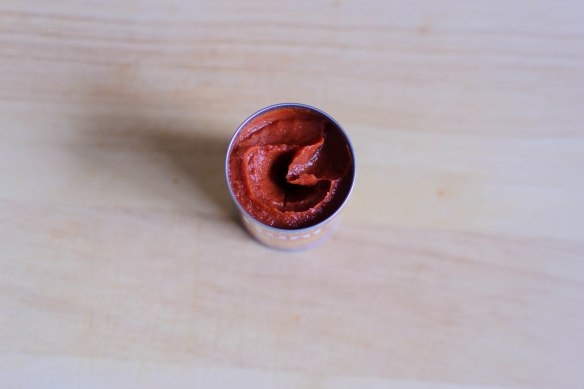
28 ounce can whole peeled tomatoes, plain or fire roasted
½ cup diced onion
2-3 cloves garlic, smashed, skins removed
2 tablespoons butter
2-2½ cups vegetable or chicken stock (you may not use it all)
1 bay leaf
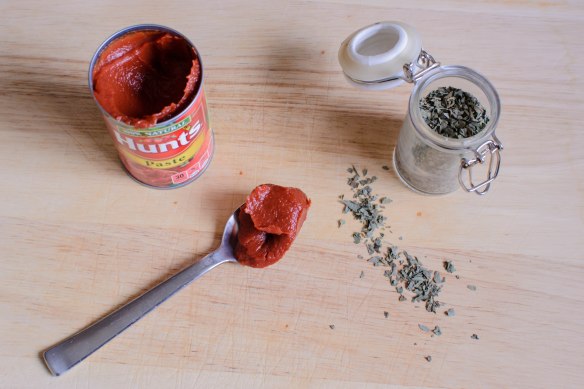
1 teaspoon fresh oregano (1-2 sprigs)
salt and pepper to taste
½-1 cup heavy cream
1-2 teaspoons honey, optional
For herb puree:
½ cup basil leaves
¼ cup other mixed herbs – I used parsley, chives, and just a few sage leaves
1 clove garlic
lemon juice to taste
¼-½ cup olive oil
For cheese toasts:
Per slice of baguette or half-slice of sandwich bread:
½ teaspoons mayonnaise
2 tablespoons finely grated sharp cheddar cheese


  • If you are using plain tomatoes, preheat the oven to 450F. If you are using fire-roasted tomatoes, no need. For both, open the tomato can and dump into a fine mesh strainer positioned over a bowl or a large glass measuring cup to collect the juices. As they drain, use your fingers to gently tear the tomatoes and extract some of the juice and seeds inside.
  • If you are using jarred roasted red peppers, skip this step. If you are using a fresh red bell pepper, while the oven is warming, char the red bell pepper over a gas burner turned on high. Let the skin blacken, adjusting the placement of the pepper with a pair of metal tongs to allow for maximum char. As each lobe blackens, turn to a new side, repeating until the skin is well charred and the flesh of the pepper is starting to soften, around 15 minutes. Transfer to a bowl and cover tightly with plastic wrap for another 15 minutes.
  • If you are using plain tomatoes, when the oven has preheated, cover a baking tray or roasting pan with aluminum foil, drizzle on the 1 tablespoon olive oil, and add the juiced, seeded tomatoes. Transfer to the oven and roast 25-30 minutes, until the tomatoes have dried out and are starting to take on a little color.
  • While the tomatoes roast and the pepper steams, turn your attention to the soup base. Melt the butter in a large pot over medium heat, then add the diced onions and the smashed garlic. Reduce the heat to medium-low, then sweat, stirring occasionally, until the vegetables are translucent and smell sweet, 8-10 minutes.
  • After the pepper has steamed for about 15 minutes, strip off the plastic wrap and use a knife to cut a slit into the pepper (be careful – hot steam will be released). When it is cool enough to handle, wrap it in a dry paper towel and rub to remove the majority of the skin – it should slide off relatively easily. Don’t worry if a few charred pieces stay on. Split the pepper in half, remove the stem and seeds, then roughly chop the flesh.
  • Add the chopped pepper and the roasted tomatoes to the pot with the onions and garlic (or add the drained fire-roasted tomatoes and jarred roasted red peppers). Add enough vegetable or chicken stock to the reserved tomato juices to make 2½ cups of liquid. Add to the pot along with the bay leaf and oregano. Bring to a boil, then reduce the heat and simmer 20-25 minutes with a slightly vented lid.
  • While the soup is simmering, you can make the herb puree. In a food processor or blender, combine the basil, other mixed herbs, a few tablespoons lemon juice, and about ½ teaspoon of salt. Buzz to combine. While the processor is running, stream in about ¼ cup olive oil. Stop the processor, scrape down the sides, and assess. You want a reasonably smooth, well-seasoned puree. If needed, add salt, pepper if you wish, and lemon juice. If the herb pieces still seem dry and not well integrated, run the processor again and stream in some more olive oil, until the mixture comes together into a puree. Scrape into a small bowl and rinse out the processor or blender.
  • After 20-25 minutes of simmering, remove the bay leaf and the stems of oregano, if you used full sprigs, and carefully transfer the soup into the rinsed out food processor or blender. Carefully, since hot liquids can “explode” when blended from the trapped steam, cover the lid with a towel and turn on the processor or blender to low speed. I like to leave the feed tube lid/pusher out of my food processor when I do this, to let steam escape. As the soup blends, turn the machine up to high speed and run until the mixture is very smooth.
  • Once you’ve achieved the consistency you want, return the soup to the pot, add the cream, and season to taste. If it seems a little too acidic, add a little more cream and/or the 1-2 teapoons honey. Warm through over medium-low heat.
  • While the soup warms, it’s a good time to make the cheese toasts. Spread each slice of baguette or half-slice of sandwich bread with a thin layer of mayonnaise, sprinkle on the 2 tablespoons finely grated cheese, and place under a broiler or toaster oven heated to 400F until the cheese bubbles and browns.
  • To serve, ladle the soup into a large bowl. Carefully spoon on the herb puree in a swirl (or whatever pattern you want, or just a dollop). Dunk in a cheese toast, or serve it on the side, while still warm.

Save

Mom’s Chunky Gazpacho

I would wager a guess that Spain’s two best-known dishes, at least for Americans, are paella and gazpacho. While I see the value in both for late summer, this weekend the temperature in Southern California – and therefore in our living room – skyrocketed uncomfortably, and the idea of cooking anything felt like a death sentence. We turned, therefore, to the option least likely to wilt us further.

Even then, the idea of venturing into the kitchen – away from a trio of fans all blowing directly on me – to chop up a few vegetables before letting my blender do the bulk of the work was oppressive. Don’t let that stop you, though, because having a big bowl of this in your refrigerator is worth it. Gazpacho is, as I always think of it, the Spanish, blended, soup version of the Italian classic panzanella salad. Traditionally it always includes bread and olive oil along with the tomatoes, producing a lovely smooth, emulsified bowl that chopped vegetables can be floated into.

My mom’s version, which we’re having with few adjustments, doesn’t include the traditional bread component. She adds red wine vinegar and a little chicken broth to the vegetables and the olive oil, and always serves hers up cold, with a dollop of sour cream on top that can be dipped into with every spoonful, or swirled through the entire bowl, for a little extra richness. Of course you can leave off the sour cream and use vegetable broth instead, for a vegan option.

In addition to being simple, and cold, and raw, this soup keeps well; its flavors mingle over a night or two as it sits in your fridge, and it requires only a quick stir to bring it back together (it doesn’t have any emulsifying components, so after a long chill the olive oil will pool on the surface a bit which can look unappealing). One summer, I remember Mom keeping a massive tureen of it in the fridge for a few weeks, replenishing the base and adding more chopped vegetables as needed.

Aside from the indolent bother of rising from whatever surface you’re plastered to, the only troublesome complication of this soup is that it really does need to chill for a few hours before you eat it. Not only is it better served cold (some people like it at room temperature but they are wrong I obviously have preferences); the time in the fridge allows the flavors to meld, mellowing the astringency of the raw onion and the vinegar. Somehow the two acids – vinegar and tomato – harmonize as they chill, resulting in a soup that is bright but not overwhelming, and bolstered by the more neutral flavors of the other vegetables. Aside from the tomato, which softens as it sits, the vegetables retain crunch and a bowlful feels light and refreshing, which means, perhaps to the dismay of your dining partners, they will regain just enough energy to wash up afterwards.

Mom’s Chunky Gazpacho
Serves 6
About 15 minutes, plus at least 2 hours to chill
3 large tomatoes
1 bell pepper (Mom uses green; I prefer red)
1 bunch green onions, root tips removed, or 1 small red onion, or 1 large shallot
1 large English cucumber
3 cups tomato juice or low sodium V8
⅓ cup red wine vinegar
¼ cup olive oil
¾ cup vegetable or chicken broth
salt and pepper to taste
optional garnishes: sour cream or greek yogurt, hot sauce, chives, dill


  • Roughly chop 1½ of the tomatoes, half of the cucumber, and half of the bell pepper. Place these into a blender. Add the white bulbs and pale green portions of the green onion stalks, if using, or half the onion or shallot, roughly chopped. Pour in the 3 cups of tomato juice and blend until smooth.
  • Chop the remaining tomato, cucumber, and bell pepper into bite-size pieces, or to your liking (I like a bit smaller than bite-sized). Thinly slice the remaining green onions, or dice the remaining onion or shallot, if using. Combine these and the blended liquid in a large bowl.
  • Stir in the red wine vinegar, the olive oil, and the broth. Add salt and pepper to taste, then cover with a lid or plastic wrap and refrigerate for at least 2 hours. If desired, chill the bowls or glasses you will use as well.
  • Just before serving, taste the soup for seasoning again and adjust as needed – I found I wanted a tiny bit more salt. Following in Mom’s footsteps, I like to top mine with a good dollop of sour cream. You could use greek yogurt instead, and a sprinkle of soft herbs like chives or dill, or a few splashes of hot sauce, would not be amiss. Fresh, crusty bread – perhaps grilled and rubbed with garlic – is a perfect accompaniment.

Save

Panzanella Toasts

The word “panzanella,” to an American, probably conjures thoughts of two ingredients: bread and tomatoes. Sometimes onion, cucumber, or various herbs join the party; I’ve even added a mix of lettuces and some white beans to make it a more substantial dinner. But the “pan” part of the panzanella is the most important: at its heart, this is a bread salad. As every blogger will tell you (which I learned this morning when I did this very thing,) if you look up panzanella and its history you will learn that this is a charming, rustic way of ensuring day-old bread doesn’t go to waste. You’ll also learn, interestingly, that tomatoes are not part of the original dish. Panzanella is an old salad, eaten and beloved before tomatoes made their way across the Atlantic. The original vegetable paired with the rehydrated bread in this salad was the humble onion. It is esteemed enough and beloved enough that it has found its way into Early Modern poetry; Emiko Davies provides a particularly nice overview of the salad and its literary as well as dietary record.

So, I’m all for food history – I think it’s important to know where dishes come from and who moved them along from what they were to what they are, and I agree that it’s especially crucial to not hide the cultural complications involved in a dish – barbecue removed from its African American roots, for example – but… onions and bread, with some vinegar and perhaps additional greens… just needs some help. Tomatoes are such a convenient addition because they contribute a punch of acid that the vinegar picks up and heightens. They also add juice to the mix, so that the bread gets flavored as it softens thanks to the reintroduction of liquid. Besides, it’s summer, and to me, few things are as summery as a tomato (maybe a crisp, effervescent rosé with a squeeze of lime, but then, no one’s saying you can’t have one or two of those alongside this salad).

There are two general ways of dealing with the bread in a panzanella. One is toasting it, to emulate the dry staleness that is traditional but also to prevent it from disintegrating when dressed. The other is to give it a short bath. This works best with dry, day-or-two-old Italian bread – your standard baguette will break down immediately. I had such a baguette, so I was going to be broiling, not bathing. Panzanella is typically served as a salad, but given that I was already going down the toasting route, I thought about changing the format entirely: rather than a big bowl, why not a layer of crisp toast, topped with chopped vegetables and herbs, so the juice of the tomatoes and vinegar and cucumber soaked down into the bread? The interior of each slice would soften but the bronzed top would retain a bit of crunch to stand out against the rawness of the vegetables. And since we were already far from tradition, why not some meaty chunks of kalamata, a few capers, mixed herbs, and a sprinkle of feta to top the whole thing off?

The final combination of ingredients whizzes like pinballs around your mouth: tomatoes with their sweet tang. Briny salt from olives and capers and cheese. Watery crunch of cucumbers. The bitter, grassy edge of chopped parsley. Sour vinegar, and the unobtrusive richness of olive oil holding everything together. The toast gets rubbed with garlic while it is still hot – because why not? – and the dish becomes something you could offer up at a party as essentially the messiest crostini ever, or pile into a wide, shallow bowl as the main event of a light dinner when it’s too hot to think.

One planning ahead note to consider: this dish is best when it has had time to sit for at least two hours, as the juices of the vegetables, helped along by the salt you’ll add when you mix them together, start to pool and collect, giving you an intensely flavorful dressing to soak into your toast slices. Your best option, then, is to mix it up and toast the bread slices in the morning when it’s cool, then stow the vegetable mixture in the refrigerator for the day. Or, if you are a plan-ahead-er, make the salad the night before, and toast your bread on the day you’ll be serving. When you’re only about half an hour from dinnertime, pull the vegetables back out and let them sit on the counter, just to wake the flavors up a bit – cold tomatoes, unless they are blended into gazpacho or juiced and shaved into a savory granita, are nobody’s darlings.

Panzanella Toasts
Serves 2 as a light dinner; 6-10 as an appetizer
20-30 minutes active time, at least 2 hours resting time
1 pound cherry tomatoes – I like a variety of colors for a prettier presentation – halved or quartered, if large
1 cup chopped cucumber
½ cup finely sliced green onions (2-3)
½ cup chopped kalamata olives
2 tablespoons capers
½ cup basil leaves, rolled and sliced into ribbons (chiffonade, if you’re fancy)
2 tablespoons other mixed soft herbs of your choice, such as parsley, dill, chives, etc.
2 tablespoons cider vinegar or balsamic vinegar
¼ cup olive oil + 1-2 tablespoons or olive oil spray
salt and pepper to taste
About ½ of a baguette, cut into half inch slices
1 garlic clove, halved
½ cup crumbled feta cheese


  • Combine all vegetables and herbs in a large bowl, toss lightly to combine. Add the vinegar, then the olive oil, and toss again. Taste for seasoning and add salt and pepper to taste. Cover with a lid or plastic wrap and refrigerate at least an hour and a half, though longer is better to collect more juices.
  • About half an hour before you are ready to serve, take the vegetable mixture out of the refrigerator and let it sit on the counter, just to take the chill off.
  • To make the toasts: heat the broiler on high (you can also use a toaster oven for this) and arrange the slices of baguette on a tray in a single layer. Spray or drizzle them with the remaining 1-2 tablespoons olive oil (you’ll likely use less than this if you are spraying), then sprinkle lightly with salt and pepper. Broil until evenly golden and crunchy, then remove from heat.
  • As soon as the toast is cool enough to handle, rub each piece with the cut garlic clove, then set aside until ready to serve.
  • To plate, arrange half of the toast slices on a platter or on your plate – a shallow bowl is also nice for this. Scoop big spoonfuls of the vegetable mixture onto the bread slices, including any juice that has collected. Scatter the crumbled feta over the top, and dig in.

Spaghetti with Miso Tomato Sauce

2016-food-blog-september-0763A lot of people focus, when they talk about their own recipes – the recipes they have created, or modified from already-existing dishes – on secret ingredients. There’s that one, singular item you add to “make it your own,” (or, if you’re the Colonel, maybe eleven). If you’re a certain kind of cook, you leave it out of your written recipes so no one can duplicate your masterpiece exactly, and they struggle for a lifetime trying to figure out why theirs doesn’t taste quite like yours. Secret ingredients puzzle your audience; they are intrigued but can’t quite identify that flavor combination – it blends just enough to keep it unidentifiable.

2016-food-blog-september-0737My one big secret ingredient used to be nutmeg in oatmeal chocolate chip cookies – it added another layer of warmth and interest, and it made one of my high school friends giggle about my cookies being aphrodisiacal. It was unexpected until you knew it was there, and then it made sense. My college roommate adopted it in her own chocolate chip cookies and at least once left it out of the recipe she passed along to a friend, so that the cookies would never be quite the same, thereby keeping them special.

2016-food-blog-septemberApart from that, my typical “secret ingredient” practice is just adding so many components that I likely won’t remember them all when I need to recreate whatever dish it was (clearly ideal methodology for a food blogger!). But suddenly, I have a secret ingredient. It fits all the qualifications: it adds a definite flavor without being obvious, and it would be difficult to guess at were you trying blindly to taste out every component of the dish.

2016-food-blog-september-07442016-food-blog-september-0747This came about by accident, as many of my masterworks do. We had just arrived home from our annual summer road trip, which meant a whatever-is-still-good meal. Pasta is easy here – a bag of spaghetti and a can of tomatoes are guaranteed to be fine and tasty – but being who I am, the urge to tinker kicked in and I was rooting around in the fridge looking for something to make it special. I found a container of heavy cream that, shoved to the very back, was not only still good, but almost frozen, and a tiny, hard, crusty little corner of miso paste. It looked okay, apart from being approximately the texture of granite, and in a moment of innovation genius “well, why not?” I tossed it into the sauce.

2016-food-blog-september-0749As secret ingredients go, this is a good one. No, you don’t necessarily want to buy a whole tub of miso paste just for this, since you’ll only be going through a tablespoon or two, but the number of other sauces, soups, and stir-fry dishes that it will contribute to makes it a great thing to have at the back of the fridge. (And really, if you bought the stuff for Deb’s recipe in the first place, you’ll need a new recipe to use up that last stubborn chunk that has been hiding in your fridge for months anyway.) The miso adds all the salt needed to the sauce, but it also contributes a lux, complex quality that gives depth the tomatoes and somehow makes the cream feel lighter – more sprightly.

2016-food-blog-september-0754In the final incarnation, I added leeks for an onion-y aromatic base, a splash of wine to deglaze, and a smattering of chili flakes, and I was delighted with all of these additions, though you could certainly leave out the heat, replace the leeks with garlic or shallot (or some combination), and I wouldn’t say no to marsala in place of the wine.

In any case, though, scatter the top with a chiffonade of basil or some parsley fragments, and challenge your dinner guests to guess what that extra flavor is – I bet they will be stumped, trying to determine our new secret ingredient.

2016-food-blog-september-0762

Spaghetti with miso tomato sauce
40-45 minutes
Serves 8-10
1 pound spaghetti
2 tablespoons salt for pasta water
4 tablespoons butter
½ cup finely chopped leek, white and pale green parts only
½ cup dry white wine
¼ teaspoon red pepper flakes (or to taste)
2 tablespoons white or red miso paste
28 ounce can whole peeled tomatoes
½ cup heavy cream, at room temperature (adding to the sauce at room temperature, rather than cold, eliminates the danger of curdling)
optional: 2-3 tablespoons chopped parsley or chiffonade of basil to scatter over the top


  • Fill a large pot with water, add the 2 tablespoons salt, and bring to a boil. When it boils, add the spaghetti and cook according to package directions, stirring once or twice to separate pasta strands. When the spaghetti is tender but still has a slight bite, drain it and add it to the sauce as directed below.
  • While the pasta water heats, melt the butter in a large skillet over medium heat. When it is melted, add the leeks and turn the heat down to medium-low; sweat the leeks, stirring often, until they are tender. This should take about 8-10 minutes.
  • When the leeks are tender and translucent, add the wine and the red pepper flakes, stir to integrate, and raise the heat to medium-high. Simmer for 3-5 minutes to cook off some of the raw flavor of the wine.
  • Now, add the miso paste, using a wooden spoon or a whisk to break it up and integrate it evenly into the wine mixture. Cook 2-3 minutes to allow it to soften and distribute (the older the miso paste is, the more reluctant it will be to integrate).
  • Dump in the canned tomatoes and their juice, stir, and turn the heat down to medium-low. Simmer for 20-30 minutes, stirring occasionally. Periodically, crush the tomatoes with the back of a wooden spoon or with a potato masher (be careful: they squirt!).
  • When the sauce has simmered at least 20 minutes to let the flavors blend, and when the pasta is cooked and drained, take the skillet off the heat and stir in the room temperature cream.
  • Integrate the drained pasta (I use tongs for this), then place the skillet back over medium-low heat and cook, frequently manipulating the pasta with your tongs, for another two minutes. This lets the pasta absorb some of the sauce.
  • To serve, transfer to a large bowl or serving dish and, if desired, scatter the top with your parsley or basil. Warm garlic toast is a welcome accompaniment.

Summer Vegetable Tzatziki

2016 Food Blog August-0683Sometimes the most difficult thing about these posts is deciding what to call them. Cucumber yogurt dip sounds good, but because there is the same amount of tomatoes here as there is cucumber, such a title feels like a lie of omission. “Cucumber tomato yogurt dip” starts to sound clunky, and it excises the radishes that provide such a good peppery crunch to the whole thing. And really, if your title includes everything in the finished product, it’s not a title at all – it’s an ingredient list. I tell my students that titles are hard. A title is the summary of all summaries. It should catch the audience’s interest and encompass the topic at hand and suggest the writer’s stance on it. But then, you don’t want to fall into the trap of emotive language: “Delicious Cucumber Yogurt Dip” makes up your mind for you before you have a chance to taste the thing yourself. And while that may be a fine thing for something like a food blog, in writing as a larger practice, it can be a problem. Your evidence should make the argument for you, not your manipulation of alluring language (can you tell the fall semester is imminent?!). Besides, that’s a pretty bold promise!

2016 Food Blog August--4But we’re moving away from the issue: a late summer dip flush with vegetables, crammed with texture, bound by the creamy thickness of good greek yogurt. As I continued to dither over titles, I remembered another suggestion I give my students: play with your audience’s existing knowledge. In my intro level composition class, I structure our readings around the theme of “the journey,” and once ended up with a student paper entitled “Don’t Stop Believing.” Genius. Well then. Crisp vegetables, cool yogurt, herbs, just enough salt to pull the flavors together; let’s go with tzatziki.*

2016 Food Blog August-0657This is not the most pinterest-worthy pretty dish, because once you enrobe vegetables in a coating of yogurt, the whole thing takes on a blurred creaminess that I was concerned to see reminded me of those yogurt-based fruit salads of my youth that someone always insisted on adding banana to. But be consoled! Though this is, I suppose, technically a fruit salad in that the starring ingredients are only masquerading as vegetables, it is savory and crisp and cleanly refreshing, and there are no mushy browning slices of banana hidden amidst the bright flavors you were expecting.

2016 Food Blog August-0664Of course this is perfect with chips of all kinds, and would probably make a nice accompaniment to falafel or skewered meat. But since I was roasting a chicken for dinner, I wanted to avoid heat sources of any kind earlier in the day, so I had mine on well salted pita chips and, in spite of earlier vacillation over titles, ended up with this simplest of solutions: just call it lunch.

2016 Food Blog August-0665Note: alas, for all its merits, this tzatziki does not keep well, nor is it a promising “make ahead” option. The tomatoes and cucumbers begin to give off juice almost immediately, and though the yogurt is quite thick, it does get watered down within the hour. It is best, then, for those moments when you need something fresh and bright and cool and easy, and you need it NOW-thank-you-very-much.

2016 Food Blog August--2-2* I considered raita as well, but while cucumbers and yogurt are pretty standard for a tzatziki, raitas can have all sorts of vegetables in them, are often a bit thinner, and sometimes carry a hit of spice so that even as you are cooling off, you are heating up again. Tzatziki, with its dominant ingredients and its chunky reputation, seemed to fit better here.

2016 Food Blog August-0683

Summer Vegetable Tzatziki
Serves 2-4
10-15 minutes, depending on your chopping speed
1 cup greek yogurt (don’t sub regular yogurt; you need the thick texture to stand up to the wetness of the vegetables)
1 cup chopped cucumber, seeded if you wish
1 cup quartered cherry tomatoes
3 radishes, sliced, julienned, then cubed (directions below)
1 tablespoon your choice of finely chopped soft-stemmed herbs (I went with chives. Cilantro, parsley, basil, or dill are other possibilities)
½ teaspoon salt, or to taste
⅛ teaspoon black pepper, or to taste


  • This is laughably easy, guys. Combine all ingredients in a large bowl and stir to combine, then taste for seasonings and adjust accordingly. But I said I’d explain about the radishes, so here goes: remove the tops and tails, then cut into thin slices. Pile up a stack of the slices and cut straight down into skinny little matchsticks – this is a julienne cut. Then, if you want the pieces even smaller, cut up those matchsticks into tiny cubes. This ensures even distribution of radish pieces, and ensures you aren’t biting down onto a giant chunk, which is nice if your radishes are particularly peppery.
  • If desired, use a rubber spatula to pour and scrape the tzatziki into a pretty serving bowl, and serve with your choice of dippables.

Save

Tomato Basil Loaf

2016 Food Blog February-0424N. and I first discovered Panera when we were living in Eugene. This seems a bit counterintuitive, since Eugene doesn’t have any Paneras. But on a visit or two with my parents, and N.’s parents, it became an easy place to pick up lunch, or a dinner for a sunset hike, and I was quickly sold on their vegetarian sandwich, not just because it came layered with pickled red peppers and fresh greens and spicy spread and crumbled feta, but because the bread it used – a fluffy tomato and basil flavored loaf with an intriguing, slightly sweet streusel across the top crust – was addicting. When we could, N. and I started buying a whole loaf of the bread on our last day in California, to take home to Eugene with us.

2016 Food Blog February-0378Now that we are in Los Angeles, there are Paneras everywhere (in fact, I just checked: there are at least five within a 5 mile radius of our house). Despite that proximity, though, we don’t go there very often. There are several reasons for this, but mostly, if I’m going to spend my money on restaurant fare, I’m going to explore what Los Angeles has to offer rather than a national chain. Regardless, the tomato basil bread, with that intriguing streusel, remains a favorite of mine, and when “red” was declared as February’s Twelve Loaves theme, I decided this was the right time to try a little re-creation attempt.

2016 Food Blog February-0370My bread combines lush, densely flavored scarlet tomato paste with a generous dusting of dried basil. The loaf itself is moistened and sweetened with buttermilk and molasses, and though it does bake up more orange than red, it makes perfect sandwich slices for cucumber and mozzarella, or pesto chicken, or just well-buttered toast.

2016 Food Blog February-0375The challenge here was the streusel. There are a number of “copycat” recipes out there for Panera’s loaf, but few of them make any attempt at the dark, sweet, sticky crumble adorning the top crust. I finally found a suggestion for a glaze made from tomato paste and brown sugar, thinned with a little water, and brushed over the top of the loaf. Since my first attempt was a little heavy on the tomato paste in the dough itself, reserving some for the top seemed like a smart adjustment. It did look a bit distressingly like a meatloaf with the traditional ketchup coating when I first applied the glaze, but the flavor of the finished product was strikingly similar to my inspiration.

2016 Food Blog February-03832016 Food Blog February-03892016 Food Blog February-0394Panera’s loaf is scored straight down the center so that the top crust puffs and pulls away from itself in two fat rounds, leaving the top of a slice looking almost heart shaped. I decided I wanted to try something new, so I went for a twist instead, separating my dough into two sluggish, sticky logs and wrapping them around each other before depositing into a loaf pan.

2016 Food Blog February-04042016 Food Blog February-0406A second rise, a glaze, and a quick 40 minutes in the oven, and I was rewarded with a loaf that, despite not being truly red, may be as close to the original as I’ll ever get. The interior is tender and chewy and springy, and the glaze hardened into gleaming sticky shellac (though it loses its crustiness as it sits). The tomato and basil flavor are both easily discernible, and the combination of tomato paste and brown sugar burnishing the top crust is just the right toasty sweetness, since despite the molasses, the bread itself is fairly savory.

2016 Food Blog February-0416Because the dough is pretty sticky, the loaf is moist and tender, which also means it’s a bit delicate. Take care when slicing into it, and be sure to give it at least half an hour to cool before attempting a slice at all. Conveniently, we found we liked the flavor better once the bread had cooled completely. As noted above, the glaze resorts to stickiness after a few hours, but it is still quite tasty, and will “crisp” up again just slightly after a trip through the toaster. Slicked with salted butter, it makes a perfect accompaniment to lesson-planning on a blustery afternoon.

2016 Food Blog February-0430

Tomato Basil Loaf
Makes 1 large sandwich loaf
4-4½ hours, including rising and baking time
1 cup cold buttermilk
⅓ cup boiling water + more to thin the glaze
3 tablespoons molasses
2 teaspoons active dry yeast
3 ¾ cups bread flour (you may not use all of it) + additional flour to dust the board
2 teaspoons salt
1 tablespoon dried basil
½ cup tomato paste, divided
3 tablespoons brown sugar


  • In a 2-cup glass measuring cup, combine the cold buttermilk and the boiling water. This creates a yeast-friendly temperature without having to wait for the buttermilk to warm up. Stir in the molasses and the yeast, and let sit for 5-10 minutes until the surface of the mixture foams up and it smells bready.
  • While the yeast is working, combine 3 cups of the flour with the salt and basil in a large bowl. I use the bowl of my stand mixer. After the yeast has had a chance to wake up and is foamy, add the liquid slowly to the flour mixture and mix on low with the paddle attachment (or with a wooden spoon) to combine. Scrape in the tomato paste and again, mix just to combine.
  • Now, if you are using a stand mixer, switch to the dough hook. If you are not using a stand mixer, turn out onto a well-floured board. Knead at medium speed for 5-7 minutes, adding in more flour if needed ¼ cup at a time, until the dough pulls away from the sides of the bowl and takes on the consistency of soft, sticky play-dough.
  • Oil the inside of your work bowl (I use a non-stick spray), turn the ball of dough over inside a few times to coat it evenly, and then cover the bowl tightly with plastic wrap and stow in a slightly warm spot for 1½-2 hours, until almost doubled.
  • Once the dough has risen adequately, punch it down by gently depressing your fist into the center to release the air, then let rest about ten minutes to get its breath back. Meanwhile, spray or butter a standard loaf pan.
  • Turn the dough out onto a lightly floured board and divide it into two equal portions. Roll each half out into a pudgy log about 9 inches long. Pinch one end of each log together tightly to connect, then create a twist by lifting the left strand over the right, then repeating (because now what was the right strand will be the left one) until you come to the other end of each log. Pinch these remaining ends together tightly, then tuck underneath the twist you’ve created and gently place it in the prepared loaf pan. Cover lightly with plastic wrap and set aside to rise again for 45-60 minutes.
  • About 30 minutes before you put the dough into the oven, preheat to 350F, and make the glaze by combining the remaining 2 tablespoons of tomato paste, 3 tablespoons of brown sugar, and 1-2 tablespoons of hot water to thin to a barely pourable glaze. When ready to bake, remove the plastic wrap, brush the glaze over the top of the loaf in a thin layer, and gently slide it into the preheated oven. Bake 35-40 minutes, or until the interior tests 180-200F on an instant read thermometer.
  • Cool at least 10 minutes in the loaf pan, then turn out onto a wire rack and cool at least 20 minutes more before slicing and eating. We found the flavor was better once the bread had completely cooled.


#TwelveLoaves is a monthly bread baking party created by Lora from Cake Duchess and run with the help of Heather of All Roads Lead to the Kitchen, which runs smoothly with the help of our bakers.

This month we’ll be baking breads with a RED theme in honor of National Heart Month, Valentine’s Day, and the Oscars (red carpet) – any red ingredient goes! For more bread recipes, visit the #TwelveLoaves Pinterest board, or check out last month’s mouthwatering selection of #TwelveLoaves enter last month’s breads featuring a “new to you” type of flour!

If you’d like to bake along with us this month, share your “RED” themed bread using hashtag #TwelveLoaves!