Pan Roasted chicken with kale and cauliflower puree

I’ll confess, I wasn’t going to post a THING today, but then my friend J. saw a photo on Instagram of the dinner I made on Saturday night and asked for a recipe. So here we are!

This is such a cheat post I can hardly stand it, since I have only my phone photo and I measured nothing. It also isn’t (quite) an NYT recipe recreation, though I will admit the inspiration for the cauliflower puree does come from there: I had planned to make the same dish, using the puree recipe as my bloggable item, and then I just wasn’t happy with the recipe as-is, so I scrapped it and went my own way. Feel free to do the same with any part of this, and note: all quantities here (except for the butter) are approximate. You do you.

Continue reading

Gochujang Glazed Cauliflower

One of the many amazing, beneficial things having a culturally diverse population does is make our food more interesting. Though Sriracha is pretty recognizable to most people at this point and salsa is, of course, an everyday condiment, my newest spice-related obsession might still be a bit of an unknown. Gochujang, which is a Korean staple made from hot peppers that falls somewhere between sauce and paste, has now taken up permanent residence in my fridge. It’s a more complex, rounded taste than a sauce like Sriracha or sambal, with a slight fermented kick and an affinity for sweet companions, but it packs no less of a punch.

I’m only slightly embarrassed to admit that I first learned about gochujang as a result of the amount of food television I watch, but I’m delighted that I did. Since purchasing the bottle that sits jammed in amongst my mustards and capers and olives and preserved lemons on the door of my refrigerator, I have added it to every sauce I can think of and drooled over its application on chicken, steak, anything grillable.

Weirdly enough, though, the food I have applied this wonder-sauce to that made me the most excited was cauliflower. Through a roundabout voyage starting with the hipsterized version of the age old bar-and-tailgating tradition that is buffalo wings, I found my way to a tray of cauliflower lightly seasoned and roasted until tender, then brushed thickly with a mixture of gochujang, molasses, and oyster sauce before being broiled to caramelize. Served over a scoop of fluffy brown rice and topped with conservatively confetti-ed lime zest, it requires nothing else.

I know, I know, I just said it requires nothing else. But I want to add a few notes before we get to the recipe part because how much you love this depends on you doing a little taste testing. I use a spare amount of olive oil to roast the cauliflower because there’s melted butter in the glaze. Were you going light you could skip that, but I love the way it enriches and rounds out the end result. As for the “big three,” so to speak, of sauces we’re combining, you’ll want to start with ¼ cup of each and then play according to your taste. I find I end up wanting a little more gochujang and just a drizzle more molasses, but remember as you sample it in progress that this is going to be divided up over two heads of cauliflower and tempered by the neutral nuttiness – if you choose to serve it the way I do – of brown rice. In either case, the lime juice I couldn’t resist adding winds up being non-negotiable: you don’t taste it, quite, but that little bit of acid, as is so often the case, balances the whole thing.

Gochujang Glazed Cauliflower
Serves 4 (with sauce and rice left over)
50-60 minutes
2 cups long grain brown rice
chicken broth and/or water to cook rice
2 large heads cauliflower
4 tablespoons olive oil, divided
1 teaspoon salt
¼ cup unsalted butter
¼ cup gochujang (Korean red pepper paste)
¼ cup oyster sauce
¼ cup molasses
juice of ½ a lime
zest of one lime


  • Start the brown rice cooking in a rice cooker or a large pot (if you use a rice cooker, follow its directions for quantities of liquid. If you use a pot, you’ll need about 4½ cups of liquid for 2 cups of rice). It will take about 45 minutes.
  • Set the oven to 450F, then drizzle two large baking trays with 1 tablespoon of olive oil each and put them in the oven to preheat as well. This ensures that the cauliflower starts to roast immediately upon adding it to the pan, since the oil will already be hot.
  • To prep the cauliflower, carefully use a sharp knife to cut out the core from the bottom of each head. Remove that central core and any lingering leaves, then set the heads floret side up on a cutting board and slice into thick slabs – about ½ inch – and florets as some of the slabs separate. Remove the preheated trays from the oven and arrange the slabs and florets in a single layer on the hot oiled trays. Drizzle the remaining olive oil over the top, 1 tablespoon for each tray, and sprinkle lightly with the salt.
  • Place the trays into the oven and roast at 450F for 20 minutes, then carefully flip over each piece using tongs; return to 450F oven for another 20 minutes.
  • While the cauliflower roasts, make the sauce. In a small saucepan or a heat-safe bowl set over a small pot of simmering water, melt the butter, then whisk in the remaining ingredients. Taste to see how you like it, then add more of the gochujang, molasses, or oyster sauce as desired. I find I like a little more gochujang and just a drizzle more molasses.
  • This is a good moment to check on your rice: once it has absorbed all its liquid, let it sit with the heat off (or on the “keep warm” setting of your rice cooker, if it has that) for a few minutes for a fluffier end result.
  • When the cauliflower is tender and lightly golden on both sides, remove it from the oven and preheat the broiler. If your broiler element is at the top of your oven, move the top rack up so it’s positioned right underneath the flame. Either brush cauliflower pieces generously with glaze, or tumble them into a bowl and toss with the glaze. I prefer the former because it keeps the pieces more intact, but the latter method would make for a more even coating of sauce.
  • However you glaze them, return the trays of sauced cauliflower to the oven, now on broiler mode, and broil for just a few minutes to allow the glaze to bubble and caramelize.
  • To serve, pile a generous helping of cauliflower over a scoop of brown rice, add additional sauce if desired, then sprinkle with lime zest.


Lamb Stuffed Zucchini

The last week of summer is a curious avalanche of light melancholy and nervous action. I’m caught between the post-vacation-slump of wanting to curl and laze and bake my mind in nothing, and the deep itch of my protestant work ethic demanding I Get. Things. Done. before school starts.

So I cautiously plan in small doses, and I soothe the anxious itch that rears up when I am “wasting” time by consuming novels in gulps, to make up for reading little during the rest of the summer. I’m struck by Jesmyn Ward and Tommy Orange, and just this morning I fell back down into the entrancing, haunted wonderland that is Toni Morrison’s Beloved, inspired in part by this suggested reading list for white Americans assembled by a group of black writers. When I saw Morrison’s perhaps most famous novel on the list, I was brought back to an interview she did with Stephen Colbert in which she describes looking through her book for the right page to autograph for a reader, telling him “I looked down and there were these sentences.” I needed to read those sentences again. I burrowed through the first fifty pages this morning and now that itch is to open the book again.

But I do have other obligations, and one of them is to the final, late summer push of my miraculous zucchini plant. It flourished in our absence, our friend who was on plant-watering duties taking home several swollen specimens, and offering another few to our neighbors, and then suddenly, with only two large, hidden bats remaining, took a gasping breath and shuddered to a… pause? A stop? I think it will produce a few more, maybe, but its time seems limited.

That being the case, there was little time to waste in sharing my biggest zucchini triumph of the summer with you, in case you, too, have a few dark green baseball bats you aren’t sure how to consume.

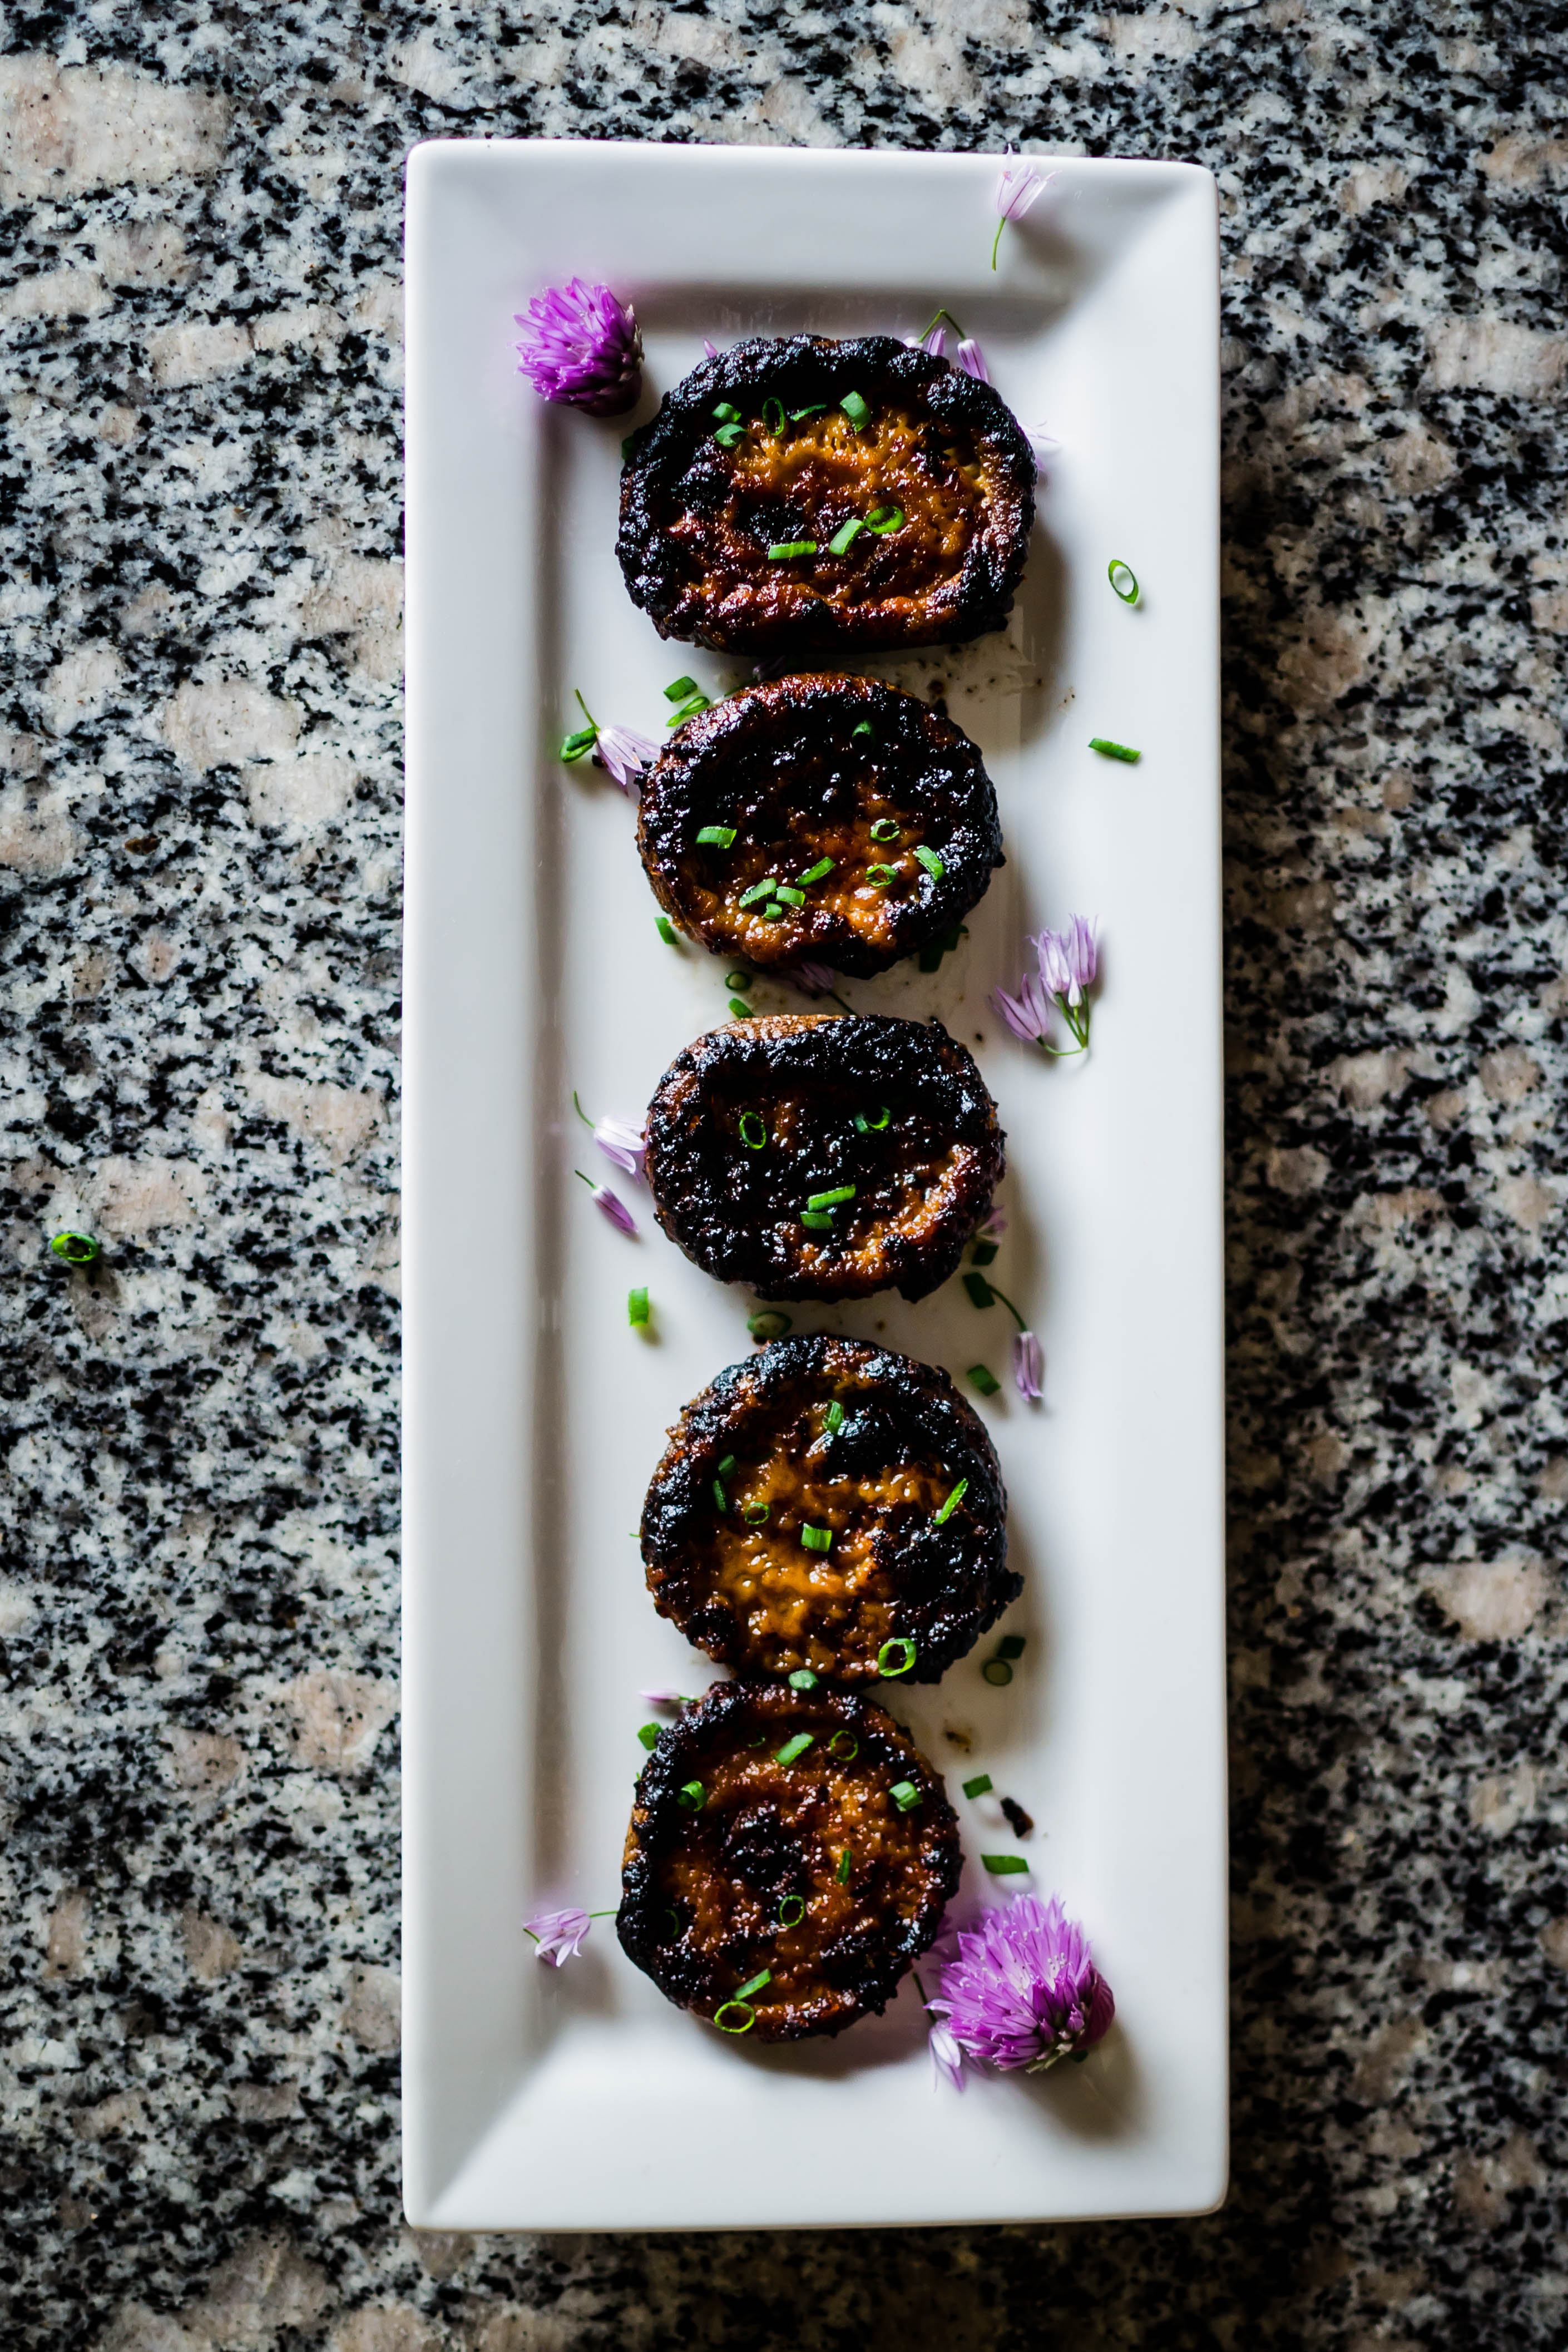
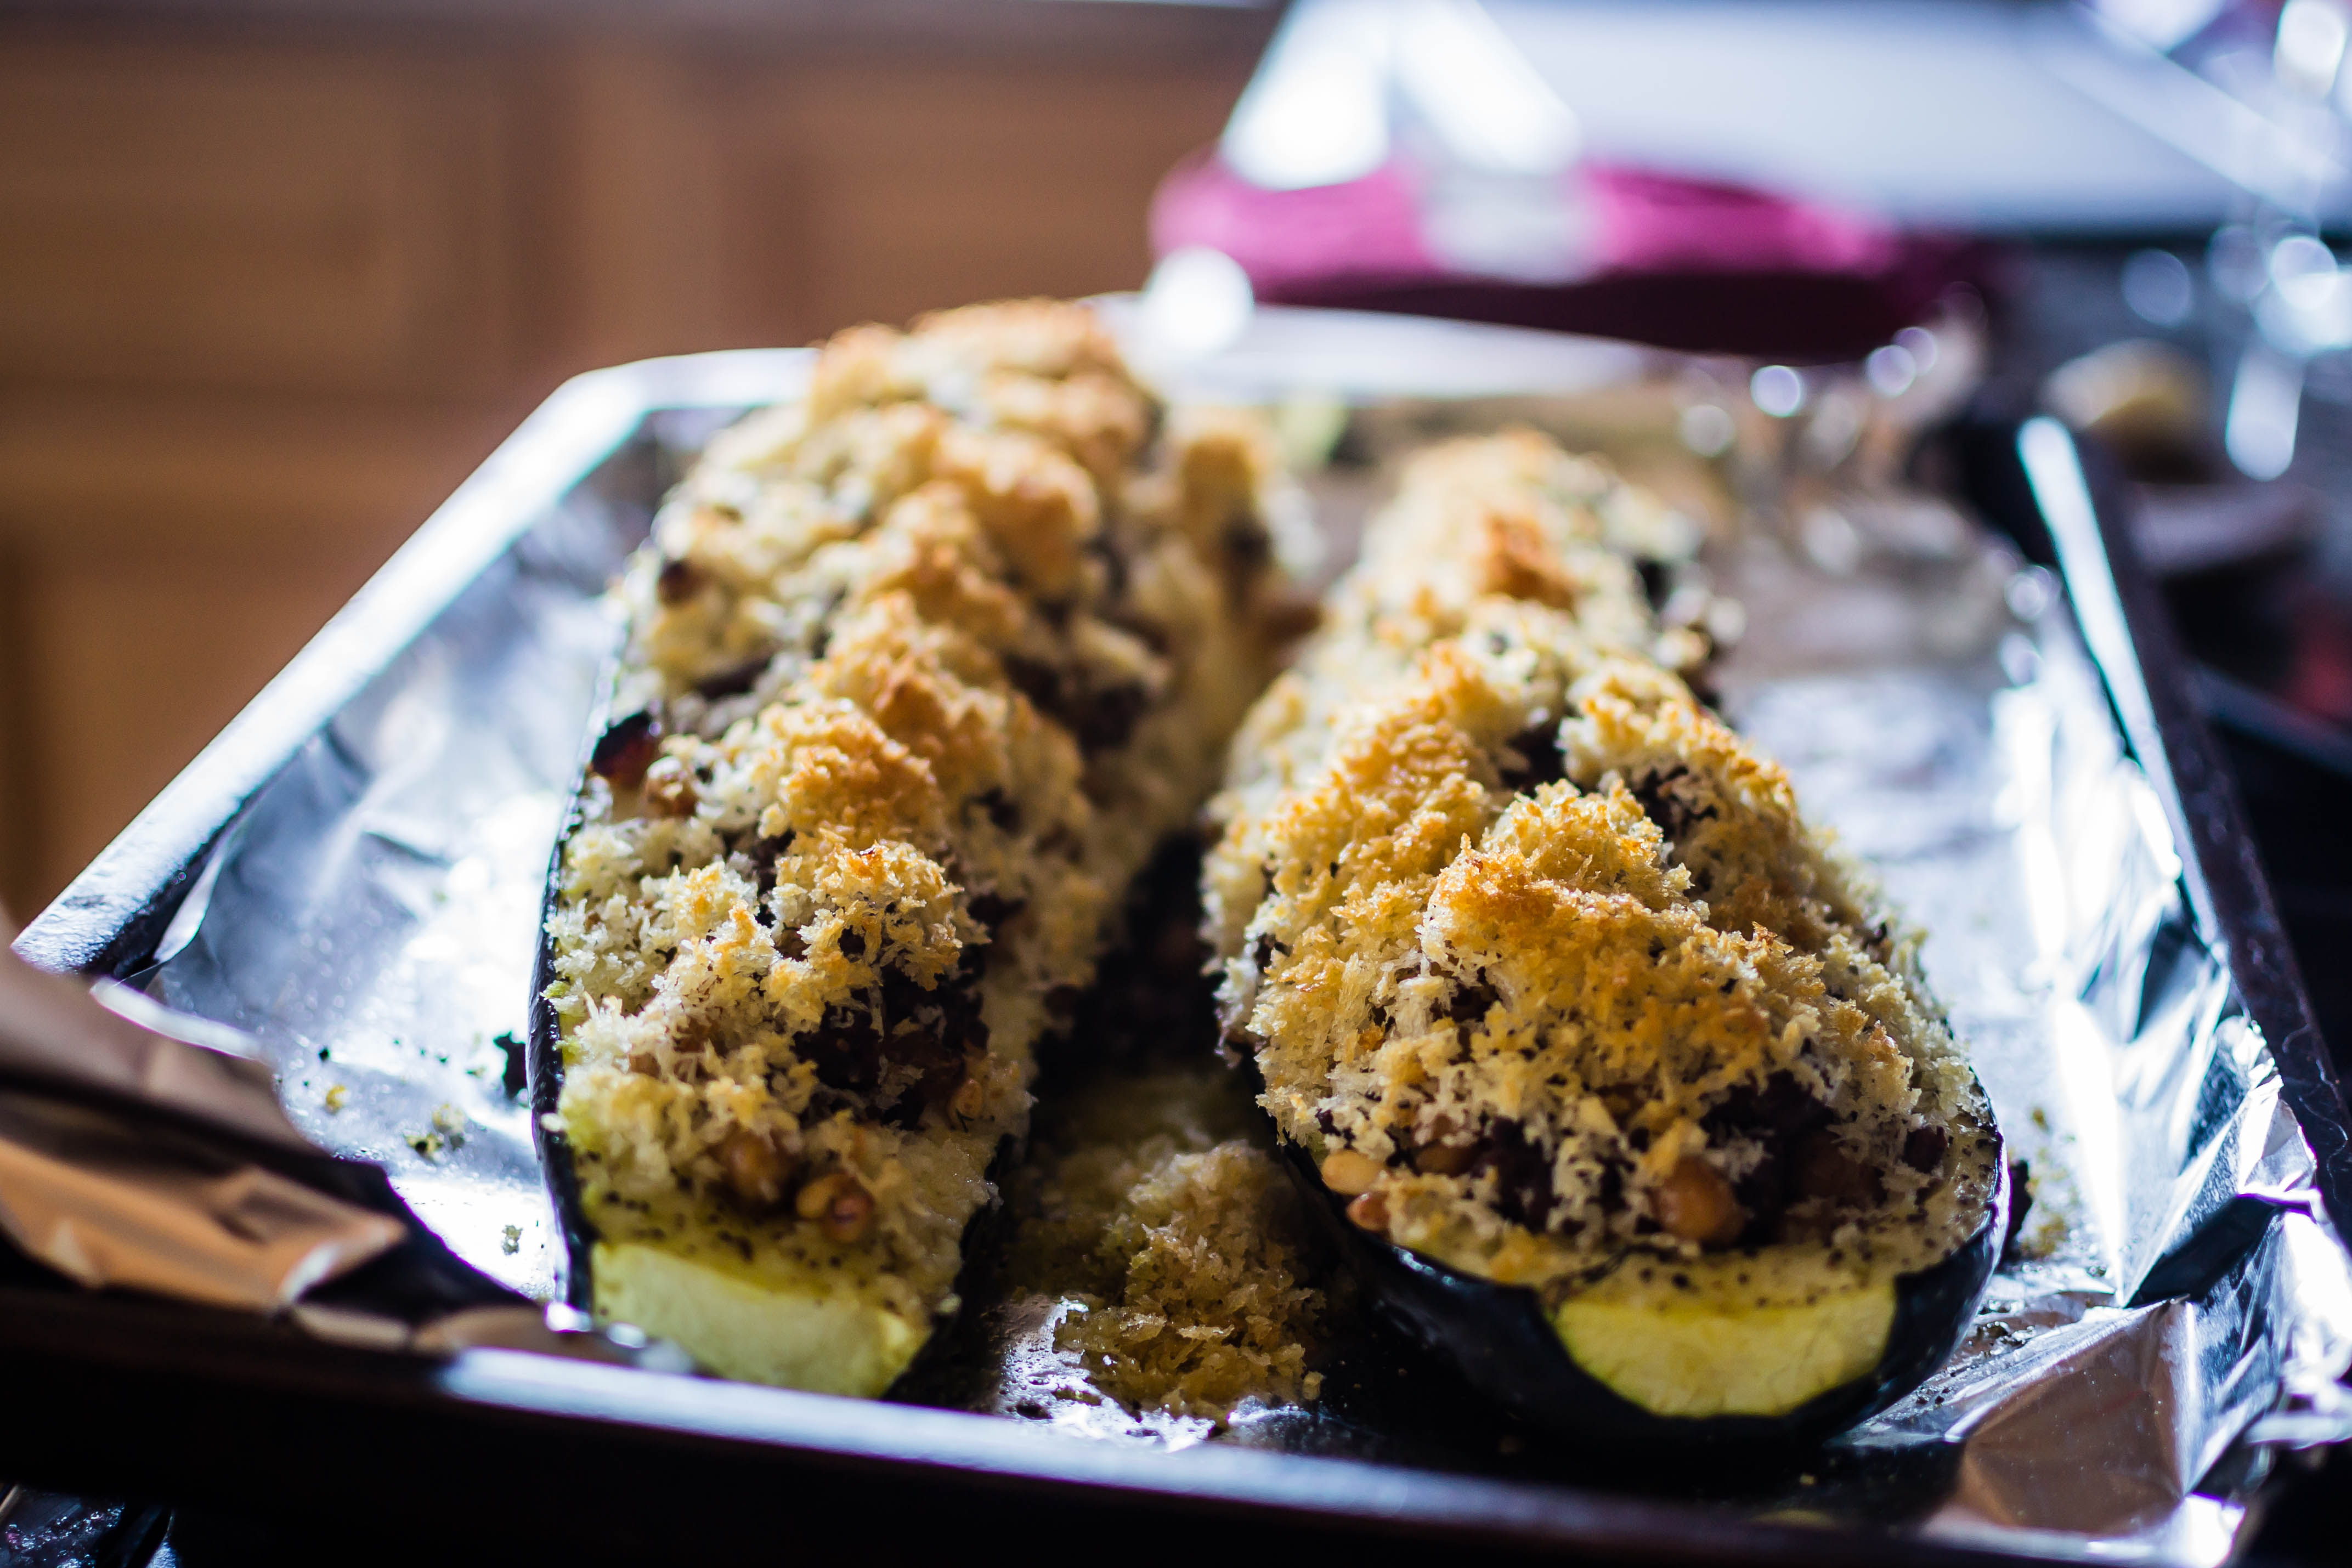
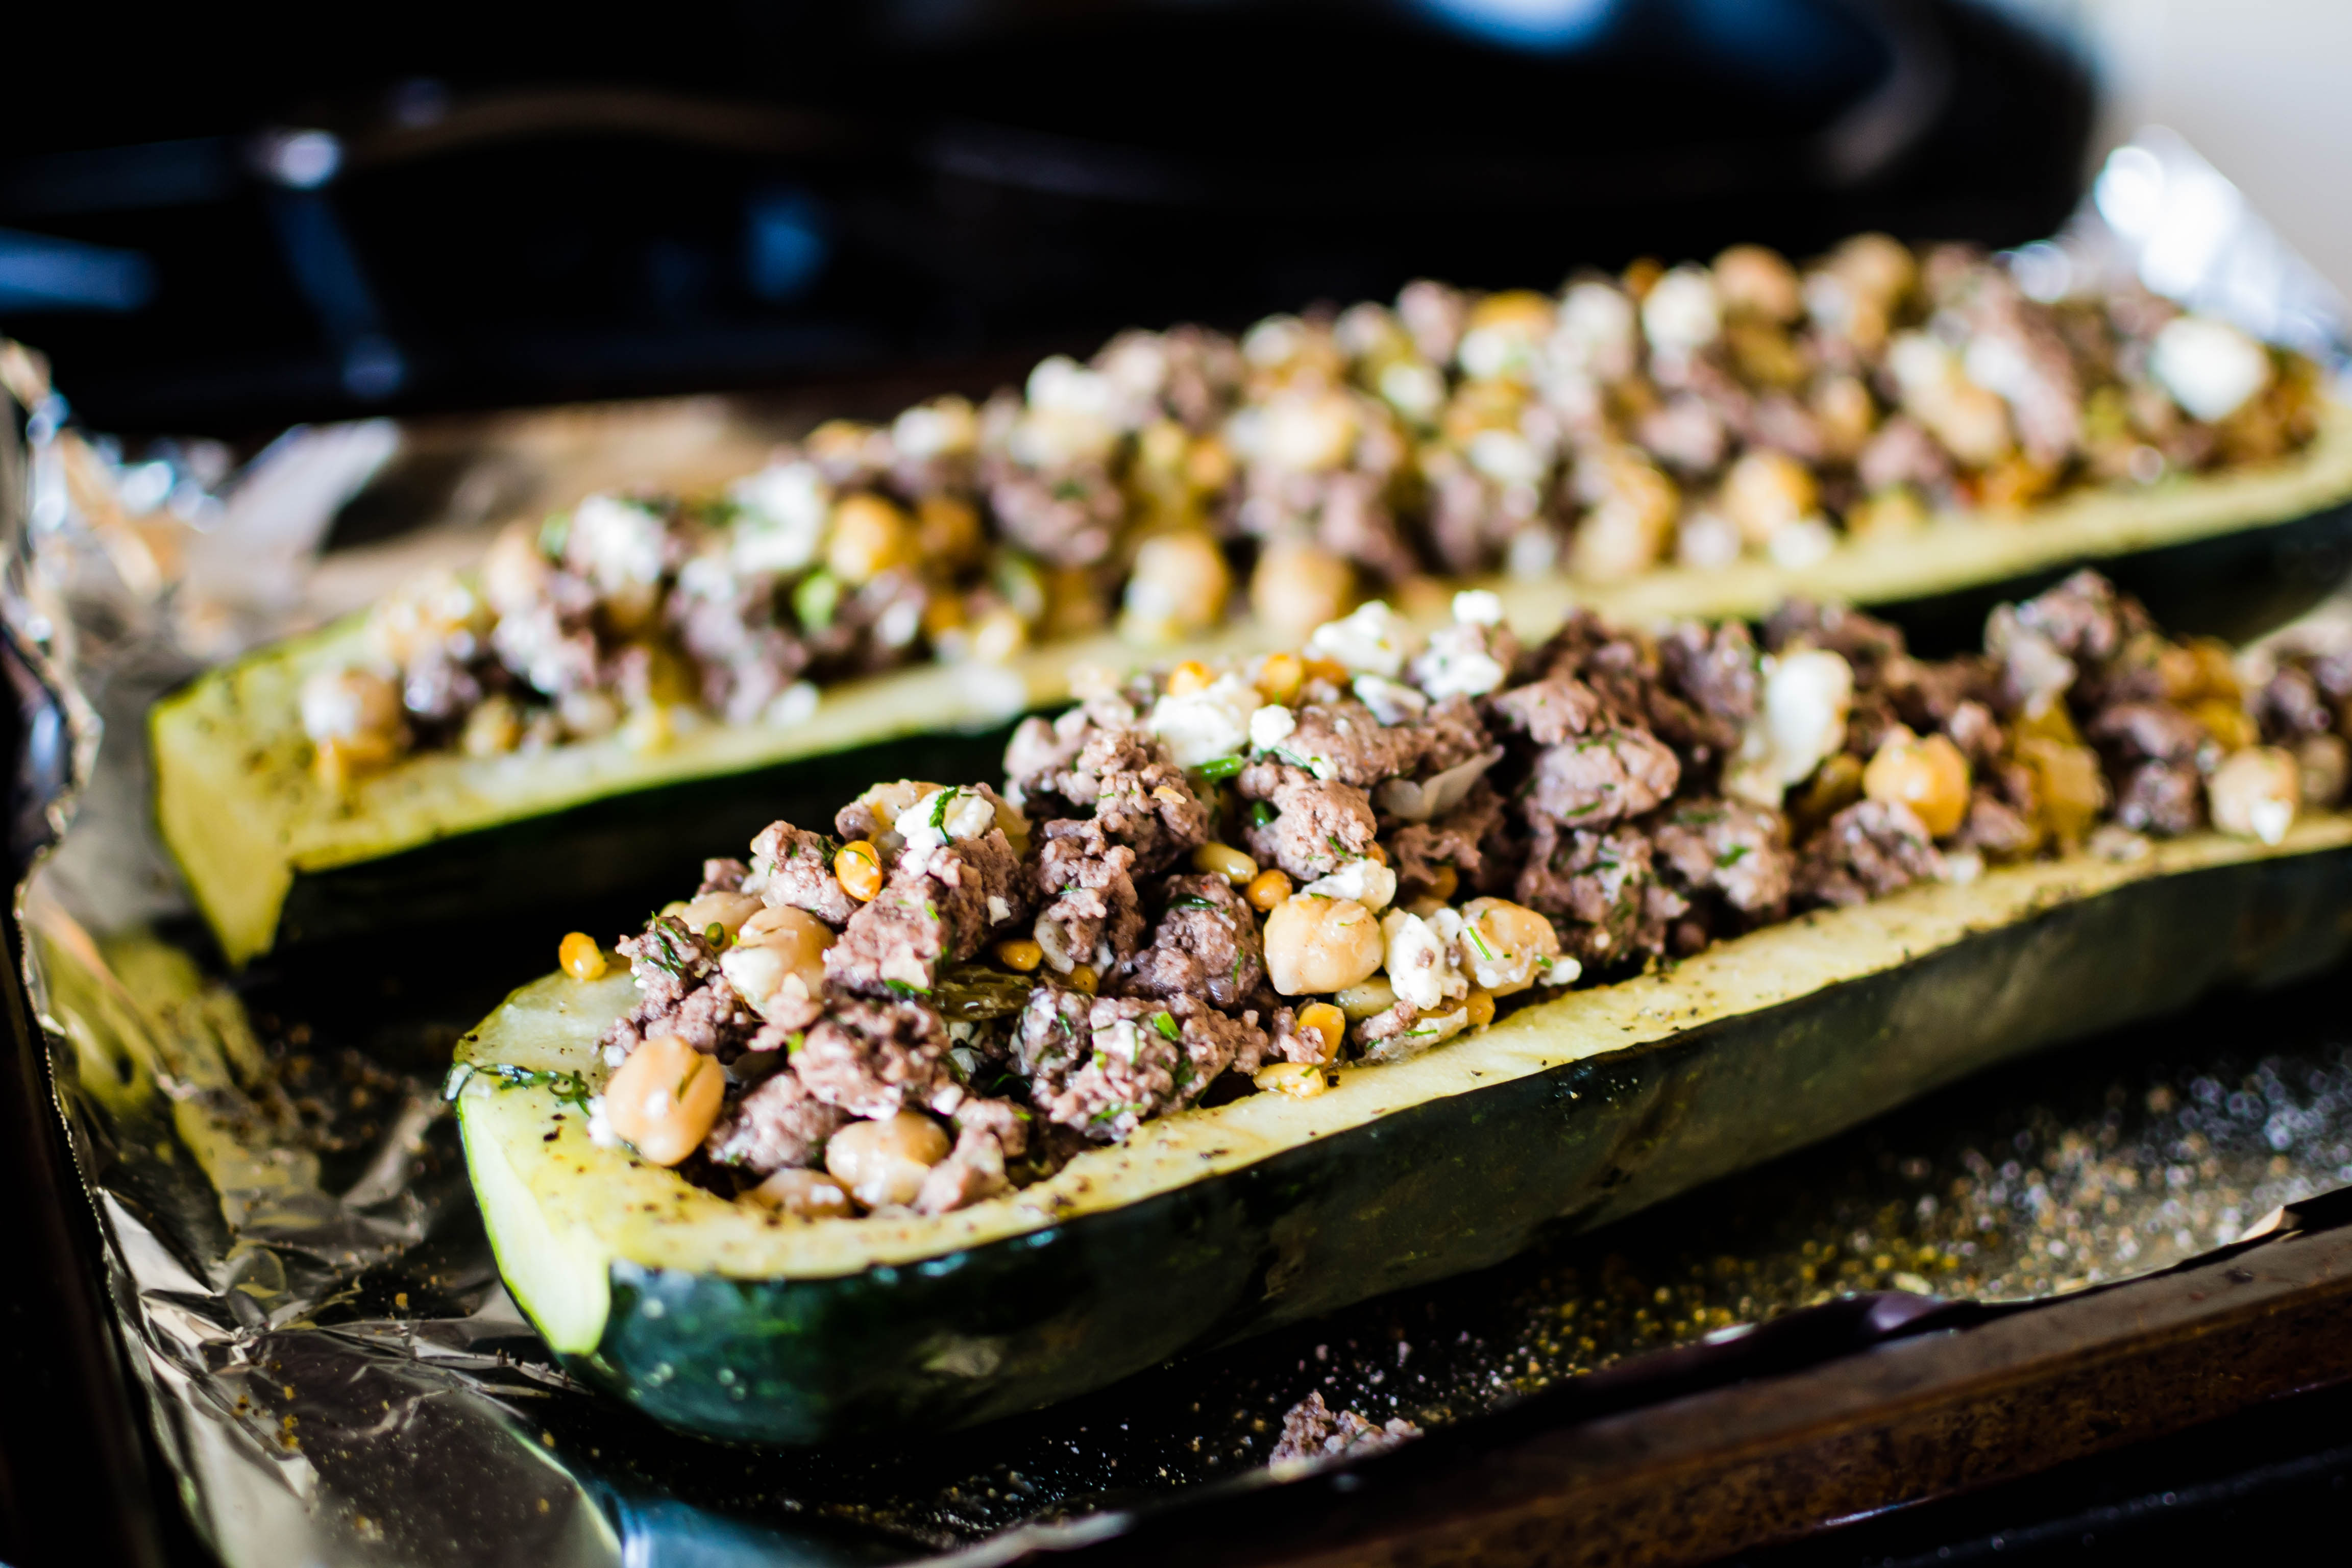
Rather than an accompaniment or a burying-ground, this recipe uses the zucchini as a vessel. Ground lamb, seared and spiced and liberally tossed with toasted pine nuts, golden raisins, chick peas, preserved lemon, feta crumbles, and as much grassy, bright dill as you can handle, gets piled into the scraped-out cavity of the monstrous squash. A mound of oiled breadcrumbs on top is not a necessity, but what a luxury.

This may seem like a lot of ingredients, but they really play together well. Lamb with dill is obviously a winner, but if you haven’t tried lamb with golden raisins, I insist that you make it a priority – they add a perfect sweetness and here, soak up some of the fat from the meat so they are juicy and plump in the final product. The feta and preserved lemon each contribute a nice brininess – I wouldn’t forgo either, though if you don’t have preserved lemon (and are unwilling to make it yourself), plenty of zest might fill in reasonably well. I initially added chick peas as a way of stretching the lamb, and you certainly don’t need them, but they provide a nice lightness of their own and, I think, eradicate any need for a side of starch. Though we ate ours overflowing segments with garlic-rubbed toast and were quite happy.

I like to think this filling has a life of its own beyond zucchini, which is what makes it so nice. A well-hollowed eggplant would work nicely as well, maybe a cored bell pepper, and as the days shorten and hopefully cool, a carefully carved butternut or kabocha squash. Or you could just ignore the vegetables entirely and use the lamb mixture (maybe minus the chick peas) as a loose filling for a take on stuffed shells, or ravioli, or just tossed gently with rigatoni and a few glugs of sauce.

Lamb Stuffed Zucchini
Serves 6-8 with filling left over
About an hour
1 very large zucchini squash
a maximum of ½ cup olive oil (you probably will not use all of it)
salt and pepper to taste
⅓ cup pine nuts
1 pound ground lamb
1 teaspoon allspice
¼ teaspoon cayenne pepper
15 ounce can chick peas, drained and rinsed
½ cup golden raisins
2-3 tablespoons finely diced preserved lemon
3-4 tablespoons finely chopped fresh dill (you could sub with an equal amount of mint or about half as much oregano, if you don’t like dill)
4 ounces crumbled feta
¾-1 cup panko bread crumbs


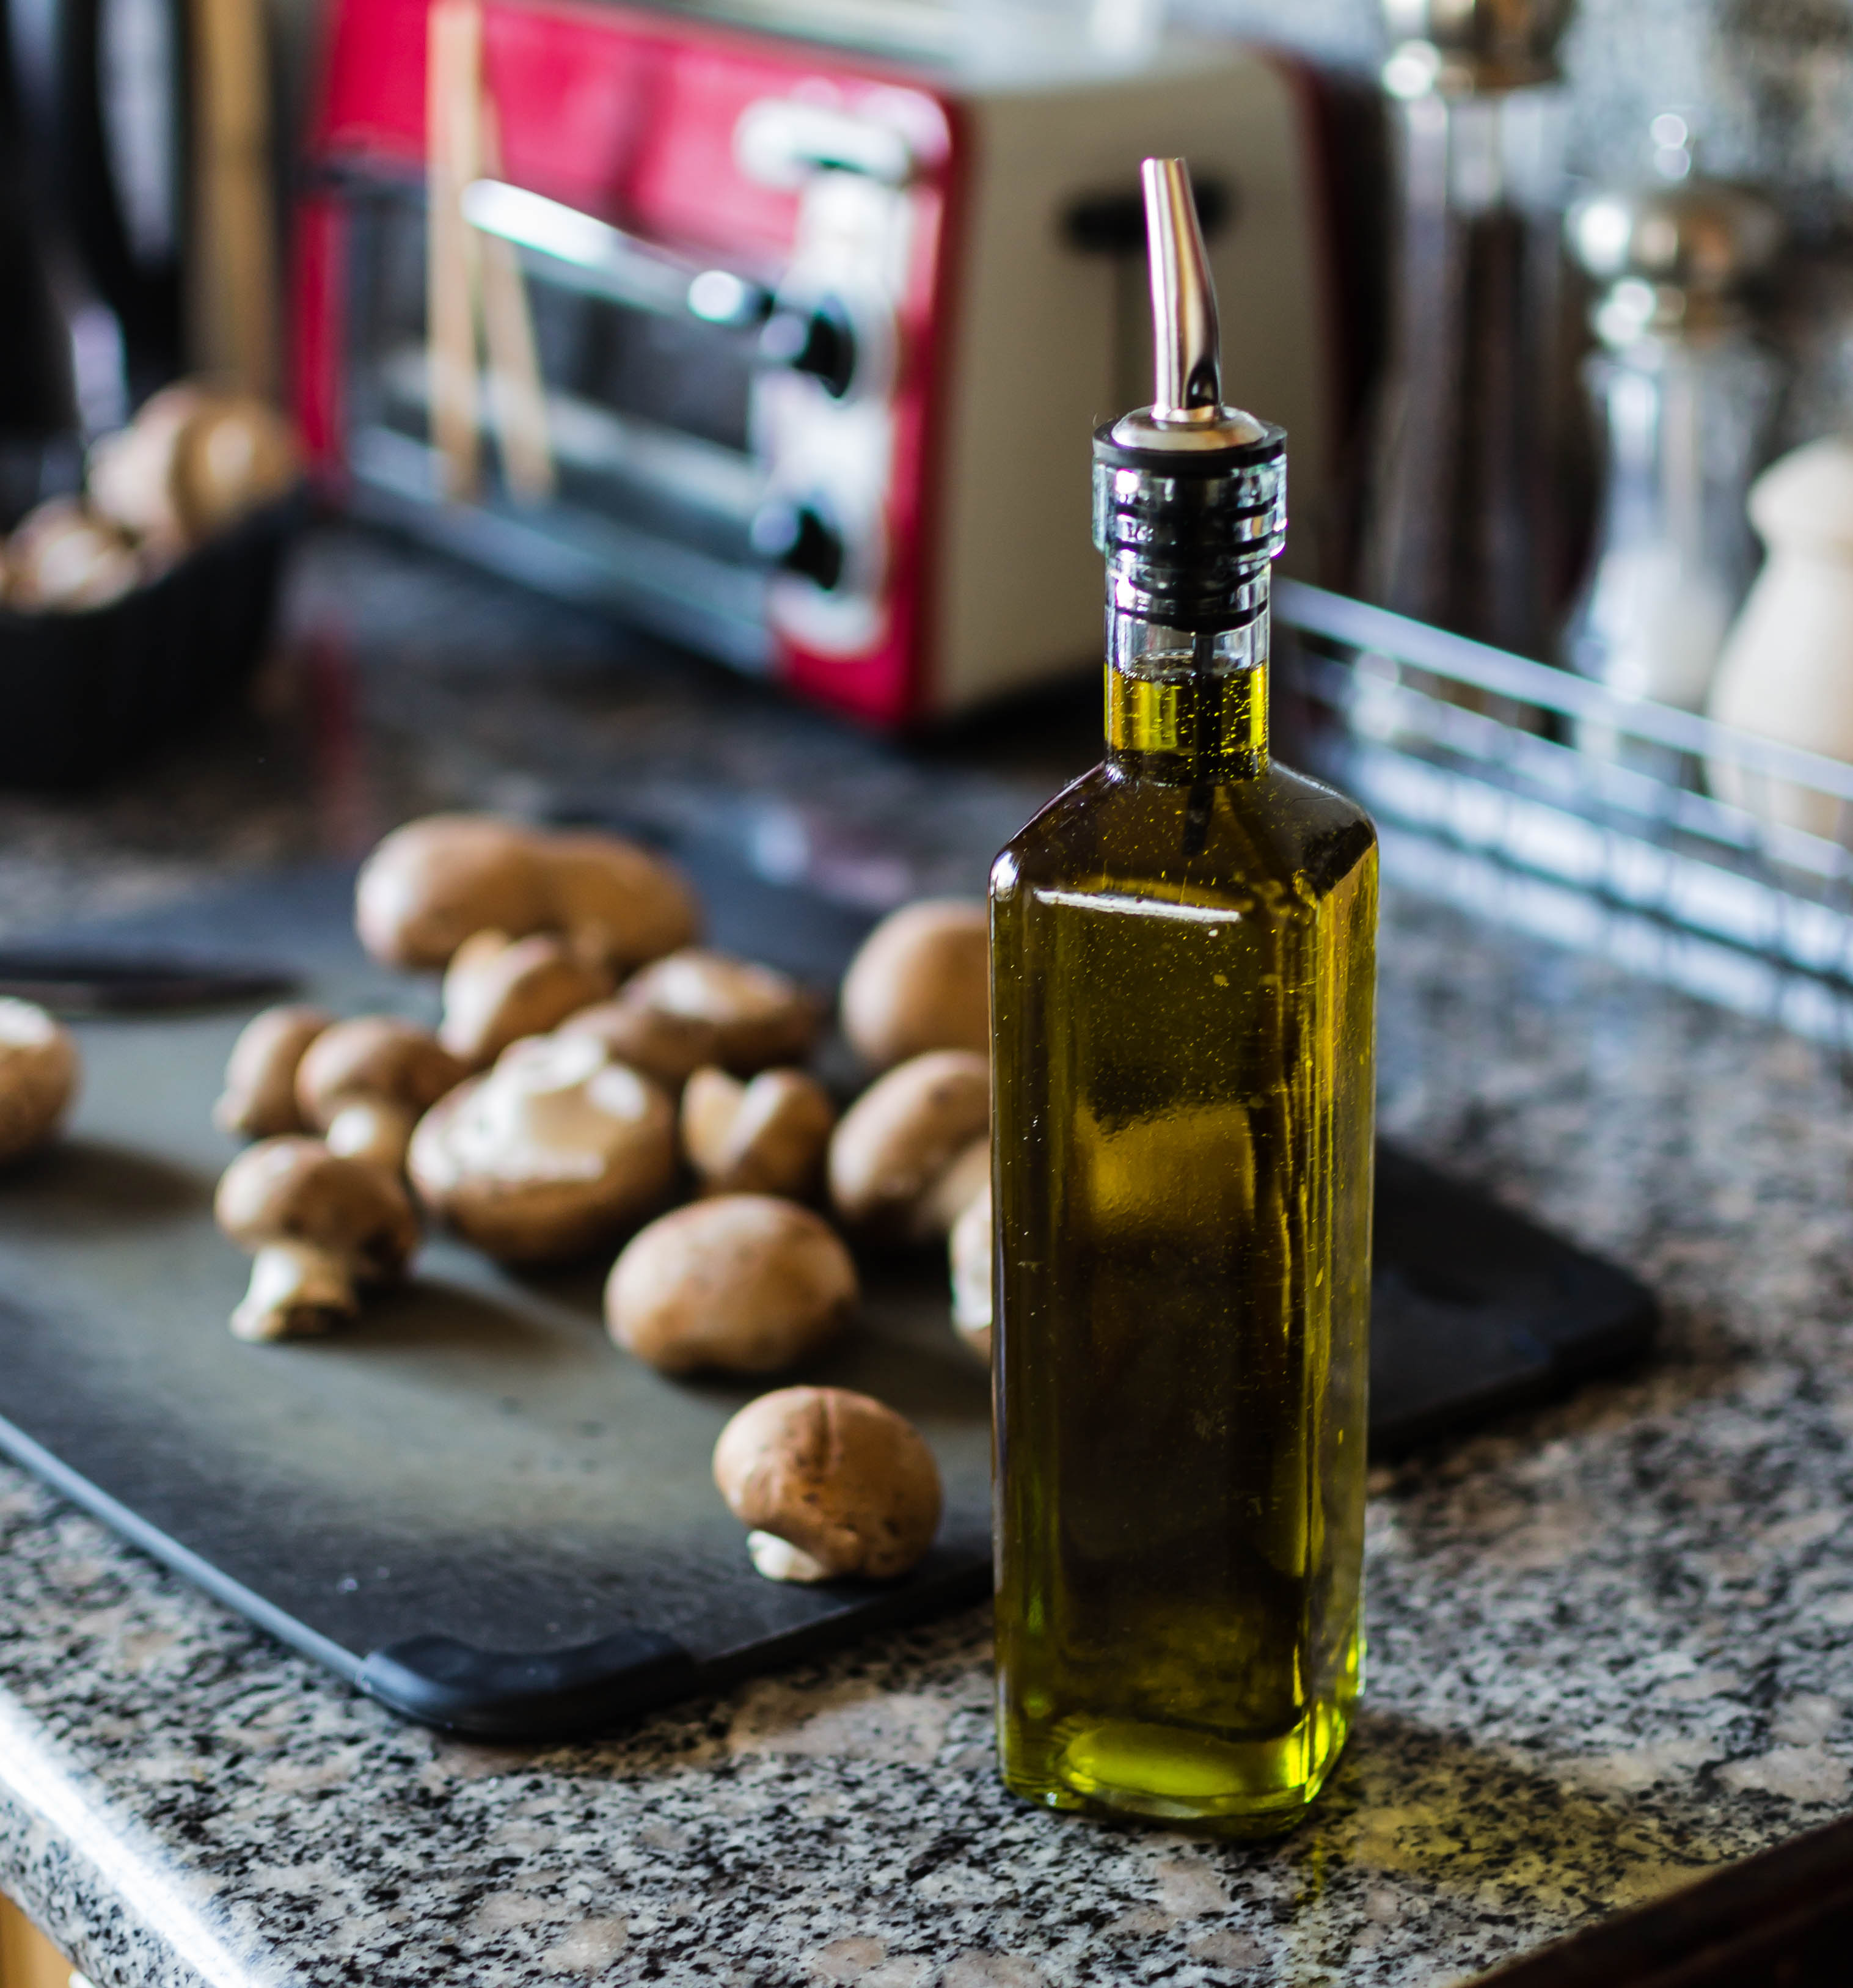
  • Preheat the oven to 400F and line a large baking tray with aluminum foil. Split the zucchini in half lengthwise so you have two long, rounded planks with seeds exposed. Scrape out the seeds and some of the interior flesh with a metal spoon. Discard the scrapings and place the remaining “boats” on the baking tray. Lightly coat them with olive oil before seasoning liberally with salt and pepper. When the oven is preheated, put in the zucchini-laden baking tray and let them roast about 20 minutes while you start the filling. After 20 minutes, remove from the oven and set aside.
  • To make the filling, first heat about 1 tablespoon of olive oil in a medium pan and add the pine nuts. Toast over medium heat, stirring and checking often, until they are nicely golden. Be careful; they burn quickly. When toasted to your liking, set them aside.
  • In the same pan, still on medium heat, add a little bit more oil and then your ground lamb. Use a flat-sided wooden spoon, if you have one, to break it up, then sprinkle over the allspice, cayenne pepper, and a bit of salt to season. Let it cook, stirring and turning and continuing to break up large chunks, until no longer pink in the center.
  • When the lamb is just cooked through, stir in the chick peas and the golden raisins, turn the heat down to medium-low, and let it go another five minutes. This lets the new additions pick up some flavor. After five minutes, remove from heat and drain off any excess fat.
  • To the now-cooked lamb, add the toasted pine nuts, the preserved lemon, the dill, and the feta, stirring well to combine everything. Taste for seasoning and add salt and more cayenne pepper, if needed. When you are satisfied with the flavor, scoop the filling into the empty, partially-cooked zucchini halves. I like to mound it up a bit. It will be crumbly because there is no binder.
  • In a small bowl, toss the panko bread crumbs with enough olive oil to coat them well. Pack spoonfuls on top of the lamb filling and exposed zucchini flesh.
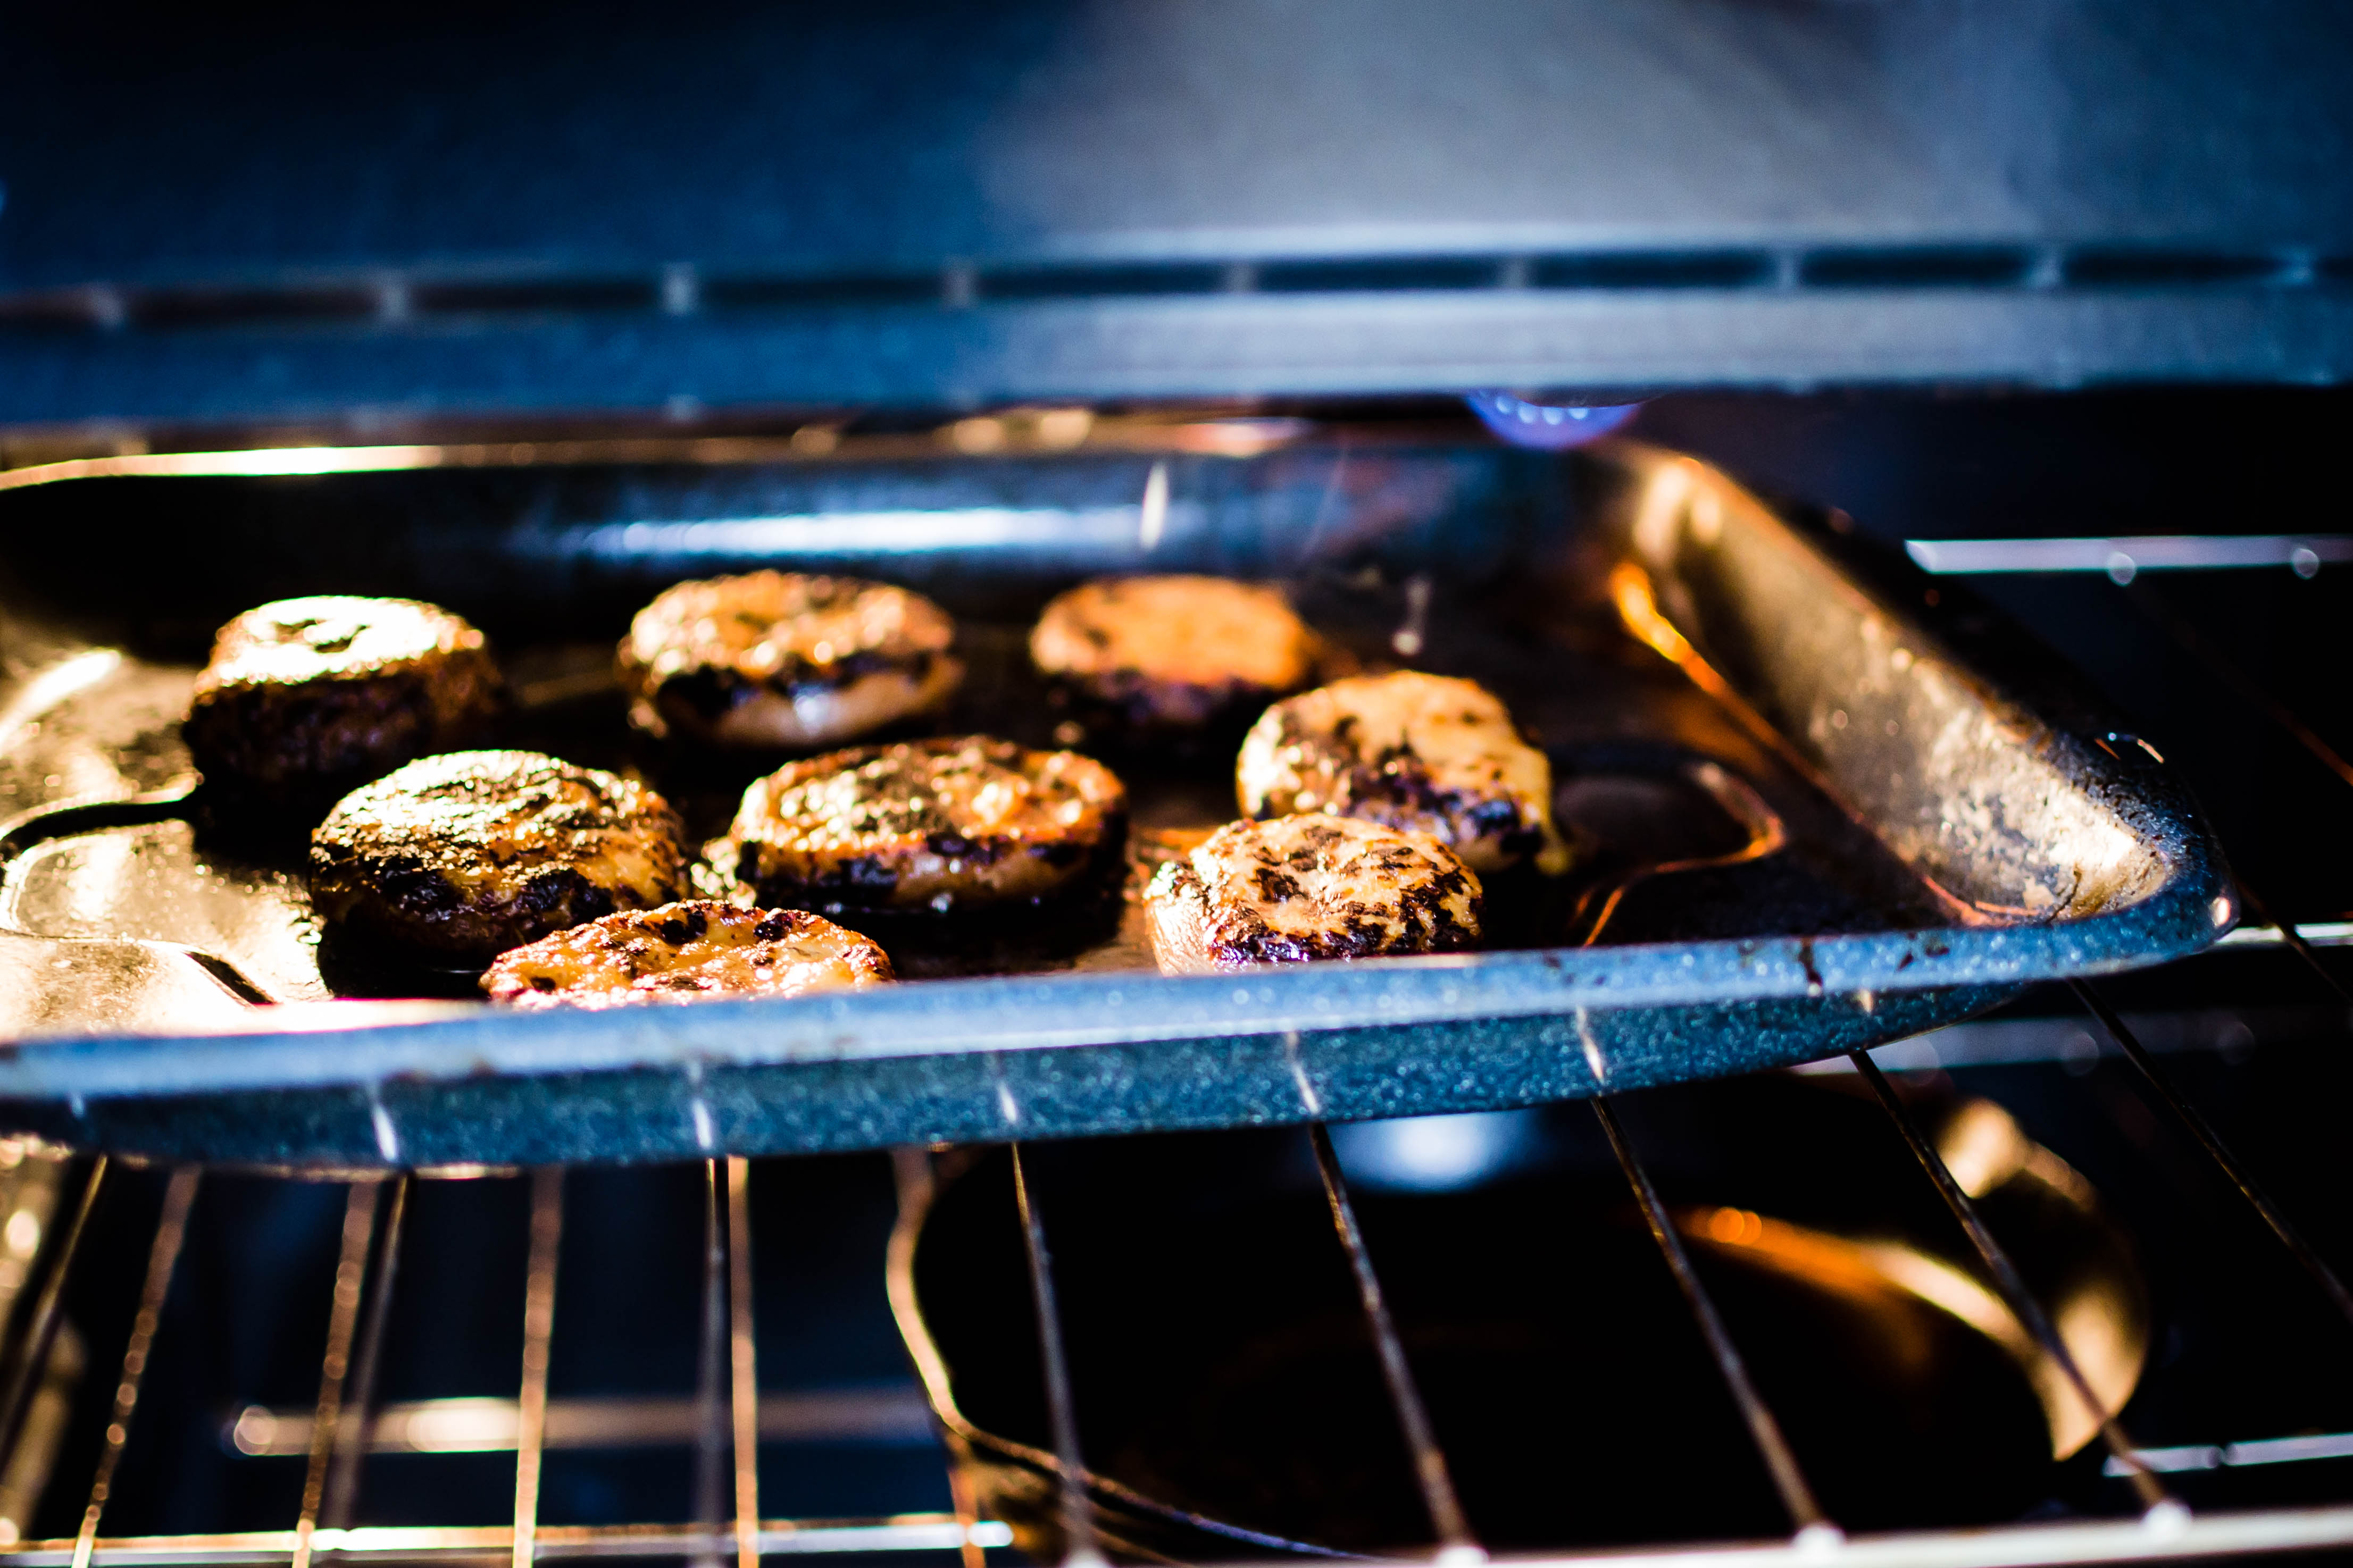
  • Carefully place the laden tray back into the oven, turn the temperature down to 375F, and roast for 25-35 minutes, until the panko is deeply bronzed and the flesh of the zucchini pierces easily with a fork.
  • Let cool about 5 minutes before slicing and serving large segments.


Miso Butter Broiled Shiitakes

It has been a busy couple of months. I’m getting used to the lack of cooking companion in my doorway, watching intently as food moves from countertop to stove (and sometimes to the floor – much consternation resulted!), and I’m slowly regaining that urge to putter around and experiment in the kitchen. I didn’t know how much this part of my life would be impacted by the absence of a big, golden dog.

But anyway, in addition to that change, we’ve also been busy planning our summer (more on that soon…), and working through the semester, and at the end of April, N. crossed a huge item off his bucket list as he successfully finished the Eugene Marathon! Not only was this a major accomplishment for him; it also provided the inspiration for this post. During that weekend, we stayed with our friends S. and M., and as part of a Friday evening happy hour spread, S. made these mushroom caps, smeared with a mixture of miso paste and butter, broiled until charcoal black but so savory and deep and perfect we could barely keep our fingers away long enough to let them cool. They were a restaurant recreation of hers, from an appetizer at a local izakaya, and I haven’t stopped thinking about them since. On a long, slow Saturday, punctuated by errands and an intense summer travel planning session, they seemed the right late-afternoon accompaniment to a glass of pinot noir.

The ingredient list here is unusually short, for me: shiitake mushrooms, miso, butter. Maybe a shower of chives, if you want a little color and hint of onion-y freshness on top. The mushrooms are stemmed, the miso and butter are whisked or smeared or stirred together, the mixture gets liberally frosted onto the gills of the shiitakes, and into the broiler they go. 5-10 minutes later, you are dispensing small, homely saucers approximately the temperature of the molten center of the earth, but so incredibly savory and chewy and crusty and almost too salty in just the right way, that if you are anything like me, you will already have eaten a few in the kitchen before anyone else knew they were ready.

When you broil miso and butter together, some of the intense mixture seeps down into the mushroom as it softens and barely cooks through, but much of it remains trapped in the enclosing folds of the cap, where the butter bubbles and the miso takes on an appealing char not unlike the crusty exterior of a grilled steak.

The trickiest part of the whole procedure is managing your broiler. You want the mushrooms to cook, but you also want the deep browning on top, and since every broiler is so different, I’ve included below only the most basic of instructions. Yours might do best on low, or on high, and it might take as few as four or as many as ten minutes for satisfactory results. In any case, I’d say to let them go a tiny bit longer than you think you need to, because I promise it isn’t burning; it’s just getting better.

Miso Butter Broiled Shiitakes
10-15 minutes, depending on your broiler
For 8 shiitake caps:
8 large shiitake mushrooms, stems removed
2 tablespoons red miso paste (or use white for a less intense miso flavor)
4-5 tablespoons softened (not melted) unsalted butter
sprinkle of chives to garnish, optional


  • Preheat your broiler. I set mine to low with the rack closest to the broiler element. Broilers are all so different, so you might need to experiment a bit.
  • In a small bowl, combine the miso paste and softened butter with a flexible rubber spatula. Mix and smash and stir until the butter and miso are homogenized.
  • Using the same spatula, fill each cap with the miso and butter mixture. Depending on the shape of your shiitakes, you might have more or less room to fill. Mine were quite roomy and I used almost all of the mixture. If yours are small or flattish, you will probably have miso butter left over. May I suggest an amazing spread for avocado toast?
  • Arrange the filled mushroom caps evenly, with space in between, on a broiler-safe tray or pan. Broil until the miso and butter mixture is bubbly and very, very dark – it will look a little burned – and the mushroom caps have softened and flattened a bit. Again, broilers are so different. On low, mine took about 7 minutes. Play with yours and judge accordingly.
  • Remove from the oven and let sit 1-2 minutes, until they are no longer the temperature of fresh lava. Sprinkle with chives if desired, scoop onto a decorative plate, and consume immediately.

Fake-out “beef and broccoli” over brown rice cakes

I fell off the wagon in a big way. I know. Between the time of the semester and the recent loss of my best canine kitchen helper*, I haven’t felt particularly inspired in the kitchen as of late. And I’m behind on my Chopped Challenges. The producer/judge has been informed of this and is apparently “cooking” up a basket for me… But I do have one little triumph I’d like to offer.

I tend to vehemently resist foods that try to be other foods – I like tofu and tempeh, but I like them for what they are, not as “fake meat.” I’ll happily buy both soy-based sausages and bratwurst in the same shopping trip, because I like the taste of each one. So it’s not really common for me to concoct vegetarian meals for the purpose of substitution or imitation. But when, a few weeks ago, I unceremoniously tipped a few tablespoons of oyster sauce over a skillet full of well browned mushrooms and kale and the result tasted almost exactly like a plate of beef and broccoli from a neighborhood Chinese restaurant, and when we spent the part of the evening usually reserved for reluctant washing of dishes instead picking the leftovers out of the skillet, I decided this one was worth sharing.

Recently I’ve discussed my new obsession of crisping rice in the pan before serving, and as the owner of a new stove with magnificently hot burners, this practice is getting easier and more dependable, and I just can’t. stop. doing. it. Here, I thought the crisp nuttiness of the rice would be a great flavor and textural contrast to the vegetables and their savory sauce. In lieu of a fancy ring mold, I packed steaming spoonfuls of cooked brown rice into a biscuit cutter, pressing the rice down firmly to create a disc that stayed together, before levering it carefully a pan of extremely hot oil to brown and crisp on each side.

It’s a classy looking presentation, too, if you’re careful enough that the cakes stay together during transport, as you can stack or fan the cakes artfully across a plate or platter before smothering them with their umami-laden topping.

For a light dinner (but heavy in flavor), we didn’t think this needed another thing, but if you want added substance, a good bowl of won ton or hot and sour soup as a lead-in certainly wouldn’t be amiss.

* At the very end of March, after much discussion and heartache, we let our Lucy go. She was almost fifteen and her quality of life was beginning to diminish due to mobility problems and increasingly frequent infections that were becoming resistant to antibiotics. Don’t worry, though; we sent her out with true foodie-style aplomb: on her last day she had bacon for breakfast, and a big slice of chocolate cake after a lunch of chicken, rice, and broccoli bits (her favorite vegetable), because why not? Eventually, her remains will fertilize and hopefully help grow a raucous mix of wildflowers in the back corner of our yard, beneath a pink trumpet tree. We think she would like that.

She couldn’t stand like this anymore, but this was her favorite way to be in the kitchen with me: interested and close to the food.

Fake-out “beef” and “broccoli” on brown rice cakes
Serves 2-3
About 60 minutes (brown rice takes a while…)
1 cup raw brown rice
24 ounces crimini mushrooms
8 ounces kale
about 6 tablespoons olive oil, divided
2-3 tablespoons oyster sauce
1 tablespoon soy sauce or to taste
black pepper to taste
1-2 tablespoons sliced green onion tops, dark green parts only


  • Cook the 1 cup brown rice according to package directions. I always use my rice cooker, where it takes 45-50 minutes. You’ll prep and cook everything else while it is working. When it finishes, remove the lid of the cooking vessel to let it cool slightly, and stir in the 1-2 tablespoons sliced green onions.
  • Preheat the oven to 400F. As soon as you turn it on, line a sheet tray with aluminum foil, drizzle on 2 tablespoons olive oil, then put that in the oven while it preheats, so the oil is hot when the mushrooms are ready.
  • While the oven and the pan heat, prep the vegetables: stem the mushrooms, wipe the caps gently if they seem dirty, then quarter each one. Remove the central tough stem from the kale and chop into bite-size or slightly larger pieces (it will wilt down a bit as it cooks), and set aside. Slice up the green onions and set them aside as well.
  • When the oven has preheated, carefully remove the oiled pan, add the mushrooms and a little more oil, then place back into the oven. Roast at 400F for 20 minutes, remove and pour off any collected liquid, gently toss the mushrooms, and return to the oven to roast for another 20 minutes. They will be deeply browned, a bit wrinkled, and concentrated in flavor.
  • When the mushrooms have about 10 minutes to go, heat a scant 1 tablespoon olive oil in a large skillet over medium heat. Add the kale all at once and let it cook down for a minute or two, then toss in about 1 tablespoon water to help. Wilt until it is as tender as you like; I like a bit of bite in there still, so I only cook it for 3-4 minutes.
  • When the mushrooms and kale are finished cooking, add the mushrooms to the skillet with the kale, stir in the oyster sauce (start with 2 tablespoons – it is strong), then season to taste with soy sauce, black pepper, and/or more oyster sauce as you wish. Set aside (if you want fewer dishes, dump the vegetable mix back onto the sheet tray you cooked the mushrooms on, turn off the oven, and put the tray back inside – the residual heat will keep things toasty while you finish the dish. Meanwhile, quickly wash out the skillet, dry, and continue as directed below.)
  • To make the rice cakes, heat the final 2 tablespoons olive oil in a skillet over high heat until the oil is shimmering and almost smoking. While it warms, if you haven’t done so already, mix the 1-2 tablespoons sliced green onions in with the rice. Pack about ⅓ cup rice into a 3 inch ring mold or biscuit cutter set on a cutting board that can handle the heat, pressing down very firmly with the back of a spoon. Carefully remove the cutter; if you’ve packed tightly enough, the rice should stay together. Repeat until you have sufficient rice cakes; plan for 2-3 each (I found 2 per person was perfect; I think N. would happily have gone for a third).
  • Use a spatula to carefully transport the rice cakes from cutting board to skillet one at a time. Once they are in the skillet, do not adjust or move them. Turn the heat down to medium-high, and let them sit and sizzle for 3 minutes without disturbing them. This is essential for structural integrity.
  • After 3 minutes undisturbed, gently but firmly flip each rice cake using a thin spatula, and cook another 3 minutes until nicely browned on both sides.
  • To serve, arrange rice cakes on a plate as desired, add a few scoops of kale and mushroom mixture on top, and eat immediately.

Roasted Tomato and Red Pepper Bisque with Herb Puree and Cheese Toast

Just under the wire: your October soup! I debated between this and tortilla soup for several weeks, then it was too hot to think even remotely about soup, and when I came out on the other end, almost time for Halloween and without a single container of chicken stock in my freezer nor an ounce of impetus to make any, all I could think about was a tomato bisque with a swirl of pesto I had at a surprise Friday lunch date with N. last month at a little bistro we like, and the decision was made. Bisque is traditionally a soup made with seafood stock to which cream is added – lobster bisque is of course the poster child. However, it has evolved, as food so often does, and now seems to just indicate a soup that has been blended to smooth consistency and finished with cream. Tomato seemed like a good way of making it a vegetarian option, and I have a soft spot for tomato soup. For extra interest, I wanted to add roasted red pepper to mine, to evoke that dry, smokiness fall can sometimes carry with it. As for the tomatoes, I dithered: did it make sense to look for lingering heirlooms at my Farmers’ Market, or settle for grocery story options, and should I peel or not peel? And would it be cheating if I just grabbed a jar of fire-roasted and called it a day?

Then my friend S. sent me Deb’s new book, and of course she already had the answer, which she says came from Cook’s Illustrated: gently split and drain the canned tomatoes, and roast them until dried and lightly colored. This concentrates their flavor, saves you the headache of deciding on perfect tomatoes, makes this an any-time-of-year option, and gives you time to prep the rest of the ingredients while the tomatoes are in the oven. Yes, it probably makes the soup take a little longer to come together, and yes, if you don’t line your baking sheet with aluminum foil first you’ll be every so sorry, but the flavor difference is noticeable, so I think it’s worth doing. The roasted flavor is evened and enriched by the cream we add at the end, and I think it also combats that too-acidic bite tomatoes sometimes have. But if you find yours are still a touch sour at the end, add a quick squeeze of honey.

A tomato soup is a comforting standard, but the trick – and treat – of this one is the herb puree I made to imitate that pesto from the bistro. A quick whizz of basil along with whatever other soft stemmed herbs you like – parsley, dill, I threw in some sage, but it’s such powerful stuff you really only need a few leaves of it – a clove of garlic, some lemon juice if you dig that sourness, and enough olive oil to bring it all together.

The herb puree can be dolloped on or mixed in, but I wanted to be fancy, so I carefully dribbled a swirl through the center of my bowl. And then, because imagining a bowl of tomato-based soup without melted cheese on toasted bread is impossible for me, I broiled some sharp cheddar onto a few leftover slices of baguette and settled in for dinner.

*This recipe includes charring a fresh pepper and roasting a can of tomatoes, but you can also make it easy on yourself and sub in roasted red peppers and fire-roasted tomatoes, and I bet your results will be similar, and cut down about half an hour of the time it takes to make this. If you try that way, let me know how it turned out.


Roasted Tomato and Red Pepper Bisque with herb puree and cheese toasts
About an hour, if your tomatoes and peppers are not pre-roasted. About half an hour if they are.
Serves 4 as a light dinner
For soup:
1 large red bell pepper (or 1 jar roasted red peppers, drained)
1 tablespoon olive oil
28 ounce can whole peeled tomatoes, plain or fire roasted
½ cup diced onion
2-3 cloves garlic, smashed, skins removed
2 tablespoons butter
2-2½ cups vegetable or chicken stock (you may not use it all)
1 bay leaf
1 teaspoon fresh oregano (1-2 sprigs)
salt and pepper to taste
½-1 cup heavy cream
1-2 teaspoons honey, optional
For herb puree:
½ cup basil leaves
¼ cup other mixed herbs – I used parsley, chives, and just a few sage leaves
1 clove garlic
lemon juice to taste
¼-½ cup olive oil
For cheese toasts:
Per slice of baguette or half-slice of sandwich bread:
½ teaspoons mayonnaise
2 tablespoons finely grated sharp cheddar cheese


  • If you are using plain tomatoes, preheat the oven to 450F. If you are using fire-roasted tomatoes, no need. For both, open the tomato can and dump into a fine mesh strainer positioned over a bowl or a large glass measuring cup to collect the juices. As they drain, use your fingers to gently tear the tomatoes and extract some of the juice and seeds inside.
  • If you are using jarred roasted red peppers, skip this step. If you are using a fresh red bell pepper, while the oven is warming, char the red bell pepper over a gas burner turned on high. Let the skin blacken, adjusting the placement of the pepper with a pair of metal tongs to allow for maximum char. As each lobe blackens, turn to a new side, repeating until the skin is well charred and the flesh of the pepper is starting to soften, around 15 minutes. Transfer to a bowl and cover tightly with plastic wrap for another 15 minutes.
  • If you are using plain tomatoes, when the oven has preheated, cover a baking tray or roasting pan with aluminum foil, drizzle on the 1 tablespoon olive oil, and add the juiced, seeded tomatoes. Transfer to the oven and roast 25-30 minutes, until the tomatoes have dried out and are starting to take on a little color.
  • While the tomatoes roast and the pepper steams, turn your attention to the soup base. Melt the butter in a large pot over medium heat, then add the diced onions and the smashed garlic. Reduce the heat to medium-low, then sweat, stirring occasionally, until the vegetables are translucent and smell sweet, 8-10 minutes.
  • After the pepper has steamed for about 15 minutes, strip off the plastic wrap and use a knife to cut a slit into the pepper (be careful – hot steam will be released). When it is cool enough to handle, wrap it in a dry paper towel and rub to remove the majority of the skin – it should slide off relatively easily. Don’t worry if a few charred pieces stay on. Split the pepper in half, remove the stem and seeds, then roughly chop the flesh.
  • Add the chopped pepper and the roasted tomatoes to the pot with the onions and garlic (or add the drained fire-roasted tomatoes and jarred roasted red peppers). Add enough vegetable or chicken stock to the reserved tomato juices to make 2½ cups of liquid. Add to the pot along with the bay leaf and oregano. Bring to a boil, then reduce the heat and simmer 20-25 minutes with a slightly vented lid.
  • While the soup is simmering, you can make the herb puree. In a food processor or blender, combine the basil, other mixed herbs, a few tablespoons lemon juice, and about ½ teaspoon of salt. Buzz to combine. While the processor is running, stream in about ¼ cup olive oil. Stop the processor, scrape down the sides, and assess. You want a reasonably smooth, well-seasoned puree. If needed, add salt, pepper if you wish, and lemon juice. If the herb pieces still seem dry and not well integrated, run the processor again and stream in some more olive oil, until the mixture comes together into a puree. Scrape into a small bowl and rinse out the processor or blender.
  • After 20-25 minutes of simmering, remove the bay leaf and the stems of oregano, if you used full sprigs, and carefully transfer the soup into the rinsed out food processor or blender. Carefully, since hot liquids can “explode” when blended from the trapped steam, cover the lid with a towel and turn on the processor or blender to low speed. I like to leave the feed tube lid/pusher out of my food processor when I do this, to let steam escape. As the soup blends, turn the machine up to high speed and run until the mixture is very smooth.
  • Once you’ve achieved the consistency you want, return the soup to the pot, add the cream, and season to taste. If it seems a little too acidic, add a little more cream and/or the 1-2 teapoons honey. Warm through over medium-low heat.
  • While the soup warms, it’s a good time to make the cheese toasts. Spread each slice of baguette or half-slice of sandwich bread with a thin layer of mayonnaise, sprinkle on the 2 tablespoons finely grated cheese, and place under a broiler or toaster oven heated to 400F until the cheese bubbles and browns.
  • To serve, ladle the soup into a large bowl. Carefully spoon on the herb puree in a swirl (or whatever pattern you want, or just a dollop). Dunk in a cheese toast, or serve it on the side, while still warm.

Save