Happy I-hope-you-eat-some-really-good-chocolate-day!


Happy I-hope-you-eat-some-really-good-chocolate-day!
Ah, expectations. They can be weasel-y little twerps, don’t you think? We organize our lives around them, constructing hope-castles, forts stabilized by plans that don’t pan out, two-story shambles resulting from too many taken-for-granted ideals. Expectations bolster us. And then they dissolve into crumbs, or explode, or sink, or flop around in directions we weren’t expecting.
 In college, I had sky-straddling expectations. I expected to figure this life thing out in the first year or two. I would be at the top of my major. I would make decade-spanning friendships. I would collect acclaim, graduate with honors, make my parents proud, especially my dad. I expected to land a perfect career, garner financial success, all while also a perfect wife, mother, homemaker, lover, even though I didn’t know what that entailed yet. I expected to write a novel or two along the way.
 I didn’t expect to fall in love with an older version of our language and want to study its literature forever, setting me up for a career path typically paved with loans and let-downs. I didn’t expect to struggle with roommates or friendships or classes. I didn’t expect to have my heart torn by the gentle trampling of a pair of shining sneakers, in snap-up track pants, driven by reasons that probably involved a raucous house full of boys, boredom, and possibly a brunette with glasses.
 But after that, I tried to give up on expectations. I would stop thinking “everything would work out.” I would stop expecting him to realize he’d made a mistake. I would stop, oh please, I would stop, writing terrible mopey songs about this person who wasn’t even the same person anymore. I would just live. I would just try to be me. I wouldn’t ask someone else to repair the torn bits for me, because that would be expecting too much. And since I’ve never been much of a seamstress, my repairs were clumsy. I was patched, the stitches were irregular, and I felt worn and fragile but maybe whole, and maybe a little bit strong.
 And then I met N. And because I was done with expectations, I didn’t expect anything at all. Not even a friendship. It would be a, well, a something. It might be fun, it might be sweet, but it would end. We were seniors. We were going somewhere. We didn’t know where yet, because we weren’t expecting anything, but we were sure of little, then. We spent phone calls trying to scare each other away by explaining our neuroses, and our cynicism, and what we considered our more unlovable attributes. I hate phone calls, but ours would last hours.
 I’m not going to say, at this point, that because N. was worn and patched and had sewed his heart back together in an irregular shape too that these two odd shapes fit perfectly together and made one another complete – my ventricle, his aorta – because I don’t believe in that. We were both whole people before, and we are both whole people now. I’m not a half, and I wouldn’t want N. to be either. But because he was patched up too, and some of my stitches were snagged like his, he was better able to understand me. We weren’t what we expected. The thing about patches is, they hide but don’t erase the worn spot. Every stitch, meant to repair, could also re-harm. But when you are patched and stitched up, and you still feel raw from that needle of hope and trying and blistering
 independence loneliness solitude you weren’t sure you wanted, you know how to see that in someone else, and you know how gently you have to reach out. Or how hard. We weren’t what we expected, no. But ten years into a relationship, and seven years into a marriage, he defies and surmounts and explodes any expectations I could have had. And I wouldn’t have it any other way.
 This, oddly enough, brings me around to Valentine’s Day, and to ice cream. This is, you may notice, a bit heavy, a bit confessional, for me. I wasn’t expecting to tell you all this. But we’re approaching that holiday that is supposed to be about love, and I’ve always felt a little torn and patchy about it (the day, not the love), so here we are.
 I had big plans for our Valentine’s Day celebration. I’m not talking about me and N. He’s always hated Valentine’s Day, probably thanks to that whole expectations thing. I’m talking about us. You and me. We were going to have soufflé. And not just any soufflé; chocolate soufflé. I wanted to teach you a quick, easy, all-but-fool-proof version of the dessert, one that I’ve now made for several big-deal-must-impress events with zero problems, so you could defy someone’s expectations this Valentine’s Day. Maybe even yours!
 I had never thought about serving soufflés with ice cream. A lovely sweet drizzle, yes. A liqueur infused caramel or cream, completely. But when I saw Lindsay’s chestnut soufflé with matching ice cream a few weeks ago, and when I watched a recorded episode of Nigella Lawson making a coffee ice cream that required no eggs and no churning, I knew this would be our Valentine’s Day pairing: deep, dark, rich chocolate soufflé, and an ice cream so easy, so deep, silky as satin lingerie and toasty with espresso (because hey, you might need that shot of caffeine on the evening of Valentine’s Day!), it would be perfect. I would be perfect. I even half-bragged in a comment on Lindsay’s post about how easy soufflé-making is, once you get the hang of it.
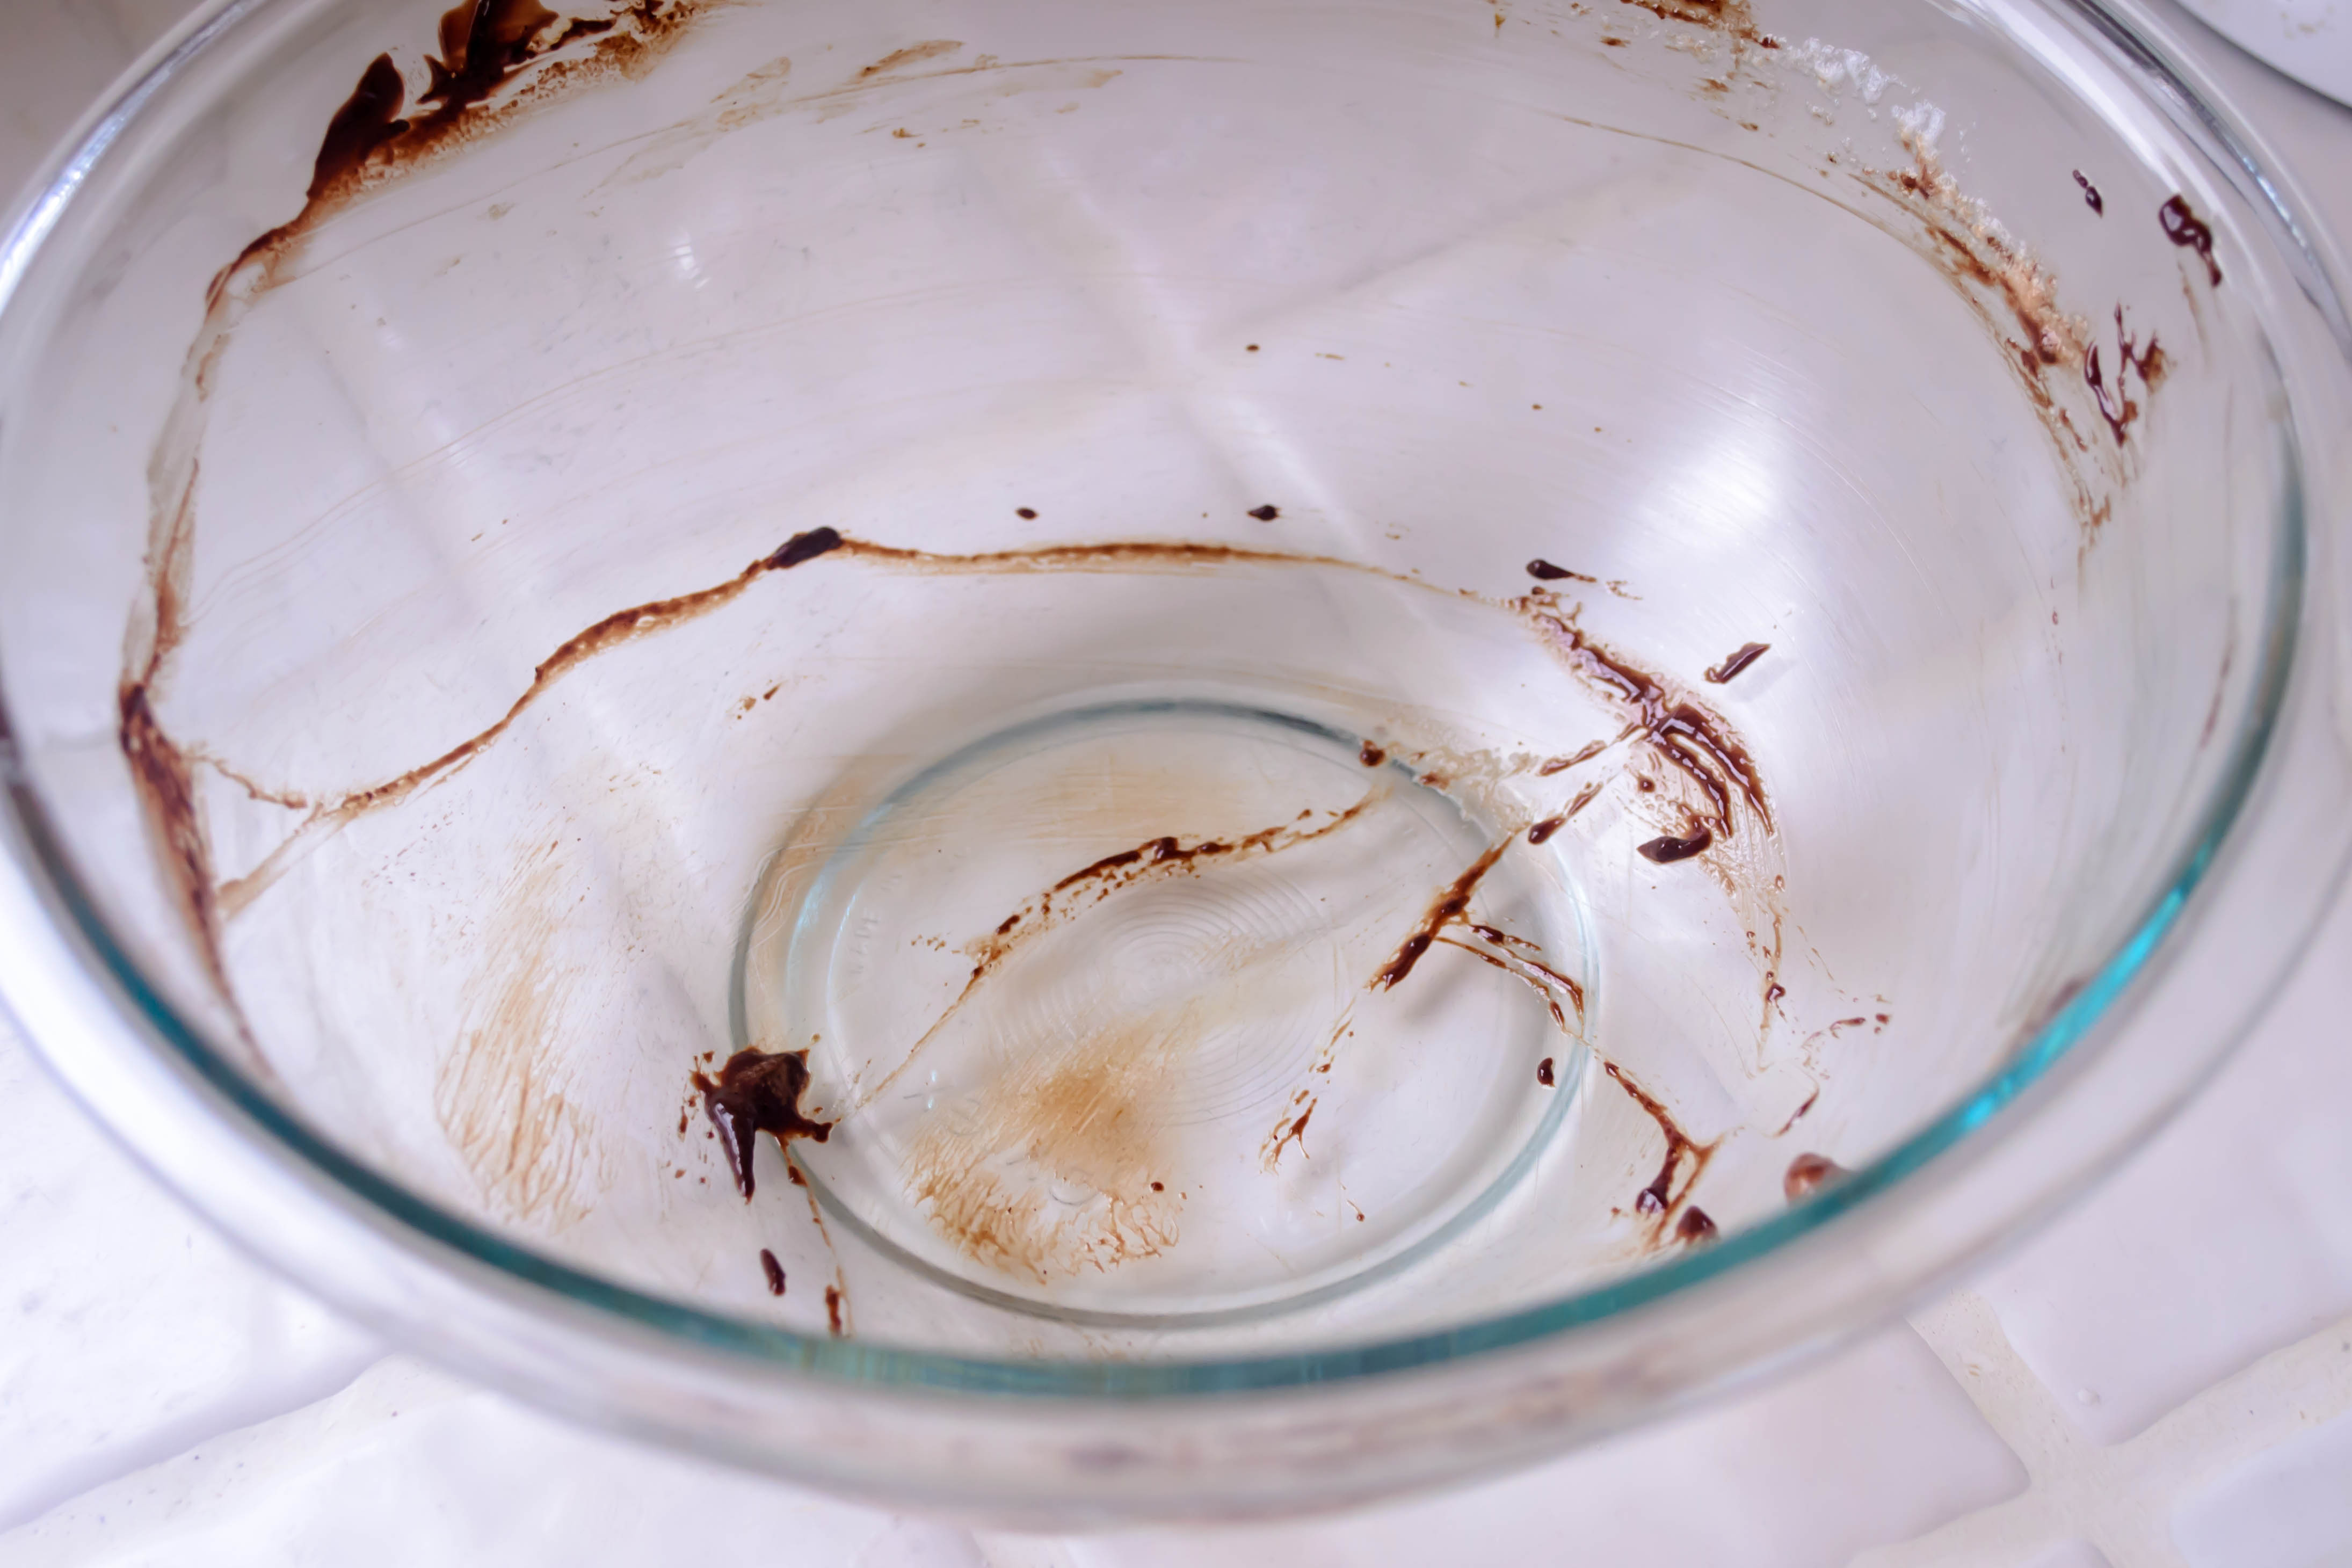
 And so, expectations. Because I don’t know what happened – maybe my eggs were too small (they were of the homegrown variety, given to N. by a student), maybe I didn’t whip the whites enough, maybe I scrambled the yolks a little or the chocolate seized or the oven was too hot – but my soufflés were a disaster. They rose only a few reluctant centimeters. They were dark and rich, but dense, thick, almost crumbly where they should have been flat-topped trembling pillows.
I despaired. But then I remembered me, and my patchwork, and that I had this ice cream that was so so creamy, and so thick, and so tasty and light and dangerously easy, that in fact the soufflé was hardly necessary. It may even have muddied things. And so, I put expectations aside again, the better to embrace what I had.
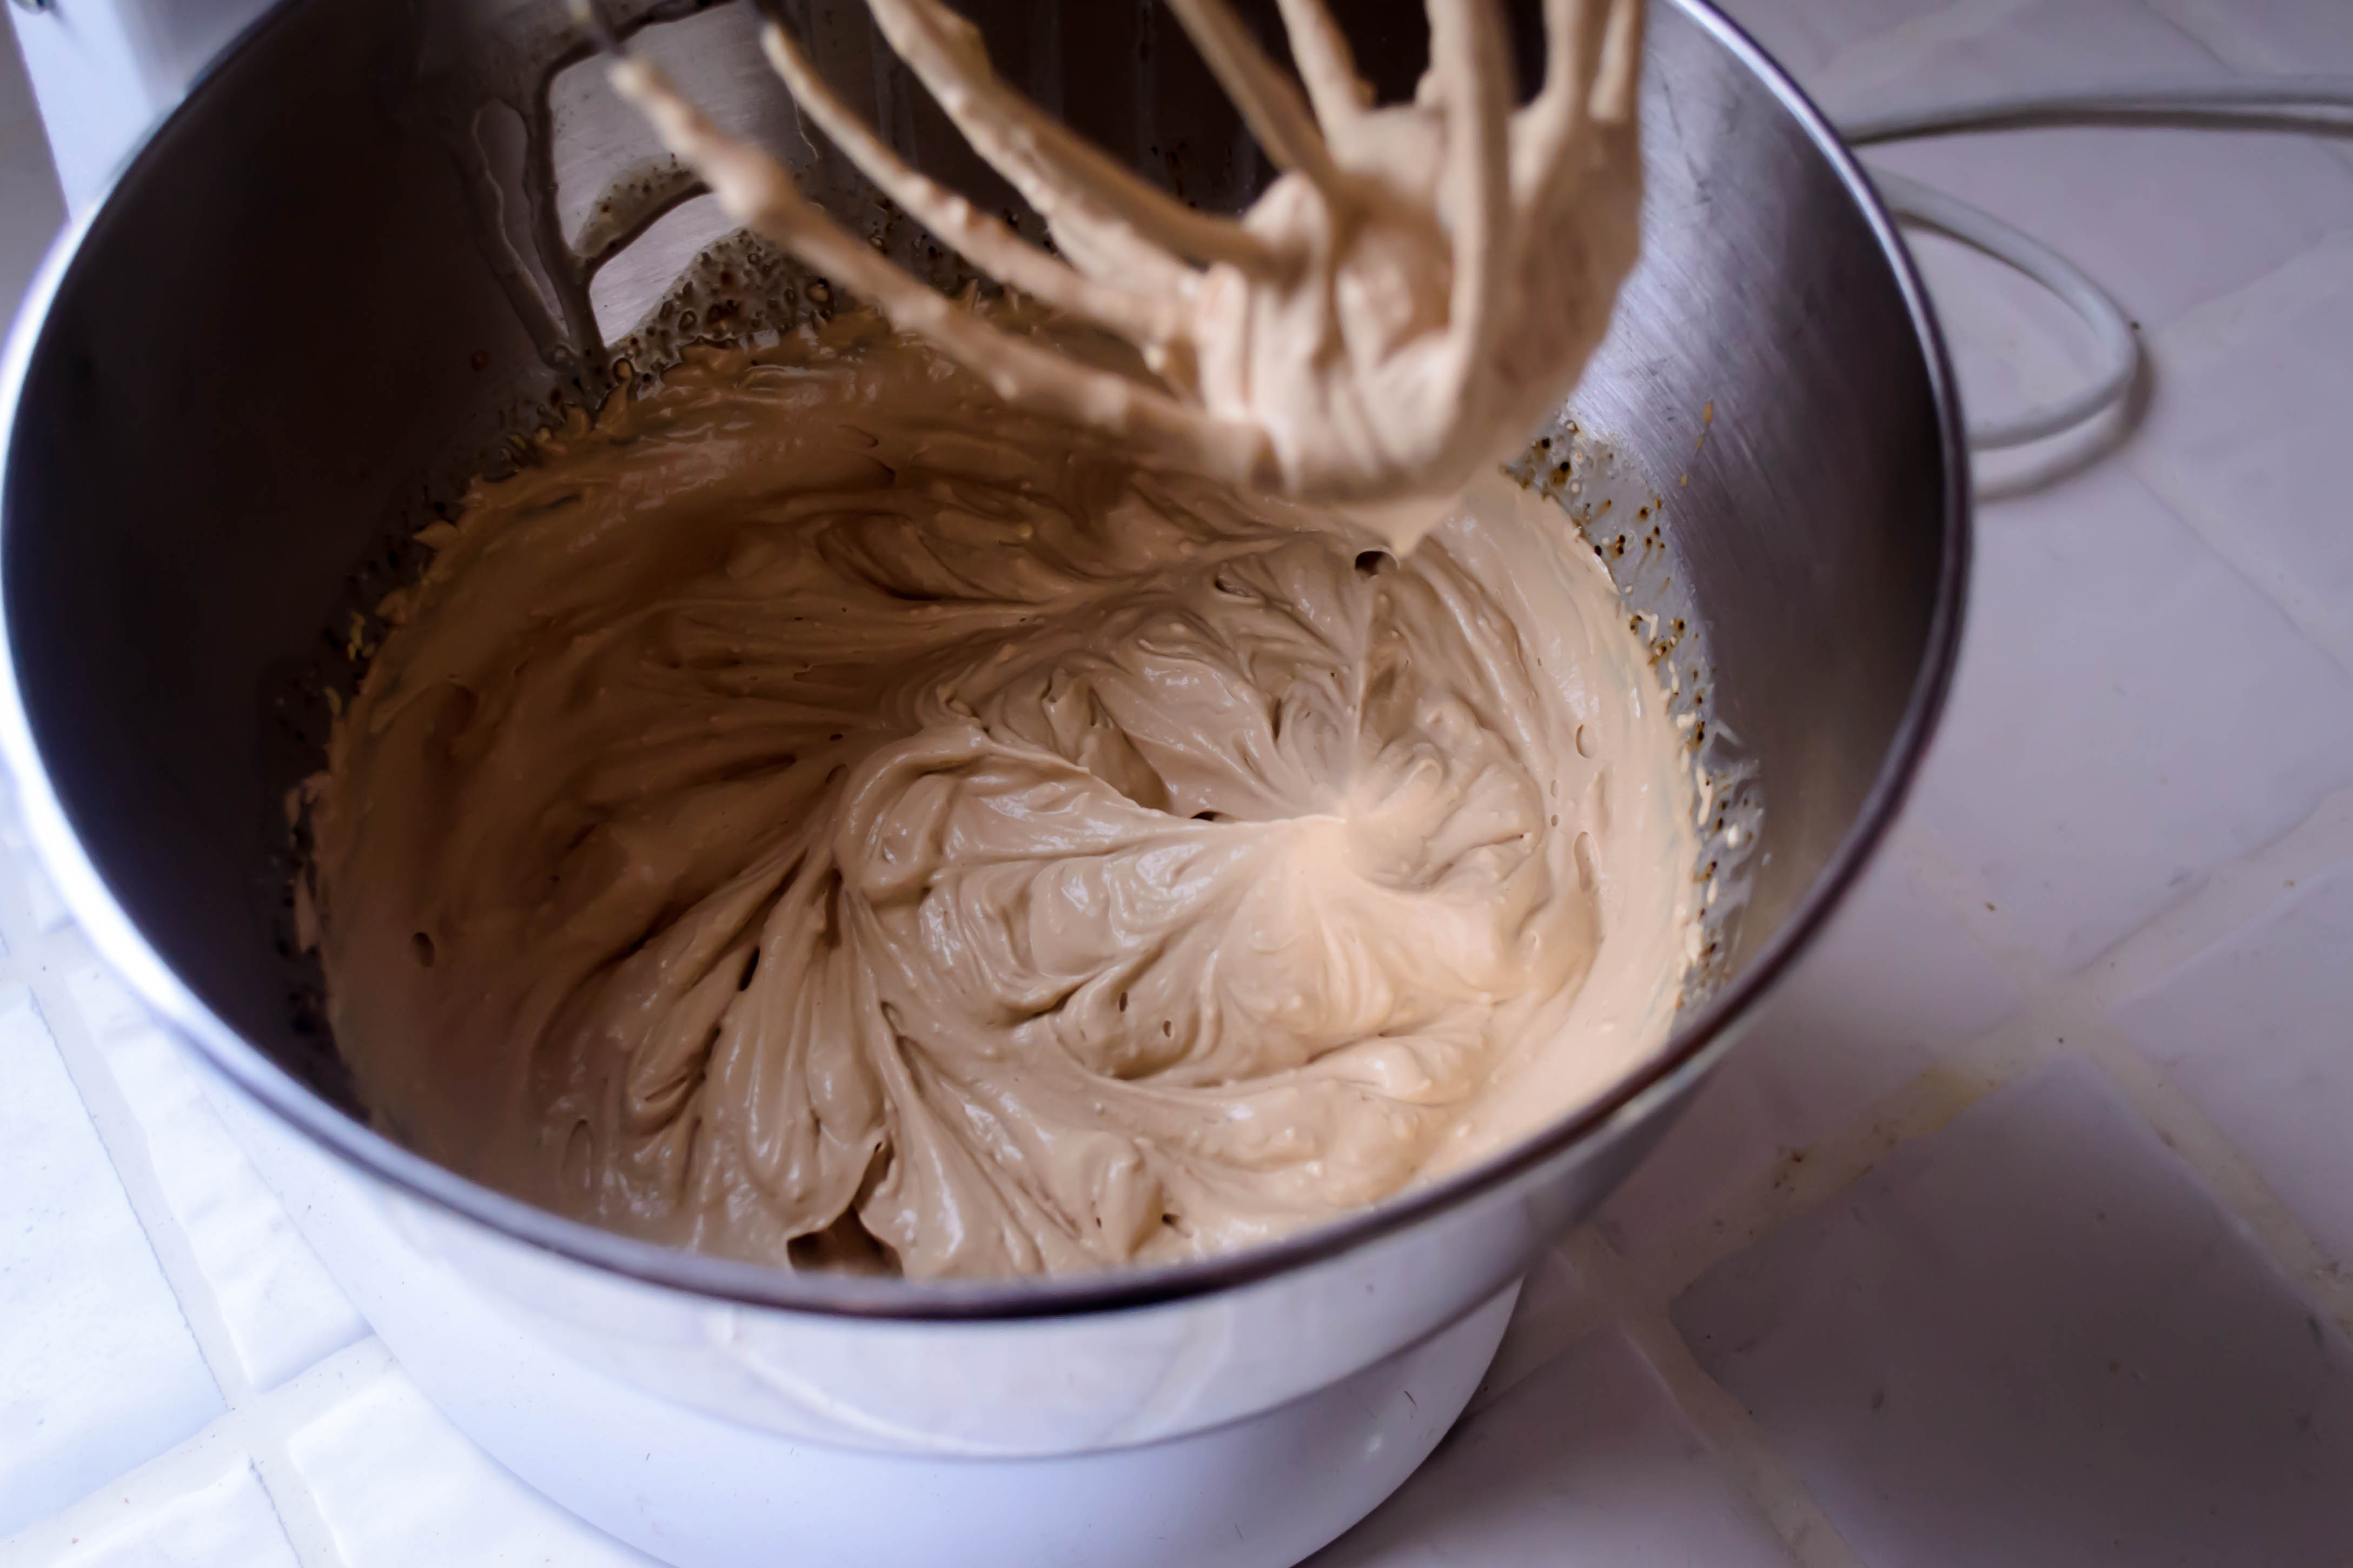
 Nigella’s ice cream does not start with a custard. It combines unlikely and few ingredients: sweetened condensed milk, double cream (a British institution we would do well to adopt), espresso powder, and a few tablespoons of coffee liqueur. I made a few changes, inspired by my own insufficiencies and a suggestion from a commenter on the original recipe. For a slightly lighter result, I replaced some of the double cream with whipping cream. For want of coffee liqueur, I replaced it with Irish cream. The liqueur serves two purposes. First, it deepens and enhances the flavor of the ice cream. Second, it offers a textural benefit: since alcohol doesn’t freeze (or at least it freezes at lower temperatures than water), the ice cream maintains a soft, scoopable consistency indefinitely (not that you’ll have long to find out – I suspect you’ll eat all of it before conclusive data can be gathered).
And so, I send you into the week of that dubious, expectation-laden lovers’ holiday with this: I hope you are happy, and that your version of love, whether it is patched and fragile, or hearty and unblemished, is at least in part directed back toward you. Because no matter what your expectations have told you, you are lovely and perfection is overrated. And I think ice cream is a perfectly suitable Valentine to send yourself. I recommend this one.

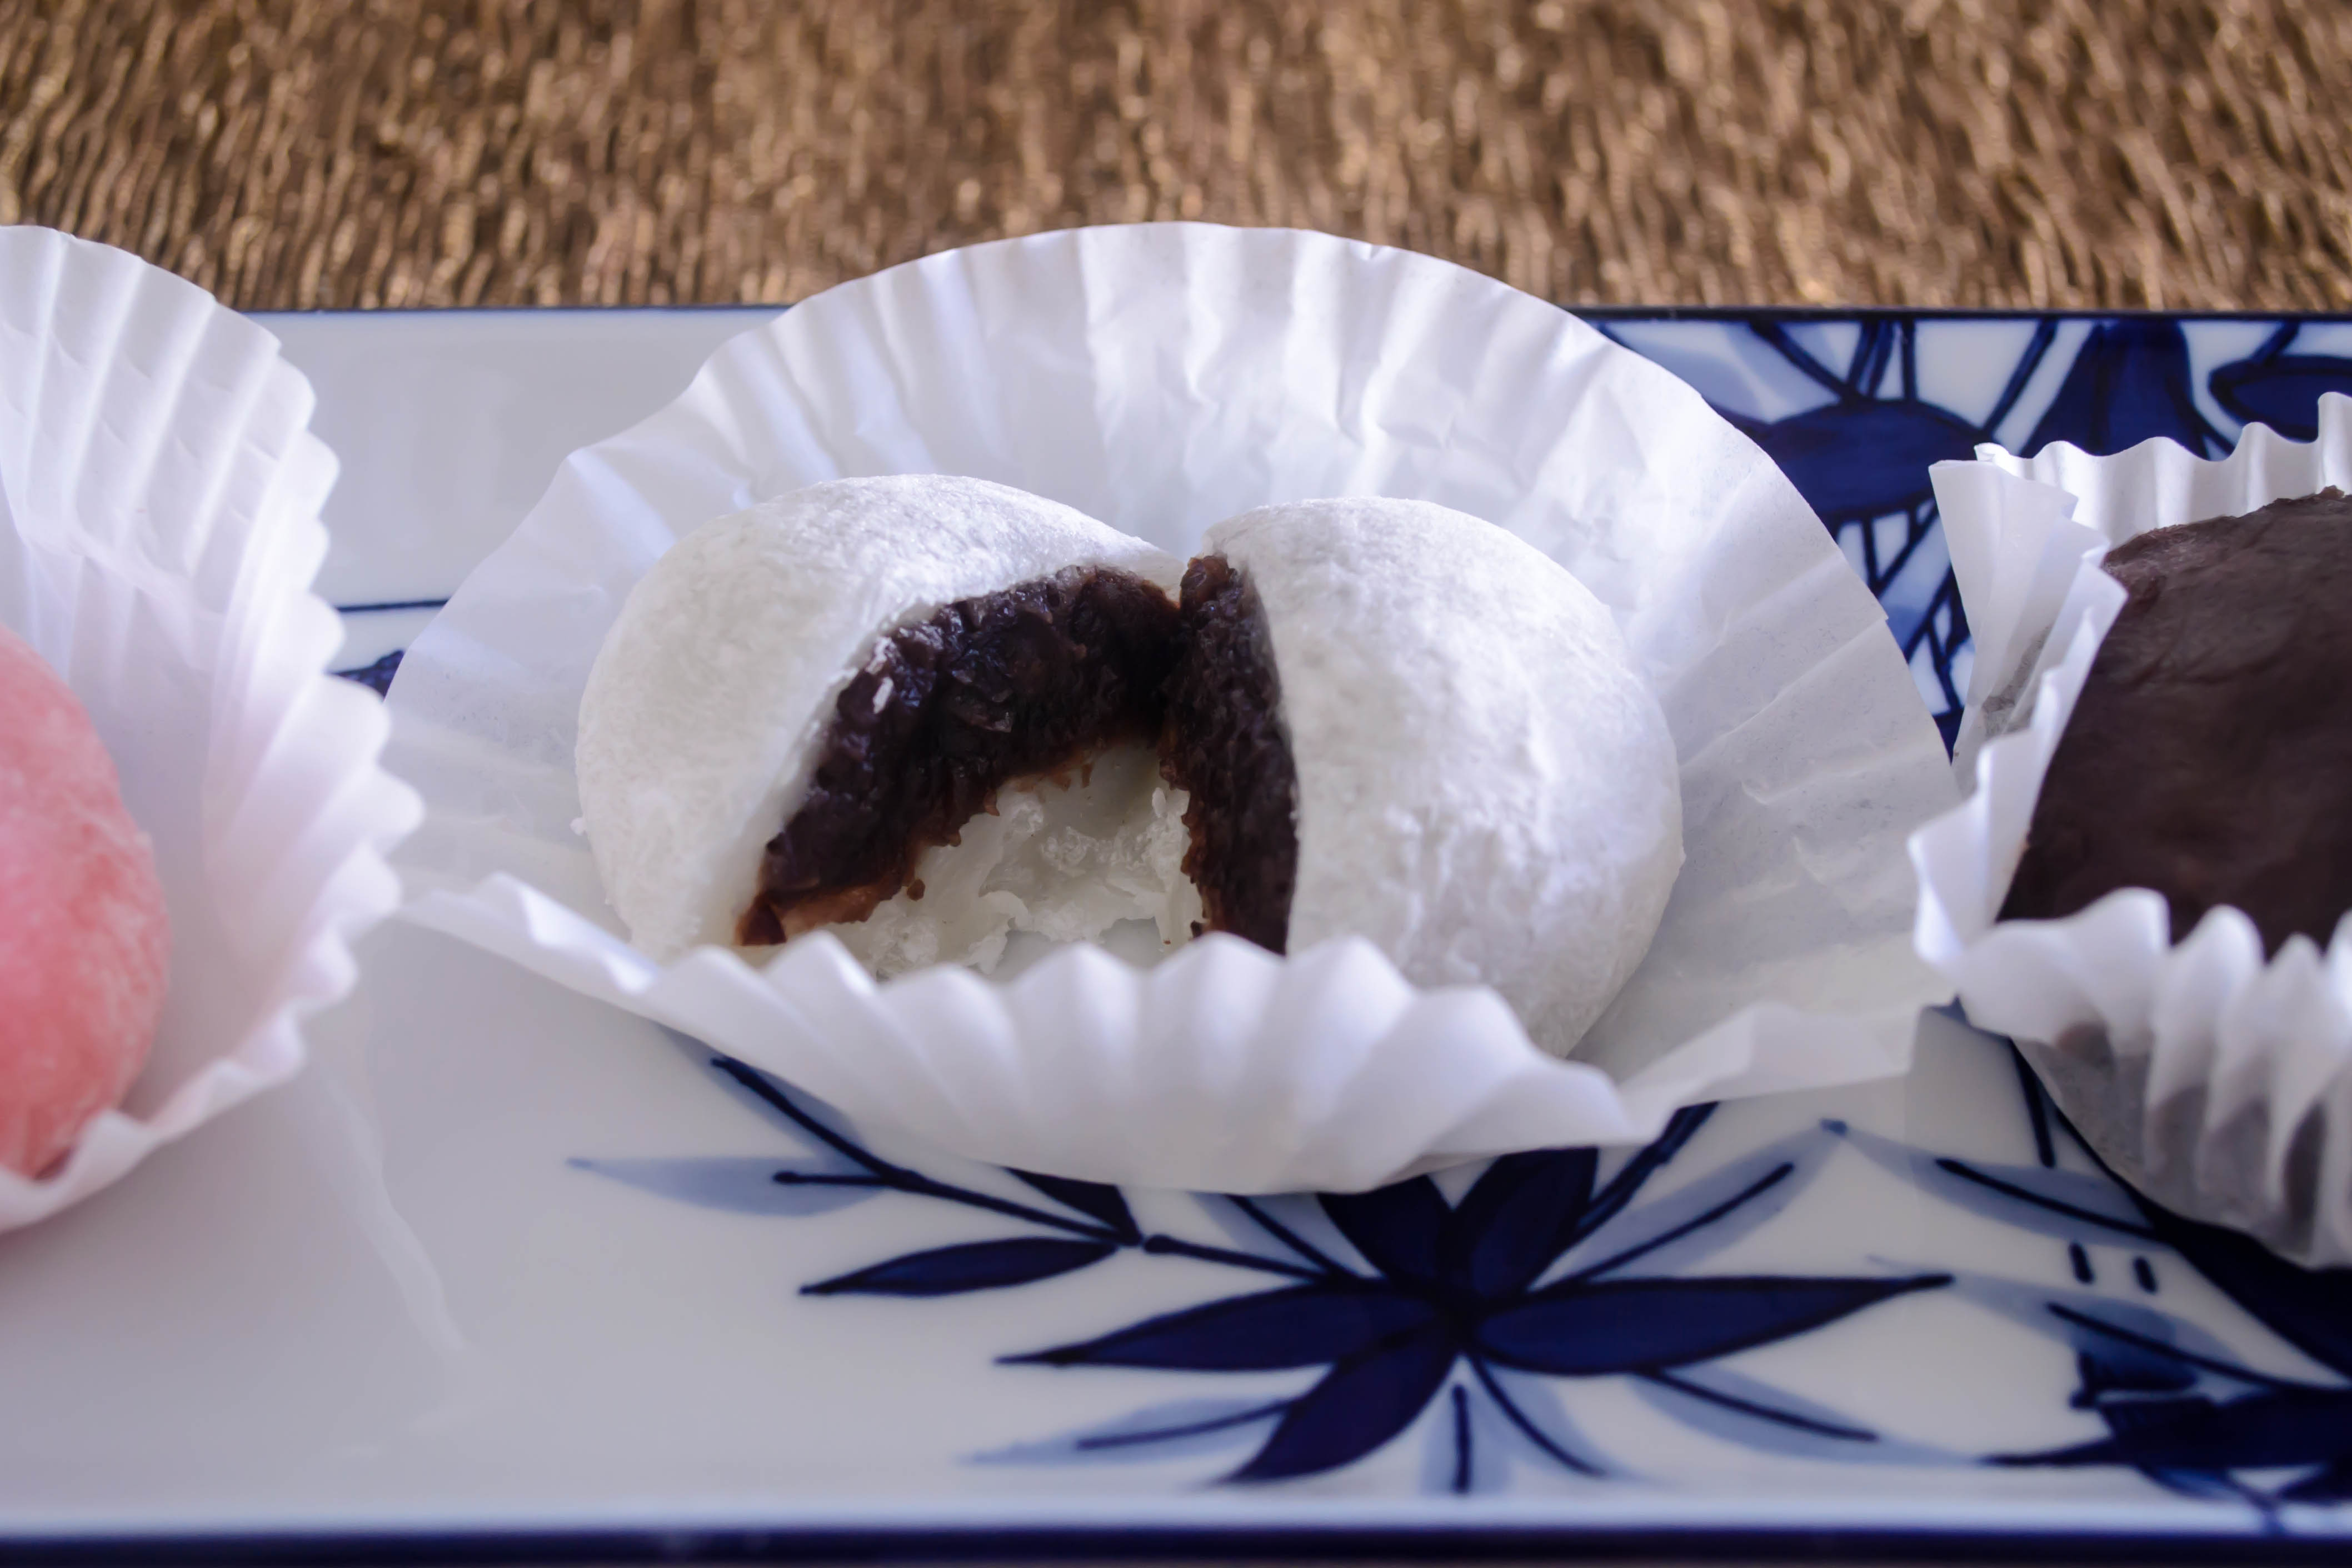
Mochi, three ways (in quartet), from Sakura-ya in Gardena.


 Ricotta cheese and I have a strange (strained?) relationship. I want to love it. Dishes in which it features – lasagna, calzone, a certain breed of cheesecake – sound to me decadent and worthy. But when I do eat it, I feel torn. It’s a texture thing, isn’t it? It has this graininess – a kind of luscious roughness that doesn’t feel quite right. I want it to make up its mind. Either be feta, all craggy and crumbling and tang, or be mascarpone, relentlessly silken. But ricotta is neither. It resists singularity. It hovers in the middle there, taunting me with its bothness.
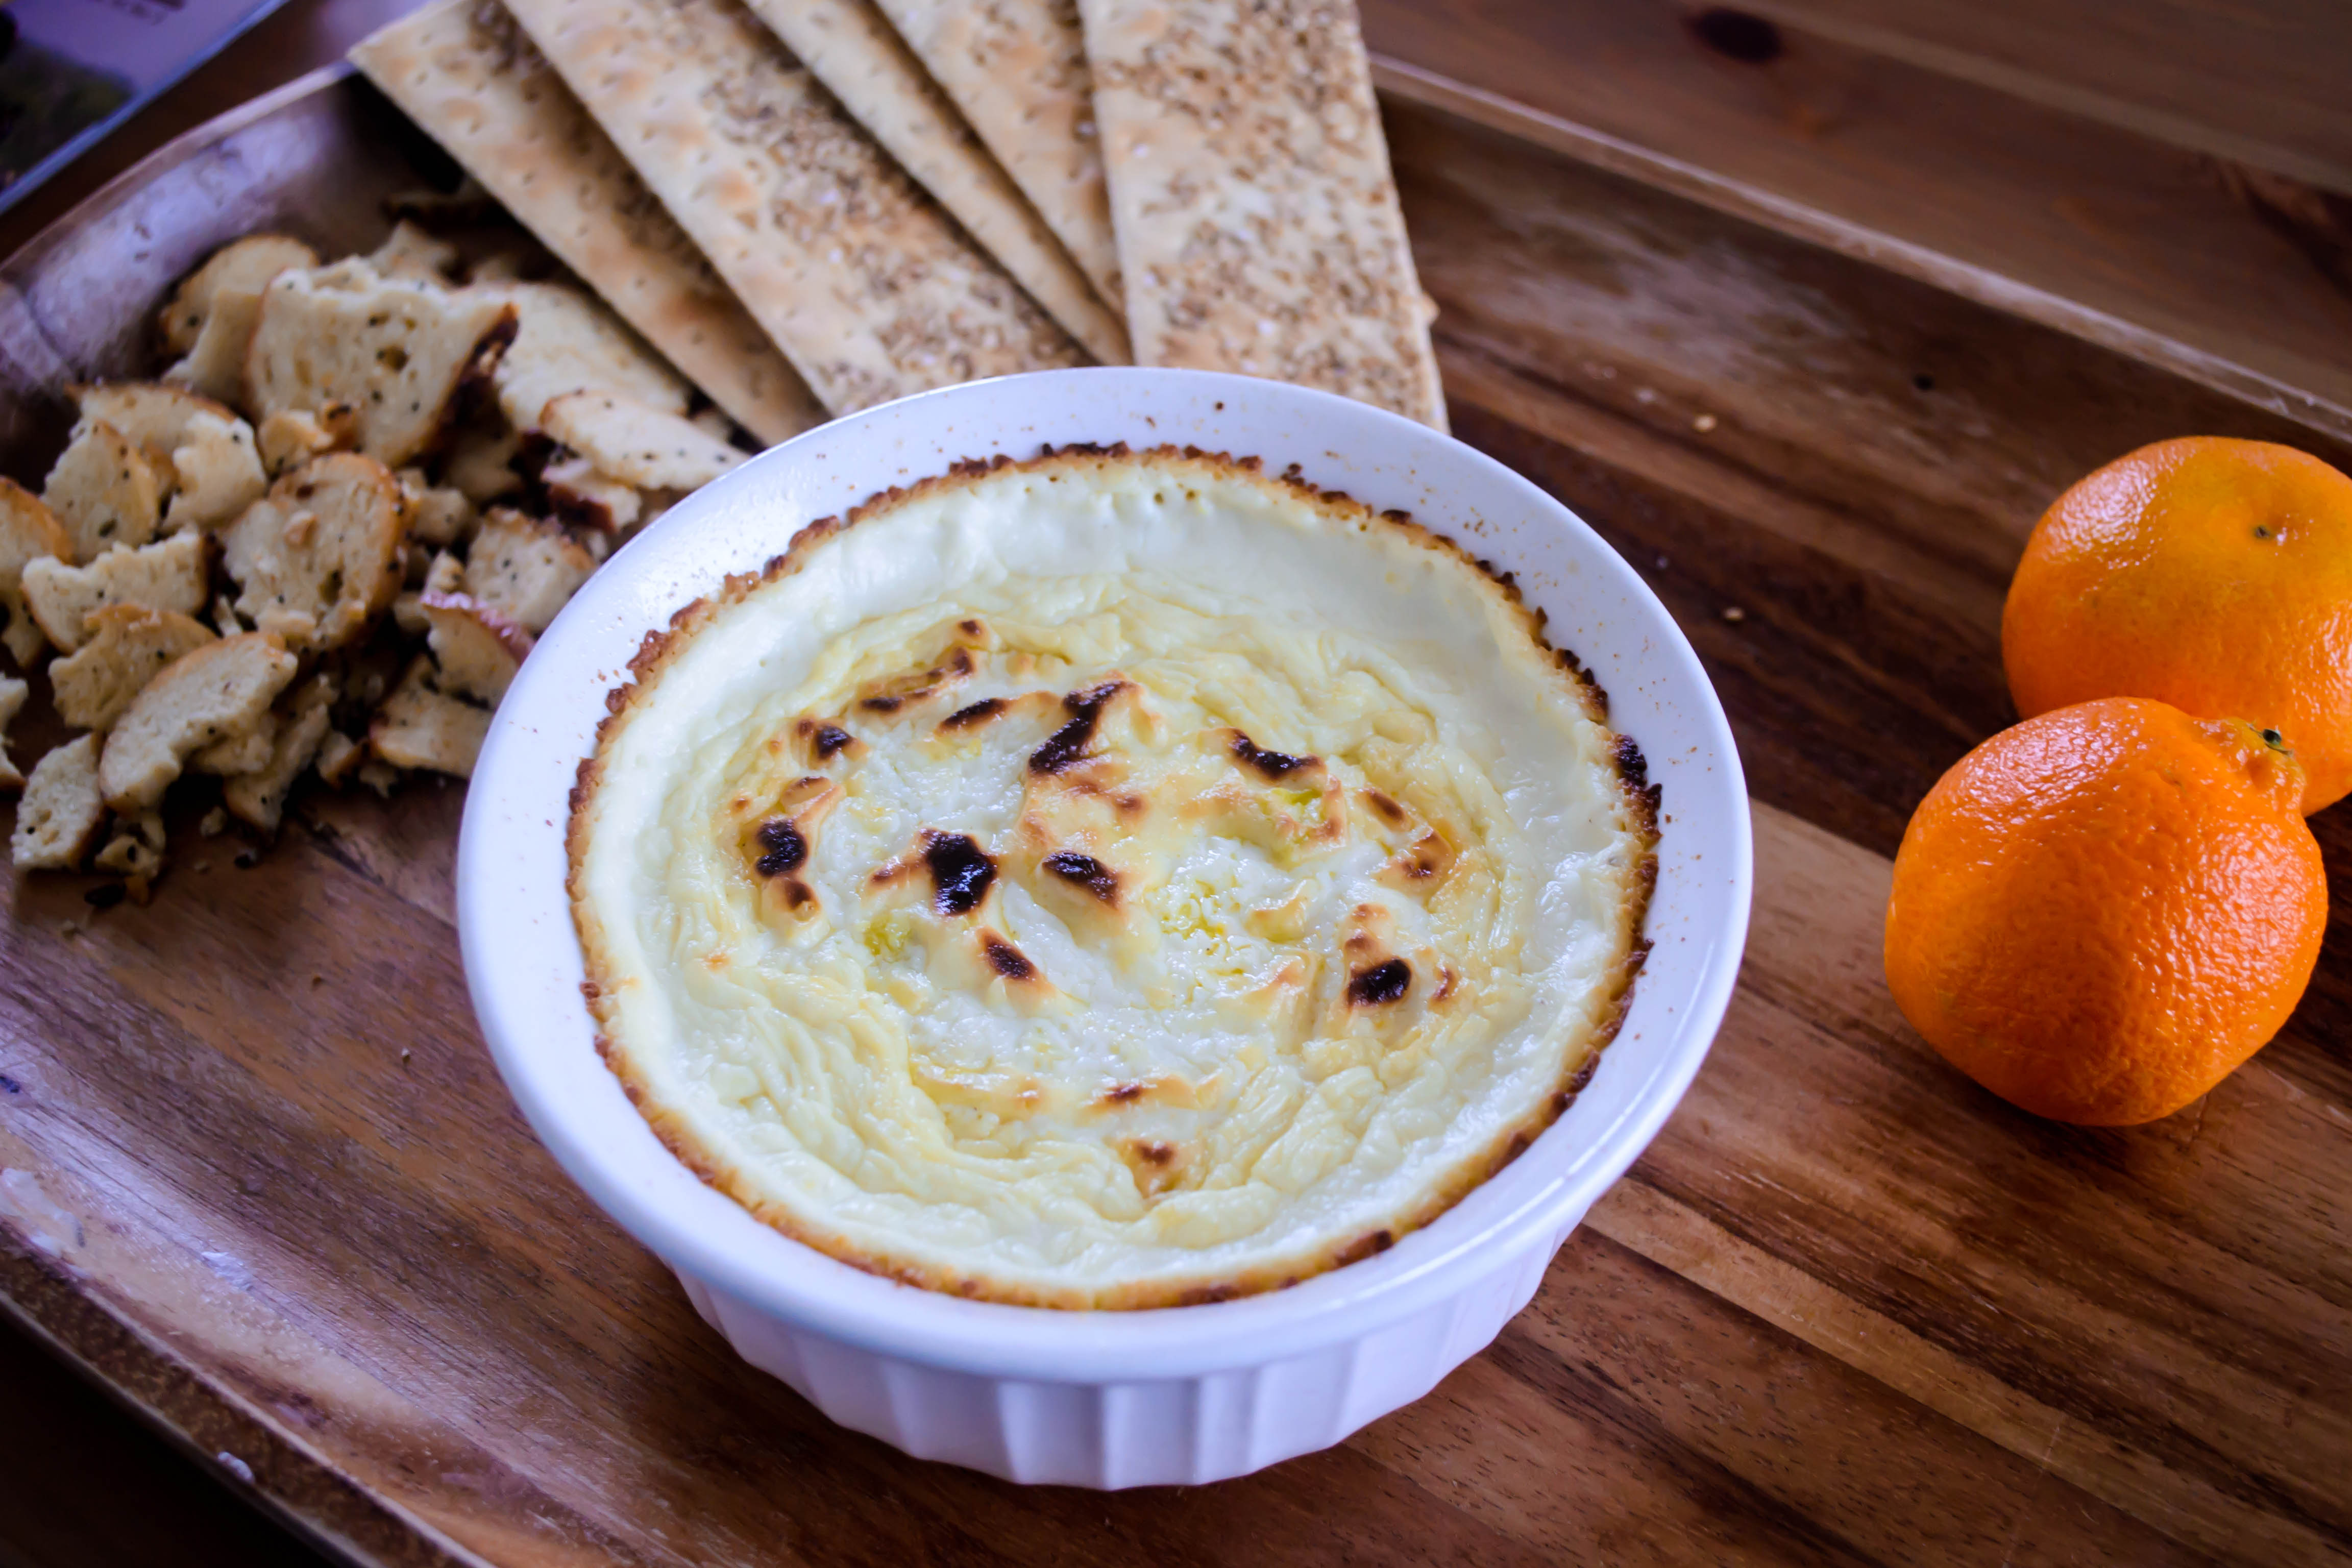
 Just before our annual in-laws holiday shuffle, I needed to use up some of our perishables, and there was half a container of ricotta, lonely and renounced in the back corner of the fridge. With lemons coming in on my backyard tree, I suddenly thought of a feta dip flavored with lemon zest and oregano and garlic that I’ve made dozens of times, and wondered how it would fare with this creamy cousin as its star player. I’d also been itching to try baked ricotta, after hearing that it transforms in the oven into something airy and rich. With a block of cream cheese also wailing its abandonment and crackers to use up before the trip at the end of the week, hey presto, my lunch menu was suddenly all about a savory Greek inspired dip.
 Unlike a standard baked ricotta, I didn’t add any eggs here. This omission, plus the addition of cream cheese, kept the dip quite thin – not the quasi-souffle texture you might be expecting. Were I to make this again, I might add an egg or two just to puff it up a bit more. If you try it that way, let me know how it turns out.
 Thanks to these changes, what you’re getting here is essentially melted creaminess that, at least when it’s hot, won’t even need spreading, covered by a layer of golden-brown bubbles that are easily pierced with the persistent corner of a cracker. It’s soft, it’s hot, it’s herby and spicy and perversely fresh, thanks to the lemon zest, and while I had it with crackers, it could be easily compelled to drape itself over sticks of fresh vegetables or bread. Pita chips, too, would be particularly nice. I’d be clever and current and say it would make a superb addition to a Superbowl game day spread, but I’ve narrowly missed that opportunity which, for me, seems somehow fitting. Instead, bake yourself a batch of this to fend off the post-holiday cold of the next month or two, when winter always seems the longest.
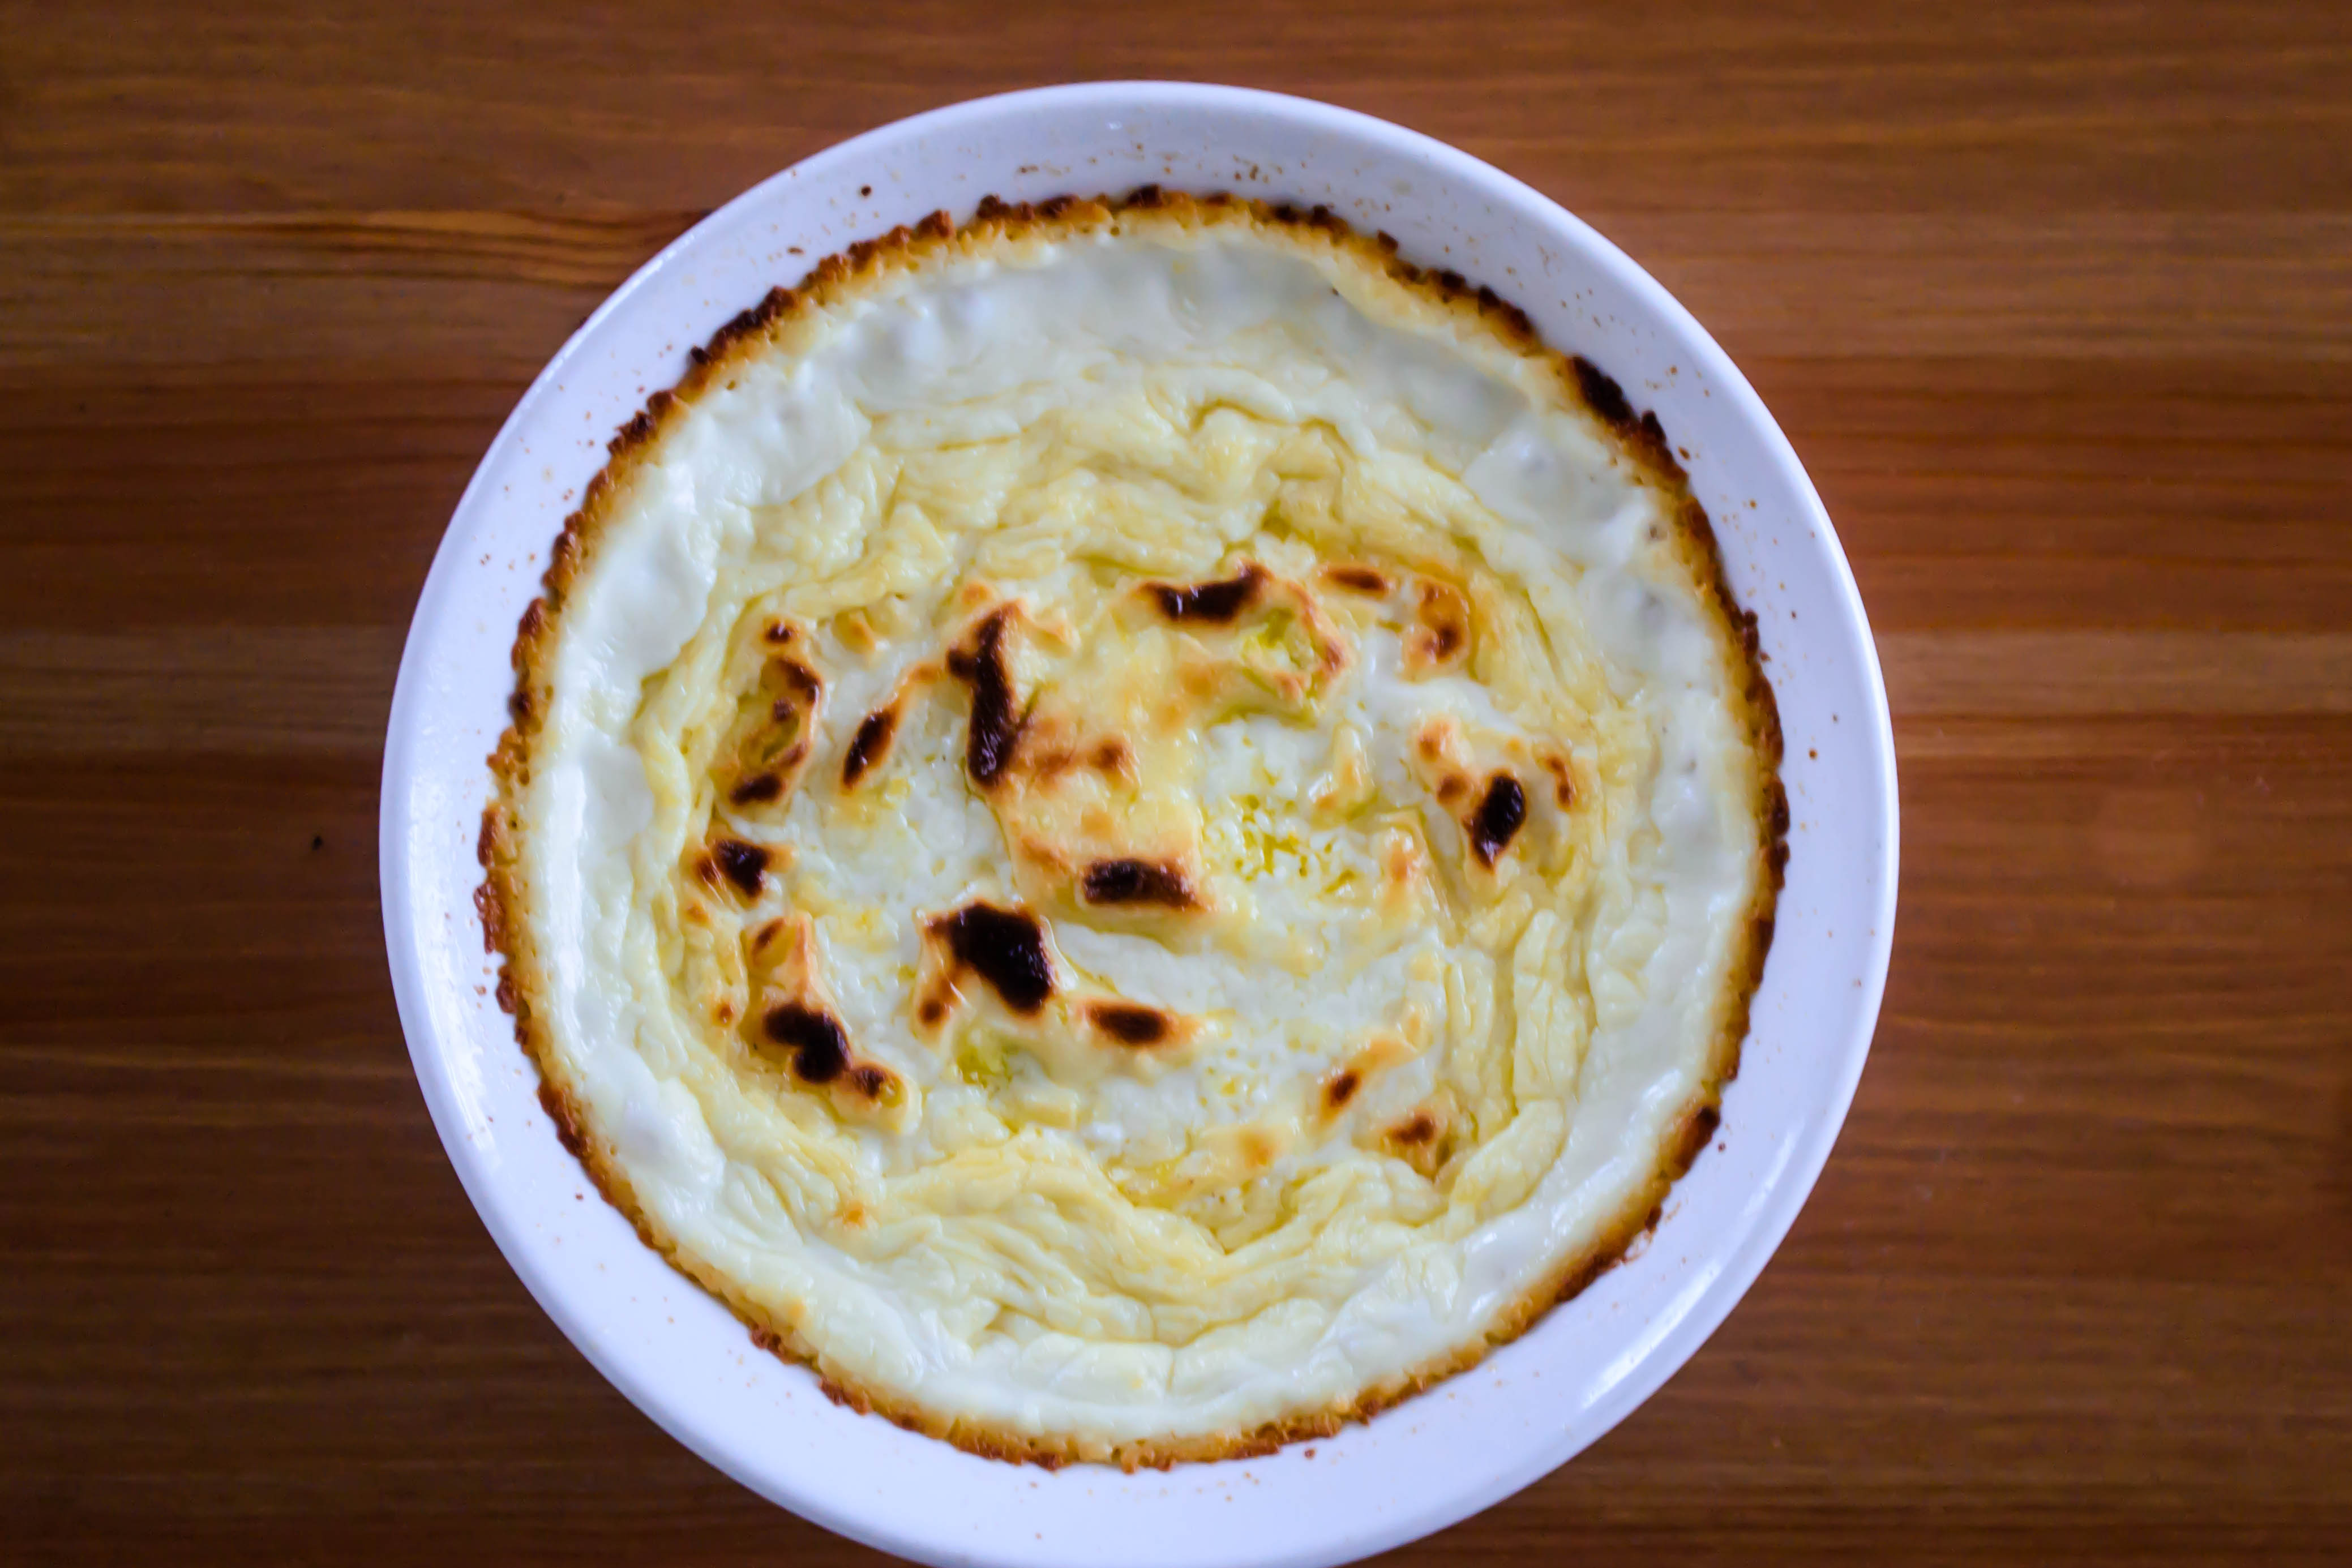
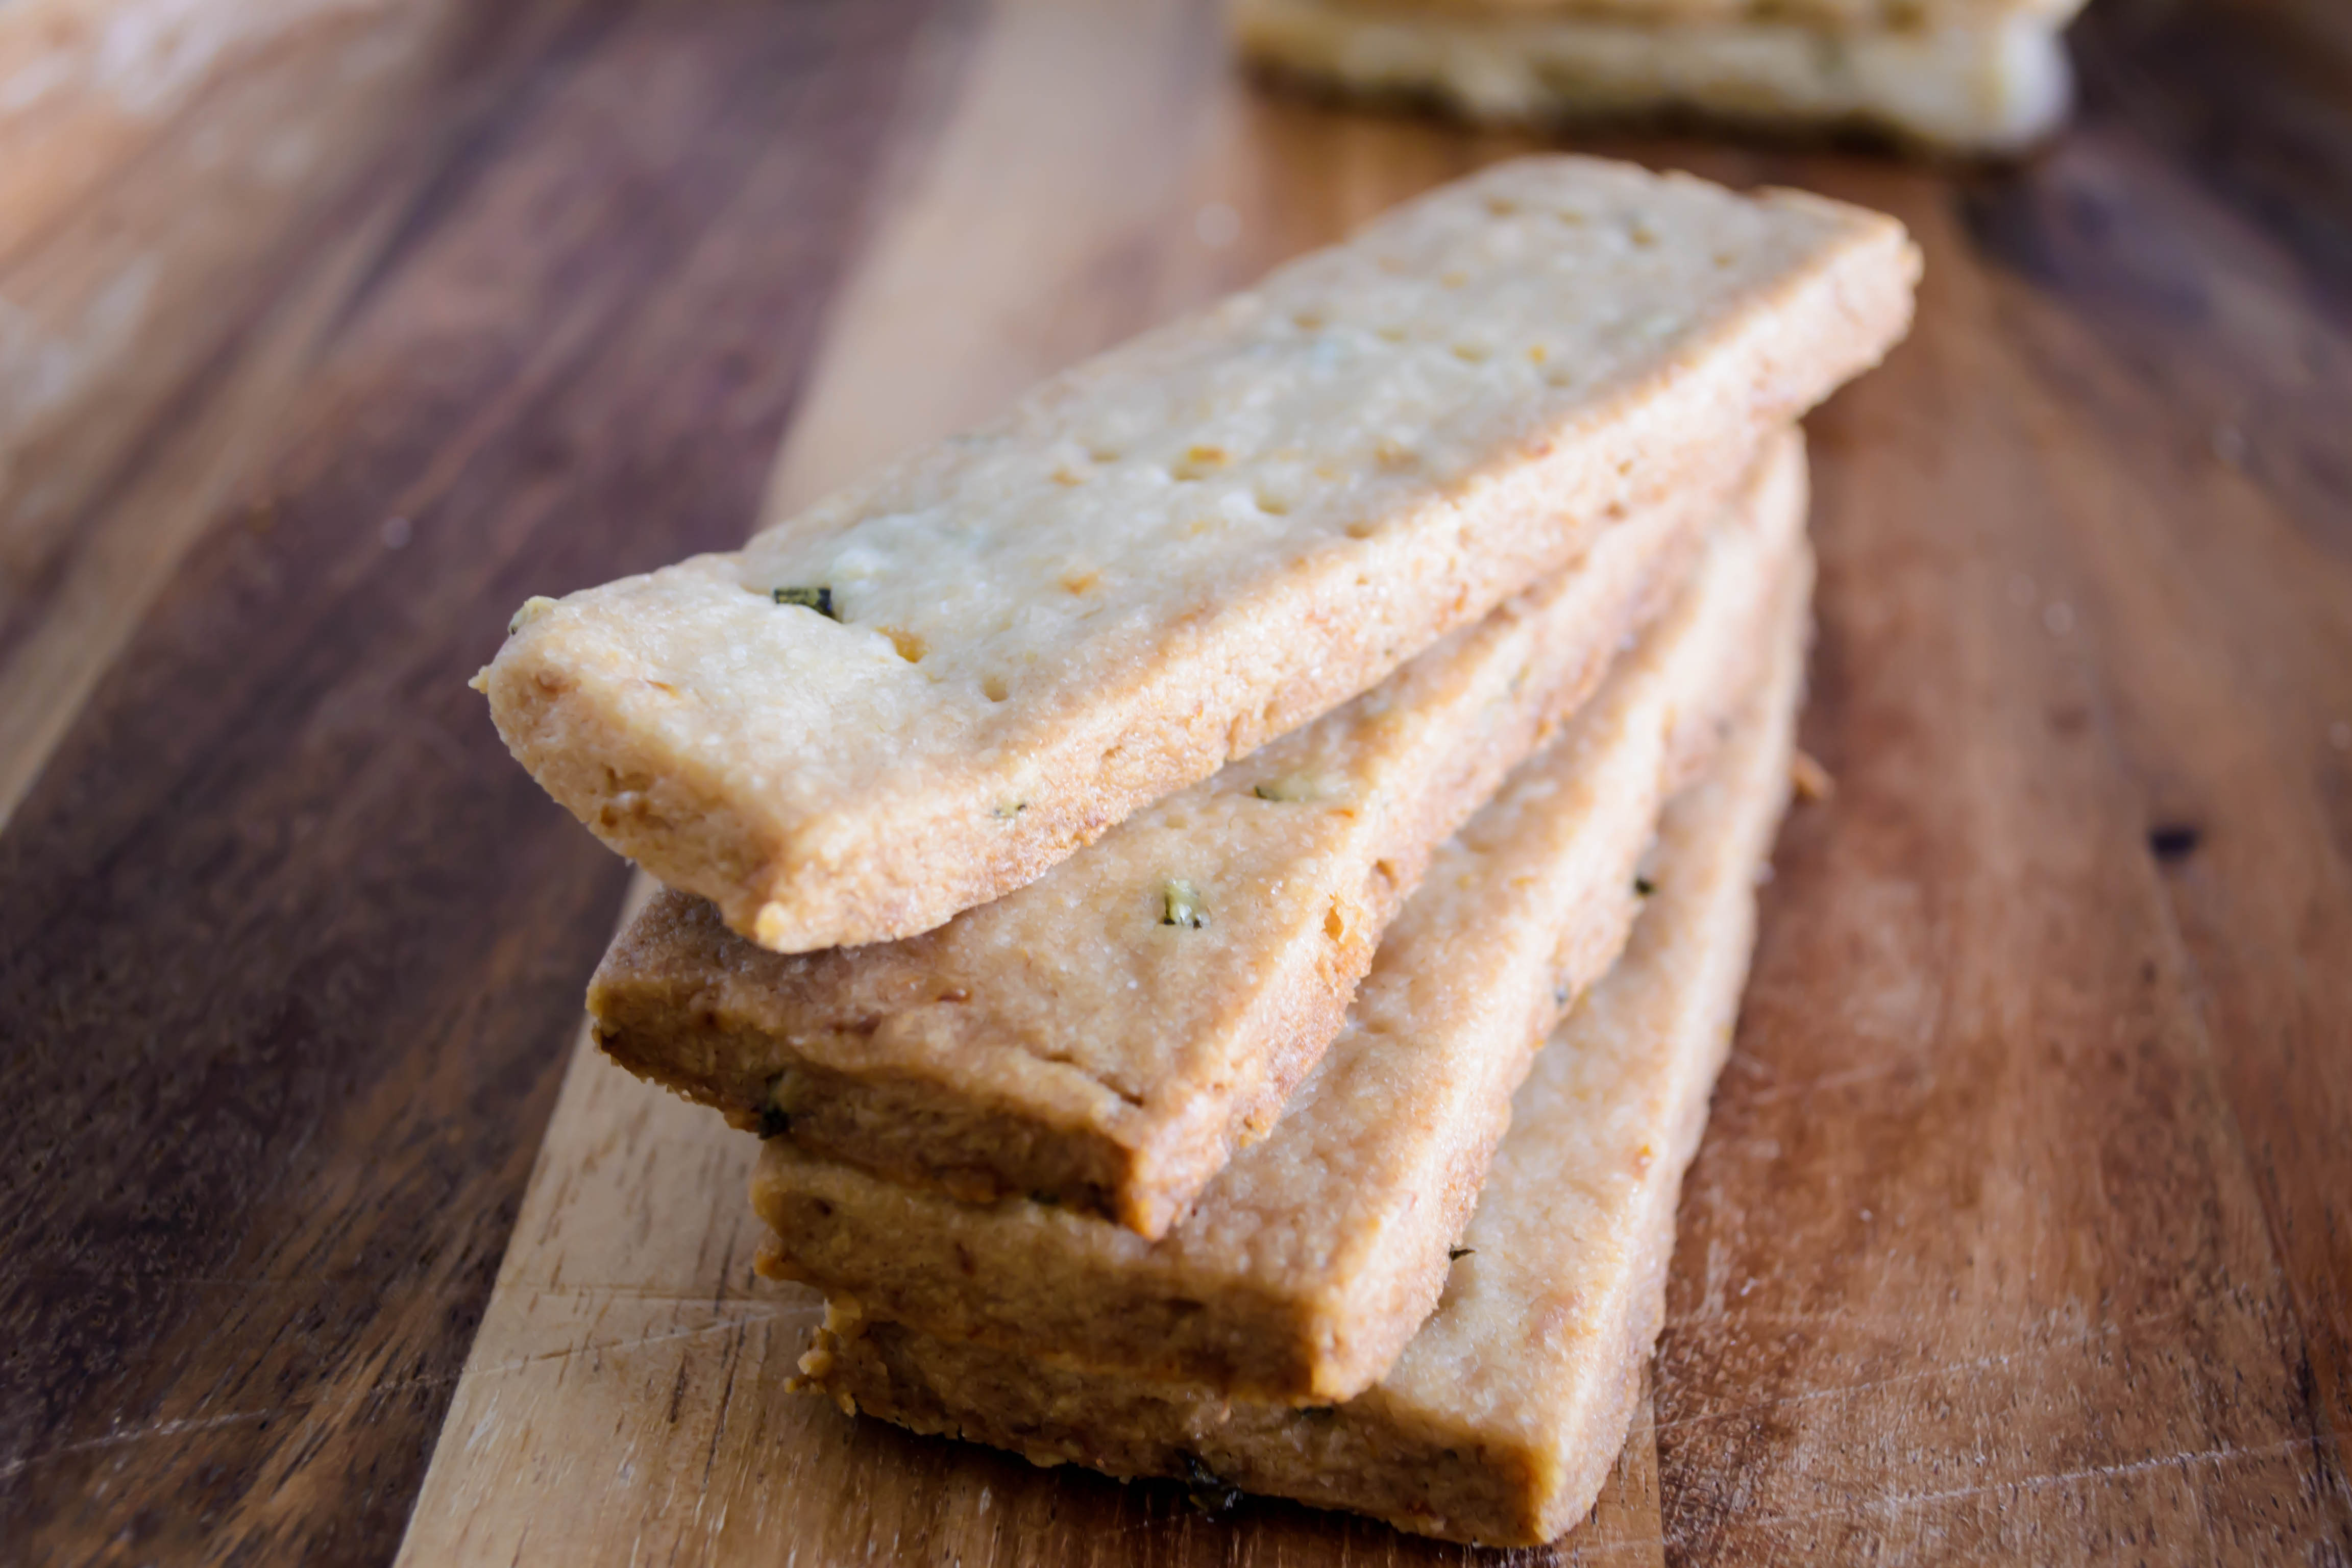
Lemon rosemary shortbread
 Even though I’m getting sauced this year (is that joke already old?), I’m not abandoning my bread ambitions. I love the monthly challenge of Twelve Loaves, and I received a sourdough starter as a Christmas gift that, according to its bequeather, “needs some TLC.” Anxious to do it right, I scoured the internet for suggestions, of which there are no shortage, and in many cases, no consistency, which, delightfully and frustratingly, appears to be no problem at all! I distilled the various directions down into what felt like a successful (read: doable) routine for me. I fed it flour and water, it smells like San Francisco, and I’ve named it Bubblin’ Bertram. Is that weird? Probably.
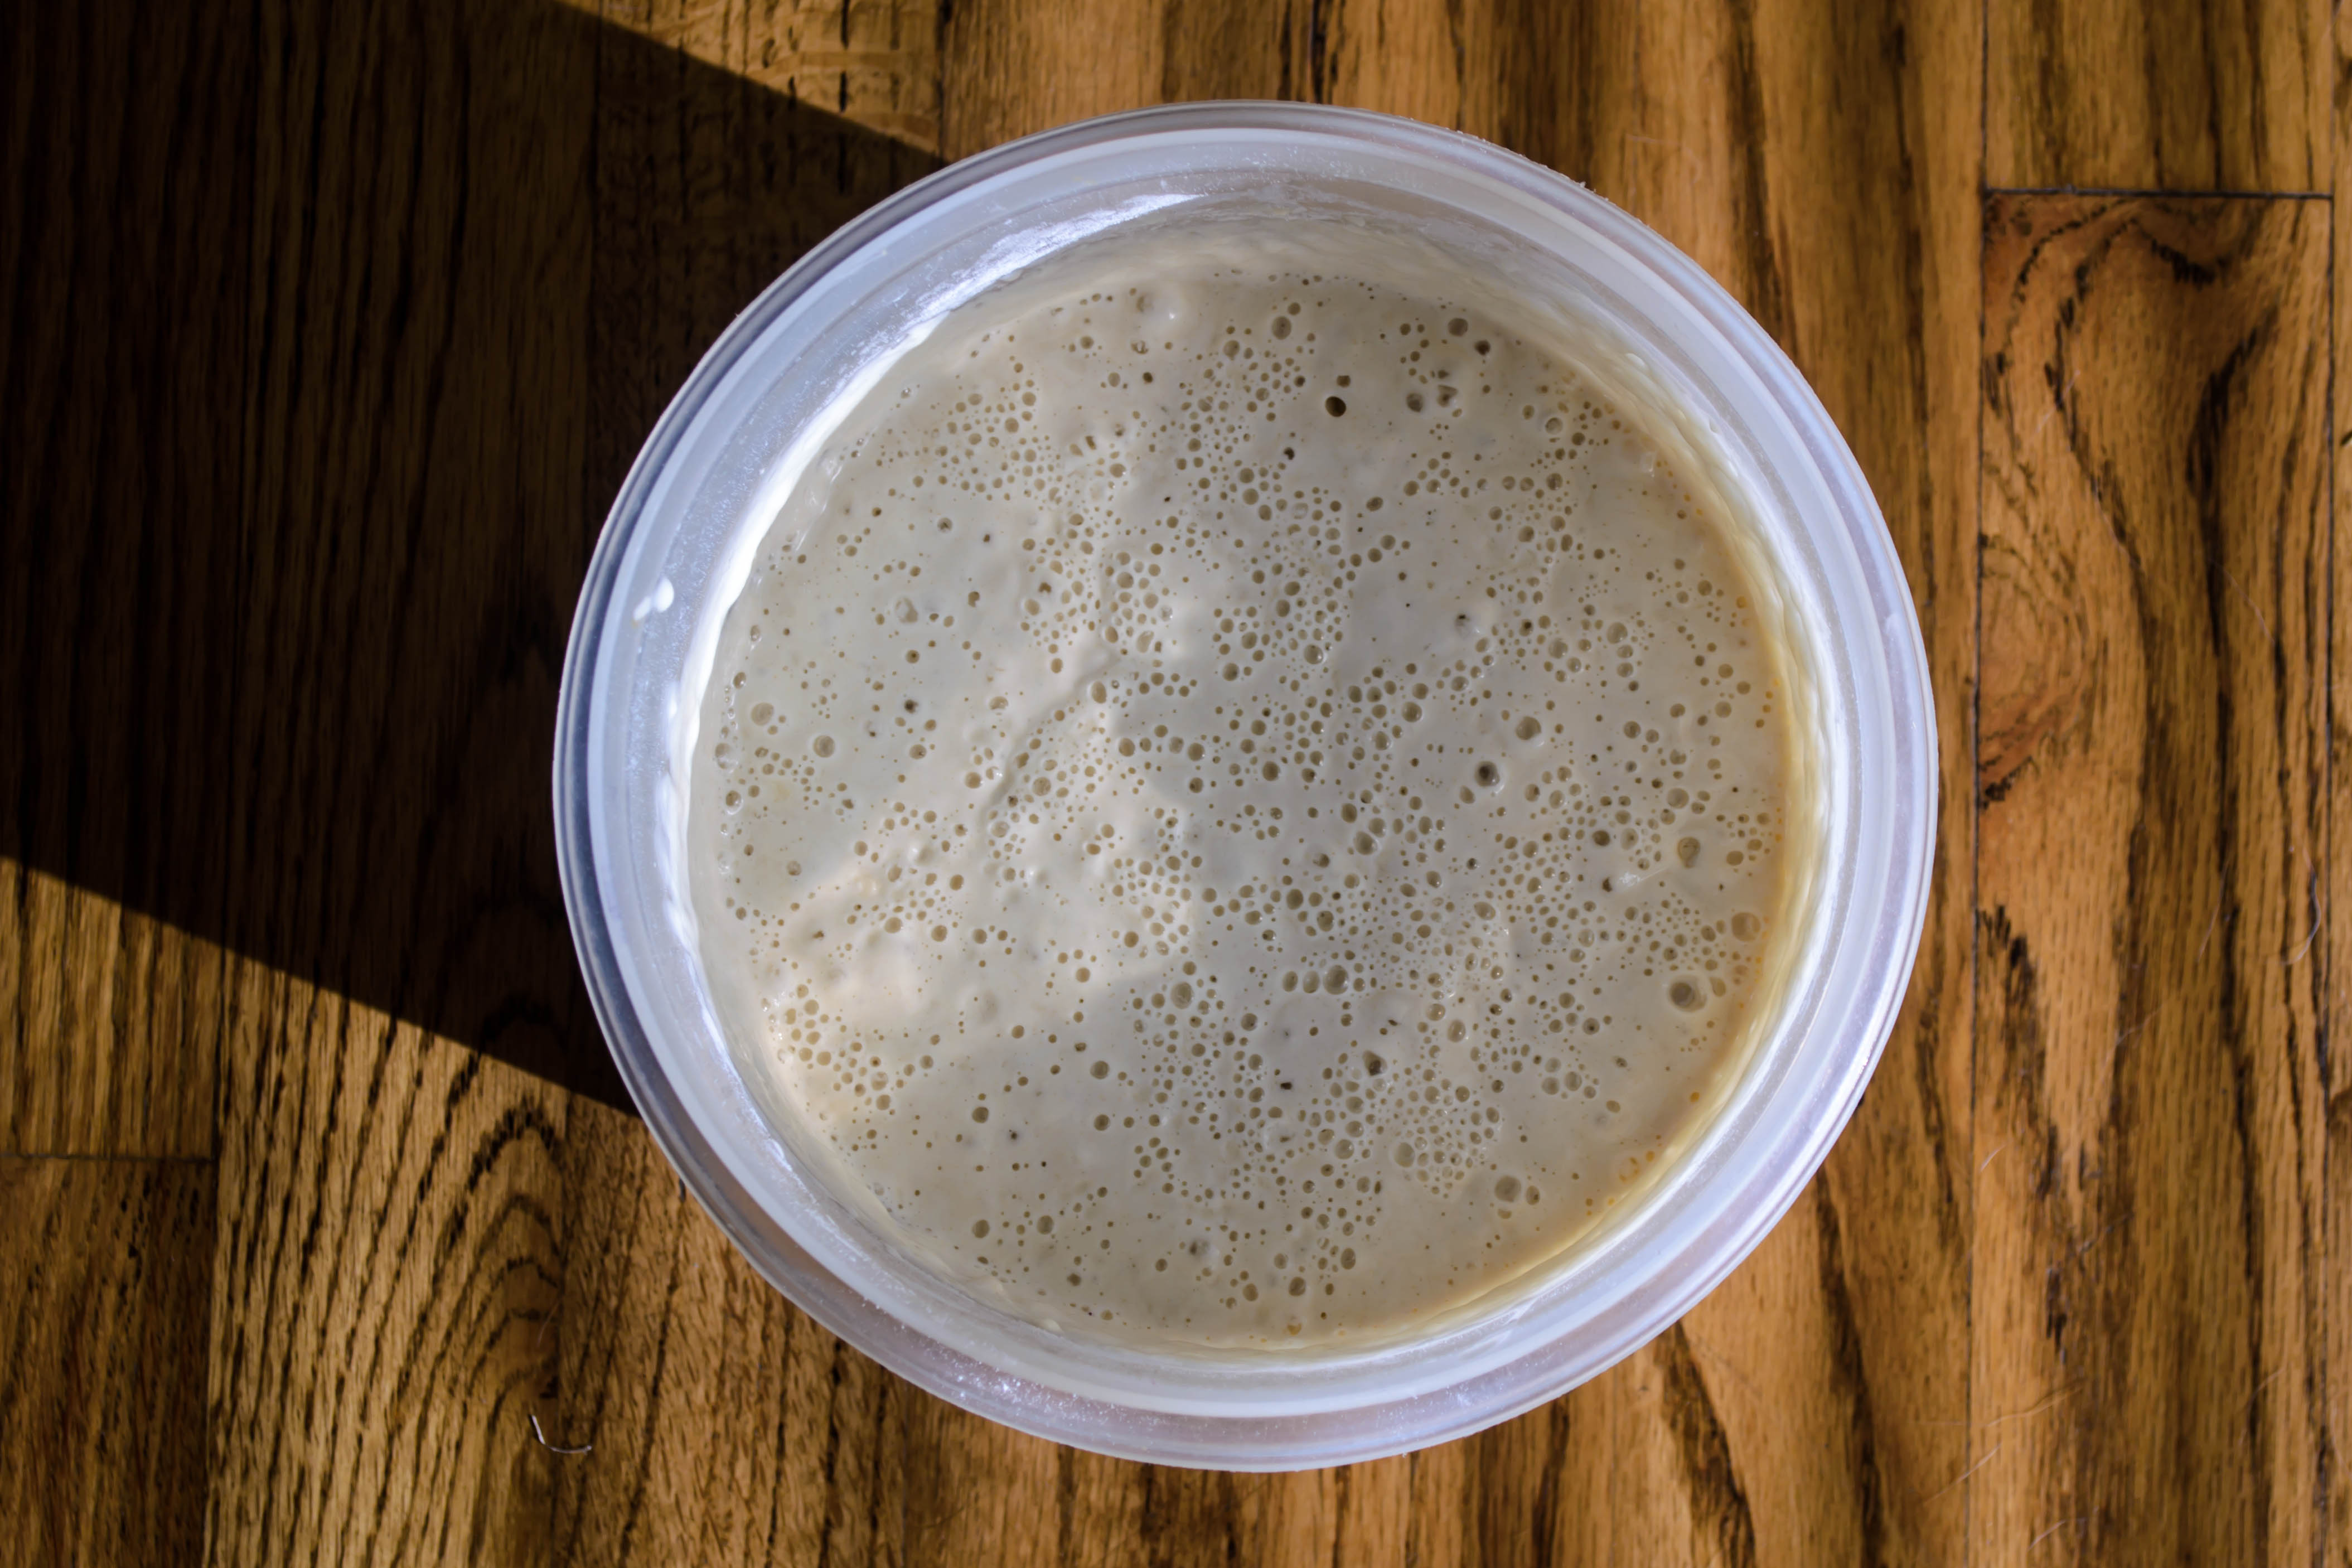
Bubblin’ Bertram bubblin’ away
This month’s Twelve Loaves challenge is “Keep it Simple.” As you know if you’ve spent any time on this blog, that tends to be difficult for me. I like a classic. I like a basic, fundamental recipe, but I like to twist it a little, to ask it to shimmy along with me into something fresh and bright and different. To make my predilection for complexity work with the challenge set, and to to celebrate both my new housemate (what? Yeast is alive!) and the kitchen scale Santa brought me (thanks, Mom and Dad!), I decided to face basics in a way I’ve never done before: by weight.
 Baking by weight is hardly new. Shauna talks about it all the time, and it is just as true for baking with wheat flour as it is for using gluten-free flour mixes. Michael Ruhlman has written a whole book that relies on it. But it was new for me. There is something bizarrely scary about ignoring your measuring cups, though I’m not sure why, because working by ounces is admittedly so much more precise.
 So I threw caution (and habit) to the wind and dove in, dipping up some of my burbling fed starter, glorying in the yeasty sour smell, and kneading it gently into flour, water, salt, and a breath each of butter and honey for a little extra flavor and moisture. It made a lovely soft dough, and I lovingly nestled it in an oiled bowl, covered it with plastic wrap, and set it aside to swell.

“Shaggy” dough
And then it sat. And I sat. And we sat. And I paced. And it did nothing. For hours. No rising. No bubbling. No noticeable change of any kind. I went back to the internet and searched for solace.
 Three hours later, finally, my dough had almost doubled. In my warm home office, this usually takes a maximum of 90 minutes. But I had used no commercial yeast, only what was naturally in the starter. It takes those little guys a while to gulp down all the new food they’ve been handed, and to expel the gas that causes dough to puff and thicken.

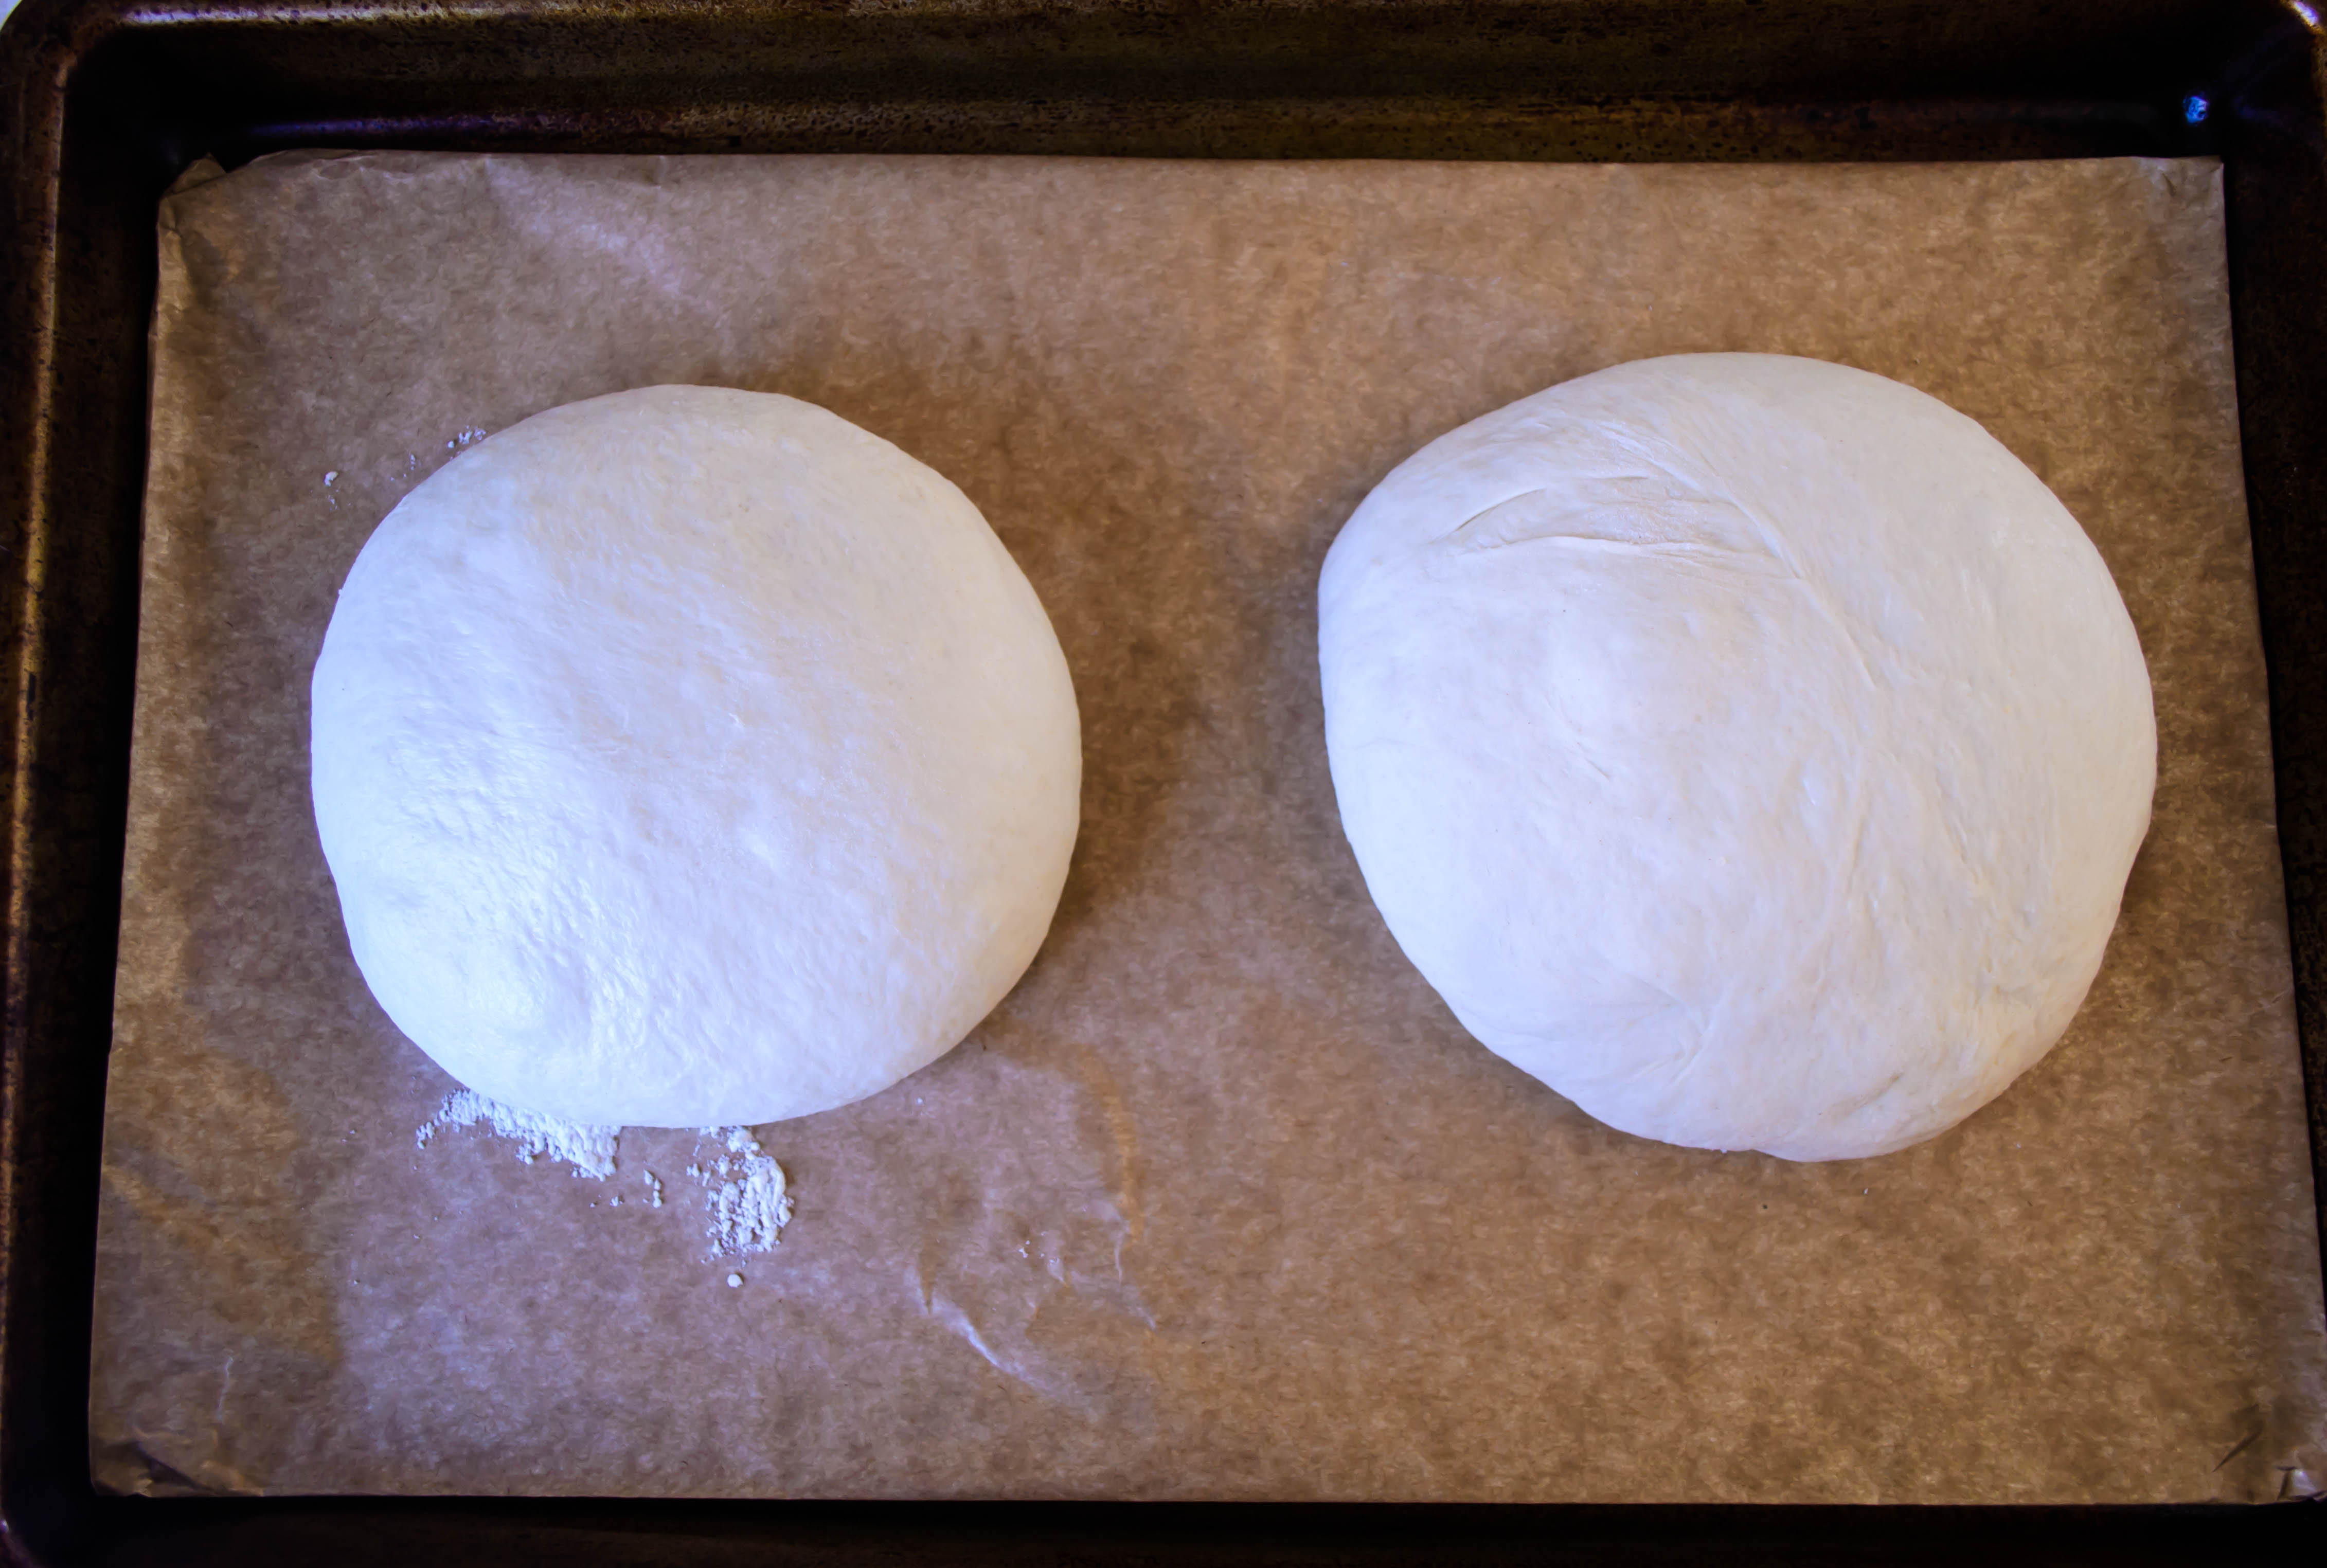 Now that I knew time was the real challenge, everything else fell into place. I divided the ball of dough in two, lightly shuffled them around in some flour and shaped them into rounds, and let them rise again for an hour and a half. They didn’t puff very high, but they did expand into fat floppiness, like doll-sized beanbag chairs. But this didn’t seem to matter. Slashed artfully across the top to help gasses escape while baking, coerced into a steam-filled oven for half an hour, and we had a conjoined pair of soft, browned loaves, moist, warm, on the dense side of fluffy, and lightly but noticeably sour. Simple.

 Simple Sourdough Boule, by weight
A fabled land of farmers, farm shares, fancy (and not so fancy) restaurants, family meals, food projects and more.
cooking my way through my dissertation, one egg at a time
Fearless cooking from a tiny NYC kitchen.
food, in so many words.
Recreating the famous dishes of famous writers. Part recipe blog, part historical discussion, entirely unabashed love of books.
Epicurean Adventures from Eugene, Oregon
Celebrating the Harvest
Modern Iranian aka Persian Food & Culture Blog - Cuisine, Recipes, Stories , Photos, Pictures, DIY tutorials
Exploring Culinary Traditions of Africa, African America and the African Diaspora
food, in so many words.
food, in so many words.
food, in so many words.
Food-Stories-Recipes-Love
WordPress.com is the best place for your personal blog or business site.
