Smoked salmon sushi rolls

This is one of those meals we have all the time but it never occurs to me to post here. It’s just a weeknight meal. It doesn’t feel “impressive” or “blogworthy,” but as I was making it the sixth-or-so time in so many months, I finally asked myself why. Well, because, I answered (what? You don’t have these kind of conversations with yourself?), it’s so… simple. There’s not much to actually cook, it doesn’t take long, the ingredients are (mostly) really easy to find, and… why did I think this wasn’t worth posting again?

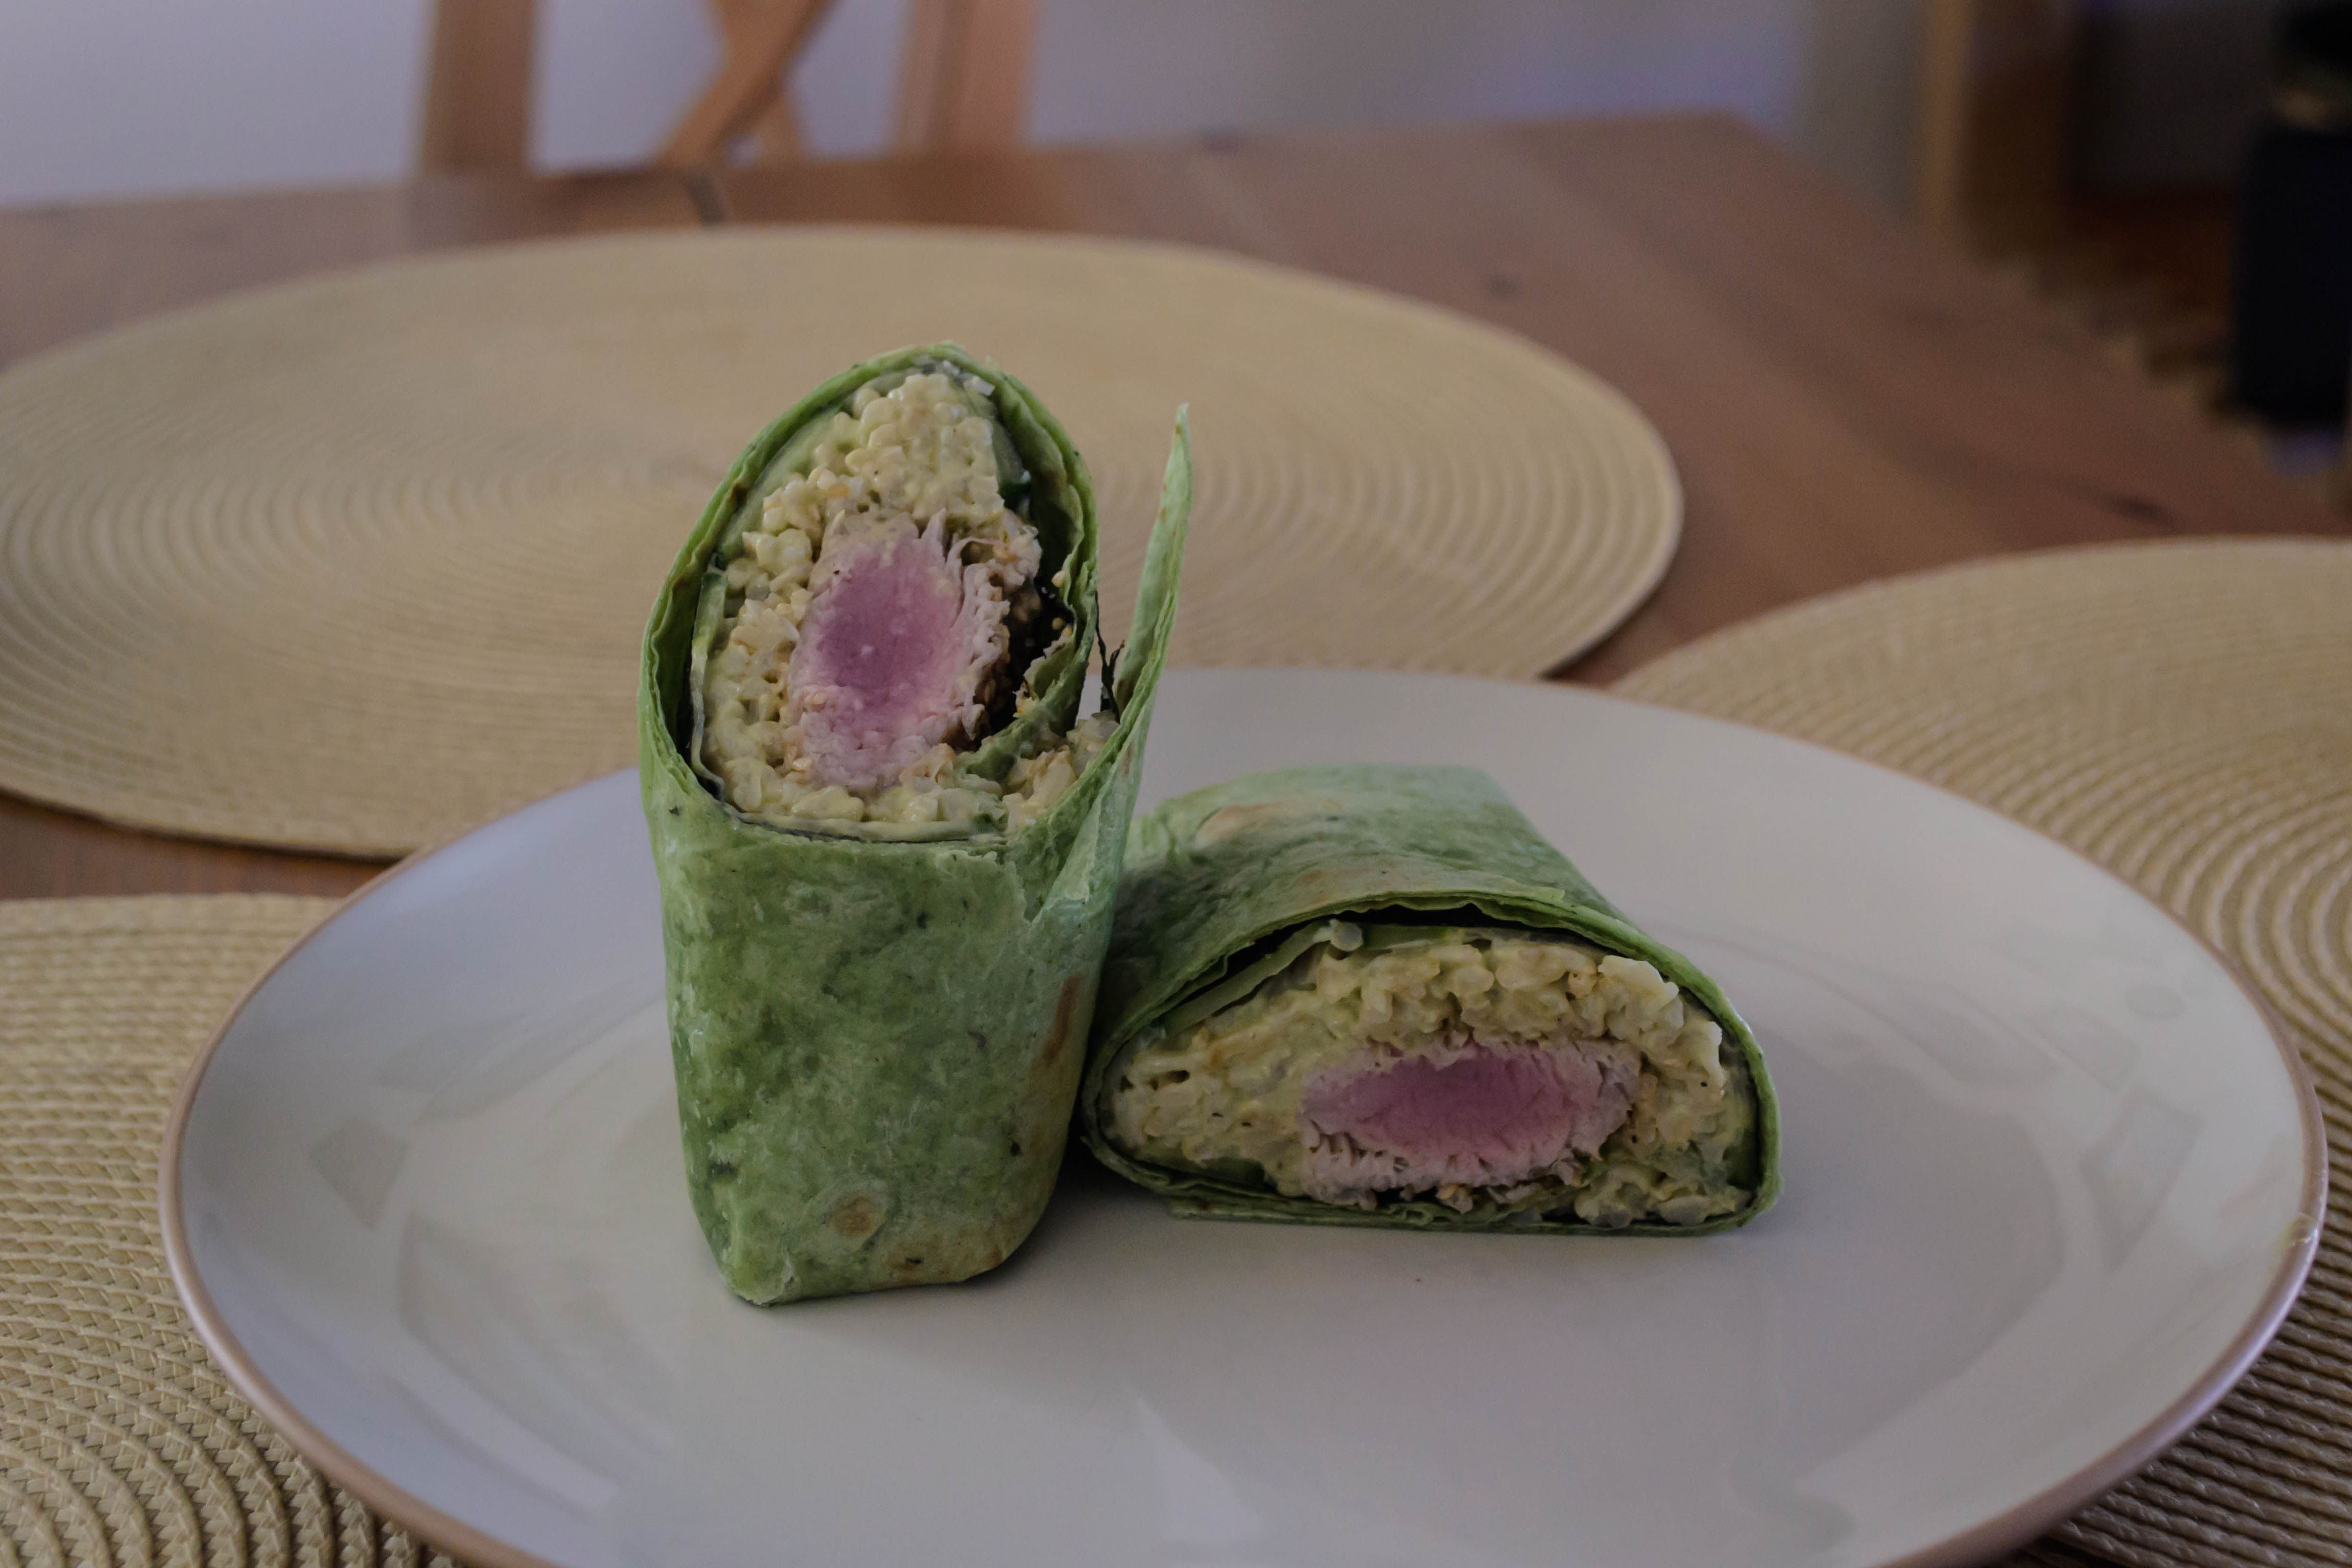
We’ve been calling these “sushi burritos” mainly due to size and shape, but they really are just unsliced maki rolls, filled with avocado, cucumber, pickled ginger, and a generous portion of smoked salmon. “No raw fish?” you’re thinking, “so how is that sushi?” Ah, but “sushi” refers not to the fish – though that is probably what many of us call to mind first when we hear the word – but the rice: short grain, combined with (usually) seasoned rice vinegar, and then wrapped, covered, or rolled with other ingredients.

Here I’m using smoked salmon instead of the more traditional uncooked fish. Though I agree it would never stand up against a beautiful slice of raw ahi, the substitution is nice for a few reasons. First, especially if you are limiting your trips to the grocery store right now, you don’t have to worry about using it immediately – convenient if your avocado is less ripe than you’d hoped. Second, it tends to be much less expensive. Third, the texture is not quite the same, but it is comparable – on the tongue this does not feel like cooked fish, and if you can find one that is not particularly smoky, the salmon flavor comes through nicely. You could also use a cured product like gravlax for an even purer salmon-y flavor. And if you aren’t comfortable purchasing or consuming raw fish at all, this is an easy workaround.

Aside from acquiring the ingredients, the most intimidating component of sushi for many people is the rolling: spreading the rice evenly over the nori, trying to keep all those central components together, ending up with a nice, tight roll and good shape. For me, though, it’s the slicing. That’s when things start to come apart: when you disrupt the structural integrity of the nori, now nice and flexible after absorbing some of the moisture and warmth of the rice, by running a usually-not-sharp-enough knife through it. Here I forgo all but one slice, drawing my sharpest knife just once through each long roll, on a diagonal, and calling it a day. We get to the eating part faster that way.

I noted above that the ingredients for this meal are mostly easy to find. If you have an Asian market nearby, they are very easy to locate. If you don’t, your grocery store probably has an “ethnic foods” aisle with most of these ingredients: the rice vinegar, nori sheets, and pickled ginger (the same stuff, often lightly pink, that comes on your plate next to the blob of wasabi at your local sushi joint) will more than likely be there. If you can’t find wasabi mayonnaise, that same aisle will probably have various options for prepared wasabi – I just get a tube of it and add it to regular mayonnaise until the degree of nostril-tingling spice suits my fancy.

I’m also using furikake here (same aisle), a rice seasoning that is basically a mixture of sesame seeds and finely diced nori, seasoned with salt and sugar. My current container also has bonito flakes, and there are spicy varieties too. Bonus: furikake is also a madly delicious seasoning mixture for popcorn.

If you are efficient about all this, you can prep your vegetables and get everything else ready in the time it takes the rice to cook. My rice cooker usually requires about 25 minutes, and I find I can usually have everything else prepped and laid out in that time span. (Yes, I use a rice cooker for this instead of cooking my rice on the stove. I like the insurance that it offers, since it switches to “keep warm” when it’s done instead of, you know, continuing to cook into a blackened mess because I forgot to set a timer and got busy with other tasks…).

The play of flavors here, as you know if you enjoy sushi, is so comforting and so, just, good. The avocado and salmon are rich and fatty, so the watery crunch of cucumber and the pickled ginger punch provide a nice foil. The wasabi mayonnaise is just background spiciness, and the nori, warmed and moistened by the rice, takes on a chewiness I really like against the seasoned rice. You could serve this however you want, though we like two rolls a-piece, each one sliced in half at a steep angle. No need for utensils here – we just pick them up, pinch the uncut ends together a bit to avoid anything escaping, and enjoy the resistance of the chewy nori wrapper with each bite. You could likely also wrap them into cones for a more traditional hand roll shape, though I’ll admit I haven’t tried it that way yet, and thus I’m including instructions only for my method.

Smoked salmon sushi rolls
4 whole rolls (serves 2)
30-40 minutes, depending on how fast your rice cooks (some rice cookers take longer than others, and can differ from the speed at which rice cooks on the stove)
2 cups short grain white rice, cooked on the stove or in a rice cooker
¼ cup seasoned rice vinegar (if yours is unseasoned, stir in 1 teaspoon sugar and 1 teaspoon salt)
optional: 2-3 tablespoons furikake seasoning
about ½ a small cucumber, cut into long planks as thin as possible
4-6 ounces lightly smoked salmon, cut or torn into small pieces
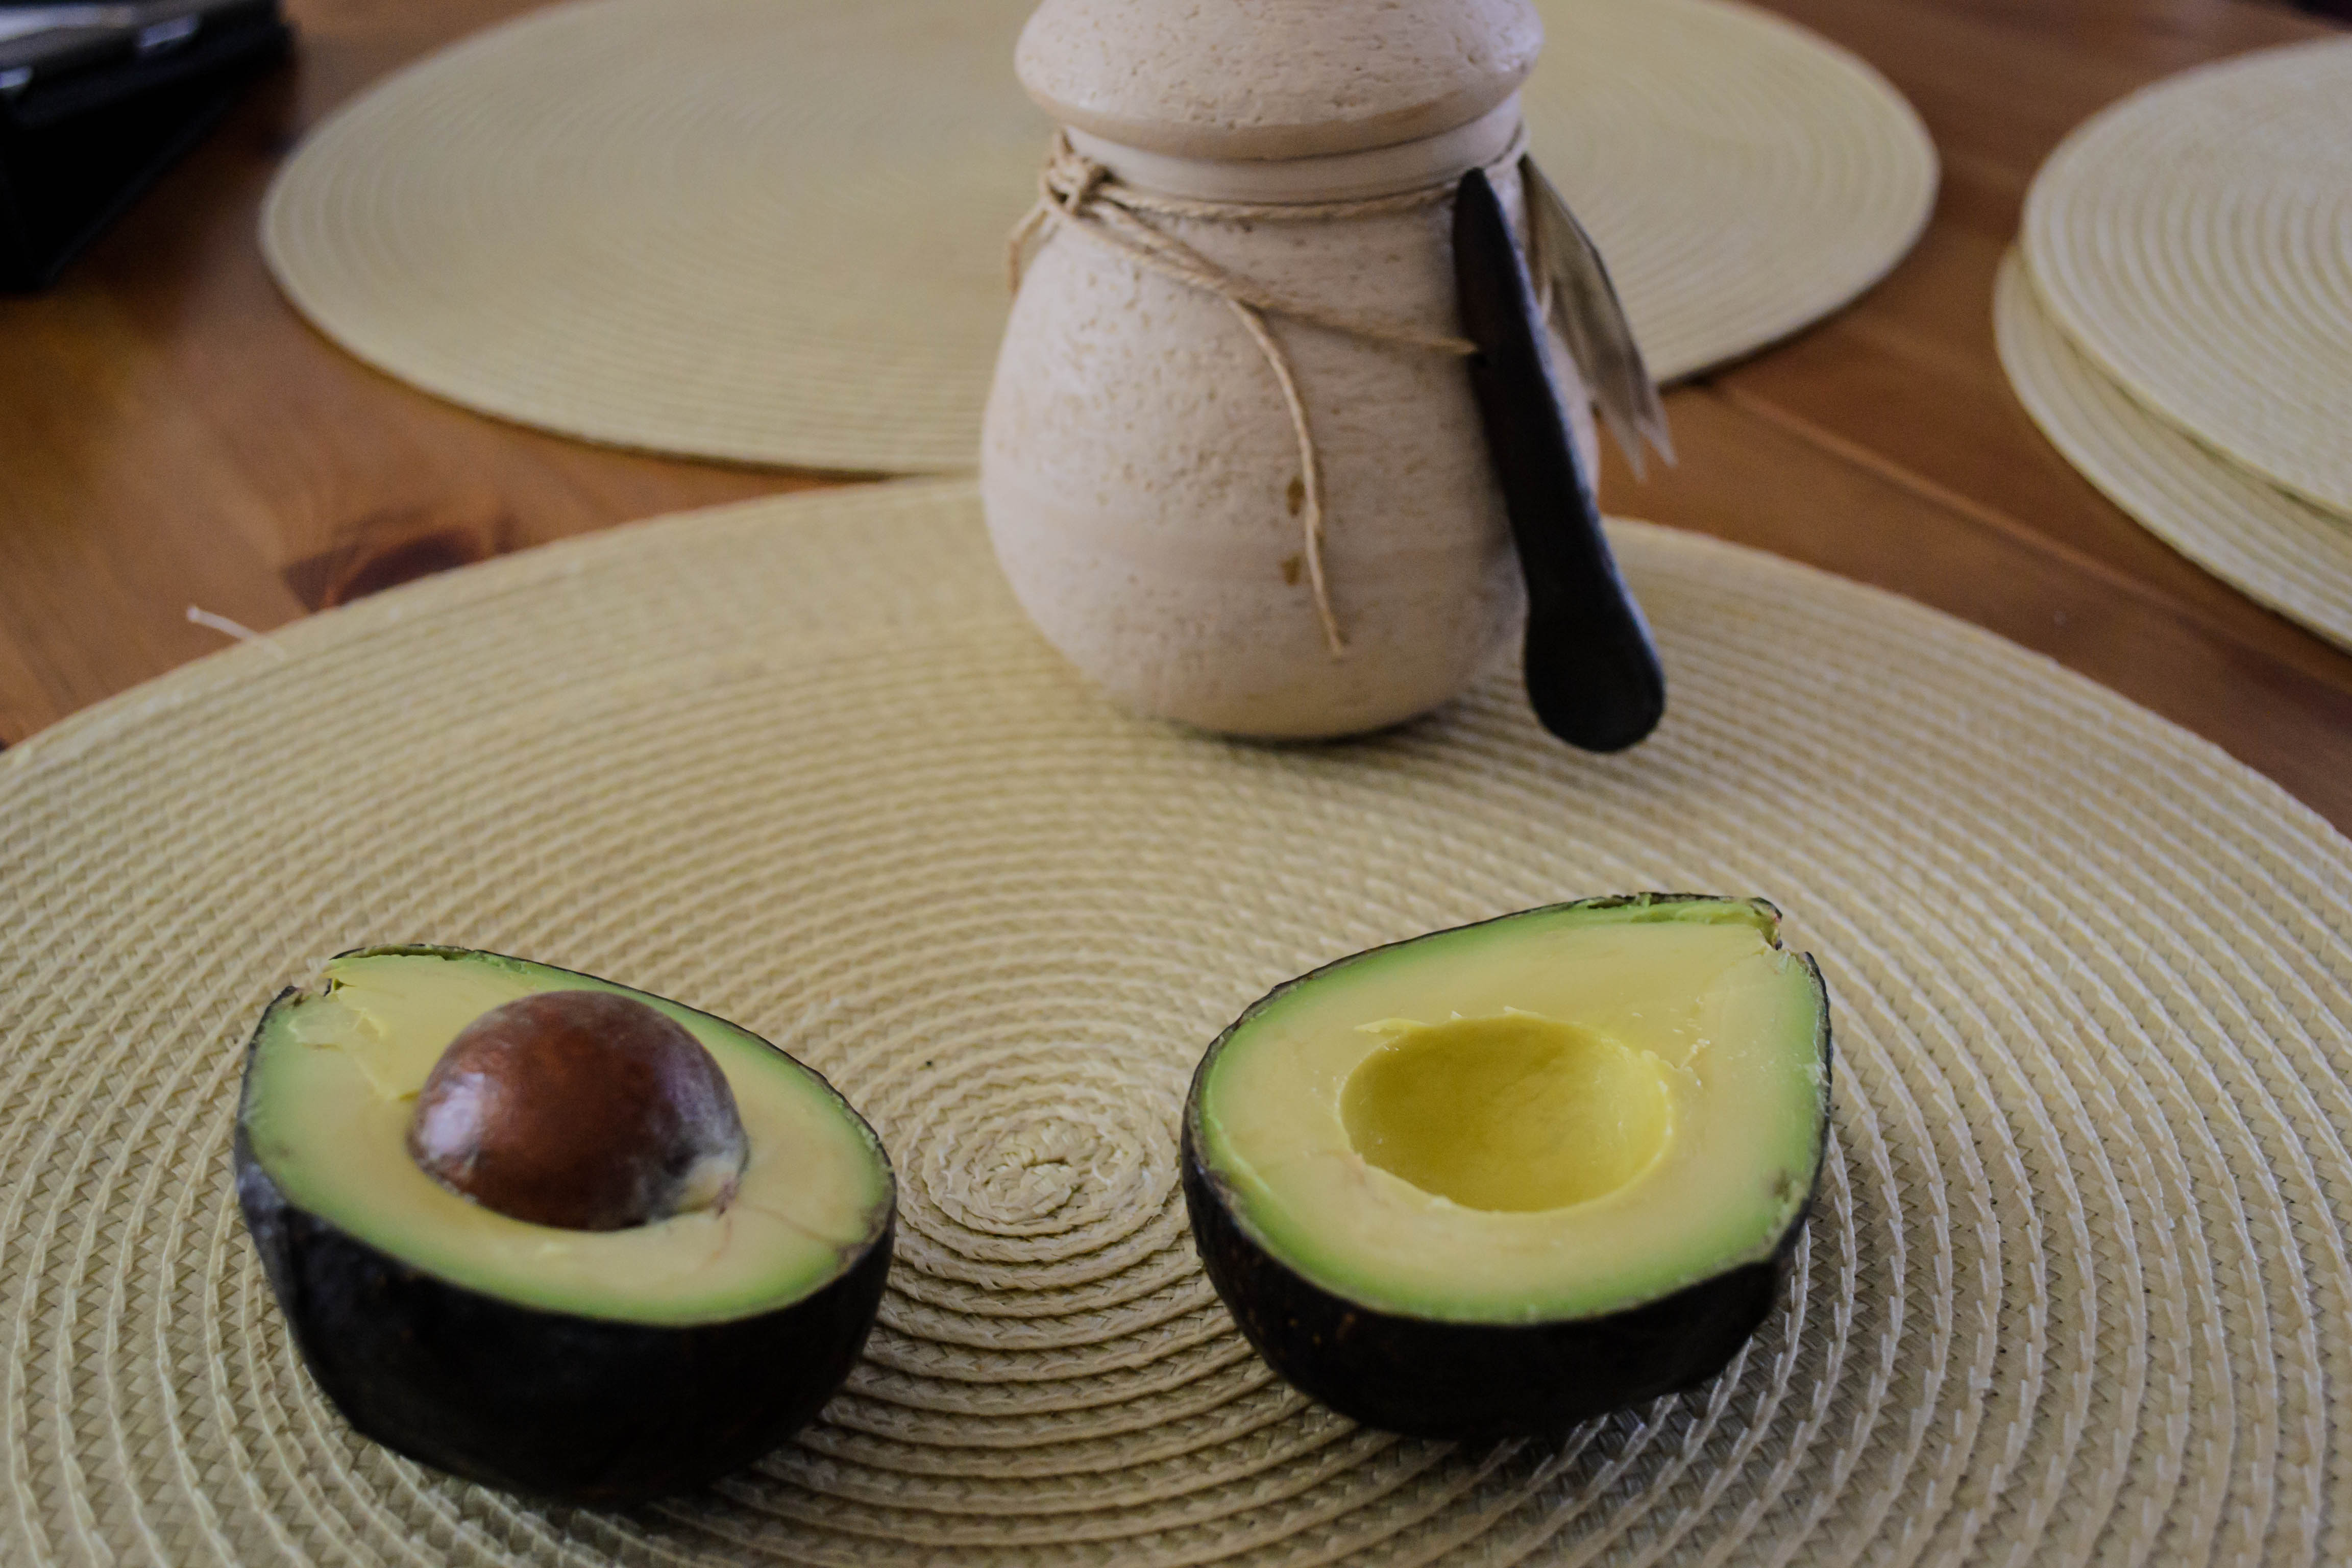
½ ripe avocado, very thinly sliced
1-2 tablespoons pickled ginger (also called sushi ginger)
4 sheets nori
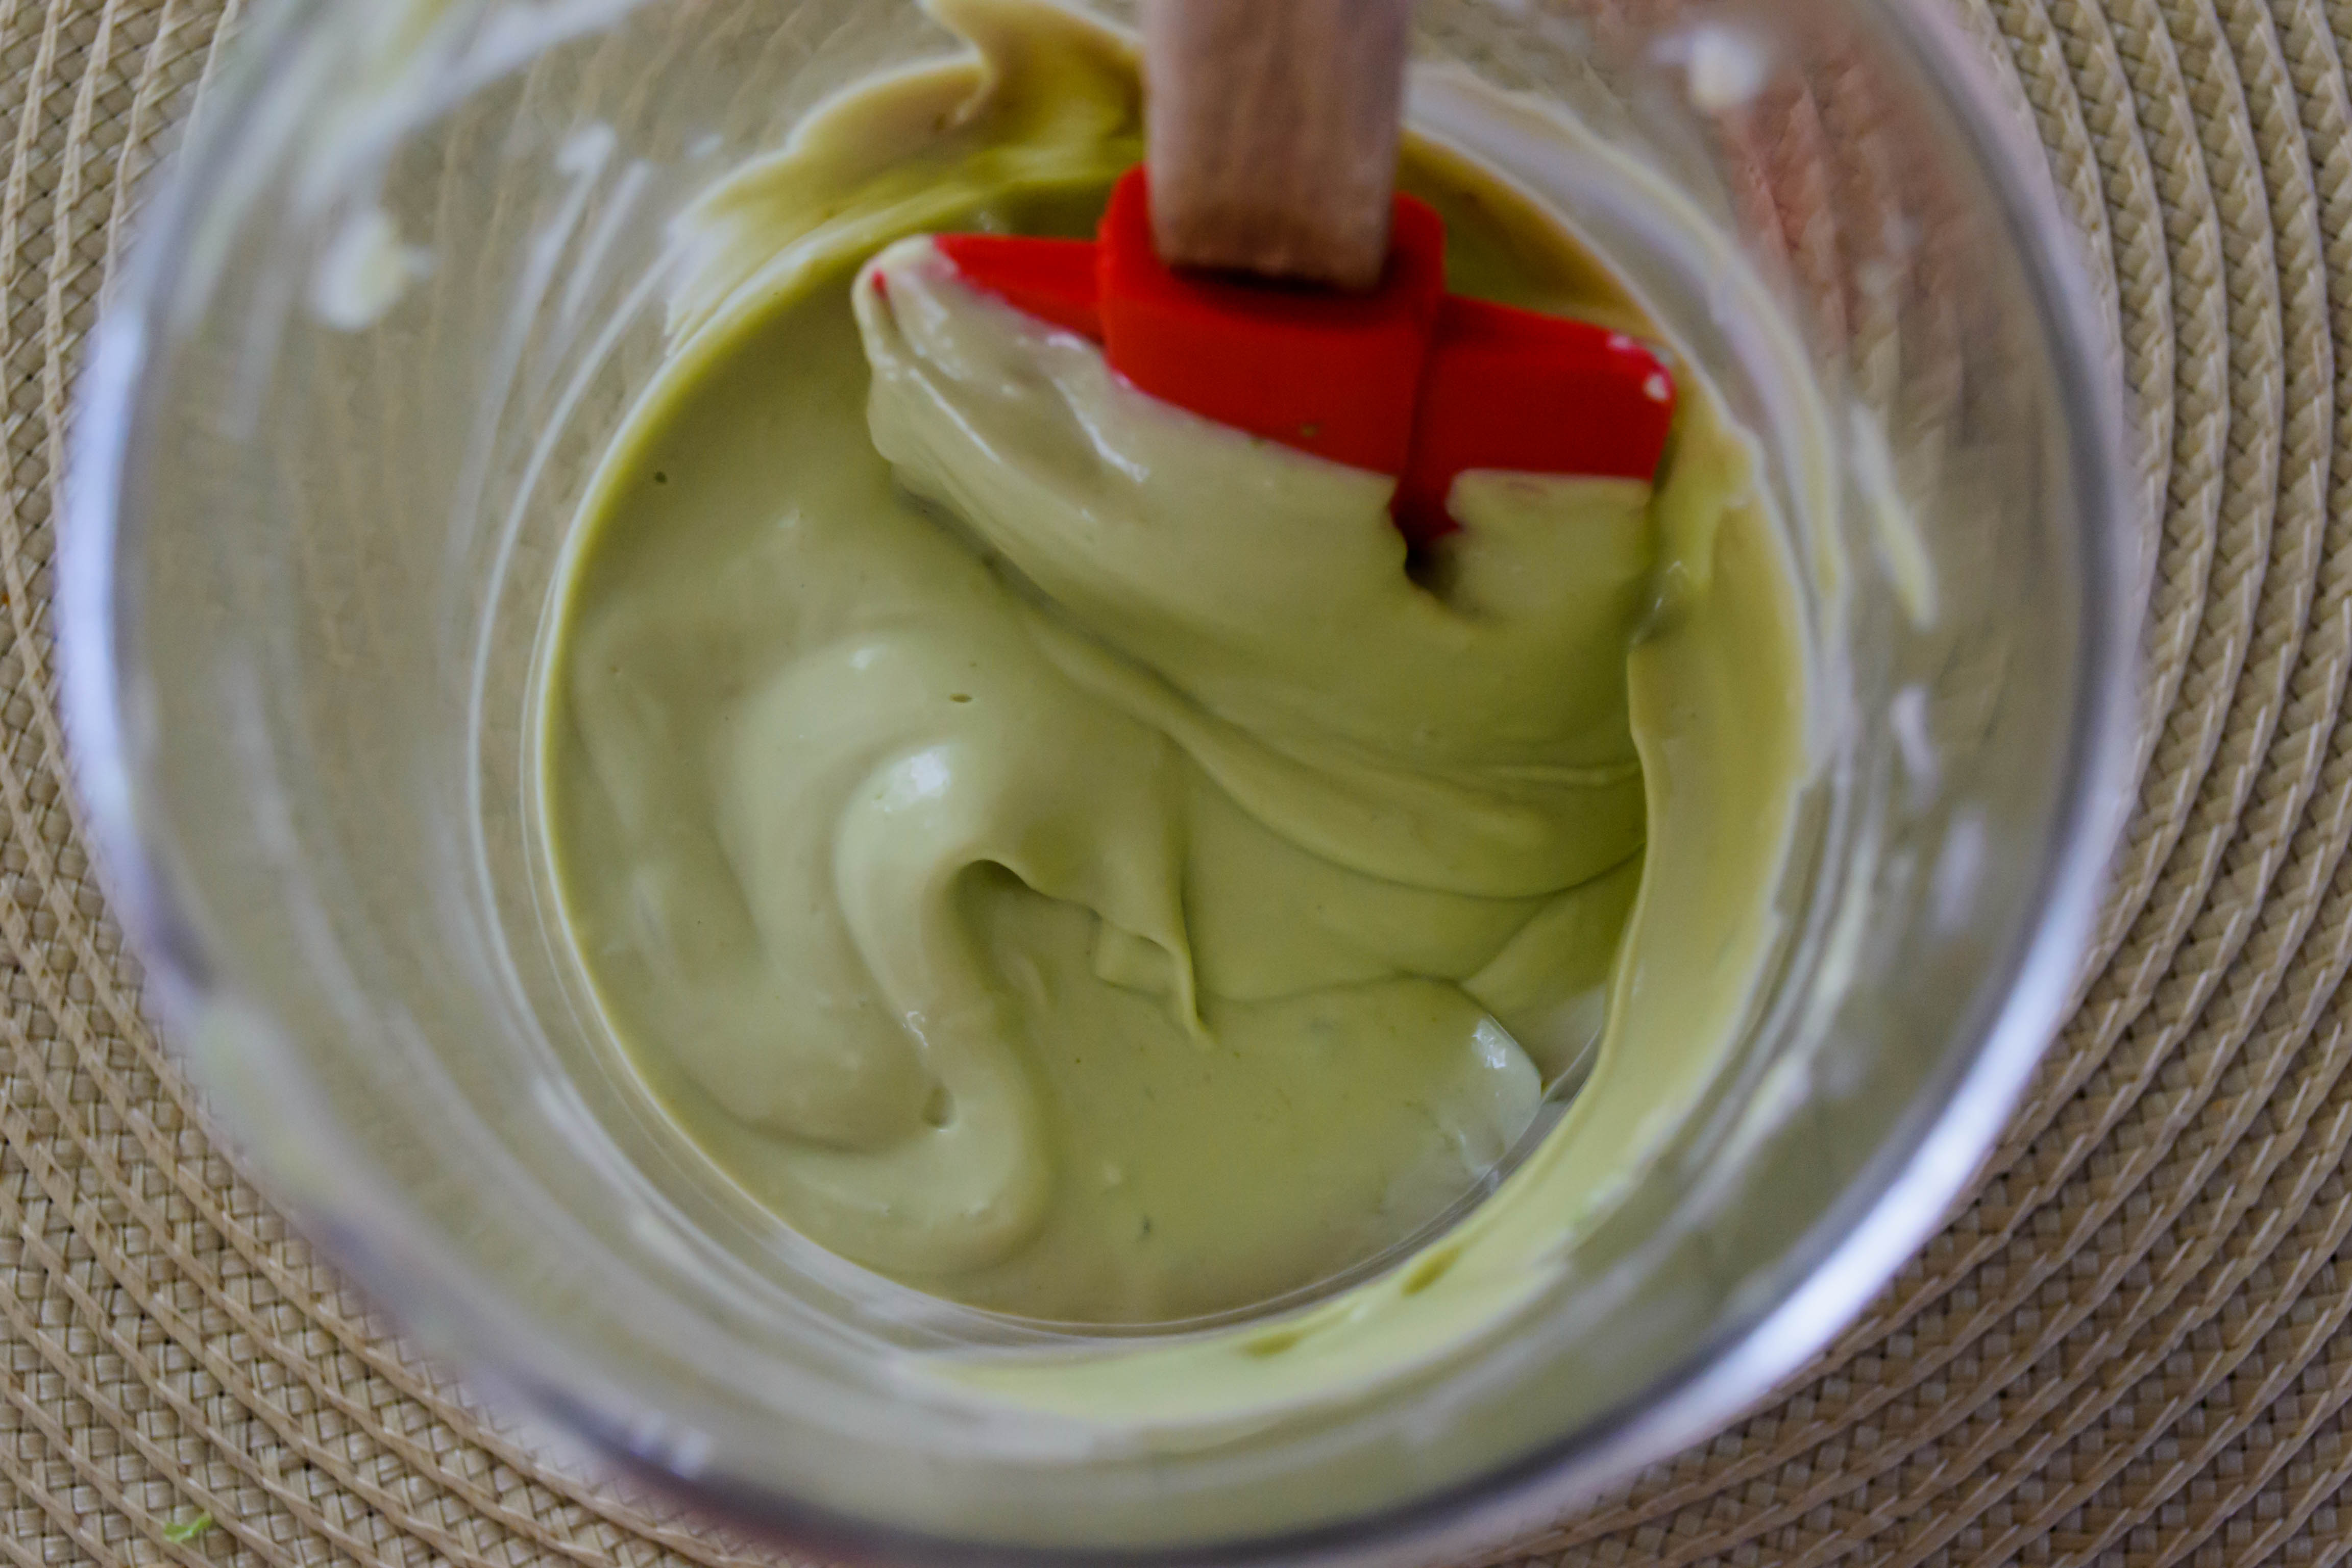
1-2 teaspoons wasabi mayonnaise


  • First, cook your rice. Use the time as it cooks to prep the other ingredients: thinly slice the cucumber using a knife or y-shaped vegetable peeler. Cut the avocado into very thin slices. Cut or tear the salmon into small pieces (this makes for easier eating). Fish out the appropriate amount of ginger from the container. Get everything laid out for easier construction.
  • When the rice is done, immediately mix in the vinegar and, if using, the furikake seasoning. It will be extremely tart at first, but the vinegar flavor will mellow as the rice cools. Set it aside until it is cool enough to handle.
  • To build the rolls, lay a piece of nori on your work surface, rough side (if there is one) facing up, short end toward you (most nori I’ve worked with is slightly rectangular, not exactly square). Spread a small amount of wasabi mayonnaise evenly over the nori, leaving a small border on all sides.
  • Scoop on about ⅓ cup of rice and use your fingers to spread/sprinkle it somewhat evenly over the nori sheet, leaving a half inch or so border at the far edge. About half an inch in from the edge closest to you, place two slices of cucumber, then about a quarter of the salmon pieces, then a few thin slices of avocado, then a few pieces of ginger. As you can see in my photos above, these should be arranged horizontally from your perspective, and all fairly tightly together.
  • Begin to roll the nori sheet by folding the short end closest to you up and over the row of fish and vegetables, then continue to roll until you get to the opposite side. The half-inch border you left rice-free will ensure a clean closure of sorts.
  • I like to slice these just once, on a diagonal, with a very sharp knife. Then we pinch the uncut ends together a bit and eat them out of hand, like a small burrito.

Tempura Salmon Tacos

As I mentioned not long ago, I’ve completely caught N’s obsession with tacos and now I want them all the time. In past years I thought the concept of “Taco Tuesday” was a bit silly and boring, but now it seems brilliant, because of course you wouldn’t do the same old ground beef and shredded cheddar every week; you would change it up and have charred vegetable tacos one week, slow cooked carnitas with pickled onions another week, and of course you would need fish tacos in there at least once a month.

Fish tacos tend to come in two camps: grilled and fried. When grilled, the fish is flaky and barely smoky and feels righteously healthy (at least as healthy as a taco can be), especially since it’s usually topped with confetti of cabbage, maybe a minute dice of tomatoes and, if you’re me, some paper thin slices of radish for a little peppery crunch. A spicy creamy drizzle and a generous dollop of guacamole are requirements.

But if I have to choose, I’m sure it will come as no surprise to you that I’m almost always going to go with fried. Encased in batter, sometimes cornmeal, sometimes flour, sometimes with beer, the fish stays molten hot and so juicy, and the batter is (ideally) crisp and crunchy and thus adds perfect texture even to a soft tortilla. Of course, many people’s objection to this format will likely be that it is unnecessarily heavy or fatty, and they are right: the wrong batter can be gloppy and greasy and excessive. Luckily, I have a solution to that: tempura.

Light and crisp and golden and melt-in-your-mouth-barely-there, tempura is, of course, that perfectly crunchy deep-fried coating for seafood and vegetables so common in Japanese restaurants. Its lightness is frequently achieved through the use of seltzer water as the liquid component in the batter, and sometimes rice flour, which fries up lighter and crispier than wheat flour.

The big problem with tempura, though, and what makes it a pain to do at home, is the deep-frying part. For a simple fish taco dinner, heating up a vat of oil is not high on my priority list. So I wondered if you could achieve satisfying tempura results with a shallow fry, not unlike old-fashioned fried chicken in a cast iron skillet. A few experiments later, I can definitively report that, although you have to be a touch more careful with the batter sticking to the pan, shallow-fried tempura is a completely viable option. Less oil means less time, less waste, and less of that fried smell in your kitchen (although it’s worth noting that an open window and a few votive candles lit for an hour or two can clear out most of that). My tempura batter takes the best of both worlds of fried fish, combining rice flour and baking powder not with the traditional seltzer, but with beer for a little extra flavor along with the requisite fizz.

Fish tacos are usually made with white fleshed fish of some kind – cod or halibut or mahi – but I love salmon, and have had some stellar fish and chips platters using this dense, meaty, pink option, so here I’m using it in lieu of more traditional options. You can certainly change out the type of fish you use, but I can’t speak for the cooking time of other fish since I’ve only tested the salmon with this method.

Of course half the fun of a fish taco is adorning it with various toppings, so here I’ve got two on offer for you: a red cabbage slaw bright with lime and cilantro, and a smash of avocado and corn to make up just before serving. We thought they needed nothing more, but if you like that creamy spicy sauce, I suggest whisking a few drops of sriracha into some buttermilk for a tangy kick to drizzle on.

Tempura Salmon Tacos
Serves 4
About ½ hour, if you are quite organized
For red cabbage slaw:
¼ head of red cabbage, grated or shredded or very finely slices (you can use green cabbage here too; I just like the unexpected bright color of the red)
¼-½ cup chopped cilantro, leaves and tender upper stalks
zest of 1 lime
juice of ½ lime
½ teaspoon salt
optional: 1-2 tablespoons mayonnaise or wasabi mayonnaise, if you like your slaw creamy
For tempura salmon:
1 pound salmon, cut into 1×3-4 inch strips (approximately)
⅔ cups rice flour
1 teaspoon baking powder
1 teaspoon salt
6-8 ounces beer (go with a pale ale or lighter; this is not a place for a deep roasty stout. Save that for waffles)
2-3 cups vegetable oil
For corn avocado smash:
1 ripe avocado (I like haas)
½ cup fresh or defrosted corn kernels
2 tablespoons thinly sliced green onion tops (dark green parts only)
¼ teaspoon salt or to taste
¼ teaspoon black pepper or to taste
lime juice to taste
To serve:
Tortillas (we like crunchy corn shells for this, but soft or blistered corn, or even flour, would also be tasty)
Optional garnishes: radish slices, crema, buttermilk and sriracha, sour cream, additional cilantro, green onion, or lime


  • First, make the cabbage slaw. Toss together the cabbage, cilantro, lime zest and juice, and salt in a medium bowl. Set aside for at least 10 minutes to let the salt and lime juice permeate. If you like a creamy slaw, toss in 1-2 tablespoons regular or wasabi mayonnaise just before serving.
  • With the slaw done, turn your attention to the fish. In a cast iron or other large, heavy skillet, heat enough vegetable oil to come about 1 inch up the sides. While the oil heats, prep a warming tray: place a wire cooling rack over a baking sheet and place in the oven. Heat the oven to 300F.
  • Next, slice the fish into 1×3-4 inch strips or “fingers.” You can alter the size if you prefer, but this size cooks quickly and fits well into a taco shell.
  • When the oil reaches a temperature between 350-375F, whisk together the rice flour, baking powder, and salt in a large bowl. If you prefer a very light batter, add 8 ounces of beer, whisking constantly as you pour it in. If you prefer a more substantial batter, add only 6 ounces of beer.
  • Now you are ready to fry. Add 5-6 strips of the fish to the tempura batter, submerge to ensure they are fully coated, then gently add them to the oil one at a time (it will sizzle aggressively), being sure they are separate from one another in the skillet. Cook 1-2 minutes per side, until the batter is lightly golden and the fish is barely cooked through (this doesn’t take long; you’ll be surprised how fast it is). Remove the fish to the warming rack in the oven. Continue to fry the fish in batches until it is all cooked.
  • Either in between, or just after the last batch of fish goes into the oven to keep warm, make the corn avocado smash. Halve, pit, and cube up the avocado into a small bowl (I like this method) Use a fork or the back of a spoon against the side of the bowl to lightly smash the cubes of avocado to your desired texture. I like it fairly chunky. Add the corn, green onion tops, salt, pepper, and lime juice, and gently stir to combine.
  • To serve, add a few fish strips to a warmed, grilled, or toasted tortilla, then top with the slaw and the smash in your desired order and quantity. Eat immediately.

Grape and Cherry (Tomato) Avocado Toast

food-blog-january-2017-0152
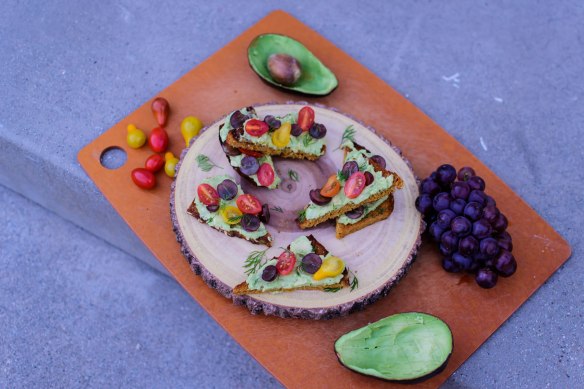
This one is a restaurant recreation from a spot we like in Culver City. These guys appreciate the lux/simplicity combo that is avocado toast; in fact, they are also the inspiration for my last foray into this ever-so-trendy meal base.

food-blog-january-2017-0136Cherry tomatoes and grapes seemed like a strange combination, and I was dubious about how well grapes would play with avocado, but it all works. The tomatoes are bright and acidic, and the grapes are tart enough that, with a squeeze of lemon and flake or two of salt on top, they toe the savory/sweet line successfully.

food-blog-january-2017-0157

I hope all is well in your world.


Grape and Cherry (Tomato) Avocado Toast
Serves 2 as an appetizer; 1 as a light lunch
About 15 minutes
4 thin slices sourdough or French bread (you can remove the crusts if you want more uniform toasts)
Olive oil spray, or 1-2 teaspoons olive oil
1 teaspoon coarse sea salt, divided
1 ripe avocado
1 tablespoon lemon juice, divided
freshly ground black pepper to taste
12 cherry tomatoes, halved (I like a mix of colors)
12 red grapes, halved
1 teaspoon fresh dill sprigs
1 teaspoon finely chopped chives
  • Preheat your broiler to high and prep the bread by spraying or brushing it with the olive oil on both sides. Sprinkle ¼ – ½ teaspoon coarse salt evenly over both sides of all four slices (that is, ¼ – ½ teaspoon for all four, not ¼ – ½ teaspoon per slice). Set the slices on a broiler tray or a wire oven rack set over a cookie sheet and broil on high, flipping each slice over once, until nicely browned and quite crisp on both sides. Don’t step away or try to prep other ingredients while you broil; the bread can burn very quickly. Once you have crisp, golden toast, set it aside to cool slightly.
  • In a small bowl, smash up the avocado with 1-2 teaspoons of the lemon juice. Add black pepper to taste, and slightly underseason with salt (we’ll be adding more to finish). You can go with a perfectly smooth mixture if you want, but I like to leave a few small chunks of avocado for extra texture.
  • Smear ¼ of the avocado mixture in an even layer onto each piece of toast. Then cut each slice on the diagonal and arrange it on a plate or serving platter. Arrange the halved grapes and tomatoes on each piece – aim for even distribution. Scatter the chives and dill sprigs over the top, then squeeze on the remaining 1 teaspoon lemon juice and a very light sprinkle of coarse sea salt. That way we get a crunch and salty kick with each piece.
  • Serve immediately – underneath the weight of the avocado, the toast will soften very quickly.

Save

Braised Lamb on Kale and Avocado Toast

2016-food-blog-november-0420Are you tired of turkey yet? Good, me neither. But just in case you want an indulgent break, may I suggest lamb instead? The inspiration for this recipe comes from three places: a restaurant near our house that does a braised lamb dip with kale and a garlic jus, the intense obsession of the last few years that is avocado toast, and Ina Garten. Ina doesn’t offer me any dish in particular, but does often take luxury ingredients and serve them in a very simple, homey way, and that’s exactly what happens here.

2016-food-blog-november-0395The first few times I watched a Barefoot Contessa episode that did this, I was annoyed. Like Ina’s penchant for advocating “best quality” base ingredients (read: expensive), I found the idea somehow pretentious. If I’m going to spend the money on fancy ingredients, then I want a fancy dinner! But contemplating this dish, it somehow seemed right. Let’s slow braise some lamb with aromatic vegetables and a good splash of wine until it collapses and shreds eagerly, bake a loaf of nicely seeded bread and cut it into thick slices, and spread that bread with a smash of avocado and kale, dosed with a good squeeze of lemon to keep it bright before draping on a healthy pile of the lamb. Fill the belly and keep the darkness away.

2016-food-blog-november-0391In determining how to go about this, I turned to yet another inspiration: the marvelous food mind that is Michael Pollan. In his book Cooked, which I’ve written about before, he spends a chapter discussing braising as a cooking method, and offers a mentor chef’s procedure in seven steps. Though I’ll give you the full recipe below, here’s what he recommends in my own order:

  1. salt the meat, then brown it
  2. finely dice some onions
  3. sauté onions and other aromatic vegetables
  4. place all the ingredients in a covered pot
  5. pour the braising liquid over the ingredients
  6. simmer, below the boil, for a long time
  7. remove pot from oven. If necessary, skim fat and reduce liquid. Bring to the table and serve.

As you can see, this is a procedure rather than a recipe – it’s the kind of steps a grandmother well acquainted with her own methods would give, and answer questions like “how many onions” with “enough,” or the precise temperature at which to braise with “oh, pretty low.”

2016-food-blog-november-0401Within the chapter itself, though, Pollan does give a bit more. Since the section of the book is the look at “Water,” he discusses the merits of using water rather than some other liquid to braise. Though we are always tempted to use broth or stock or wine, he notes that water retains a purer flavor – the meat is not in competition with the flavors of the liquid you’ve chosen. I bore this in mind, but wanted some red wine richness and tang anyway, so I settled for half and half water and wine. Only part way through the miracle, I suppose you could say.

This is a long project. The braise itself takes 2-3 hours all on its own, and that’s after you’ve let the onions cook down slowly for 30 minutes, then allowed the other vegetables to mingle another 15. Plus, as if all that wasn’t enough, you give the lovely, heady broth another good half hour to boil to create your final jus. And if you’re baking the bread yourself (in for a penny, in for a pound, right?), you’re looking at another multi-hour ingredient. You could, it seems, spend the entire day in the kitchen, lazily cooking your way toward dinner. Add some Edward Sharpe and the Magnetic Zeros, and that sounds like the day of my dreams.

2016-food-blog-november-0408When you’re finished, even though the resulting product looks humble, the reward is anything but. The lamb falls apart, and you stand there over the bowl you’re shredding it into trying not to stuff too many pieces straight into your mouth. It is meaty and savory and slightly gamey, and you taste lamb, but also wine and dark, piney, peppery herbs, and a subtle sweetness that comes from the vegetables. And then you pile it onto freshly toasted bread that you’ve smeared with the grassy, fatty spread you’ve made of kale and avocado, and you dribble over some of the juice left behind in the pan, and you eat it. And that was your day: making food, eating food, letting the aroma of the long braise fill your nostrils and your house, and you sleep happy.

2016-food-blog-november-0412Not that you need telling what to do with leftovers as luxurious as braised lamb, but if you aren’t sure, I think they would make amazing filling for tacos, perhaps with some shredded cabbage and feta cheese, and maybe a dollop of sour cream or yogurt, thinned with a squirt of lime and sprinkled with wafer thin slices of jalapeno and radish.

2016-food-blog-november-0420

Braised Lamb on Kale and Avocado Toast
Approximately 5 hours
Serves 4 + leftover lamb
2 tablespoons salt
2 pounds lamb leg or shoulder, in one piece (i.e. not in chunks)
¼ cup olive oil
2 white or yellow onions, finely diced
3 large or 4 medium carrots, finely diced
3 ribs of celery, finely diced
8 garlic cloves, smashed, skins removed
2 bay leaves
1 tablespoon whole peppercorns, optional
2 inch sprig rosemary, optional
2 cups dry red wine
2 cups cold water
2-3 ounces kale, leaves only – tough stems removed – finely chopped
1 ripe avocado
2 tablespoons lemon juice
1 tablespoon chives or green onion tops, very thinly sliced
salt and pepper to taste
thick slice of seeded toast for each diner
optional: finely sliced pickled radish or onion, to garnish


  • Sprinkle the salt evenly over both sides of the lamb. It will seem like a lot. Don’t worry. This is seasoning the entire 2 pounds of meat AND the broth. Let it sit for at least ten minutes, or up to a few hours.
  • When you are ready to cook, heat the olive oil in a dutch oven or other large, steep-sided pot with a lid over medium-high heat until it is shimmering. Carefully add the lamb (the oil may spit) and let it sear until well browned, then flip and repeat until all sides are nicely browned: about 2-4 minutes per side. Remove to a plate.
  • Turn the heat down to medium low or low and add the onions. We are looking to sweat them, not brown them. They will pick up some color from the lamb, but don’t actually let them sizzle too much after adding them. Cook, stirring frequently, until they are very tender and translucent, about 30 minutes.
  • Add the carrots, celery, and garlic cloves, stir to combine, and cook another 15 minutes.
  • Add the bay leaves, the rosemary and peppercorns, if using, and settle the lamb on top of the vegetables. Pour the wine and water in around the lamb as well as any meat juices that collected on the plate while the lamb rested, add the lid, and turn the heat up to medium high. Bring to a simmer, then turn back down to medium low or low – we want to keep the liquid below a simmer – only the barest bubble every so often.
  • Cook, keeping just below a simmer, until the lamb is very, very tender: 2-3 hours.
  • When the lamb falls apart at the slightest fork provocation, hoist it out to a bowl and turn up the heat on the pot to high. Boil the cooking liquid about 30 minutes to reduce it, then strain out the vegetables and, if you wish, pour the remaining jus into a gravy boat to serve.
  • While you wait, make the kale and avocado spread: scoop the avocado out of its skin and smash it up with a fork or spoon. Squeeze in the lemon juice, add the kale and chives and mix well, then taste and add salt and pepper to your liking.
  • Toast the bread and smear on thick, equal portions of the kale and avocado spread.
  • Just before serving, shred the lamb using two forks or, if it has cooled enough, your fingers. Pile a good helping onto the toast, then scoop or pour on a few tablespoons of the jus. Eat immediately.

Ahi Nori Wraps

Food blog May 2015-0757Months and months ago, I showed you photos of a tiny shack in Kauai and promised you my own rendition of their signature ahi nori wraps: thick, squared-off cylinders of seared ahi and spears of cucumber, surrounded by brown rice, doused with a mysterious wasabi sauce and wrapped up in a spinach flour tortilla lined with a sheet of nori. A delightful cross between a burrito and sushi, they were one of our favorite meals while on the island. But then, you know, life, with all those pesky obligations, insisted on happening, and now we are a full school year later and I’m finally getting around to it. It’s a cringe-worthy cliche to declare that these are worth the wait, but since we are now on our second version of them in two weeks, I’m going to take the chance.

Food blog May 2015-0742Since it has been so long, I’ve had plenty of time to reflect on what make these funny little sushi / burrito mash-ups so good. Well-spiced, lightly seared tuna, still rare or even raw in the middle, is of course the main reason. But only slightly secondary are the issues of texture and temperature. As you’ll know if you like sushi, there’s something amazing about a perfect piece of ahi – it’s meltingly soft but, when seared around the edges, it becomes softness with a bouncy chew. It is hot on the outsides, but still cool in the interior. Flanked by cucumbers, you get a fresh, bright, cold crispness, and the chewy strangeness of the nori seaweed layer is somehow perfect.

Food blog May 2015-0743Food blog May 2015-0744Food blog May 2015-0749These also offer perfectly contrasting tastes. Of course there’s the glorious fresh fish flavor, but there’s also nostril-piercing heat from the wasabi, and saltiness from the seaweed, and the welcome nutty blandness of the rice. Because I can’t leave well enough alone, I thought the addition of rich, creamy avocado blitzed into a velvet puree with a touch of mayonnaise would be the right vehicle for the wasabi, and insisted on crusting the tuna itself with sesame seeds, lime zest, and some red pepper flakes as well as the customary salt and pepper sprinkle before searing it off.

Food blog May 2015-0751Food blog May 2015-0752We ate these in big gulps, then went back for more. One wrap is plenty for a dinner, especially if you wisely offer yourself a side of mango-spiked salad or lightly sautéed vegetables, but we are not always wise, and opted instead to make a third wrap and split it. Still, even the resulting food coma couldn’t deter our enthusiasm about the meal.

Food blog May 2015-0753If you aren’t comfortable with raw fish, you can of course cook yours all the way through, though if you’re going to do that I wouldn’t bother with the pricey ahi. Cut a nice filet of salmon into long strips and crust and sauté or broil until just cooked through. Or, if you want to go an even easier route, sprinkle some lime juice over a few layers of smoked salmon and wrap that up inside instead. Food blog May 2015-0756

Ahi Nori Wraps
Makes 4
For rice and sauce:
1 avocado, pitted and peeled
juice from ½ a lime
¼ cup mayonnaise
1-2 tablespoons wasabi paste or sauce
(alternatively, you could use about ¼ cup of wasabi mayonnaise)
2 cups cooked brown rice, warm or at room temperature
For the tuna:
½ tablespoon coarse salt
½ teaspoon black pepper
pinch of red pepper flakes
zest of 1 lime
2 tablespoons untoasted sesame seeds
½ pound ahi or other sushi grade tuna, cut into long rectangles that are about 1×1 inch at the ends
2 tablespoons vegetable oil
1 teaspoon sesame oil
To assemble:
1 seedless cucumber, halved lengthwise and cut into long, thin planks (thinner is better – too thick and they won’t roll up well. Go for translucent, but be careful!)
4 spinach tortillas
4 sheets nori


  • In a small bowl or blender, combine the avocado, the lime juice, the mayonnaise, and the wasabi paste. If you have wasabi mayonnaise you like the flavor and heat level of, you could use that instead. I wanted my mixture a little spicier than my wasabi mayo, so I opted to make my own mix. Whiz together with a standard or immersion blender until a completely smooth, pale green puree forms; it will be too thick to pour.
  • Combine the puree with the cooked brown rice and taste for seasoning. Adjust as needed, then set aside.
  • For the tuna, combine the salt, black and red pepper, lime zest, and sesame seeds on a small plate. Carefully dredge each log of tuna in the mixture by rolling it through the seasoning. When all are well coated, heat the vegetable oil and sesame oil in a large skillet over medium-high heat until shimmering. Add the crusted tuna carefully, watching out for oil spatters, and sear about 1 minute on each side (for raw in the center), or until done to your liking. I overcooked mine, as you can see from my photos; I would have preferred red, not pink, in the center.
  • When tuna is done to your liking, remove from pan immediately and set aside.
  • To assemble, lay out your tortillas and place a sheet of nori in the center of each one. Lay 4-5 planks of cucumber atop the nori, all facing in the same direction. Add about ½ cup of the rice and sauce mixture per wrap, and spread this out to the edges of the cucumber planks. Lay one log of ahi in the center of each one in the same direction as the cucumber planks, then wrap up like a burrito, carefully folding in the edges.
  • To serve, cut on a bias and, if you’re feeling fancy, stand one half up like I’ve done above to show off the interior.
  • Eat immediately, and lick your fingers with no shame.

Guacamole Steak Salad

Food Blog August 2014-0352I remember it so clearly: the day my perspective on salads was enunciated aloud. It wasn’t by me. I’d had mixed, un-uttered feelings about salads for years, but it wasn’t until the year after I’d graduated from college, as I watched one of my roommates adding spinach, and then sliced tomatoes, and then garbanzo beans, and then hunks of cheese, and one or two (or five) other ingredients to a big red bowl – one of those bowls with the spout on one side for easy pouring, and a rubber bottom so it wouldn’t slide around the counter – and she looked up at me watching and said “I like my salads with a lot of stuff in them.”

Food Blog August 2014-0331Yes. That was right. That was why the salads my dad liked to pair with pasta – lettuce, a few tomatoes, maybe a sliver of cucumber or three, and the occasional crouton – didn’t seem worth it to me. That was why the house salad at innumerable restaurants was a chore to crunch through rather than a pleasure (I’d rather have had another basket of bread). There was a whole course for that sort of thing? Boring. Bring on the entree.

Food Blog August 2014-0335Food Blog August 2014-0337Food Blog August 2014-0342But salads are – can be! – exciting, if we are mindful of my roommate’s assertion. They just need a lot of stuff in them. And at this time of the summer, when all I want for dinner is a big salad, or something charred and fragrant off the grill, it seems the right moment to combine the two for a salad so stuffed with, well, stuff, that it needs no entree to help it along. It is no side; no first course. It is the main event. And this main event has found its way to our table an embarrassing number of times in the past few months.

Food Blog August 2014-0338Food Blog August 2014-0341Food Blog August 2014-0345I took guacamole as my inspiration, and chunked up all the ingredients necessary there – tomatoes, onion, cilantro, a whisper of jalapeno, if spicy suits you, and of course a mound of buttery, creamy cubes of avocado. Lime and garlic found their way in as part of a dressing, the brisk acidity and bite of raw garlic tempered a bit with a drizzle of honey. Because it’s grilling season, I couldn’t help but add some corn on the cob, grilled whole, then kernels lopped off to find their sweet, charred way into the mix. Since the grill was on anyway, the logical thing to do was to grill up a hunk of flank or skirt steak, liberally rubbed with spices, and slice it thin to lay across the top of all that veg. And then, because why not, a generous crumbling of queso fresco. Deconstructed guacamole. Steak. Corn. Cheese. Stuff.

Food Blog August 2014-0348This sounds like a salad only tangentially. I haven’t even mentioned crisp romaine, or toothsome kale, or fresh, grassy spinach. The thing is, as Mark Bittman taught me, the greens part of the salad is neither the starring role, nor (stay with me here) even necessary! Though I did end up including a greens foundation here (I chose cabbage because it stays crisp, and because it’s the green I like most in tacos – you could easily swap it out for lettuce of any sort, or even spinach if you prefer), the salad is bolstered by it, not overwhelmed with it. Any odd forkful is going to include a mix of vegetables, not a pile of cabbage with the occasional tomato you had to hunt around for.

Food Blog August 2014-0351If you’ve got a grill, this salad is executable without even looking at your oven or your stove. It is fresh and light, but still substantial, it carries a pleasant citrus bite but is creamy from the avocado and the cheese, and it makes a big bowlful. The steak is flavorful and slightly spicy; I’ve included my seasoning blend here, but you can use any mixture of spices you like – this is another tasty one. N. and I found ourselves fighting over the last succulent pieces as we went back for seconds. And though the salad stands alone just fine, as noted above, if you simply have to char a few corn tortillas over the grill at the last minute to serve in place of bread or chips on the side, I doubt anyone would argue. Because you, my friend, just won summer.

Food Blog August 2014-0354

Guacamole Steak Salad
Serves 4-6
For the steak:
1 pound skirt steak
1 teaspoon salt
pinch of cayenne pepper
1 teaspoon smoked paprika
1 teaspoon garlic powder
1 teaspoon onion powder
1 teaspoon ground cumin
1 teaspoon ground coriander
zest of 1 lime
1 tablespoon olive oil or vegetable oil
For the corn:
2 ears corn, husks and silk removed, stalk end still in place
salt and pepper for sprinkling
a few teaspoons olive oil to drizzle or spray over the corn
For the salad:
8-12 ounces thinly sliced cabbage shreds
16 ounces cherry tomatoes, quartered, OR 4 medium tomatoes, cored and cubed
8-10 green onions, roots removed, thinly sliced
2 avocados, pitted, peeled, and cubed
6 ounces crumbled queso fresco
½ cup packed chopped cilantro, from one bunch
For the dressing:
¼ cup lime juice (estimate 2-3 limes)
2-4 cloves garlic, very finely minced
2 teaspoons honey
⅓ – ½ cup olive oil
salt and pepper to taste
  • Preheat your grill to high. While it heats, we’ll prep the steak and the corn. Spread the steak out on a flat surface (I just unwrap it and leave it on the butcher paper wrapping it came in to save on dishes). Place the salt, the cayenne, and the other spices in a small bowl and combine with a fork. Add the lime zest and the olive oil and mix again – it will have the consistency of wet sand.
  • Scoop up half the sandy spice mixture you’ve created and rub it over one side of the steak. Be liberal in your application, and don’t be too gentle about it either – really massage it into the surface of the steak. Flip the steak over and repeat the process with the remaining half of the spice mixture, then set the steak aside to drink up some flavor.
  • Now we’ll prep the corn. Remove all husks and silk, but leave the stalk end on – it makes cutting the kernels off later on a bit easier because you have a built-in handle. Coat the corn with a drizzle or a few sprays of olive oil, being sure you get it on all sides of the ear. Sprinkle on salt and pepper as well, again, being sure all sides get seasoned.
  • Place the seasoned corn directly on the grates of the grill, and grill over high, direct heat for about 8 minutes, turning every few minutes. Your goal is to cook it through, and create a beautiful, golden char on all sides.
  • When the corn is done, set it aside to cool. In its place, flop the steak onto the grill and grill over high, direct heat for 5 minutes undisturbed. Flip it over and grill another 5 minutes, again, undisturbed. Remove to a plate or platter, cover with a layer of aluminum foil, and set aside to rest for about 10 minutes. This gives the juices time to redistribute and it allows for a bit of carryover cooking – by the time you slice it up, the steak will be medium to medium-well (skirt steak can be a bit uneven in thickness).
  • While all this grilling and resting is going on, make the rest of the salad. Place the cabbage, tomatoes, onions, cilantro, and queso fresco into a large bowl. You can either mix them all together, or arrange the ingredients in rows atop the cabbage like a cobb salad for pretty presentation.
  • To add the corn, stand up one of the grilled ears, which should be cool enough to handle by now, with the stalk sticking up toward you. Hold the stalk firmly and, with a sharp knife, cut straight down the ear, sawing back and forth a bit to help loosen the kernels. As you remove each segment of kernels, rotate the ear a bit to line up a new segment. Add the kernels to the salad. Some will be individual; some will be in big chunks. That’s okay. They will break up as we toss the whole thing.
  • To make the dressing, juice the limes and add the finely minced garlic, and the honey. Combine with a fork or a small whisk. Drizzle in the olive oil, whisking continuously, until the dressing emulsifies. Start with ⅓ cup of oil, then dunk in a chunk of tomato and give the dressing a taste to see what you think. Remember, it will taste stronger straight out of the mixing bowl than it will when you’ve tossed the entire salad with it.
  • Season the dressing to your liking, adding more of the olive oil if it is too acidic for you. Add the avocados to the salad immediately before you add the dressing, to prevent browning.
  • The last step here is to add the meat. Unwrap the steak from its rest and place it on a board or butcher block to slice it. Using a sharp knife, cut thin slices (no more than ¼ inch or so) against the grain at an angle. This will give you lovely tender slices. Drape the slices over the salad, down the center for a pleasing presentation.
  • Serve immediately, with a side of charred corn tortillas, if desired.