Project Cook: Seeded Pumpkin Biscotti

A few weeks ago, Irvin from Eat the Love posted on his instagram feed that he wasn’t seeing many pumpkin recipes from the bloggers he follows, and both politely and in fun, essentially told everyone to step it up! Instantly (although I’m definitely not one of his favorites – I doubt he knows I exist!) I knew I wanted to make pumpkin biscotti, using one of his tricks (more on that later). I would stud them generously with pumpkin seeds since I’d had that bag of pepitas in the pantry forever,* and maybe some other nuts, and top them with coarse, crunchy sugar or a criss-crossed shiny glaze, and I’d be right on trend.

And then, of course, I didn’t. Instead we had friends over, and I graded papers, and the kitchen was too warm, and I lost track of my biscotti for a while, but this past weekend, in between setting out Halloween decorations (and, of course, more grading), I finally got down to it. Supplies bought, I went looking for the rest of the ingredients, and after tearing through my pantry shelves, realized the wellspring inspiration for the whole recipes – the pumpkin seeds – were nowhere to be found.

Cut to me, grumbling and grouchy, on an emergency trip to the nearest grocery store, scouring what felt like every aisle until I finally found some, in measly little 2 ounce packages, next to the cocktail peanuts. Project back on track.

For the base dough, I turned to the gurus at King Arthur Flour. While their recipe looks delicious, I knew I wanted to raise the stakes a bit with various sources of crunch, and – here’s where Irvin becomes important for this recipe again – I wanted to use his pumpkin trick of drying the puree out on the stove before integrating it into the recipe. The problem with pumpkin, as I’ve noted previously, is its massive moisture content. The KAF recipe contains only ½ cup pumpkin puree, likely because it’s so wet that adding much more would not allow for crunchy cookies. I figured since I was going to reduce the moisture so much I could increase that quantity by half. This would give me a dryer ingredient with a more intense pumpkin flavor.

But making my mixture less wet entailed potential recipe problems. Biscotti should be crunchy, but reducing moisture content too much could lead to stale-tasting cookies, or a mix that didn’t hold together properly. Time to do some research. My favorite biscotti recipe, from the very first issue of Bon Appétit I ever bought, is flavored with lemon and walnut and has become a family Christmas standard. It differs considerably from the KAF recipe for pumpkin biscotti, with more egg, a good bit more butter, and of course a staggering 3 cups of chopped walnuts I was not planning to come even close to. The recipe creation then became guesswork, which involved a series of texts between me and my sister to try and figure out how to proceed.

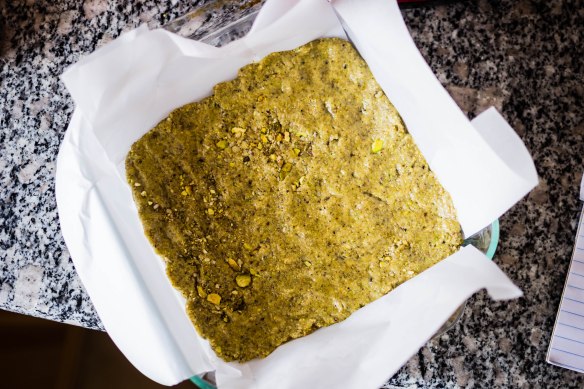
I settled on increasing the amount of egg and butter, but not quite as much as my old reliable standby. Since I’d be adding nuts and seeds, I also opted to change up KAF’s procedure a bit to match the one I was used to: rather than putting the shaped, sticky batter straight into the oven, I wrapped mine in plastic wrap (which also helps shape it – more below…), chucked it into the fridge for a few hours, and then unwrapped and baked it once it had firmed up.

My go-to lemon and walnut biscotti recipe advocates cooling the flattened dough logs completely after their first bake, then slicing, lying the cookies down on their cut sides, and baking again at low heat. The KAF recipe I was half-following suggests cutting while still hot, then baking again with the cookies standing up on their flat bottom edges. I was intrigued and tried this new way, and I might never go back. Yes, the slicing requires delicacy, especially because the pumpkin seeds and pistachio pieces are harder than the surrounding dough, but cooking them standing up means first: the coarse sugar you press into the top stays put, and second: they brown evenly on both sides. Even browning, sugar-crunch layer, and you can even fit more on the baking tray at once. Say no more. I’m sold.

But I guess really there is one more thing to say, and that’s our assessment. These are outstandingly delicious. They are spicy and crunchy and not too sweet, and though the pumpkin flavor is mild it’s definitely there. The sparkling coarse sugar on top is perfect against the earthiness of the nuts and pumpkin seeds inside. It’s a good thing I’m taking a batch in to work tomorrow, because by the time I remembered I should count how many cookies this recipe made to report here, we had already eaten… enough of them… that guesswork was required, and when I realized I was eating what might have been my fourth in an hour or so, I sentenced them all to wait in a hard-to-open Tupperware on top of the fridge with the Halloween candy so they would be harder to access. We will certainly make these again, as should you. And I’ve already plotted out a version with amped up ginger and chopped dried apples for Christmas. Move over, lemon and walnut standard. Or at least be ready to share the plate.

* for a clear explanation of the difference between pepitas and plain old pumpkin seeds, see here.

Seeded Pumpkin Biscotti
Adapted from King Arthur Flour
Makes approximately 3 dozen
About 4 hours (including resting time) or overnight
1 cup pumpkin puree
½ cup pepitas
½ cup roughly chopped pistachios
6 tablespoons unsalted butter, softened
⅔ cups granulated sugar
1½ teaspoons ground cinnamon
¼ teaspoon ground nutmeg
scant ¼ teaspoon ground ginger
1½ teaspoons baking powder
½ teaspoon salt
2 eggs
2 cups all-purpose flour
1 tablespoon flax seeds
2-3 tablespoons coarse sugar, such as turbinado or demerara, for sprinkling


  • In a small skillet, cook the pumpkin puree over high or medium-high heat for about 15 minutes, stirring frequently, until the color has deepened and the puree has dried and has a texture something like a thick, crusted frosting. It will be reduced by about half. Set aside to cool.
  • While the pumpkin puree is reducing, if desired, toast the pepitas and chopped pistachios in a 300F oven for about 10 minutes. Set these aside to cool as well.
  • In a large bowl, or the bowl of your stand mixer, cream together the butter and granulated sugar. Add the cinnamon, nutmeg, ginger, salt, and baking powder, and beat with the paddle attachment until smooth and creamy.
  • Beat in the eggs and the cooled pumpkin puree until well combined. The pumpkin will take a minute or two to fully integrate.
  • With the mixer on low speed, add the flour a ½ cup at a time, then the flax seeds and the cooled pepitas and pistachios. Be sure to scrape the bottom of the bowl once or twice to ensure everything is mixed in. The resulting mixture will be very sticky.
  • Cut two pieces of cling wrap and spread them out on a clean counter. With a determined spatula, scrape half the dough mixture onto each. Using the plastic wrap, push and mold the dough into two long rectangles of about 10 x 2½ inches. Wrap them up in the plastic wrap, put them on a cookie sheet or other flat tray, and stow in the fridge for at least two hours, or overnight.
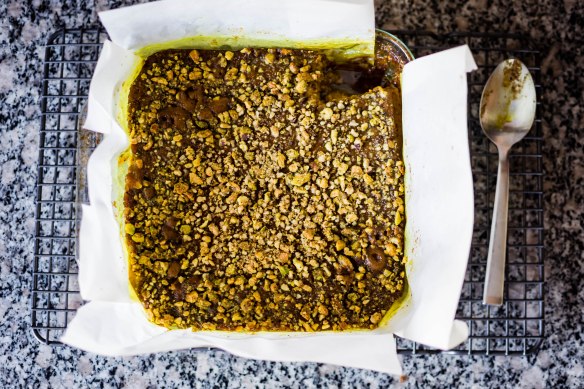
  • When you are ready to bake, preheat the oven to 350F. Retrieve the dough logs from the refrigerator, unwrap them from the plastic wrap, and position them an inch or two apart from one another on a parchment lined baking sheet. Sprinkle the tops with the 2-3 tablespoons coarse sugar, then use your hand to spread the sugar evenly and gently press it in to the top of the dough a bit so it adheres.
  • Bake the dough logs for 25 minutes; they will be just firm. Remove from the oven and let cool 10-15 minutes. Meanwhile, reduce the oven temperature to 325F.
  • After 10-15 minutes, use a sharp serrated knife to cut the logs crosswise into ½ inch slices. Use a gentle sawing motion to avoid breaking up the slices, which will still be very delicate at this point. Some of the nuts and seeds will be harder to cut through. Be sure to cut as straight up and down as possible; if the biscotti are thicker on the top than the bottom, they won’t stand up correctly for their second baking.
  • Stand the biscotti on their bottom edges on the same parchment lined baking sheet you used to bake the flattened logs. They can be fairly close together but should not be touching. Carefully return the pan to the 325F oven and bake for 40-45 minutes, until they are getting golden brown around the edges. They will still be soft in the middle.
  • KAF recommends turning off the oven, cracking the door, and allowing the biscotti to cool completely while inside, likely to ensure the finished cookies are crunchy. I did not do this because I had something else I needed to bake; I cooled them in the oven only 5 or 10 minutes, then removed the pan to a counter top and let them cool completely. Mine were still perfectly crisp all the way through.
  • Serve when completely cooled. Perfect with coffee, chai or other tea, or straight off the pan.

Indian Spiced Pumpkin Custard Bars

I’ve tried to start this post three times. Each time I deleted what I’d written, and ultimately it took me a week in between actually making the thing and knowing what to write (hence the Halloween plate) because as usual, it’s hard to know how much from “out there” belongs here in my little virtual kitchen. I feel like I want to talk about it, even though it is hard, because to separate and live only in an idealized, happy little blog space feels disingenuous. Yet to try to write about a massacre in the same breath as a dessert feels just as bad. And it is happening more and more often.

So I’m going to try to write this post by talking about my friend M. instead. M. is an amazing woman who, in my last two years of graduate school became a firm friend, and in the years since has risen in my esteem to be one of my favorite people. She is smart. She is complex. She is opinionated and feisty and loud and dedicated and… just a really cool human being. She is also vexed with a complicated set of food allergies. And she happens to be Jewish. She deserves, as do all people, to live safely, have the freedom to practice their faith or lack thereof, and to pursue happiness in their own way. And so because I’m having trouble writing out my thoughts about Pittsburgh and what has happened there in a way that makes sense, I made a dessert for M.

It’s not enough. It’s not even a related action. But I saw a post on Facebook the day I made these from a woman named Kim Weild that told me “The Talmud says: Do not be daunted by the enormity of the world’s grief. Do justly, now. Love mercy, now. Walk humbly, now. You are not obligated to complete the work, but neither are you free to abandon it.” We have so, so much work to do. And on this day I could not complete the work, but baking was a tiny way of doing something I felt capable of doing. And I voted while it was baking, so there. Are you going to? Tomorrow’s the day…

One of the challenges of feeding M. is that she cannot have dairy or eggs. Rice is out of the question, as is beef. So is avocado, of all things. Gluten isn’t a no-no, but it should be a rarity. So M. has spent several years investigating alternatives, and though I don’t see her very often, I occasionally concoct something she can eat, in the off chance I’ll get a chance to feed her. There’s an allergy-free coconut cream pie recipe deep in my mind that I want to get to someday.

This one, though, is inspired by a now-lost-to-the-ages conversation she and another food-interested friend had on Facebook once that I eavesdropped all over. It involved pumpkin, turmeric, and other various spices. It may have included oatmeal. What it did for me, however, was to get me thinking of what would happen if you combined a lot of warm spices with Indian flair in a pumpkin pie, subbed out the eggs for silken tofu, and instead of a traditional crust, pressed together a combination of nuts and coconut oil graham cracker style. And then I scrapped the whole pie idea entirely and went with bars instead.

These are rich, taking a long time to bake and an insistence on cooling completely before they can be dealt with. Ideally they should be refrigerated overnight to let the coconut oil and the oils the nuts release chill and reconstitute, while the pumpkin and tofu mixture solidifies into something creamy and almost smooth. But in addition to a baking dish, they do require only one food processor and a small bowl to mix up, so that’s easy. They fit right into a long, slow afternoon when you need something sweet and tender and spiced to comfort you.

M., here’s a humble plate of comfort I made thinking of you. Happy belated Hallow-birthday-ween.

Indian Spiced Pumpkin Custard Bars
Makes 9×9 inch square pan
About 1½ hours plus cooling time
Crust:
1 cup raw, unsalted pistachios
1 cup raw walnuts (halves or pieces)
¼ cup brown sugar
½ teaspoon salt
scant ⅓ cup coconut oil
Filling:
1 can (15 ounces) pumpkin puree (not pumpkin pie filling)
16 ounce block silken tofu, drained and patted dry
½ cup soy, almond, or coconut milk – your preference
¾ cup brown sugar
½ teaspoon salt
1 teaspoon turmeric
1 teaspoon cinnamon
1 teaspoon cardamom
½ teaspoon ginger
½ teaspoon allspice
1 teaspoon vanilla


  • Preheat the oven to 350F and line your baking dish with a “sling” of parchment paper: one piece that covers the bottom and extends past the top of opposite sides, and a second piece positioned perpendicularly, so it adds a second layer to the bottom and extends past the top of the other two sides.
  • To make the crust, add the walnuts, pistachios, ¼ cup brown sugar, and ½ teaspoon salt into the bowl of a food processor. Using the pulse function, pulverize into fairly even bits about the size of lentils, though some will be smaller. Reserve ¾ cup of this mixture for later.
  • Add the coconut oil and buzz on high until very well combined but not quite buttery. You want the coconut oil to be fully integrated, but you still want to be able to manipulate the mixture.
  • Once well combined, dump the crust mixture into the prepared pan and use your hands or a spatula to press it into an even layer across the bottom. Stow this in the fridge while you make the filling.
  • In the same food processor (you can wash it out if you want to, but I didn’t bother), combine the pumpkin puree, the silken tofu, the milk, the ¾ cup brown sugar, ½ teaspoon salt, all the spices, and the vanilla. Process on high until the mixture is very smooth, then stop the machine and scrape down the sides to be sure – sometimes little clumps of tofu remain.
  • Remove the crust from the refrigerator and pour the velvet-smooth filling in, then carefully transfer to the oven and bake for about 60 minutes. The edges of the filling will be firm and the center will be extremely wobbly but set on top.
  • Remove from the oven, gently sprinkle the reserved nut mixture over the top in an even layer, being sure to get it into the corners. Return to the oven and bake for another 10 minutes.
  • Turn off the oven but leave the dish inside for about 10 minutes, then remove to a wire rack to cool completely before refrigerating, ideally overnight, but at least for a few hours.
  • Carefully remove from the pan and the sling, then slice while still cold and serve. Alternatively, serve by scooping big spoonfuls into bowls or pretty glasses and adding a scoop of ice cream or whipped cream on top.

Haters Gonna Hate Pumpkin Spice Loaf: Now with photos!!

People have such vitriolic responses to the phrase “it’s pumpkin spice season” that by this point some of you have already stopped reading. I’ve heard a few interesting theories about why this is, including the idea publicized by a student at Swarthmore College a few years ago that since the drink that popularized this craze is popular among women, hating on it is another subtle way we’ve internalized sexism: pumpkin spice lattes are a girly thing, so just like other girly trends it must be devalued. Vox and various others picked up on this idea, also evaluating the pumpkin spice connection to capitalism, class, and being “basic.”

But I tend to sympathize more with the point made near the end of the article, and which I’ve seen in a few other places, which is simply: there’s enough trauma and horror and viciousness going on in that weird world we inhabit, so let’s let people find harmless joy where they can. And further, let’s face it: by and large, the mixture of warm autumnal spices that we mean when we say “pumpkin spice” are, even if you don’t want them in your coffee, frankly delicious.

So I’m on board the pumpkin spice train, and although I’m not terrifically enthused about them being swirled through my latte, a liberal dosing in pies, cookies, cakes, muffins, or breads of almost any kind is a-okay by me. And since my Trader Joe’s had a big end cap display of their pumpkin butter this week and Los Angeles is STILL resisting its usual September heat wave tendencies, I decided to take advantage of the season my calendar reports we’ve just fallen into (get it? get it?) and bake up a yeasted loaf infused with all those spices pumpkin benefits from.

My loaf started with an old favorite I haven’t worked with in a while: my Nana’s sweet dough. It’s a firm but soft product, elastic and pliable, and though in this incarnation it’s fairly sticky from all the wet ingredients, it just sighs when you roll it out in such a lovely way. I added a full cup of pumpkin puree to Nana’s original recipe, plus the requisite cinnamon and nutmeg the pumpkin spicing requires. You could use ginger and cloves as well, but this time around I decided to complete the trifecta with cardamom; its slightly citrusy brightness feels right for “fall” in Southern California.

To get that luscious, deep, spicy sweetness of the pumpkin butter into my creation, I decided to do a swirl in the center of my loaf: once risen, I rolled out the dough into a large rectangle, smeared it with butter, added a glossy layer of the deep orange spread, and on a whim, zested on some orange rind for additional lift.

This is a monstrous loaf. I bake so often with only sourdough anymore that I forget how high and how certainly active dry yeast rises. Even though it climbed in both its first and second rise, the oven spring as the loaf actually baked was incredible; I couldn’t believe it was holding its shape as it pillowed, hugely, almost like a gigantic Yorkshire pudding, above the loaf pan, and was disappointed but not surprised when it deflated a bit as it cooled; a huge air pocket between the bulk of the loaf and the mountaineering dome was the source of much of its swollen majesty.

Never mind that aesthetic imperfection, though; the loaf itself was a delight. Not too sweet, it boasts a pillowy, soft-but-chewy texture that reminds me of my mom’s challah, but with a subtle pumpkin flavor pushed along by the warm spices, and a just-toothsome crust for a pleasant contrast. The pumpkin butter slathered into the center is sweet and rich, but there’s only a bit of it swirled through the while thing, making the addition of jam or preserves extraneous: it’s baked right in. To me, that means you can eat this at any time of day, just like its latte-based inspiration. Haters gonna hate, it’s true, but that just means another slice for you.

Pumpkin Spice Loaf
Makes 1 very large loaf
About 4 hours
Dough:
2 teaspoons active dry yeast
pinch sugar
½ cup warm whole milk
1 egg
¼ cup softened butter
1 cup pumpkin puree
1 teaspoon vanilla
¼ cup brown sugar
1 teaspoon cinnamon
1 teaspoon cardamom
½ teaspoon nutmeg
1 teaspoon salt
2-3 cups bread flour
Filling:
¼ cup softened butter
¼ – ½ cup pumpkin butter spread
zest from 1 orange


  • Stir the yeast into the warm milk with the pinch of sugar and let it sit for 5-10 minutes to allow the yeast to wake up.  It will begin to get bubbly and smell warm and bready.
  • While you wait for the yeast, add the ¼ cup softened butter, the pumpkin puree, the egg, and the vanilla into the bowl of a stand mixer (or into a large mixing bowl). Mix with the paddle attachment to combine.
  • Add the yeast and milk mixture to the combined wet ingredients and mix them together briefly using the paddle attachment (if you are not using a stand mixer, an electric handheld or some elbow grease and a whisk will do nicely here).
  • Add the brown sugar, spices, salt, and 2 cups of flour.  Using the paddle attachment (or a sturdy wooden spoon if you aren’t a stand mixer sort of person), mix just until the flour is moistened and you have created a lumpy dough. Let it sit for about 20 minutes to begin hydrating the flour.
  • After the dough rests for 20 minutes, switch to the dough hook (or turn your dough out onto a well floured board) and knead for 5-8 minutes in the mixer, or 10-12 minutes by hand. The dough will be very sticky at first – we’ve added a lot of fat and a lot of moisture.  Don’t despair. Add more flour a ¼ cup at a time just until the dough cooperates (up to 3 cups of flour, though depending on the relative humidity of the day, you might not need that much).  It will still be a bit sticky, but it will become more elastic and supple and much easier to work with.
  • When your dough is smooth and stretchy and a bit springy, plop it into a greased or oiled bowl, cover it with plastic wrap, and set it aside in a warm place to rise until doubled, around 90 minutes.
  • Once doubled, punch down the dough to release trapped gas by gently deflating it with your fist. Turn it out onto a floured board and roll it into a rectangle of about 12×24 inches.
  • Smear the second ¼ cup of softened butter over the surface of the rolled out dough. Add the pumpkin butter and spread this atop the butter, leaving a half inch border at one of the long ends. Sprinkle on the orange zest, if using.
  • Begin to roll up the dough from the long side opposite the edge on which you left a border. Start with the middle and move out to the sides, as you would for a jelly roll.  Continue rolling until all the filling is enclosed, and then fold up the remaining, bare edge and pinch it firmly against the roll to create a seam.
  • Twist your log of dough a few times by gripping it and rotating your hands in opposite directions. This will ensure that a pretty swirl of filling is formed as it bakes. Fold the thinner ends underneath the fat middle and settle the whole thing into a buttered or greased loaf pan. Cover it lightly with greased plastic wrap and set it aside to rise again for 30-45 minutes minutes. Meanwhile, preheat the oven to 350F.
  • At the end of the second rise, remove the plastic wrap form the loaf and bake it for 35-40 minutes, until the bottom sounds hollow when thumped or the internal temperature is between 180-200F (the thump test is the standard way of checking for doneness on bread, but it seems sort of impossible when you are baking a big loaf in a loaf pan. I prefer to take its temperature).
  • When it tests done, using whatever is your favorite method, remove it from the oven and let it cool for at least twenty minutes in the pan.  This will allow the structure to firm up so it slices nicely, rather than collapsing and squashing into itself when you so much as approach it with a serrated knife.
  • Slice and consume. I don’t think it needs a thing to accessorize it, but especially on the second or third day, a sweep of unsalted butter or a smear of cream cheese probably wouldn’t hurt anything…

Dried Cranberry and Seed Pumpkin Loaves

As I noted a few weeks ago, all I want to do in my kitchen, still searingly bright with sunlight from Southern California’s misguided attempts at “fall,” is bake. Luckily, one of the few cool weekend days we’ve had since then corresponded with a break in grading, and I had a chance to see if my dough skills are still in there somewhere.

Inspiration for these pretty, autumnal loaves came from a seasonal box of those lovely raincoat crisp crackers Trader Joe’s puts out, these a bright, turmeric-esque orange from pumpkin and flavored with dried cranberries and sunflower seeds. I decided to see if I could translate them into a bread. The ingredient list on the box of crackers served as my starting point, but for quantities I returned to these loaves from last year, replacing the rye flour with whole wheat, dolling them up with the dried cranberries, a few additional seeds, and some fresh herbs, and running some of the seeds through the dough itself rather than reserving them all for the top. As before, though, the secret is cooking down the pumpkin puree first to dry it out. It adds a little time to the whole endeavor, but makes the dough much more manageable and more aggressive in pumpkin flavor.

The dough here is soft and elastic and slightly sticky, even after its first rise, and the hardest part of the process is convincing yourself not to use too much flour on your board when you shape them, because the dustier with flour they are, the harder it will be to get seeds to adhere to their surface.Internet forums abound with how to get seeds to stick to the outside of a shaped dough-ball; the easiest and most effective method seems to be dampening the surface of the dough slightly by spraying or brushing with water, then gently pressing it into the mixture of seeds and, in this case, oats. It doesn’t guarantee they won’t tumble off while you’re carving thick slices, but at that point, you at least have the option of spreading the slice generously with cream cheese* and sprinkling the rebels back on, where they are sure to adhere.

As for flavor, these delightfully toe the line between sweet and savory. Pumpkin is so commonly paired with sweet flavors, and the dried cranberries and nutmeg seem to push it in that direction, but the woodsy herb flavor (the crackers use rosemary, which I think I’d prefer, but in the moment I only had sage) and the nudge of heat from the black pepper keep it from feeling dessert-like. I’m not sure you would want to use this for sandwiches, but I could imagine it being a starchy side for a roast chicken or a big dinner salad. I find, though, as with many freshly baked loaves, I want it most in mid-afternoon, when it is still just warm from the oven, and I am slightly peckish and starting to dream about dinner.

*goat cheese is nice too, and though I suppose you could make it into frozen slices a la this peanut butter “hack” the internet responded to with hilarity a few weeks ago to prevent tearing your bread, you could also just let the goat cheese come to room temperature, at which point it smears pretty easily across the tender slice.

Dried Cranberry and Seed Pumpkin Loaves
Makes 2 round loaves 7-8 inches in diameter
4 – 4 ½ hours
1 15-ounce can of pumpkin puree (not pumpkin pie filling)
1½ cups warm milk
pinch granulated sugar
1 tablespoon active dry yeast
¼ cup molasses
2 tablespoons melted butter
1¼ cups rolled oats, divided
1½ cups whole wheat flour
2-3 cups bread flour
1 cup dried cranberries
¾ cup sunflower seeds, divided
¼ cup flax seeds
2 tablespoons finely chopped rosemary or sage
1 teaspoon ground nutmeg
1 teaspoon ground black pepper
1 tablespoon salt
½ cup raw pumpkin seeds


  • In a small skillet, cook the pumpkin puree over high or medium-high heat for about 15 minutes, stirring frequently, until the color has deepened and the puree has dried and has a texture something like a thick frosting. Set aside to cool.
  • While the pumpkin comes to room temperature, add the pinch of sugar to the warm milk, then stir in the yeast and let it sit to burble for 5-10 minutes, until it is bubbly and smells like bread.
  • Pour the yeast and milk mixture into the bowl of a stand mixer fitted with the paddle attachment. Add 1 cup of the oats, all of the whole wheat flour, the molasses, the melted butter, and the cooled pumpkin. Stir with the paddle attachment to combine.
  • Now add 1½ cups of the bread ½ cup at a time, paddling in between, until a soft, sticky dough is formed. Dump in the rosemary or sage, the nutmeg, the pepper, the salt, the dried cranberries, ½ cup of the sunflower seeds, and all of the ¼ cup flax seeds, and paddle again just until integrated.
  • Switch to the dough hook and knead at medium speed until it comes together into an elastic but slightly sticky dough, 8-10 minutes. If it doesn’t seem to be coming together, continue adding the bread flour ½ cup at a time as needed, kneading a minute or two in between each addition. You may not need all of the bread flour.
  • Cover the bowl of kneaded dough with plastic wrap and set aside in a warm spot to rise until it has doubled, 60-90 minutes. While this is happening, combine the remaining ¼ cup rolled oats, ¼ cup sunflower seeds, and the ½ cup pumpkin seeds in a large, shallow bowl.
  • After it has risen, punch down the dough by gently depressing your fist into the center of it. Pour and scoop it out of the bowl onto a lightly floured board and divide in half using a dough scraper. One at a time, shape each half into a round by holding the dough ball in your hands and stretching the top taut, tucking the excess underneath. Each time you stretch and tuck, turn the dough a quarter turn or so. You can also do this while the dough is resting on your board, turning it and tucking the excess, which will form something that looks like a balloon tie or a belly button underneath. Check out this series of photos from the kitchn for helpful illustrations.
  • When you have a round loaf that is reasonably taut across its domed top, spray or lightly brush it with water, then gently press all sides of it into the mixture of oats and seeds you’ve prepared. Repeat with the other half of the dough.
  • Gently place the seeded loaves on a baking tray lined with parchment paper, lightly cover them with plastic wrap or a clean kitchen towel, and set them aside to rise again for about 45 minutes. Meanwhile, preheat the oven to 375F.
  • After 45 minutes, with the loaves swollen, place them carefully in the oven and bake at 375F for 35-45 minutes, until they reach an internal temperature of 180-200F.

Pumpkin Oatmeal Rye Bread

2016-food-blog-november-0522I’ve felt pressed since summer, when it comes to posting – I’ve been, all too often, a negligent blogger. There are many reasons for this, especially in the past few weeks, but I realized part of the reason lately, and that reason is the absence of a group. I liked the challenge of a monthly bread assignment, and between the dissolution of the Twelve Loaves baking party, heat, and busyness, I haven’t been doing as much experimental bread baking as I used to. I looked back, for another cooking project a week or two ago, at the notes I’d made about Suzanne’s site in my Five Seed Loaves post, and was reminded of the idea for a bread – inspired by hers – that incorporated rye flour, and canned pumpkin, and maybe some rolled oats for heft. With a long weekend looming and the season of pumpkin upon us, it seemed like the right thing to do.

2016-food-blog-november-05012016-food-blog-november-0504The problem with canned pumpkin, as anyone knows who has grown frustrated by repeated testing of that pumpkin chocolate chip bread that just will not finish baking, is its incredible water content. It keeps baked goods amazingly moist, but it also is a sopping, wet, hard-to-deal-with mess if you aren’t careful, especially in dough.

2016-food-blog-november-32016-food-blog-november-0498Irvin helped me solve this problem, with the ingenious tip he discovered of cooking down your canned pumpkin first, to eliminate some of that pesky moisture and concentrate the flavor. A quick, hot fifteen minutes of near-constant stirring and folding results in a thick, deeply sunset orange pan of something the texture of thick frosting that adds flavor and richness, but won’t bog down your mixture. I foresee many pumpkin-centric baking projects in the future, now that I know this helpful little extra step.

2016-food-blog-november-0507As with most breads, this one involves a substantial knead, a long first rise, a punch and a shape and – after a roll in some pumpkin seeds and rolled oats for texture and indication of predominant ingredients – a second rise before baking for a little over half an hour. These loaves incorporate some molasses for sweetness and color, and milk rather than water.

2016-food-blog-november-0525I must admit, the rye flavor doesn’t come through overly much here, though I suspect it added to the substance and of course to the lovely toasty color of the finished loaf. The pumpkin is mild as well, but you can taste it despite the absence of the telltale wintry spices that usually accompany this big squash. It’s satisfyingly orange inside (which makes photo editing tricky, by the way!), and it is a rich autumnal flavor I already want to taste again. The oats all but disappear into the dough as it bakes, and they contribute to the pleasant, spongy density of the thick slices you’ll be carving off to slather with cream cheese.

2016-food-blog-november-0529

Pumpkin Oatmeal Rye Bread
Makes 2 9×5 inch loaves (though mine were a little stubby from overly tight loaf shaping)
4-5 hours, approximately
15 ounce can of pumpkin puree (not pumpkin pie filling)
1½ cups warm milk
small pinch white sugar
1 tablespoon active dry yeast
1½ cups rolled oats, divided
2 cups dark rye flour
¼ cup molasses
1 tablespoon salt
2 tablespoons melted butter
2-3 cups bread flour
½ cup raw pumpkin seeds


  • Cooked the canned pumpkin in a skillet over high heat for 10-15 minutes, stirring frequently to avoid burning, until it is thick and reduced and takes on the consistency of a thick, spreadable frosting. You should wind up with only about ¾ cup left. Let it cool to room temperature.
  • While the pumpkin cools, combine the warm milk with the yeast and sugar, stirring briskly, then let sit for about 10 minutes to allow the yeast to activate. The surface of the milk will get bubbly and smell bread-y.
  • In the bowl of a stand mixer, combine the yeasted milk, 1 cup of the oats, the rye flour, the molasses, the melted butter, the salt, and the cooled pumpkin. Use the paddle attachment on low to medium speed to combine.
  • Now begin adding the bread flour ½ cup at a time, paddling in each addition, until a soft dough forms that pulls and tears away from the side of the bowl. You may not need the entire 3 cups of flour – I ended up using about 2½ cups total.
  • Switch to the dough hook and knead on medium speed for about 5 minutes. The resulting dough will be soft and sticky – a play-dough that clings to your fingers – but that’s okay. The oats need time to absorb the liquid so it will become less tacky as it rises.
  • Spray the inside of the bowl with a non-stick spray or olive oil, flipping over the dough so both sides are coated. Cover the bowl with plastic wrap and set it in a warm place to rise until doubled; 60-90 minutes.
  • When the dough has doubled, punch it down by depressing your fist gently into the middle, then let it sit to get its breath back for about 10 minutes. While it rests, spray two 9×5 inch loaf pans with non-stick spray and start the oven preheating at 375F. Combine the pumpkin seeds with the remaining ½ cup of oats and spread out on a flat, rimmed surface like a cookie sheet.
  • Carefully dump the risen dough out onto a very lightly floured board. The more flour you use, the more trouble you’ll have getting the seeds and oats to stick. Divide the dough into two equal hunks, then form each into a loaf and roll it through the seed and oat mixture before settling it into its respective loaf pan. If you have a lot of trouble getting the oats and seeds to stick, spray the loaf with nonstick spray or olive oil first, then have another go.
  • Cover the loaf pans with plastic wrap and set the loaves aside to rise again for about 45 minutes.
  • When the loaves have just about doubled in size again, remove the plastic wrap covering them and carefully set them into your preheated oven to bake until their central temperature reaches 180-200F; about 35 minutes.
  • Let the loaves cool in their pans about 10 minutes, then remove to a wire rack to cool completely.

Save

Save

Pumpkin Chocolate Cupcakes with Spiced Cream Cheese Frosting

2015 Blog November-0577The beauty of having a perfect chocolate cake recipe, as I do, is that it’s always there in the back of your memory, ready for any holiday, any event, any Wednesday evening you really need a piece of cake. It’s always tender, it’s always moist, it tastes refreshingly of cocoa but is not overly sweet. It is easy to make – 45 minutes from empty bowl to tins hot out of the oven if you’re organized, and its recipe is easily halved and quartered for when you want a single layer, and when you just need a 6-inch cake for you and somebody you’re willing to go halfsies with right out of the cake tin.

2015 Blog November-05572015 Blog November-0560Because this recipe is so dependable, because it is so easy and so well loved I’ve learned the measurements by heart, I’ve basically come to the conclusion that it is magic. It’s delicious, it’s quick, it’s vegan (until you drape it in whipped cream), which also means it’s cheap. But most magically, it is easily modified in dozens of ways, and every time it seems to come out right. I’ve made it gluten-free, I’ve soaked it in liqueur, I’ve added coffee, I’ve used olive oil instead of vegetable oil, I’ve switched out the type of vinegar, I’ve turned it into cupcakes; somehow, it just always works.

2015 Blog November-05622015 Blog November-0563Here, in the ultimate experiment, I added an entire cup of pumpkin puree without adjusting any of the other ingredient values, and it STILL WORKED. That shouldn’t be possible. Pumpkin is so wet that dumping in such a healthy portion of it should require some tweaking. But because this cake is magic, it produced more than two dozen deeply dark, tender, moist cupcakes within an hour and a half.

2015 Blog November-05642015 Blog November-05662015 Blog November-0569Though I usually fill and slather this cake in an unapologetically thick layer of whipped cream, for cupcakes, I wanted to play with the subtle pumpkin flavor by spiking the frosting with the spices of pumpkin pie. Cream cheese frosting is a perennial favorite of mine, though for some reason I always forget about it when I’m not addressing a carrot cake. Here, though, it works perfectly: the tang of the cream cheese prevents the frosting from getting too sweet too fast, and it can hold up to the strong flavors of the spices that get whipped in.

2015 Blog November-0573Plus, bonus, cream cheese frosting is easy to pipe because it remains nice and stiff, which means you end up with professional looking cupcakes you can impress your coworkers or your Thanksgiving guests with. You know, if you feel like sharing.

2015 Blog November-0575

Pumpkin Chocolate Cupcakes with Spiced Cream Cheese Frosting
Makes 28
60-90 minutes (plus at least 30 minutes cooling time for cupcakes)
For cake:
3 cups flour
2 cups sugar
2 teaspoons baking soda
1 teaspoon salt
½ cup unsweetened cocoa powder
⅔ cups vegetable oil
2 teaspoons white vinegar
1 teaspoon vanilla
1 cup unsweetened pumpkin puree (NOT pumpkin pie filling)
2 cups cold water
For frosting:
16 ounces (2 packages) plain, full-fat cream cheese, at room temperature
4 ounces (8 tablespoons or 1 stick) unsalted butter, at room temperature
1 tablespoon vanilla
2-3 cups powdered sugar
1 teaspoon cinnamon
½ teaspoon cardamom
¼ teaspoon nutmeg
¼ teaspoon ginger
  • Preheat the oven to 350F and spray or line a 12-cup muffin tin with cupcake wrappers. Set aside.
  • In a large mixing bowl, or the bowl of a stand mixer, whisk together the flour, sugar, baking soda, salt, and cocoa powder. It turns a lovely pale pinkish color when the cocoa is fully integrated.
  • In a 2-cup glass measuring cup, measure out the vegetable oil and stir in the vinegar and the vanilla. Carefully add the pumpkin puree and whisk together. Add to the dry ingredients and use the stand mixer or an electric handheld mixer to combine – it will form a wet, clumpy mess.
  • With the mixer running on low, slowly add the 2 cups of cold water. As the batter loosens you’ll want to add no faster than a trickle lest the now suddenly deep, deep cocoa-brown batter splatters.
  • Once all the water is added, continue mixing until well combined – at least a minute. Be sure to scrape the bottom of the bowl with a spatula to ensure no hidden pockets of dry ingredients.
  • When the batter is fully mixed, scoop ⅓ cup into each cavity of your prepared muffin tin. I use an ice cream scoop that holds ⅓ cup and has one of those trigger pieces that sweeps across and cleans out the scoop – I highly recommend this. It’s very convenient.
  • Bake for 18 minutes or until a toothpick or cake tester inserted comes out with only a moist crumb or two. Cool in muffin tin for 5-10 minutes, then remove to a wire rack to cool completely. Repeat with remaining batter until all cupcakes are baked and cooled.
  • To make the frosting, drop the cream cheese into a large bowl and beat well with an electric handheld mixer or the whisk attachment on a stand mixer. When the cream cheese is looking fluffy, scrape down the sides, add the room temperature butter, and beat again until mixture is thick and fluffy. Scrape down the sides, add the vanilla, and beat once more.
  • Now, sift in the powdered sugar ½ cup at a time, beating well in between each addition. You will want to start with slow speed each time to avoid a powdered sugar cloud. Once you’ve hit the 2 cup mark, let the mixer run for 2-3 minutes until the frosting becomes very thick. Give it a taste to check for sweetness and texture. If it seems thick enough for your purposes, add the spices, beat to integrate fully, and you’re done (I found 2 cups was perfect in flavor and texture). If the frosting is not thick enough, add the remaining powdered sugar ½ cup at a time, beating well, for additional stiffness. Then add the spices, beat to integrate fully, and prepare to frost the cupcakes.
  • If you have a piping bag, fit it with a star shaped tip and use a rubber spatula to fill it halfway with frosting. If you don’t have a piping bag, cut the bottom corner off a gallon sized zip-top freezer bag and slide in a star shaped tip (or just leave it open for a less defined swirl of frosting). Half fill with frosting. Use your fingers to gently smoosh the frosting toward the bottom of the bag. Twist the top (empty) half of the bag around two or three times.
  • To frost the cupcakes, hold the filled half of the bag in your dominant hand and a cupcake in your other hand. Without touching the icing tip to the surface of the cupcake, squeeze the bag gently and move your hand in a clockwise circle, letting the frosting ooze out and create a curlicue of frosting on top of the cupcake. Repeat until all cupcakes are frosting, refilling the bag when needed. You’ll likely have some extra, which seems to me like a terribly good thing, and which apparently freezes quite well.
  • Refrigerate cupcakes until ready to serve – they keep just fine overnight (and, in fact, were still moist and tender into day three).