Breads of the World: ojos de Haman

It’s rare for me to be organized enough to produce a holiday dish sufficiently in advance of the actual holiday that you, my readers, could – gasp – make the dish for the holiday if you so desired. And yet here, for once, I’ve managed it. Purim is at the end of this week, an important holiday in the Jewish calendar, which celebrates the overthrow of the evil Haman. Royal advisor to the King of Persia, Haman planned to slaughter the Jews, and was thwarted by Esther, the queen, and her cousin Mordecai.

Purim is celebrated with feasting and can be, by all accounts, quite raucous. My friend M. relates childhood memories of delivering and receiving Purim baskets to and from family and friends, akin to an Easter basket, but more likely to be filled with hamantaschen and preserves than with chocolates and egg-shaped candies. In the Talmud, M. says, Jews are instructed to make themselves “so fragrant with wine” that they can’t tell the difference between “wicked is Haman” and “blessed is Mordecai.” This intensity of celebration sometimes produced dangerous results, as people would fall over at Temple (or right into the fire, per M). Other Purim traditions include retelling the whole story (the “Purim Spiel”), and using noisemakers to drown out Haman’s name every time it is uttered, which sounds like excellent fun.

The most common food related to the holiday is hamantaschen, the delicious triangular cookie with sweet filling, which I’ve seen translated both as “Haman’s pocket” and as “Haman’s ears.” Deb at Smitten Kitchen has a new one, and Jake Cohen has opinions about the filling. Kreplach, a savory dumpling, is another popular option.

Neither of these is bread, of course, but while I was poking around that weird neighborhood “the internet,” I came across two possibilities for this year’s project. Keylitsh, according to the blog Poppy and Prune, is an elaborately braided Eastern European challah served for numerous holidays. At Purim, the fancy braids are symbolic of the rope used to hang Haman. I am well versed in the three-strand challah I learned from my mom, and I’ve tried a six-strand once that went… poorly… so I kept going.

Poppy and Prune goes on to say:

If that’s not enough gore for your Purim table, I have just the thing for you: a traditional Moroccan bread known as boyoja ungola di Purim or ojos de Haman. This is a round, flattish loaf decorated with two hard boiled eggs in their shells, which are meant to represent Haman’s eyes. Each egg is held down with two thin strips of dough arranged in an x, and, once the bread is baked, it’s a traditional to rip them out of the loaf—you know, like ripping Haman’s eyes out. The dough for this bread is traditionally studded with anise and sesame seeds, as well as coarsely chopped almonds.

This sounded promising, and delightful, so I set about finding more information and a recipe that incorporated these flavorings. Kosher Cowboy offers a story about the symbolism of this bread, though I’m unclear on his source.
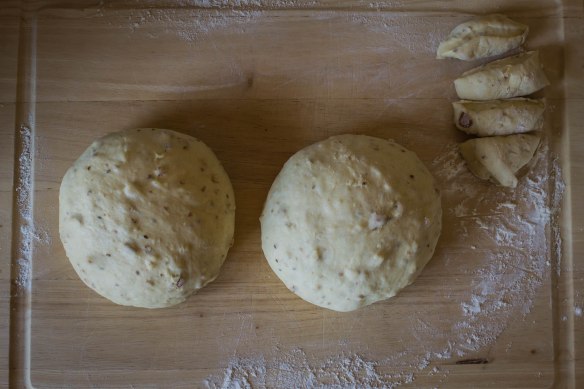
Some incarnations of this bread don’t stop at the eyes, but decorate the loaf to look like a magnificently evil head, complete with a long beard darkened by poppyseeds and round cheeks that puff up during baking. Mine, as you can see, were not that elaborate, although I appreciate that where the dough tore slightly below the eye crosses it left a pale stripe, then a darker, browned lower half that could, if you squint a bit, be seen as a thick beard.

Many of the recipes and traditions of this loaf come courtesy of Maggie Glezer’s A Blessing of Bread and Phyllis and Miriyam Glazer’s The Essential Book of Jewish Festival Cooking,  both of which look like beautiful books that might end up on my already-overpacked cookbook shelves…

The best part about this bread, besides eating it, is the shaping. It’s a lovely dough to work with, as are most enriched doughs, elastic and puffy. After lightly flattening and scoring the main ball, you get to poke in two divots, insert a hard boiled egg* into each, and add two pieces of dough in an X shape across the eggs and pressed into the main loaf, where they hold the eggs in place during baking. If you’re going the fancy route, you can use additional pieces of dough to make Haman’s facial features or, if you’re keeping it comparatively simple, as I did, you can just snip around the edge of each loaf at one inch intervals with scissors, which makes a lovely pattern like sunflower petals or, I suppose, like thick locks of Haman’s beard and hair.

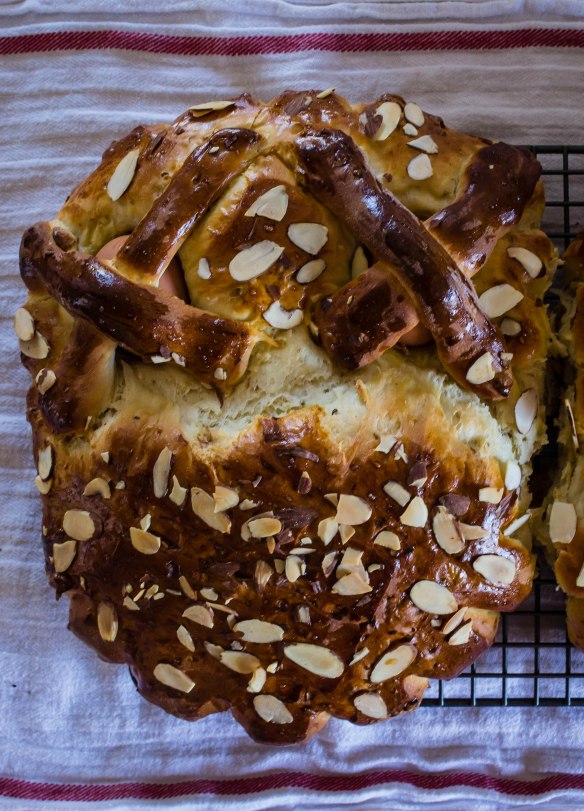
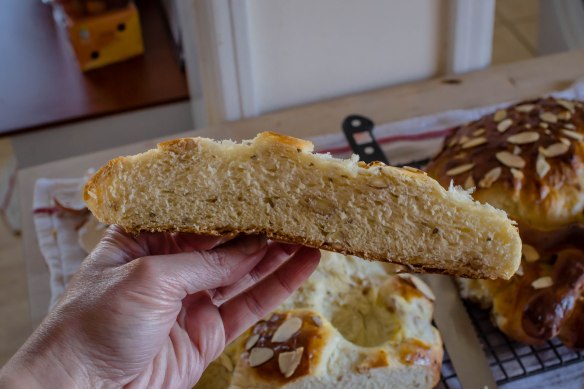
As expected, in addition to being a lovely dough and a gorgeous loaf – deeply golden brown, shiny from egg wash, and scattered with sliced almonds – it is also delicious. We found it slightly sweeter and also less eggy than the challah my family makes, and the nuts and seeds were a lovely addition. I wasn’t sure how I would feel about chopped almonds inside, but I found I loved the added texture. I tend to avoid anise and anise-flavored things, but here it’s such a small amount it isn’t overpowering, and I found it reminded me slightly of a good, traditional biscotti (in flavor alone, though – the texture of this bread is much lighter and softer). Oh, and peeling back the X of dough to gouge out the hard-boiled egg “eye” on either side is, as you can imagine, also a delight.

Because Purim involves exuberant eating and drinking, many of the recipes I found for this bread, which is essentially an unbraided challah with added flavoring agents, make a LOT. I’m talking, 8 cups of flour, 3-4 loaves a lot, or even more: some recipes offer the more modest quantities for 3-4 loaves, and then provide instructions for a full 5 pounds of flour. I scaled mine back a little bit to just 2 loaves, one of which, eyeballs already extracted, is sitting happily in our freezer waiting for a weekend when we want something more celebratory than my standard sourdough toast.

* thanks to careless proofreading on a recent Whole Foods order, I ended up with a package of medium – rather than the grocery standard large – sized eggs. I used these smaller ones to make Haman’s hard-boiled eyes and was pleased with the results. Large eggs would work too, but depending on the size of your loaf they might be a tight squeeze to fit in.


Ojos de Haman
Adapted from Phyllis Glazer’s recipe at The Times of Israel, and shaping instructions from STL Jewish Light
Makes 2 loaves
3½-4 hours
5 1/3 cups all-purpose flour
1 TB + 1tsp active dry yeast
2/3 cups granulated sugar
2 tsp sesame seeds
2 tsp anise or fennel seeds
2/3 cups coarsely chopped almonds
½ tsp salt
2 large eggs
1/3 cup vegetable oil
1½ cups warm water
4 hard boiled eggs (I used medium eggs because I happened to have some and found they fit well. Large eggs would work too, but might be a tight squeeze on Haman’s face)
1 yolk + 1 tsp water, to glaze
2 TB sliced almonds


  • In a large bowl or the bowl of your stand mixer, combine the flour, yeast, sugar, sesame seeds, anise or fennel seeds, and chopped almonds. Whisk or mix to combine with the dough hook. Once well combined, add the salt and whisk in.
  • In a smaller bowl or a large glass measuring cup, stir together the eggs, oil, and warm water. Make a well in the flour mixture and pour in the wet ingredients. If you’re working with a stand mixer, knead with the dough hook on medium speed into a soft, slightly sticky dough: about 7-8 minutes. If you aren’t using a stand mixer, first stir the wet ingredients into the dry with a wooden spoon or a sturdy spatula, then turn out onto a floured board and knead by hand until soft and smooth: about 8-10 minutes.
  • Let the dough rise, covered with plastic wrap or a clean towel, until doubled: 1 – 1½ hours. Meanwhile, hard boil the eggs: bring a small pot of water to a rolling boil, then use a spoon to gently add the eggs. For large eggs, boil 10 minutes and then remove eggs and set aside to cool. For medium eggs, boil 8 minutes and then remove and set aside to cool. Remember: the eggs will bake along with the bread.
  • Once the dough has doubled in size, turn it out onto a lightly floured board and remove a piece the size of a small fist. Cut this into four pieces, then roll each into a thin strand about 6 inches in length. Cut each thin strand in half: these are for your Xs to hold in the egg “eyes.”
  • Divide the remaining dough in half. Working with one half at a time, roll into a ball, then use a rolling pin or floured hands to flatten into a disk 8-9 inches in diameter. With a razor blade or a sharp knife, slice a shallow crosshatch pattern into the surface of the dough.
  • Using your thumb or the knuckle of your index finger, firmly press two indentations into the dough about two inches apart in the top third of the disk. Place one cooled hard-boiled egg into each indentation. Use your reserved strips of dough to make an X shape across each “eyeball,” pressing firmly into the rest of the loaf to adhere, as in the photos above. Transfer to a baking tray lined with parchment paper. With scissors or a sharp knife, snip around the edge of the loaf at 1-inch intervals to create a petal pattern. Repeat with remaining loaf.
  • Let the shaped loaves rise, covered with a clean kitchen towel, for 30 minutes. Meanwhile, preheat the oven to 350F.
  • After 30 minutes, combine the egg yolk and 1 tsp water in a small bowl. Remove the kitchen towel and glaze the loaves with this egg wash, trying to avoid the hard-boiled eggs as much as possible. Scatter or press on the sliced almonds, then bake in the preheated 350F oven for 20-25 minutes, until they are deeply browned.
  • Cool at least 15-20 minutes before eating. We started by peeling off the X of dough to pluck out Haman’s eye, but you should proceed as desired. Enjoy!

 

Project Cook: Apple Spice Cake with Walnuts and Ginger

Sometimes dishes emerge from nowhere – no set, traceable inspiration; just an idea baked or simmered into existence. Philosophical. Cartesian cooking. Sometimes they are more geographical, linked to location and experience – blogs are rife with this, aren’t they? “This cake reminds me of my pilgrimage to…” But sometimes they are more narrative: visible evolution, each major ingredient or element its own origin story, entering the room at a moment that changes the direction of the final dish.

No surprise that the narrative method is one I favor. This magnificent stack began life as a carrot cake. That is, I wanted to make a cake, and after seeing (and resisting) a container of crystalized pineapple at the grocery store, carrot cake with crystalized pineapple sounded perfect. And then I thought about adding crystalized ginger too. And then I wondered whether some apple along with the carrot would be good, because fall, and pineapple turned into a third wheel that rolled away from the party. And then, inspired by old episodes I was watching of The Great British Bake Off, I wondered about adding dried apple, and maybe finely chopped, toasted walnuts to the filling instead of just plain cream cheese frosting, and suddenly the carrots – the very namesake of the cake! – started to feel out of place.

Suddenly I was planning an apple walnut cake. I tore through several cookbooks and a recipe site or two looking at various apple cake recipes – most rely on applesauce for both flavor and moisture, which I wasn’t interested in using – and came upon Deb’s roasted apple spice sheet cake, which does have a fair amount of applesauce, but also chunks of pre-cooked apples that, as she puts it, transform into “soft pillows of apple pie-like puddles.” I didn’t read much past that before deciding I, too, must have such puddles in my cake.

But I still wanted the moisture and freshness I knew shreds of raw apple would bring, and so while I dithered over recipes and quantities I remembered the cake’s initial origins and adapted my favorite carrot cake recipe: a triple layer extravagance from The Bon Appetit Cookbook that calls for pre-toasted nuts and a thick, rich, almost too sweet cream cheese frosting. Not much changes in the cake itself, aside from the significant shift from carrot to apple, except that I subbed in brown butter instead of the as-written vegetable oil, and as usual, it was a worthwhile extra effort.

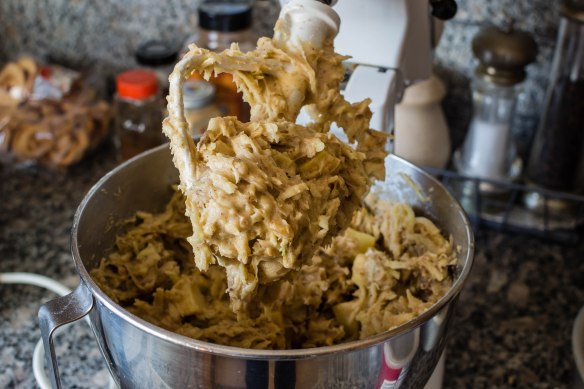
This cake winds up so packed with threads of grated raw apple, toasted and chopped nuts, crystalized ginger, and the soft chunks of roasted apple, that it almost doesn’t feel like enough batter to encase the additions. The layers when you spread them into the pans are thin, but they do puff as they bake, into lovely, spicy, delicate layers you really do have to let cool for at least 15 minutes before taking them out of the pan. What became my middle layer, which emerged from the pan in six or seven moistly crumbling pieces, is proof positive of this. (Worth noting: if that kind of disintegration happens to you, reform the layer to the best of your ability on a sheet of plastic wrap, enclose it tightly, and put it in the freezer for half an hour or so before stacking and frosting. I was amazed by how well the pieces magically re-adhered.) If you’re worried about the fragility, I think you could get away with adding an additional ¼ cup flour to the recipe and still retain adequate moistness, but I haven’t tried this. If you do, let me know how it works out.

There are all sorts of other fun things you could do with the cake itself to change it up. Tart dried cherries would be lovely along with or instead of the golden raisins I’ve called for. Those raisins could easily be re-plumped in rum or brandy, a step I’m sorry I didn’t think of until my layers were already in the oven. The walnuts could be swapped out for pecans. You could play with the variety of apples you use – I almost always tend toward Granny Smiths or another tart green apple for cooking because I like their flavor and sturdiness, but you could mix and match as you please.

What I really want to talk about here, though, is the filling and the frosting. When I frost a cake, with a few notable exceptions, I typically put the same thing between the layers that I do around the outside. Here, though, whether it was thanks to Bake Off (likely) or just lightening strike inspiration, I wanted some texture in the filling, and the finely chopped mixture of dried apples and toasted walnuts woven through the cream cheese frosting was delightful.

As for that cream cheese frosting, it’s serviceable, easily pipe-able, and as rich and delicious as you could ever want. But N. and I noticed that, at least on the first day and despite the tablespoon of lemon juice I added for mitigation purposes, it is very, very sweet. Not surprising, given the number of cups of powdered sugar my recipe called for, but challenging for an insomniac to consider for an afternoon snack. So I have some thoughts, which I’ll admit I’ve tried exactly none of.

  1. You could decrease the quantity of powdered sugar down from 4 to 3 cups (you might end up wanting to add less vanilla as well, if you do this). This will produce a wetter frosting that might be harder to pipe, if that’s what you’re going for, but I think it would probably still spread successfully and stay where you put it.
  2. You could make the frosting a day ahead (would that make a difference? I don’t know…). Or, perhaps more logically, you could plan to make the whole thing a day before you serve it. We thought the whole cake tasted great – maybe even a bit better – after a night in the fridge.
  3. You could add a dried spice or herb to the frosting for an additional, not-so-sweet flavor. I thought first of ginger, which would make sense with the spices in the cake, but then, quite unconventionally, I thought of sage. Good with apples, decidedly savory, and about as stereotypically Fall as you can get, would a teaspoon or so of dried sage, finely crumbled and beaten into the frosting, tamp down that sweetness a bit?
  4. You could go the “naked” or “semi-naked” route, using only a small amount of frosting and spreading it on such that the sides of the cake artfully show through. You’ll have a fair bit of frosting left over if you opt for this route, but cream cheese frosting freezes quite well so I don’t see that as a bad thing. Emergency back-up frosting feels like a good idea.

Since I’m sure you’re limiting your social gatherings at this point and thus you might not be sure you really want a triple layer cake sitting around, you’ll be happy to know that this cake is a good candidate for freezing. We ate, over the course of I’m-ashamed-to-admit-how-few-days-it-was, about half of it, and then I carefully plastered over the cut portions with some extra frosting so no cake was exposed. Leaving the fully frosted cake in the fridge overnight ensures the frosting crusts a little bit, which makes it easy to wrap securely in plastic wrap and deposit in the freezer until you next need a rich, spicy, sweet reminder of fall.

Apple Spice Cake with Walnuts and Ginger
Adapted from The Bon Appétit Cookbook
Makes 3 9-inch layers, serves 10-12
About 90 minutes, plus cooling and frosting time
For the cake:
1 cup walnuts, divided (see filling and frosting ingredients, below)
4 large, tart apples, like Granny Smiths, peeled, divided
1½ cups unsalted butter (3 sticks)
2 cups granulated sugar
4 large eggs
2 cups all-purpose flour (as noted above, if you’re worried about very fragile layers, you could probably get away with 2¼ cups flour, but I haven’t tried that yet)
2 teaspoons baking soda
2 teaspoons baking powder
1 teaspoon salt
1 teaspoon ground cinnamon
½ teaspoon ground nutmeg
¼ teaspoon ground cloves
¼ teaspoon ground ginger
½ cup golden raisins (optional: soak in warmed rum or brandy for 10-20 minutes to rehydrate, then drain)
¼ cup chopped crystalized ginger
For the filling and frosting:
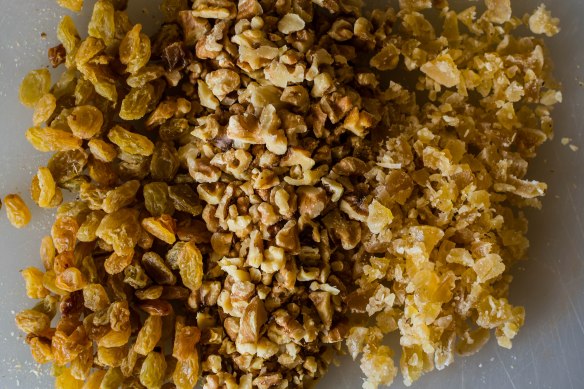
½ cup dried apples, finely chopped or cut with kitchen scissors
¼ cup finely chopped walnuts, from the 1 cup total listed above
½ cup unsalted butter (1 stick), at room temperature
16 ounces cream cheese, also at room temperature (I prefer Philadelphia brand)
1 tablespoon vanilla extract
1 tablespoon lemon juice
4 cups powdered sugar (see numbered thoughts on frosting sweetness, above recipe)
Optional: extra dried apples, crystalized ginger, and cinnamon, for decoration
  • To make the cake, preheat the oven to 375F and put the walnuts on a baking tray in the oven to toast while it is preheating. When they smell fragrant and have darkened slightly in color, they are ready. Remove and set aside until cool, then chop roughly.
  • Quarter and core 2 of the peeled apples, arrange on a foil-lined baking sheet and roast in the preheated 375F oven until they are browned underneath and dry to the touch, about 20 minutes. When done, set them aside to cool, then chop them roughly into chunks of your desired size.
  • Meanwhile, brown the butter and prepare the remaining apples. For the butter, melt all 3 sticks in a medium saucepan and let cook over medium heat until the solids on the bottom take on a toasty brown color. First it will foam up, then subside, then brown. It’s easiest to use a pot that does not have a dark surface, since you can see color changes in the butter more easily. Once those bits have browned, remove the pot from the heat and let cool.
  • For the remaining two apples, grate on the large holes of a box grater or use the shredding disc of a food processor (be careful to avoid stems and seeds). Gather the shreds into a clean kitchen towel and give them one good squeeze, then set aside. Don’t squeeze them out too much; we want some of that moisture for the cake.
  • Once all your pre-cooked ingredients have cooled down, lower the oven temperature to 325F and make the batter. In a large bowl (I used the bowl of my stand mixer), beat the sugar and the cooled brown butter together. Be sure to scrape in all of those browned bits from the bottom of the pot – that’s where much of the toasty flavor resides! Add the eggs one at a time, beating well.
  • Add the dry ingredients, sifting if you want to bother. I never do.
  • Stir in the golden raisins, ¾ cup of the toasted, roughly chopped walnuts, the crystalized ginger, and the grated apple. Finally, gently fold in the chunks of roasted apple.
  • Divide the mixture evenly between 3 well-greased 9-inch round baking pans. You can line with parchment paper too, if you want the extra insurance. The layer of batter in each will be thin. If you, like me, only have two 9-inch pans, bake two layers first, then use one of those pans again for the final layer after the first batch has cooled a bit.
  • Bake in the preheated 325F oven until a toothpick inserted comes out with just a few moist crumbs, 30-35 minutes.
  • Cool layers in pans for at least 15 minutes, then remove from pans and cool completely. I’m serious about that 15-minute thing, by the way. Trying to take them out before that could result in disintegration!
  • To make the frosting and filling, finely chop the remaining ¼ cup of walnuts and combine with the finely chopped dried apples in a small bowl.
  • In a large bowl, beat together the room temperature butter, cream cheese, vanilla, and lemon juice until well combined. Scrape down the sides of the bowl and the beaters to ensure full integration.
  • Add the powdered sugar ½ cup at a time, to prevent cough-inducing clouds, and beat well after each addition, until the frosting reaches your desired thickness.
  • Scoop out about 1 cup of the frosting and add it to the small bowl with the walnuts and dried apples; use a flexible spatula to mix in. This is your filling.
  • To fill and frost the cake, position one fully cooled cake layer on a plate or cake stand. (If you are messy like me, you might want to arrange strips of wax paper to cover the exposed parts of the cake stand or plate while you frost.) Using a flexible rubber or an off-set icing spatula, spread about ½ of the filling evenly over this first layer of cake, going all the way to the edges. Add the next layer of cake and repeat, then top with the final layer of cake.
  • Use the remaining cream cheese frosting to frost the cake as desired. If you want to do a crumb coat, use a small amount of frosting to coat the entire cake, not worrying about full coverage. When done, pop it in the fridge for a few minutes to let any crumbs that have come unstuck from the cake set into the frosting as it chills. Then remove from the fridge and continue. I usually scoop about two thirds of the frosting right onto the top layer of cake, then use an off-set spatula to gently push it toward the edges of the cake and down the sides, filling in any uneven gaps and creating as smooth a surface as I can. You may end up with extra frosting, which is convenient if you are thinking of freezing part of the cake, as explained above.
  • This looks lovely with just the frosting, but if you want to decorate a little, consider artfully arranging a few dried apple rings and chunks of crystalized ginger in the center of the cake, then dusting the top edge with cinnamon before slicing and serving.

Contrarian Chewy Not-Chocolate-Chip Cookies

As I’ve noted here before, I can be a bit contrarian about food. I like my risotto with anything but rice, somehow I always find myself frying food in the most disgusting heat of summer, and I’m that person who, instead of making something practiced and reliable for a dinner party, always somehow ends up trying something untested.

But perhaps my most blasphemous contrarian food tendency is this: sometimes I don’t want chocolate chips in chocolate chip cookies. I love the cookie part – the depth of the brown sugar, the butter, the just-crisp edges – and then that chocolate gets in the way. Don’t get me wrong: I do like chocolate. I’m not a total monster. But in a cookie, especially after it cools and the chunks or chips or boulders of chocolate solidify again, I could do without. I sometimes find myself looking forward to the cookie that comes from the very last scrapings of batter from the bowl, since it probably won’t have much chocolate in it.

Last month N. ran a half marathon and I, following what is becoming a tradition, decided to have cookies waiting for him when he came home. Not so contrarian as me, N. loves a good chocolate chip cookie (and a mediocre chocolate chip cookie too – in fact, let’s be honest: he’ll take just about any chocolate chip cookie). Inspired by a recent trip to Le Grande Orange Café in Pasadena, I decided I wanted to do a batch of thin, crisp-but-chewy cookies with a sprinkling of salt on top. Good for helping my runner rehydrate a little. I started with a Bon Appetit recipe, but played a little: almond meal replaced some of the flour, I was out of chocolate chips, so I chopped up some dark chocolate covered pretzels and, just for fun, couldn’t resist a little instant espresso powder to the dough as well. A little buzz of extra caffeine wouldn’t hurt N. as he unwound from a thirteen mile morning.

We both loved the cookies. But again, I found myself thinking how good they would be if they just… didn’t have chocolate in them. So I did another batch here, retaining the almond meal, but eliminating all hints of chocolate. These are designed to be crisp at the edges and chewy at the middle, and several elements of the recipe contribute to that: the almond meal is always going to add some pleasant texture, as is brown sugar. The powdered sugar allows for a denser final result, which contributes to chew in that not as much air is trapped in the dough. And using egg yolks instead of just whole eggs seems to help too, though opinions seem divided on this.

My contrarian cookies were simple. As I was mixing them up, I found myself thinking, “could I add anything? What about dried cherries? What about lemon zest? Could I put in some cardamom or cinnamon, or maybe chopped nuts?” And of course the answer is yes. I could. You could too. Toss in a teaspoon or so of some warm spice. Toast and chop and fold in about a cup of nuts or dried fruit. If you’re feeling particularly contrary with me, you could even reverse hack all the way into putting the chocolate back in; you’ll want about 8 ounces.

But when I chewed my way through the first, and then the second, of these simple, too-spread-out, just bendable,* still warm offerings, I wanted none of that. The texture was right: crisp around the edge, a chew similar to a good snickerdoodle in the middle, and the occasional delightful crunch from the sea salt. And nothing, nothing at all, disrupting that deep, lovely, buttery brown sugar taste.


* because these cookies spread so much while they bake, and because they are so soft when they first come out of the oven, I’d wager you could successfully cool them over the back of a muffin tin or ramekin for little cookie bowls to fill with ice cream or custard or fruit, or maybe even a deep, rich mousse to get the chocolate back in there…


Contrarian Chewy Not Chocolate Chip Cookies
Adapted from Bon Appétit
Makes about 18 cookies
½ cup (1 stick, or 4 ounces) room temperature unsalted butter
¾ cup brown sugar
½ cup granulated sugar
¼ cup powdered sugar
2 large egg yolks
1 large egg
1½ tsp vanilla
1 cup all purpose flour
½ cup almond meal
1 tsp baking powder
¼ tsp baking soda
½ tsp kosher salt + more for sprinkling


  • Preheat the oven to 375F and line two cookie sheets with parchment paper or nonstick spray
  • In a large bowl or the bowl of a stand mixer, beat the butter with the paddle attachment or with an electric mixer until it is soft and the big pieces have broken down. Add all three varieties of sugar and continue mixing until light and fluffy, about 3 minutes. Scrape down the sides of the bowl. Add the egg yolks, the whole egg, and the vanilla. Beat again, stopping once or twice to scrape down the sides of the bowl, until the whole mixture is pale and fluffy, about 4 minutes. This seems like a long time, but it does make a difference. It will look like buttercream frosting when it’s ready, and really, it basically is.
  • If you want to, whisk the dry ingredients (flour, almond meal, baking powder, baking soda, salt) together in a smaller bowl, then slowly add to the wet mix in three additions, mixing just to blend in between. If you don’t want to bother with the whisking, just add in stages: ½ cup flour, mix to blend, ½ cup almond meal, mix to blend, then remaining ½ cup flour with leavening and salt, mix just to blend.
  • Spoon tablespoonfuls of dough onto your prepared cookie sheets, spacing them at least 1 inch apart. They will spread. I wouldn’t do more than about 6 dough blobs on each sheet. Sprinkle the tops sparingly with kosher salt or flaky sea salt.
  • Bake in the preheated 375F oven, rotating the sheets halfway through, until golden around the edges, 12-13 minutes. The middles will seem very soft, but will firm as they cool. Let sit on baking sheets 3-5 minutes before transferring to wire racks to cool completely (unless you want to mold them – see * above).

Indian Spiced Pumpkin Custard Bars

I’ve tried to start this post three times. Each time I deleted what I’d written, and ultimately it took me a week in between actually making the thing and knowing what to write (hence the Halloween plate) because as usual, it’s hard to know how much from “out there” belongs here in my little virtual kitchen. I feel like I want to talk about it, even though it is hard, because to separate and live only in an idealized, happy little blog space feels disingenuous. Yet to try to write about a massacre in the same breath as a dessert feels just as bad. And it is happening more and more often.

So I’m going to try to write this post by talking about my friend M. instead. M. is an amazing woman who, in my last two years of graduate school became a firm friend, and in the years since has risen in my esteem to be one of my favorite people. She is smart. She is complex. She is opinionated and feisty and loud and dedicated and… just a really cool human being. She is also vexed with a complicated set of food allergies. And she happens to be Jewish. She deserves, as do all people, to live safely, have the freedom to practice their faith or lack thereof, and to pursue happiness in their own way. And so because I’m having trouble writing out my thoughts about Pittsburgh and what has happened there in a way that makes sense, I made a dessert for M.

It’s not enough. It’s not even a related action. But I saw a post on Facebook the day I made these from a woman named Kim Weild that told me “The Talmud says: Do not be daunted by the enormity of the world’s grief. Do justly, now. Love mercy, now. Walk humbly, now. You are not obligated to complete the work, but neither are you free to abandon it.” We have so, so much work to do. And on this day I could not complete the work, but baking was a tiny way of doing something I felt capable of doing. And I voted while it was baking, so there. Are you going to? Tomorrow’s the day…

One of the challenges of feeding M. is that she cannot have dairy or eggs. Rice is out of the question, as is beef. So is avocado, of all things. Gluten isn’t a no-no, but it should be a rarity. So M. has spent several years investigating alternatives, and though I don’t see her very often, I occasionally concoct something she can eat, in the off chance I’ll get a chance to feed her. There’s an allergy-free coconut cream pie recipe deep in my mind that I want to get to someday.

This one, though, is inspired by a now-lost-to-the-ages conversation she and another food-interested friend had on Facebook once that I eavesdropped all over. It involved pumpkin, turmeric, and other various spices. It may have included oatmeal. What it did for me, however, was to get me thinking of what would happen if you combined a lot of warm spices with Indian flair in a pumpkin pie, subbed out the eggs for silken tofu, and instead of a traditional crust, pressed together a combination of nuts and coconut oil graham cracker style. And then I scrapped the whole pie idea entirely and went with bars instead.

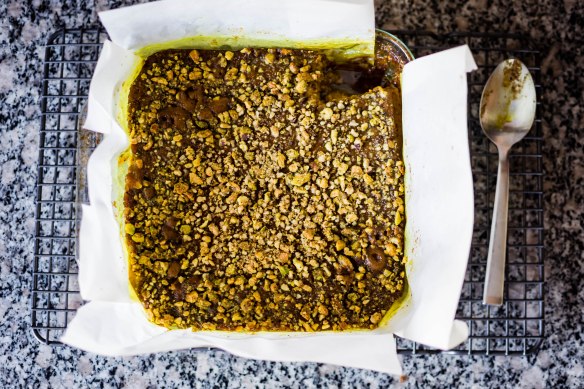
These are rich, taking a long time to bake and an insistence on cooling completely before they can be dealt with. Ideally they should be refrigerated overnight to let the coconut oil and the oils the nuts release chill and reconstitute, while the pumpkin and tofu mixture solidifies into something creamy and almost smooth. But in addition to a baking dish, they do require only one food processor and a small bowl to mix up, so that’s easy. They fit right into a long, slow afternoon when you need something sweet and tender and spiced to comfort you.

M., here’s a humble plate of comfort I made thinking of you. Happy belated Hallow-birthday-ween.

Indian Spiced Pumpkin Custard Bars
Makes 9×9 inch square pan
About 1½ hours plus cooling time
Crust:
1 cup raw, unsalted pistachios
1 cup raw walnuts (halves or pieces)
¼ cup brown sugar
½ teaspoon salt
scant ⅓ cup coconut oil
Filling:
1 can (15 ounces) pumpkin puree (not pumpkin pie filling)
16 ounce block silken tofu, drained and patted dry
½ cup soy, almond, or coconut milk – your preference
¾ cup brown sugar
½ teaspoon salt
1 teaspoon turmeric
1 teaspoon cinnamon
1 teaspoon cardamom
½ teaspoon ginger
½ teaspoon allspice
1 teaspoon vanilla


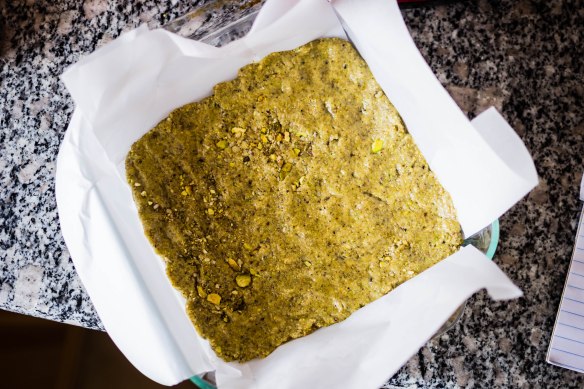
  • Preheat the oven to 350F and line your baking dish with a “sling” of parchment paper: one piece that covers the bottom and extends past the top of opposite sides, and a second piece positioned perpendicularly, so it adds a second layer to the bottom and extends past the top of the other two sides.
  • To make the crust, add the walnuts, pistachios, ¼ cup brown sugar, and ½ teaspoon salt into the bowl of a food processor. Using the pulse function, pulverize into fairly even bits about the size of lentils, though some will be smaller. Reserve ¾ cup of this mixture for later.
  • Add the coconut oil and buzz on high until very well combined but not quite buttery. You want the coconut oil to be fully integrated, but you still want to be able to manipulate the mixture.
  • Once well combined, dump the crust mixture into the prepared pan and use your hands or a spatula to press it into an even layer across the bottom. Stow this in the fridge while you make the filling.
  • In the same food processor (you can wash it out if you want to, but I didn’t bother), combine the pumpkin puree, the silken tofu, the milk, the ¾ cup brown sugar, ½ teaspoon salt, all the spices, and the vanilla. Process on high until the mixture is very smooth, then stop the machine and scrape down the sides to be sure – sometimes little clumps of tofu remain.
  • Remove the crust from the refrigerator and pour the velvet-smooth filling in, then carefully transfer to the oven and bake for about 60 minutes. The edges of the filling will be firm and the center will be extremely wobbly but set on top.
  • Remove from the oven, gently sprinkle the reserved nut mixture over the top in an even layer, being sure to get it into the corners. Return to the oven and bake for another 10 minutes.
  • Turn off the oven but leave the dish inside for about 10 minutes, then remove to a wire rack to cool completely before refrigerating, ideally overnight, but at least for a few hours.
  • Carefully remove from the pan and the sling, then slice while still cold and serve. Alternatively, serve by scooping big spoonfuls into bowls or pretty glasses and adding a scoop of ice cream or whipped cream on top.

Lamb Stuffed Zucchini

The last week of summer is a curious avalanche of light melancholy and nervous action. I’m caught between the post-vacation-slump of wanting to curl and laze and bake my mind in nothing, and the deep itch of my protestant work ethic demanding I Get. Things. Done. before school starts.

So I cautiously plan in small doses, and I soothe the anxious itch that rears up when I am “wasting” time by consuming novels in gulps, to make up for reading little during the rest of the summer. I’m struck by Jesmyn Ward and Tommy Orange, and just this morning I fell back down into the entrancing, haunted wonderland that is Toni Morrison’s Beloved, inspired in part by this suggested reading list for white Americans assembled by a group of black writers. When I saw Morrison’s perhaps most famous novel on the list, I was brought back to an interview she did with Stephen Colbert in which she describes looking through her book for the right page to autograph for a reader, telling him “I looked down and there were these sentences.” I needed to read those sentences again. I burrowed through the first fifty pages this morning and now that itch is to open the book again.

But I do have other obligations, and one of them is to the final, late summer push of my miraculous zucchini plant. It flourished in our absence, our friend who was on plant-watering duties taking home several swollen specimens, and offering another few to our neighbors, and then suddenly, with only two large, hidden bats remaining, took a gasping breath and shuddered to a… pause? A stop? I think it will produce a few more, maybe, but its time seems limited.

That being the case, there was little time to waste in sharing my biggest zucchini triumph of the summer with you, in case you, too, have a few dark green baseball bats you aren’t sure how to consume.

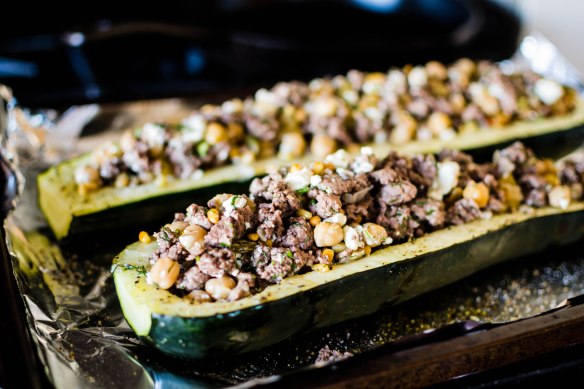
Rather than an accompaniment or a burying-ground, this recipe uses the zucchini as a vessel. Ground lamb, seared and spiced and liberally tossed with toasted pine nuts, golden raisins, chick peas, preserved lemon, feta crumbles, and as much grassy, bright dill as you can handle, gets piled into the scraped-out cavity of the monstrous squash. A mound of oiled breadcrumbs on top is not a necessity, but what a luxury.

This may seem like a lot of ingredients, but they really play together well. Lamb with dill is obviously a winner, but if you haven’t tried lamb with golden raisins, I insist that you make it a priority – they add a perfect sweetness and here, soak up some of the fat from the meat so they are juicy and plump in the final product. The feta and preserved lemon each contribute a nice brininess – I wouldn’t forgo either, though if you don’t have preserved lemon (and are unwilling to make it yourself), plenty of zest might fill in reasonably well. I initially added chick peas as a way of stretching the lamb, and you certainly don’t need them, but they provide a nice lightness of their own and, I think, eradicate any need for a side of starch. Though we ate ours overflowing segments with garlic-rubbed toast and were quite happy.

I like to think this filling has a life of its own beyond zucchini, which is what makes it so nice. A well-hollowed eggplant would work nicely as well, maybe a cored bell pepper, and as the days shorten and hopefully cool, a carefully carved butternut or kabocha squash. Or you could just ignore the vegetables entirely and use the lamb mixture (maybe minus the chick peas) as a loose filling for a take on stuffed shells, or ravioli, or just tossed gently with rigatoni and a few glugs of sauce.

Lamb Stuffed Zucchini
Serves 6-8 with filling left over
About an hour
1 very large zucchini squash
a maximum of ½ cup olive oil (you probably will not use all of it)
salt and pepper to taste
⅓ cup pine nuts
1 pound ground lamb
1 teaspoon allspice
¼ teaspoon cayenne pepper
15 ounce can chick peas, drained and rinsed
½ cup golden raisins
2-3 tablespoons finely diced preserved lemon
3-4 tablespoons finely chopped fresh dill (you could sub with an equal amount of mint or about half as much oregano, if you don’t like dill)
4 ounces crumbled feta
¾-1 cup panko bread crumbs


  • Preheat the oven to 400F and line a large baking tray with aluminum foil. Split the zucchini in half lengthwise so you have two long, rounded planks with seeds exposed. Scrape out the seeds and some of the interior flesh with a metal spoon. Discard the scrapings and place the remaining “boats” on the baking tray. Lightly coat them with olive oil before seasoning liberally with salt and pepper. When the oven is preheated, put in the zucchini-laden baking tray and let them roast about 20 minutes while you start the filling. After 20 minutes, remove from the oven and set aside.
  • To make the filling, first heat about 1 tablespoon of olive oil in a medium pan and add the pine nuts. Toast over medium heat, stirring and checking often, until they are nicely golden. Be careful; they burn quickly. When toasted to your liking, set them aside.
  • In the same pan, still on medium heat, add a little bit more oil and then your ground lamb. Use a flat-sided wooden spoon, if you have one, to break it up, then sprinkle over the allspice, cayenne pepper, and a bit of salt to season. Let it cook, stirring and turning and continuing to break up large chunks, until no longer pink in the center.
  • When the lamb is just cooked through, stir in the chick peas and the golden raisins, turn the heat down to medium-low, and let it go another five minutes. This lets the new additions pick up some flavor. After five minutes, remove from heat and drain off any excess fat.
  • To the now-cooked lamb, add the toasted pine nuts, the preserved lemon, the dill, and the feta, stirring well to combine everything. Taste for seasoning and add salt and more cayenne pepper, if needed. When you are satisfied with the flavor, scoop the filling into the empty, partially-cooked zucchini halves. I like to mound it up a bit. It will be crumbly because there is no binder.
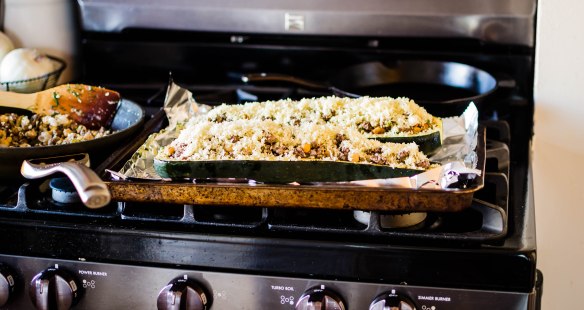
  • In a small bowl, toss the panko bread crumbs with enough olive oil to coat them well. Pack spoonfuls on top of the lamb filling and exposed zucchini flesh.
  • Carefully place the laden tray back into the oven, turn the temperature down to 375F, and roast for 25-35 minutes, until the panko is deeply bronzed and the flesh of the zucchini pierces easily with a fork.
  • Let cool about 5 minutes before slicing and serving large segments.


Chopped Challenge #3: Bourbon chocolate ice cream “sliders” with spiked, salted praline

Course: dessert

Ingredients: Hawaiian rolls, chocolate syrup, bourbon, sea salt.

For my first foray into dessert, N. gave me a list of ingredients that, at least in two cases, were deviously chosen with ulterior motives. As he’s currently training for a marathon (twenty-six miles and change! My brain can’t even fathom how long that is!), he is consistently hungry, and always looking for protein-laden snacks. He goes through chicken thighs, hard-boiled eggs, and toasted tempeh at alarming rates. Recently, he decided chocolate milk would be a fantastic mid-afternoon pick-me-up indulgence, and thus the chocolate syrup was assigned. As for the Hawaiian sweet rolls, he let me know in no uncertain terms that the leftovers would be “great for pulled pork!” so, of course, that was also added to our menu for the week…

I have to admit that this quartet stumped me for a while, though perhaps not in the way you might expect. In fact, as soon as N. handed me the post-it note on which he’d written his choices, I had an answer in mind: this screamed bread pudding. The rolls could be toasted, and would be perfect for absorbing a bourbon-spiked custard mixture. The chocolate would make it extra indulgent, and the sea salt could get sprinkled on top, as with my favorite cookies, for a briny unexpected crunch.

But I couldn’t make bread pudding. I couldn’t. As easy as it would be, and as well as the ingredients lent themselves to it, doing so would make me a hypocrite. As N. (or anyone who has had the misfortune to watch the show with me) can attest, bread pudding is one of the dessert choices contestants make that instantly evokes bellows of protest from me. “DON’T MAKE BREAD PUDDING!” I yell. “YOU DON’T HAVE ENOUGH TIME!” And they usually don’t! Their custards don’t set, their bread isn’t properly soaked, and they usually wind up with runny undercooked messes. I say other things about their choices too, which are even less nice. But we don’t have to talk about that here.

So even though I am not restricting myself to a time frame, I just don’t think I can get away with making bread pudding – not with as rude as I’ve been to the television about it. Neither can I make French toast, nor panna cotta, nor crepes (though this last one is less about not having enough time, and more about me explaining, tiredly, over and over, as if they can hear me, that “of COURSE your first couple are going to be disasters; that’s what crepes DO! Try again!). I had to go with something I don’t, from the safety and anonymity of my living room, routinely take contestants to task for, as natural as the choice might be.

I’m not sure what made me come around to ice cream, but from that point I realized the small size of the Hawaiian rolls might make the dessert a play on sliders. The scoop of ice cream, spiked with bourbon and browned with chocolate, would stand in for the burger patty. There would need to be something bright and acidic to break up the richness, so smashed raspberries might make a fun alternative for a slice or tomato or a slick of ketchup.

As for the sea salt, the only thing I could think of was salted caramel, and this dessert didn’t really need another creamy, drippy, sweet component. I was stumped until I remembered an episode of The Great British Baking Show in which the contestants made hazelnut dacquoise, an elevated meringue cake sweetened by praline, essentially toasted hazelnuts encased in hard caramel that had been reduced to a powder. That would be the perfect place to put the salt and another glug or two of the bourbon, and the powder could be rolled around the edges of the ice cream, like a more sophisticated sprinkle lining to an ice cream sandwich.

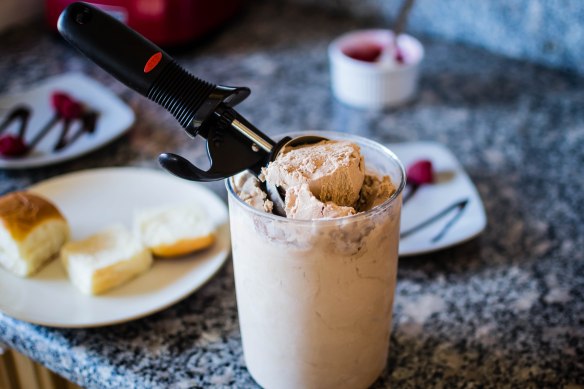
So here’s how it went: the ice cream was without question the best component. I’m using here a version of a recipe I’ve played with before – a no-churn, egg-free miracle from Nigella Lawson that, sure, takes about six hours to freeze up and requires one specialty ingredient, but hey, with chocolate and bourbon in there, and since I’ve always been able to find that specialty item at Whole Foods, was no big deal, really. I’d just make the ice cream the day before.

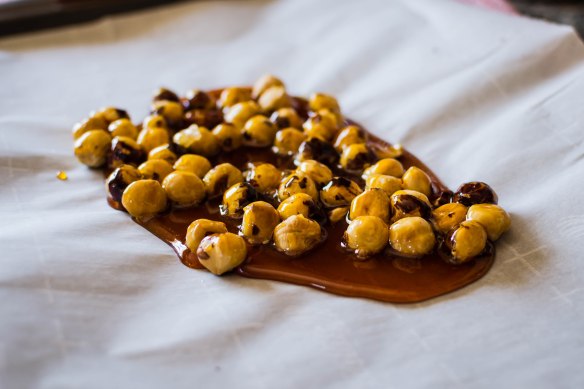
The praline was delicious and surprisingly successful. As I was making the caramel, using bourbon rater than water to help the sugar dissolve, things start to crystallize a bit, but rather than dumping the mess out and starting again, I added about a tablespoon of water, stirred it up, and magically the crystals dissolved and a gorgeous caramel the color of maple syrup bubbled its way into being. With no added dairy, it solidified into a sheet of colored glass around the hazelnuts, and the powder turned out to be equally delightful paired with the ice cream as it was an indulgent sweetener for oatmeal a morning or two later.

As for the Hawaiian rolls, while they made a reasonable vehicle for getting the other ingredients to our anxious mouths, I couldn’t help but feel as though they weren’t really needed. This could just as easily have been an ice cream sundae: smooth, luscious scoops dollops with smashed raspberries, generously sprinkled with praline, then topped with freshly whipped cream. And the rolls… well, since they had to be included, perhaps I could have toasted them, ground them up, and mixed them into the praline.

A project for another month, perhaps. Regardless, my judge says I am “on to the next round,” and now that I’ve done one of each course, April’s challenge is unknown. N. might give me an entrée, or an appetizer, or he might drop another dessert in my lap, considering he’s got twenty-six miles to run and a continually growling void in place of a stomach. We’ll just have to wait and see…


Bourbon chocolate ice cream “sliders” with spiked, salted praline
Ice cream adapted from Nigella Lawson
At least 6½ hours, counting time for ice cream to chill and harden
Makes generous 1 pint ice cream and approx. 1 cup praline
For bourbon chocolate ice cream:
⅔ cups sweetened condensed milk
1 cup heavy whipping cream
6 ounces double cream (I found mine at Whole Foods)
2 tablespoons bourbon
¼ cup chocolate syrup
For spiked, salted praline:
¾ cup whole hazelnuts
½ cup granulated sugar
2 tablespoons bourbon
1-2 tablespoons water, if needed
¾ teaspoon sea salt
For serving:
Split Hawaiian sweet rolls, one per person
1 pint raspberries (or fewer, depending on how many are enjoying), smashed with a fork (add a sprinkle of sugar if you want, but the rest of the dessert is pretty sweet)
Additional chocolate syrup, if desired, to decorate the plate


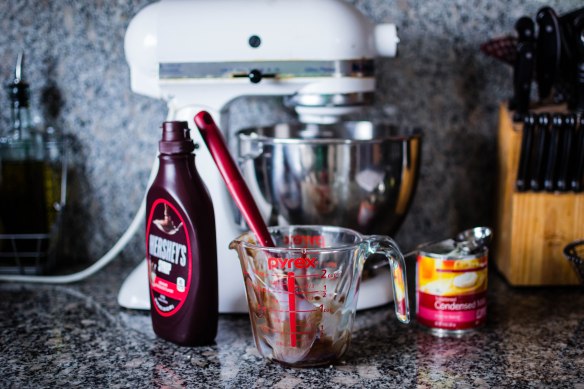
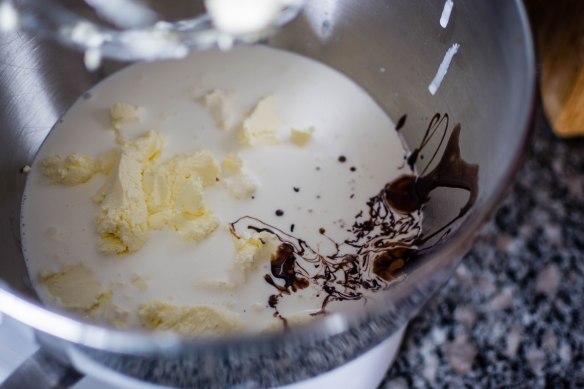
  • To make the ice cream, add sweetened condensed milk, whipping cream, double cream, 2 tablespoons bourbon, and ¼ cup chocolate syrup to the bowl of a stand mixer. You could do this in a regular mixing bowl with a hand-held mixer too.
  • Using the whisk attachment (or regular beaters), whip on medium speed until soft peaks form. For me, this took only 3-4 minutes. It may take more or less time for you depending on the speed of your mixer.
  • Using a rubber spatula, scrape the fluffy clouds into a freezer friendly container – I used a clean empty Greek yogurt tub – and freeze for at least 6 hours to let the mixture harden up.
  • While the ice cream chills, make the praline. Roast the ¾ cup of hazelnuts 10-12 minutes in a 350F oven, until they are slightly darker in color and have begun to release their oils. If you wish, dump them into a clean kitchen towel and rub vigorously to help remove their skins.
  • When the hazelnuts are roasted (and skinned, if desired), stir together the granulated sugar and the bourbon in a small pan or skillet. Cook over medium heat until the sugar is dissolved and the mixture is the color of dark maple syrup and almost smoking. If the mixture seems to seize up and crystalize while the sugar is dissolving, stir 1-2 tablespoons water. I found this eliminated the crystals handily.
  • Remove from heat, stir in the sea salt and the hazelnuts, then spread onto a piece of parchment paper and let cool for at least 1 hour.
  • Break up the solidified mixture into smaller pieces and whiz them into a powder in a food processor. Don’t go too far, though; since the nuts contain fat, if you continue processing eventually the powder will turn into a paste.
  • When the ice cream is set and the praline is ready, assemble your “sliders”: place a scoop of ice cream on the bottom of one of the split Hawaiian rolls. Sprinkle it generously with praline on all sides. Spread a dollop of smashed raspberries on the top half of your split Hawaiian roll, then smash together over the ice cream. If you wish, decorate the plate with additional chocolate syrup and maybe some whole raspberries, and eat immediately.