Trying-to-be-patient Brown Butter Brioche

Food Blog Jaunary 2015-0297It’s always interesting to see what the Twelve Loaves baking group decides on as a January theme. This is a time of renewal, of fresh beginnings, of starting again or trying again or reestablishing. Last year they asked for simplicity, prompting me to try my hand at sourdough, made by weight rather than volume measurements. This year, they asked for something a little more poetic but just as abstract: bake a loaf inspired by a New Year’s resolution.

Food Blog Jaunary 2015-0292I knew immediately I would make brioche. One of my New Year’s resolutions for 2015 is to be more patient. While this would be a good goal in any area of life (or perhaps all of them), for me, it’s very specific. I want to be more patient with Lucy when we take our daily walk. My dog-daughter will be twelve years old in the spring, and though she’s still very energetic and quite healthy, she has slowed down over the years. Some of this is age, but some is insistence on getting what she wants. For her, our outing is not a walk. It’s an extended sniff. She wants to stop at every bush, at every bench, at every blade of grass, it sometimes seems. This can easily push a two mile walk into an hour-long endeavor.

Fall and Winter 2014-0915Like most of us, though, I’m a busy person. At least I feel like I am. When I get home from work, after a brief decompression (read: Facebook and a snack), I want to walk Lucy, do a final check of my email inbox, and get on with cooking dinner. Ultimately, I want to get these things done so I can changed into pajamas and deposit myself on the couch. Sniffing every blade of grass impinges on this plan, so over the past year or so I found myself getting frustrated, and even quite angry when Lucy stopped, and stopped, and stopped again.

Food Blog Jaunary 2015-0265Food Blog Jaunary 2015-0266Food Blog Jaunary 2015-0267Food Blog Jaunary 2015-0268In November I was getting ready to snap at her about such a stop, and instead I stopped. Chelsea, she’s a dog. This is her daily chance to get outside and experience the world. She doesn’t understand what I’m even asking, let alone why I’m asking, and all my impatience is doing is making us both feel bad. And really, what’s the damage to my schedule if I do let her have an extended nasal examination of the things she’s most interested in? All told, three, maybe five minutes.

Food Blog Jaunary 2015-0269I can handle that.

So I am trying to be more patient with her, gently encouraging her to hustle along rather than snapping at her. I’m delivering commands in a calmer voice, and letting the sniff session go on an extra few seconds before delivering that command at all. I’m not at total karmic peace with the extra time spent yet, but I’m working on it.

Food Blog Jaunary 2015-0275Brioche is my bread project, then, because it’s a loaf that requires patience. Rich with eggs and loaded with butter, brioche is the “cake” from the famous quote misattributed to Marie Antoinette. To integrate the massive quantities of butter the loaf requires, most recipes detail a process of bringing the fat to just the right temperature and incorporating it into the dough a maddening single tablespoon at a time. Too cold, and the butter won’t mix in. Too warm, and it will collapse the dough into a soupy mess. Too much at once, and the dough will get greasy and separate unpleasantly. It takes, typically, a 20-30 minute knead time to get the gluten chains in the flour tangling nicely and then incorporate all of that butter. After this, a long, slow, cool rise time is required, in part to build flavor, in part to develop structure, and in part just to make it easier to handle – that butter has to chill down before the dough can be manipulated successfully.

Food Blog Jaunary 2015-0270Food Blog Jaunary 2015-0271Food Blog Jaunary 2015-0272By the time you are finally ready to bake the thing, a brioche has usually been under construction for the better part of a day, if not two (sponges and overnight refrigerated rises are common). But the result – a spongy tender, light-as-air crumb inside a deeply browned crunchy crust – is remarkable. It reminds me of challah, another egg-laden loaf requiring multiple rises, but is more finely textured and even a bit richer. If your gourmet burger arrives on a deeply, perfectly rounded bun so shiny it looks lacquered and leaves a sheen of fat on your fingertips when you set it back down on the plate with a sigh, you’ve had brioche. It’s a frequent choice for a truly decadent french toast, and I was prepared, with a cringe, to sink myself into making it.

Food Blog Jaunary 2015-0273
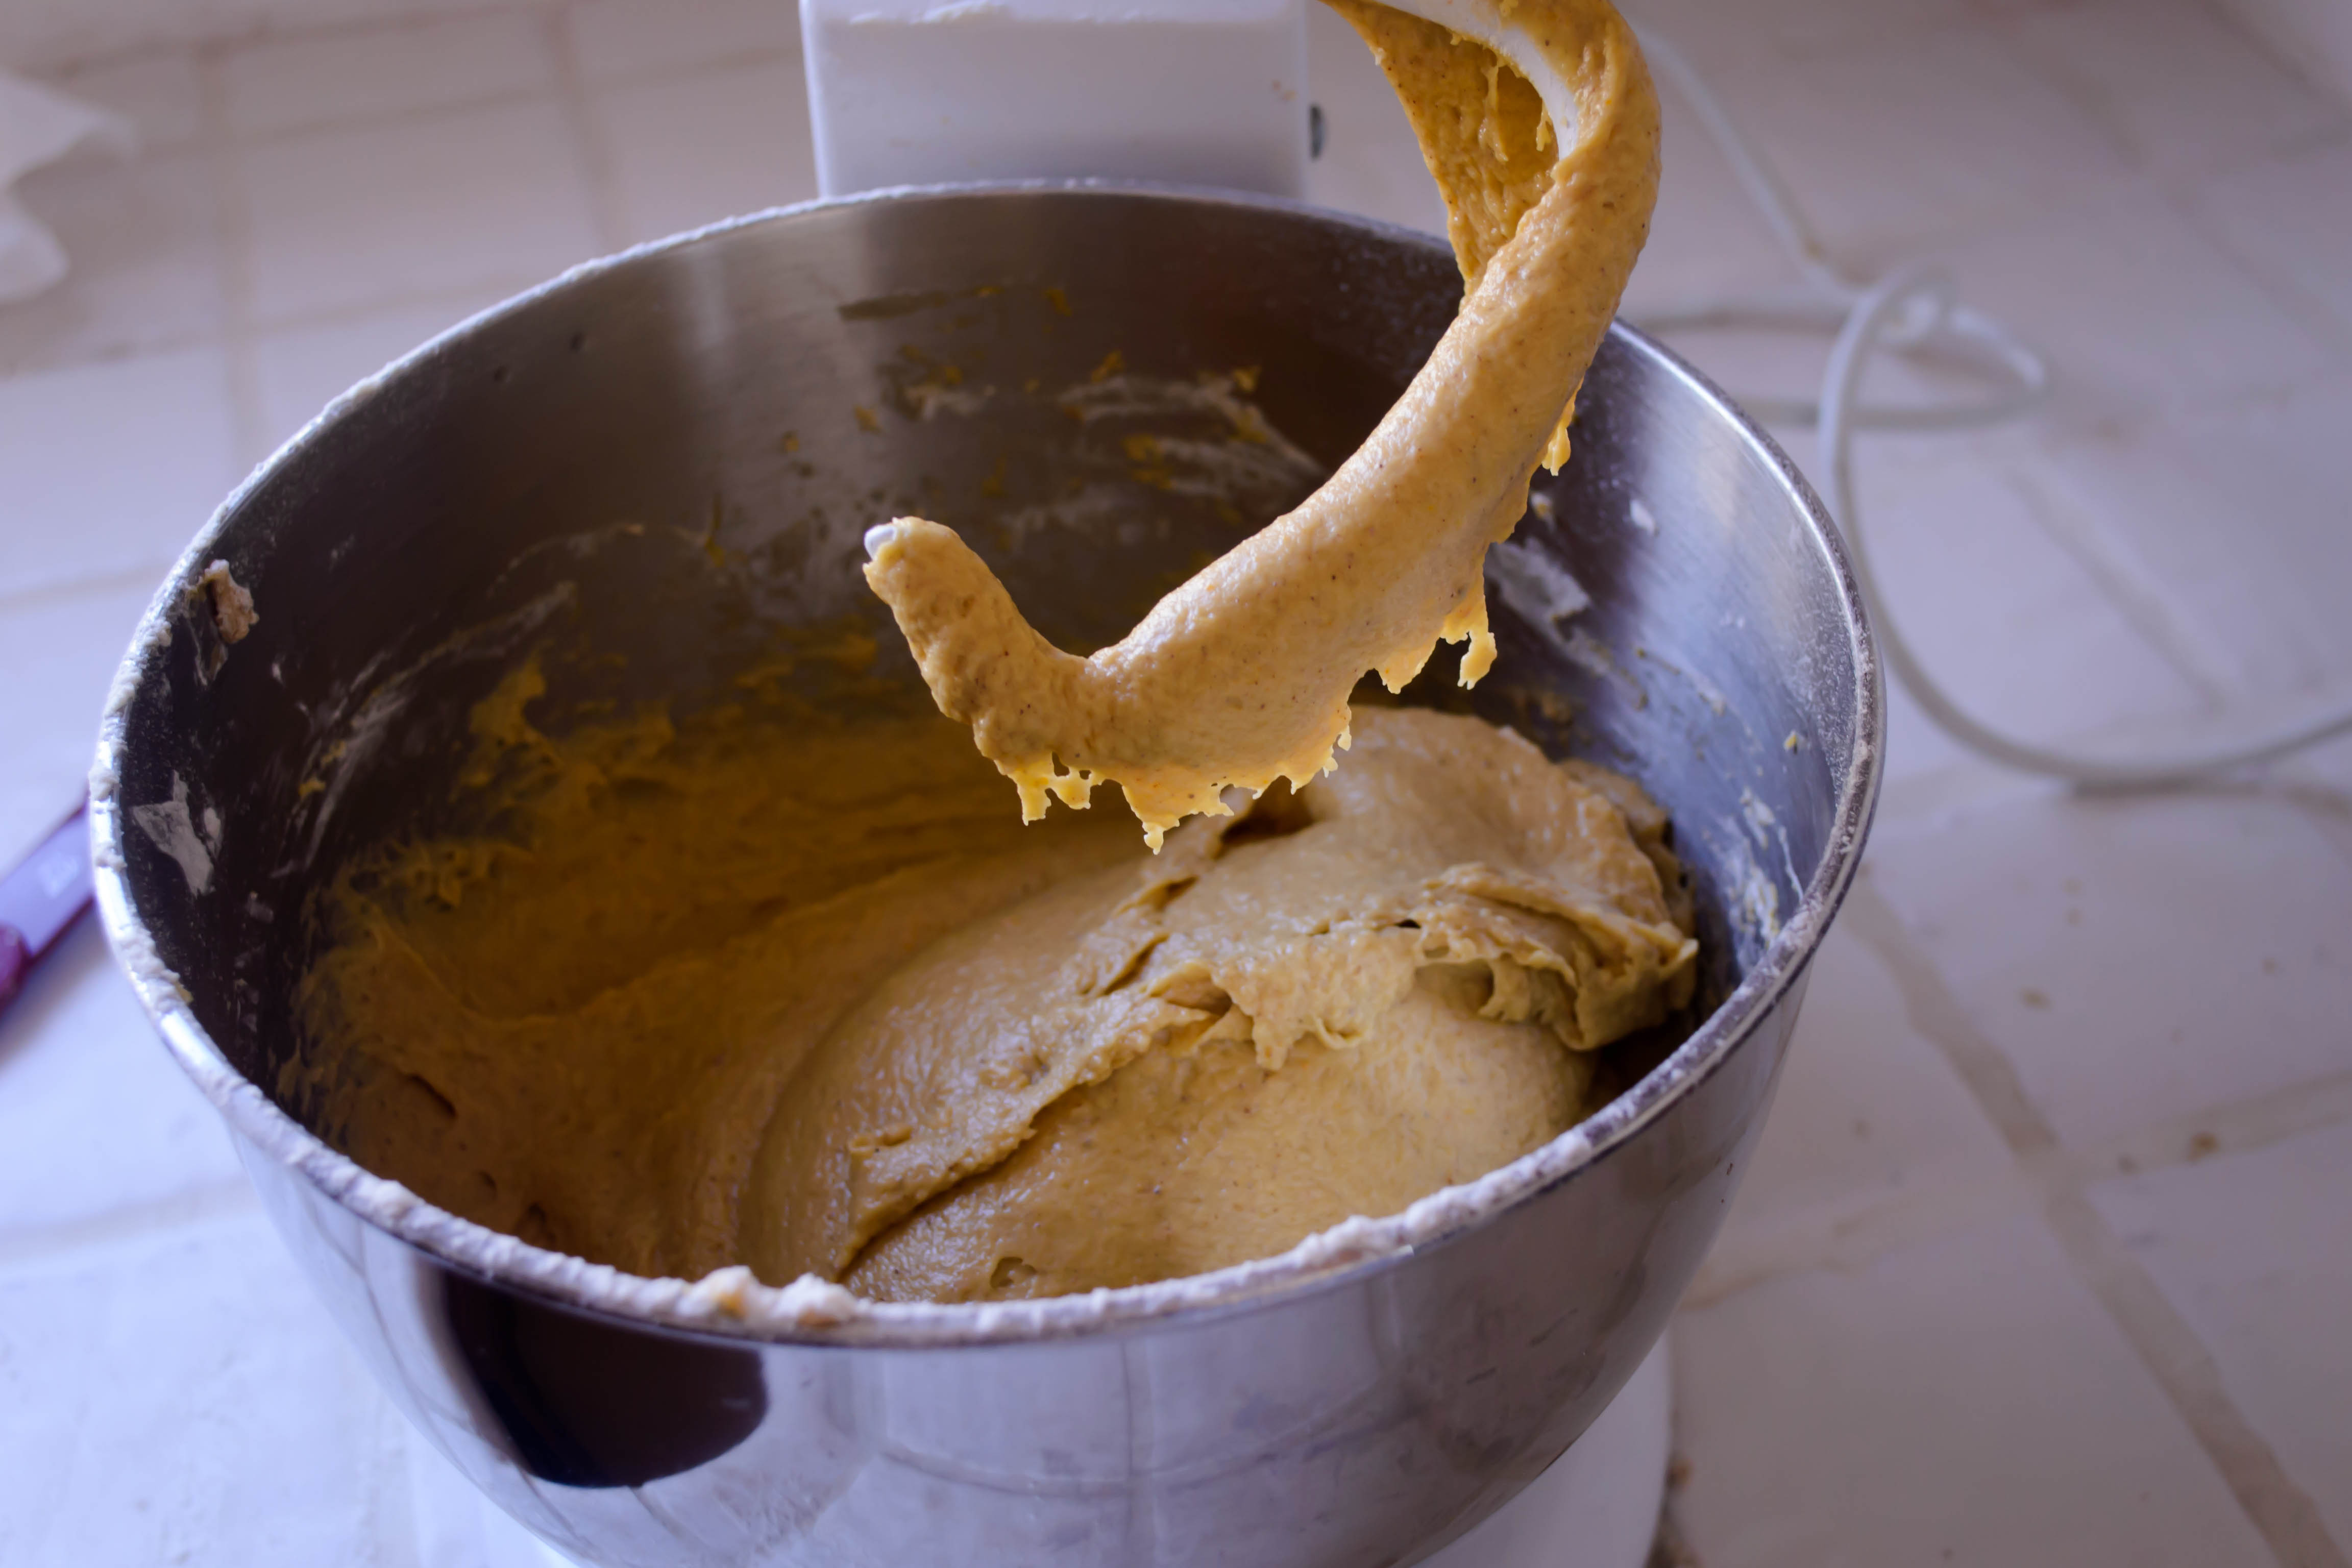
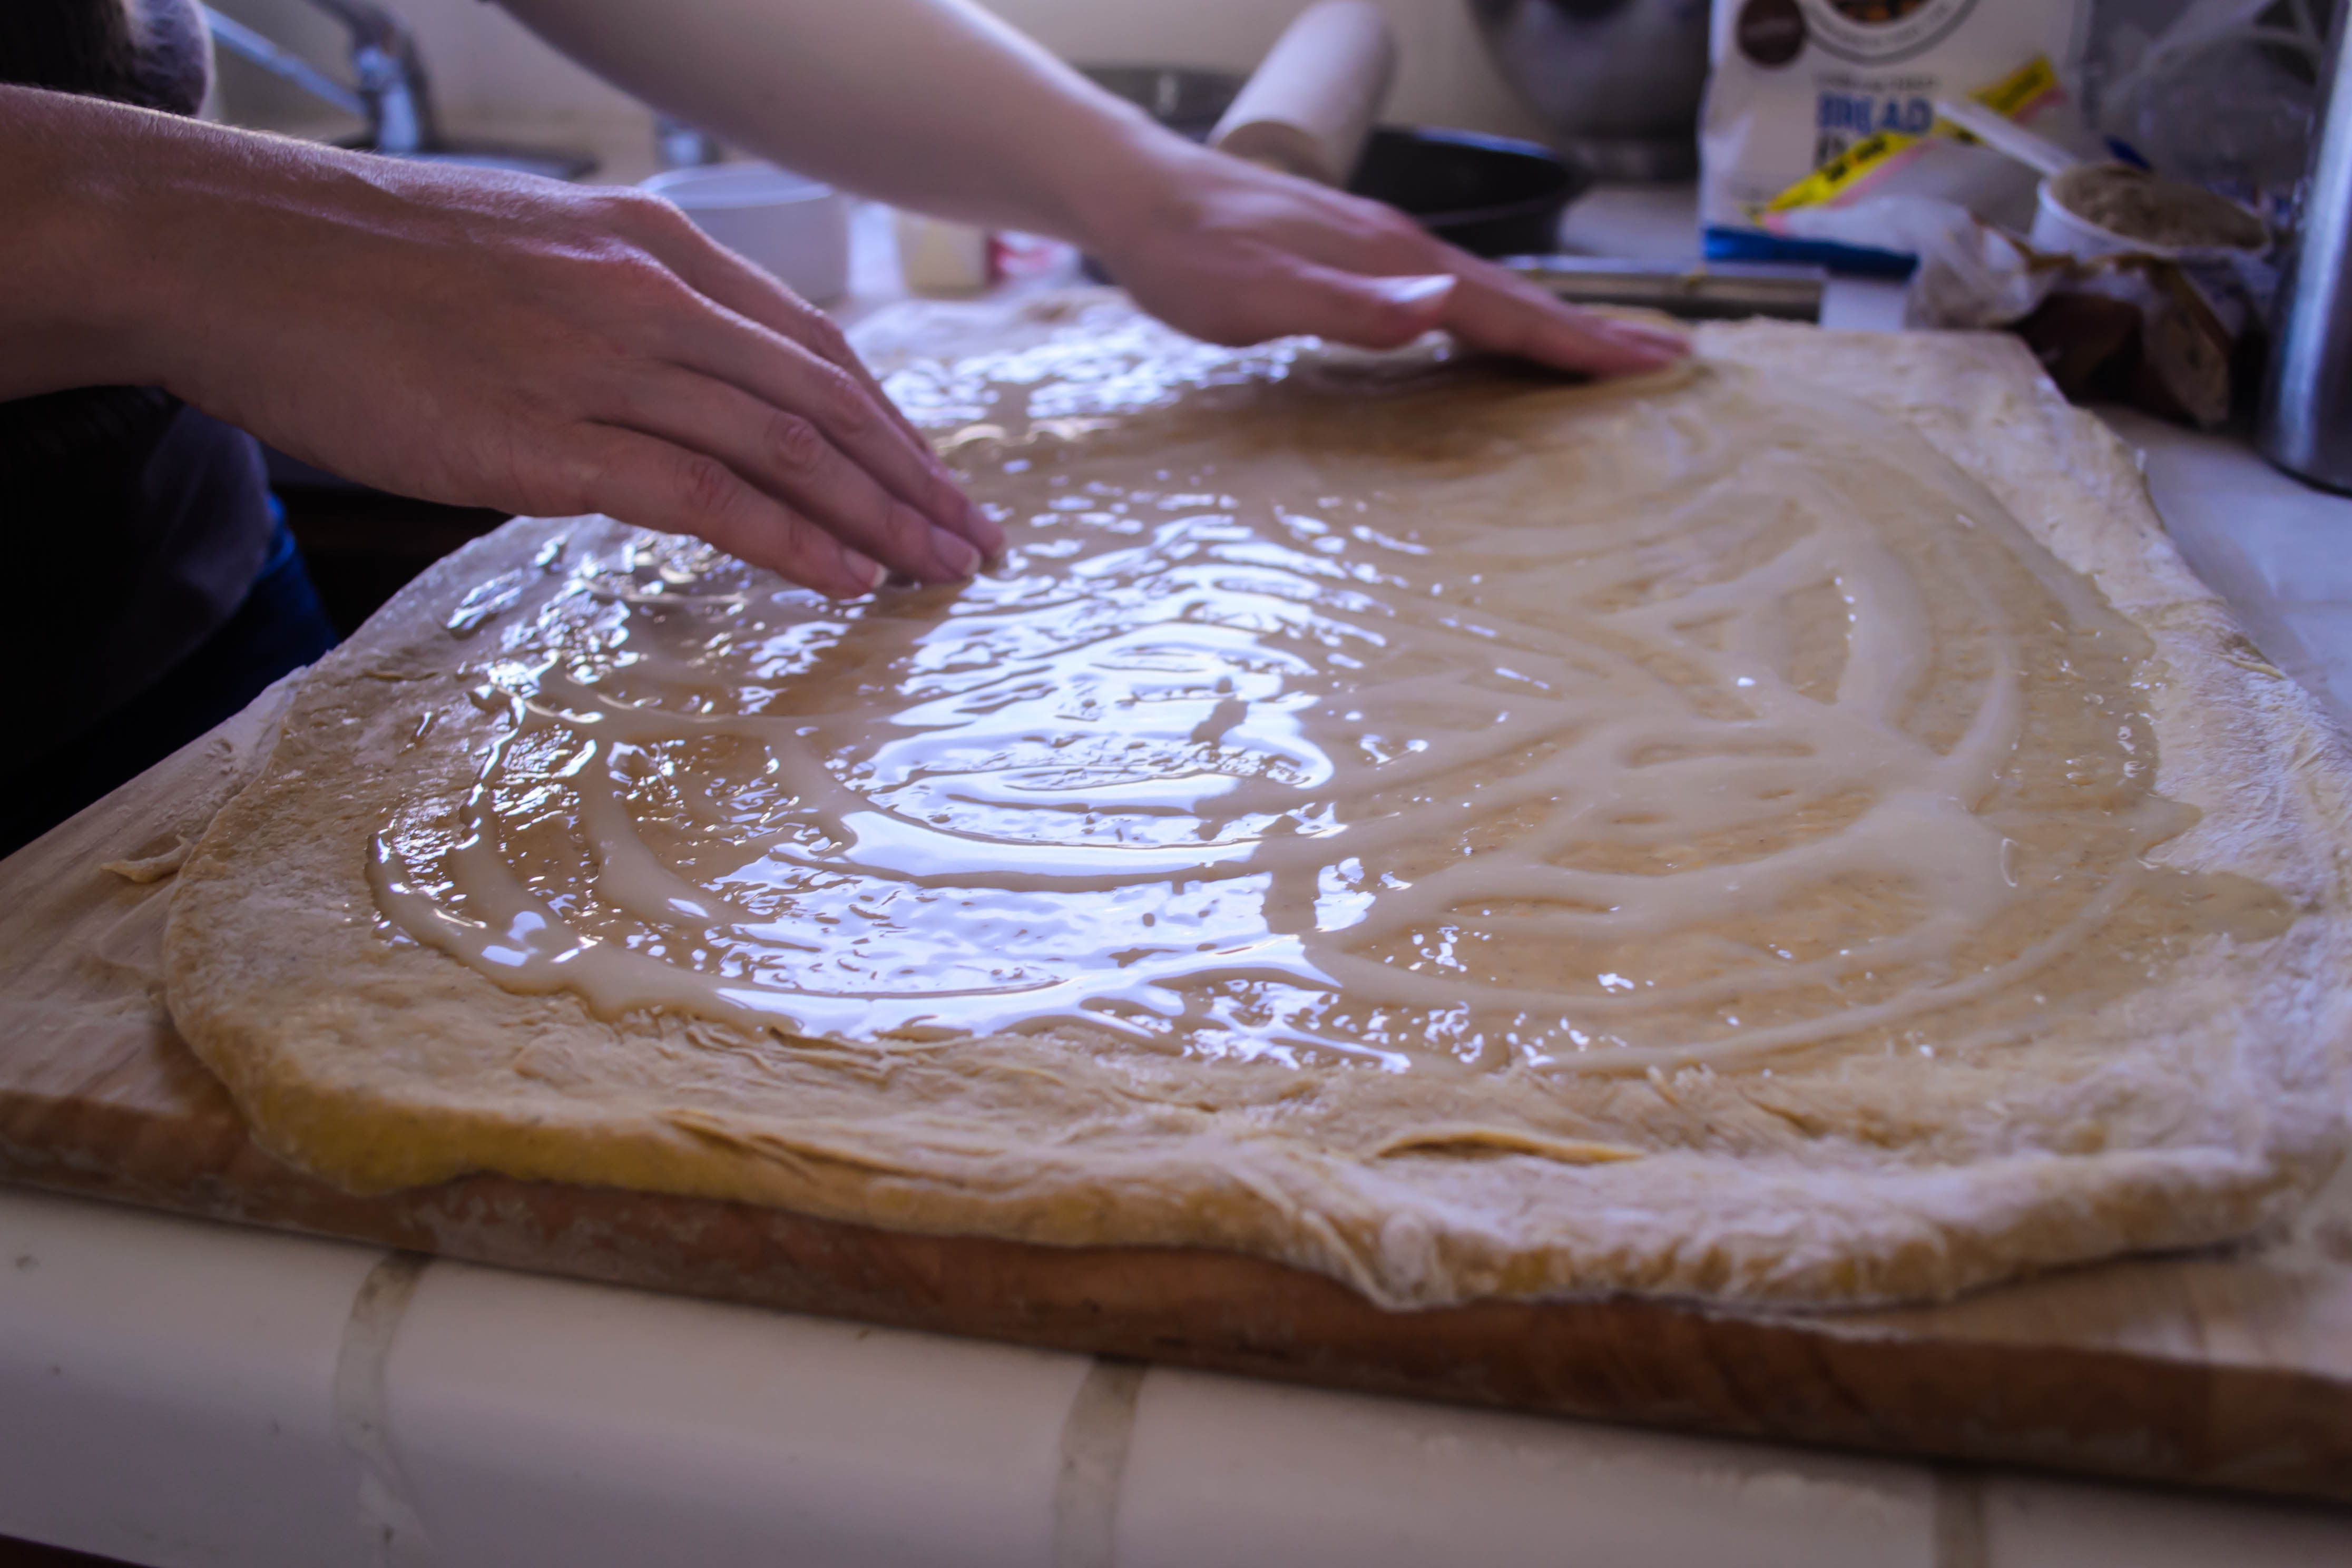
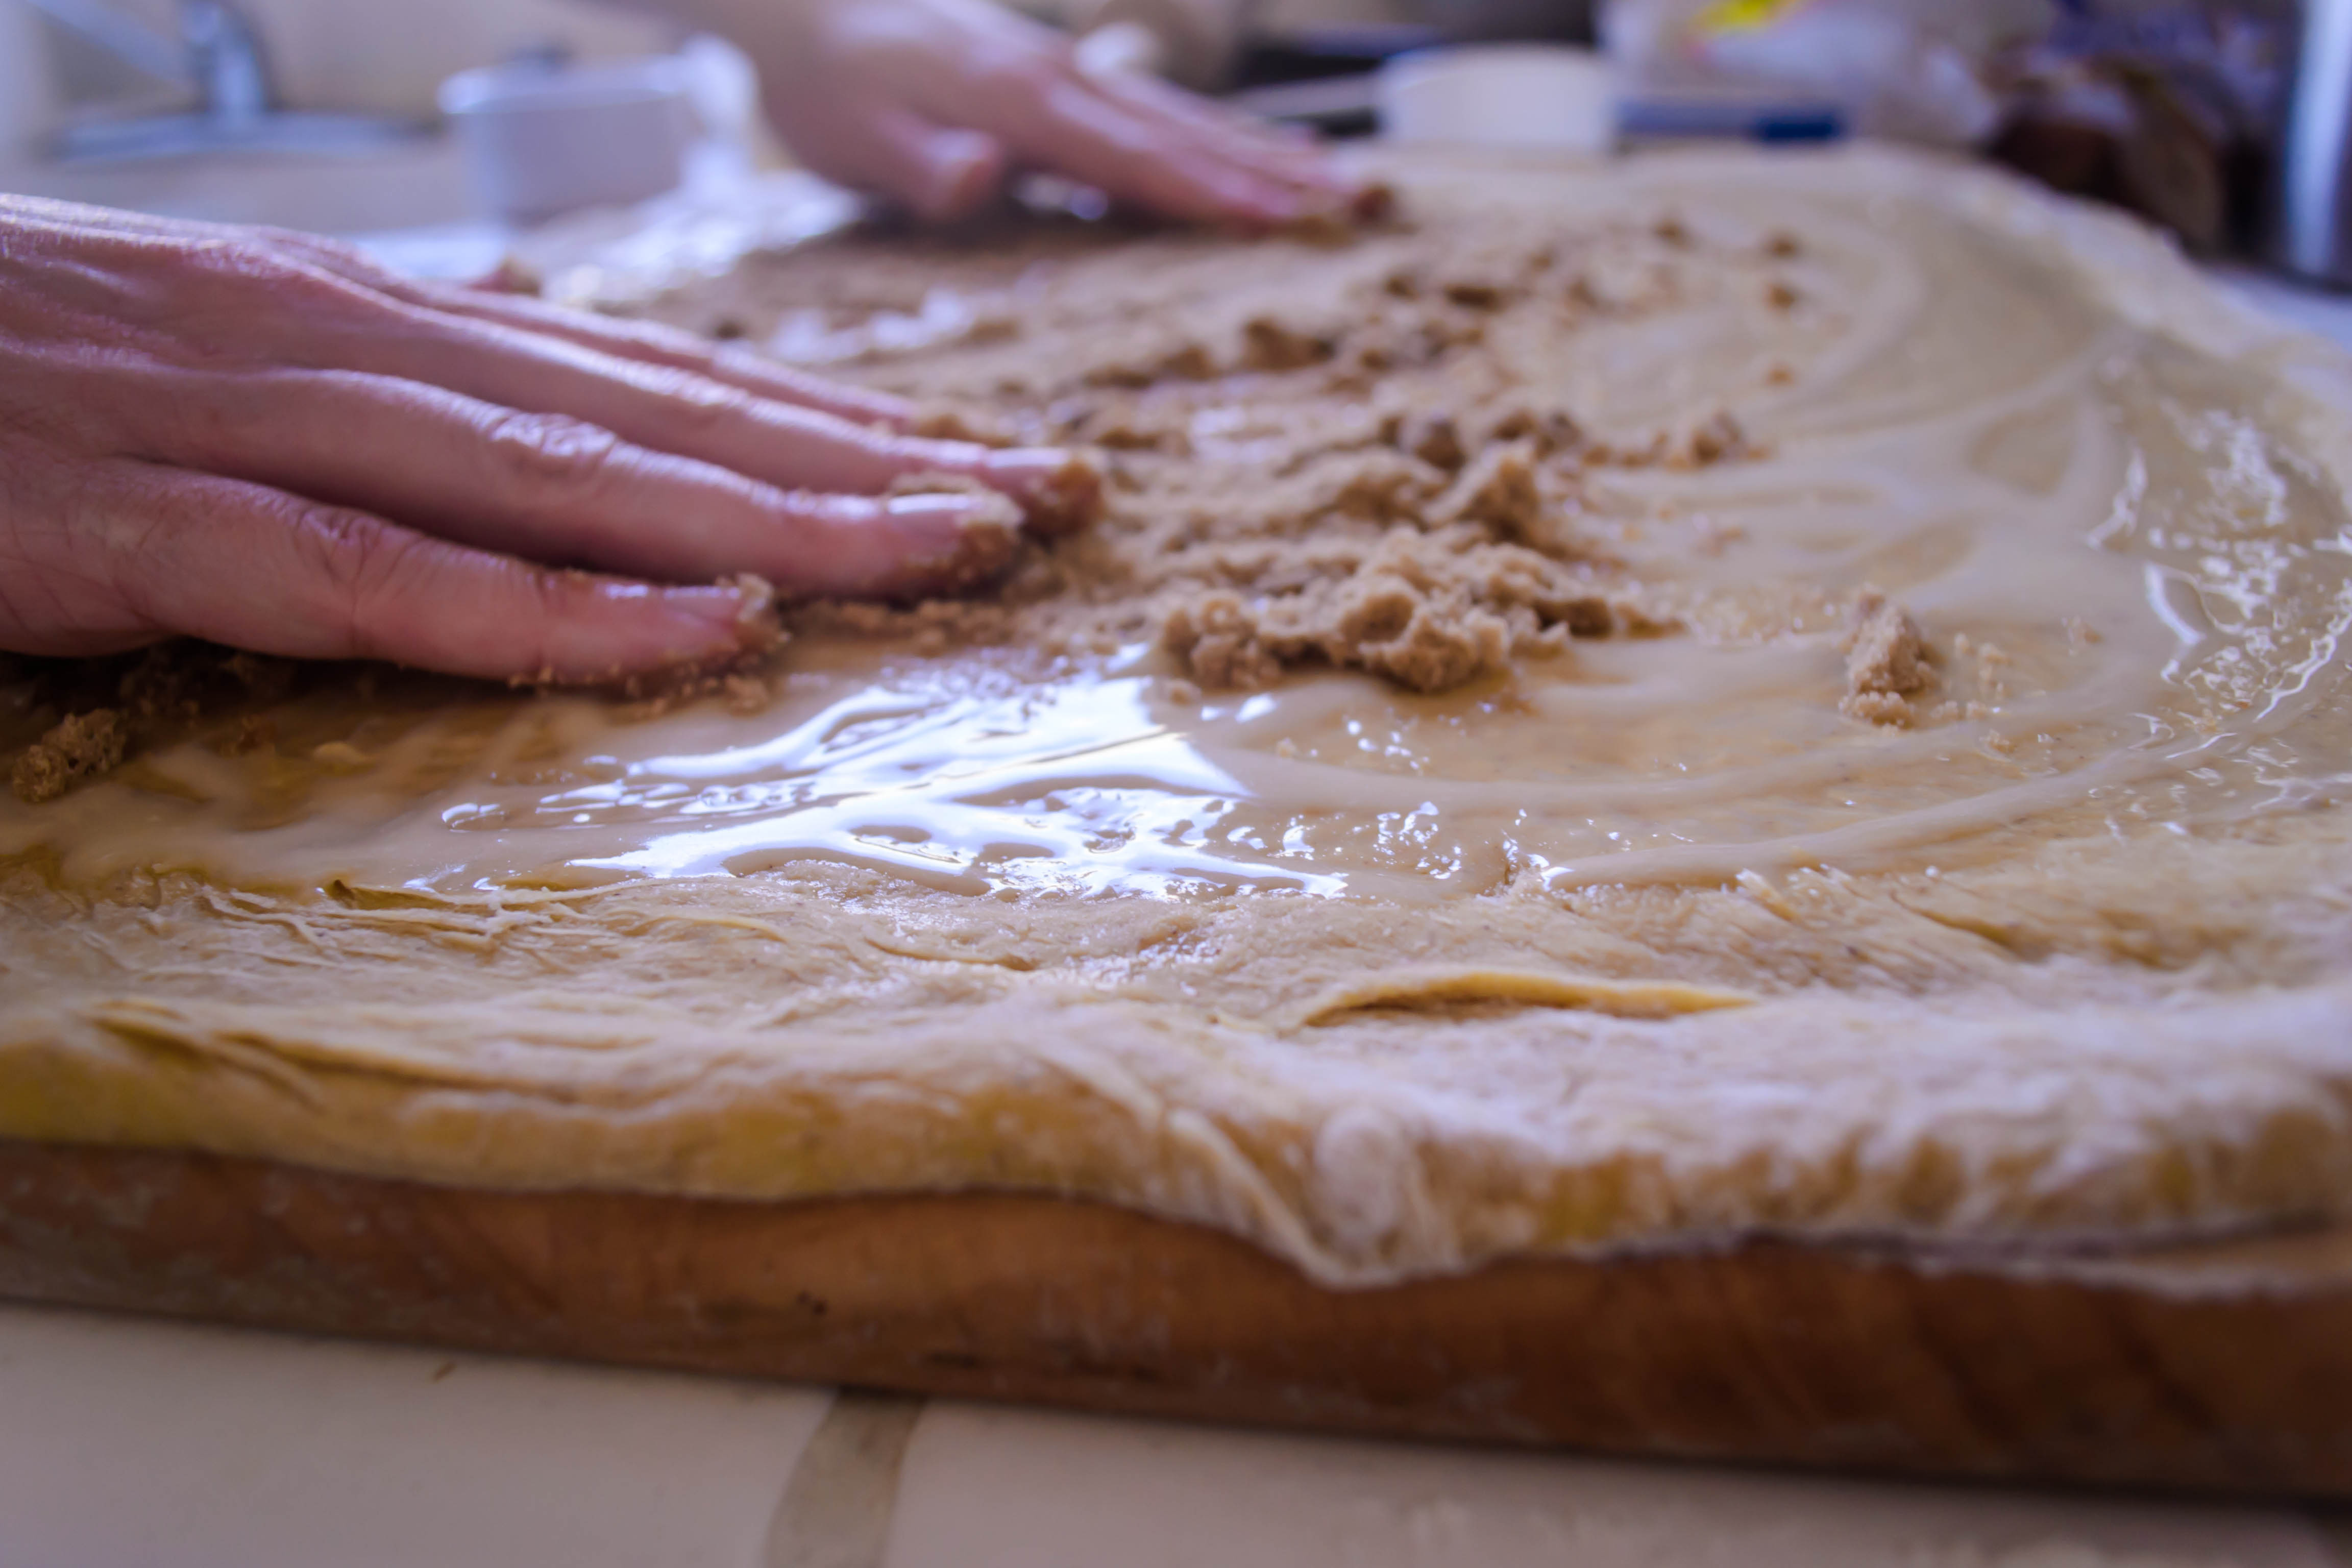
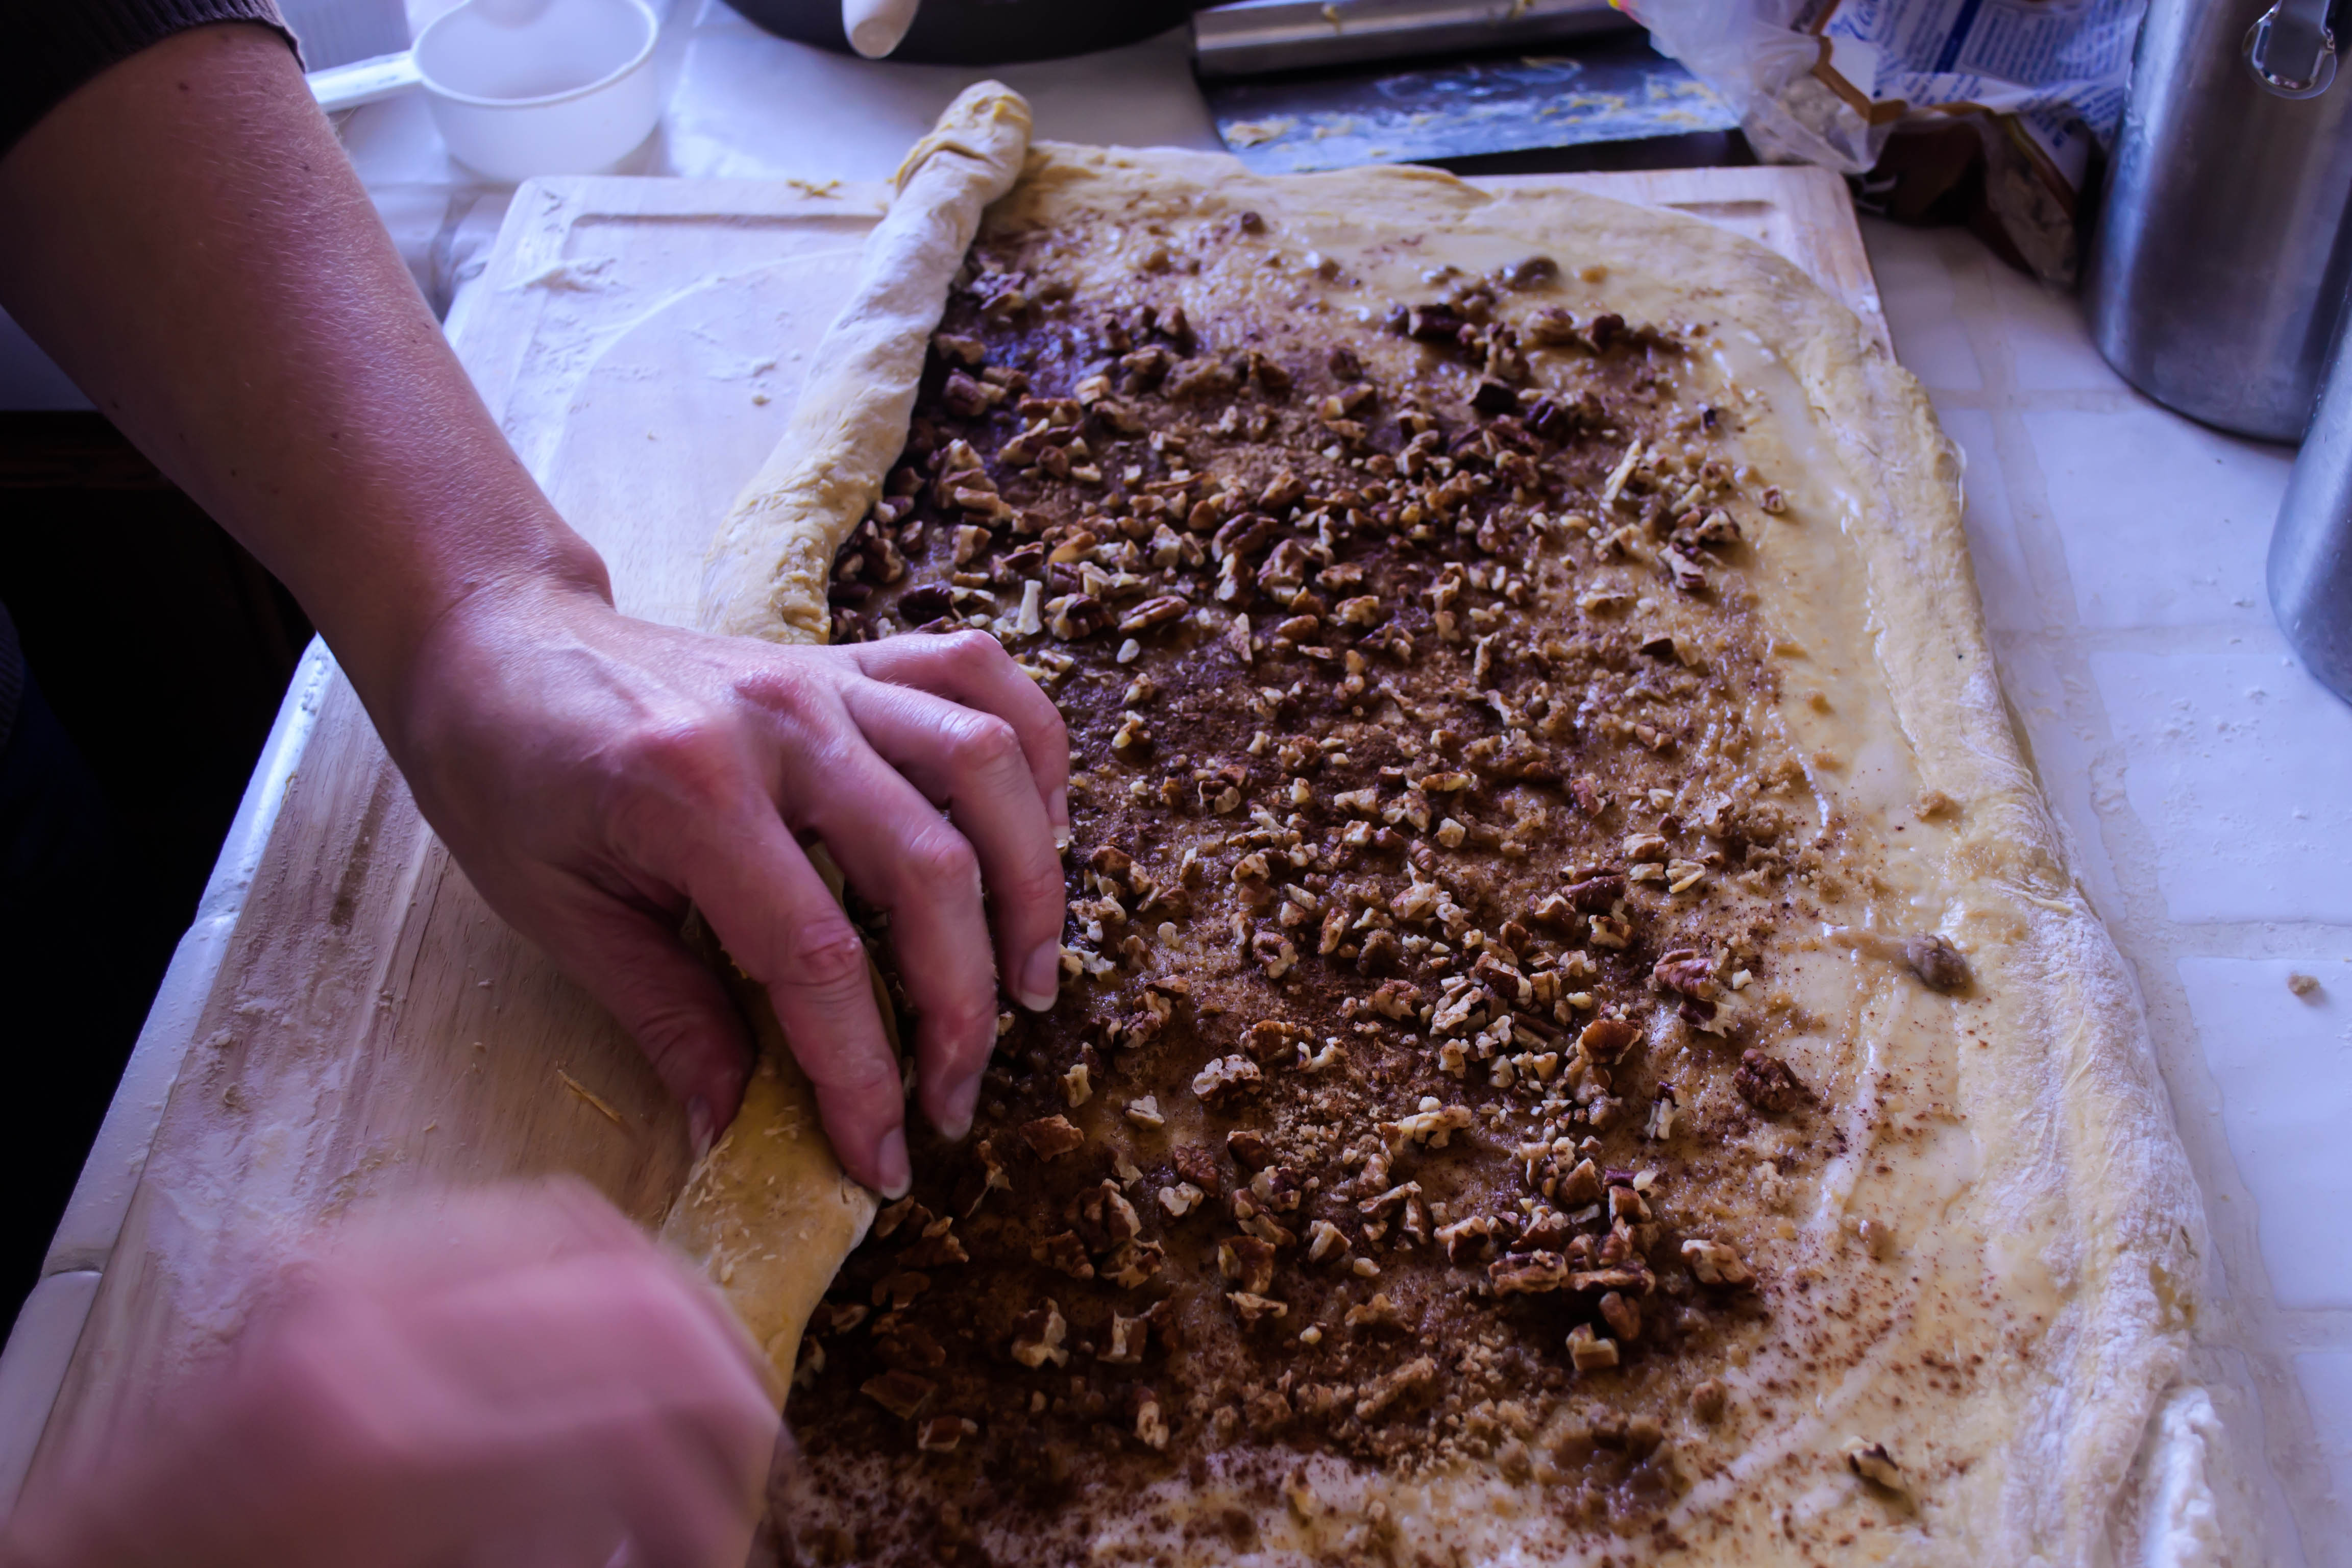
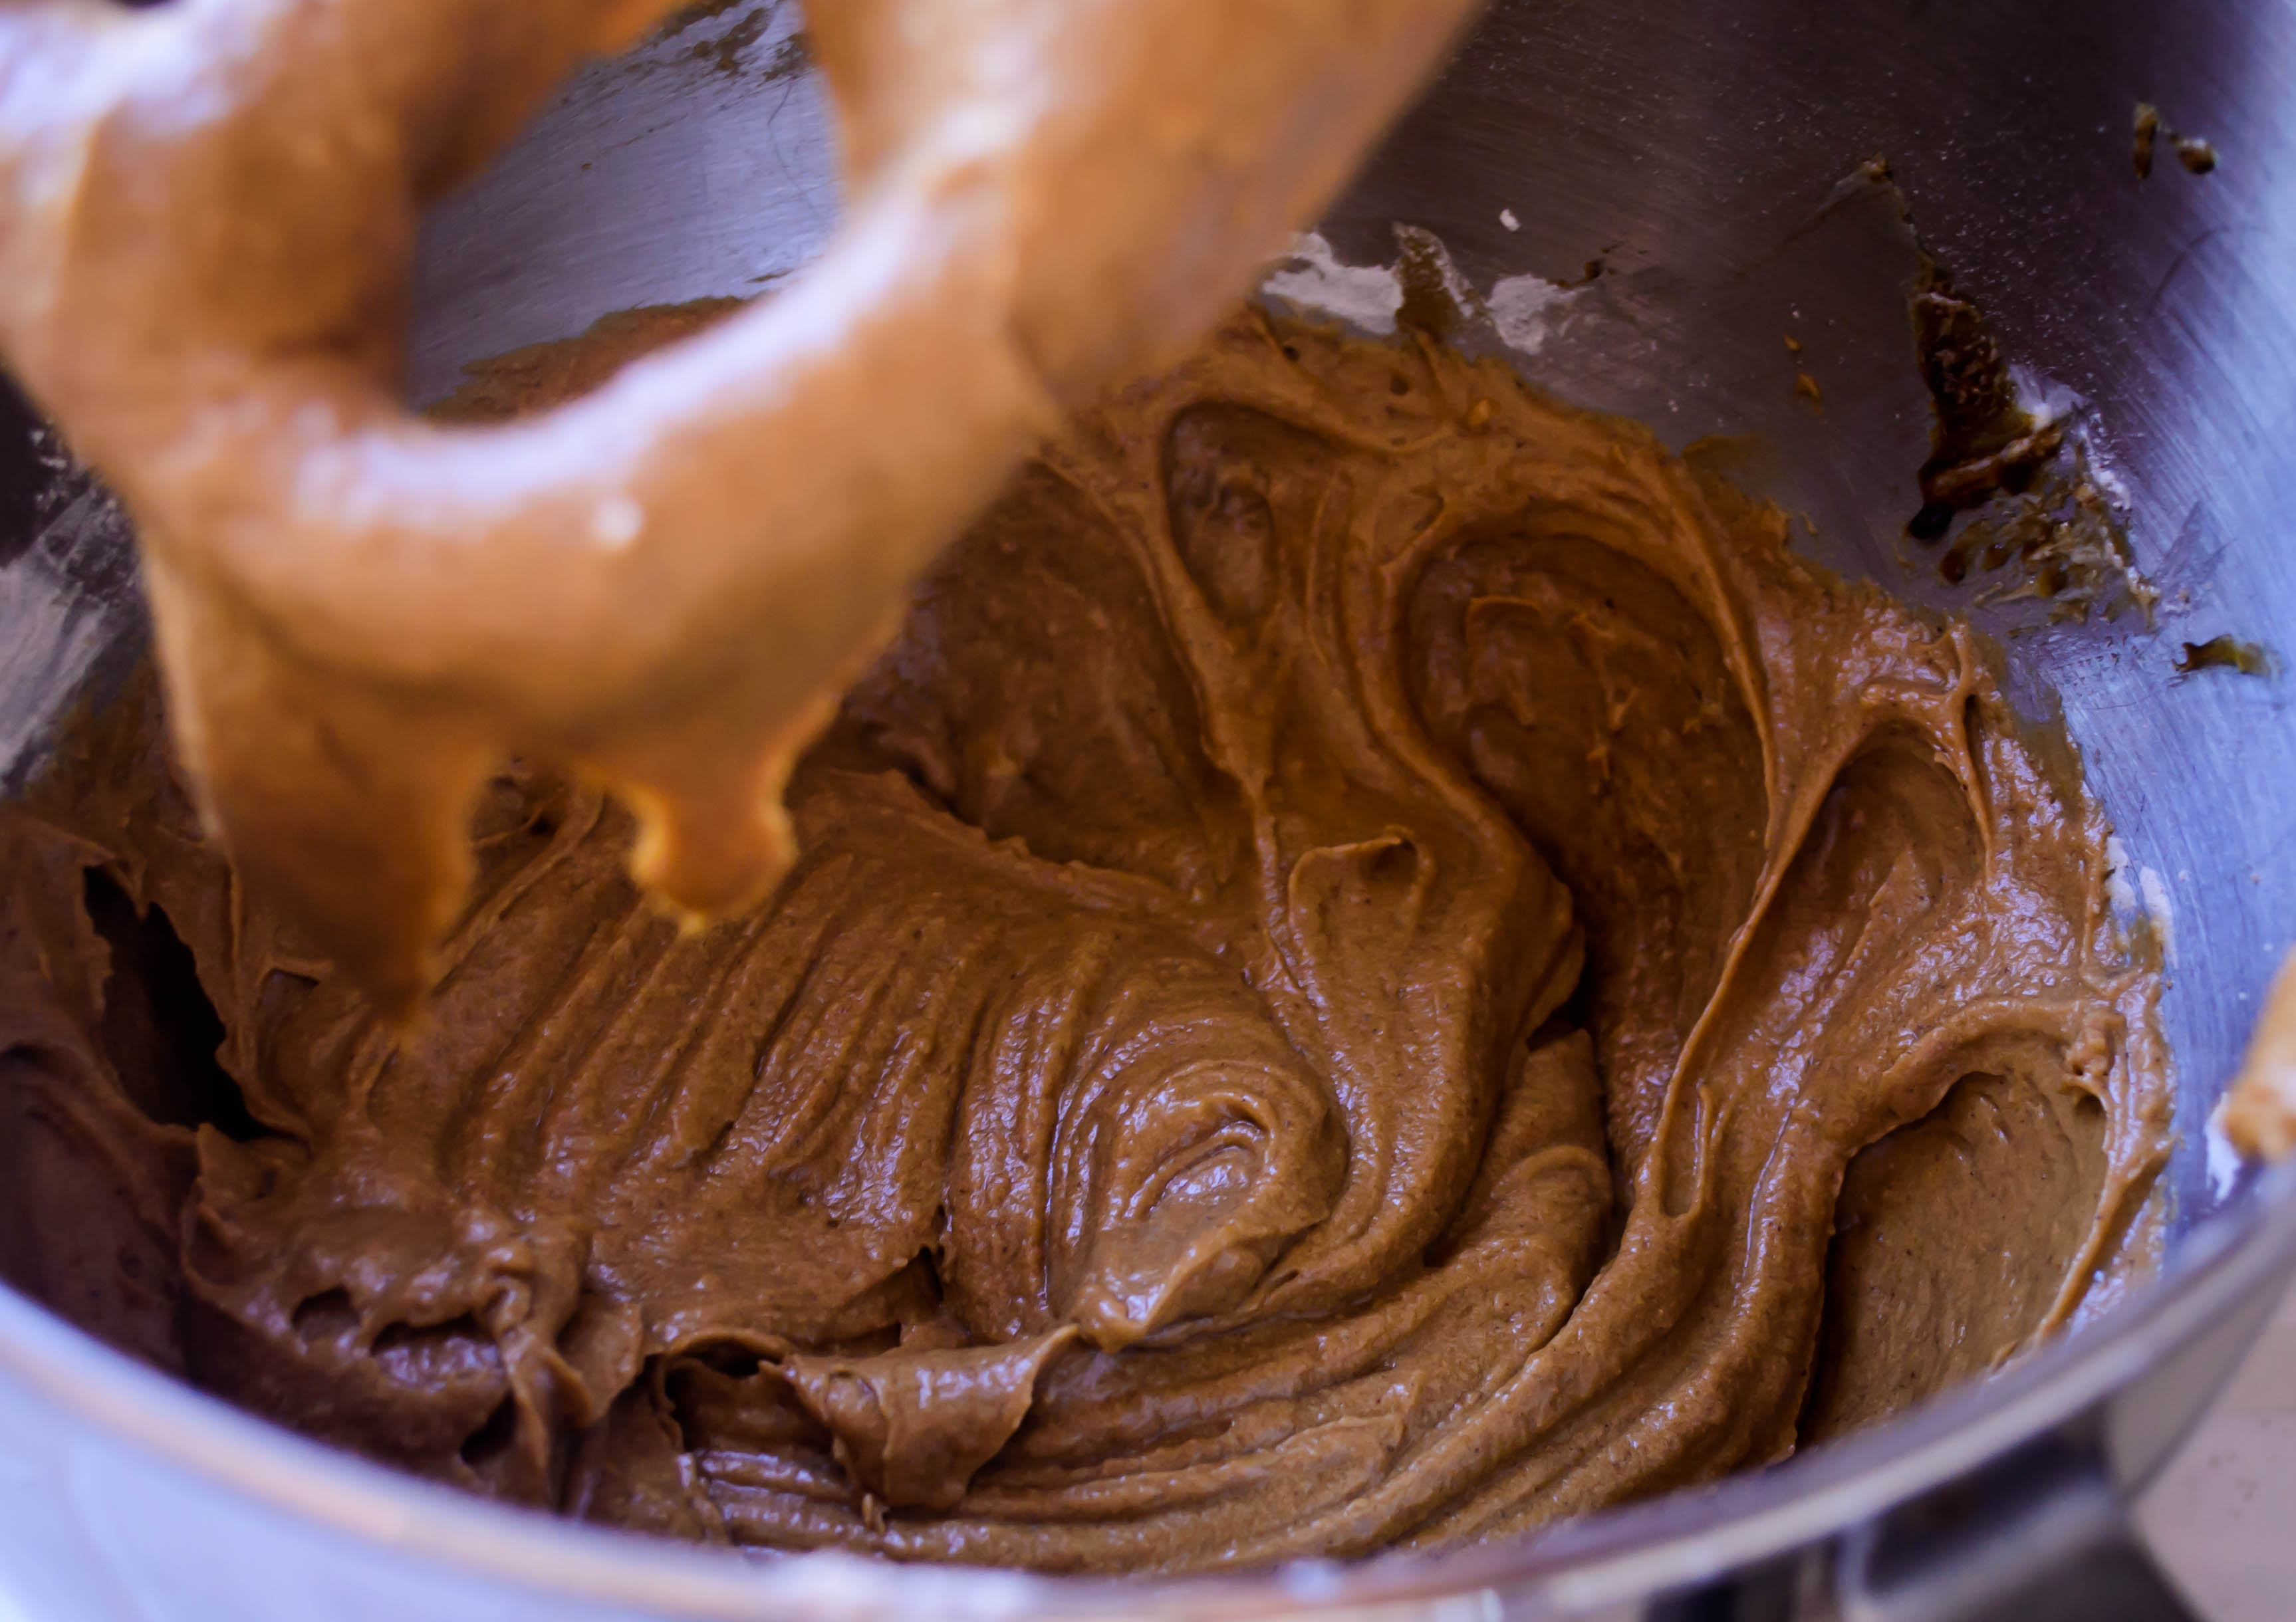
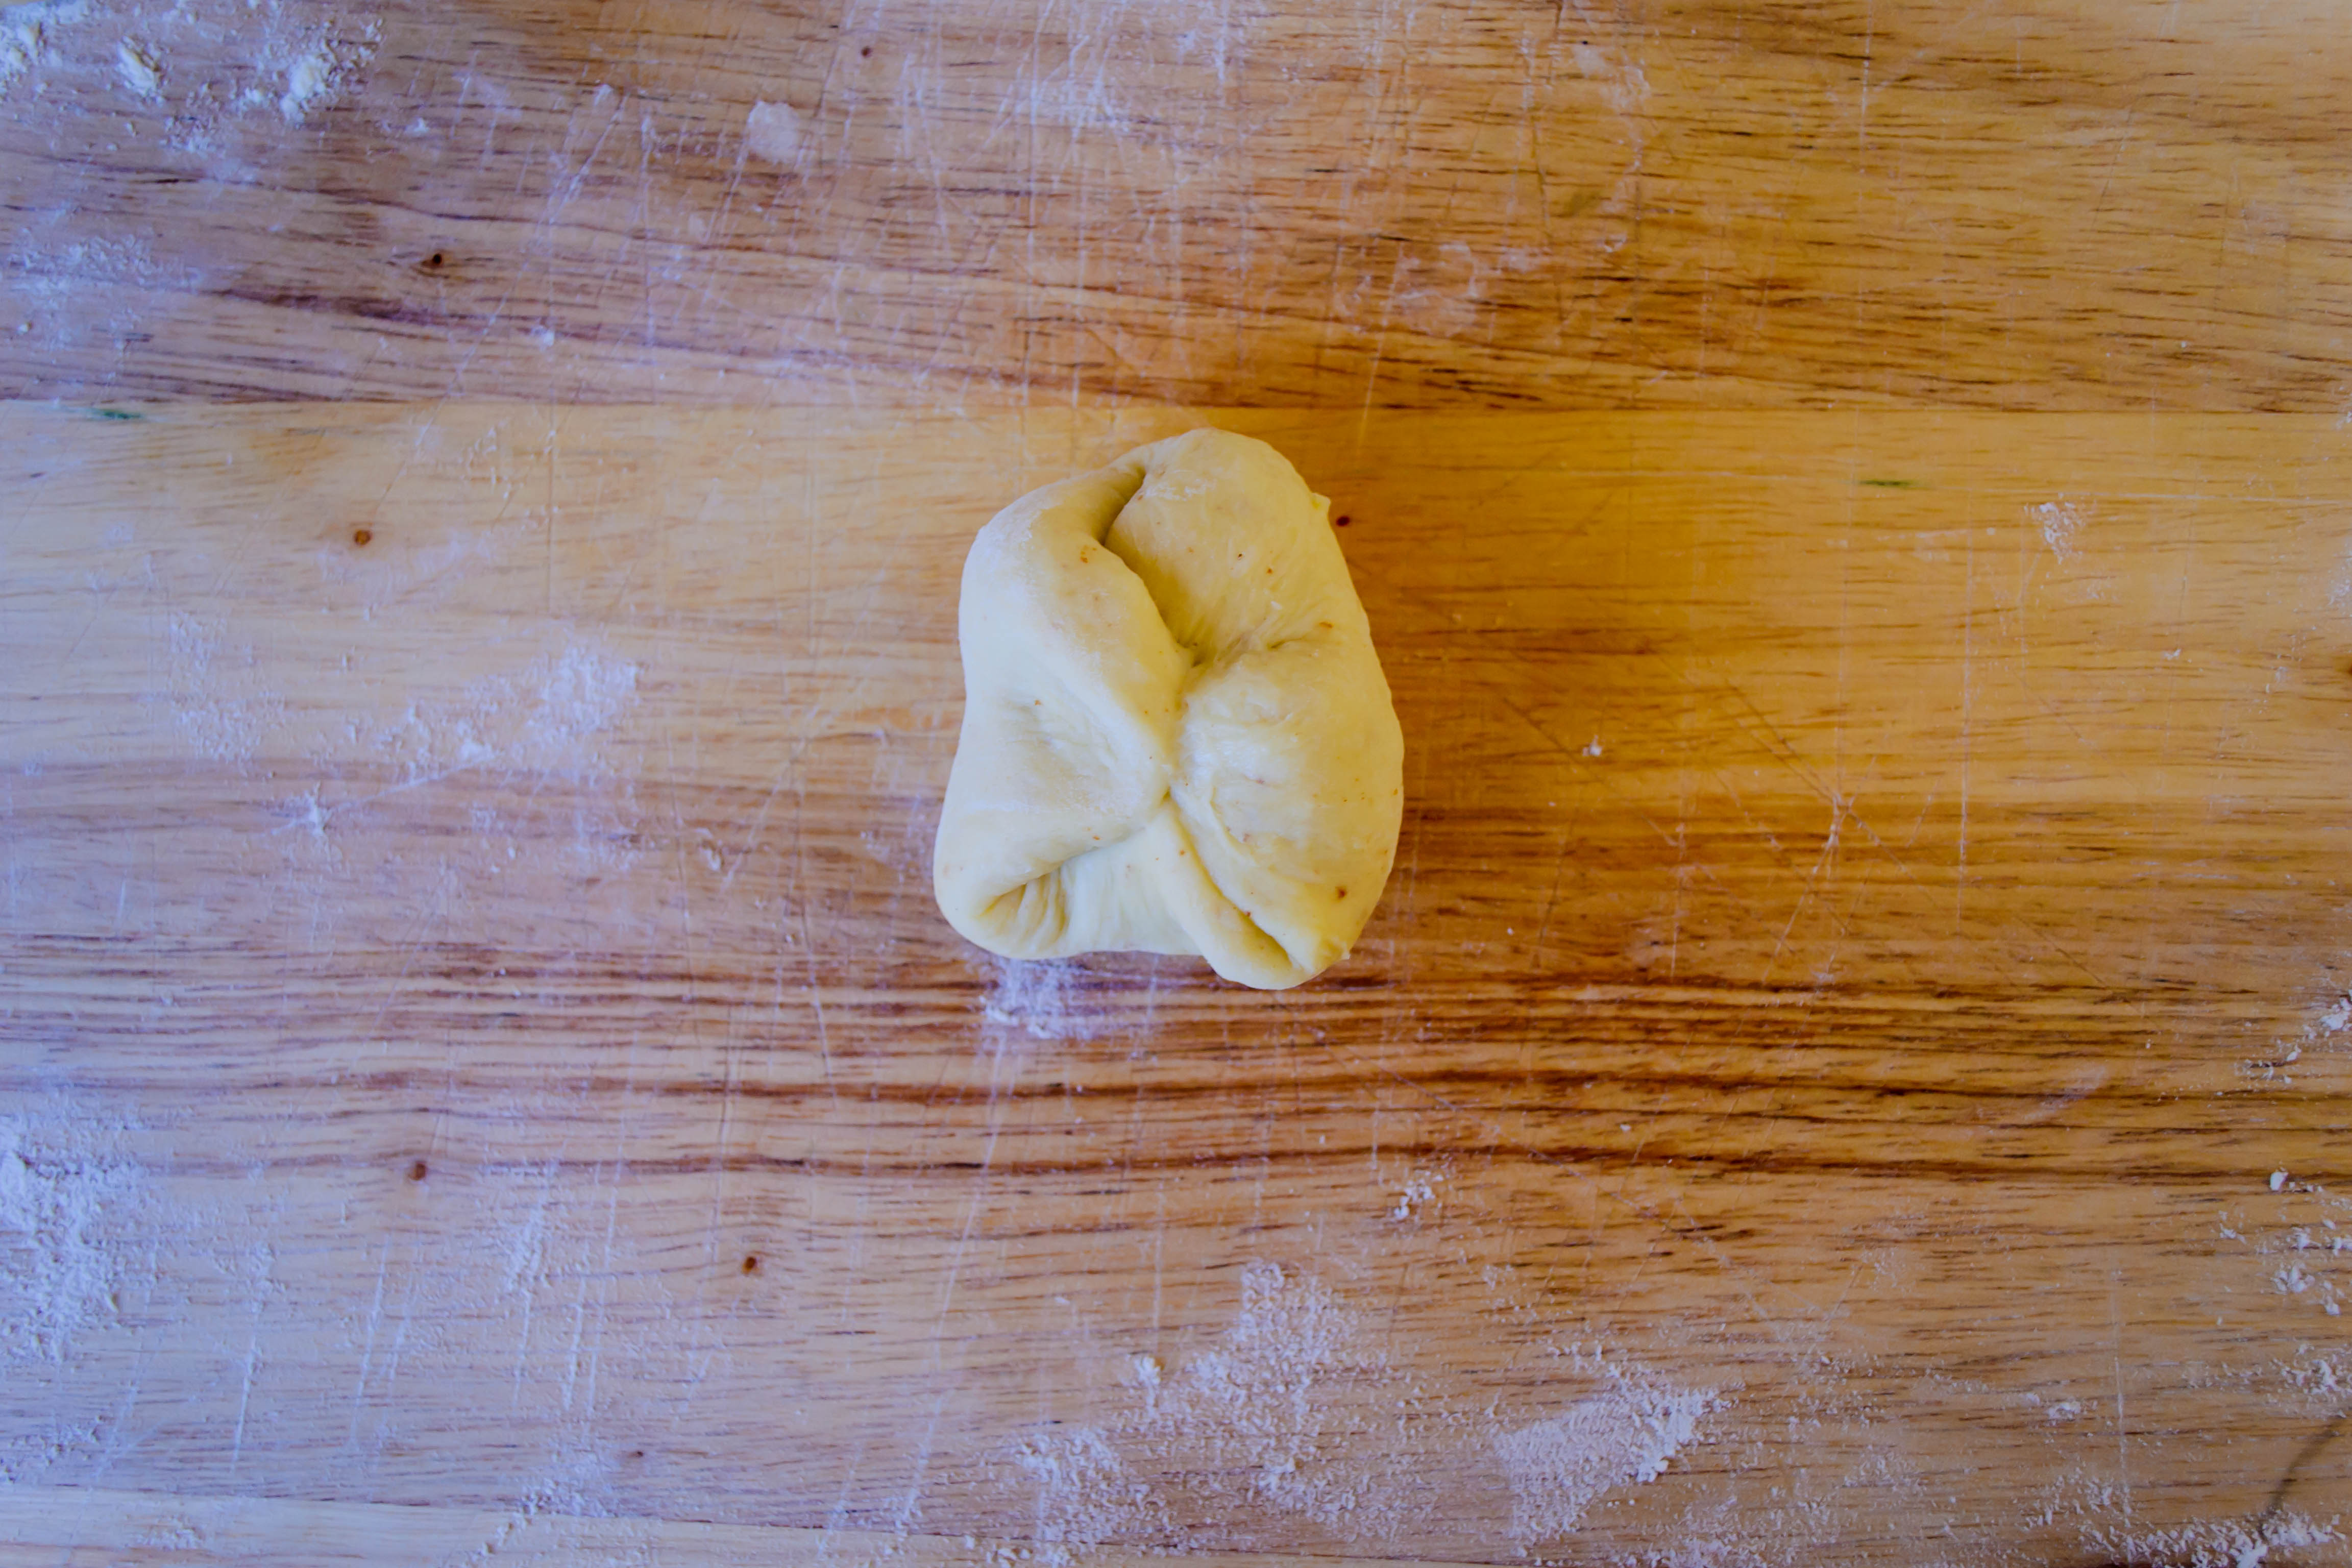
When I looked around at recipes for points of comparison, I came back, as I often do, to Cooks Illustrated, which featured a practically fool-proof take on brioche. To combat the frequent problems associated with the quantity and temperature of the butter, recipe developer Andrew Janjigian opts for a no-knead approach, relying on a combination of gentle folding of the dough (see photo series above), and time, to stimulate gluten production. The very wet dough brioche requires works well for this method, because the moister the dough, the better the enzymes in there activate the gluten. Janjigian explains that this no-knead method leads to another benefit: since we aren’t kneading the dough, we can’t spend 20 minutes mixing in all the butter. Melting it and stirring it in all at once works just fine.

Food Blog Jaunary 2015-0277As I read his explanation of the changes he’d made from the original and recognized the ease involved compared to the traditional procedure, I was almost sold. A small part of me protested that this might be cheating – that if I was really making something to represent the resolve to be more patient, I should go with the typical long knead, slow-and-steady incorporation of butter, and force myself to avoid shortcuts. But in reading the recipe again, I realized this was still going to be a long process. Even before chilling the dough overnight, I would need to perform a series of folds on the sticky, wet mass I’d created to help activate the gluten. Using large chunks of my Friday and Saturday to put this together, attend to timers, coordinate myself through the rising and proofing process, and get through the agonizing final two hours of waiting for the baked loaves to cool enough for slicing, was going to take plenty of patience. I’m only human, and it’s only January. If I’m going to be successful in this resolution, baby steps might be the way to go.

Food Blog Jaunary 2015-0278Food Blog Jaunary 2015-0279Food Blog Jaunary 2015-0280Food Blog Jaunary 2015-0281
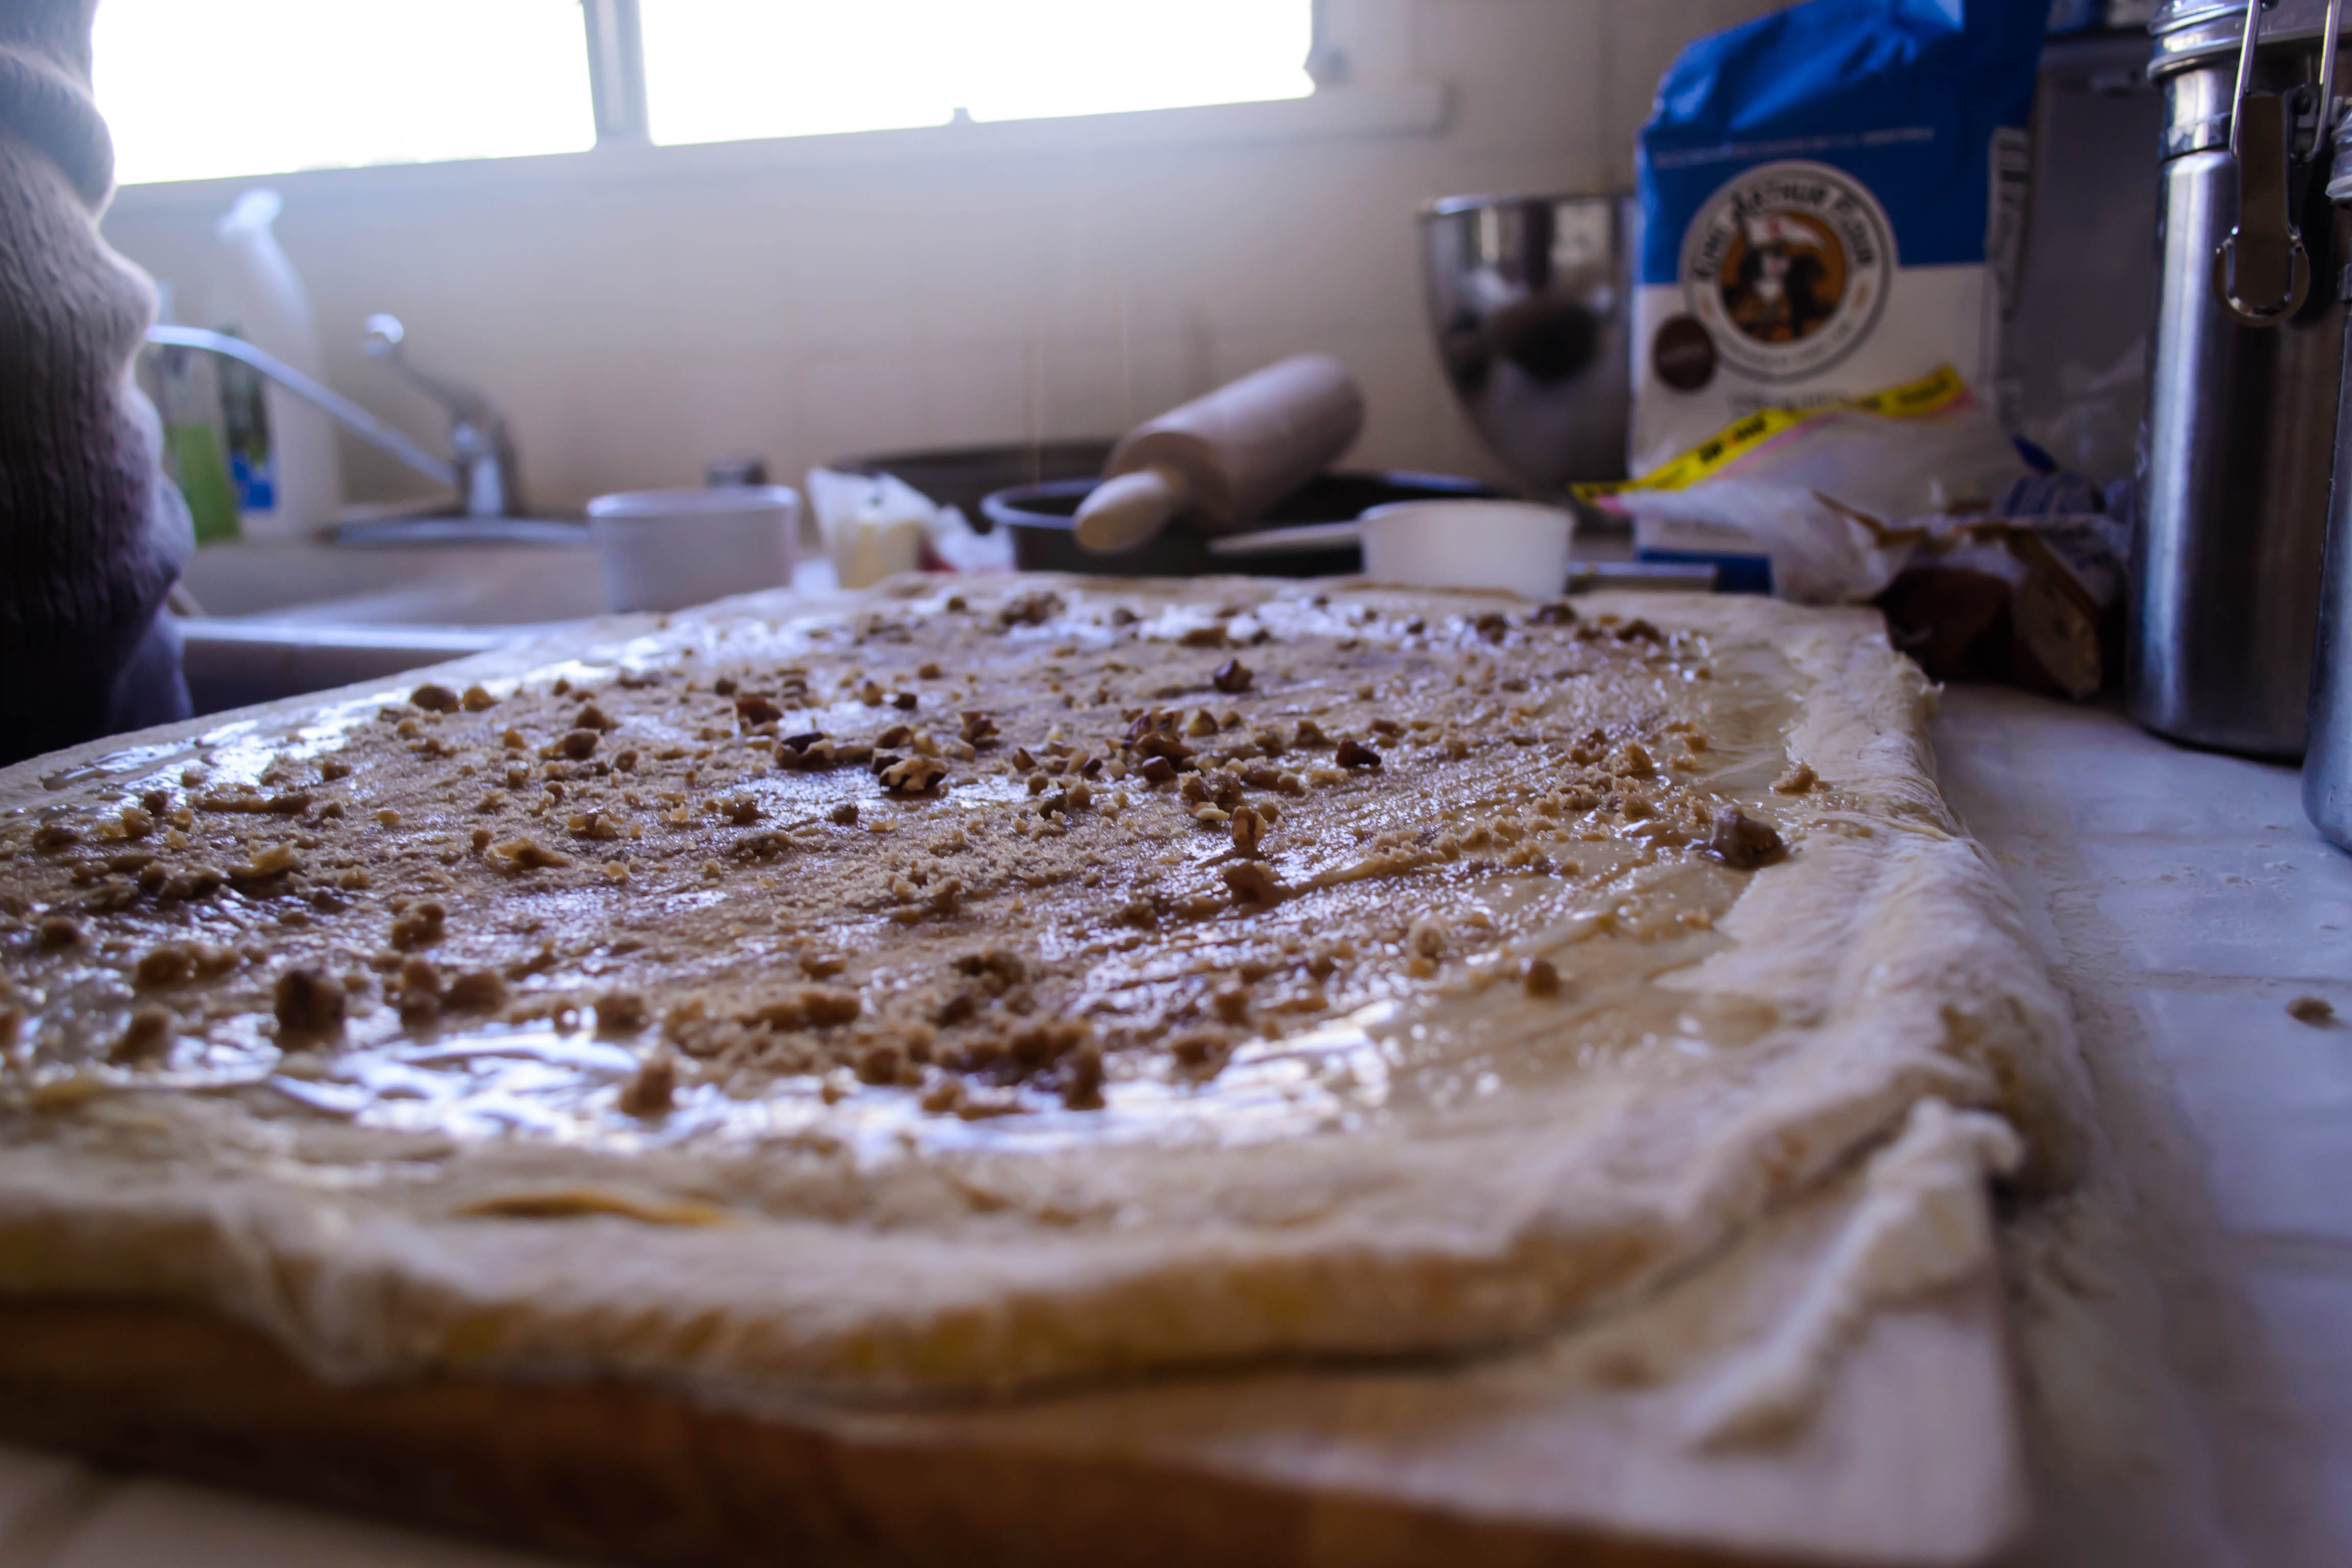
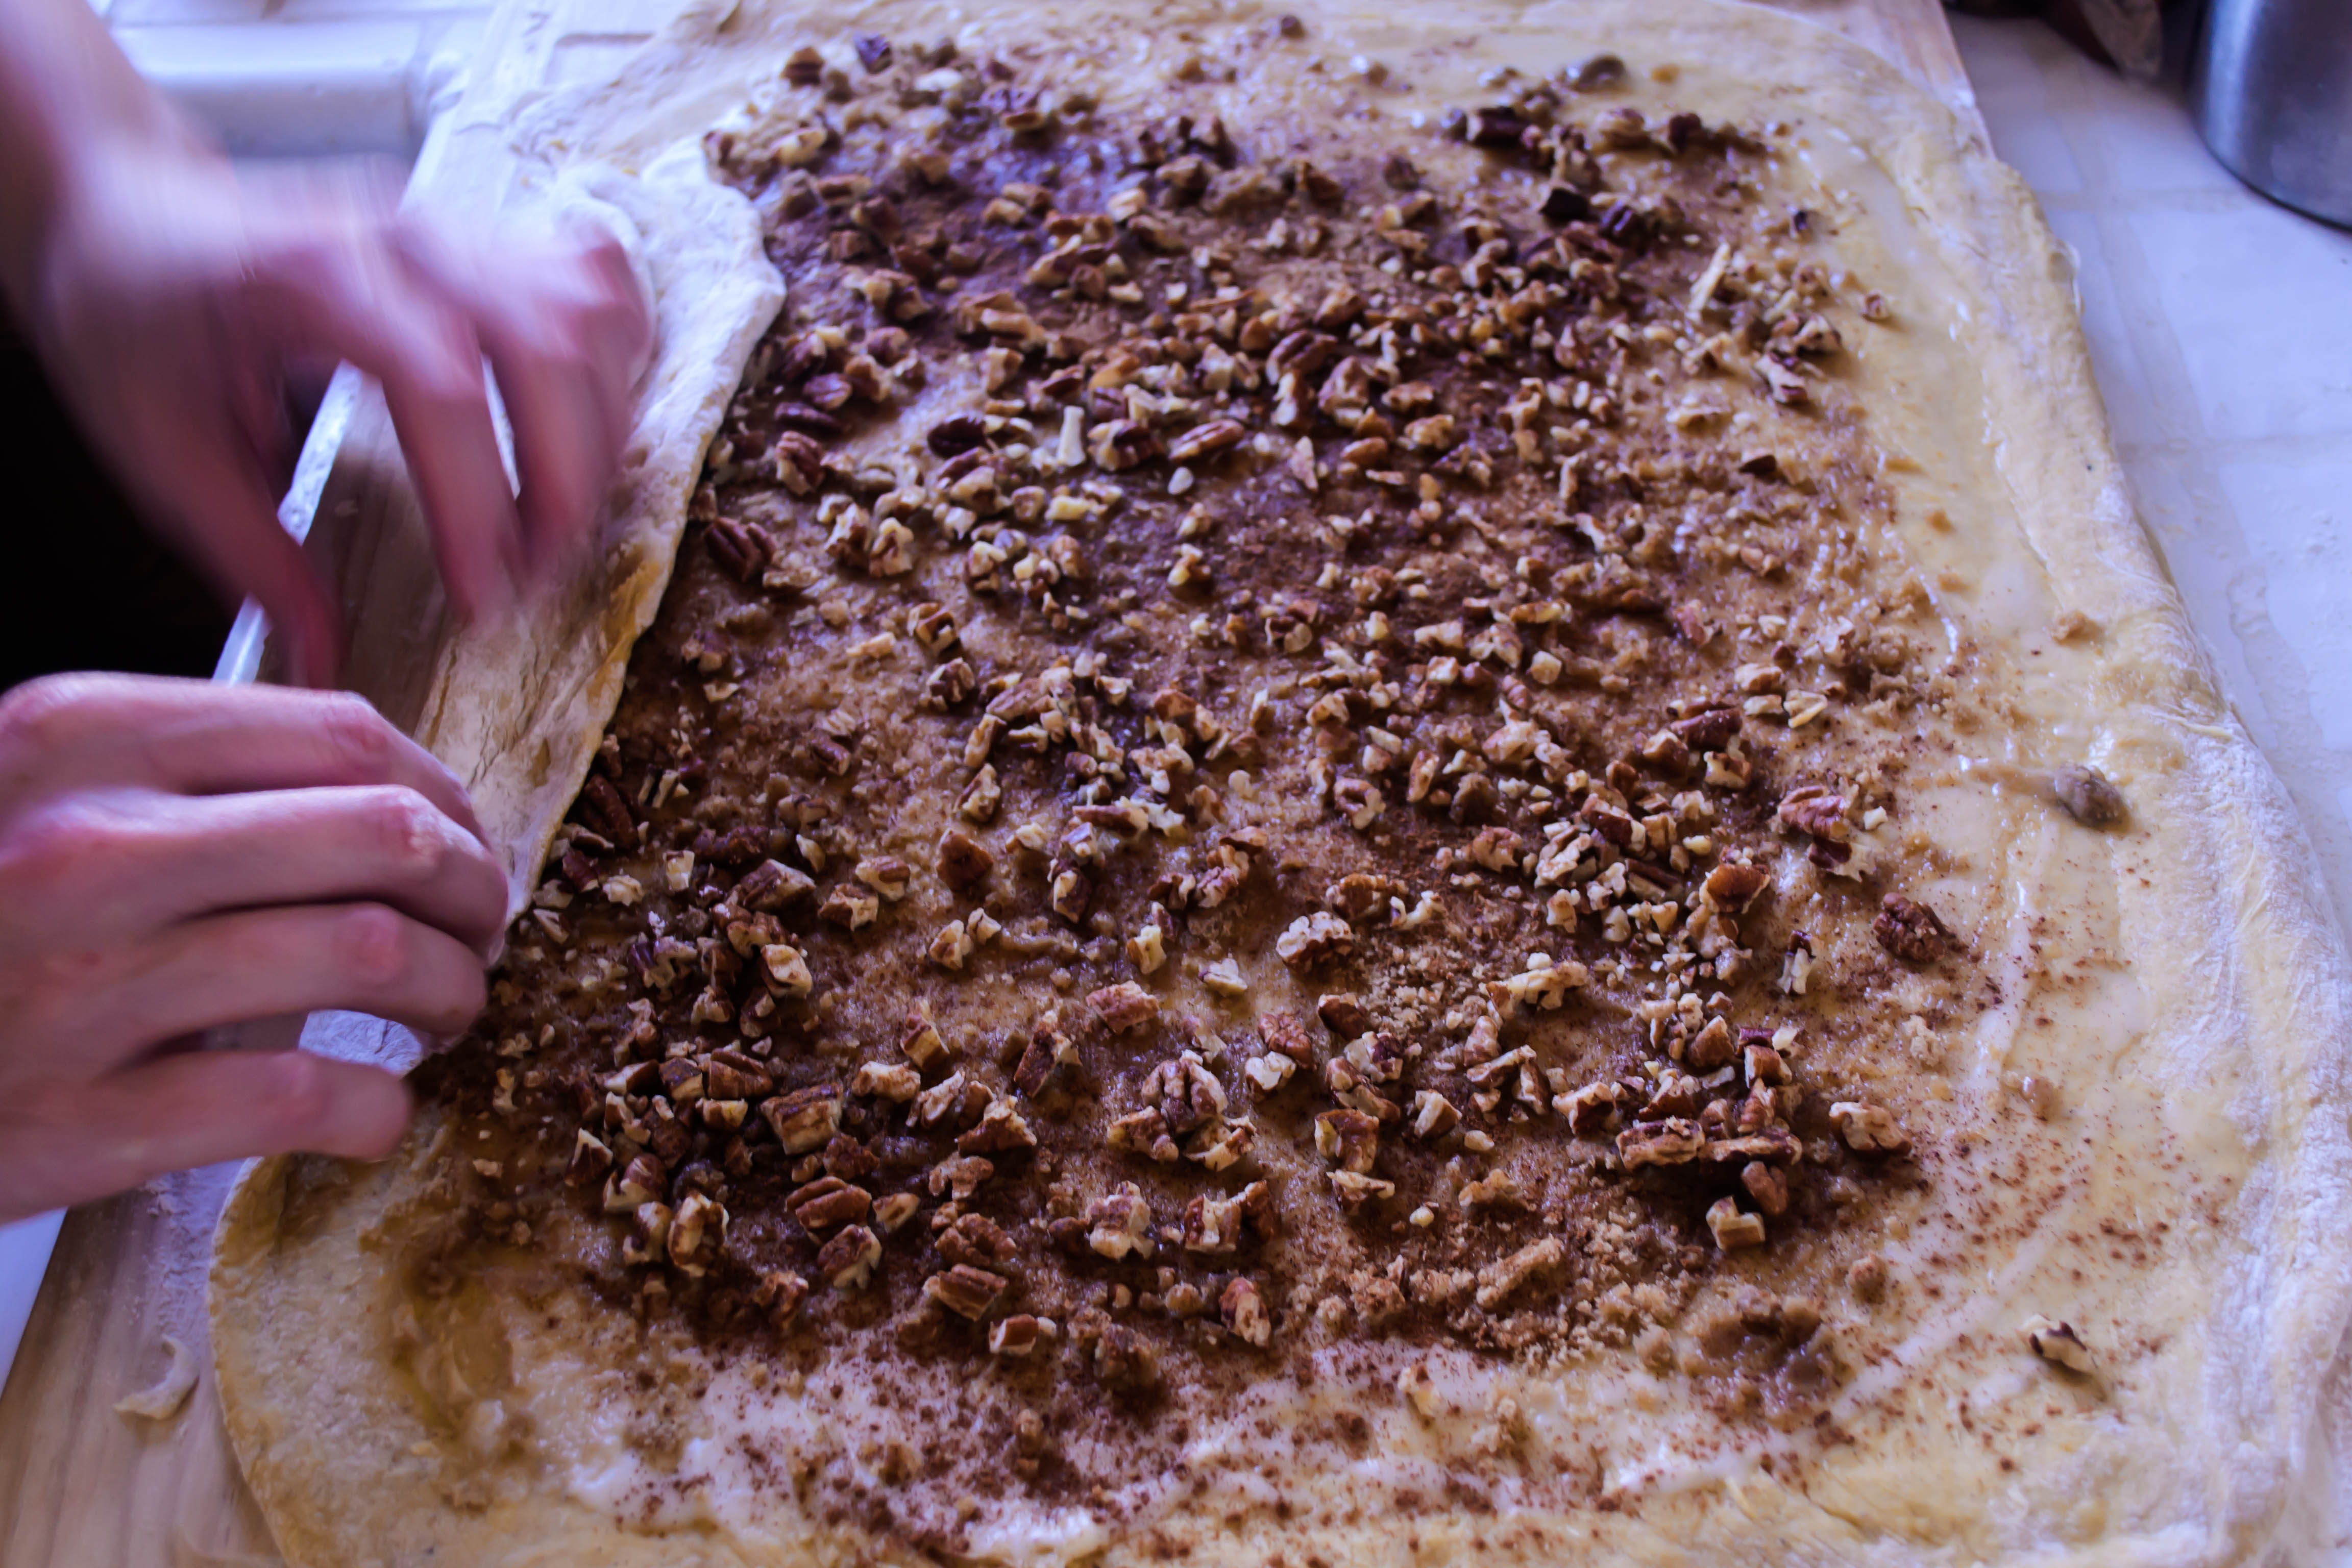
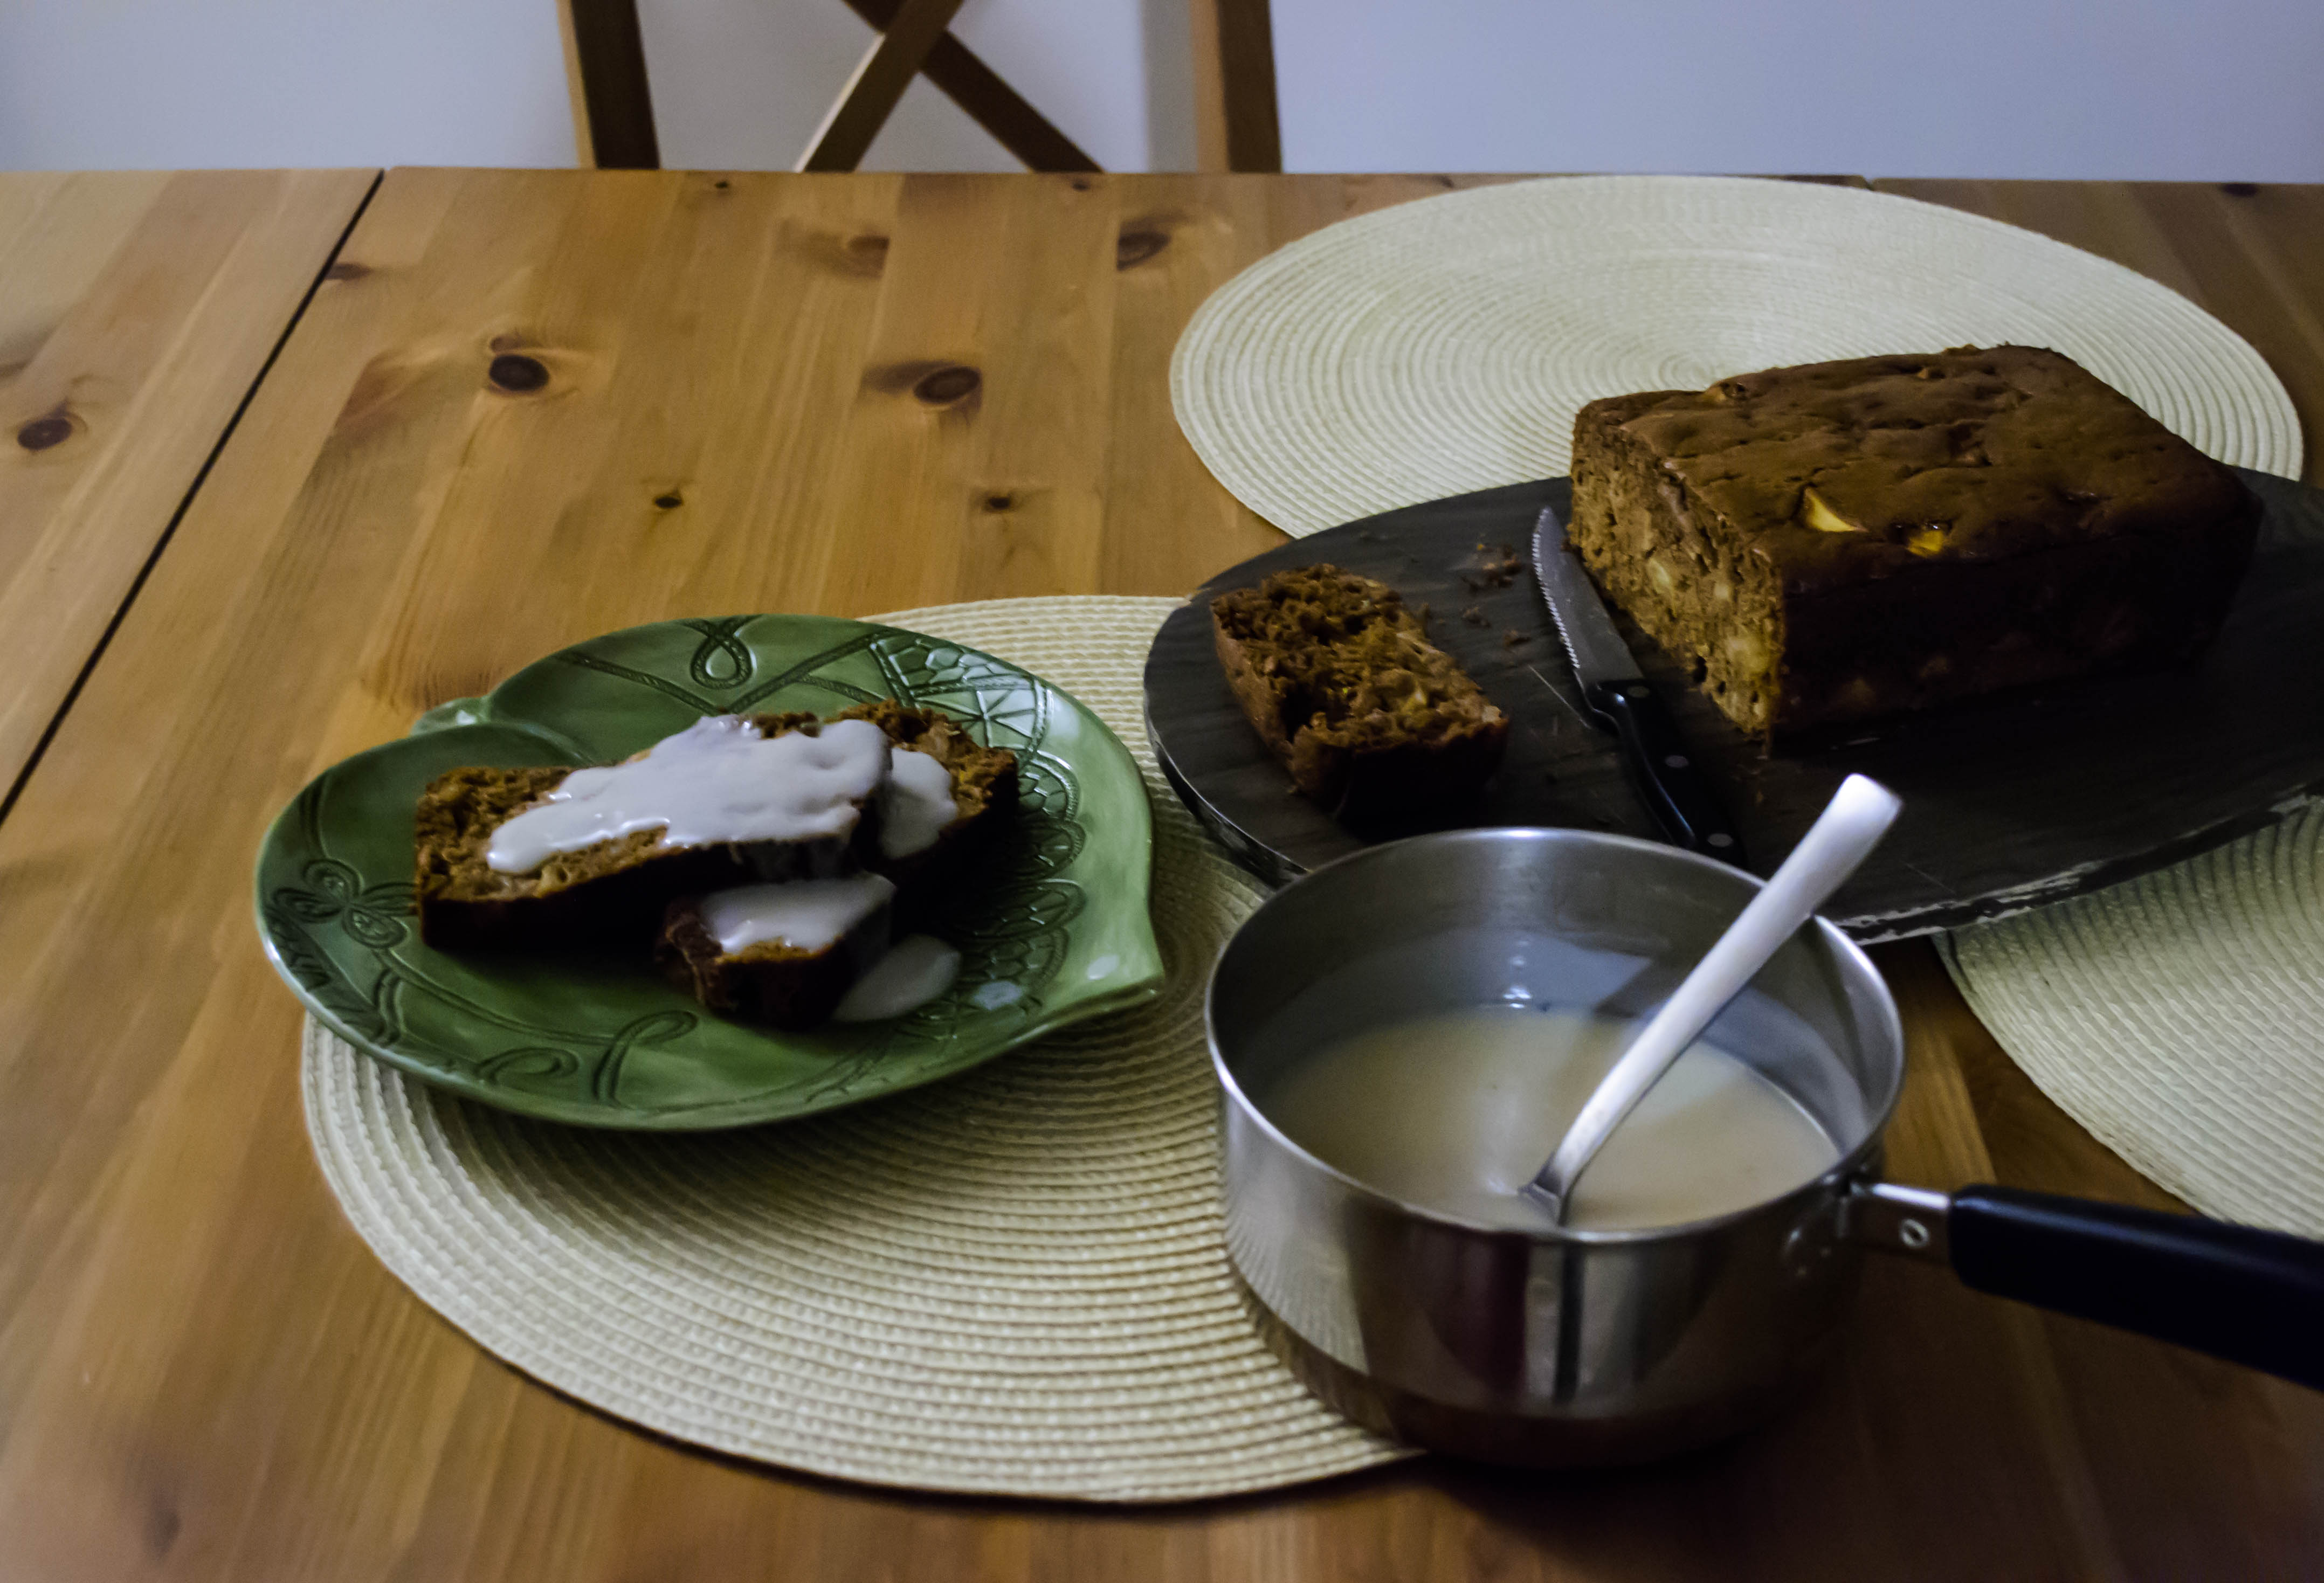
The nail in the coffin, though, was when I checked Joe Pastry’s version of brioche. He suggests pumping up the flavor by using brown butter. Since I was already going to be melting the butter, this was clearly the right thing to do. Tiny speckles of toasted nuttiness running through my dough? Yes, thanks. Now, please.

Food Blog Jaunary 2015-0282Food Blog Jaunary 2015-0283Food Blog Jaunary 2015-0284Food Blog Jaunary 2015-0285
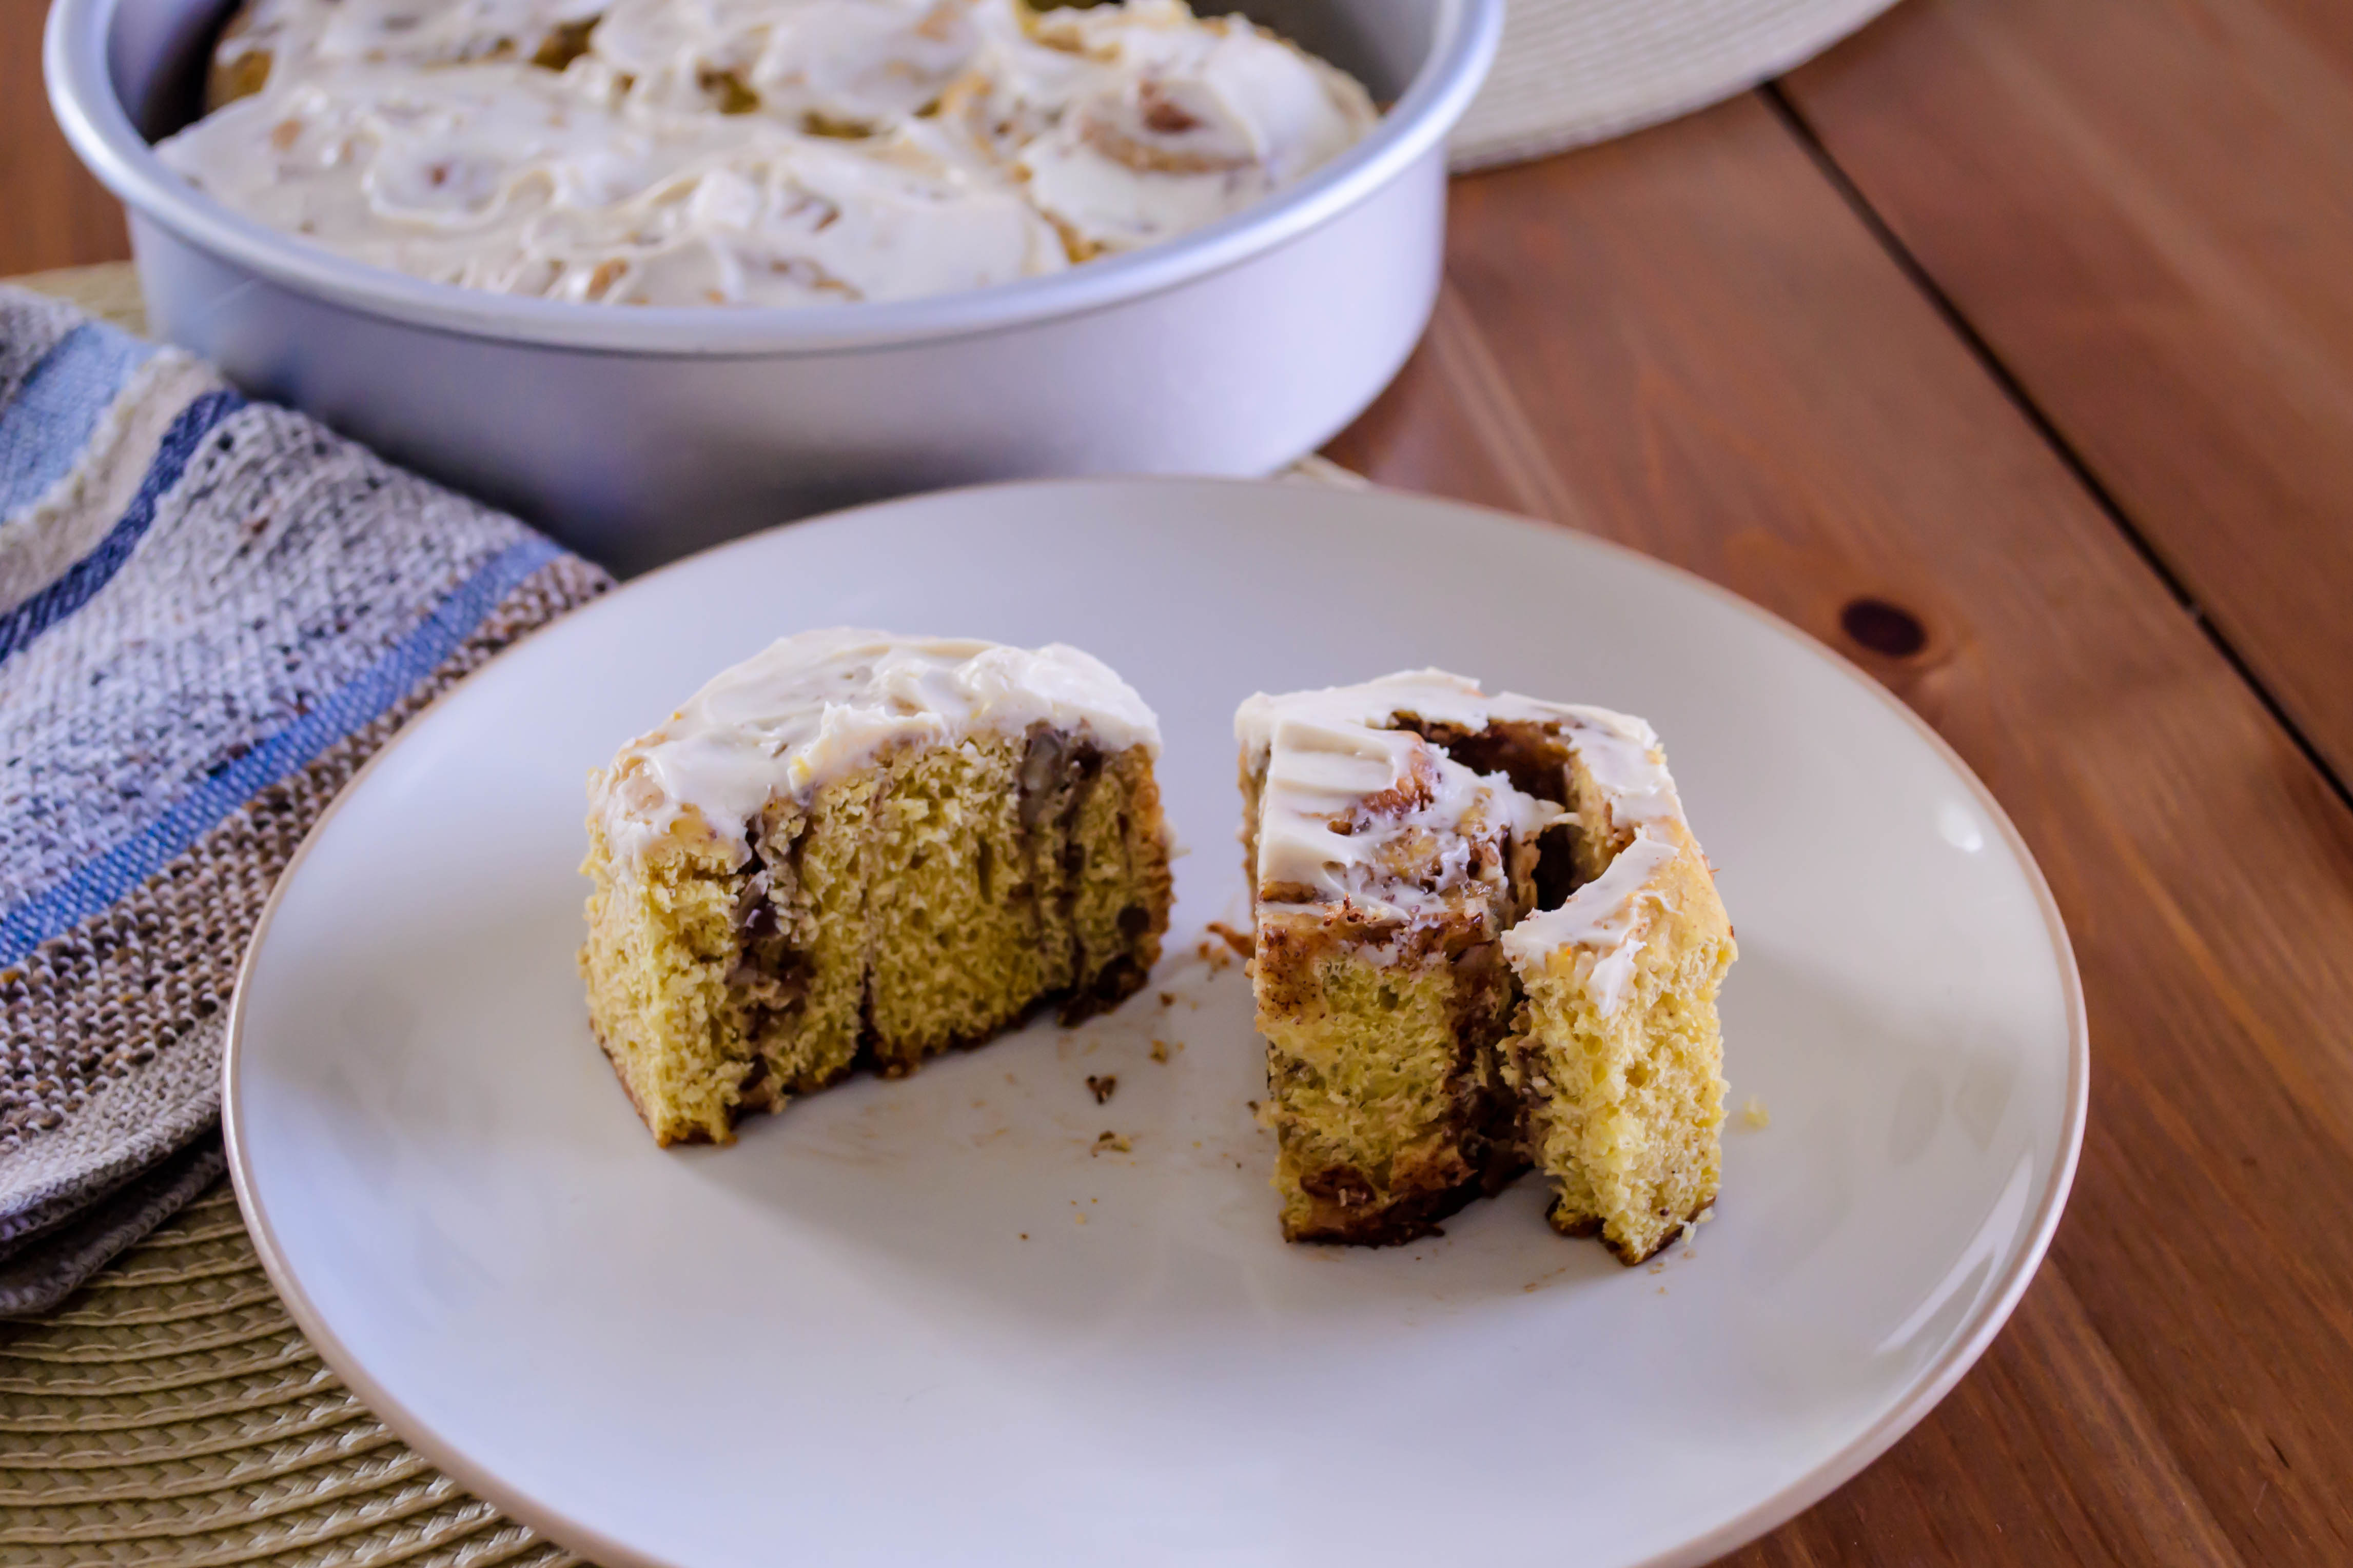
Well, not now. Two long, patient days from now. But at the conclusion of those days, slicing through a softly shattering crust into a pillowy yellow interior laced with bits of brown butter, it was all I could do to eat each slice in more than one bite. Because, you know, patience.

Food Blog Jaunary 2015-0288Food Blog Jaunary 2015-0289
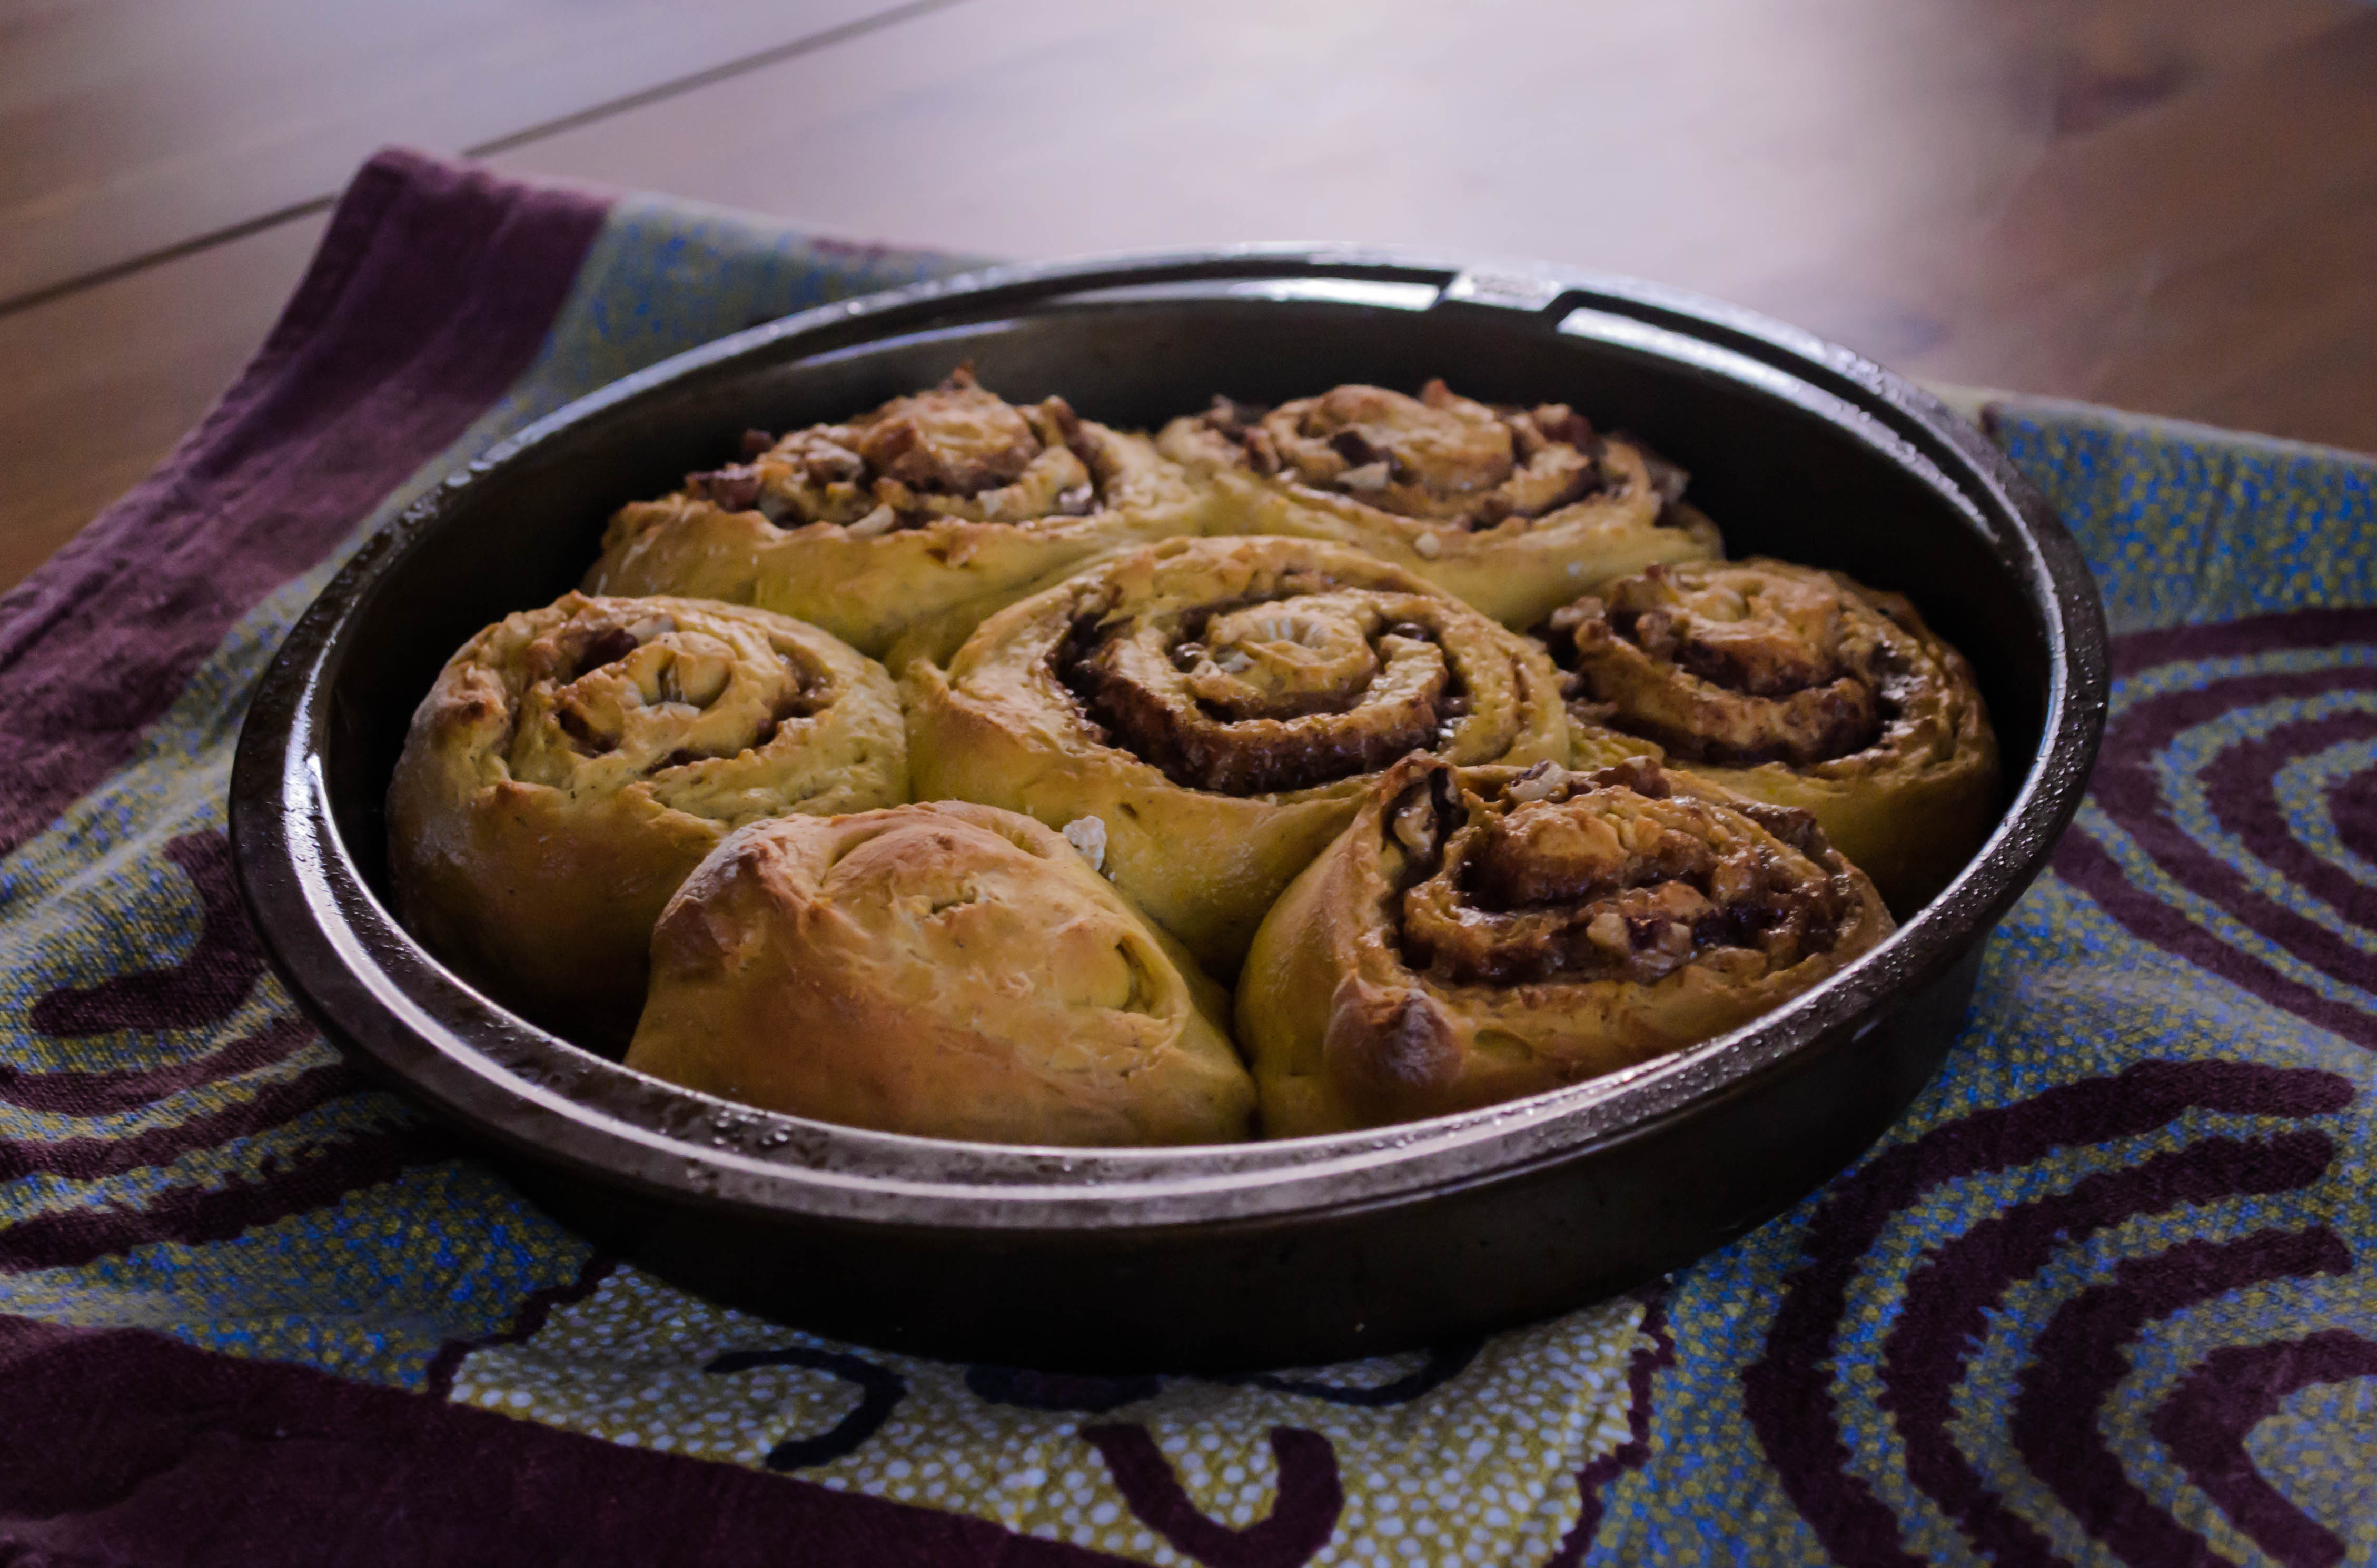
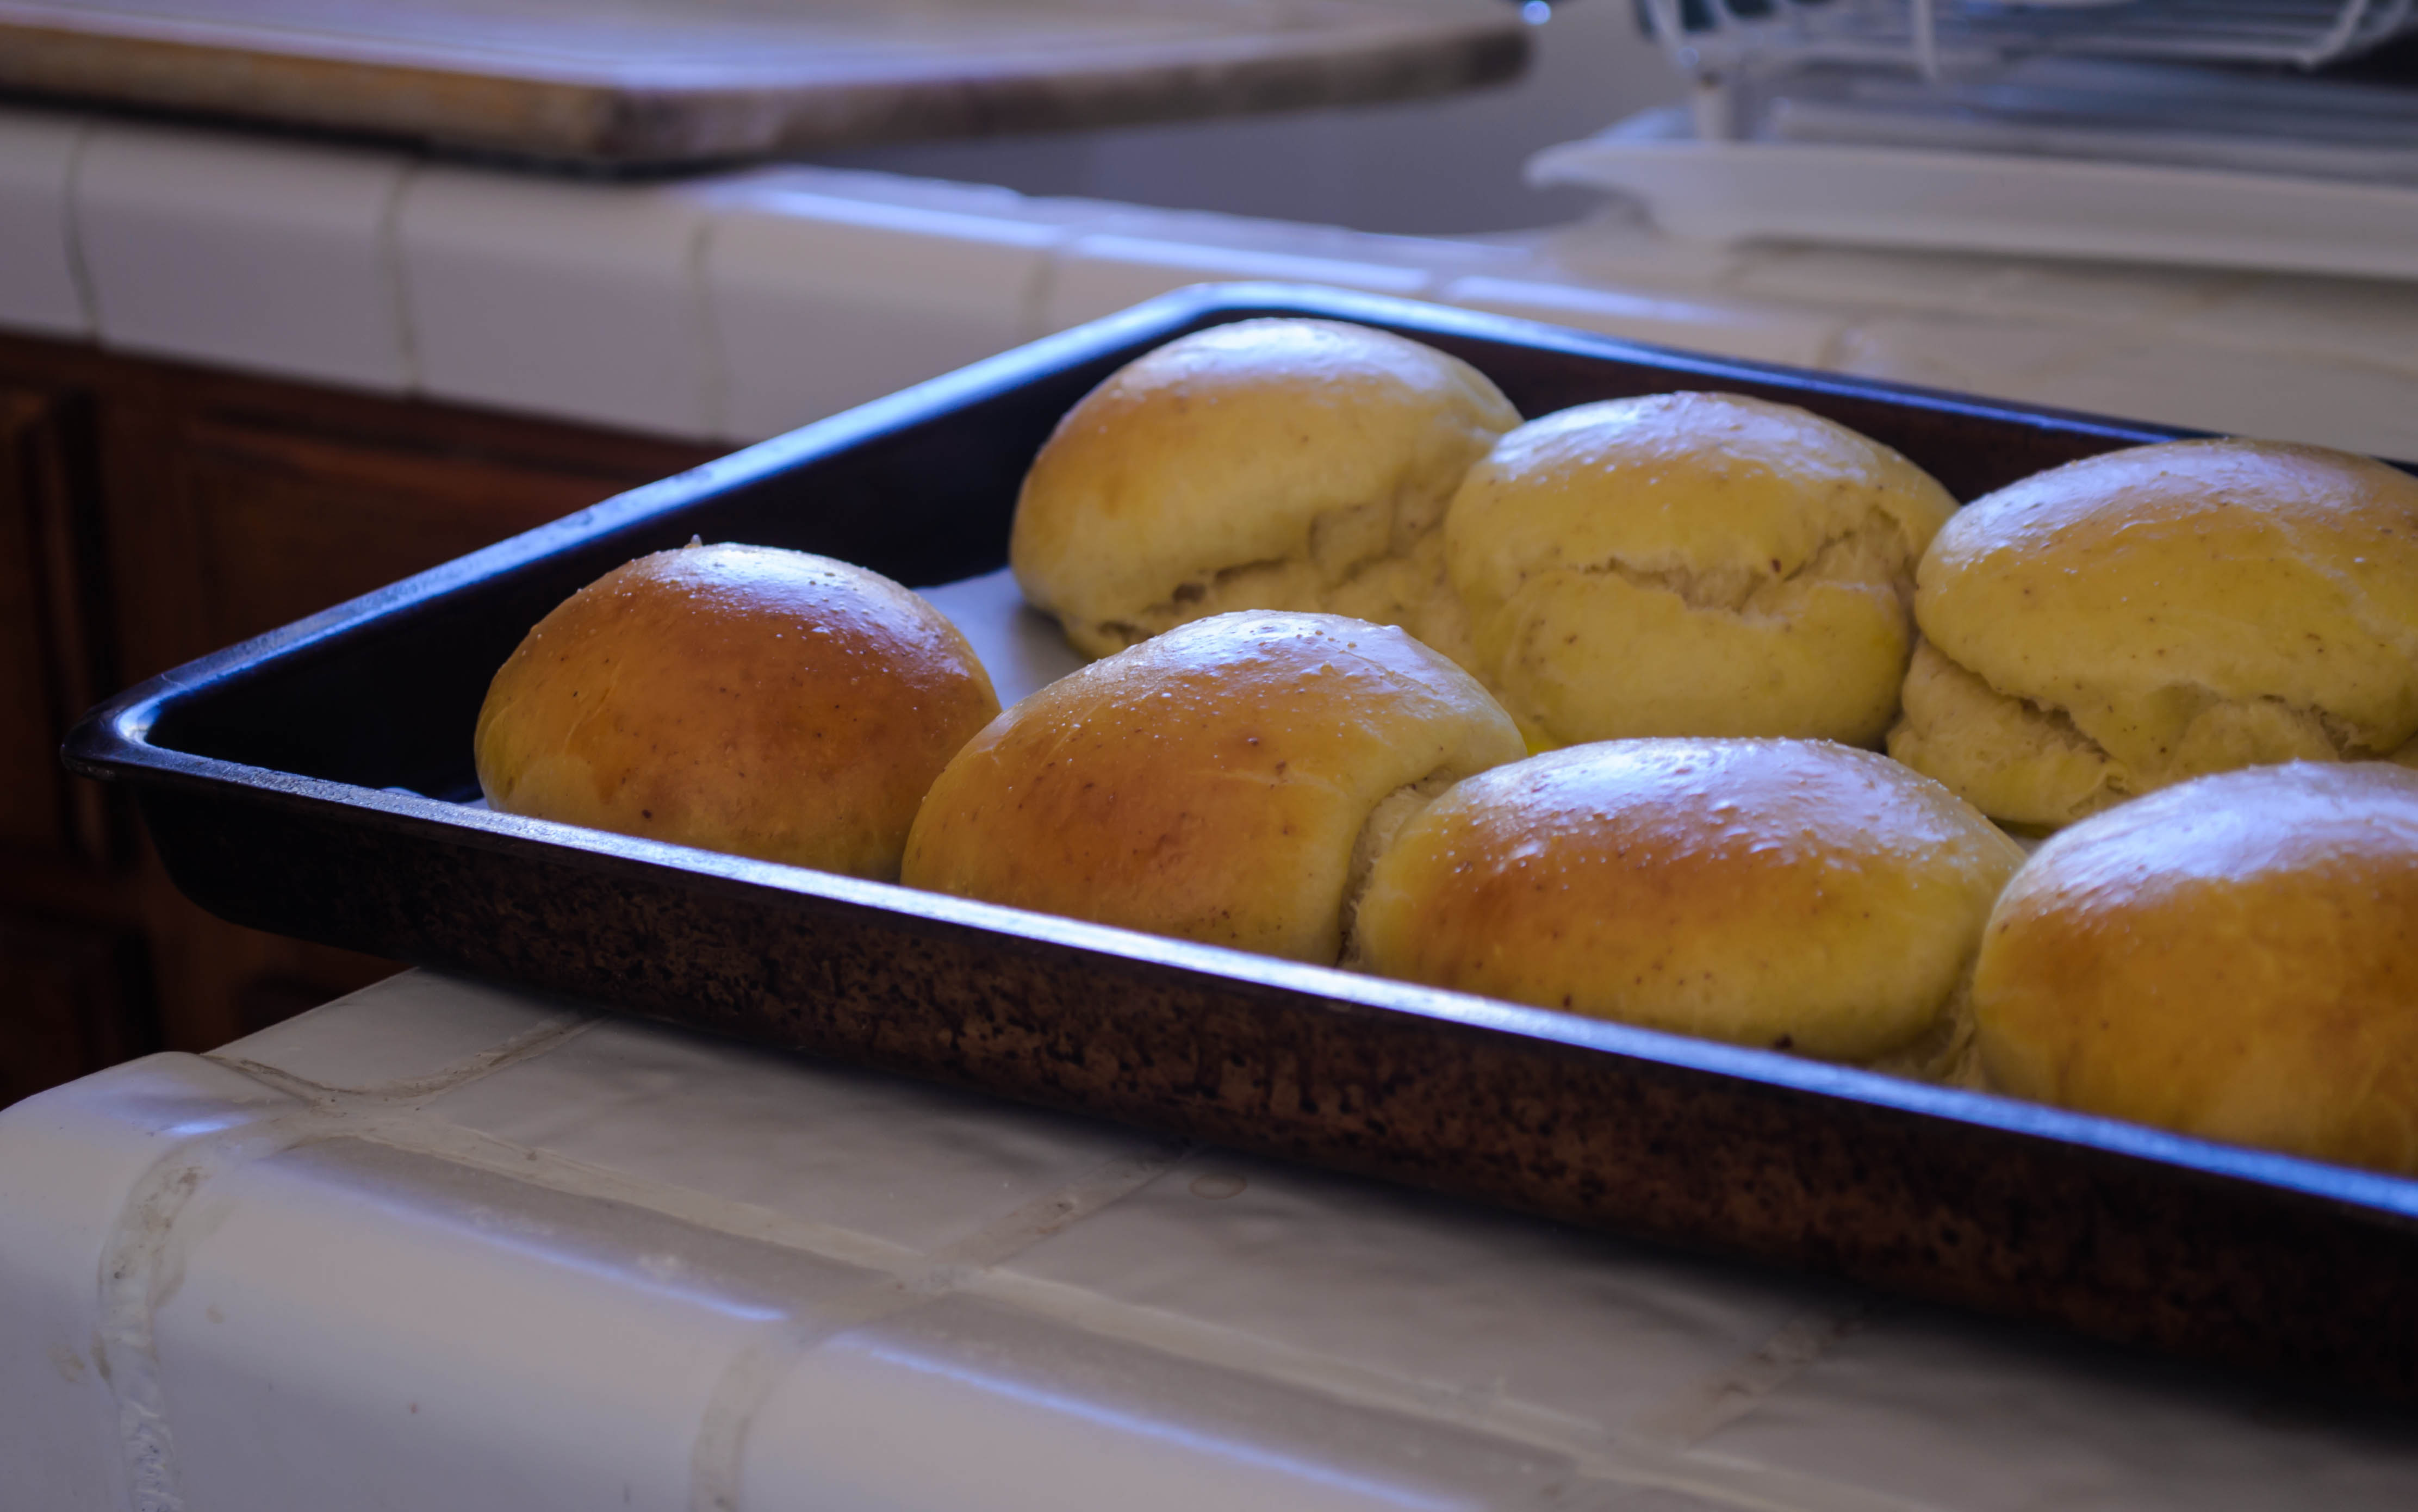
Serving suggestions: there’s not much you shouldn’t do with brioche. It can be a bit soft for a sandwich, but makes glorious toast and french toast. My recipe is for one regular loaf and 8 small or 6 large buns, and we used the bun shape for veggie burgers. Because they are more compact, the buns hold up to rough handling a bit better than the slices, so feel free to load them with pulled pork, or crab cakes, or egg salad, or whatever moves your taste buds most deeply.
Food Blog Jaunary 2015-0296

Trying-to-be-Patient Brown Butter Brioche
barely adapted from Cooks Illustrated
makes 1 loaf and 8 small or 6 large buns
16 tablespoons unsalted butter (2 sticks)
½ cup room temperature or slightly warm water
⅓ cup sugar
2 ¼ teaspoons active dry yeast
7 large eggs, divided (but not separated!)
3 ¼ cups bread flour
1½ teaspoons salt + a pinch
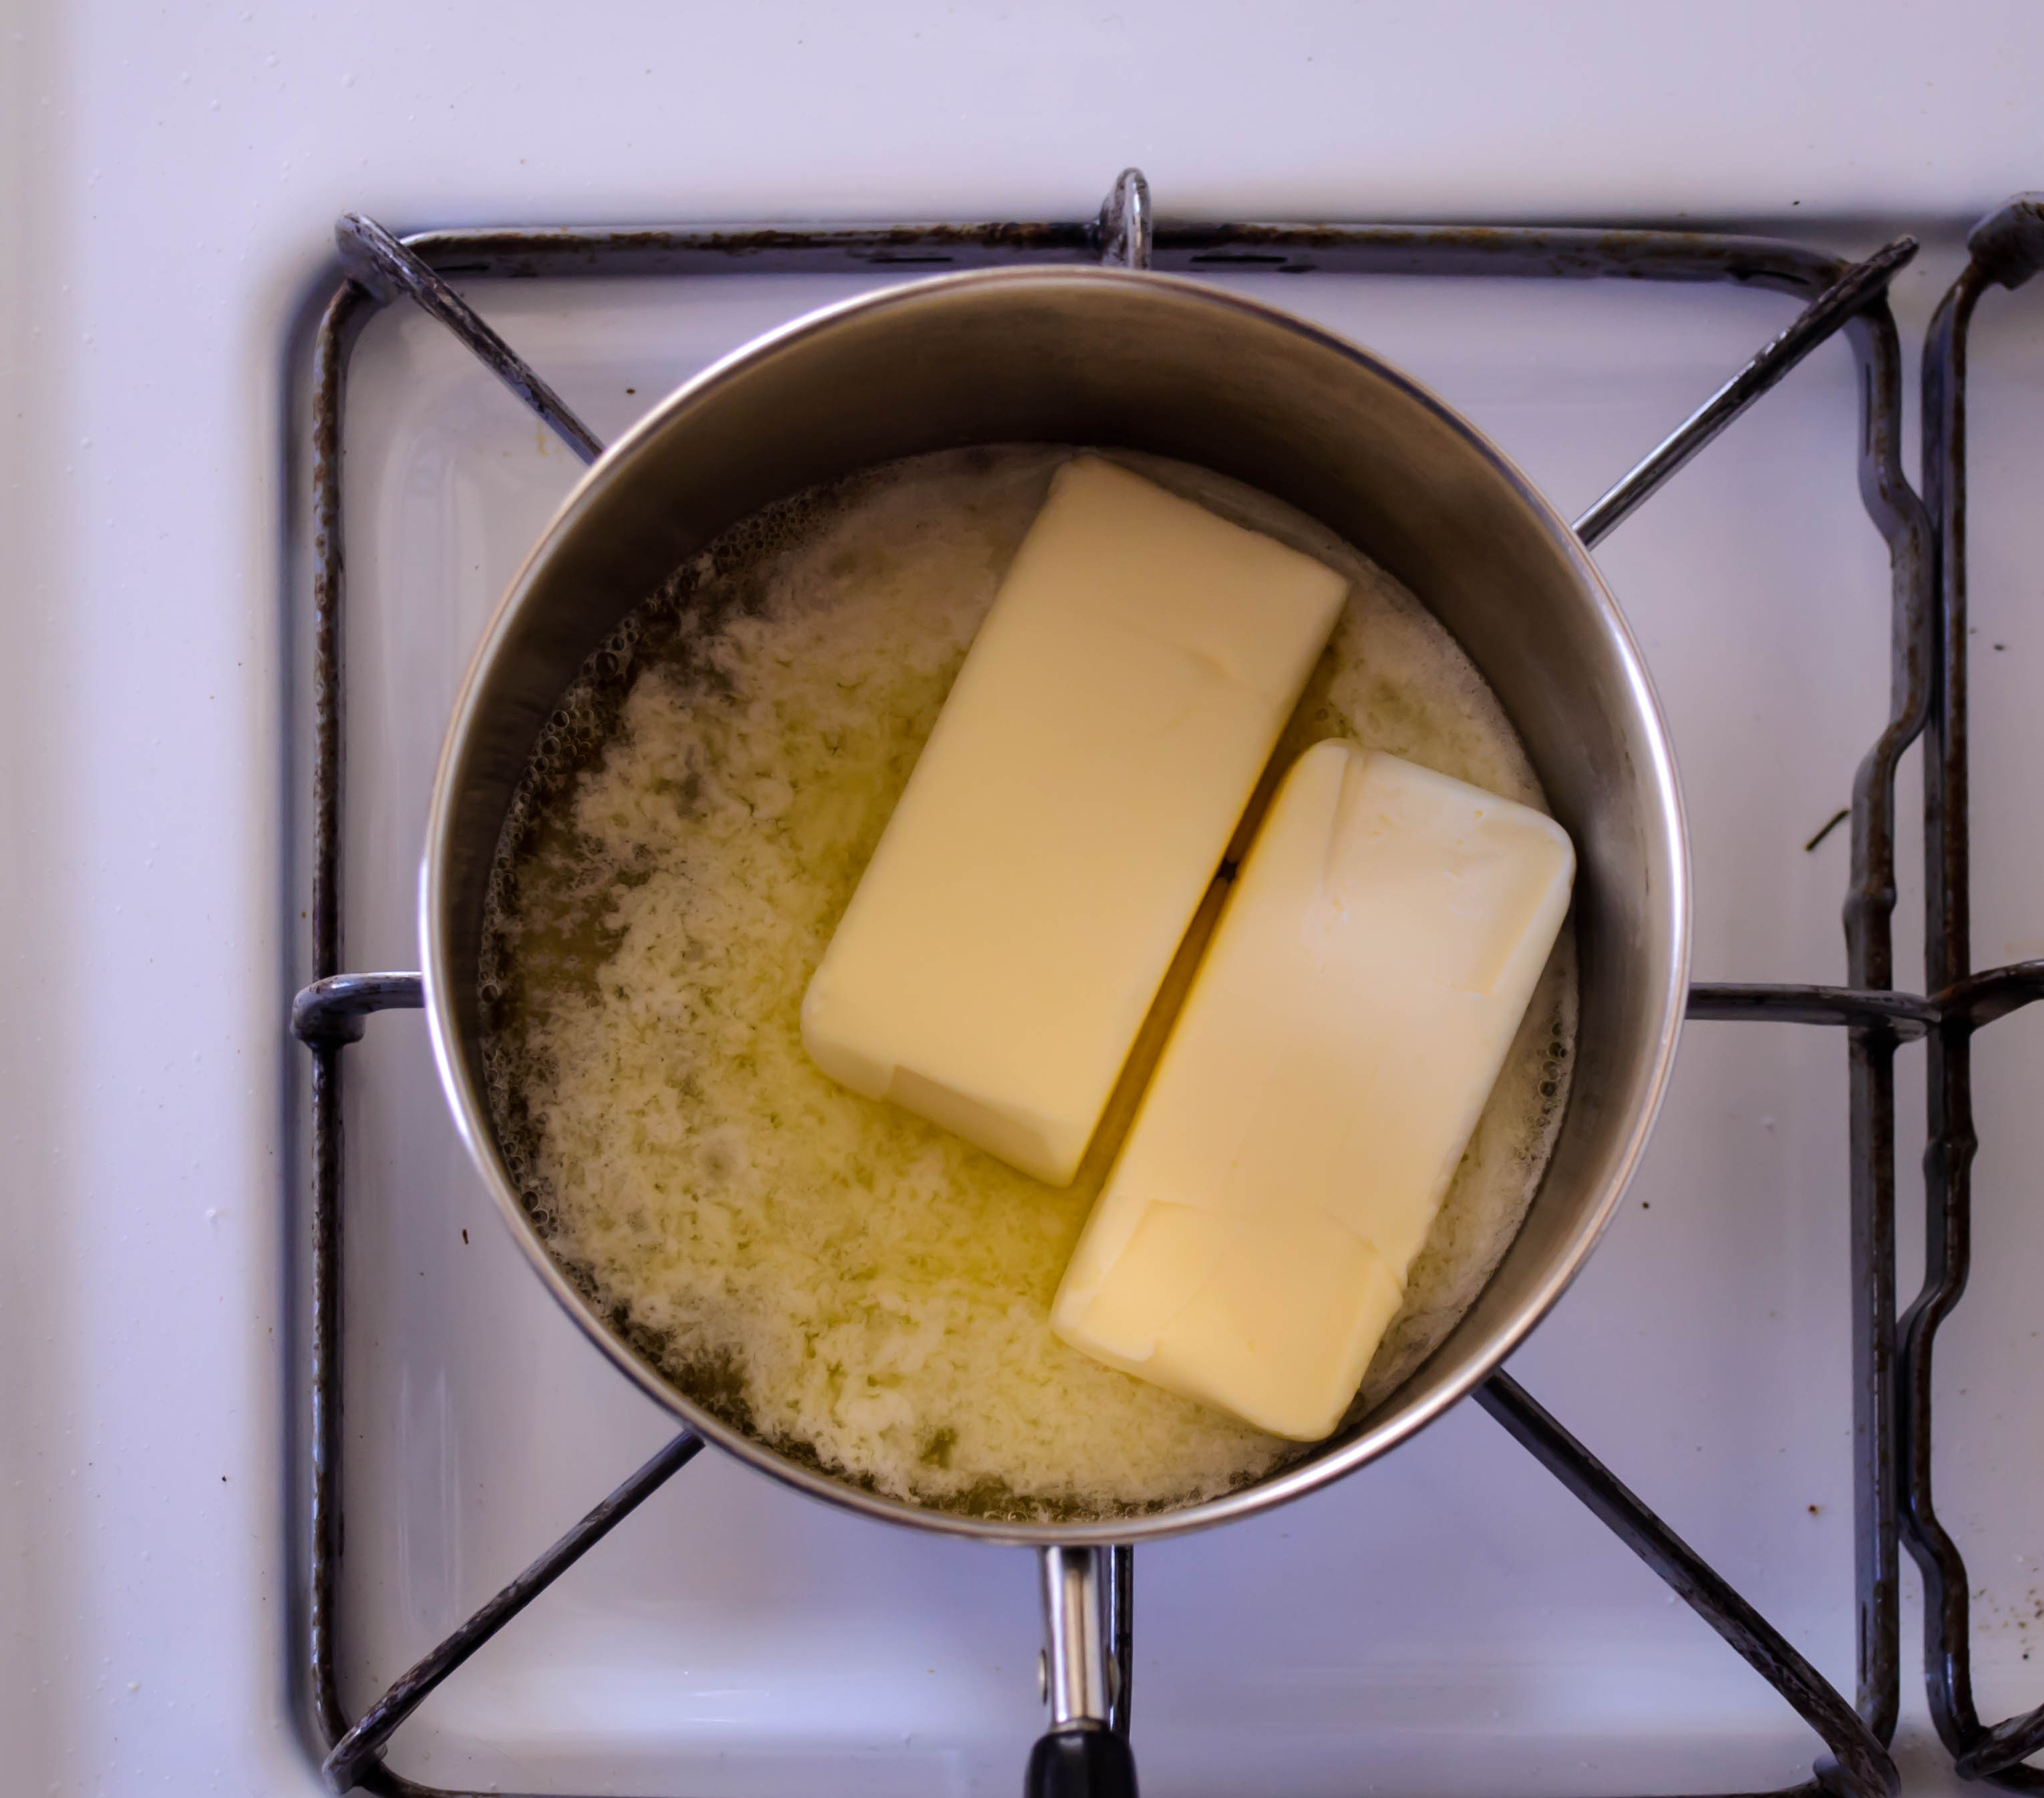
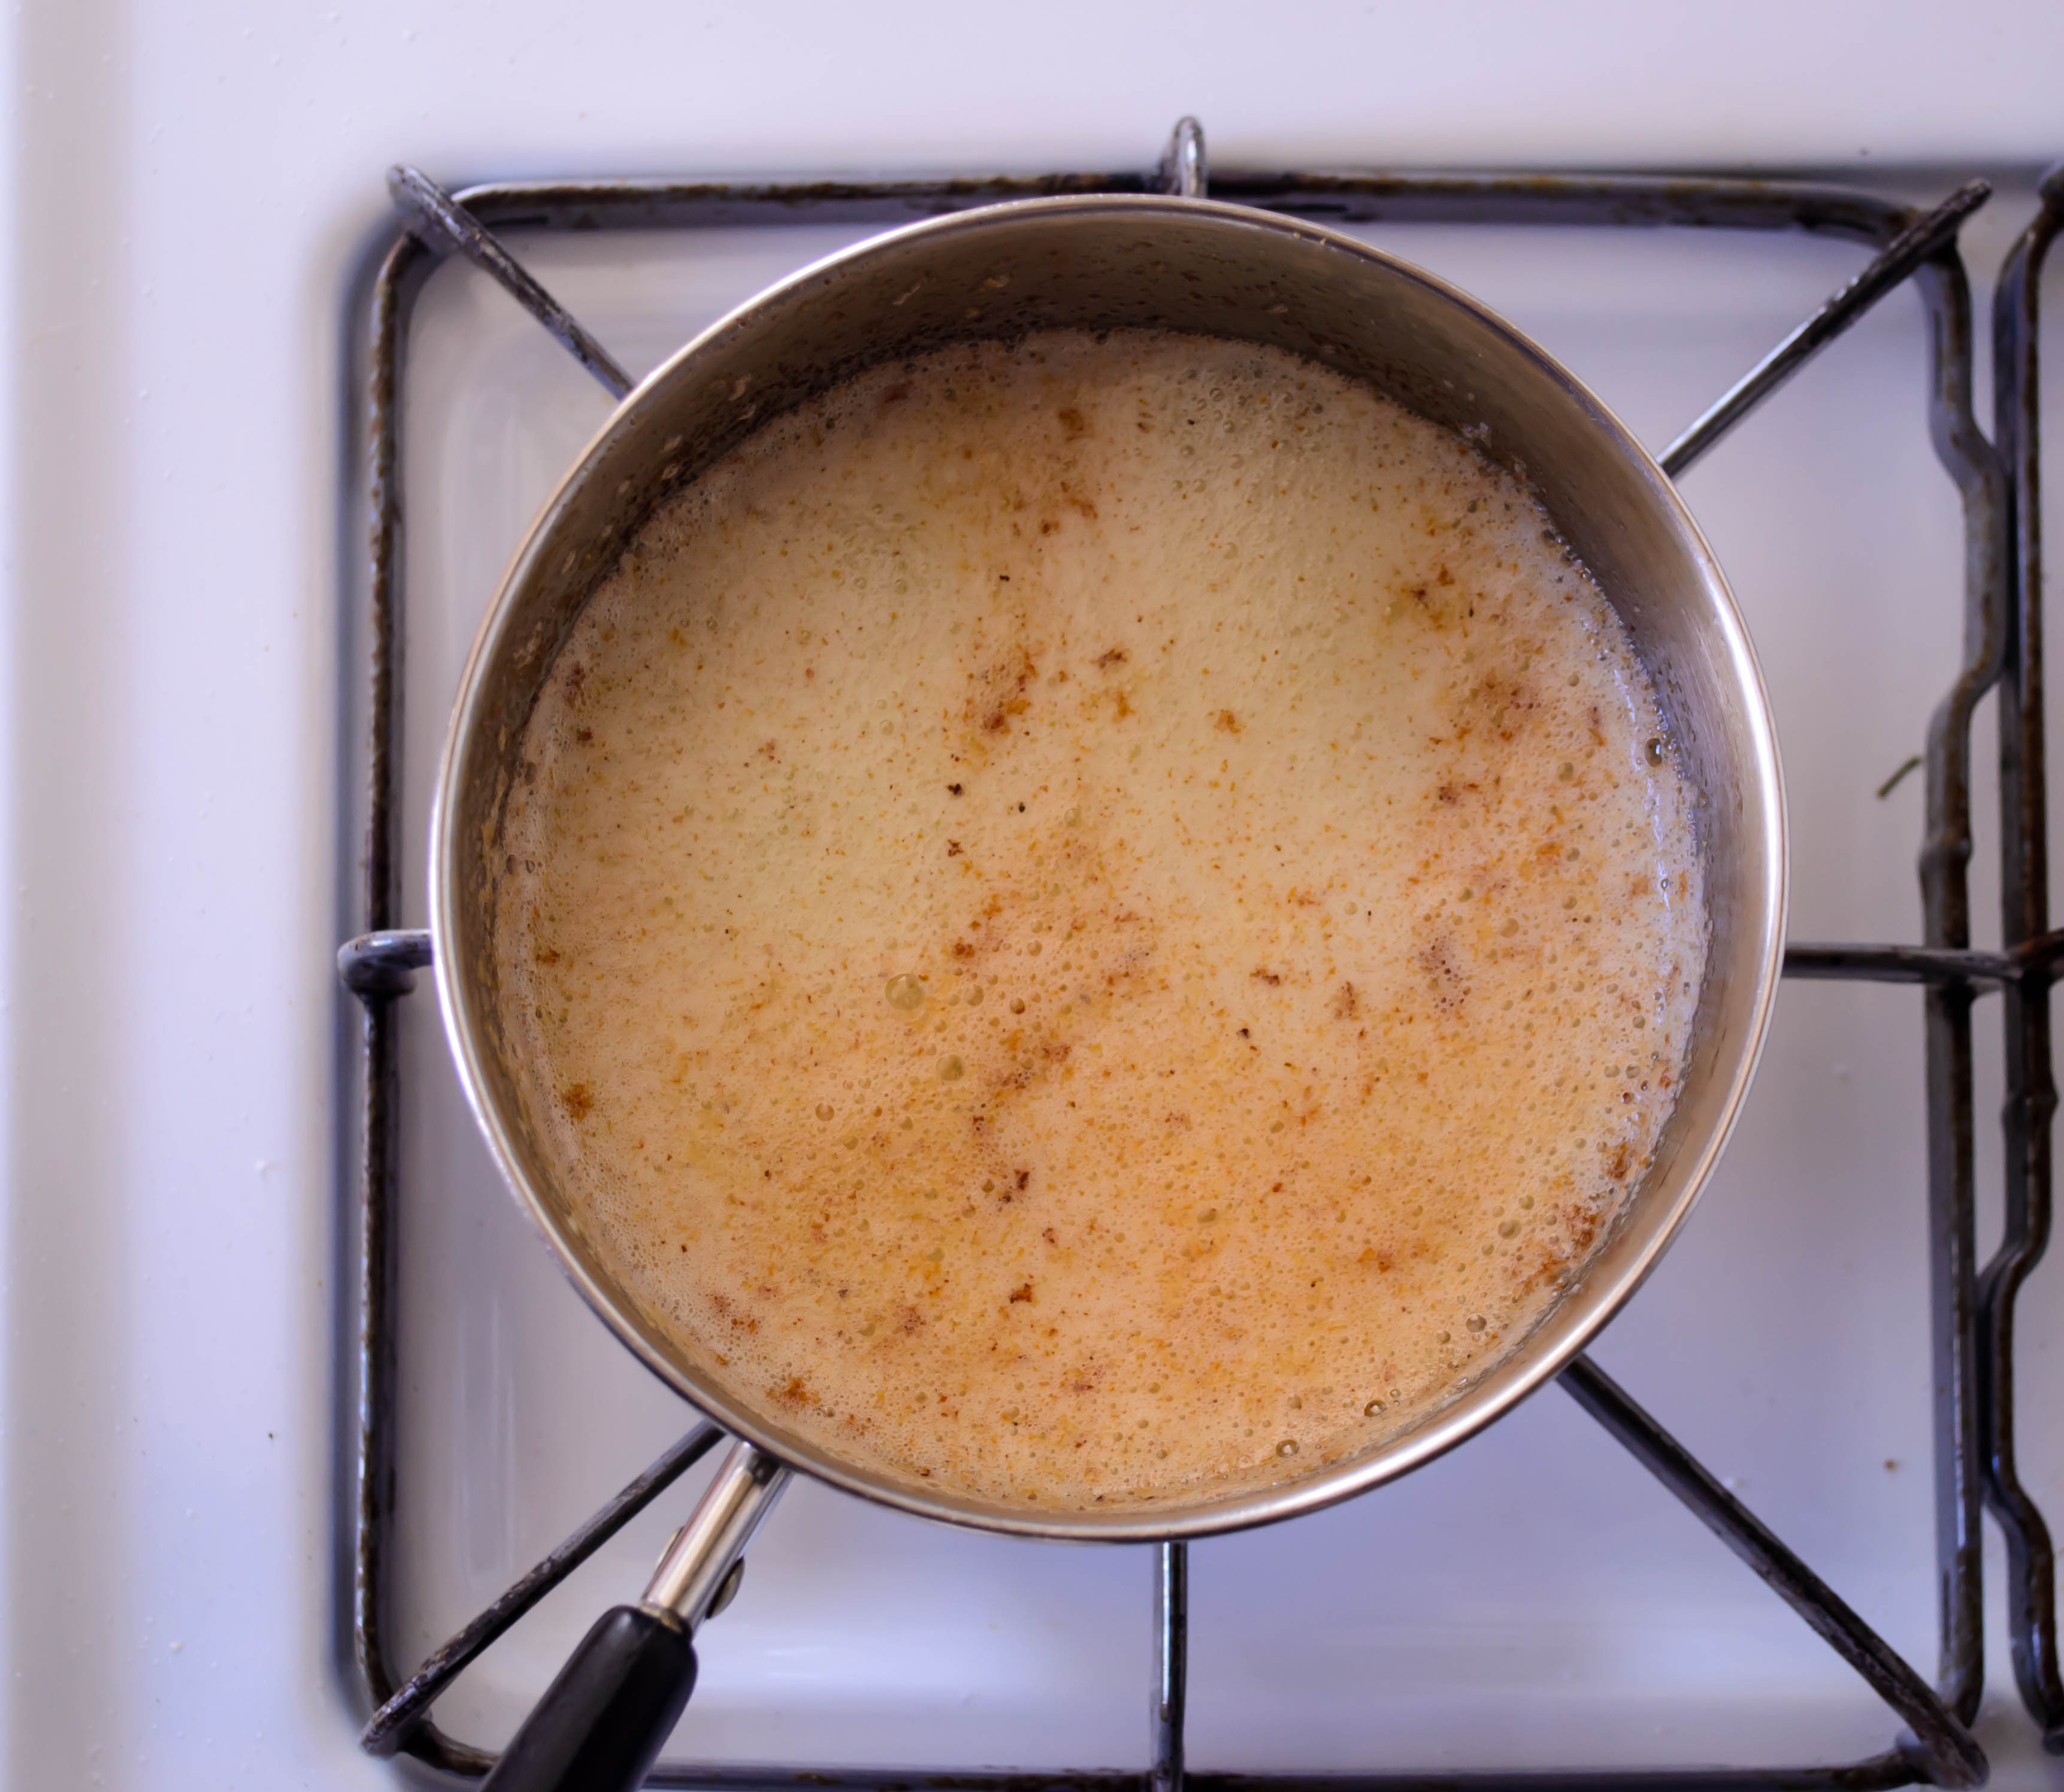
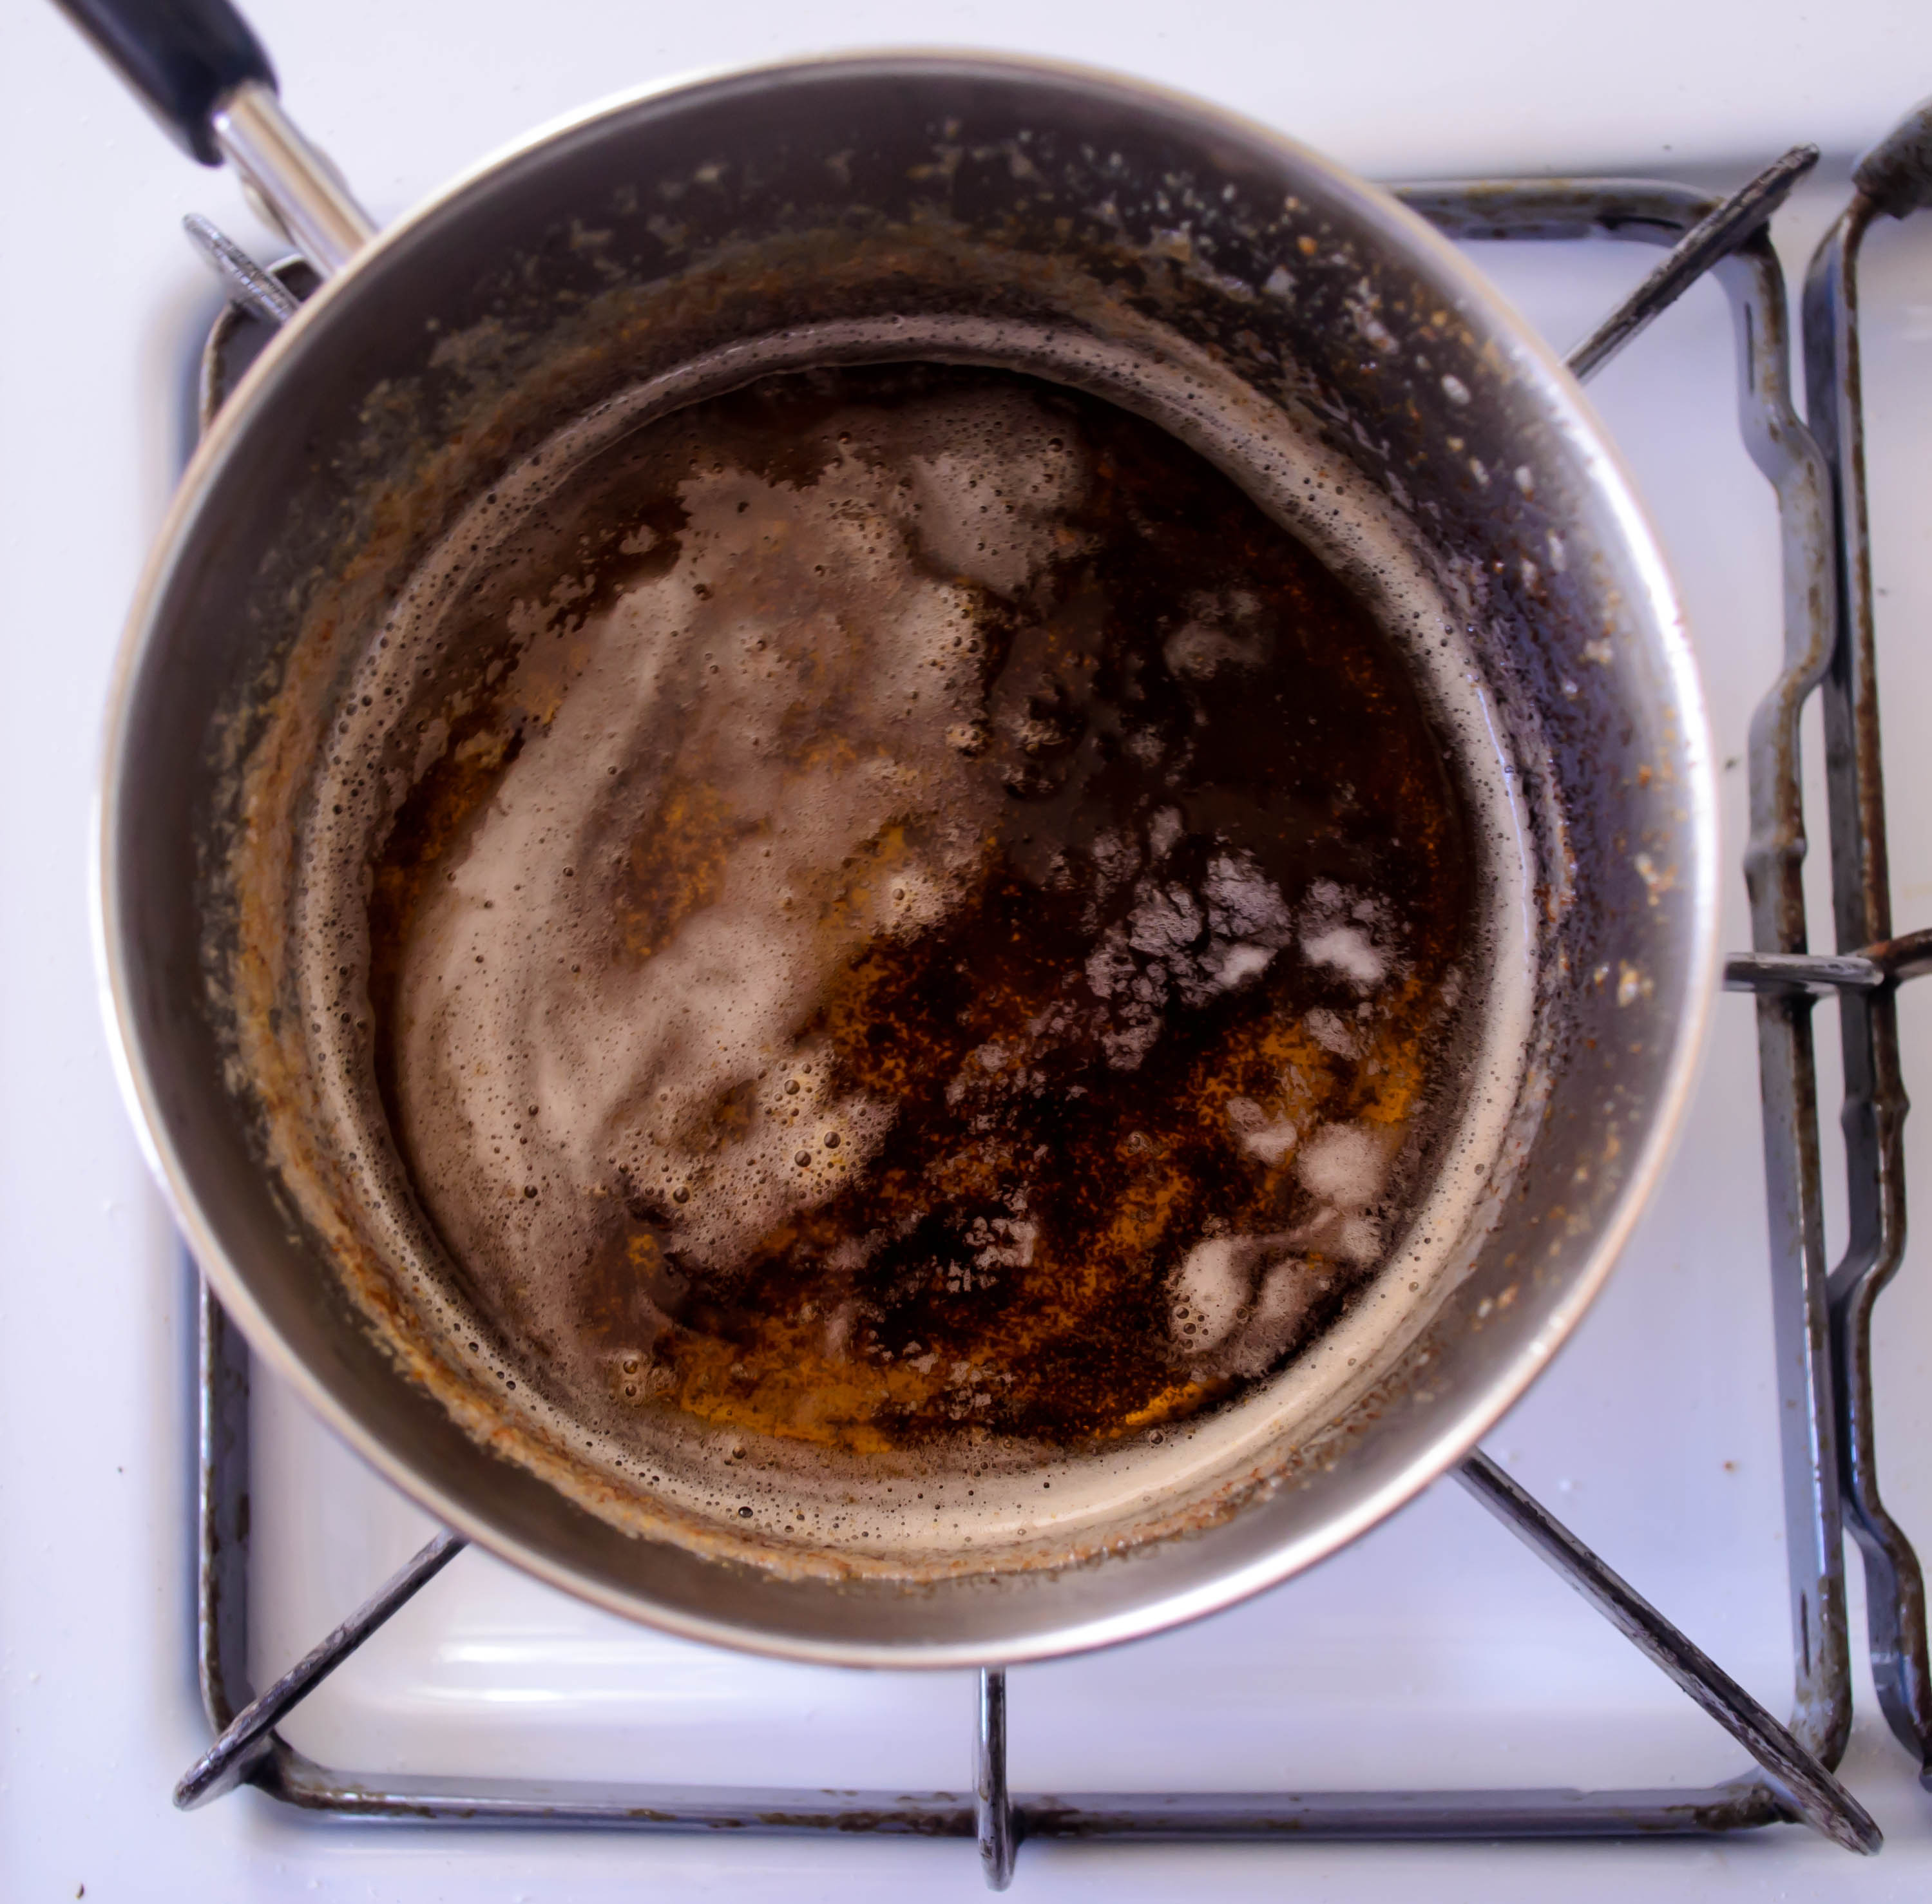
  • Day one: melt the butter over medium heat in a small saucepan, preferably not with a dark bottom (it makes it easier to see the butter browning). As it melts, it will sputter and foam up. The foam will eventually subside, but shortly thereafter it will get foamy again. At this point, tilt the pan a little bit (carefully) to see the bottom – little specks of solids should be getting golden-brown. Let them get golden and then chestnut brown, then turn off the heat and set the pan aside to cool. These little dark bits are what makes it brown butter.
  • While the brown butter cools (pop it in the fridge for a few minutes if you are nervous about the temperature), combine the water, sugar, and yeast in a large glass measuring cup or a medium bowl. Stir well, then set aside for 10 minutes to allow the yeast to activate.
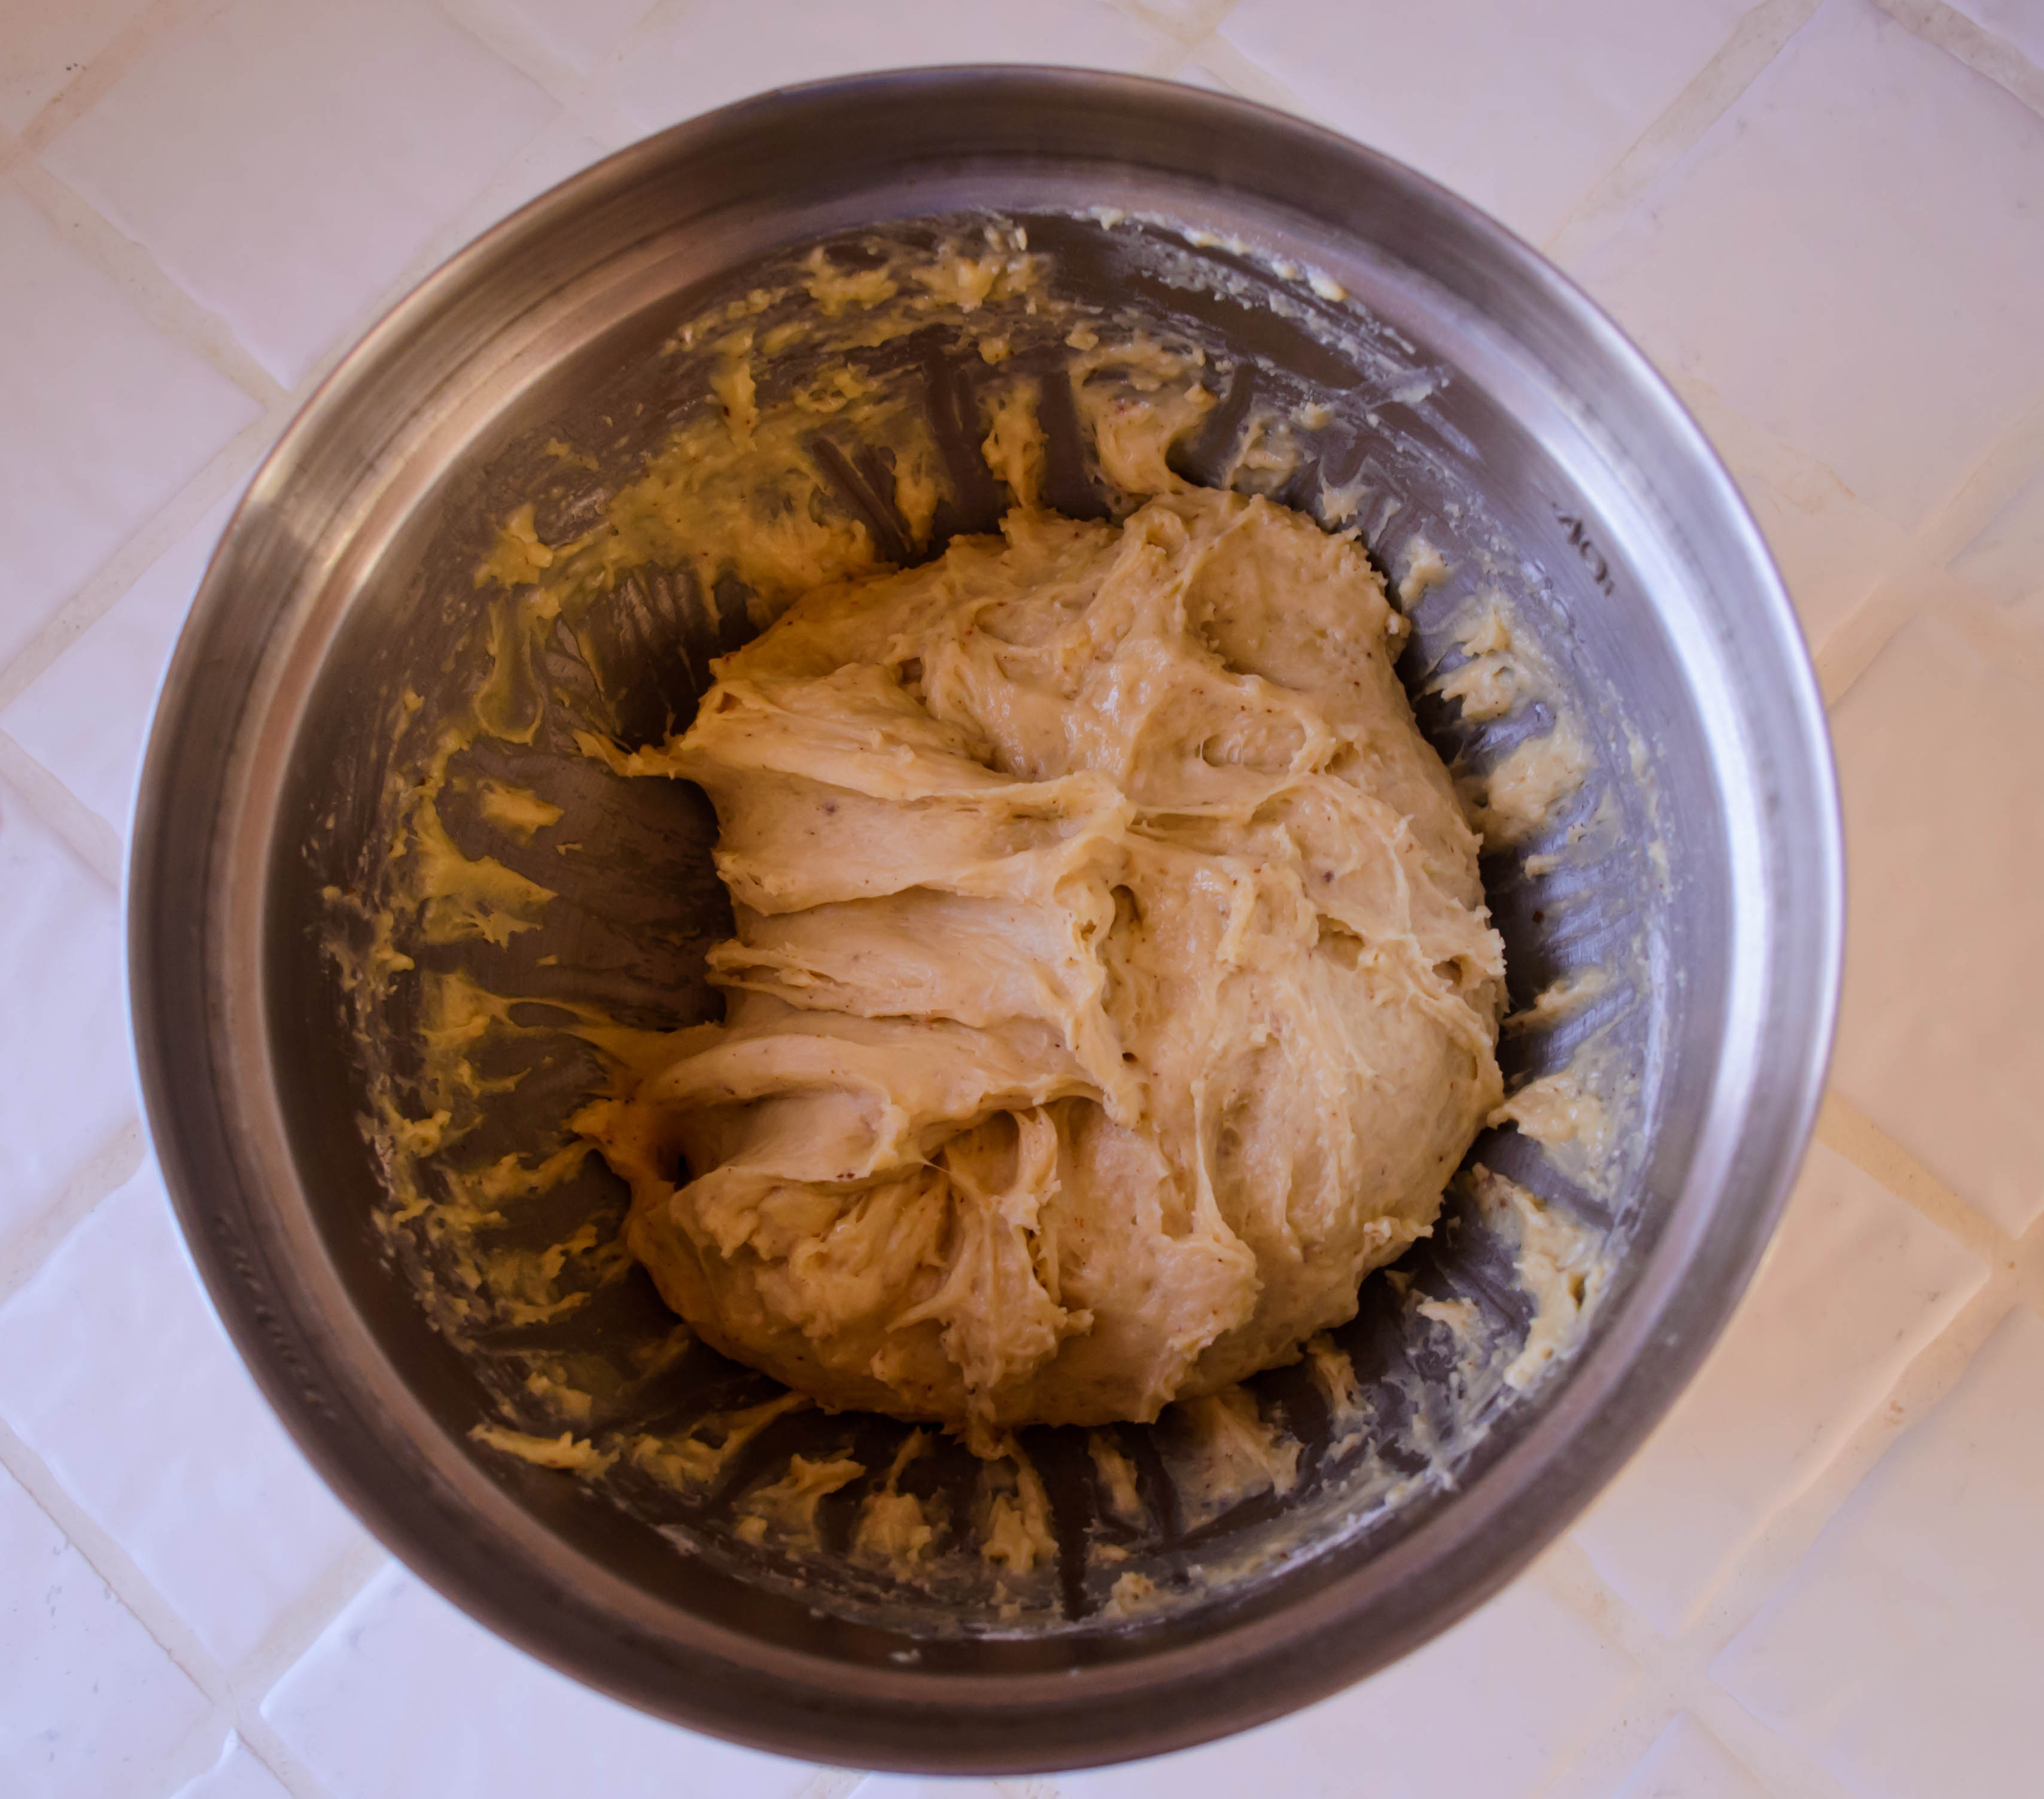
  • Meanwhile, whisk together the flour and salt in one bowl (a large one), and 6 of the eggs in another (a small one will do). When the yeast mixture is bubbly and smells like warm bread, add the whisked eggs and stir to combine. Whisk in the cooled brown butter, then dump the whole wet mess into the bowl with the flour and salt. Stir with a wooden spoon until no flour streaks remain. It will be a damp lump that looks more like thick cake batter than like dough.
  • Cover the bowl of dubious dough with plastic wrap and let it sit for 10 minutes.
  • Uncover the dough and pull up one edge with your fingertips (sprayed with non-stick spray or lightly coated with oil, if you’re concerned about stickiness), then fold that edge over the middle of the dough ball (see photo series above). Turn the bowl 45 degree and fold again. Repeat the process until you have made 8 folds.
  • Cover with plastic wrap and let rise for 30 minutes. Repeat this folding and rising process every 30 minutes for 3 more times (so you’ll do this folding process 4 times over the course of 2 hours). This helps activate the gluten without the labor intensive kneading process. After the fourth and final folding circuit, replace the plastic wrap and stow the bowl in the refrigerator overnight.
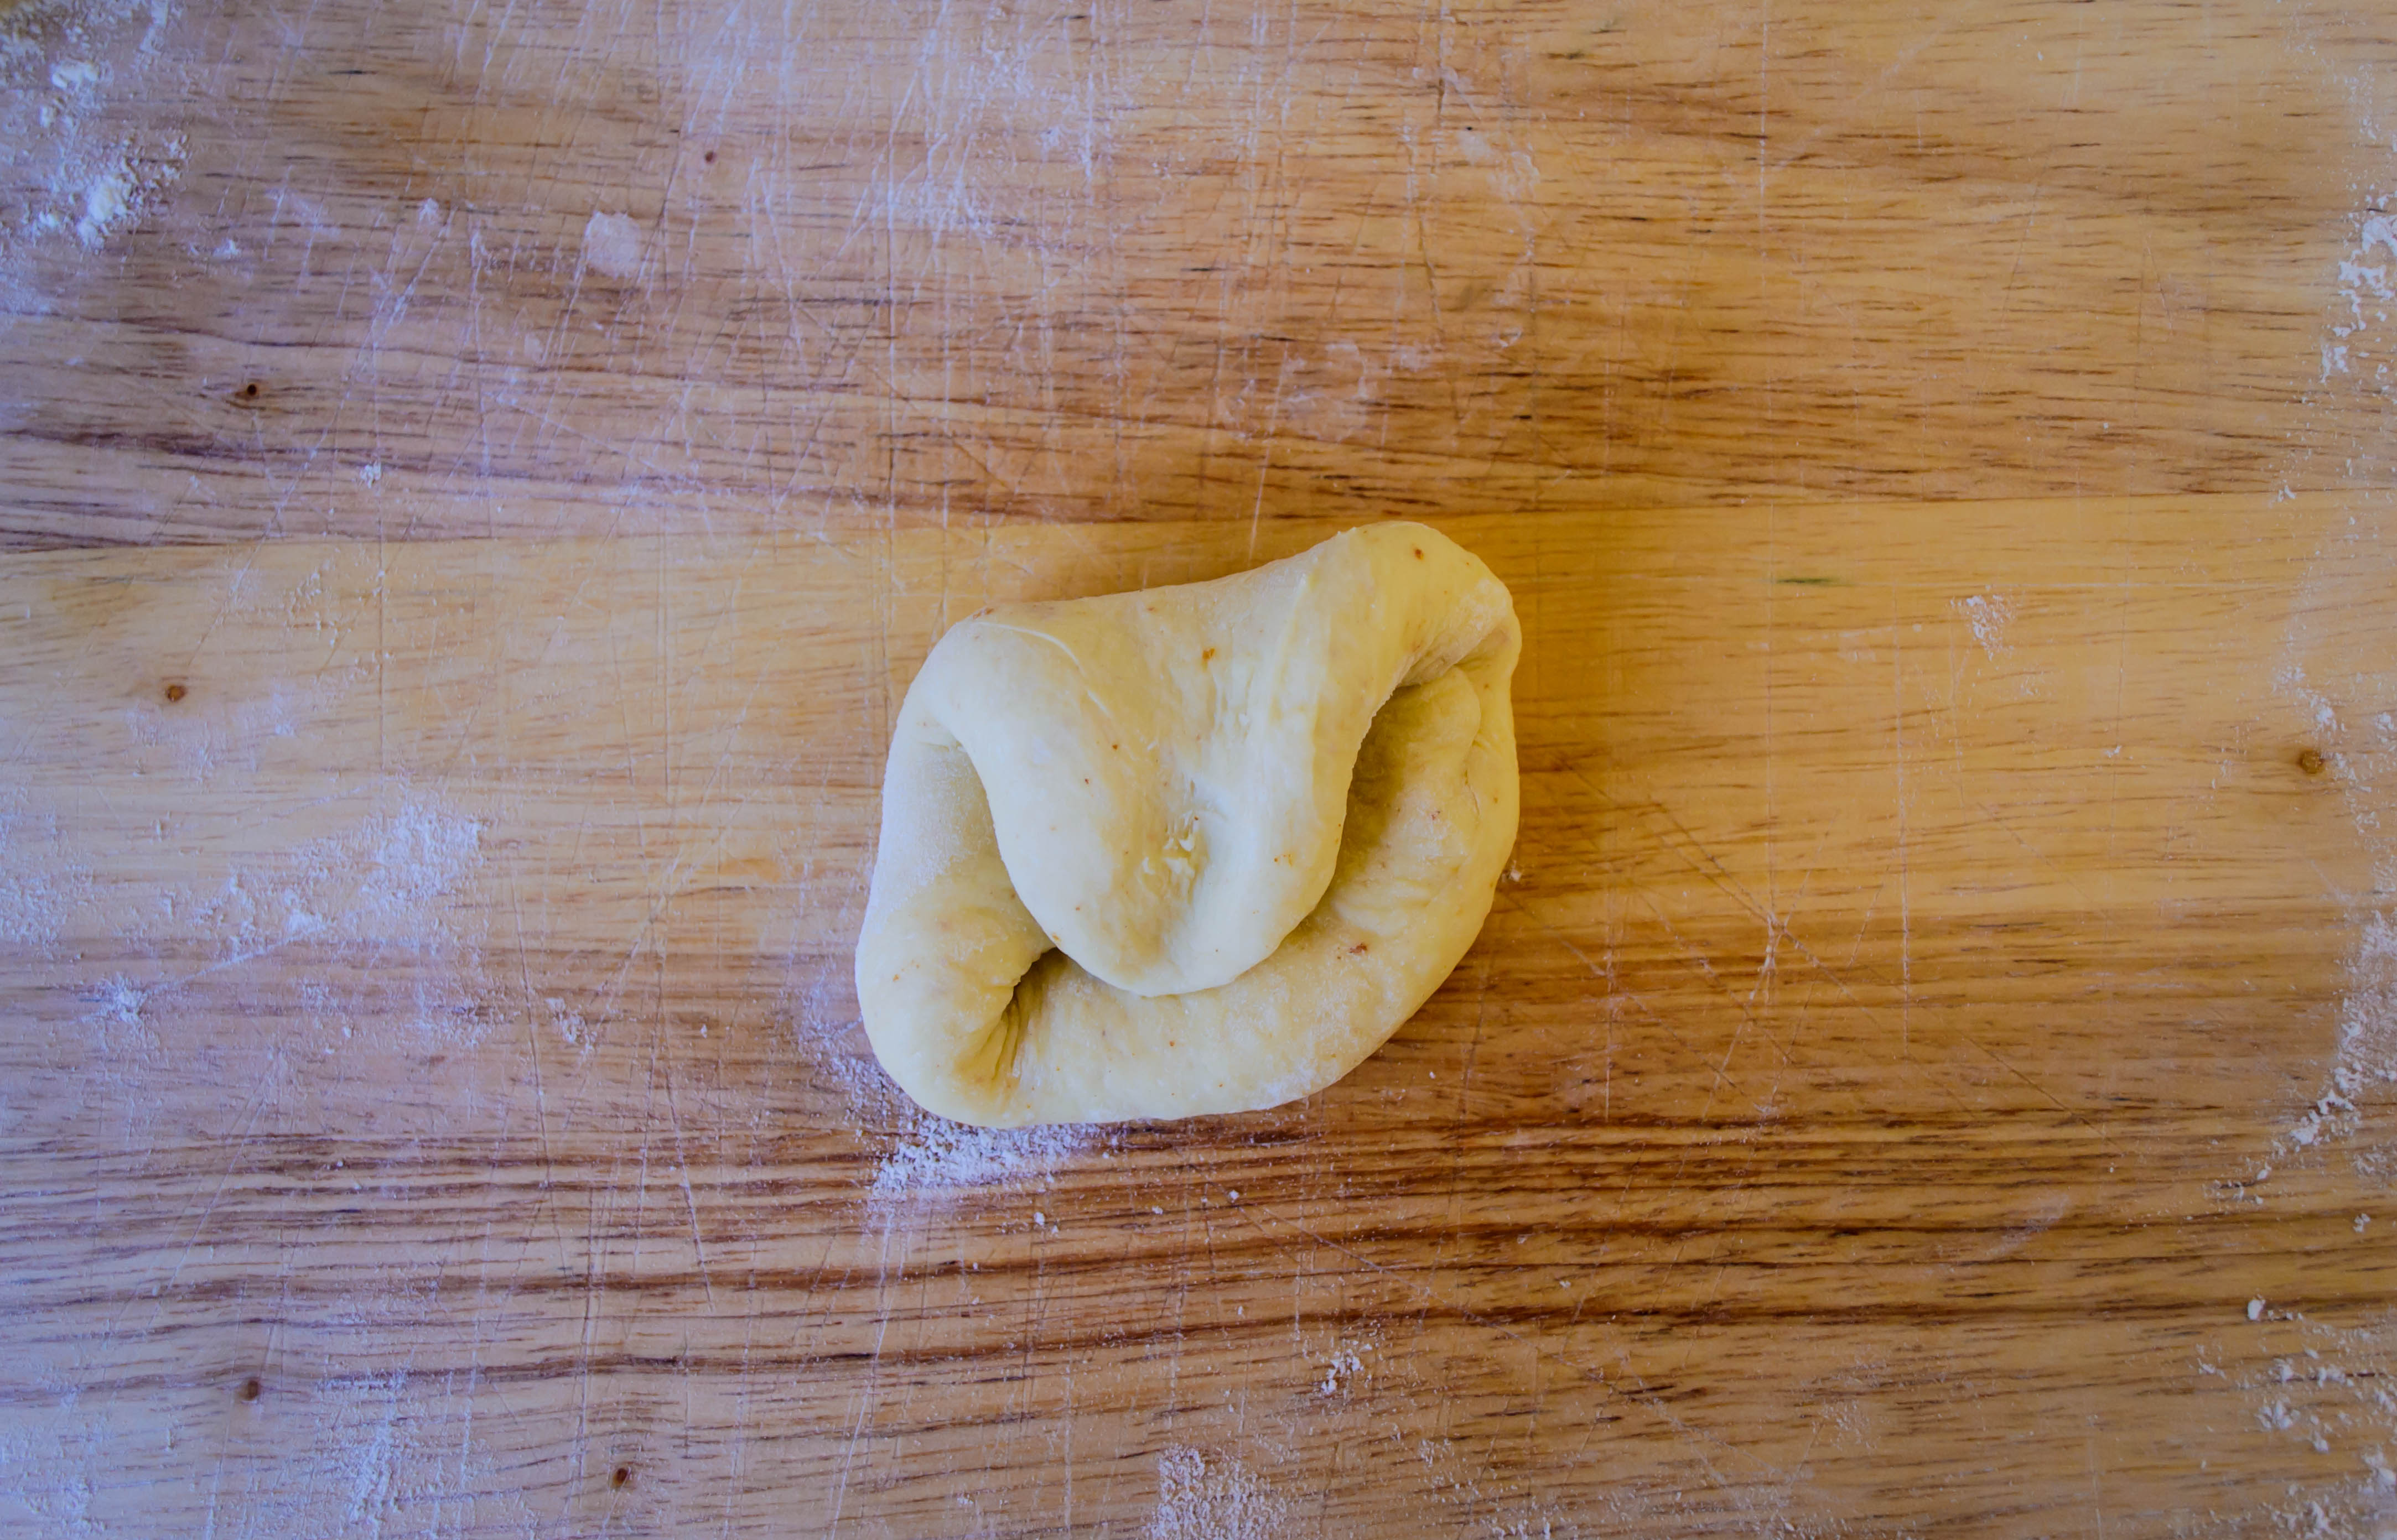
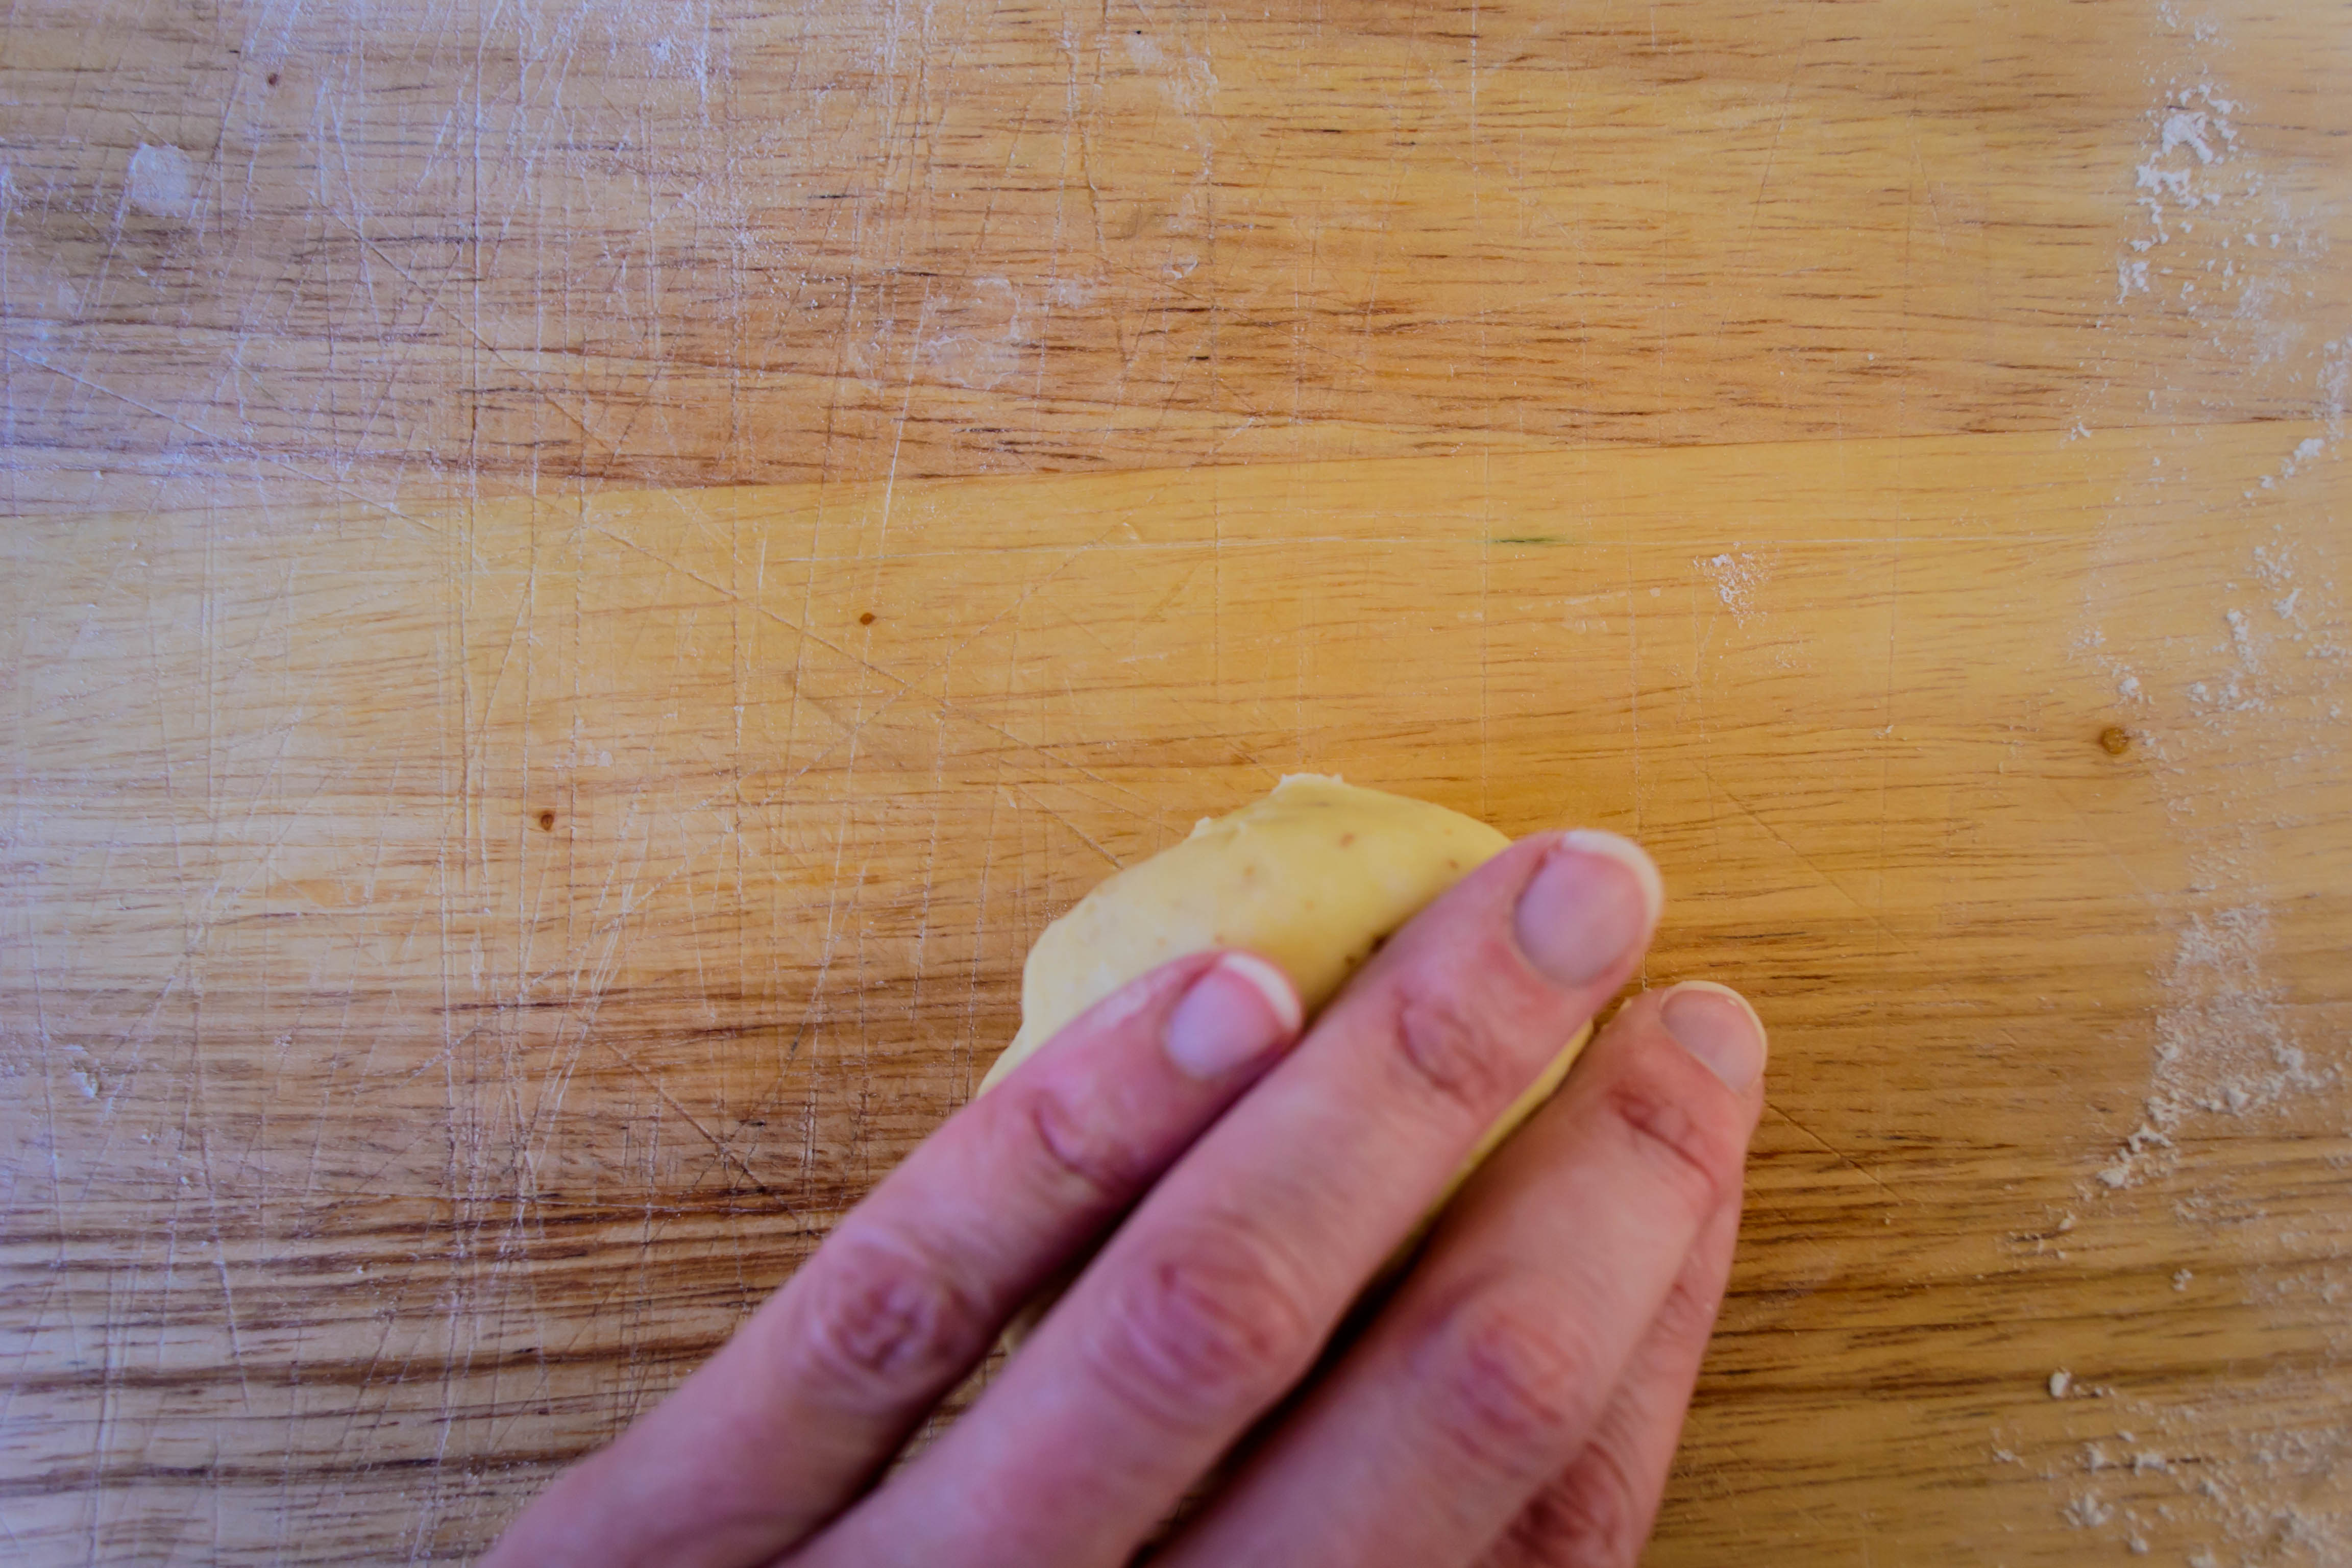
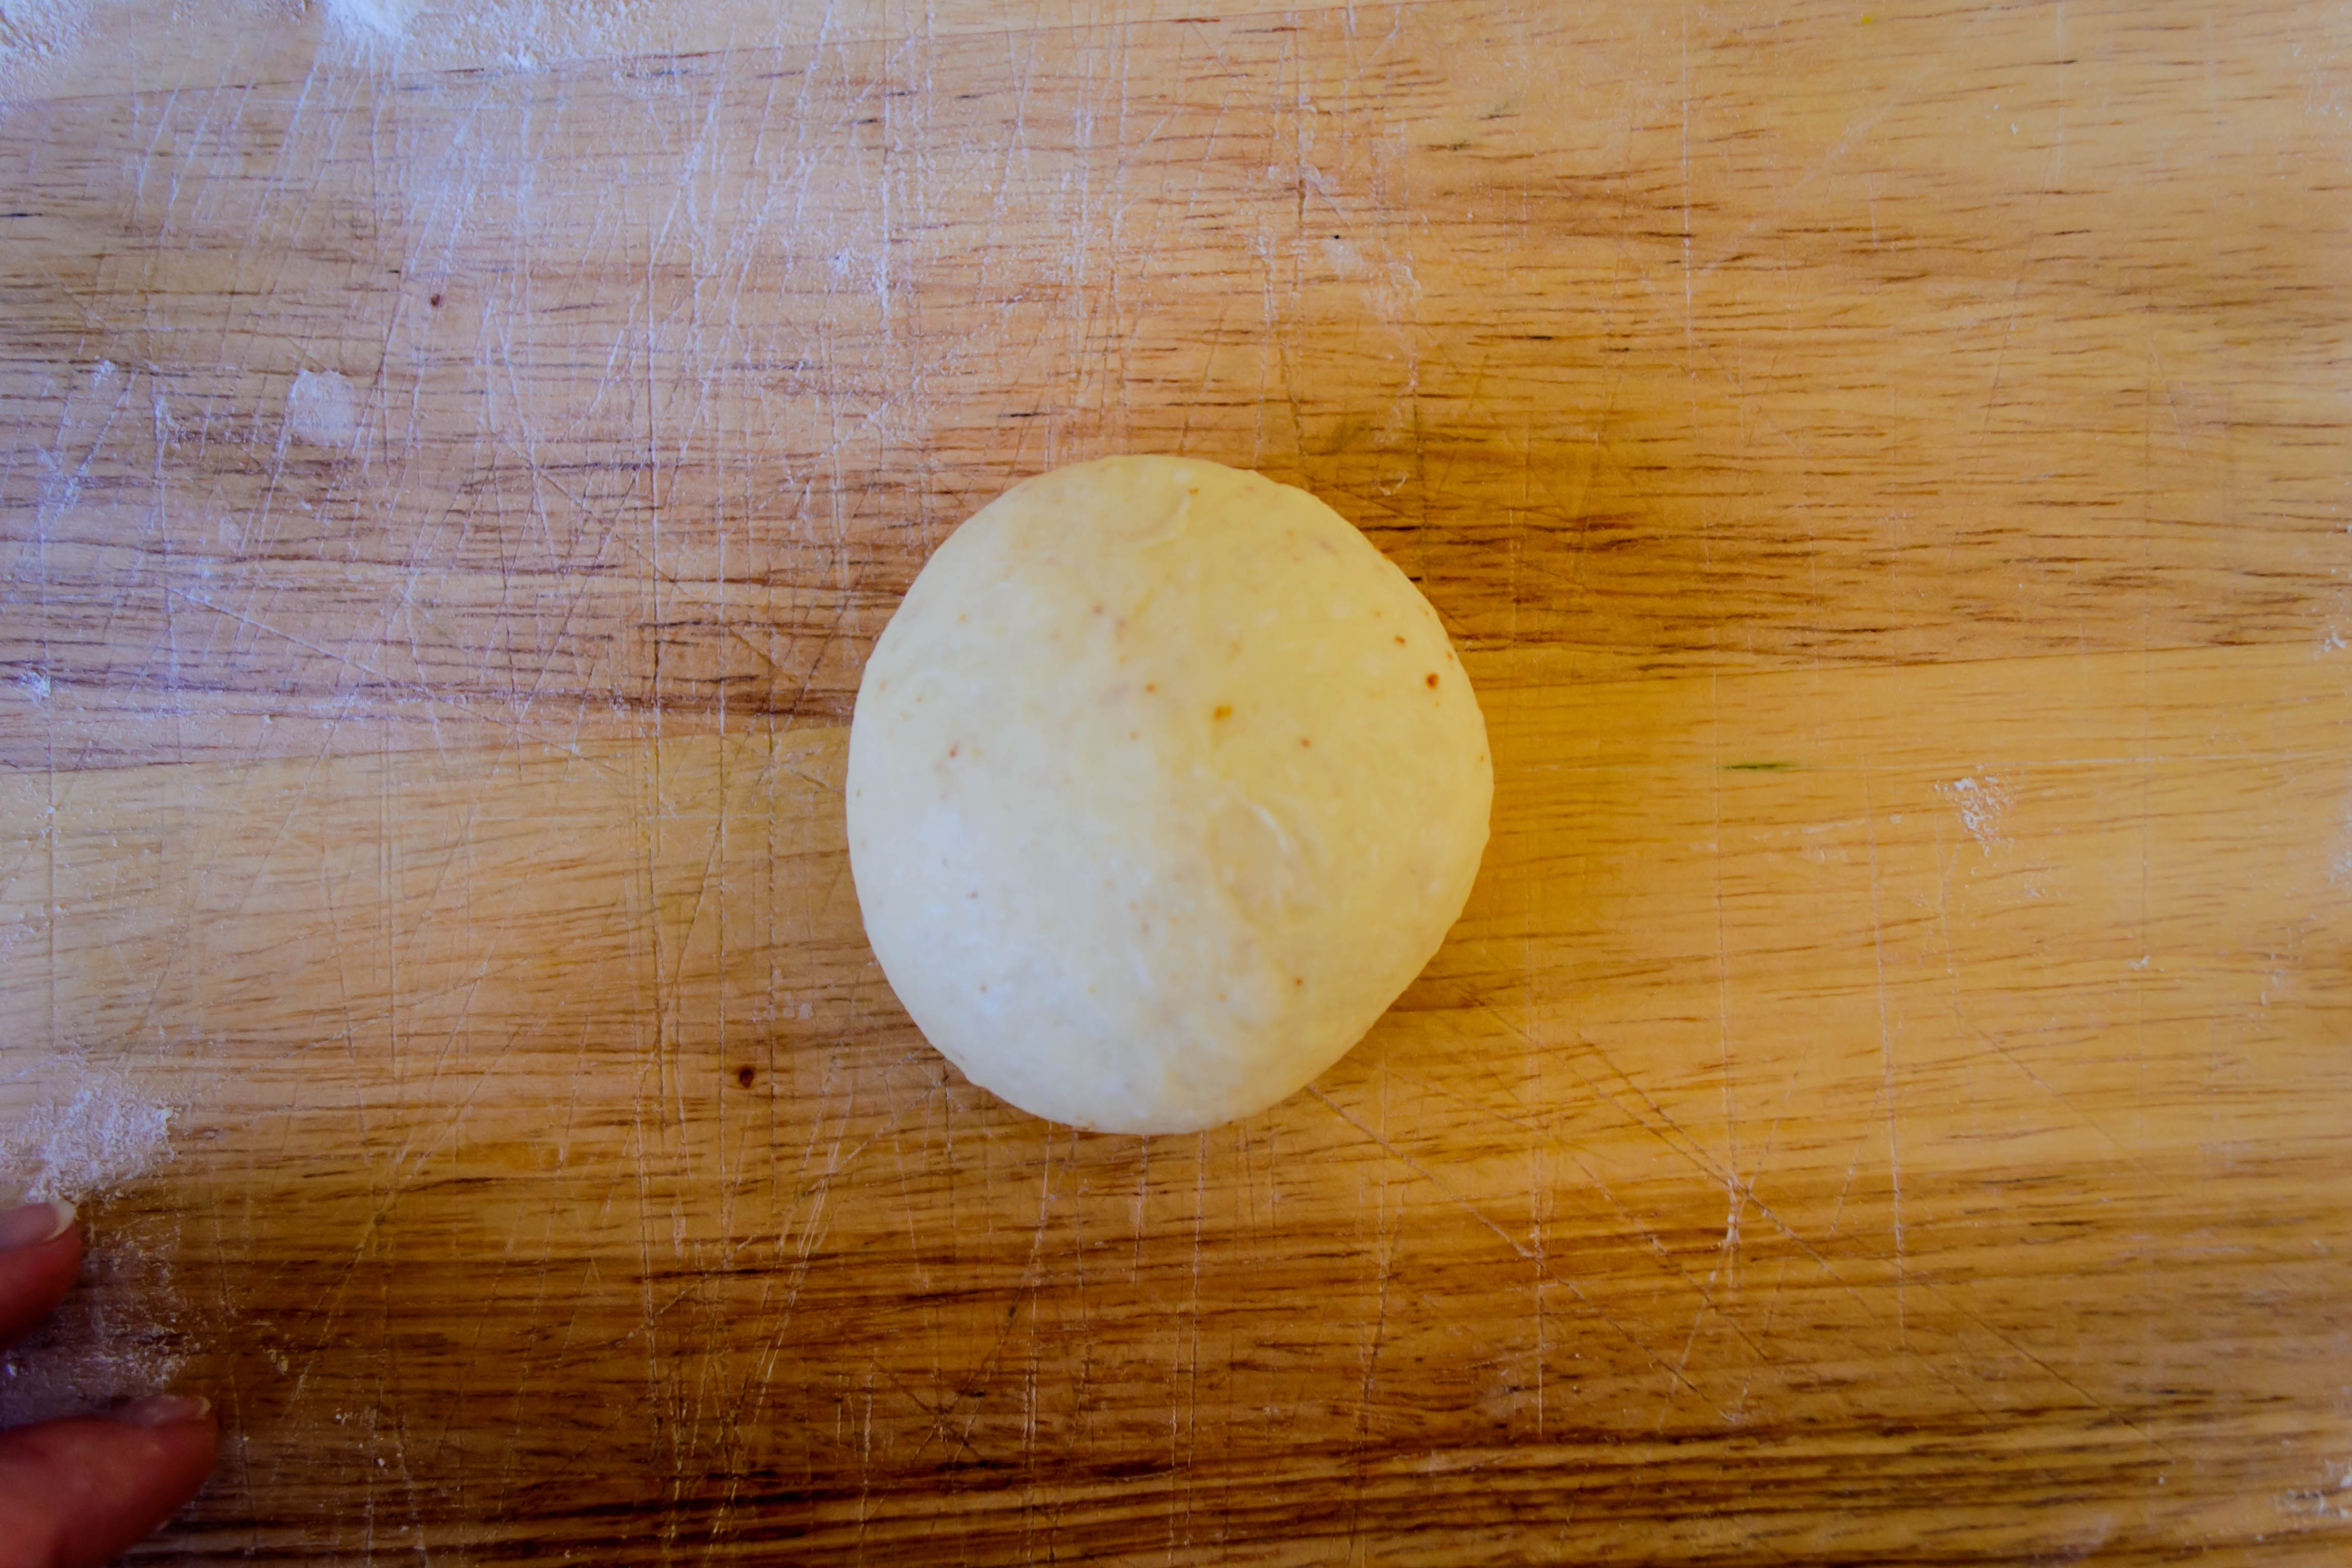
  • Day two: remove the dough from the refrigerator and relocate it to a well-floured board. Divide it into four pieces. Working one at a time, pat two of the pieces of dough into about a 4-inch round. Around the circumference of the dough, fold in the edges toward the center to form a clumpy ball (see photo series above). Turn the dough ball over and form your hand around it like a cage, then roll gently with very little pressure in light circles on the board to form a smooth, taut round (see Joe Pastry’s excellent tutorial if you need help with this). Repeat with the second piece of dough.
  • The remaining two pieces are for the buns. Divide each of them into equal thirds or quarters, depending upon whether you want 6 or 8 buns. Repeat the flattening, folding, and shaping process with each of these smaller dough pieces, then cover all dough rounds with plastic wrap and let them rest for 5 minutes.
  • Grease one loaf pan and one baking tray (or line it with parchment paper). After the dough balls have rested for 5 minutes, flip them to expose the seam side and repeat the flattening, folding, and shaping process with each one. This creates a finer, more uniform texture in the final product – a step worth doing.
  • Place the two larger balls into the loaf pan, pressing them gently into the corners. They will rise and merge into each other while baking. Place the 6 or 8 smaller rounds on the prepared cookie sheet. Cover both loosely with plastic wrap and leave to rise until almost doubled in size – this should take 1½ – 2 hours. Even after this rise, the loaf may look a bit puny. Don’t worry; it rises quite impressively in the oven.
  • Half an hour before baking, be sure your oven rack is in the middle position and preheat the oven to 350F. Cooks Illustrated suggests placing a baking stone on the rack to preheat along with the oven, perhaps to create a more even shot of heat.
  • When the loaf and the buns have nearly doubled, beat the final egg with the pinch of salt. Remove the plastic wrap and brush the loaves with the egg mixture. Set the pans in the oven (on the stone, if you’re using one), and bake until the tops are golden brown and the internal temperature registers 190F. This will take 18-20 minutes for the buns, and 35-45 minutes for the loaf. If you can remember, rotate the pans halfway through baking.
  • Once cooked through and shiny golden on top, transfer pans to a wire rack and cool for 5 minutes. Then remove from pans, return to wire rack, and cool at least 2 hours before slicing and serving.

Brownie Chunk Cookies

Despite my self-effacing proclamations of cookie-production-failure last week, earlier this week I pushed through my grading, closed down the semester (email? What email?), and made another batch of cookies. These, while not Christmas or holiday themed, per se, are a cookie I’ve been playing with for some time now, and the final result is so big, so decadent and comforting and butter laden and jammed with chocolate, that not including them on a holiday cookie platter feels unacceptable. Unless, of course, that’s because you ate them all before you had a chance to assemble that platter. In which case, carry on. I think you’ve got the right idea.

Food Blog December 2014-0972I found the original recipe for these cookies in an old issue of Bon Appetit magazine – a contribution from a place called Sweet Pea Bakery and Catering – and was bowled over by the concept: brownie chunks folded into walnut-spiked, brown-sugar forward cookie dough, baked into a, what? Brownkie? Cooknie? It means two separate baking projects, but really? If the end result is two casual, much beloved hand-held desserts in one thick, golden, oversized package, I’m willing to put in the extra time.

Food Blog December 2014-0961Food Blog December 2014-0962And yet, as I played, I wanted more. The recipe already calls for walnuts; I wanted mine toasted for that extra, almost bitter buttery richness. The deep chocolate-y squidge of the brownies, on the fudgy side (as opposed to cake-y, as you might expect), is good, but baked into the cookies they don’t have that same melty purity as chocolate chips or chunks might. Easy solution. A handful of chopped bittersweet chocolate joined the party. I replaced some of the all-purpose flour with bread flour to give the cookie some extra chew. And as a final coup de grace, a sprinkle of coarse sea salt over the top of each innocent not-so-little scoop of dough. Chocolate and salt are old friends, suitable for mergers beyond that classic dipped pretzel business. (Seriously, try it. If you don’t like a little salt sprinkled atop a chocolate chip cookie, I’m not sure we can be friends.)

Food Blog December 2014-0966Food Blog December 2014-0967This is a big cookie. I like it that way, because it means the brownie chunks and shards of chopped chocolate inside can be big enough to retain structural integrity. I will admit, though, that devoting almost 1/2 a cup of batter to each cookie makes for a large serving. If you were so inclined, I’m sure you could chop the additions smaller and scoop out more petite dough balls. I just… haven’t. Though I will admit to having thought hard about the opposite: smashing a scoop of vanilla ice cream between two of these monsters and giving up on eating any other food ever again. Because hey, holiday.

Next week I’ll be back with my final sauce offering for the year, and some concluding words on that project. But for now, I’ll keep it short, and wish you joy, warmth, and food as gorgeous on the tongue as it was on the plate. Or maybe more. Happy holidays, friends, no matter what you celebrate.

Food Blog December 2014-0976

Brownie chunk cookies
adapted from the Sweet Pea Bakery and Catering, via Bon Appetit magazine


Old Fashioned Brownies
Makes a 1/2 inch slab of about about 10×15 inches
5 ounces unsweetened chocolate, chopped (unless you’re lazy like me)
½ cup unsalted butter (1 stick), cubed (see parentheses above)
2 cups sugar
2 teaspoons vanilla
4 large eggs
¼ teaspoon salt
1 cup all-purpose flour


  • Preheat the oven to 350F. Line a cookie sheet with aluminum foil, leaving at least an inch overhang on all sides to lift with.
  • Create a double boiler by filling a medium pot about half full of water and setting a glass or metal bowl over the pot, being sure the bottom of the pot doesn’t touch the water. Add the chocolate and butter to the bowl, and bring the water in the pot to a bare simmer over medium heat. Stir frequently until chocolate and butter are smooth, glossy, and completely melted. Set aside to cool for at least 15 minutes.
  • When chocolate is barely warm to the touch, whisk in the sugar and vanilla. The mixture will become clumpy. Add the eggs and salt; whisk firmly until fully combined. Switch to a spatula and stir in the flour until no white streaks remain.
  • Dump and spread the batter over the prepared pan to create a thin, even layer. You may have to manipulate it quite a bit to get it to spread that far.
  • Bake in the preheated oven until a cake tester comes out with just a few moist crumbs; about 20 minutes. Cool in pan, then cover and refrigerate for a few hours or overnight.
  • To remove from the pan, lift using the foil overhang and reserve 3/4 of the slab for the cookies. Use the remainder for your own devious purposes.


Brownie chunk cookies
Makes 2½ – 3 dozen
1½ cups room temperature butter (3 sticks)
1 cup sugar
1½ cups brown sugar
1½ teaspoons vanilla
3 eggs
3 cups all-purpose flour
¾ cups bread flour
1½ teaspoons baking soda
1 teaspoon coarse sea salt, + more for sprinkling
1½ cups walnuts, toasted, then chopped
4 ounces bittersweet chocolate, chopped in chunks
¾ old-fashioned brownie slab, cut into 1-inch chunks


  • Preheat oven to 325F and line 2 baking sheets with parchment paper
  • Cream the butter in a large bowl until it is light and fluffy. Add the sugar and the brown sugar and cream again until well integrated – be sure there are no errant chunks of butter.
  • Add the vanilla and eggs to the creamed butter and sugar and mix well to combine, scraping down the sides to create a homogenous mixture.
  • Stir in the flours, baking soda, and salt to form a soft dough. Add the walnuts and chopped chocolate, stirring well to combine. Finally, gently fold in the brownie chunks – we don’t want to break them up too much.
  • Spray a ⅓ – ½ cup ice cream scoop or measuring cup with non-stick spray and use it to scoop the batter into rounds on the prepared cookie sheets, spacing them about 2 inches apart (this allowed me to fit six balls of dough on each sheet). Once spaced, press down with two fingers to flatten each ball slightly.
  • Sprinkle the top of each cookie sparingly with coarse or flaky sea salt and bake in the preheated 325F oven for 18-20 minutes, until edges of cookies are starting to turn golden and the middle is set but still very soft.
  • Cool on cookie sheets for 5 minutes, then remove to a wire rack to cool completely.

Apricot Ginger Thumbprint Cookies

Food Blog December 2014-0956Up until I was in college, almost every year my family received a heavy box a week or two before Christmas. As soon as we tore through the tape we could smell them: Nana’s cookies. Ladylocks or cream horns, nut-rolls, pizzelles, thumbprints, sometimes chocolate dipped apricots or seven layer bars; everything nestled in its own individual wrapping and ready to be devoured. And she didn’t just send them to us, but to the families of her other two children as well, and who knows who else. I’m sure she saved a few for herself and Pap – who was quite the cookie fiend – to eat as the holidays approached.

Food Blog December 2014-0943I never thought about it when I was a kid, but this must have taken her weeks to do. I can only imagine the organization that went into it – I’m sure dough was made ahead of time and frozen until she was ready to bake, and what a baking day(s) it must have been! How many cookie sheets would that be, all rotating in and out of the oven? How many measuring spoons and bags of flour and sugar and butter?

Food Blog December 2014-0941I had big plans this season. I was going to give you with a week of cookies, presenting my favorite holiday offerings with which you could grace your own dessert bar (and if you have one of those, I politely demand to be invited over). Just one cookie recipe a day, and you and I would both be set for the whole season.

Food Blog December 2014-0944Alas, as usual, that whole having a day job thing took over. Amidst the stacks of papers, however, one cookie managed to sweet talk its way through: a modest tray of thumbprints that, offered up in my department’s mailroom, disappeared in less than two hours. My people are cookie people.

Food Blog December 2014-0946Thumbprints were always included in Nana’s Christmas cookie box. Somewhere between a sugar cookie and shortbread, but with brown sugar rather than white, the soft dough gets rolled into a ball, dunked in egg whites and then coated in chopped nuts. A gentle squash in the middle of the ball gives the cookie its name, and provides a little receptacle for more sweetness – after baking, Nana always filled the little cavity of the cookie with pink or blue royal icing.

Food Blog December 2014-0948I hadn’t thought about thumbprint cookies in years, but at some point this summer, something reminded me of these pretty little sweets and I knew I wanted to make my own version. None of my relatives – good bakers all – had a copy of Nana’s recipe, but one of my aunts told me to start with Betty Crocker, and gave me a few hints about how Nana might have adapted her version. In mine, I’ve replaced the margarine I’m almost sure Nana used with butter, and gone with a fruit-based jammy chutney for the center rather than the sweet icing she favored. Apricot and crystallized ginger, chopped fine or pulverized in the food processor, cooked down with some water, some sugar, and some lemon zest create a beautiful glossy compote reminiscent of those tubs of candied fruit that show up in grocery store produce sections this time of year, but with fresher, cleaner flavor.

Food Blog December 2014-0949It has been a long time since I tasted one of Nana’s thumbprints, but my first bite of these, still warm from the oven, told me I was close. The cookie itself is buttery and crumbly, both features enhanced by its walnut coating, and not overly sweet. The apricot and ginger filling give it a spicy-sweet character that went as well with the walnuts as I’d hoped, and they are actually tastier the day after baking. My recipe wound up making a mere 2 ½ dozen cookies, which doesn’t sound like a pittance, but when I brought home an empty tray after making my offering at work, N. and I wished we’d saved more than the four cookies I’d laid aside for us.

Food Blog December 2014-0952As a friend shocked me by revealing last night, it’s only ten days till Christmas, and Hanukkah starts tomorrow already. I hope your plans are going well, and if you do have the urge to bake something sweet for someone you love, this little gem of a cookie should be hard to resist.

Food Blog December 2014-0955

Apricot Ginger Thumbprints
Adapted from Betty Crocker
Makes about 2 ½ dozen cookies
For the filling:
1 cup dried apricots
¼ cup crystallized ginger
Zest of one lemon
¾ cup water
1 tablespoon brown sugar
Pinch salt
For the dough:
½ cup brown sugar
1 cup butter, soft but not melted (2 sticks)
1 teaspoon vanilla
2 egg yolks
2 egg whites
2 cups all-purpose flour
½ teaspoon salt
1 ½ – 2 cups finely chopped walnuts


  • Make the filling first, since it will need time to cool after cooking.
  • With a sharp knife or a food processor, chop the apricots and ginger until very fine.
  • Place apricot and ginger bits in a small pot with lemon zest, water, brown sugar, and the pinch of salt. Bring to a bubble, then reduce heat to medium-low and simmer until the mixture becomes thick, 15-20 minutes. Stir occasionally.
  • When mixture is a thick, jammy consistency, remove from heat and set aside to cool completely.
  • While apricot ginger mixture cools, preheat the oven to 350F and make the cookie dough.
  • Cream the butter until light and fluffy – about 2 minutes.
  • Add the brown sugar and cream together another 2 minutes, until this, too, is light and fluffy. Add the egg yolks and vanilla, and mix well to combine.
  • Sprinkle in the flour and salt, mix well to combine into a clumpy dough approximately the consistency of wet sand.
  • If at this point the dough is too soft to work with, stow it in the fridge for 15 minutes or so to let the butter harden up a bit.
  • While the dough chills, use a fork to lightly beat the egg whites, reserving them in a small bowl.
  • Chop or process the walnuts into small crumbs.
  • When you are ready to form the cookies, use a spoon or your fingers to portion out and roll 1-inch balls of dough. Dunk each ball in the egg whites, then roll in the walnuts until well coated.
  • Place each ball on a greased or parchment-lined cookie sheet, spacing them about 2 inches apart.
  • When your cookie sheet is full, use your thumb or finger to push down into the center of each cookie ball, making a depression. That’s the thumbprint!
  • Bake at 350F for 15 minutes, until cookies are lightly golden and have swelled up.
  • Upon removing the cookies from the oven, use the back of a spoon to lightly press down on the depressed area again, as it may have puffed up during baking.
  • Let cool on cookie sheet for 1 minute, then remove to a wire rack. While still warm, fill the center with apricot ginger mixture – each cookie should fit about ½ a teaspoon of the fruit filling.
  • Cookies are best cooled completely, and only get better the second day, though I suspect they won’t last much longer than that.


Rye and Mushroom Stuffing with Chestnuts and Hazelnuts

Food Blog December 2014-0936A few months ago, my sister and her boyfriend engaged in a Whole 30 food challenge to help them feel healthier and more in control of their diets before the holiday season. As part of the challenge, and to silence naysayers convinced this would mean a barrage of boring, bland food, my sister took photos of almost every meal they ate. Some of these looked so good I was ready to hop on the bandwagon myself (though, as she admitted, going without cheese for that long was a hardship. First world problems, I know).

Food Blog December 2014-0930One dish in particular caught and held my imagination. R. called it “hazelnutted mushrooms.” The combination of two much beloved, earthy, woodsy ingredients made me think of Oregon and long for its damp autumnal glory as Los Angeles cycled through week after week of 80 degree days.

Food Blog December 2014-0929As the idea simmered in my mind, I kept thinking of other ingredients that would pair well with hazelnuts and mushrooms. Sage, certainly, with its dusty sharpness. Whiskey, to deglaze with that sear of burning honey. Maybe even chestnuts, with their curious texture and meaty sweetness.

Food Blog December 2014-0932Once chestnuts entered the picture, there was no doubt this was destined to become a stuffing. With half a loaf of dark pumpernickel rye bread in the fridge longing for an application, I took action. Butter, onions, celery, deeply caramelized mushrooms, and the crunch and odd sweetness of chestnuts bolstering the broth-moistened bread and toasted hazelnut bits. The whiskey adds just a gentle flavor and a great smell to the stuffing that backs up the flavor of the chestnuts and somehow makes them make more sense as an ingredient – I wouldn’t do without it, but you can if you wish.

Food Blog December 2014-0935You’ve likely noticed there are fewer photos here than usual – it turns out that though “brown food tastes goooood” as Anne Burrell is apt to note in her throaty growl, it doesn’t always produce the most flattering or interesting photograph. Regardless, this brown food is indeed good, and deserves your attention. Though we weren’t willing to put this on the Thanksgiving menu (we are boring sticklers, and this big a shift in the sides might cause turmoil), it has considerable promise as a winter companion to roasted meats at other cold-weather holidays, especially if you tend to go with pork or beef. I think stuffed pork chops would be a particularly nice application. We kept it simple, though, and went (almost) vegetarian, pairing moist, heaping spoonfuls with mashed sweet potatoes and salty, crispy roasted brussels sprouts.

Food Blog December 2014-0936

Rye and Mushroom Stuffing with Chestnuts and Hazelnuts
Serves 6-8 as a side
6-8 slices dark rye bread, preferably stale
¾ cup raw, unsalted hazelnuts
6 tablespoons butter
½ a red onion, diced
2 large ribs of celery, diced
¾ pound (12 ounces) crimini mushrooms, stemmed and quartered
½ cup (6-8 ounces) cooked, peeled chestnuts, roughly chopped
8-12 fresh sage leaves, minced
¼ cup whiskey (I used Jack Daniels – you use what you like, or omit it and use extra broth instead)
2 – 2 ½ cups broth, chicken or vegetable
Salt and pepper to taste (how much salt you use will depend on the sodium content of your broth)


  • Preheat your oven to 350F and position a rack in the middle slot. Fill a baking sheet with your hazelnuts. Place a wire rack in the tray (it should fit over the hazelnuts) and spread out your rye bread on a single layer atop it. Toast in the preheated oven until the bread is quite dry and the hazelnuts are starting to look slightly oily; 10-15 minutes. Remove and set aside to cool.
  • Meanwhile, heat your broth in a small pot or in the microwave – it doesn’t need to be boiling, but it should be quite hot. If it does boil, turn it down to avoid losing too much through evaporation.
  • Melt the butter in a large skillet over medium heat. Add the diced onions and celery and cook until softened and translucent; 5-8 minutes.
  • Add the mushrooms and cook for an additional 5-8 minutes, until the mushrooms have soaked up much of the moisture in the pan and are soft. They may begin to brown a bit; that’s a good thing.
  • Add the chopped chestnuts and the sage and let them warm through for 1-2 minutes.
  • While the vegetables are cooking, chop your hazelnuts into rough chunks (it’s wise to wait until they are cool enough to handle), then add them to the vegetable mixture in the skillet.
  • Turn off the heat and immediately add the whiskey, which should bubble furiously when it hits the surface of the pan. Stir to combine – much of the whiskey will evaporate.
  • Tear or cut the rye bread into small pieces or cubes. It should be quite dry. Add the bread cubes to the pan and stir well to combine.
  • Now, add 2 cups of the hot broth and stir to combine. If the bread still seems fairly dry, add the remaining ½ cup. Season with salt and pepper to taste, then put a lid on the skillet and let the mixture sit for five minutes to allow the bread to absorb the broth.
  • After five minutes (or more – allowing it to sit a while at this stage is fine), deposit the stuffing mixture into a greased 9×9 inch baking dish, spread or pat into an even layer, and bake in your preheated 350F oven for 30-35 minutes, until the top layer is crusty but the interior is still nice and moist.
  • Serve hot, as an accompaniment for meat or veg.

Pumpkin Pecan Sweet Rolls – #TwelveLoaves

Food Blog November 2014-0866The time of peace is coming. I can feel it. I need it. This is week 14 of a 16 week semester, and though I had a brief respite from grading this weekend, this week papers begin pouring in again. And this is not to say that my weekend wasn’t busy. It was crammed, jammed, packed, precariously scheduled. It was just busy with other things. But I felt, for just a moment, the peace I’m craving.  I caught myself, about five minutes into dusting the living room, enjoying it.

I’ll wait while that sinks in.

I was enjoying. dusting.

Food Blog November 2014-0809Food Blog November 2014-0812Before you think me a complete freak, let me say this is a highly irregular occurrence. I don’t enjoy dusting. In fact, within ten minutes of noticing this odd feeling of pleasure, I was tired of the activity again. But for those few minutes, there was something so calming, so reassuring, so soft and easy about running a cloth over the bookshelves and the side table and the TV stand. It was a moment that was easy to escape from. It was mentally effortless. I thought, “I need this.” I need this peace, this feeling of being brainless with no guilt.

Food Blog November 2014-0816Food Blog November 2014-0819Fortunately, this time is approaching like a freight train (it would be nicer if it were approaching like fog, or frosting, or some other delicate F word, but we must be honest…). The commercials I try not to pay attention to when I watch television loudly broadcast how many shopping days are left until Christmas. Within my family, texts about gifts have started flying. I may or may not already know exactly what I’m wearing for my family’s Christmas dinner.

Food Blog November 2014-0824Food Blog November 2014-0825Food Blog November 2014-0827Food Blog November 2014-0832Food Blog November 2014-0834But that’s getting ahead of things. That’s the full stop. We do get a funny little moment of pause first, which is what the dusting was for. My parents arrive on Wednesday to celebrate Thanksgiving. It will be the first year my sister doesn’t join us. This is, when I think about it, a stab of selfish sadness. But that only lasts a moment, because instead of winging her way all the way across the country to be with us for one short weekend, she’ll be with her partner and her dog, with his family. This is a joyful thing. She sent me a photo of a batch of pumpkin bread cake pops she made to take along. She said something about “impressing purposes.” She won’t need cake pops to do that.

Food Blog November 2014-0842Food Blog November 2014-0845Food Blog November 2014-0846It does seem like pumpkin is the thing to do these days. I was unsurprised that this month’s Twelve Loaves project calls for that most celebrated of squashes. I typically try to imagine something no one else will have made for the Twelve Loaves challenge, but this month I decided to loosen up. The fact was, I wanted pumpkin sweet rolls. So no matter how many other people chose this too (two so far), I was making them. Originality be damned. Sometimes you just have to make what you’re craving.

Food Blog November 2014-0849For these rolls, I started with my Nana’s sweet roll dough, but used all whole milk instead of water for added richness. I replaced the white sugar with brown, to play with the autumnal feel of the pumpkin, and spiked the dough with all the spices that usually find their way into pumpkin pie. And then, of course, the bright orange vegetal sweetness of pumpkin puree. Once risen and rolled out, I spread it with melted butter, more brown sugar and cinnamon, and a scattering of toasted, chopped pecans. Rolled, sliced, and baked, they puffed into glorious swirls – orange gold, with dark bronze bubbling fissures twisting through them. Pulled apart just like that, they were delicious. Because I didn’t overdo it on the sugary center, they could almost pass as breakfast.

Food Blog November 2014-0854But this is holiday food, and holiday food is so often about excess that I couldn’t help myself. A quick whip of cream cheese with a breath of powdered sugar, a splash of vanilla, and just a touch of heavy cream to loosen it up, and I had a soft, thick frosting to spread over their golden tops.

Food Blog November 2014-0851I left two pans in the department mailroom at work. By the time I left in mid-afternoon, there weren’t even crumbs left.

Food Blog November 2014-0855Making these rolls is an investment. They have a long ingredient list. The dough can be quite sticky. They require two rises. They demand rolling, chopping, toasting, sprinkling, whipping, spreading… but they also require pulling into shreds of sweet chewy dough, and assiduous finger licking. And meditative savoring. And here’s the thing: the holiday season often feels hectic. There is shopping to be done, and traveling to navigate, and wrapping and cooking and impressing family you rarely see, and all of that can feel like too much to squeeze in a complicated baking project.

Food Blog November 2014-0863But I think, if you embark on such a baking project, knowing the time it requires, and sinking into its gentle rising and baking schedule, it provides its own kind of peace. Besides, these are too good not to make. So just make some. Thanksgiving breakfast, maybe. You’ll thank me later.

Food Blog November 2014-0867

Food Blog November 2014-0869

Pumpkin Pecan Sweet Rolls
Makes about 30

For dough:
4 ½ teaspoons active dry yeast
1 cup lukewarm milk
1 cup + a pinch brown sugar
1 teaspoon salt
2 eggs
½ cup (8 tablespoons or one stick) soft butter
1 cup pumpkin puree, canned or fresh (if canned, be sure it is not pumpkin pie filling)
1 teaspoon vanilla
1 teaspoon ground cinnamon
½ teaspoon ground nutmeg
½ teaspoon ground ginger
¼ teaspoon ground cloves
6-7 cups all-purpose or bread flour
For filling:
½ cup (8 tablespoons or one stick) melted butter
1 cup brown sugar
2 teaspoons ground cinnamon
1 cup toasted, chopped pecans
For frosting:
8 ounces room temperature cream cheese
1 teaspoon vanilla
¾ cup powdered sugar
3-4 tablespoons heavy cream


  • In the bowl of a stand mixer, combine yeast, lukewarm milk, and the pinch of brown sugar. Stir, then let sit for 5-10 minutes until the yeast is bubbling and smells like fresh bread.
  • Once the yeast has woken up, add the rest of the sugar, the salt, the eggs, the butter, the pumpkin puree, and the vanilla. Mix on medium-low speed with the paddle attachment to combine.
  • Add 4 cups of the flour and all of the spices, and mix on medium-low again to combine. You will have something like orange cake batter. Add 2 additional cups of flour (this is 6 total) and mix to combine.
  • Switch from the paddle attachment to the dough hook and knead for about 5 minutes, or until a sticky but slightly elastic dough has formed. It will not become a firm ball, but will pull away from the sides of the bowl in stretchy threads. If the dough is not pulling away from the sides of the bowl at all after the first three minutes, begin adding the remaining cup of flour ¼ cup at a time, kneading well in between each addition.
  • When the dough is kneaded, spray the sides of the bowl with a non-stick spray, roll the dough over in it once or twice to coat, then cover the bowl tightly with plastic wrap and set it aside to rise until doubled – about 90 minutes.
  • While the dough rises, prepare the filling ingredients – toast and chop the pecans, melt the butter, and get the cinnamon and brown sugar measured out for easy application. While you’re at it, spray pans with non-stick spray. I used two 9-inch and two 8-inch cake pans. Square or rectangular pans would work fine as well.
  • Dump the risen dough onto a well floured board. If it is aggressively sticky, dust the top of the dough with flour as well and knead by hand a few times, until it is easier to work with.
  • With a dough scraper, a pizza cutter, or a sharp knife, cut the dough in half and stow one half back in the bowl. We will work with one half at a time.
  • Using a well floured rolling pin, roll the first half of dough into a thin rectangle (about ¼ inch thick, if you can manage it). The size of this rectangle will depend on how much your dough has risen. Aim for thickness rather than dimensions.
  • Pour half of the butter over your dough and spread it across the surface with your fingers. Leave a border of about ½ inch on all sides.
  • Sprinkle half of the brown sugar and half of the cinnamon over the surface, again respecting the border. Spread for even coverage if needed.
  • Sprinkle half the pecans over the buttered, sugared surface.
  • Now, we roll. Beginning in the middle of the long edge of your dough rectangle, begin to roll up the dough into a long log. Once you have rolled a revolution or two in the center, move your hands toward the edges, rolling them up as well to create an even log. As you reach the end, pull the loose edge of dough firmly against the log you have made and pinch and crimp it into the already rolled dough to create a seal.
  • Using a serrated knife, cut your log into slices 1 to 1-½ inch thick. To do this without squashing the rolls, use almost no pressure as you saw the knife back and forth.
  • Settle the slices with the filling swirl exposed in your prepared pans, and repeat the process with the remaining half of the dough.
  • When all of your rolls are, well, rolled, drape the pans with clean kitchen towels or plastic wrap and let them rise again for 45 minutes.
  • During the last 30 minutes of this second rise, preheat the oven to 350F.
  • After their second rise, the rolls should have noticeably puffed and be pressing against each other. Remove the towels or plastic wrap and stow the pans in the oven for 20-22 minutes, until the rolls are nicely browned and the filling inside is beginning to bubble. Remove and set aside to cool while you make the frosting.
  • In a medium bowl (or, if you’ve been proactive enough to wash your stand mixer bowl, use that), whip the cream cheese until very smooth with a whisk or electric mixers. Add the vanilla, the powdered sugar, and 3 tablespoons of the cream, and mix to combine. You are looking for a texture a touch thicker than condensed milk – too thick to pour, but loose enough to wilt toward the edges of your icing spatula. If it seems too thick, add the final tablespoon of cream and mix again.
  • While the rolls are still warm, spread with the frosting. This makes enough for about one tablespoon per roll. I found individual dollops, then careful spreading over one roll at a time, made for a more attractive result than just globbing on a pile and spreading over all of the rolls at once.
  • Separate rolls using a butter knife or an icing spatula and serve warm (they are fine at room temperature too, but if you refrigerate the leftovers, I recommend warming them up before eating, as the dough gets a little dry when cold).

Apple-ginger-bread with nutmeg “hard” sauce for #Twelve Loaves October

Food Blog October 2014-0722As soon as I saw that the October assignment for Twelve Loaves was apples, I thought of cinnamon. But then my contrary side took over. Apples and cinnamon is such a natural pairing, it’s practically expected. Why not give someone else a chance? Why not ginger? The searing spiciness of ginger against the cool sweetness of apples sounded like a worthy combination, and I was off and running with not just an answer to the Twelve Loaves assignment, but for my long postponed sauce project as well.

Food Blog October 2014-0735My mom has, on and off since I was little, made a holiday dessert of gingerbread and a warm, well-spiced, rum-spiked sauce. The gingerbread is a homely 9×9 layer, cut into unremarkable uniform squares. The sauce, almost still bubbling, gets spooned over the top, and a swirl of whipped cream inevitably slides right off the square of cake onto the plate beside it, already losing its fluff from the heat of the sauce. I love it.

Food Blog October 2014-0702But like so many desserts, Mom’s gingerbread with nutmeg sauce belongs to the winter. We only ever have it around Christmas and New Year’s. There’s something about its flavors that requires chill in the air. Contrary once again, I decided to see what could be done about that.

Food Blog October 2014-0705Food Blog October 2014-0706We call it a bread, but gingerbread is truly a dark, moist cake. It’s redolent with spices and sticky-sweet from large doses of molasses. Its crumbs cling wetly together and, though not particularly dense, it feels rich and heavy.

Food Blog October 2014-0700I poked around and shifted things a bit, landing on a slight adaptation of Laurie Colwin’s gingerbread recipe in her lovely little book Home Cooking. First of all, if I was going to pass this off as a bread, it needed to be in a loaf pan. This is suitable for dessert, of course, but it should also be acceptable as an afternoon snack. For freshness (and to meet the terms of the challenge, of course), I added the diced chunks of two apples. Two eggs and some buttermilk lighten things up. And finally, because I can’t leave well enough alone, to the already tremendous tablespoon of ground ginger I was prepared to include, I insisted on a palmful of finely chopped crystallized ginger as well.

Food Blog October 2014-0712Food Blog October 2014-0714Food Blog October 2014-0715Now, this bread on its own is a marvelous thing. The apples and the ginger are good playmates, and the spiciness of the bread elicits a harvest feel. With a cup of tea or a mug of apple cider, this bread is perfect.

Food Blog October 2014-0732But sometimes you want more than perfect. Enter Nutmeg Sauce: a silky, buttery, creamy spill dotted with grains of freshly grated nutmeg and discolored in the most wonderful way by a generous dose of dark rum. When I first nabbed this recipe from my mom, I thought this was another classic. Due to its inclusion of alcohol, I’d always thought it was a “hard sauce.” This name, however, comes not from the inebriating potential of the concoction, but the texture: a hard sauce is, well, hard. It’s a solid, buttery spread intended to be served in a cold, spoonable dollop. Nutmeg sauce, on the other hand, is served hot (it’s good cold as well, though it does get a bit clumpy). It is thickened to a pourable velvet with cornstarch, and it is the ideal addition to an already-perfect slice of gingerbread.

Food Blog October 2014-0734Food Blog October 2014-0740Here, though I was determined to serve them together, I must admit: the bread was good. The sauce was good. Together, they were friendly but not in love (still, I wouldn’t say no to yet another generously garnished slice). But I think I know how they could become so. Despite my most contrary, resistant feelings, I think replacing the nutmeg in the sauce with cinnamon, for the sake of the apples, would be the perfect pairing. Sometimes you just shouldn’t fight the classics.

Food Blog October 2014-0736

Apple-ginger-bread
Adapted from Laurie Colwin
Makes one 9×5 inch loaf
1 ½ cups flour
½ teaspoon salt
½ teaspoon baking soda
1 tablespoon ground ginger
1 teaspoon ground cinnamon
¼ teaspoon ground nutmeg
¼ teaspoon ground cloves
½ cup (8 tablespoons or 1 stick) unsalted butter, at room temperature
½ cup brown sugar
2 eggs
2 teaspoons vanilla
scant ½ cup molasses
½ cup buttermilk
2 sweet (rather than tart) apples, peeled, quartered, cored, and diced
2 tablespoons finely minced crystallized or candied ginger


  • Preheat the oven to 325F and lightly grease a 9×5 inch loaf pan.
  • In a medium bowl, whisk together the flour, the salt, and the ground spices.
  • In a large bowl (I used the bowl of my stand mixer), cream together the butter and sugar on medium speed until a light, fluffy mixture forms. Add the eggs, one at a time, mixing to combine after each. Add the vanilla and the molasses and mix well, scraping down the sides and bottom of the bowl to ensure complete integration.
  • Add about ⅓ of the flour mixture and beat to combine, then add half the buttermilk. Repeat with another ⅓ of the flour mixture, then the other half of the buttermilk, and finally the last ⅓ of the flour mixture, mixing until the batter is homogenous each time.
  • Finally, add the apples and the minced crystallized ginger and mix on low speed until just incorporated. Scrape and pour the mixture into the prepared loaf pan, and bake at 325 until a toothpick or cake tester inserted through the center emerges with only one or two damp crumbs; 70-80 minutes.
  • For the sake of structural integrity, let cool in the loaf pan for at least 30 minutes, then transfer to a wire rack and cool completely. Serve with or without nutmeg sauce.


Nutmeg “hard” sauce
Makes about 1 cup
½ cup sugar
1 tablespoon cornstarch
½ teaspoon freshly grated nutmeg (or try it with cinnamon to marry with the apples, and tell me all about it)
¼ cup butter
2 tablespoons dark rum (or 2 teaspoons vanilla)
1 cup whole milk


  • Pour the sugar, cornstarch, and nutmeg into a small pan. Set the pan over medium heat, and with a whisk, stir in the milk and the butter.
  • Cook over medium, whisking slowly but consistently, until a sluggish boil is reached. Continue whisking for another 3-4 minutes, or until the sauce thickens slightly to a texture like barely melted ice cream.
  • Remove from heat and add rum (or vanilla); serve hot.