Zucchini Crepes with Mascarpone Almond Cream

food-blog-february-2017-0288There is no way I can connect this recipe with Black History Month. I’ve tried. The transition just isn’t there. But when this issue of The New Yorker showed up on our doorstep, with this beautiful new imagining of the iconic Rosie the Riveter staring confidently back at me on the front, I wanted to make sure you saw her. Clearly a response to the Women’s March, she is also a powerful image of intersectional feminism, replacing the white WWII era working woman with an African American marcher, pink pussy hat and all. And though the cover doesn’t bear Rosie’s original accompanying phrase – “We can do it” – there’s no way to divorce that message, with all its connotations, from this new version.

There is so much to do, but we can do it.

food-blog-february-2017-0260These started not as crepes but as a desire to modify my favorite zucchini spice bread recipe into a pancake (I told you there was no transition. I just wanted to show you my magazine cover and remind you about the history we should be celebrating this month). There would be nutmeg and cinnamon, there would be caramelized crisp edges, there might be golden raisins… and then I made the mistake of searching for “zucchini bread pancakes” online, and of course the first hit was Deb’s recipe, deepening, as ever, my intense love-hate relationship with her and her site. Let me be clear, before you start emailing me: I adore Smitten Kitchen (look, Deb, I’m even giving you traffic!). I have the cookbook, I went to a signing and thoroughly embarrassed myself, and I trawl through her archives all the time, because she has tried everything! But there’s the hate part (or, at least, the jealous part): she’s tried everything! I certainly wasn’t going to make zucchini bread pancakes if she already had the consummate version (which, of course, I just automatically assume she does. Being a jealous fan-girl is weird).

food-blog-february-2017-0263food-blog-february-2017-0267So I had to go with something different, and somehow something different became crepes. I wasn’t sure how they would work, given the sodden heaviness large quantities of shredded zucchini often contribute to a dish, but the zucchini were already in the fridge and the milk on the door was begging to be used, so the experiment had to move forward.

food-blog-february-2017-0255I’m calling these crepes, but they don’t share ratio or ingredient quantities with other crepe recipes. My grandfather called them Swedish pancakes, probably more because he was Swedish than due to any recipe authenticity. They are a bit moister than some crepes – a little less papery around the edges, maybe a bit heavier, and we’ve never been particularly fussy about getting them wafer thin. Here, the addition of the zucchini makes these qualities important, since the batter has to be substantial enough to hold up to the extra weight of the vegetation.

food-blog-february-2017-0268food-blog-february-2017-0272As I always yell at food competition contestants when they scrunch or tear or mangle their first crepe, the first one probably is going to be ugly. Maybe the second one too. But you have to persist. Crepes require a bit of a rhythm – you have to get a feel for how much batter goes into the pan, how steeply to tilt your pan while you swirl to get an even coating of batter, and how long it really does need to cook before you can flip that delicate, eggy circle. And ultimately, really, it’s okay when that first one rips, because now you get to eat it surreptitiously and make sure it’s good. Cook’s prerogative.

food-blog-february-2017-0277These were indeed good. The zucchini is mild, so don’t worry if it’s not your very favorite vegetable flavor, but it cooks so quickly that every bit of grassy rawness was gone. They could go in a sweet or a savory direction, but I opted for sweet, whisking mascarpone cheese with some honey, some lemon, and roughly chopped toasted almonds for a bit of crunch. Lemon and zucchini play well together, as do zucchini and almonds, and it’s nice to have some texture in with the softness of the cheese and the pliable delicacy of the pancake.

food-blog-february-2017-0280We had these for dinner as a decadent response to a rainy day, but they would make an indulgent breakfast or a superb brunch course as well. You can fold the crepes up into a triangular, handkerchief-like packet with a mound of cheese inside, or you can roll up into a cylinder, which is what my family has always done. I found I liked a few almonds sprinkled over the top, and an extra drizzle of honey as well. Any extra crepes keep fine covered in the fridge for a day or two, until you take them out, reheat them with a bit of salted butter, and smother them with cinnamon sugar, because some days require that kind of solid self care, so you can get out there and keep going.

food-blog-february-2017-0293

Zucchini Crepes with Mascarpone Almond Cream
Makes 10-12 crepes in a 10-inch skillet
30-40 minutes
For the filling:
½ cup whole raw almonds
8 ounces mascarpone cheese
1 tablespoon heavy cream
2 tablespoons honey
zest of one lemon
1-2 teaspoons lemon juice
additional honey, to drizzle
For the crepes:
2 cups shredded zucchini, from 2 medium zucchinis
2 cups milk
2 tablespoons melted butter
3 eggs
1½-1¾ cups all-purpose flour
1 teaspoon sugar
⅛ teaspoon salt


  • First, make the filling. Preheat the oven to 350F. While it heats, roughly chop the almonds – it’s okay to have some uneven sizing. Spread them out on a baking tray and toast in the oven 10-15 minutes until they are golden brown. Start checking at 10 minutes; keep in mind they will continue to cook after you take them out of the oven.
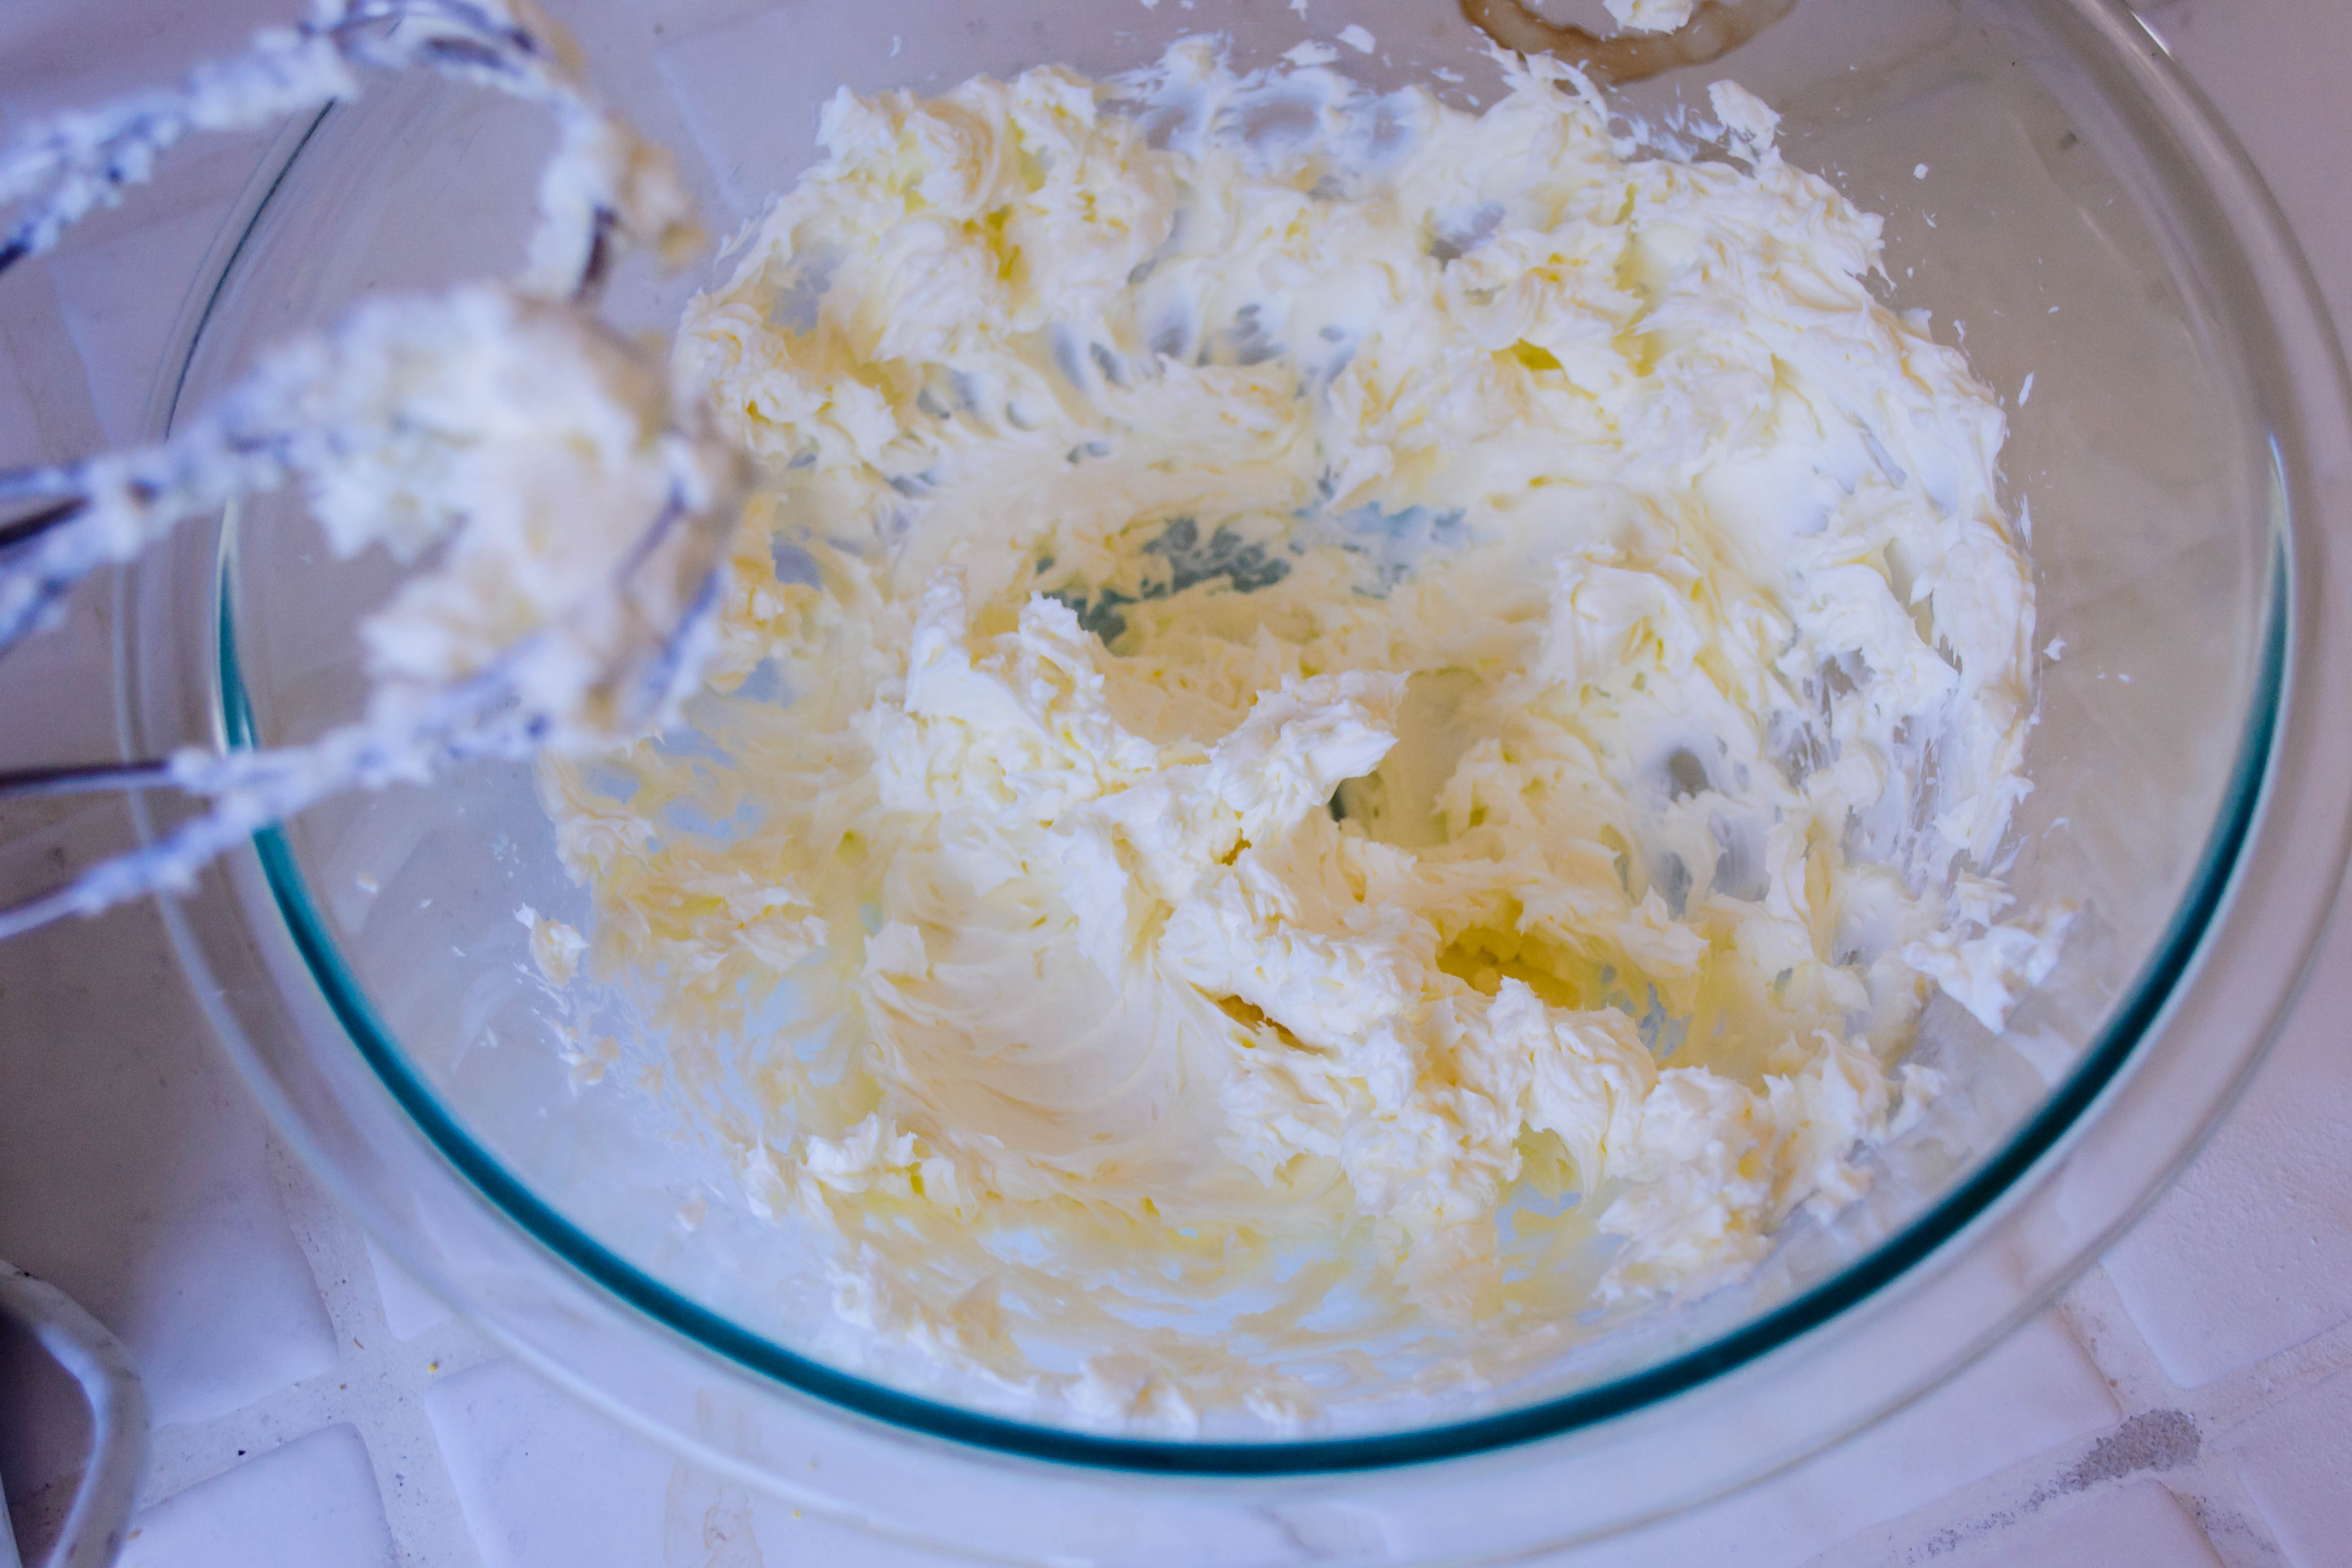
  • In a bowl, whisk the mascarpone cheese and the heavy cream together until light and fluffy (I used the whisk attachment of my stand mixer). Add the honey, the lemon zest, and the lemon juice, whisk again and taste for seasoning – you are looking for something lightly sweet, and rich but not overwhelming. When the almonds cool, fold ¾ of the amount into the mascarpone mixture, reserving the remainder to sprinkle atop the crepes.
  • To make the crepes, shred the zucchini in a food processor or with the large holes on a box grater. Collect them on a clean kitchen towel and squeeze to remove as much liquid as possible. Let it sit for 2 minutes, then squeeze once more.
  • Warm the milk slightly in a bowl or large glass measuring cup and add the melted butter, stirring to incorporate. This ensures the butter will integrate evenly, rather than hardening back into chunks. Let cool to room temperature and whisk in the eggs, then 1½ cups of the flour, the sugar, and the salt. Finally, whisk in the zucchini shreds. You should have something like a thin cake batter, probably thinner than your average pancake batter. If it seems too liquid, add the remaining ¼ cup of flour.
  • To cook the crepes, heat about 2 teaspoons butter in a 10-inch skillet or crepe pan over medium-high heat. Pour in about ⅓ cup of batter, turning and swirling the skillet as you do so to allow for a thin layer of batter to coat the entire surface. Try to spread out the zucchini a bit – it has a tendency to clump up in the middle, which results in uneven cooking.
  • Cook 1-2 minutes per side, until golden and almost dry. Don’t be alarmed if the first crepe tears or is otherwise mangled – they are delicate, and you have to get a rhythm going. After every two crepes, add another few teaspoons of butter to the skillet.
  • As you finish cooking each crepe, remove from the skillet to a covered plate to keep them warm. They won’t stick together – there’s enough fat in them to prevent clinging.
  • To serve, spread out one crepe on a flat surface and spread a few tablespoons of the mascarpone and almond mixture in a line a bit to the left of the center. Use the tines of a fork or your fingers to lift the edge of the crepe over the mascarpone filling, then continue rolling up into a tight burrito shape. Remove to a serving plate and continue with remaining crepes and filling. Sprinkle the finished rolls with the remaining almonds, and if desired, drizzle with more honey before serving.

Pumpkin Oatmeal Rye Bread

2016-food-blog-november-0522I’ve felt pressed since summer, when it comes to posting – I’ve been, all too often, a negligent blogger. There are many reasons for this, especially in the past few weeks, but I realized part of the reason lately, and that reason is the absence of a group. I liked the challenge of a monthly bread assignment, and between the dissolution of the Twelve Loaves baking party, heat, and busyness, I haven’t been doing as much experimental bread baking as I used to. I looked back, for another cooking project a week or two ago, at the notes I’d made about Suzanne’s site in my Five Seed Loaves post, and was reminded of the idea for a bread – inspired by hers – that incorporated rye flour, and canned pumpkin, and maybe some rolled oats for heft. With a long weekend looming and the season of pumpkin upon us, it seemed like the right thing to do.

2016-food-blog-november-05012016-food-blog-november-0504The problem with canned pumpkin, as anyone knows who has grown frustrated by repeated testing of that pumpkin chocolate chip bread that just will not finish baking, is its incredible water content. It keeps baked goods amazingly moist, but it also is a sopping, wet, hard-to-deal-with mess if you aren’t careful, especially in dough.

2016-food-blog-november-32016-food-blog-november-0498Irvin helped me solve this problem, with the ingenious tip he discovered of cooking down your canned pumpkin first, to eliminate some of that pesky moisture and concentrate the flavor. A quick, hot fifteen minutes of near-constant stirring and folding results in a thick, deeply sunset orange pan of something the texture of thick frosting that adds flavor and richness, but won’t bog down your mixture. I foresee many pumpkin-centric baking projects in the future, now that I know this helpful little extra step.

2016-food-blog-november-0507As with most breads, this one involves a substantial knead, a long first rise, a punch and a shape and – after a roll in some pumpkin seeds and rolled oats for texture and indication of predominant ingredients – a second rise before baking for a little over half an hour. These loaves incorporate some molasses for sweetness and color, and milk rather than water.

2016-food-blog-november-0525I must admit, the rye flavor doesn’t come through overly much here, though I suspect it added to the substance and of course to the lovely toasty color of the finished loaf. The pumpkin is mild as well, but you can taste it despite the absence of the telltale wintry spices that usually accompany this big squash. It’s satisfyingly orange inside (which makes photo editing tricky, by the way!), and it is a rich autumnal flavor I already want to taste again. The oats all but disappear into the dough as it bakes, and they contribute to the pleasant, spongy density of the thick slices you’ll be carving off to slather with cream cheese.

2016-food-blog-november-0529

Pumpkin Oatmeal Rye Bread
Makes 2 9×5 inch loaves (though mine were a little stubby from overly tight loaf shaping)
4-5 hours, approximately
15 ounce can of pumpkin puree (not pumpkin pie filling)
1½ cups warm milk
small pinch white sugar
1 tablespoon active dry yeast
1½ cups rolled oats, divided
2 cups dark rye flour
¼ cup molasses
1 tablespoon salt
2 tablespoons melted butter
2-3 cups bread flour
½ cup raw pumpkin seeds


  • Cooked the canned pumpkin in a skillet over high heat for 10-15 minutes, stirring frequently to avoid burning, until it is thick and reduced and takes on the consistency of a thick, spreadable frosting. You should wind up with only about ¾ cup left. Let it cool to room temperature.
  • While the pumpkin cools, combine the warm milk with the yeast and sugar, stirring briskly, then let sit for about 10 minutes to allow the yeast to activate. The surface of the milk will get bubbly and smell bread-y.
  • In the bowl of a stand mixer, combine the yeasted milk, 1 cup of the oats, the rye flour, the molasses, the melted butter, the salt, and the cooled pumpkin. Use the paddle attachment on low to medium speed to combine.
  • Now begin adding the bread flour ½ cup at a time, paddling in each addition, until a soft dough forms that pulls and tears away from the side of the bowl. You may not need the entire 3 cups of flour – I ended up using about 2½ cups total.
  • Switch to the dough hook and knead on medium speed for about 5 minutes. The resulting dough will be soft and sticky – a play-dough that clings to your fingers – but that’s okay. The oats need time to absorb the liquid so it will become less tacky as it rises.
  • Spray the inside of the bowl with a non-stick spray or olive oil, flipping over the dough so both sides are coated. Cover the bowl with plastic wrap and set it in a warm place to rise until doubled; 60-90 minutes.
  • When the dough has doubled, punch it down by depressing your fist gently into the middle, then let it sit to get its breath back for about 10 minutes. While it rests, spray two 9×5 inch loaf pans with non-stick spray and start the oven preheating at 375F. Combine the pumpkin seeds with the remaining ½ cup of oats and spread out on a flat, rimmed surface like a cookie sheet.
  • Carefully dump the risen dough out onto a very lightly floured board. The more flour you use, the more trouble you’ll have getting the seeds and oats to stick. Divide the dough into two equal hunks, then form each into a loaf and roll it through the seed and oat mixture before settling it into its respective loaf pan. If you have a lot of trouble getting the oats and seeds to stick, spray the loaf with nonstick spray or olive oil first, then have another go.
  • Cover the loaf pans with plastic wrap and set the loaves aside to rise again for about 45 minutes.
  • When the loaves have just about doubled in size again, remove the plastic wrap covering them and carefully set them into your preheated oven to bake until their central temperature reaches 180-200F; about 35 minutes.
  • Let the loaves cool in their pans about 10 minutes, then remove to a wire rack to cool completely.

Save

Save

Five-Seed Loaves

2015 Blog September-0394Growing up, my sister and I ate a lot of reasonably healthy food. Mom wasn’t the “crunchy granola type,” especially not by the time my sister showed up, but her waffle recipe involved wheat germ, and my lunchtime sandwich bread always had a measure of whole wheat in it. When I got a little older, it seemed like the more seeds and nuts a loaf contained, the more likely my mom was to buy it. Nine grains? Hearty nuts and seeds? R. and I wouldn’t always eat it, but it was probably in our freezer.

2015 Blog September-0359Thus I felt a certain fondness when I started to consider this month’s Twelve Loaves assignment of seed breads. I knew I wanted multiple seeds, and I knew I wanted them on the inside and outside of my loaves. A bit of internet research led me to Suzanne’s lovely little site Flour Arrangements, and even if she hadn’t had a great seeded loaf recipe to work with and adapt, I would have been enticed by her blog’s clever title (not the mention how many great sounding loaves she’s made – I can’t wait to adapt her multigrain pumpkinseed loaf as the weather cools – I’m thinking of adding some pumpkin puree and rye flour, and maybe some oatmeal).

2015 Blog September-03642015 Blog September-0366I kept her recipe mostly the same, only replacing oil with butter and adding a few additional seeds for a total of five: sesame, poppy, sunflower, pumpkin, and flax.

2015 Blog September-03672015 Blog September-0369I’ve been baking mainly sourdough loaves lately, trying different ratios of starter and flour, comparing notes with S. about various stirring or folding techniques instead of kneading the dough, tipping in just enough whole wheat flour to make a nutty loaf that isn’t too dense, and getting used to long, slow rise times and overnight rests in the refrigerator to develop a tangier sour flavor. Imagine my delight, then, when my bowl of dough, bolstered by its full tablespoon(!) of yeast, agreeably puffed enough to press against its plastic wrap lid in a little over an hour. Not only that, but after carefully pressing and rolling the lovely tight loaves I’d formed through a jumble of seeds, they swelled again in their pans to triumphant heights. Sourdough is delicious and tends to be my go-to for everyday toast, but it is an exercise in patience and in long-term benefits. These loaves, though they do require two rises, expand so eagerly it feels like a reward for a job well done.

2015 Blog September-0376And really, these are a reward. Yes, the seeds you’ve so carefully pressed into the surface of the dough go everywhere – when you turn the baked loaves out of the pans, when you slice into them, when you bag and store them – but those that stay affixed offer a really nice set of flavors and textures. The heat and time in the oven toasts and crisps them lightly, and the flax seeds in particular take on a roasted taste and a slippery crunch I find incredibly appealing. And that’s just the surface. Inside, the crumb is tender and light and barely sweet, as soft as a commercially made pre-sliced loaf, but with the hearty, toasty, wholesome feel and flavor that comes with homemade.

2015 Blog September-0384You could certainly trade out the seeds here if you wanted – caraway would give a stronger anise-y feel, tiny nigella or black onion seeds would make for a more savory flavor, maybe good for meat or tomato based sandwiches. But I am devoted to sweet breakfast toast, and this bread, toasted or not, welcomes salted butter and cinnamon sugar so nicely I must admit I never explored beyond that combination.

2015 Blog September-0390

Five-Seed Loaves
Adapted from Seeded Wheat Bread on Flour Arrangements
Makes 2 9×5 inch loaves
4-5 hours, approximately (including rising/resting time)
¾ cup warm water
1 tablespoon active dry yeast
pinch white sugar
1 ½ cups warm milk
2 cups whole wheat flour
5 tablespoons poppy seeds, divided
5 tablespoons sesame seeds, divided
3 tablespoons very soft or melted butter
¼ cup molasses
1 tablespoon salt
3-4 cups bread flour
¼ cup sunflower seeds
¼ cup pumpkin seeds
3 tablespoons flax seeds


  • In the bowl of your stand mixer, or in a large bowl if you aren’t using a mixer, combine the warm water with the yeast and the pinch of sugar. Stir and let it sit for about 10 minutes until the mixture smells bread-like and the yeast has foamed up a bit.
  • Add the milk, whole wheat flour, butter, molasses, and salt to the yeast mixture. Add two tablespoons each of the poppy seeds and sesame seeds. Mix with the paddle attachment or with a wooden spoon until well combined.
  • With the mixer running on low speed, add the bread flour ½ cup at a time until you have a soft dough that pulls and tears away from the sides of the bowl. I needed all 4 cups of the flour, as it was a bit humid in my kitchen – you might need less depending on the day.
  • If you are using a stand mixer, switch to the dough hook. If you are mixing by wooden spoon, now is the time to turn the dough out onto a floured surface. Knead on medium speed for about 5 minutes if you are working by machine, or about 7-8 minutes by hand, to form a smooth and elastic but still sticky dough. It will still droop and pull when you stop kneading, not sit firmly in a cohesive ball. That’s okay. This ensures a more tender loaf.
  • Lightly grease the sides of a large bowl (I just use the stand mixer bowl; you don’t even have to clean it out) and position your dough in the middle of it. Cover tightly with plastic wrap and let it rise until doubled – 1½-2 hours, depending on how warm your house is.
  • As the rising period nears its end, combine the remaining 3 tablespoons poppy seeds, 3 tablespoons sesame seeds, and the sunflower, pumpkin, and flax seeds on a baking tray. Butter or grease two 9×5 inch loaf pans and set aside.
  • Punch down the risen dough to release trapped gas by gently depressing your fist into its center, then turn it out onto a very lightly floured board (too much flour and the seeds won’t stick). Divide the dough in equal halves, shape into tight loaves and roll each one in seeds, turning to coat the ends, or just pushing a palmful of seeds against the ends of the loaves.
  • Set the seed-coated loaves gently in the prepared loaf pans, pat remaining seeds on top and drizzle down into the corners. Drape lightly with plastic wrap and let rise again for about 45 minutes, until doubled once more. They swell beautifully.
  • About twenty minutes before the rising period ends, preheat your oven to 375F. When the loaves are fully risen, remove the plastic wrap and place them gently into the oven to bake for 30-40 minutes. To test for doneness, either use a digital thermometer and check for a temperature between 180-200F, or thump the bottom lightly for a hollow sound.
  • Cool loaves in pans at least 20 minutes, then turn out onto wire racks to cool completely before slicing. At all manipulation, seeds will scatter everywhere, but the flavor and texture are worth the mess.


Check out what our other awesome Twelve Loaves bakers made this month, below:

#TwelveLoaves is a monthly bread baking party created by Lora from Cake Duchess and runs smoothly with the help of Heather of girlichef, and the rest of our fabulous bakers.

Our host this month is Lora from Cake Duchess and our theme is Seeds. For more bread recipes, visit the #TwelveLoaves Pinterest board, or check out last month’s selection of #TwelveLoaves Malt Breads!

For more bread recipes, visit the #TwelveLoaves Pinterest board, or check out last month’s selection of #TwelveLoaves Malt Breads!

If you’d like to bake along with us this month, share your Seed Bread using the hashtag #TwelveLoaves!

Cinnamon Mocha Swirl Bread

Food blog June 2015-0938Around here, we take afternoon snack time very seriously. During the school year, it’s an opportunity to sit down together for a few minutes and work our way through notable moments from the day. During the summer, it’s a good way to reconnect from whatever individual projects we might have lost ourselves in. It feels like a restart, in a lot of ways, which can be important if the day hasn’t gone all that well.

Food blog June 2015-0916More than that, though, we are gluttons, and our mid-afternoon snack, or “teatime” as my wannabe Londoner husband likes to call it, is a sacred few minutes reserved for cramming something delicious into our mouths. Usually this is something quick: chips and salsa, or crackers and cheese; on Fridays it often dovetails into an impromptu happy hour of some sort (stay tuned for snack-y developments on this front, by the way…). But sometimes I like to get fancy.

Food blog June 2015-0911Spurred by this month’s Twelve Loaves theme “A Little Something Sweet,” I decided a special “teatime” loaf was in the works: I wanted a swirled bread, and since N. was working his way through his very last week of school, I decided something with a bit of pick-me-up was called for. Playing with flavors of Mexican chocolate and tiramisu, with a block of cream cheese thrown in for good measure, I ended up with this stunner: a lightly sweet cinnamon spiced loaf, with an unapologetically thick filling of sweetened cream cheese, espresso powder, and chopped semi-sweet chocolate. Yes, please.

Food blog June 2015-0910The production of this loaf is fairly standard: a good knead, two rises, with the application of the filling in between, and the better part of an hour in the oven. The most difficult part, honestly, is waiting for the finished loaf to cool enough to slice into it without making a mess. I waited almost long enough.

Food blog June 2015-0915Oddly, despite the Mexican and Italian dessert inspirations, what this reminded me of more than anything else was mocha chip ice cream. You know, the luscious, rich brown scoops with just the right amount of coffee flavor, studded with chunks of dark chocolate. Except in my version, it’s a soft swirl through a moist slice, and the chocolate pieces melt easily on your tongue (one of my biggest complaints about “chip” anything ice cream: the cold, hard chunks of chocolate. I know, I know, first world problems).

Food blog June 2015-0920Food blog June 2015-0921Obviously, this is a rich bread. I’d say it’s more than a “little” something sweet, but let’s indulge anyway. Unless caffeine doesn’t disrupt your sleeping patterns, I’d stay away from it as a bedtime snack. But as a pick-me-up in mid-afternoon, or mid-morning for that matter, it’s solid. I can imagine thick slices on a brunch table as well, maybe even as part of a bridal shower (colors: espresso and vanilla?) since the presentation is so pretty. But then, I’ve got weddings on the brain this summer.

Food blog June 2015-0933Oh, p.s., like my new “studio” set-up next to the window? My Photo Friday post from the other week had such lovely lighting I decided to make it a more regular shoot location. I’m looking forward to playing more with angles and light at different times of day.

Food blog June 2015-0942

Cinnamon Mocha Swirl Bread
Makes 1 large 9×5 inch loaf
For dough:
2 teaspoons active dry yeast
½ cup lukewarm milk (I use whole milk)
¼ cup granulated sugar
2 teaspoons cinnamon
½ teaspoon salt
1 teaspoon vanilla
2 eggs
¼ cup + 1 tablespoon unsalted butter, soft or melted and cooled, divided
2-3 cups bread flour
For filling:
8 ounces cream cheese, at room temperature
2 tablespoons instant espresso powder
5 tablespoons granulated sugar
4 ounces semi-sweet or bittersweet chocolate, chopped or broken into small pieces
  • In a glass measuring cup, combine the lukewarm milk and the yeast, and let sit for 5-10 minutes to allow the yeast to wake up a bit. While you wait, combine the sugar, cinnamon, salt, vanilla, eggs, and ¼ cup of butter in the bowl of a stand mixer (or just a large mixing bowl).
  • When the yeast and milk mixture is bubbly and smells like bread, add it into the egg and butter mixture and stir well to combine. Add 2 cups of the flour, and stir well to combine again.
  • If you are using a stand mixer, fit with the dough hook attachment and begin to knead on medium speed. If you are working by hand, dump the dough out onto a floured board and knead for about 5 minutes. As needed, work in more flour ¼ cup at a time until the dough is easy to handle. I ended up using about 2 ¾ cups total. In the stand mixer bowl, it will start to pull away from and then slap the sides.
  • After you’ve kneaded for about 5 minutes, the dough should feel smooth and stretchy and be texturally reminiscent of play-dough. At this point, lightly oil the inside of a large bowl (I use the stand mixer bowl for this – you don’t even need to clean it out), flip the dough around in it to coat all sides, then cover with plastic wrap and set aside to rise until doubled; about 90 minutes.
  • While you wait for the dough, make the filling: in a medium bowl, beat together the cream cheese, espresso powder, and granulated sugar until light and fluffy; 1-2 minutes. Then gently incorporate the chopped chocolate, and set aside.
  • When the dough has doubled, punch it down by depressing your fist gently into its center to release trapped air, then let it rest for 5 minutes to get its breath back. Turn it out onto a floured board and roll into a rectangle of roughly 9×16 inches.
  • Spread the dough rectangle with the filling, leaving a border of about 1 inch on all sides to ensure minimal overflow. Working gently, roll up into a log starting from the short edge (so you’ll end up with a fat log about 9 inches long). Crimp the edges at the end to seal it – be aggressive! The dough might not want to stick to itself at first.
  • Now that you have your fat log, well-sealed, twist it 4 or 5 times to disperse the swirl. This may stretch it out a bit, so when you carefully wedge it into a buttered 9×5 inch loaf pan, just tuck the ends underneath.
  • Once the loaf is settled in the pan, rub the top with the remaining 1 tablespoon of soft or melted butter, then cover lightly with plastic wrap, set aside for another 30 minutes, and preheat the oven to 375F.
  • By the time your loaf has risen for another 30 minutes, it should have come close to doubling in size again, and your oven should be fully preheated. Bake the loaf in the preheated 375F oven for 35-40 minutes, until the exterior is nicely burnished and the interior tests 180-200F (A skewer that comes out clean works too, though be careful, because the cream cheese filling will remain gloopy).
  • Cool loaf in pan for at least 10 minutes, then remove from pan and cool on a wire rack for at least another 10 minutes. The cream cheese and chocolate need time to solidify a bit, or the layers within the loaf will threaten collapse.
  • Enjoy with coffee, or tea, or milk, or your fingers. Keeps well in the fridge for 4 or 5 days (probably more would be fine, but ours didn’t last longer than that). Bring to room temperature before eating for best leftovers.

#TwelveLoaves is a monthly bread baking party created by Lora from Cake Duchess and runs smoothly with the help of Heather of girlichef, and the rest of our fabulous bakers.

Our theme this month is A LITTLE SOMETHING SWEET. For more bread recipes, visit the #TwelveLoaves Pinterest board, or check out last month’s mouthwatering selection of #TwelveLoaves Mexican Breads!

If you’d like to bake along with us this month, share your “A Little Something Sweet” Bread using hashtag #TwelveLoaves!

Apple-ginger-bread with nutmeg “hard” sauce for #Twelve Loaves October

Food Blog October 2014-0722As soon as I saw that the October assignment for Twelve Loaves was apples, I thought of cinnamon. But then my contrary side took over. Apples and cinnamon is such a natural pairing, it’s practically expected. Why not give someone else a chance? Why not ginger? The searing spiciness of ginger against the cool sweetness of apples sounded like a worthy combination, and I was off and running with not just an answer to the Twelve Loaves assignment, but for my long postponed sauce project as well.

Food Blog October 2014-0735My mom has, on and off since I was little, made a holiday dessert of gingerbread and a warm, well-spiced, rum-spiked sauce. The gingerbread is a homely 9×9 layer, cut into unremarkable uniform squares. The sauce, almost still bubbling, gets spooned over the top, and a swirl of whipped cream inevitably slides right off the square of cake onto the plate beside it, already losing its fluff from the heat of the sauce. I love it.

Food Blog October 2014-0702But like so many desserts, Mom’s gingerbread with nutmeg sauce belongs to the winter. We only ever have it around Christmas and New Year’s. There’s something about its flavors that requires chill in the air. Contrary once again, I decided to see what could be done about that.

Food Blog October 2014-0705Food Blog October 2014-0706We call it a bread, but gingerbread is truly a dark, moist cake. It’s redolent with spices and sticky-sweet from large doses of molasses. Its crumbs cling wetly together and, though not particularly dense, it feels rich and heavy.

Food Blog October 2014-0700I poked around and shifted things a bit, landing on a slight adaptation of Laurie Colwin’s gingerbread recipe in her lovely little book Home Cooking. First of all, if I was going to pass this off as a bread, it needed to be in a loaf pan. This is suitable for dessert, of course, but it should also be acceptable as an afternoon snack. For freshness (and to meet the terms of the challenge, of course), I added the diced chunks of two apples. Two eggs and some buttermilk lighten things up. And finally, because I can’t leave well enough alone, to the already tremendous tablespoon of ground ginger I was prepared to include, I insisted on a palmful of finely chopped crystallized ginger as well.

Food Blog October 2014-0712Food Blog October 2014-0714Food Blog October 2014-0715Now, this bread on its own is a marvelous thing. The apples and the ginger are good playmates, and the spiciness of the bread elicits a harvest feel. With a cup of tea or a mug of apple cider, this bread is perfect.

Food Blog October 2014-0732But sometimes you want more than perfect. Enter Nutmeg Sauce: a silky, buttery, creamy spill dotted with grains of freshly grated nutmeg and discolored in the most wonderful way by a generous dose of dark rum. When I first nabbed this recipe from my mom, I thought this was another classic. Due to its inclusion of alcohol, I’d always thought it was a “hard sauce.” This name, however, comes not from the inebriating potential of the concoction, but the texture: a hard sauce is, well, hard. It’s a solid, buttery spread intended to be served in a cold, spoonable dollop. Nutmeg sauce, on the other hand, is served hot (it’s good cold as well, though it does get a bit clumpy). It is thickened to a pourable velvet with cornstarch, and it is the ideal addition to an already-perfect slice of gingerbread.

Food Blog October 2014-0734Food Blog October 2014-0740Here, though I was determined to serve them together, I must admit: the bread was good. The sauce was good. Together, they were friendly but not in love (still, I wouldn’t say no to yet another generously garnished slice). But I think I know how they could become so. Despite my most contrary, resistant feelings, I think replacing the nutmeg in the sauce with cinnamon, for the sake of the apples, would be the perfect pairing. Sometimes you just shouldn’t fight the classics.

Food Blog October 2014-0736

Apple-ginger-bread
Adapted from Laurie Colwin
Makes one 9×5 inch loaf
1 ½ cups flour
½ teaspoon salt
½ teaspoon baking soda
1 tablespoon ground ginger
1 teaspoon ground cinnamon
¼ teaspoon ground nutmeg
¼ teaspoon ground cloves
½ cup (8 tablespoons or 1 stick) unsalted butter, at room temperature
½ cup brown sugar
2 eggs
2 teaspoons vanilla
scant ½ cup molasses
½ cup buttermilk
2 sweet (rather than tart) apples, peeled, quartered, cored, and diced
2 tablespoons finely minced crystallized or candied ginger


  • Preheat the oven to 325F and lightly grease a 9×5 inch loaf pan.
  • In a medium bowl, whisk together the flour, the salt, and the ground spices.
  • In a large bowl (I used the bowl of my stand mixer), cream together the butter and sugar on medium speed until a light, fluffy mixture forms. Add the eggs, one at a time, mixing to combine after each. Add the vanilla and the molasses and mix well, scraping down the sides and bottom of the bowl to ensure complete integration.
  • Add about ⅓ of the flour mixture and beat to combine, then add half the buttermilk. Repeat with another ⅓ of the flour mixture, then the other half of the buttermilk, and finally the last ⅓ of the flour mixture, mixing until the batter is homogenous each time.
  • Finally, add the apples and the minced crystallized ginger and mix on low speed until just incorporated. Scrape and pour the mixture into the prepared loaf pan, and bake at 325 until a toothpick or cake tester inserted through the center emerges with only one or two damp crumbs; 70-80 minutes.
  • For the sake of structural integrity, let cool in the loaf pan for at least 30 minutes, then transfer to a wire rack and cool completely. Serve with or without nutmeg sauce.


Nutmeg “hard” sauce
Makes about 1 cup
½ cup sugar
1 tablespoon cornstarch
½ teaspoon freshly grated nutmeg (or try it with cinnamon to marry with the apples, and tell me all about it)
¼ cup butter
2 tablespoons dark rum (or 2 teaspoons vanilla)
1 cup whole milk


  • Pour the sugar, cornstarch, and nutmeg into a small pan. Set the pan over medium heat, and with a whisk, stir in the milk and the butter.
  • Cook over medium, whisking slowly but consistently, until a sluggish boil is reached. Continue whisking for another 3-4 minutes, or until the sauce thickens slightly to a texture like barely melted ice cream.
  • Remove from heat and add rum (or vanilla); serve hot.

Bean and cheese stuffed poblanos and “stuck pot” red rice

Food Blog October 2014-0674I must have been this busy last year. I just don’t remember. When I get to work, I sit down at a desk on which the stacks of papers have been rearranged so many times they might as well be dancing. When I get home, I sit down at a table slowly succumbing to a pile of opened and unopened mail, notes and lesson plans, and yes, more papers. I am freest when standing, and when I am standing I am either stalking the classroom (a practice that, though necessary, regrettably and inevitably produces yet MORE papers), walking my sweet dog-daughter, or leaning over the stove to smell or to stir or to taste.

Food Blog October 2014-0645 Food Blog October 2014-0651 Food Blog October 2014-0652 It’s mid-October. It is at once much later in the year, and much earlier, than I’d hoped it would be. Recently my parents phoned to confirm a flight time for Thanksgiving; could N. or I pick them up from the airport if they arrived at x time? My brain flew ahead, thinking of food, thinking of games, thinking of the family closeness of the winter holidays and longing, longing, for that to be now, now, right-now-thank-you-very-much. But at the same time, there are so many things I wanted to accomplish, as always, that remain undone.

Food Blog October 2014-0648

Food Blog October 2014-0653All I can do is what I have. And what I have for you this week is, as promised, a pair of dishes that fit together so well I can’t, in retrospect, imagine presenting them here separately.

Food Blog October 2014-0655These dishes, a bean and cheese stuffed poblano and a take on the sort of rice you find shaped in a mound or a scoop on your enchilada plate at a certain type of Mexican restaurant, came into being for me during one of our dinners this past summer with our closest graduate school colleagues. Dinner was made by T., previously featured here as a salt expert, and she presented us a casserole dish approximately the temperature of hot magma, laden with fragrant peppers piled with beans and cheese. Beside them, she wedged a heavy dutch oven filled to the brim with “red rice,” a medley of tomato-laced long-grain rice shot through with aromatics and spice. It was one of those dinners where everyone ate without speaking.

Food Blog October 2014-0657I had to have it again, and I knew it would take some tinkering. T.’s rice was fluffy and almost dry, whereas recipes I’d tried for this style of rice produced something wet and floppy – a Mexican risotto, if we’re trying for politeness – and that wasn’t my aim. I wanted something toastier, more like a pilaf. Inspiration and guidance came, as it so often does, from Deb at Smitten Kitchen, in a simple, hearty little feast she calls “Stuck Pot Rice and Lentils.” Inspired by Middle Eastern rice dishes that praise the tahdig, a crispy layer on the bottom of the pot, this rice gets parboiled vigorously, then mixed with other ingredients and cooked slowly, with very little additional liquid, until it adheres into a massive round cake you can, with some care and bravery, flip out onto a plate in a large, crunchy-topped wheel.

Food Blog October 2014-0673Food Blog October 2014-0679Are you hungry yet? There’s more. The peppers, which get roasted over a gas flame until their skins split and peel away and their flesh hangs like wet velvet (you could likely also do this in the oven at high heat or under the broiler, but I haven’t tried it – if you do and it works out, leave your procedure in the comments!), get delicately split and seeded, and then gently loaded with a mixture of smashed black beans and cheddar cheese before being baked for a half hour to bring everything together. Upon emergence from the oven, as if all this weren’t enough, they are subjected to a shower of crumbled queso fresco cheese, cubes of avocado, toasted pumpkin seeds and (if you’re the sort who appreciates this sort of thing) a sprinkling of cilantro and a squeeze of lime juice.

Food Blog October 2014-0660This is a play of heat. The pepper is a gamble – some poblanos (they may be labeled pasillas in your grocery store) are moderately spicy, while others are barely hot enough to tickle the back of the throat. The beans keep even the spicier peppers from overwhelming the palate, and if you are steaming, the cool avocados and a big forkful of the starchy rice relieve the sting. If you really want to tease your taste buds, you could add some diced jalapeño to the rice along with the other vegetables. I resisted, since the poblanos we used were aggressive enough.

Food Blog October 2014-0668This is, I must admit, not a quick weeknight dinner. The peppers must be addressed in several stages, the beans are seasoned and cooked separately, and the rice collectively takes the better part of an hour to complete. But it’s worth it, especially as temperatures cool. At this point in the season, I’d rather be warmed from within by a well-seasoned pepper than I would by the relentless sun (did you hear that, Southern California?!). It’s a warmth that almost, almost, chases away the busyness.

Food Blog October 2014-0667*** I’ve presented these recipes with the peppers first, since they require a bit more advanced planning. But I’ll inject spots in the procedure for each where you can switch between dishes to get both on the table at roughly the same time.

Food Blog October 2014-0676

Bean and Cheese Stuffed Poblanos
serves 6
6 large, shiny, firm-fleshed poblano peppers (they may be called “pasilla” peppers at your market)
2 cans (14 ounces each) black beans, one drained, one with liquid reserved
8 ounces cheddar cheese, as sharp as you like it
½ a red onion, diced
4 cloves garlic, finely minced
1 teaspoon cumin
(you may find you want salt for this, you may not. It will depend on your taste and how salty your black beans are. Taste first, add second)
¼ cup crumbled queso fresco
¼ cup toasted pumpkin seeds
1 whole avocado, cut into small chunks
2 tablespoons cilantro
squeeze of lime juice

  • If you have a gas stove, turn the burners on to medium-high heat and set the whole poblanos over the flame, charring them on all sides. Turn as needed until the skins are uniformly black and crackly and the flesh feels soft; for me this took 10-15 minutes. As they finish roasting, pop them into a large bowl and cover tightly with plastic wrap. Leave them to steam (this helps the skins peel off) until they are just warm to the touch (I, um, forgot about mine while I did some other chores; they were quite certainly ready half an hour later…).
  • If you don’t have a gas stove, I suggest using your broiler. Since I haven’t tried this I can’t give indication of times, but put them close to the heat, watch them carefully and turn as needed.
  • When the peppers are cool, use your fingers, a paper towel, or the edge of a knife blade to scrape and peel the skins off. A few black specks here and there is okay, but the skins are a bit bitter, so the more you remove, the better.
  • (While you wait for the peppers to cool, you can turn your attention to prepping ingredients for the rice)
  • As you relieve each pepper of its skin, carefully cut a slit through just one side of the pepper and excavate the seeds and ribs inside. You want an empty, in-tact pouch, and this takes some delicacy. The flesh is quite tender at this point. Wedge the skinless, empty peppers into a greased 9×13 inch baking dish.
  • Saute the onions and garlic with a pinch of salt and pepper in 1 tablespoon of olive oil over medium heat until they are starting to shade gold, but are not burned. For me, this took 5-10 minutes with frequent agitating.
  • When the aromatics are toasty and golden, add the beans – one can that has been drained, one complete with the liquid. Add the cumin and stir to combine. Then, use a potato masher to smash about ¾ of the beans into a thick paste. A few whole or half stragglers are okay – they break up the texture nicely. Cook over medium heat until most of the liquid has evaporated: 15-20 minutes.
  • This is a good moment to preheat your oven to 350F.
  • (While the beans cook, you can shift your focus to the rice for a bit. Just don’t forget to give the beans an occasional stir to ensure they are not cementing themselves to the bottom of the pan.)
  • When the liquid in the beans has mostly disappeared, turn off the heat and add the 8 ounces of shredded cheddar cheese. Stir to combine.
  • To assemble, load up each empty pepper pouch with about ½ cup of the bean and cheese mixture. This takes a bit of finagling – get the mixture in there, but don’t tear up the peppers too much. Use the sides of the neighboring peppers to help everyone stand up straight and hold in their own filling.
  • If you wish, you may sprinkle on the ¼ cup queso fresco at this point. I found I preferred it as a post-baking addition, but it’s also nice baked on.
  • Bake in your preheated 350F oven for 25-30 minutes.
  • (While the peppers bake, carry on with your rice – if you are setting it over a low flame as you put the peppers in the oven, both will be ready at the same time)
  • When the peppers emerge from the oven, set them aside for 5 minutes. Then, serve, sprinkling as desired with queso fresco, avocado chunks, toasted pumpkin seeds, and cilantro. At the last possible moment, squeeze a bit of lime juice over the top.
Stuck-pot red rice
Serves 6-8
1-½ cups long grain white rice
¼ cup olive oil, divided
½ a large onion, diced (the other half of the one you used for the peppers is convenient)
4 cloves garlic, finely minced
part or all of 1 jalapeno, ribs and seeds removed, finely diced (optional)
½ cup fresh or defrosted frozen corn
juice of 1 lime
14.5 ounce can diced tomatoes, drained, juice reserved
Water as needed (see procedure)
2 teaspoons cumin
1 teaspoon coriander
1 teaspoon salt
fresh cilantro to serve, if desired
queso fresco to serve, if desired
  • Bring a large pot of salted water to a rolling boil. Add the rice all at once, clamp on the lid, and cook undisturbed for 5 minutes. Drain and set rice aside in a large bowl.
  • In the same large pot, heat 2 tablespoons of the olive oil over medium heat. When it is shimmering, add the onion, garlic, corn, and jalapeno, if using. Stir in a pinch of salt, then put the lid back on and cook 10-15 minutes, or until the vegetables are browning nicely. Be sure your corn is defrosted before adding, or it will take longer to cook off the water it emits.
  • While vegetables cook, drain the canned tomatoes, reserving their juice. Add enough water to the tomato juice to reach ⅓ cup, then add an additional 2 tablespoons.
  • When the vegetables are nicely browned, add them to the rice and mix well to distribute evenly. Add the canned tomatoes, the cumin and coriander, the salt, the lime juice, and the mixture of tomato juice and water as well, stirring to combine.
  • (The mixture can sit for a bit at this point if you need to go back and pay attention to your beans and peppers)
  • In the same pot you used to boil the rice and cook the vegetables, heat the remaining 2 tablespoons olive oil over medium heat until shimmering. Quickly and carefully, add all of the rice mixture and use a spatula to smooth it down into an even layer.
  • Now, being sure to keep edges away from the burner, place a clean kitchen towel over the open top of the pot, clamp on the lid, and securely wrap the edges of the towel around the handle of the pot lid. This creates a tighter seal and prevents extra water from dripping from the lid back onto the rice.
  • Once your towel and lid are securely situated, lower the heat to medium-low or low and cook, undisturbed, for 30 minutes. After about fifteen minutes you should start to smell a lovely toasty rice-y smell. If it smells closer to burning, turn the heat down a bit but don’t remove the pot from the heat. Check Deb’s post (linked above) for more on the procedure, if you like.
  • When 30 minutes has passed, turn the heat off and let the pot sit for 5 minutes to allow the rice to firm up. Then, using pot holders or a thick towel, carefully position a large plate or round platter over the top of the pot and, over a counter, invert the pot onto the plate and set it down. The rice should plop down onto the plate or platter; if you’re lucky, it will do so in a single round wheel.
  • Scatter it with cilantro and crumbled queso fresco, if desired, and serve.
  • If you don’t want all that fuss, just scoop the rice into a bowl, scatter on the optional garnishes, and be done with it.