Lemon Vanilla Pound Cake with Apricots and Whipped Ricotta

2016 Food Blog June-1030This world in the last few weeks has been a place of heartbreak and confusion and frustration and terror. I was bewildered, and angry, and I grieved, and I wrote and deleted various posts on various platforms that felt too tidy, and too ineffectual.

2016 Food Blog June-0981But amidst the heartbreak, and the anger, and the mistakes, there were these moments of strength and of recovery and of determination: one of my students, wearing a t-shirt that said “Caution: educated student of color.” I wanted to hug him. I wanted to say “great shirt.” I wanted to tell him to keep wearing it so proudly and to use that power and that dangerous-in-a-good way truth about himself to help change happen. I just smiled as he sat down at his desk. A sold-out message on every single one of the shirts bearing an excerpt from Lin-Manuel Miranda’s Tony award acceptance sonnet, which were being sold to raise funds for victims of the Orlando shooting. As a friend of a friend commented, agree with their objective or not, and whether their actions and their words were successful or not, the filibuster in the Senate and the sit-in in the House were pretty inspirational. Determination. Strength. Flashes of brightness and connection in an increasingly isolating world.

2016 Food Blog June-09832016 Food Blog June-09862016 Food Blog June-0991
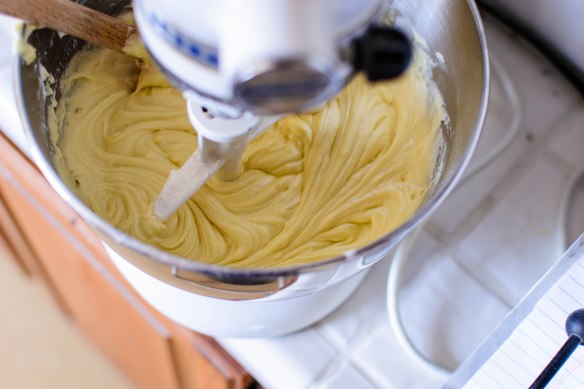
At first, because there was too much of the world in my brain with all of this going on, I couldn’t think of anything to make. As always, food seemed too trivial to worry about, and perhaps it is. But it is a comfort. Stumbling all unwilling into the kitchen was a chore, until I picked up a knife, and a whisk, and the familiar enfolded me. Perhaps because it was the first kind of cooking I learned to do, standing beside my mom, scooping or mixing or poking at cookies, baking seemed like the right way in. Then, inspired both by N’s recent snack preferences at a certain coffee corporation, and a gorgeous picture on King Arthur Flour’s instagram feed, I knew the answer was pound cake. In a way, it works with my tangled feelings: it’s a dense cake, weighty and substantial and thick, but shot through with lemon zest and topped with a drizzle that becomes crunchy and tart as it bakes it has those flashes of brightness I’m looking for and lifted by. KAF’s version incorporates some cream cheese along with all that butter, which I like for the barely discernible tang it promises.

2016 Food Blog June-1021You don’t need a lot to pair with pound cake; in fact, its very title suggests you need nothing, but I couldn’t resist a bit of excess. Bright, meaty, fuzz laden apricots, pitted and sliced into wedges, and a heaping dollop of barely sweetened whipped ricotta, lightened with cream, make the utilitarian slice a rich-but-not-too-heavy dessert.

2016 Food Blog June-10272016 Food Blog June-1029I wish you some comfort this week, and I hope you have something safe and solid in your life, and some flashes of brightness to turn your face toward.

2016 Food Blog June-1043Lemon vanilla pound cake with apricots and whipped ricotta
Adapted from King Arthur Flour
Makes 1 9×5 inch cake and approx. 1½ cups ricotta cream
2-2½ hours, including cooling time
For cake:
¾ cups unsalted butter, at room temperature (1½ sticks)
3 ounces cream cheese, at room temperature
1½ cups + 2 tablespoons sugar, divided
1 tablespoon lemon zest from 1-2 lemons
1 teaspoon baking powder
¾ teaspoons salt
5 large eggs, at room temperature
3 tablespoons milk
1¾ cups + 2 tablespoons all-purpose flour (I know it’s a weird amount; remember “pound” cake is based on weight measurements)
2 teaspoons lemon juice
For toppings:
4-5 fresh apricots, rinsed
1 cup whole milk ricotta cheese, cold
1 cup heavy cream, cold
2-3 tablespoons granulated sugar
additional lemon zest, optional


  • Preheat the oven to 350F and lightly grease a 9×5 inch bread pan. KAF is very specific about the measurements of the pan; otherwise you might get batter overflow.
  • In a mixing bowl (I used the bowl of my stand mixer), beat together the butter and cream cheese until well combined with no obvious lumps. Room temperature fats here will incorporate more quickly.
  • Rub together the lemon zest and 1½ cups of the sugar with your fingertips. This evenly distributes the zest and encourages it to release its oils, which are what give it that heady, perfumed flavor. Add the zest and sugar to the butter and cream cheese mixture and cream on medium-low or medium speed for about 1 minute, or until the mixture is pale and fluffy.
  • Add the baking powder, salt, and vanilla to the creamed butter and sugar and beat briefly to combine. Then, with the mixer running on low, begin to add the eggs one at time, mixing well between each addition. When the eggs are all integrated, add the milk and beat on high speed for 2-3 minutes until the mixture is light and fluffy. KAF notes the mixture may look curdled or grainy as you add the eggs; mine didn’t, though it did look a little grainy after I mixed the milk in. Either way, it’s nothing to worry about.
  • Now, sprinkle the flour gradually over the batter with the mixer running, and mix on low speed just until combined. Pour and scrape into the prepared pan, using a spatula to smooth the top.
  • Set the cake on a baking sheet for easy handling and in case of overflow, and stow in the preheated oven for 55 minutes.
  • While the cake bakes, combine the remaining 2 tablespoons sugar and the 2 teaspoons lemon juice in a small bowl, stirring until it reluctantly comes together into a thick syrup. After the cake has cooked for 55 minutes, remove it from the oven on its pan and brush or drizzle the sugar and lemon juice mixture over the top (you may need to re-stir the lemon juice and sugar mixture just before using it). Return the cake to the oven for another 15-20 minutes, or until a toothpick or cake tester comes out clean, or an instant-read thermometer inserted deep into the center reads 200-205F (as KAF notes, there may still be a touch of gooiness to the very top crown where the cake has split; don’t worry about this).
  • Cool the cake on a rack in its pan for at least five minutes, then turn out of the pan and rest on the rack until it is completely cooled.
  • About 20 minutes before you are ready to serve the cake, place a metal bowl and beaters or whisk attachment into the freezer. This helps the cream whip up faster. While they cool, pit the apricots and cut them into thick wedges. Once the bowl and beaters are cold, add the heavy cream and ricotta to the bowl and begin to mix on low speed. Sprinkle in the sugar and, as you see the mixture thicken, raise the speed to medium. Whip at medium speed until the ricotta cream has thickened to your desired consistency; probably 2-3 minutes if you started with cold equipment.
  • To serve, cut the cake into thick slices, and serve one slice topped with a few wedges of apricot, a dollop of whipped ricotta cream, and a few strands of lemon zest, if desired.

Save

Apricot Goat Cheese Biscuits

2016 Food Blog May-0756One of my first big Sandra Lee-type triumphs in the kitchen was with biscuits. At the time, I was using Bisquick, and after a number of successful productions, I decided there was no reason I shouldn’t make the fluffy little drop biscuits more interesting by adding herbs, or green onions, or cheese, and then that my creations would probably be better with buttermilk rather than skim milk, and then at some point, with contributions from Mark Bittman and Michael Ruhlman, the Bisquick box disappeared altogether and the biscuits got fluffier, and higher, and packed densely with all kinds of interesting additions.

2016 Food Blog May-07262016 Food Blog May-0728There are probably enough biscuit recipes on this site – adding another seems superfluous. But they are so tasty, and so comforting, and so simple, and they accept additions that drive them into the realms of sweet or savory so well, that they keep popping up on my list of food ideas. This time, with half a bag of dried apricots in my pantry and a partial log of goat cheese in my fridge, there were no excuses for a special weekend breakfast.

2016 Food Blog May-07332016 Food Blog May-07362016 Food Blog May-07382016 Food Blog May-0743Biscuits are a comforting baked item because they are easy. No yeast, so no long rise times or careful shaping or temperature concerns. No special flours or long ingredient list, and you don’t even have to have actual buttermilk to make buttermilk biscuits; you can just add a tablespoon of vinegar or lemon juice to regular milk, stir it up, and let it sit for two minutes, and you suddenly have perfectly serviceable “buttermilk” to work with. Mine are complicated just a tiny bit by a lazy-person’s adaptation of Michael Ruhlman’s method for lots of moist, fluffy layers, much like those beautifully sodden pillows from the can that you have to rap on the edge of the counter – you know what I mean – but this only entails a few extra folds and rolls of the dough before punching or cutting out your biscuit shapes.

2016 Food Blog May-07482016 Food Blog May-07532016 Food Blog May-0750Most magical of all, biscuits survive freezing spectacularly. Once mixed and rolled and cut, you can stow them in the freezer overnight, which means hot, fresh, flaky biscuits for breakfast can be yours in just over twenty labor-free minutes – time easily used to start the coffee, or find your slippers, or get some Lou Reed going to groove breakfast to.

2016 Food Blog May-0761

Apricot and Goat Cheese Biscuits
Makes 10-12 biscuits (2-3 inch diameter)
2 cups all-purpose flour
1 teaspoon salt
1 tablespoon raw sugar (I use turbinado)
2 tablespoons baking powder
¾ cup chopped dried apricots (chop to your desired size – I like a mix of rough and fine)
6 tablespoons cold butter, cut into chunks
½ cup crumbled goat cheese
6 ounces cold buttermilk (or faux buttermilk: stir one tablespoon white vinegar or lemon juice into the milk and let it sit for 2 minutes before using)


  • Line a baking tray with parchment paper. If you are cooking the biscuits immediately, preheat the oven to 400F. If you are cooking the biscuits the next day, clear some space in your freezer.
  • In a medium bowl, whisk together the flour, salt, sugar, baking powder, and dried apricots until well combined. Tumble in the butter and the goat cheese and, with a pastry blender, a fork, or two knives (I’ve never mastered this method, though), work in the chunks until well distributed in small pebbly bits throughout the mixture.
  • Now, pour in the buttermilk and, using a fork, turn and mix and work until a clumpy, wet dough forms. Dump this out onto a well-floured board and, with lightly floured hands, work it into a ball.
  • Use your hands or a floured rolling pin to flatten the dough ball you’ve formed into a rectangle or oval about 1 inch thick. Then, fold up the flattened shape into thirds, turn it 90 degrees, and flatten again. Repeat this process of folding, turning, and flattening twice more. When the biscuits bake, they will rise high with lots of fluffy layers.
  • With your folded and flattened dough back at about 1 inch thick, punch out biscuit rounds by pushing a biscuit cutter or the lip of a glass straight down through the dough. Don’t twist! Twisting disrupts all the layers you’ve just made and the biscuits won’t rise as high or as evenly.
  • When you have punched out all the biscuits you can, gather the dough back together into a ball, knead gently once or twice, and then flatten out again and punch remaining biscuits. You should be able to get 10-12 out of this amount, depending on the diameter of your cutting tool.
  • Space your punched-out biscuits at least half an inch apart on your prepared baking sheet. If you are baking immediately, place the loaded tray into your preheated oven and bake for 12-14 minutes, until the biscuits are just golden on top. If you are waiting, shove the tray straight into your freezer. The next morning (or whenever you need freshly baked biscuits), remove the tray from the freezer, preheat the oven to 400F, and bake for 18-20 minutes. There’s no need to defrost first – the extra time in the oven will do the job.
  • Either way, serve steaming. We like ours with butter and honey.

Ginger Blackberry Scones

2016 Food Blog March-0656It’s going to sound a bit cliché to do this – a literature major starting a post with quotes about April – but it has again proved itself to be the cruelest month. Really, as a medievalist I should be referencing Chaucer, and I do prefer his April – with its sweet showers and sleepy birds and waking pilgrims – to T.S. Eliot’s earthy disturbance of memory and desire, but this year Eliot is unfortunately more apropos. April is a thief. It stole things from me, and from others I love. It sapped me on a personal and a professional plane, and on levels both trivial and profound.

2016 Food Blog March-06192016 Food Blog March-06242016 Food Blog March-0625In the wake of April’s larceny, which began on the very first day of the month, something had to give, and that something was this something. The ease with which I slipped in a substitute post was insidious, and to manage my own needs, I had to allow that ease to linger.

2016 Food Blog March-0627Now that April has blustered its way out of our lives, now that I’m picking my way delicately up the slope that everything I dropped created, I think we need something warm and comforting, but bright. Something to wake up those sleepy birds and push us forward on our pilgrimages. There are several search terms for the 2016 project that involve blackberries, which is no surprise. However, I just couldn’t see my way ‘round “blackberry sauerkraut party meatballs” (any ideas?), so I settled on “ginger blackberry scones” instead, borrowing a bit from a Bon Appetit base recipe for cream scones.

2016 Food Blog March-06382016 Food Blog March-0641There is much, and also not a great deal, to say about scones. Richer than a biscuit, drier than a cake, they are a crumbly compact package I would eat at any time of day. Studded with chopped crystallized ginger, bright with citrus zest and weeping with the purple stain of lurking blackberries, they are capable of offering comfort even in the final days of the “stony rubbish” that is that cruelest of months (Eliot 20).

2016 Food Blog March-0647Ginger Blackberry Scones
Makes 8 large, 16 medium, or 24 small
Adapted from Bon Appetit
¼ cup granulated sugar
zest of one lemon or one lime
2 teaspoons baking powder
½ teaspoon baking soda
½ teaspoon kosher salt
3 cups all-purpose flour, plus more for dusting your board
½ cup (8 tablespoons or one stick) cold unsalted butter, cut into cubes
1¼ cups (about 12 ounces) fresh blackberries
¼ cup finely chopped crystallized ginger
1 large egg, beaten
1¼ cups heavy cream, plus more for brushing
raw sugar, optional, for sprinkling


  • Preheat the oven to 375F. In a medium bowl, rub the sugar and citrus zest together until the zest is evenly integrated and the sugar and your hands smell of its brightness. Whisk the zested sugar with the baking powder, baking soda, salt, and three cups of flour.
  • Add the butter chunks and, using a pastry blender or your fingers, work the butter into the flour until only small pieces remain – some will be the size of oats; some will be more like peas.
  • Add the blackberries and chopped ginger and toss gently to incorporate.
  • Make a well in the center of the mixture and add the egg and the 1¼ cups cream. Use a fork to mix, incorporating the wet and dry ingredients gently, until a shaggy dough forms. Lightly knead in the bowl just until it comes together – a few dry patches are fine. Some of the blackberries will lose integrity, bleeding through the dough. That’s okay too.
  • Turn the sticky, shaggy dough out onto a floured board and pat it into a round (more traditional) or a rectangle about 1 inch thick. Cut into wedges/triangles (a pizza cutter works well for this), or punch out rounds with a cutter, and transfer to a parchment lined baking sheet.
  • Brush tops of scones with a bit of cream, then sprinkle with raw sugar if desired. Bake at 375F: 25-30 minutes for large scones, 20-25 minutes for medium or small. They will blush pale gold when they are done, and the bottoms will bronze a bit darker.
  • Remove gently to a wire rack and let cool a few minutes before eating. If desired, you can leave off the brush of cream and sugar, and instead, when the scones are cool, drizzle them with a well-whisked mixture of 1 cup powdered sugar, ¼ cup lemon juice, and 2 teaspoons vanilla.

Barmbrack with Plums

2016 Food Blog March-0543I’m not sure whether it’s a blessing or a curse that, as the semester picks up, this recipe happens to fill both of my current projects for the month of March: the Twelve Loaves assignment, and my own search term theme. It’s a blessing, in that it’s only one loaf that needs to be baked, which is certainly all I can handle in one weekend. It’s a curse, in that it means I have to come up with something else to make this month, since combining these two leaves an extra week out in the open.

2016 Food Blog March-0511Still, though, it’s fortuitous in an utterly delicious way that these work together. The Twelve Loaves theme for the month is “Irish Breads,” and last year someone found my little site searching for “Irish bread with plums.” Aside from soda bread, the standard go-to Irish loaf, I knew nothing about Irish breads at all. Well, I suppose I knew about scones, but those are really British Isles in general to me, and not as specific to Ireland as I wanted to get.

2016 Food Blog March-0509After a little research, I hit upon barmbrack, or barm braec. In Gaelic, “braec” means speckled, and so this lovely rich bread is threaded through with dried fruit. Usually the speckles are raisins and sultanas (or golden raisins, as we somewhat unimaginatively call them in the U.S.). This seemed, though, like a perfect place to add the requisite plums from the search. They would need to be dried, both because it’s not stone fruit season yet and because the moisture levels of fresh plums would make the bread too wet. Still, though, chopped prunes along with the traditional raisin component seemed promising. I love prunes, with their rich, concentrated flavor and their dense, almost meaty texture, but they don’t often find their way into baked goods, which I think is a shame.*

2016 Food Blog March-0510Barmbrack can be made both as a yeasted loaf and as a simple round raised with baking soda. I decided on yeast, since sometimes I find soda breads a bit too dense for my taste. Since this was already going to be weighed down by the fruit, I wanted to give it a good bit of lift. In either case, it’s usually a holiday bread celebrating the harvest season, and there are sometimes small treasures like rings or coins baked into it as part of a fortune-telling game (I must admit I skipped this part).

2016 Food Blog March-0515I surveyed a number of recipes, and finally combined two with features I liked. Interestingly, this bread is often made with tea: the dried fruits, and sometimes candied or fresh citrus zest, are soaked in strong black tea for a few hours, or even overnight, before being kneaded into the spiced, slightly enriched dough. I didn’t have any Irish Breakfast Tea, so I gritted my teeth and chose between Earl Grey and English Breakfast. In the end, I went with the Earl Grey. I realize the reference to British politics and aristocracy might ruffle some feathers, but at least it didn’t outright have the word “English” in the name. In any case, do forgive me, and use proper Irish tea for your loaf.

2016 Food Blog March-0527Because there is a lot of moisture from the fruit in this loaf, you can expect a quite sticky dough. Don’t be afraid of it, though; just add some more flour to your board and knead away. You’ll be rewarded, after two rises and the better part of an hour in a hot oven, with a deeply browned loaf studded with a rubble of raisins and prune pieces, moist and richly chewy, but with a firm and almost crackly crust. Because it is baked in a round cake pan, it rises with a glorious even dome, and just around the edge where the loaf leaves the pan, there’s a curiously lovely pale golden stretch mark encircling the bread.

2016 Food Blog March-0535The Saveur recipe I borrowed from suggests, as the end of the baking time nears, brushing the top of the loaf with warm honey and then baking for an additional two minutes. I did not do this, in both an effort avoid too much sweetness and to maintain its lovely crusty exterior. If you should want to, though, they recommend ⅓ cup.

2016 Food Blog March-0542Despite wolfing down a thick slice the day I baked it, N. has since forgotten about this homely little loaf, and I haven’t bothered to remind him, because that means more for me. Even after a few days wrapped in aluminum foil, the interior remains moist and rich but not too dense, and the outside stays perfectly crusty – a rugged, deeply browned layer that I’ve tried all week to think of ways to describe. “Imagine if a brown paper bag were a crust,” I said to N. at one point, but we agreed that didn’t sound particularly delicious. “Perfectly crusty” remains the best thing I can come up with, and you’ll have to believe me that it’s part of what makes the loaf worth hoarding. Perfect still warm from the oven, great at room temperature, and glorious toasted, this is good plain but revelatory with a thick pat of salted butter and, obviously, a cup of tea.

2016 Food Blog March-0551* if you aren’t a prune fan, you can stick with the traditional raisins and sultanas, or test out other dried fruit options: currants would be great here, and dried cranberries or dried cherries might also be good. Dried apricots also sound promising to me along with the sultanas, provided they were quite finely chopped. Perhaps a dollop of clotted cream or even mascarpone cheese over the top of the slice wouldn’t go amiss.

Prune and Sultana Barm Brack
Adapted from Saveur and RTÉ Lifestyle
Makes one 8-inch round loaf
About 5½ hours, including steeping and rising time, or overnight
2 cups strong black tea (I used 2 tea bags)
¾ cups chopped prunes (dried plums)
¾ cups sultanas (golden raisins)
2 tablespoons each orange and lemon zest, plain or candied
¼ cup whole milk, warm or at room temperature
2 teaspoons active dry yeast
2-2½ cups bread flour
1 teaspoon salt
¼ cup light brown sugar
½ teaspoon ground cinnamon
¼ teaspoon ground nutmeg
¼ teaspoon ground cloves
8 tablespoons softened unsalted butter, divided
1 egg
(optional: ⅓ cup honey, warmed, to brush over the loaf)


  • In a medium glass bowl (I used my 4-cup measuring cup), pour 2 cups of boiling water over 2 teabags and let steep for 4-5 minutes. Add the chopped prunes, the raisins, and the mixed zest, and let soak for at least 2 hours, or as long as overnight. When you are ready to make the dough, drain the fruit and zest in a strainer, but reserve the soaking liquid.
  • Meanwhile, sprinkle the 2 teaspoons active dry yeast and a pinch of sugar over the warmed milk and let sit for 5-10 minutes until the yeast fizzes and foams up. Mine raised quite a dome.
  • While you wait for the yeast, combine 2 cups of flour, the salt, the brown sugar, the cinnamon, the nutmeg, and the cloves in the bowl of a stand mixer, or another large bowl.
  • When the yeast is foamy, add the egg and mix briefly, then pour into the dry ingredients, add 6 tablespoons of the softened butter, and mix with the paddle attachment to bring together. Mine was a bit crumbly at this point.
  • Switch to the dough hook and knead at medium speed for 5-7 minutes until you have a smooth but slightly sticky dough. If the dough seems too dry and is just not coming together, add a tablespoon or two of the reserved tea. If it gets too wet, add flour a tablespoon or two at a time until it is a workable consistency.
  • When your dough is smooth and elastic but still a bit sticky, turn it out onto a well-floured board (I’m not kidding). In three or four additions, knead the drained fruit into the dough. I tried this in the mixer bowl with the dough hook, but it made a huge mess. By hand with flour and a dough scraper nearby is the best strategy.
  • With the fruit incorporated, form the dough into a loose ball and deposit it into a large bowl you’ve buttered with 1 tablespoon of the remaining softened butter. I used the stand mixer bowl; you don’t even have to rinse it out in between. Cover the bowl tightly with plastic wrap and set aside to rise for 1-1½ hours, until nearly doubled.
  • Punch down the risen dough by depressing your fist gently into the center; the dough will spring back only slightly. Turn it out onto a floured board and knead lightly 2 or 3 times, then shape it into a tight ball and position it in an 8-inch cake pan, which you’ve buttered with the last remaining 1 tablespoon of softened butter. Drape lightly with plastic wrap and let rise another 30-60 minutes. Mine was ready to go in 45 minutes.
  • About 30 minutes before you are ready to bake, preheat your oven to 400F with a rack in the middle position. When the loaf fills the pan and is nicely domed, remove the plastic wrap and carefully place in the oven to bake for 35-45 minutes, until the bottom sounds hollow when thumped, or an instant-read thermometer measures 180-200F.
  • If you wish, now is the time to remove from the oven, brush on the ⅓ cup warm honey, and return to the oven to bake an additional 2 minutes. I skipped this because I wanted the crust to stay, well, crusty.
  • Let cool in the cake pan at least 10 minutes, then turn out onto a wire rack to cool an additional 20 minutes before cutting into unapologetically thick slices, slicking thickly with butter, and eating alongside a strong cup of tea.


#TwelveLoaves is a monthly bread baking party created by Lora from Cake Duchess and runs smoothly with the help of Heather of All Roads Lead to the Kitchen, and the rest of our fabulous bakers.

This month we are baking Irish Breads. For more bread recipes, visit the #TwelveLoaves Pinterest board, or check out last month’s inspiring selection of #TwelveLoaves RED Breads!

If you’d like to bake along with us this month, share your Irish Breads using hashtag #TwelveLoaves!

“Rumpled Donuts”

2016 Food Blog January-0343Some of the blog search terms I’ll be using for this year’s project are straightforward, and some made proto-recipes fly immediately into my head. This one did not. Part of the reason I chose to do it first was simply because I wasn’t sure what “rumpled donuts” should be, and wanted to figure it out before I was too deep into the spring semester.

2016 Food Blog January-0316Though I can think of what many “rumpled” baked goods might look like – particularly rumpled pancakes, which might be crepes, or maybe that lovely giant Dutch baby or German pancake that rises up past the edges in the pan – I couldn’t fathom what a rumpled donut might be. If you’re still out there, searcher, what were you after? When I think “rumpled,” I think unmade bed sheets. It’s uneven. It’s piled and layered, and that meant my dough, whatever I opted for, would also have to be uneven. Clearly this is a problem for regular dough – in almost all baked goods you want your dough or batter to be rolled or spread or patted out to the same thickness all the way across, for even cooking. It would need, then, to be a non-traditional dough.

2016 Food Blog January-0319I’m not sure what eventually led me to phyllo. Certainly I thought of my favorite donut, the perfectly delicious but sometimes overlooked apple fritter, and somewhere in the contemplation of apple and cinnamon and unmade beds, I thought of a crumpled layer of phyllo dough, and I knew exactly what I would do. Phyllo would get twisted and wrapped around a ring of apple, then fried until crisp and dredged in a healthy layer of cinnamon sugar. Bingo. Rumpled donut. The apple slices would have to be cooked for a while first, though, since the phyllo would fry so quickly.

2016 Food Blog January-0312Next to making caramel, frying is the cooking project that puts me most on edge. The oil takes a long time to come up to temperature, it seems like so much, and there’s always the fear that, well, you have a vat of boiling oil on your stove right next to your hands, and arms, and legs, and all those body parts you’d prefer remained un-fried. In this case, there was also the complication of working with phyllo, which needs to be treated quickly and delicately to avoid tearing or drying out. For that reason, even after deciding exactly what I would do, I put off making these for three weeks. Surely, I thought, they would be more trouble than the end product was worth.

2016 Food Blog January-0330Untrue. I’m not in a rush to make them again, but for a pure experiment they were amazing. The apple rings are meltingly tender after a sauté in butter and brown sugar spiked with a cinnamon stick. The loose buttery caramel they leave behind is the perfect slick to brush between phyllo layers to help them cook through and to sweeten the tasteless, papery dough. Once fried, which only takes about a minute on each side, the phyllo is impossibly crisp, not particularly greasy, and deeply golden. It’s like a croissant and an apple fritter had a beautiful affair. I made six of these, since that’s how many rings I divided my apple into, and since each one consisted only of one slice of apple and one sheet of phyllo, N. and I felt no compunction whatsoever about eating three each over the course of the afternoon and evening.

2016 Food Blog January-03392016 Food Blog January-0337Here’s the thing, though. Most of the recipes I post here, I want you to cook. I try to make them precise, and organized, and exact, so you can replicate them successfully, with your own touches, if you wish. This one is different. Unless you’re really into what you’re seeing here, don’t make these. They were outstandingly delicious, yes, but they were also a giant pain to execute. The apples tore, the phyllo tore, there was sugar everywhere, and as you’ll see below, the process of folding and twisting and wrapping is tricky to describe and to do (and impossible to take pictures of – I gave up). What I’d advise instead, and what I will likely do when a craving for fried phyllo arises, is to forget about the donut ring shape. Just make packets – twist or roll or wrap up a sautéed slice or plank of apple in phyllo layers and drop it into the oil that way. It will still produce sweet, tender apples in flaky, crispy layers of dough that shatter everywhere upon impact, but you’ll save yourself a lot of irritation in the construction phase. And if apples aren’t your jam, I’d imagine you could use almost anything: a smear of pesto, a dollop of nutella, a slice of brie spread with fig or apricot preserves and wrapped in prosciutto inside that papery crispy envelope.

2016 Food Blog January-0309Just in case, though, what follows is my procedure, as clearly as I can describe it, for my attempt to invent the “rumpled donut.” Enjoy!

2016 Food Blog January-0344

Rumpled Donuts
Makes 6
45-60 minutes, roughly, depending on how many donuts you fry at a time
1 large green apple
4-5 tablespoons of butter
2 tablespoons brown sugar
1 cinnamon stick
pinch of salt
6 sheets phyllo dough (or however many apple rings you end up with)
1-2 quarts vegetable oil
½ cup granulated sugar
2 tablespoons cinnamon


  • Begin to heat the oil to 350F in a deep pot. I use one with straight sides, but a wok would probably also work nicely. Oil should be at least three inches deep.
  • While the oil heats, prep your ingredients. Skin the apple and core it, leaving a hole down the center at least 1 ½ inches in diameter. Cut the cored apple into ¼ inch thick rings – for me, this made 6 even slices.
  • Melt 4 tablespoons of the butter in a skillet over medium heat. Add the brown sugar, the cinnamon stick, and the pinch of salt and stir or whisk together the sugar is fully dissolved into the butter. Add the apples in a single layer and sauté until tender, about 2 minutes per side. When apple slices are tender but not mushy, turn off the heat, remove apple slices from the pan, and set them aside to cool until room temperature, or just barely warm.
  • While the apples are cooling, combine the granulated sugar and cinnamon in a small dish, and prepare a work station for the phyllo dough. You will need a large board and two slightly damp kitchen towels. Lay one towel down on a countertop, place the 6 sheets of phyllo on it, then cover the phyllo with the other towel. Phyllo dries out fast, and when it dries it becomes brittle and even more difficult to work with. Set out a wire rack with paper towels, or a cookie sheet, or a large plate underneath – this is where you will set your finished rumpled donuts.
  • Carefully separate one sheet of phyllo from its companions and spread it out on the large board. Cut it in half width-wise so you end up with two fatter rectangles (as opposed to two thinner ones, as you would if you cut it lengthwise). Use the leftover butter and sugar mixture in your pan to brush lightly over each rectangle (if this has solidified and seems unbrushable, add the additional tablespoon of butter, put it over low heat, and stir or whisk together until melted and spreadable again). Fold each phyllo rectangle in half lengthwise for two longer, thinner strips. Repeat, brushing and folding again, for each piece so you have two thin strips of phyllo.
  • Now comes the pesky part. Take one of your apple rings and carefully insert one of the phyllo strips through the hole in the center. Pull the apple through about ¼ of the length of the phyllo, and wrap that ¼ back around the apple ring. Draw the remaining phyllo strip around the apple ring and back through the hole. This is easiest if you draw the end of the phyllo through as though you were threading a needle, rather than pushing from the middle of the phyllo strip, which can encourage tearing. Continue to draw the phyllo through and carefully wrap it around the apple ring in a spiral, and repeat with the second strip. You will need both to form a full spiral of dough around the apple, completely encircling it. Tuck the ends of phyllo into the central hole of the apple to secure.
  • Repeat with the remaining apple rings and sheets of phyllo.
  • When you have wrapped your apples and your oil has reached a temperature somewhere in the window of 350-365F, you are ready to fry. Use a skimmer or a kitchen spider to carefully lower the “donuts” into the oil one at a time. If your pot is wide, you can fry more than one at once. I just did one at a time.
  • Fry the “donuts” until deeply golden, then flip and repeat. For me, this took about 1 minute per side. Carefully remove with the skimmer and let it drain over the pot of oil for a few seconds, then sprinkle liberally with the cinnamon sugar mixture (be sure to get both sides!), and set gently on the wire rack to cool for at least 5-10 minutes. This will ensure that all surfaces stay crispy. Keep an eye on your oil temperature, ensuring that it remains in the 350-365F range.
  • Repeat with remaining donuts, and eat as soon as they are cool enough to handle, with plenty of napkins at the ready. We did not save any, so I don’t know how they store, but my guess is the phyllo will not retain its perfect crunch overnight.

Apple Cranberry Hand Pies

2016 Food Blog January-0251When my sister was a kid, she somehow acquired a cooking toy the internet tells me was called “McDonald’s Happy Meal Magic: Pie Maker.” Released in 1993 (feeling old yet?), it allowed the user – with parental guidance, to be sure – to create a small pocket snack that, at least in inspiration, vaguely approximated the fast food giant’s classic dessert. The “pies” this toy made can’t have been very good; from what I recall, they consisted of a piece of store-bought bread, crusts removed, that you rolled out thin and topped with a small hill of fruit filling (I remember applesauce; my sister recalls jam). You then folded the bread over the filling, placed it in a little box-like contraption and, upon forceful application of the lid, squashed and crimped it into submission. You could then sprinkle on some cinnamon sugar, and eat it immediately.

2016 Food Blog January-02192016 Food Blog January-0221The problem with this, aside from the fact that it doesn’t sound very appetizing anymore, was that after going to all the trouble of removing crusts, rolling out, squashing and crimping, my mom would only let us eat one or two at a time. And I can’t imagine they would keep well.

2016 Food Blog January-0222Regardless of practicality or flavor, though, I remember this being a lot of fun. There was a satisfaction to assembly-line production of “dessert” items that, though not as prolific as Lucy and Ethel’s experience, meant we had the ability (if not the permission) to create high volumes of sweets.

2016 Food Blog January-0224This was my introduction, though I didn’t realize it, to hand pies. A sweet rejoinder to pasties, flaky dough encases a fruity filling in a single serving that, true to its name, can be picked up (once it has cooled enough, of course) and eaten straight out of hand. It can also, of course, be topped with a scoop of ice cream, or drizzled with caramel, or a dozen other plate-and-fork applications, but the glory of being able to lift one straight off of a baking sheet and walk away utensil-free is worth noting.

2016 Food Blog January-0225A mid-winter pie should be sweet, yes, but it should also be tart and bright to wake up your sluggish, post-holiday self. I decided on apple and cranberry. I always buy a few extra bags of cranberries when they are on sale in November and December, and stow them in the freezer in case I get early spring cravings for cranberry sauce.

2016 Food Blog January-0233The dough for hand pies needs to be easy to manipulate, since you’ll be rolling and cutting and folding and crimping, so I went with the cream cheese dough I’ve been dabbling with lately – it is a moist dough, so it doesn’t tear as easily as some, and the cream cheese as well as butter keeps it fairly tender even when you work it a bit.

2016 Food Blog January-0237The filling is lightly adapted from Joy the Baker’s Apple Cranberry Crumble pie.  In addition to the classic procedure – toss the apples with sugar, cinnamon, lemon juice – Joy includes two extra steps: let the apples macerate for thirty minutes or so, to create a puddle of sweet, spiced juices. Rather than just dump this into a pie shell, in a stroke of genius, you bubble the juices down with some butter to create a thick, syrupy caramel, which you promptly stir back into the fruit before filling your crust. You end up with a slightly less wet filling, which is a fine thing on the mess front, and a deeper, more developed flavor. I took the liberty, and I think Joy would approve, of adding a few tablespoons of bourbon to my juice mixture before I boiled it down into a syrup.

2016 Food Blog January-0242These are lovely little pockets of sweet tartness. In the time it takes the crust to go pale gold and fluff up into pockets of flakiness, the small chunks of apples and coarsely chopped cranberries swimming in syrupy cinnamon caramel have time to cook through, but not turn to mush. Your only enemies here are time and heat – as with all butter-based pie crusts, if the butter in the dough warms up too much before it goes in the oven, the crust will not puff and flake, as the butter will melt right out of the dough before it has a chance to create layers of pastry. But you can surmount this by carefully moving back and forth between prep with the crust and the filling, making use of your fridge in between, and still put forth a dessert in about two hours. I brought one to N. to sample, and he returned ten minutes later with an empty plate and said “that was really, really good. Now I just want four more.” I didn’t tell him I’d already eaten two and was contemplating another.

2016 Food Blog January-0259I call that a win.

2016 Food Blog January-0275These will keep wrapped in aluminum foil for 2-3 days before the pastry starts to get a bit soggy. Good news, though: they reheat perfectly in a 300F toaster oven.

2016 Food Blog January-0250

Apple Cranberry hand pies
Makes 16 5-inch pies
Time: about 2 hours
For Crust:
2 ½ cups all-purpose flour
2 tablespoons granulated sugar
1 teaspoon salt
8 ounces cold full fat cream cheese
8 ounces cold unsalted butter (2 sticks), cut into thin slices
3-4 tablespoons very cold water
For Filling:
3 large granny smith or other tart apples, peeled, cored, and cut into ¼-½ inch chunks
1 tablespoon lemon juice
¼ cup packed brown sugar
¼ cup granulated sugar
2 teaspoons cinnamon
¼ teaspoon salt
2 tablespoons butter
2 tablespoons bourbon (optional)
1 tablespoon cornstarch
For assembly:
Flour, for dusting
Coarse sugar, to sprinkle


  • To make the crust, pulse the flour, salt, and sugar in the belly of a food processor until evenly distributed (consider doing this in halves – my food processor could barely handle the whole quantity). Add the cream cheese and let the mixer run until the mixture is homogeneous – it will be the texture of barely moistened sand and stay together only a moment when pressed between thumb and fingertip, as in the photo above.
  • Dump in the slices of butter and pulse in 1 second intervals until most of the butter is broken up and, when tested, the mixture stays together when pressed between thumb and fingertip.
  • Drizzle in 3 tablespoons of the cold water and pulse again briefly once or twice. We are looking for the mixture to just start to come together into a rumbling ball in the belly of the machine. If the mixture seems too dry, add the last tablespoon of water and pulse again briefly to bring together.
  • Stretch out a piece of plastic wrap on your countertop and dump the contents of the food processor onto it. Remove the blade and use the plastic wrap to help you shape the dough into a disc about 6 inches in diameter. Try to handle it as little as possible to keep it tender. Wrap it up and stow it in the fridge for at least an hour.
  • While the crust chills, make the filling. Combine the apple chunks, lemon juice, brown sugar, granulated sugar, cinnamon, and ¼ teaspoon salt in a large bowl. Toss with a spatula or your fingers to evenly distribute the spicy, sugary coating. Gently maneuver the apples and their sugar and spice mixture into a fine mesh sieve and position this over the large bowl you were using, then set aside for at least 30 minutes (Joy says up to three hours, though I didn’t leave mine this long). The objective here is to catch the drippings.
  • While the apples drip, preheat the oven to 400F and line two baking sheets with parchment paper. Remove the pie crust disc from the fridge. Lightly flour a large board and a rolling pin, then unwrap the disc, divide it in half, and set half on the floured board. Pop the other half back into the fridge until you are ready for it. Using firm and deliberate strokes, roll out the first half of the dough into a rough circle about ¼ inch thick. Every few rolls, shift the dough circle around, flipping it and adjusting it on the board – this will minimize sticking. You can also add more flour if needed.
  • With an even ¼ inch layer of dough, use a floured cutter or lip of a glass to cut the dough into circles. I went with 5 inches in diameter. To avoid extra stickiness or tearing the dough, press straight down without twisting. Once you have cut all the way through the dough, then you can twist the cutter a bit to loosen the round from the board.
  • Once you have made all the circles you can, gather together your scraps and re-roll them – you want to do this as quickly as you can to prevent the butter from softening too much. Roll out and cut again, then repeat with the other half of the dough. Position your dough circles on the prepared baking sheets (it’s okay if they overlap – they won’t stick), and put them into the fridge to chill out again.
  • Now turn back to the filling. When you have at least ½ cup of liquid from the apples, pour it into a small saucepan along with the 2 tablespoons butter and the bourbon, if using, and cook over medium-low heat until it becomes thick and syrupy, and only about ⅓ cup remains.
  • While the apple drippings cook down, plop the apples back into the original large bowl. Using the same food processor you used for the crust (you can wash it out if you want – I usually just scrape out any big lingering bits), pulse up the cranberries until they are coarsely chopped. You can do this by hand if you want, but it is fairly messy.
  • Add the cranberry pieces to the apple chunks in the large bowl, and toss them with the cornstarch until the cornstarch is no longer visible.
  • When the apple drippings are reduced to a thick, syrupy caramel, pour it back over the fruit and toss gently to combine.
  • Now, pull the prepared dough rounds out of the fridge (I’d do one baking sheet at a time), and add 1½-2 tablespoons filling to each 5-inch round of dough. You will be tempted to add more. Don’t do it! 1½, or a scant 2, tablespoons is all that can safely fit. If your rounds are smaller, you will, of course, need less filling. When all rounds are filled, you’ll likely have a tablespoon or 2 of filling left over.
  • As you place each tiny pile of filling in the middle of the dough round, fold it in half and press the edges together with your forefinger and thumb. To seal each little half-moon package, set it down on the floured board or on your baking sheet and press down on the edges all the way around with the back of the tines of a fork.
  • Settle each crescent evenly spaced on your baking sheet – you should be able to fit 8 per sheet without them touching each other. Slash the top of each one lightly with a knife to give an escape valve for steam, and if desired, sprinkle on a pinch or two of coarse sugar before levering them into the oven.
  • Bake at 400F for 25-30 minutes, until the crusts are puffed and golden brown, and possibly a bit of gooey syrup escapes from the less-carefully-crimped edges.
  • Cool for at least 10 minutes before digging in. They are perfect on their own, but I suspect a scoop of vanilla ice cream wouldn’t hurt matters…