Plantains with lime, cotija, and honey

If you are working from home during this pandemic, you have probably thought more than once since March about the weirdness of time passing. On one hand, we’ve been doing this foreverrrrrrrrrrr. On the other hand… no, it’s been forever.

But within that space of Marchunetember, or whenever we are, time passes oddly. Sometimes I can’t believe it’s already Thursday (I know, it’s Monday. But you know what I mean). Sometimes the afternoon just will. not. end. We are feeling the first hints of fall here in Southern California: two beautiful overcast mornings in which the gloom was not smoke, thank-you-very-much, cool enough that I wanted pants on my dog walk. Yet later this week we are supposed to rocket back into temperatures in the 90s. There’s a bit of everything at once.

So this is a little dish that speaks to all of those things. It makes a nice lunch for one, but it would be an equally delightful afternoon snack for two. It could easily be doubled or tripled to feed your pod.  It’s sweet and salty and sour and a little spicy – in fact, it would go so well with this kicky, smoky, spicy mix that you might as well plan to serve them up for a happy hour together, whether that means margaritas, palomas, or puckeringly good lemonade.

I like a mostly-ripe plantain for this, yellow with streaks of brown on the peel, because I enjoy the mix of textures: crisp, fried exterior with cushiony softness inside. But you could also do them tostones-style, frying less-than-ripe plantain slices over medium-low heat first to soften, then smashing them flat and frying again over higher heat on both sides for even brownness.

I ate mine with a fork, as you can see from my not-quite-in-focus close-up, but if you want to go nachos style and use the plantain pieces as scoops, I say go for it.

Plantains with lime, cotija, and honey

Serves 1 as a light lunch or 2 as a snack

15-20 minutes

1 large, yellow plantain, peel removed, cut into about ½ inch slices (I like mostly ripe, but see above for another option)

1 tablespoon vegetable oil

2 tablespoons butter

salt and red pepper to taste – I like the fruity heat of aleppo pepper

1 lime, which you’ll use for zest, supremes, and juice

1-2 tablespoons crumbled cotija cheese

1-2 teaspoons honey

about 1 tablespoon chopped cilantro


  • In a cast iron or other skillet, heat the vegetable oil and butter over medium-low heat until the butter is melted. Add the plantain slices, dust with salt and pepper, and continue to cook over medium-low for 4-6 minutes, or until they are nicely golden brown on the bottom. Don’t rush it. Don’t turn up the heat. They need to cook inside but not burn on the outside.
  • As plantains brown, flip, dust the other side with salt and pepper, and cook on the second side until it is also nicely browned, around 4-5 minutes this time.
  • While the plantains are cooking, zest the lime and reserve that zest for serving. Then use a sharp knife to cut a thin slice off the top and bottom. Remove the remaining skin and pith by cutting it off in strips from top to bottom, following the curve of the fruit. When you have removed the skin all the way around, cut supremes: slice between the fruit and the membrane that separates each segment. This is a useful step-by-step as well.
  • To serve, pile the fried plantains on a plate or in a shallow bowl. Add the lime supremes and cotija crumbles. Squeeze on some juice from the remaining carcass of the lime. Drizzle on the honey, then scatter the cilantro and the reserved lime zest over the top.

Sourdough Soft Pretzels

I think it took me a little longer to fall into the sourdough-everything craze than it did some people, but that could be because I’ve been nurturing a little starter for some time now. Left with a bit of discard, though, from a (semi)weekly bake of my standard sourdough loaves, I decided to branch out from pancakes, and revisited the humble-but-stellar pretzel. Thus although I don’t have a clever or nostalgia-laced story to offer today, in an effort to get myself back into this blog-thing I supposedly have and considering that we mowed through the first batch of these in about twenty minutes and were already planning a second, they certainly seemed worth sharing!

I’m adapting two recipes here: one from King Arthur Baking Company (have you seen they’ve updated their name?!), and one from Smitten Kitchen, which she in turn adapted from Martha Stewart. The KAF (or, I guess, KABC?) recipe doesn’t include the traditional boiling step, moving their shaped dough straight into the oven after a single rise. I wanted the extra browning and chewy texture the baking soda boil offers (I have neither the materials nor the courage to use food grade lye… at least not yet…), so I used SK’s procedure for that part.

We had our half dozen chewy, slightly tangy results dunked in a beer cheese sauce – a simple, roux-thickened mix of stout, milk, mustard, and cheddar whisked into a smooth, thick cheese gravy,* and, in an attempt to be slightly virtuous, a side of sautéed cabbage.

Enjoy the sequence of pretzel-shaping shots below, featuring N. as my arm-and-hand model (he was also very keen to perfect his technique, so even though I told him he only needed to shape one pretzel while I photographed, he did three of the half dozen we made that night before I pushed him aside – I wanted to play with dough ropes too!).

* cheese gravy sounds weird, I know. But this had more body than just a sauce; it clung thickly to the pretzels and could have made a great macaroni and cheese base. It didn’t have the right ingredients or flavors to be a queso (Tex-Mex) or a fondue (Swiss), so I’m going to embrace the weirdness. Cheese gravy it is.


Sourdough Soft Pretzels
Adapted from King Arthur Baking Company and Smitten Kitchen
Makes 12 (but easily halved; I’ve included quantities for both below)
2-3 hours (it will take longer to twist and boil 12 pretzels than it does for 6)


For 12:
¾ cup + 2 TB water
2 teaspoons active dry yeast
1 TB honey
1 cup sourdough starter, unfed / discard
3-3½ cups bread flour
¼ cup milk
1 TB butter
1½ teaspoons salt


For 6:
⅜ cup + 1 TB warm water
1 teaspoon active dry yeast
½ TB honey
½ cup sourdough starter, unfed / discard
1½-1¾ cups bread flour
2 TB milk
½ TB butter
¾ teaspoons salt


For the boil:
water to fill a 12-inch skillet
¼ cup baking soda
2 TB brown sugar


To bake:
Coarse salt or pretzel salt


  • Combine the yeast, warm water, and honey in a medium bowl (I used the bowl of my stand mixer). Let them sit for 5-10 minutes, until the mixture is bubbly and smells like bread. Add 1½ cups of the flour, and all of the sourdough starter, milk, butter, and salt.
  • Using the dough hook, knead into a smooth but slightly sticky dough; for me this took about 5 minutes on medium speed. If it really seems like it is too wet (too sticky), add the remaining ¼ cup of flour and knead at least 2 minutes longer.
  • Cover the dough and leave it to rest for 45 minutes, ideally in a warm place. It will only rise a little bit, so don’t be alarmed.
  • Line two baking sheets with parchment paper, then dump and pull your risen dough out onto a lightly floured board. Using a knife or a bench scraper, divide the dough into 12 even lumps (or 6 if you are making a half recipe).
  • Now the part that can seem intimidating: shaping the pretzels. Working with one piece of dough at a time, use your fingers and the palms of your hands to roll the lump or ball of dough into a long, even rope about 18 inches long. Above you can see N. measuring the one he’s working on. Note: too much flour on your board here is not a good thing. You don’t want the rope to stick (as you can see some of ours did), but you do need some friction or the dough will just slide around on the board instead of rolling and elongating.
  • Drape the 18-inch rope into a U shape on your board. Holding each end between your thumb and forefinger, but leaving the bottom of the U on the board, gently cross the left side over the right side about 2 inches from each end. Repeat, again crossing the (new) left side over the (new) right side so you have two twists in your pretzel. Now, again holding one end in each thumb and forefinger, flip the ends down to the bottom of the U shape to form a pretzel. Pinch the points where they intersect with the U a little bit to keep them in place. Gently but quickly, relocate your shaped pretzel to one of the lined baking sheets. Repeat with the remaining dough.
  • When you have twisted all 12 (or all 6) pretzels into shape, stow them in the refrigerator for at least 30 minutes. This is a pretty soft dough, so plunging them right into the boil might result in disintegration.
  • While the pretzels chill, fill a 12-inch skillet about ¾ of the way with water and bring it to a boil. This is also a good time to preheat the oven to 350F, and to line an additional baking sheet with parchment paper.
  • After at least 30 minutes in the refrigerator, remove the tray(s) of pretzels and set them near the stovetop. Carefully, (carefully!), add the baking soda and brown sugar to the boiling water. There will be a lot of abrupt bubbling and fizzing! Stir gently to disperse and dissolve, then carefully add the pretzels 2 or 3 at a time. I find this should be done gently but with speed, to prevent the dough from stretching out of shape.
  • Let the pretzels boil in the bath for about 30 seconds, then use a strainer or spatula to flip. Boil another 30 seconds on the second side, then carefully, again using the strainer or spatula, remove the pretzels from the water and arrange them with space in between on the empty parchment lined baking sheet. Repeat with the remaining pretzels, letting the water come back to a boil between each batch. They won’t grow too much in the oven, but you don’t want to overcrowd them; I would suggest no more than 4 on each baking sheet unless they are very compact.
  • While the pretzels are still wet from the baking soda bath, sprinkle on some coarse salt or pretzel salt, then slide into the preheated oven and bake 25-30 minutes, until they are deeply golden and have a slightly crisp crust.
  • Remove from the oven and consume, with glee, as soon as they are cool enough to handle (or, if you’re me, a few minutes before that…).

Pandemic Potato Salad

This is a recipe born out of need and change and a series of odd connections. I bought a bag of red potatoes intending to make a gratin, but a sudden upswing in temperature made the idea of roasted anything feel oppressive. Meanwhile, my beautiful heads of romaine lettuce in my garden started to bolt, and my parsley was already flowering. I thought of salad, of course, and then of potato salad, and then of likely ways I could combine them. A potato salad with green beans and parmesan I had in Eugene crept back into my mind, and parmesan reminded me of pesto. Pesto is such a convenient way of using excess greens, even when they are getting bitter, so I wondered if lettuce pesto would be tasty. The garlic and parmesan of pesto along with the lettuce reminded me of Caesar salad, and suddenly I was adding anchovies and mayonnaise and hard-boiled eggs for good measure, and this franken-potato-salad was born.*

This is not one of those “not your average gloopy potato salad” iterations. I must admit, as an ardent mayonnaise lover, I resent those complaints about gloopiness. This one is gloopy. It is unapologetically gloopy. It is a potato salad for mayonnaise aficionados. But I have an important secret when it comes to those “gloopy” mayonnaise based summer salads, whether their bases are potato or pasta: you have to add the dressing while the starch base is still warm. If the potato chunks or noodles are cold, the dressing just weakly sits beneath and around them. If it’s stirred in while they are warm – or even hot – the dressing soaks in. The texture is better, the flavor is better, and you can get the hot part of the process out of the way hours before you intend to serve anything. At least 2 hours in the fridge after everything is combined ensures nicely melded flavors – the anchovy mellows, the garlic relaxes, the lettuce emerges not as a strong presence but as a juicy green background taste we found quite pleasant.

Because I’m me, I couldn’t quite leave well enough alone: since the lettuce and anchovy and parmesan allude to Caesar salad, and since lately we’ve been all about crunch and texture, I wanted to give a nod to the crouton component. A shower of panko crumbs well toasted in olive oil right over the top added crunch, though if you wanted to be a little less excessive, you could probably used well-toasted almonds instead. I’d suggest a rough chop for rubbly texture.

* As I wrote this, I was weirdly reminded of my most recent and ongoing scholarly project, which suffers from organizational stress. A few weeks ago a fellow academic tweeted “How has anybody ever structured a piece of writing? It’s an impossible con, all the things to be said must be said at exactly the same time or none of them will make sense” (Jones). I felt that as I tried to explain the intersecting idea strands for this salad: in my brain, the connections happened nearly instantaneously. Here, which do you mention first? The potato salad with parmesan that reminded me of pesto? The lettuce that evoked Caesar? Words prohibit the all-at-once-ness that feels so natural when we think…

Pandemic Potato Salad
Serves 6-8 as a side, not that you’re having anyone over right now…
2 ½-3 hours, including chilling time
6-8 ounces green beans or haricot verts
10-12 medium red potatoes
4-6 cloves garlic
5-9 anchovy filets (wide range, but adjust according to how much you love anchovies)
zest and juice from 1 lemon
1 head romaine lettuce, core removed, leaves roughly torn
1 cup packed parsley leaves and stems
1 cup mayonnaise
1 cup grated parmesan cheese
3 hard-boiled eggs, peeled and roughly chopped
salt and pepper to taste
Optional: 2 tablespoons olive oil and ½ cup panko breadcrumbs or ½ cup roughly chopped almonds


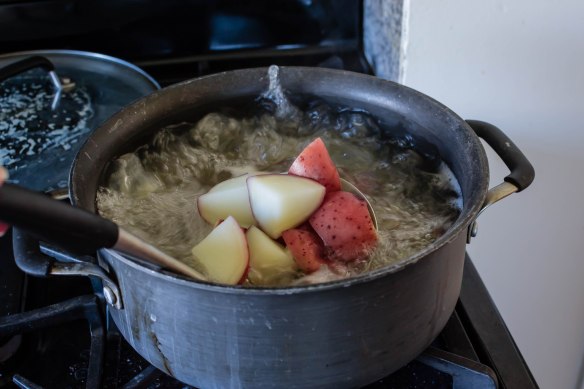
  • Blanch the green beans in a large pot of boiling salted water. This will take 2-3 minutes for large size beans, or about 90 seconds for skinny little haricot verts. Remove from the pot and douse in cold water to stop them from cooking further. Reserve the salted cooking water. Quarter the potatoes (or if they are gigantic, cut down into large bite-sized pieces) and place them in the same pot. Fill the pot with more water if needed to cover the potatoes, then bring back to a boil over high heat. Turn down to medium and simmer until the potatoes are just tender when pierced with a fork. Drain and set aside while you make the dressing.
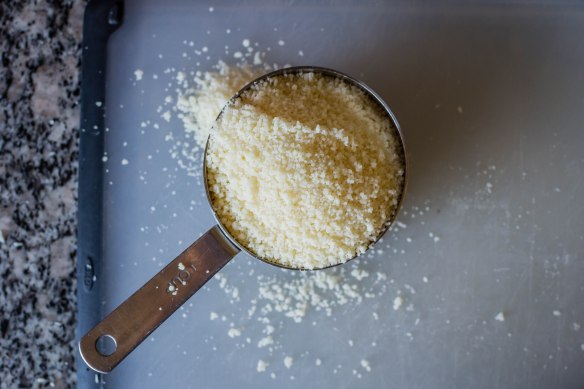
  • If you need to grate the cheese, load the belly of your food processor with small chunks of parmesan, then run on high speed until the cheese is adequately broken down. Empty the processor, measure out the required cup of cheese, and set aside to add later.
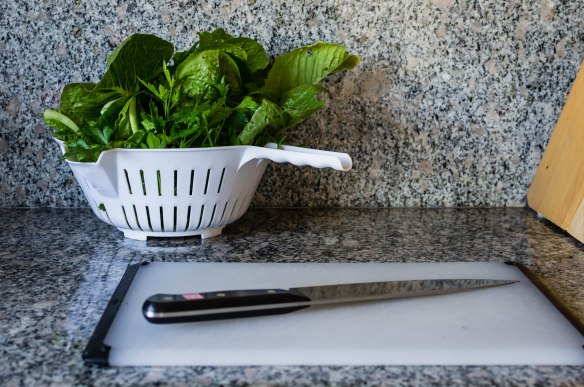
  • Process the garlic cloves, anchovy filets, and lemon zest and juice together first into a clumpy paste. Use a rubber spatula to scrape down the sides of the processor, then add about half of the torn lettuce leaves and the parsley and pulse a few times to break them down. When there is enough room in the processor, add the remaining lettuce and parsley and process on high until the mixture is finely chopped.
  • Scrape down the sides of the processor again and add the mayonnaise and reserved parmesan cheese. Process on high speed until well combined. Taste for seasoning; add salt and pepper as needed. It’s important to wait until now to add the salt, since the anchovy, mayonnaise, and cheese are all salty already.
  • Add the still-warm potatoes and the drained green beans to a large bowl. Stir in about ¾ of the dressing until the vegetables are evenly coated. Gently fold in the chopped hard-boiled eggs. Add more dressing, if needed.
  • At first this will probably taste too salty. Refrigerate for at least 2 hours to allow the flavors to mellow and combine. Bring back to room temperature before serving.
  • This is ready to serve as is. But if you like a little excess (or if crunch is important to you), heat the optional 2 TB olive oil in a small skillet, then stir in either ½ cup panko breadcrumbs or ½ cup roughly chopped raw almonds and toast until deeply golden. Sprinkle over the top of the potato salad just before serving.

Contrarian Chewy Not-Chocolate-Chip Cookies

As I’ve noted here before, I can be a bit contrarian about food. I like my risotto with anything but rice, somehow I always find myself frying food in the most disgusting heat of summer, and I’m that person who, instead of making something practiced and reliable for a dinner party, always somehow ends up trying something untested.

But perhaps my most blasphemous contrarian food tendency is this: sometimes I don’t want chocolate chips in chocolate chip cookies. I love the cookie part – the depth of the brown sugar, the butter, the just-crisp edges – and then that chocolate gets in the way. Don’t get me wrong: I do like chocolate. I’m not a total monster. But in a cookie, especially after it cools and the chunks or chips or boulders of chocolate solidify again, I could do without. I sometimes find myself looking forward to the cookie that comes from the very last scrapings of batter from the bowl, since it probably won’t have much chocolate in it.

Last month N. ran a half marathon and I, following what is becoming a tradition, decided to have cookies waiting for him when he came home. Not so contrarian as me, N. loves a good chocolate chip cookie (and a mediocre chocolate chip cookie too – in fact, let’s be honest: he’ll take just about any chocolate chip cookie). Inspired by a recent trip to Le Grande Orange Café in Pasadena, I decided I wanted to do a batch of thin, crisp-but-chewy cookies with a sprinkling of salt on top. Good for helping my runner rehydrate a little. I started with a Bon Appetit recipe, but played a little: almond meal replaced some of the flour, I was out of chocolate chips, so I chopped up some dark chocolate covered pretzels and, just for fun, couldn’t resist a little instant espresso powder to the dough as well. A little buzz of extra caffeine wouldn’t hurt N. as he unwound from a thirteen mile morning.

We both loved the cookies. But again, I found myself thinking how good they would be if they just… didn’t have chocolate in them. So I did another batch here, retaining the almond meal, but eliminating all hints of chocolate. These are designed to be crisp at the edges and chewy at the middle, and several elements of the recipe contribute to that: the almond meal is always going to add some pleasant texture, as is brown sugar. The powdered sugar allows for a denser final result, which contributes to chew in that not as much air is trapped in the dough. And using egg yolks instead of just whole eggs seems to help too, though opinions seem divided on this.

My contrarian cookies were simple. As I was mixing them up, I found myself thinking, “could I add anything? What about dried cherries? What about lemon zest? Could I put in some cardamom or cinnamon, or maybe chopped nuts?” And of course the answer is yes. I could. You could too. Toss in a teaspoon or so of some warm spice. Toast and chop and fold in about a cup of nuts or dried fruit. If you’re feeling particularly contrary with me, you could even reverse hack all the way into putting the chocolate back in; you’ll want about 8 ounces.

But when I chewed my way through the first, and then the second, of these simple, too-spread-out, just bendable,* still warm offerings, I wanted none of that. The texture was right: crisp around the edge, a chew similar to a good snickerdoodle in the middle, and the occasional delightful crunch from the sea salt. And nothing, nothing at all, disrupting that deep, lovely, buttery brown sugar taste.


* because these cookies spread so much while they bake, and because they are so soft when they first come out of the oven, I’d wager you could successfully cool them over the back of a muffin tin or ramekin for little cookie bowls to fill with ice cream or custard or fruit, or maybe even a deep, rich mousse to get the chocolate back in there…


Contrarian Chewy Not Chocolate Chip Cookies
Adapted from Bon Appétit
Makes about 18 cookies
½ cup (1 stick, or 4 ounces) room temperature unsalted butter
¾ cup brown sugar
½ cup granulated sugar
¼ cup powdered sugar
2 large egg yolks
1 large egg
1½ tsp vanilla
1 cup all purpose flour
½ cup almond meal
1 tsp baking powder
¼ tsp baking soda
½ tsp kosher salt + more for sprinkling


  • Preheat the oven to 375F and line two cookie sheets with parchment paper or nonstick spray
  • In a large bowl or the bowl of a stand mixer, beat the butter with the paddle attachment or with an electric mixer until it is soft and the big pieces have broken down. Add all three varieties of sugar and continue mixing until light and fluffy, about 3 minutes. Scrape down the sides of the bowl. Add the egg yolks, the whole egg, and the vanilla. Beat again, stopping once or twice to scrape down the sides of the bowl, until the whole mixture is pale and fluffy, about 4 minutes. This seems like a long time, but it does make a difference. It will look like buttercream frosting when it’s ready, and really, it basically is.
  • If you want to, whisk the dry ingredients (flour, almond meal, baking powder, baking soda, salt) together in a smaller bowl, then slowly add to the wet mix in three additions, mixing just to blend in between. If you don’t want to bother with the whisking, just add in stages: ½ cup flour, mix to blend, ½ cup almond meal, mix to blend, then remaining ½ cup flour with leavening and salt, mix just to blend.
  • Spoon tablespoonfuls of dough onto your prepared cookie sheets, spacing them at least 1 inch apart. They will spread. I wouldn’t do more than about 6 dough blobs on each sheet. Sprinkle the tops sparingly with kosher salt or flaky sea salt.
  • Bake in the preheated 375F oven, rotating the sheets halfway through, until golden around the edges, 12-13 minutes. The middles will seem very soft, but will firm as they cool. Let sit on baking sheets 3-5 minutes before transferring to wire racks to cool completely (unless you want to mold them – see * above).

Zucchini Spice Bread with Cherries (now with post and recipe!)

This past summer, we did not grow zucchini. Still traumatized by the various baseball bats we had to consume the previous year, N. flatly refused it. He couldn’t find the humor even in my joke that we would only grow a small one… Needless to say, no zucchini graced our table this summer.

But I missed it. In particular, I missed my favorite zucchini bread recipe, a cinnamon-spiced affair with an appealingly-crusty top but still-moist center from The Bon Appétit Cookbook that I’ve made probably at least a dozen times. It’s lightly sweet, it’s not overwhelmingly, well, zucchini flavored, and you don’t even have to squeeze out the grated squash before adding it to the mixture. In fact, you shouldn’t; the recipe relies on some of that wetness to attain the correct consistency. Buying zucchini from the grocery store to put toward this purpose just didn’t seem right – this was, as the book itself declares, a recipe designed for a zucchini harvest.

So when one of my coworkers advertised her bounty, I suggested that I’d be willing to take one of her prolific squashes off of her hands, and as a result I received a delivery at least as long as my forearm. Yes. This meant zucchini bread. To keep myself interested, in this incarnation I not only included the deeply toasted chopped walnuts the recipe calls for, but subbed in some almond flour for part of the all-purpose flour to add extra nuttiness and – not that this recipe needs it – assured moisture. I also added my most recent baking obsession: a generous few handfuls of tart dried cherries. And then, since just a loaf will never do, I made four. And I still had a chunk of zucchini left that’s probably still at least 6-7 inches long.

This recipe calls for two cups of grated zucchini. And that seems like a lot, until you realize it really only takes one reasonably sized squash to make that amount. So here I’m offering a recipe for two loaves, since if you’re facing down a bed-full of zucchini, that’s the least you’ll want to make. They freeze beautifully too, so you can sock away a loaf or two until you, or your family, or your neighbors, are feeling zucchini-receptive again. I’m sure I don’t need to tell you that, just in case the end pieces feel a little dry, toasting and adding a generous smear of cream cheese is revelatory.


Zucchini Spice Bread with Cherries
Adapted (barely) from The Bon Appétit Cookbook
Makes 2 loaves 9x5x3 inch loaves
2 cups chopped walnuts
6 large eggs
4 cups granulated sugar
2 cups vegetable oil
2 teaspoons vanilla
4 cups all-purpose flour
1 cup almond meal or almond flour
2 teaspoons salt
2 teaspoons ground cinnamon
2 teaspoons baking soda
½ teaspoon baking powder
4 cups coarsely grated zucchini, not squeezed
2½ cups dried tart cherries, such as Montmorency


  • Preheat the oven to 350F. While it heats, scatter the walnuts on a cookie sheet and put it in the oven to toast. The nuts should go about two shades darker brown and look slightly oily when you take them out. Once nicely toasted, remove from the oven and set aside to cool.
  • Prepare two metal loaf pans by spraying with non-stick cooking spray or rubbing with butter or oil.
  • Using an electric mixer or a stand mixer, beat the eggs in a large bowl until they are foamy. With the mixer running, gradually add the sugar, then beat until the mixture is very thick and pale. This takes a good 3-4 minutes. Slowly beat in the oil, then the vanilla.
  • In another bowl, whisk together the flour, the almond meal, the salt, cinnamon, baking soda, and baking powder. With the mixer on low speed, beat in this dry mixture in three additions, scraping down the sides of the bowl in between.
  • Gently fold in the walnuts and cherries to ensure even distribution. The batter will be extremely thick. Don’t despair! Fold in the zucchini (it will be almost too much for a standard stand mixer, but it will fit. Mostly). The batter will loosen up considerably as the grated pieces release moisture.
  • Divide the batter evenly between the two prepared pans and bake at 350F until the top is dry and crusty, and a toothpick or cake tester inserted comes out clean. This pretty dependably takes about 1 hour and 30 minutes. Cool the loaf for at least 5 minutes in the pan before turning it out onto a rack to cool completely.

Banh mi salad (no recipe)

I don’t have a recipe for you today, but I do have a suggestion that, like my almost-too-late discovery of the aperol spritz in Venice, has probably already occurred to you. But just in case. It turns out that banh mi, that beloved Vietnamese sandwich that, along with pho, is probably the nation’s most well-known dish in the United States, translates amazingly well into a salad. You chop or stack all the ingredients from the sandwich – well seasoned and seared tofu, or pork, or chicken, fresh cucumbers, wafer-thin jalapeno slices, assorted vegetable pickles, soapy-fresh cilantro sprigs – atop crisp, juicy romaine or crunchy shredded cabbage (or a combination of both). You toss it gently with a dressing made from mayonnaise, sriracha, fish sauce, and lime juice or rice vinegar. Finally, since banh means “bread” in Vietnamese, so it couldn’t be banh- anything without a bread component, you fry the torn innards of a baguette in a generous quantity of oil, sprinkle them with a little salt, and pile them to precarious heights on top.

And if you already have some of these items lying around – like, say, you had banh mi sandwiches a few day before – it comes together in the time it takes you to fry the croutons.

Boom. Lunch is served.