Beef Stroganoff Meatballs

2015 Blog October-0554These are the meatballs that started it all. On a whim, in a post I wrote to publicize Shauna’s (at the time) most recent cookbook, I mentioned off-hand the idea of roasting the mushrooms in the Russian classic beef stroganoff – a savory stew of long-cooked beef with onions and mushrooms, often draped over egg noodles or mashed potatoes.

2015 Blog October-05462015 Blog October-0548Somehow, as it simmered in my head, the concept of roasted mushrooms, well, mushroomed, and turned instead into adapting the whole dish into a meatball. Onions and mushrooms, sautéed down in butter until tender and moist, studding a beef meatball floating in a beefy wine sauce, finished with a generous dollop of sour cream. It sounded exactly right, and though a few ingredients added themselves to the mix – thyme in the meatballs, a bay leaf in the sauce and a sprinkling of fresh herbs of the top – they stayed in basically the same form as the year stretched on. From there, in fact, they launched the whole meatball project: if beef stroganoff could be remade in meatball form, why couldn’t other classic dishes? And if I could come up with enough of those, I was set with a project for the year. It became a plan.

2015 Blog October-05492015 Blog October-0551
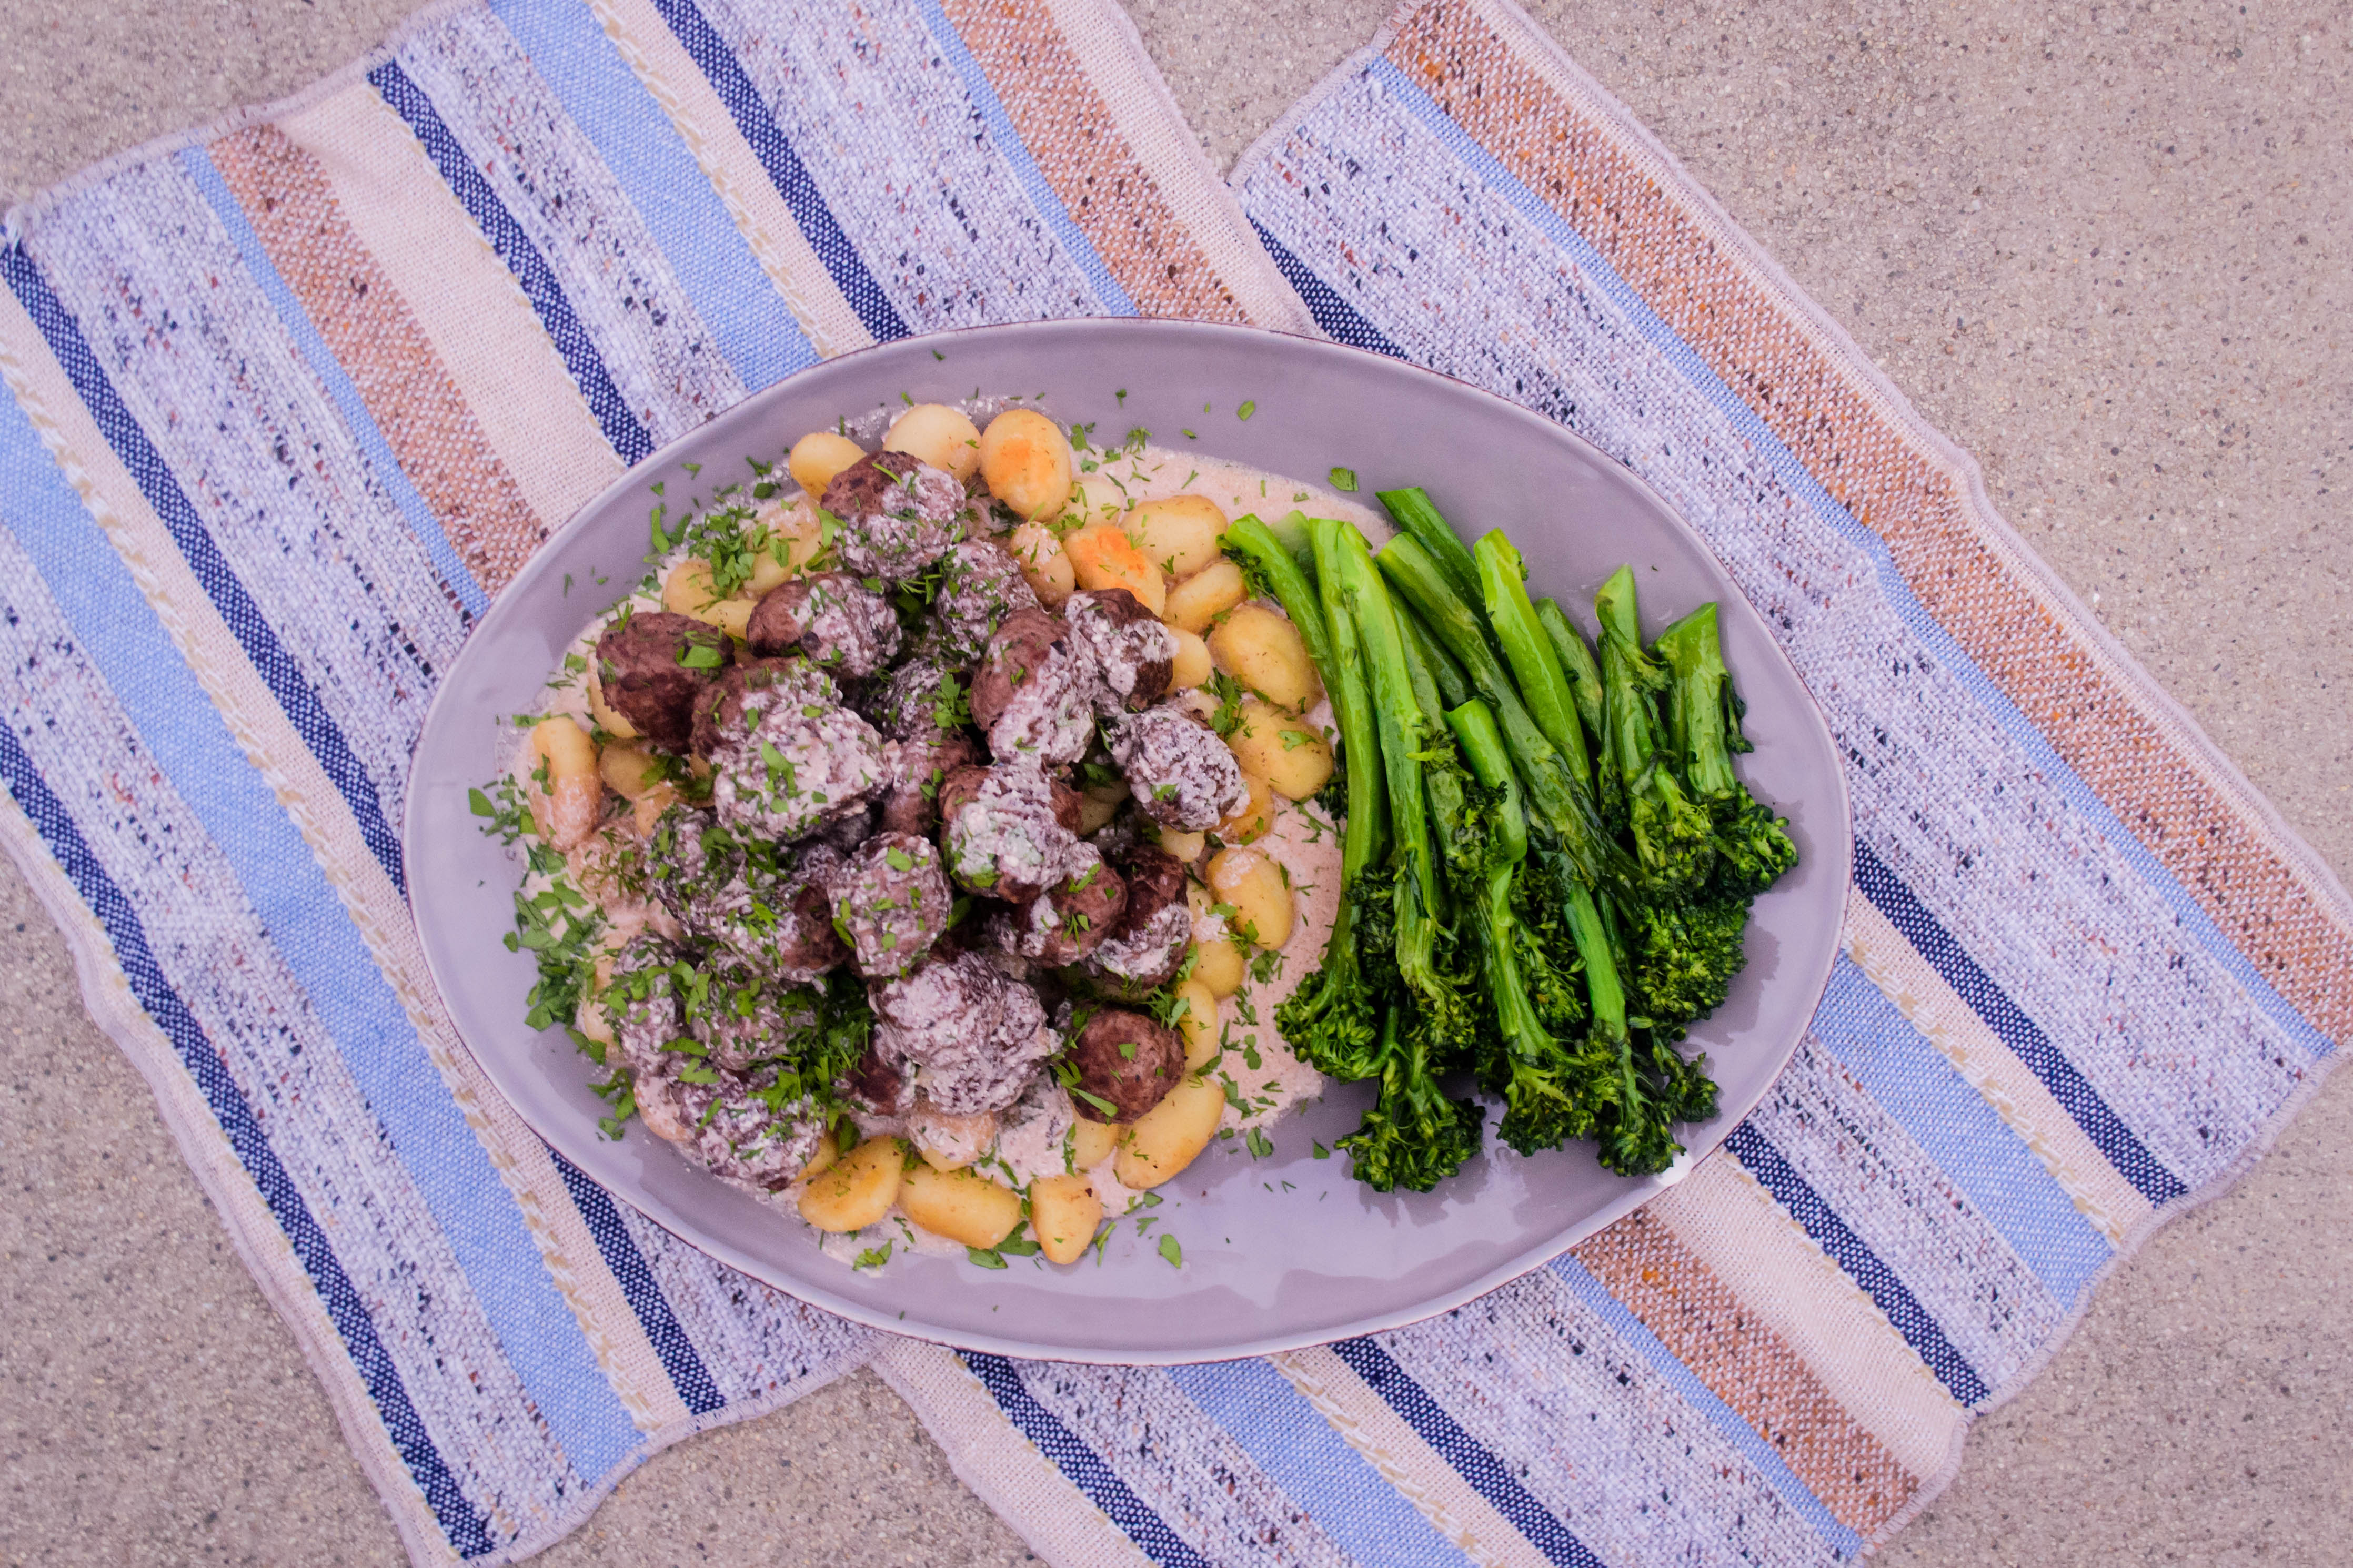
As ideas came thick and fast, and the seasons grew warmer, stroganoff was put off month after month. Finally, in a rare cool weekend, I was able to return to the idea and let me tell you, it was a worthy origin story. My sauce broke, but yours won’t, because you will start with your sour cream at room temperature and add it slooooowly with the heat off, won’t you? And your meatballs will be tender and moist, after simmering but not boiling in the rich, slightly thickened sauce. And though you can certainly serve these as we did, piled atop pan-toasted gnocchi, a pillow of sour cream mashed potatoes or a bowl of egg noodles would be equally welcome.

2015 Blog October-0552

Beef Stroganoff Meatballs
Makes 24-28 tablespoon sized meatballs
45-60 minutes, very approximately
4 tablespoons olive oil, divided
2 tablespoons butter
½ cup minced white onions
1 cup minced mushrooms (I like crimini)
¼ teaspoon freshly ground black pepper
1 teaspoon fresh thyme leaves
1 pound ground beef, preferably 85% lean / 15% fat (any leaner and the meatballs run the risk of being dry)
1 teaspoon salt
2 tablespoons dijon mustard
1 egg
1 cup red wine
2 cups low-sodium beef broth
1 bay leaf
¾ cup full-fat sour cream, at room temperature
1-2 tablespoons each minced dill and parsley, to garnish
pan-fried gnocchi, egg noodles, or mashed potatoes, to serve


  • In a large skillet, heat 2 tablespoons of the olive oil with the butter over medium-low heat. Add the onions and stir once, then let cook gently while you prepare the mushrooms.
  • Add mushrooms, ¼ teaspoon pepper, and the thyme to the gently cooking onions and raise the heat to medium, then cook, stirring frequently, until tender and lightly browned – around 5-8 minutes. Let cool.
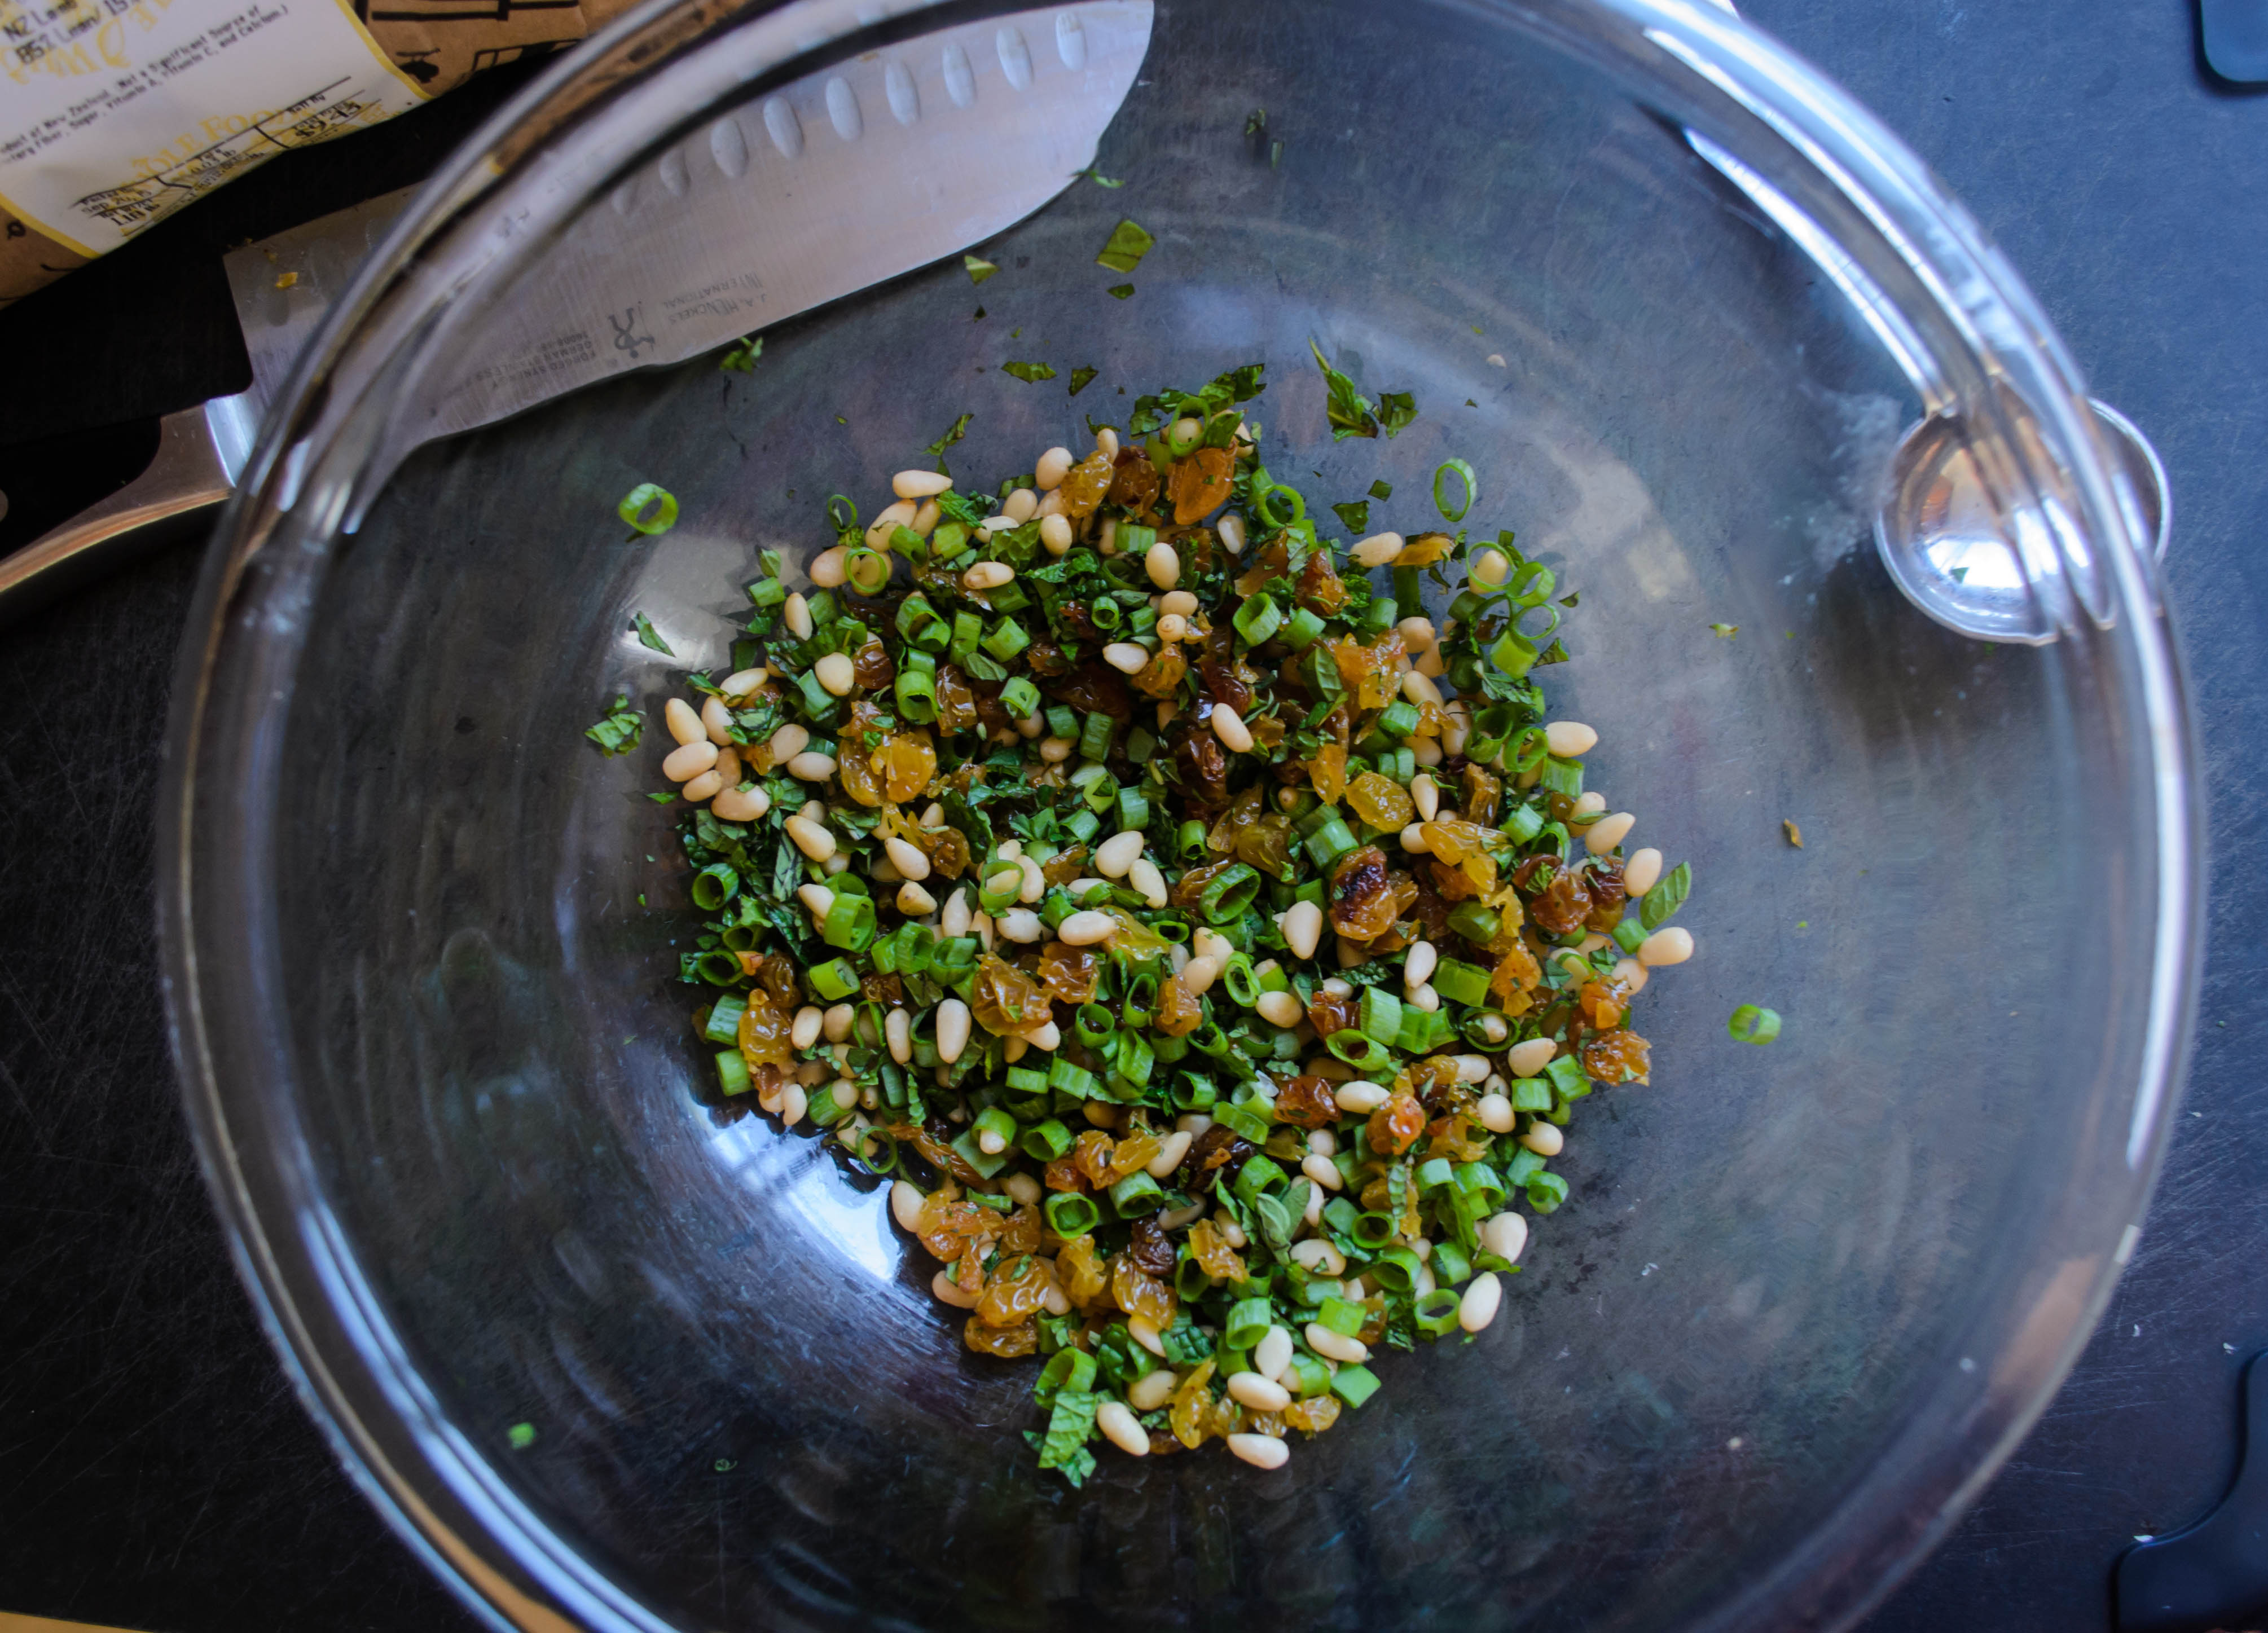
  • In a medium glass bowl, combine ground beef, salt, mustard, egg, and the cooled mushrooms and onions. Use your fingertips (preferable) or a spatula to lightly bring everything together; we are aiming for a mixture in which the aromatics and seasonings are evenly distributed.
  • In the same skillet you used for the onions and mushrooms, heat a few drops of olive oil over medium heat. When it is shimmering, add a teaspoon-sized patty of the meat mixture and cook on both sides until done. Taste for seasoning and adjust for the rest of the mixture, if needed.
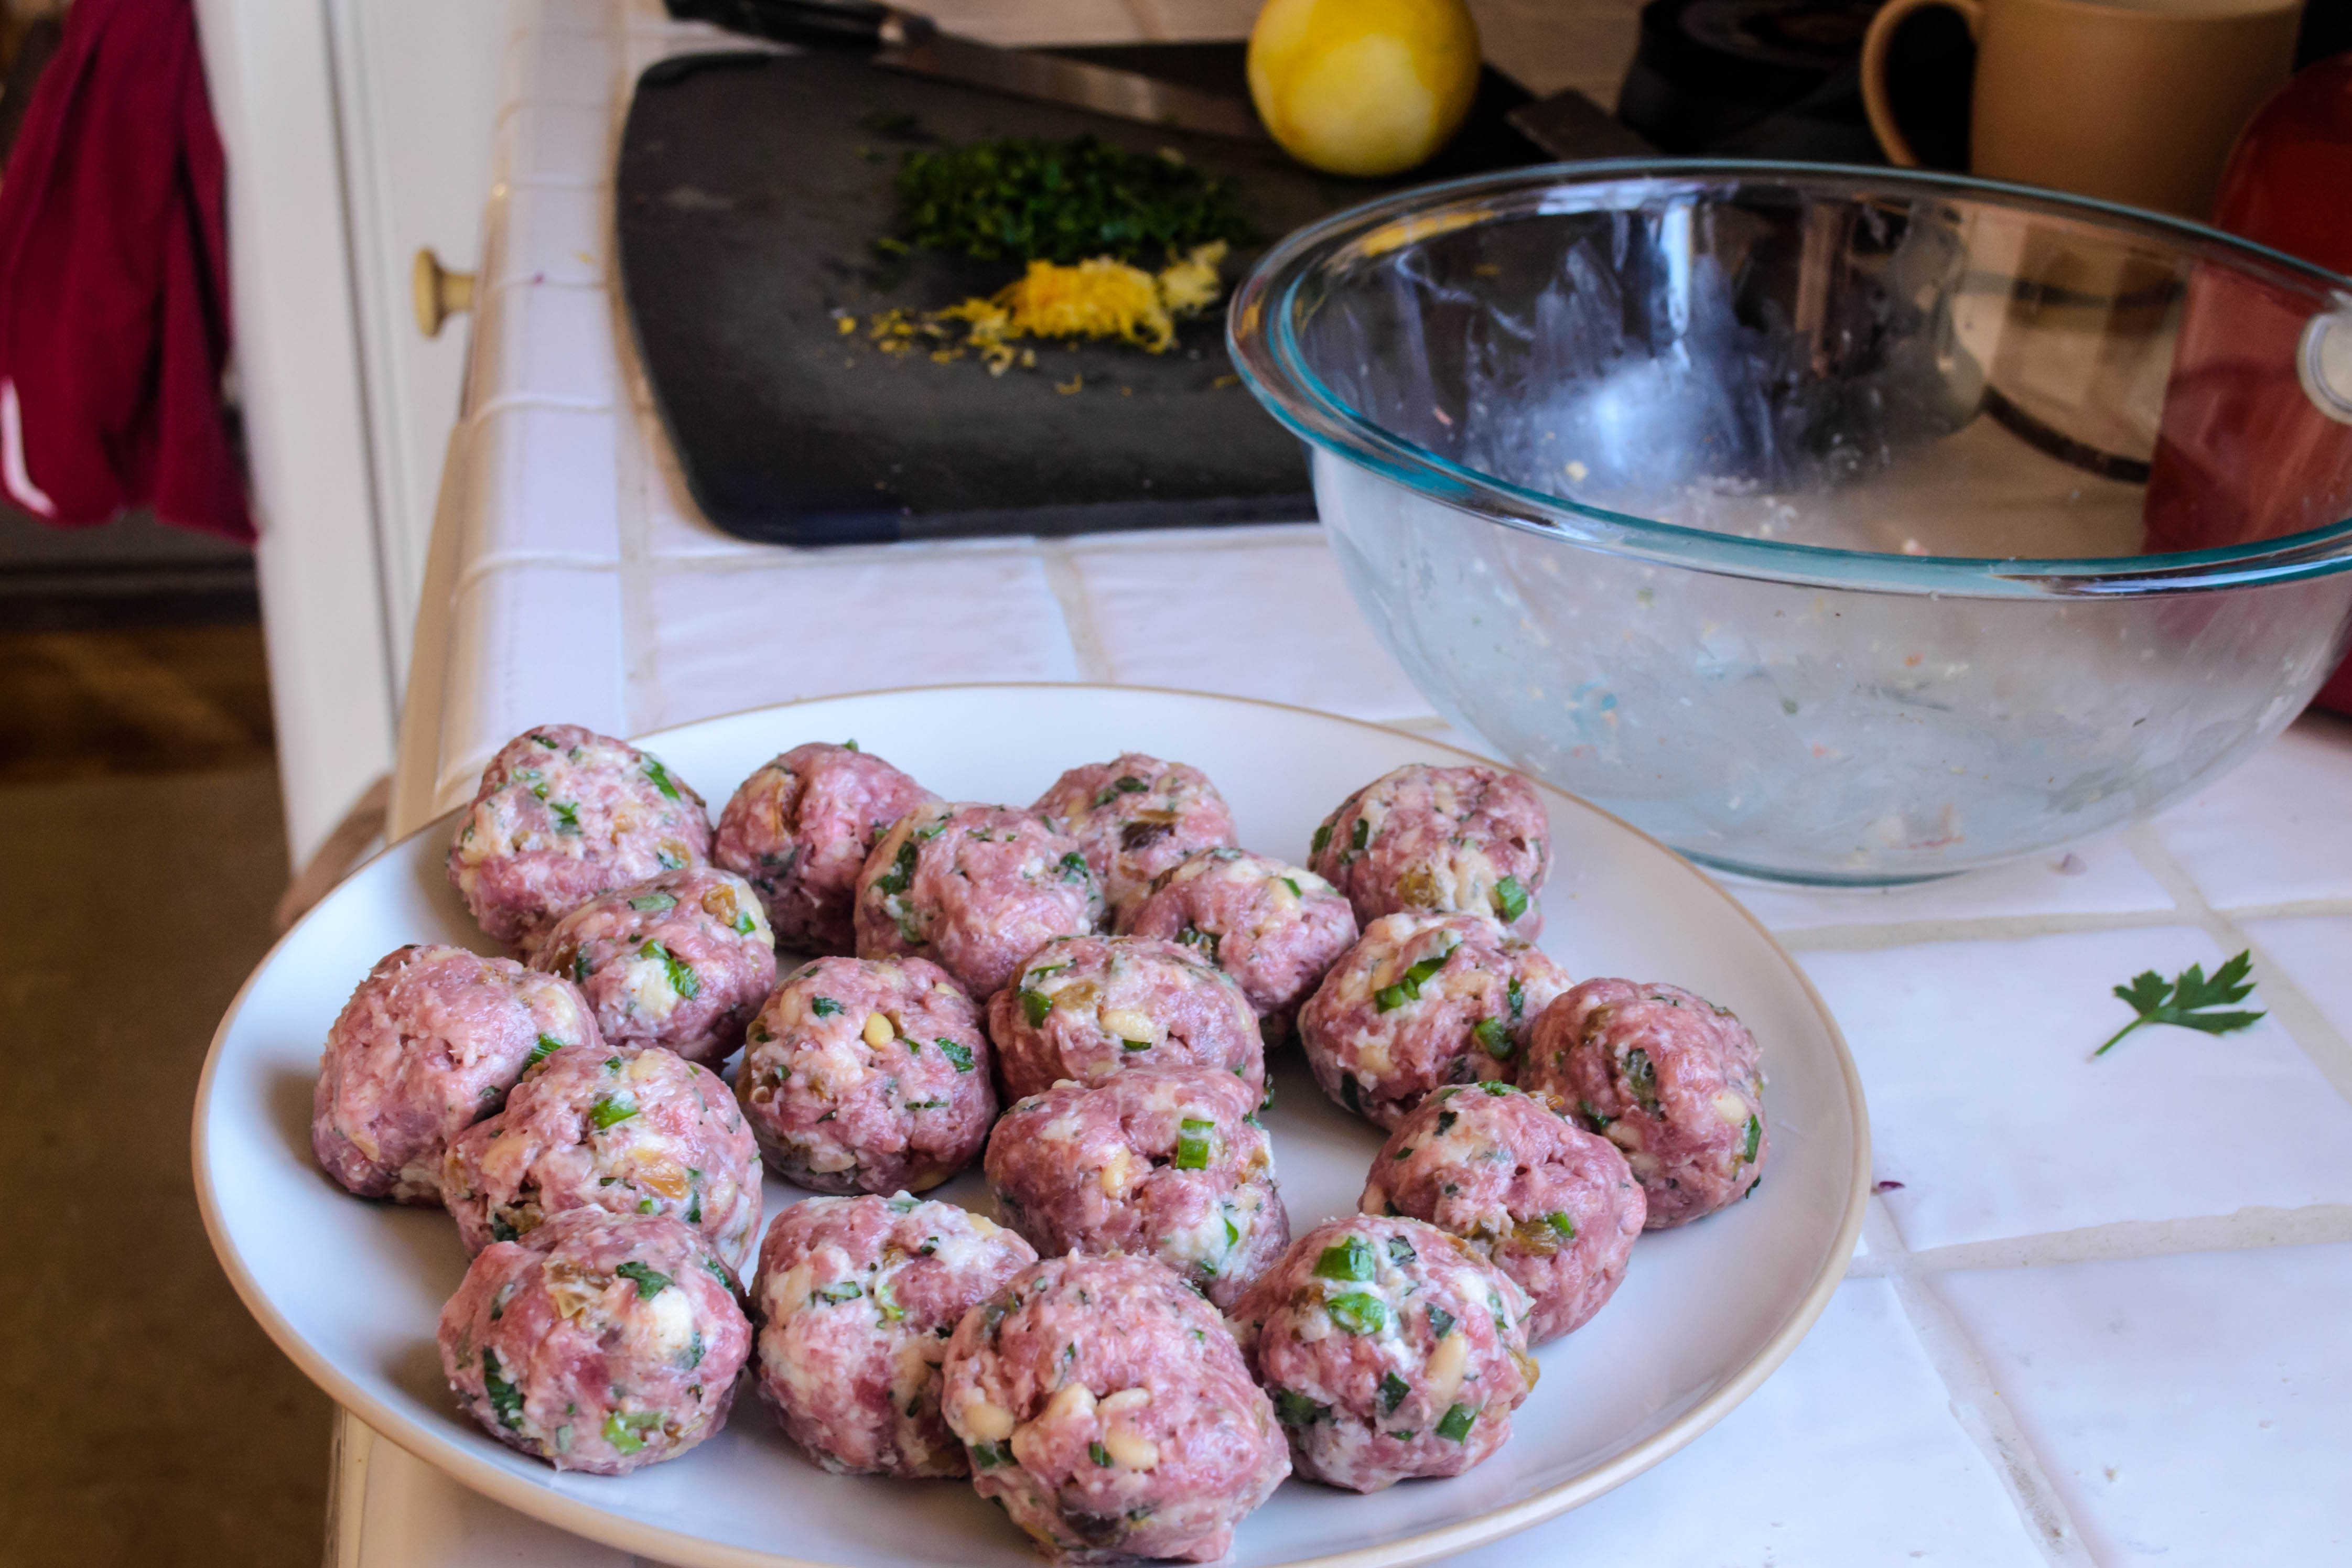
  • Using moistened hands, roll tablespoons of the meat mixture into tight but tender spheres, setting each on a plate until all are rolled. In the same large skillet, heat the remaining 2 tablespoons of olive oil over medium heat. Add the meatballs in a single layer, not touching each other (this will probably take at least two batches). Cook until browned on all sides (2-3 minutes per side), then set aside on a clean plate. Repeat until all meatballs are browned.
  • When all meatballs are browned and set aside, add the red wine all at once and use a wooden spoon or spatula to loosen the browned bits from the bottom. This is called fond, and it contains a lot of flavor. Add the beef broth and the bay leaf, and bring to a boil, then reduce the heat and let the broth and wine mixture simmer for 10 minutes.
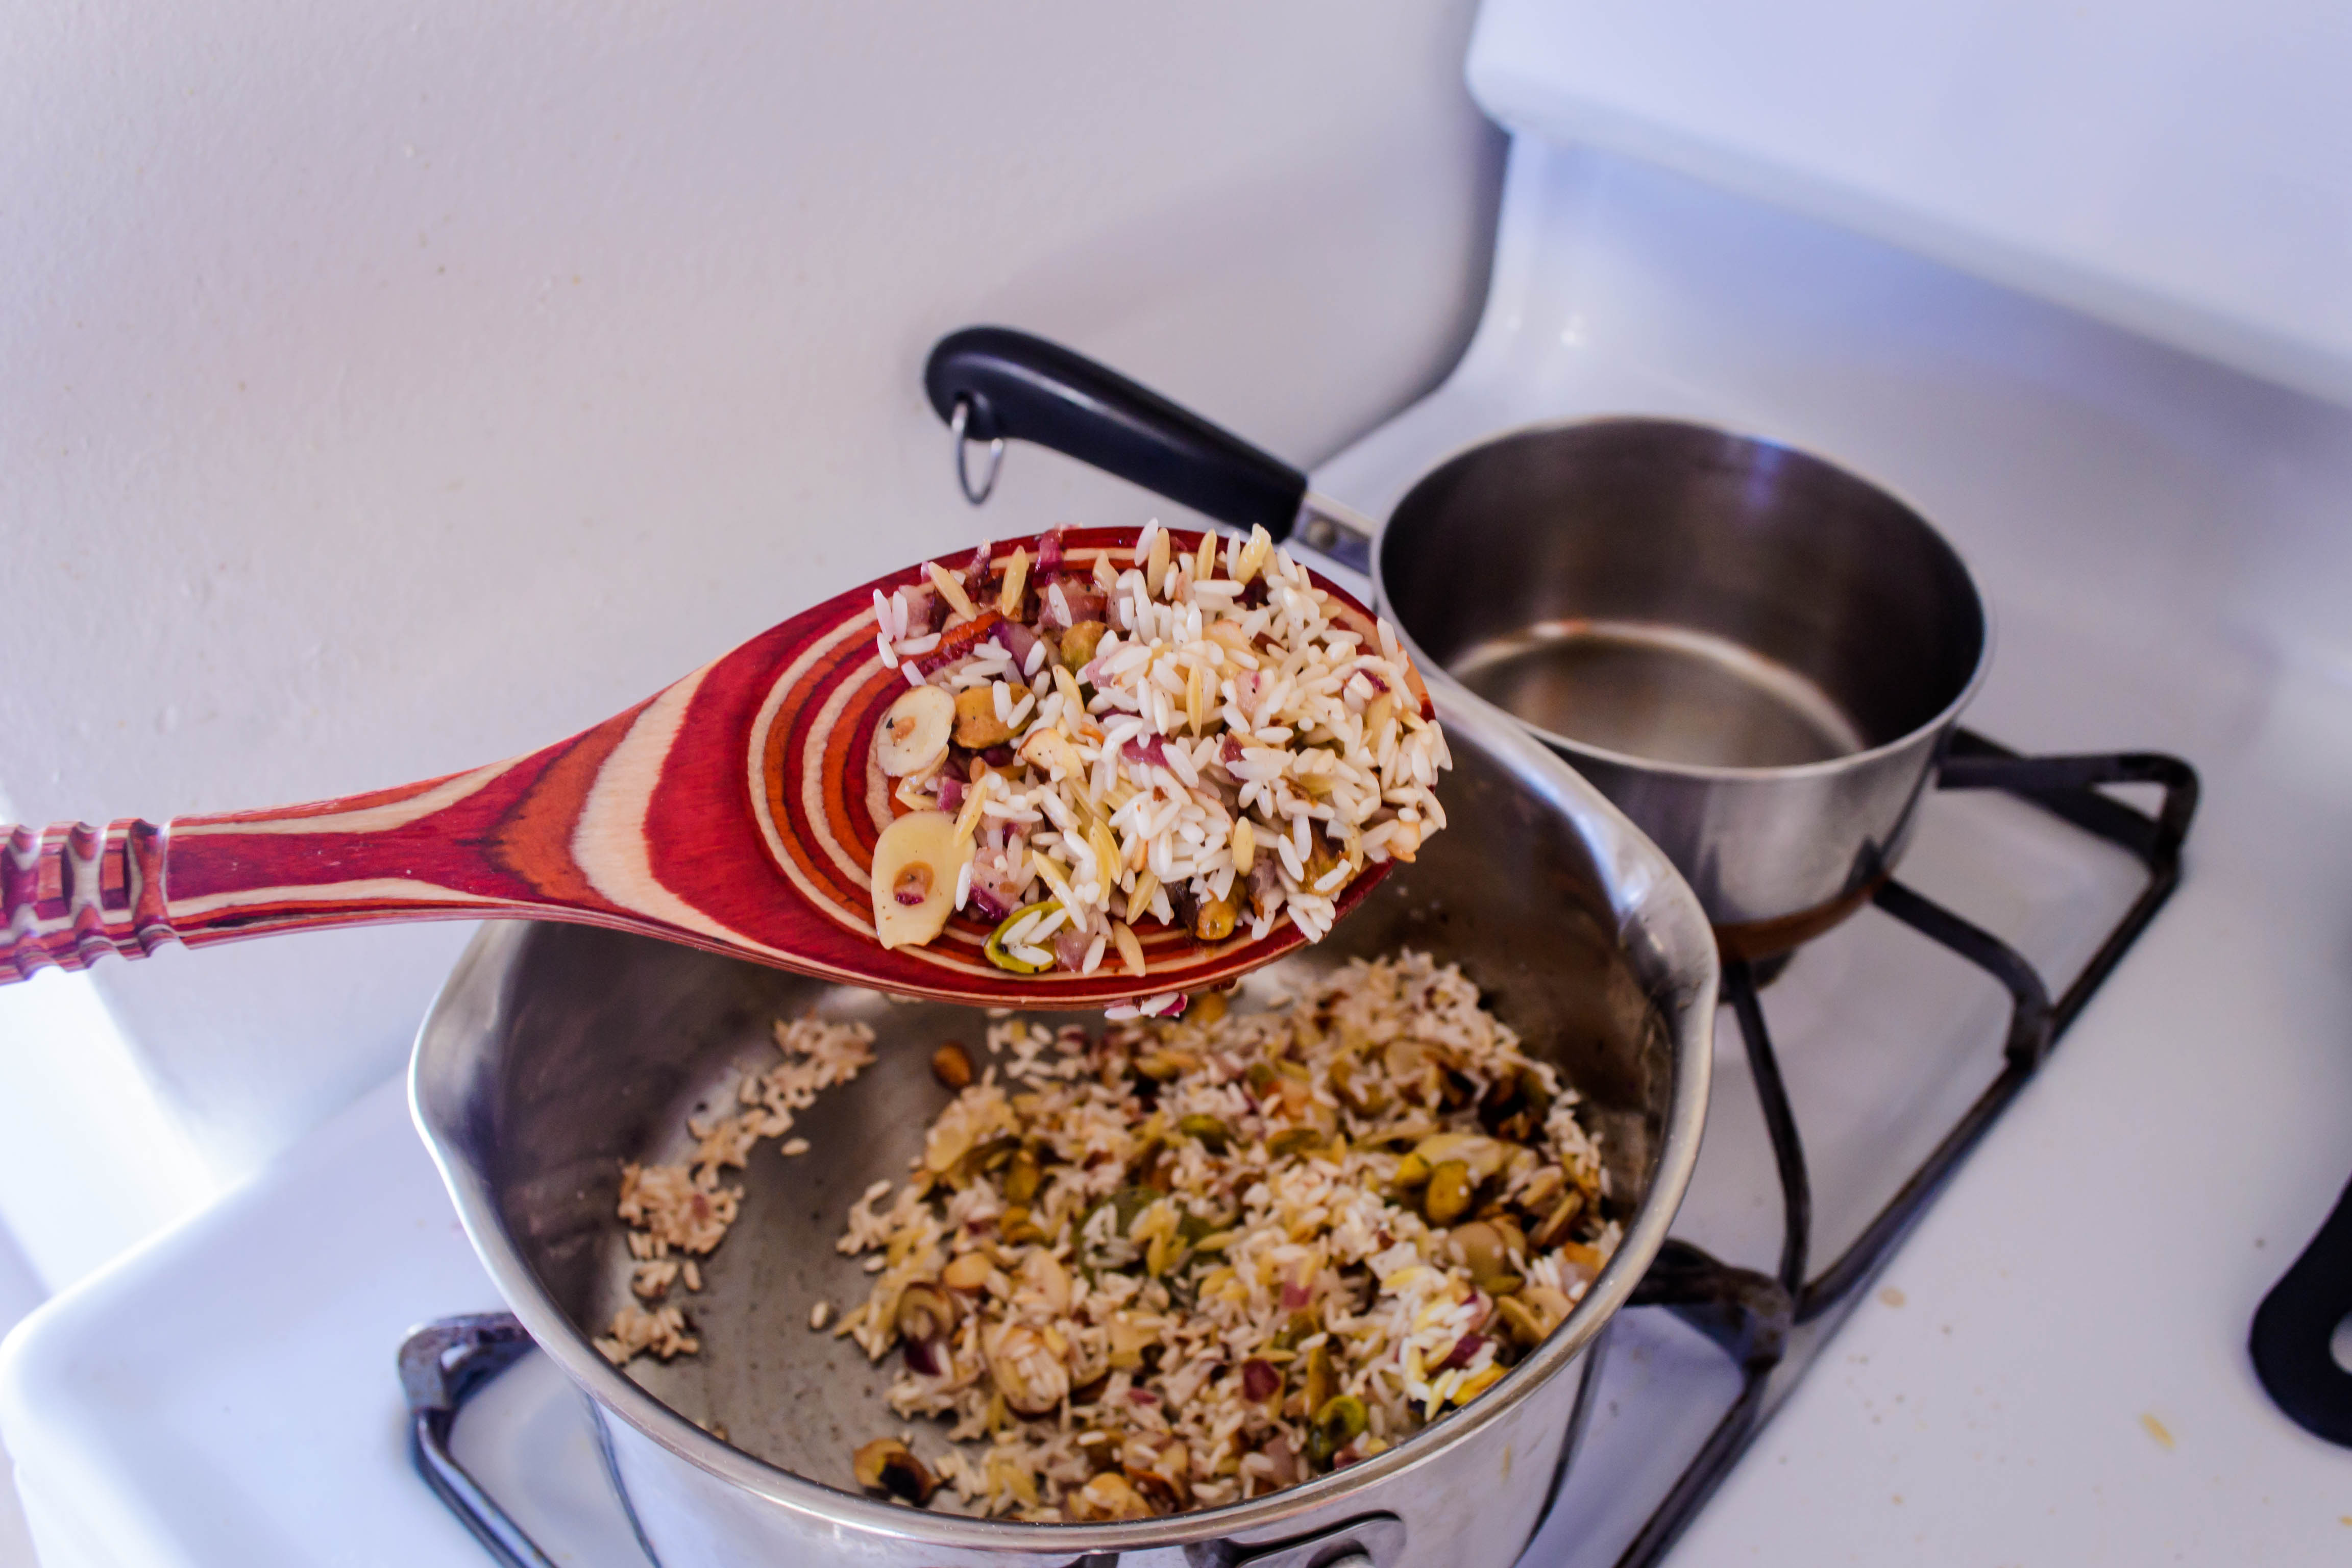
  • Carefully add the browned meatballs back into the liquid and return to a simmer, letting the meatballs roll in their broth and wine bath for 10 minutes. At this point, it would be wise to get the starch component ready as well.
  • When the meatballs are cooked through, dish them out with a slotted spoon to a temporary storage plate. Turn off the heat and slowly whisk in the sour cream ¼ cup at a time. Don’t add it all right away, and by all means don’t add it straight out of the refrigerator – this will cause it to turn grainy and look curdled (though it will still taste okay). Slow incorporation is key.
  • Once sour cream is fully incorporated, return skillet to low heat, add the meatballs back in once more, and cook just until sauce and meatballs are warmed through.
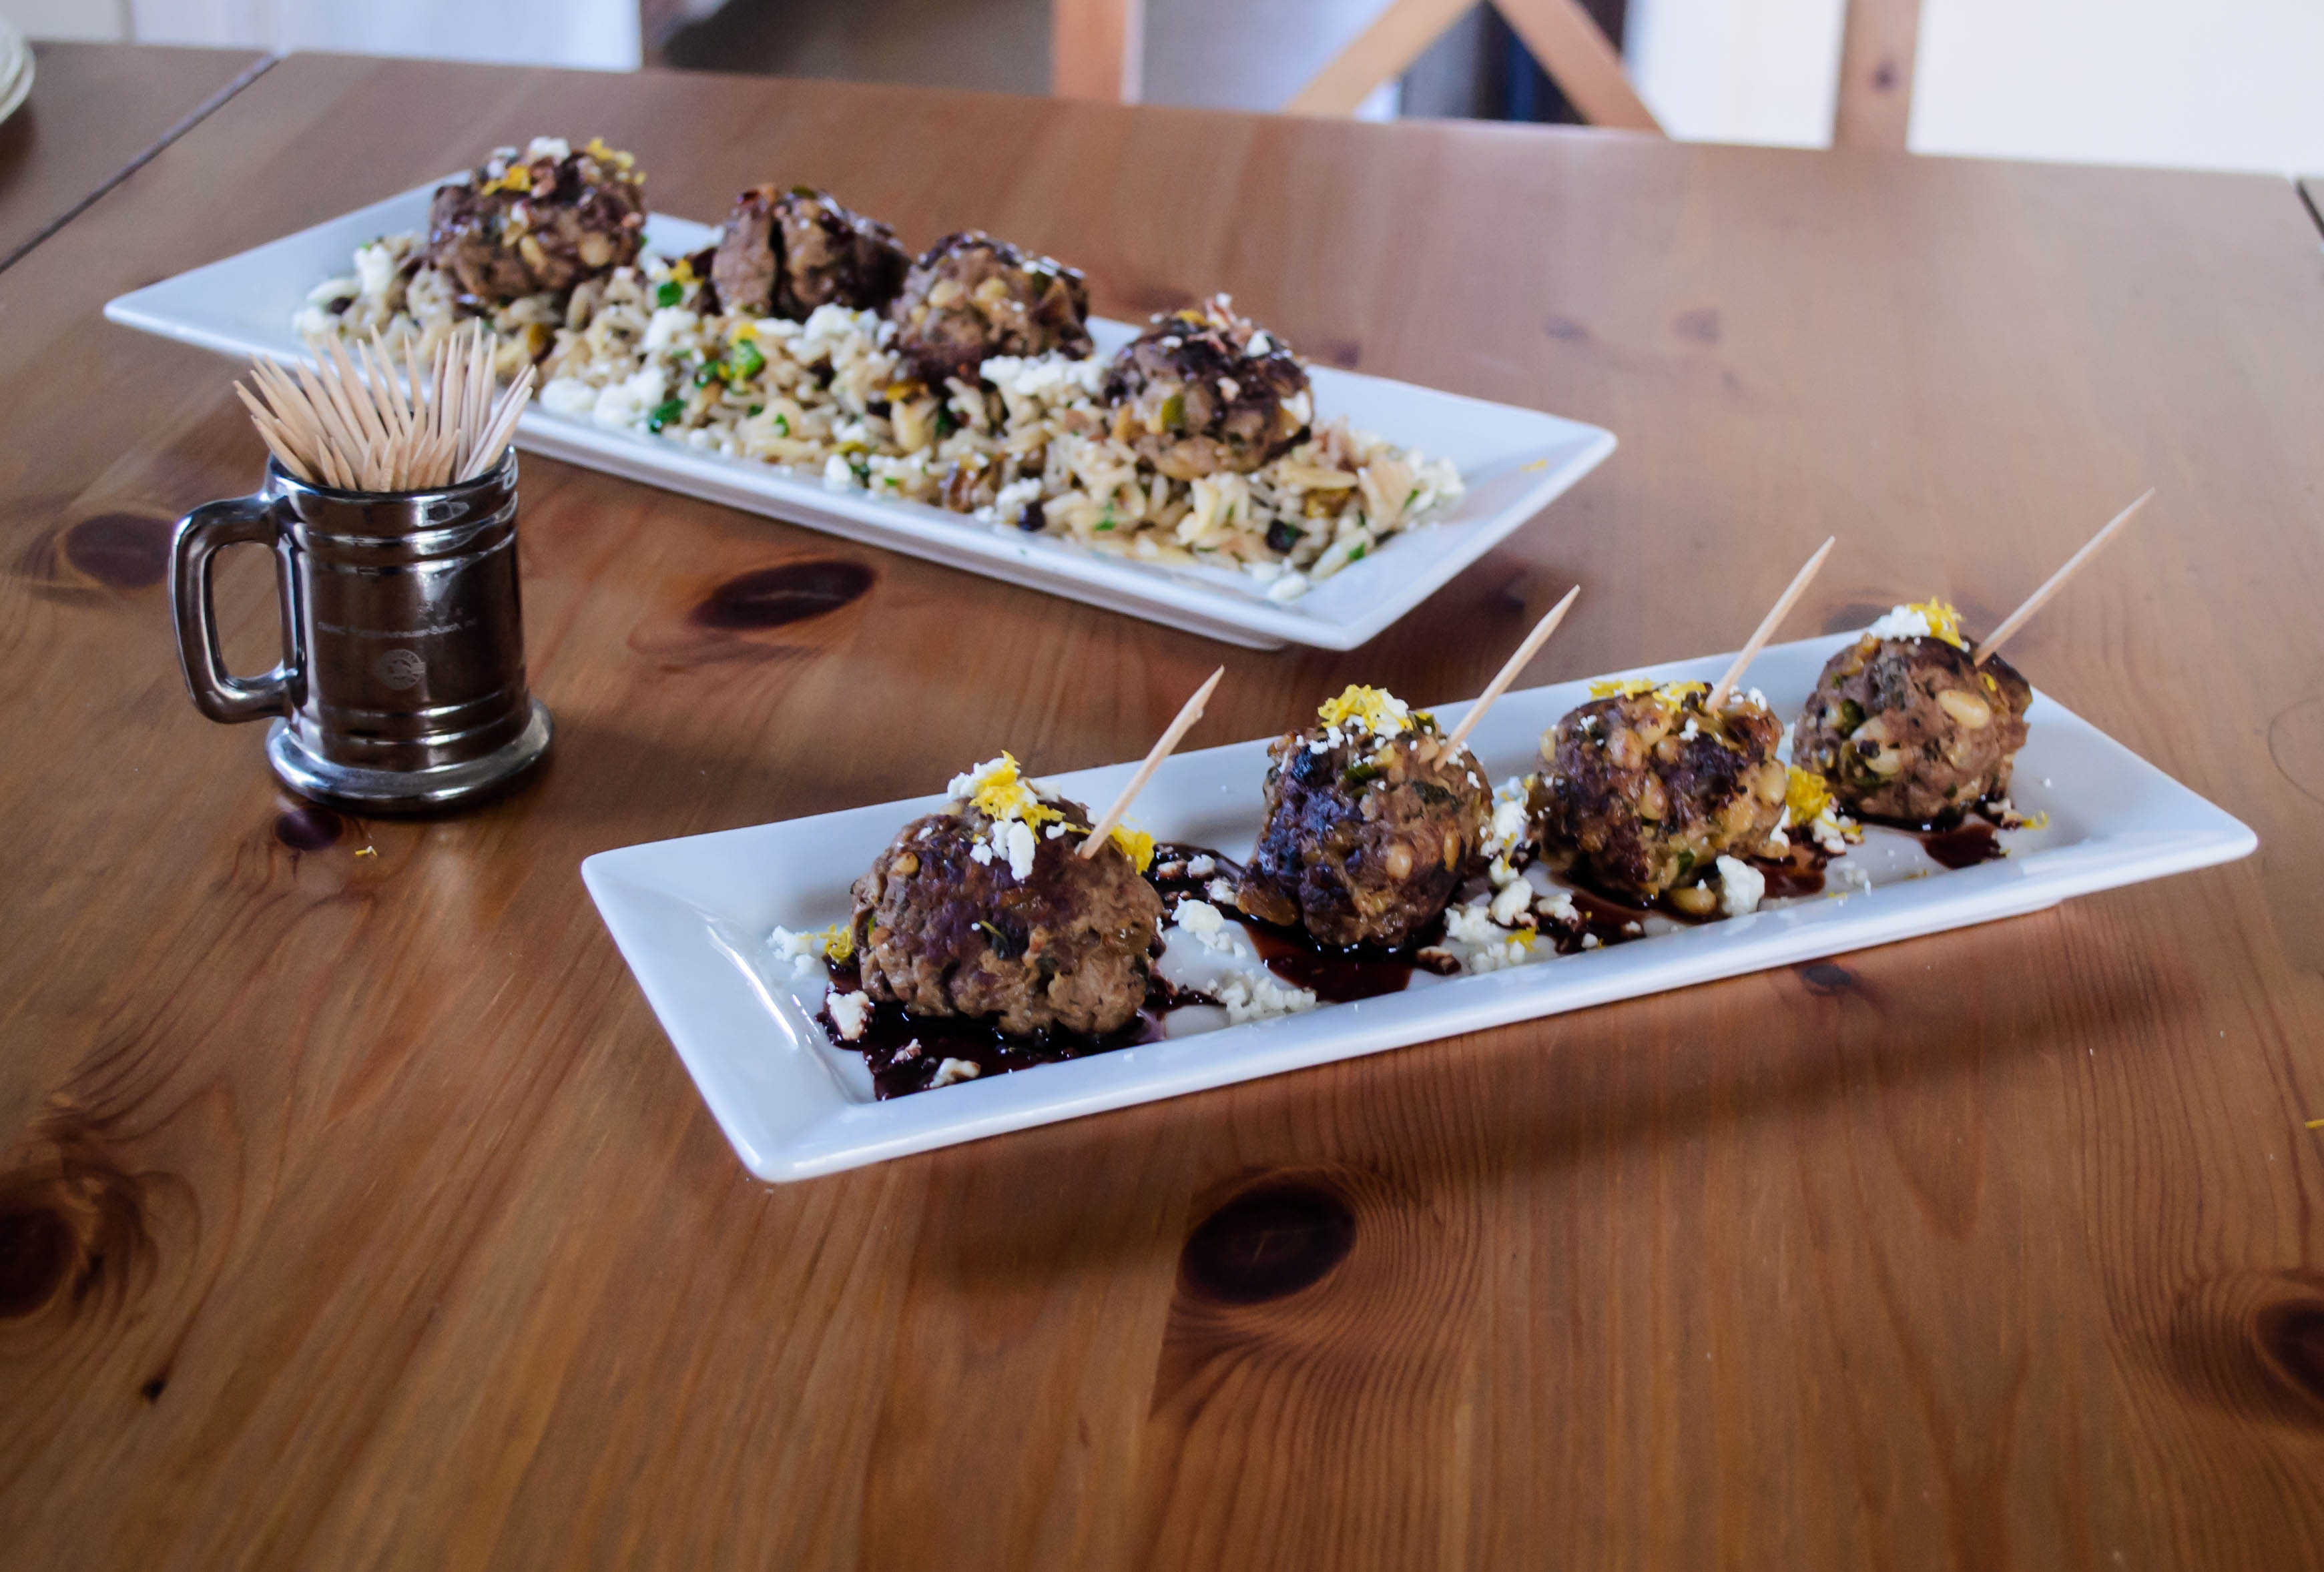
  • To serve, pile meatballs with a healthy helping of sauce atop pan-fried gnocchi, mashed potatoes, or egg noodles, and garnish with a sprinkle of fresh dill and parsley.

Apple Cheddar Waffles

2015 Blog September-0463Although I object to the idea of swapping all of your usual décor with pumpkins and corncobs the moment calendars proclaim it’s the first day of fall, by the time mid-October rolls around I’m both cool with the harvest theme and starting to crave richer, belly-warming food. I have such ideas about bread, and stews, and short-ribs, and roasted everything…

2015 Blog September-04502015 Blog September-04522015 Blog September-0455Los Angeles is making this hard lately. With temperatures in the 90s during two of the past three weekends, it’s difficult to convince myself to cook anything, much less wax poetic about its warming spices and satisfying heartiness. My bedroom feels like the inside of a dryer. I might have fleeting dreams about fluffy, toasty, steaming biscuits mounded with chili, but all I can truly imagine consuming is a series of popsicles and frozen grapes.

2015 Blog September-04562015 Blog September-0457But I will say, if it’s cool enough where you are that the thought of using heating implements in your kitchen doesn’t throw you into depression, you should make these waffles immediately. I first made them a month or so ago when it didn’t feel like Dante might mistake our kitchen for one of the circles of Hell. They were so good – fluffy and light from their yeasted batter, crisp and burnished with crackling edges of melted cheese – that it was only a week or two before we had to make them again. Like the grilled cheese sandwiches I pushed on you last year, they pull from the classic combination of cheddar cheese and apple pie. A wedge of salivation-inducing cheese against the sweet tartness of apple desserts is a worthy experiment in many cases, and here, soft, tender apple bits and pockets of melted cheese folded into a crisp waffle drowning in maple syrup is a combination you’re going to want to make all season, if the seasons would ever straighten themselves out. And if you simply aren’t enthused by a recipe that advertises itself with a pile of apples and sharp-as-you-can-get cheddar cheese, I’m not sure we can stay friends.

2015 Blog September-0467These start from my basic yeasted beer batter waffles recipe, which is adapted from King Arthur Flour. You can use milk instead of beer if you must, but between the yeast and the heat most of the alcohol is processed out, and the slightly bitter flavor of dark beer is such a welcome addition, balancing the rich cheese and tart apples. The first time I made these I was concerned about the apple pieces cooking all the way through in the short time they are enfolded in the waffle iron, but I needn’t have worried. They are in small enough pieces that they will cook. I like to leave the skins on for extra tartness, but you can peel them first if you prefer. Apples and cheese play well in both sweet and savory directions, so while I think a glug of maple syrup – we like to warm it up with a pinch of red pepper flakes for a little kick – makes these a complete meal, I could also see them providing a perfect raft for a moist thigh of roasted or fried chicken, or even piled with a fresh kale salad studded with walnuts and dried cherries. 2015 Blog September-0464

Apple Cheddar Waffles
Loosely adapted from King Arthur Flour
Makes about six 7-inch waffles
2-2½ hours (45 minutes active time)
1½ cups (12 ounces) lukewarm dark beer, such as a stout or a porter
1½ teaspoons active dry yeast
3 tablespoons maple syrup
6 tablespoons (3 ounces) melted butter, cooled
1 teaspoon salt
2 large eggs
2 cups all-purpose flour
1 green apple, diced into ¼ inch-½ inch chunks (1⅓ – 1½ cups, approximately)
1 generous cup grated sharp or extra sharp cheddar cheese


  • In a 2-cup glass measuring cup, or a small microwave safe bowl, heat the beer until just warm to the touch. Add yeast and let them mingle for 5-10 minutes. The yeast will foam up considerably, thanks to the extra sugars and yeast already in the beer.
  • While the yeast proofs, whisk together the cooled melted butter, the maple syrup, the salt, and the eggs in a large bowl. Be sure there’s room for the batter to expand.
  • Add the beer and yeast mixture and whisk to combine, then add the flour 1 cup at a time, whisking to combine thoroughly. Switch to a rubber spatula and fold in the apple chunks and the cheese. Stir well, as the cheese may want to stick together; we want it evenly incorporated.
  • Cover the bowl with plastic wrap and set it on the counter for 1½-2 hours (how fast it rises and bubbles will depend on how warm your kitchen is, but longer rise = deeper flavor).  The mixture will develop lethargic and then more energetic bubbles, and begin to smell quite bready.
  • Once it has had a chance to rise and is covered with a near-consistent layer of bubbles, either stow in the refrigerator overnight, or preheat your waffle iron!
  • Drop the batter in generous ⅔ cup batches onto a preheated, greased waffle iron (or whatever capacity your iron can handle). Close the lid and cook for the recommended amount of time, or until the waffle is crisp on the outside and deeply golden, with dark crisp cheese lace protruding. Ours took about 7 minutes per waffle. (If you refrigerated your batter for a few hours or overnight, be sure to bring it back up to room temperature before cooking)
  • Serve hot with your choice of sweet pourable topping. We like maple syrup warmed with a pinch of red chili flakes in it, for a little kick. If you need to keep the waffles warm, stow them on a wire rack over a baking sheet in a 250F oven until you are ready to eat.


Thyme and Black Pepper Crackers

2015 Blog September-0498Over the past few years, N. and I have made it our business to conclude the week with a happy hour – we load some cheeses and crackers on a plate, sometimes some sliced cured meat, sometimes a few dried figs – and pour something cold and alcoholic into a frosty glass. Through this process, I’ve learned that N. loves black pepper. We bought a wedge of cheese crusted in black pepper once as an experiment, and I think since then it has been on every shopping list, every week, for about the last two years. More recently, we started picking up variety packs of crackers – the crushed wheat rounds, the chalky water crackers, the rectangles spiked with vegetable bits – and in one variety-pack, a black pepper water cracker. This sleeve always, always disappears first. N. doubles up on the pepper – peppered cheese on peppered cracker. And should there be peppered salami? The kid is in paradise.

2015 Blog September-04712015 Blog September-0475Because we always run out of the black pepper cracker first, I knew when I saw this month’s Twelve Loaves theme of crackers, crisps, or flatbreads that I wanted to recreate them. I poked around and considered, decided to add some fresh thyme for a little more interest, and ended up with these. At first I called them water crackers, but decided to amend for the sake of accuracy. A real water cracker, traditionally speaking, contains only flour and water (and sometimes some salt or leavening agent). No fat. Yet fat is what, so often, imparts flavor. Here, a few glugs of oil result in a cracker that crackles in thin, flaked layers, almost like a very crisp pastry crust.

2015 Blog September-04762015 Blog September-04782015 Blog September-04792015 Blog September-0482A few notes: first, these are not for the weak-of-tongue. The black pepper flavor is quite aggressive, and though a smear of creamy cheese will certainly cool things down, it can’t disguise the sharp spice of the bits of cracked pepper. Second, as with most crackers, the greatest trick here is getting them thin enough. I’ve recommended ⅛ inch at the thickest, but even thinner than that is better. They swell up only slightly as they bake, and a thick cracker is, alas, a decidedly not-crisp cracker. Those that I didn’t get quite thin enough tasted stale already barely cooled from the oven, simply because they didn’t snap and crumble adequately between the teeth. For us, the thinnest, most golden specimens stayed crisp and fresh tasting for a mere two days afterward, even stored in a firmly flattened zip-top bag. That means, unless you have a pepper fiend around your house, you are best served by making these for a gathering (the spice suggests a Halloween party might be a good venue), or throwing together a half recipe, or maybe even freezing half the dough until you need another batch. I haven’t tried that with this particular cracker, but I have done so with great success with Joy the Baker’s Sharp Cheddar Cheese Crackers, so I have every confidence these will be equally suited for the deep freeze.

2015 Blog September-0488Serving recommendations: topped with any sort of cheese, of course. But they would be equally good with cured meat of some sort, or a scoop of egg salad, or maybe even some hummus. While they were hot, I found myself compulsively snatching one and then another from the cooling rack, suggesting they are even acceptable bare. I do think, though, that a glass of something sparkling to wash them down is not to be discounted.

2015 Blog September-0497

Thyme and Black Pepper Crackers
Adapted from Chowhound
Makes 4-5 dozen 2½ inch crackers
Time needed: about an hour
2 cups all-purpose flour
1 teaspoon baking powder
½ teaspoon salt
1 tablespoon black peppercorns
1 tablespoon fresh thyme leaves
⅔ cup warm water
⅓ cup olive oil


  • Preheat the oven to 400F and line two cookie sheets with parchment paper.
  • In a food processor, pulse the flour, baking powder, salt, and thyme until combined. Use a spice grinder or similar small bladed tool to crush up the peppercorns until some are coarsely chopped and some are a fine powder. Add this pebbly pepper dust into the food processor and run until the pepper is evenly distributed through the flour mixture.
  • Measure out the warm water and the oil into the same vessel. With the food processor still on, drizzle in the water and oil and let the machine run until the ingredients form a smooth, slightly sticky dough. First small hunks will clump together, then quite suddenly a mass will form and run in circles around the belly of the processor.
  • Lightly flour a board and a rolling pin, and turn out half the dough. Sprinkle a little flour atop the dough as well. Roll out until very thin – at maximum ⅛ inch, but 1/16 inch is better for crisp crackers. Be sure to get the edges as thin as the middle. If you fear the dough is getting sticky, flip it over and turn it 180 degrees, then sprinkle with a little flour and roll again.
  • Cut the thin, even layer of dough into shapes of your choosing. We like rounds, and I used a glass with a diameter of 2½ inches. Prick rounds with a fork three or four times, then transport dough rounds to the prepared cookie sheets. Place them in a single layer, but they can sit very close together because they will not spread out. I easily fit 2 dozen on a single cookie sheet. Repeat for the remaining half of the dough.
  • Bake 12-14 minutes, until golden on top and quite dry. Cool completely before topping with cheese, salami, hummus, or whatever’s your favorite.
  • These can be stored in an airtight container or zip-top bag for a few days, but because they are freshly made and contain no preservatives, they will get stale faster than the average boxed cracker.


#TwelveLoaves is a monthly bread baking party created by Lora from Cake Duchess and runs smoothly with the help of Heather of All Roads Lead to the Kitchen, and the rest of our fabulous bakers.

Our host this month is Camilla from Culinary Aventures with Camilla, and our theme is Crackers, Crisps, and Flatbreads. For more bread recipes, visit the #TwelveLoaves Pinterest board, or check out last month’s mouthwatering selection of #TwelveLoaves enter last month’s #TwelveLoaves Seeded Breads!

If you’d like to bake along with us this month, share your Crackers, Crisps, and Flatbreads using hashtag #TwelveLoaves!

Lamb meatballs with basmati pilaf and pomegranate drizzle

2015 Blog September-0440I don’t remember the first time I had lamb. I suspect it was a special occasion – probably Easter – and I suspect I had it in the company of a generous scoop of that emerald green mint jelly that still, in my memory, is the perfect accompaniment for the slight gaminess of a well-seared chop or slim carved slice.

2015 Blog September-0423To bring lamb into the meatball fold (too much? I couldn’t resist), I went back to the mint pairing with a few fresh sprigs, but decided to dress up the seasonings a bit more, pushing these meatballs in a Mediterranean direction. Oregano joined the mint, along with green onions, pine nuts, a small handful of coarsely chopped golden raisins, a tiny touch of cayenne pepper to keep things interesting. Fresh breadcrumbs soaked in cream keep the meat mixture springy and moist, and after a sear and a simmer in beef broth, they are fragrant and herbaceous, tugging toward both the savory and the sweet.

2015 Blog September-0426In dreaming these up, I knew I wanted to play with the sweetness of the traditional mint jelly, but push it in a more grown-up direction. Lamb and chutneys are also a common pairing, since lamb goes so nicely with fruit, and in searching for that agradolce flavor – the Italian sweet/tart/sour answer to a gastrique, I hit upon a thick, puckering drizzle of pomegranate juice and balsamic vinegar, reduced down into a glossy syrup, that would be as delectable over vanilla ice cream as it is here over meat. To finish, according to my notes, all is needed is lemon zest and a “sparing crumble of feta.”

2015 Blog September-04332015 Blog September-0435Just like this – a meatball drizzled in syrup, sprinkled with briny cheese and a touch of bitter citrus rind, these make perfect appetizers. They require only a toothpick, and since they are even better at room temperature than they are steaming from the pan (time to cool gives the herbs a chance to assert their flavors), they are ideal for a party. If you’re looking for an entrée application, though, I also opted for a basmati pilaf, all nutty and fluffy and toasted, spiked with currants and nuts and a little fresh parsley to finish, that these meatballs can be happily snuggled into.

2015 Blog September-04312015 Blog September-0437These are, without question, my favorites of the meatball project thus far. When it’s done right, the play of savory and sweet is one of my favorite taste combinations. And I must, for the sake of your stomachs, eschew modesty and admit: here, it is done right.

2015 Blog September-0444

Lamb meatballs with basmati pilaf and pomegranate balsamic drizzle
Serves 4-5 (with 18-20 1-½ tablespoon meatballs)
45 minutes if you’re quite efficient, 60-90 minutes if you’re not
For drizzle:
¼ cup balsamic vinegar
1 cup unsweetened pomegranate juice
For meatballs:
1 cup fresh breadcrumbs
½ cup milk or cream
1 lb. ground lamb
¼ cup finely sliced green onions, dark and light green parts only (save the bulbs for another night)
1 tablespoon minced fresh oregano
2 tablespoons minced fresh mint
¼ cup roughly chopped golden raisins
¼ cup pine nuts
½ teaspoon salt
⅛ teaspoon cayenne pepper
3 tablespoons olive oil
1-2 cups beef broth
For pilaf:
3 tablespoons butter
3 tablespoons roughly chopped pistachios
3 tablespoons sliced almonds
¼ cup minced red onion
¾ cup basmati or other long-grain rice
¼ cup orzo (small rice-shaped pasta)
1 bay leaf
3 tablespoons currants
¾ teaspoon black pepper
½ teaspoon salt (but taste your chicken broth first – you may need more or less salt)
2 cups low-sodium chicken broth
¼ cup roughly chopped parsley, to finish
To serve:
½ cup finely crumbled feta cheese
zest from one lemon


  • Combine the balsamic vinegar and pomegranate juice in a small pot and set it over medium heat. Bring to a boil, then reduce to just simmering and let it go for 30-40 minutes, stirring occasionally, until it has become a thick, glossy syrup the consistency of molasses. When that happens, remove from heat immediately and set aside.
  • In a glass measuring cup or small bowl, combine the fresh breadcrumbs and the milk or cream and let sit for about 10 minutes to soak. While they suck up the moisture, chop and prep your remaining meatball ingredients (and the pilaf ingredients, if you have time).
  • Add the ground lamb, the green onions, the oregano, the mint, the golden raisins, the pine nuts, the ½ teaspoon of salt, and ⅛ teaspoon cayenne pepper to a medium mixing bowl. Using a fork or your fingers, lift the bread crumbs out of the milk or cream, let any excess liquid drip off briefly, and add them to the other meatball ingredients. Use your fingertips to combine the meatball ingredients, mixing lightly but thoroughly to distribute the wet bread and the sticky meat evenly.
  • In a large skillet, heat the 3 tablespoons of olive oil over medium heat. Add about a teaspoon of the meat mixture and fry for about a minute on each side until cooked through. Taste for seasoning and adjust salt and cayenne pepper quantities as desired. It’s okay to leave them slightly undersalted, though, as the feta you’ll crumble over at the end is so salty.
  • With moistened hands, scoop up 1-½ tablespoon quantities of the meat mixture and roll them into spheres. This should net you 18-20 meatballs. Place as many meatballs as will fit in a single layer without touching one another in the preheated skillet, and brown on all sides over medium heat – about 2 minutes per side. Remove to a clean plate. Repeat until all meatballs are browned on the outsides.
  • Wipe out the meatball skillet with a paper towel to remove the excess fat, then add the 1-2 cups beef broth and bring to a simmer. When it is bubbling, carefully add the meatballs back into the skillet – you want enough liquid that it comes approximately halfway up the sides of the meatballs. Cover with a tight-fitting lid and let simmer 15-20 minutes, turning all meatballs once.
  • The moment the meatballs hit their simmer, make the rice. Heat the 3 tablespoons butter in a medium pot over medium heat. Add the pistachios and almonds and toast, stirring frequently, until lightly browned. Add the ¼ cup minced red onion and sauté until onion is translucent and tender – 3-5 minutes. Stir frequently to ensure the nuts do not burn.
  • Add the rice and the orzo to the onion and nuts and stir to coat evenly with the melted butter. Toast over medium heat for 1-2 minutes, just until the rice gains some opacity. Add the black pepper, the salt, the bay leaf, the currents, and the chicken broth. Stir well and cover with a tight-fitting lid.
  • Bring the rice mixture to a boil, stir once more, and reduce heat to a simmer. Simmer 15 minutes, or until rice is tender and has absorbed all the broth. Stir in the parsley and fluff with a fork before serving.
  • To serve, nestle 4-5 meatballs per diner on a bed of the fluffy pilaf. Drizzle a few teaspoons of the thick, glossy pomegranate syrup over the meatballs, crumble on some feta and lemon zest, and serve warm or at room temperature.
  • Alternatively, for appetizers, make a decorative drizzle of the pomegranate glaze on an attractive platter (I prefer white, for the contrast), spear the meatballs and place them atop the glaze layer, and then dust the whole thing lightly with feta and lemon zest. Serve the rice alongside, or not at all.

Raincheck

We are careening into week 5 of the semester, and even though I tell my students not to ask the night before (or worse, the morning of), I have need of an extension. With temperatures this weekend back up to near 90 in Los Angeles, and a kitchen so dirty-dish-strewn N’s face paled a couple shades when he walked in, there just wasn’t enough time in the day to grade papers, lesson plan, cook, edit photos, and write you a post worthy of the meatballs I’m digesting that are – without question – my favorites thus far.

So I’ll have my assignment to you next Monday. I understand if there’s a late penalty. But as I also tell my students, I’d rather they take the extra time to create something they are really proud of, than rushing and taking shortcuts just to meet the deadline.

See you in a week, friends.