Roots Latkes

Most kids, upon reviewing what they ate during college, will talk about late night burrito runs. There will be a fair share of ramen noodle stock-up stories, and an assessment of the school’s dining facilities. For a student who has moved off campus, such a topic is likely to provoke a discussion of microwaveable meals. I had my share of those as well, I’ll readily admit, particularly during the month after a stunningly disorienting and unexpected breakup during which I subsisted mainly on Coca-Cola, boxed stuffing mix, Godiva ice cream, and carne asada burritos to-go from a restaurant next door to the grocery store where I was buying the rest of my supplies.

Food Blog November 2014-0694Thankfully, that month or so was an exception. For much of my off-campus college career, I lived with one other girl in a duplex her mom rented to us, and we fed each other. Sometimes it was easy stuff: pancakes, omelets, pasta with jarred red sauce, sometimes something a bit junkier like Oreo milkshakes. But we definitely introduced each other to our classics. One of mine was a modification of an old Ghirardelli oatmeal chocolate chip cookie recipe. One of hers was a simple, lovely little roasted vegetable dish her family just called “roots.” Roots consisted of, well, roots. Russet potatoes, sweet potatoes, carrots, parsnips, rutabagas, turnips, and sometimes beets got peeled, cubed, and tossed with salt, pepper, and olive oil. The first time she made it for us, K. said that she wasn’t sure how much olive oil to use, but that her mom said it should be just enough that the raw cubes of vegetables “glistened.” Then we loaded them into large glass casserole dishes and roasted them until they were done.

Food Blog November 2014-0681Roots comprised whole meals for us during those years. Sometimes there would be some kind of green side, but mostly we just sat down (never at the table, always on the couch) with big bowls of autumnal cubes, toasty and brown on the outside, starchy and pillowy soft on the inside, and inhaled them. It was reasonably good for us, it was filling, it was delicious, and best of all, it was cheap. The biggest disadvantage to the whole endeavor was getting a cashier at the grocery store who didn’t recognize “weird” vegetables like rutabagas and parsnips, and would take a long time looking up the codes to ring them up.

Food Blog November 2014-0682Over the years, I’ve made roots more times than I can count. They are a lovely comfort food dish: simple to make, hot and forgiving, and easily changed up depending on what vegetables and herb combinations you like the best. Over time, I’ve eliminated beets from the equation, and opted to add plenty of chopped rosemary to the requisite salt, pepper, and olive oil.

But recently, I got thinking about roots again and wondered what it would be like to turn these simple cubed, roasted vegetables into a latke. This would increase the ratio of crisp edges to soft interior, always a good thing, and cut down a bit on preparation as well as cooking time – you can just shred everything in a food processor before frying it up, rather than cubing by hand before waiting out the hour or more the original takes in the oven.

Food Blog November 2014-0687
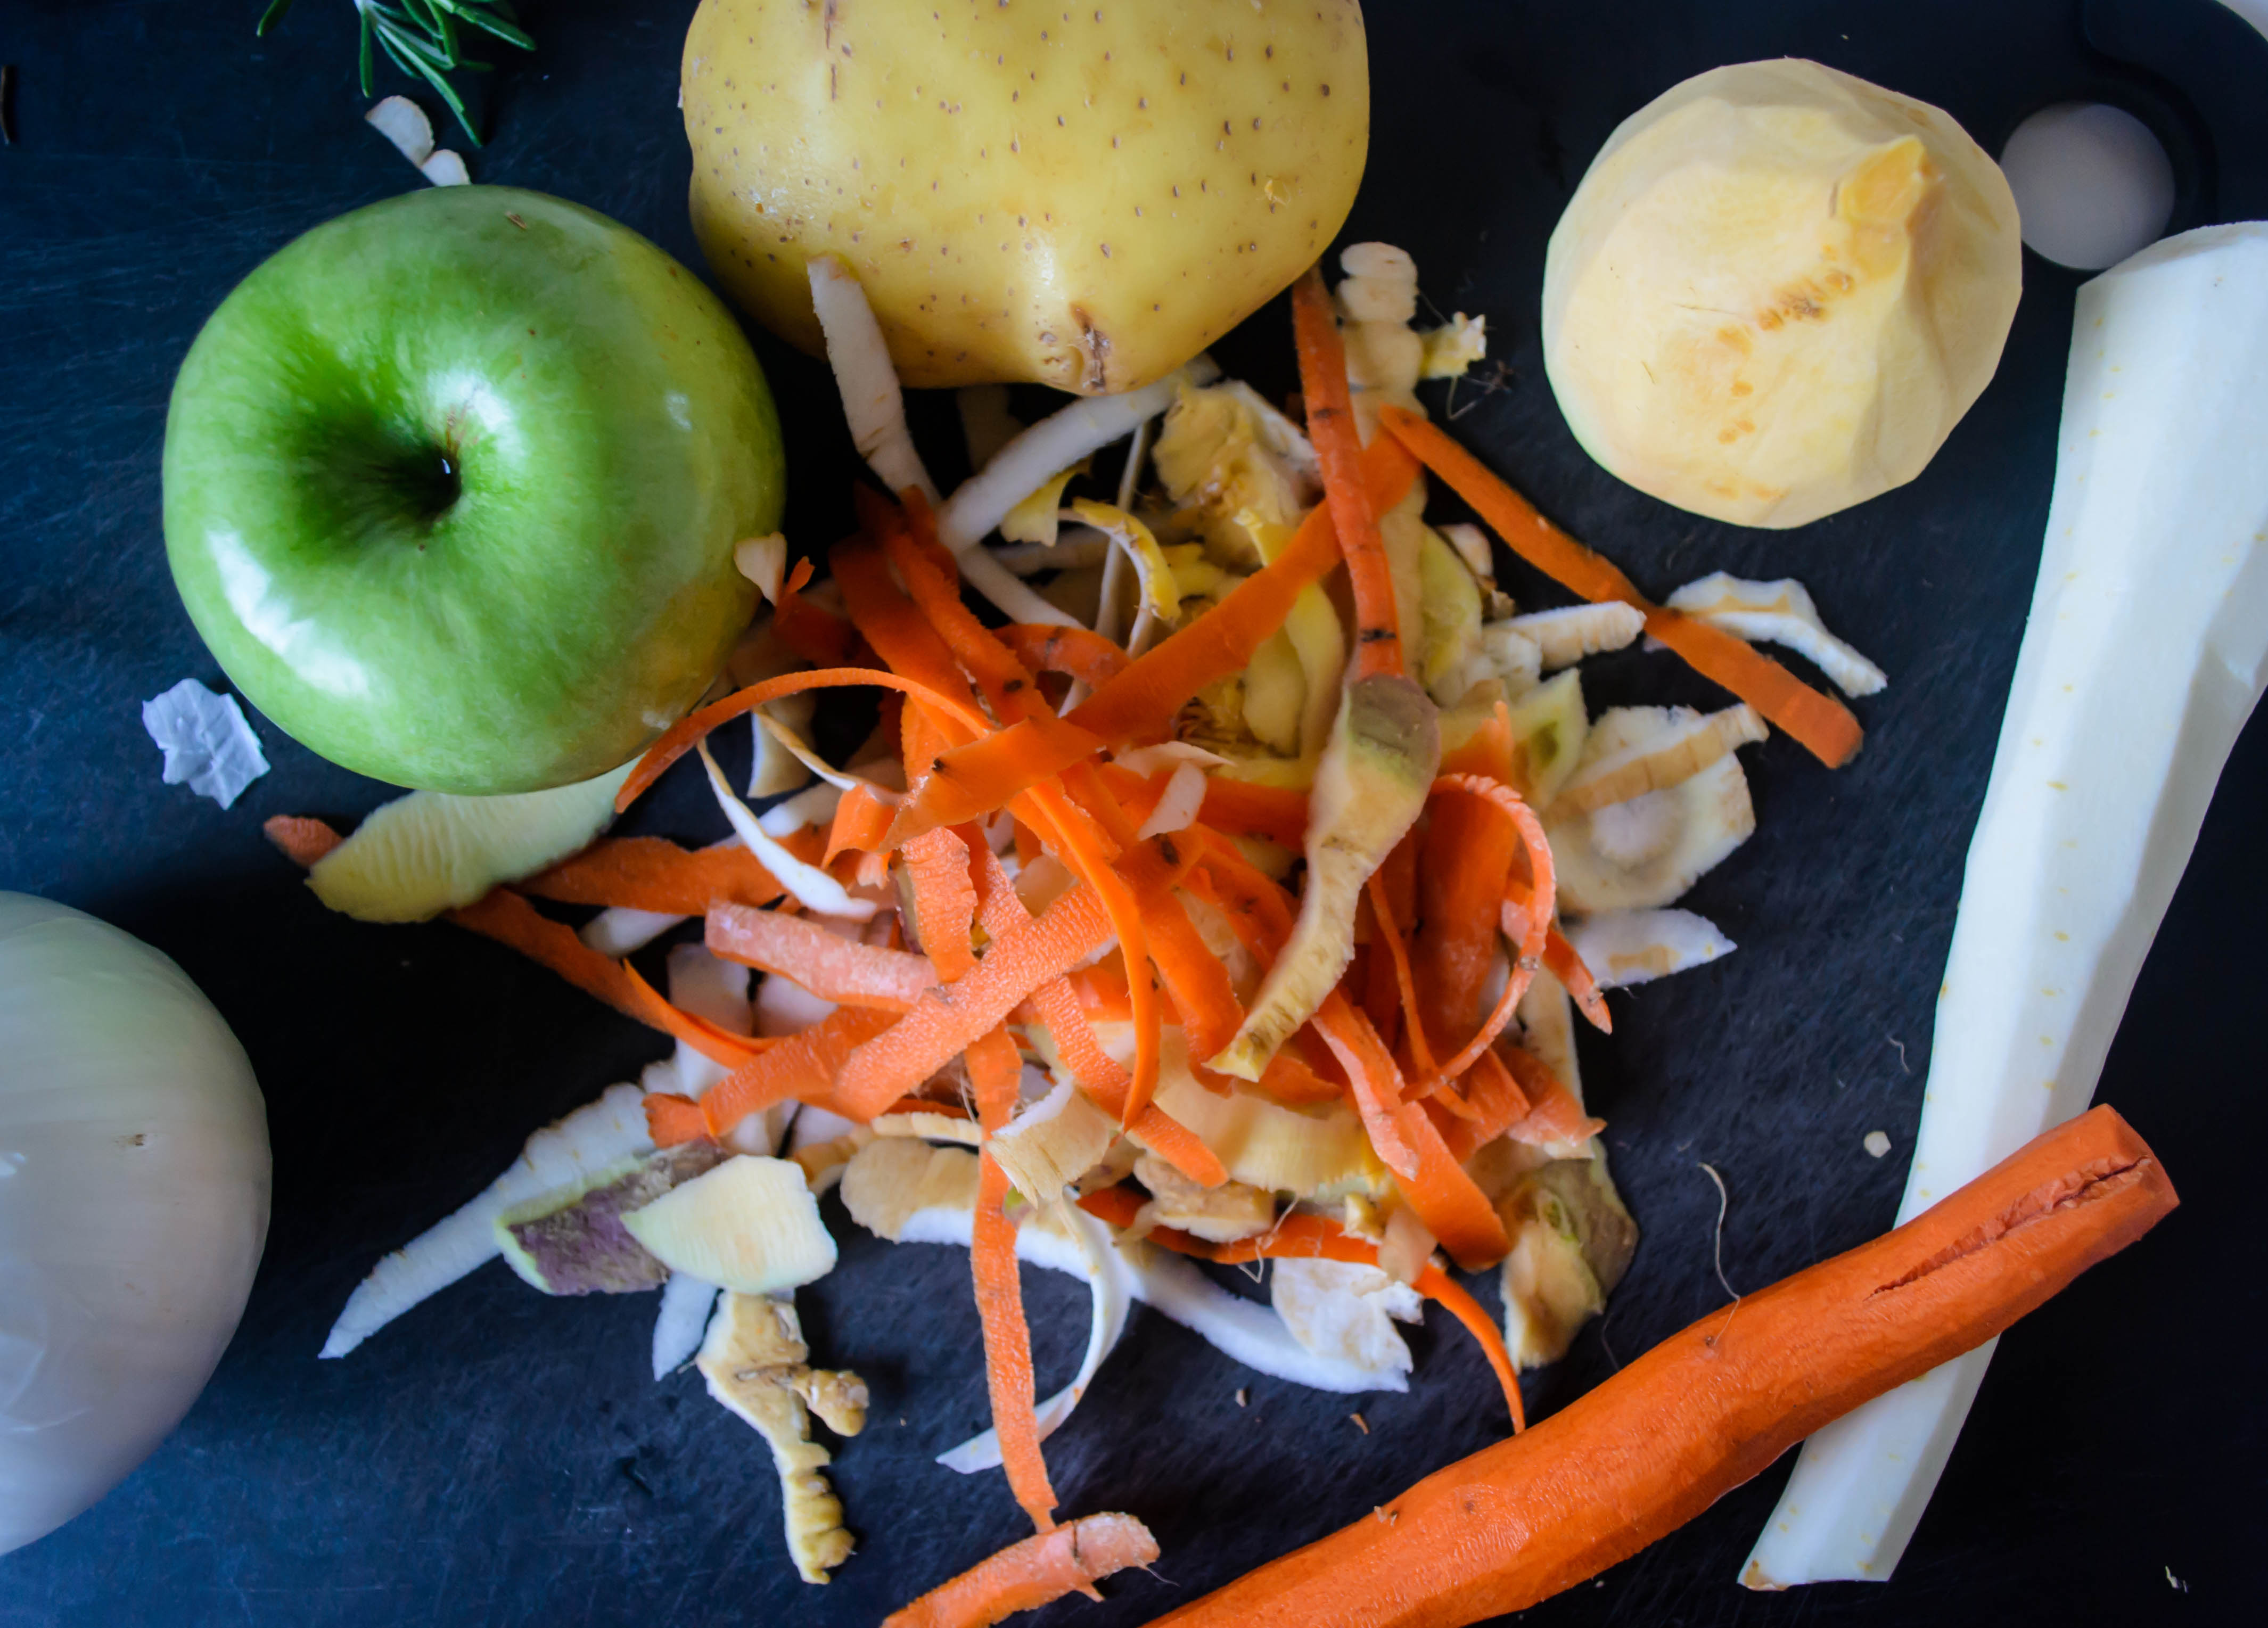
This was, as it turned out, exactly the right thing to do. I opted for potato, carrot, parsnip, and rutabaga as my key players. They whiz into a tangle of starchy threads. Half an onion joins the party – it’s part of a standard latke, and it’s a root vegetable too. As a nod to the common practice of serving latkes with applesauce, I added a tart green apple to the vegetable combination and was pleased with the sweet sharpness it contributed. And I preserved my own love of rosemary with a hefty tablespoon in the mix.

A few eggs, a toss with some flour, and salt and pepper to season, and you carefully drop-pour dollops of the sticky mixture into hot vegetable oil, preferably in a nicely seasoned cast iron pan. It sizzles, it browns, you flip it, and within ten minutes from your first addition of batter, you are passing out hot roots latkes to your delighted diners. Or, if you want to serve everything together, you can stow each batch in the oven on a rack in a baking tray to keep them warm and crisp.

Food Blog November 2014-0690What you are left with is a reasonably quick, reasonably easy (both provided you have a food processor with a shredding disk) meal that doesn’t cost much but tastes exactly right for the approach of chillier weather. The flavors are more complex than your standard latke – there’s a mix of sweetness from the addition of the carrot and the apple. The parsnip and rutabaga have a spicy, earthy flavor that reminds me somehow of incense, a feeling pleasantly intensified by the rosemary.

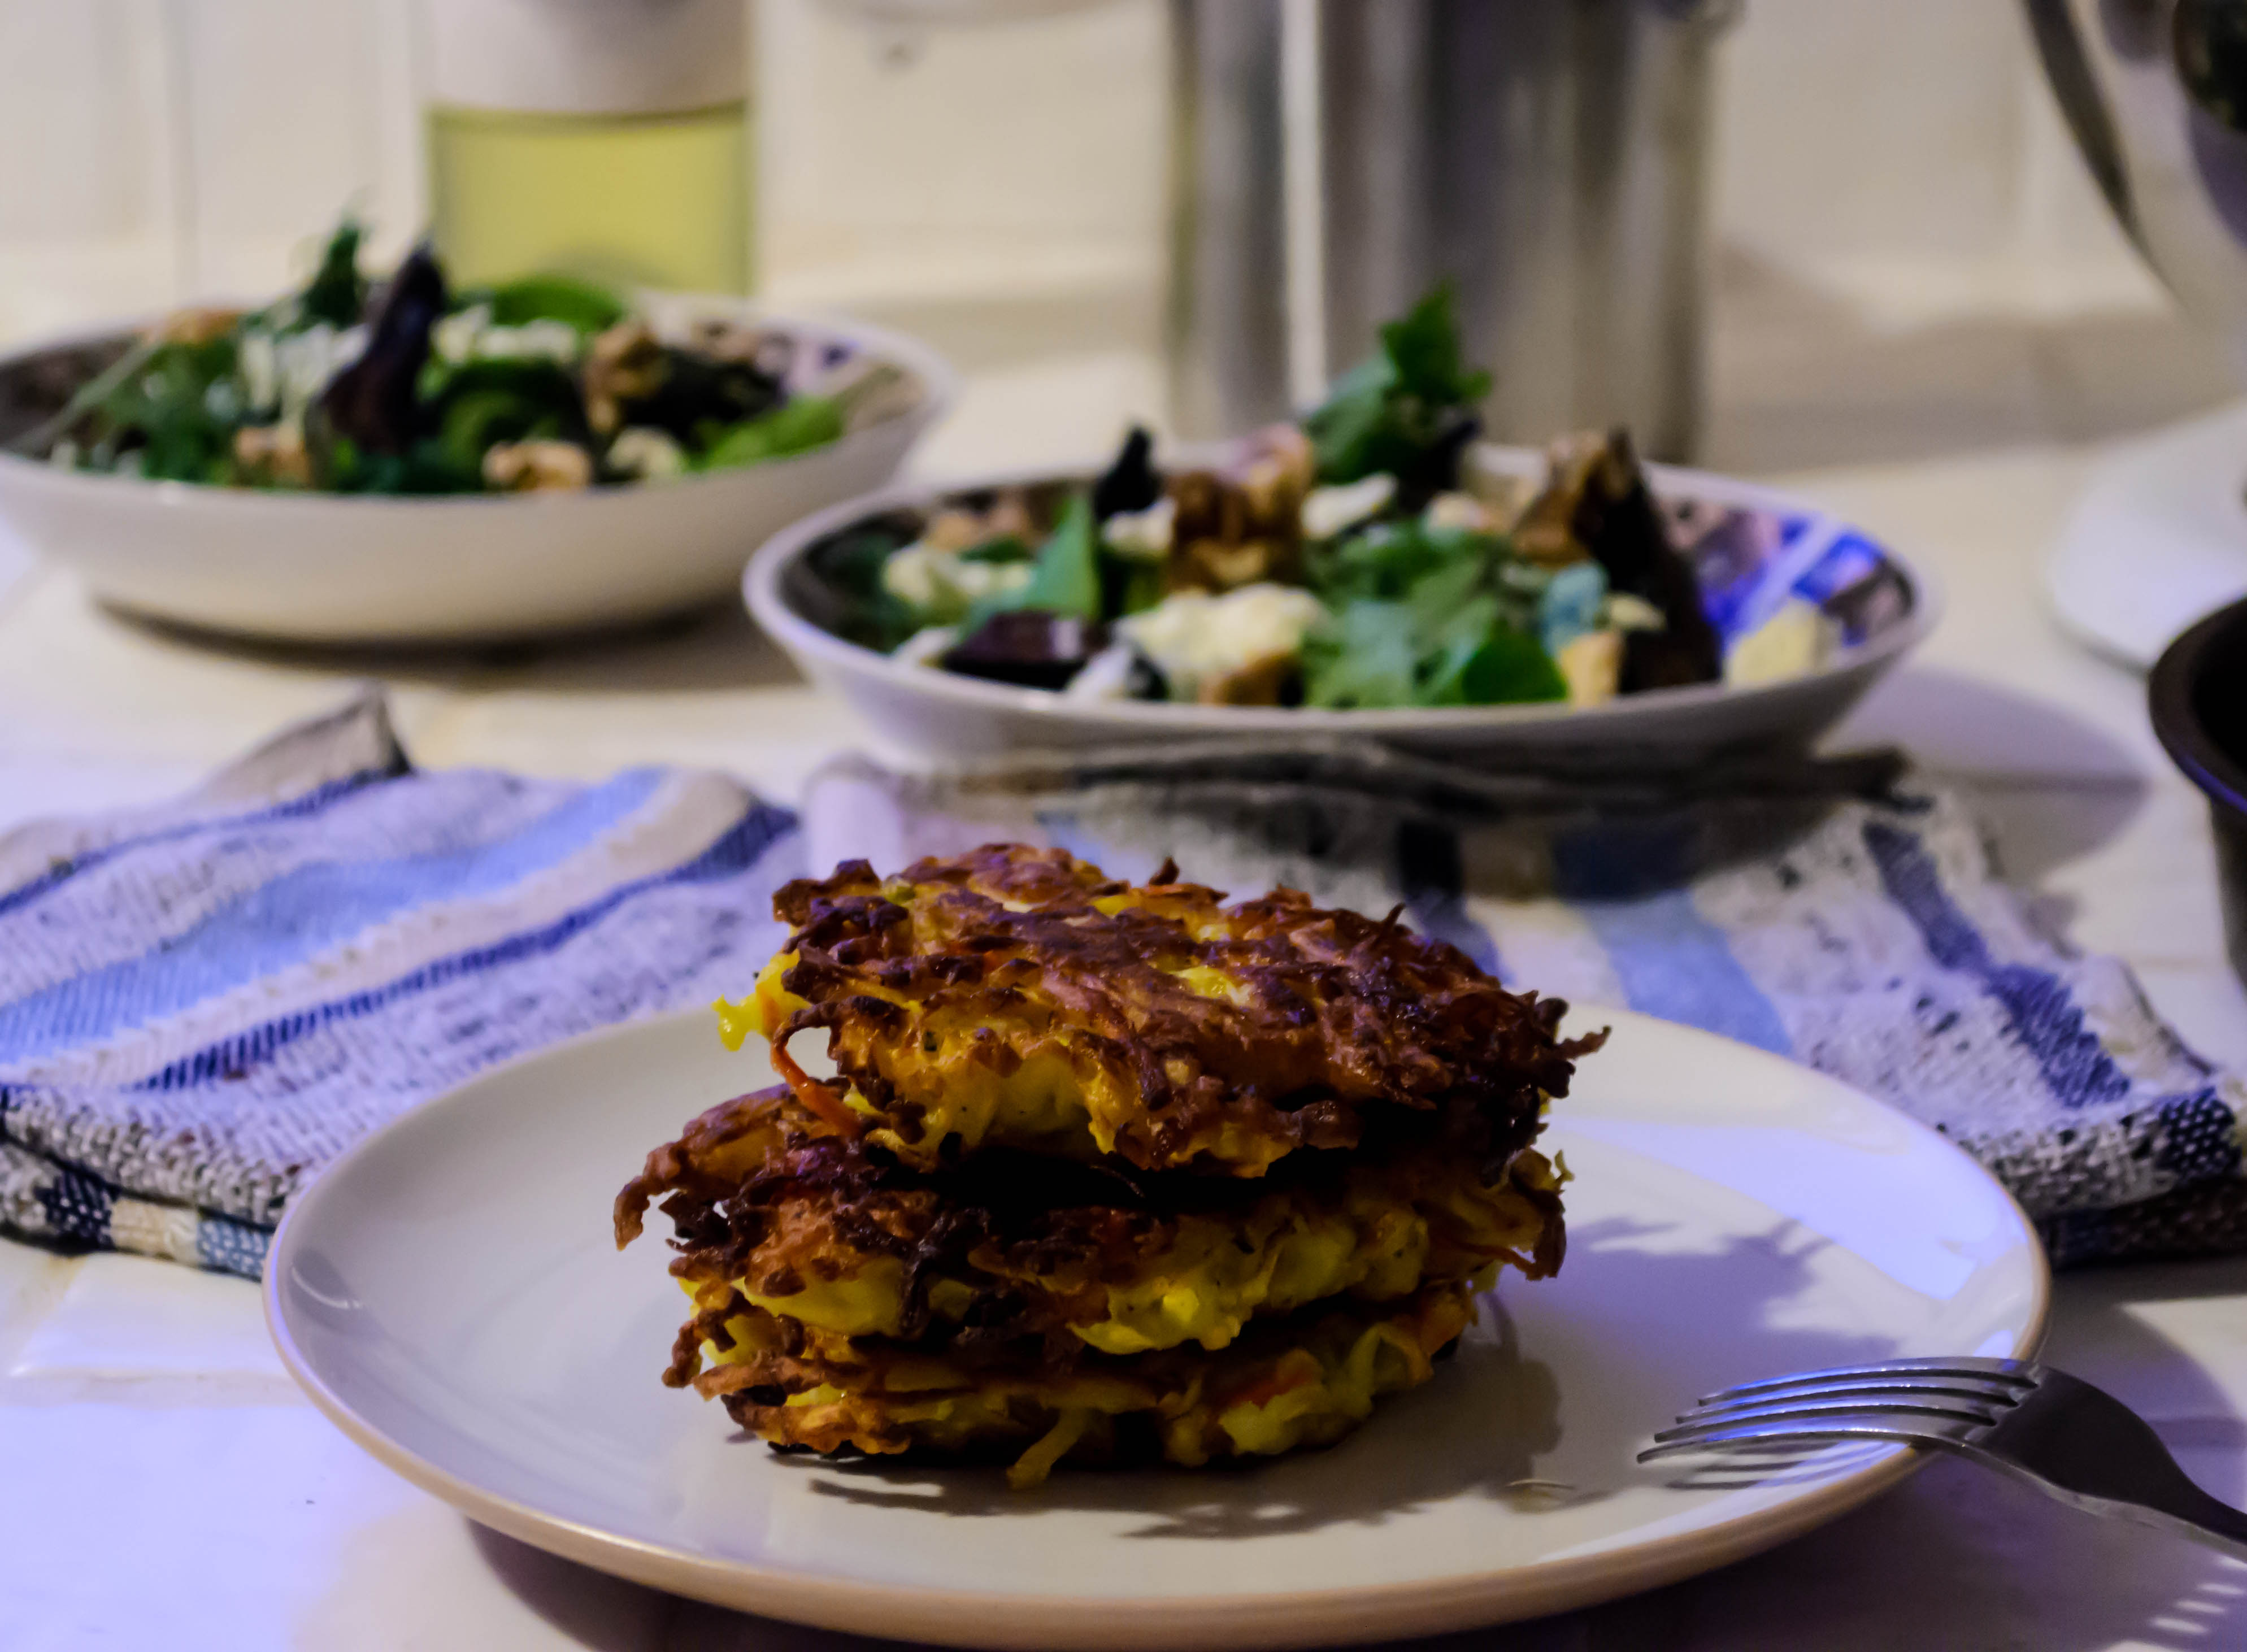
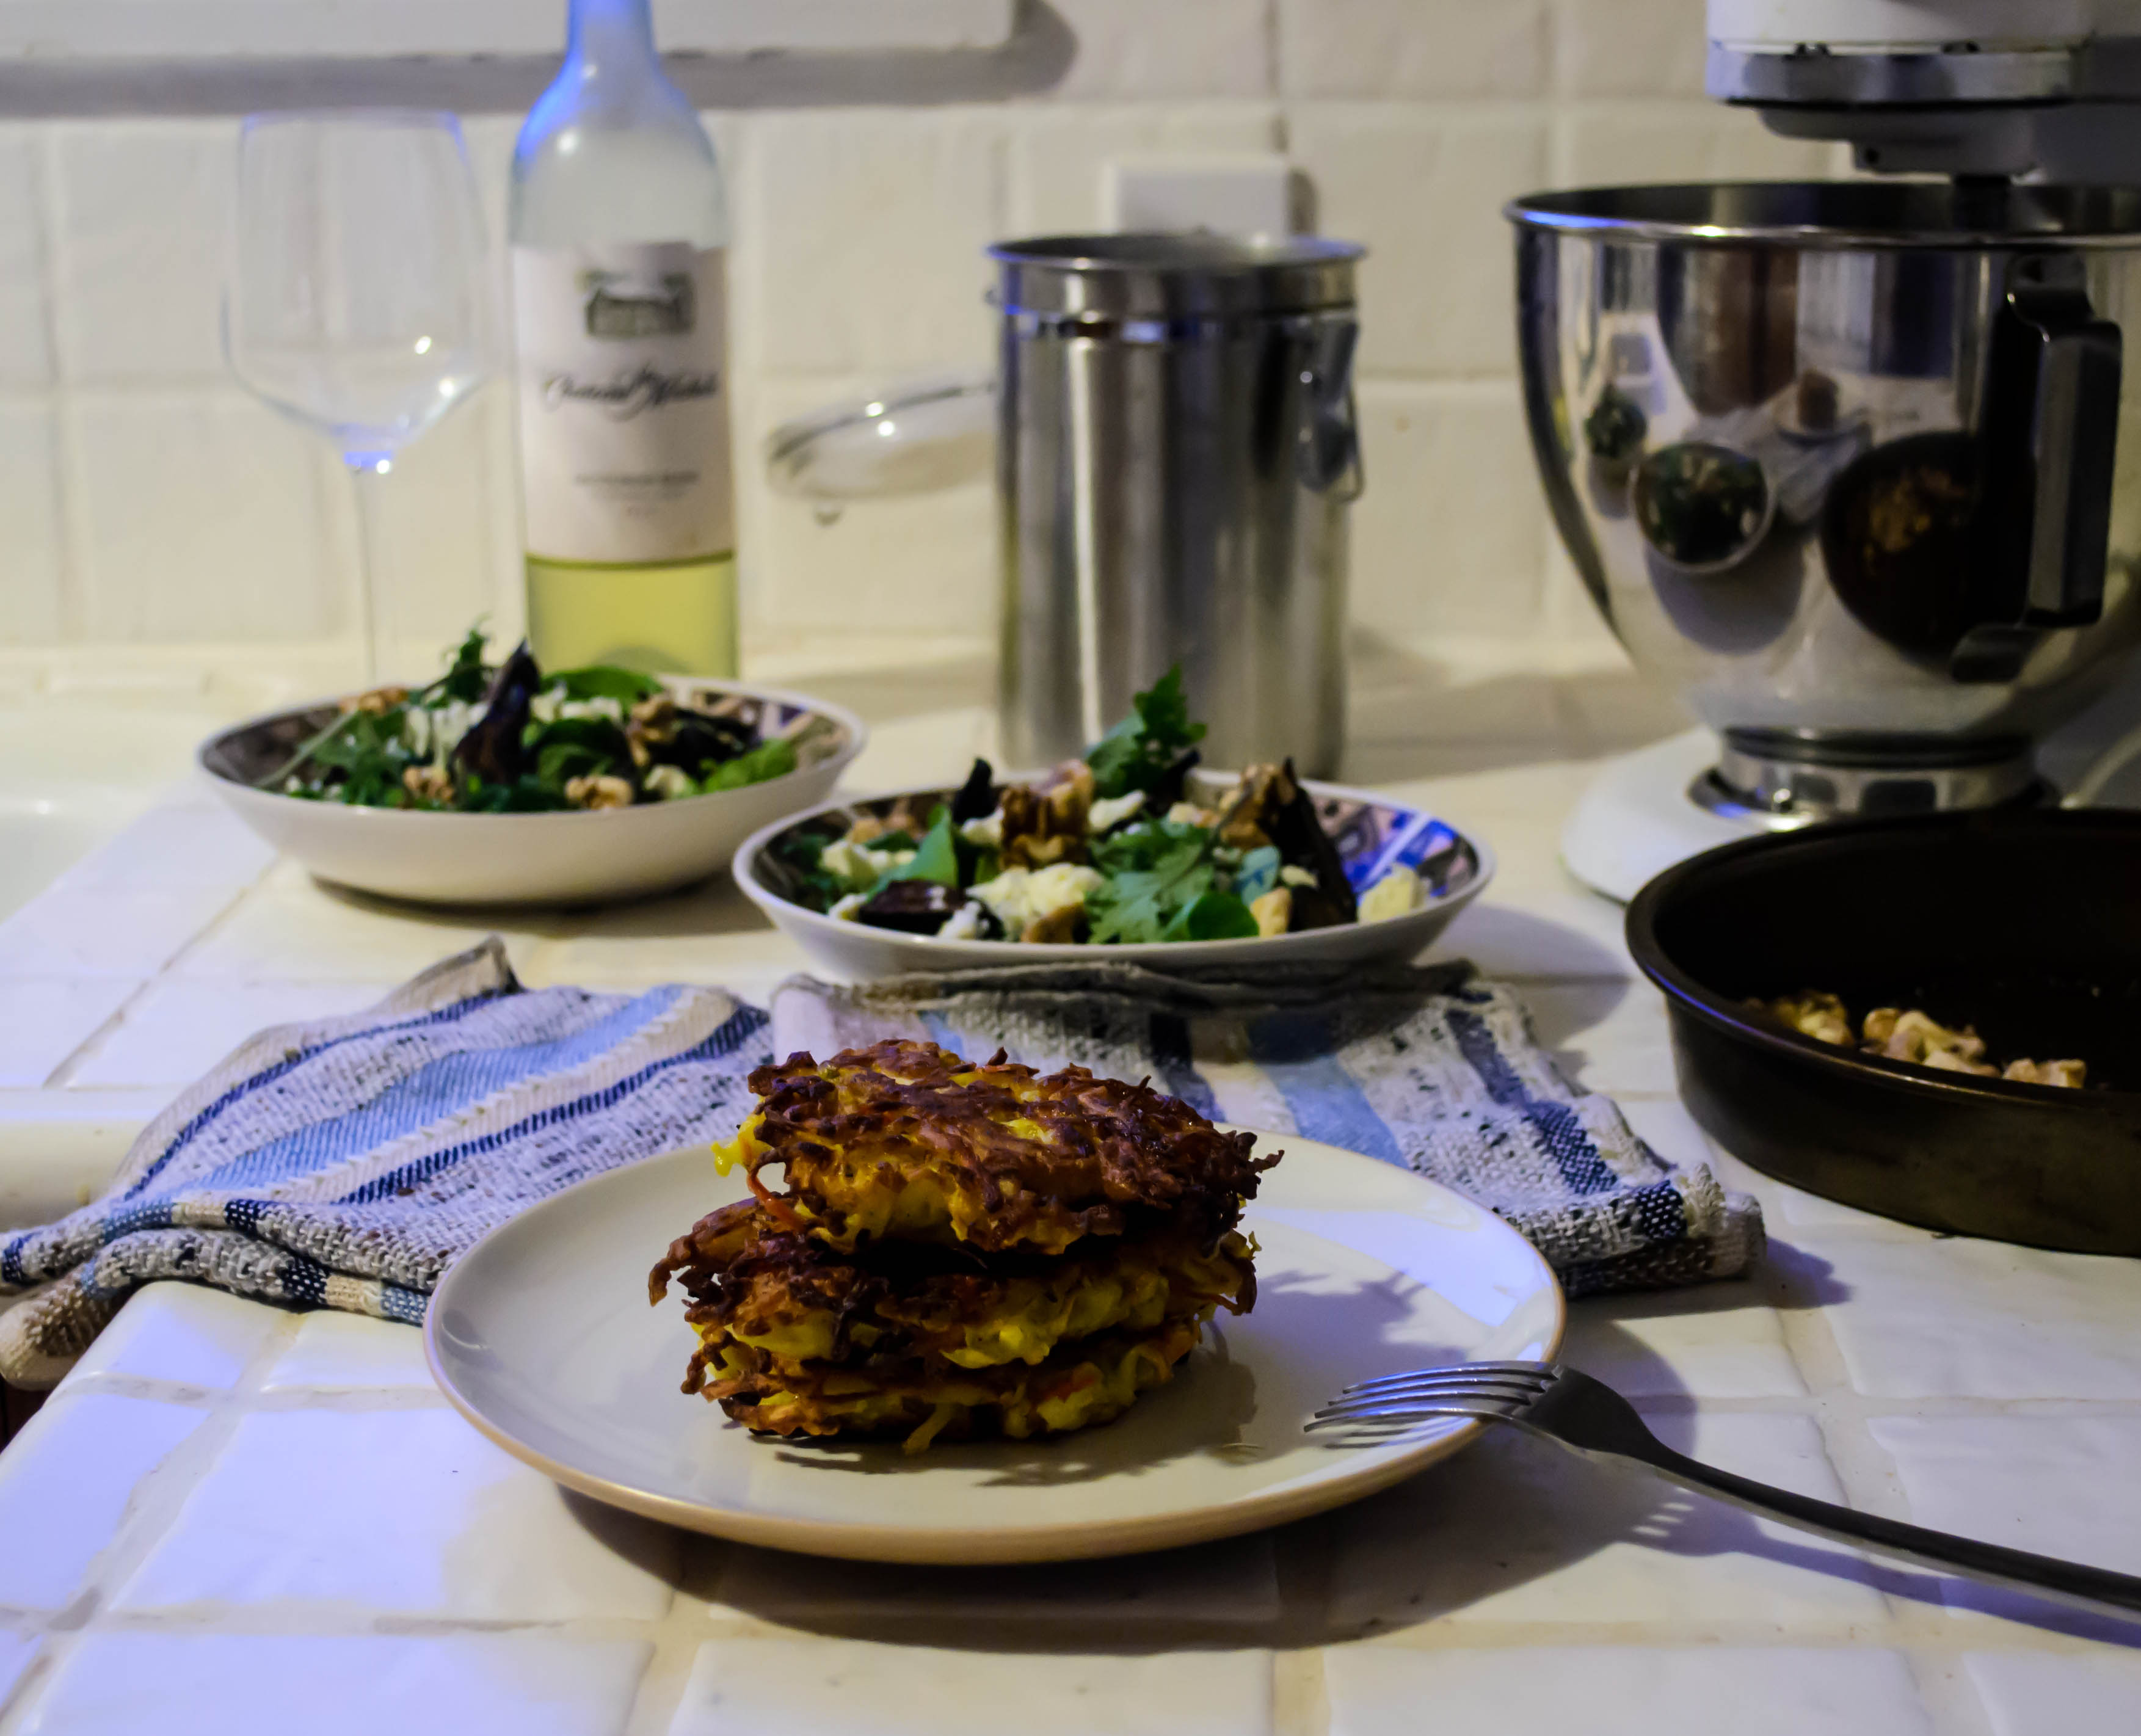
Since I’d already captured the applesauce element by adding apple to the batter, I served these with a dollop of sour cream as a nod to another classic pairing.

Food Blog November 2014-0695

Roots latkes
Makes about a dozen  3-inch latkes
1 yukon gold potato
1 large carrot, peeled
1 large parsnip, peeled
1 medium rutabaga, peeled
1 large tart apple, cored
½ large white or yellow onion, ends and papery skin removed (either color is fine, so long as it’s not a sweet onion)
1 tablespoon minced rosemary
1-½ cups all-purpose flour
2 eggs, lightly beaten
1 teaspoon salt, or to taste
½ teaspoon pepper, or to taste
½-1 cup vegetable oil
Sour cream, for serving (optional)


  • Begin heating ½ cup of vegetable oil in a large cast iron skillet over medium heat – it will take a few minutes, but you are looking for it to just shimmer when swirled around the pan. If you plan to make the whole batch at once and need to keep them warm, preheat the oven to 300F and position a baking sheet with a wire rack on it inside the oven.
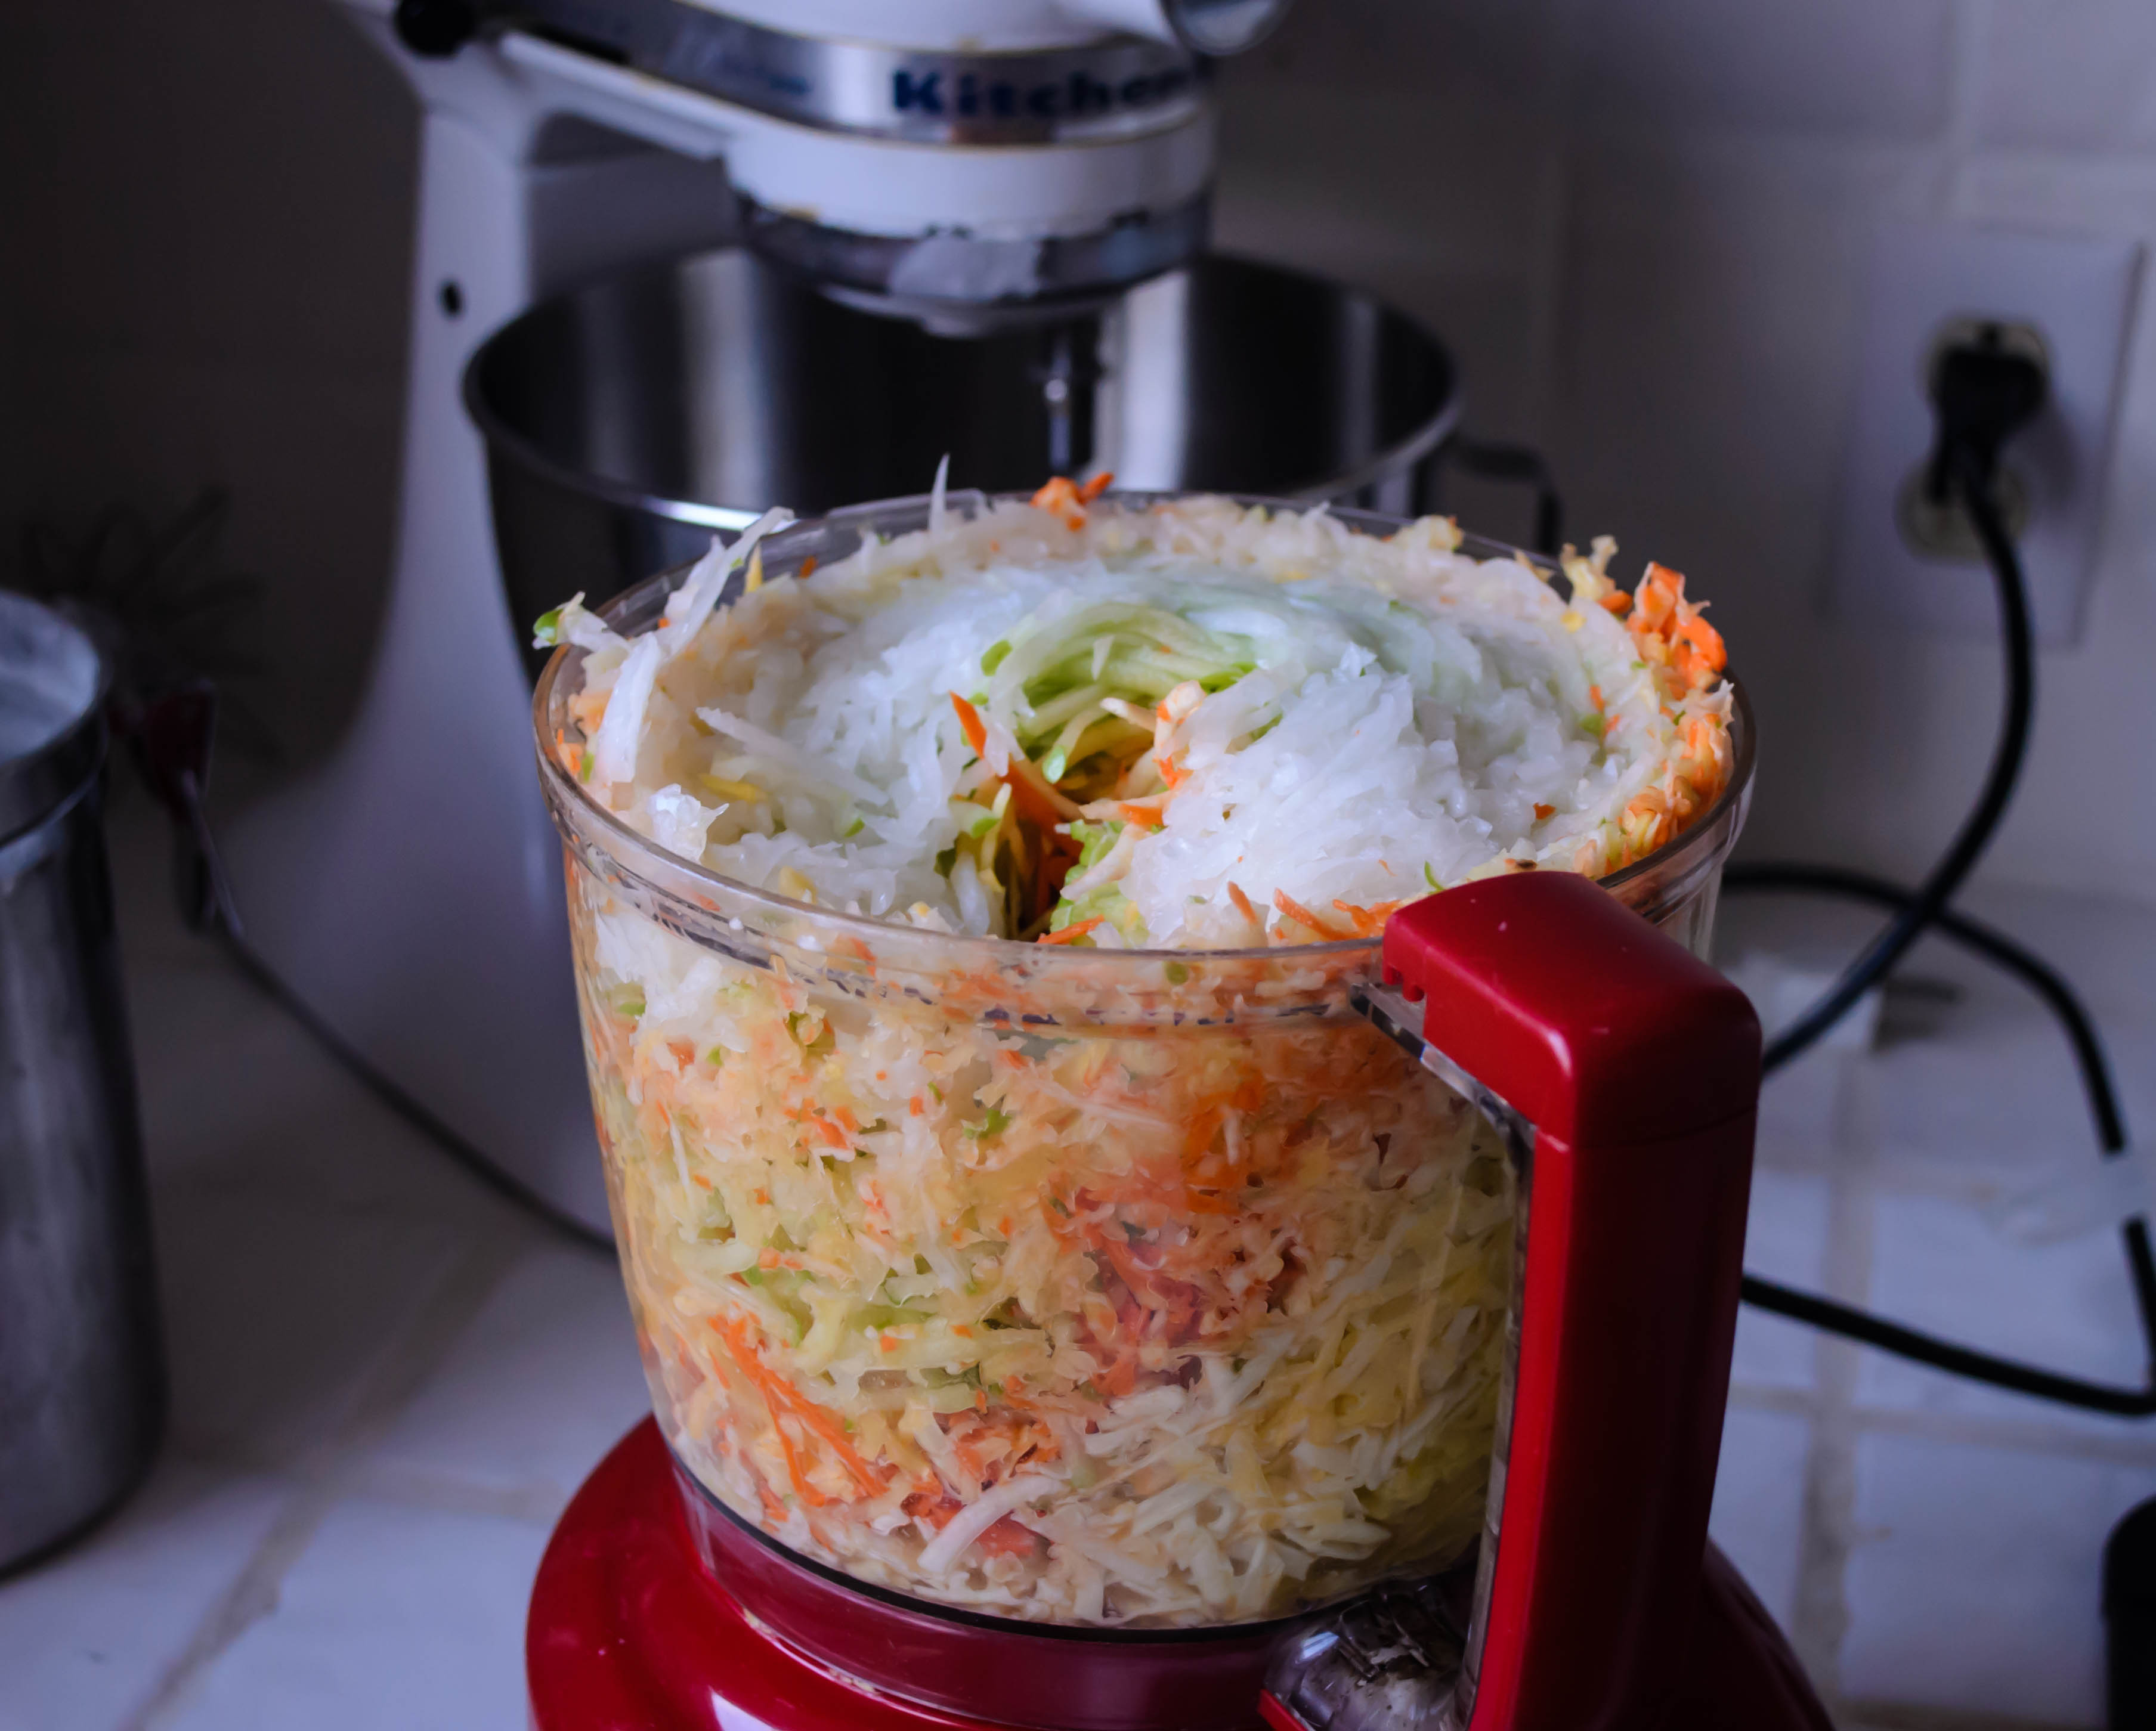
  • Fit a food processor with the shredding disk, or address the largest holes on a box grater with care for your knuckles. Cut the vegetables into the size needed to fit comfortably down the feeding chute of the food processor, and carefully feed the potato, carrot, parsnip, rutabaga, apple, and onion through the machine to create long, thin shreds of vegetable.
  • Dump the whole mess into a large bowl and mix them up a bit with your fingers to distribute evenly. You’ll be left with strands of vegetable confetti.
  • Add the rosemary and flour to the vegetable shreds and toss well with your fingers to combine. Then add the eggs and the salt and pepper, and mix well to combine. You could use a spoon or spatula for this, but I just use my fingers. They do a better job ensuring everything is evenly distributed.
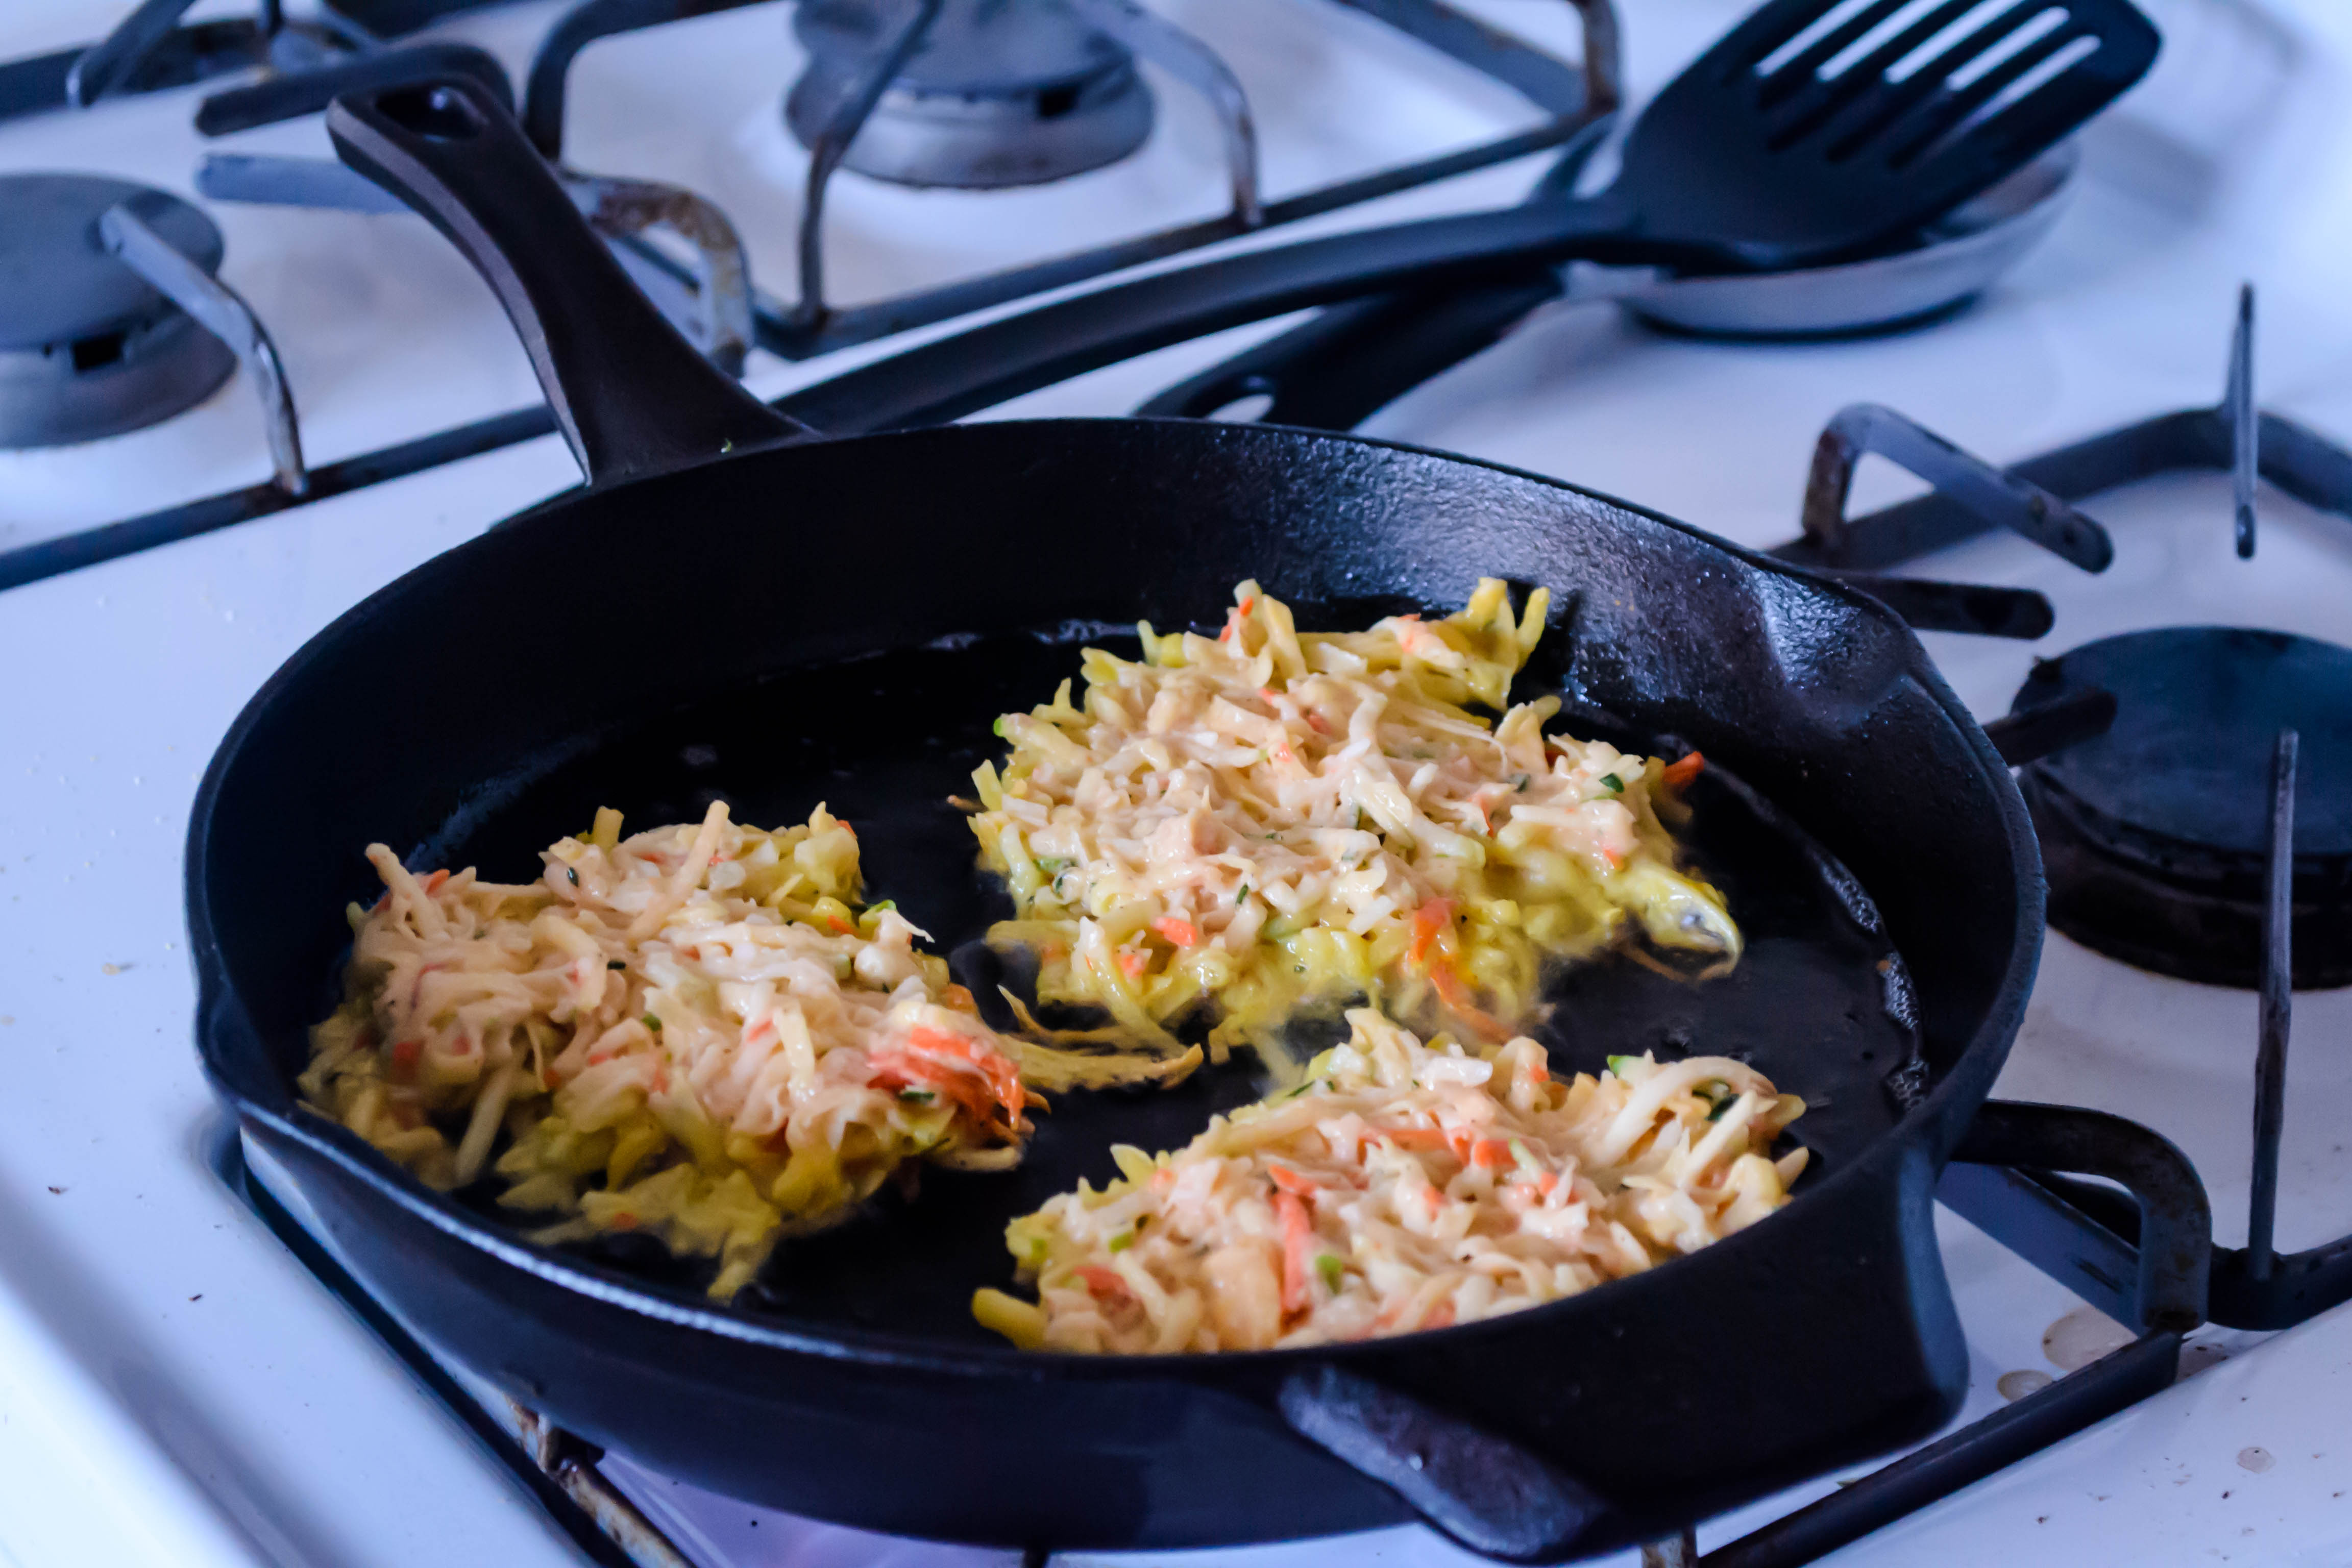
  • When the oil is shimmering, plop ¼ – ⅓ cup dollops of the mixture into the oil. In my 10-inch skillet, I can fit three dollops of batter comfortably without touching – don’t crowd them. When they hit the oil, they should sizzle lightly. If the oil spits aggressively, it’s too hot. Turn the heat down or remove the pan from the heat for a minute to cool it down.
  • Sizzle the latkes for 4-5 minutes on the first side, until it is evenly golden-brown and crisp. Flip carefully (oil splatters) and cook for 2-3 minutes on the second side, until it too is brown and crisp. Move to the rack in the oven to keep warm, or directly to a plate for immediate consumption.
  • Repeat until batter is used up. If the oil level gets low or the latkes begin to brown unevenly, add additional vegetable oil to the skillet, giving it time to heat up before adding more batter.
  • Serve with sour cream, if desired, or applesauce, or just an anxious fork.

Apple-ginger-bread with nutmeg “hard” sauce for #Twelve Loaves October

Food Blog October 2014-0722As soon as I saw that the October assignment for Twelve Loaves was apples, I thought of cinnamon. But then my contrary side took over. Apples and cinnamon is such a natural pairing, it’s practically expected. Why not give someone else a chance? Why not ginger? The searing spiciness of ginger against the cool sweetness of apples sounded like a worthy combination, and I was off and running with not just an answer to the Twelve Loaves assignment, but for my long postponed sauce project as well.

Food Blog October 2014-0735My mom has, on and off since I was little, made a holiday dessert of gingerbread and a warm, well-spiced, rum-spiked sauce. The gingerbread is a homely 9×9 layer, cut into unremarkable uniform squares. The sauce, almost still bubbling, gets spooned over the top, and a swirl of whipped cream inevitably slides right off the square of cake onto the plate beside it, already losing its fluff from the heat of the sauce. I love it.

Food Blog October 2014-0702But like so many desserts, Mom’s gingerbread with nutmeg sauce belongs to the winter. We only ever have it around Christmas and New Year’s. There’s something about its flavors that requires chill in the air. Contrary once again, I decided to see what could be done about that.

Food Blog October 2014-0705Food Blog October 2014-0706We call it a bread, but gingerbread is truly a dark, moist cake. It’s redolent with spices and sticky-sweet from large doses of molasses. Its crumbs cling wetly together and, though not particularly dense, it feels rich and heavy.

Food Blog October 2014-0700I poked around and shifted things a bit, landing on a slight adaptation of Laurie Colwin’s gingerbread recipe in her lovely little book Home Cooking. First of all, if I was going to pass this off as a bread, it needed to be in a loaf pan. This is suitable for dessert, of course, but it should also be acceptable as an afternoon snack. For freshness (and to meet the terms of the challenge, of course), I added the diced chunks of two apples. Two eggs and some buttermilk lighten things up. And finally, because I can’t leave well enough alone, to the already tremendous tablespoon of ground ginger I was prepared to include, I insisted on a palmful of finely chopped crystallized ginger as well.

Food Blog October 2014-0712Food Blog October 2014-0714Food Blog October 2014-0715Now, this bread on its own is a marvelous thing. The apples and the ginger are good playmates, and the spiciness of the bread elicits a harvest feel. With a cup of tea or a mug of apple cider, this bread is perfect.

Food Blog October 2014-0732But sometimes you want more than perfect. Enter Nutmeg Sauce: a silky, buttery, creamy spill dotted with grains of freshly grated nutmeg and discolored in the most wonderful way by a generous dose of dark rum. When I first nabbed this recipe from my mom, I thought this was another classic. Due to its inclusion of alcohol, I’d always thought it was a “hard sauce.” This name, however, comes not from the inebriating potential of the concoction, but the texture: a hard sauce is, well, hard. It’s a solid, buttery spread intended to be served in a cold, spoonable dollop. Nutmeg sauce, on the other hand, is served hot (it’s good cold as well, though it does get a bit clumpy). It is thickened to a pourable velvet with cornstarch, and it is the ideal addition to an already-perfect slice of gingerbread.

Food Blog October 2014-0734Food Blog October 2014-0740Here, though I was determined to serve them together, I must admit: the bread was good. The sauce was good. Together, they were friendly but not in love (still, I wouldn’t say no to yet another generously garnished slice). But I think I know how they could become so. Despite my most contrary, resistant feelings, I think replacing the nutmeg in the sauce with cinnamon, for the sake of the apples, would be the perfect pairing. Sometimes you just shouldn’t fight the classics.

Food Blog October 2014-0736

Apple-ginger-bread
Adapted from Laurie Colwin
Makes one 9×5 inch loaf
1 ½ cups flour
½ teaspoon salt
½ teaspoon baking soda
1 tablespoon ground ginger
1 teaspoon ground cinnamon
¼ teaspoon ground nutmeg
¼ teaspoon ground cloves
½ cup (8 tablespoons or 1 stick) unsalted butter, at room temperature
½ cup brown sugar
2 eggs
2 teaspoons vanilla
scant ½ cup molasses
½ cup buttermilk
2 sweet (rather than tart) apples, peeled, quartered, cored, and diced
2 tablespoons finely minced crystallized or candied ginger


  • Preheat the oven to 325F and lightly grease a 9×5 inch loaf pan.
  • In a medium bowl, whisk together the flour, the salt, and the ground spices.
  • In a large bowl (I used the bowl of my stand mixer), cream together the butter and sugar on medium speed until a light, fluffy mixture forms. Add the eggs, one at a time, mixing to combine after each. Add the vanilla and the molasses and mix well, scraping down the sides and bottom of the bowl to ensure complete integration.
  • Add about ⅓ of the flour mixture and beat to combine, then add half the buttermilk. Repeat with another ⅓ of the flour mixture, then the other half of the buttermilk, and finally the last ⅓ of the flour mixture, mixing until the batter is homogenous each time.
  • Finally, add the apples and the minced crystallized ginger and mix on low speed until just incorporated. Scrape and pour the mixture into the prepared loaf pan, and bake at 325 until a toothpick or cake tester inserted through the center emerges with only one or two damp crumbs; 70-80 minutes.
  • For the sake of structural integrity, let cool in the loaf pan for at least 30 minutes, then transfer to a wire rack and cool completely. Serve with or without nutmeg sauce.


Nutmeg “hard” sauce
Makes about 1 cup
½ cup sugar
1 tablespoon cornstarch
½ teaspoon freshly grated nutmeg (or try it with cinnamon to marry with the apples, and tell me all about it)
¼ cup butter
2 tablespoons dark rum (or 2 teaspoons vanilla)
1 cup whole milk


  • Pour the sugar, cornstarch, and nutmeg into a small pan. Set the pan over medium heat, and with a whisk, stir in the milk and the butter.
  • Cook over medium, whisking slowly but consistently, until a sluggish boil is reached. Continue whisking for another 3-4 minutes, or until the sauce thickens slightly to a texture like barely melted ice cream.
  • Remove from heat and add rum (or vanilla); serve hot.

Bean and cheese stuffed poblanos and “stuck pot” red rice

Food Blog October 2014-0674I must have been this busy last year. I just don’t remember. When I get to work, I sit down at a desk on which the stacks of papers have been rearranged so many times they might as well be dancing. When I get home, I sit down at a table slowly succumbing to a pile of opened and unopened mail, notes and lesson plans, and yes, more papers. I am freest when standing, and when I am standing I am either stalking the classroom (a practice that, though necessary, regrettably and inevitably produces yet MORE papers), walking my sweet dog-daughter, or leaning over the stove to smell or to stir or to taste.

Food Blog October 2014-0645 Food Blog October 2014-0651 Food Blog October 2014-0652 It’s mid-October. It is at once much later in the year, and much earlier, than I’d hoped it would be. Recently my parents phoned to confirm a flight time for Thanksgiving; could N. or I pick them up from the airport if they arrived at x time? My brain flew ahead, thinking of food, thinking of games, thinking of the family closeness of the winter holidays and longing, longing, for that to be now, now, right-now-thank-you-very-much. But at the same time, there are so many things I wanted to accomplish, as always, that remain undone.

Food Blog October 2014-0648

Food Blog October 2014-0653All I can do is what I have. And what I have for you this week is, as promised, a pair of dishes that fit together so well I can’t, in retrospect, imagine presenting them here separately.

Food Blog October 2014-0655These dishes, a bean and cheese stuffed poblano and a take on the sort of rice you find shaped in a mound or a scoop on your enchilada plate at a certain type of Mexican restaurant, came into being for me during one of our dinners this past summer with our closest graduate school colleagues. Dinner was made by T., previously featured here as a salt expert, and she presented us a casserole dish approximately the temperature of hot magma, laden with fragrant peppers piled with beans and cheese. Beside them, she wedged a heavy dutch oven filled to the brim with “red rice,” a medley of tomato-laced long-grain rice shot through with aromatics and spice. It was one of those dinners where everyone ate without speaking.

Food Blog October 2014-0657I had to have it again, and I knew it would take some tinkering. T.’s rice was fluffy and almost dry, whereas recipes I’d tried for this style of rice produced something wet and floppy – a Mexican risotto, if we’re trying for politeness – and that wasn’t my aim. I wanted something toastier, more like a pilaf. Inspiration and guidance came, as it so often does, from Deb at Smitten Kitchen, in a simple, hearty little feast she calls “Stuck Pot Rice and Lentils.” Inspired by Middle Eastern rice dishes that praise the tahdig, a crispy layer on the bottom of the pot, this rice gets parboiled vigorously, then mixed with other ingredients and cooked slowly, with very little additional liquid, until it adheres into a massive round cake you can, with some care and bravery, flip out onto a plate in a large, crunchy-topped wheel.

Food Blog October 2014-0673Food Blog October 2014-0679Are you hungry yet? There’s more. The peppers, which get roasted over a gas flame until their skins split and peel away and their flesh hangs like wet velvet (you could likely also do this in the oven at high heat or under the broiler, but I haven’t tried it – if you do and it works out, leave your procedure in the comments!), get delicately split and seeded, and then gently loaded with a mixture of smashed black beans and cheddar cheese before being baked for a half hour to bring everything together. Upon emergence from the oven, as if all this weren’t enough, they are subjected to a shower of crumbled queso fresco cheese, cubes of avocado, toasted pumpkin seeds and (if you’re the sort who appreciates this sort of thing) a sprinkling of cilantro and a squeeze of lime juice.

Food Blog October 2014-0660This is a play of heat. The pepper is a gamble – some poblanos (they may be labeled pasillas in your grocery store) are moderately spicy, while others are barely hot enough to tickle the back of the throat. The beans keep even the spicier peppers from overwhelming the palate, and if you are steaming, the cool avocados and a big forkful of the starchy rice relieve the sting. If you really want to tease your taste buds, you could add some diced jalapeño to the rice along with the other vegetables. I resisted, since the poblanos we used were aggressive enough.

Food Blog October 2014-0668This is, I must admit, not a quick weeknight dinner. The peppers must be addressed in several stages, the beans are seasoned and cooked separately, and the rice collectively takes the better part of an hour to complete. But it’s worth it, especially as temperatures cool. At this point in the season, I’d rather be warmed from within by a well-seasoned pepper than I would by the relentless sun (did you hear that, Southern California?!). It’s a warmth that almost, almost, chases away the busyness.

Food Blog October 2014-0667*** I’ve presented these recipes with the peppers first, since they require a bit more advanced planning. But I’ll inject spots in the procedure for each where you can switch between dishes to get both on the table at roughly the same time.

Food Blog October 2014-0676

Bean and Cheese Stuffed Poblanos
serves 6
6 large, shiny, firm-fleshed poblano peppers (they may be called “pasilla” peppers at your market)
2 cans (14 ounces each) black beans, one drained, one with liquid reserved
8 ounces cheddar cheese, as sharp as you like it
½ a red onion, diced
4 cloves garlic, finely minced
1 teaspoon cumin
(you may find you want salt for this, you may not. It will depend on your taste and how salty your black beans are. Taste first, add second)
¼ cup crumbled queso fresco
¼ cup toasted pumpkin seeds
1 whole avocado, cut into small chunks
2 tablespoons cilantro
squeeze of lime juice

  • If you have a gas stove, turn the burners on to medium-high heat and set the whole poblanos over the flame, charring them on all sides. Turn as needed until the skins are uniformly black and crackly and the flesh feels soft; for me this took 10-15 minutes. As they finish roasting, pop them into a large bowl and cover tightly with plastic wrap. Leave them to steam (this helps the skins peel off) until they are just warm to the touch (I, um, forgot about mine while I did some other chores; they were quite certainly ready half an hour later…).
  • If you don’t have a gas stove, I suggest using your broiler. Since I haven’t tried this I can’t give indication of times, but put them close to the heat, watch them carefully and turn as needed.
  • When the peppers are cool, use your fingers, a paper towel, or the edge of a knife blade to scrape and peel the skins off. A few black specks here and there is okay, but the skins are a bit bitter, so the more you remove, the better.
  • (While you wait for the peppers to cool, you can turn your attention to prepping ingredients for the rice)
  • As you relieve each pepper of its skin, carefully cut a slit through just one side of the pepper and excavate the seeds and ribs inside. You want an empty, in-tact pouch, and this takes some delicacy. The flesh is quite tender at this point. Wedge the skinless, empty peppers into a greased 9×13 inch baking dish.
  • Saute the onions and garlic with a pinch of salt and pepper in 1 tablespoon of olive oil over medium heat until they are starting to shade gold, but are not burned. For me, this took 5-10 minutes with frequent agitating.
  • When the aromatics are toasty and golden, add the beans – one can that has been drained, one complete with the liquid. Add the cumin and stir to combine. Then, use a potato masher to smash about ¾ of the beans into a thick paste. A few whole or half stragglers are okay – they break up the texture nicely. Cook over medium heat until most of the liquid has evaporated: 15-20 minutes.
  • This is a good moment to preheat your oven to 350F.
  • (While the beans cook, you can shift your focus to the rice for a bit. Just don’t forget to give the beans an occasional stir to ensure they are not cementing themselves to the bottom of the pan.)
  • When the liquid in the beans has mostly disappeared, turn off the heat and add the 8 ounces of shredded cheddar cheese. Stir to combine.
  • To assemble, load up each empty pepper pouch with about ½ cup of the bean and cheese mixture. This takes a bit of finagling – get the mixture in there, but don’t tear up the peppers too much. Use the sides of the neighboring peppers to help everyone stand up straight and hold in their own filling.
  • If you wish, you may sprinkle on the ¼ cup queso fresco at this point. I found I preferred it as a post-baking addition, but it’s also nice baked on.
  • Bake in your preheated 350F oven for 25-30 minutes.
  • (While the peppers bake, carry on with your rice – if you are setting it over a low flame as you put the peppers in the oven, both will be ready at the same time)
  • When the peppers emerge from the oven, set them aside for 5 minutes. Then, serve, sprinkling as desired with queso fresco, avocado chunks, toasted pumpkin seeds, and cilantro. At the last possible moment, squeeze a bit of lime juice over the top.
Stuck-pot red rice
Serves 6-8
1-½ cups long grain white rice
¼ cup olive oil, divided
½ a large onion, diced (the other half of the one you used for the peppers is convenient)
4 cloves garlic, finely minced
part or all of 1 jalapeno, ribs and seeds removed, finely diced (optional)
½ cup fresh or defrosted frozen corn
juice of 1 lime
14.5 ounce can diced tomatoes, drained, juice reserved
Water as needed (see procedure)
2 teaspoons cumin
1 teaspoon coriander
1 teaspoon salt
fresh cilantro to serve, if desired
queso fresco to serve, if desired
  • Bring a large pot of salted water to a rolling boil. Add the rice all at once, clamp on the lid, and cook undisturbed for 5 minutes. Drain and set rice aside in a large bowl.
  • In the same large pot, heat 2 tablespoons of the olive oil over medium heat. When it is shimmering, add the onion, garlic, corn, and jalapeno, if using. Stir in a pinch of salt, then put the lid back on and cook 10-15 minutes, or until the vegetables are browning nicely. Be sure your corn is defrosted before adding, or it will take longer to cook off the water it emits.
  • While vegetables cook, drain the canned tomatoes, reserving their juice. Add enough water to the tomato juice to reach ⅓ cup, then add an additional 2 tablespoons.
  • When the vegetables are nicely browned, add them to the rice and mix well to distribute evenly. Add the canned tomatoes, the cumin and coriander, the salt, the lime juice, and the mixture of tomato juice and water as well, stirring to combine.
  • (The mixture can sit for a bit at this point if you need to go back and pay attention to your beans and peppers)
  • In the same pot you used to boil the rice and cook the vegetables, heat the remaining 2 tablespoons olive oil over medium heat until shimmering. Quickly and carefully, add all of the rice mixture and use a spatula to smooth it down into an even layer.
  • Now, being sure to keep edges away from the burner, place a clean kitchen towel over the open top of the pot, clamp on the lid, and securely wrap the edges of the towel around the handle of the pot lid. This creates a tighter seal and prevents extra water from dripping from the lid back onto the rice.
  • Once your towel and lid are securely situated, lower the heat to medium-low or low and cook, undisturbed, for 30 minutes. After about fifteen minutes you should start to smell a lovely toasty rice-y smell. If it smells closer to burning, turn the heat down a bit but don’t remove the pot from the heat. Check Deb’s post (linked above) for more on the procedure, if you like.
  • When 30 minutes has passed, turn the heat off and let the pot sit for 5 minutes to allow the rice to firm up. Then, using pot holders or a thick towel, carefully position a large plate or round platter over the top of the pot and, over a counter, invert the pot onto the plate and set it down. The rice should plop down onto the plate or platter; if you’re lucky, it will do so in a single round wheel.
  • Scatter it with cilantro and crumbled queso fresco, if desired, and serve.
  • If you don’t want all that fuss, just scoop the rice into a bowl, scatter on the optional garnishes, and be done with it.