Reflections: Jubilee Red Beans and Rice (no recipe), and Bread in a Pandemic

Jubilee Red Beans and Rice:

I don’t have any bread to share with you today, based in part upon some complications I’ve realized my “Breads of the World” project poses. More on that below if you’re interested, but first, instead of a typical recipe post I thought I’d share a few images and considerations about the meal we ate on Saturday. In an effort to diversify my cookbook shelves, one of my recent acquisitions is the beautiful volume you see above: Jubilee: Two Centuries of African American Cooking by Toni Tipton-Martin. As numerous Black cooks and food historians have in recent years, Tipton-Martin wants to acknowledge the tremendous role of Black cooks in “soul food” and “Southern food.” But she also wants to push beyond that – to restrict African American food to stereotypes is to perpetuate caricatures and poor representation. Tipton-Martin’s recipes come with history lessons – not all are extensive, but she recognizes and shares the background and development of the dishes she offers, sometimes with original recipes from centuries-old collections, and then her updated or adapted version.

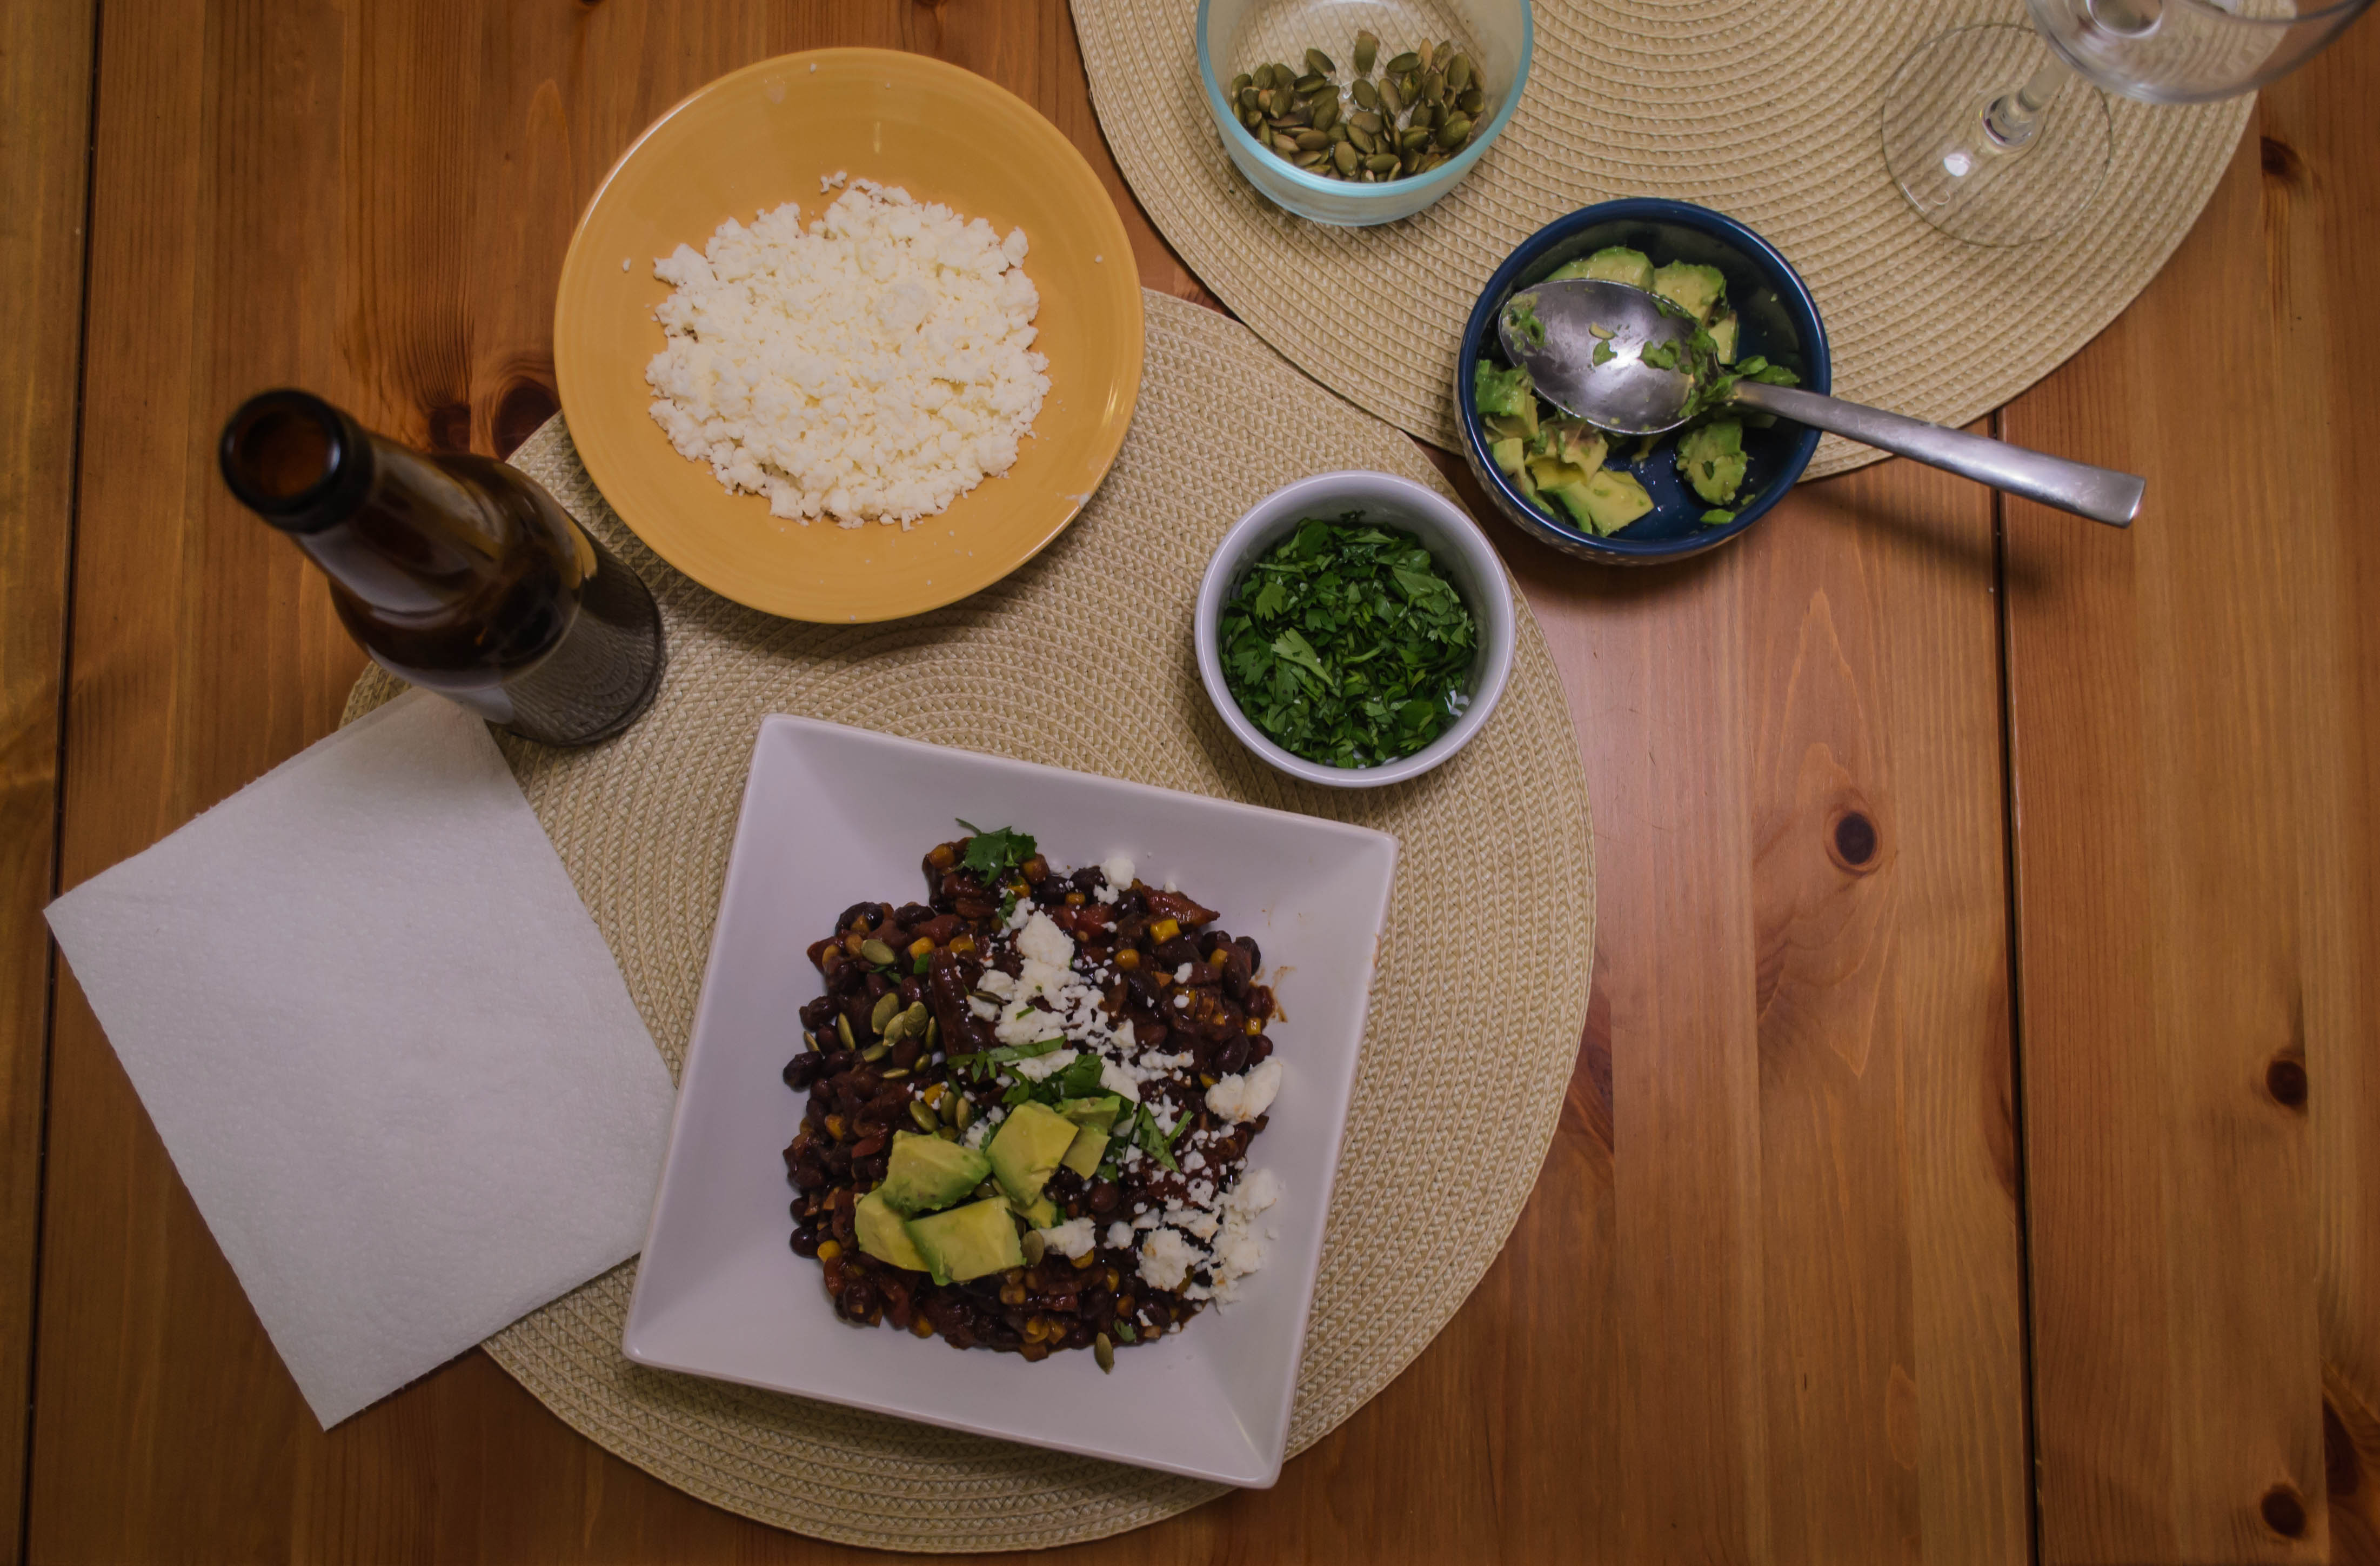
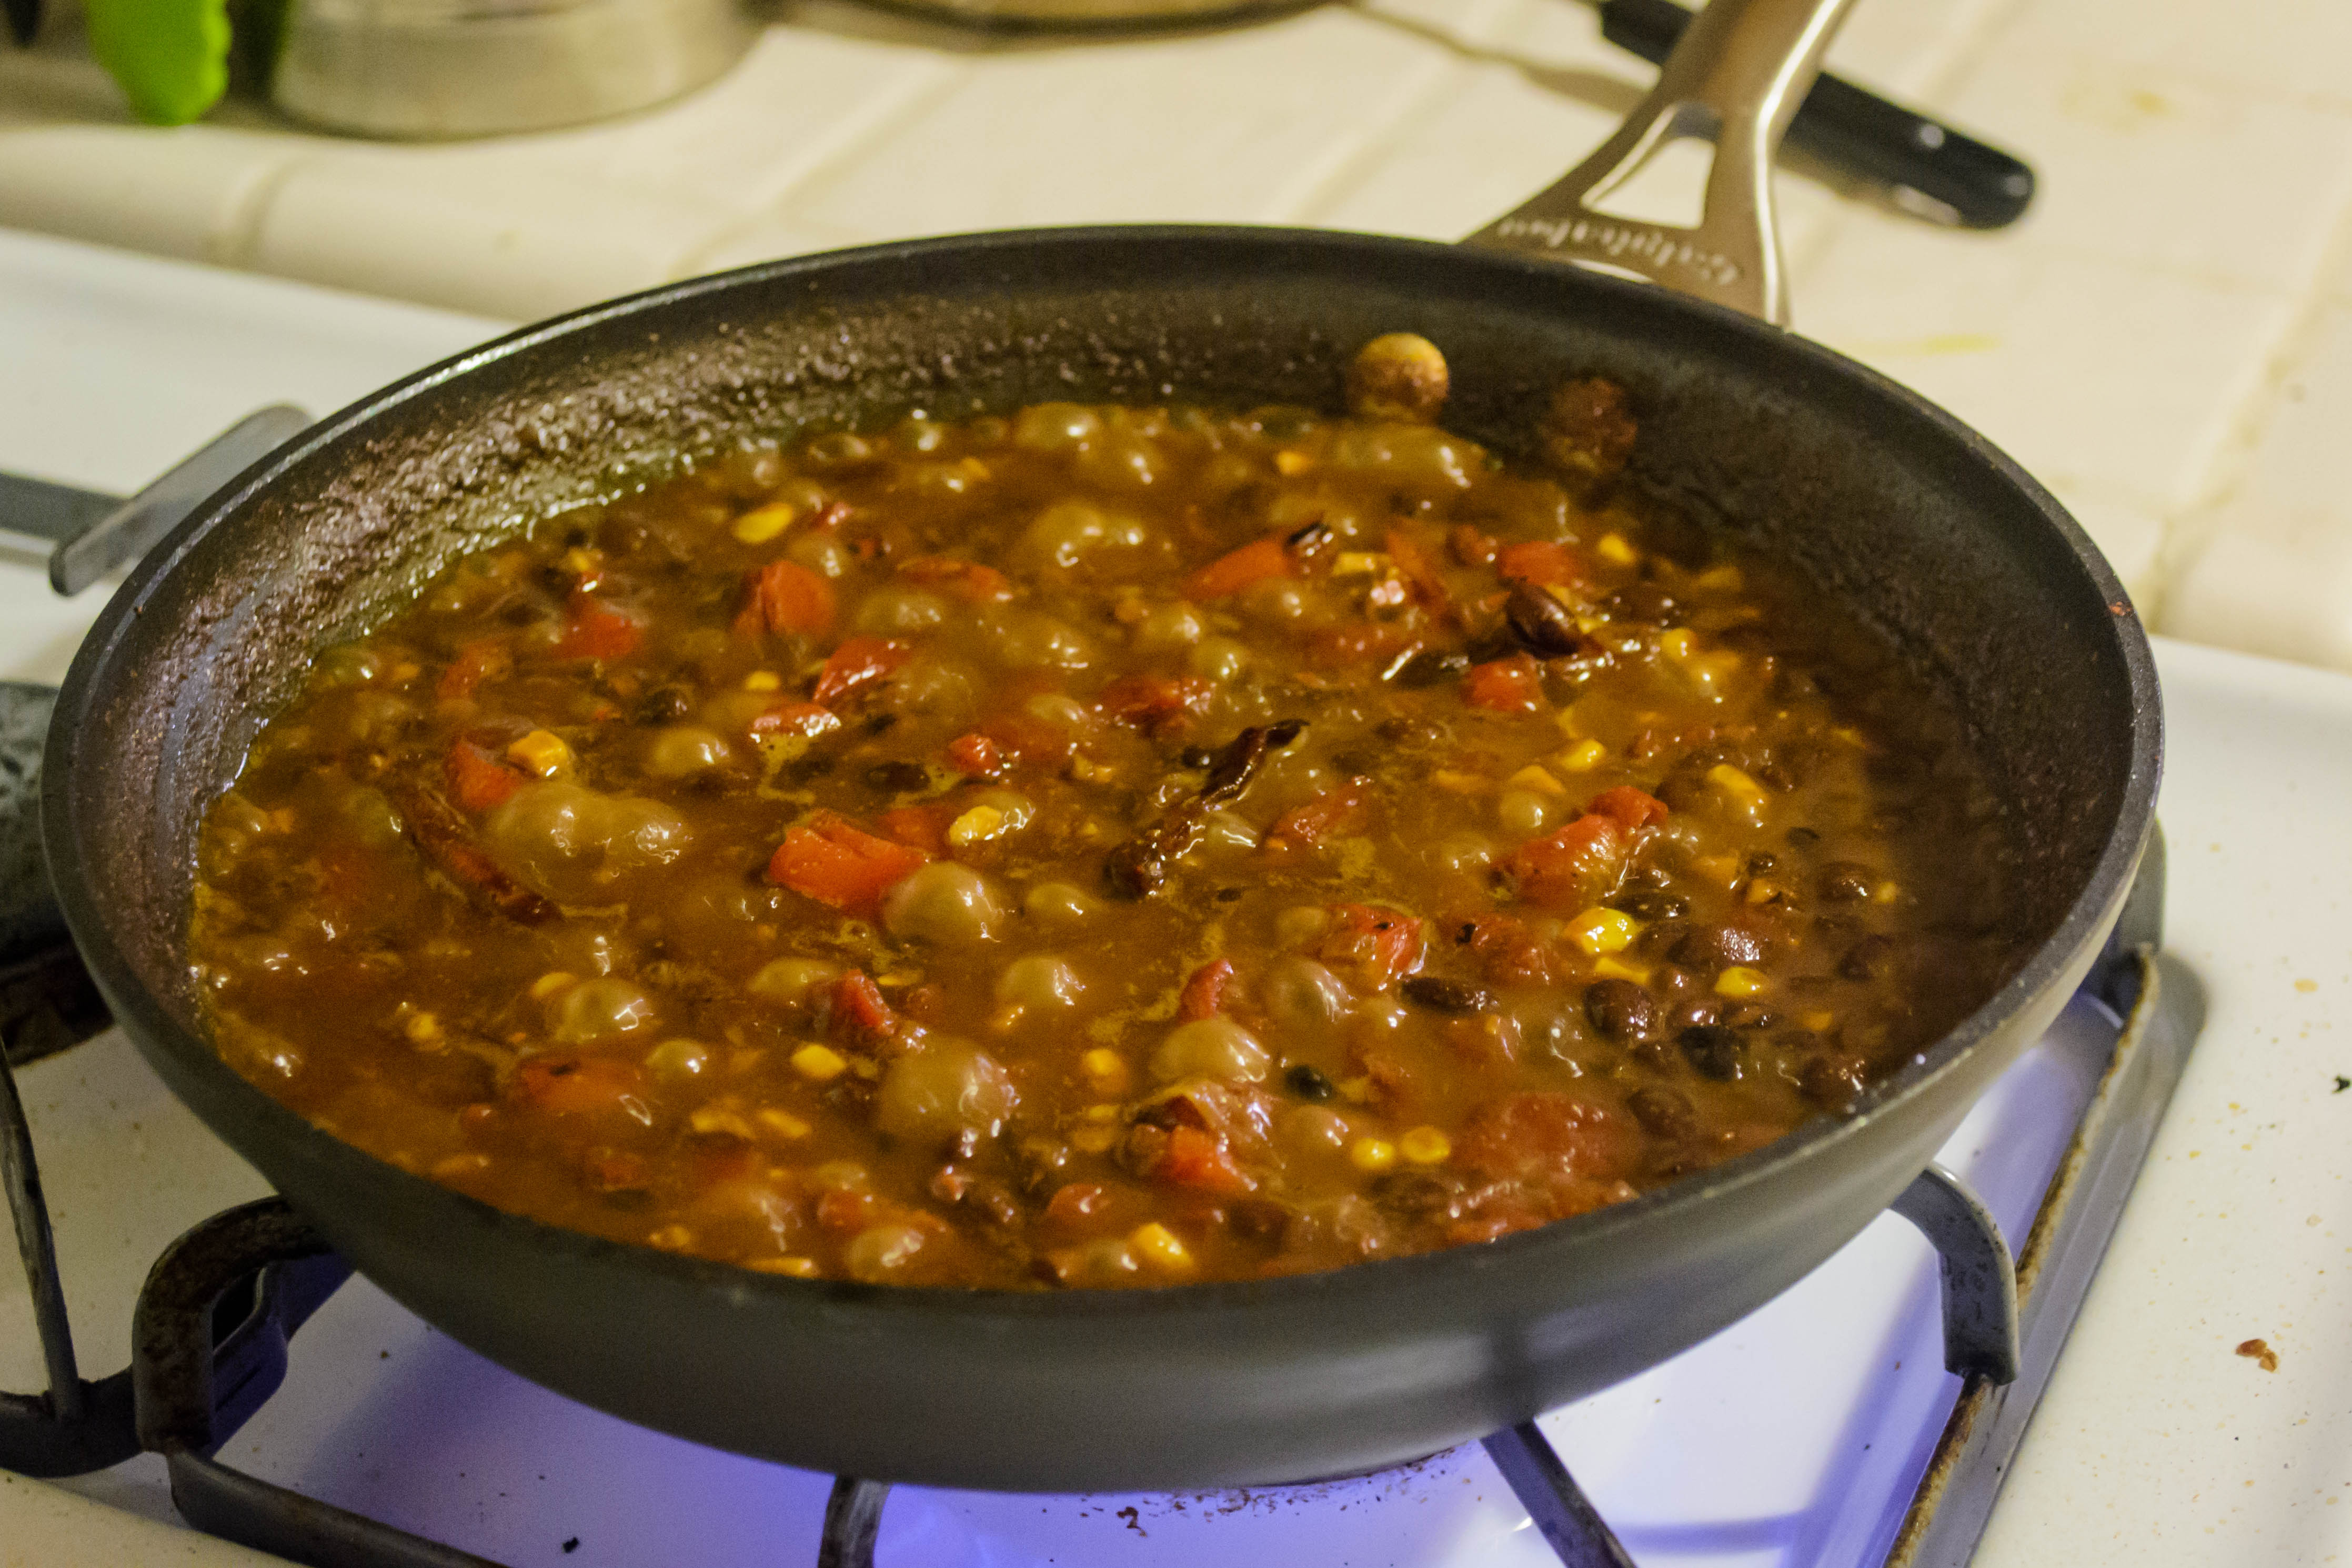
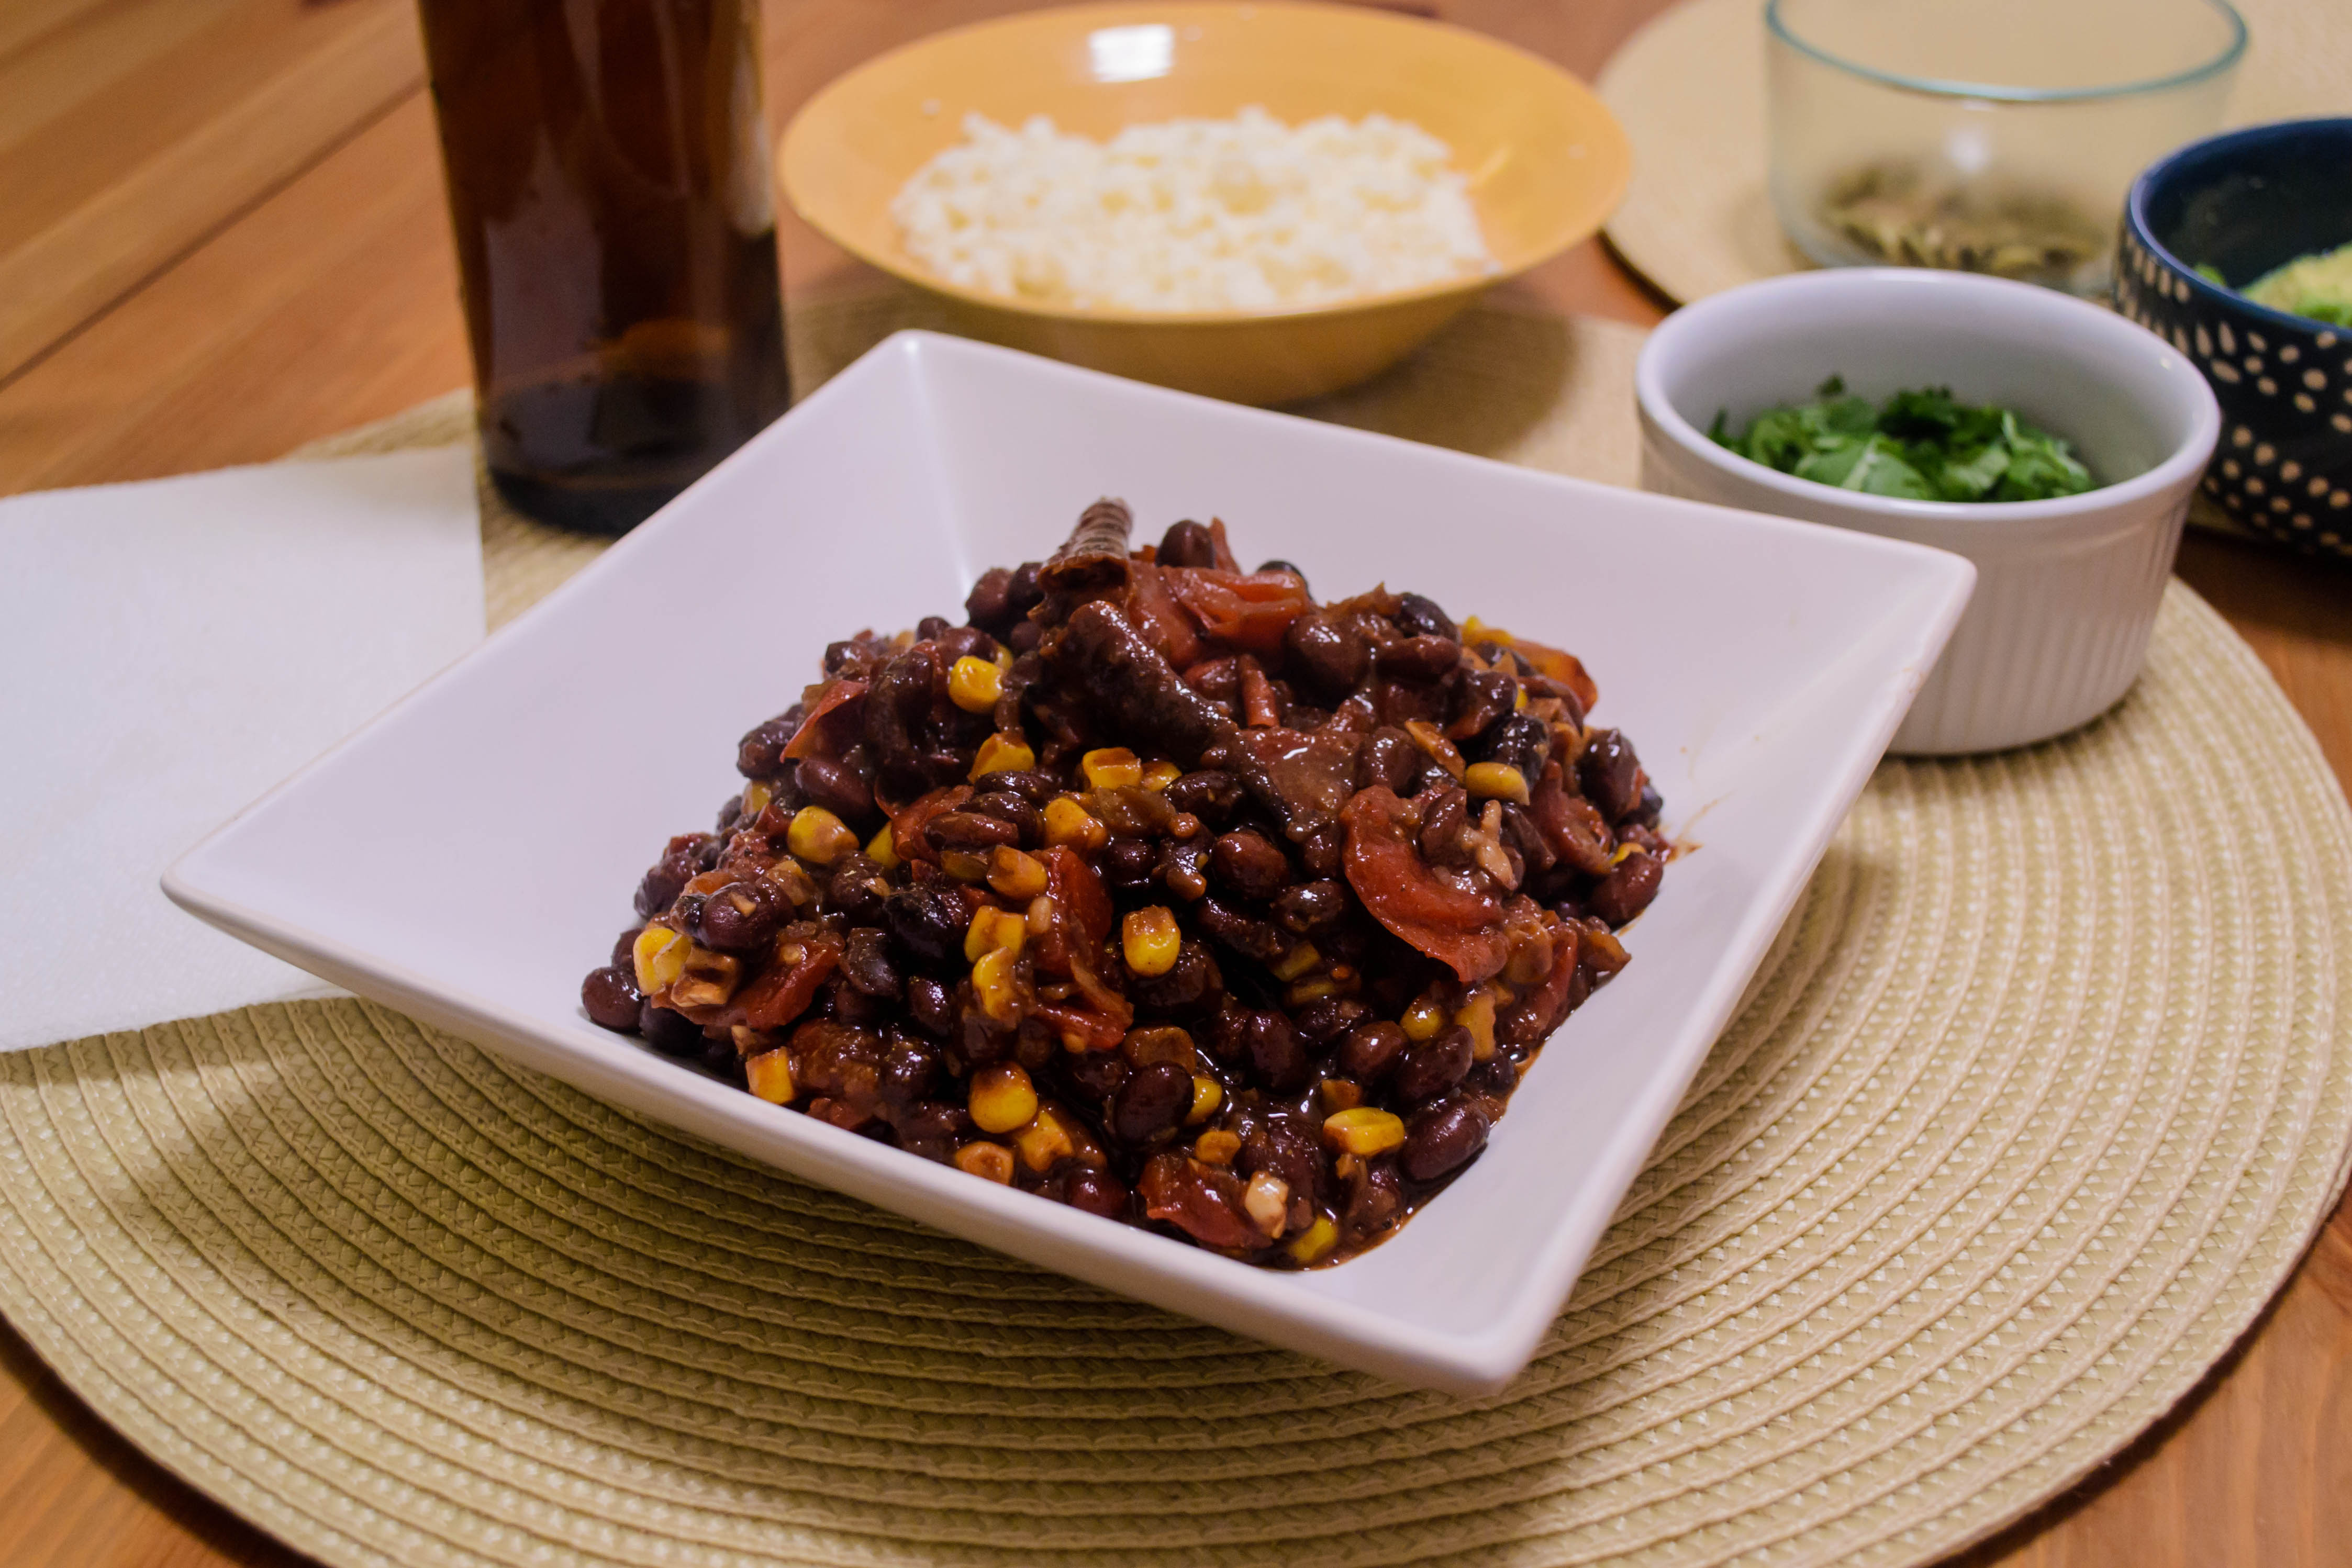
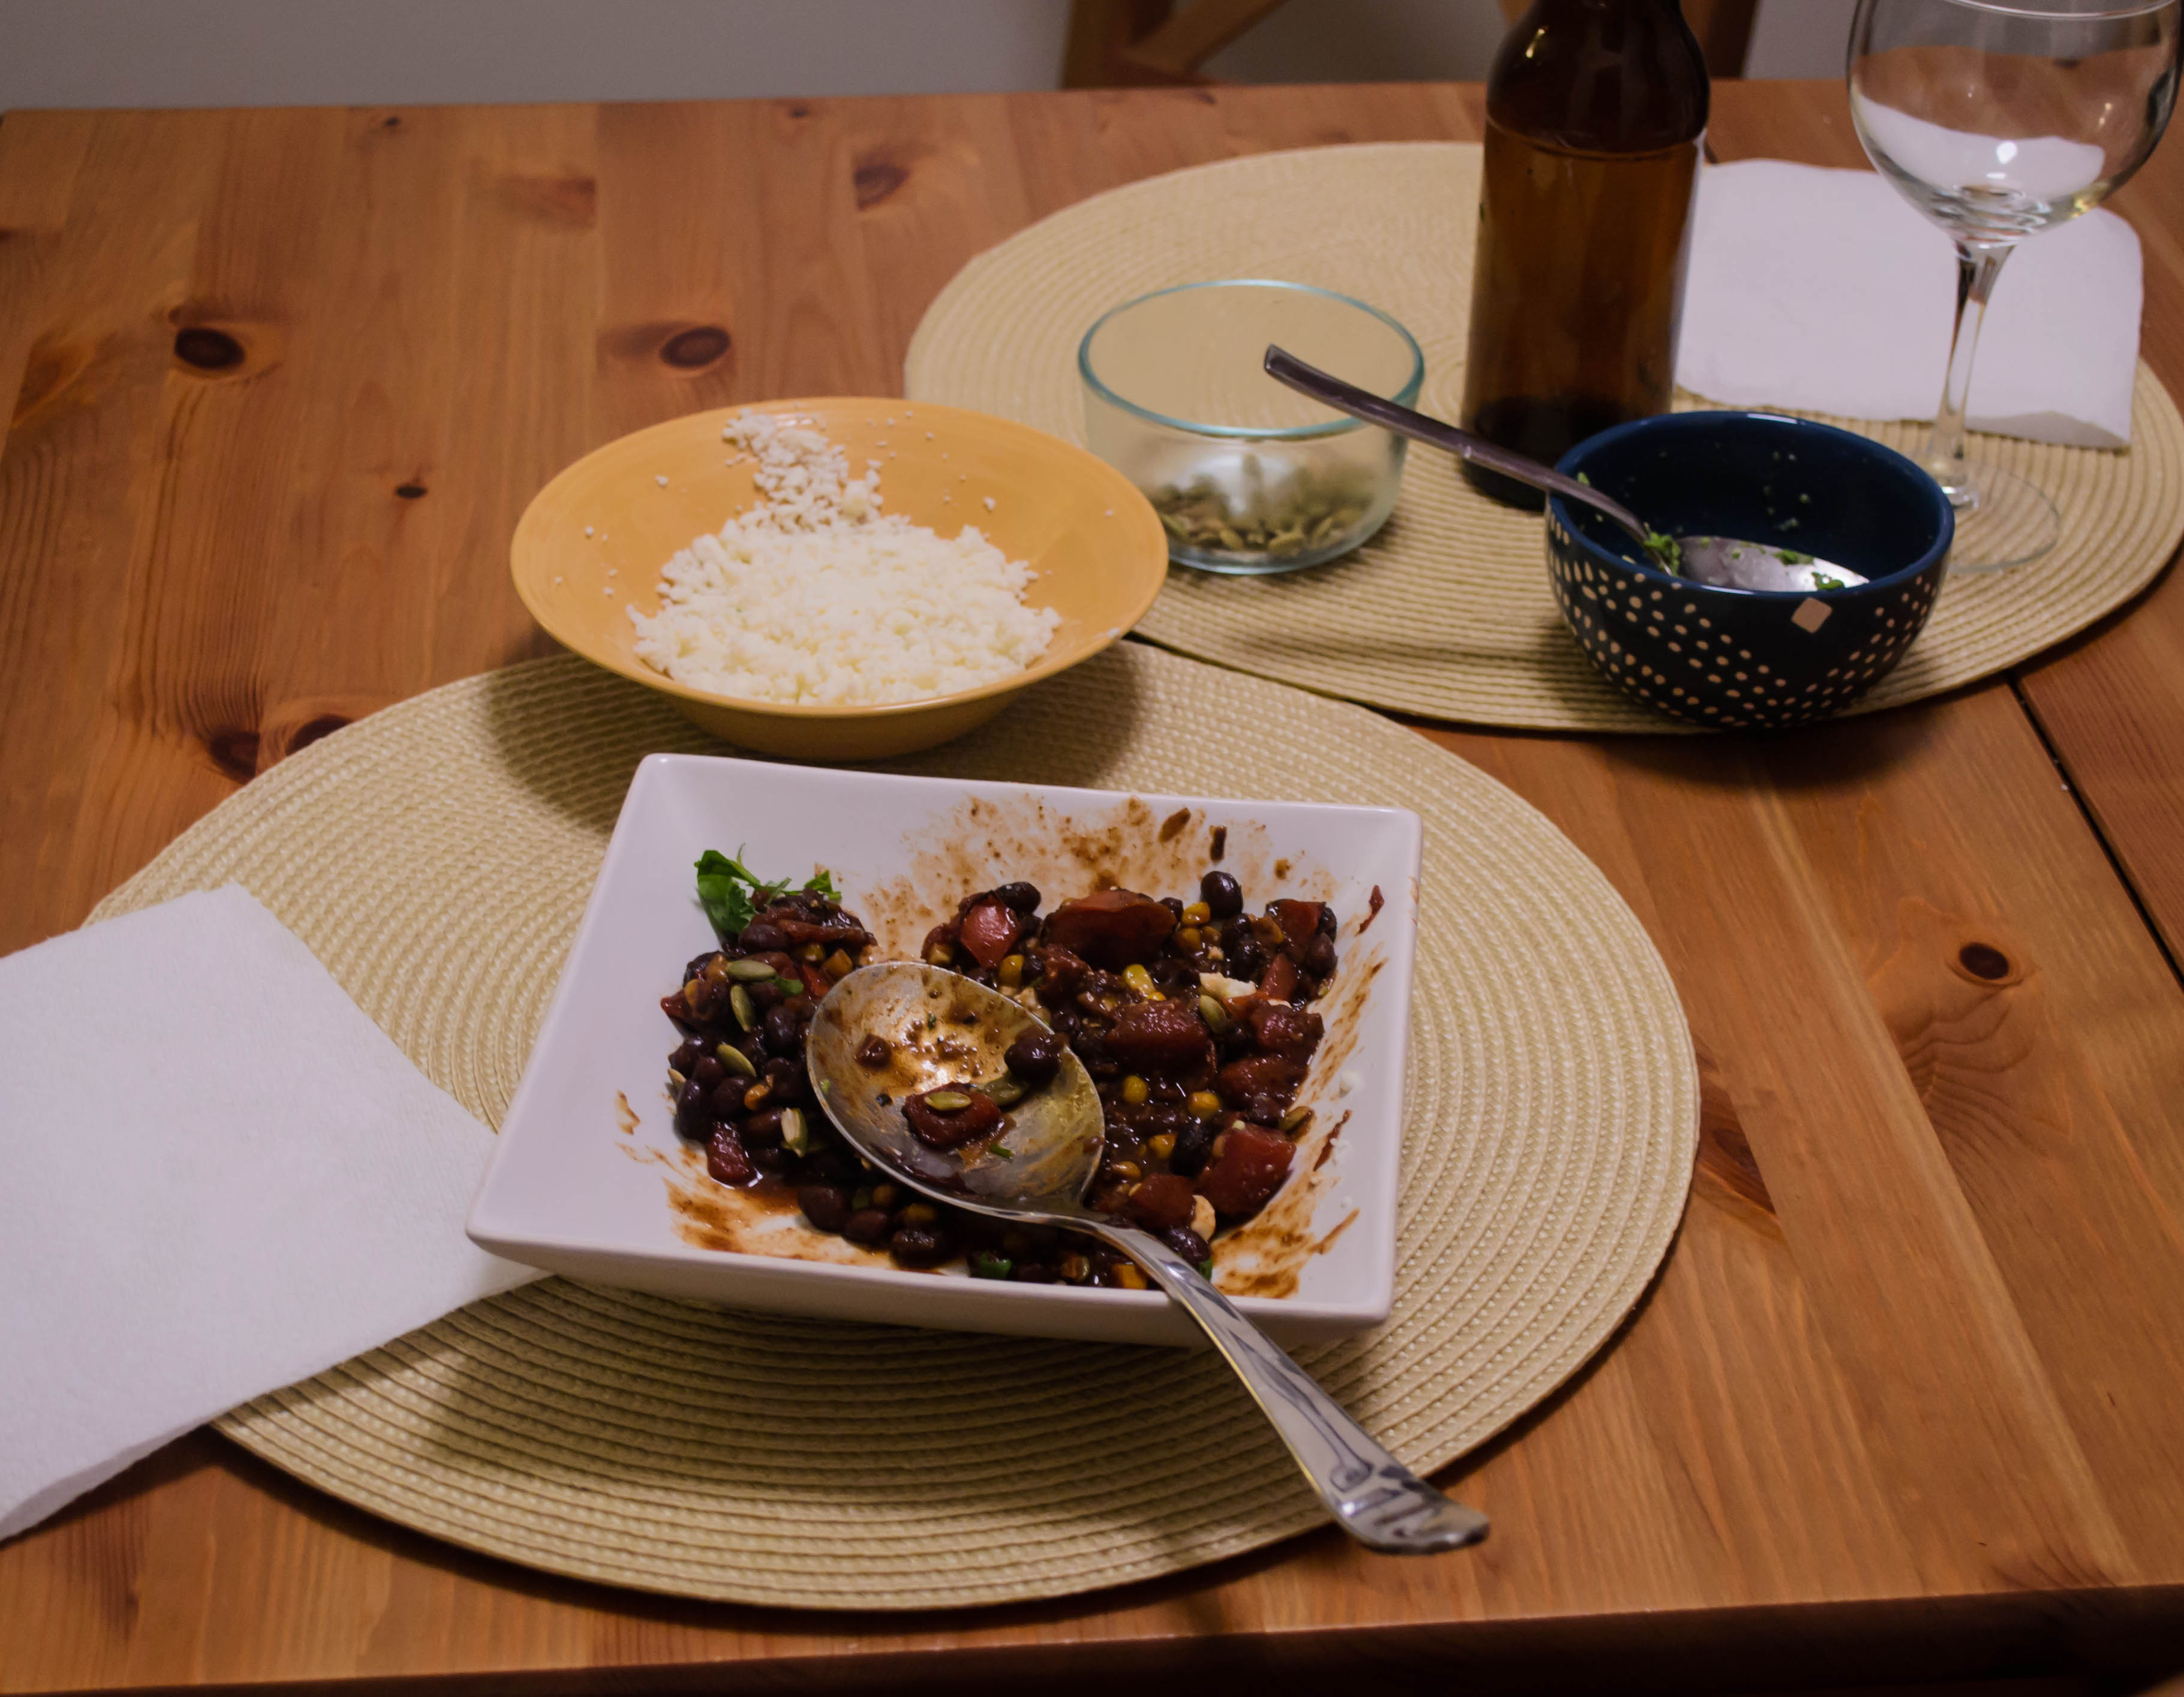
Although the book certainly pushes beyond the borders of “The South,” on a cold, rainy day in Los Angeles I wanted something deep and warm and spicy I could spend the afternoon checking on, so I went with red beans and rice. Tipton-Martin’s recipe headnote is about Louis Armstrong and his devotion to the dish despite changing circumstances, a consideration of how traditions are sustained even as they undergo adaptation. Unless I’m baking, these days I tend to see recipes as guidelines rather than rules, but this one I followed to the letter, and it was basically perfect. A mound of hot, buttered rice underneath and a final sprinkle of cayenne pepper on top, and we were the happiest of quarantine campers.

Bread in a Pandemic:

Speaking of quarantine, while I continue to be enthusiastic about my “Breads of the World” project, I’m starting to realize it carries a few distinct challenges, emphasized thanks to pandemic conditions. First and perhaps most obvious: N. and I are going to eat a lot of bread this year. That doesn’t sound like a big or particularly intelligent revelation, I know, but it is a blessing-curse I hadn’t quite realized the magnitude of when I started collecting ideas. As my friend D. commented the other day, when you are a happy household of two working from home, baked goods weigh more heavily (all puns intended) in your day-to-day. Were this a typical year, I would just bring my bread of the moment to work and leave it in the department mail-room. It would be gone by mid-afternoon, and I’d be headed home ready to think through the next one. Now, although I certainly could (and probably should) engage in some bread-drops for local friends (what would you call a drive-by bread drop? A roll-out? A loafing?), the reality of making a loaf or a batch of buns is that most of the time N. and I will wind up eating them all. “We’re going to be having a lot of bread and salad this year,” I told him yesterday. He was delighted, but I can imagine weekly dosings might become less appealing than the panem et circensus alternative.

Second, there are a lot of breads to choose from! Again, not exactly an epiphany, but I could easily bake one or even two a week and still have pages of recipes to sift through in December. I don’t agree with all of their choices, but the list of breads on Wikipedia is both an entertaining read-through and a fair example of what I mean. I’m not obsessed with authenticity (and I don’t want every selection to turn into the intensive research I did for the naan-e-komaj I made earlier this month), but because I do want this project to be representative in both its scope and its recipes, I do want to look into the breads I’ve chosen at least a little bit, and if possible, to find a recipe or an overview from someone of or familiar with the culture or region that produced the bread. That takes time. Especially when the semester begins, my imaginary second career as a culinary historian will resume its usual status as unpaid-side-hustle, which means less time for exploring and writing about the breads I decide to recreate.

Third, and related to the point about being representative, breads from areas that are typically less well represented also often use less typical, and thus less accessible, flours. Cassava, teff, and millet flour are certainly not impossible to locate, especially with the whole internet at my literal fingertips, but they aren’t on the shelves at my usual grocery store. And since I’m not shopping as often as I would be under non-COVID conditions, I can’t just decide on a whim to make, say, pao de queijo one afternoon unless I already have tapioca flour on hand. That’s not a complaint, per se, but it is a realization that I’m going to have to plan around. You know, like everything else these days!

Until next time, then…

In praise of beans?

Last month I read Meghan McCaron’s article “Cool Beans,” about this most humble of ingredients and how it has slid comfortingly into our food scene, and was a mixture of transfixed and scornful. On one hand, there was the image of the author sitting on the floor, being nourished by a simple but enticing dish, so appealing-sounding I was willing to forgive its hipster overtones: “Brothy and luscious in a shallow ceramic bowl, served with oven-fresh focaccia and a zingy glass of natural white wine.” Although the scene takes place in a friend’s apartment, I imagined one of those adobe tile floors that seem to exude warmth and hominess, and maybe there were also small potted olive trees set around, and that’s it, for the rest of the winter I wanted to be in Tuscany eating beans. On the other, there was the cynic in my brain sneering and saying “really? Beans? What’s special about beans?”

McCaron goes on to point out that beans have swum slowly into our consciousness in recent years, but they have never been fully absent: as a species, we have been using them in one form or another for centuries, fresh or dried, as vegetable, as starch, as protein. And now, in the era of heirloom seeds, of the Insta-pot, of ever growing awareness about the environmental costs of meat, beans are… well, cool.

For me, as deeply as I sank into the article’s imagery, beans had never struck me as cool or as particularly delicious. I mean, sure, I love a good dal, and a pot of baked beans threaded with molasses is hard to say no to, and there is something appealing about a creamy cannellini or the perfect hummus, so smooth it feels unreal, like the one at Shawarma King in Kalamazoo, Michigan, that I had back in 2010 or so but still think about… oh. So I did have deep attachment to the unassuming bean after all.

And then I thought of two more bean dishes I’ve eaten. I wouldn’t go so far as to say they were transporting, but they brought me miles closer to McCaron’s assessment. In our first year in Los Angeles, while N. still worked at an independent school, one of the students who attended happened to be the son of a restaurateur with an establishment in Culver City (and grandson of a certain spaceship captain in a galaxy far, far away). For a teacher appreciation event, the restaurant provided takeaway dinners, and N. brought home two. In my memory, he didn’t eat his, but upon delivery then went back out to some other school-related obligation. I stayed home and ate the proffered dinner: fried chicken, which I was tremendously excited about, and a small scoop of what turned out to be black or beluga lentils sitting on some frisee.

Beluga lentils are small, intensely black, and shiny, like little beads or beetles, and they, like French green lentils or lentils de puy, retain some texture when cooked, so they are often used in salad preparations. These were glistening and still just warm, and when I dug in a tentative fork I couldn’t believe how flavorful they were. Nothing I had ever done with beans had been so delicious and so simple. Of course, the only things I’d really ever done with beans, besides grind them into falafel, involved opening and draining a can.

My other mind-expanding bean dish was just last year, during a birthday dinner at local chef David LeFevre’s second Manhattan Beach spot: a little (and I mean little) oyster bar slash seafood restaurant just down the block from his better-known Manhattan Beach Post. Everything we ate I wanted more of, but the surprise star that evening was not the fish; it was the unassuming accompaniment on N’s plate: an almost risotto-textured scoop of corn and white beans advertised on the menu as flageolets, providing a warm base for a nice chunk of roasted halibut. Yeah, the fish was good. But those beans! With that sweet summer corn! There was a meatiness and a creaminess about them, and again, an intensity of flavor I didn’t expect.

I had to have more. As September stretched into October, my own bean harvest – from a prolific set of pole bean vines in my backyard – got out of control. Once standard green bean pods start to bulge from the expanding seeds inside, they just aren’t pleasant blanched or steamed anymore: the seeds are starchy and the pods are fibrous and hard to get through. On the contrary, flageolets are immature shell beans, meaning they haven’t yet matured fully into the bean that will be canned or dried and wind up on shelves as kidney beans, navy beans, and a host of others. It turns out overripe green beans make a suitable substitute for flageolets. I stripped them down, simmered them in broth with thyme and garlic and pepper, which they drank and drank and drank, added corn and a gulp of cream, gleefully measuring nothing. We slurped them down, and though I don’t think they quite qualify as “brothy and luscious,” we had them again only a few weeks later.

So I guess I’m on board for the bean love after all. I haven’t put myself in line for a Rancho Gordo subscription yet, but I will admit to saving some of my pole beans that were just too mature and dried out for my bean and corn recreation in hopes of replanting. And beans are finding their way onto my “want to make” list more and more frequently. In particular, I’m still savoring the leftovers of a lentil and goat cheese dish I made from an old (2005) issue of Bon Appetit. It’s been reproduced here; we had ours with black lentils instead of green, and I wilted the spinach into the whole mess and then served it scooped in big spoonfuls on toasted olive ciabatta. And though I haven’t made it yet, I’m all about adding Alison Roman’s shelf-emptying spicy white bean soup with broccoli rabe to my meal plan.

What is your stance on this staple? Are you aboard the bean boat? Are you a legume lover, no holds barred, or are they more of a labor of love for you, or just plain old labor? Let’s discuss, let’s share knowledge and complaints and, if you like, recipes too. Let’s talk beans.

Perfect Soy and Mustard Green Beans

2016-food-blog-september-0790It is uncommon for me to champion a dish for being quick and easy, as so few of the recipes I create for you are. But every once in a while, particularly at the beginning of a new semester of school as I re-learn how to do my job and how much time it entails, I have to shift my cooking style a bit – multi-part sandwich experiments just don’t fit into my day. Once in a greater while, a dish that results – like this one – is such a stunner that we have it three times in as many weeks and I know I have to share it with you as soon as possible.

2016-food-blog-september-0775This one is everything. I mean, with a claim like “perfect” in the title, it had better be, but trust me. Not only does it take advantage of the late summer green bean harvest, but the ingredient list can almost fit on one hand, and aside from the green beans and citrus (unless you are lucky enough to have a lemon tree nearby), it really is composed of ingredients you probably already have.* Mustard and soy are a dynamite pairing that work well as a marinade for meat too (and tofu and tempeh, for that matter), and the squeeze of lemon right at the end keeps things light despite the short, buttery stir-fry the beans are subjected to.

2016-food-blog-september-0783Okay, so there are two cooking methods here. But honestly, each of them only takes 3 minutes at most, and you can prep the beans while the water to blanch them is heating up. One knife, one cutting board, one skillet, one bowl or pie plate, and one pair of tongs. It’s hard to beat that, especially when the result is a pile of snappy, still-crisp beans speckled with a perfectly savory, tangy, just-salty-enough coating that pairs as well with a roast chicken as it does with a sandwich or a bowl of quinoa.

2016-food-blog-september-0779* this is a television chef claim that bothers me: while I do usually have things like canned tomatoes and a selection of beans in my pantry, sardines in olive oil, bars of white chocolate, and marsala wine are just not “pantry staple items” that I always have on hand to “throw together” a quick meal (though let’s not pair these particular options – this sounds even worse than a bad Chopped basket).

2016-food-blog-september-0787

Perfect Soy and Mustard Green Beans
Serves 4 normal or 2 green bean-obsessed diners
10-15 minutes
Cold water
1 tablespoon salt + more to taste if desired
1 pound green beans, stem ends removed (but leave the little tails on – they look nice)
¼ cup soy sauce (I use low-sodium)
2 tablespoons Dijon or spicy brown mustard
1 tablespoon olive oil
1 tablespoon butter
juice of ½ a lemon (around 2 tablespoons)
black pepper to taste


  • Fill a 12-inch skillet with cold water, add the 1 tablespoon salt, and bring it to a boil over medium-high heat.
  • While the water heats, prep the green beans and whisk the soy sauce and mustard together in a wide, shallow dish – a pie plate works well for this.
  • When the water is boiling, carefully drop in the green beans, stirring to ensure they are all immersed, and cook for about 90 seconds (2 minutes if your green beans are very large).
  • Immediately drain off the water and relocate the beans to the soy and mustard mixture; toss to coat evenly.
  • Place the skillet back over medium-high heat, add the olive oil and the butter, and when the mixture is shimmering, use tongs to add the green beans back into the skillet, shaking them off a bit as you do so to avoid adding excess liquid to the pan.
  • Cook, tossing often, for about 2 minutes, until the beans are well coated with little brown bits. Squeeze in the lemon juice, season with salt and pepper to taste if desired, and cook, tossing frequently, about 1 minute more.
  • Serve immediately.

Save

Save

Beer Braised Beans

Food Blog March 2015-0444There is little glamour in a pot of beans. Beans are humble, simple food. They are inexpensive, they fill you up, and most often they serve as a neutral backdrop for flashier plate-mates: pork, beef, cheese… When it comes to aesthetics, things don’t get much more exciting. Photographing a pot of beans is not particularly rewarding. The overwhelming, well, brownness of the whole deal makes any tremendous infusion of flavors discernible in descriptors only. In short, I suppose, beans are not Pinterest food.

Food Blog March 2015-0435More and more, though, I’m appreciating beans – not as an excuse to shovel away great spoonfuls of bacon and brown sugar (though really, that sounds far from terrible), but for their savory value. Beans are a vehicle for flavor. They are, as a friend once remarked while I was preparing dinner, “Nature’s little sponges.” Aside from the fact, as I pointed out, that sponges are in fact Nature’s little sponges, this tends to be quite true. Beans learn by osmosis.

Food Blog March 2015-0436Typically I take advantage of this tendency to suck up flavors in Latin American directions: cumin, garlic, various chiles. A few months ago, though, needing another few minutes before dinner and not wanting the beans that had been simmering away on the stove for who-know-how-long to dry up, I cast about the kitchen and emptied a bottle of beer into the pot. I’m not going to say angels sang or the clouds lifted (because let’s be honest; this weekend’s welcome rain aside, this is Southern California. What clouds?), but the revelation was substantial in its own way. Beans already have an earthiness that separates them from the rest of the fruit and vegetable kingdom. Theirs is not the leafy greenness or plump juice of their compatriots, but a creamy, grounded neutrality. Brown. Earth. How odd that they grow on bushes and vines rather than beneath the surface, like potatoes.

Food Blog March 2015-0440Beer, I found, enhances this earthiness perfectly, especially a dark beer like a porter or a stout. The bitterness of an ale or even a lager is tempered in a darker brew, giving way to toasted, bready flavors that mingle well with the earthy pleasantness of beans. Since this discovery, we’ve charged through a number of bean-and-beer concoctions, including a chile that also contained hunks of slow cooked bison stew meat and a barrage of spices – a triumph. But the one I want to come back to for you is the original, simple combination. Beer and beans. A few flavor enhancers by way of garlic, onion, some almost-burned corn kernels, and a scoop of fire-roasted tomatoes, and you’re looking at a side dish that I’d push away the mains for.

Food Blog March 2015-0439If you like a good garnish, I recommend the standards: crumbled queso fresco, cilantro, toasted pumpkin seeds, generous chunks of avocado, perhaps a dollop of sour cream or a few snippings of chives. But really, these beans don’t require much beyond a bowl, a spoon, and a belly in need of warming.
Food Blog March 2015-0442Food Blog March 2015-0445

Beer Braised Beans
Serves 2 as a main; 3-4 as a side dish
2 tablespoons olive oil
1 dried chile of your choice (I like ancho chiles for this)
½ cup diced red onion (about ½ a medium onion)
1 teaspoon ground cumin
1 teaspoon ground coriander
2 cloves garlic, minced
½ cup corn kernels (defrosted, if you’re using frozen corn)
14-16 ounce can of black beans
1 cup drained fire-roasted tomatoes, from a 14 ounce can
12 ounces of dark beer like a porter or a stout
salt to taste
garnishes of your choosing: crumbled queso fresco, avocado, cilantro, pumpkin seeds, etc.


  • Heat the olive oil over medium heat, then add the dried chile and the onions and sauté for 1-2 minutes. The chile may sputter a bit, and the onions will start to turn translucent.
  • Stir in the cumin and coriander and continue to cook for another 1-2 minutes, turning the heat down to medium-low if the onions threaten to burn.
  • Add the garlic and corn, turn the heat back up to medium if you previously lowered it, and sauté, stirring occasionally, until the corn picks up some roasty color; about 3-5 minutes.
  • Now pour in the beans, canning liquid and all, along with the tomatoes and the beer. Turn the heat up to medium high, stir to ensure nothing is sticking to the bottom of the pan, and let it bubble away, stirring occasionally, until much of the liquid is absorbed. For me, they reached the consistency I wanted in 20 minutes – not totally dry, but not tremendously soupy either.
  • Taste for salt (canned beans can sometimes be quite salty, and reducing the liquid enhances the sodium content), pick out the dried chile, and serve hot with whatever garnishes you wish.

Roasted Cauliflower and Chick Pea Tacos

Food Blog February 2015-0342I’m sure it won’t surprise you to learn this, but I am one of those people who makes a meal plan. Every week, before we head to the grocery store, I write out a shopping list. I like to know what we’ll be eating most nights ahead of time, to be sure the pantry is adequately stocked, but also to prevent a lot of impulse buys or take-out emergencies (also I just love making lists. You probably aren’t surprised by that either). When I put the meal plan together, I usually ask N. for some input. Sometimes it’s because I need a little inspiration, sometimes it’s because I want to make sure he’s getting a meal or two he’s excited about, and sometimes, I’ll admit, it’s just because I want him to feel like he has some say about what happens in our kitchen.

Food Blog February 2015-0322This considerate move doesn’t always play out as helpfully as expected, however. Most weeks, without even looking at the list or at the meals I’ve proposed, he immediately says “tacos.” Nothing else gets this kind of instantaneous, definitive response. Tacos. Sometimes, when he says this, we’ve just had tacos. Sometimes, when I query him further, he doesn’t seem very enthusiastic about the suggestion he’s just made. Sometimes I’m just not in the mood for tacos (I mean, we JUST had them) and so I nod and smile and write down something else instead.

Food Blog February 2015-0324Finally, though, I got curious, and yesterday I asked him why he suggests tacos so frequently. Does he really like them that much? What is it about a taco that he finds so compelling? Turns out it’s not the food, exactly, but the name. Be warned, people. This is what happens when you fall for a words person. He really likes the sound of the word “taco.”  It is, he claims, an interesting sounding word. You can put emphasis on each of the syllables in turn, you can change the pronunciation of the vowel, you can draw out the length of each part of the word, all with different sounds and results. He then proceeded to say “taco” four or five times. It is, I must admit, a fun word to say. I’ll wait while you try it a few times…

Food Blog February 2015-0328As much fun as the word is, N. noted that he likes the dish as well, and it got me thinking about the constituent parts – what makes a taco a taco? As I see it, tacos break down into three major components: the shell, the “meat,” and the sauce. Of course you can – and often should – add cheese and lettuce and other garnishes, but I think you have to have at least these three parts. Once you have these critical components, you can take your tacos in a variety of directions.

Food Blog February 2015-0335Perhaps because N. is so fond of them – whether it’s the word or the dish itself – I quickly tire of the standard ground-meat-with-cheese-and-things compilation, and look for other options. We’ve had grilled zucchini tacos with crumbled queso fresco and lime, dozens of incarnations of fish tacos (my favorite always involves a corn relish and plenty of smashed avocado), tofu tacos overloaded with pepperjack cheese, and I’m working on a potato taco inspired by an amazing version at – of all places – the Getty Museum cafeteria. This time around, though, I wanted something a little more outside the box (or should I say outside the shell? No, you’re right, I probably shouldn’t. Let’s pretend it didn’t happen). I’m not sure where the combination came from (if I’m honest, probably Pinterest), but I decided on a tumble of roasted cauliflower and chick peas, liberally spiced with a ras al hanout-esque blend and drizzled with a sauce of tahini and yogurt, tangy with lemon and flecked with parsley.

Food Blog February 2015-0332What resulted was not N.’s favorite taco ever (though I doubt it will stop him from requesting them), but I am finding, a day or two later, that I’m mildly obsessed with them, especially the sauce. It wasn’t fancy, but there was something quietly brilliant about how the yogurt and parsley lightened up the earthiness of the tahini. Roasted vegetables, though I will almost never say no to a bowl of them, can feel a little heavy. Blanketed with this sauce, they are bright and buoyant, and the creamy spread is just as fitting against the soft unctuousness of the cauliflower as it is against the toasted crunch of the chick peas.

Food Blog February 2015-0336This is one of those recipes where the list of spices looks daunting, and by all means, if your spice cabinet is not as ridiculous overflowing full as mine is, go easy on yourself and use a pre-mixed blend. I won’t judge. Ras al hanout is a North African combination of spices, one of those lovely warm mixtures incorporating options American dishes usually reserve for desserts. Really, though, any mixture of Mediterranean or Middle Eastern spices would be lovely here – choose your favorite and apply accordingly.

Food Blog February 2015-0338Once you’ve got the spices sorted, this dish is a multi-tasker’s dream. The cauliflower and chick peas need a good chunk of time in the oven at high heat, and while they are roasting you have plenty of time to whip up the sauce, warm the taco shells according to your favorite method, and even concoct a side dish (we ended up with sautéed cubes of butternut squash folded into a bit of cooked quinoa and a shower of green onions). By the time the filling finishes roasting, all you have left to do is scoop and serve, and if you’ve been reasonably efficient it has probably taken you just under an hour.Food Blog February 2015-0342*Note: you’ve probably noticed by now, and may be horrified by the omission, that these tacos don’t include a cheese component. With the yogurt and the deep earthy roasted flavors of the vegetables, I found I didn’t miss it. If you can’t do without, however, I suggest a few crumbles of feta to fill the void.


Roasted Cauliflower and Chick Pea Tacos
Makes 10-12 tacos

For the tacos:

½ teaspoon ground cardamom
½ teaspoon ground cumin
½ teaspoon ground coriander
½ teaspoon ground ginger
½ teaspoon ground turmeric
½ teaspoon freshly cracked black pepper
¼ teaspoon ground allspice
¼ teaspoon ground cloves
¼ teaspoon cayenne pepper
1 teaspoon coarse salt
6 tablespoons olive oil
1 head cauliflower, cut into bite-size florets
15 ounce can chick peas, drained and dried
1 cup loosely packed baby spinach leaves
taco shells
For the sauce:
½ cup tahini
½ cup plain greek yogurt
½ cup flat-leaf parsley
2-3 tablespoons lemon or lime juice, or a combination
1 teaspoon honey
½ cup water, to thin
salt and pepper, to taste


  • Line two baking trays with aluminum foil and place them in the oven. Preheat oven, trays and all, to 450F.
  • In a small bowl, combine all of the spices and the salt, stirring to be sure they are well-blended. Add the olive oil and stir or whisk to combine.
  • In a large bowl, toss the cauliflower with about ⅔ of the spiced olive oil mixture, then spread on one of the preheated baking trays in a single layer (if possible).
  • In the same bowl, toss the chick peas with the remaining olive oil and spice mixture, then spread onto the other baking tray.
  • Stow both baking trays in the oven and roast at 450F for 20 minutes. After 20 minutes, remove the tray of chick peas, shake them around a bit to deter sticking, and set aside. They should be toasty and crunchy. Shake and stir the tray of cauliflower pieces to promote even browning, then return just the cauliflower tray to the oven and roast for another 10-15 minutes, until both sides of most pieces are nicely browned.
  • While vegetables are roasting, combine the tahini, yogurt, parsley, honey, and lemon juice in a food processor and whir to create a thick paste. With the food processor running, dribble in the ½ cup of water slowly to transform the paste into a sauce. You may not need the entire ½ cup – thin to your desired consistency. Season to taste with salt and pepper, then set aside and prepare your chosen form of taco shells according to your preferences.
  • When the cauliflower is nicely browned and tender, toss it with the chick peas and stuff the mixture into taco shells with a few spinach leaves for freshness. Top with tahini yogurt sauce and serve immediately.

Warm lentil and kale salad

I don’t know about you, but when I get home from vacation I feel at once heavier and lighter.  Lighter, because the toil of dragging overnight bags jammed with clothes, a laptop, a camera bag, two backpacks, a cooler, a sun hat, hiking boots, a satchel bristling with electronics, a grocery sack full of road snacks, a suit bag of dress clothes for a wedding, another satchel, this one loaded with supplies spanning the randomness quotient from shampoo to a day-planner (seriously, how can we have this much stuff???), and the leash of a dog intent on smelling every single thing she’s never smelled before from parking lot to hotel room to parking lot every other night is finally over.

Food Blog August 2013-2458Heavier, because even though I didn’t cook much, I sure ate a lot.  Plus, there’s that whole emotional withdrawal from the glory of vacation, but mostly I’m just shallow enough to be talking about my waistline.

In any case, upon our return from a trip we typically plan out a few particularly virtuous meals to combat the quantity of food we consumed, and the dubious quality of some of those choices – road food is always, alas, simultaneously necessary and a bit specious (take, for example, the Milky Way I bought at a gas station in Coos Bay to help myself stay away for the remainder of the drive to Brookings, which turned out to be open on one side.  I threw it away.  And then I almost cried).  Simple rice and steamed broccoli is one of our go-to homecoming meals.  Whatever can be scraped together from the garden and eaten with a light dressing and curls of Parmesan cheese is another.

But now we have a third, which might also become a side for roast chicken, a working lunch, or a base for seared tuna or poached salmon: a warm salad of lentils, tossed with lightly blanched kale, briny kalamata olives, and the tang of feta cheese.

Food Blog August 2013-2450A few days after our return, with pantry and fridge freshly stocked, I considered my starch choices.  We eat a good bit of pasta and a fair amount of rice, but our consumption of legumes and pulses is way below par.  This had to change.  I picked out a bag of green lentils that had slowly been pushed to the back of the shelf as new and more exciting boxes were set in front of it.

Lentils are great for us.  They are packed with fiber and protein and folate, which all make them filling as well as nutritious.  But like most dried beans, on their own they just aren’t very exciting.  They call for additional flavors and textures: chilies or acid or salt, crunch or freshness.  Herby sharpness.  Crumbly cheese.  A dance of textures.  You see where this is going.

Food Blog August 2013-2453To give them as much of a fighting chance at flavor as possible, I sautéed some onions and garlic before tumbling in lentils, water, a lone bay leaf, and a bracing hit of red wine vinegar.  “And salt,” you’re surely crying, but no!  Salt should be added to lentils only near the end of cooking.  It can toughen them if you add it right away.  I’ve also read that acidic ingredients – like the red wine vinegar I used – can contribute to this toughness, but I didn’t notice any particularly virulent refusal to soften, so I wouldn’t worry too much about it.

You want your lentils to be fully cooked – that is, not crunchy – but to still retain a bit of texture.  They should soften but not fall apart into mush – taste a few to be sure they have achieved the level of tenderness you like, but be sure to do a good sampling – five or six – as isolated beans can cook at different rates.

Food Blog August 2013-2459Once done, add salt to taste, let them cool a bit, and then the magic happens, and it’s such easy magic, it’s worth doing any night of the week.  Torn pieces of blanched kale, cubes of feta, and halved kalamata olives.  A drizzle of olive oil if you think it’s on the dry side.   Faced with this combination – salty, chewy, crisp and fresh and soft – we scooped spoonful after spoonful, and ended up eating most of the pot.  So much for virtue.

Food Blog August 2013-2460

Warm lentil and kale salad with olives and feta
Serves 4-6 as a side, 2-4 as a main lunch dish
½ cup diced onion
2-4 cloves garlic, minced fine
1 TB olive oil
1 cup small green lentils, picked through and rinsed
2 ¼ cups water, vegetable, or chicken broth
2 TB red wine vinegar
1 bay leaf
1 tsp salt (or to taste)
4 packed cups chopped kale, tough stems removed
½ cup kalamata olives, halved (or to taste)
½ cup crumbled feta (or to taste)
Additional splash of olive oil (optional)
  • Heat the 1 TB olive oil in a medium pot over medium heat.  Add the onions and garlic and sweat them gently for 3-5 minutes, until the onion pieces are translucent but not vigorously browned.
  • Add the lentils, water or broth, red wine vinegar, and bay leaf, but not the salt.  Salt added at the beginning of cooking can toughen the lentils.  We’ll wait to season them until they have cooked.
  • Turn up the heat and bring the pot to a boil, then reduce the heat to simmer the mixture for 35-40 minutes.
  • After 35-40 minutes, the lentils will have sucked up most of the liquid in the pot and they will be tender but not mushy.  You want a slight bite of resistance to remain.  Add the salt, stir well, and then pour out the pot into a colander or strainer to drain off any remaining liquid.  Pick out the bay leaf so there aren’t any unwelcome surprises later.  Set the colander of lentils aside to cool.
  • Meanwhile (if you are proactive, or in the same pot you just used, if you are lazy like me), bring a pot of salted water to a boil.  Add the 4 cups of kale and cook for 1-2 minutes, until the leaves are intensely green and barely tender.  Drain the kale into the same colander as the lentils.  Cool until just warm, or completely to room temperature as desired.
  • While kale and lentils are cooling, halve your olives and crumble your feta.
  • When the lentils and kale have reached your desired temperature, add the olives and feta and toss to combine.  If the salad seems dry, add a splash of olive oil to moisten things up a bit.
  • Serve slightly warm or at room temperature.