
Because my little house sits smack between the concentrated skyscrapers of downtown Santa Monica and the constant ascent path from LAX, because I can hear the freeway from my backyard and see, from just down the block, the Hollywood sign in the distance, it sometimes slips my mind that I only live a few miles from the ocean. Los Angeles is a funny place: loud, boisterous, urban, crowded, and yet along its edges it’s a beach town, where it’s just as loud and crowded, but people seem to move just a little slower.
Hard to remember, sometimes, but this past week we were treated to afternoons that reminded me I’m only a few minutes from the water. Warmth gave way to brisk, fresh breezes heavy with the smell of salt. Fog rolled over and it felt like a summer day on the Oregon coast. These reminders of the Pacific Northwest made me want to call on ocean flavors: smoked salmon, crunchy salt crystals, and the grassy headiness of fresh dill.
 There are so many different methods for making bread that it’s a wonder anyone becomes a master at it. This week I decided to try a process slightly more complex than Ruhlman’s basic boule, working with a recipe for French Boule from the Feburary 2009 issue of Cuisine at Home. The process for this round loaf starts the night before, with a sticky, soggy, tasteless combination of flour, yeast and water called a poolish. C@H tells us this came from the French pronunciation of “Polish,” from whom they learned this technique (19). The long, slow fermentation time allows for plenty of yeast development and supposedly contributes a nuttier flavor to the end product. It is supposed to look like pancake batter, and when you pull it out the following morning and add more water, it is supposed to be very thin. Mine was, when I put it in the fridge for its overnight chill session, more like the texture of silly putty. When I added water the following morning, it refused to combine evenly, its sticky strands getting soggier and stickier at the same time. I was skeptical about this, but followed procedure anyway, and once it had been kneaded aggressively into my dough it didn’t seem to matter.

With the starter crises resolved, I considered flavorings. Thanks to the overcast coastal feeling of our afternoons and a recent episode of Top Chef, dill sprang to mind as the most logical choice. It would pair perfectly with our dinner: gemelli pasta draped with smoked salmon and vodka cream sauce. Black pepper sounded like a nice foil for the dill – pungent and dry where the dill was fresh and mild. I sprinkled them onto the flattened dough, then rolled the whole thing up into a long tube and kneaded through before letting it rise. You could certainly add other flavor combos – kalamata olives and cloves of roasted garlic sound incredible – and gently roll and then knead them through the dough.

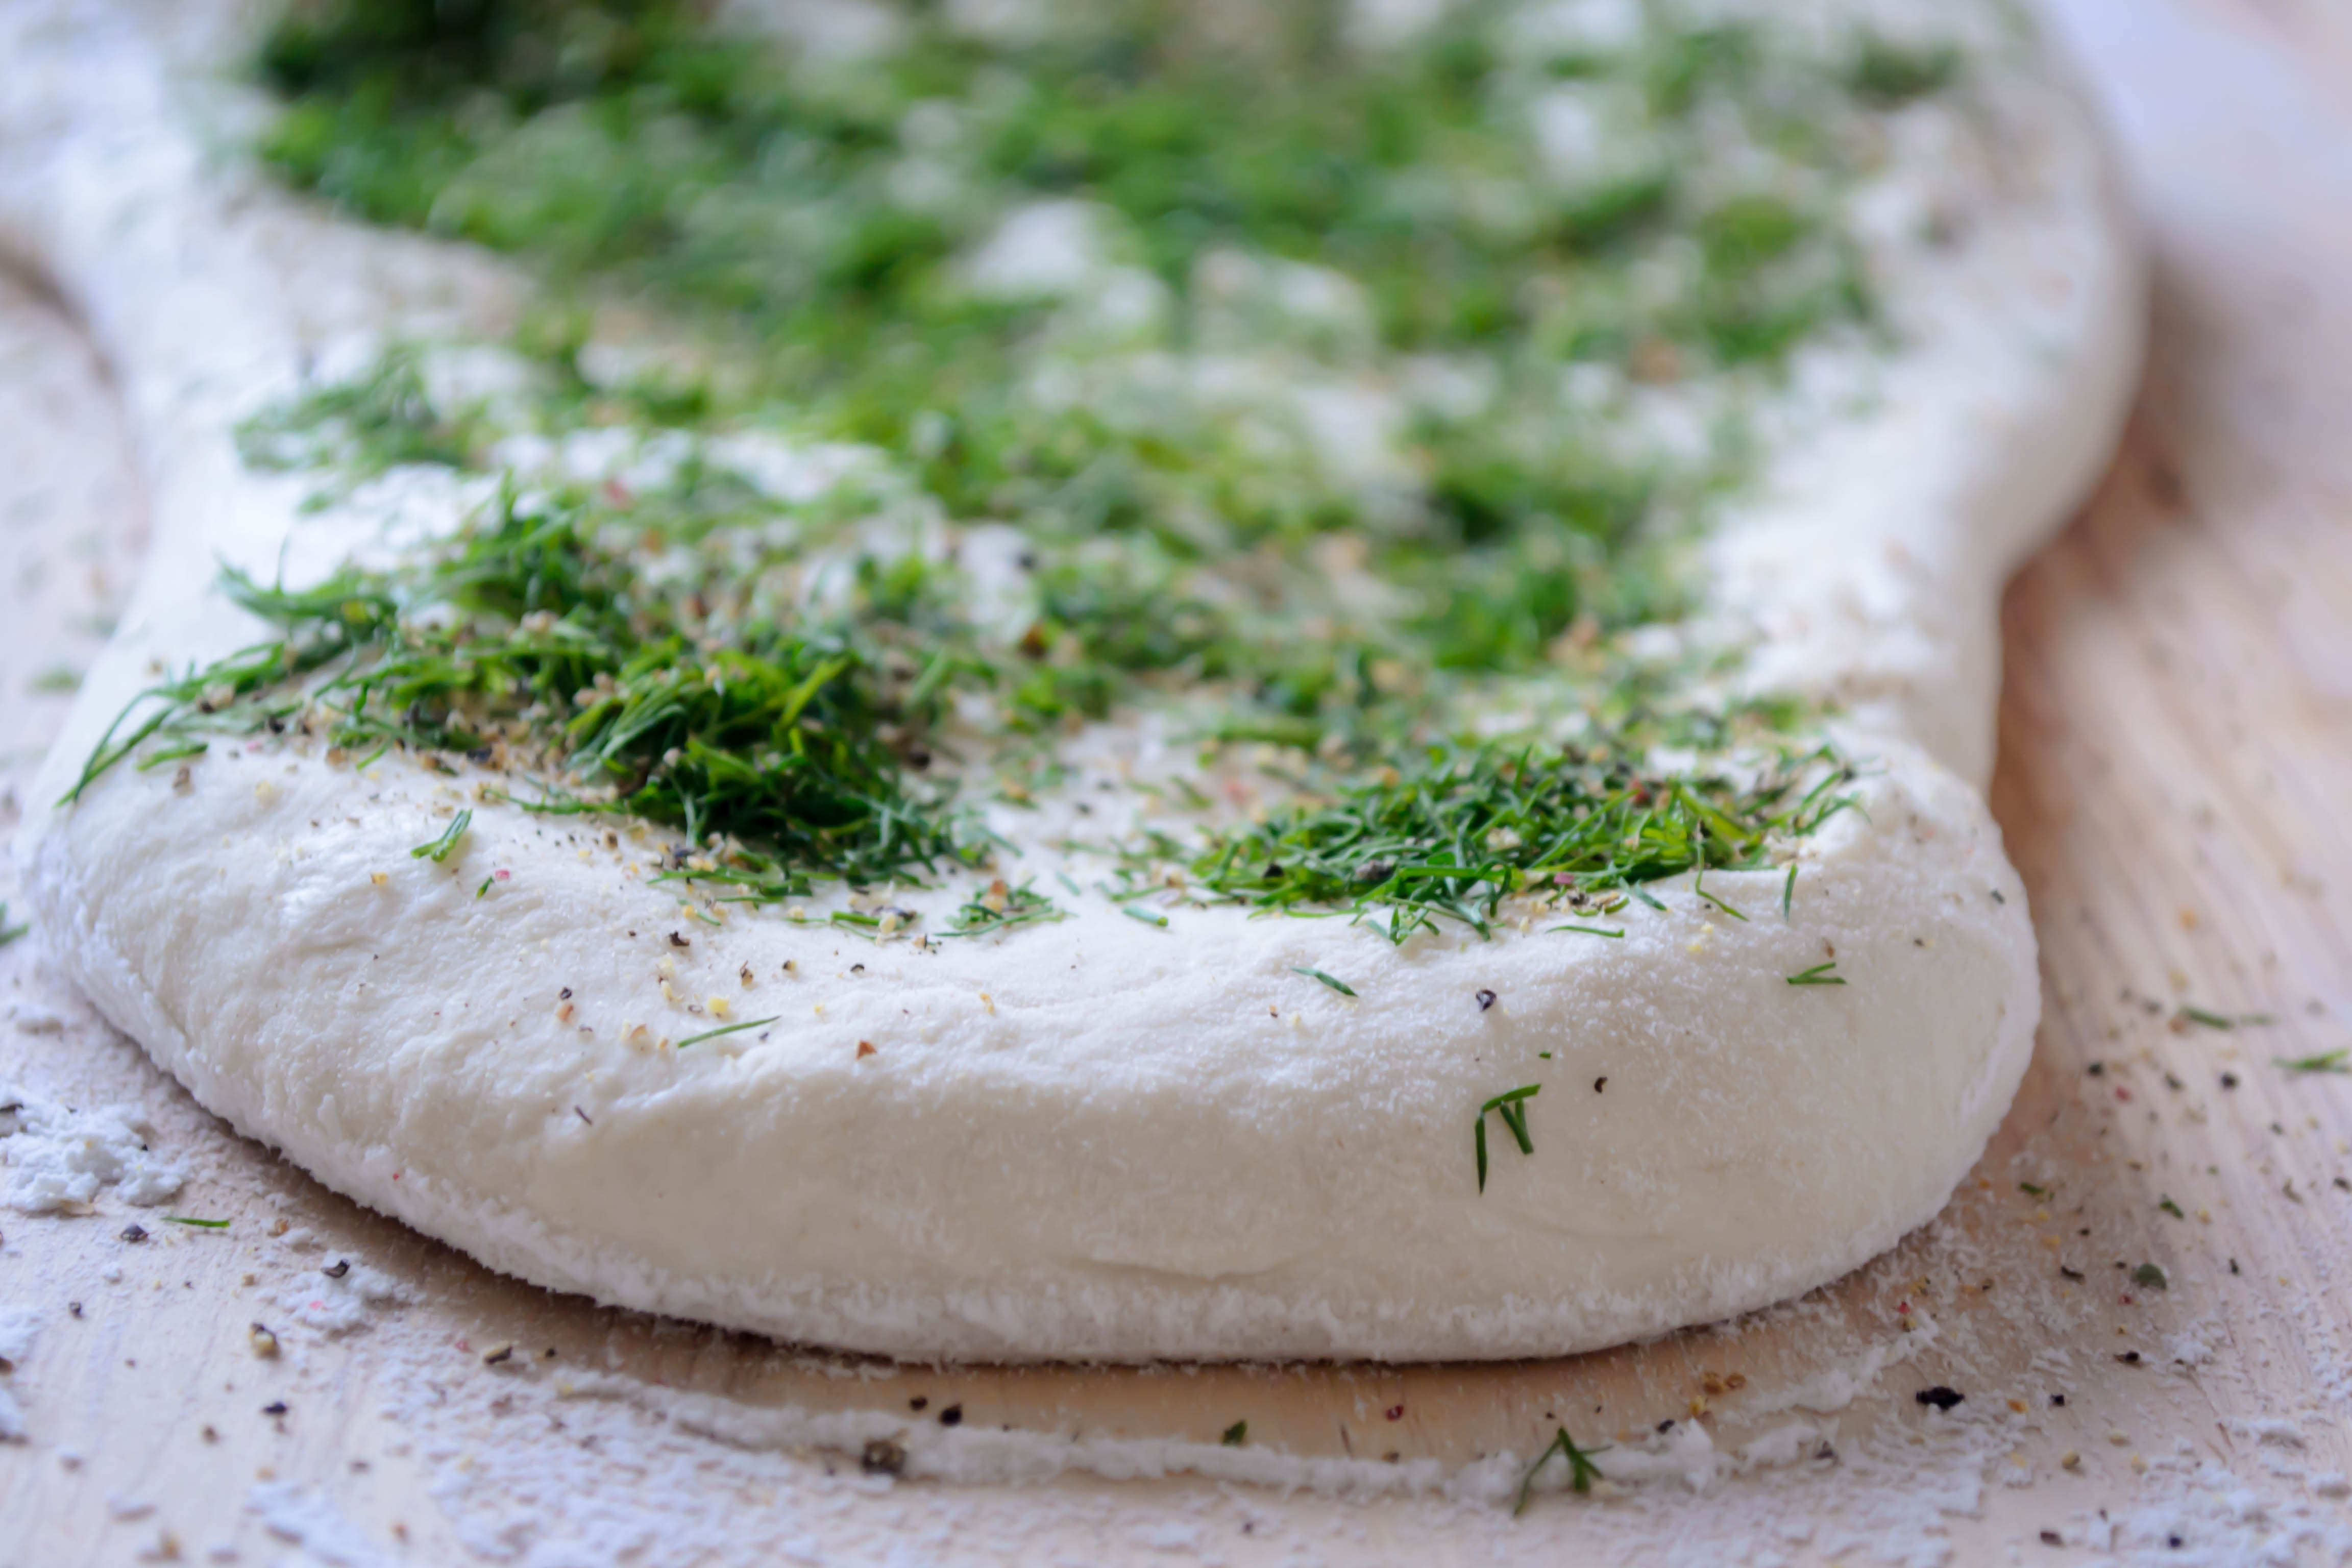
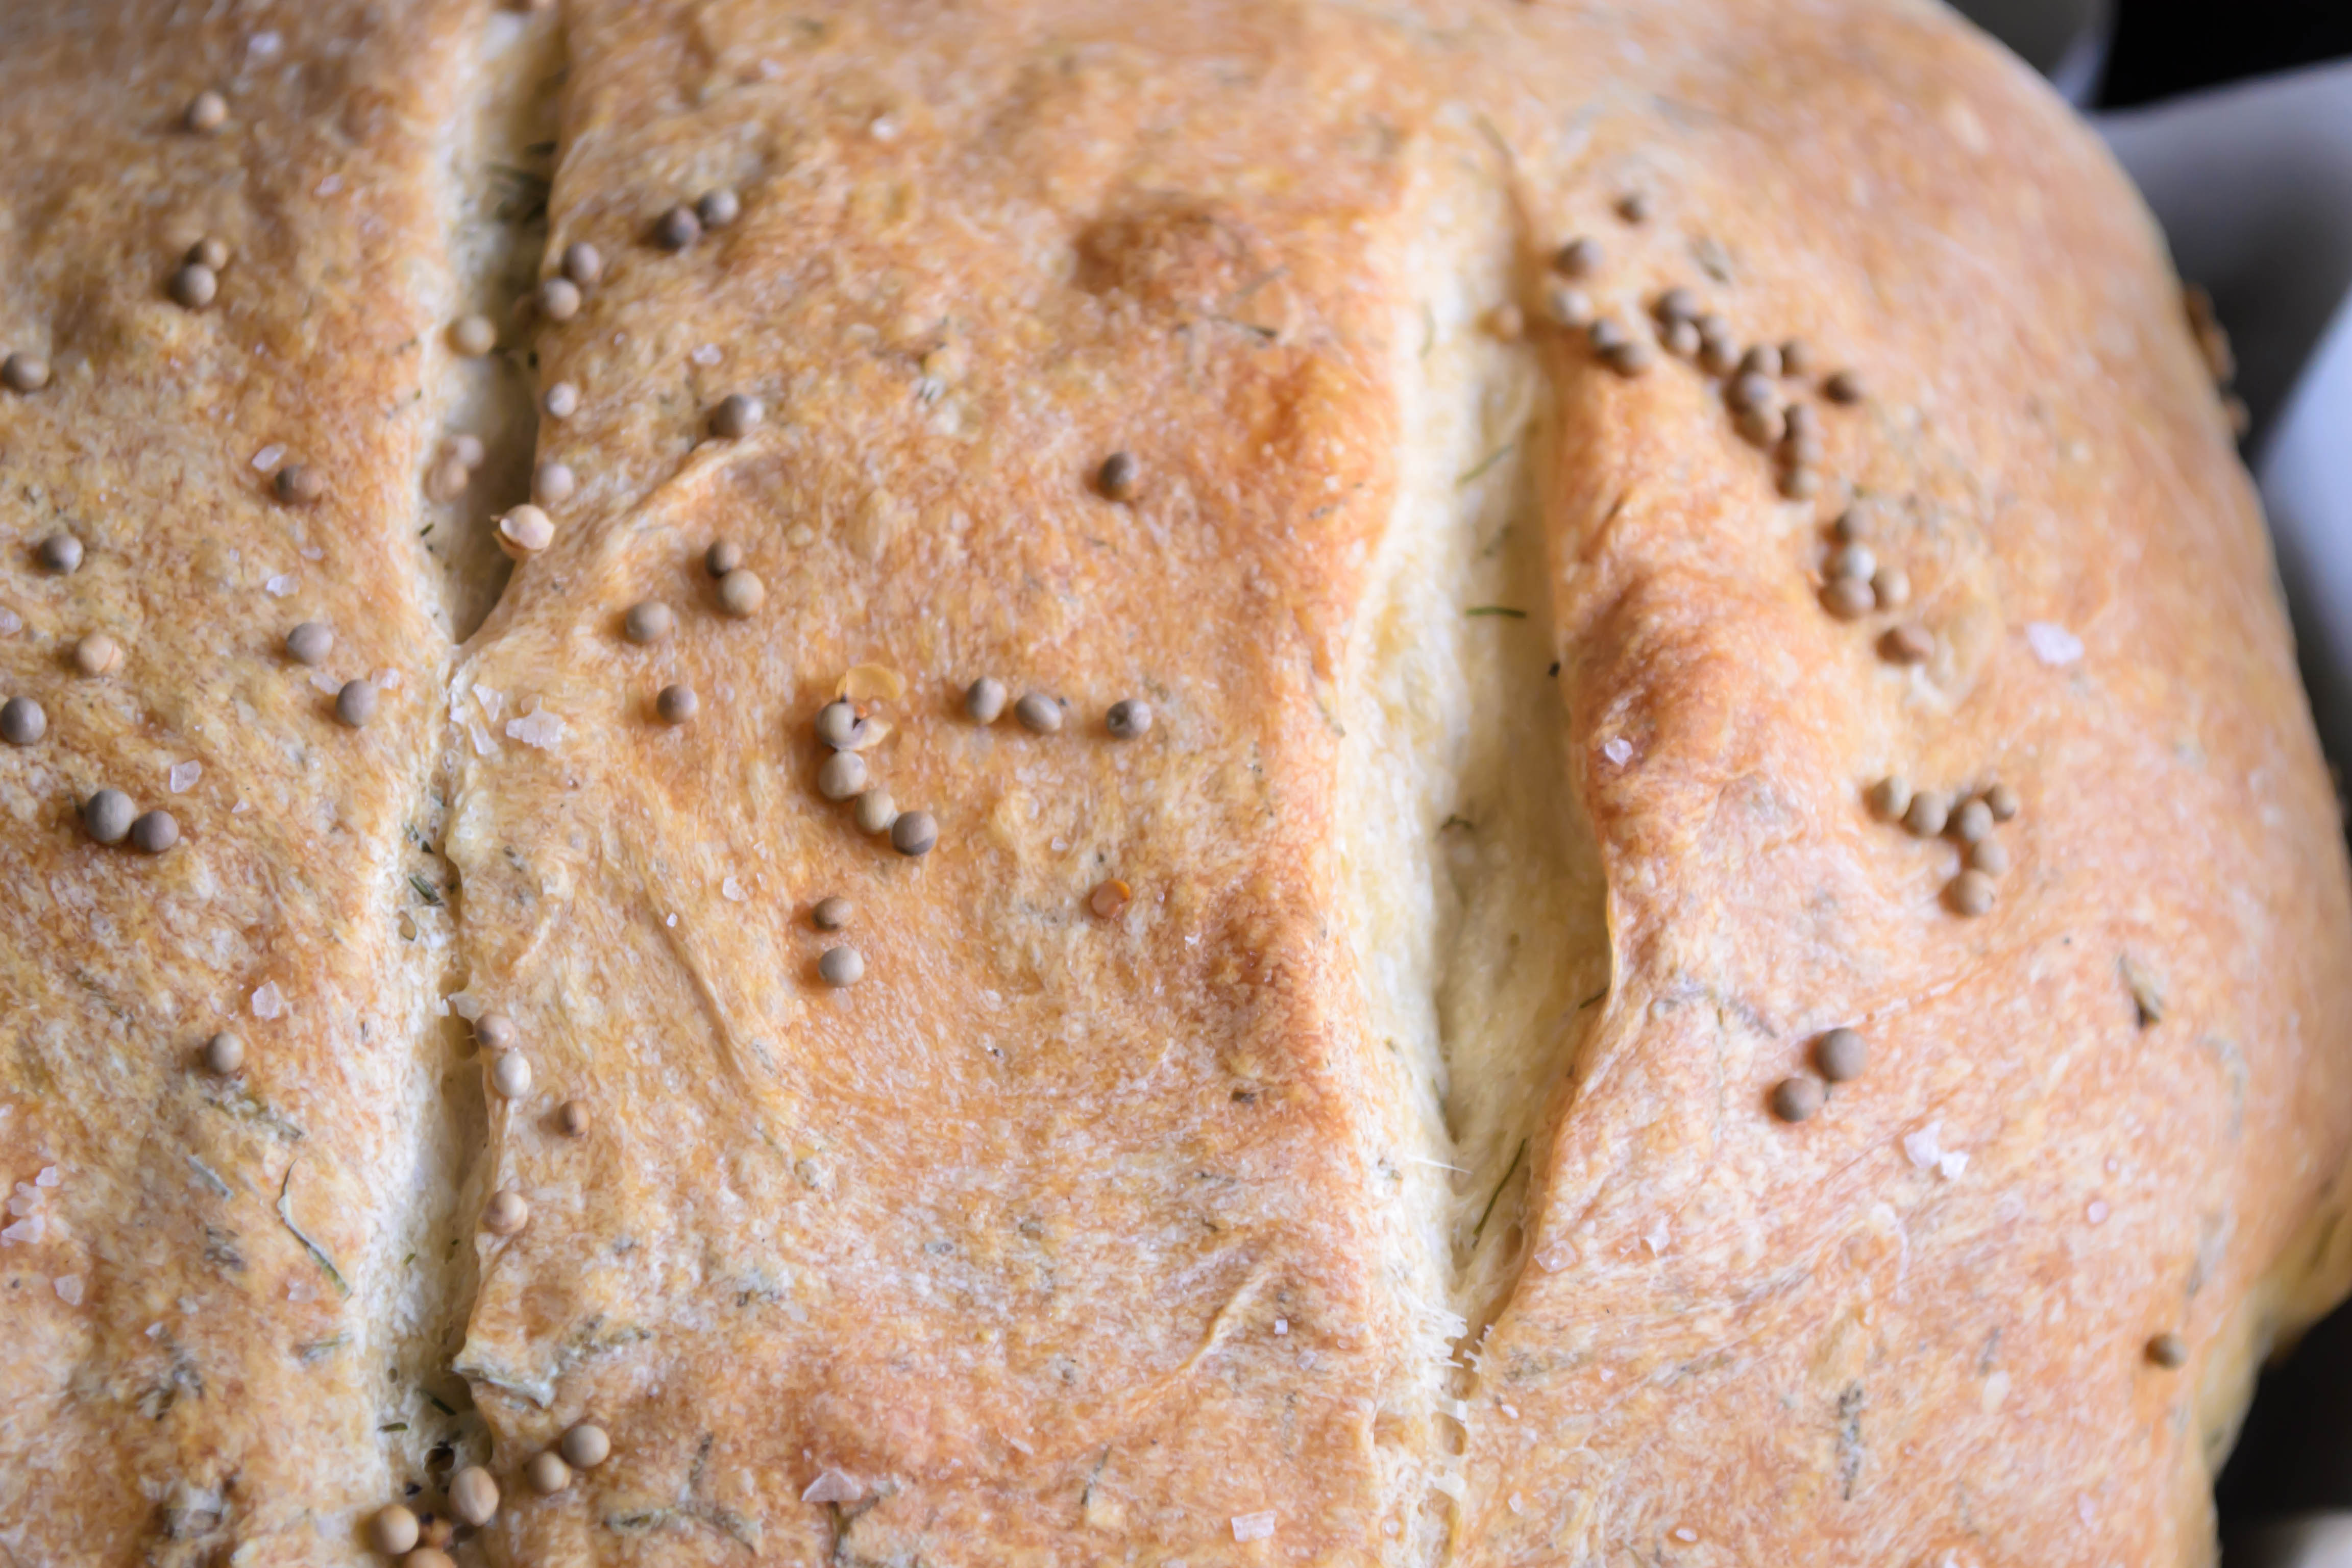
The usual procedure followed: rise, shape, rise again, and prepare for baking. Olive oil, mustard seeds, and a good sprinkle of coarse salt seemed like the right things to add.
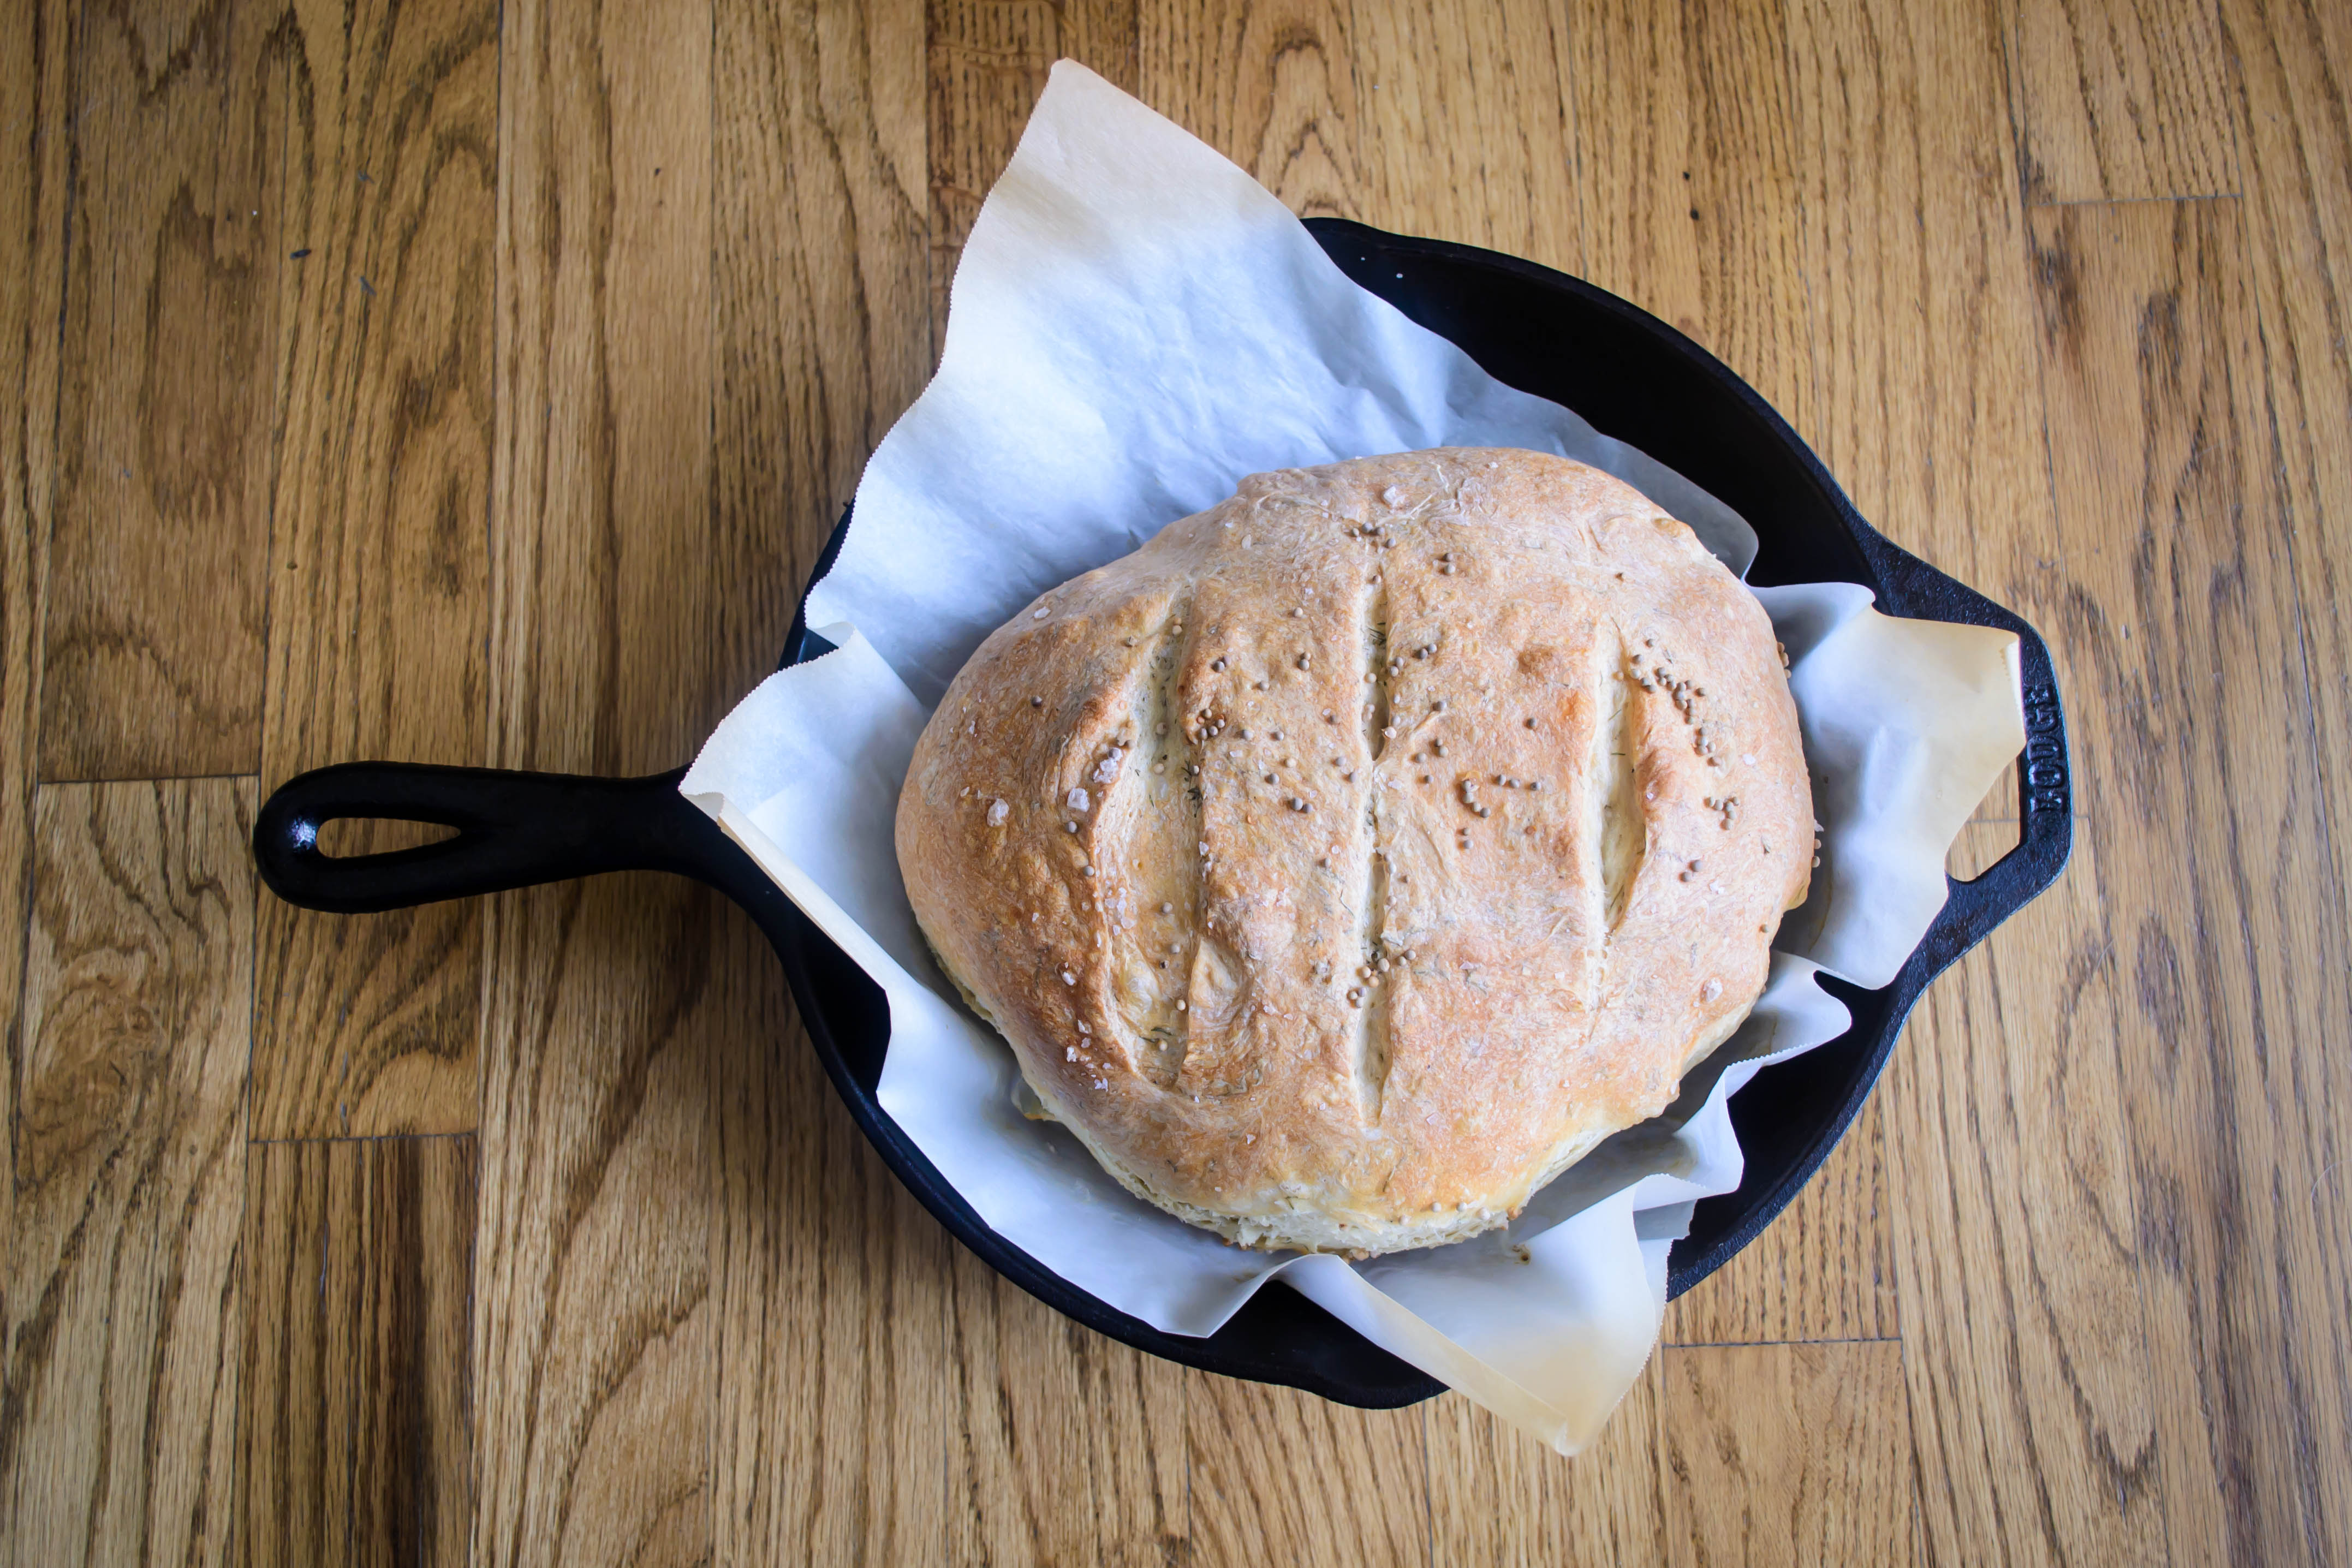
This time, instead of using a Dutch oven, I opted for my cast iron pan. I was nervous about the bread sticking, which is probably silly, but what can I say? I’ve lost several chunks of flatbread to that pan because I get anxious and rush the cooking process, so I took out some insurance and settled my loaf onto a layer of parchment paper sandwiched between it and the surface of the pan.
My recipe called for a heavy misting of water over the bread and into the inside of my preheated oven. I didn’t have a spray bottle on hand with which to mist, so I just flicked droplets in with the tips of my fingers. The sizzle was tremendous, but seemed to work well. The resulting loaf was not as big as my first boule attempt, but it was lighter and not overbrowned on the bottom. The crust was thin but crisp, and we loved the flavor combination. The mustard didn’t do much besides providing a fun crunchy-pop texture on the edges, but the dill and black pepper were the right contrast of fresh and sharp and incredibly aromatic. We each took a slice to eat in the car on the way to a soccer game at my husband’s school – had to make sure it was suitable for dinner, after all. We ate thick slices with our pasta, running them around our plates to pick up every drop of sauce. We ate more the next day, spread with salted butter, and were surprised and saddened the following morning to find that the loaf was nearly gone. Dreaming of this bread again, I could see it toasted lightly, smeared with artisan goat cheese and topped with a luscious slice of smoked salmon: the Oregon coast in one bite.
Dill and Black Pepper Boule
(adapted from Cuisine at Home, February 2009)
For the poolish starter:
1¼ cups bread flour
¾ cup room-temperature water
¼ tsp yeast (I used active dry yeast)
Rehydrate the yeast by combining it in a small dish with 1 TB of the water you’ll be using for the starter. Let it sit for a few minutes.
Combine the flour, water, and yeast mixture in a bowl or a large measuring cup. Stir well; the mixture should come together into a texture somewhere between pancake batter and silly putty.
Cover your mixture with plastic wrap and let it sit at room temperature for 3-4 hours, then move to the refrigerator and leave it alone overnight.
The next day, take it out about an hour before you intend to start, so it can return to room temperature and the yeast can wake up a little.
For the bread:
2 cups all-purpose flour (I’m not sure what the advantage is of combining bread flour and AP flour here, but I followed the directions anyway…)
1½ tsp salt
½ tsp yeast
½ cup room temperature water
Poolish starter
2 TB chopped fresh dill
½ tsp (or to taste) fresh ground black pepper
1 TB mustard seeds
1 TB coarse salt
Olive oil for drizzling
Fit your stand mixer with the paddle attachment and use it to combine the flour and salt (you could likely add the dill and pepper here too).
Rehydrate the yeast with 1 TB of the ½ cup water. Add the remaining water to the room temperature poolish starter and combine. Mine did not become very thin, as my recipe said. In fact, mine refused to combine particularly well (read: at all) with the poolish, but it seemed to work out just fine anyway.
Add rehydrated yeast and poolish mixture to the dry ingredients and stir with paddle attachment until the whole mess comes together a bit. It will be quite sticky.
Scrape sticky mass of just-barely-dough onto a well-floured board and work it with a bench scraper, adding more flour in small sprinkles until some of the stickiness abates and it seems like it could be worked by hand.
At this point, let the dough rest for 10-15 minutes. The recipe suggests turning a bowl over it (I presume to prohibit drafts), but I think draping on a clean, dry kitchen towel would work just as well.
After the dough has rested, it’s time to knead. You can do this by hand for 10-15 minutes, or in a stand mixer with the dough hook for 8-10 minutes, until it passes the windowpane test.

When the dough is smooth, elastic, and stretchy enough to pass the test, if you haven’t added your flavor extras already, flop it onto a floured board and push, pull, or roll out into a rectangle. Sprinkle on the toppings, then roll up lengthwise and knead together until the dill and pepper are distributed; you’ll be able to see green and black flecks throughout. I don’t think it matters much when you add something finely chopped like dill, but if you are using a more delicate addition like olives or even sundried tomatoes, be sure to add it this way so it doesn’t get bashed up during the kneading.

Set the dough in an oiled bowl and let it rise for an hour in a warm, draft-free place (like a briefly heated, then switched off oven). It should double in size.
Once the dough has risen, remove it from the bowl and shape it into a boule by spinning it away from you with one hand and tucking the dough under with the other. Let it rise for another hour.
While the dough rises, preheat your oven to 475F and put a cast iron skillet inside (mine is a 9” skillet). If you are worried about the loaf sticking or getting too brown, prep a piece of parchment paper by cutting or tearing it to cover the bottom and sides of the skillet (don’t be too fussy about this – mine was a square that protruded above the sides of the pan and it was just fine).
Turn the dough out onto the parchment paper, then pull the skillet out from the oven and set the loaf – on parchment paper if you are using it – into the center. Slash the top, drizzle with olive oil, and sprinkle liberally with mustard seeds and salt. Using the tips of your fingers or a spray bottle, mist or dribble the top of the loaf with water.
Place the laden skillet back into the oven, spritz the inside of the oven with ten flicks or so of water, and shut the door. Wait 30 seconds and repeat the spritzing process.
Reduce heat to 450F and bake for ten minutes.
Reduce heat to 425F and bake for ten more minutes.
Finally, reduce the heat to 375F and bake another twenty minutes. Remove from oven and cool on a rack for 45 minutes before slicing and devouring.


Sounds fantastic, especially the idea for combining with salmon and goat cheese!
Wish you guys could have shared it with us! I guess that only means, on all counts, that I’ll have to make it again.
Sounds good to me!
Pingback: Orange Marmalade and Almond Sweet Rolls | "blackberry-eating in late September"
Pingback: Go-to Dough III – Orange and Rosemary loaf | "blackberry-eating in late September"