Photo Friday

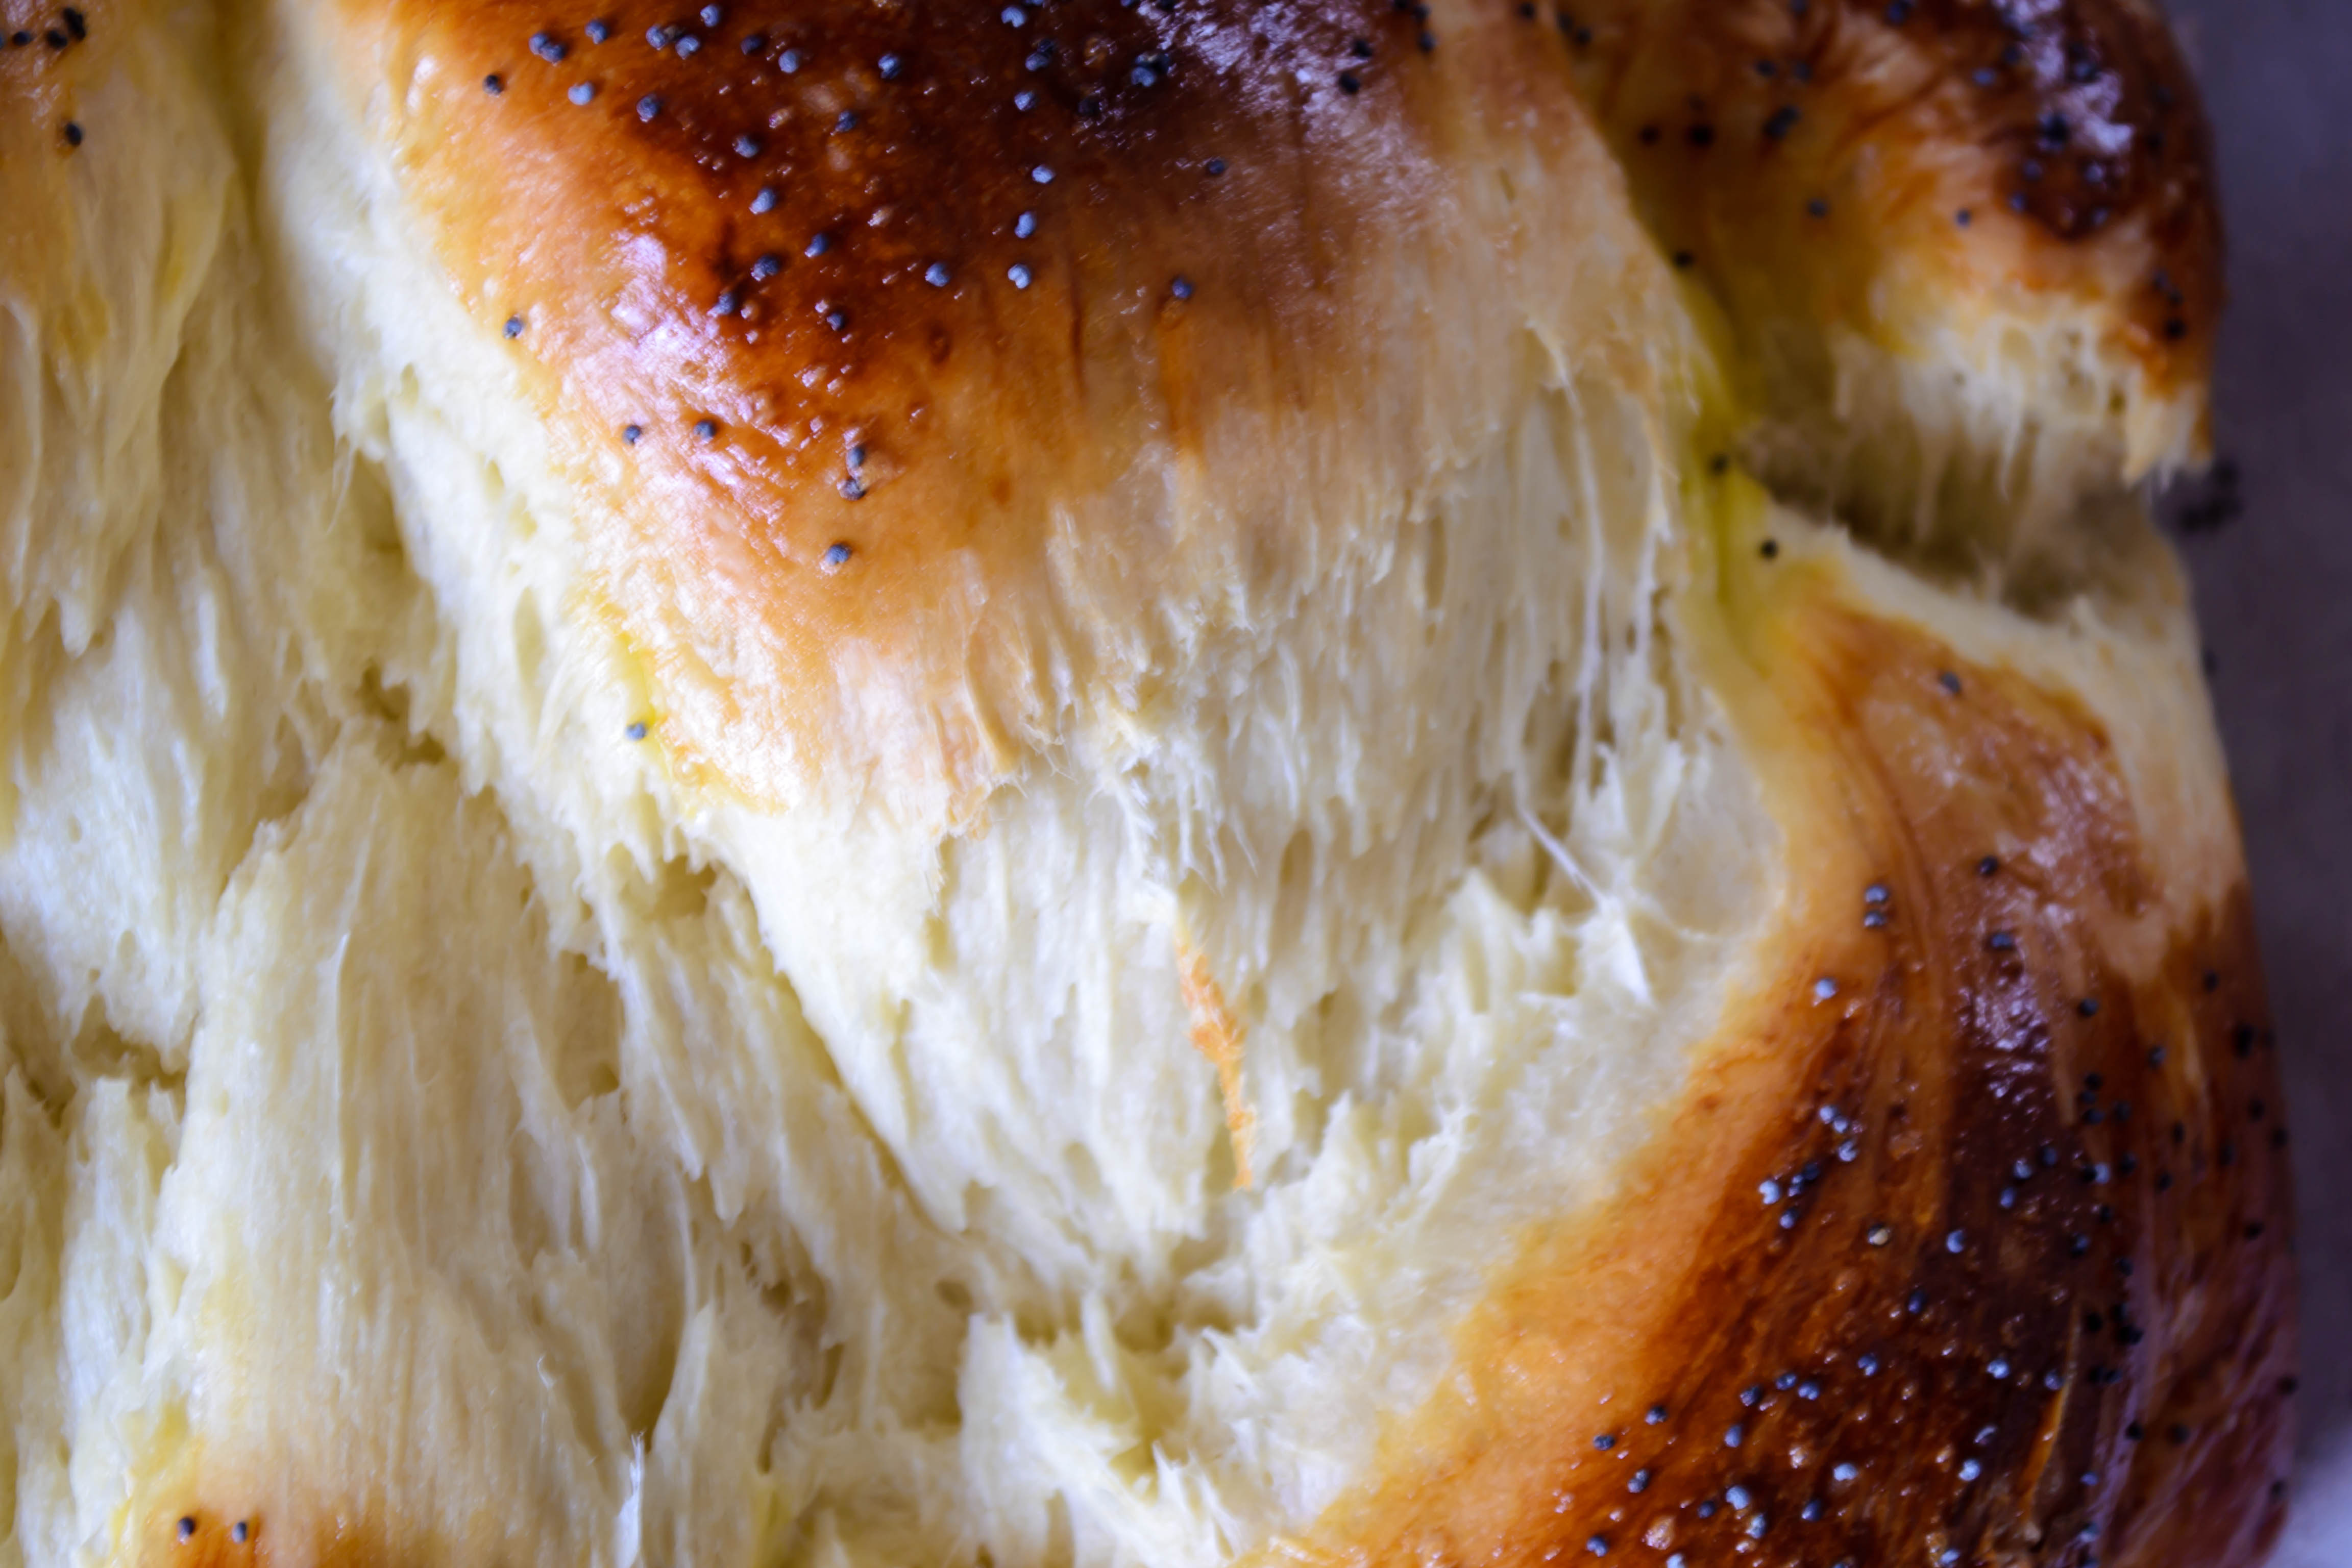
Challah photo-shoot.

Food Blog Photo Fridays 2014-3503I’m crazy about the way the dough stretched – it looks like you can see the chains of gluten! Let’s see a close-up or six…


Food Blog Photo Fridays 2014-3506 Food Blog Photo Fridays 2014-3507 How about from a new angle?  Food Blog Photo Fridays 2014-3509Food Blog Photo Fridays 2014-3508 Food Blog Photo Fridays 2014-3510
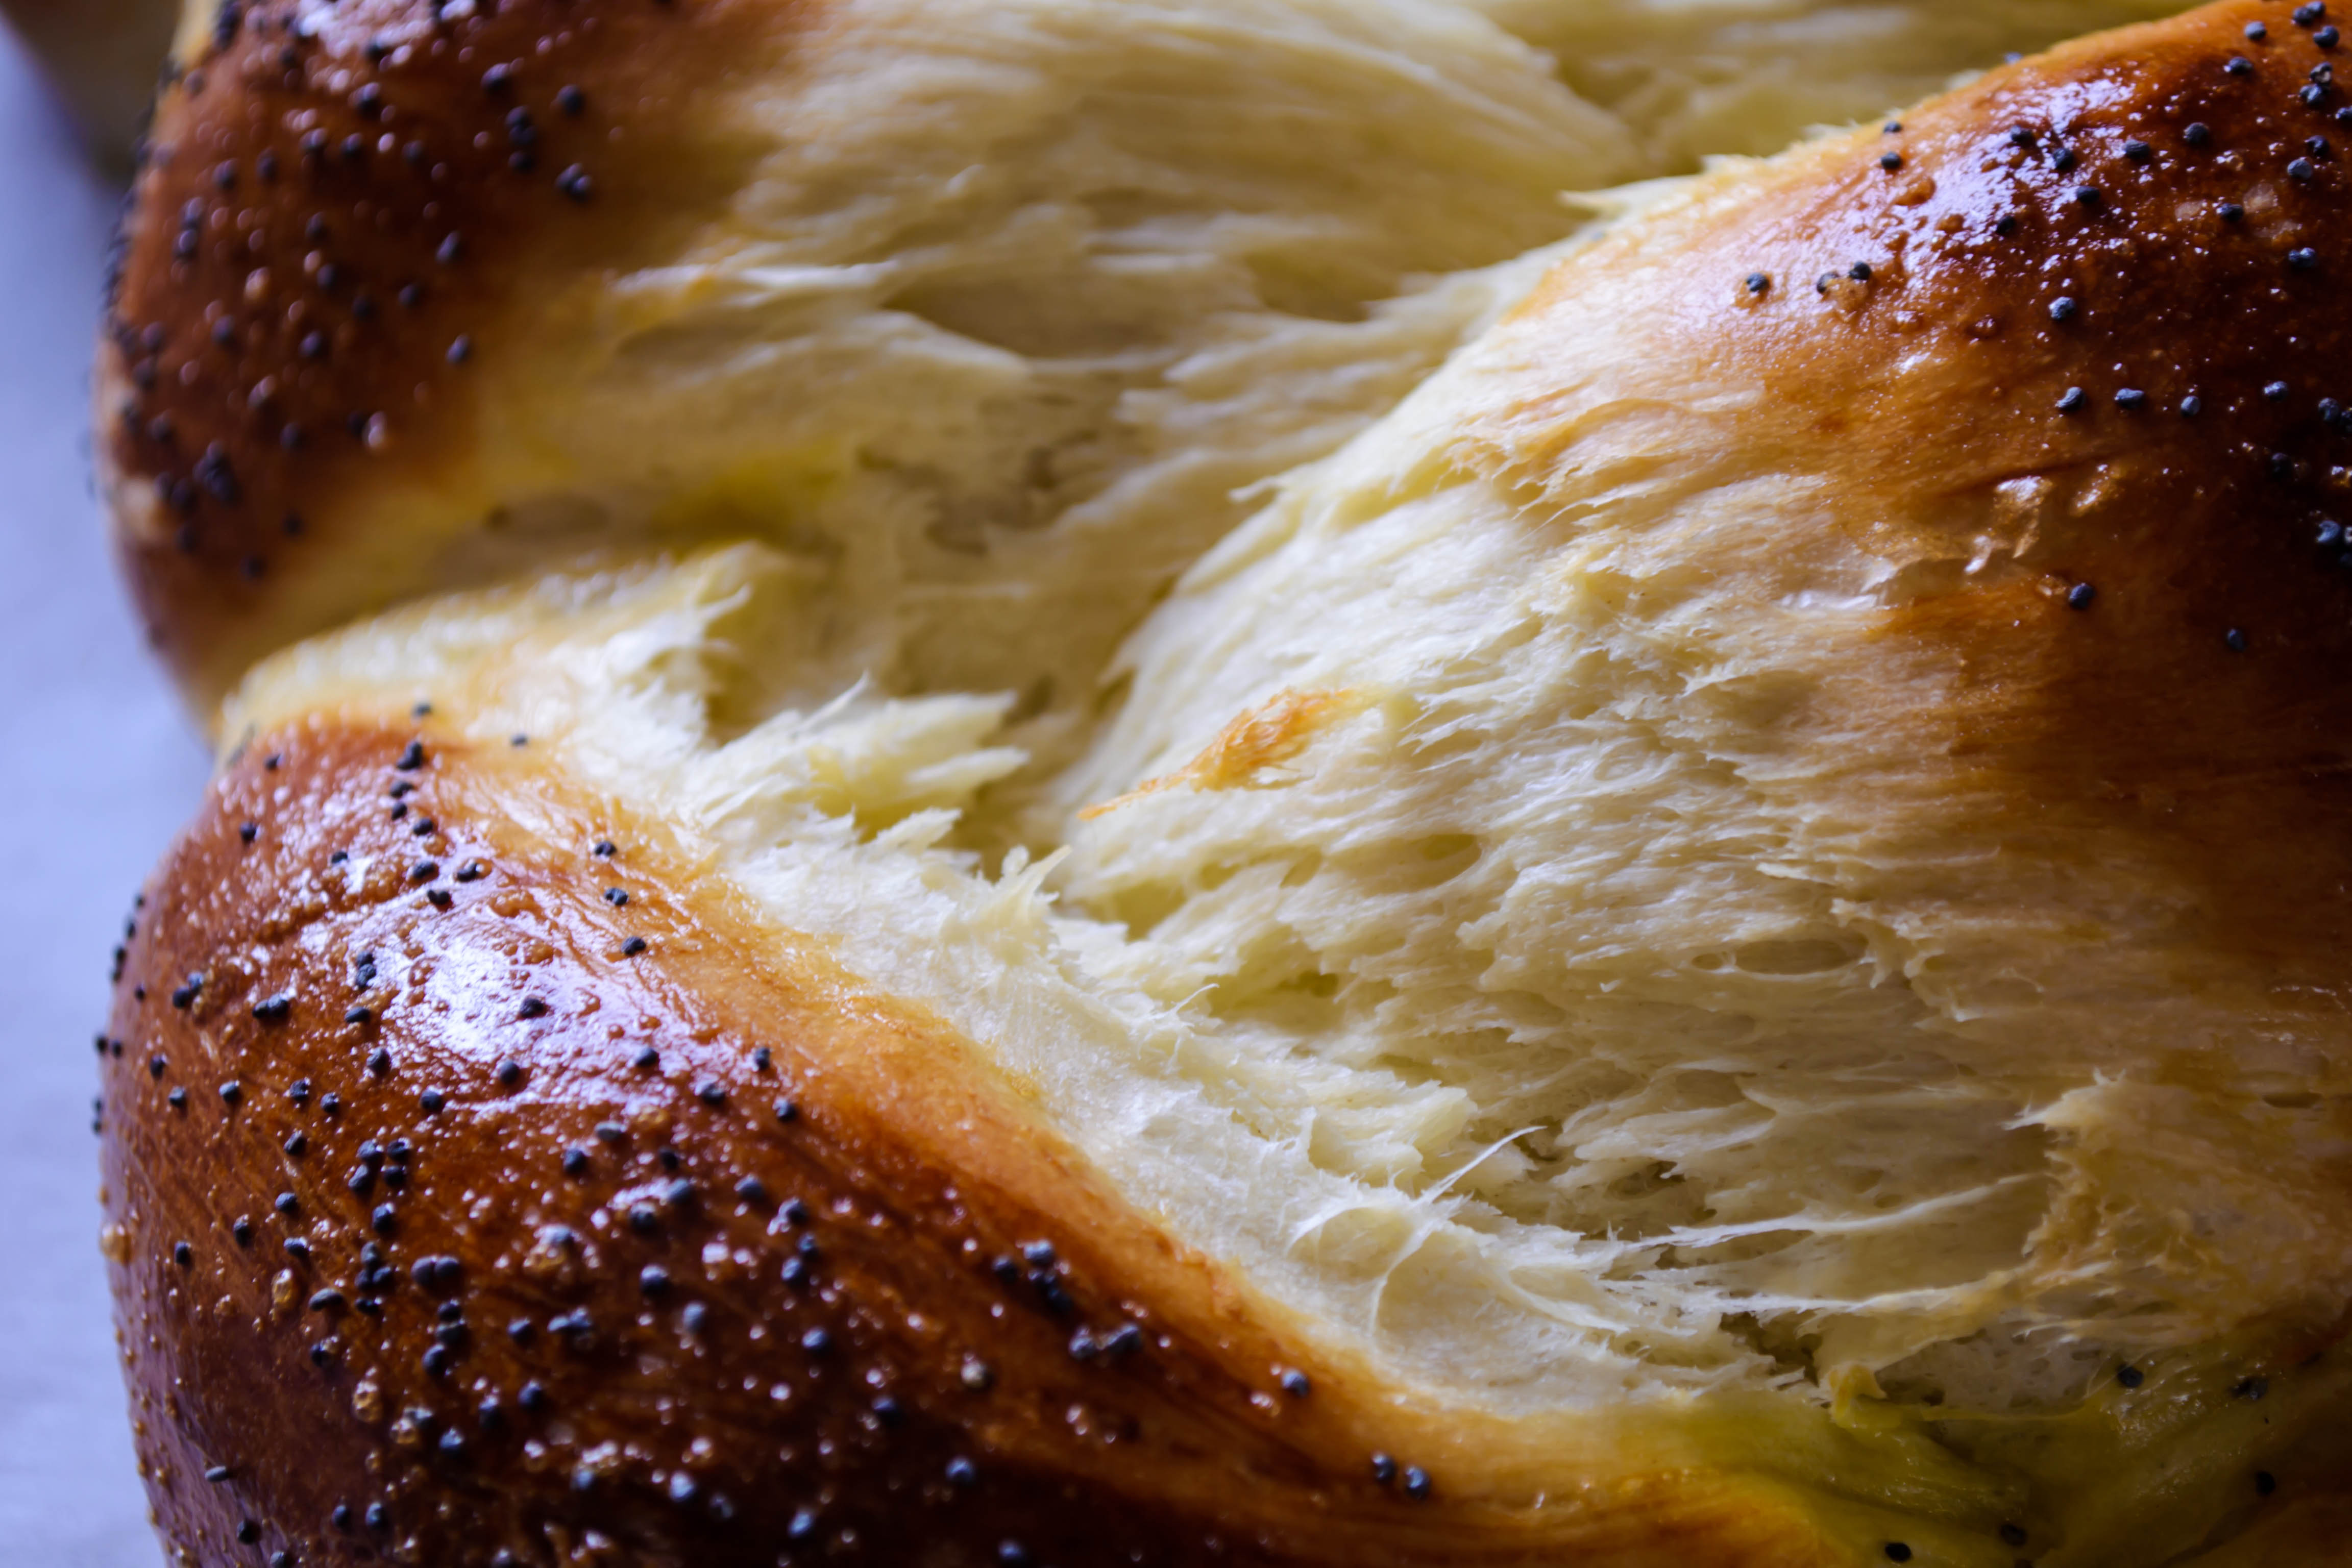
Burnished and bronze and eggy and tender… it’s almost enough to make me run back to the kitchen and make another one. You?

Here’s a recipe, just in case.

Honesty and Irish Soda Bread

Food Blog March 2013-0878
It seems like admission and honesty are the motifs of the moment in many of the blogs I read.  A few weeks ago Joy the Baker created a beautiful list of things to remember while blogging – things like despairing over the cuteness of other people’s pages isn’t worth it.  Things like not stressing over ratings, and remembering that the internet is always changing, which means it’s okay to not be involved in every single new trend.  She has just ended a week on that most humble and most basic of vehicles for deliciousness: toast.  Simple.  Honest.  Real.  (Also, can you tell I’m kind of crushing on Joy the Baker right now?  This is about honesty, after all…).  Shauna on Gluten-free Girl and the Chef has been writing for herself lately, not for ratings or comments or trends.  In fact, she has closed comments on her blog; she’s writing in the undisturbed beauty of what is important to her, not what is important to others making demands on her.  Just Monday, Irvin at Eat the Love published a beautiful, real, excruciatingly honest piece he’d been sitting on for over a year about jealousy and perfection and measuring up in the blogging world.  (Lately I’m crushing on Irvin too; he just seems so nice!  And sometimes he responds to my tweets!  Squee…).
Food Blog March 2013-0854These are courageous posts.  It’s hard to be real here in this virtual world.  It’s hard to admit to imperfection or doubt or dissatisfaction or envy.  These are ugly ideas.  Yet we have them, and our impulse is to hide them behind the veneer of beautifully crafted pages, or photos with the white balance adjusted, and cropped just right to edit out the dish soap we forgot to move, or fluffy, romantic sentences with words like “mouth-feel” or “buttery crumb” or “silky texture.”
Food Blog March 2013-0858
And I do it too.  Despite my assertion that you are going to see imperfect products or read about unsuccessful attempts, of course I want every item I post about here to be beautiful and balanced and insurmountably delicious.  Of course I don’t want to admit to the doubts and worries and sneaky hate spirals that sometimes result from something as simple as turning away from grading papers to bake a loaf of bread and then half an hour later I’m trembling before a monster of despair that maybe by cooking instead of researching I’m throwing away all that work I did on my PhD because my dissertation might never become a book.  That by insisting on making dinner every night and posting every week, I’m sabotaging my own search for a better job and therefore I’m never going to “make it” in the adult world.  That I’m wasting my time as a blogger because I don’t have – and will likely never have – the same kind of following as Deb or Ree.  That there are a billion food blogs out there and I’m just adding to the clamor without bringing anything original or special or any of the things I hoped to be when I started writing.

Food Blog March 2013-0861

But I don’t want to tell you all that.  Despite my doubts, I, too, want to be a “good blogger,” a “popular blogger” with a following and cooing comments over the little messes I arrange just right so they look like masterpieces on screen, so I try to do the things that will make this happen.  I want to be an authority.  I want to spring to people’s minds when they think of food sites they like.  I want to talk about food and I want to be real, but I still want to find that magical, imaginary combination of words and photos and style and design that pulls people here in droves.  Those days where my little stats bar doesn’t even tick from zero to one are too real.  I never tell you that.
Food Blog March 2013-0862But I think this desperate, ugly, gasping kind of honesty can be a good thing, even if it only emerges now and then.  It’s a sign of strength and a sign of independence.  It forces you – it forces me – to reassess, to remember that I am doing what makes me happy for the reasons it makes me happy.  And maybe that is part of what Spring is about: cleaning out your assumptions.  Stripping down the need for perfection and presenting a more naked, more truthful, more real version of yourself to your audience.  Even if that version is a little ugly.
Let’s call it mental Spring cleaning.

Food Blog March 2013-0851

This week I made Irish Soda Bread.  Simple, rustic, honest.  Lumpy.  Rough.  Uneven.  No yeast, no eggs, no herbs or dried fruit or fancy techniques or browned butter or sifting.  I didn’t even wipe down the counters first to make you think my kitchen is always spotless.  I shuffled through a few recipes and found suggested combinations like golden raisin and rosemary, or candied orange peel and bittersweet chocolate.  Those didn’t feel truthful.  They were too dressed up – too showy.  So I turned to the most basic, most honest cookbook I have: Baking Illustrated.  BI is willing not only to present you with a recipe, but to explain why they made the choices they made, and what happened when they tried things in other ways.  They talk about the cakes that came out gummy or runny.  They talk about overly eggy batters and dry loaves and dense biscuits.  They show you what a less-than-perfect product looks like.  And then they tell you how to fix it.  This was the kind of Springtime honesty I needed.

Food Blog March 2013-0866

I changed very little from the original recipe, only using brown sugar in place of white granulated sugar for a deeper flavor, and taking up the suggestion to bake the loaf in a deep covered pot to enhance the texture of the crust.  Since I’ve been doing that with success in my yeast experiments, it seemed worth trying out here too, and I have to recommend it highly.  Our loaf was surprisingly tender – almost like a giant scone – and the crust was springy and buttery – it felt like it must be loaded with eggs even though there are none in the recipe.  I like the flavor the baking soda provides, which is a different kind of tangy breadiness than yeast.  After weeks of churning out loaves that require hours and hours and multiple rise times, it was nice to have a quick-bread that rose just enough on baking time alone, and left behind concerns like proofing and kneading and windowpanes and tucking and shaping.  Honestly.
 Food Blog March 2013-0868
Irish Soda Bread
adapted from Baking Illustrated
3 cups all-purpose flour (BI recommends one with a relatively low protein content, like Gold Medal or Pillsbury) plus a scattering for your work surface
1 cup cake flour (even lower protein, which makes for a more tender end product)
2 TB brown sugar
1½ tsp baking soda
1½ tsp cream of tartar
1 tsp salt
2 TB softened butter
1½ cups buttermilk
3 additional TB butter, divided
Food Blog March 2013-0872

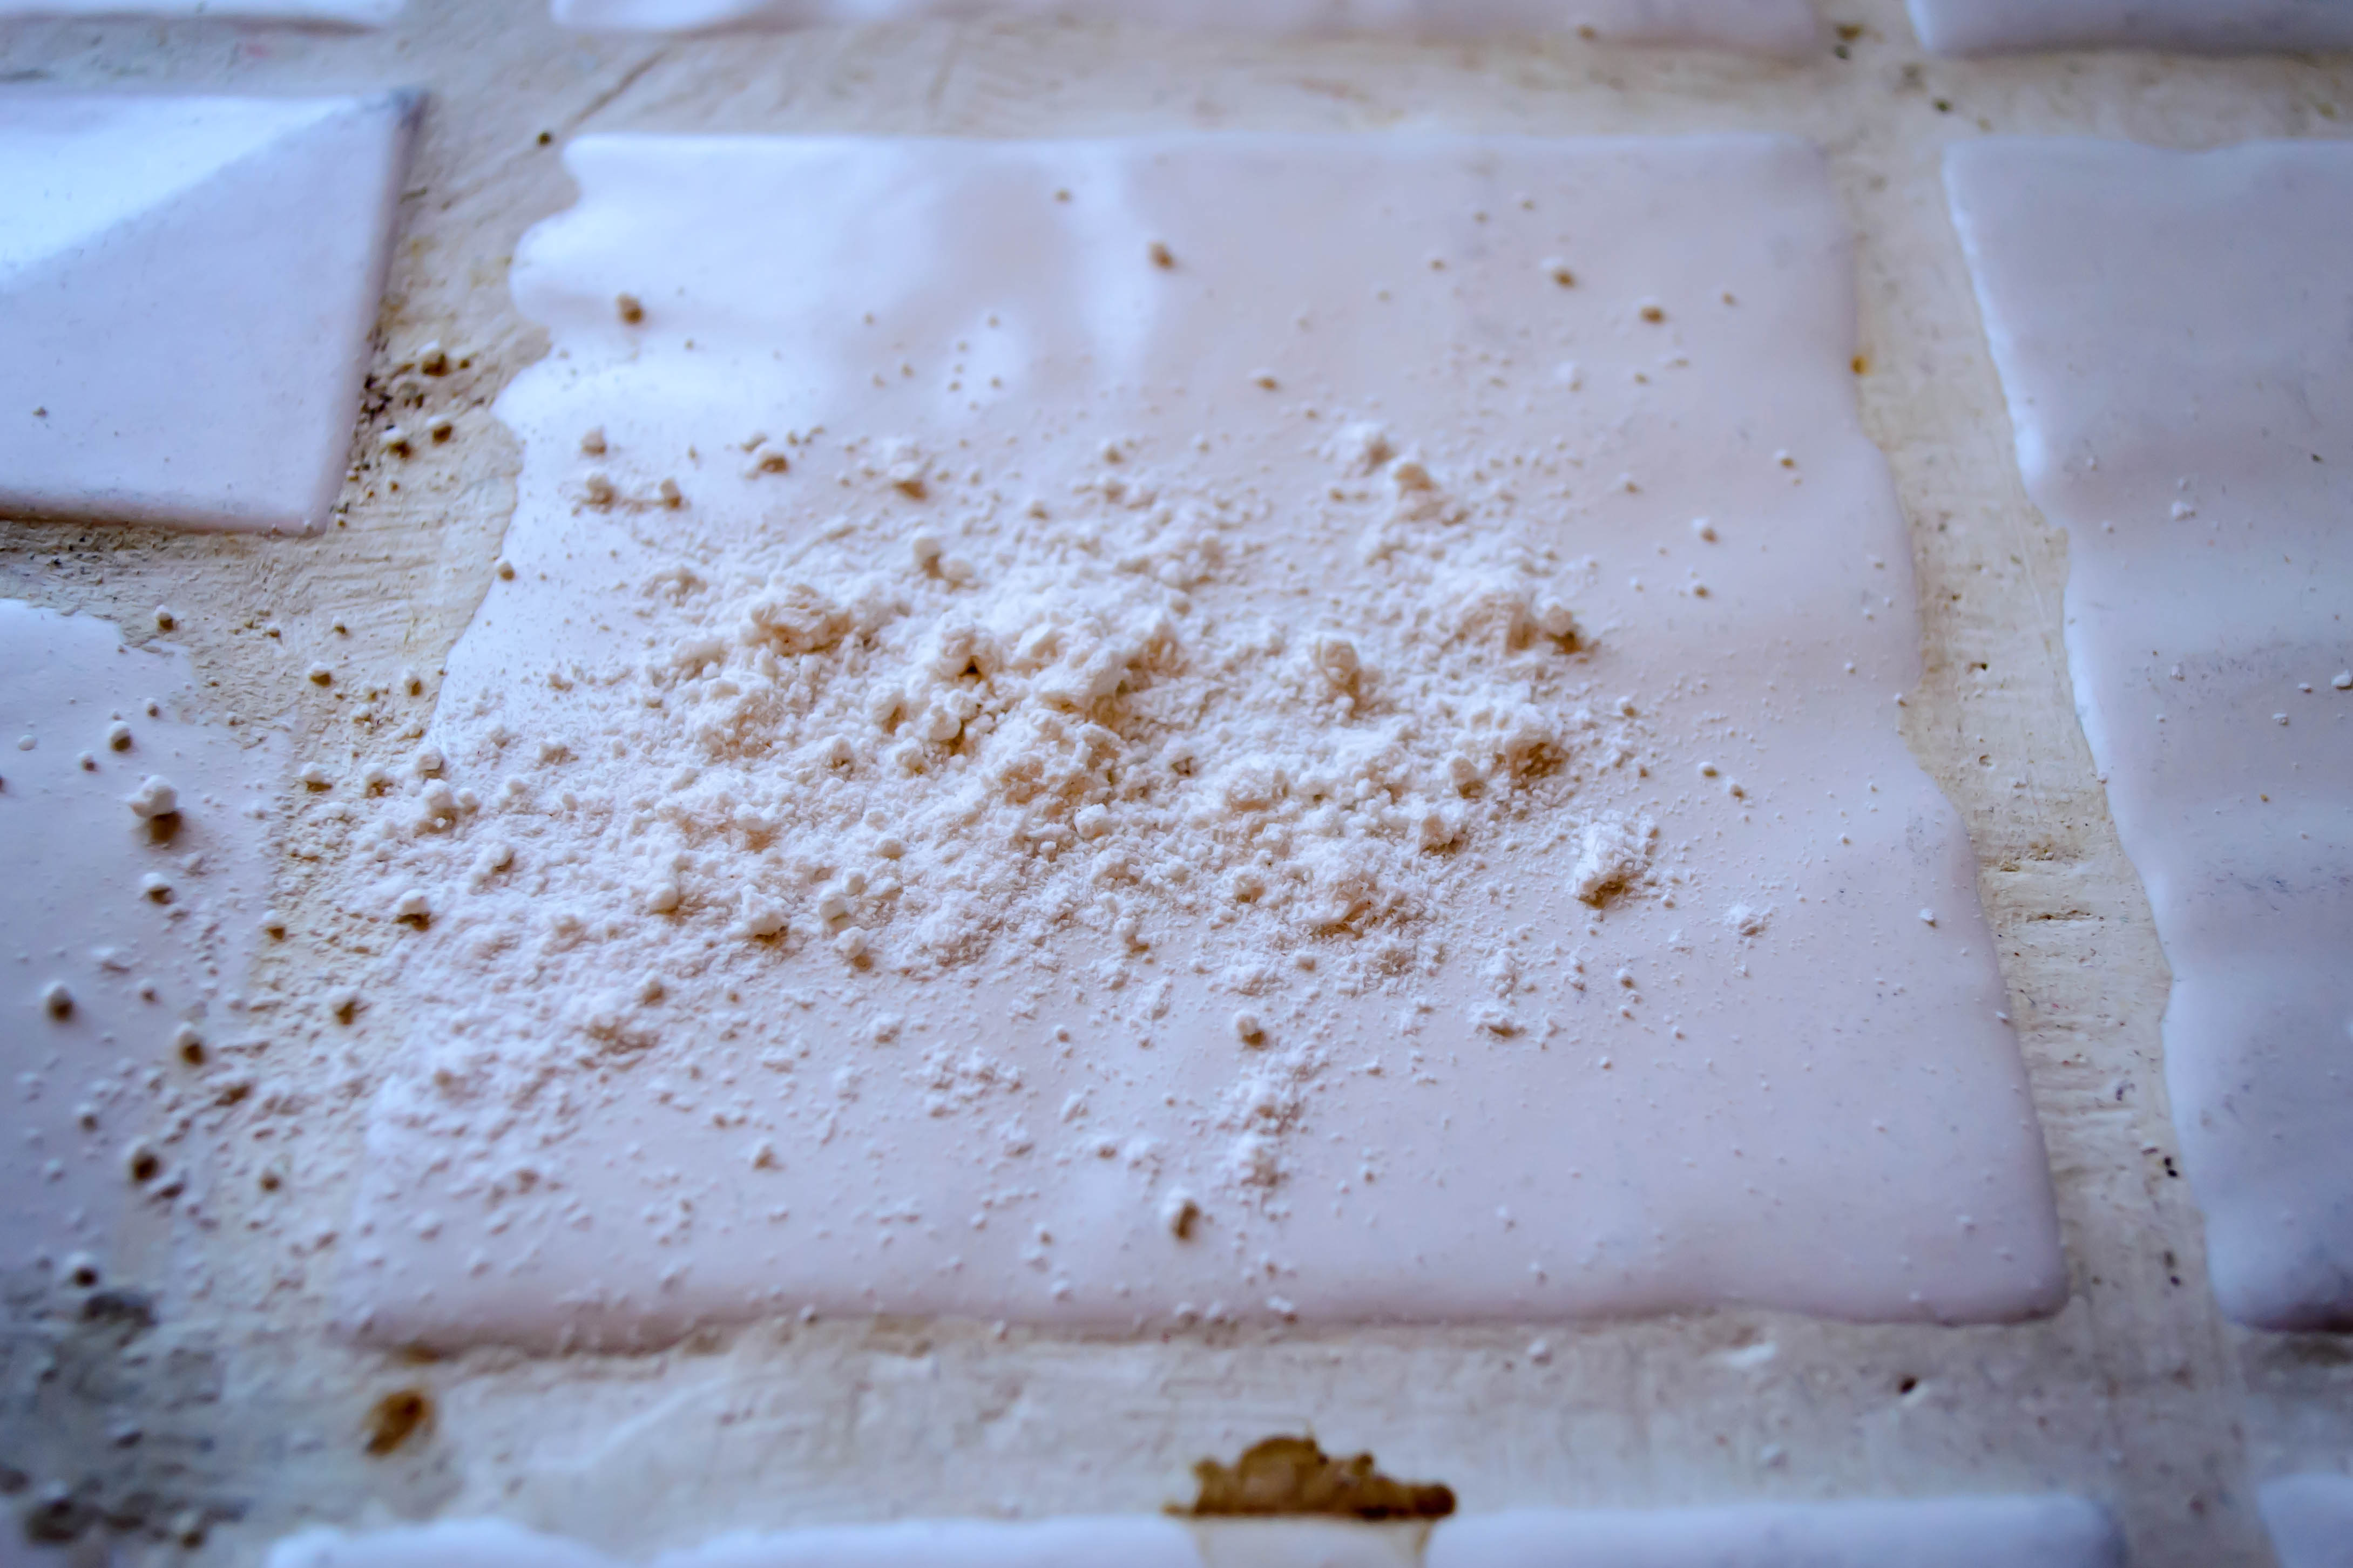
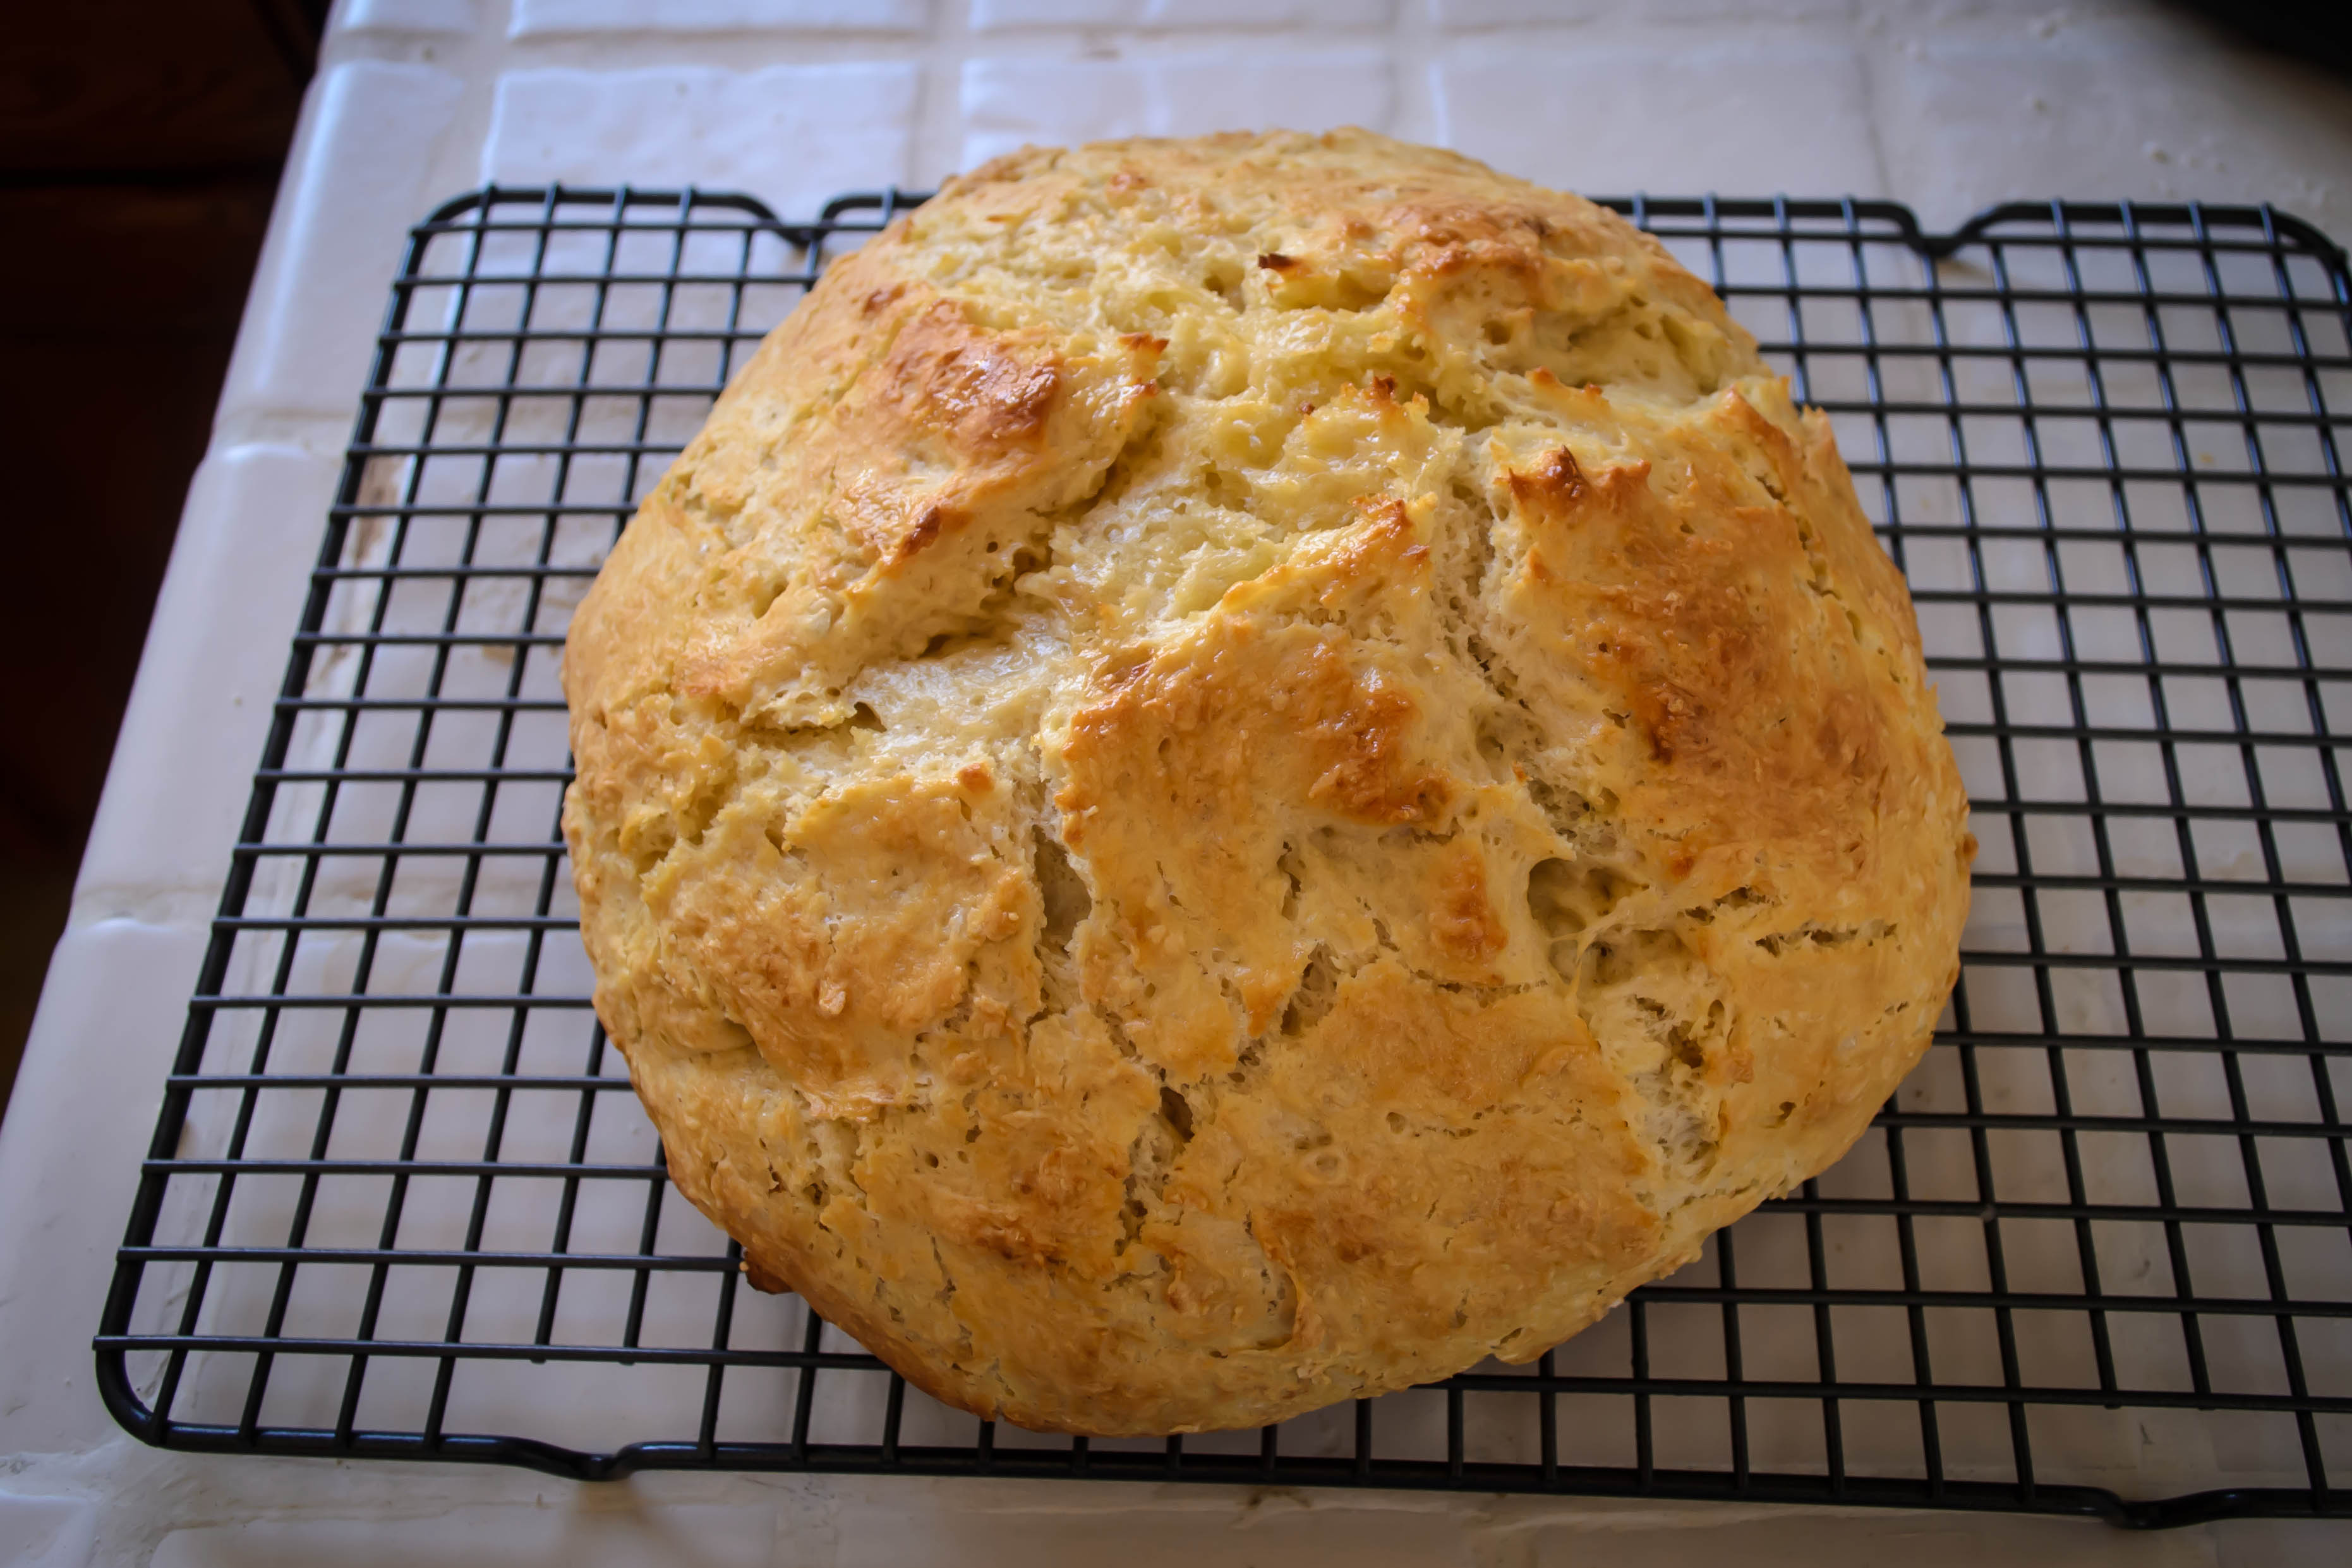
Here’s the final product, when I edit and trim.

Food Blog March 2013-0873

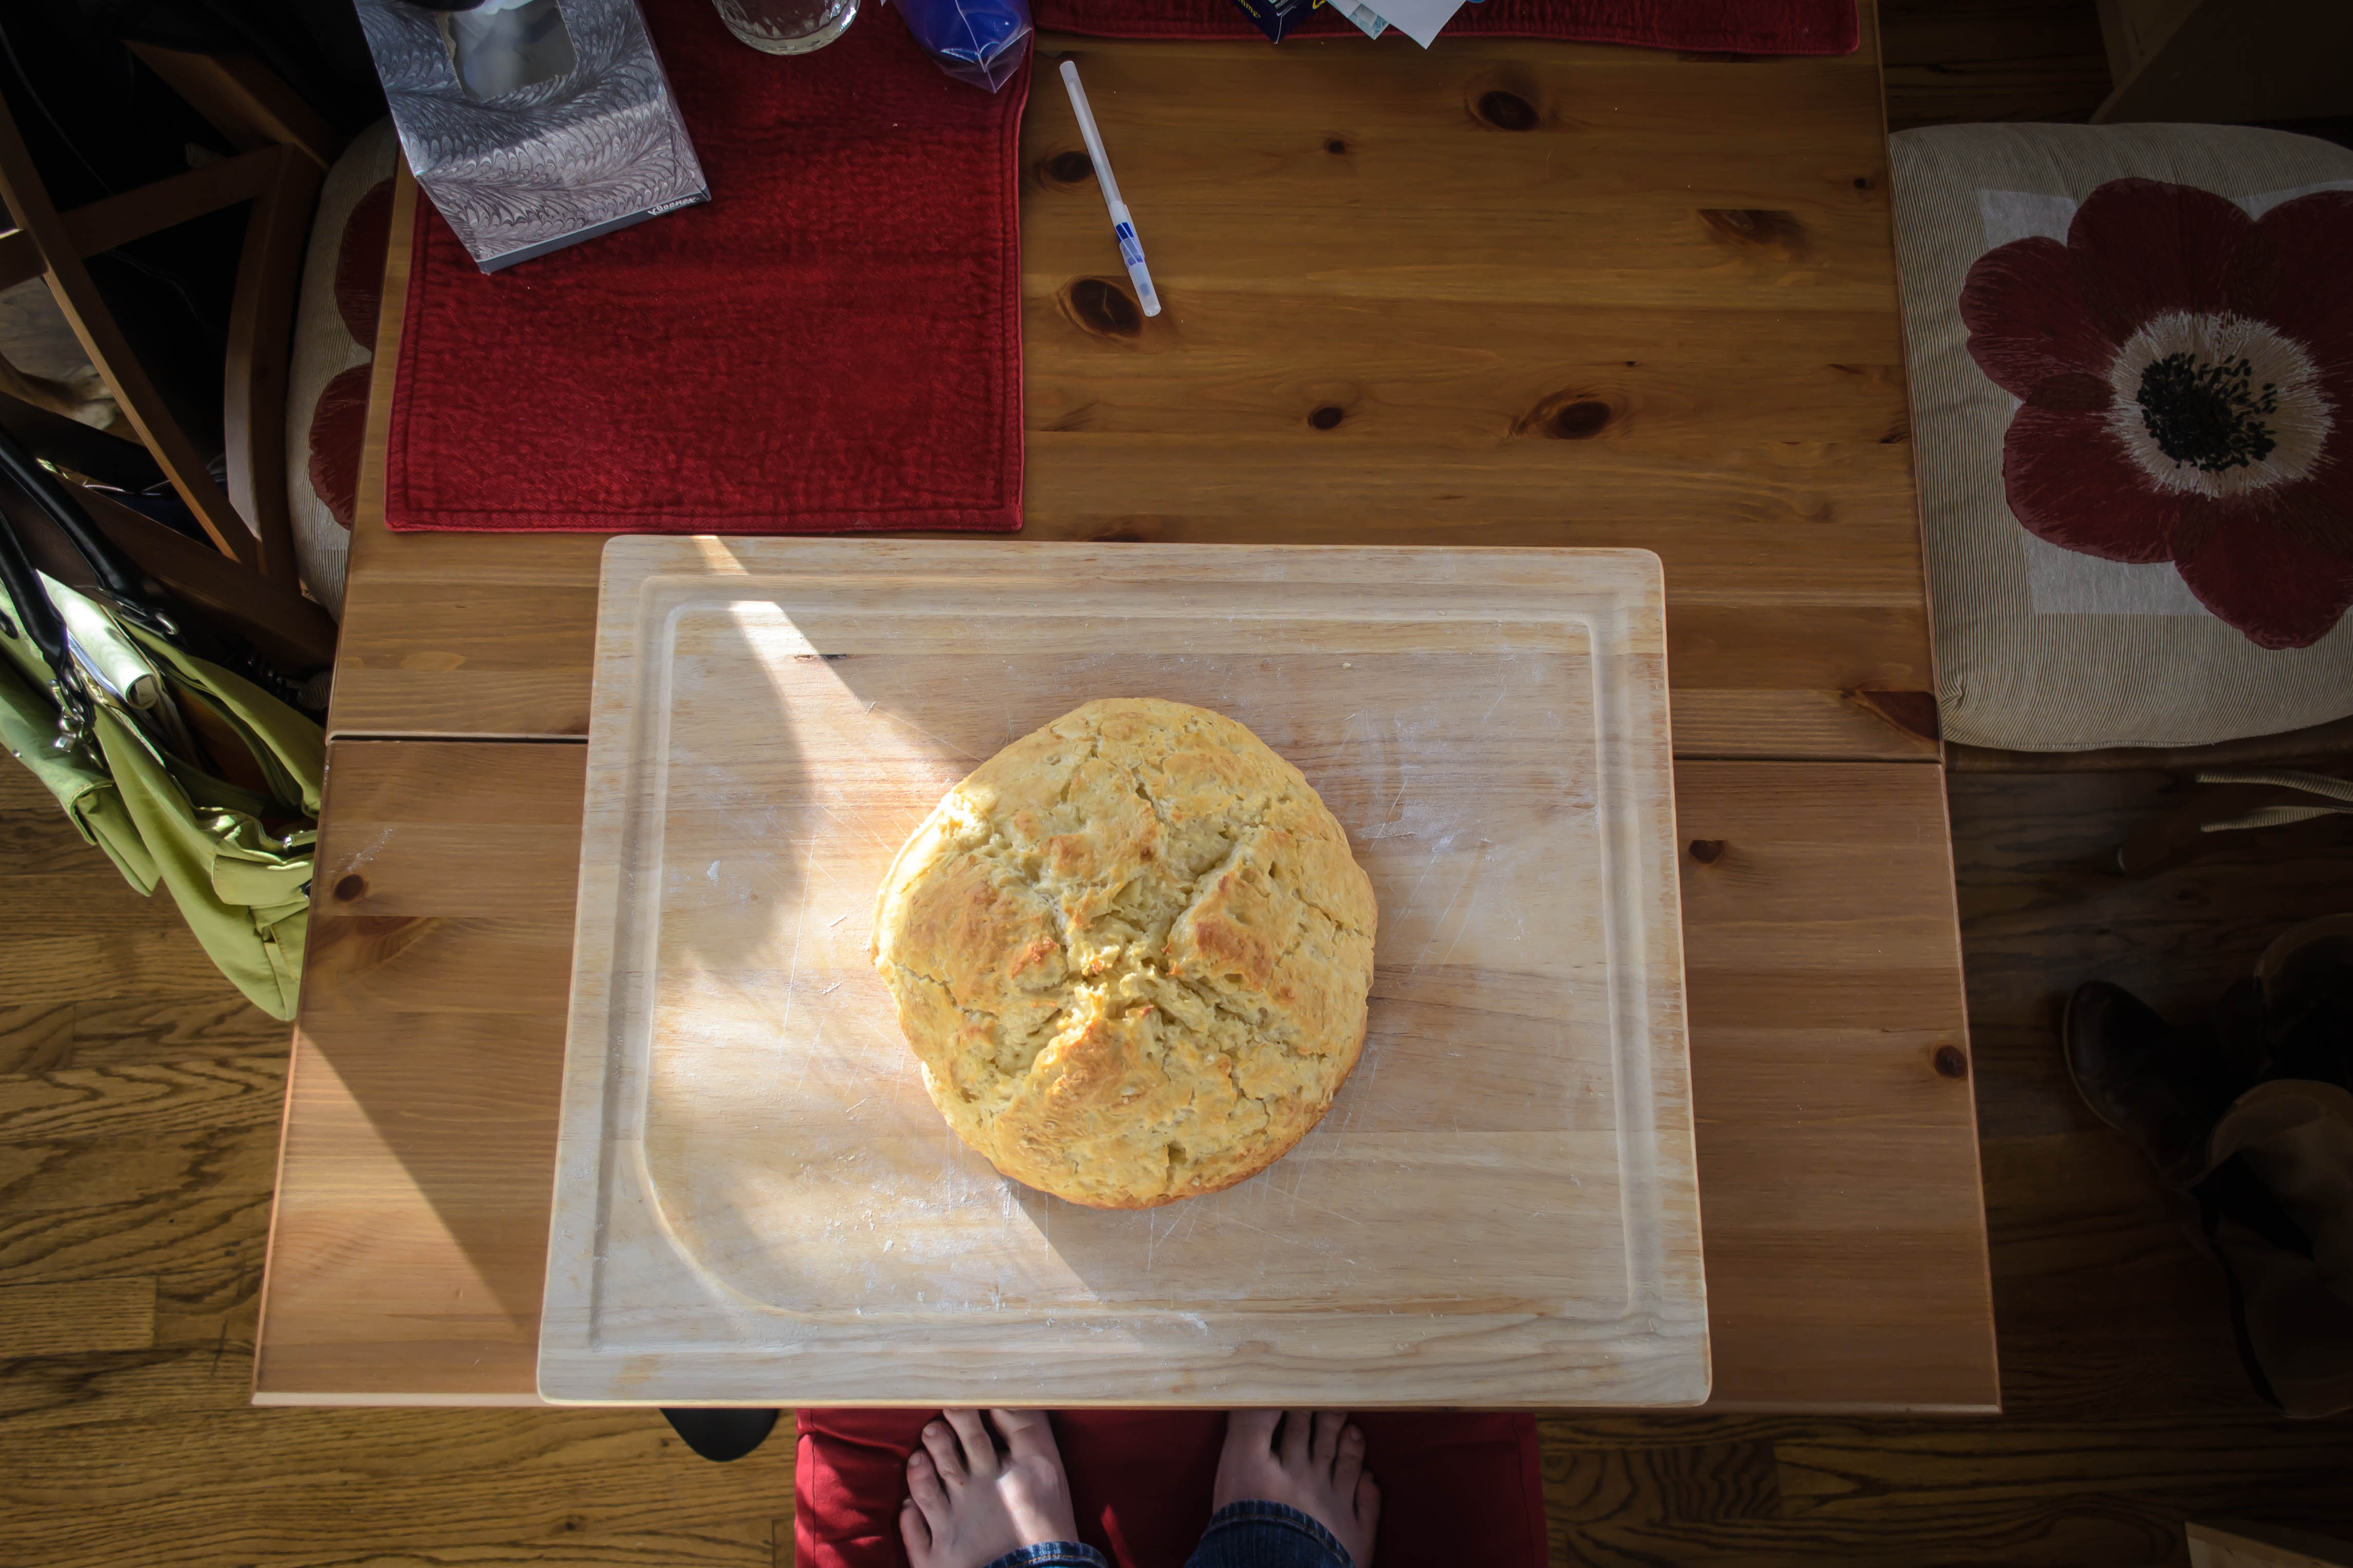
But since we’re being honest here, this is the set-up; I just push all that other stuff aside and crop it out…

Preheat your oven to 400F.  BI says to position a rack in the upper middle portion of your oven, but I left mine near the bottom and things turned out fine.
Whisk the dry ingredients together in a large bowl.
Cut in the softened butter with a fork, your fingers, or a pastry blender until it is distributed in small crumbly bits.  The mixture, BI says, should resemble coarse crumbs.
Add the buttermilk and combine with a fork just until the mixture begins to come together – the coarse crumbs should clump into slightly wet crags.
Turn out onto a floured board and knead slightly – 12 to 14 turns – just till the dough becomes “cohesive and bumpy” (43).  You don’t want to overknead this bread because it will become tough.  The intent here is not to stimulate gluten production, as it would be in a yeast dough.  We just want a homogenous mass that stays together.
Pat the dough into a 6 inch round (about 2 inches high) and score an X in the center with a sharp knife; use 2 TB of the additional butter to grease the bottom and sides of a dutch oven or similar covered pot.  Place the loaf carefully inside, cover, and bake with the lid on for 30 minutes.  Then remove the lid and continue baking for an additional 10 minutes, or until the internal temperature is 180F.
Melt the final TB of butter.  As soon as you remove the loaf from the oven, brush the top with the melted butter to keep the crust soft and tender.
Wait about half an hour before you attack it – this bread is delicate and it needs the extra structural support gained by cooling.  Earlier slicing will result in squashing and crumbling, and as honest as that is, we’d rather have nice slices or, as N. and I prefer, thick wedges for dunking.

Food Blog March 2013-0875Food Blog March 2013-0877

Go-To Dough 2

Because my little house sits smack between the concentrated skyscrapers of downtown Santa Monica and the constant ascent path from LAX, because I can hear the freeway from my backyard and see, from just down the block, the Hollywood sign in the distance, it sometimes slips my mind that I only live a few miles from the ocean.  Los Angeles is a funny place: loud, boisterous, urban, crowded, and yet along its edges it’s a beach town, where it’s just as loud and crowded, but people seem to move just a little slower.
Hard to remember, sometimes, but this past week we were treated to afternoons that reminded me I’m only a few minutes from the water.  Warmth gave way to brisk, fresh breezes heavy with the smell of salt.  Fog rolled over and it felt like a summer day on the Oregon coast.  These reminders of the Pacific Northwest made me want to call on ocean flavors: smoked salmon, crunchy salt crystals, and the grassy headiness of fresh dill.
Food Blog February 2013-0621
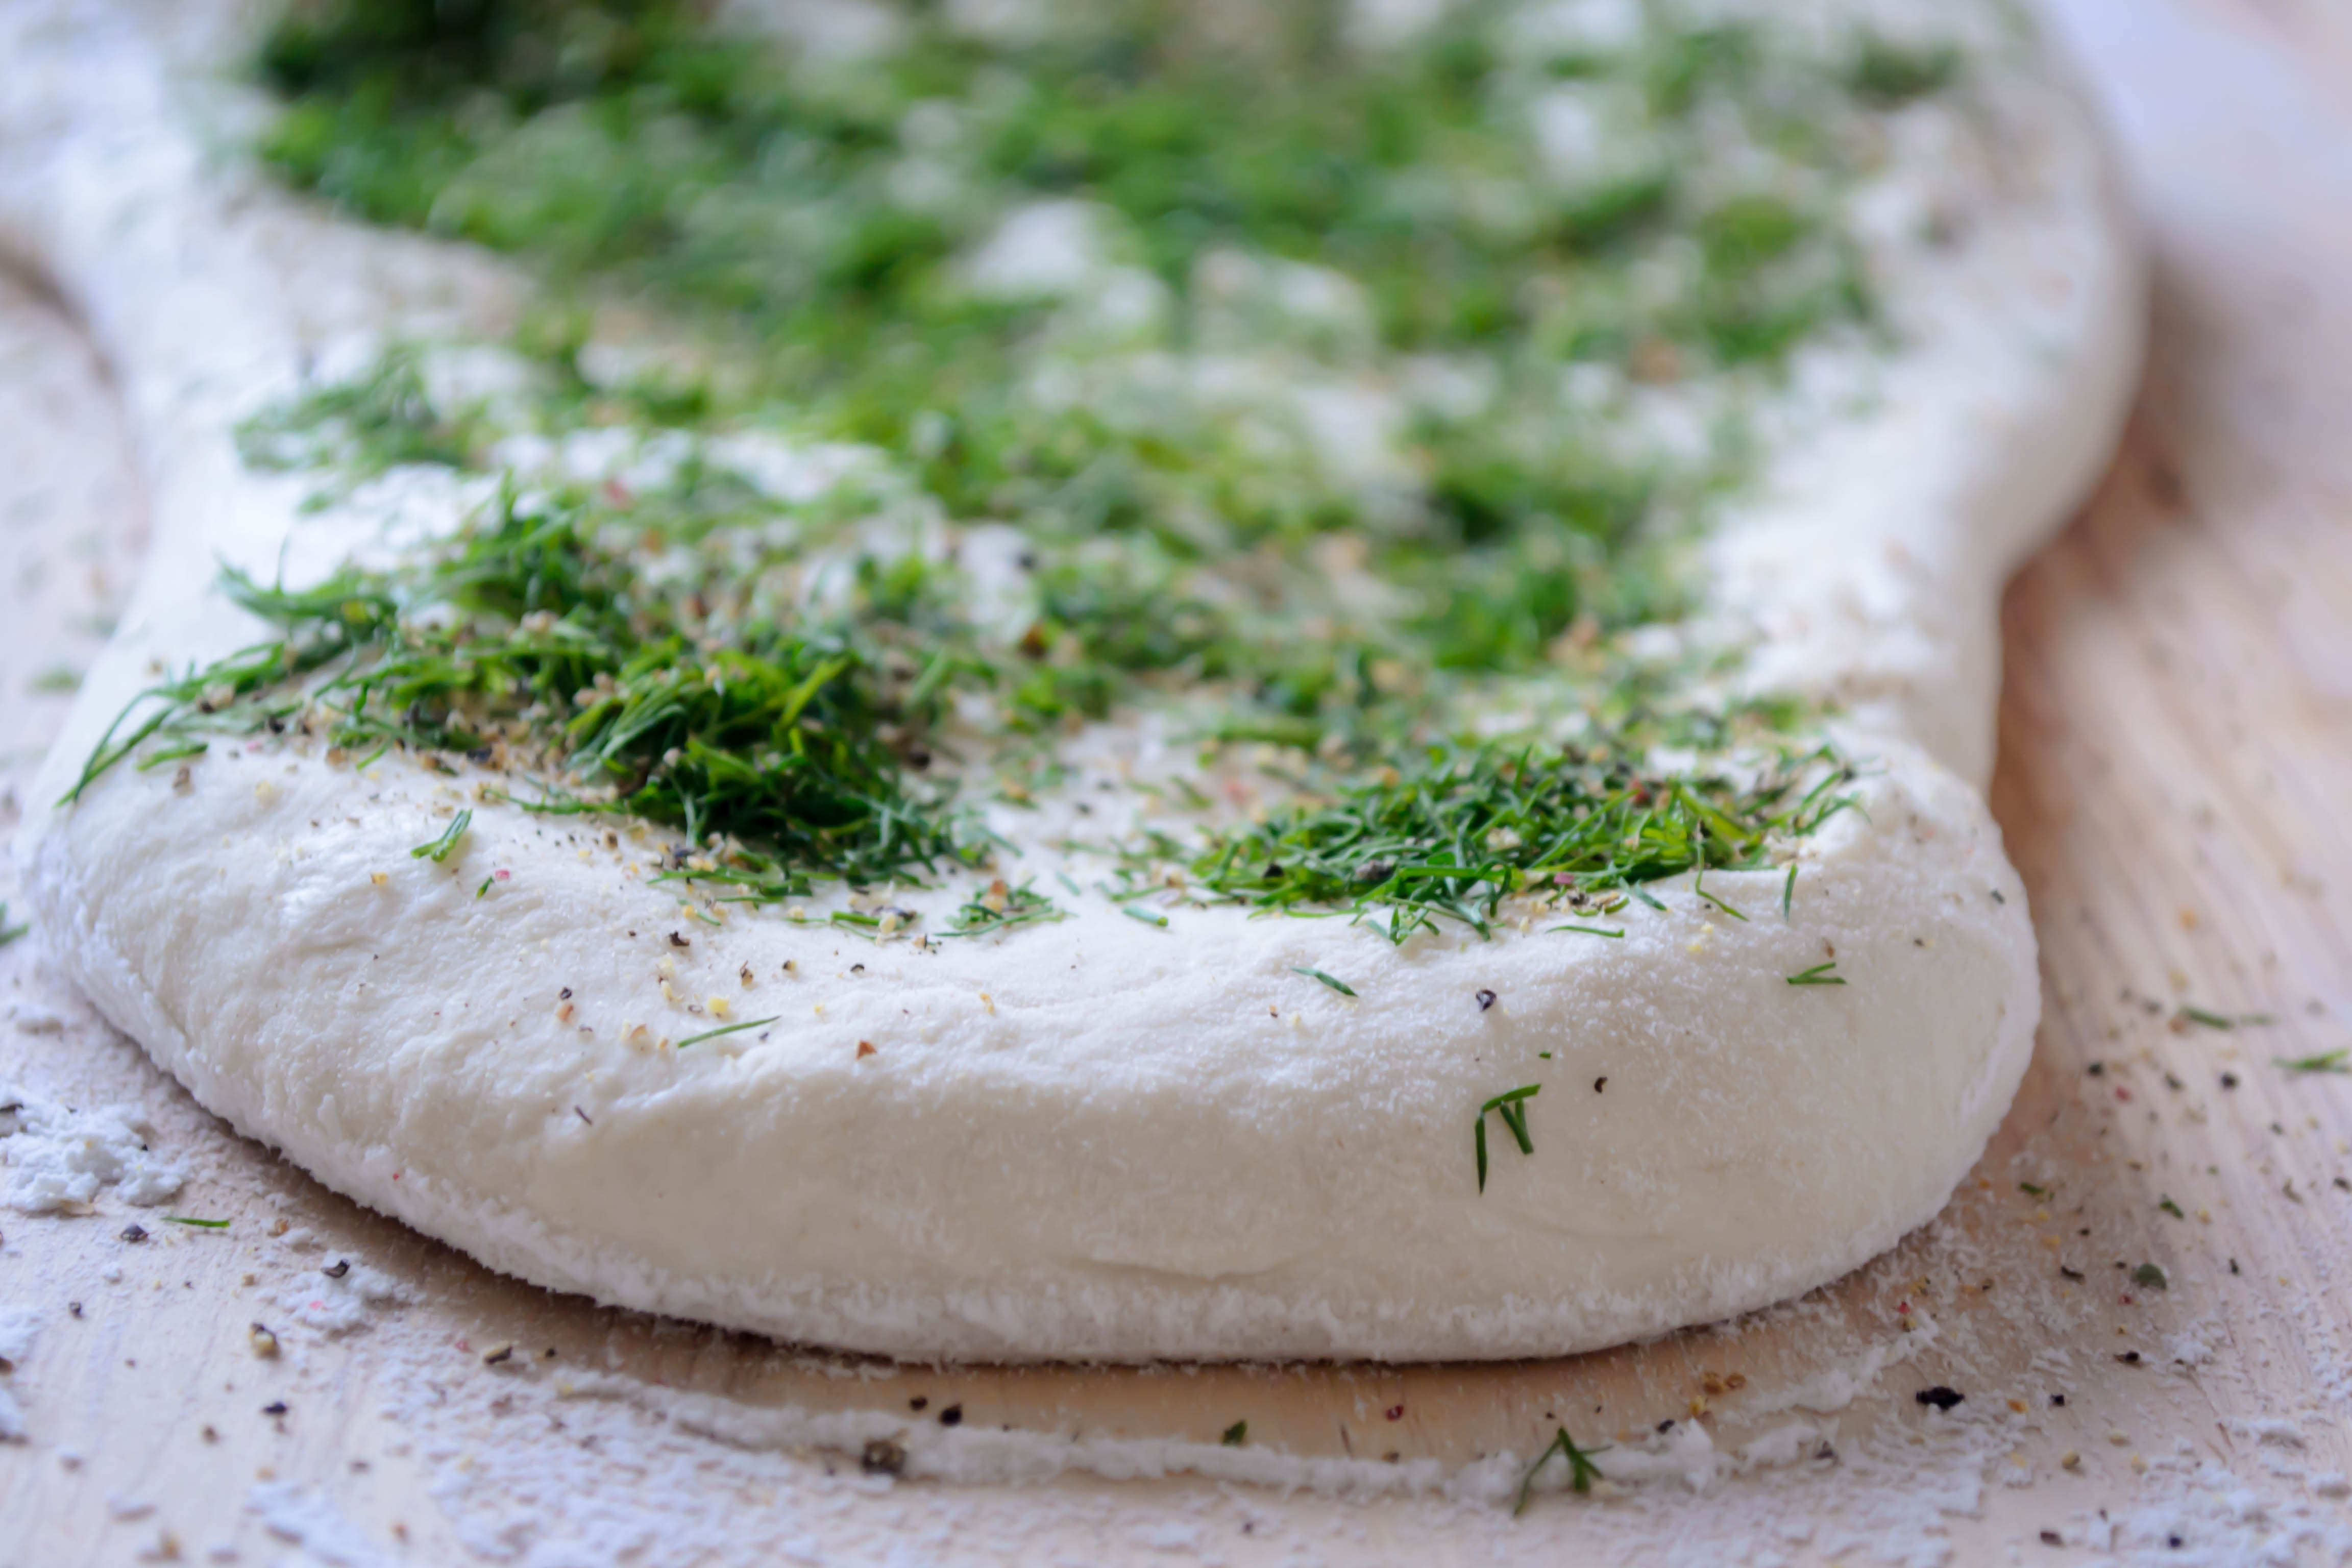
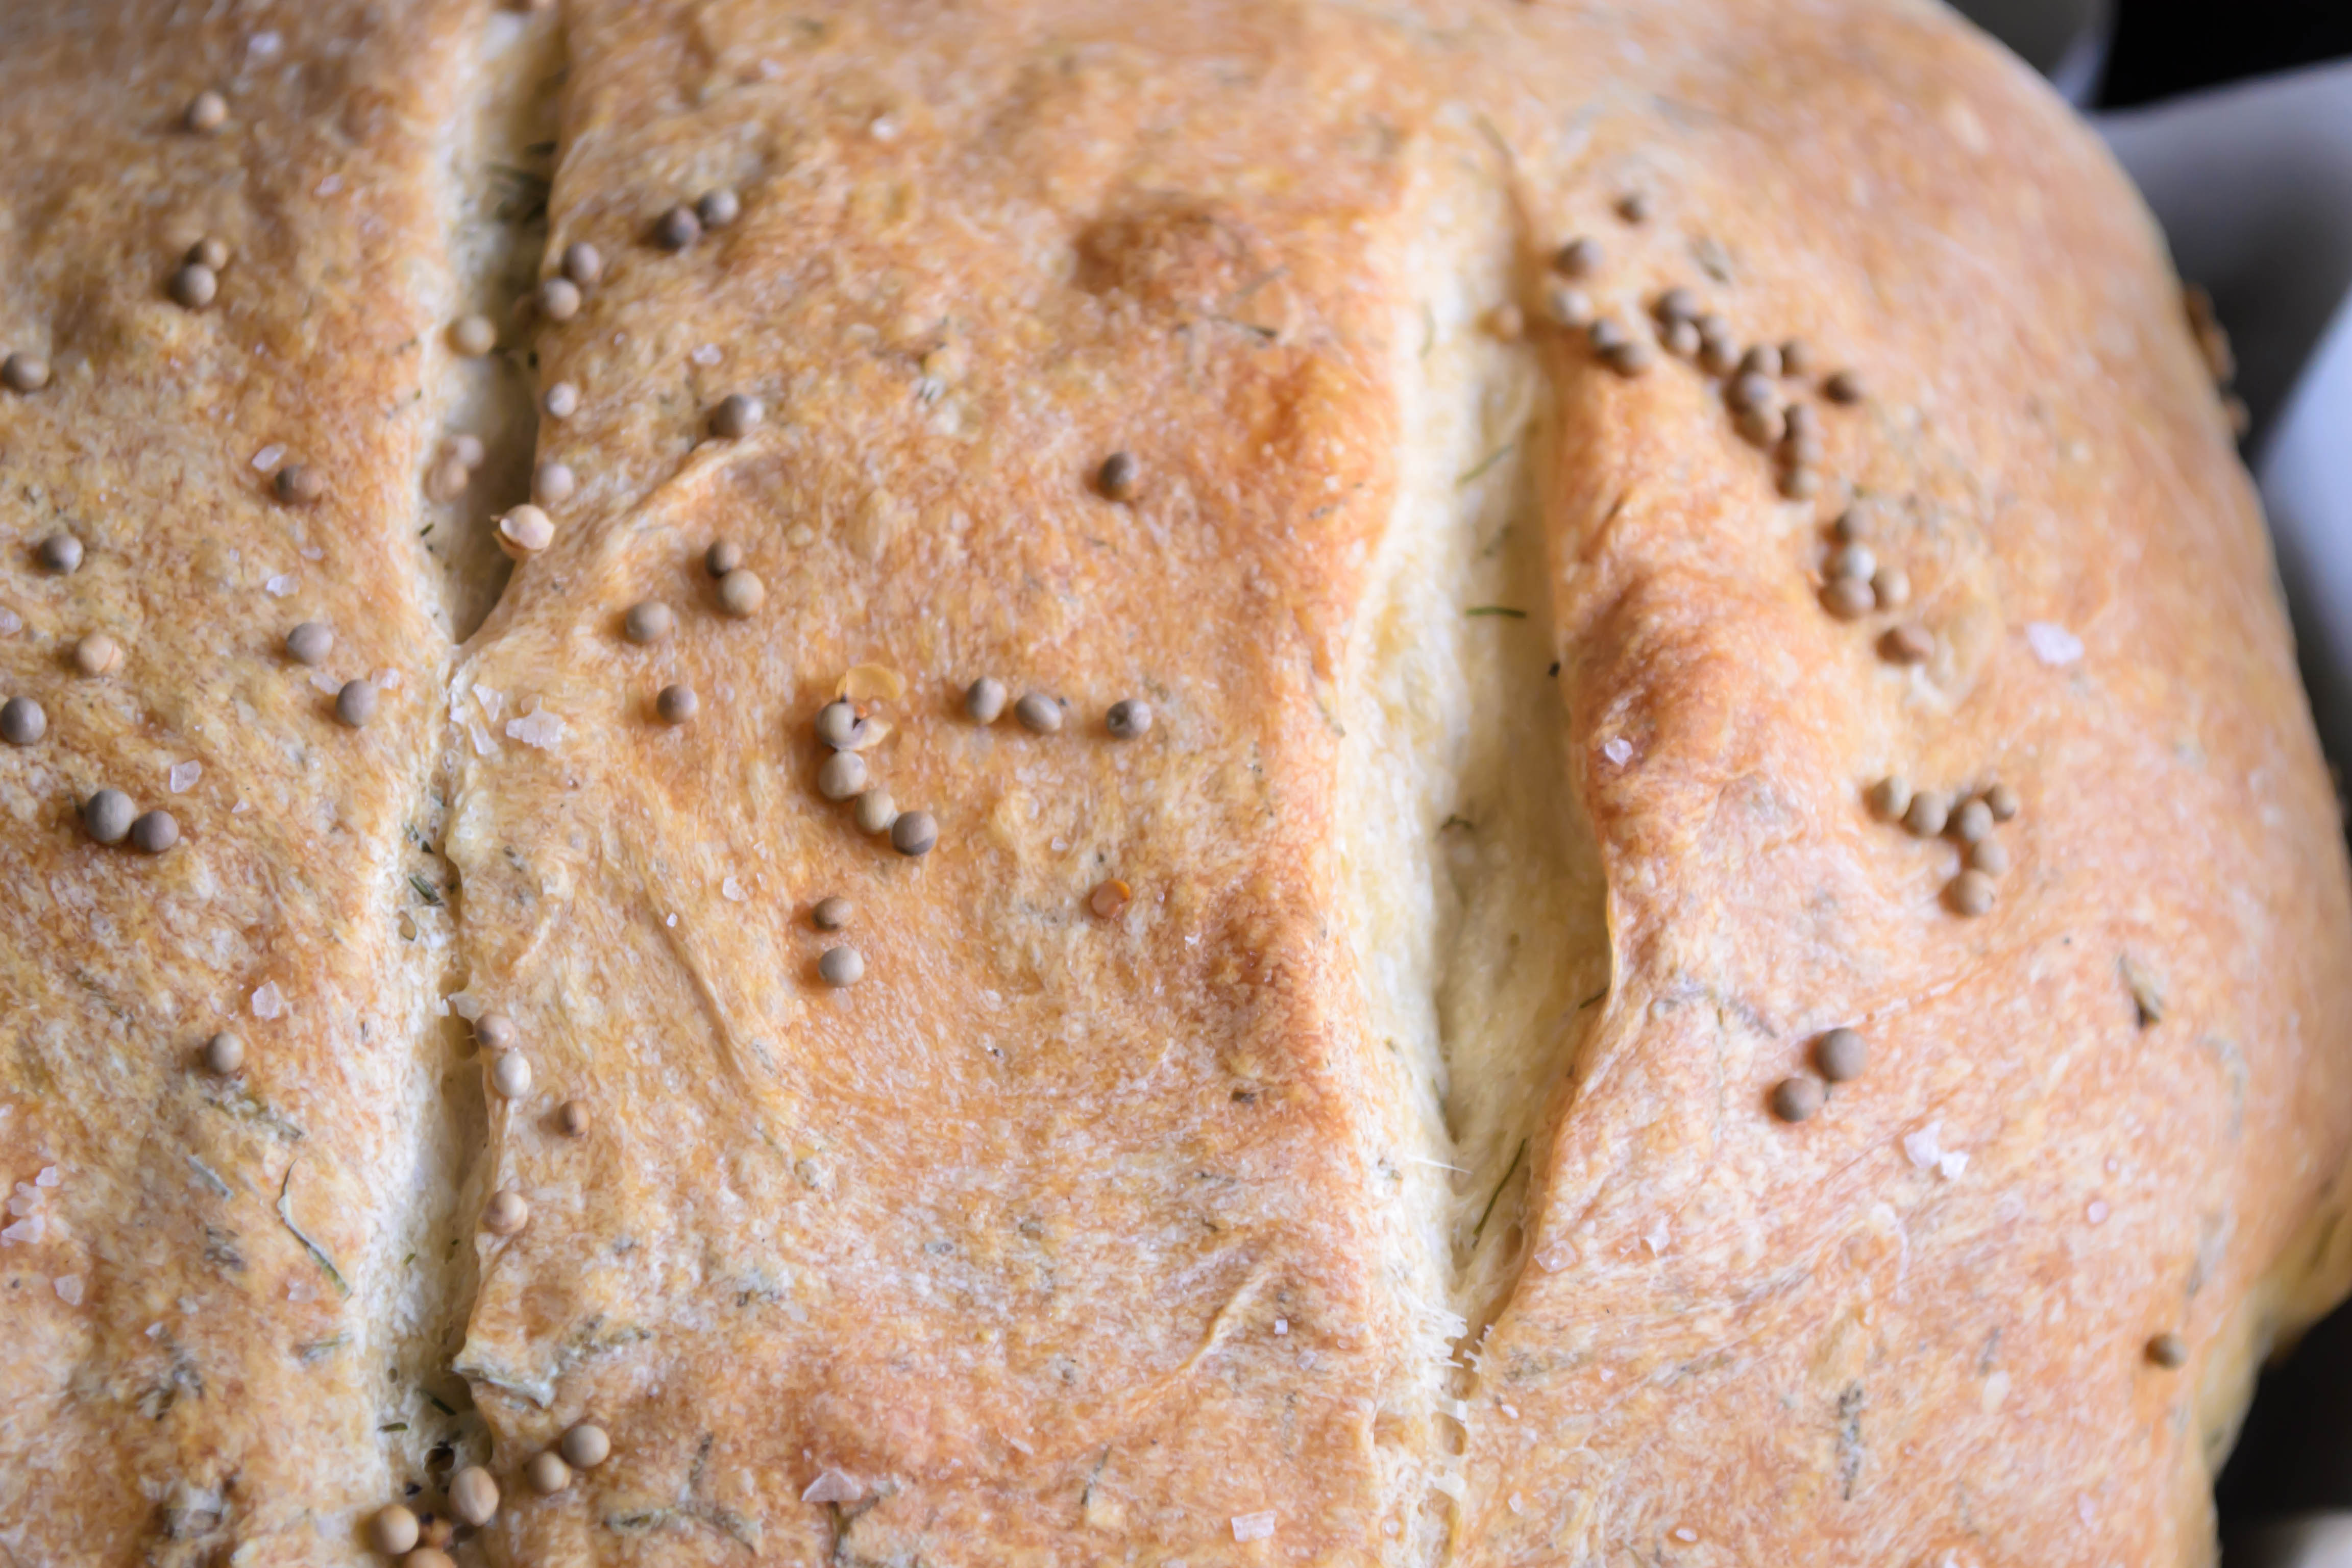
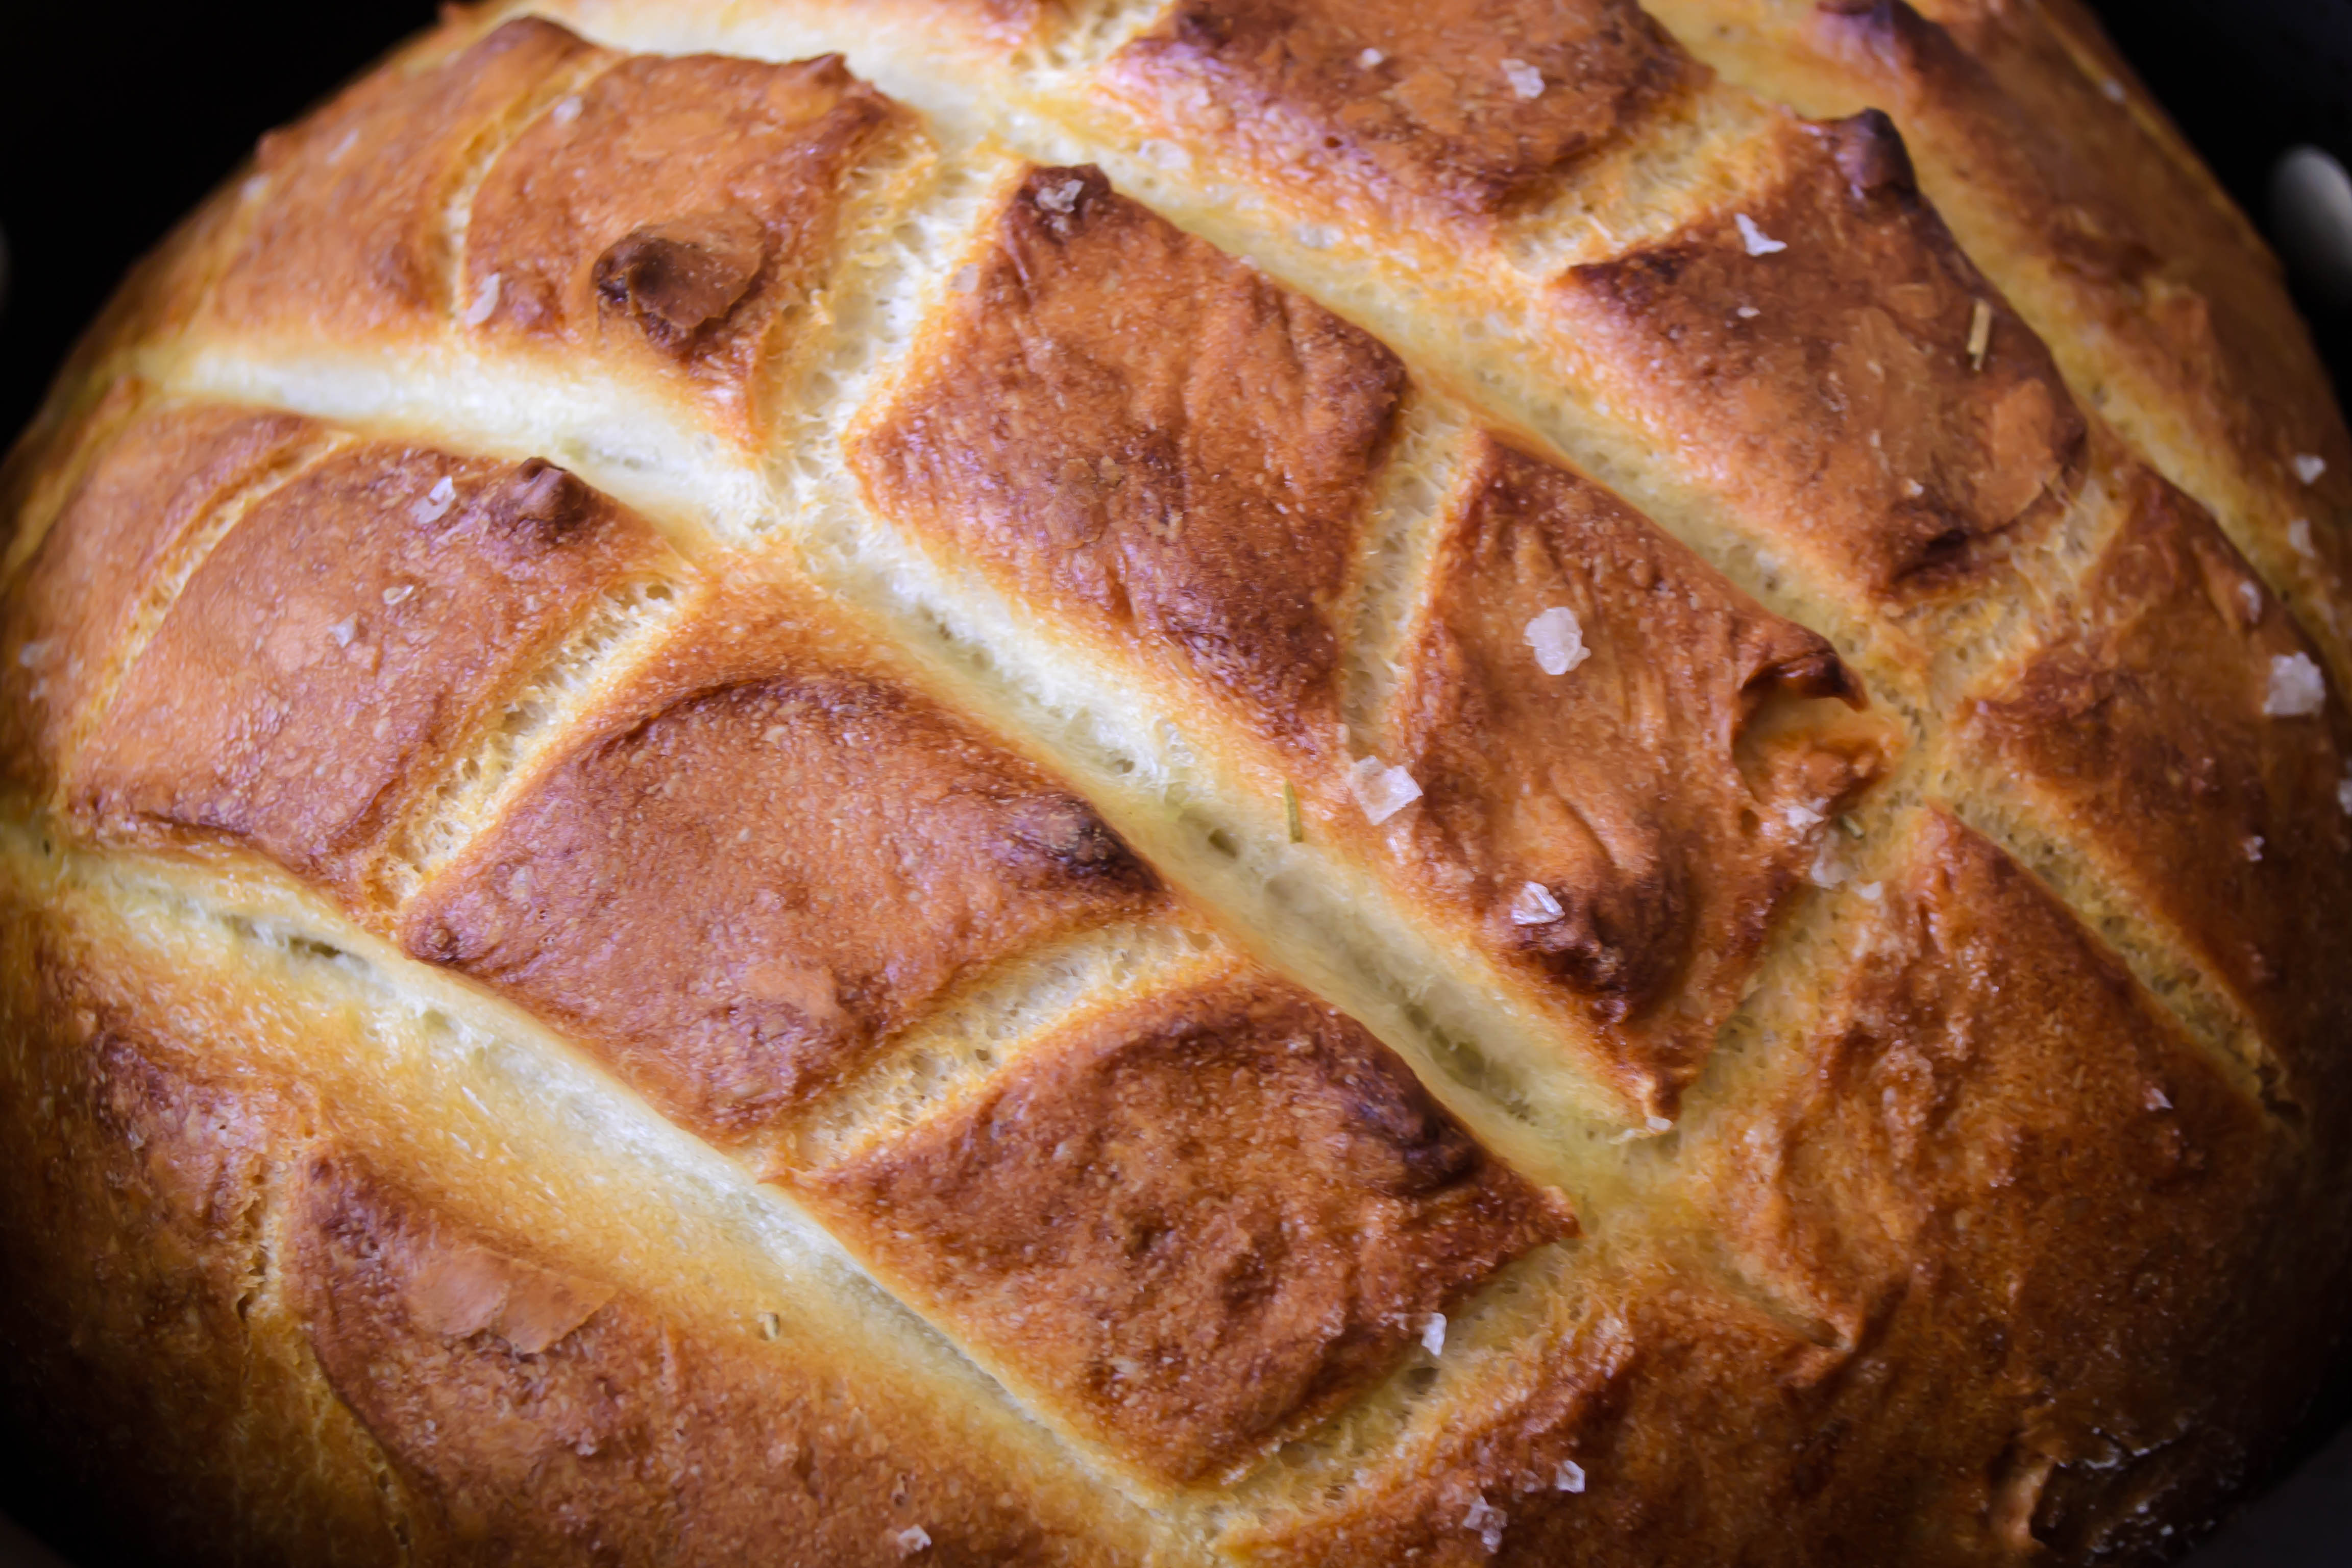
There are so many different methods for making bread that it’s a wonder anyone becomes a master at it.  This week I decided to try a process slightly more complex than Ruhlman’s basic boule, working with a recipe for French Boule from the Feburary 2009 issue of Cuisine at Home.  The process for this round loaf starts the night before, with a sticky, soggy, tasteless combination of flour, yeast and water called a poolish.  C@H tells us this came from the French pronunciation of “Polish,” from whom they learned this technique (19).  The long, slow fermentation time allows for plenty of yeast development and supposedly contributes a nuttier flavor to the end product.  It is supposed to look like pancake batter, and when you pull it out the following morning and add more water, it is supposed to be very thin.  Mine was, when I put it in the fridge for its overnight chill session, more like the texture of silly putty.  When I added water the following morning, it refused to combine evenly, its sticky strands getting soggier and stickier at the same time.  I was skeptical about this, but followed procedure anyway, and once it had been kneaded aggressively into my dough it didn’t seem to matter.
With the starter crises resolved, I considered flavorings.  Thanks to the overcast coastal feeling of our afternoons and a recent episode of Top Chef, dill sprang to mind as the most logical choice.  It would pair perfectly with our dinner: gemelli pasta draped with smoked salmon and vodka cream sauce.  Black pepper sounded like a nice foil for the dill – pungent and dry where the dill was fresh and mild.  I sprinkled them onto the flattened dough, then rolled the whole thing up into a long tube and kneaded through before letting it rise.  You could certainly add other flavor combos – kalamata olives and cloves of roasted garlic sound incredible – and gently roll and then knead them through the dough.

Food Blog February 2013-0611

Food Blog February 2013-0608
The usual procedure followed: rise, shape, rise again, and prepare for baking.  Olive oil, mustard seeds, and a good sprinkle of coarse salt seemed like the right things to add.
This time, instead of using a Dutch oven, I opted for my cast iron pan.  I was nervous about the bread sticking, which is probably silly, but what can I say?  I’ve lost several chunks of flatbread to that pan because I get anxious and rush the cooking process, so I took out some insurance and settled my loaf onto a layer of parchment paper sandwiched between it and the surface of the pan.
My recipe called for a heavy misting of water over the bread and into the inside of my preheated oven.  I didn’t have a spray bottle on hand with which to mist, so I just flicked droplets in with the tips of my fingers.  The sizzle was tremendous, but seemed to work well.  The resulting loaf was not as big as my first boule attempt, but it was lighter and not overbrowned on the bottom.  The crust was thin but crisp, and we loved the flavor combination.  The mustard didn’t do much besides providing a fun crunchy-pop texture on the edges, but the dill and black pepper were the right contrast of fresh and sharp and incredibly aromatic.  We each took a slice to eat in the car on the way to a soccer game at my husband’s school – had to make sure it was suitable for dinner, after all.  We ate thick slices with our pasta, running them around our plates to pick up every drop of sauce.  We ate more the next day, spread with salted butter, and were surprised and saddened the following morning to find that the loaf was nearly gone.  Dreaming of this bread again, I could see it toasted lightly, smeared with artisan goat cheese and topped with a luscious slice of smoked salmon: the Oregon coast in one bite.
Food Blog February 2013-0615
Dill and Black Pepper Boule
(adapted from Cuisine at Home, February 2009)
For the poolish starter:
1¼ cups bread flour
¾ cup room-temperature water
¼ tsp yeast (I used active dry yeast)
Rehydrate the yeast by combining it in a small dish with 1 TB of the water you’ll be using for the starter.  Let it sit for a few minutes.
Combine the flour, water, and yeast mixture in a bowl or a large measuring cup.  Stir well; the mixture should come together into a texture somewhere between pancake batter and silly putty.
Cover your mixture with plastic wrap and let it sit at room temperature for 3-4 hours, then move to the refrigerator and leave it alone overnight.
The next day, take it out about an hour before you intend to start, so it can return to room temperature and the yeast can wake up a little.
For the bread:
2 cups all-purpose flour (I’m not sure what the advantage is of combining bread flour and AP flour here, but I followed the directions anyway…)
1½ tsp salt
½ tsp yeast
½ cup room temperature water
Poolish starter
2 TB chopped fresh dill
½ tsp (or to taste) fresh ground black pepper
1 TB mustard seeds
1 TB coarse salt
Olive oil for drizzling
Fit your stand mixer with the paddle attachment and use it to combine the flour and salt (you could likely add the dill and pepper here too).
Rehydrate the yeast with 1 TB of the ½ cup water.  Add the remaining water to the room temperature poolish starter and combine.  Mine did not become very thin, as my recipe said.  In fact, mine refused to combine particularly well (read: at all) with the poolish, but it seemed to work out just fine anyway.
Add rehydrated yeast and poolish mixture to the dry ingredients and stir with paddle attachment until the whole mess comes together a bit.  It will be quite sticky.
Scrape sticky mass of just-barely-dough onto a well-floured board and work it with a bench scraper, adding more flour in small sprinkles until some of the stickiness abates and it seems like it could be worked by hand.
At this point, let the dough rest for 10-15 minutes.  The recipe suggests turning a bowl over it (I presume to prohibit drafts), but I think draping on a clean, dry kitchen towel would work just as well.
After the dough has rested, it’s time to knead.  You can do this by hand for 10-15 minutes, or in a stand mixer with the dough hook for 8-10 minutes, until it passes the windowpane test.
Food Blog February 2013-0606
When the dough is smooth, elastic, and stretchy enough to pass the test, if you haven’t added your flavor extras already, flop it onto a floured board and push, pull, or roll out into a rectangle.  Sprinkle on the toppings, then roll up lengthwise and knead together until the dill and pepper are distributed; you’ll be able to see green and black flecks throughout.  I don’t think it matters much when you add something finely chopped like dill, but if you are using a more delicate addition like olives or even sundried tomatoes, be sure to add it this way so it doesn’t get bashed up during the kneading.

Food Blog February 2013-0612

Set the dough in an oiled bowl and let it rise for an hour in a warm, draft-free place (like a briefly heated, then switched off oven).  It should double in size.
Once the dough has risen, remove it from the bowl and shape it into a boule by spinning it away from you with one hand and tucking the dough under with the other.  Let it rise for another hour.
While the dough rises, preheat your oven to 475F and put a cast iron skillet inside (mine is a 9” skillet).  If you are worried about the loaf sticking or getting too brown, prep a piece of parchment paper by cutting or tearing it to cover the bottom and sides of the skillet (don’t be too fussy about this – mine was a square that protruded above the sides of the pan and it was just fine).

Food Blog February 2013-0614

Turn the dough out onto the parchment paper, then pull the skillet out from the oven and set the loaf – on parchment paper if you are using it – into the center.  Slash the top, drizzle with olive oil, and sprinkle liberally with mustard seeds and salt.  Using the tips of your fingers or a spray bottle, mist or dribble the top of the loaf with water.
Place the laden skillet back into the oven, spritz the inside of the oven with ten flicks or so of water, and shut the door.  Wait 30 seconds and repeat the spritzing process.
Reduce heat to 450F and bake for ten minutes.
Reduce heat to 425F and bake for ten more minutes.
Finally, reduce the heat to 375F and bake another twenty minutes.  Remove from oven and cool on a rack for 45 minutes before slicing and devouring.

Food Blog February 2013-0619

Go-To Dough 1

Grading weeks are always busy.  This week my students turned in a paper examining local Farmers’ Markets, questioning this business model’s relationship to sustainability, and assessing whether, in practice, it seems to meet its own perceived goals.  They talked to vendors, they talked to shoppers, they peered at and smelled and tasted local fruit, and they shared their experiences during class.  And now I have to grade their work.  It seemed like a good idea, as I contemplated sitting down with a pen in hand and my editor glasses on, to have the smell of fresh bread in the background.

Food Blog January 2013-0548

Bread is, if you’ll excuse my torturing a metaphor for a moment here, a bit like how writing a paper should be.  You poke around a bit at your idea to see if it is viable – this is the yeast proofing stage.  You mix together your ingredients: idea, observations, quotes and facts from outside sources, and then you work and work and work your thoughts.  You knead them together until they are smooth but still elastic: one of the great and the frustrating things about writing is that you’ve got to be willing to see room for change in your product, always.  Your ideas need to stretch and flex as you read and understand more, or your work will never be as deep or sophisticated as you want it to.

And then, like dough, you have to let it rest.  You have to be patient, and plan ahead enough that your little work in progress has time to sit and develop.  When you return to it, hours or days later, if you’re lucky your perception of it will have shifted.  This gives you fresh perspective and lets you see what new avenues could be pursued, or what new angles need examining.  And so you work with it again, reshaping and adjusting, pulling and folding.  And then you let it rest again.

When it’s finally ready to submit, kneaded, shaped, risen, baked, you’ve spent time on this project.  It is yours.  Your voice rings out, your thoughts are fully developed, and the flavor is something original and pure.

Things don’t always happen that way, especially in college.  There’s not enough time or the ideas don’t flow or the method isn’t perfect.  But they don’t always happen for bread either.  You have to have patience and time, and you have to know how to work with your materials.

I wanted to a go-to recipe – a standard to work with.  I can play with additions and flavors and quantities all I want, but to become a good bread baker I think I need to solidify my technique.  So I’m auditioning basic recipes.  This week I decided to go with Ruhlman’s ratio for a boule, one of the most basic-sounding in his book.  But because I can’t leave well enough alone, I added some honey for the yeast to gobble, and some crushed dried rosemary for a little wake-up in flavor.  I also, at his suggestion, baked my loaf in a dutch oven (well, my non-stick 5 qt. version of a dutch oven – I suspect the original or enameled cast iron incarnation would be far superior), which made good sense.  It’s exactly the right shape, and having walls to hold in the diameter probably makes the resulting loaf climb a little higher.

Food Blog January 2013-0546

But somewhere in the mix things went awry.  My loaf, though it was beautifully golden and crusty on top, got a little dark on the bottom.  I suspect the non-stick cookware along with the layer of olive oil I doused on anyway had something to do with this.

Food Blog January 2013-0554

Once the unfortunate burnished bottom was removed, this loaf was delicious.  It was crusty and chewy, though a little bit dense, and a very welcome accompaniment to pasta.  It sops up alfredo sauce like a champ.  It also worked well as leftovers, toasting up beautifully and offering no resistance to my demands that it be slathered in butter, drizzled with honey and then sprinkled with lemon zest.

It wasn’t perfect, but if I can figure out the singed bottom problem, this loaf would certainly be in the running for a go-to dough recipe.

Basic Boule, adapted slightly from Michael Ruhlman’s Ratio

12 oz. warm water

1 tsp active dry yeast

2 tsp honey

(I might add a few tablespoons of olive oil for additional flavor and fat, but I haven’t tried this yet)

4 cups flour (or 20 oz., if you’re doing this properly)

2 tsp salt

2 tsp dried crushed rosemary

Combine the water, yeast, and honey in a small bowl or measuring cup and set aside for 5 minutes or so.  This is the proofing stage.  The yeast comes out of hibernation and starts to foam and smell beer-y.  Supposedly it likes the extra hit of sugar to chomp on, and I thought the honey might be a welcome background flavor.  It’s not necessary, but it’s nice.

While the yeast is waking up, combine the flour, salt, and rosemary in a medium bowl.  I used my stand mixer with the paddle attachment.

With the paddle attachment still in place, pour in your yeasted water mixture and run the mixer on low speed just until things start to come together.

Replace the paddle attachment with the dough hook and let the mixer do its thing for 10 minutes, or until the dough is smooth, elastic, and passes the windowpane test.  I kept mine on a medium-low speed, because my dough kept poking up above the edge of the bowl, and I was afraid of it escaping and rampaging the counter, blob-style, if I increased the speed.  If you are kneading by hand, this will take at least 10 minutes.

Food Blog January 2013-0530

Once the dough has undergone this change in character, becoming a smooth ball with the barest remnant of stickiness, move it to a lightly oiled bowl and stow it in a warm, draft-free place for an hour.  I like to set my oven at 200F for five minutes, then turn it off and wait five minutes before putting the dough inside with a clean kitchen towel draped over the bowl.

Food Blog January 2013-0533

After an hour, check the dough – it should have doubled or be close to doubling in size.  When it has doubled, remove it from its bowl and punch it down gently on a floured board.  I’m coming to realize that “punching down” is more like “softly press your fist into the dough, which will deflate like a feather pillow as the gas releases from inside it.”  It’s like the punch you give a friend you’re pretending to pummel, where the action begins quickly but ends with a relaxed push against his shoulder.

Food Blog January 2013-0534

Let the dough rest for a few minutes, as if to get its strength back.

Shape the dough into a round.  Ruhlman explains this procedure as “pushing the dough back and forth on the counter in a circular motion until you have a round, smooth ball” (10).  I tried this, unsure of exactly what I was doing, but really my dough was in almost the right shape already so I decided to leave well enough alone.

Oil the bottom of a dutch oven and pop the ball of dough inside.  Cover it with a towel and let it rise for another hour.  Depending on the size of your dutch oven (mine is a 5 qt.), your dough will expand to cover the bottom of the pot and maybe even begin to push its way up the sides.

Food Blog January 2013-0536

When it has risen again, carefully score the domed top of the bread with a very sharp knife, drizzle with olive oil and sprinkle with coarse or flaky salt.  I used Maldon.

Food Blog January 2013-0542

Place in a preheated 450F oven with the lid on for 30 minutes.  This holds in some water vapor and creates a crisper crust.  Remove the lid and continue baking for about 20 minutes, or until the internal temperature reaches 200F.  The loaf will slip easily out of the pot and the bottom will sound hollow when you tap an inquisitive knuckle against it.

Food Blog January 2013-0545

Let cool at least until it is comfortable to handle, then slice and serve as desired.

Food Blog January 2013-0559

This is best on the day it is made, but it makes very good toast a day or two later.

Rolling in Dough

Okay, 2013, here we go.

OLYMPUS DIGITAL CAMERA

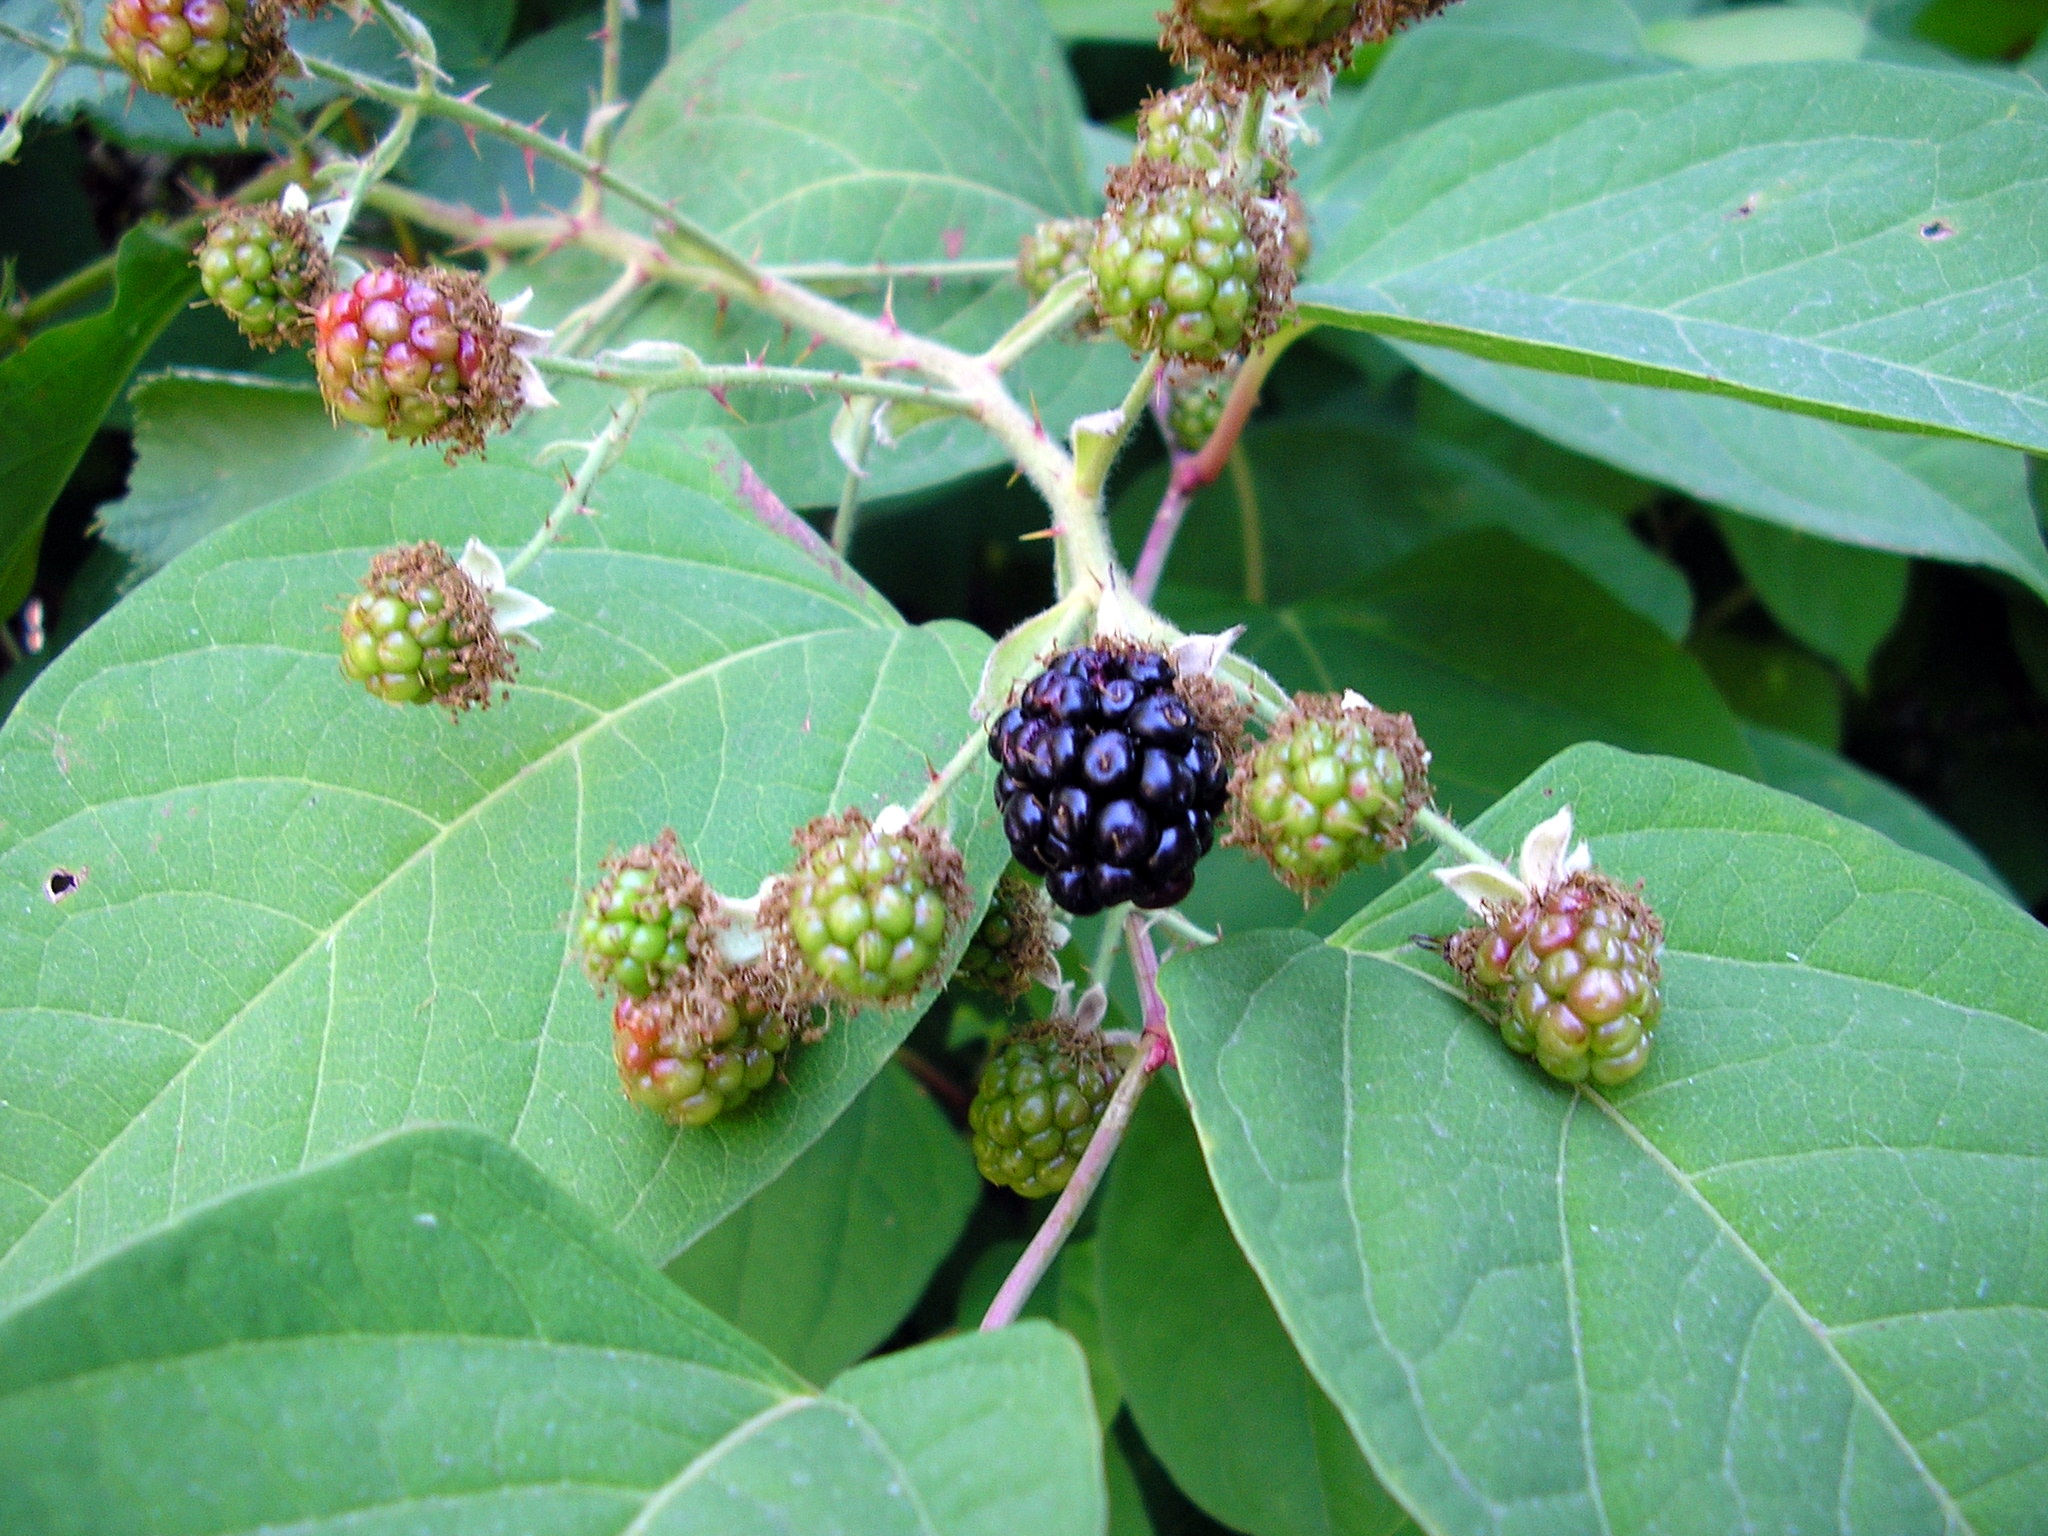
This year, I have a few changes to announce.  First, you may have noticed that we’re at a new address.  Update your bookmarks, if I’m lucky enough to be there, to http://blackberryeating.com.  As I understand it, the old address will still work, it will just redirect you here.  As I mentioned a few days ago, I’ve been wanted to upgrade to an address that makes more sense for what I’m doing here.  Blackberries, their mystery and decadence, remind me of all that is good about food: what is sweet, what is juicy, what is challenging, what is delicate, what is persnickety and strong.  The Galway Kinnell poem from which the title of this blog is taken celebrates juxtaposition and excess, likens these jeweled fruits to words and the consumption of those fruits to the search for meaning and significance.  This is a little piece of significance for me – this collection of words thrust with crossed fingers and squinted eyes out across the internet – and so I wanted to make it more connected, more applicable, but really, more mine.

Who ever thought so much consideration could go into a new address?

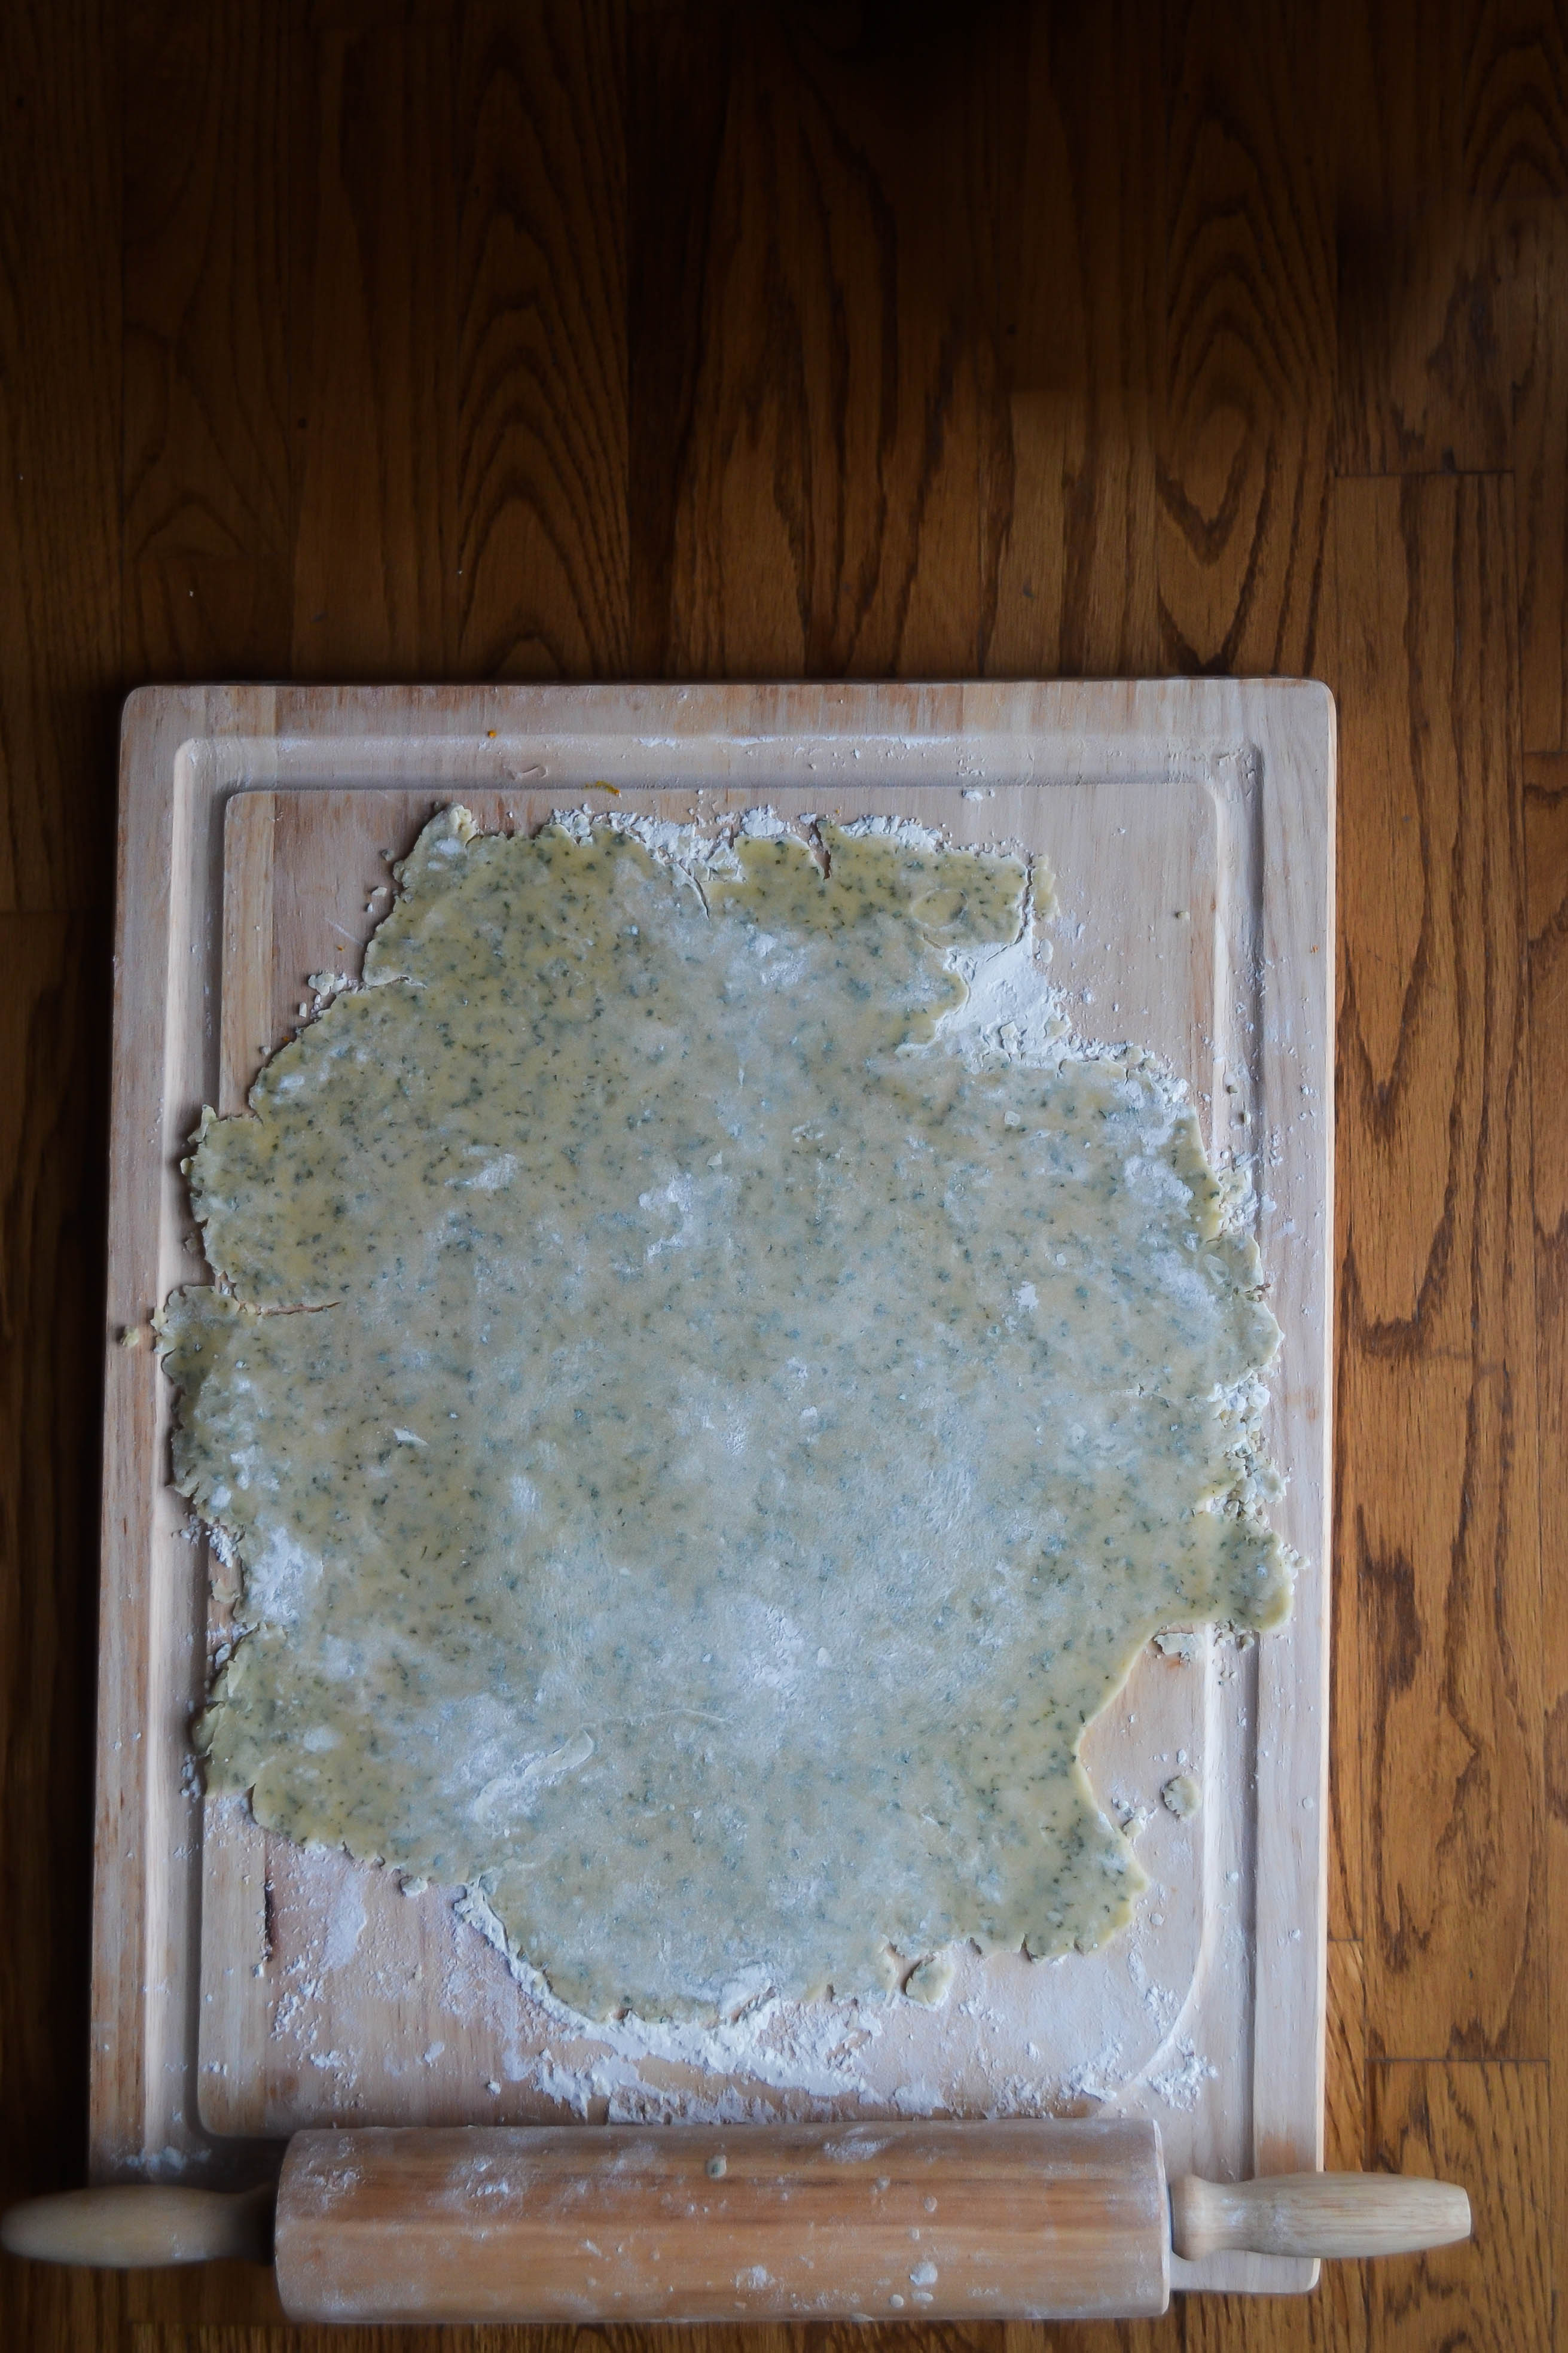
With the Bittman project over and a new address settled, it’s time to submerge myself in a new challenge.  As you know if you’ve been reading for a while, dough – particularly pie dough and yeasted dough – is one of my big fears.  What if it doesn’t rise?  What if it crumbles apart?  What if it tears or burns or collapses or comes out tough or doesn’t bake right?  What if it’s (gasp) imperfect?

DSC_0949

I decided I need to get over this.

This year, each week, I will make something out of dough.  It might be pie crust.  It might be cookies.  It might be pizza or foccaccia or flatbread.  It might, as terrifying as this is to me, be a real, honest-to-goodness loaf of bread, bloomed and kneaded, baked until crusty in a loaf pan.  I have a crazy notion that I want homemade bagels.  I have a yen to make doughnuts, and not just cake doughnuts, but the beautiful puff and chewy crumb of a good yeasted twist.

I don’t – and this is important to note – promise absolute success.  You’re going to see what crumbles along the way.  You’re going to see the scraps and scrapes and disasters I produce.  I think this is an important part of learning, and that’s part of what this blog is for me.

I have a few guides in this project, one hoped for and long awaited, one unexpected but delightful.  From my in-laws, I received Michael Ruhlman’s genius book Ratio.  This isn’t a cookbook.  It’s more than that.  It’s more exciting, it’s more foundational, and ultimately, I think, it’s more useful.  It doesn’t tell you how to make cherry pie, it tells you the essential equation of pie dough.  Three parts flour, two parts fat, one part water.  That will always equal pie dough.  Suddenly, you can use any kind of flour – more than one kind, if you want.  You can use lard instead of butter.  You can make one pie or you can make thirty-five pies, and you don’t have to think as hard about multiplying or adding or fractioning.  You have a ratio, and it is always going to work.

That’s the theory.  And I believe it, but I haven’t tried it out just yet.

From my parents, I received a bread machine.  I’ve never used a bread machine before, and while my immediate thought is that to really master dough, I will also have to make it by hand so I understand the kneading and the cycles of rising, and so I will come to know the feeling of the right kind of stretch and the windowpane test and the knowledge beneath my fingers that yes, this is bread, having a machine help me along the way is going to be nice.  The idea of dumping, in pajamas at 10pm, a series of ingredients into a pan, plugging in a machine, and telling it I want a fresh, hot loaf of bread at 7am, delights and astounds me.  I want to understand, but I also want the magic.

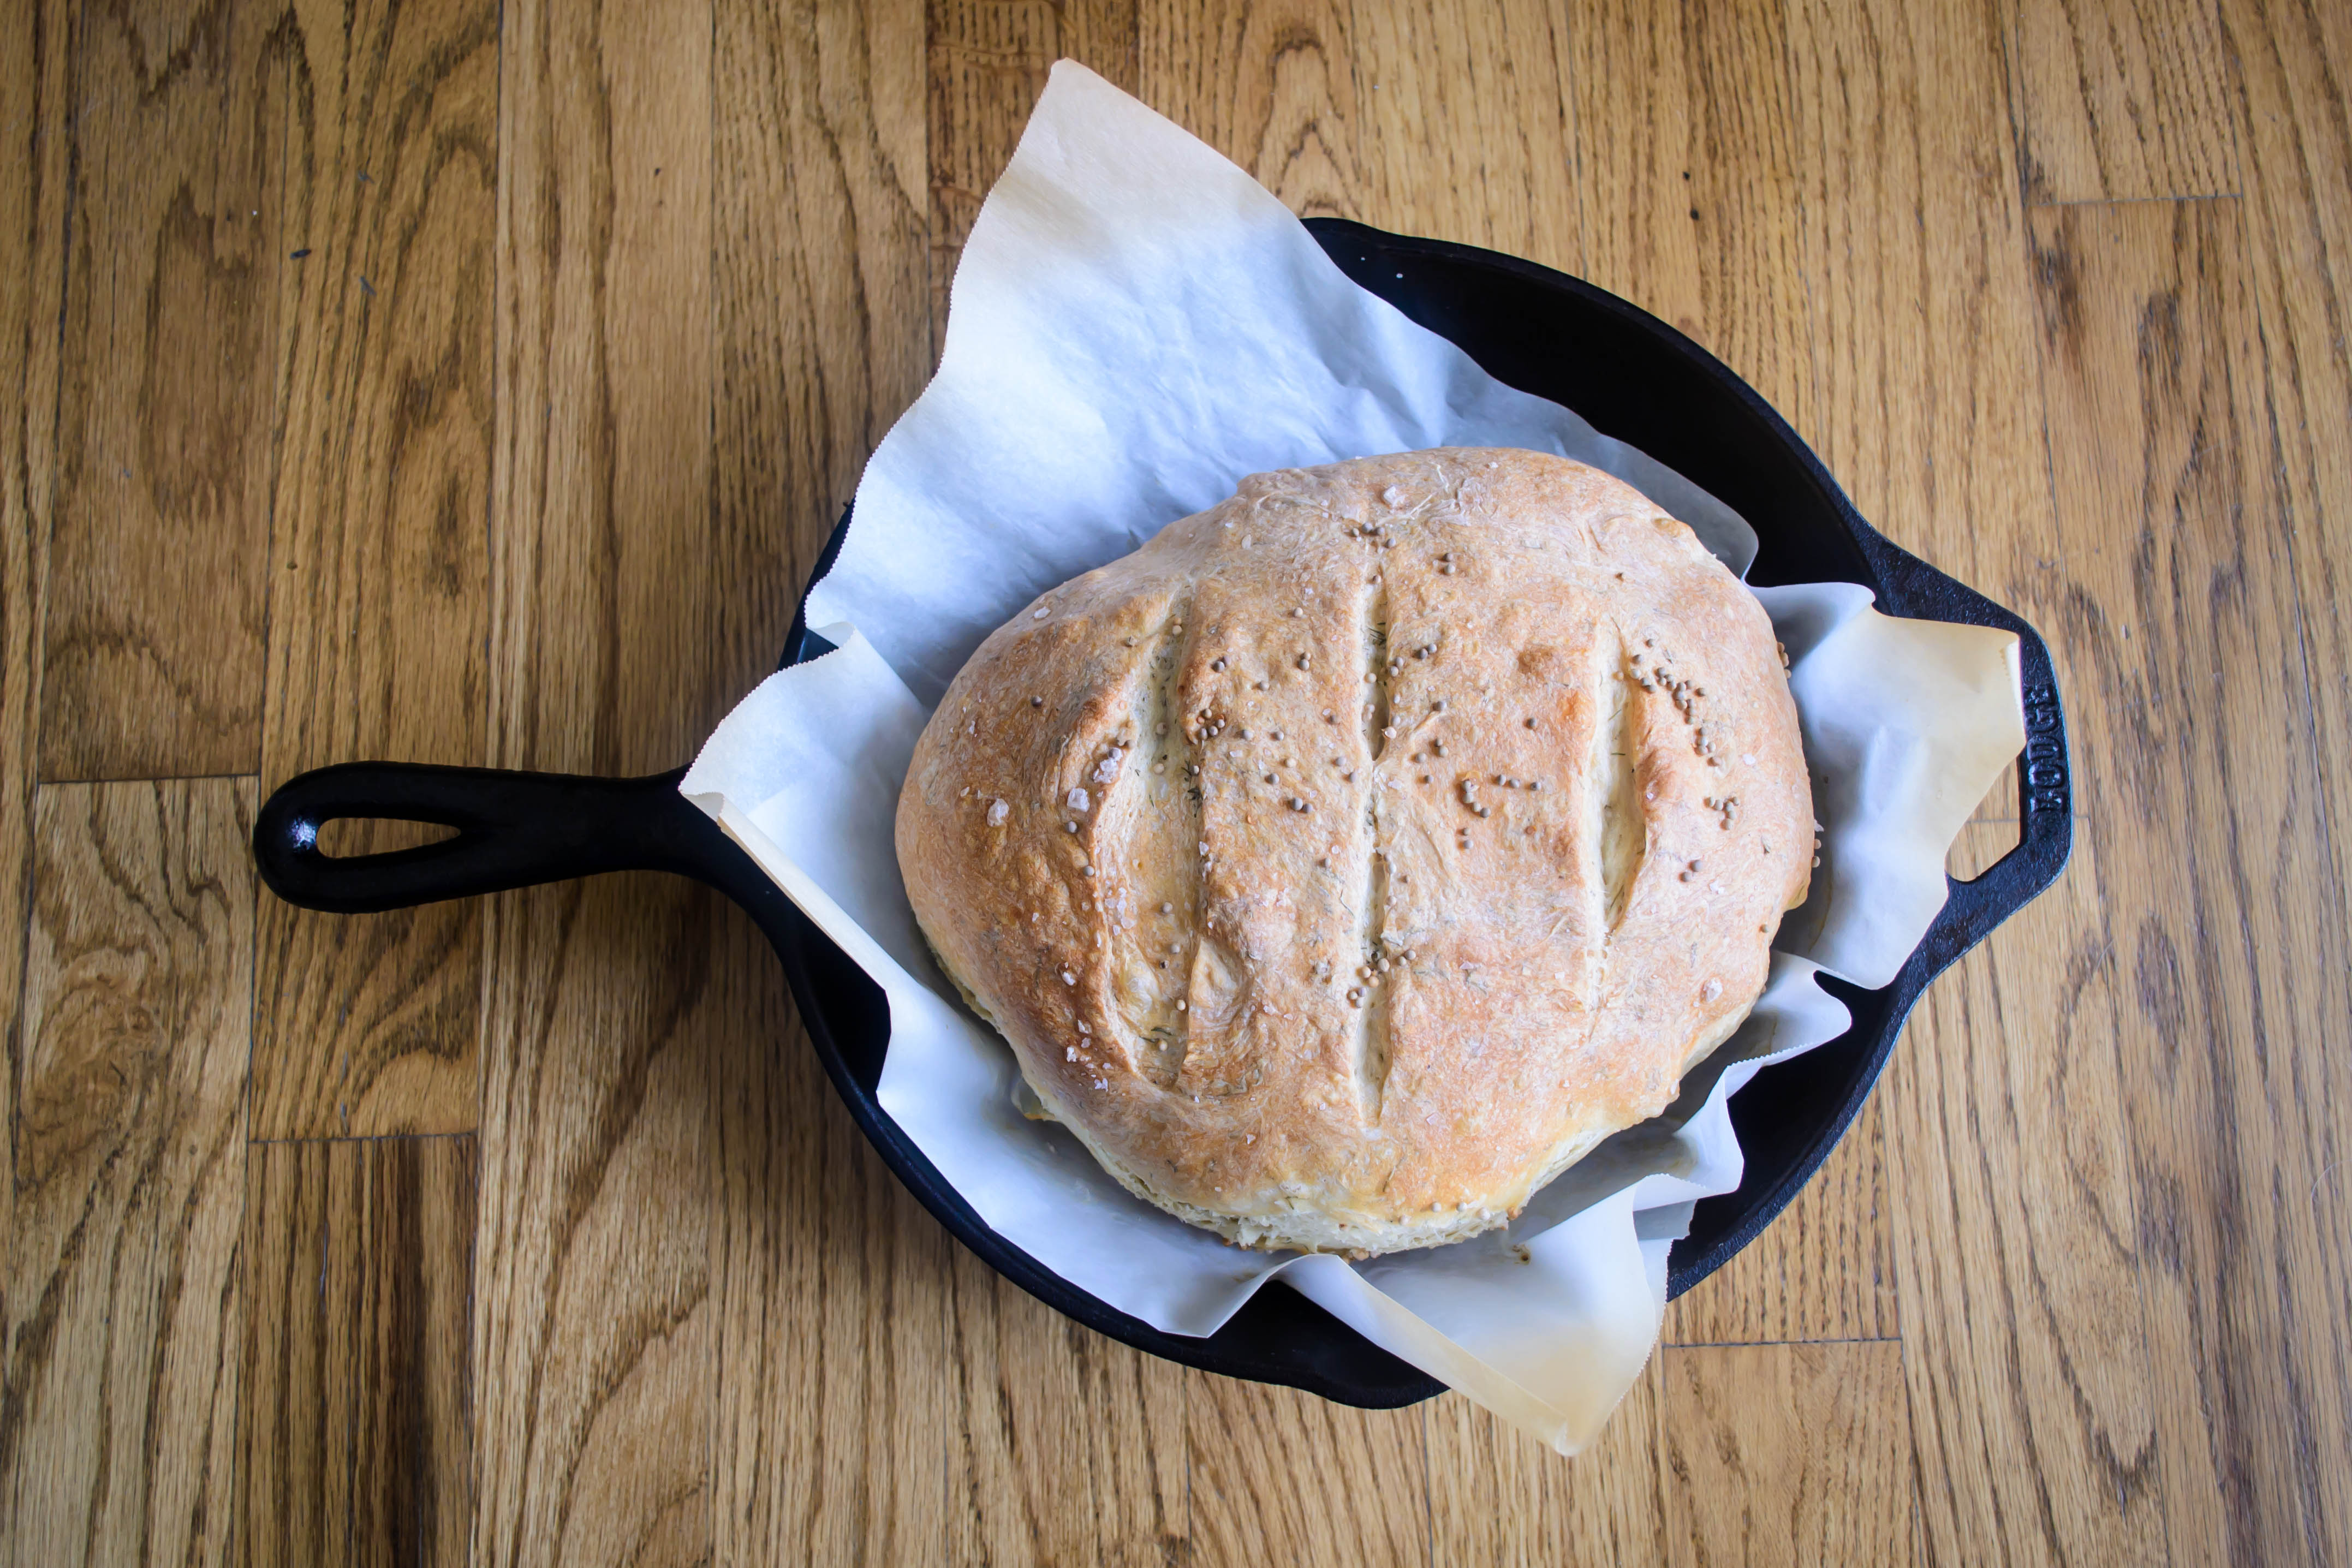
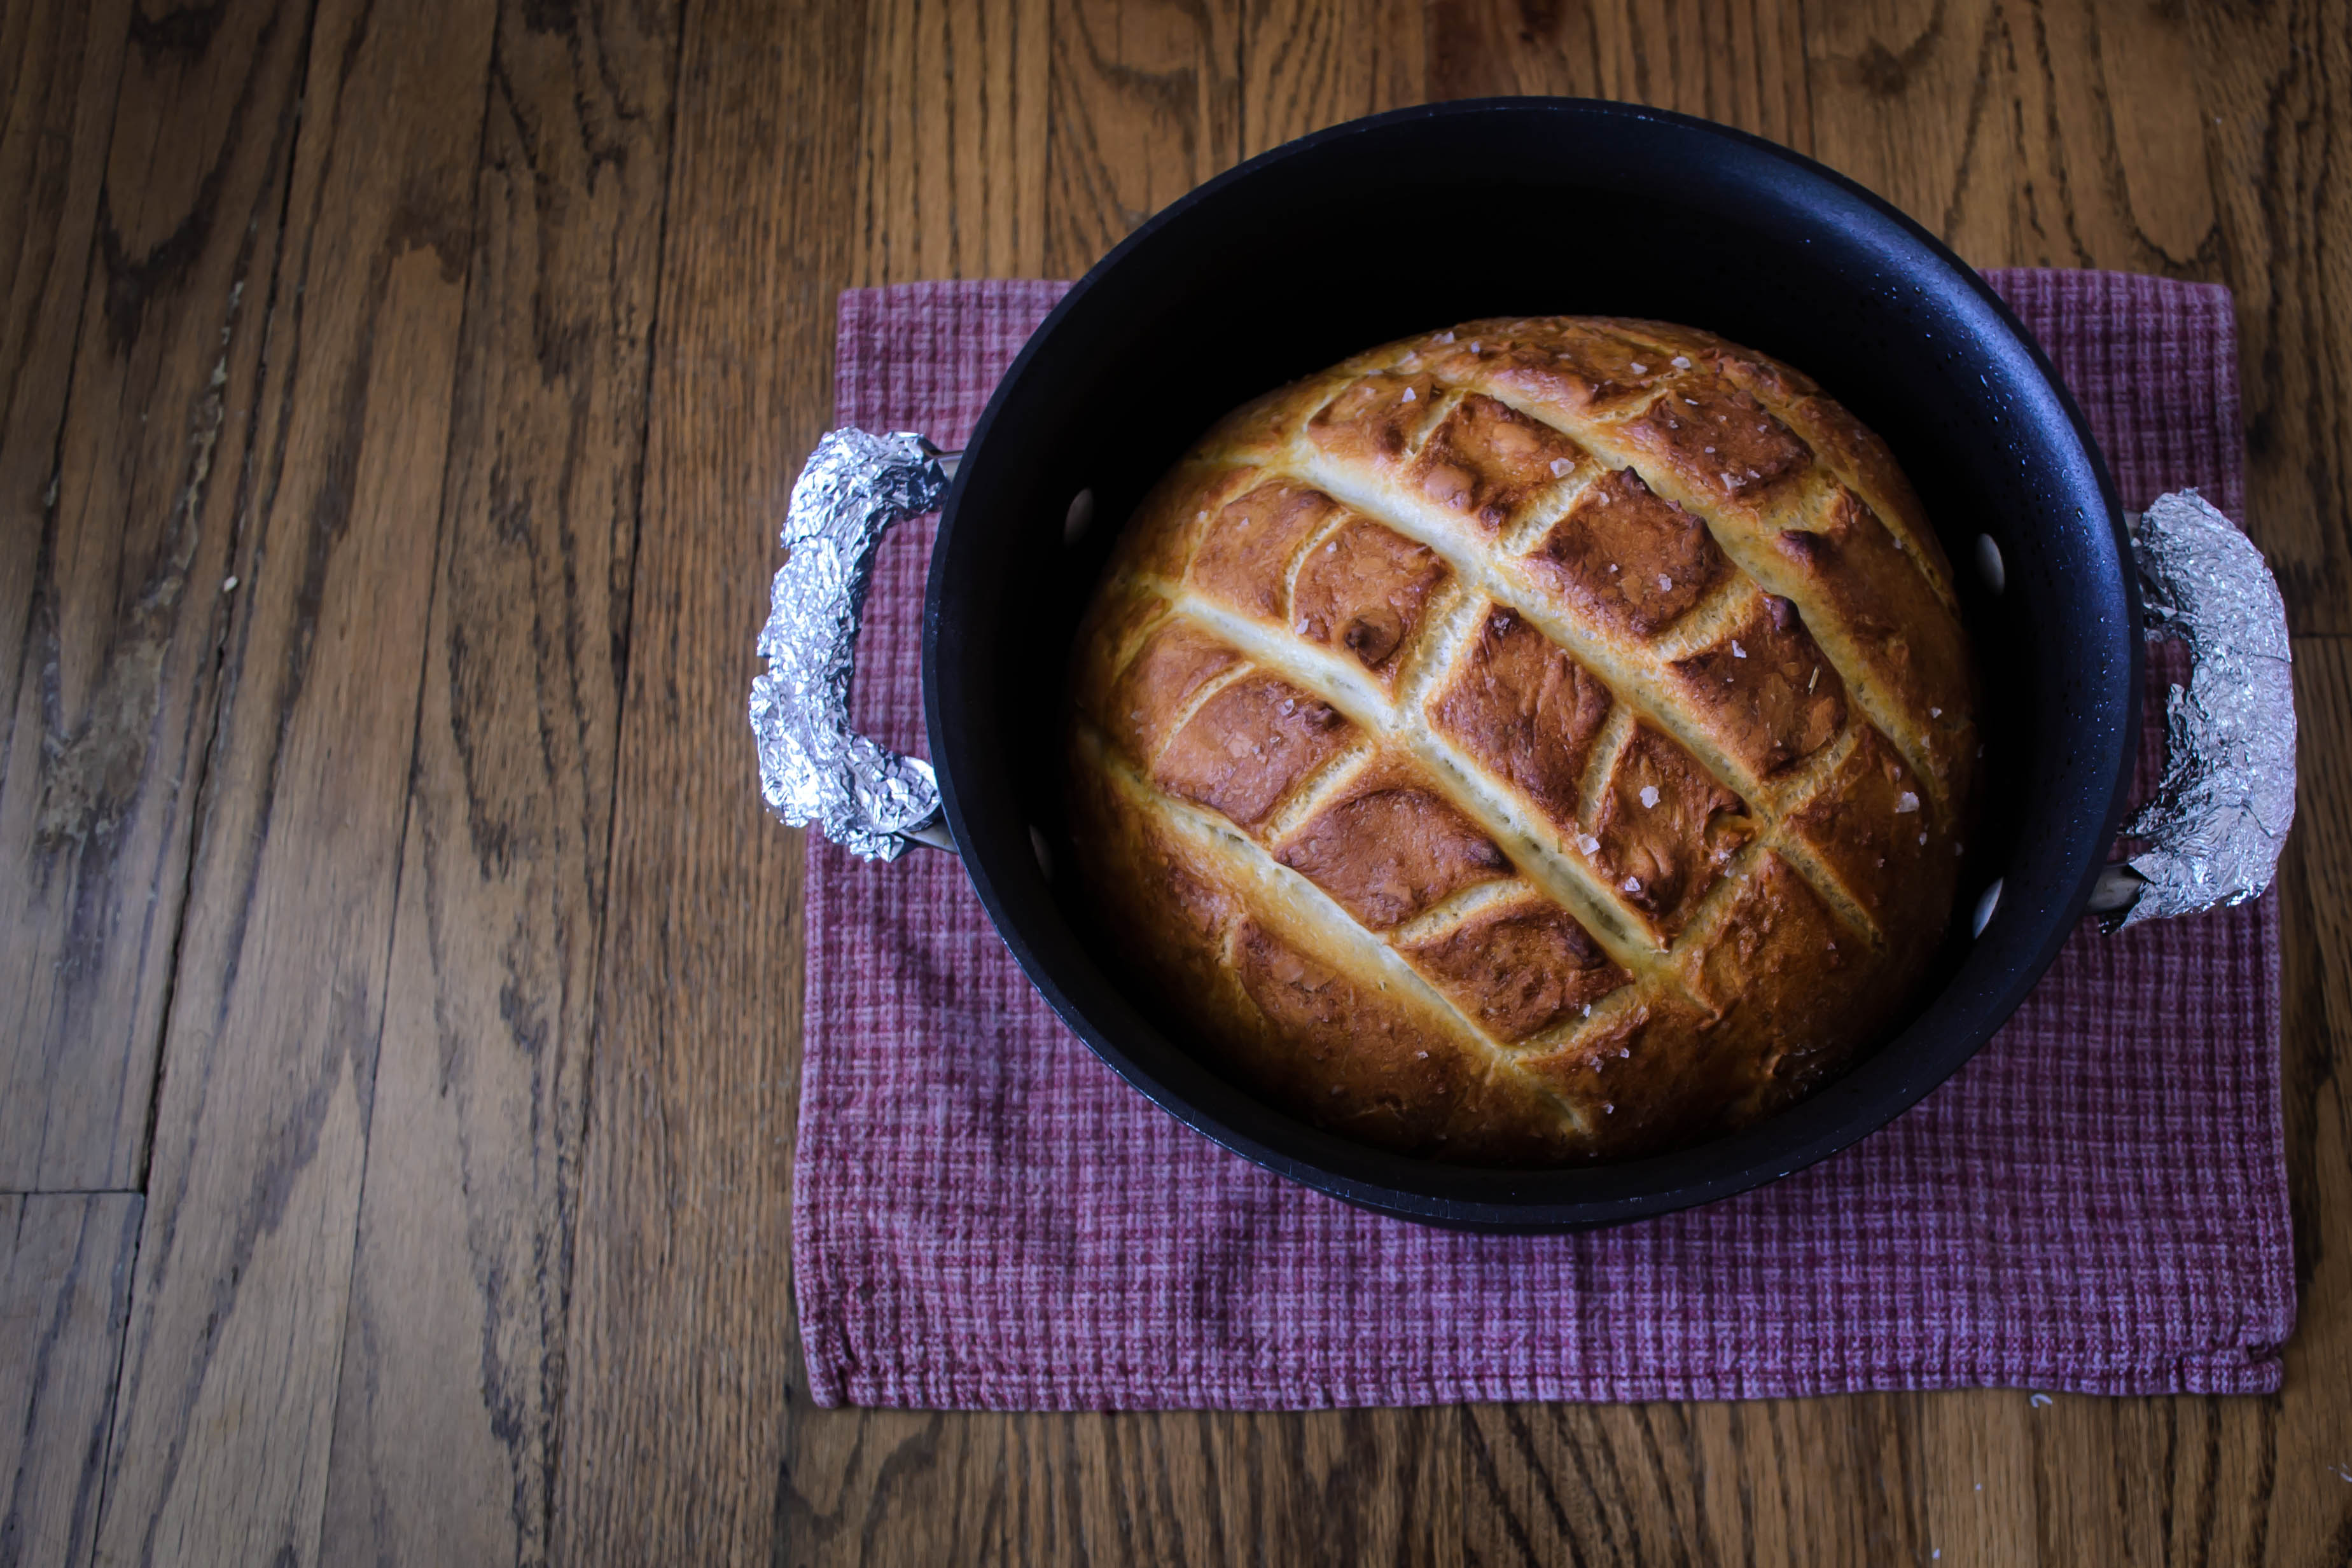
So that’s the plan.  If all goes well, it will mean more of this:

Food blog 2011-0097
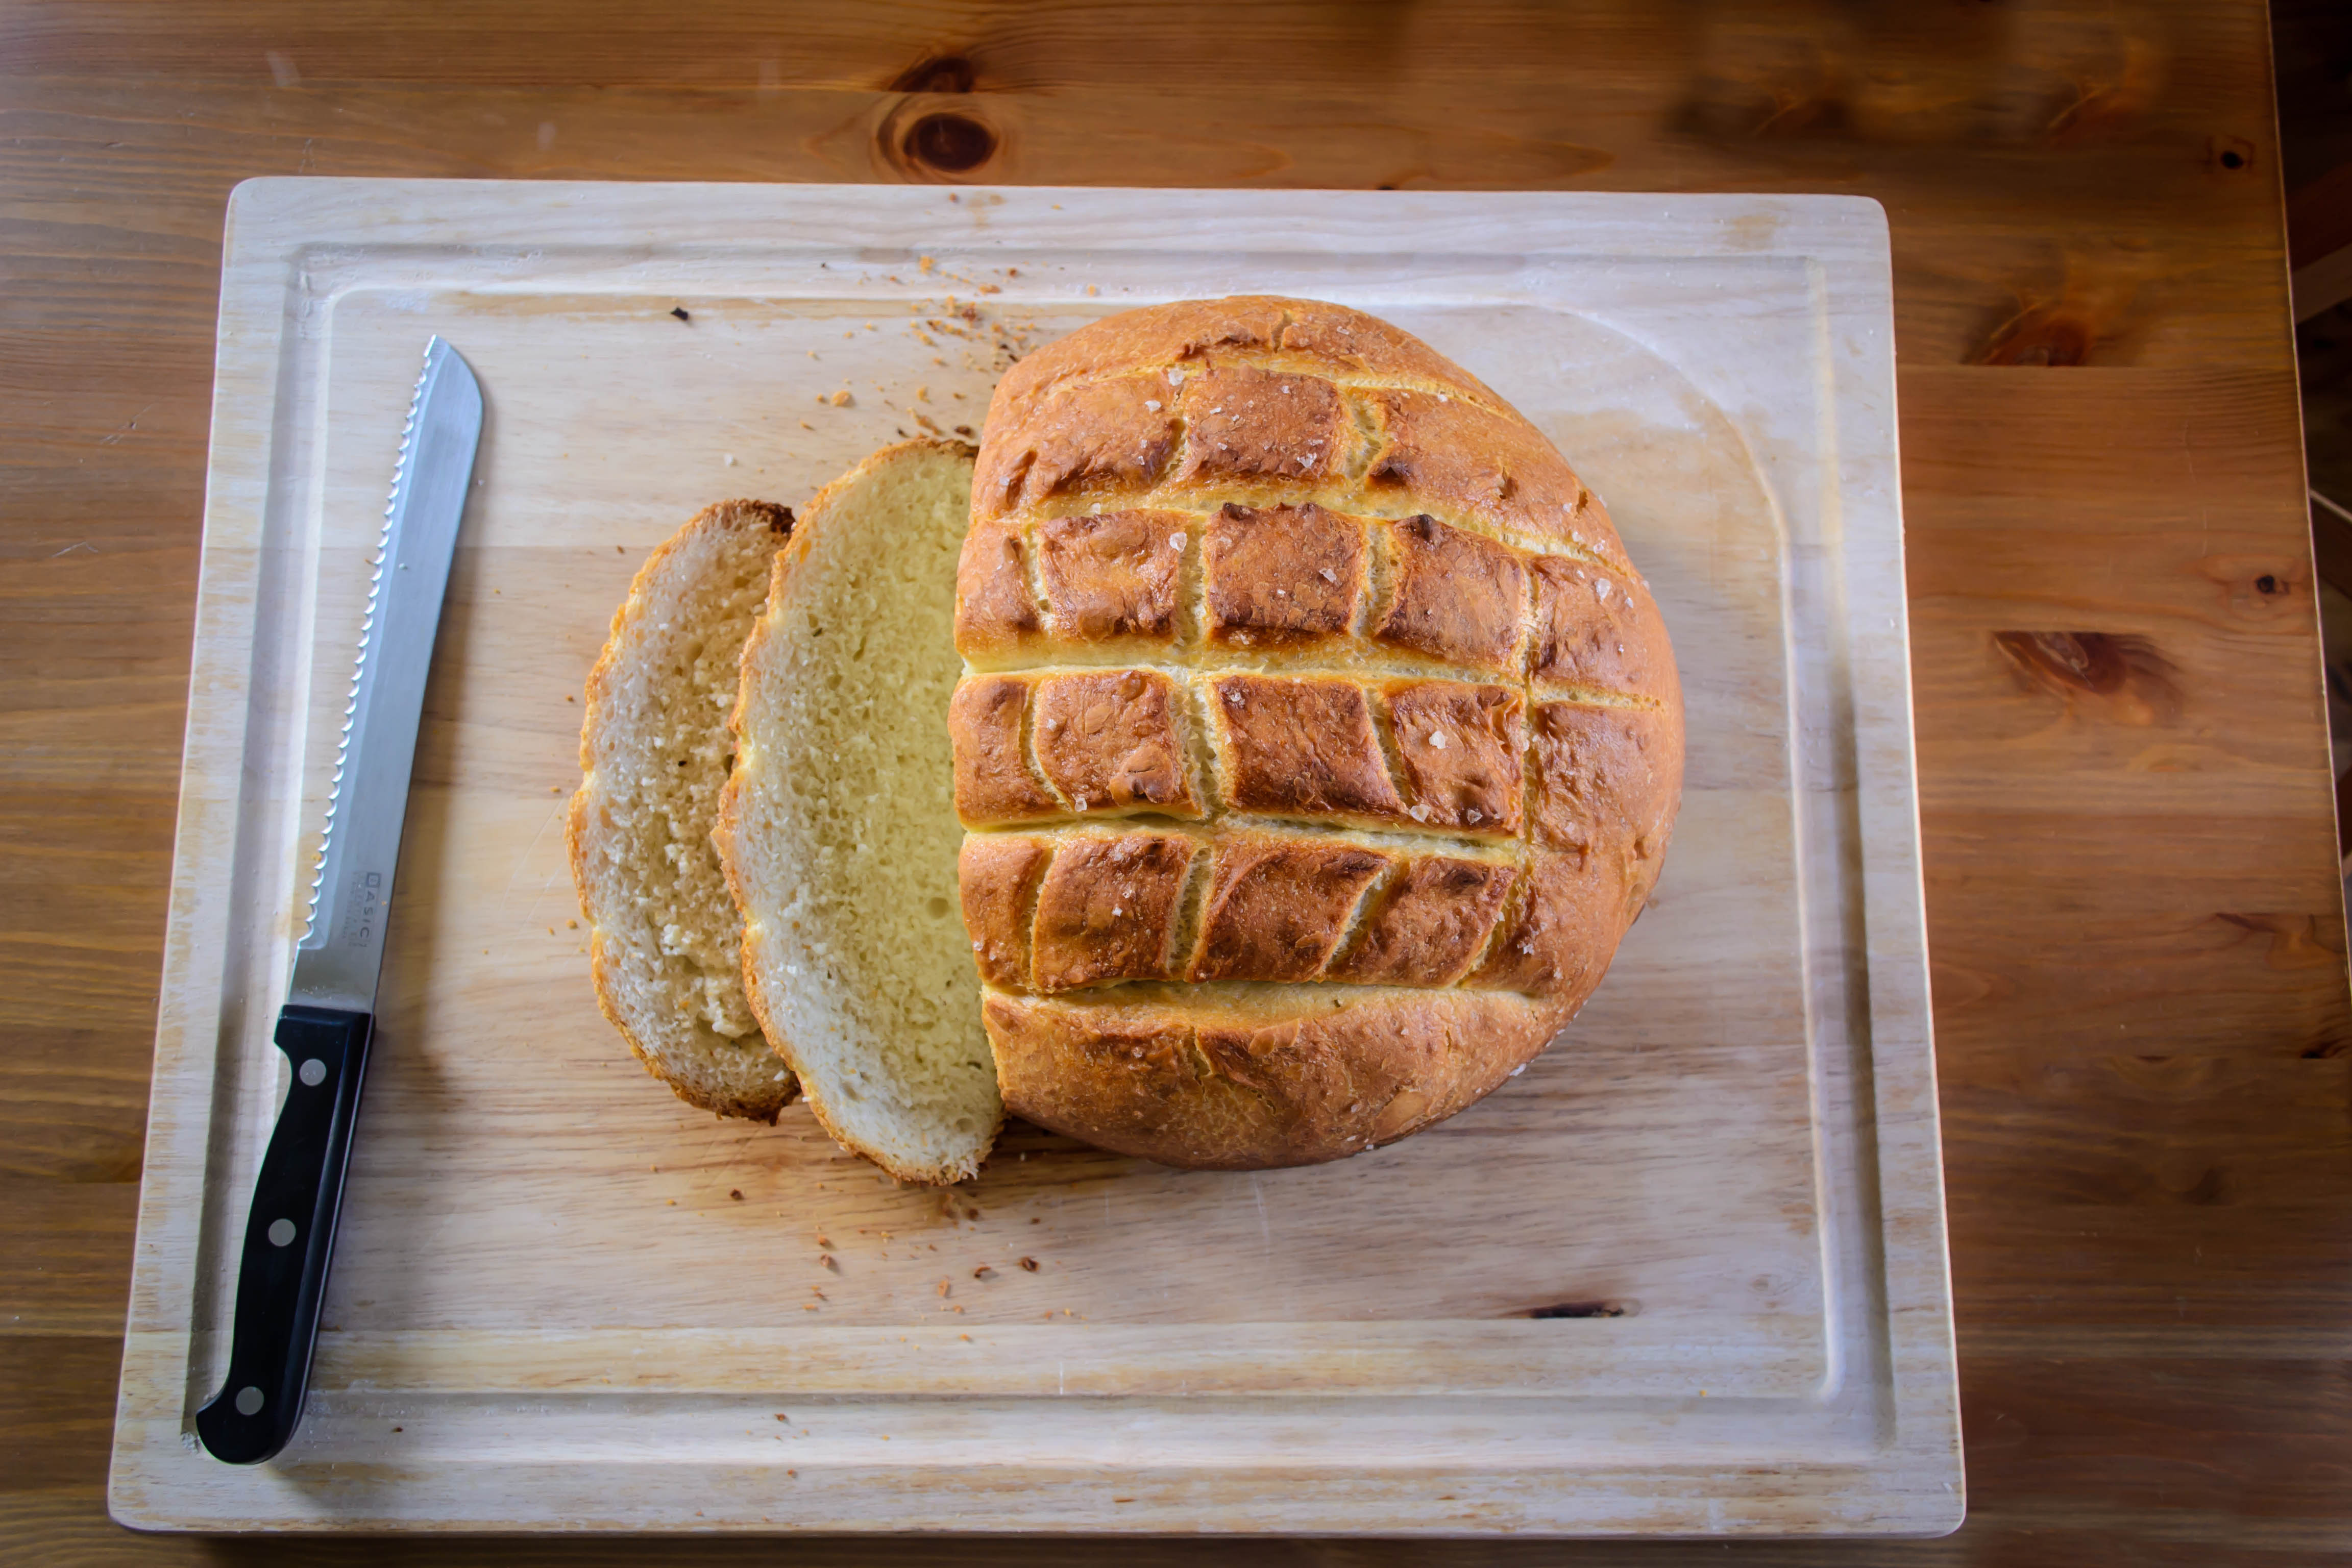
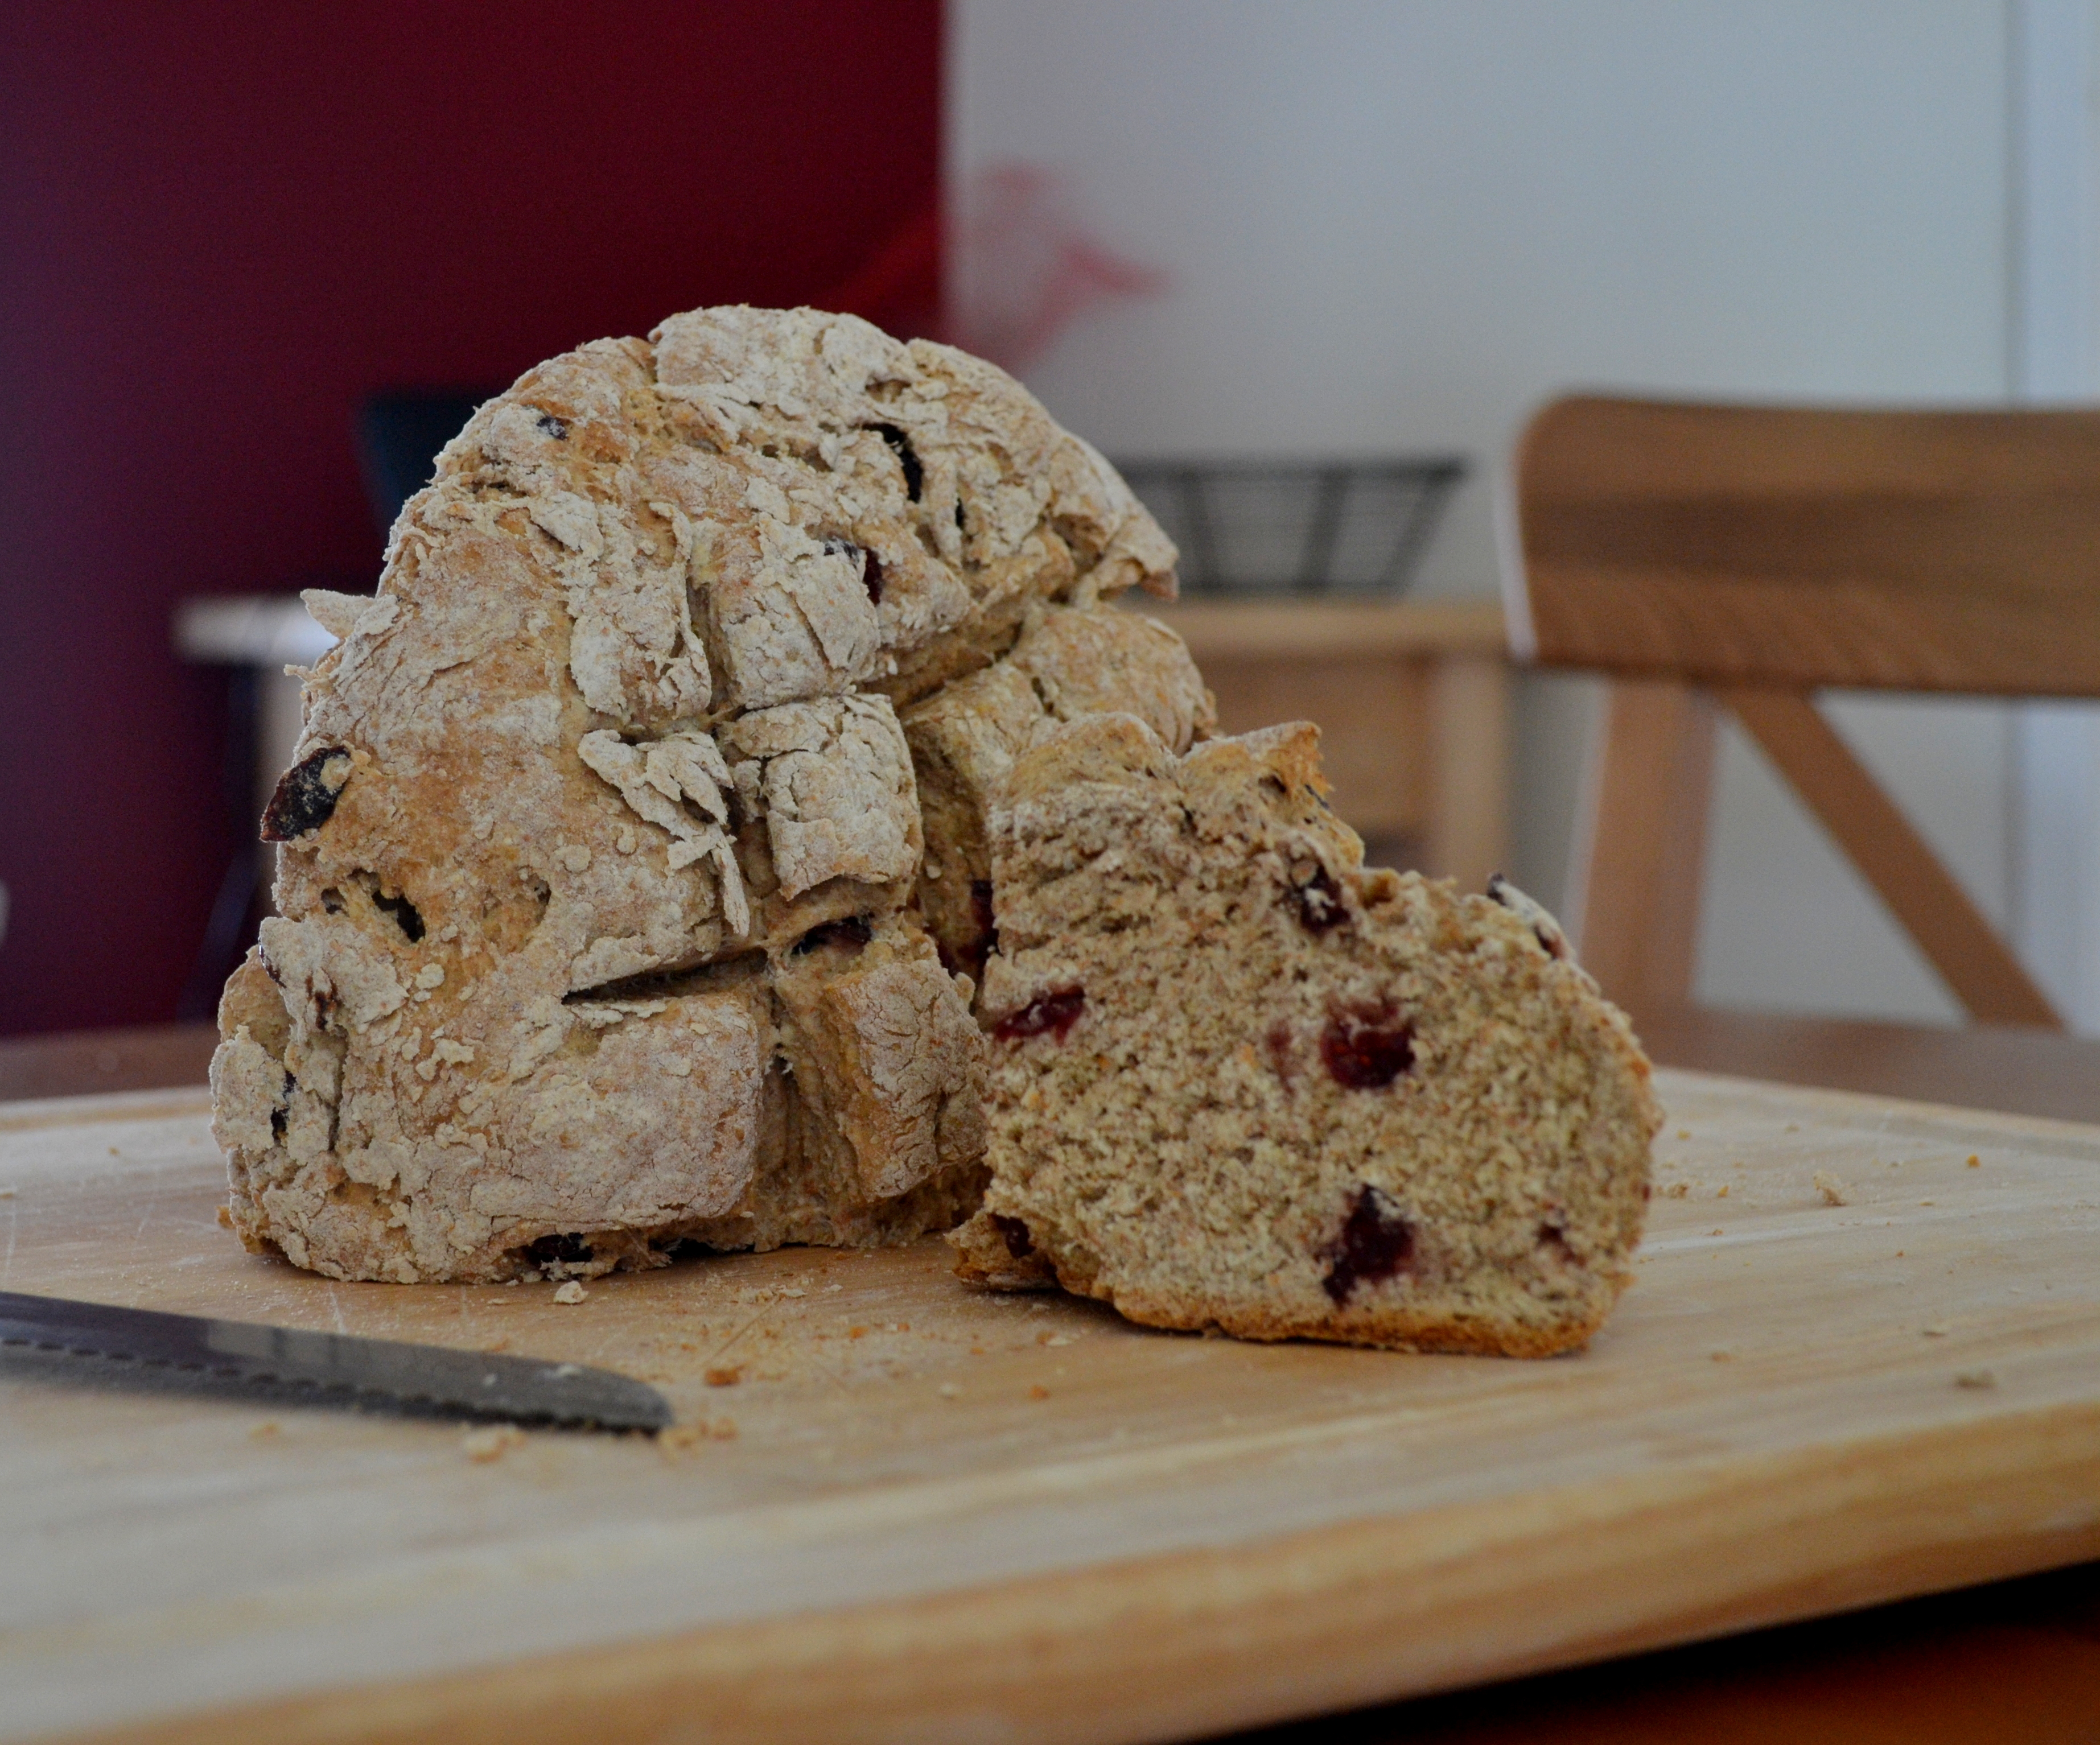
It will certainly mean more of this:

DSC_0959

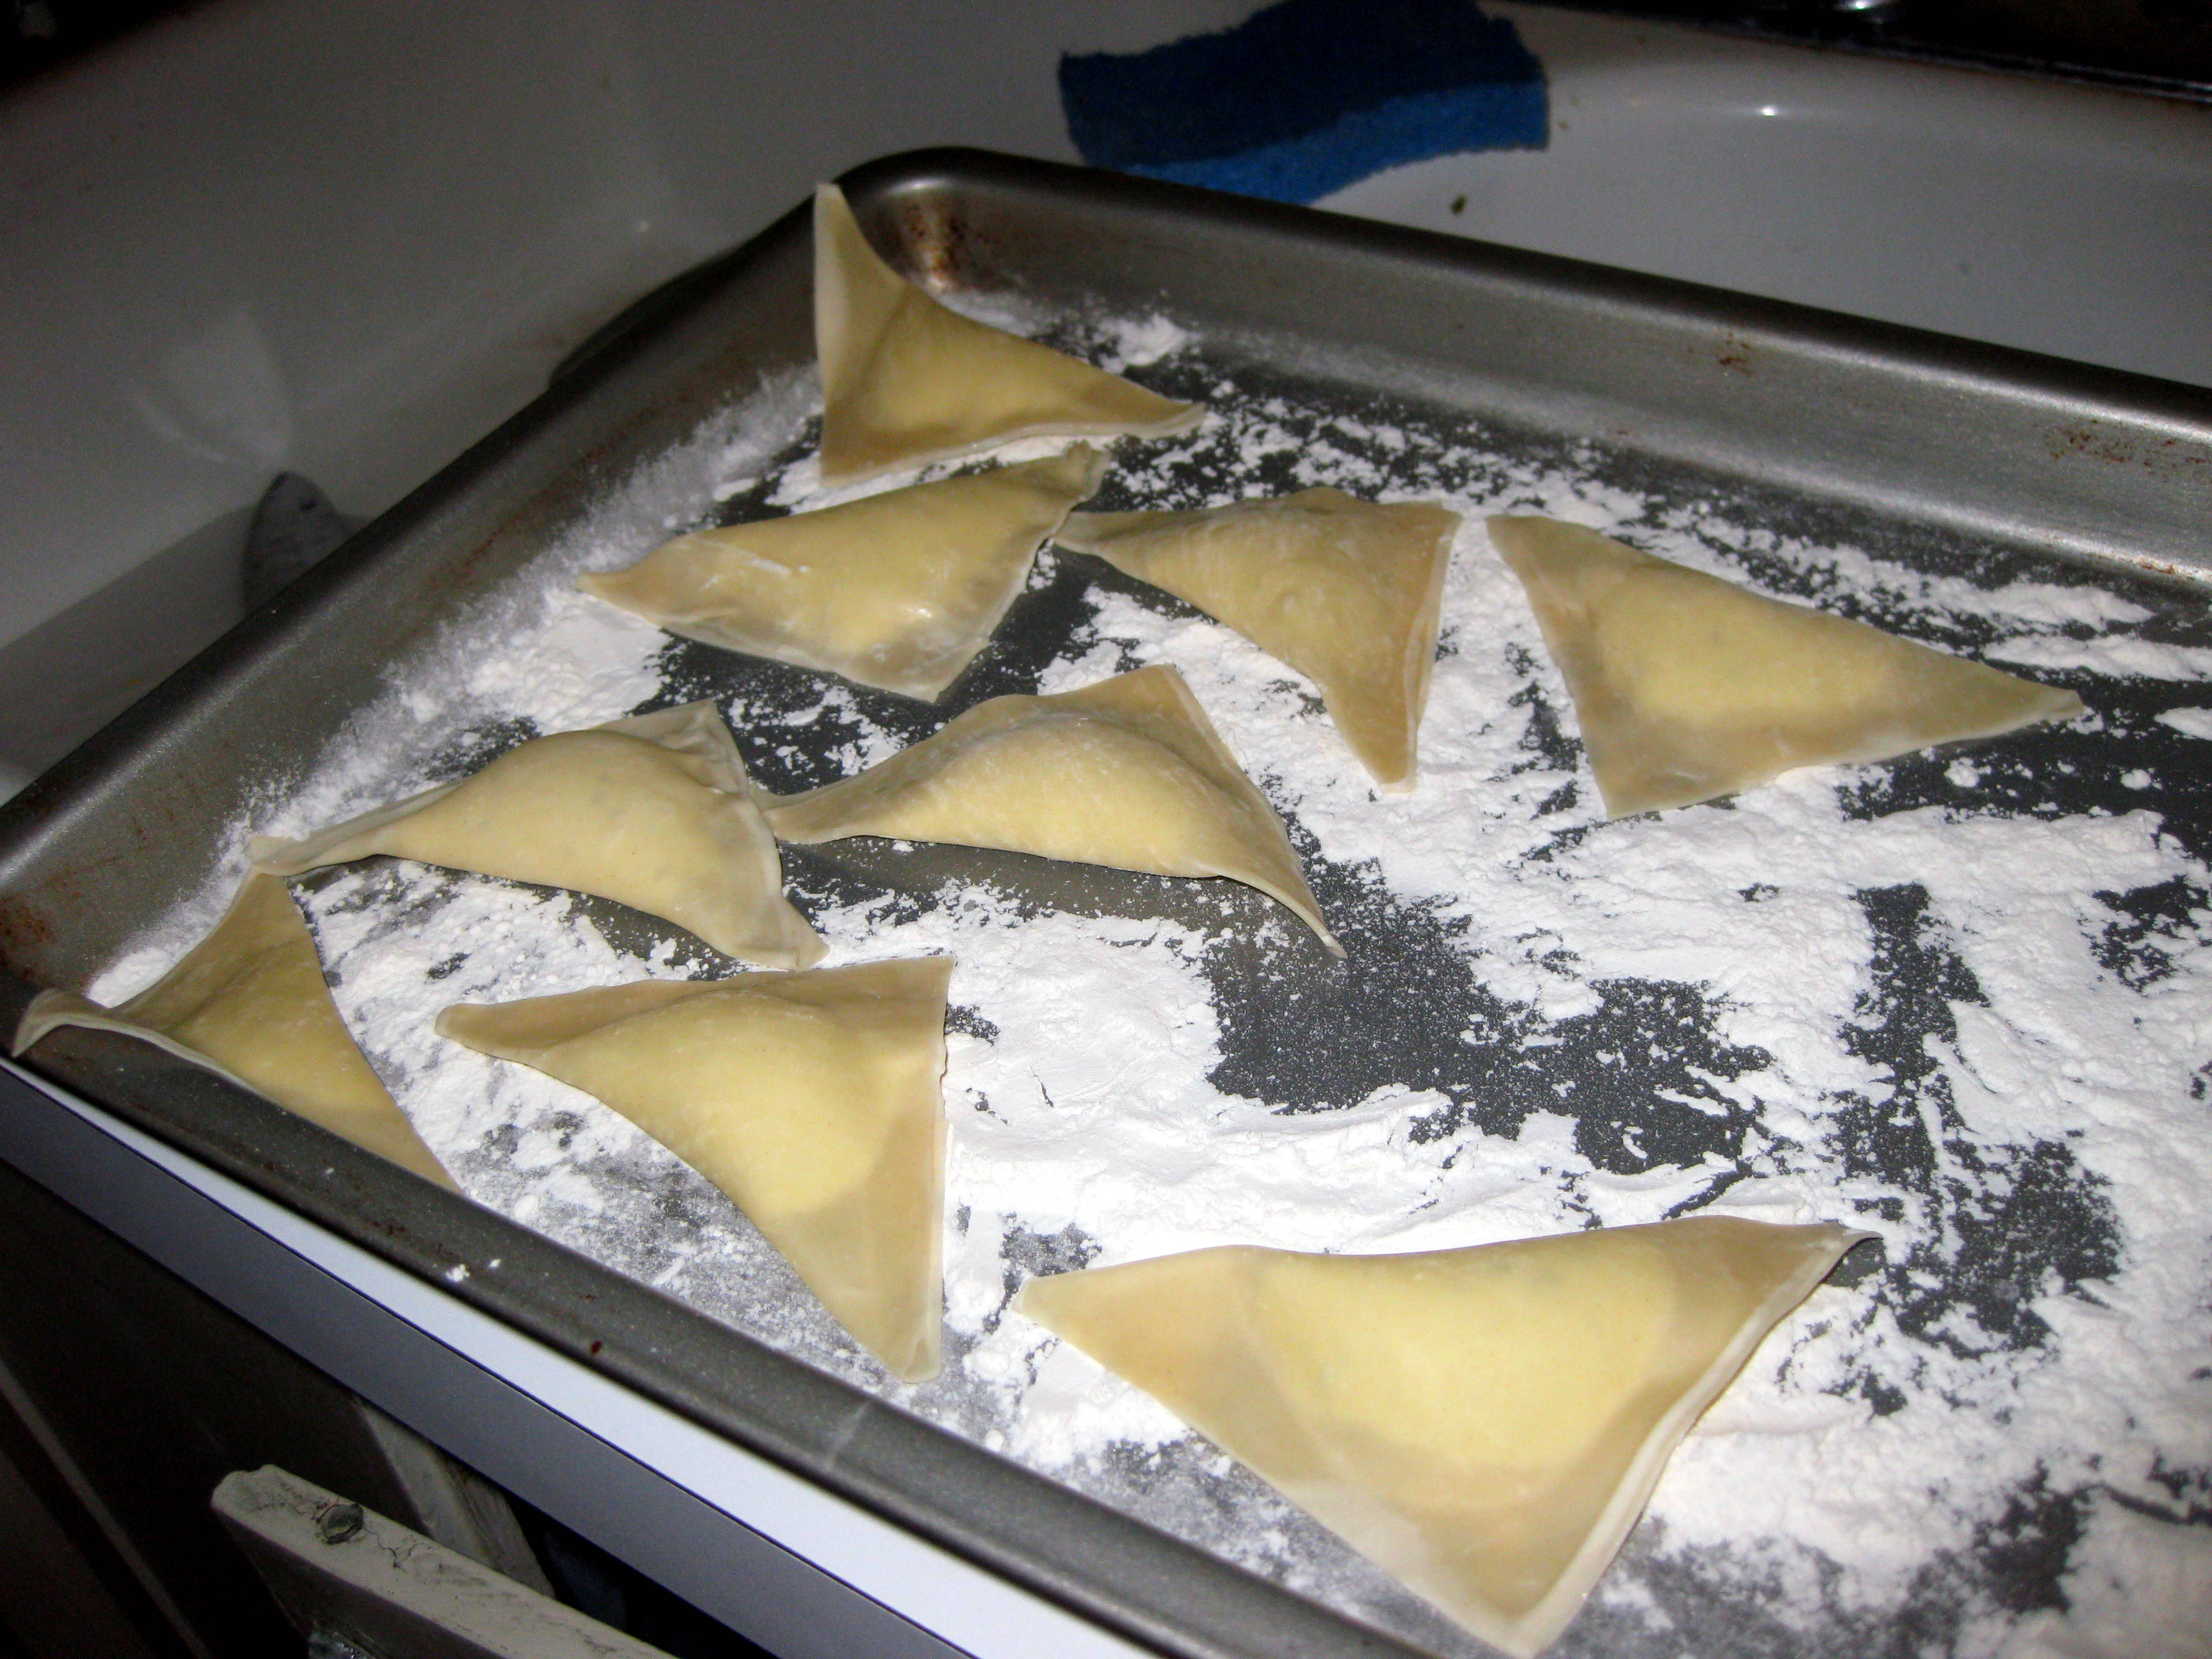
It may even mean some of this:

IMG_0698

I don’t expect it will mean all dough, all the time, just as the past two years were not exclusively Bittman concoctions.  If something amazing comes along that doesn’t involve flour or eggs or butter, I will still report on it.  But the goal this year – the resolution, if you will – is to conquer this dough thing.  I want to have conversations with you about it.  I want your feedback and advice and experiences.  And I hope you enjoy.