Guest Post: Cheddar and Green Onion Sourdough Artisan Boule

Guest post from my friend and colleague (frolleague!) K., with whom I discuss bread baking procedures and triumphs on a frantic, high-volume, excitable and regular basis. Enjoy!

BlackberryEating has officially declared 2017 the year of the soup project just in time for the cold reality of this winter: Montana is 40 below, New England is buried in snow and West Coasters down to San Diego are cold and wet from an atmospheric river that’s brought more rain in the last six weeks than in as many years.

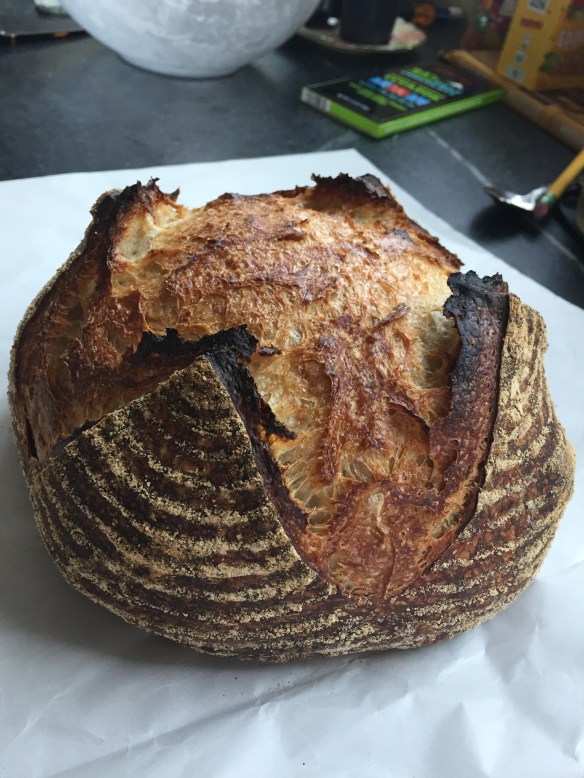
So let’s honor this project with really good bread, the stunning artisan kind, with the open crumb, shattery crust and intense bread flavor that will drive. your. people. wild. And since everyone knows that good bread is made — not bought — this homemade cheddar onion sourdough boule will be the perfect compliment to a comforting pot of simmering soup — unless you eat it before the first ladle of liquid hits the bowl, which can happen.

image-1-pretty-loaf

A few caveats before the formula:

1) Don’t have a sourdough starter? Make one. You’ll never buy commercial bread or use commercial yeast again. Loaded with hydrogenated oils, nitrates, sugar, bleaching agents and other harmful substances, store-bought bread is just plain bad for you. And commercial yeast is devoid of the healthful bacteria that makes fermented food so darn healthy. Breads made from commercial yeast go stale faster, taste blah, are harder to

digest, and have a higher glycolic index, among other issues. This makes commercial bread profitable and convenient, but not good and healthy.

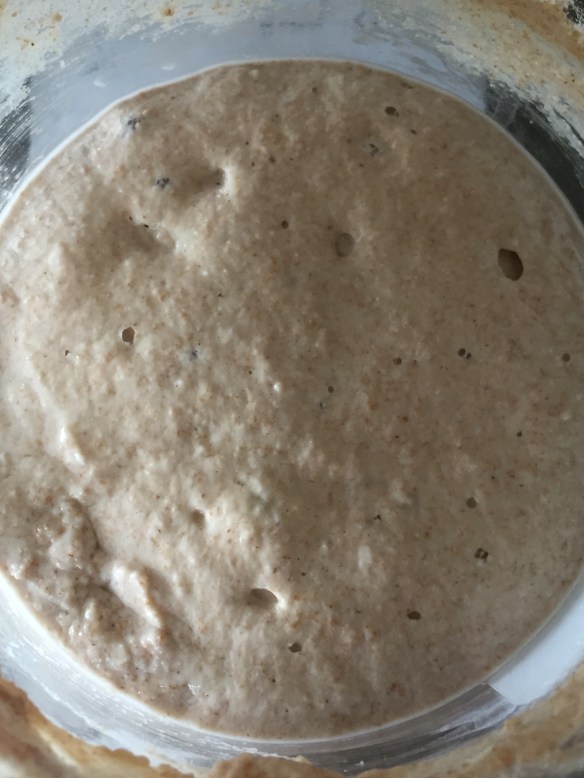
“Sourdough Starter, America’s Rising Pet” by Sam Sifton, which ran in the NYT recently, says it all. Once you get your starter fermenting on a regular schedule — rising up and then collapsing back in a consistent manner — it’s ready to use in your bread.

I started mine more than two years ago. The directions I was reading said starter consists of flour, water and wild yeast. I tried to order the wild yeast on Amazon. Nope. I Googled it. Nothing. What? Eventually I figured out that the wild yeast are in the air all around me (duh) and you catch them by mixing equal parts flour (50/50 mix of King Arthur’s all-purpose and wheat flours) and filtered water and then waiting. Within a week the starter was bubbling, and now it’s fast and strong. I feed it daily, sometimes twice.

image-2-starter

2) Invest in the basic bread-making tools: a bench knife, dough spatula, scale, banneton, thermometer, and cast iron combo cooker. You need these to turn out dazzling, delicious bread.

image-3-tools

3) Using the very best flour possible makes a huge difference. I use a combination of King Arthur Bread Flour and 10 – 20 percent high extraction wheat flour from Grist and Toll in Pasadena, the only local miller I’ve found in the greater Los Angeles area. They use a stone mill to make whole-grain, small-batch, fresh, local organic flour. And they ship! I love the hard white for its mild nutty flavor. Grist and Toll flour creates a silky, manageable dough that is loaded with nutrition. Read about stoneground, high-extraction flour here.

image-4a-and-5a-ka-bread-flourimage-4b-and-5b-g_t-wheat_

4) Be patient. Start your dough the day before you make soup and refrigerate it overnight for a next-day bake. It’s easy to make bread, but fermentation takes time. And good dough handling takes a minute, but you’ll get it, and you’ll be so glad you did. Homemade bread is a game changer. And don’t worry if the first few loaves don’t turn out perfect. Just eat them and start again.

Cheddar and Green Onion Sourdough Artisan Boule (perfect for two with a pot of soup)
The Formula
300 grams flour (270g King Arthur Bread Flour & 30g Grist and Toll Red Fife)
225g water, slightly warmed
75g starter (It’s ready to use when it’s on the rise and a bit of it floats in water.)
5g Kosher salt
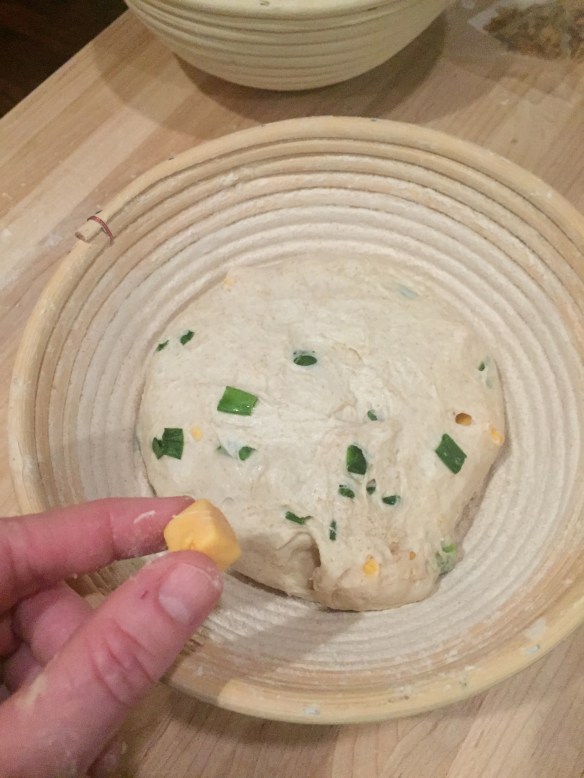
4oz. sharp cheddar, cut into small cubes and brought to room temperature.
¼ – ½ cup chopped green onion (I chop them thick) and brought to room temperature.
Cornmeal or polenta for dusting
Razor blade

The Dough

  • Pour 210g warmed water in a clear bowl.
  • Add starter and mix until incorporated.
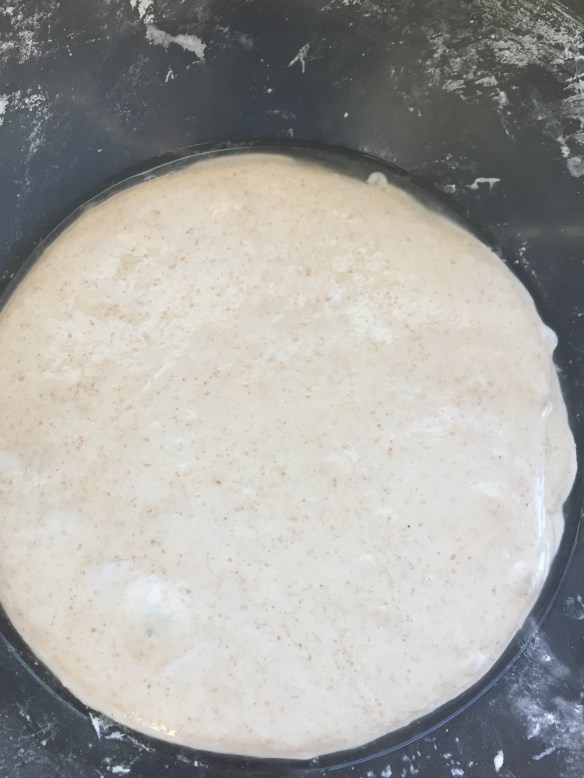
  • Add flour and mix into a shaggy dough. Let it sit for half hour.

image-6shaggy-dough_

  • Add the salt and the rest of the warmed water. Dissolve the salt in the water and work it into the dough by folding it in or cutting it in. Let it sit for half an hour.

image-7autolyse_

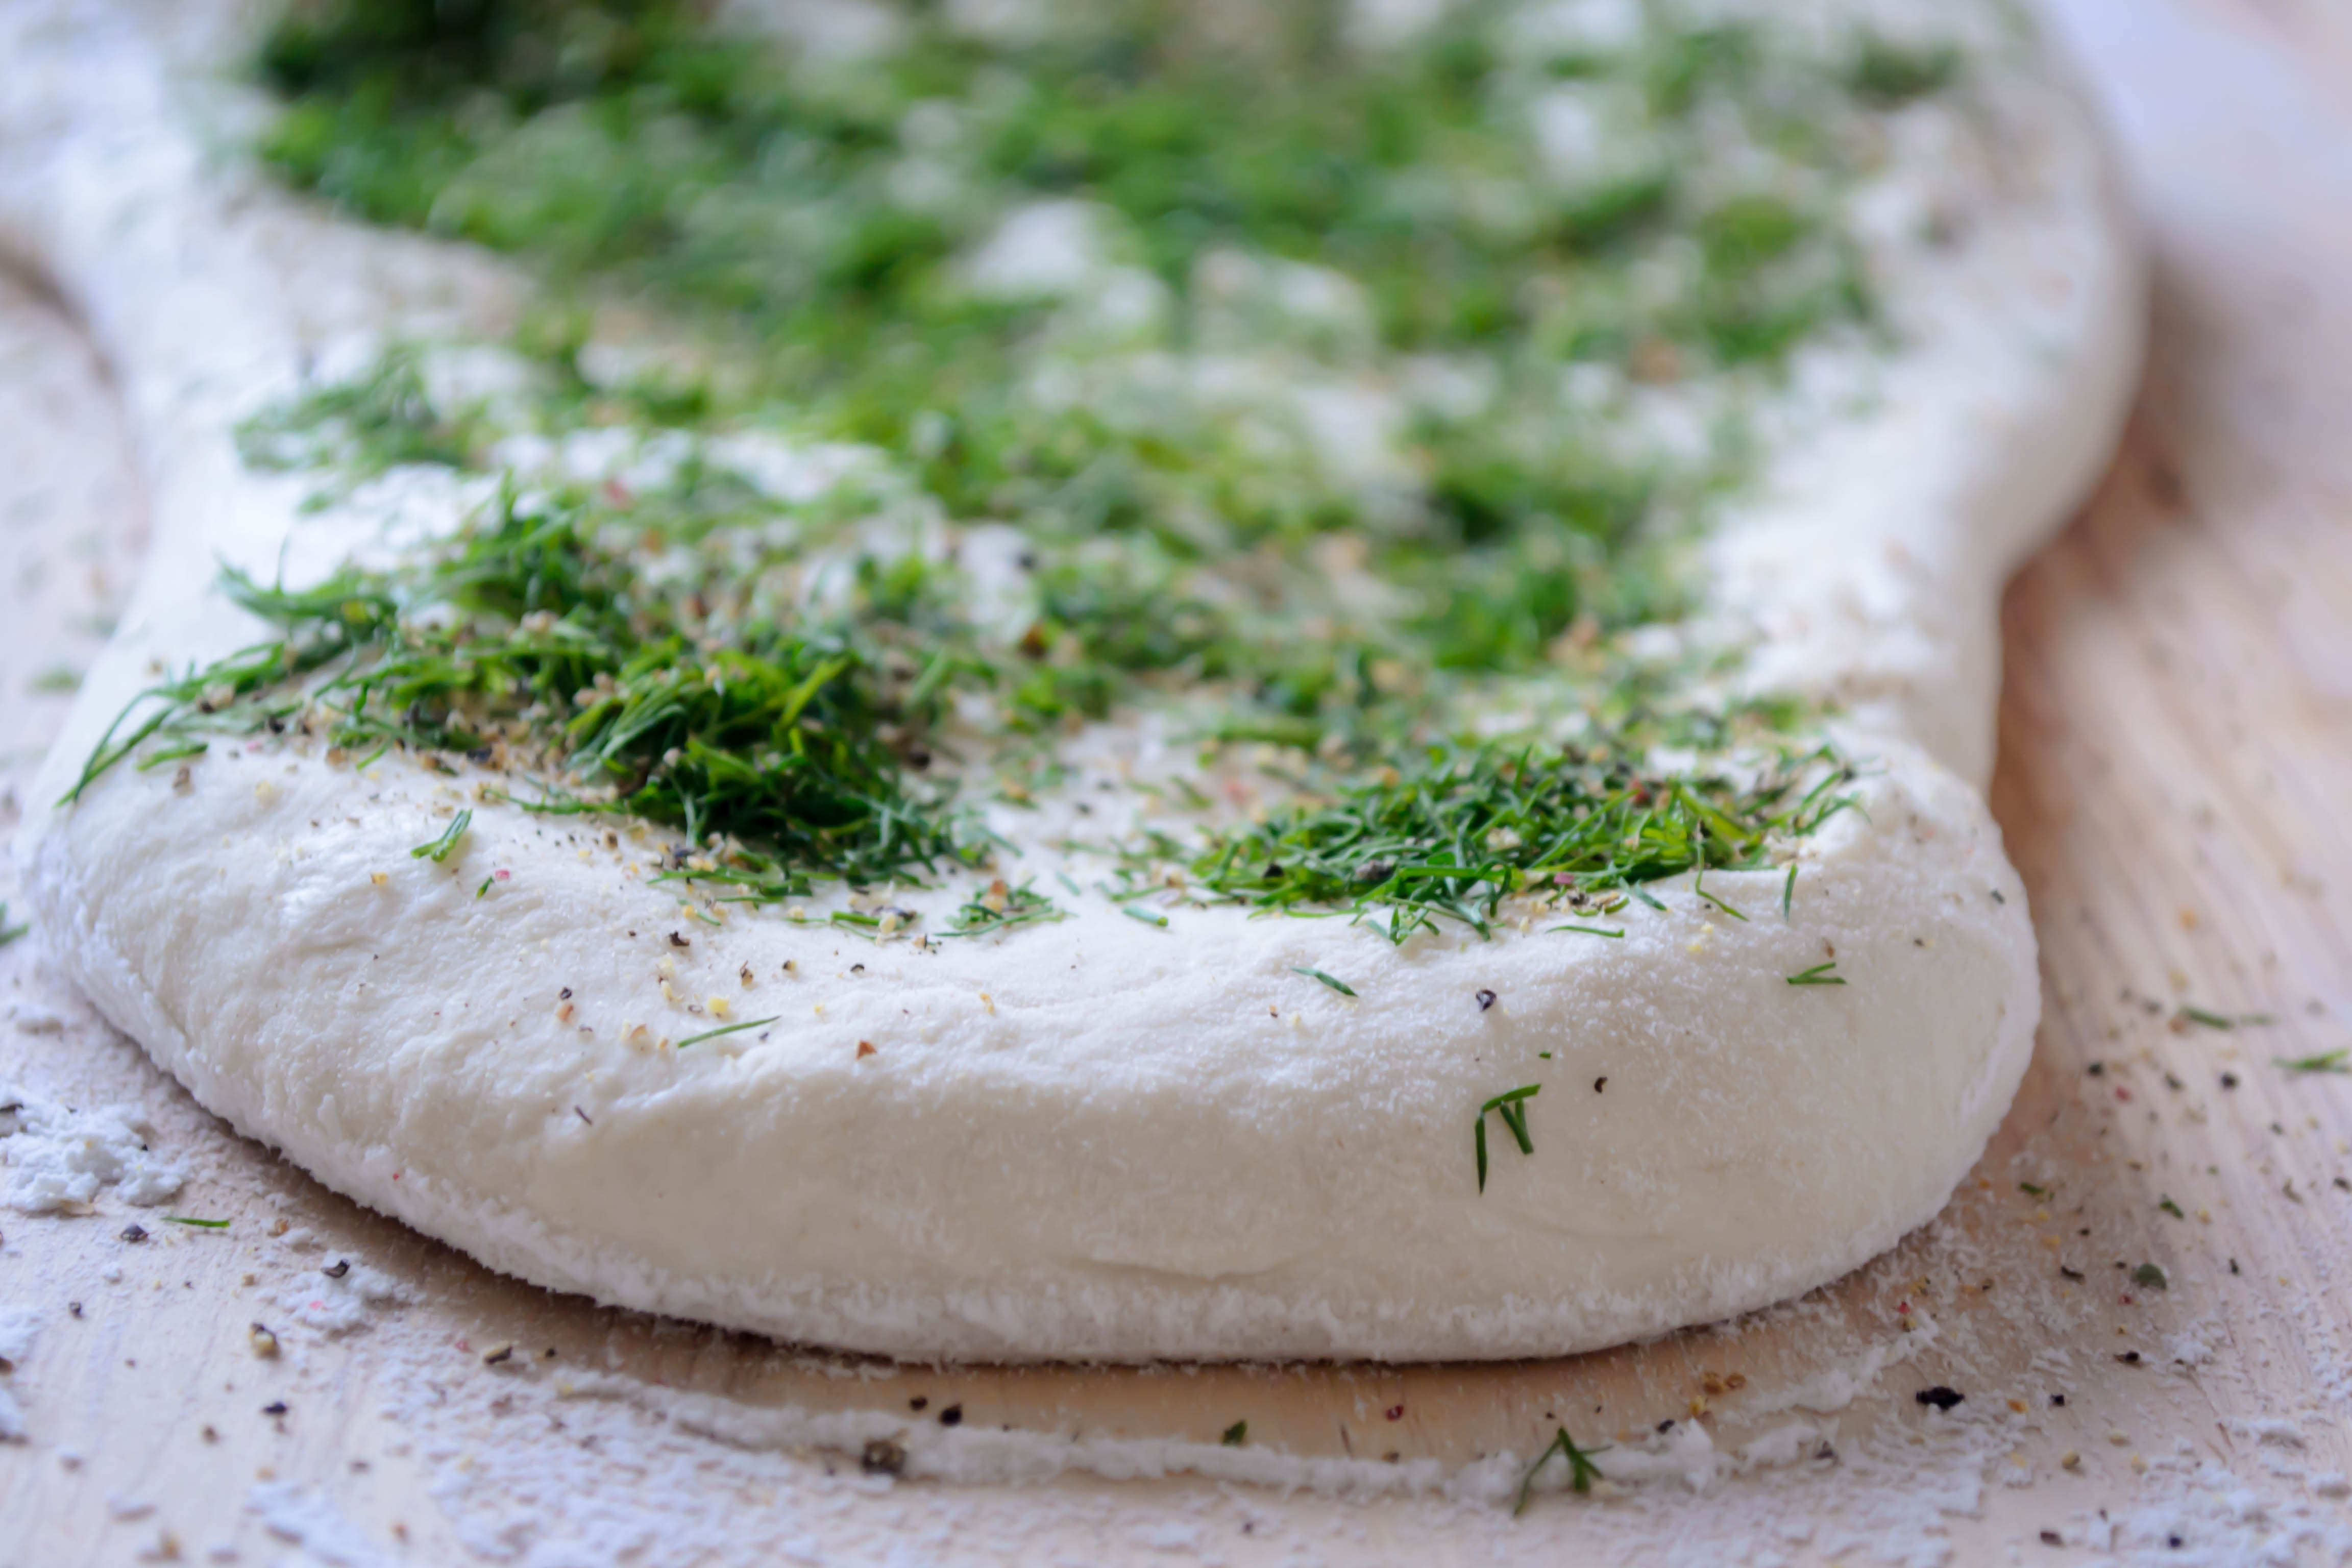
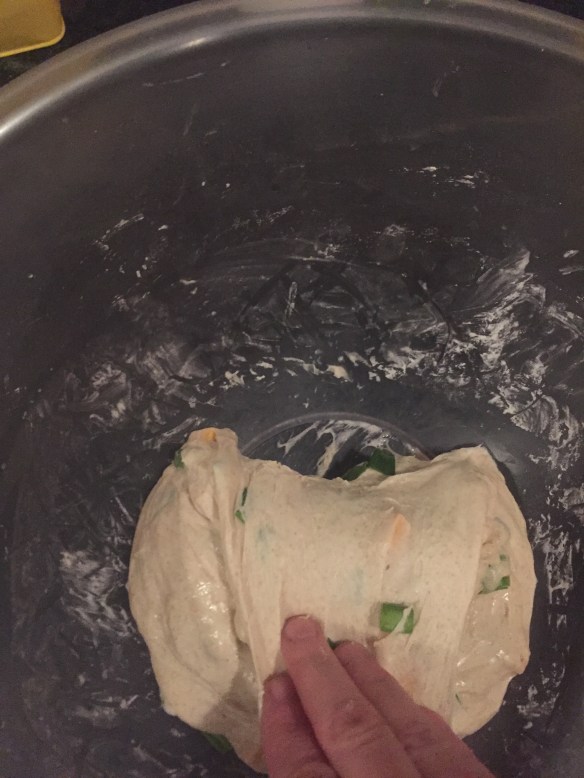
  • Flatten the dough out a bit, spread the cubes and press them into the dough. Do your best to space them out. Do the same with the onion.

image-8-cheese-and-onion-in-dough_

  • Pull all the dough edges up and fold over, encapsulating the cheese and onion.
  • Leave it for 45 minutes, then stretch and fold again. Repeat every 45 minutes (or so) for the next several hours, until the dough starts to get fuller and come together. This will take time. Give it 4 to 6 hours and 6 to 8 stretch and folds. Be patient and get gentler with your folds as you go.

image-10-stretch-and-fold

  • Once the dough is noticeably a bit puffy and fuller, turn it onto a floured board. Lightly flour the top and flip it over using the bench knife. Do one more very gentle, half-hearted round of folds, so the dough is roughly round, and gently flip it back over.

image-11-rough-round-bench-rest

  • Let it sit for half an hour.
  • Lightly flour the top. Flip it again and do a final fold. Start your fold at the top edge, then the right side, then the left, then fold the edge nearest to you up and over and keep rolling the whole ball so the seam side is down.

There is your boule!

image-16-final-boule-dough

  • Spin it once or twice on the board to seal that bottom seam. Flour your banneton well. You don’t want the dough sticking to the banneton.
  • Slide your bench knife under the boule and gently place it upside down (seam side up) in the banneton.

image-17-dough-in-banneton-cheese-chunk-removal

  • Cover with foil and put in the fridge to bake the next day.

The Bake

  • Place your combo cooker in the oven and preheat to 500 degrees. Once preheated, wait another 20 minutes. You want it screaming hot.
  • Take your dough out of the fridge. I pluck any cheese cubes that are sticking way out of the dough.
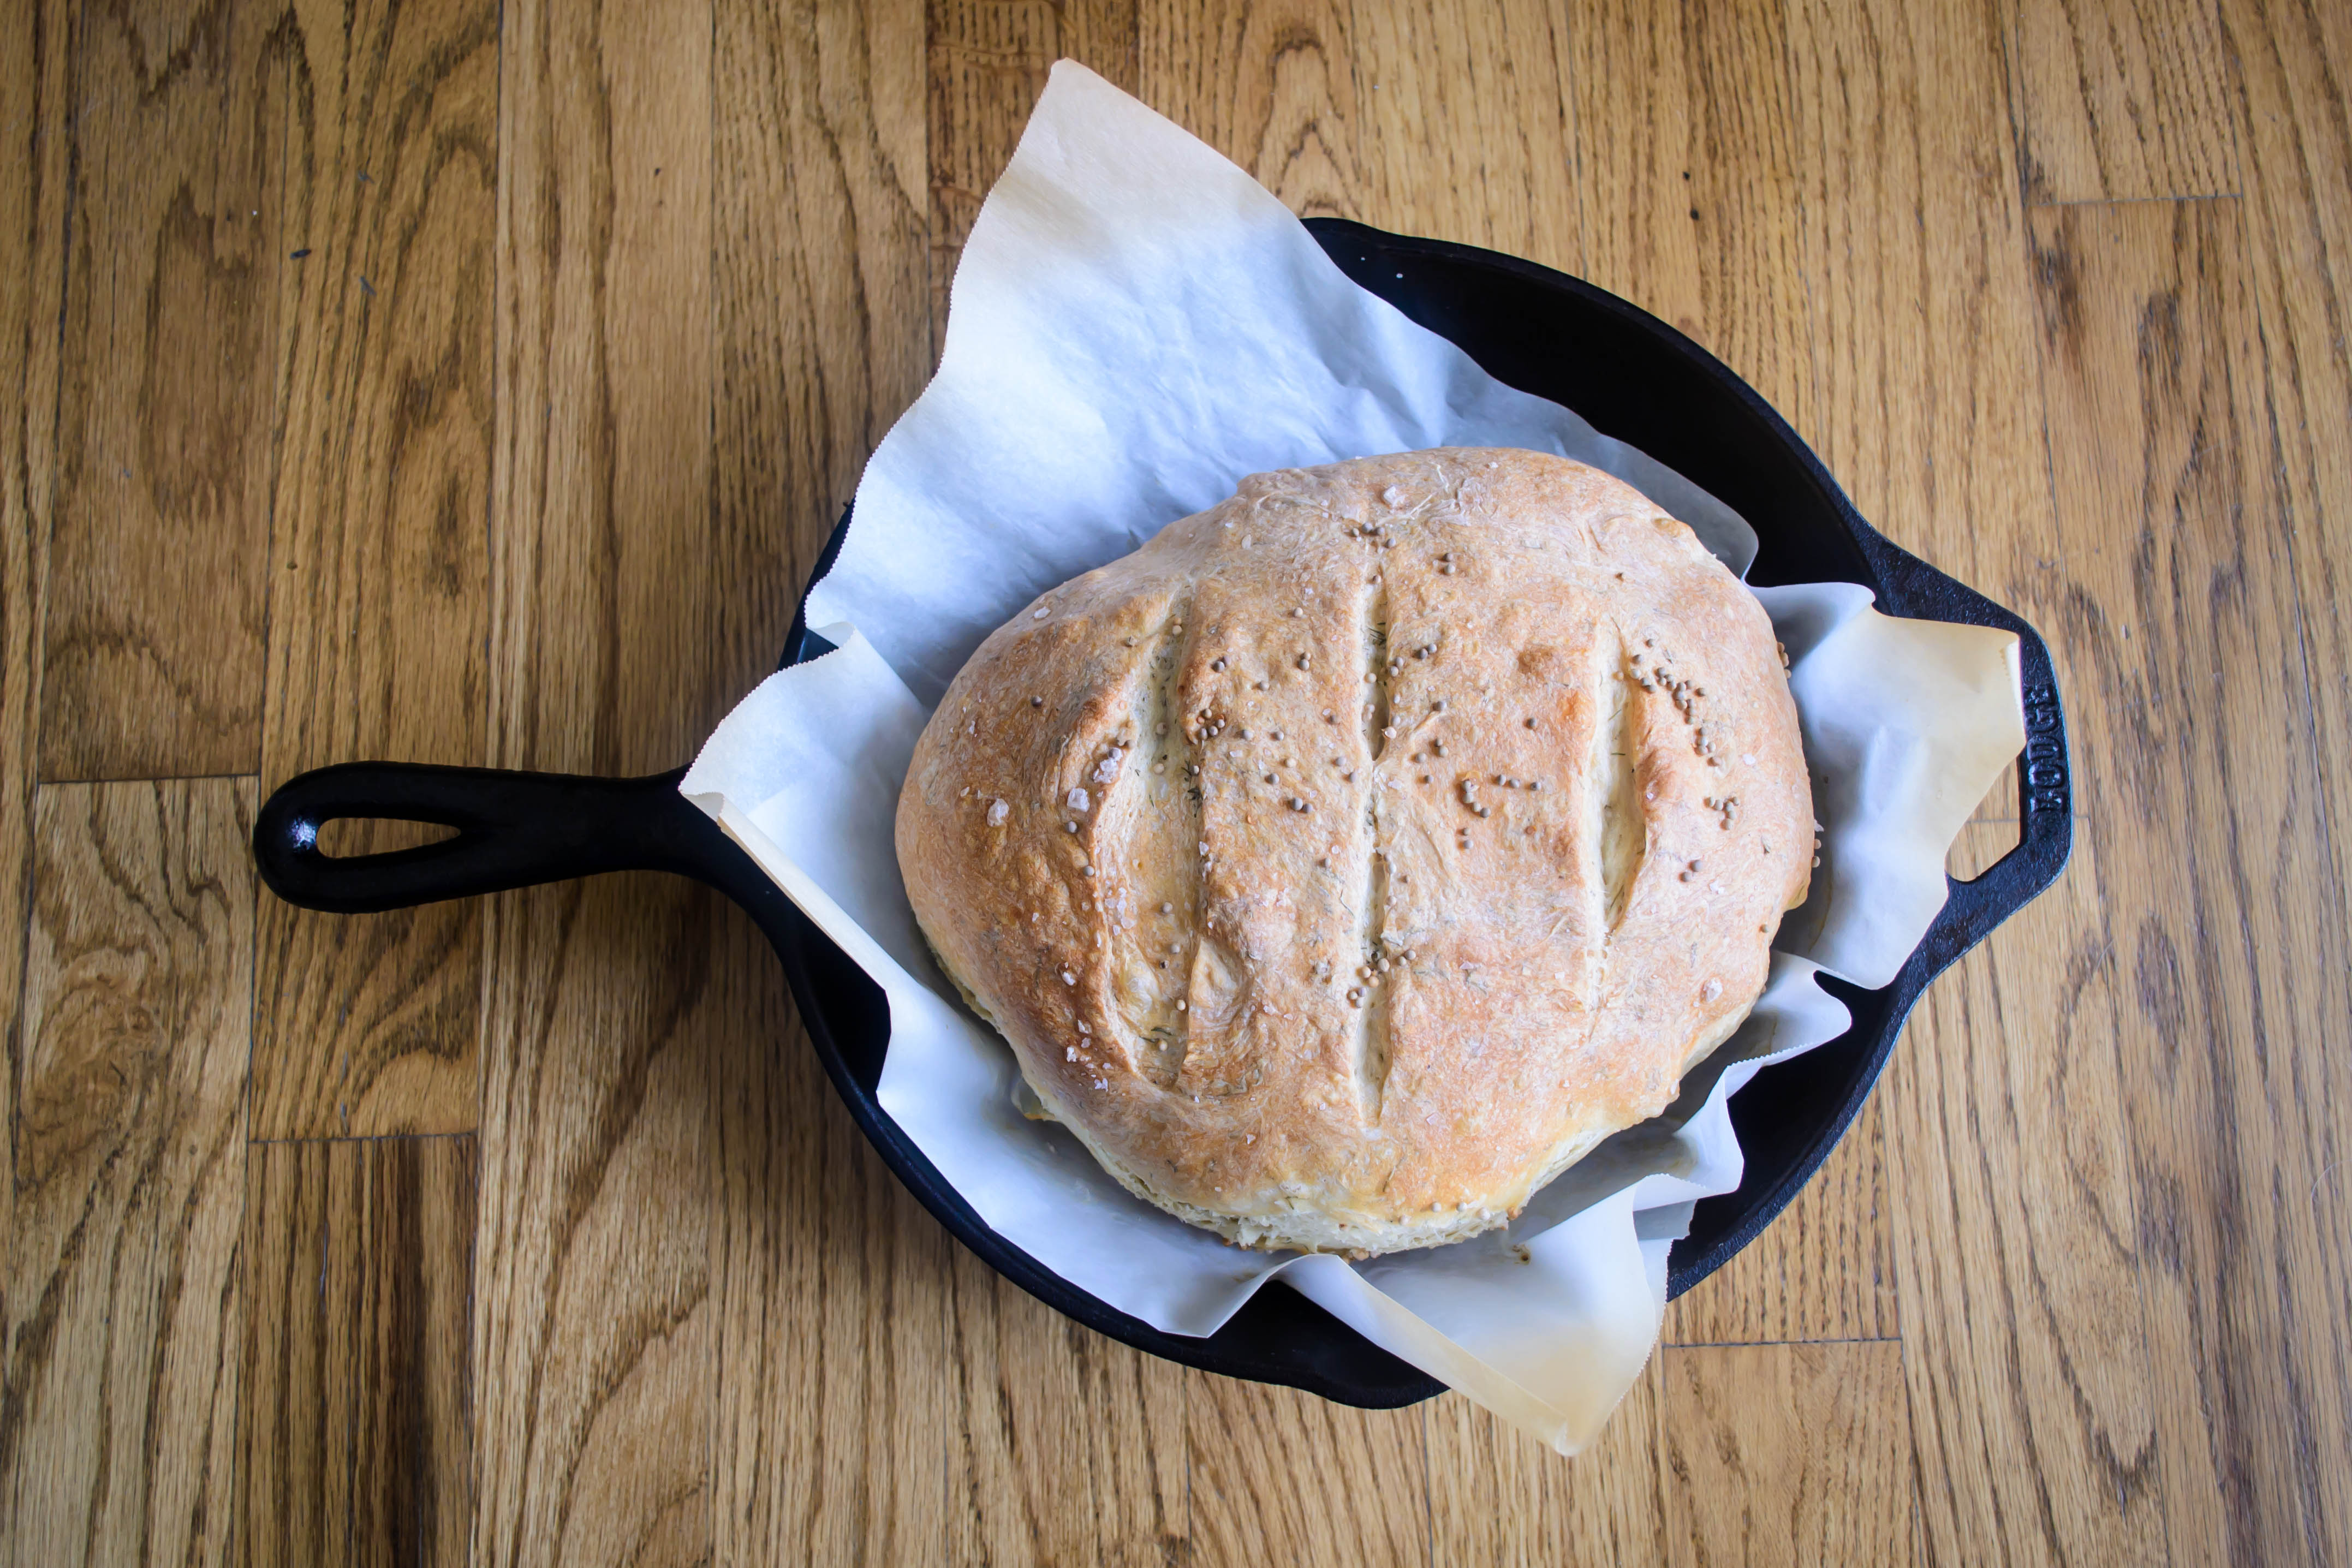
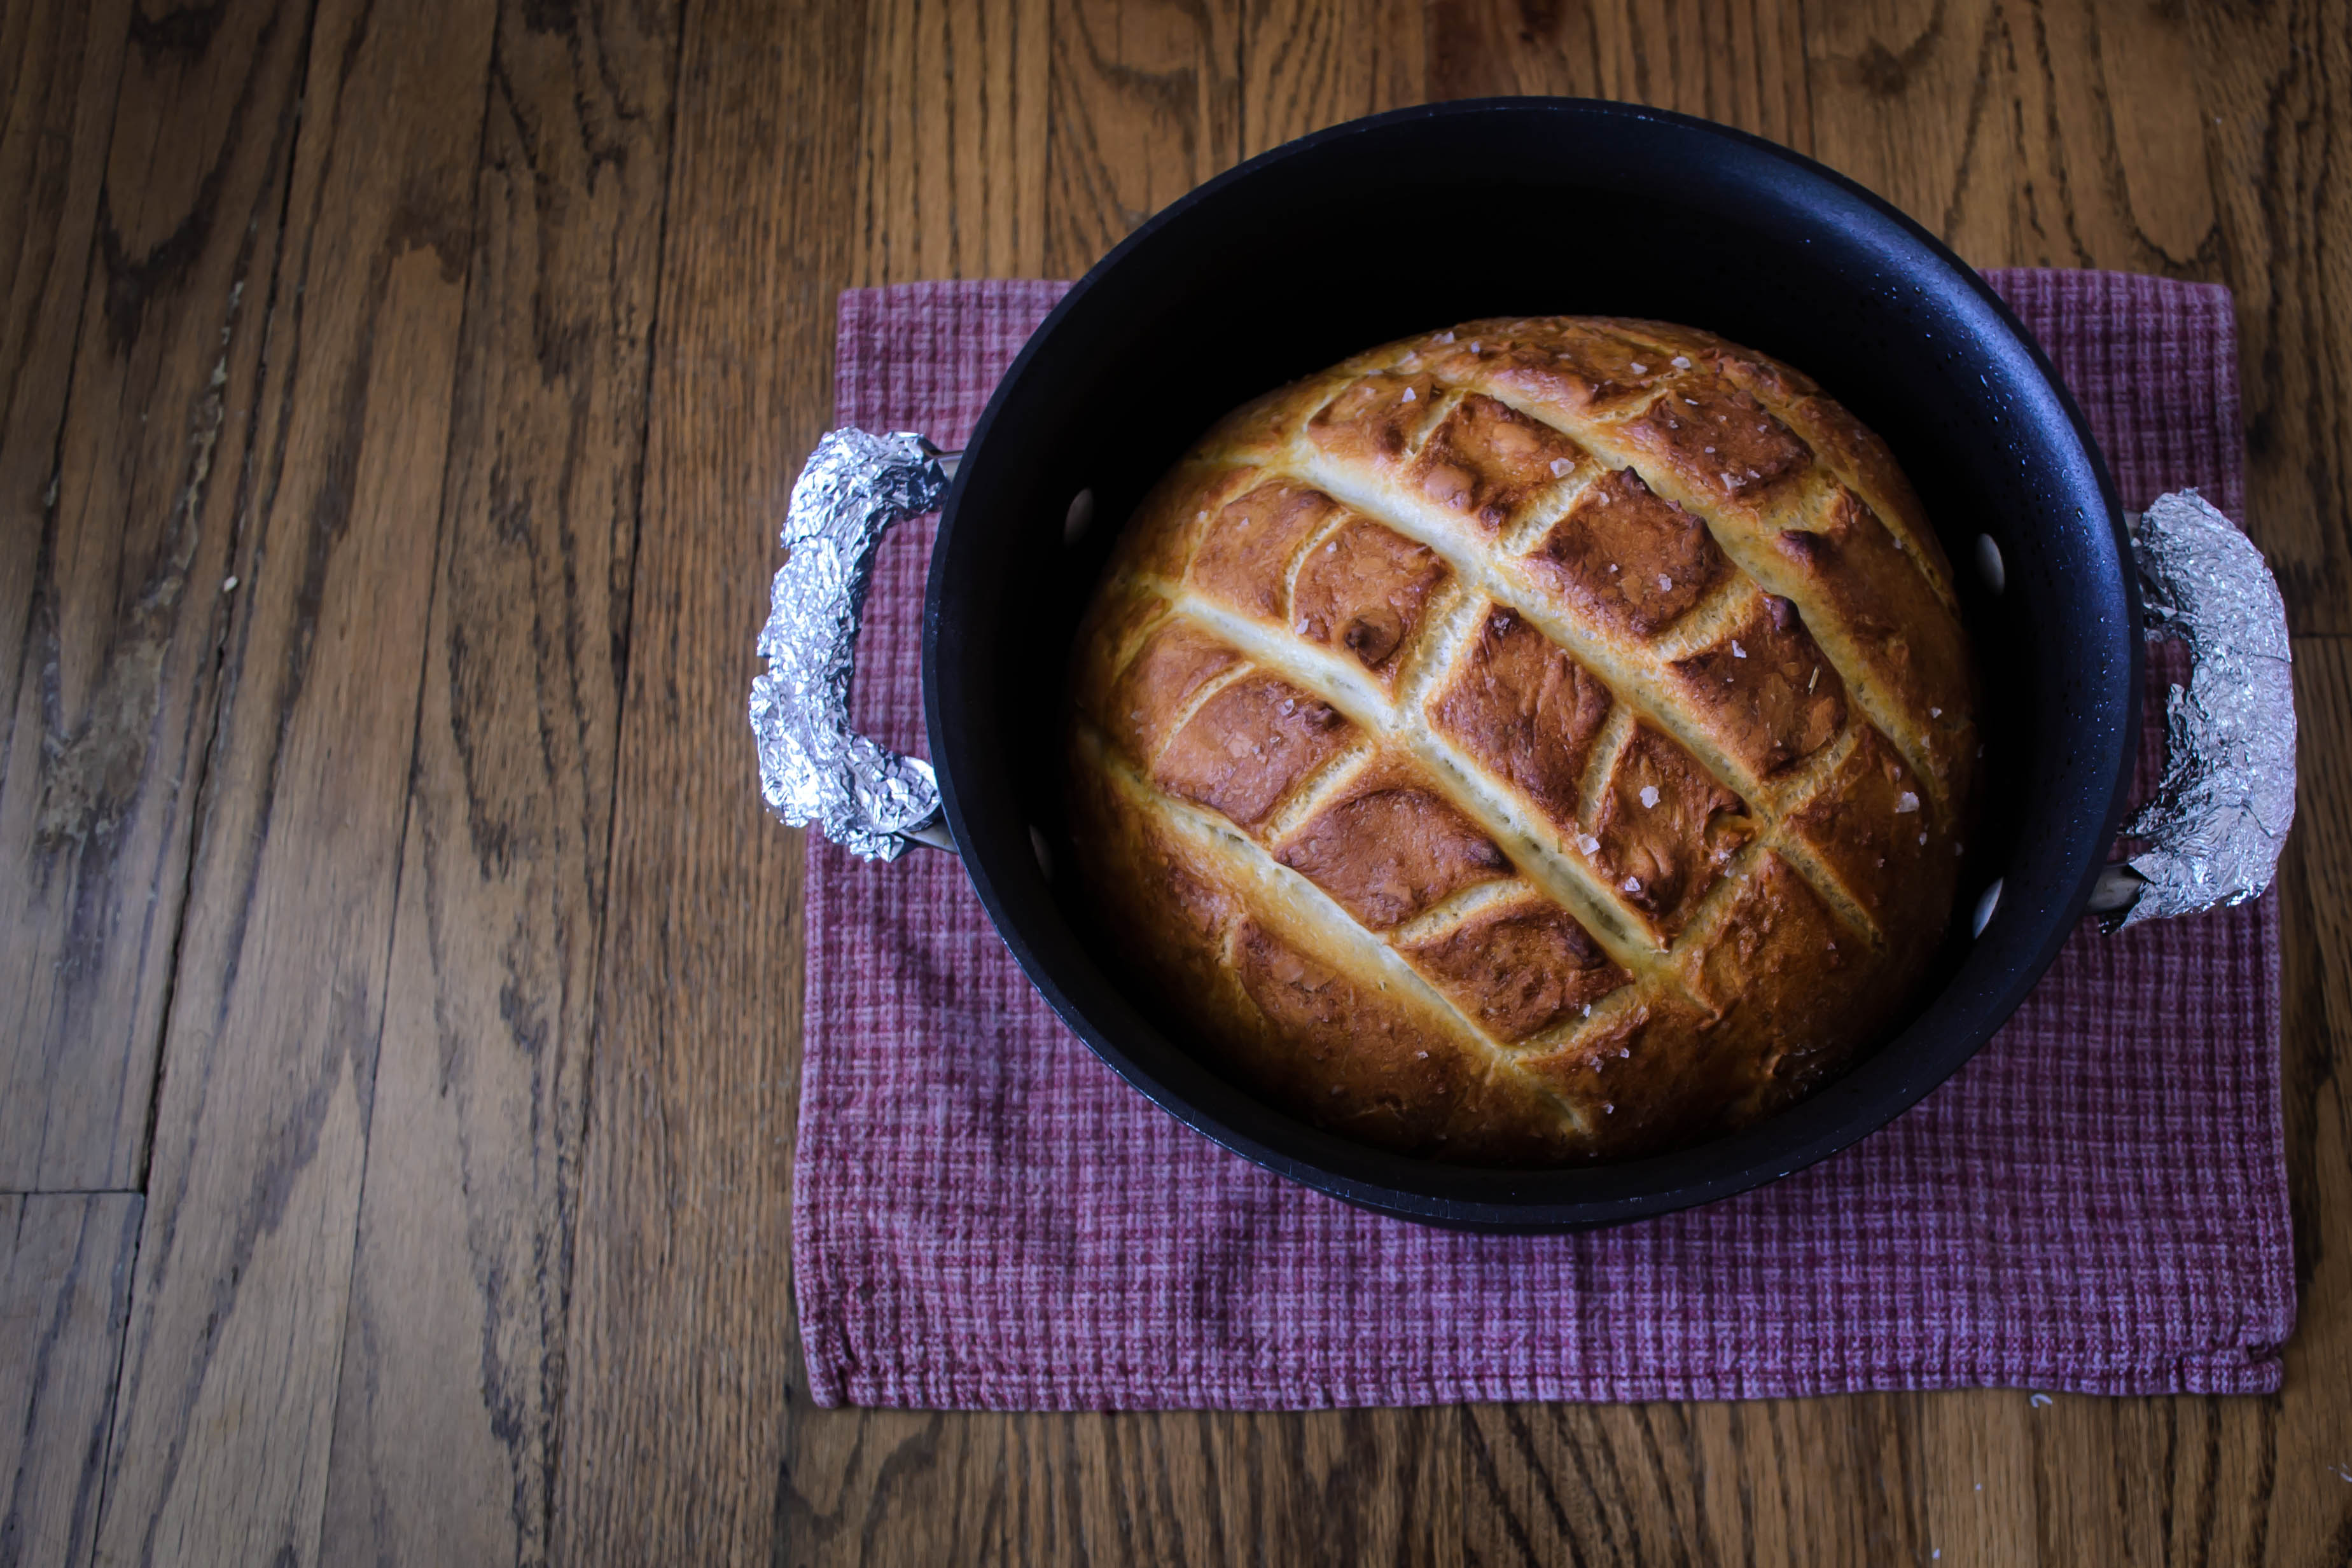
  • Take the combo cooker out of the oven using heavy silicone mitts. Take the top off and dust the bottom of the cooker with cornmeal. It will smoke but that’s OK.

image-18-cornmeal-in-combo-cooker_

  • Lightly flour the seam side of your dough and your hands and then gently turn the dough out into the bottom of the combo cooker. Be careful. That sucker is hot.
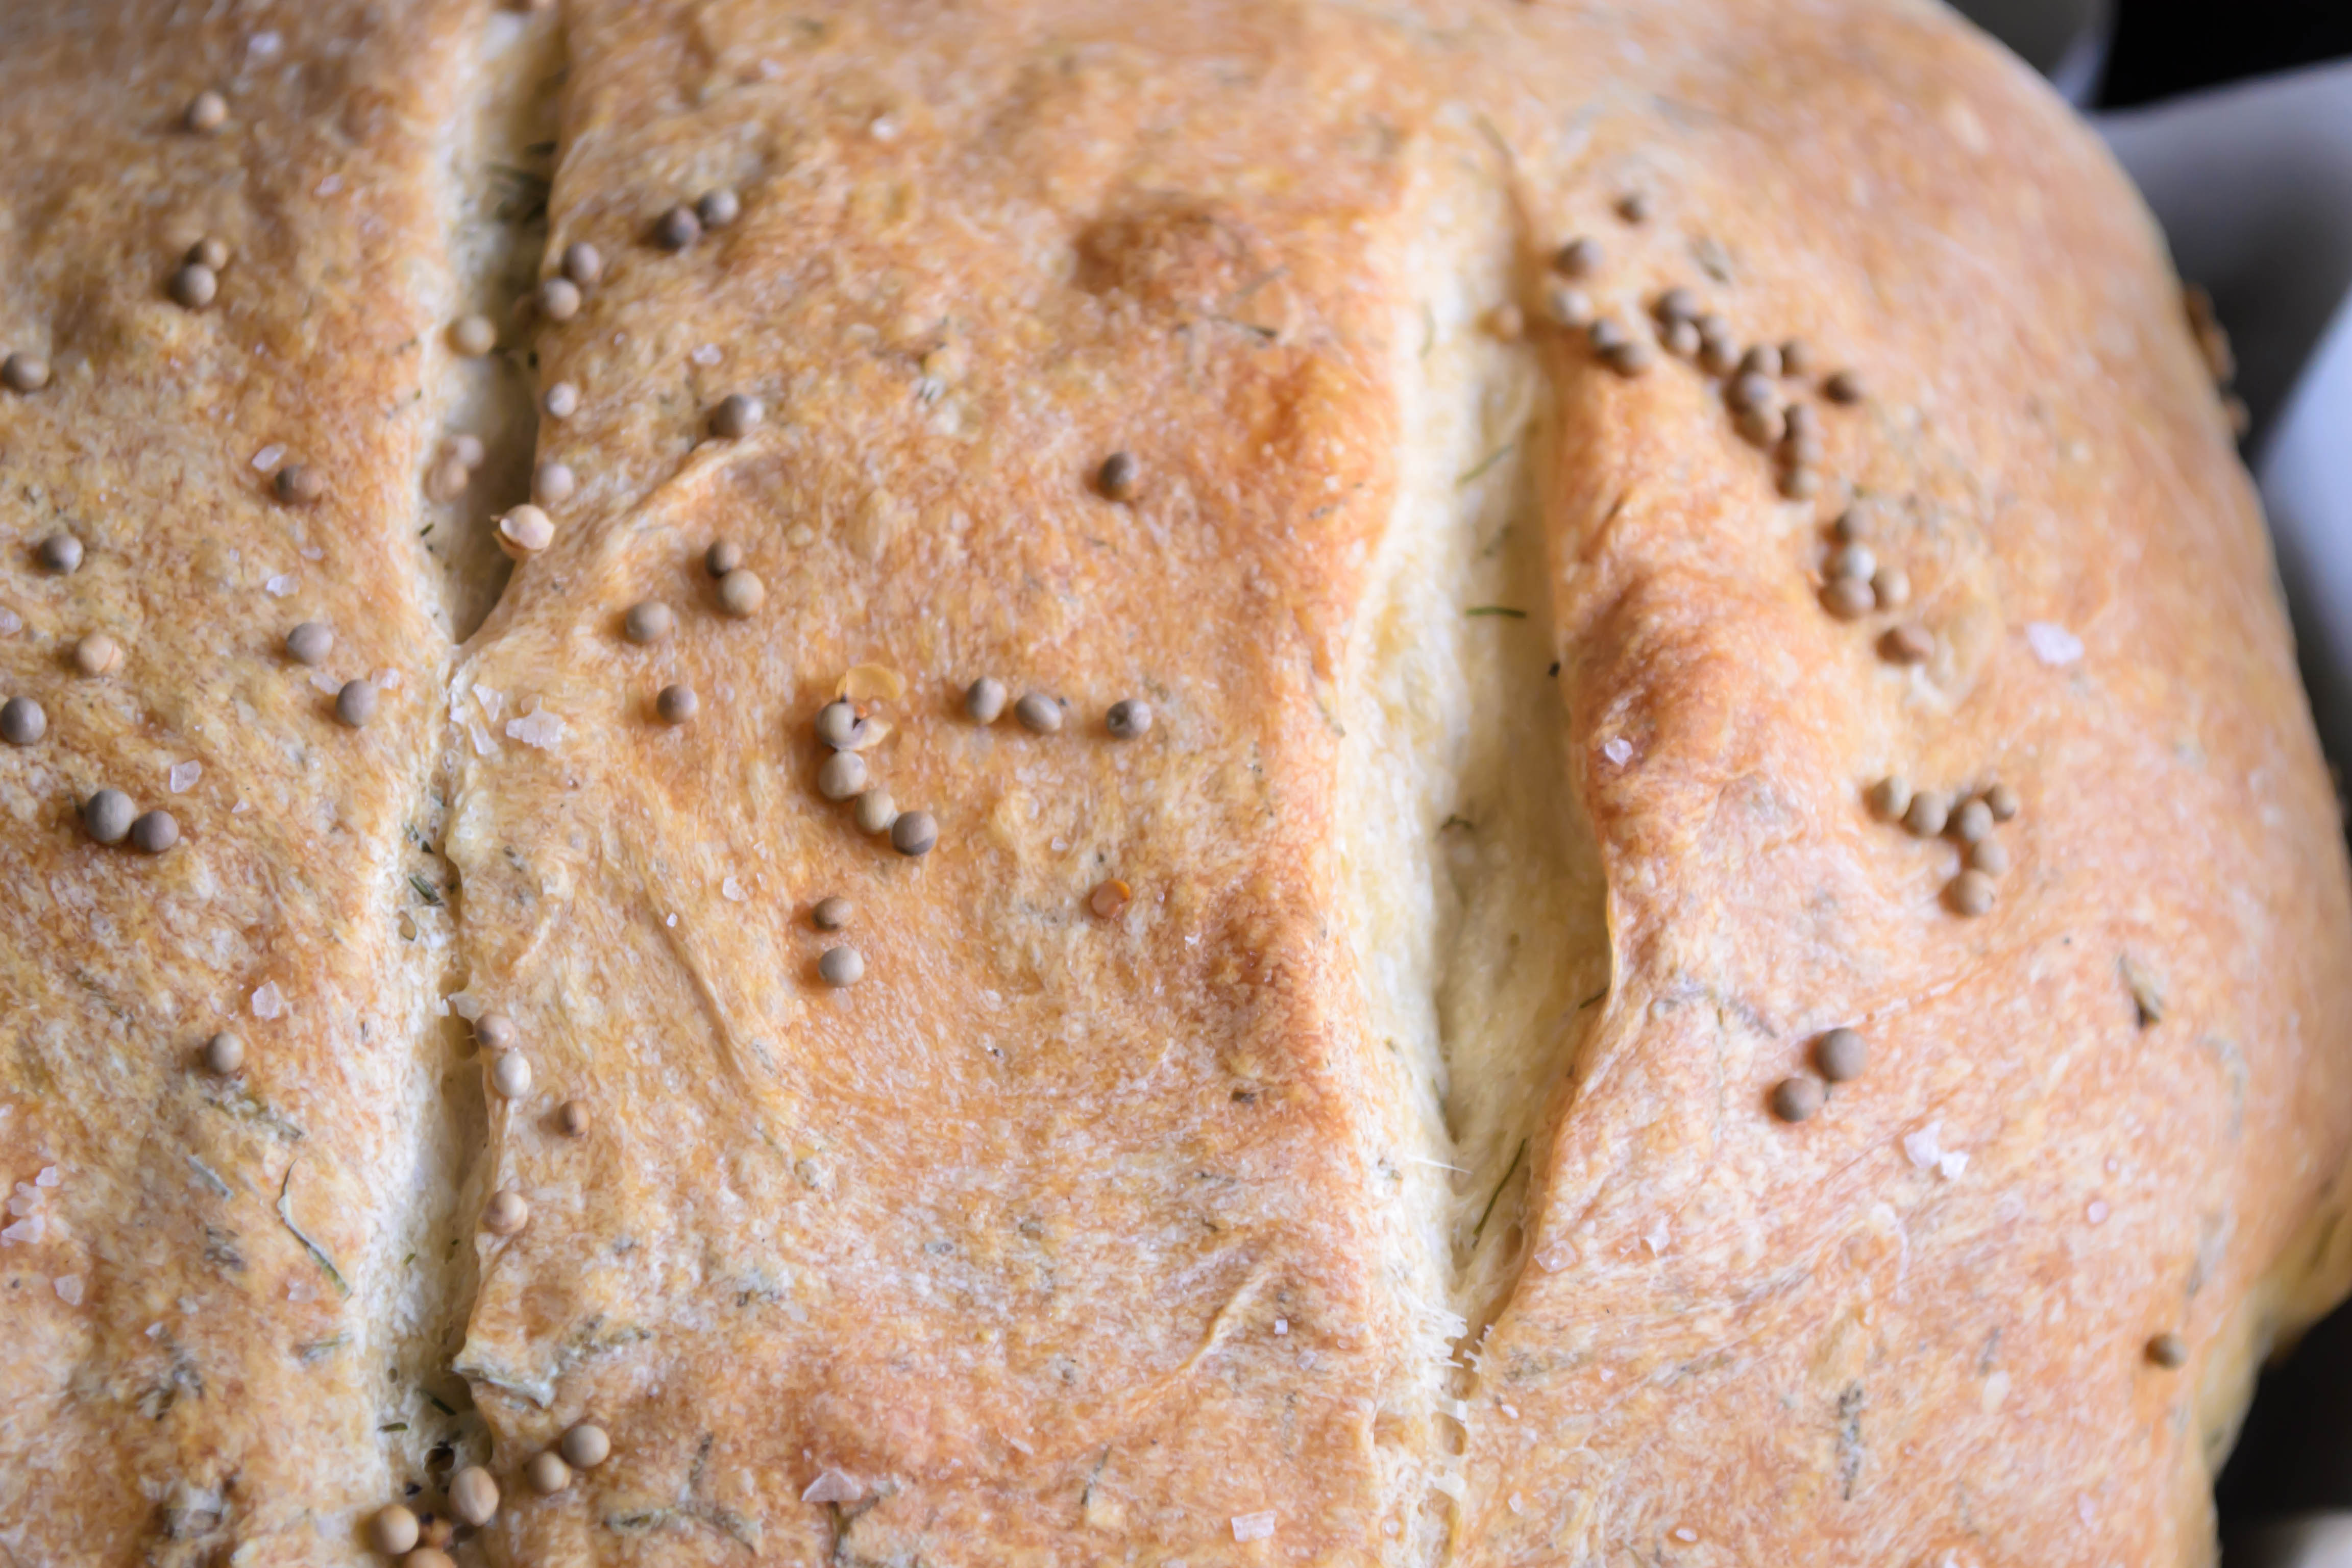
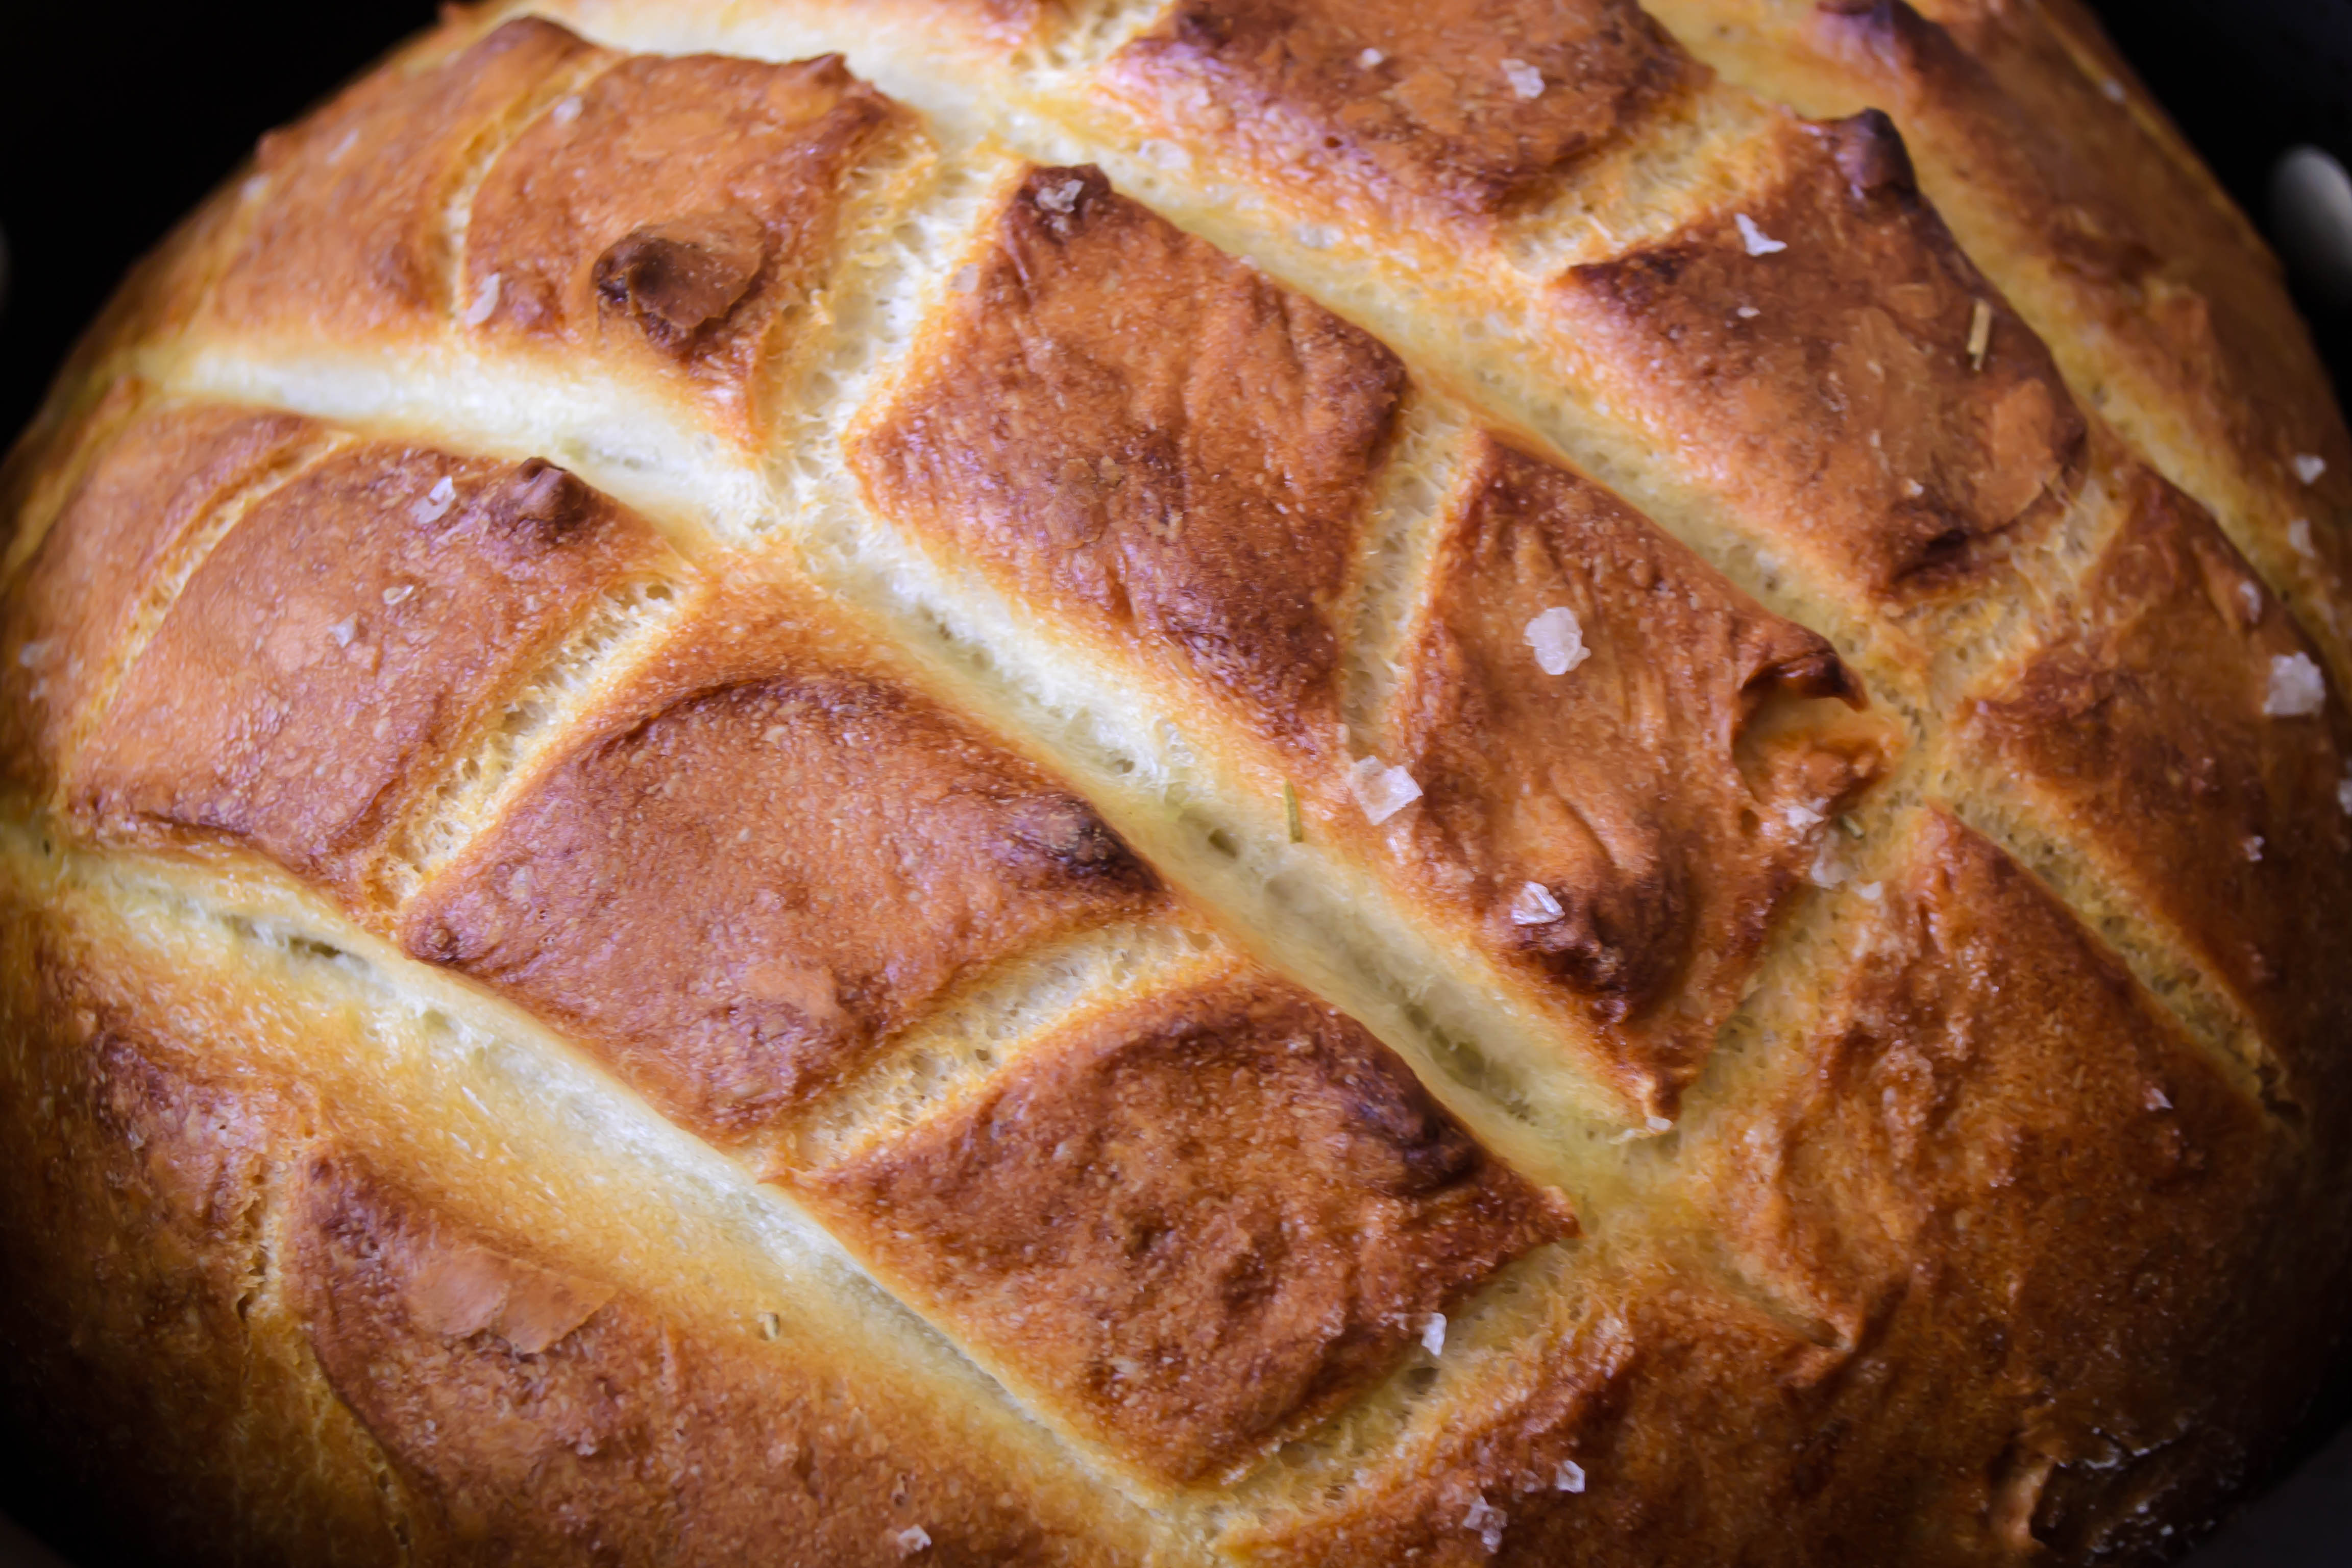
  • Using a new razor or ultra-sharp kitchen knife, slice a cross into the top of the dough. This allows the bread to expand and rise to its full potential.

image-19-score

  • Replace the top and put it all into the oven. Cook for 10 minutes, then turn heat down to 450. Cook for another 15 minutes, then remove the top. Watch your eyes! You will release a cloud of hot steam.
  • Cook another 15 -18 minutes. Bake it out strong but don’t burn it. You want the internal temperature to reach at least 210F.
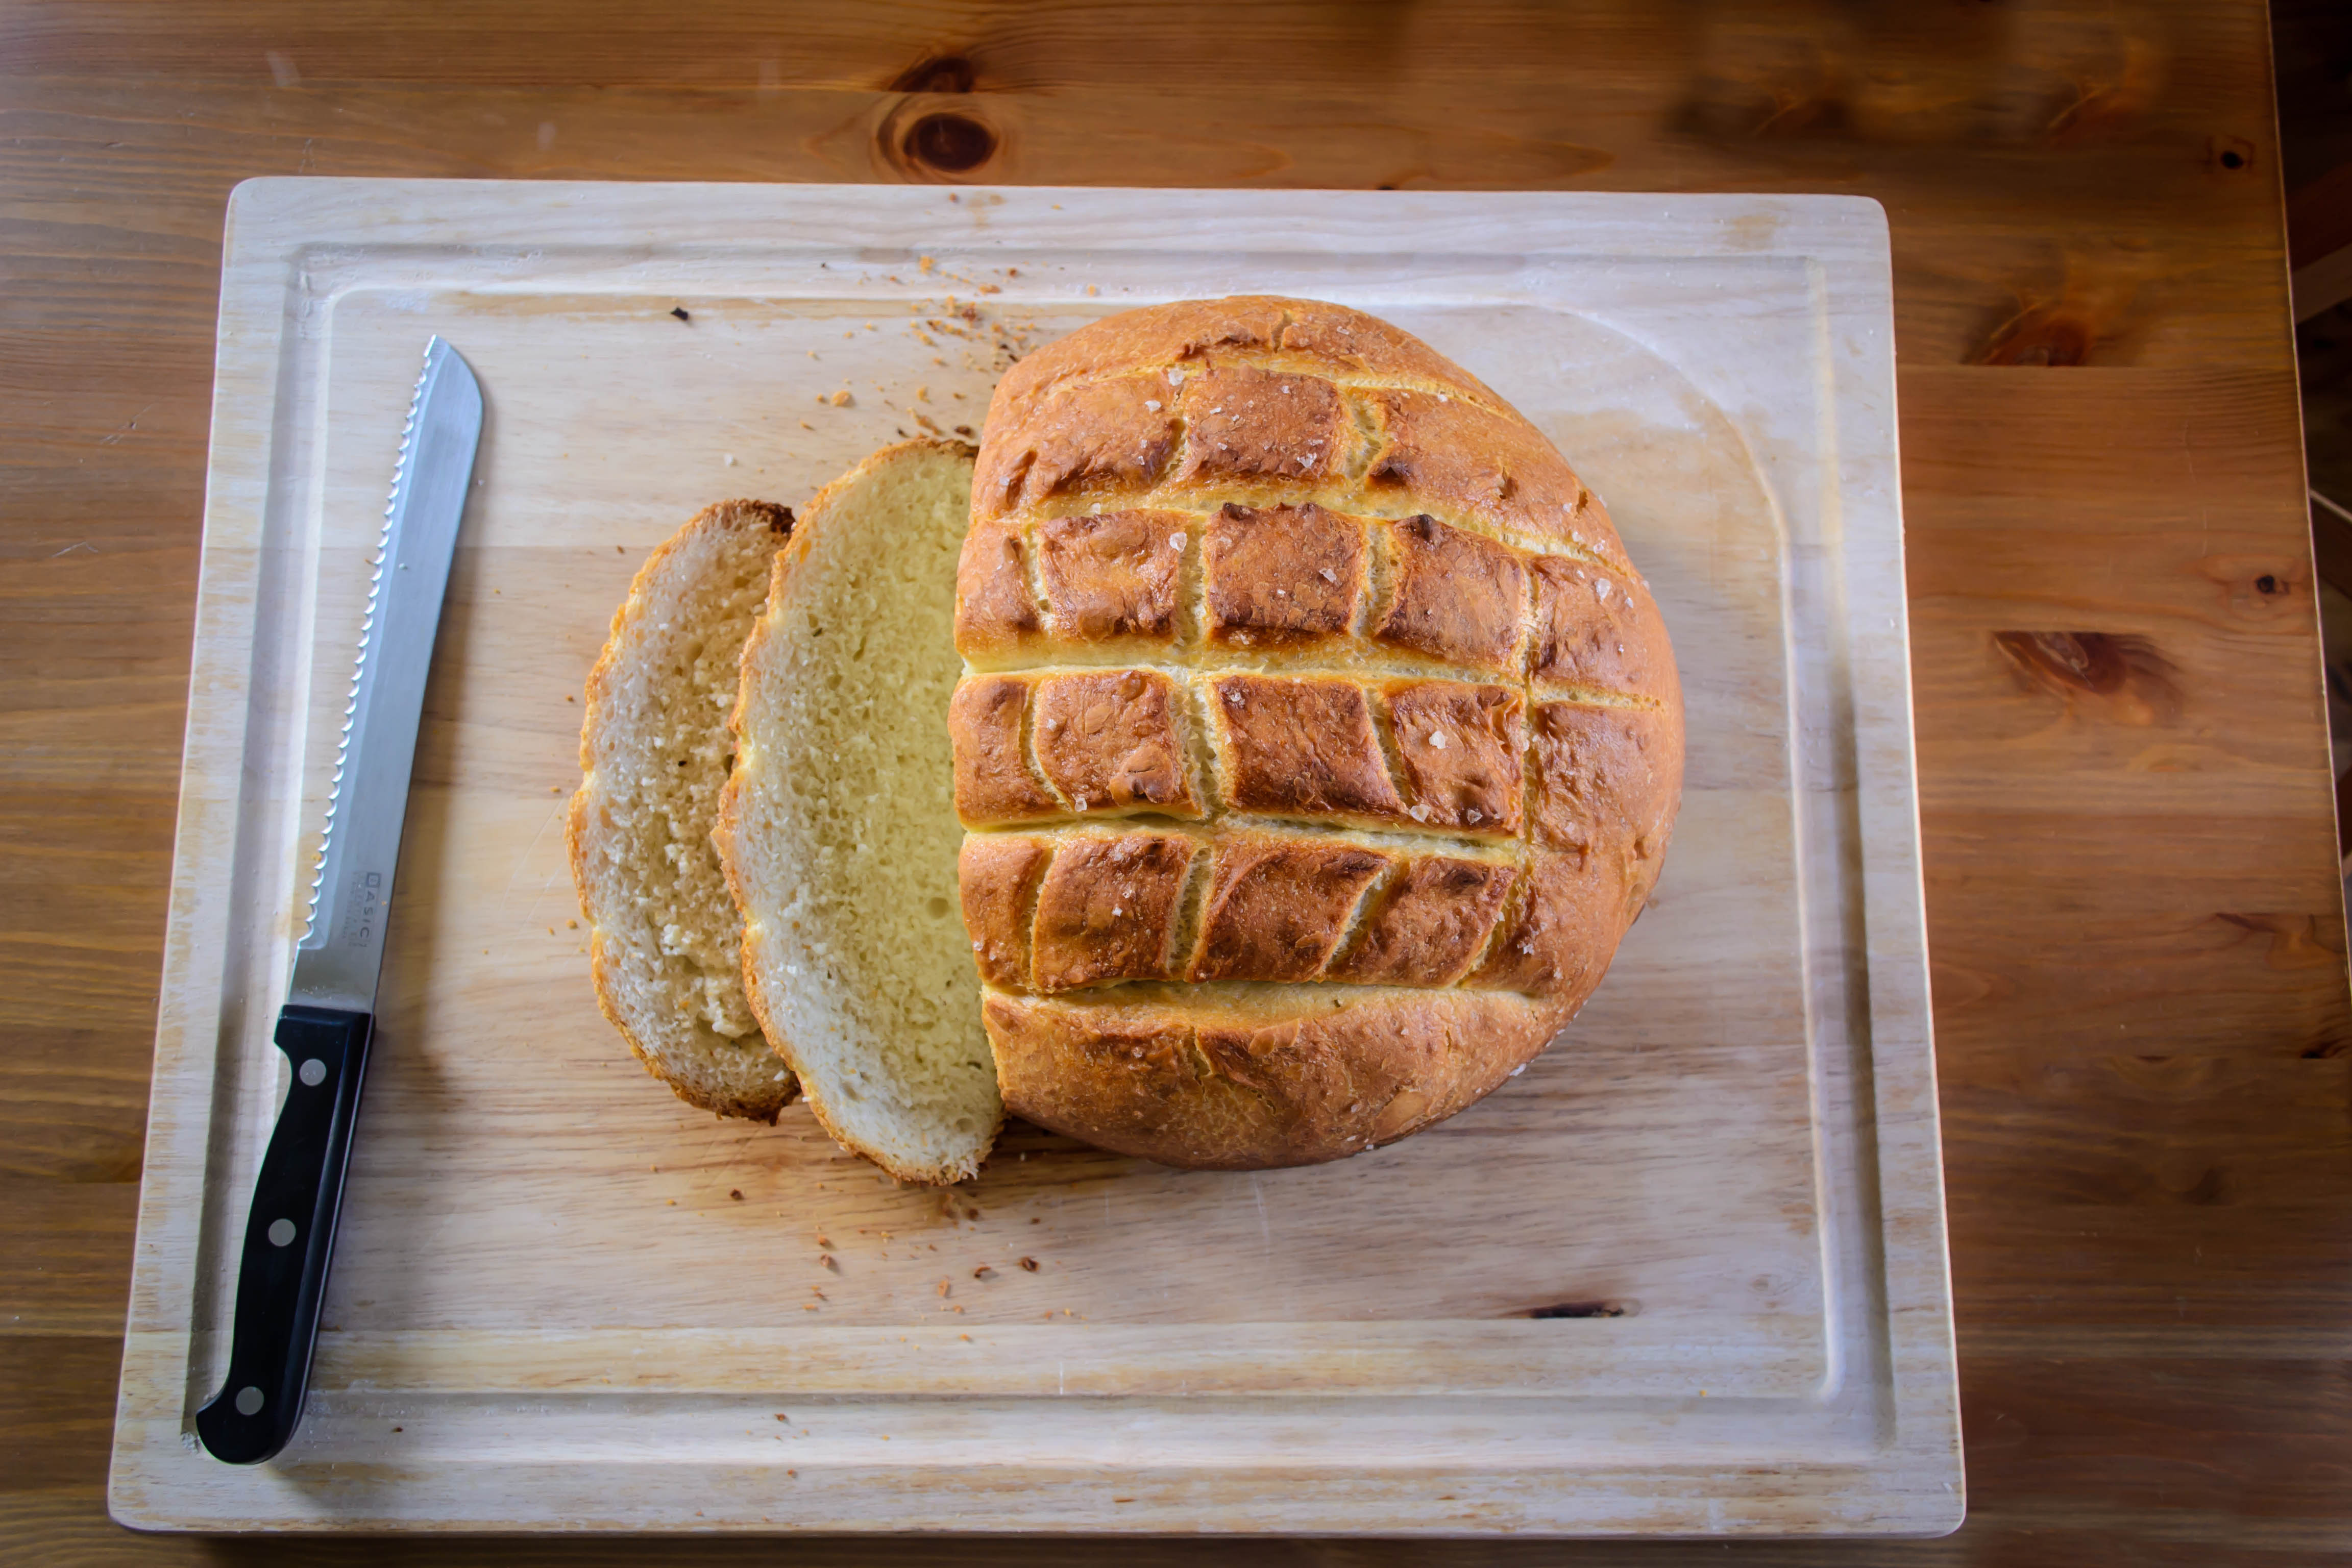
  • Put the loaf on a rack and let it cool, sitting there being beautiful while you make the soup. It’s a fine companion.

image-20-final-loaf

P.S. After you’ve demolished the loaf, keep those crumbs for mac and cheese.

Save

Go-To Dough 2

Because my little house sits smack between the concentrated skyscrapers of downtown Santa Monica and the constant ascent path from LAX, because I can hear the freeway from my backyard and see, from just down the block, the Hollywood sign in the distance, it sometimes slips my mind that I only live a few miles from the ocean.  Los Angeles is a funny place: loud, boisterous, urban, crowded, and yet along its edges it’s a beach town, where it’s just as loud and crowded, but people seem to move just a little slower.
Hard to remember, sometimes, but this past week we were treated to afternoons that reminded me I’m only a few minutes from the water.  Warmth gave way to brisk, fresh breezes heavy with the smell of salt.  Fog rolled over and it felt like a summer day on the Oregon coast.  These reminders of the Pacific Northwest made me want to call on ocean flavors: smoked salmon, crunchy salt crystals, and the grassy headiness of fresh dill.
Food Blog February 2013-0621There are so many different methods for making bread that it’s a wonder anyone becomes a master at it.  This week I decided to try a process slightly more complex than Ruhlman’s basic boule, working with a recipe for French Boule from the Feburary 2009 issue of Cuisine at Home.  The process for this round loaf starts the night before, with a sticky, soggy, tasteless combination of flour, yeast and water called a poolish.  C@H tells us this came from the French pronunciation of “Polish,” from whom they learned this technique (19).  The long, slow fermentation time allows for plenty of yeast development and supposedly contributes a nuttier flavor to the end product.  It is supposed to look like pancake batter, and when you pull it out the following morning and add more water, it is supposed to be very thin.  Mine was, when I put it in the fridge for its overnight chill session, more like the texture of silly putty.  When I added water the following morning, it refused to combine evenly, its sticky strands getting soggier and stickier at the same time.  I was skeptical about this, but followed procedure anyway, and once it had been kneaded aggressively into my dough it didn’t seem to matter.
With the starter crises resolved, I considered flavorings.  Thanks to the overcast coastal feeling of our afternoons and a recent episode of Top Chef, dill sprang to mind as the most logical choice.  It would pair perfectly with our dinner: gemelli pasta draped with smoked salmon and vodka cream sauce.  Black pepper sounded like a nice foil for the dill – pungent and dry where the dill was fresh and mild.  I sprinkled them onto the flattened dough, then rolled the whole thing up into a long tube and kneaded through before letting it rise.  You could certainly add other flavor combos – kalamata olives and cloves of roasted garlic sound incredible – and gently roll and then knead them through the dough.

Food Blog February 2013-0611

Food Blog February 2013-0608
The usual procedure followed: rise, shape, rise again, and prepare for baking.  Olive oil, mustard seeds, and a good sprinkle of coarse salt seemed like the right things to add.
This time, instead of using a Dutch oven, I opted for my cast iron pan.  I was nervous about the bread sticking, which is probably silly, but what can I say?  I’ve lost several chunks of flatbread to that pan because I get anxious and rush the cooking process, so I took out some insurance and settled my loaf onto a layer of parchment paper sandwiched between it and the surface of the pan.
My recipe called for a heavy misting of water over the bread and into the inside of my preheated oven.  I didn’t have a spray bottle on hand with which to mist, so I just flicked droplets in with the tips of my fingers.  The sizzle was tremendous, but seemed to work well.  The resulting loaf was not as big as my first boule attempt, but it was lighter and not overbrowned on the bottom.  The crust was thin but crisp, and we loved the flavor combination.  The mustard didn’t do much besides providing a fun crunchy-pop texture on the edges, but the dill and black pepper were the right contrast of fresh and sharp and incredibly aromatic.  We each took a slice to eat in the car on the way to a soccer game at my husband’s school – had to make sure it was suitable for dinner, after all.  We ate thick slices with our pasta, running them around our plates to pick up every drop of sauce.  We ate more the next day, spread with salted butter, and were surprised and saddened the following morning to find that the loaf was nearly gone.  Dreaming of this bread again, I could see it toasted lightly, smeared with artisan goat cheese and topped with a luscious slice of smoked salmon: the Oregon coast in one bite.
Food Blog February 2013-0615
Dill and Black Pepper Boule
(adapted from Cuisine at Home, February 2009)
For the poolish starter:
1¼ cups bread flour
¾ cup room-temperature water
¼ tsp yeast (I used active dry yeast)
Rehydrate the yeast by combining it in a small dish with 1 TB of the water you’ll be using for the starter.  Let it sit for a few minutes.
Combine the flour, water, and yeast mixture in a bowl or a large measuring cup.  Stir well; the mixture should come together into a texture somewhere between pancake batter and silly putty.
Cover your mixture with plastic wrap and let it sit at room temperature for 3-4 hours, then move to the refrigerator and leave it alone overnight.
The next day, take it out about an hour before you intend to start, so it can return to room temperature and the yeast can wake up a little.
For the bread:
2 cups all-purpose flour (I’m not sure what the advantage is of combining bread flour and AP flour here, but I followed the directions anyway…)
1½ tsp salt
½ tsp yeast
½ cup room temperature water
Poolish starter
2 TB chopped fresh dill
½ tsp (or to taste) fresh ground black pepper
1 TB mustard seeds
1 TB coarse salt
Olive oil for drizzling
Fit your stand mixer with the paddle attachment and use it to combine the flour and salt (you could likely add the dill and pepper here too).
Rehydrate the yeast with 1 TB of the ½ cup water.  Add the remaining water to the room temperature poolish starter and combine.  Mine did not become very thin, as my recipe said.  In fact, mine refused to combine particularly well (read: at all) with the poolish, but it seemed to work out just fine anyway.
Add rehydrated yeast and poolish mixture to the dry ingredients and stir with paddle attachment until the whole mess comes together a bit.  It will be quite sticky.
Scrape sticky mass of just-barely-dough onto a well-floured board and work it with a bench scraper, adding more flour in small sprinkles until some of the stickiness abates and it seems like it could be worked by hand.
At this point, let the dough rest for 10-15 minutes.  The recipe suggests turning a bowl over it (I presume to prohibit drafts), but I think draping on a clean, dry kitchen towel would work just as well.
After the dough has rested, it’s time to knead.  You can do this by hand for 10-15 minutes, or in a stand mixer with the dough hook for 8-10 minutes, until it passes the windowpane test.
Food Blog February 2013-0606
When the dough is smooth, elastic, and stretchy enough to pass the test, if you haven’t added your flavor extras already, flop it onto a floured board and push, pull, or roll out into a rectangle.  Sprinkle on the toppings, then roll up lengthwise and knead together until the dill and pepper are distributed; you’ll be able to see green and black flecks throughout.  I don’t think it matters much when you add something finely chopped like dill, but if you are using a more delicate addition like olives or even sundried tomatoes, be sure to add it this way so it doesn’t get bashed up during the kneading.

Food Blog February 2013-0612

Set the dough in an oiled bowl and let it rise for an hour in a warm, draft-free place (like a briefly heated, then switched off oven).  It should double in size.
Once the dough has risen, remove it from the bowl and shape it into a boule by spinning it away from you with one hand and tucking the dough under with the other.  Let it rise for another hour.
While the dough rises, preheat your oven to 475F and put a cast iron skillet inside (mine is a 9” skillet).  If you are worried about the loaf sticking or getting too brown, prep a piece of parchment paper by cutting or tearing it to cover the bottom and sides of the skillet (don’t be too fussy about this – mine was a square that protruded above the sides of the pan and it was just fine).

Food Blog February 2013-0614

Turn the dough out onto the parchment paper, then pull the skillet out from the oven and set the loaf – on parchment paper if you are using it – into the center.  Slash the top, drizzle with olive oil, and sprinkle liberally with mustard seeds and salt.  Using the tips of your fingers or a spray bottle, mist or dribble the top of the loaf with water.
Place the laden skillet back into the oven, spritz the inside of the oven with ten flicks or so of water, and shut the door.  Wait 30 seconds and repeat the spritzing process.
Reduce heat to 450F and bake for ten minutes.
Reduce heat to 425F and bake for ten more minutes.
Finally, reduce the heat to 375F and bake another twenty minutes.  Remove from oven and cool on a rack for 45 minutes before slicing and devouring.

Food Blog February 2013-0619

Go-To Dough 1

Grading weeks are always busy.  This week my students turned in a paper examining local Farmers’ Markets, questioning this business model’s relationship to sustainability, and assessing whether, in practice, it seems to meet its own perceived goals.  They talked to vendors, they talked to shoppers, they peered at and smelled and tasted local fruit, and they shared their experiences during class.  And now I have to grade their work.  It seemed like a good idea, as I contemplated sitting down with a pen in hand and my editor glasses on, to have the smell of fresh bread in the background.

Food Blog January 2013-0548

Bread is, if you’ll excuse my torturing a metaphor for a moment here, a bit like how writing a paper should be.  You poke around a bit at your idea to see if it is viable – this is the yeast proofing stage.  You mix together your ingredients: idea, observations, quotes and facts from outside sources, and then you work and work and work your thoughts.  You knead them together until they are smooth but still elastic: one of the great and the frustrating things about writing is that you’ve got to be willing to see room for change in your product, always.  Your ideas need to stretch and flex as you read and understand more, or your work will never be as deep or sophisticated as you want it to.

And then, like dough, you have to let it rest.  You have to be patient, and plan ahead enough that your little work in progress has time to sit and develop.  When you return to it, hours or days later, if you’re lucky your perception of it will have shifted.  This gives you fresh perspective and lets you see what new avenues could be pursued, or what new angles need examining.  And so you work with it again, reshaping and adjusting, pulling and folding.  And then you let it rest again.

When it’s finally ready to submit, kneaded, shaped, risen, baked, you’ve spent time on this project.  It is yours.  Your voice rings out, your thoughts are fully developed, and the flavor is something original and pure.

Things don’t always happen that way, especially in college.  There’s not enough time or the ideas don’t flow or the method isn’t perfect.  But they don’t always happen for bread either.  You have to have patience and time, and you have to know how to work with your materials.

I wanted to a go-to recipe – a standard to work with.  I can play with additions and flavors and quantities all I want, but to become a good bread baker I think I need to solidify my technique.  So I’m auditioning basic recipes.  This week I decided to go with Ruhlman’s ratio for a boule, one of the most basic-sounding in his book.  But because I can’t leave well enough alone, I added some honey for the yeast to gobble, and some crushed dried rosemary for a little wake-up in flavor.  I also, at his suggestion, baked my loaf in a dutch oven (well, my non-stick 5 qt. version of a dutch oven – I suspect the original or enameled cast iron incarnation would be far superior), which made good sense.  It’s exactly the right shape, and having walls to hold in the diameter probably makes the resulting loaf climb a little higher.

Food Blog January 2013-0546

But somewhere in the mix things went awry.  My loaf, though it was beautifully golden and crusty on top, got a little dark on the bottom.  I suspect the non-stick cookware along with the layer of olive oil I doused on anyway had something to do with this.

Food Blog January 2013-0554

Once the unfortunate burnished bottom was removed, this loaf was delicious.  It was crusty and chewy, though a little bit dense, and a very welcome accompaniment to pasta.  It sops up alfredo sauce like a champ.  It also worked well as leftovers, toasting up beautifully and offering no resistance to my demands that it be slathered in butter, drizzled with honey and then sprinkled with lemon zest.

It wasn’t perfect, but if I can figure out the singed bottom problem, this loaf would certainly be in the running for a go-to dough recipe.

Basic Boule, adapted slightly from Michael Ruhlman’s Ratio

12 oz. warm water

1 tsp active dry yeast

2 tsp honey

(I might add a few tablespoons of olive oil for additional flavor and fat, but I haven’t tried this yet)

4 cups flour (or 20 oz., if you’re doing this properly)

2 tsp salt

2 tsp dried crushed rosemary

Combine the water, yeast, and honey in a small bowl or measuring cup and set aside for 5 minutes or so.  This is the proofing stage.  The yeast comes out of hibernation and starts to foam and smell beer-y.  Supposedly it likes the extra hit of sugar to chomp on, and I thought the honey might be a welcome background flavor.  It’s not necessary, but it’s nice.

While the yeast is waking up, combine the flour, salt, and rosemary in a medium bowl.  I used my stand mixer with the paddle attachment.

With the paddle attachment still in place, pour in your yeasted water mixture and run the mixer on low speed just until things start to come together.

Replace the paddle attachment with the dough hook and let the mixer do its thing for 10 minutes, or until the dough is smooth, elastic, and passes the windowpane test.  I kept mine on a medium-low speed, because my dough kept poking up above the edge of the bowl, and I was afraid of it escaping and rampaging the counter, blob-style, if I increased the speed.  If you are kneading by hand, this will take at least 10 minutes.

Food Blog January 2013-0530

Once the dough has undergone this change in character, becoming a smooth ball with the barest remnant of stickiness, move it to a lightly oiled bowl and stow it in a warm, draft-free place for an hour.  I like to set my oven at 200F for five minutes, then turn it off and wait five minutes before putting the dough inside with a clean kitchen towel draped over the bowl.

Food Blog January 2013-0533

After an hour, check the dough – it should have doubled or be close to doubling in size.  When it has doubled, remove it from its bowl and punch it down gently on a floured board.  I’m coming to realize that “punching down” is more like “softly press your fist into the dough, which will deflate like a feather pillow as the gas releases from inside it.”  It’s like the punch you give a friend you’re pretending to pummel, where the action begins quickly but ends with a relaxed push against his shoulder.

Food Blog January 2013-0534

Let the dough rest for a few minutes, as if to get its strength back.

Shape the dough into a round.  Ruhlman explains this procedure as “pushing the dough back and forth on the counter in a circular motion until you have a round, smooth ball” (10).  I tried this, unsure of exactly what I was doing, but really my dough was in almost the right shape already so I decided to leave well enough alone.

Oil the bottom of a dutch oven and pop the ball of dough inside.  Cover it with a towel and let it rise for another hour.  Depending on the size of your dutch oven (mine is a 5 qt.), your dough will expand to cover the bottom of the pot and maybe even begin to push its way up the sides.

Food Blog January 2013-0536

When it has risen again, carefully score the domed top of the bread with a very sharp knife, drizzle with olive oil and sprinkle with coarse or flaky salt.  I used Maldon.

Food Blog January 2013-0542

Place in a preheated 450F oven with the lid on for 30 minutes.  This holds in some water vapor and creates a crisper crust.  Remove the lid and continue baking for about 20 minutes, or until the internal temperature reaches 200F.  The loaf will slip easily out of the pot and the bottom will sound hollow when you tap an inquisitive knuckle against it.

Food Blog January 2013-0545

Let cool at least until it is comfortable to handle, then slice and serve as desired.

Food Blog January 2013-0559

This is best on the day it is made, but it makes very good toast a day or two later.