Apricot Bourbon Barbecue Sauce

Food Blog September 2014-0579I wasn’t expecting that a barbecue sauce would be one of the dozen pourable concoctions I developed this year. Call me a snob but, barbecue sauce? It just seems so… pedestrian. Break out a bottle, squeeze it over some drumsticks, and reach for the wet-naps.

Food Blog September 2014-0570But that’s exactly what happened. Faced with a summer that just won’t end (upper 80s/low 90s predicted for the first weekend of October. October, people!), we couldn’t bear to waddle back to the butter-laden list of French classics. Brimming from the success of last month’s gastrique, I found myself continuing to think about fruit-based sauces – at once sweet and tart and deep in flavor from long simmering – and realized that barbecue sauce is, at its core, something like a gussied-up gastrique. There’s almost always a molasses or brown sugar component, and there’s usually vinegar of some kind, even if that is hidden within one of the most ubiquitous barbecue sauce ingredients of all: ketchup.

Food Blog September 2014-0575I’ve never been a huge fan of ketchup, so I decided to steer clear of it here and build my own collection of flavors. I’d been considering the merits of combining the flavors of apricot and bourbon, and what better place to do that than in a sticky, bubbly sauce, well-spiced, just aching to be brushed gently over some lucky poultry? Deeply caramelized onions, a squeeze of dijon mustard, a whisper of cayenne, and some cider vinegar joined the party, and then, because the richness and depth of concentrated tomato is such an expected note in this sort of sauce, I gave in and added some tomato paste for verisimilitude.

Food Blog September 2014-0573The important thing about this sauce is the time you give it. The onions must be cooked down and toffee colored. The simmer must last at least twenty minutes – I did mine for thirty before I was satisfied. The thick, slightly lumpy result can be used as is, or you can give it a quick whir with an immersion blender or standard blender to make a glossy, velvety smooth glaze you’d eat just as happily on a piece of toast as on a grilled chicken breast or pork chop (at least, if you’re me). I briefly considered using fresh apricots here rather than preserves, but since the prep time already promised to be the better part of an hour, I decided to take just one shortcut. Besides, the sweetness quotient in fresh apricots is unpredictable, and dealing with their thin, impatient skins did not sound like a welcome addition to my weekend plans. The guaranteed sticky thickness of a pectin-laced jar of preserves was the kind of guarantee I wanted.

Food Blog September 2014-0576
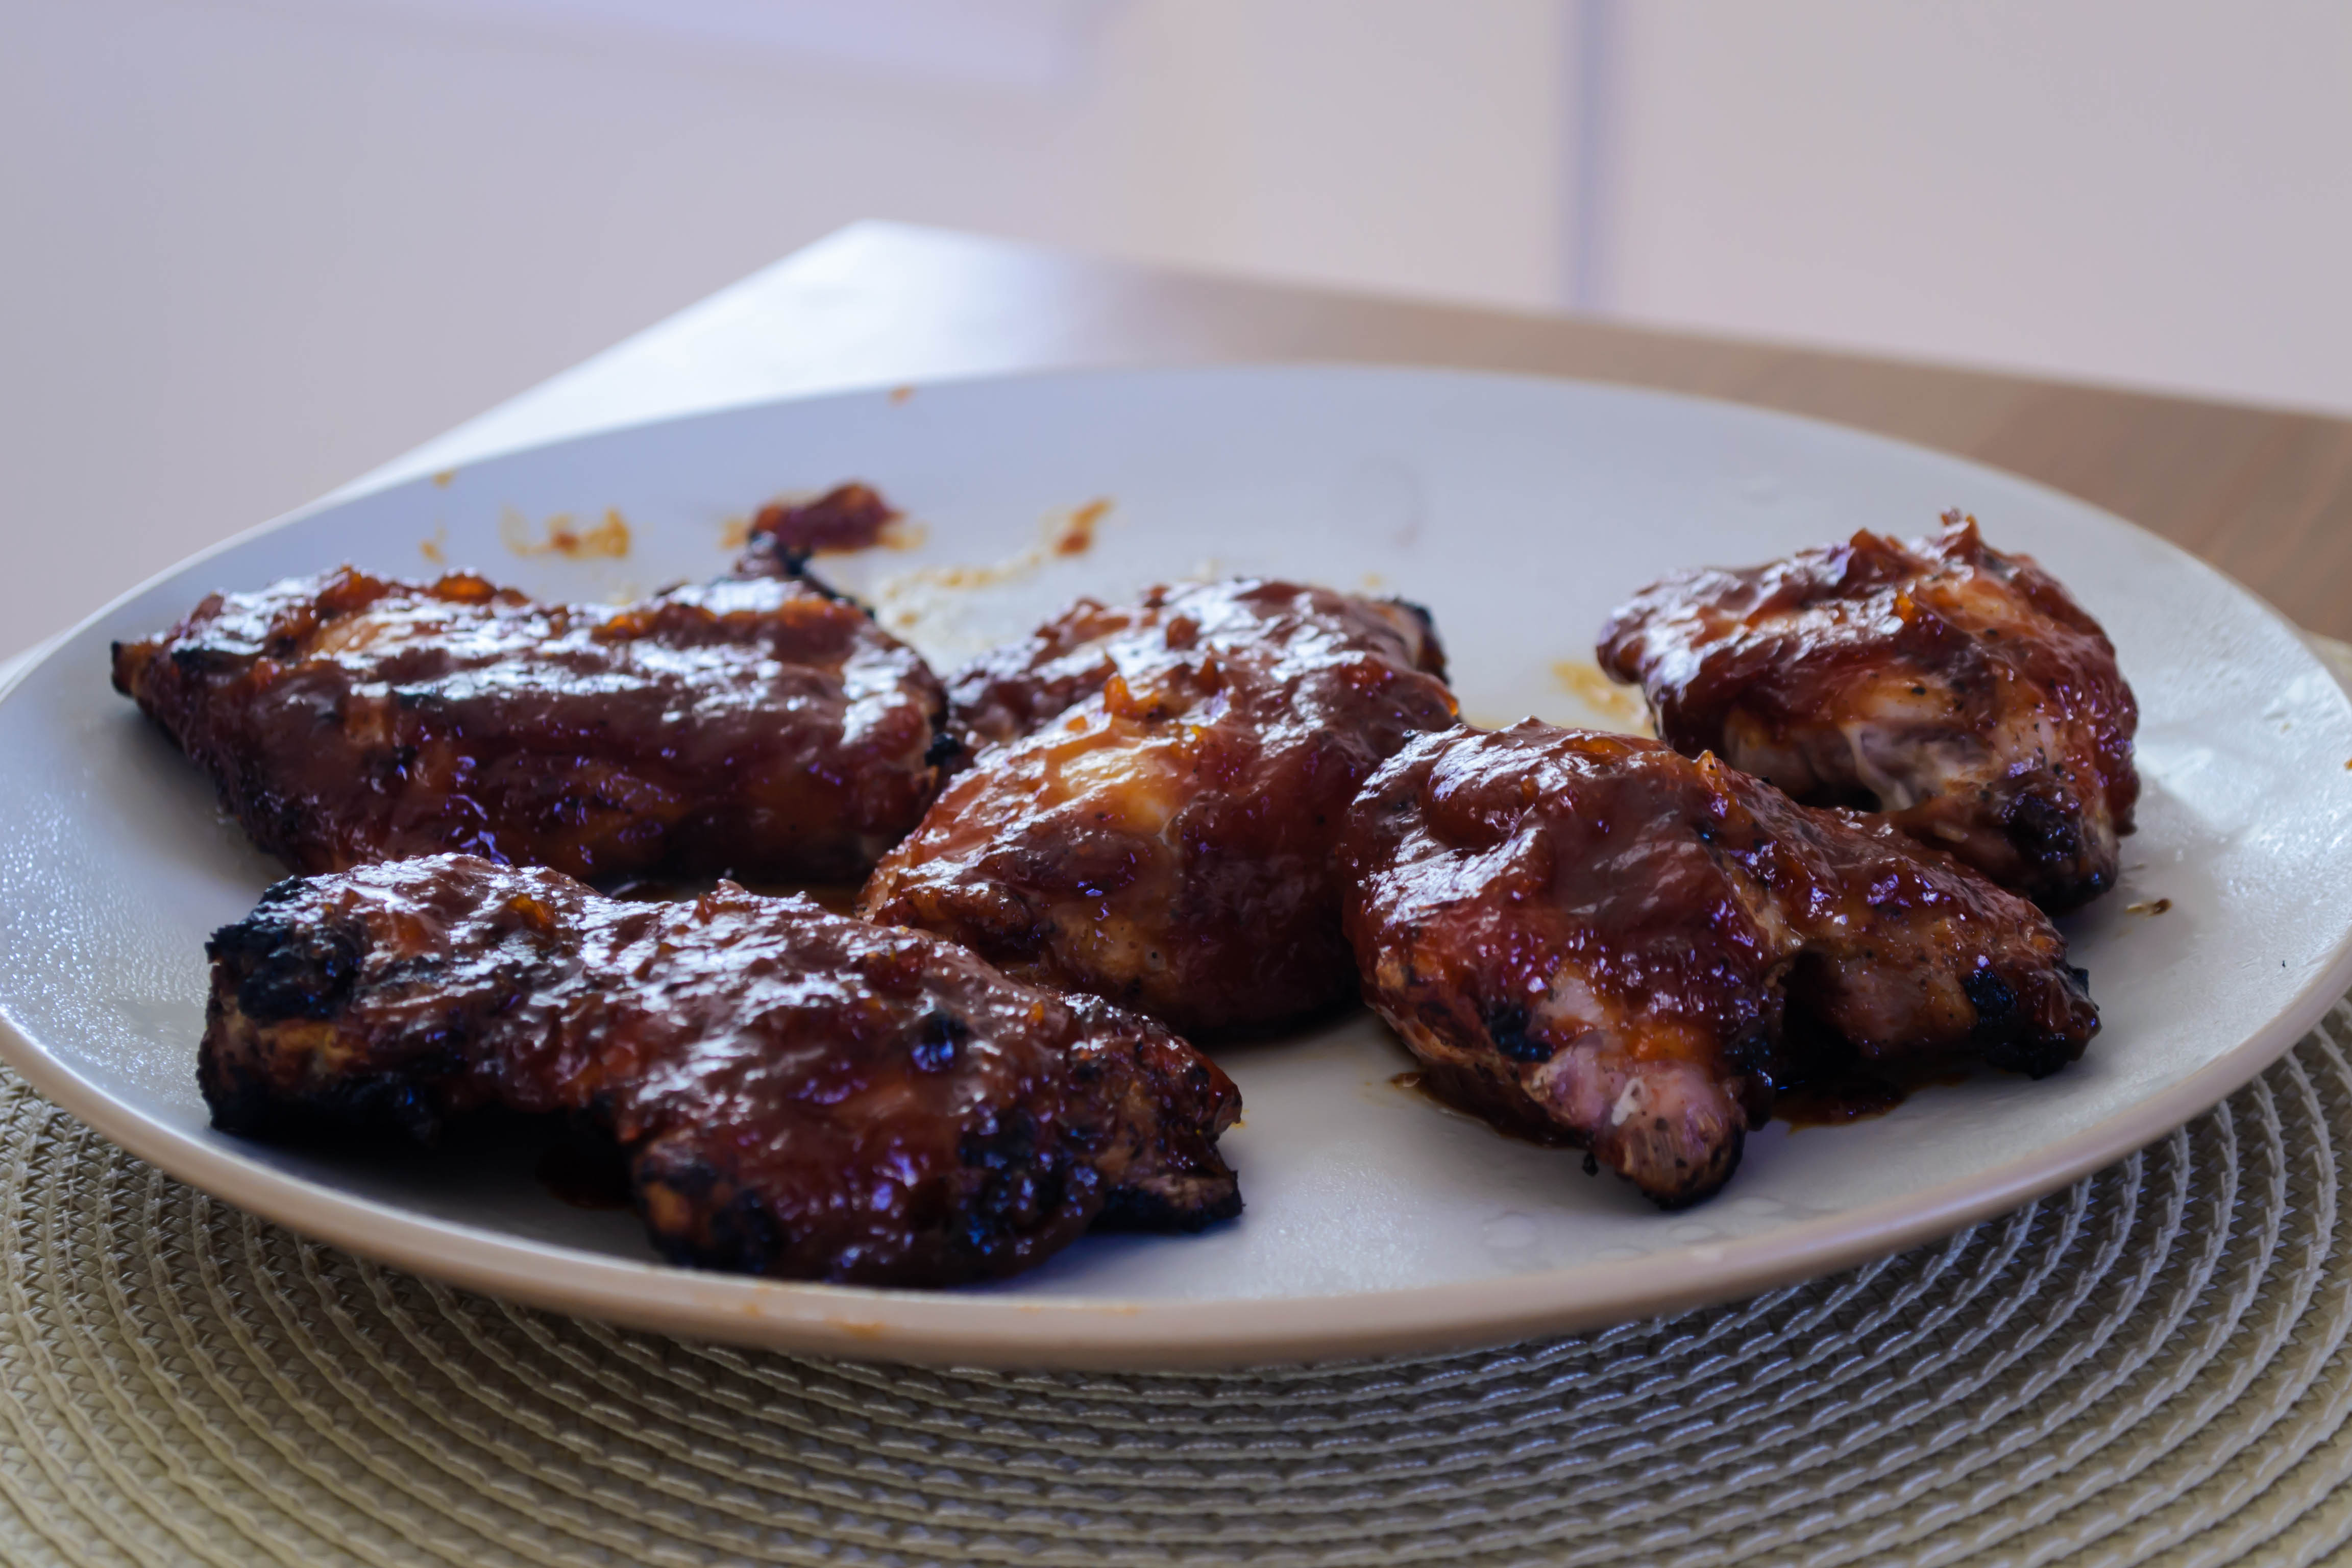
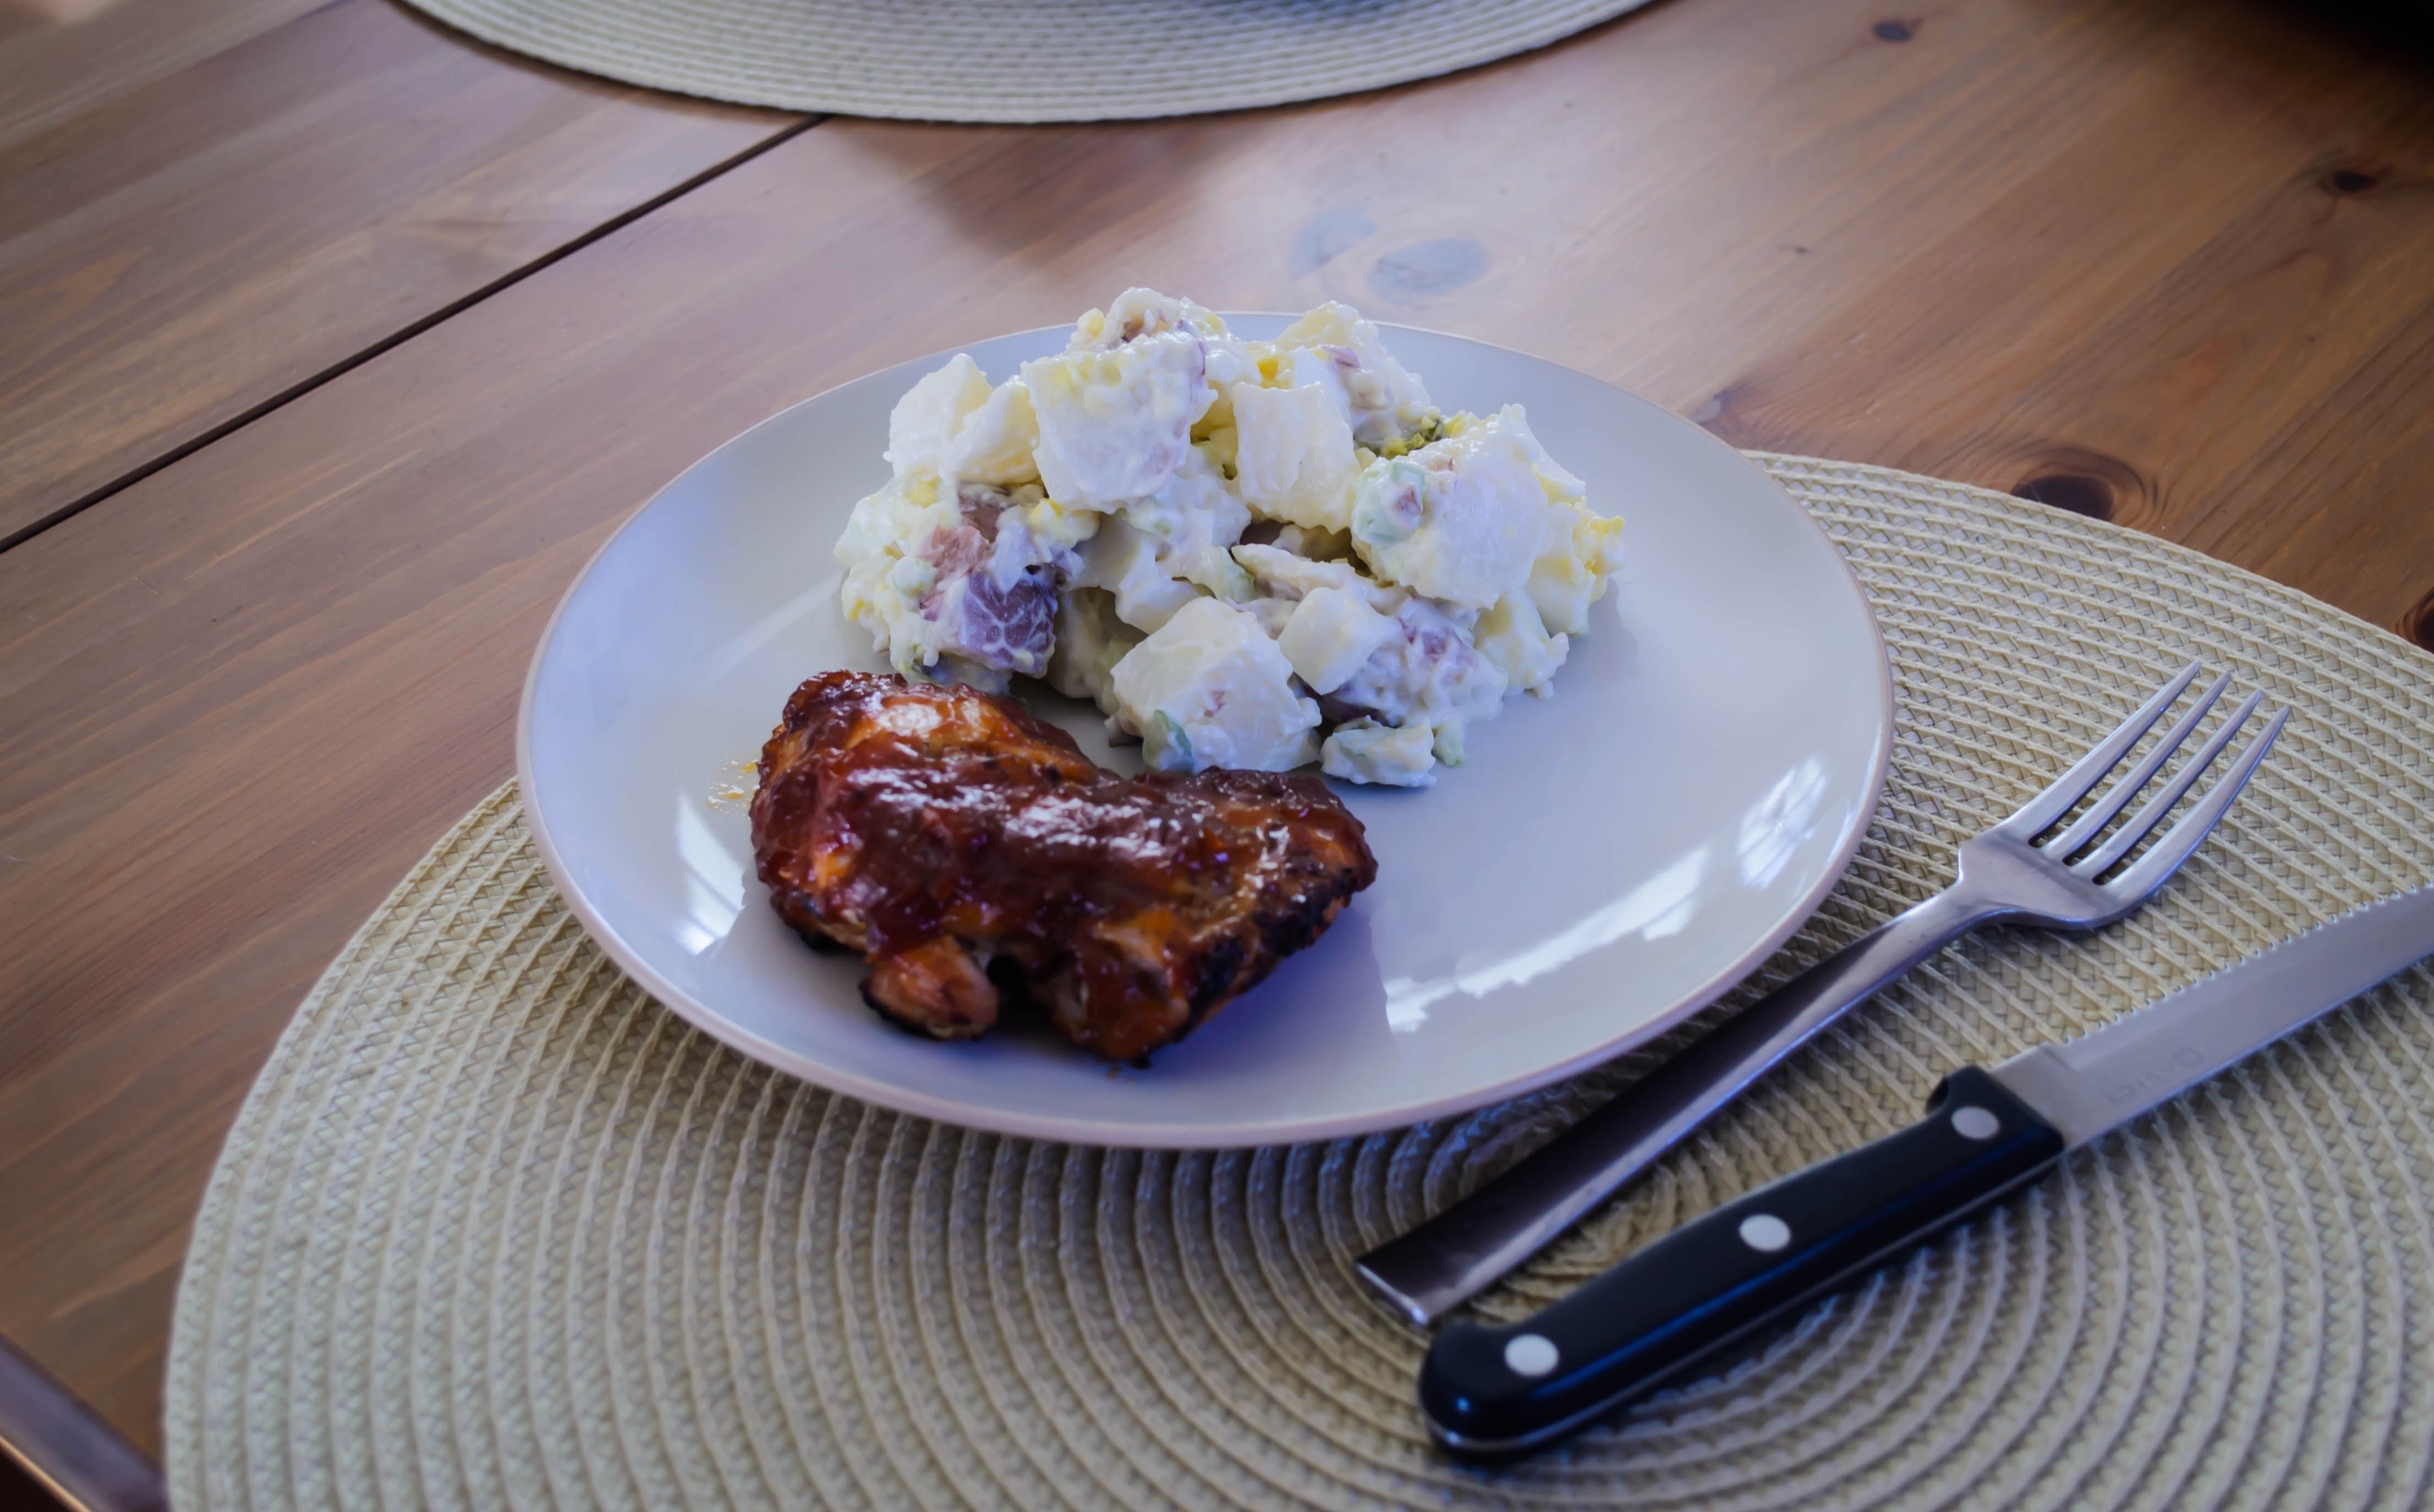
It should not come as a surprise that apricot and bourbon, balanced against a meaty tomato backdrop and laced with just enough spice, are a beautiful match. The chicken thighs we lacquered this onto never stood a chance. Neither would pork, or salmon, and I’d even venture that with a splash of soy sauce, this could make an interesting adaptation of teriyaki to sauce a bowl of perfectly steamed rice and veg. What’s more, even though it’s still summer here, the blend of fruity sweetness and dark caramel from the bourbon make this sauce a lovely offering for fall as well, if you are lucky enough where you are to be watching the seasons shift.

Food Blog September 2014-0582

Apricot Bourbon Barbecue Sauce
Makes 1 cup (will generously sauce 6-8 chicken thighs)

3 tablespoons olive oil
1 cup finely diced onion (about ½ a large onion – I like the purple ones)
1 teaspoon dijon mustard
1 tablespoon tomato paste
½ cup apricot preserves
½ cup bourbon + 1 tablespoon, divided
¼ cup water
1 tablespoon cider vinegar
½ teaspoon salt, or to taste
¼ teaspoon black pepper, or to taste
¼ teaspoon cayenne pepper, or to taste
6-8 boneless chicken thighs or desired protein


  • In a 10-12 inch skillet, heat the olive oil over medium heat and add the finely diced onions with a pinch of salt. Slap on the lid and cook for 10-15 minutes, stirring occasionally, until the onions are nicely caramelized. Lidding the skillet will help the onions brown faster while allowing for less burning.
  • When the onions are caramelized to your liking (deeper brown = deeper flavor), add the tomato paste, mustard, and cider vinegar and stir through. Then add the apricot preserves, the water, the salt and the black and cayenne peppers.
  • Remove the skillet from the heat and add the ½ cup of bourbon (reserve the remaining 1 tablespoon for later). We are doing this off the heat to prevent an accidental flame-up; alcohol can and will catch on fire!
  • Stir all ingredients together, bring to a simmer, and reduce the heat to low.  Simmer, stirring occasionally, for at least 20 minutes (but 30 is better).
  • When sauce is thick and shiny, remove from heat and cool to room temperature. Puree if desired for a smooth consistency, then stir in the remaining 1 tablespoon of bourbon.
  • To use, season your chicken thighs to your liking (maybe just salt and pepper, maybe a fancy spice rub). Preheat your grill to high heat and oil the grates.
  • Add the chicken thighs to the grill, spreading them out for faster, more even cooking, and brush the exposed side with the sauce. Close the grill lid and cook, undisturbed, for 5 minutes.
  • After 5 minutes, flip the chicken over, brush with more of the sauce, and close the lid to cook for another 5 minutes.
  • With a clean brush, slick the chicken one more time with the sauce and cook for a final 1 minute, just to get the surface really sticky and glazed and good. Serve hot, with whatever you deem best for a barbecue. For us, that meant potato salad and corn on the cob.

Apple Cheddar Monte Cristo Sandwiches

Food Blog September 2014-0599When you tell people you live in Los Angeles, one of the first things they often say is something in the realm of “well you can’t beat the weather!” Well, okay, but you can get sick of it. As I drove home from work the day we had these sandwiches for dinner, one of the local radio DJs said something akin to “is it still summer? I won’t let it be fall yet.” Cue snarling and angry words from me. How could she?! I mean, I like the sun. I love summer. But here’s the thing: I miss my jeans. When I get home from work and evict myself from my teacher clothes, I miss sliding into the worn embrace of my soft, familiar denim. Not to mention spending a day without the hair plastered to the back of my neck. Appetizing, I know.

Food Blog September 2014-0584Food Blog September 2014-0586Food Blog September 2014-0590So maybe out of resentment at the season (or lack thereof, since it just slid from mid- to late September and we spent the last two weeks ping-ponging between mid-80s and near 100 degree temperatures), I came up with a dish that screams fall at the top of its lovely, melty little lungs. Apples. Cheddar cheese, as sharp as possible. Dense, moist sourdough. Sage, that most autumnal of herbs. Maple syrup. It’s a bit of a breakfast sandwich, but since when have I ever been opposed to that sort of thing as an evening meal?

Food Blog September 2014-0591Food Blog September 2014-0594In its preparation, this sandwich takes the Monte Cristo as its font of inspiration. Though I’m using cheddar instead of swiss, and replacing ham with apples that have been gently sautéed in brown butter with a liberal dosing of maple syrup (are you hungry yet?), the whole assembled sandwich gets dunked in an egg batter and then fried until delicately crisp on the outside and limp with melted goo on the inside.

Food Blog September 2014-0597Food Blog September 2014-0598In an effort to be responsible diners, we ate this with a wilted kale salad-ish concoction, but it honestly didn’t need any accompaniment. In fact, the second time I made it in as many weeks, I didn’t prepare any side dish at all, and that and the relatively petite slices of bread I used made me feel completely justified in demolishing two sandwiches all by my lonesome. Well, minus the apple slice or two that I shared with Miss Lucy. It’s tough to refuse those velvet brown eyes.

Food Blog September 2014-0587Food Blog September 2014-0588Your fingertips will get greasy as you eat this. But despite the richness of the cheese and the eggy coating and the caramelized, syrupy apples, the sage keeps the whole thing from being overwhelming. Its sharp, herbaceous note cuts through the cheese, and it somehow miraculously maintains a bit of crunch even buried between the layers of filling. For me, it’s sandwich nirvana.

Food Blog September 2014-0600

Apple Cheddar Monte Cristo sandwiches
Quantities for 2 sandwiches
1 tart apple, quartered, cored, and cut into thin slices – I like granny smith
6 tablespoons butter, divided
3-4 tablespoons maple syrup
¼ teaspoon salt
8 whole sage leaves
4 slices sourdough sandwich bread
⅔ cups extra sharp cheddar cheese
1 egg, lightly beaten
½ cup milk
2 tablespoons flour


  • Heat 4 tablespoons of the butter, the maple syrup, and the salt over medium heat in a 10-12 inch skillet. When the butter has melted and is bubbling with the syrup, add the apple slices in a single layer, and scatter the sage leaves on top.
  • Cook on medium heat until the underside of the apples is brown, about 5 minutes. Flip the slices over, and cook again to brown the other side, about 2-3 minutes more. Try to keep the sage leaves on top of the apples so they get crisp from the heat but don’t burn. The apples will show that they are almost ready by puffing up and looking swollen just before they begin to get golden, and the butter and maple syrup mixture will get deep, deep toffee colored and become a thick caramel.
  • Remove the pan from the heat and cool while you ready the other ingredients.
  • Shred the cheddar cheese and set it aside.
  • In a shallow bowl, combine the egg, milk, and flour, mixing well to eradicate flour lumps. The addition of the flour will help the exterior of the sandwiches stay crisp – I use the same trick with French toast.
  • To assemble the sandwiches, layer cheese, then half the apples and half the sage, then a bit more cheese onto one slice of bread. You should aim to use ⅓ cup of cheese per sandwich, but we want to have some on both sides of the apple slices to hold the whole thing together better. Top with the second slice of bread, and repeat for the second sandwich.
  • In a skillet, heat the remaining 2 tablespoons butter over medium-low heat. While it melts, set the first sandwich into the egg and milk mixture and leave it for 30 seconds or so to allow some of the batter to penetrate the bread. Then flip it over and let it sit another 30 seconds or so. Repeat with the second sandwich.
  • To cook, raise the heat on the skillet to medium and carefully add the sandwich (or sandwiches, if your skillet is large enough to accommodate both). Cook over medium heat, flipping halfway through, until both sides are golden and crisp and the cheese is melted. This should take about 5 minutes per side.
  • Slice as desired, and consume hot.

Hiatus

Friends, this just got real. The semester is now in Week 4 (really? By the end of this week summer will really have been over for a month?!), the temperature is hotter than it was during the legitimate summer, and papers are rolling in. Well, trudging reluctantly, anyway.

The point is, I’m behind. I’ve been cooking, yes – it is one of the things that keeps me balanced and happy when I am busy – but there’s so much more to this game than that. There’s the photo work (I do edit my shots before I post them here, tweaking the lighting a bit and sometimes, I’ll admit, even editing out unexpected-but-suddenly-glaring spots on my counter). There’s the recipe adjusting. There’s the writing – not just flying through a few paragraphs but, as I tell my students, the idea development and the drafting and the considering and the revising and the proofreading. There’s the linking. There’s the tagging. There’s the time. And there’s not enough.

So I’m taking a short hiatus. My hope is that I’ll only be gone for a week, but I don’t feel right making that promise, because I don’t know what this week will bring. Cross your fingers for me, if you feel so inclined, and I hope to be back with you soon.

(Not Damson) Plum Coffeecake

Food Blog September 2014-0531A few weeks ago, my dad sent an email to me, my mom, and his sisters: a reading recommendation replete with a link to a story from All Things Considered. This is, in itself, not unusual. Dad often sends along news items he thinks are important or interesting. What made this one unusual and, frankly, quite special, was that it was about the acute and wonderful memories food makes for us. It was a story about a baker and a request for a very special cake – an old German cake made with damson plums. The request for this cake threw her back years to her childhood and a cake – the same cake – her opera singer mother used to make. As she watches and smells it baking, she feels like her mother Helga is there too, in the oven with that cake, singing through time and death and all those plums, and she cries tears of grief and nostalgia and joy.

Food Blog September 2014-0498Food Blog September 2014-0501Dad sent it because he thought it was a good story, but also because his mother – my Nana – used to make a coffeecake with damson plums, which made this all sound so familiar. He asked if anyone had her sweet dough recipe, and suddenly the emails were flying. He was not the only one who felt the connection here. My aunts were likewise plunged into memories. Though the cake in the NPR story was a shortbread dough topped with plums, Nana’s cake, like the one her mother made before her, used a yeast dough. It was made in a square pan and she always made two at a time so she could share one with Pap, and have one for the three kids. It had to be damson plums or it just wasn’t right. It called back memories of eating, but also of being in the kitchen with their mother. Nana was with them in that cake.

Food Blog September 2014-0492I knew I had to make it. It had called up too many happy memories for my family to remain simple nostalgia. Besides, I have Nana’s sweet dough recipe, and with the details I collected from my aunts’ emails, I felt like I had enough data to piece it together.

Food Blog September 2014-0491But you know me. I fiddle. I adjust and tweak. I ruminate, and things change. So despite my pure intentions, this is not my Nana’s cake. First of all, I couldn’t find damson plums. Even at the stand at my Farmers’ Market that carries at least six different strains of plums and pluots, there was nothing labeled “damson,” and no one knew what I was talking about. A bit of internet research suggested I might try an Italian plum as a close substitute, but without ready access to those either, I settled on a deep, black-purple skinned variety with yellow flesh. The point seemed to be a plum that was not terrifically sweet, since the cake itself is snack or breakfast fare, not a sugared up dessert. From there, with the main ingredient already an adaptation, I felt freer to play a bit as I constructed the recipe.

Food Blog September 2014-0502From Nana’s original dough, I replaced water with milk, exchanged white sugar for brown, and added a healthy dose of cardamom. I suspect Nana never used cardamom in any of her baked goods, and likely never had any in her spice collection, but its pleasant citrusy aroma and warm spicy flavor go so beautifully with plums that I decided it was a necessary update. Since I was already playing quite a bit with what I imagine was Nana’s original procedure, I decided to go whole hog and add a simple streusel to the top just before baking. This was the right thing to do. A little extra spice, a little extra sweetness, turned crumbly in some places and melted into the plums in others, adding caramel loveliness to the whole thing.

Food Blog September 2014-0504Like Nana used to, I made enough dough for two cakes. Obeying the mandates of memory, I did one in a square pan. I wasn’t sure how it was going to turn out – just a hunk of dough flopped and poked into a pan – so for the other I tried for a twisted coil, laying the flat snail-shell of dough in a springform pan to rise. Interestingly enough, while adding streusel to the top was a successful adaptation, the pan and shape change was not so ideal. The square shape turned out better because it made for a more even distribution of plums. The coil, while it baked into a beautiful puffy spiral, was smaller to start with, which meant I couldn’t load on as many plum slices. When it expanded, both on the counter and in the oven, the plum distribution ended up a bit sparse (though the outcome was still delicious). The square shaped cake, which had nowhere to expand but straight up, retained its fruit coverage for a final product that can only be termed plummier. That, then, was the one I brought to work with me to share. By the time I left campus in mid-afternoon, only a tiny, plum-less corner remained.

Food Blog September 2014-0503Food Blog September 2014-0506Nana, this is a good cake. I’m glad you made it, and I’m glad it was remembered. I don’t know whether you would have liked my version, and I know you wouldn’t have liked the mess I made in the kitchen while I worked on it. I do think, though, that you’d have liked the fact that I was happy while baking and that I made enough to share. And I think you would have liked that it made us all think about you so fondly. Food Blog September 2014-0534Food Blog September 2014-0533

(Not damson) Plum Coffeecake
Makes two 9-inch cakes – one for you, and one to share
For the dough:
4 teaspoons active dry yeast
1 cup lukewarm milk
½ cup + a pinch of brown sugar
1 teaspoon vanilla
4 eggs
½ cup unsalted butter, soft but not melted
1 teaspoon salt
2 teaspoons ground cardamom
4-5 cups flour
4-5 yellow-fleshed plums, thinly sliced (firm, or even slightly underripe, will be easiest to work with)
For the streusel:
4 tablespoons cold butter
4 tablespoons flour
3 tablespoons brown sugar
1 teaspoon cardamom or cinnamon
pinch salt


  • Add the yeast and a pinch of brown sugar to the lukewarm milk and stir to combine, then set aside for 5-10 minutes for the yeast to burble and get foamy.
  • Meanwhile, combine 3 cups of the flour, the salt and the cardamom in the bowl of a stand mixer. Add the yeast mixture, the eggs, and the vanilla and mix on low speed with the paddle attachment to combine.
  • When the eggs are mostly integrated, add the butter and mix on low speed until it is mostly absorbed into what will look like a wet batter. Add an additional 1 cup flour and mix until combined.
  • Switch to the dough hook and knead for 5 minutes until a soft, elastic dough forms. If the dough looks very loose or sticky and is not coming together, add the final cup of flour ¼ cup at a time, kneading well between each addition. You may not need the full 5 cups of flour – mine took a total of 4 ¾ cups.
  • When the dough is soft and stretchy – a bit like an elastic playdough – lightly oil the bowl, roll the dough around in it a bit, and then cover tightly with plastic wrap and set in a warm place to rise for 1 ½ – 2 hours, until doubled.
  • While the dough rises, slice the plums.
  • After the dough has doubled in size, punch it down by gently depressing your fist into the dough to release trapped air, then let it rest for 5 minutes to get its breath back.
  • Divide the dough into two equal hunks, fold, push, or twist into desired shapes, and settle each loaf into one of two greased or buttered 9-inch square or springform pans. Nana did a simple square, but you could also roll the dough out into a long, wormlike log and then twist it like a rope over and over itself, then wind it up in a coil like a flat snail-shell.
  • Top the shaped dough with plums, slightly overlapping the slices to accommodate for the additional rising time. Adding the plums now allows them to macerate a little and release some juice and flavor into the dough.
  • Cover the cakes lightly with plastic wrap or a clean kitchen towel and let them rise again for 30-45 minutes. They will almost double.
  • While the cakes rise again, preheat the oven to 350F and make the streusel.
  • In a small bowl, stir together the flour, brown sugar, cardamom or cinnamon, and pinch of salt for the streusel. Using your fingers, blend in the 4 tablespoons butter until the mixture is reminiscent of damp sand, and little clumps flatten but cling together when you press them between your thumb and forefinger.
  • Just before the cakes are ready to go in the oven, remove the plastic wrap or kitchen towel and sprinkle on the streusel, using half for one cake and half for the other. It should be enough to cover the surface completely, but don’t skimp! Use it all, as the cakes will rise again in the oven and thus the coverage will decrease a bit.
  • Bake 30-35 minutes until the streusel is golden, the tops of the cakes are nicely bronzed, and they are cooked through. Let cool at least 20 minutes before removing from pans or slicing.
  • This bread, despite how rich it is, bakes up quite light and is best the first day. It will keep three or four days in the refrigerator, well-wrapped, but it does get a little dry. Nothing a quick trip in the microwave and maybe a slick of cream cheese can’t fix, though.