(Not Damson) Plum Coffeecake

Food Blog September 2014-0531A few weeks ago, my dad sent an email to me, my mom, and his sisters: a reading recommendation replete with a link to a story from All Things Considered. This is, in itself, not unusual. Dad often sends along news items he thinks are important or interesting. What made this one unusual and, frankly, quite special, was that it was about the acute and wonderful memories food makes for us. It was a story about a baker and a request for a very special cake – an old German cake made with damson plums. The request for this cake threw her back years to her childhood and a cake – the same cake – her opera singer mother used to make. As she watches and smells it baking, she feels like her mother Helga is there too, in the oven with that cake, singing through time and death and all those plums, and she cries tears of grief and nostalgia and joy.

Food Blog September 2014-0498Food Blog September 2014-0501Dad sent it because he thought it was a good story, but also because his mother – my Nana – used to make a coffeecake with damson plums, which made this all sound so familiar. He asked if anyone had her sweet dough recipe, and suddenly the emails were flying. He was not the only one who felt the connection here. My aunts were likewise plunged into memories. Though the cake in the NPR story was a shortbread dough topped with plums, Nana’s cake, like the one her mother made before her, used a yeast dough. It was made in a square pan and she always made two at a time so she could share one with Pap, and have one for the three kids. It had to be damson plums or it just wasn’t right. It called back memories of eating, but also of being in the kitchen with their mother. Nana was with them in that cake.

Food Blog September 2014-0492I knew I had to make it. It had called up too many happy memories for my family to remain simple nostalgia. Besides, I have Nana’s sweet dough recipe, and with the details I collected from my aunts’ emails, I felt like I had enough data to piece it together.

Food Blog September 2014-0491
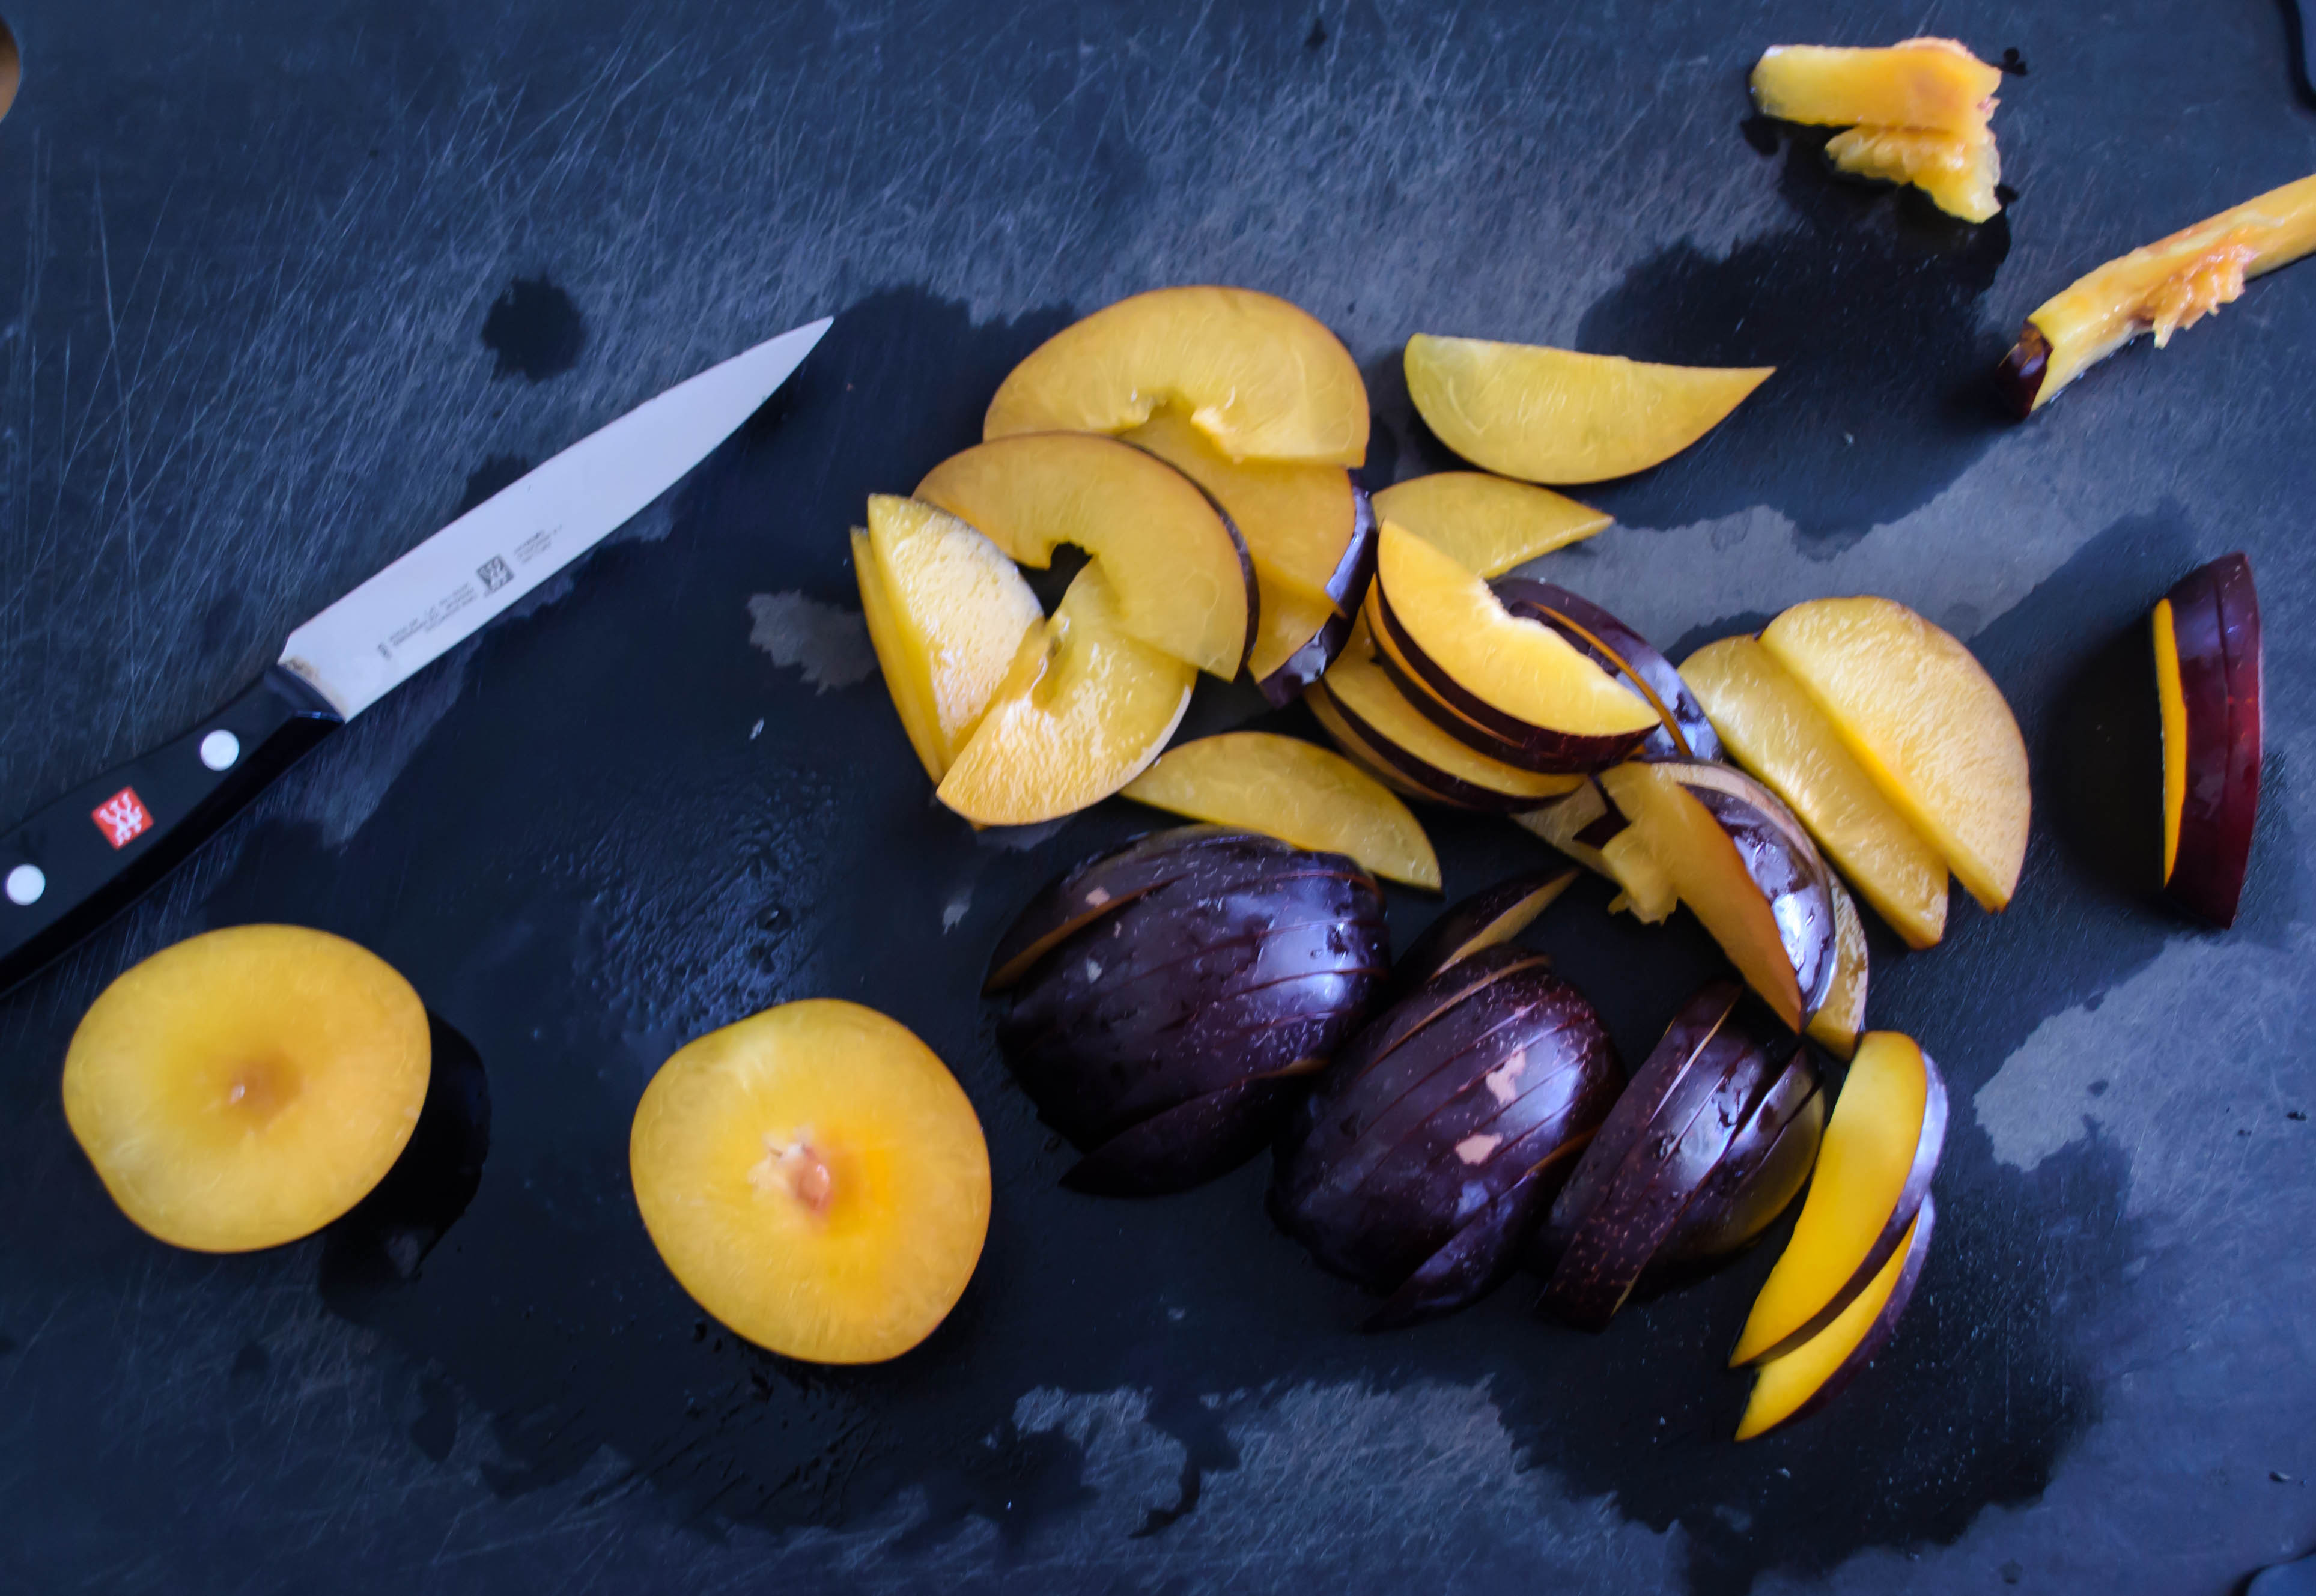
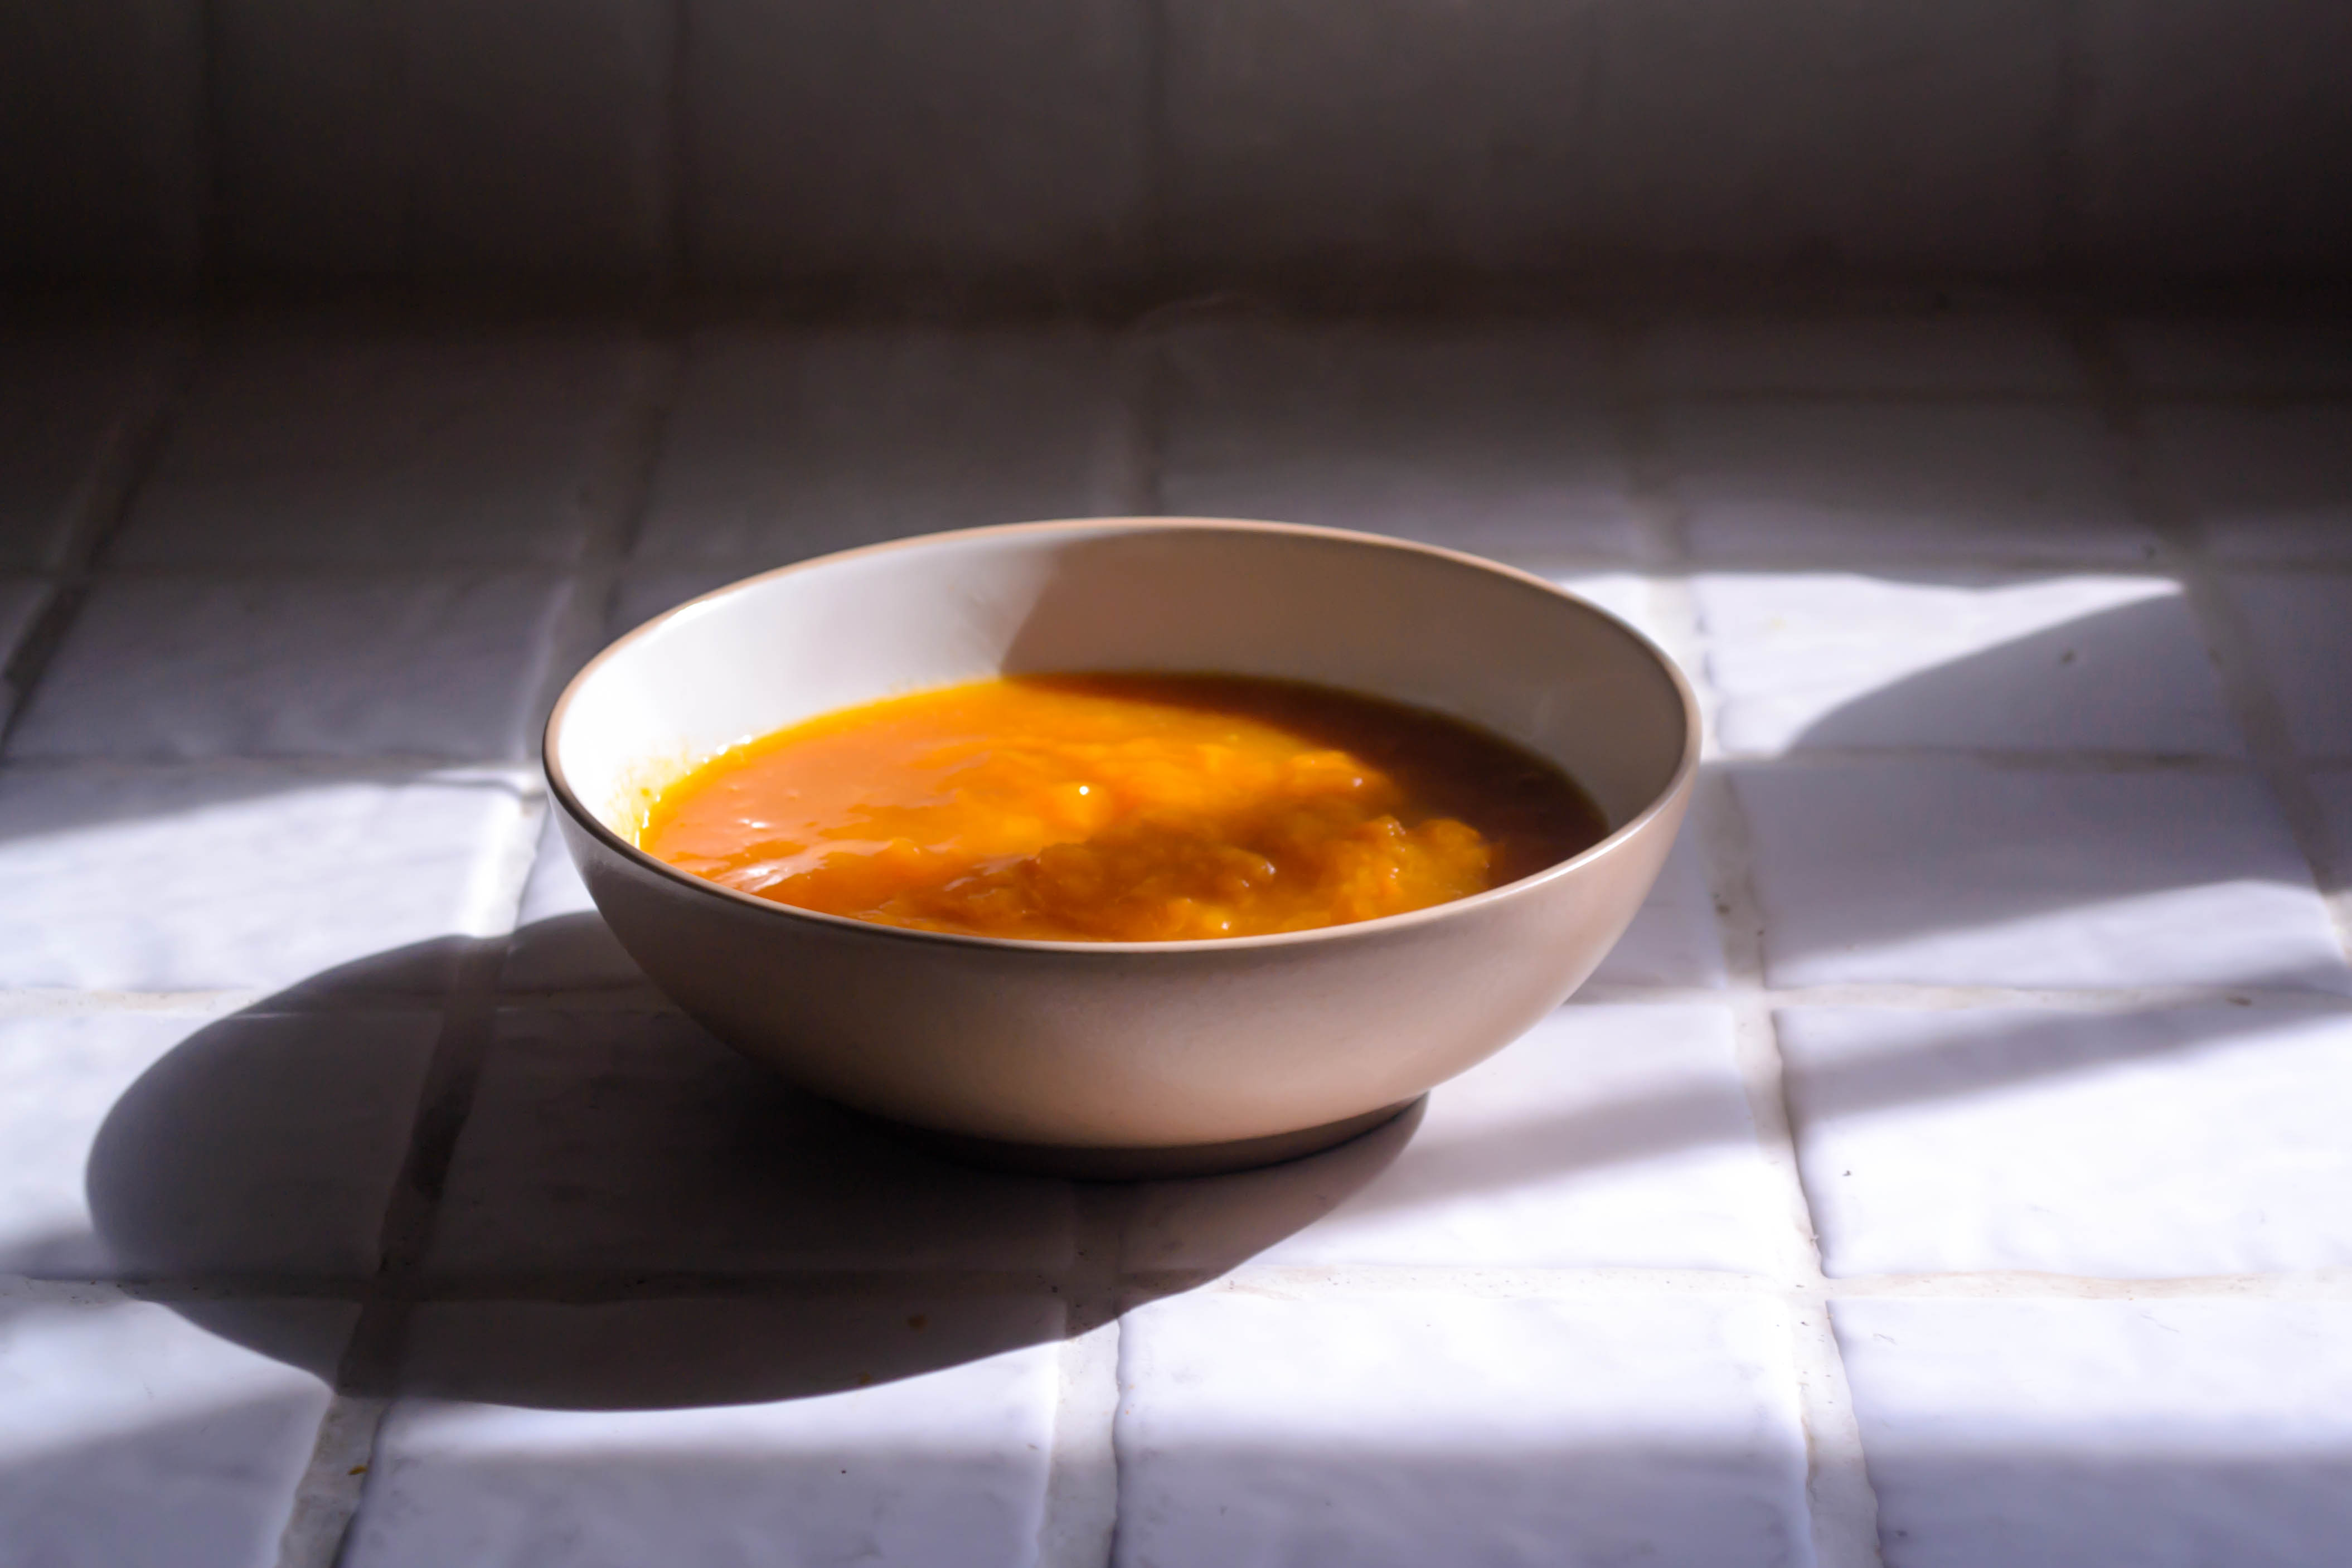
But you know me. I fiddle. I adjust and tweak. I ruminate, and things change. So despite my pure intentions, this is not my Nana’s cake. First of all, I couldn’t find damson plums. Even at the stand at my Farmers’ Market that carries at least six different strains of plums and pluots, there was nothing labeled “damson,” and no one knew what I was talking about. A bit of internet research suggested I might try an Italian plum as a close substitute, but without ready access to those either, I settled on a deep, black-purple skinned variety with yellow flesh. The point seemed to be a plum that was not terrifically sweet, since the cake itself is snack or breakfast fare, not a sugared up dessert. From there, with the main ingredient already an adaptation, I felt freer to play a bit as I constructed the recipe.

Food Blog September 2014-0502From Nana’s original dough, I replaced water with milk, exchanged white sugar for brown, and added a healthy dose of cardamom. I suspect Nana never used cardamom in any of her baked goods, and likely never had any in her spice collection, but its pleasant citrusy aroma and warm spicy flavor go so beautifully with plums that I decided it was a necessary update. Since I was already playing quite a bit with what I imagine was Nana’s original procedure, I decided to go whole hog and add a simple streusel to the top just before baking. This was the right thing to do. A little extra spice, a little extra sweetness, turned crumbly in some places and melted into the plums in others, adding caramel loveliness to the whole thing.

Food Blog September 2014-0504
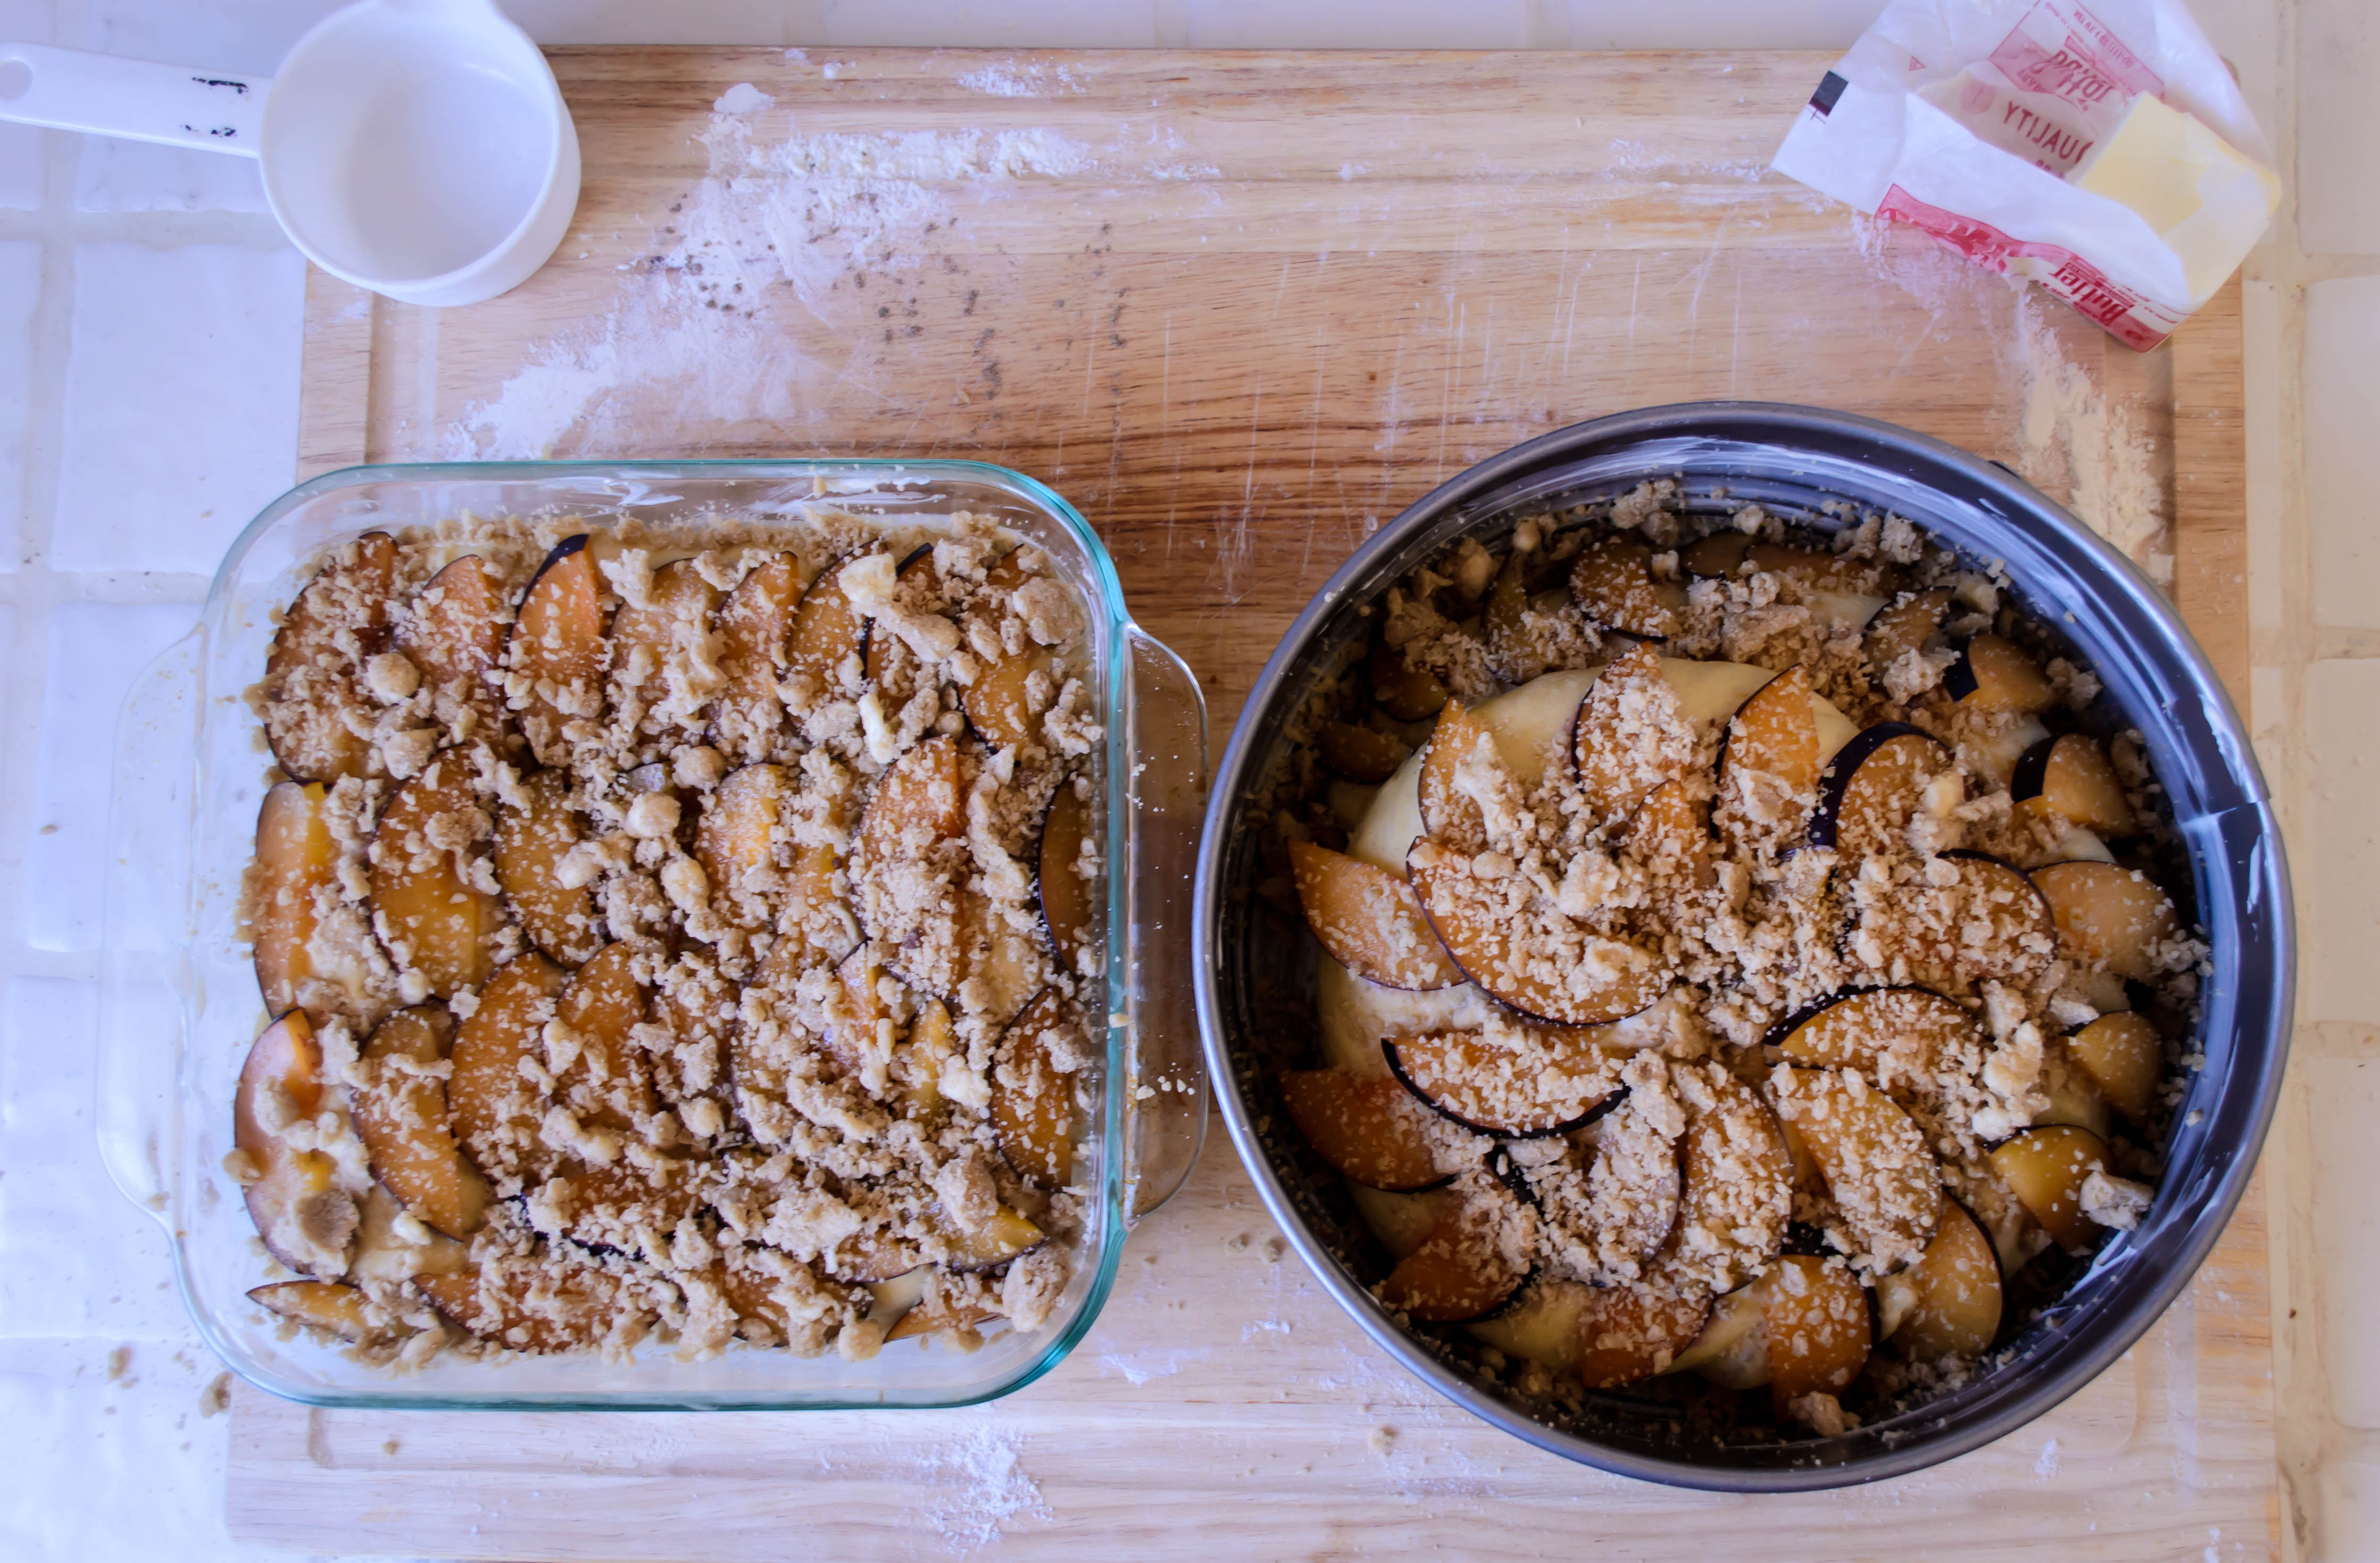
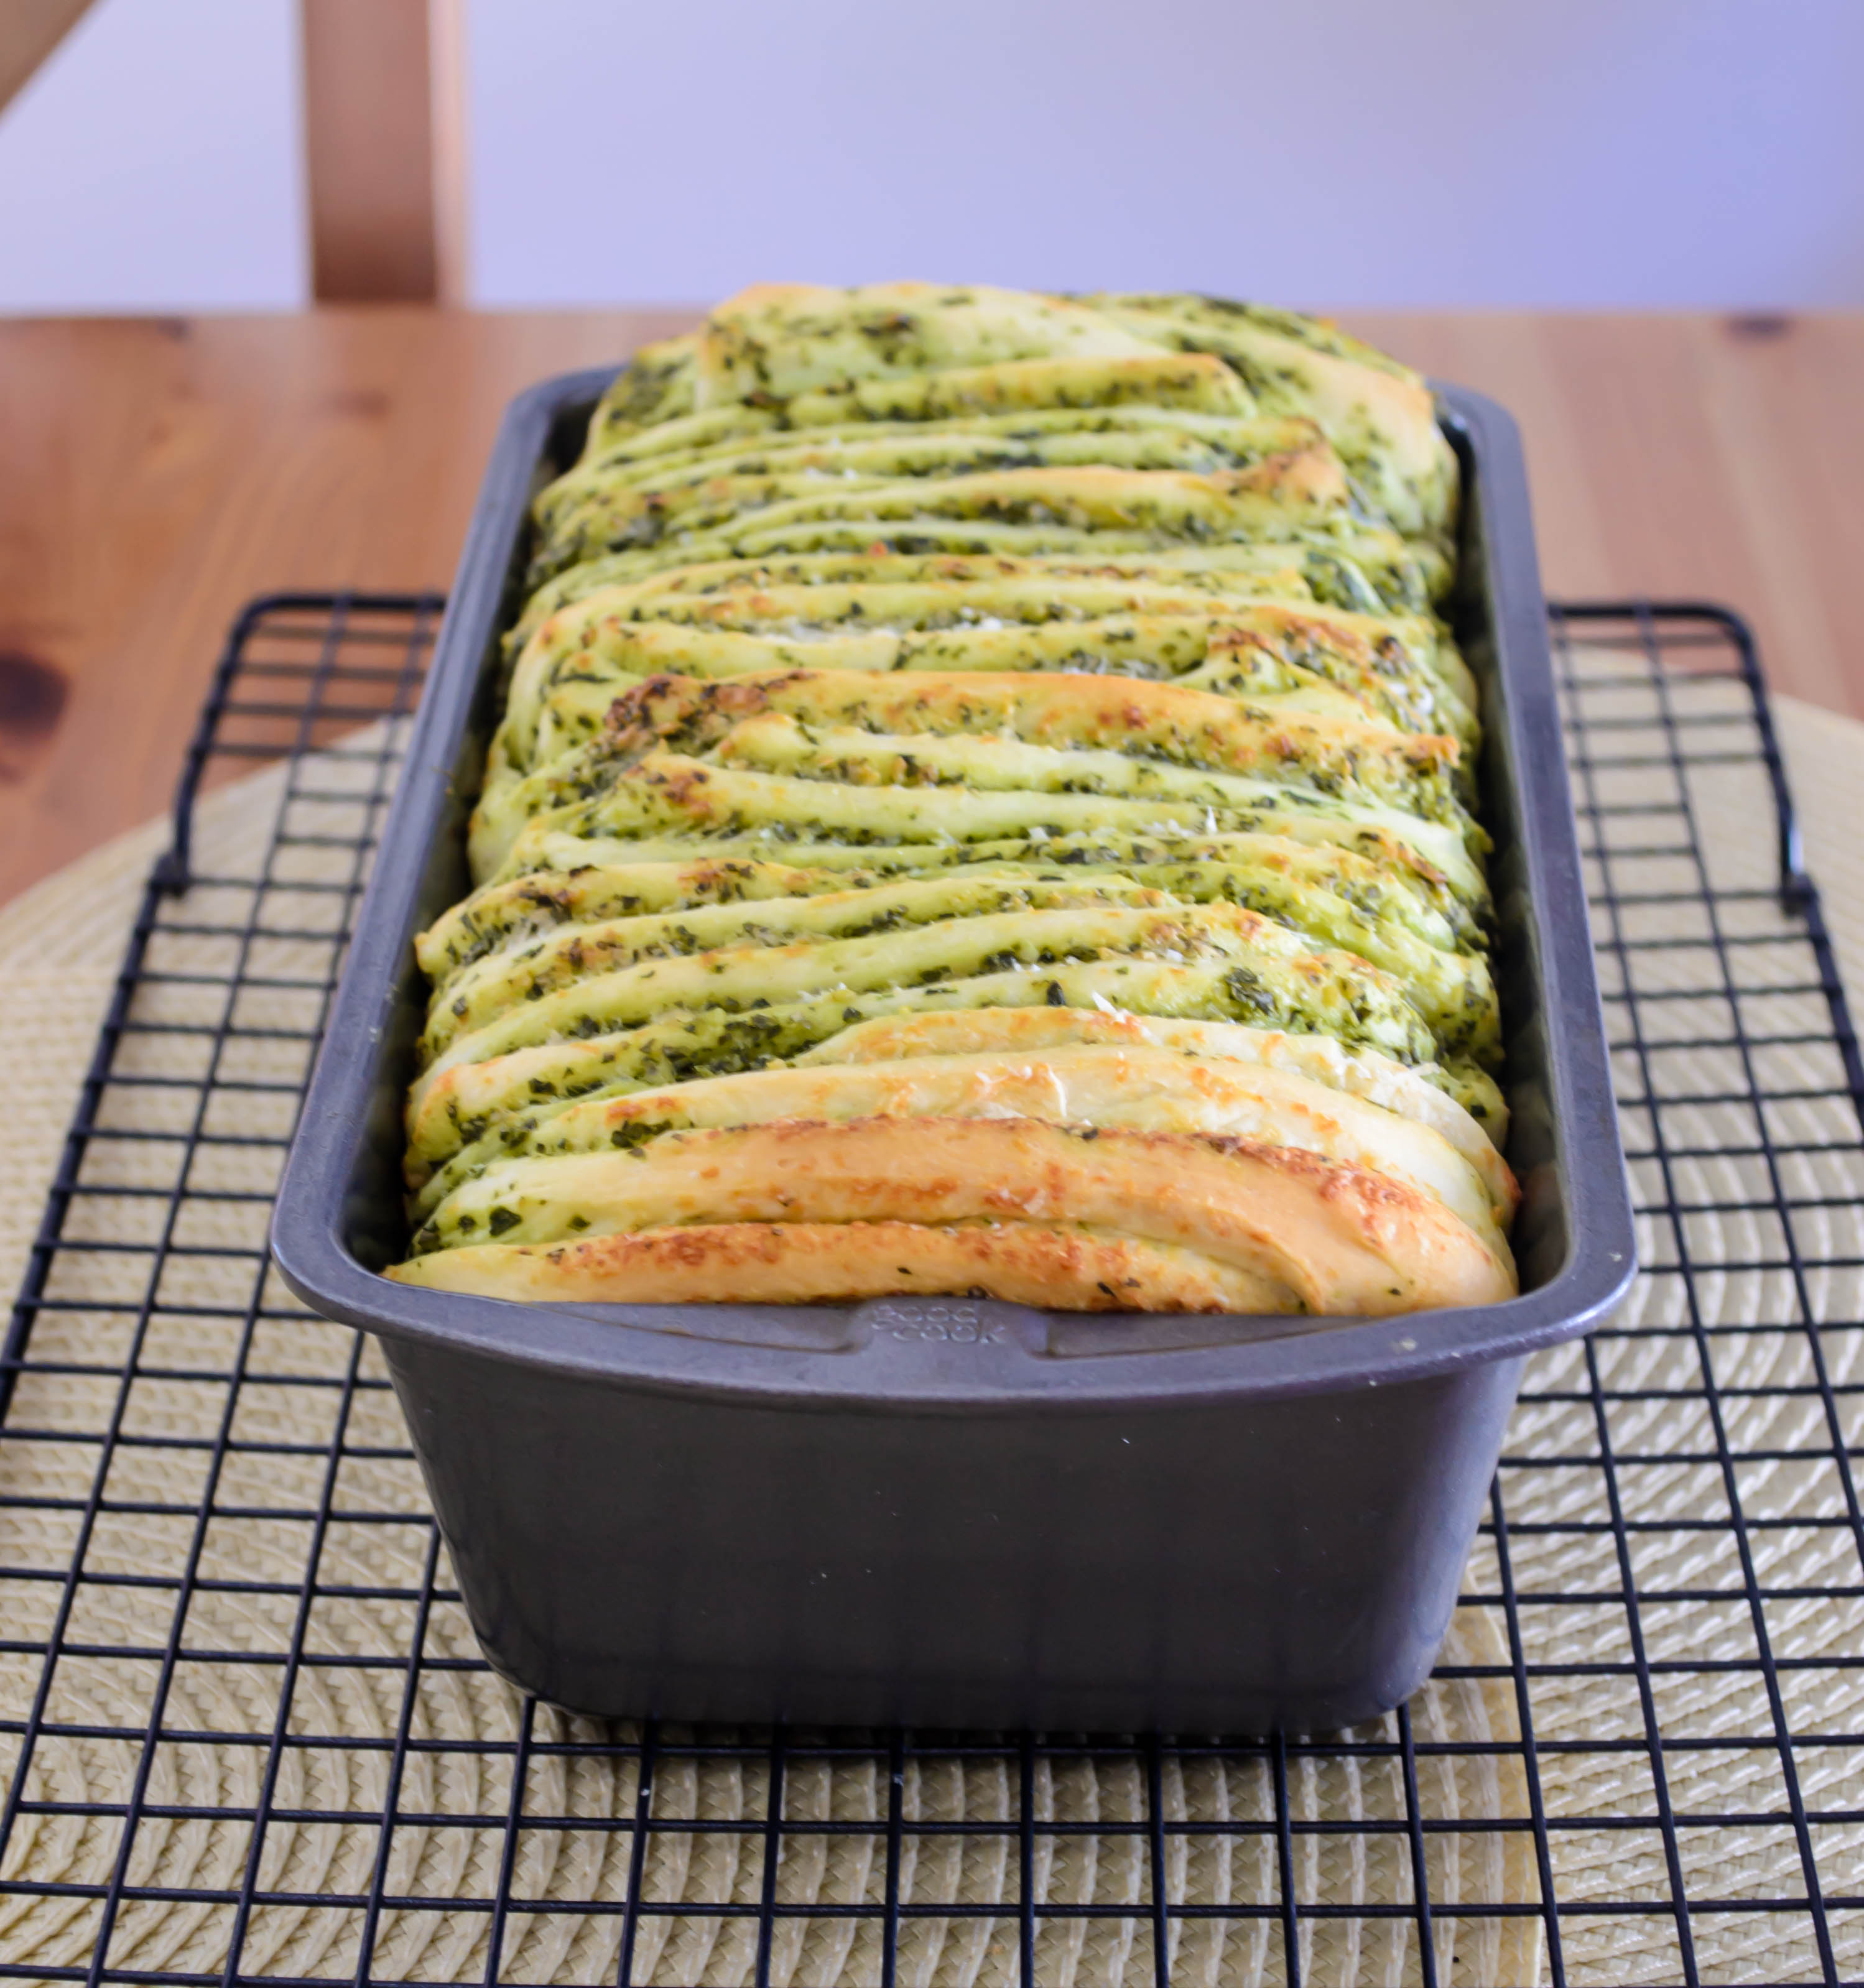
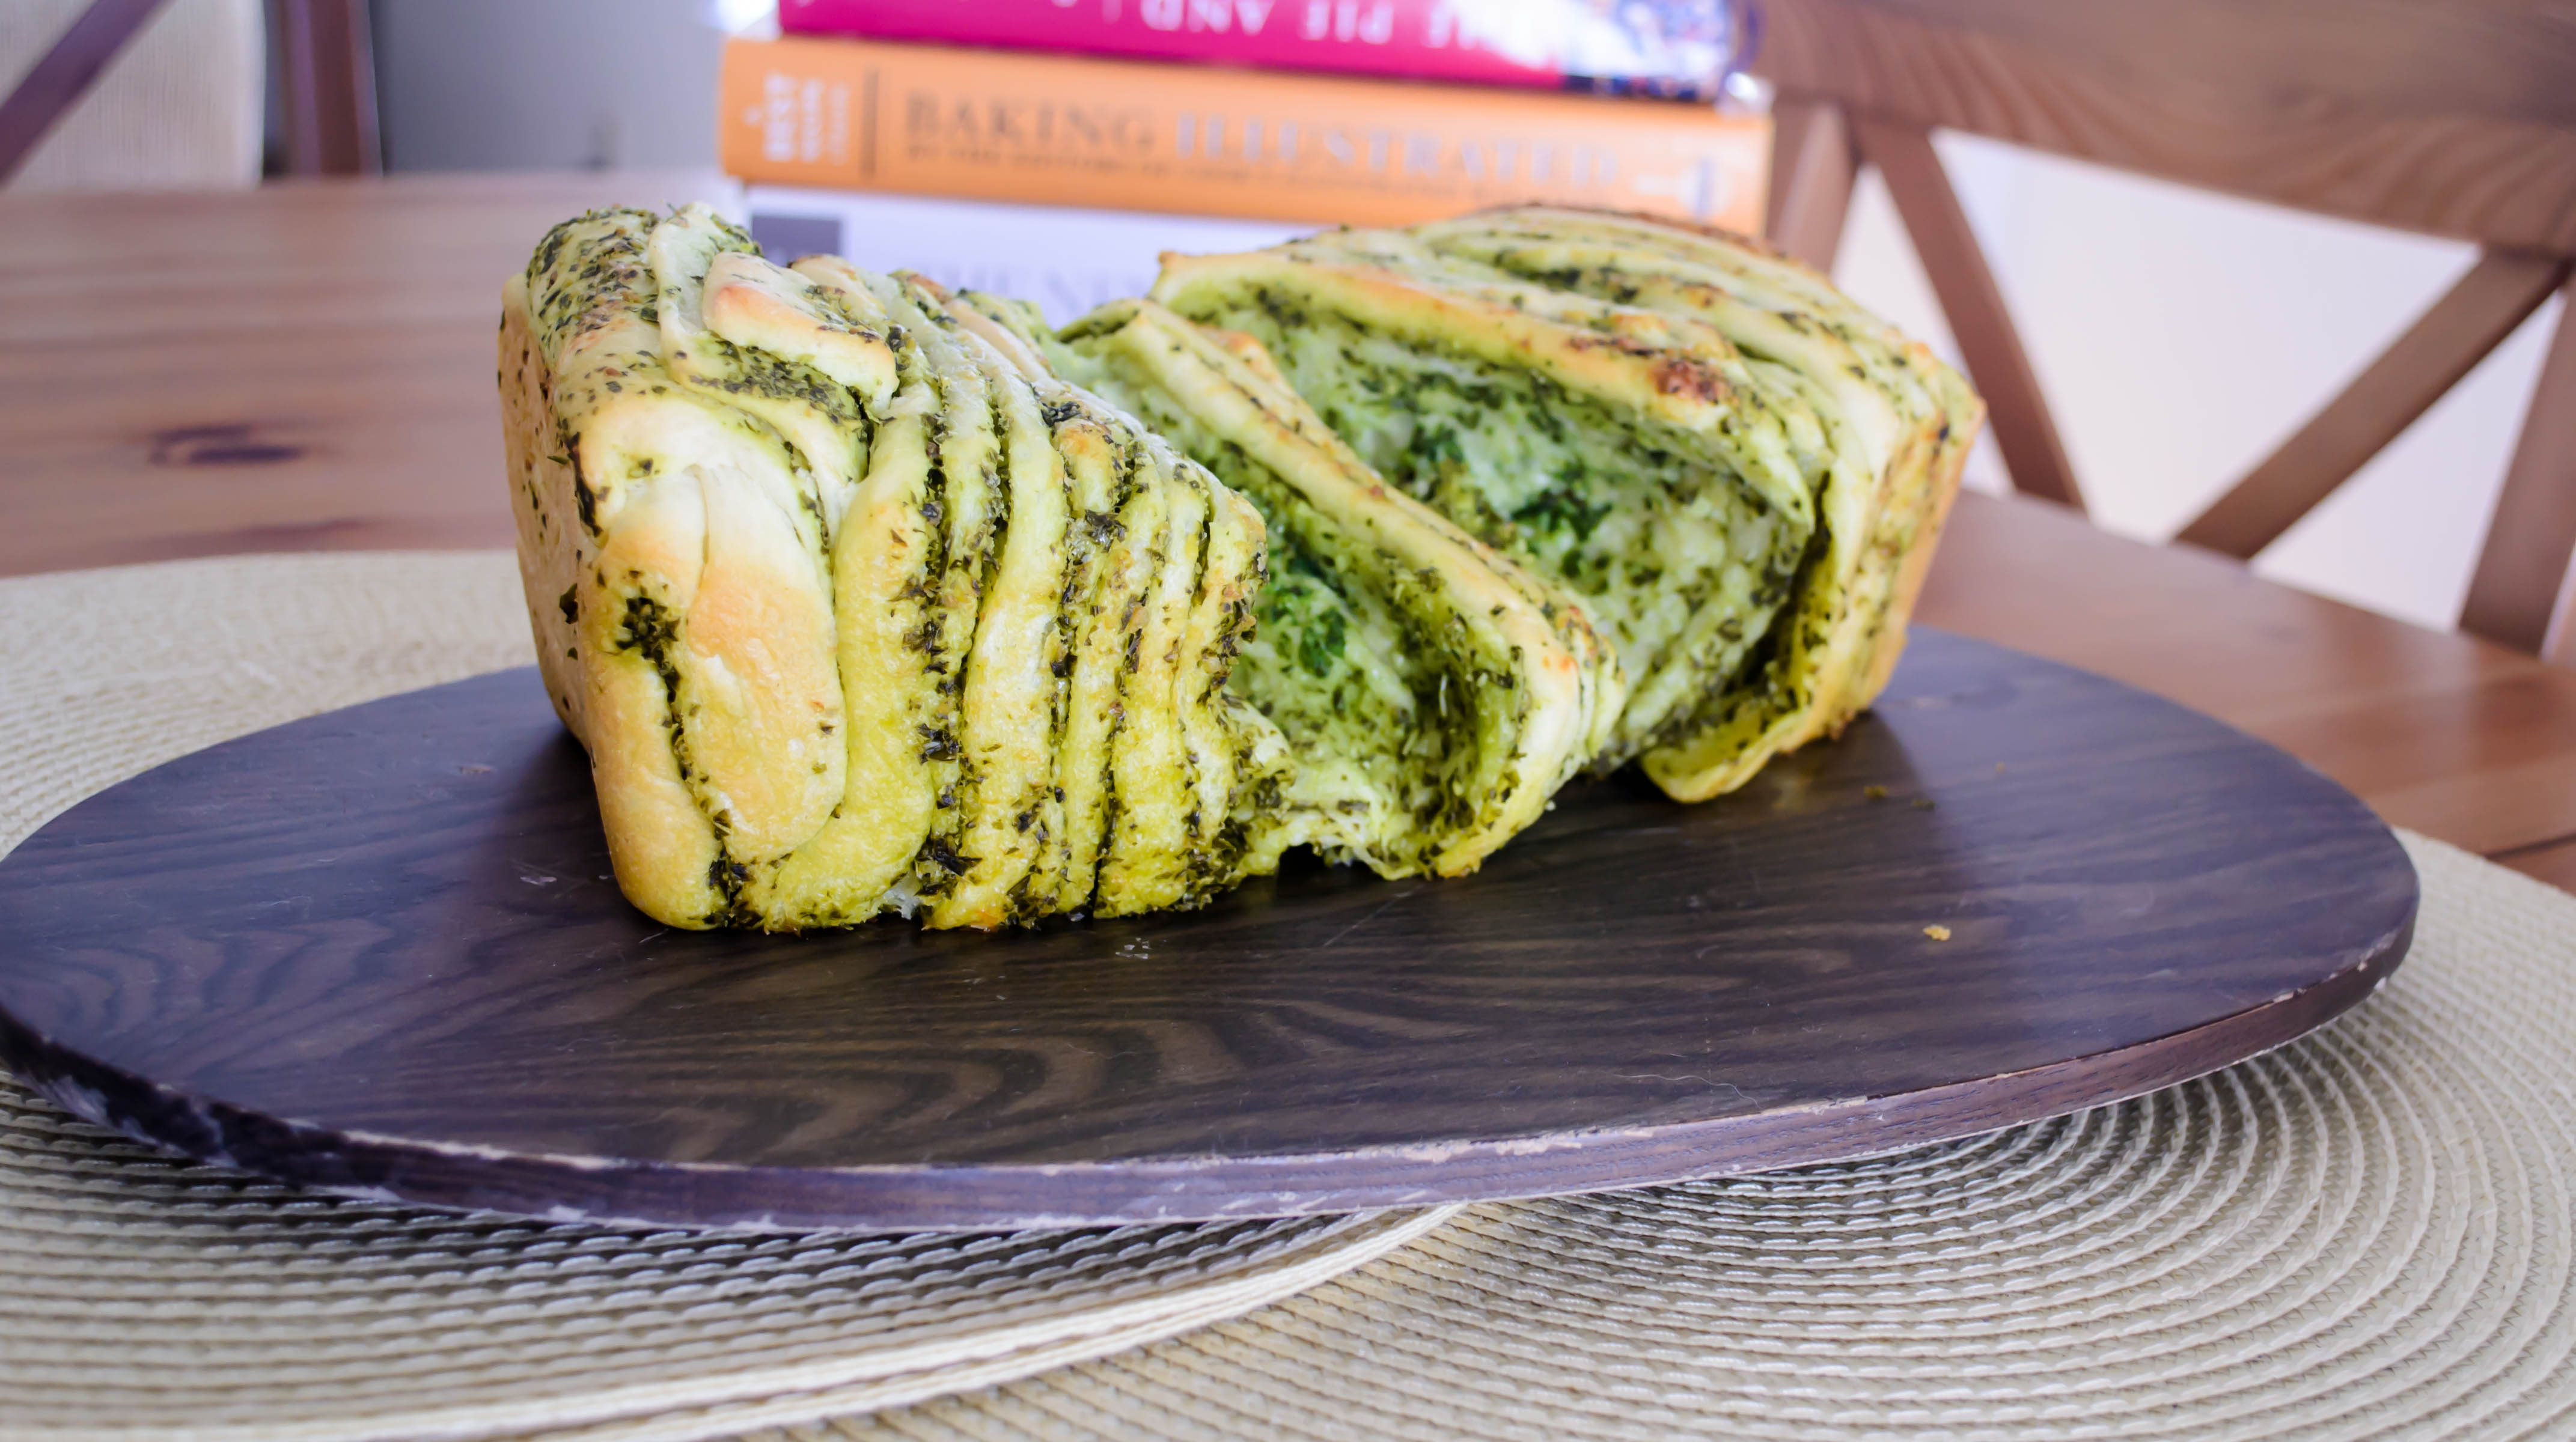
Like Nana used to, I made enough dough for two cakes. Obeying the mandates of memory, I did one in a square pan. I wasn’t sure how it was going to turn out – just a hunk of dough flopped and poked into a pan – so for the other I tried for a twisted coil, laying the flat snail-shell of dough in a springform pan to rise. Interestingly enough, while adding streusel to the top was a successful adaptation, the pan and shape change was not so ideal. The square shape turned out better because it made for a more even distribution of plums. The coil, while it baked into a beautiful puffy spiral, was smaller to start with, which meant I couldn’t load on as many plum slices. When it expanded, both on the counter and in the oven, the plum distribution ended up a bit sparse (though the outcome was still delicious). The square shaped cake, which had nowhere to expand but straight up, retained its fruit coverage for a final product that can only be termed plummier. That, then, was the one I brought to work with me to share. By the time I left campus in mid-afternoon, only a tiny, plum-less corner remained.

Food Blog September 2014-0503Food Blog September 2014-0506Nana, this is a good cake. I’m glad you made it, and I’m glad it was remembered. I don’t know whether you would have liked my version, and I know you wouldn’t have liked the mess I made in the kitchen while I worked on it. I do think, though, that you’d have liked the fact that I was happy while baking and that I made enough to share. And I think you would have liked that it made us all think about you so fondly. Food Blog September 2014-0534Food Blog September 2014-0533

(Not damson) Plum Coffeecake
Makes two 9-inch cakes – one for you, and one to share
For the dough:
4 teaspoons active dry yeast
1 cup lukewarm milk
½ cup + a pinch of brown sugar
1 teaspoon vanilla
4 eggs
½ cup unsalted butter, soft but not melted
1 teaspoon salt
2 teaspoons ground cardamom
4-5 cups flour
4-5 yellow-fleshed plums, thinly sliced (firm, or even slightly underripe, will be easiest to work with)
For the streusel:
4 tablespoons cold butter
4 tablespoons flour
3 tablespoons brown sugar
1 teaspoon cardamom or cinnamon
pinch salt


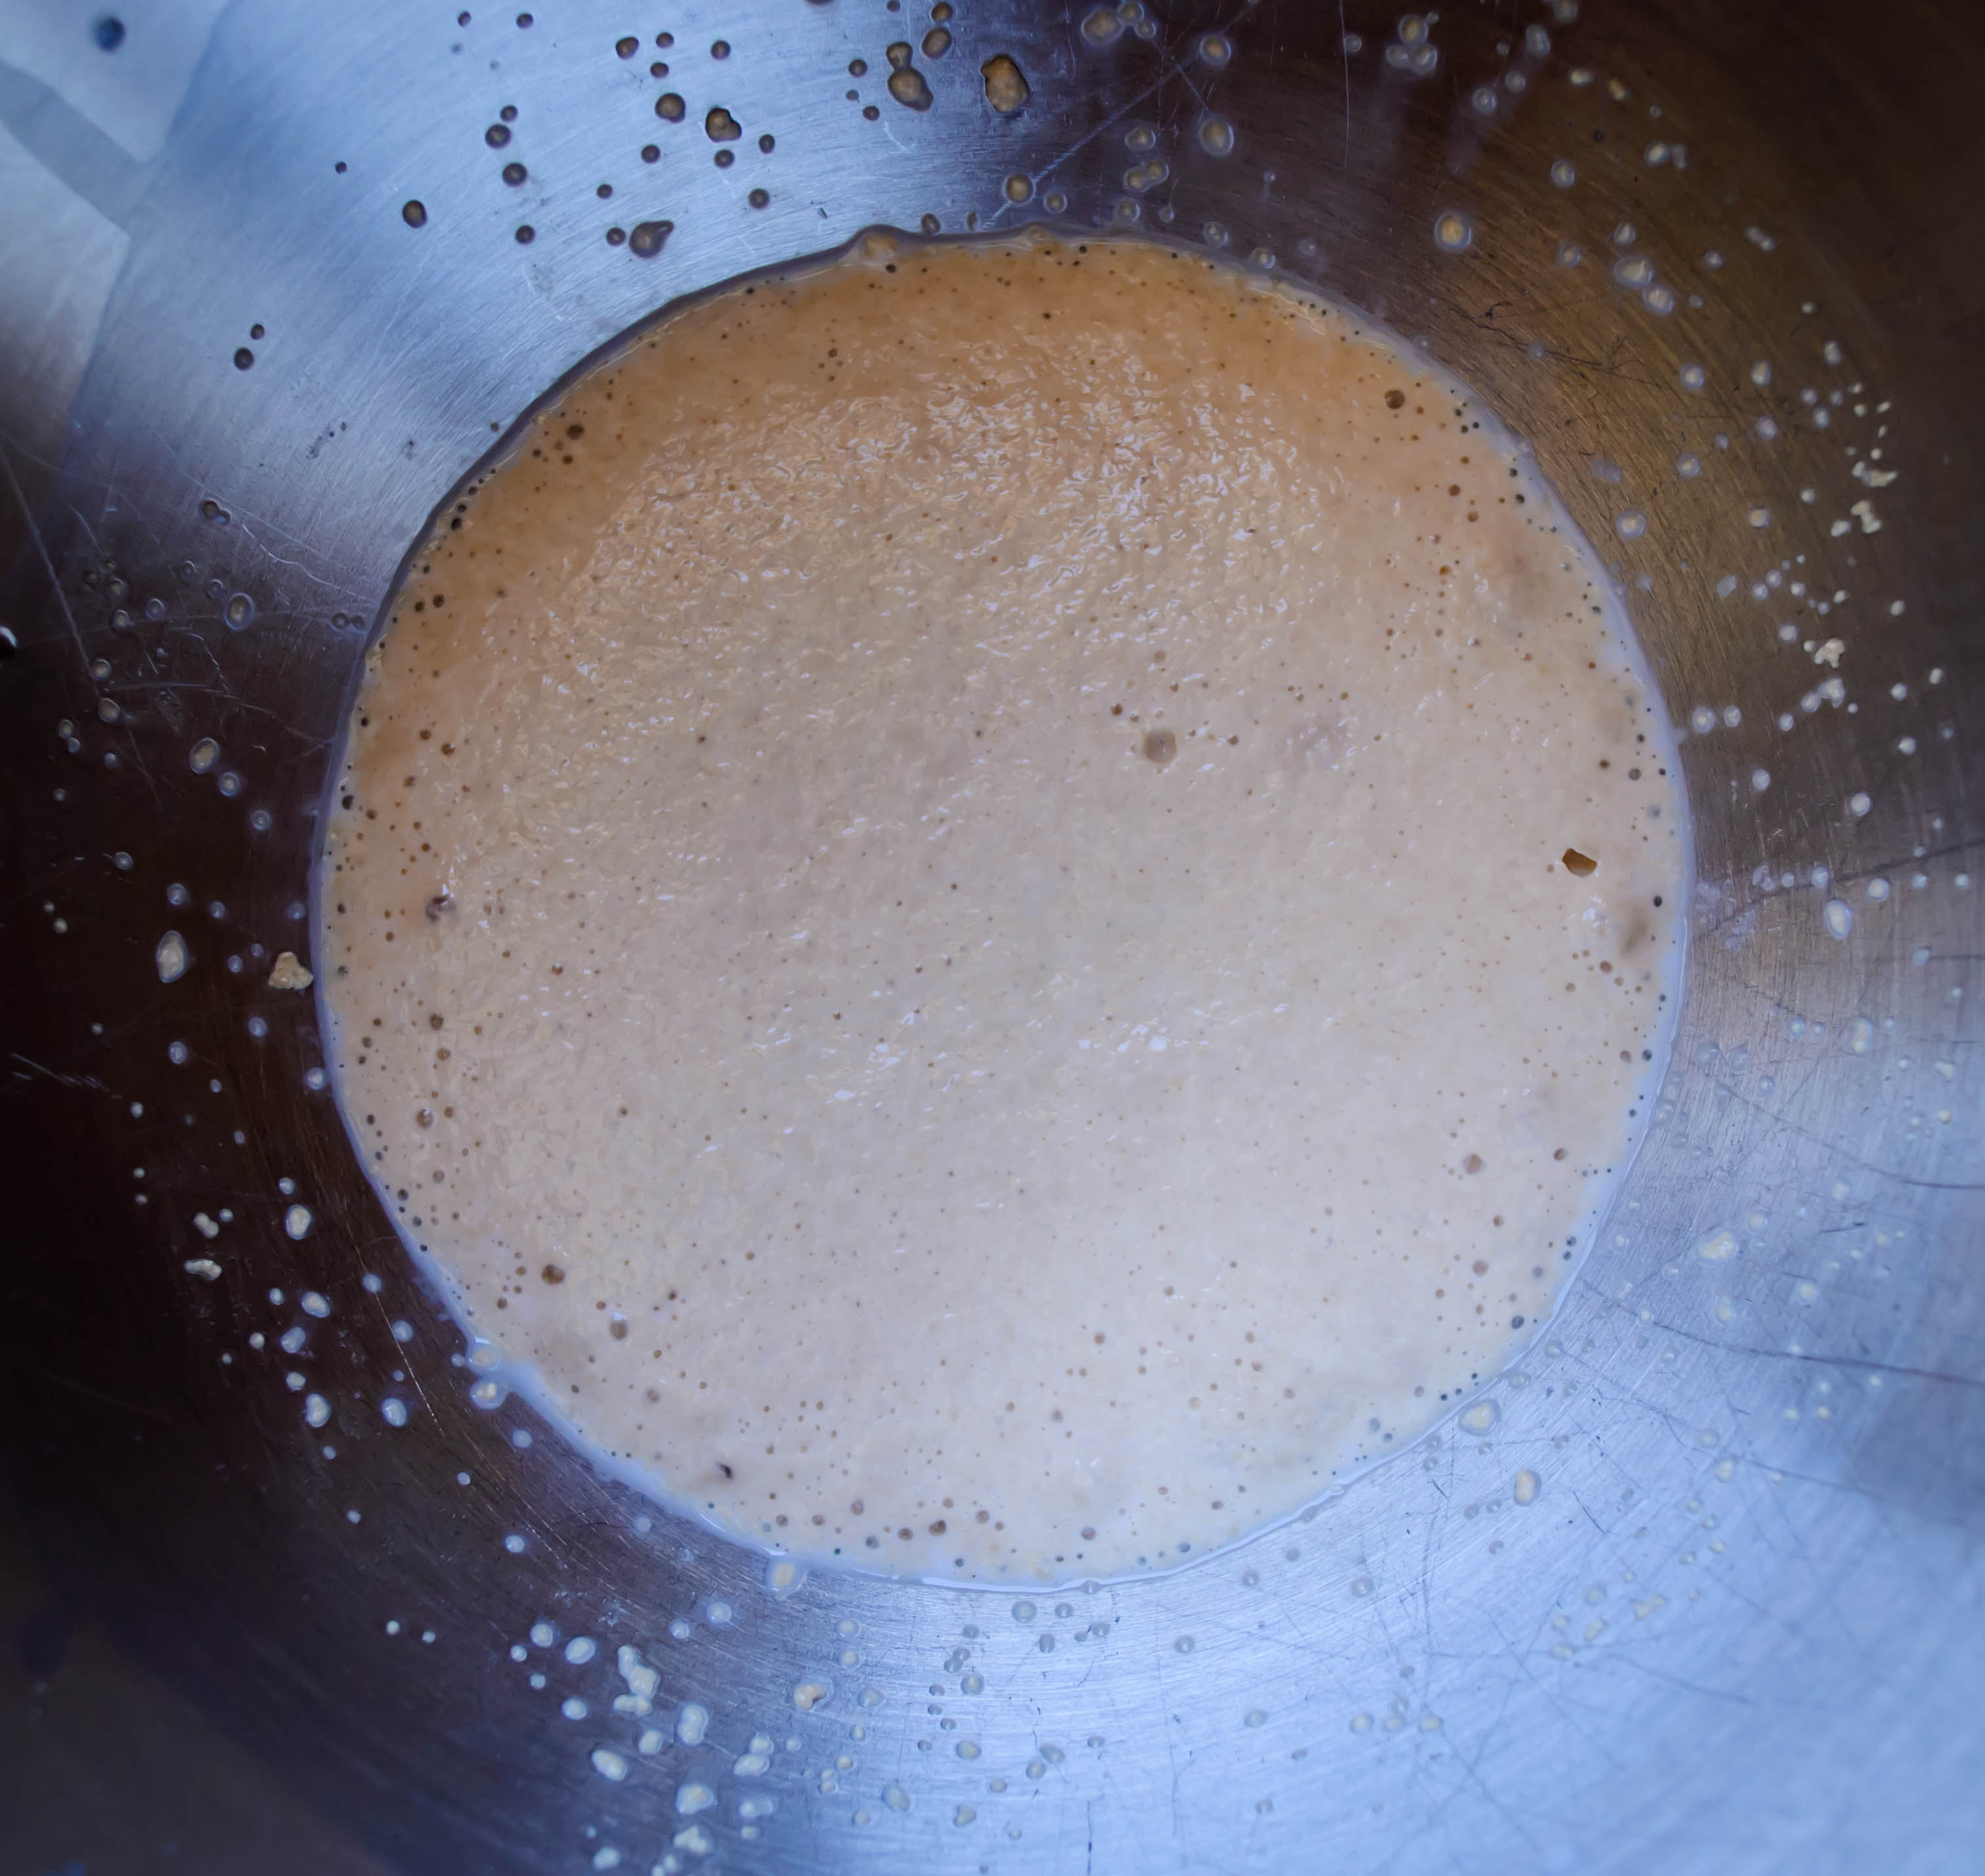
  • Add the yeast and a pinch of brown sugar to the lukewarm milk and stir to combine, then set aside for 5-10 minutes for the yeast to burble and get foamy.
  • Meanwhile, combine 3 cups of the flour, the salt and the cardamom in the bowl of a stand mixer. Add the yeast mixture, the eggs, and the vanilla and mix on low speed with the paddle attachment to combine.
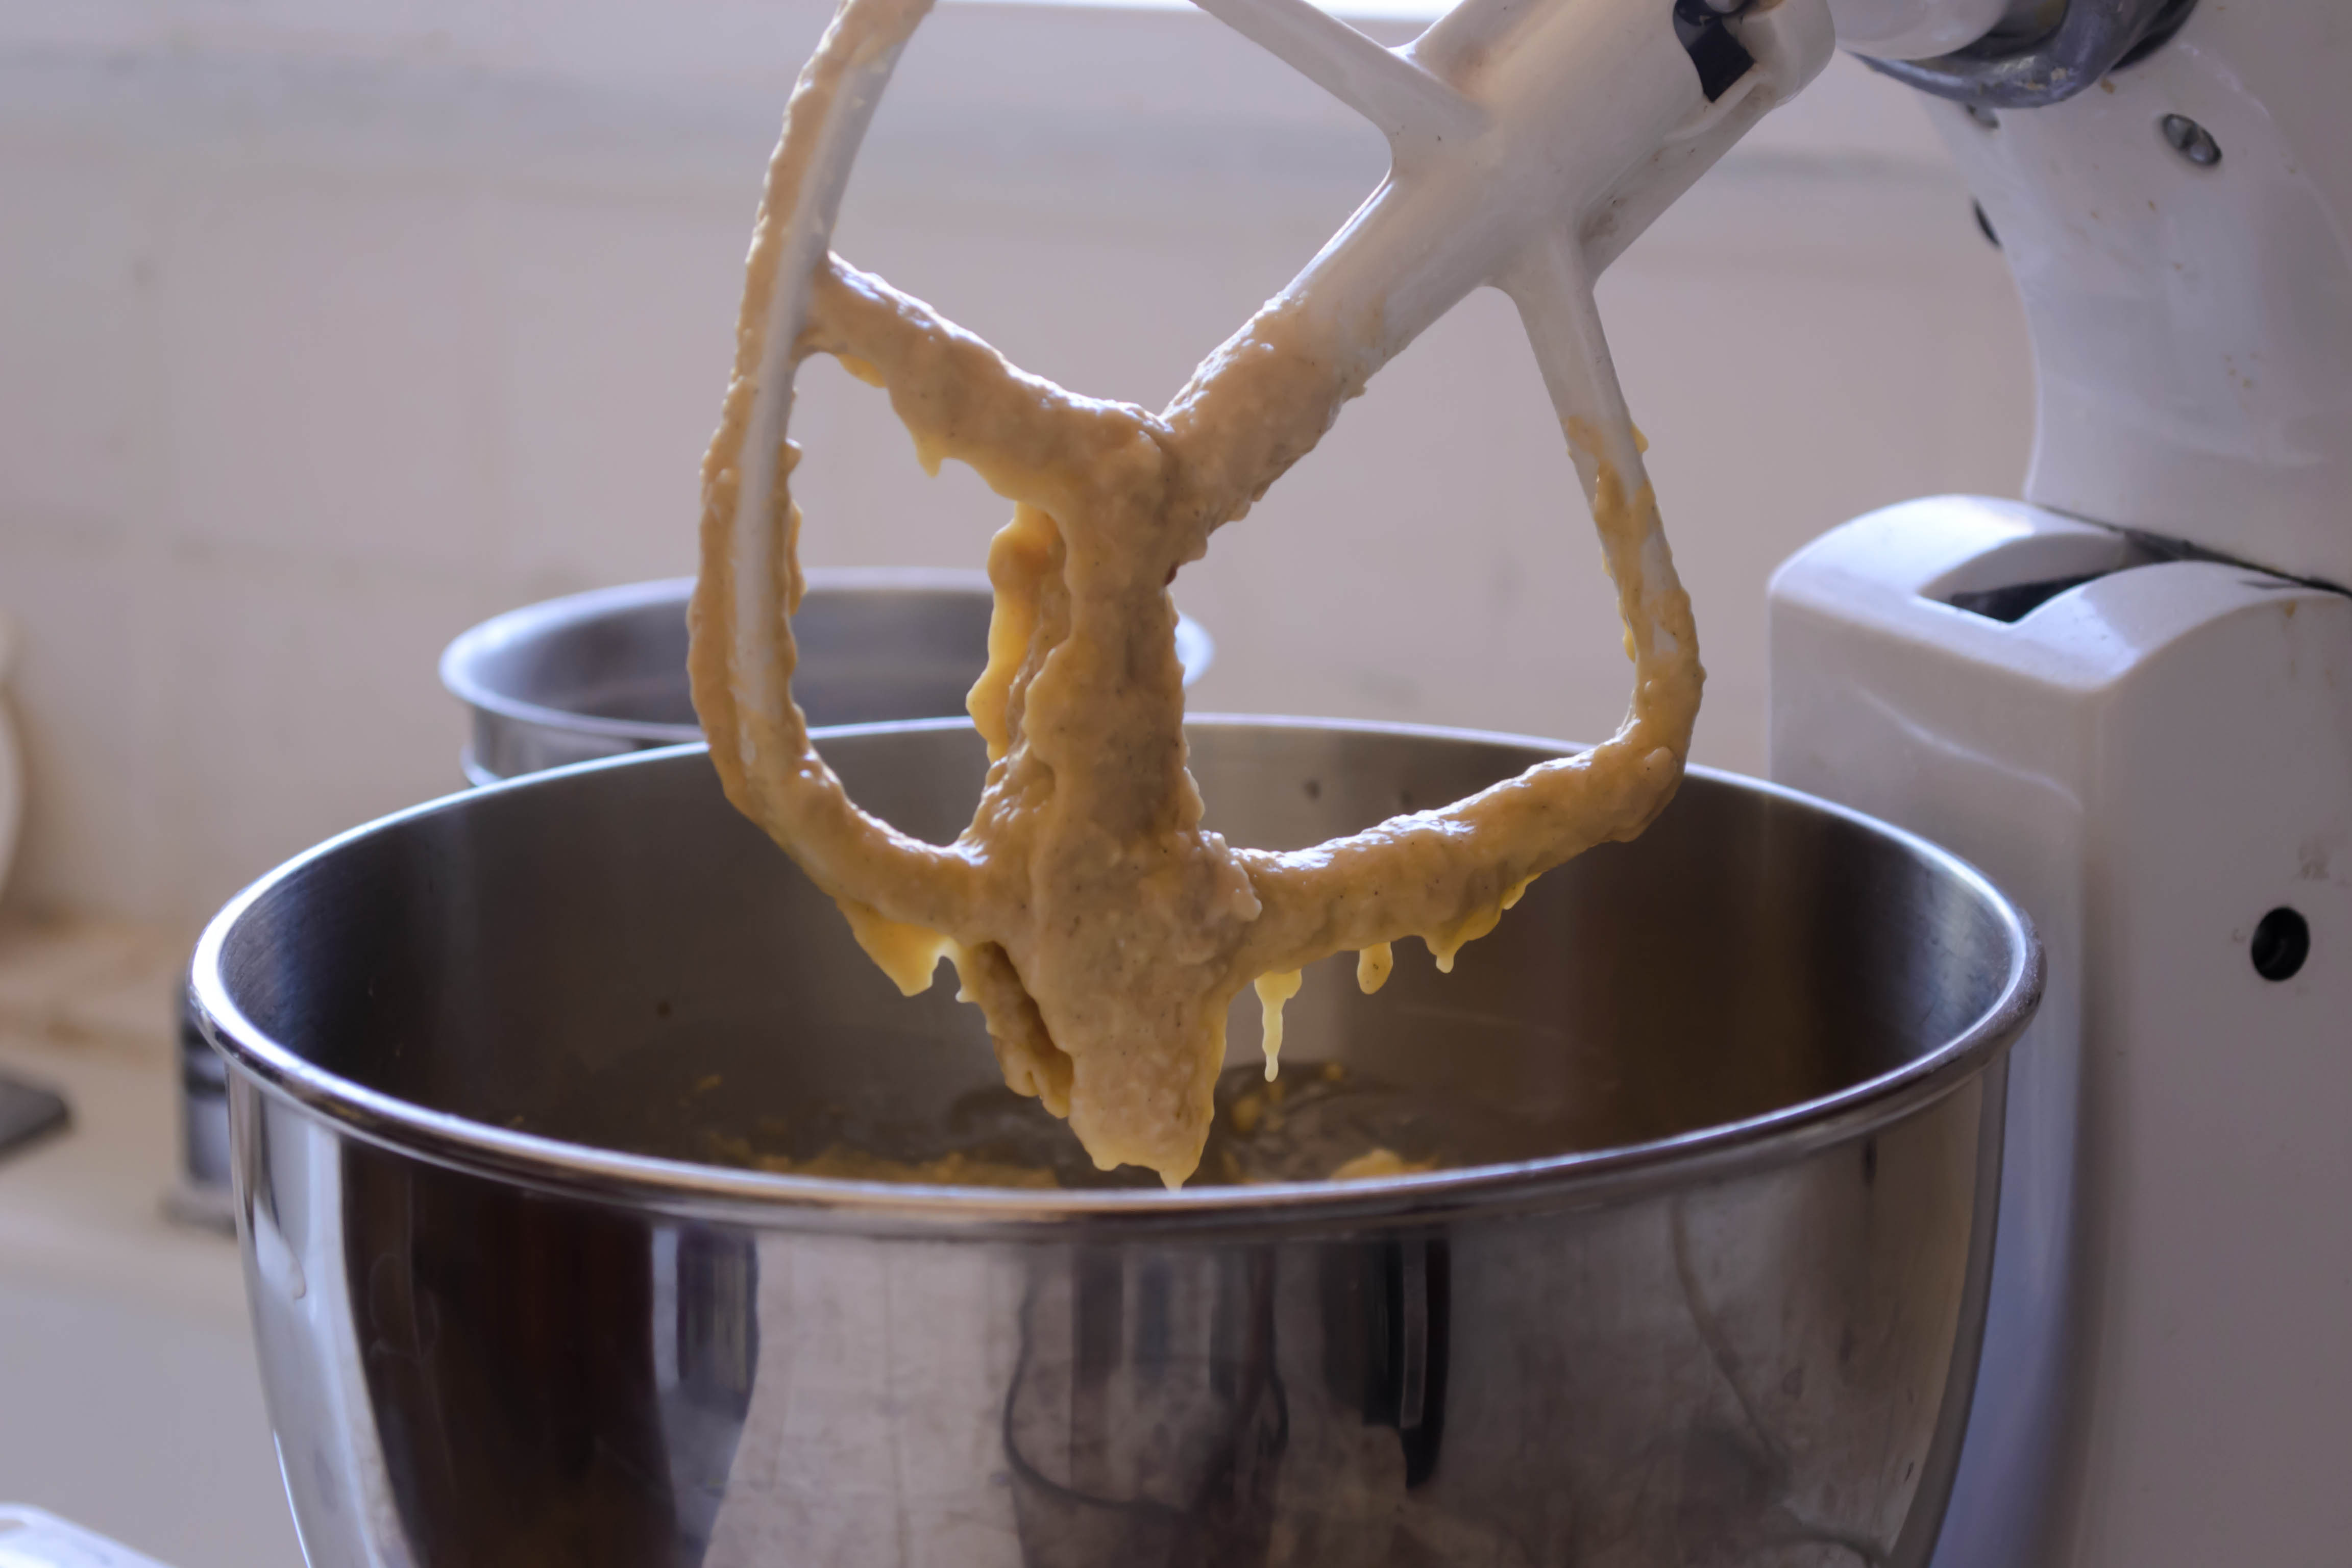
  • When the eggs are mostly integrated, add the butter and mix on low speed until it is mostly absorbed into what will look like a wet batter. Add an additional 1 cup flour and mix until combined.
  • Switch to the dough hook and knead for 5 minutes until a soft, elastic dough forms. If the dough looks very loose or sticky and is not coming together, add the final cup of flour ¼ cup at a time, kneading well between each addition. You may not need the full 5 cups of flour – mine took a total of 4 ¾ cups.
  • When the dough is soft and stretchy – a bit like an elastic playdough – lightly oil the bowl, roll the dough around in it a bit, and then cover tightly with plastic wrap and set in a warm place to rise for 1 ½ – 2 hours, until doubled.
  • While the dough rises, slice the plums.
  • After the dough has doubled in size, punch it down by gently depressing your fist into the dough to release trapped air, then let it rest for 5 minutes to get its breath back.
  • Divide the dough into two equal hunks, fold, push, or twist into desired shapes, and settle each loaf into one of two greased or buttered 9-inch square or springform pans. Nana did a simple square, but you could also roll the dough out into a long, wormlike log and then twist it like a rope over and over itself, then wind it up in a coil like a flat snail-shell.
  • Top the shaped dough with plums, slightly overlapping the slices to accommodate for the additional rising time. Adding the plums now allows them to macerate a little and release some juice and flavor into the dough.
  • Cover the cakes lightly with plastic wrap or a clean kitchen towel and let them rise again for 30-45 minutes. They will almost double.
  • While the cakes rise again, preheat the oven to 350F and make the streusel.
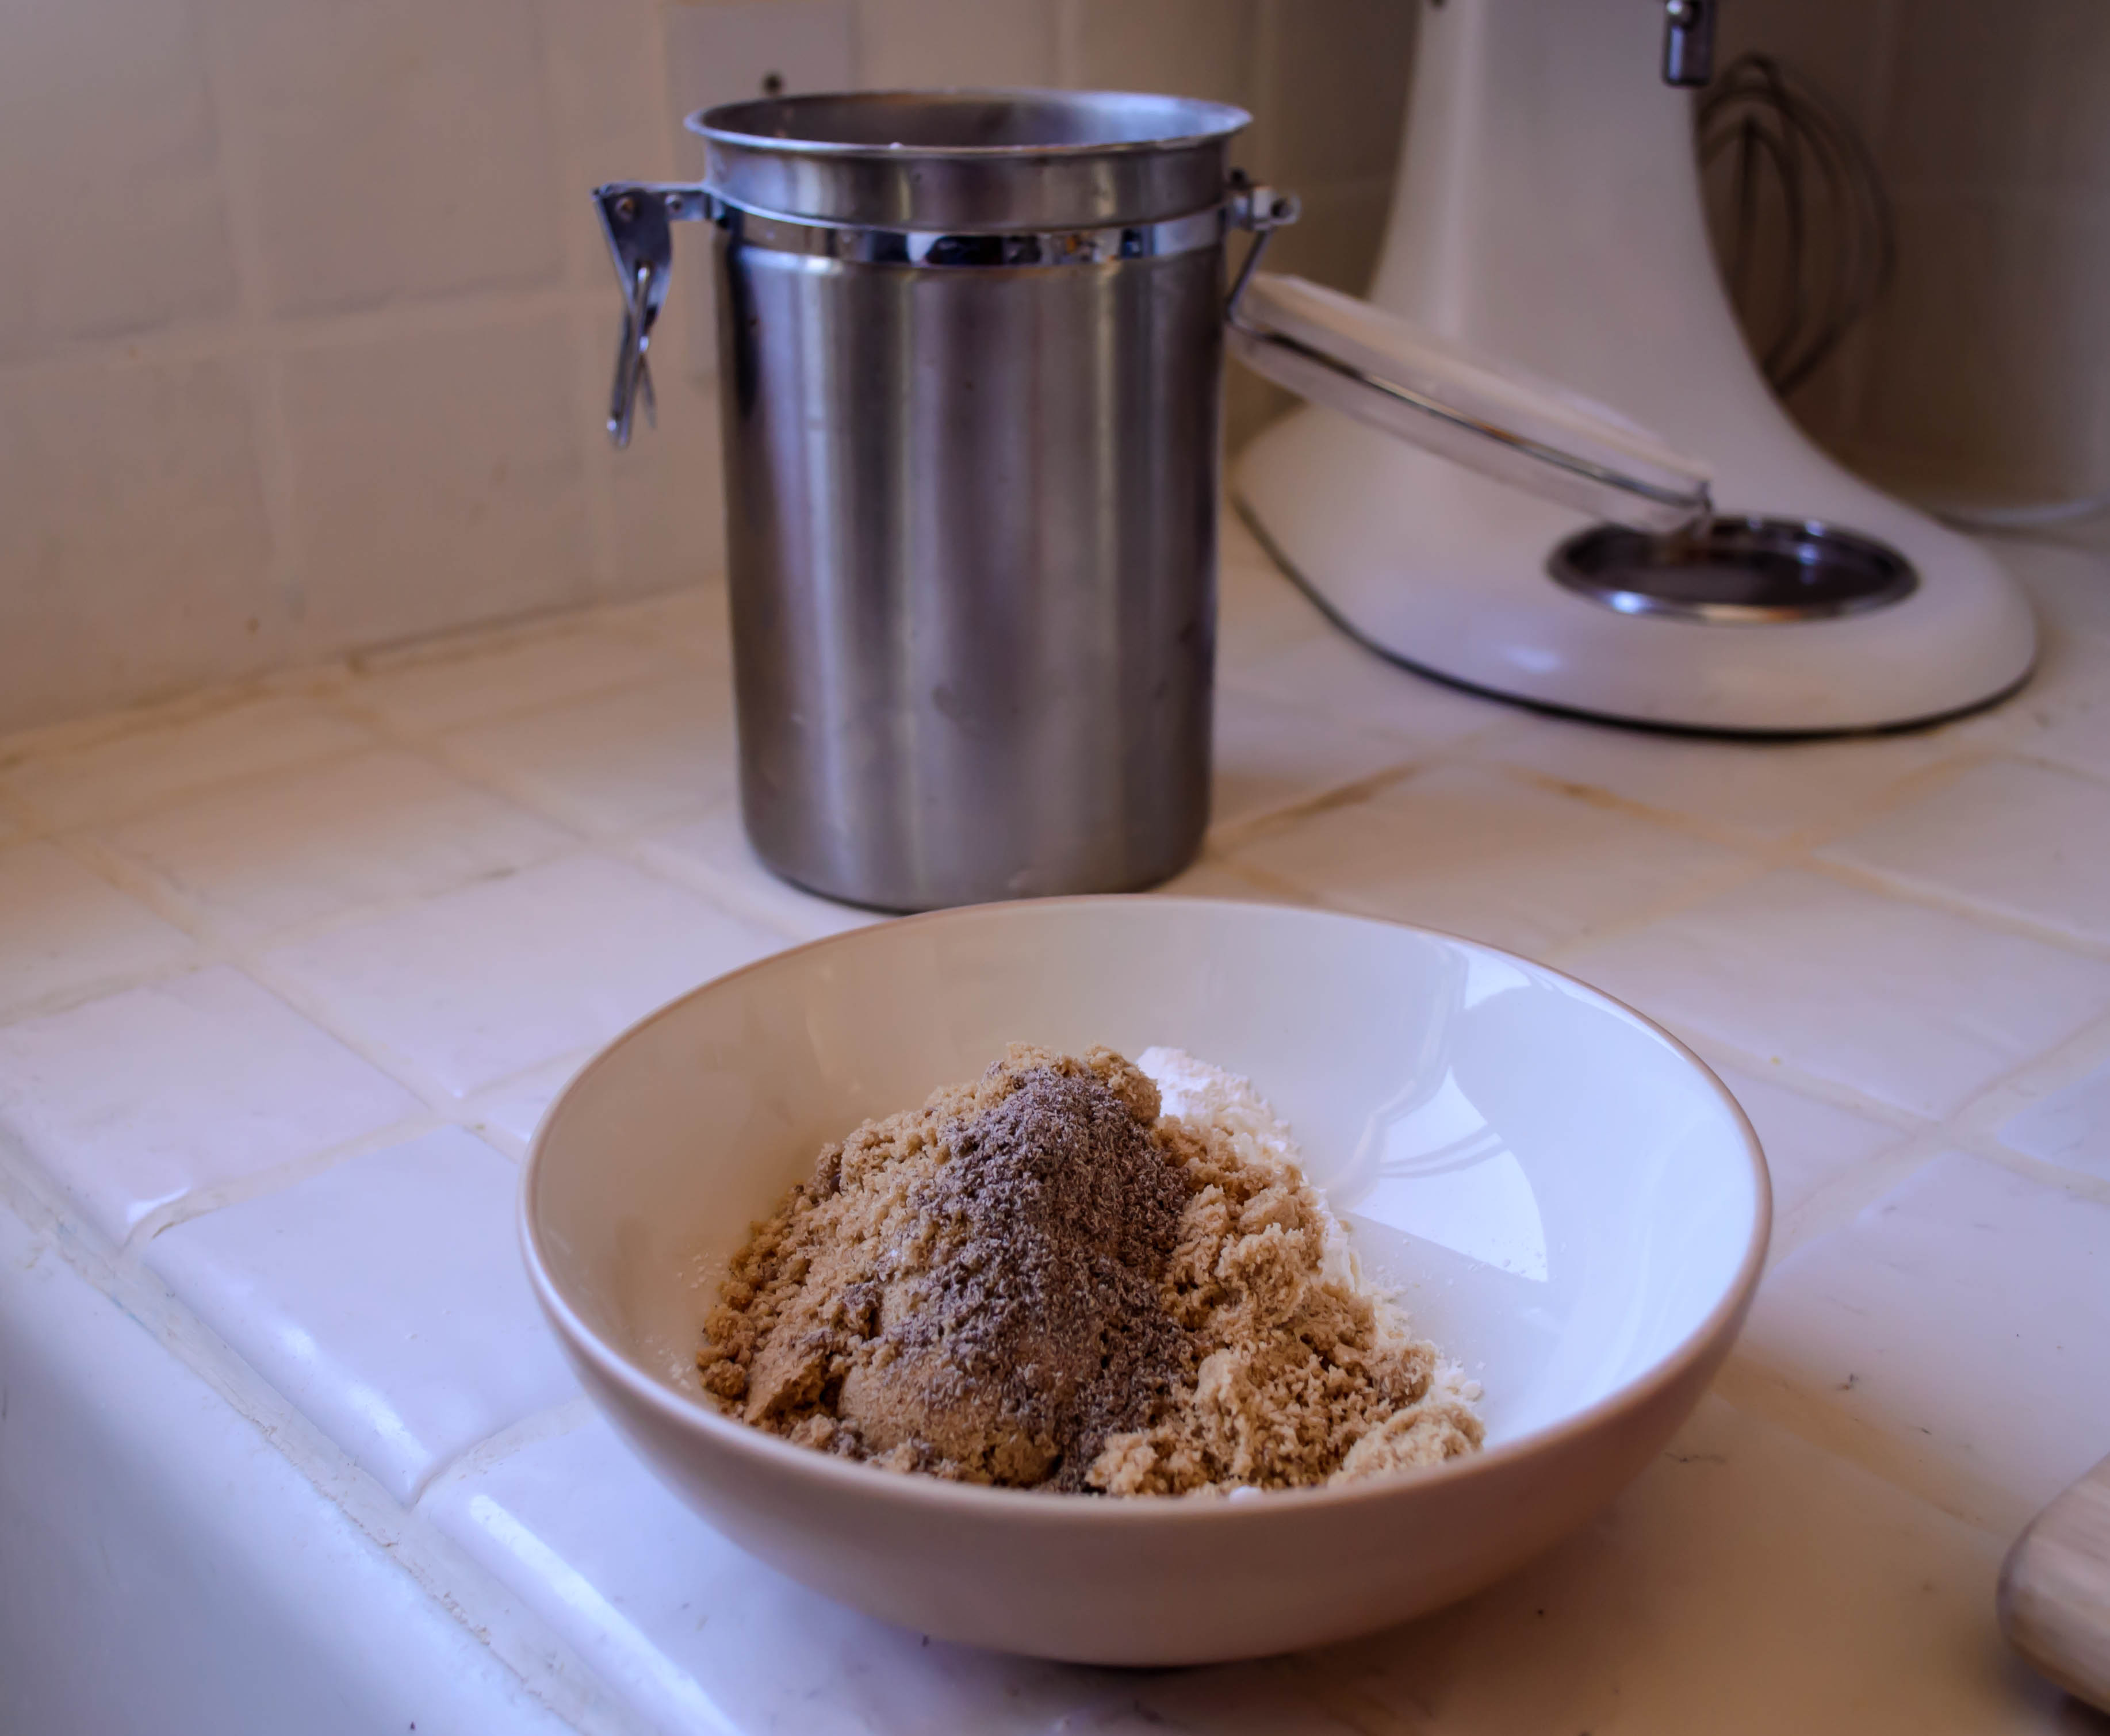
  • In a small bowl, stir together the flour, brown sugar, cardamom or cinnamon, and pinch of salt for the streusel. Using your fingers, blend in the 4 tablespoons butter until the mixture is reminiscent of damp sand, and little clumps flatten but cling together when you press them between your thumb and forefinger.
  • Just before the cakes are ready to go in the oven, remove the plastic wrap or kitchen towel and sprinkle on the streusel, using half for one cake and half for the other. It should be enough to cover the surface completely, but don’t skimp! Use it all, as the cakes will rise again in the oven and thus the coverage will decrease a bit.
  • Bake 30-35 minutes until the streusel is golden, the tops of the cakes are nicely bronzed, and they are cooked through. Let cool at least 20 minutes before removing from pans or slicing.
  • This bread, despite how rich it is, bakes up quite light and is best the first day. It will keep three or four days in the refrigerator, well-wrapped, but it does get a little dry. Nothing a quick trip in the microwave and maybe a slick of cream cheese can’t fix, though.

Pesto Parmesan Pull-Apart Bread #TwelveLoaves

Food Blog August 2014-0476I’ve put off writing this post. I wasn’t sure how to begin. Every time I sit down to think about it, I end up surfing the net, scrolling through Facebook, seeing more and more headlines, reading more and more articles about the terrible things our world has been going through recently. As one of my friends and former colleagues put it recently, “the entire internet needs a trigger warning.”

Food Blog August 2014-0450I don’t often offer political or moral commentary on this site. That’s not its job. And I don’t often try to convince you that seeing things my way is the way you should see. My truths are mine, and yours are yours. But when terrible things happen, and when death and tragedy are instigated and framed through questionable motives – sometimes on both sides of the event – I question my own job here.

Food Blog August 2014-0451Food Blog August 2014-0454I’m not going to espouse to you what I think. Not today, and probably not ever, unless it’s something frivolous and food-related. I’m just going to say, with caution, that unless you have cut off access to emotions, to moral codes, or to the internet itself (I know, gasp!), over the past week or two – certainly over the past month – the world has been pretty depressing.

Food Blog August 2014-0457So that makes a food blogger wonder where she stands. When people are suffering, when people are angry and dying and struggling, for me, there is uncertainty: is it disrespectful or willfully unaware to coo over the cuteness of a cupcake or speckle my posts with just the right adjectives to describe the lusciousness of a sauce? I’ve considered this before, written about it before, and I always come back to the same conclusion: no. Food is important. Food means things, not just about nurturing our bellies but nurturing our hearts and our minds and, depending on what you believe, our souls. I talked to N. about this the other day, thinking again of how to write this post, and he said “we have to have some things to be happy about.” Food seems like one of those things.

Food Blog August 2014-0458Finally, what helped me figure out what to write so as to be aware of, respectful of, but not overwhelmed by these events I’ve found troubling, was the introduction to Yotam Ottolenghi and Sami Tamimi’s cookbook Jerusalem. Looking back through this lovely book, I was struck by a short section they have titled “A comment about ownership.” In a place – whether that is a city, or a nation, or the world itself – where we feel a need for the power that ownership and control bring us, it is hard to share. We pull ourselves apart from one another in an effort to feel safe, or right, or justified. Ottolenghi and Tamimi argue that searching out the true “owner” of a dish through its national or personal origin is not only difficult, but futile. Either it has been made before, or there exists another, or three, or a dozen, similar dishes claiming different origins: a “variation on a theme” (16).

Food Blog August 2014-0459Though Ottolenghi and Tamimi are commenting on dish origination – which makes sense, as they like to provide a little background about the meals they offer – what struck me was not just where a dish comes from, but where it goes. For a long, long time, sitting down at a table, or a fire, or a bowl, has meant something more than filling your stomach. It means trust, or love, or a forging of bonds. You eat together and you end up sharing more than a meal. I’m not sure that’s still true, but I think it should be.

Food Blog August 2014-0461So weirdly, when it came time to sample this month’s loaf for the Twelve Loaves project, I had chosen something divisive in its very name: pull-apart bread. When you tear into it, this loaf peels into separate bits, as I see happening so often in our world. Yet its richness, its docile tendency to give up layers and hunks and edges, suggests it is meant to be shared. We pull it into soft fragrant pieces, but we’re doing that together, and the act of sharing brings us comfort and happiness.

Food Blog August 2014-0464I’ve wanted to try a pull-apart bread for a long time, particularly after seeing Deb’s nod to Welsh Rarebit on Smitten Kitchen. To answer the call of summer herbs for Twelve Loaves, I settled on pesto, blending the sharp-sweet, fresh licorice scent of basil with the usual garlic, pine nuts, and lemon juice. I amped up the parmesan quotient and included it not in the spread itself, but as a separate layer to melt and cling.

Food Blog August 2014-0468There seem to be two schools on pull-apart bread. One involves rolling little spheres of dough and jamming them into a pan together, so when they cook they swell into one another and form tenuous ties. This is also commonly called Monkey Bread, especially when it is sweet. The other, which I haven’t seen as frequently but which I chose to work with after seeing Deb’s offering, results in something more like a Pillsbury Grands biscuit or puff pastry stood on end. It involves rolling the dough thin, slicing it in long strips, layering those strips and slicing them into squares, then levering those stacked squares – like servings of lasagna or birthday cake – sideways into a loaf pan like a deck of cards to rise into one another and smash together during baking. As you peel the warm layers apart, you get the bite of pesto and the salty richness of parmesan.

Food Blog August 2014-0473I want you to make this. It’s a bit of a project, but it’s so, so delicious. And when you make it, I want you to share it. Pull it apart, by all means. But let that action by extension pull you together.

Food Blog August 2014-0480

Pesto Parmesan Pull-Apart Bread
Makes a single 9×5 inch loaf
Adapted heavily from Smitten Kitchen
For dough:
2 teaspoons yeast
2 teaspoons sugar
½ cup milk, warm but not hot
2 ½ – 3 cups bread flour, divided
1 teaspoon salt
4 tablespoons soft butter
2 eggs
For filling:
3 garlic cloves, skins removed
¼ cup pine nuts
2 tablespoons lemon juice, or to your taste
4-5 cups packed basil leaves
½ cup (approximately) olive oil
salt and pepper to taste
2 cups parmesan cheese (I know, but it’s so fluffy!  2 cups is practically nothing… besides, you’re sharing…)


  • In a glass measuring cup, warm the milk. I like to pop it into the microwave for 20-30 seconds. When it is just warmer than body temperature (poke your fingertip in – it should feel just warm to the touch), add the sugar and the yeast and stir it up. Let this sit for 5 minutes or so while the yeast wakes up and begins to bubble.
  • Meanwhile, combine the salt and 2 cups of the flour in the bowl of a stand mixer and stir to combine. When the yeast and milk mixture is bubbly and smells like bread, add it to the flour and salt and mix on low speed using the paddle attachment until damply crumbly. Add the butter and the eggs and mix on low speed again.
  • Add an additional ½ cup flour and mix to combine. As soon as the dough starts to come together and there are no longer dry swaths of flour, switch from the paddle attachment to the dough hook.
  • Knead for 3-4 minutes until a soft dough the consistency of play-dough forms. If it looks really sticky or is not coming together or pulling away from the sides of the bowl at all, begin adding the additional flour 2 tablespoons at a time, kneading for a bit in between each addition. You may not need all of the additional flour – I only used 2 ½ cups total.
  • Lightly grease the inside of the bowl (or switch to a clean, lightly oiled one), flip the dough over a few times to ensure it is lightly greased as well, then cover the bowl with plastic wrap and set it aside for 50-60 minutes to rise. We are looking for the ball of dough to double in size.
  • While the dough rises, make the filling. Drop the garlic and the pine nuts into the belly of your food processor and let it run for a few seconds, until the garlic and pine nuts become a fragrant crumble. There is still some blending to go, so they don’t have to be a smooth paste yet.
  • Add the lemon juice and as many of the basil leaves as will comfortably fit, and turn on the processor. Most of the basil will almost instantly be shredded into tiny bits. If it isn’t, or if nothing seems to be happening, take out the lid from the food chute and begin pouring in the olive oil through this chute in a slow, steady stream.
  • Once there is room in the food processor bowl again, add the remaining basil leaves, if there are any. Repeat the olive oil streaming process until you have a thick paste. I usually end up adding my basil in two or three batches. You may use more or less olive oil – this is somewhat according to preference, but you do want a fairly thick pesto that you can spread, not pour.
  • Taste for seasoning; add salt and pepper and pulse to combine. Set aside until dough is finished rising.
  • When the dough has doubled in size, punch it down by gently depressing your fist into the center. Let it rest for a minute or two, then turn it out onto a well-floured board and, using a floured rolling pin, roll it out to a rectangle of about 12×20 inches.
  • Spread pesto over the entire rectangle of dough, right up to the edges. We don’t need a bare margin for this loaf.
  • Cut the rectangle crosswise into 5 strips of 12×4 inches (so the short edge of the initial big rectangle becomes the long edge of each of the 5 strips). Sprinkle one with about ½ cup parmesan cheese – this will be the bottom of the stack.
  • Carefully, using a spatula with a long blade or a dough scraper to help you, top your parmesan covered base with another strip of dough. Sprinkle another ½ cup parmesan atop this new layer.
  • Repeat until you have a stack of five layers, though the final layer will not have cheese on top, which is fine.
  • Gently, exceedingly gently, use a serrated knife to cut the dough layers into 6 segments of about 2 inches each. Turn each segment layer-side up (showing off its stratigraphy) and snug it into a greased 9×5 inch loaf pan. You can turn the pan up on its short end to make this a bit easier – take a peek at Deb’s images (link above) for a visual. Follow this with another segment, and so on, to create a stack of layers. When you finish and set the loaf pan back on its base, Deb says this looks a bit like a full card catalog drawer, and I think this is a good assessment.
  • Cover your strange, layered loaf with plastic wrap and set it aside to rise again for 30-45 minutes. Preheat the oven to 350F so it is ready when you are.
  • Once the dough has risen again, which will squash the layers together a bit, remove the plastic wrap and stow your loaf it in the 350F oven for 25-35 minutes until it is puffy and nicely bronzed on top.
  • Cool a minimum of 10 minutes in the pan (though 15 or even 20 is probably safer; mine collapsed upon removal), then carefully flip it out and serve warm for best flavor and “pull-apart” effect.

Apricot Coffeecake Ring #TwelveLoaves

Food blog July 2014-0388Things get a little lax in the summer. Example: you’re not getting a sauce this month. What can I say? I’ve been on vacation! I’ll make it up to you in August, though, along with a slew of other delectable options I’ve got pending. I was determined, however, not to fall behind in my Twelve Loaves baking. In my haste to stay on schedule, I merely glanced at the beautiful apricots gleaming up from Lora’s bread this month, and assumed these gorgeous fleshly globes were the theme of July’s assignment.

Food blog July 2014-0362Food blog July 2014-0364Food blog July 2014-0365Turns out the theme was “summer fun.” Well. I think I’m still glad I went with apricots. Their beautiful swelling cheeks and slight fuzzy skins remind me of a healthy summery glow. After a week of beaches and bronzed bodies, the peachy simplicity of apricots seemed like the right move.

Food blog July 2014-0366I’ve been auditioning yeasted coffeecake recipes for a while now, sometimes ending up with a stunner, sometimes with something that merits a revisit, and sometimes with something that wasn’t a yeasted coffeecake at all. But for this, I turned to the place I should have looked from the very beginning: Baking Illustrated. This hefty volume from the brains and kitchens of the Cook’s Illustrated crew does all the heavy lifting for me, and if I’m ambitious enough to read the whole story, tells me why and how each item came to be, from a food science, aesthetics, and taste-bud angle.

Food blog July 2014-0356Food blog July 2014-0358Food blog July 2014-0367Food blog July 2014-0369This loaf is slightly adapted from their yeasted coffeecake recipe with an orange-apricot filling. I omitted the orange, used fresh rather than dried apricots, and opted to forgo the heavy streusel and icing in favor of a light sprinkle of almonds and a bit of coarse sugar for an appealing crunch. I took their suggested horseshoe shape and swung it all the way into a circle for a pretty golden ring oozing jammy splotches.

Food blog July 2014-0371Food blog July 2014-0373When this came out of the oven, I – forgive me the overshare – just about drooled right on it. The apricot filling escapes in spots, bubbling and thickening like the filling at the edges of a pie. The dough itself, crusty on top with its sugared almond adornments, is burnished and soft and puffy and gorgeous. Describing the creation to his parents the evening we sampled it, N. called it a giant bearclaw, and though the loaf is a bit denser than a doughnut, the effect of the snipped dough with caramelized filling oozing through is similar.

Food blog July 2014-0374Are you sold? Let me tell you one more thing. This cake is essentially a two-day project. I’m serious. But don’t run off just yet! This is actually an advantage for a summer loaf. Because it has so much butter in it, and a pair of eggs to boot, it takes this dough a long time to rise. For the same reasons, it has to be chilled after its initial rise before you can really work with it at all. It’s quite similar to brioche in that way. But this is an advantage because it means you are not switching on the oven in the middle of the day, when your hair is already plastered to your forehead and you cannot bear to be in the kitchen another instant. It’s a mix in the morning, a long rise in a preheated house, and then you can shove it in the fridge and ignore it until early the following morning, when you finally bake. It means a little planning ahead, but I think it works out better in the long run.

Food blog July 2014-0378Besides, when you taste this, with its sugared crunch and soft elastic chew and golden sunshine-y tart-sweet apricot, I think you’ll decide it was worth it.

Happy midsummer. I wish you heaps of fun.

Food blog July 2014-0400

Apricot Coffeecake Ring
Adapted from Baking Illustrated
Makes one 8-10 inch ring
Note: this is, unless you are willing to get up very early in the morning, a two day baking process. I think it’s totally worth it, but be sure to give yourself sufficient time to execute it.
Note: because this is a very rich dough, it is also very soft and sticky. It will be difficult to work with by hand, so I’m only including directions for a stand mixer.
Dough:
2 teaspoons active dry yeast
3 tablespoons warm milk
¼ cup sugar
2 large eggs
½ teaspoon vanilla
2 – 2½ cups bread flour (you may not need the entire amount)
1 teaspoon salt
8 tablespoons (1 stick, or 4 ounces) unsalted butter, softened but not melted, cut into small chunks
Apricot filling:
1½ cups peeled, chopped apricots (for me, this was 5 apricots)
1 tablespoon brown sugar
1 tablespoon rum, optional
Topping:
1 egg white
1 teaspoon milk or cream
2-3 tablespoons raw sliced almonds
1-2 tablespoons coarse sugar (I used turbinado)
  • Sprinkle the yeast and a pinch of the sugar over the warm milk in the bowl of your stand mixer, stir to dissolve a bit, and let sit for 5-10 minutes until the yeast is bubbly.
  • Add the remaining sugar, the eggs, and the vanilla, and mix on low speed with the paddle attachment until combined.
  • Now, add the salt and 1 ¼ cups of the flour, and again mix on low speed until the flour is incorporated.
  • Increase the speed by one notch so you are at medium-low, and begin adding the butter one chunk at a time, beating until each chunk is incorporated before adding the next. This will take a few minutes, but it allows them to disperse evenly into the dough. When all the butter is incorporated, the mixture will look like thick cake batter.
  • With all the butter incorporated, replace the paddle attachment with the dough hook and add 1 cup of flour. Run the mixer at medium-low for about 5 minutes, kneading until the dough is soft and fairly smooth. If it looks disastrously sticky or does not seem to be coming together, you can add the remaining flour a tablespoon or two at a time, but be sure you knead thoroughly between each addition. This is supposed to be a soft dough.
  • After you’ve kneaded for 5 minutes on medium-low, increase the mixer speed to medium and knead an additional 2 minutes. According to Baking Illustrated, this tightens up the dough a bit.
  • Cover the dough tightly with plastic wrap and let it rise in a warm spot until it doubles in size. This should take 3-4 hours (it’s a rich, heavy dough; it will take the yeast a while to work through all that butter!).
  • When the dough has doubled, punch it down by depressing your fist gently into its center, replace the plastic wrap, and stow it in the fridge overnight (Baking Illustrated’s precise instructions are “at least 4 or up to 24 hours”).
  • When you are ready to make the filling, which also needs to chill thoroughly before being added to the dough, heat a medium pot of water to boiling. Score the bottoms (flower end, not stem end) of each apricot by cutting a shallow x through the skin and just barely into the flesh with a sharp knife. Plunge the scored apricots into the boiling water and leave them for about 60 seconds. Then, remove them, drain them, and set them aside until they are cool enough to handle.
  • Using a small knife, carefully peel back the skins of the apricots starting at the x you’ve scored into the bottom. The skins may already be peeling away, and should separate from the flesh easily. If they prove particularly stubborn, stick them back in the boiling water for another 30 seconds.
  • Remove the pits and chop the peeled apricots, then put them into a pot with the brown sugar and rum, and cook over medium heat for 5-7 minutes, until they collapse into a glorious pulpy mess. Remove from heat and pulse the mixture in a food processor until almost smooth. Or, if you are lazy like me, mash it up with a potato masher. Either way, once your apricots are almost smooth, stow them in the refrigerator until quite cold.
  • When you are ready to shape the coffeecake, remove the chilled dough from the refrigerator and gently dump and scrape it out onto a well floured board. Pat the dough out into a roughly 6×5 inch rectangle, lightly flour the top, then use a rolling pin and some elbow grease to flatten the dough into a smooth, 15×9 inch rectangle (it will be about ¼ inch thick).
  • Spread the cold apricot filling over this large rectangle of dough, leaving at least a ½ inch border on all edges.
  • Using both hands and starting with one of the longer edges, roll the dough up tightly into a long log. Seal the seam securely by pinching the dough, then coax the log into a circle and pinch the ends together to join them in a ring shape. During this process some of the filling will likely ooze out; don’t worry too much about it.
  • Transfer the ring of dough to a parchment paper lined baking sheet. With a pair of kitchen scissors, snip about halfway through the log at 2-inch intervals. Again, you will get some lovely orange ooze. No worries; this will get lovely and caramelized when it bakes. Just drape some plastic wrap or a clean kitchen towel over the whole thing and let it rise again until slightly puffed; about 90 minutes.
  • 30 minutes before you are ready to bake, preheat the oven to 350F with a rack in the middle.
  • When the loaf has risen again, beat the egg white and milk together and brush it over the exposed dough evenly. Sprinkle the sliced almonds and coarse sugar over the loaf, and then slide it into the oven and bake until deeply golden and registering around 190F on an instant-read thermometer. This should take 25-35 minutes.
  • Cool at least 20 minutes on a wire rack (just slide the parchment straight from sheet tray to cooling rack) before slicing and serving.
  • This cake is amazing warm or cold, and though I suspect it would last a week wrapped in foil and refrigerated, we scarfed it within 3 days.

Baking Bootcamp: Cherry and Cardamom Swirl Bread (#TwelveLoaves)

Food blog June 2014-4049Today’s post serves double duty. Last month, Joy the Baker issued a baking challenge. Pairing with King Arthur Flour, she invited readers to join her in baking four different items, each featuring a different flour from the King Arthur line-up.

Food blog June 2014-4023
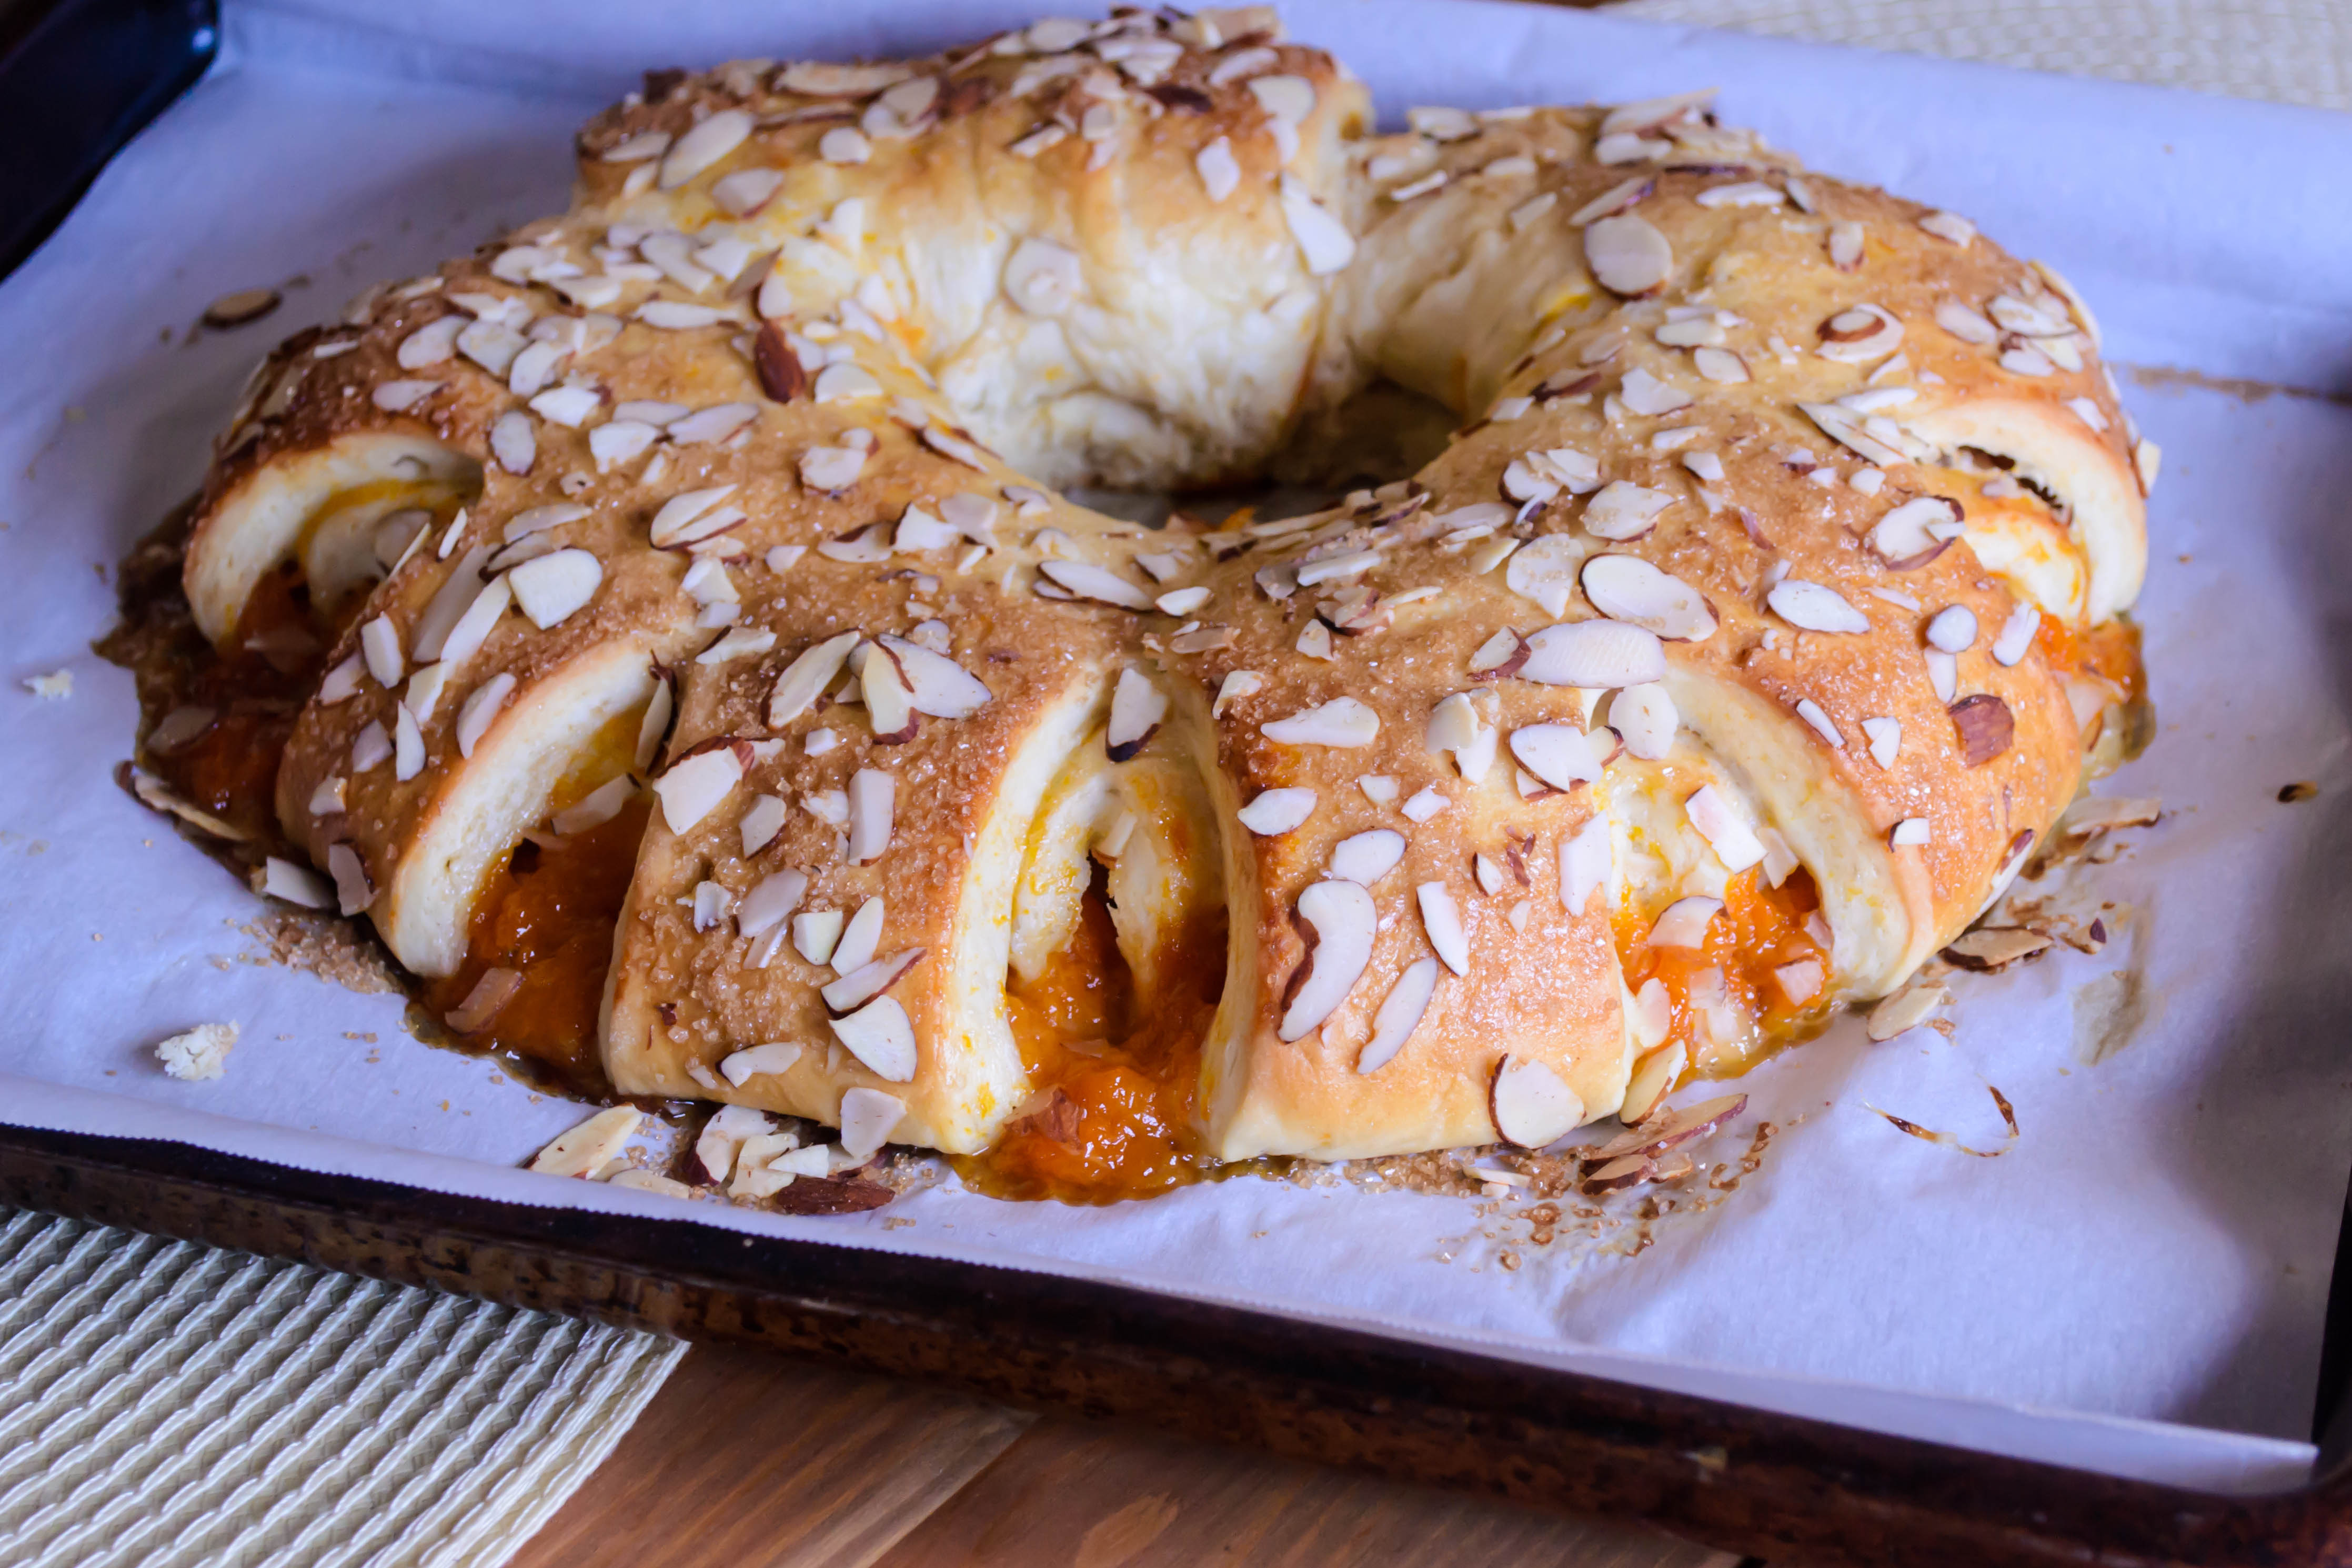
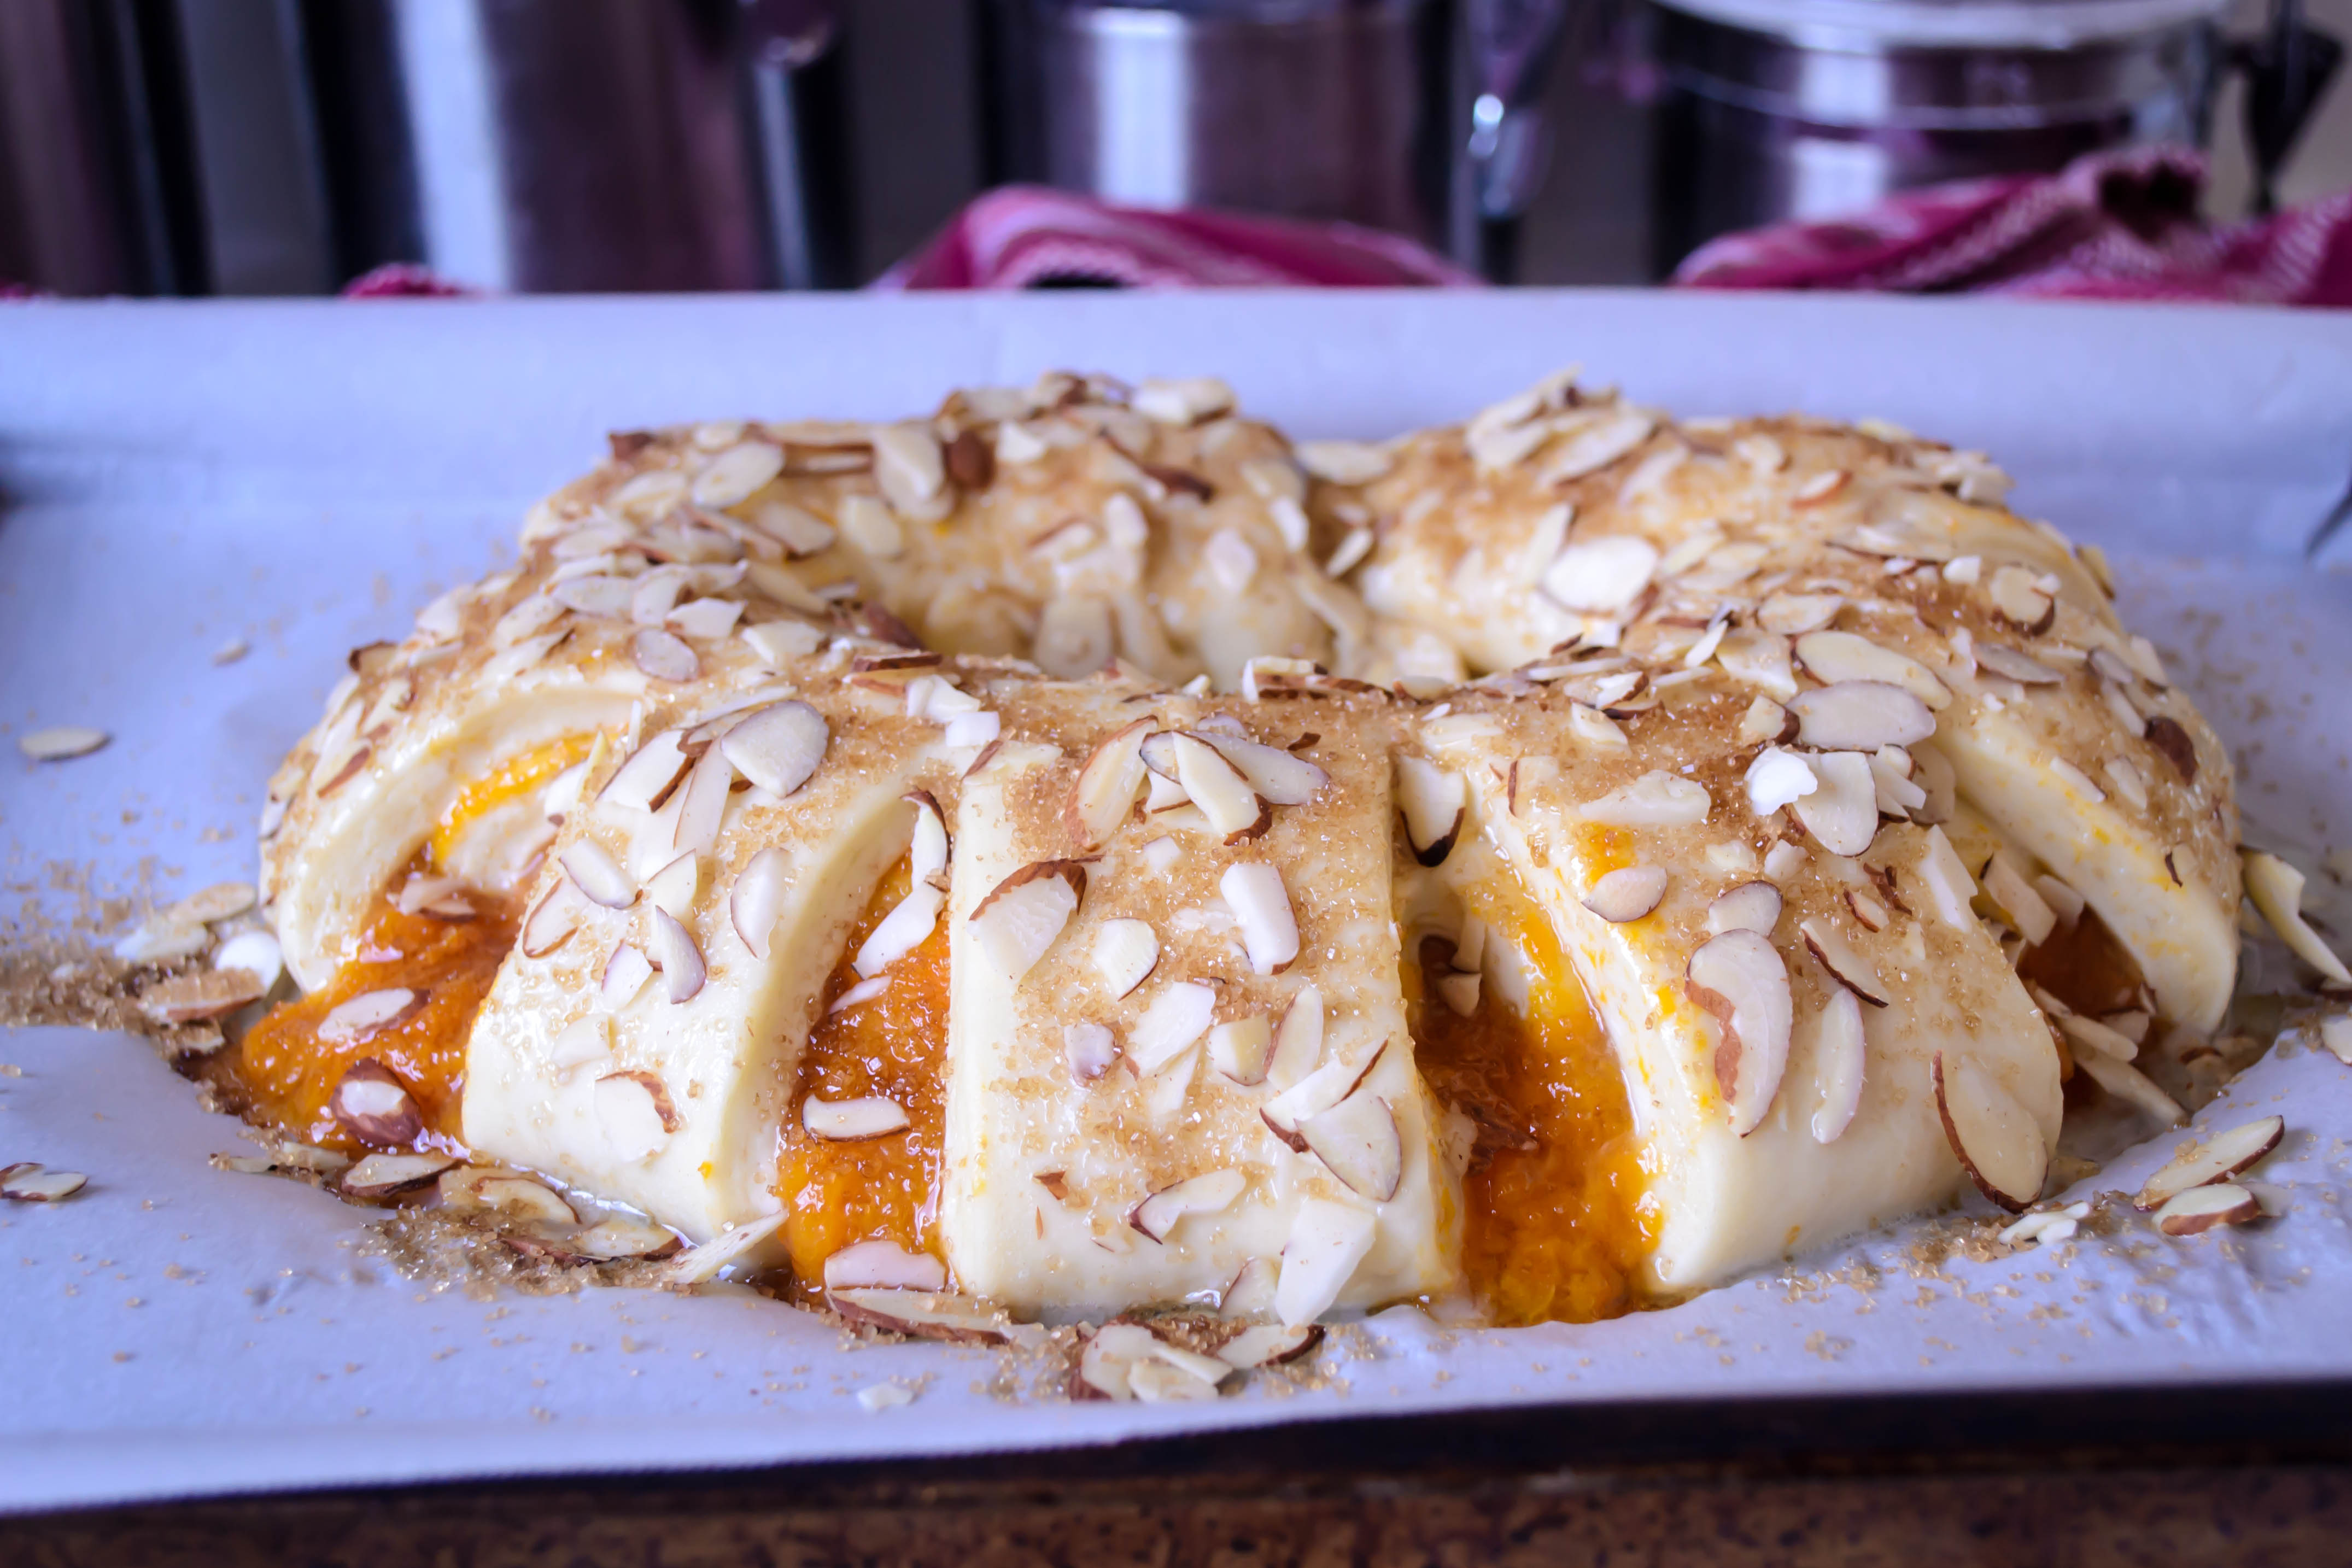
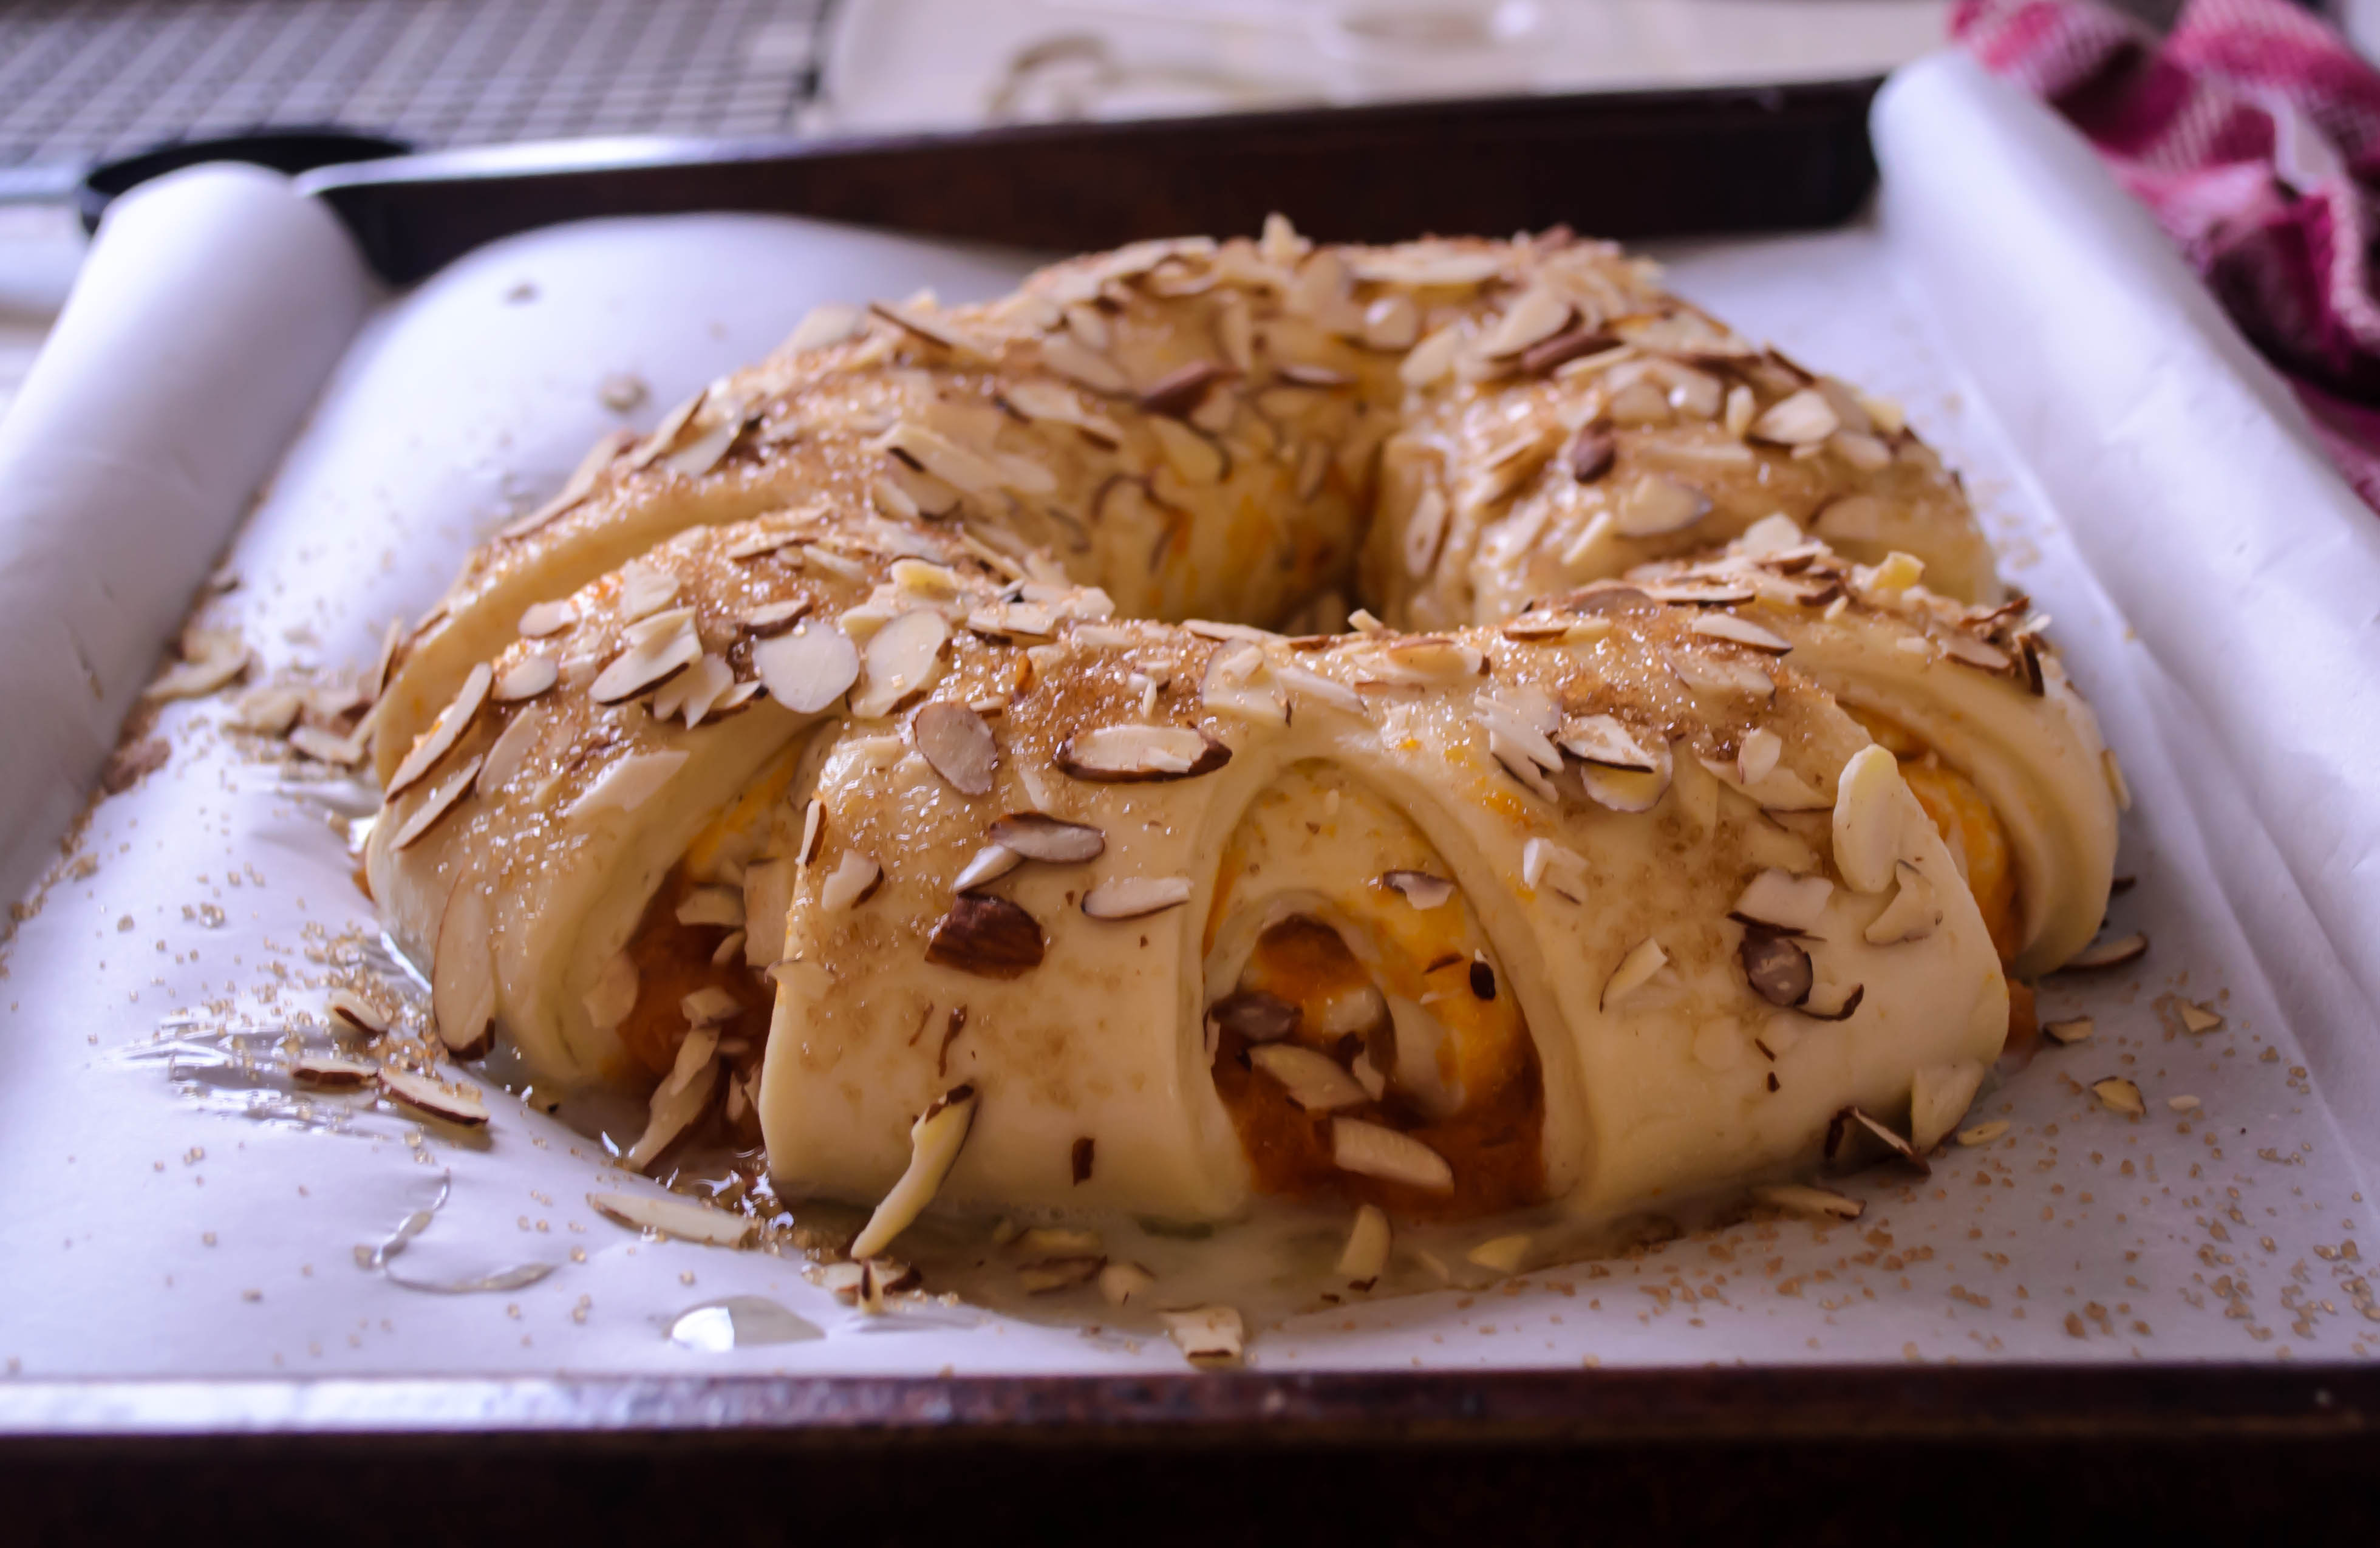
For the first – All-Purpose Flour – she made a beautiful wreath of sweet bread, braided and swirled with cinnamon sugar and a trio of summer berries. I determined that I would, indeed, bake this bread. I had yet to try a wreath or crown shape, and was curious about how it would come out.
Food blog June 2014-4018Of course, I have trouble leaving well enough alone. By the time I was done looking at Joy’s photos of her magnificent loaf, I was already scheming about what tweaks I would apply to my variation. The answer, of course, came from the June Twelve Loaves assignment: cherries.
Food blog June 2014-4032
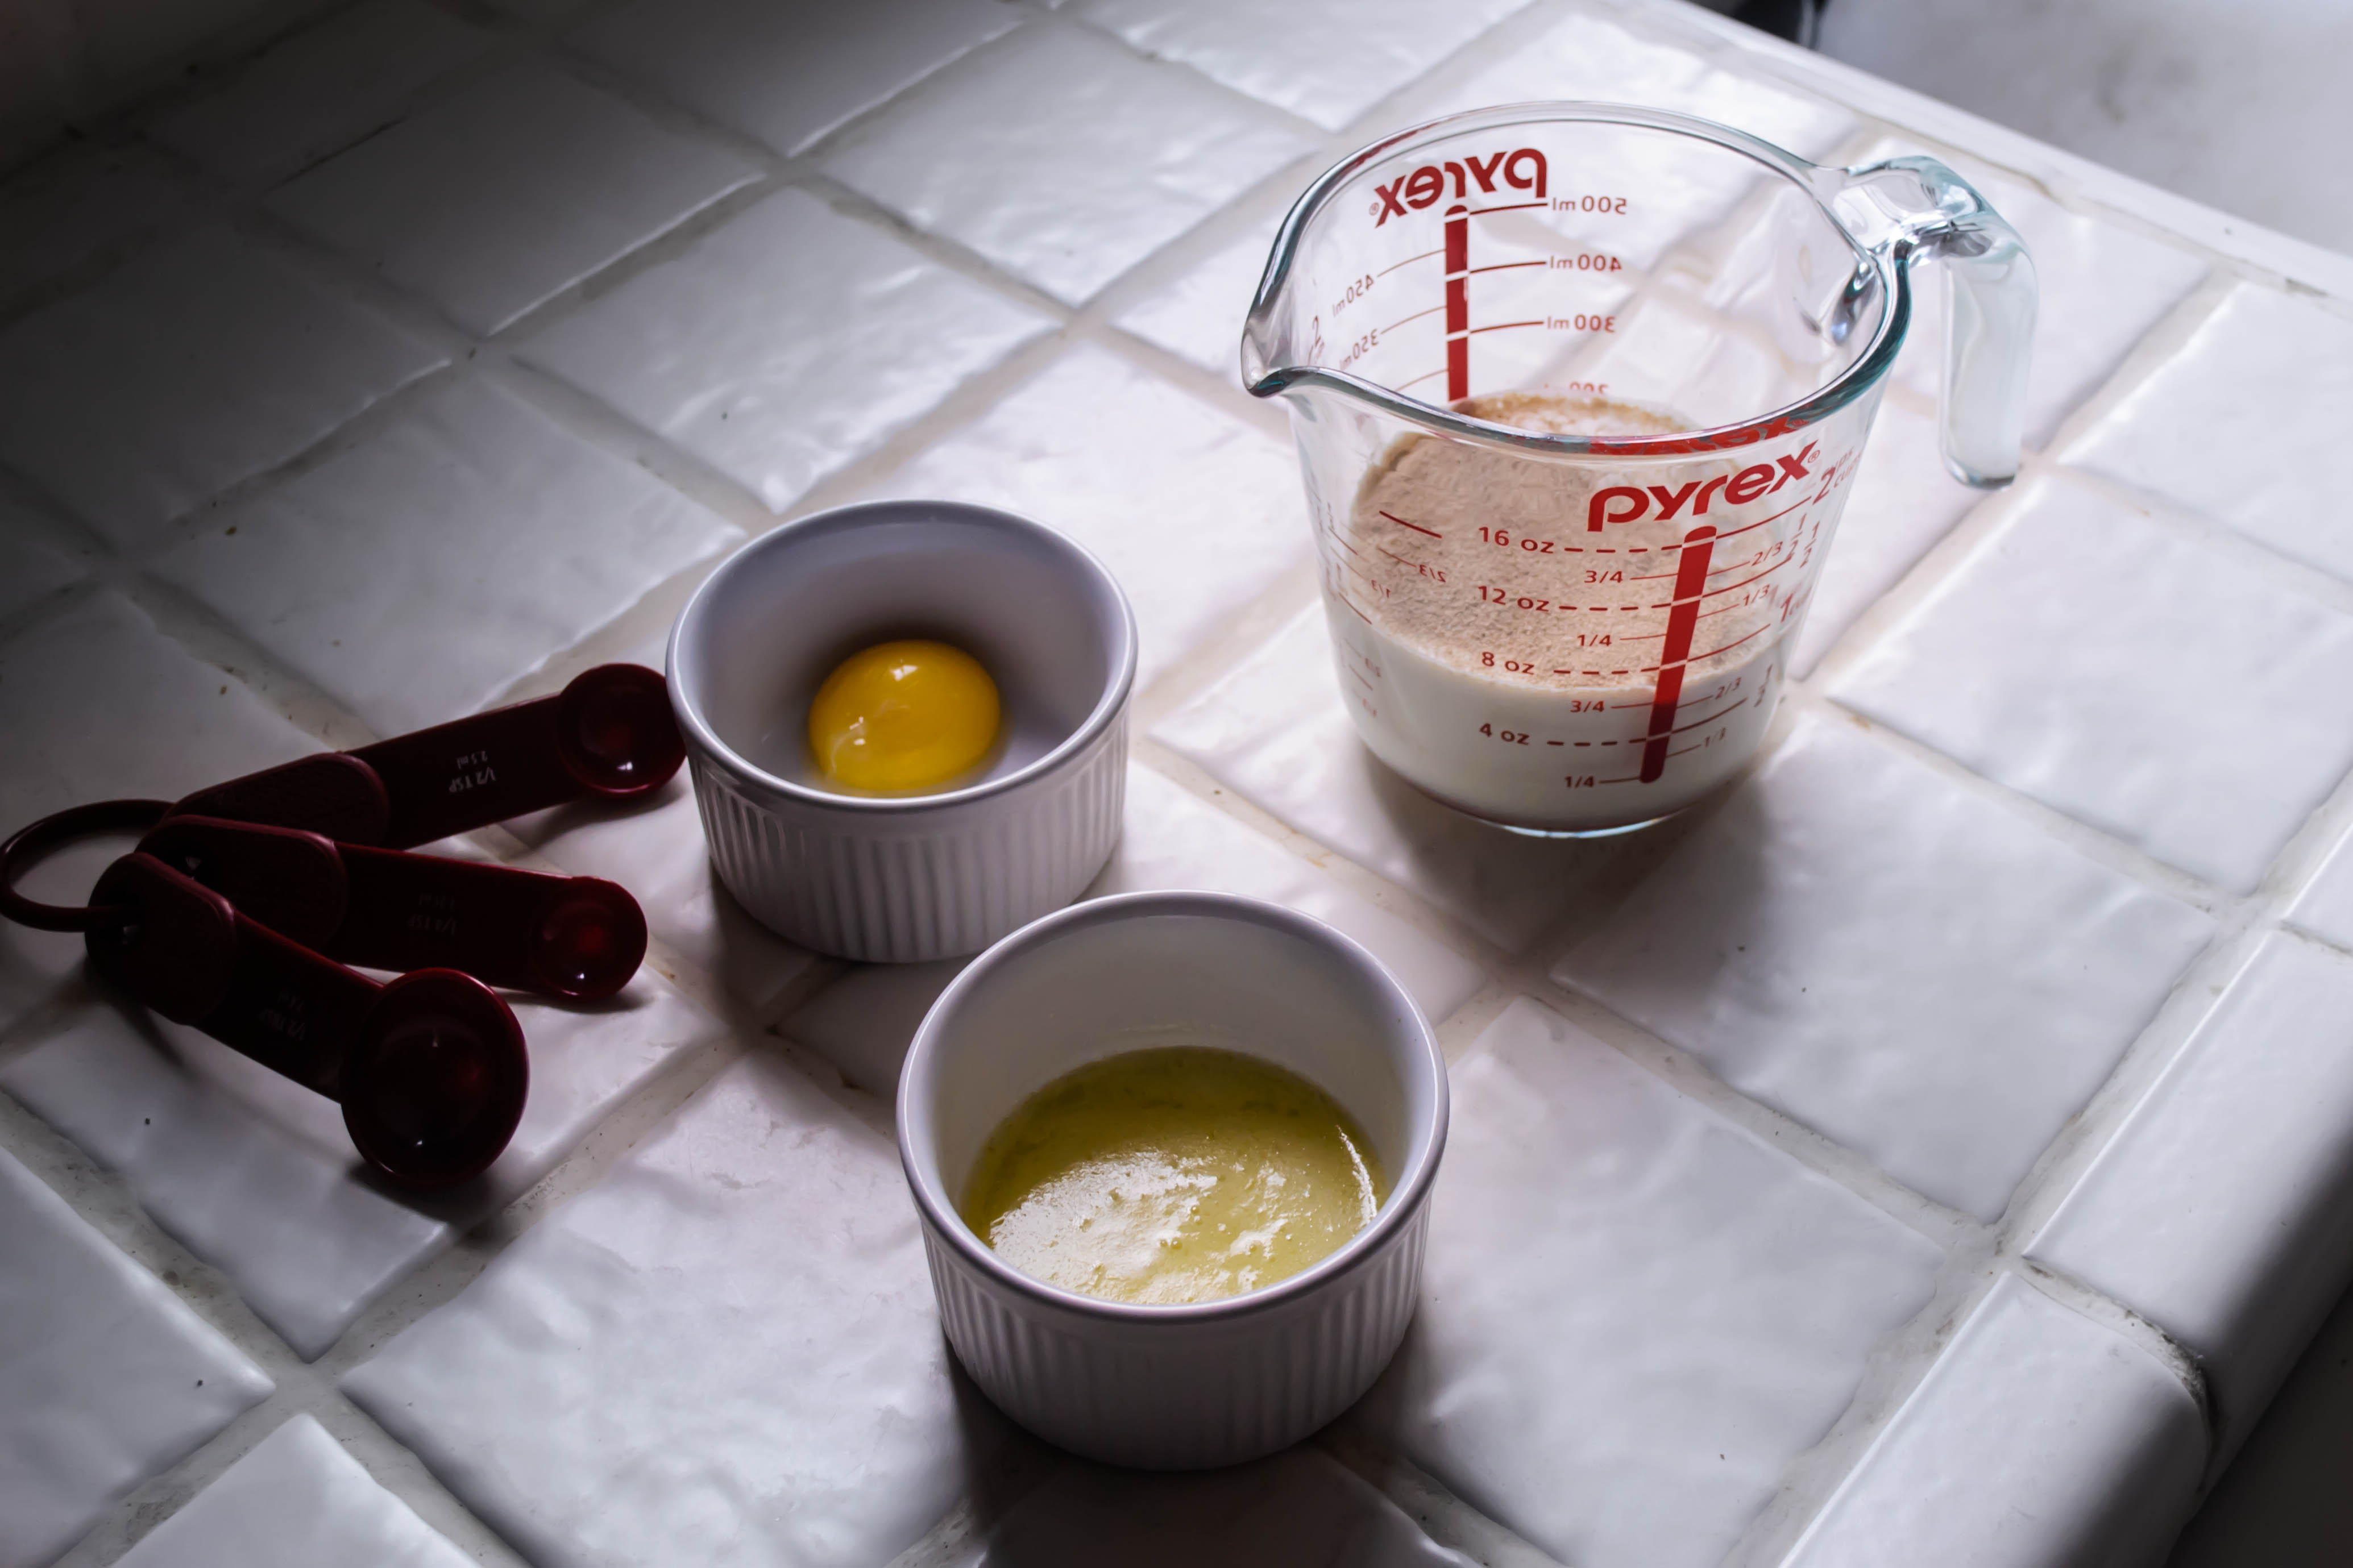
Here, I’ve replaced Joy’s berries with blood-red bing cherry halves, gushing with juice, their tartness mellowed by baking. Since I’m not crazy about cinnamon with cherries, I have substituted in cardamom, which has an intriguing deep, citrusy scent but offers a spiciness reminiscent of the zingiest flavor in your favorite chai tea blend. To bring together the flavors, I also splashed in a little vanilla.
Food blog June 2014-4024
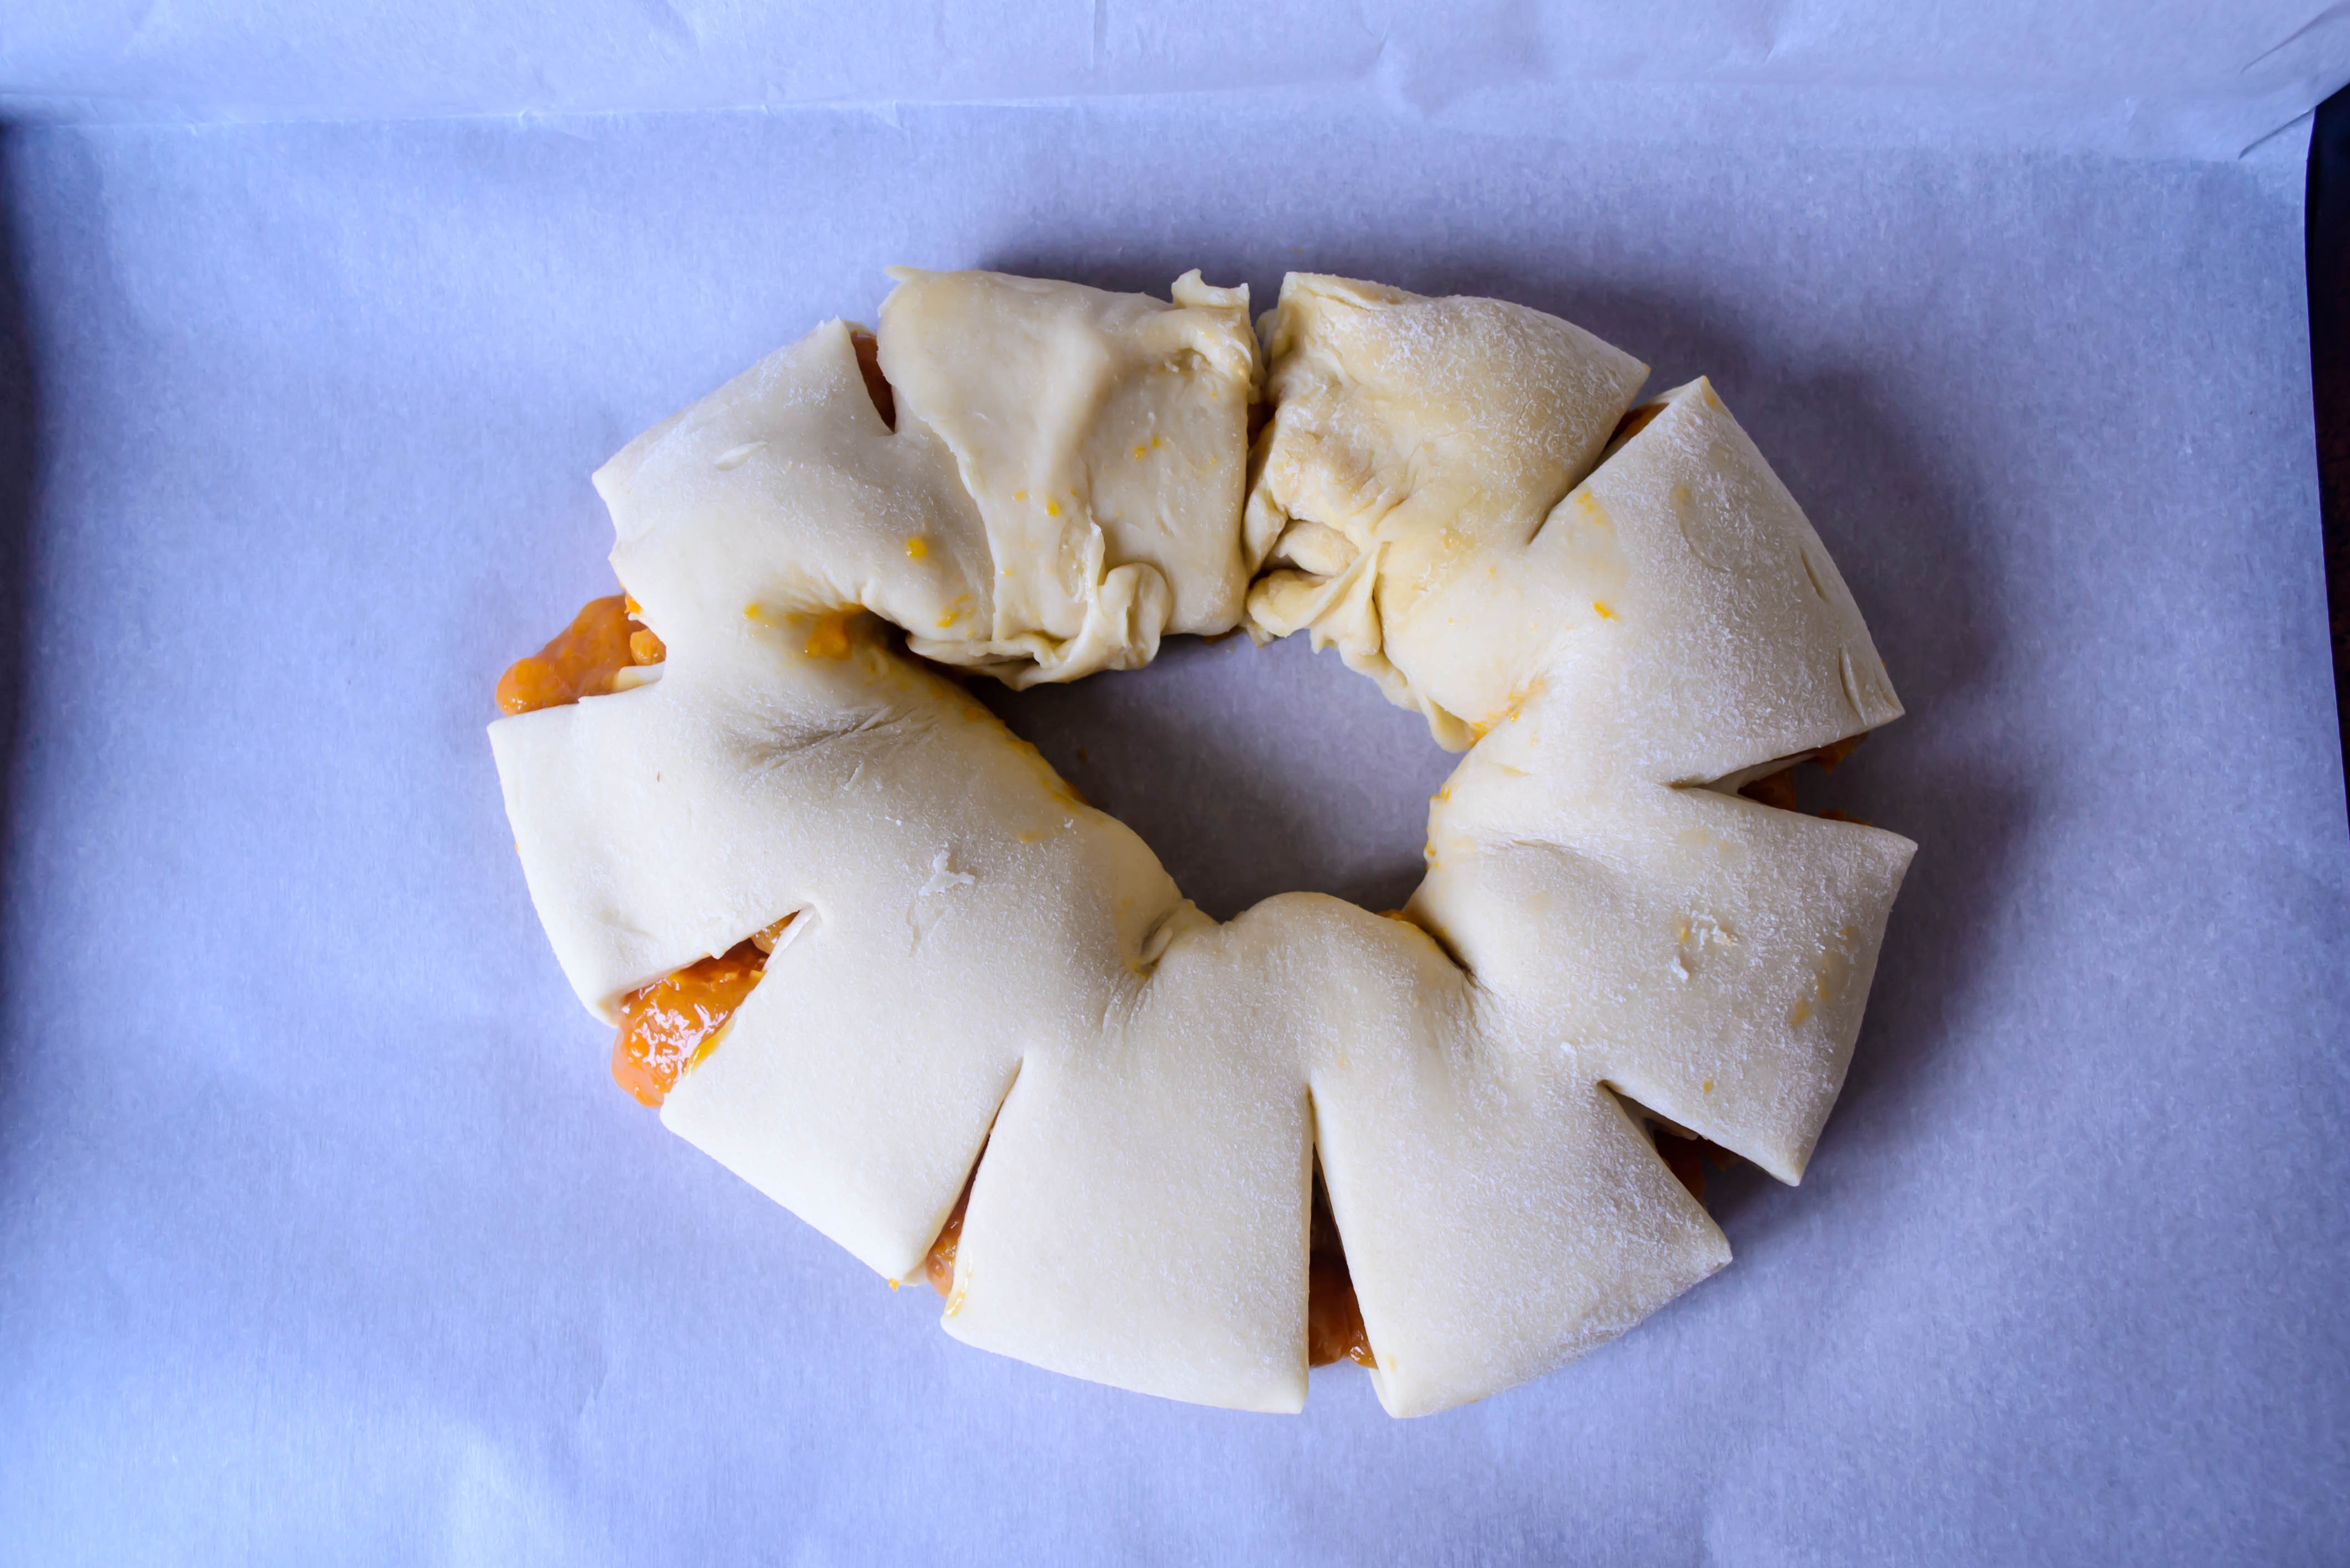
The trickiest thing about this bread is shaping the crown. This requires flattening, spreading, stuffing, rolling, and then slicing open that roll to reveal the rebellious little rubies inside, which then all immediately threaten to spill out all over your board. You have to “braid” the bread by lifting one strand over the other down its length, all the while trying to keep the fruity guts inside from escaping. Then, once you’ve tamed it into a beautiful interlaced wreath, you somehow have to pick the whole thing up and nestle it into your baking vessel. I know. Mine collapsed a little bit, but honestly, after it rose during its baking time, it was hard to notice. And once we dug in, crunching through the lightly sugared, spicy-tart sweet layers, we didn’t care. The tartness of the cherries is pleasantly rounded by the oven’s heat, but the real star, to me, was the cardamom. Its flavor is so delightful here – brighter than cinnamon but no less flavorful – that I now want it in everything. I suppose they wouldn’t really be “cinnamon rolls” without the cinnamon, but false advertising (or blasphemy) or not, those may be my next cardamom target.
Food blog June 2014-4029I didn’t take very many photos of the twisting and shaping process, mostly because I got so involved in the process I just forgot. It happens. But do take a look at Joy’s photo-by-photo instructions if you need help – they are really clear and easy to follow.
Food blog June 2014-4031Two tips for success when it comes to this bread, then, before we get all this out of the way and charge into the recipe.
Food blog June 2014-40341.) Distribute the fruit evenly. I mean it. Don’t just dump the cherries in the middle and decide that’s good enough. Spread them out across your dough rectangle before rolling it up. Though it’s important to leave a slight border, if you have a lot more cherries in the middle of the dough log, it will be much more difficult to keep them contained while you braid it, and you will end up with a really uneven wreath – one section will be much fatter than the rest and therefore bake unevenly. Take the extra few seconds to spread them out well.
2.) While you are manipulating it, be assertive with this dough. Joy, delightfully, notes that the dough can sense fear. I suspect she’s right. If you hesitate as you braid or lift, the dough sags disastrously. Just move smoothly and confidently and with a clear plan. And remember that a trip through the oven and a dusting of powdered sugar repairs many mistakes.

Food blog June 2014-4047

Cherry and Cardamom Swirl Bread
Adapted from Joy the Baker
Makes 10-inch wreath
For the dough:
2 teaspoons active dry yeast
1 tablespoon sugar
¾ cups whole milk, at or just above room temperature
1 large egg yolk
2 tablespoons butter, melted
1 teaspoon vanilla
2 ¼ cups all purpose flour (you could use bread flour too, but this is the AP flour challenge, so I complied)
½ teaspoon salt
Olive oil or vegetable oil to grease the bowl
For the filling:
¼ cup butter, at room temperature
¼ cup sugar
1 tablespoon ground cardamom
2 cups halved, pitted cherries
To finish:
1 large egg, beaten, for egg wash
1-2 tablespoons powdered sugar, for dusting
  • In a 2 cup glass measuring cup, mix the yeast and 1 tablespoon sugar, then add the milk. Whisk with a fork to combine. Add the egg yolk, the melted butter, and the vanilla, and whisk with a fork again. Set aside to work for 5 minutes. The mixture will become foamy and smell (I think) a bit like fresh donuts.
  • While the yeast does its work, whisk the flour and salt together in a large bowl (I used the bowl of my stand mixer with the paddle attachment). Add the milk mixture and combine into a rough, shaggy dough. If you are using a stand mixer, at this point you should switch from the paddle attachment to the dough hook and knead on medium speed for about 5 minutes. If you are working by hand, scoop the dough onto a floured board and knead by gathering the dough together into a ball, then pushing it away from you with the palm of your hand. Gather it back again and repeat. Knead by hand for about 10 minutes. For both methods, the dough should feel moist and elastic, but not terribly sticky. It will be a bit like a stiff play-dough in texture.
  • Spray a bowl lightly with olive or vegetable oil (you can use a clean bowl or the bowl of your stand mixer – just lift up the ball of dough for a minute) and roll the dough around a bit until it is lightly coated with the oil. Cover the bowl with a tight layer of plastic wrap and let it rise in a warm spot for an hour, or until the dough has doubled in size.
  • While the dough is rising, prep the filling. Combine the butter, sugar, and cardamom in a small bowl, mixing well. I used my fingers, but you could use an electric mixer or a fork if you prefer. Just be sure the sugar and cardamom are well integrated. We don’t want chunks of unflavored butter. Halve and pit the cherries as well, and set aside.
  • Preheat the oven to 375F and butter a 10-inch springform pan or 10-inch cast iron skillet. If you are using a springform, I recommend wrapping the bottom with aluminum foil, in case of seeping cherry juice or melted butter.
  • Now, attend to the dough again. Relocate it to a lightly floured surface and knead twice by hand, just to release some of the gathered air. Roll it out to as close to a 12×18 inch rectangle as you can manage, with the long edge facing you.
  • Spread the butter mixture onto the dough rectangle, leaving a ½ inch margin on all edges. Then, scatter the cherries atop the butter mixture, again respecting this margin, and being sure to create an even fruit layer. Uneven distribution makes shaping the loaf more challenging.
  • Begin rolling the dough rectangle into a log, starting with the middle of the long edge and working your way out to the sides to create an even, tight roll. You can mush down the lumps a little, but don’t be too aggressive about it because you don’t want to tear the dough. When you get to the end, pinch the edge firmly into the existing log to seal it.
  • This is where things get interesting. Slice through the log to expose the center, creating two long halves, but leave an inch or two attached at the top to hold the thing together (see sliced log photo above). Adjust halves to face upward, exposing the veins of cherry and buttery filling.
  • Now we twist. Take hold of the left strand and carefully (and assertively!) lift it over the right strand. Adjust to bring the braid back to the center of the board. Now lift the new left strand (previously the right strand) over the new right strand, and repeat this process until you get to the end of the two strands. It should look like an old-fashioned twist donut, but with cherries threatening to spill out of it.
  • When you have completed your twist, pinch the two strands together, and create a wreath shape by pulling the two ends of the twist to meet each other. Pinch these together as well.
  • Deep breath, now. Carefully but quickly, lift up the whole wreath of dough and settle it into your prepared pan, trying to keep the shape as round and as many cherries contained as possible. This is where you have to be confident and assertive. The longer the lift-and-nestle takes, the more the dough will droop, and the more chance you have of tearing or spilling.
  • Brush the exposed top of the wreath with the beaten egg, then bake for 25-35 minutes, until the top is golden and the interior is cooked through but still moist.
  • Let cool at least 30 minutes in the pan, then dust with powdered sugar (through some sort of sifter, please), slice, and serve.