Gingerbread spiced sweet bread with pumpkin pastry cream

Sometimes I agonize over what I’m going to cook. I leaf listlessly through cookbooks and batter my keyboard with demands of something new and fresh and better and, dare I say it? Original. But this month, faced with the Twelve Loaves challenge of baking bread with spices, I knew almost immediately what I wanted to do. I don’t know where the idea came from, but I knew it was going to be a variation on my Nana’s sweet roll dough, stuffed with luscious swirls of pumpkin pastry cream and baked into a decadent loaf.

Food Blog November 2013-2810The problem with this idea, as I started to do some research, turned out to be that no one had done it. I’m not saying this is a bad thing; it’s tough to think you’ve invented something, and then Google it, only to find dozens hundreds probably billions of results that are either more amazing-sounding than you’d imagined, or more beautifully photographed than you have the ability to do.

Food Blog November 2013-2781This one came up with nothing. I started wondering: can you bake pastry cream? If you can, why has no one done this? I tried multiple searches, I leafed through my cookbook collection again, feverishly this time; I even polled friends to see whether this was a thing. One foodie friend speculated unpleasant melting would result. Baking forums promised curdling. Every recipe I located for something remotely similar advocated baking the dough and then piping chilled pastry cream into it. I was contemplating using Nana’s old cream horn molds to wrap little crescents of bread and then shoot pumpkin pastry cream into them, and then I found this. It’s a recipe for something called Torta Della Nonna, which translates to “grandmother’s cake,” and consists of a lovely tender dough, filled sometimes with sweetened ricotta, sometimes with mascarpone, but sometimes with a layer of vanilla or lemon pastry cream!

Food Blog November 2013-2785Victory, if not ensured, at least not a total shot in the dark, I got to work. Pastry cream, if you’ve never made it, is one of those projects that sounds terrifying – hot milk, egg yolks sure to curdle, frantic whisking with scalding and scrambling around every corner – but isn’t really that tricky. It’s another one of those “read ALL the directions first and have your ingredients prepped” kinds of recipes, and suddenly the milk and eggs you were whisking away at thicken into this magical, glossy, extravagant slosh of something an éclair would beg to be filled with. And when you finish eating half of it tasting it to make sure it’s edible, you have only to strain it (in case of accidental scrambled bits), refrigerate it, and then decide what to do with it.

Food Blog November 2013-2790I opted, to be sure the Italian grandmothers I was never lucky enough to have knew what they were doing, to bake up just a little custard cup of it. If it was going to melt all over the place, I’d take a new direction. It didn’t. The top layer formed a thin skin, like custard or pudding left to set without a layer of plastic wrap pressed over it, but below that exposed skin (which, if I’m honest, I don’t really mind) was a tiny vat of this stuff, rich, creamy, better-than-pudding, and I knew we were on our way to great things.

Food Blog November 2013-2783From there, it was a matter of making up a batch of dough, a little more decadent than usual thanks to the addition of an extra egg and a few extra tablespoons of butter (hey, if you’re going to pack it with pastry cream anyway, you might as well go whole hog), and spicing the whole thing with the flavors of the winter holidays: cinnamon, ginger, nutmeg, cloves.

Food Blog November 2013-2788Food Blog November 2013-2791
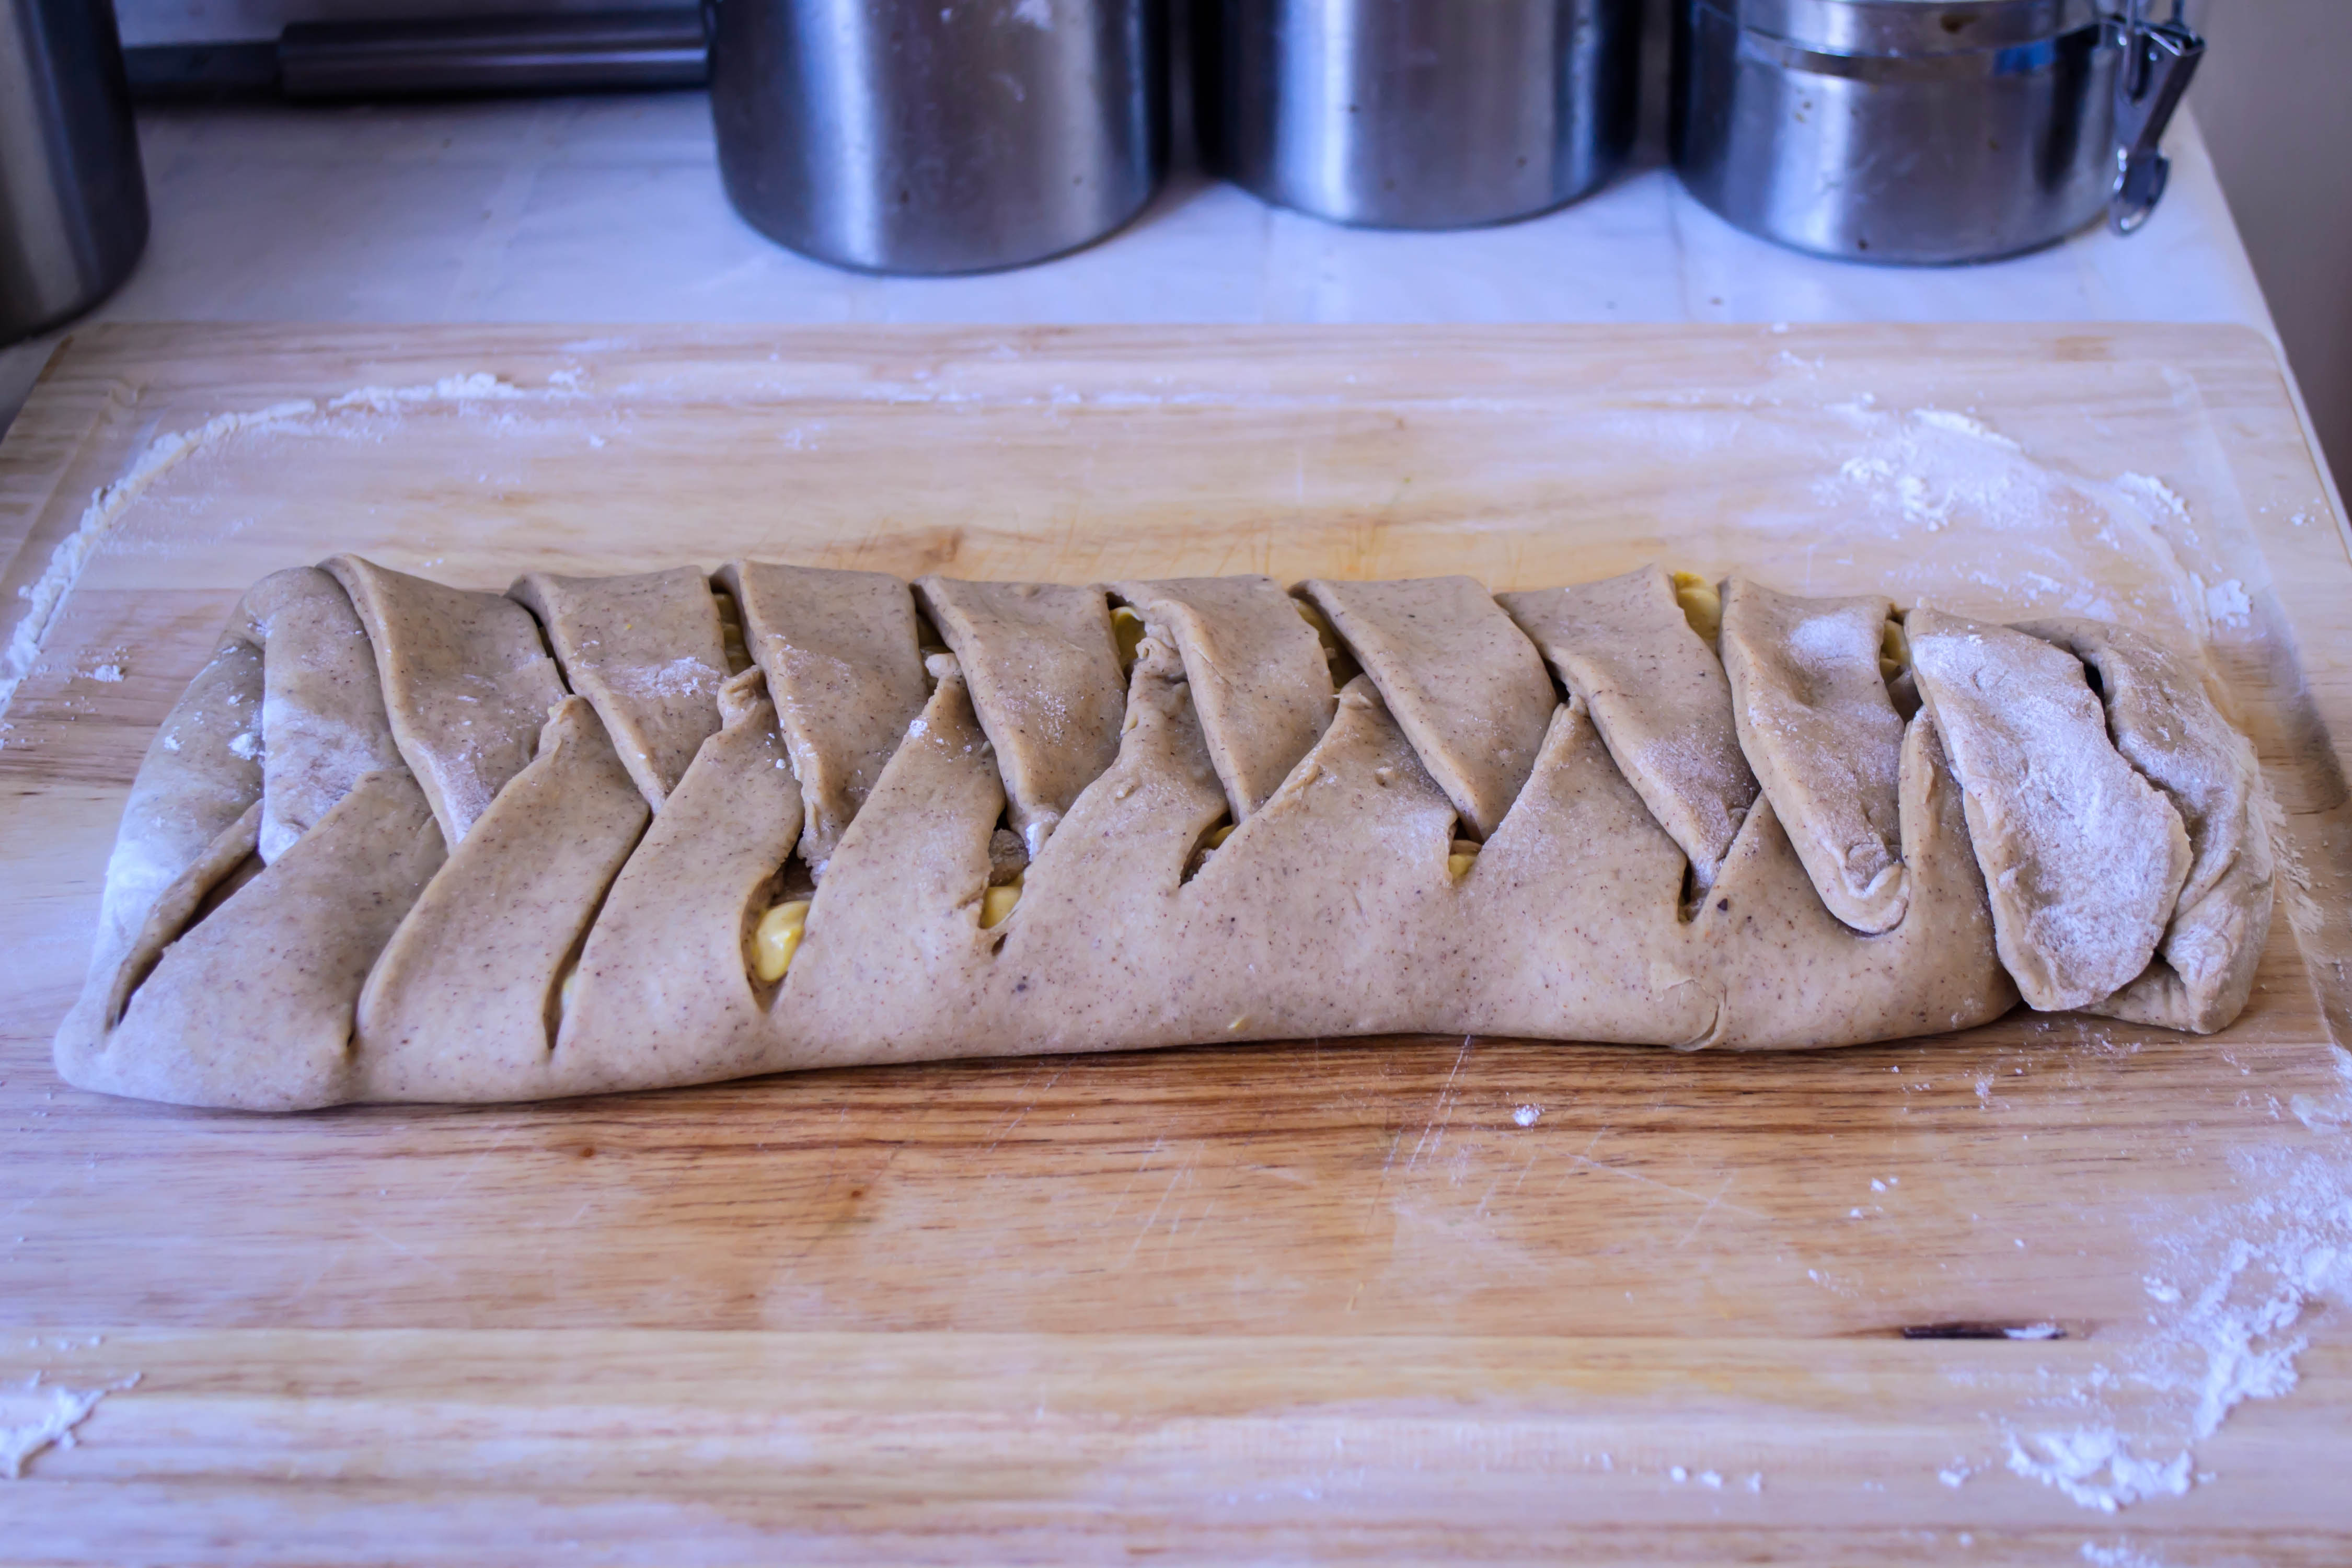
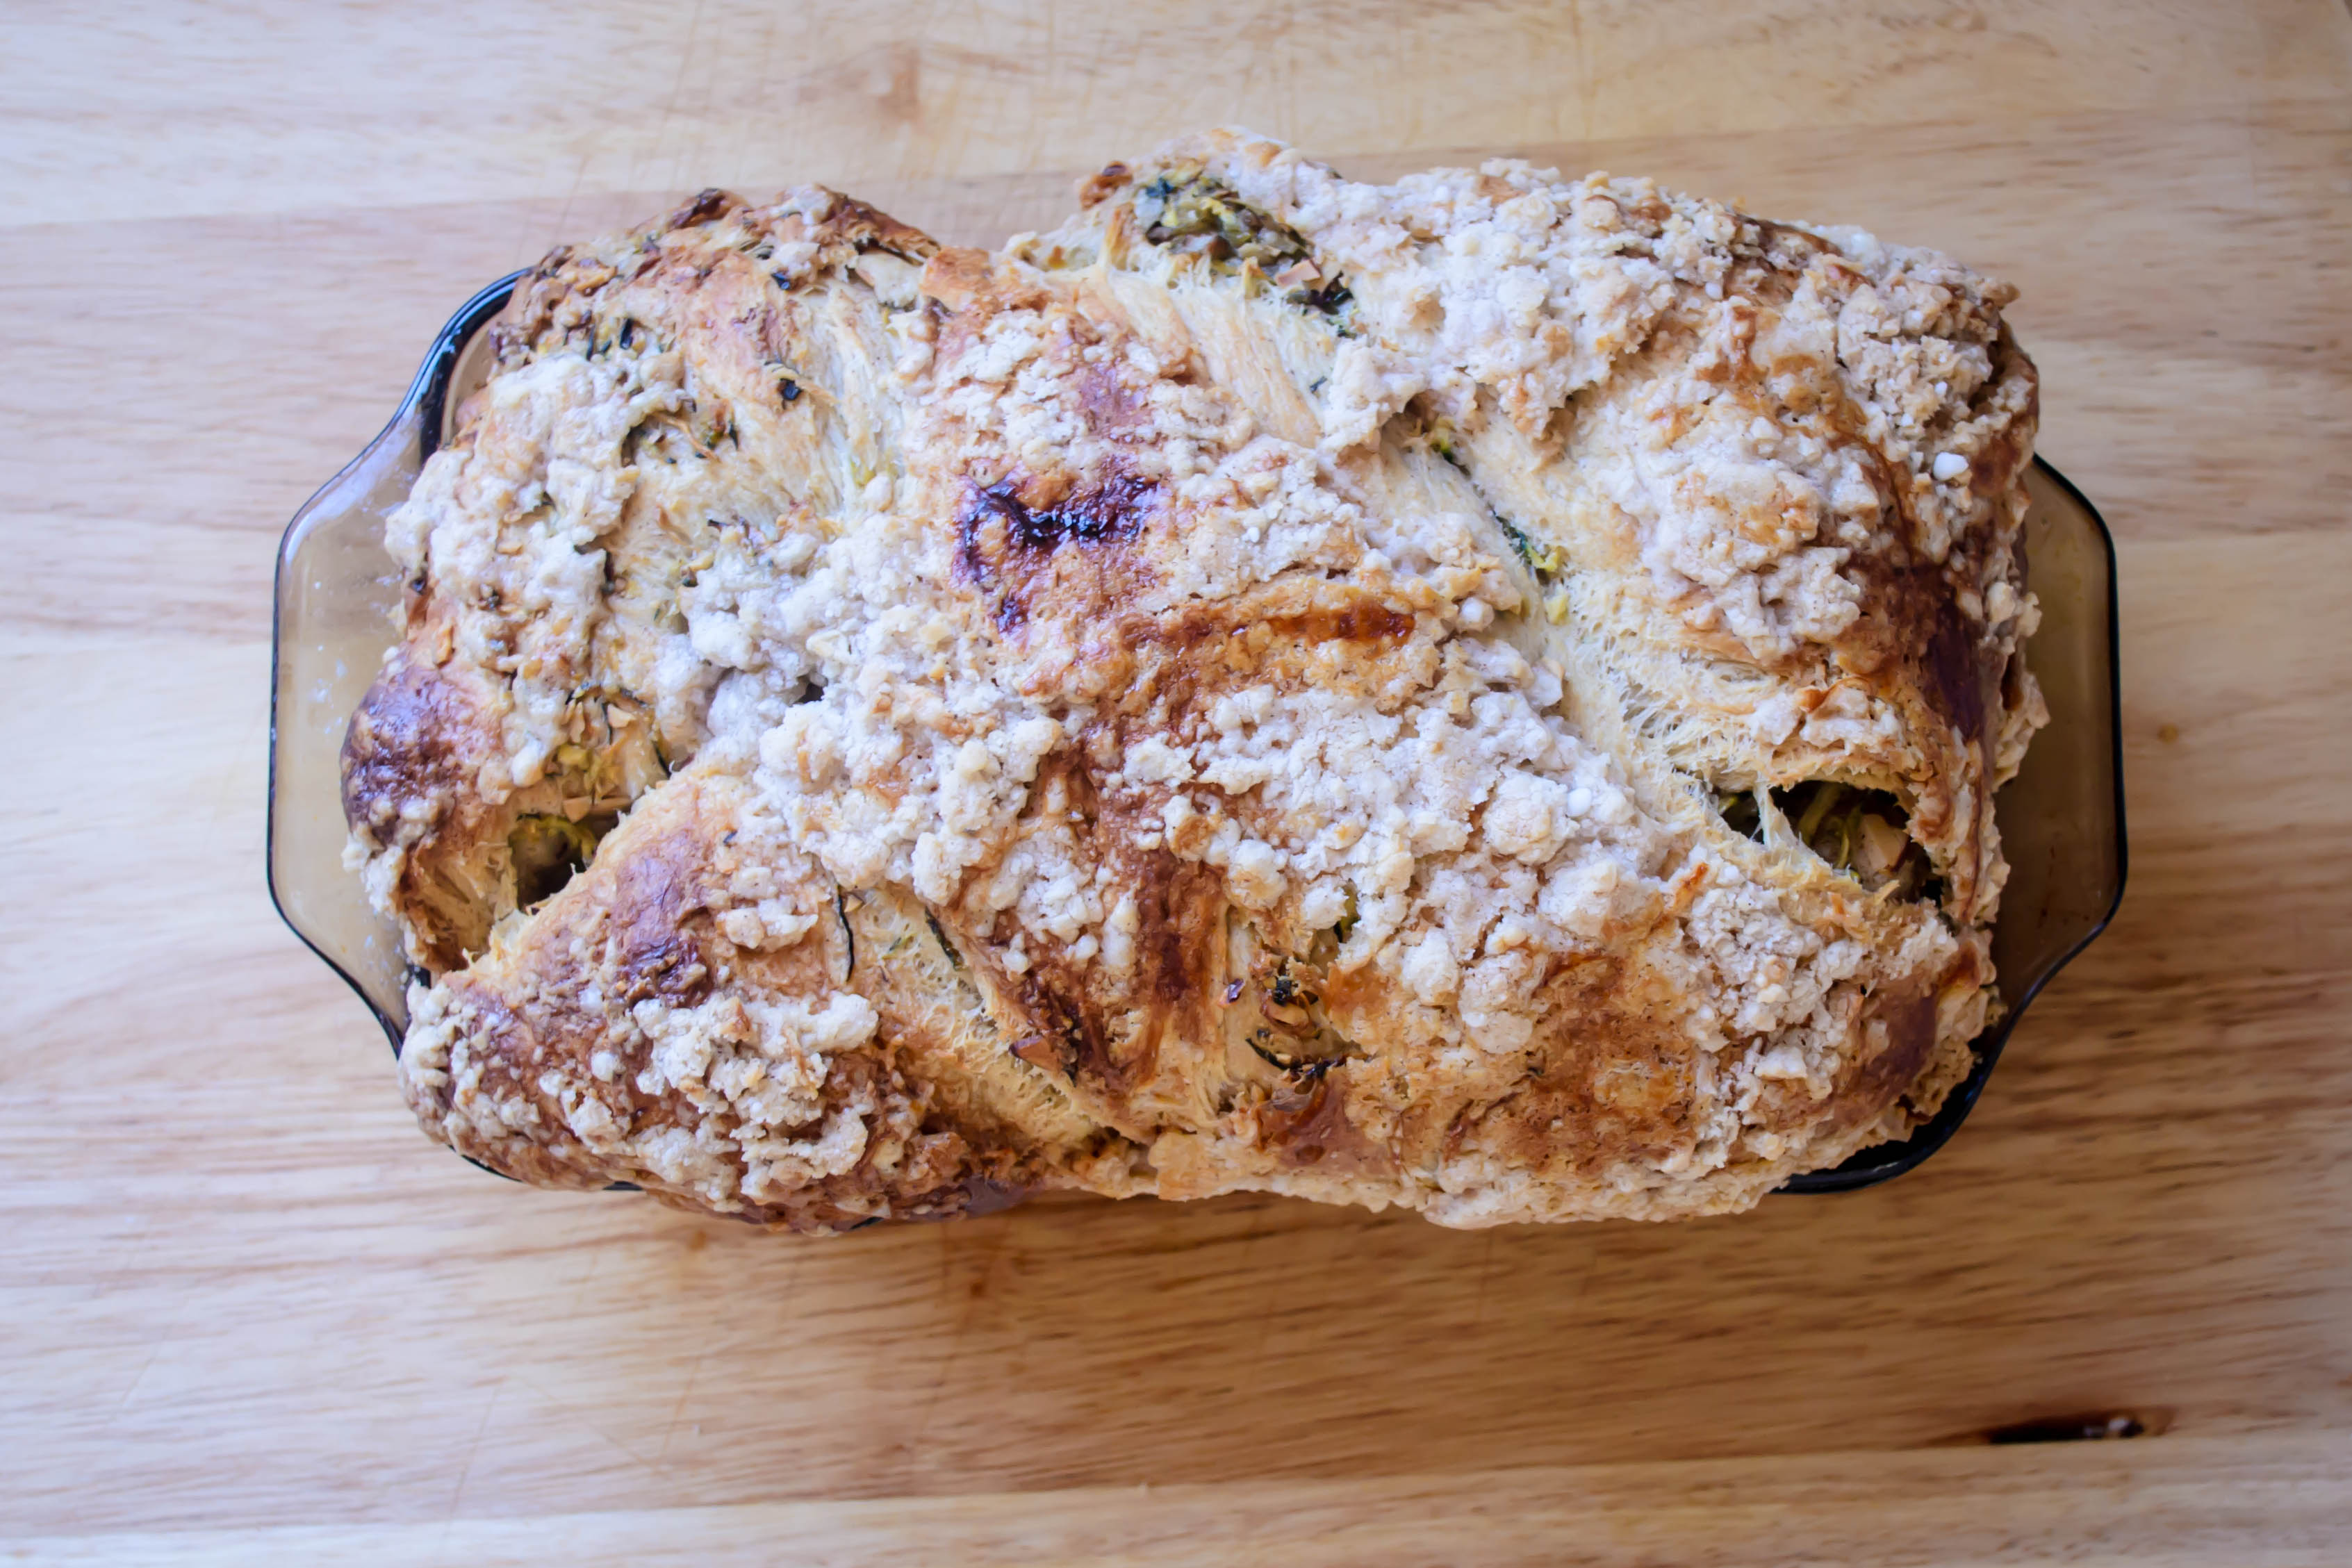
I decided to make a lattice-top loaf, which entailed rolling, slicing strips along both edges of the dough, spreading the glossy, velvet perfect orange cream inside, and weaving the whole thing together. However, I did this on my bread board (it made sense at the time), not considering that the dough, flexible and buttery already, was about to double or triple in weight thanks to the addition of the cream, and be unwilling to transfer to my baking sheet. Thus, after considerable hand-wringing and fancy spatula work, I ended up with something like a horseshoe, only slightly structurally compromised. I suggest filling and finalizing your loaf on the greased baking tray you’ll be putting into the oven.

Food Blog November 2013-2793Food Blog November 2013-2794Food Blog November 2013-2795Food Blog November 2013-2797
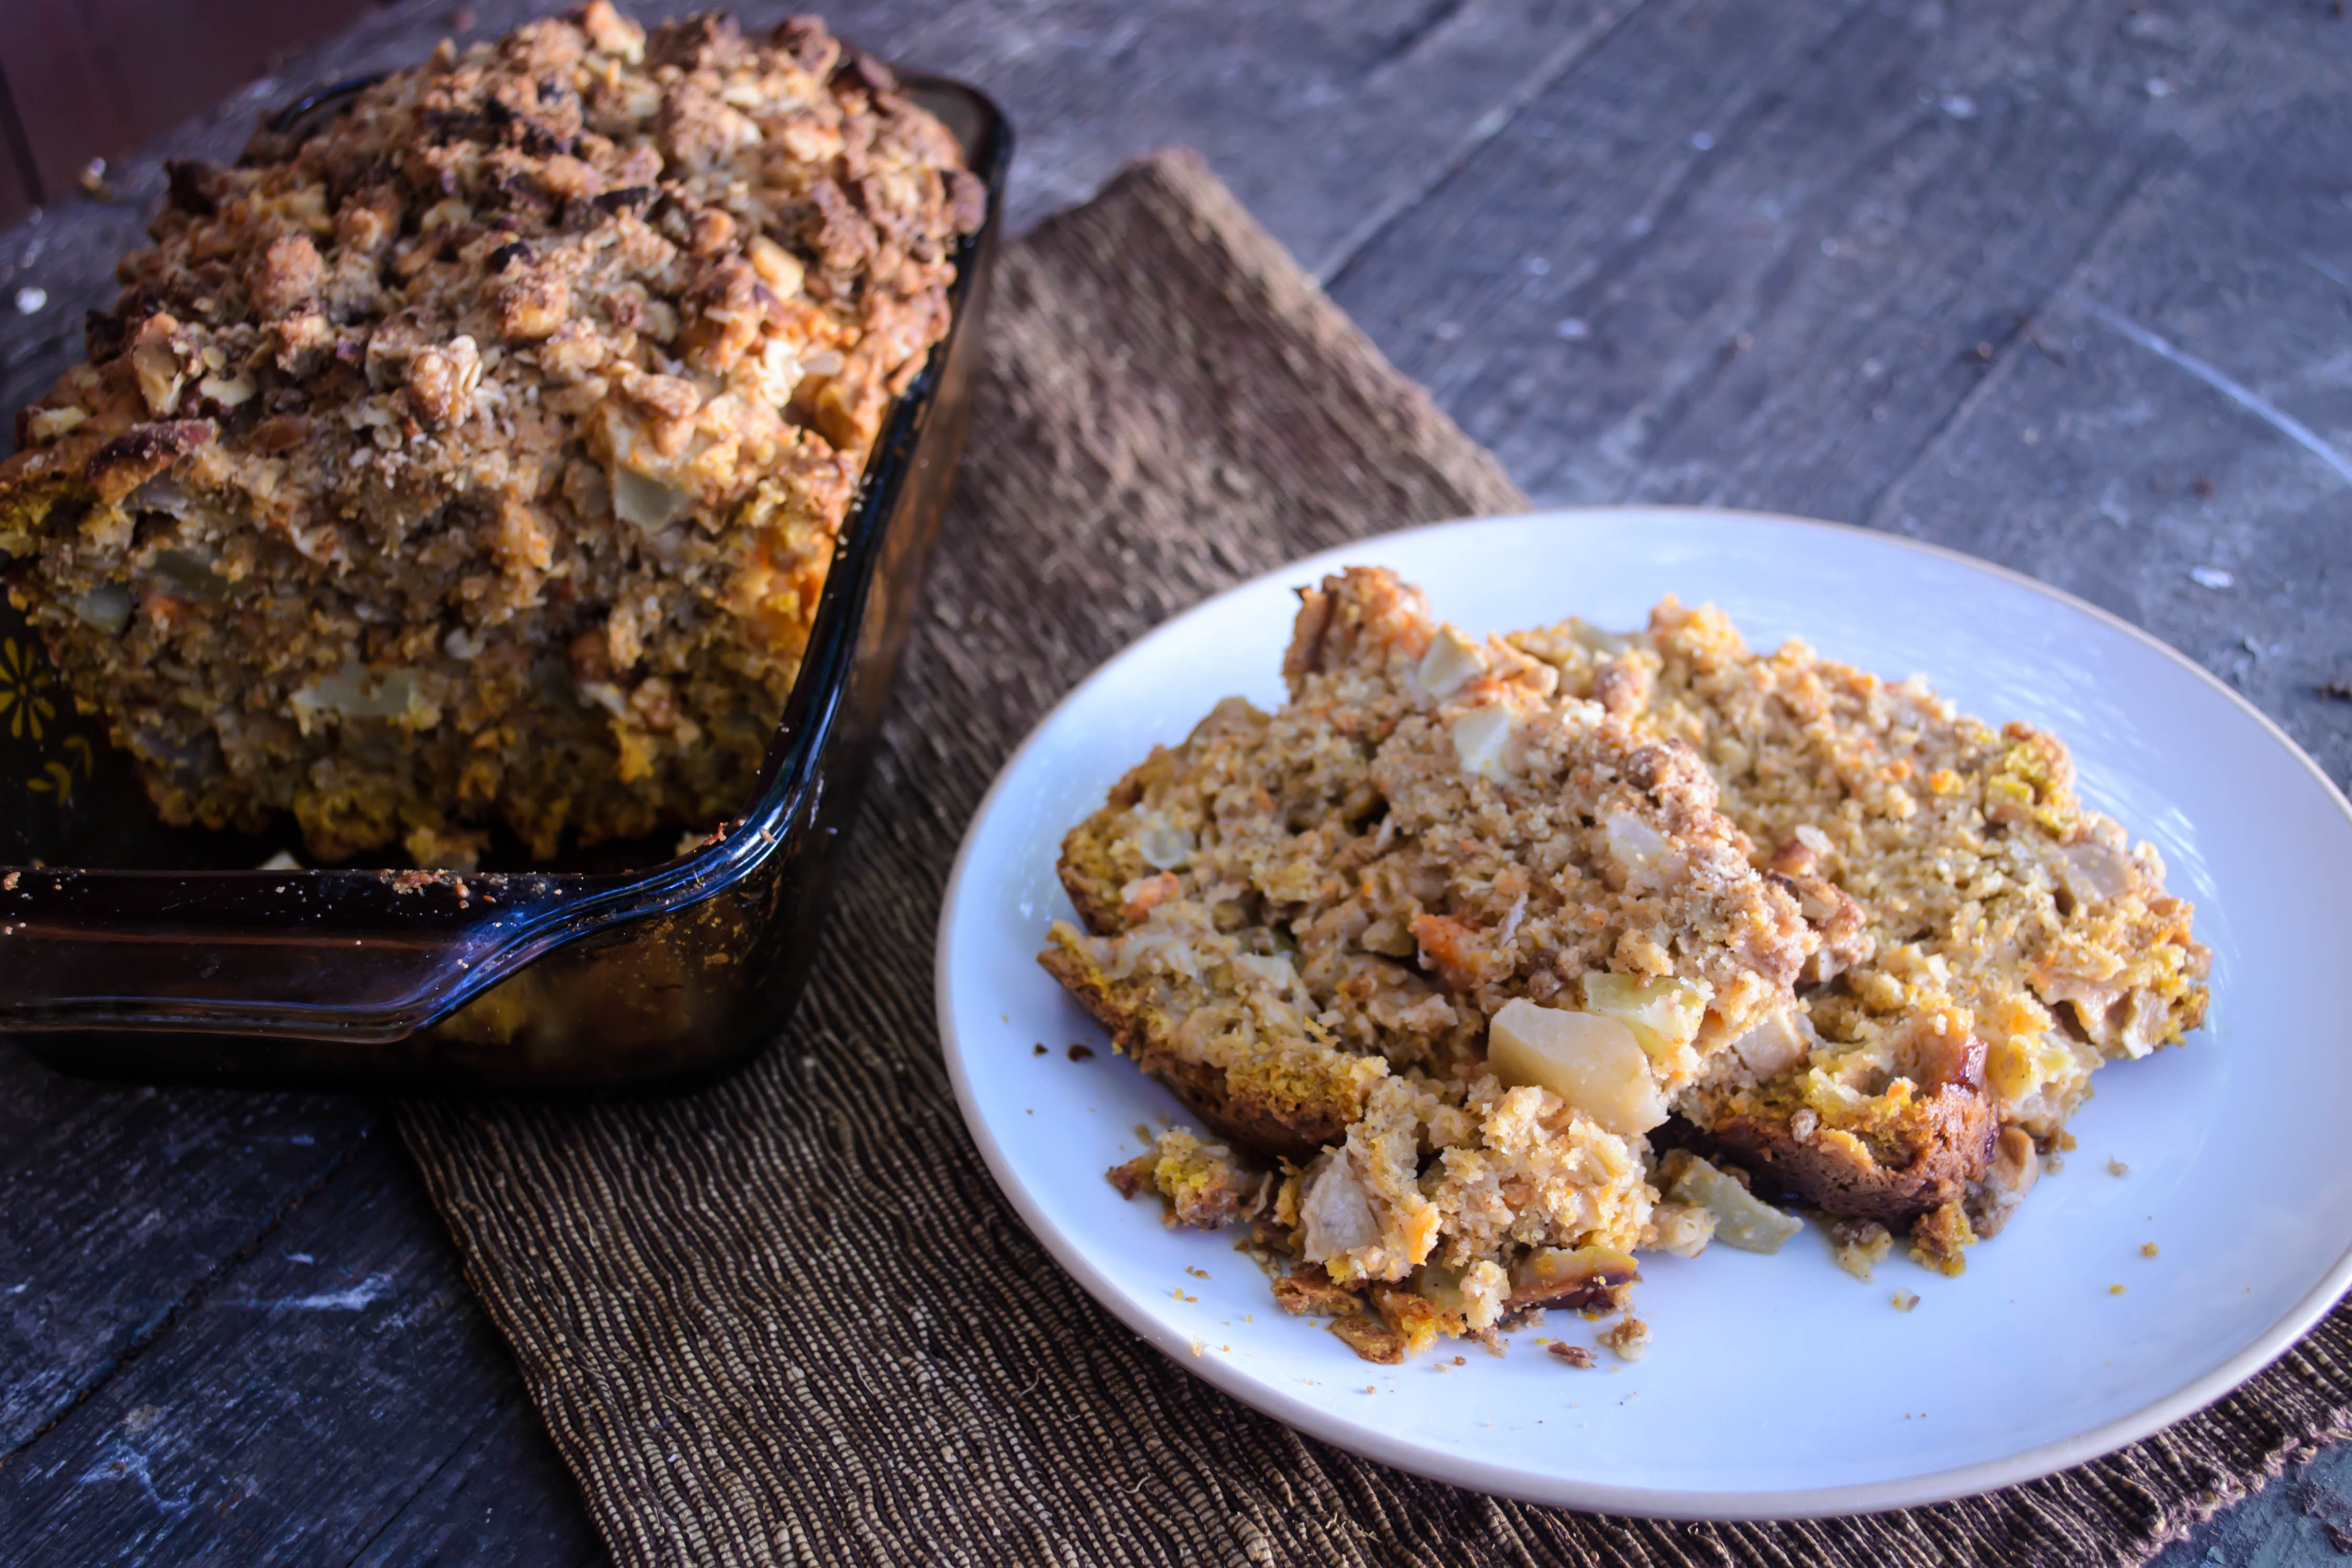
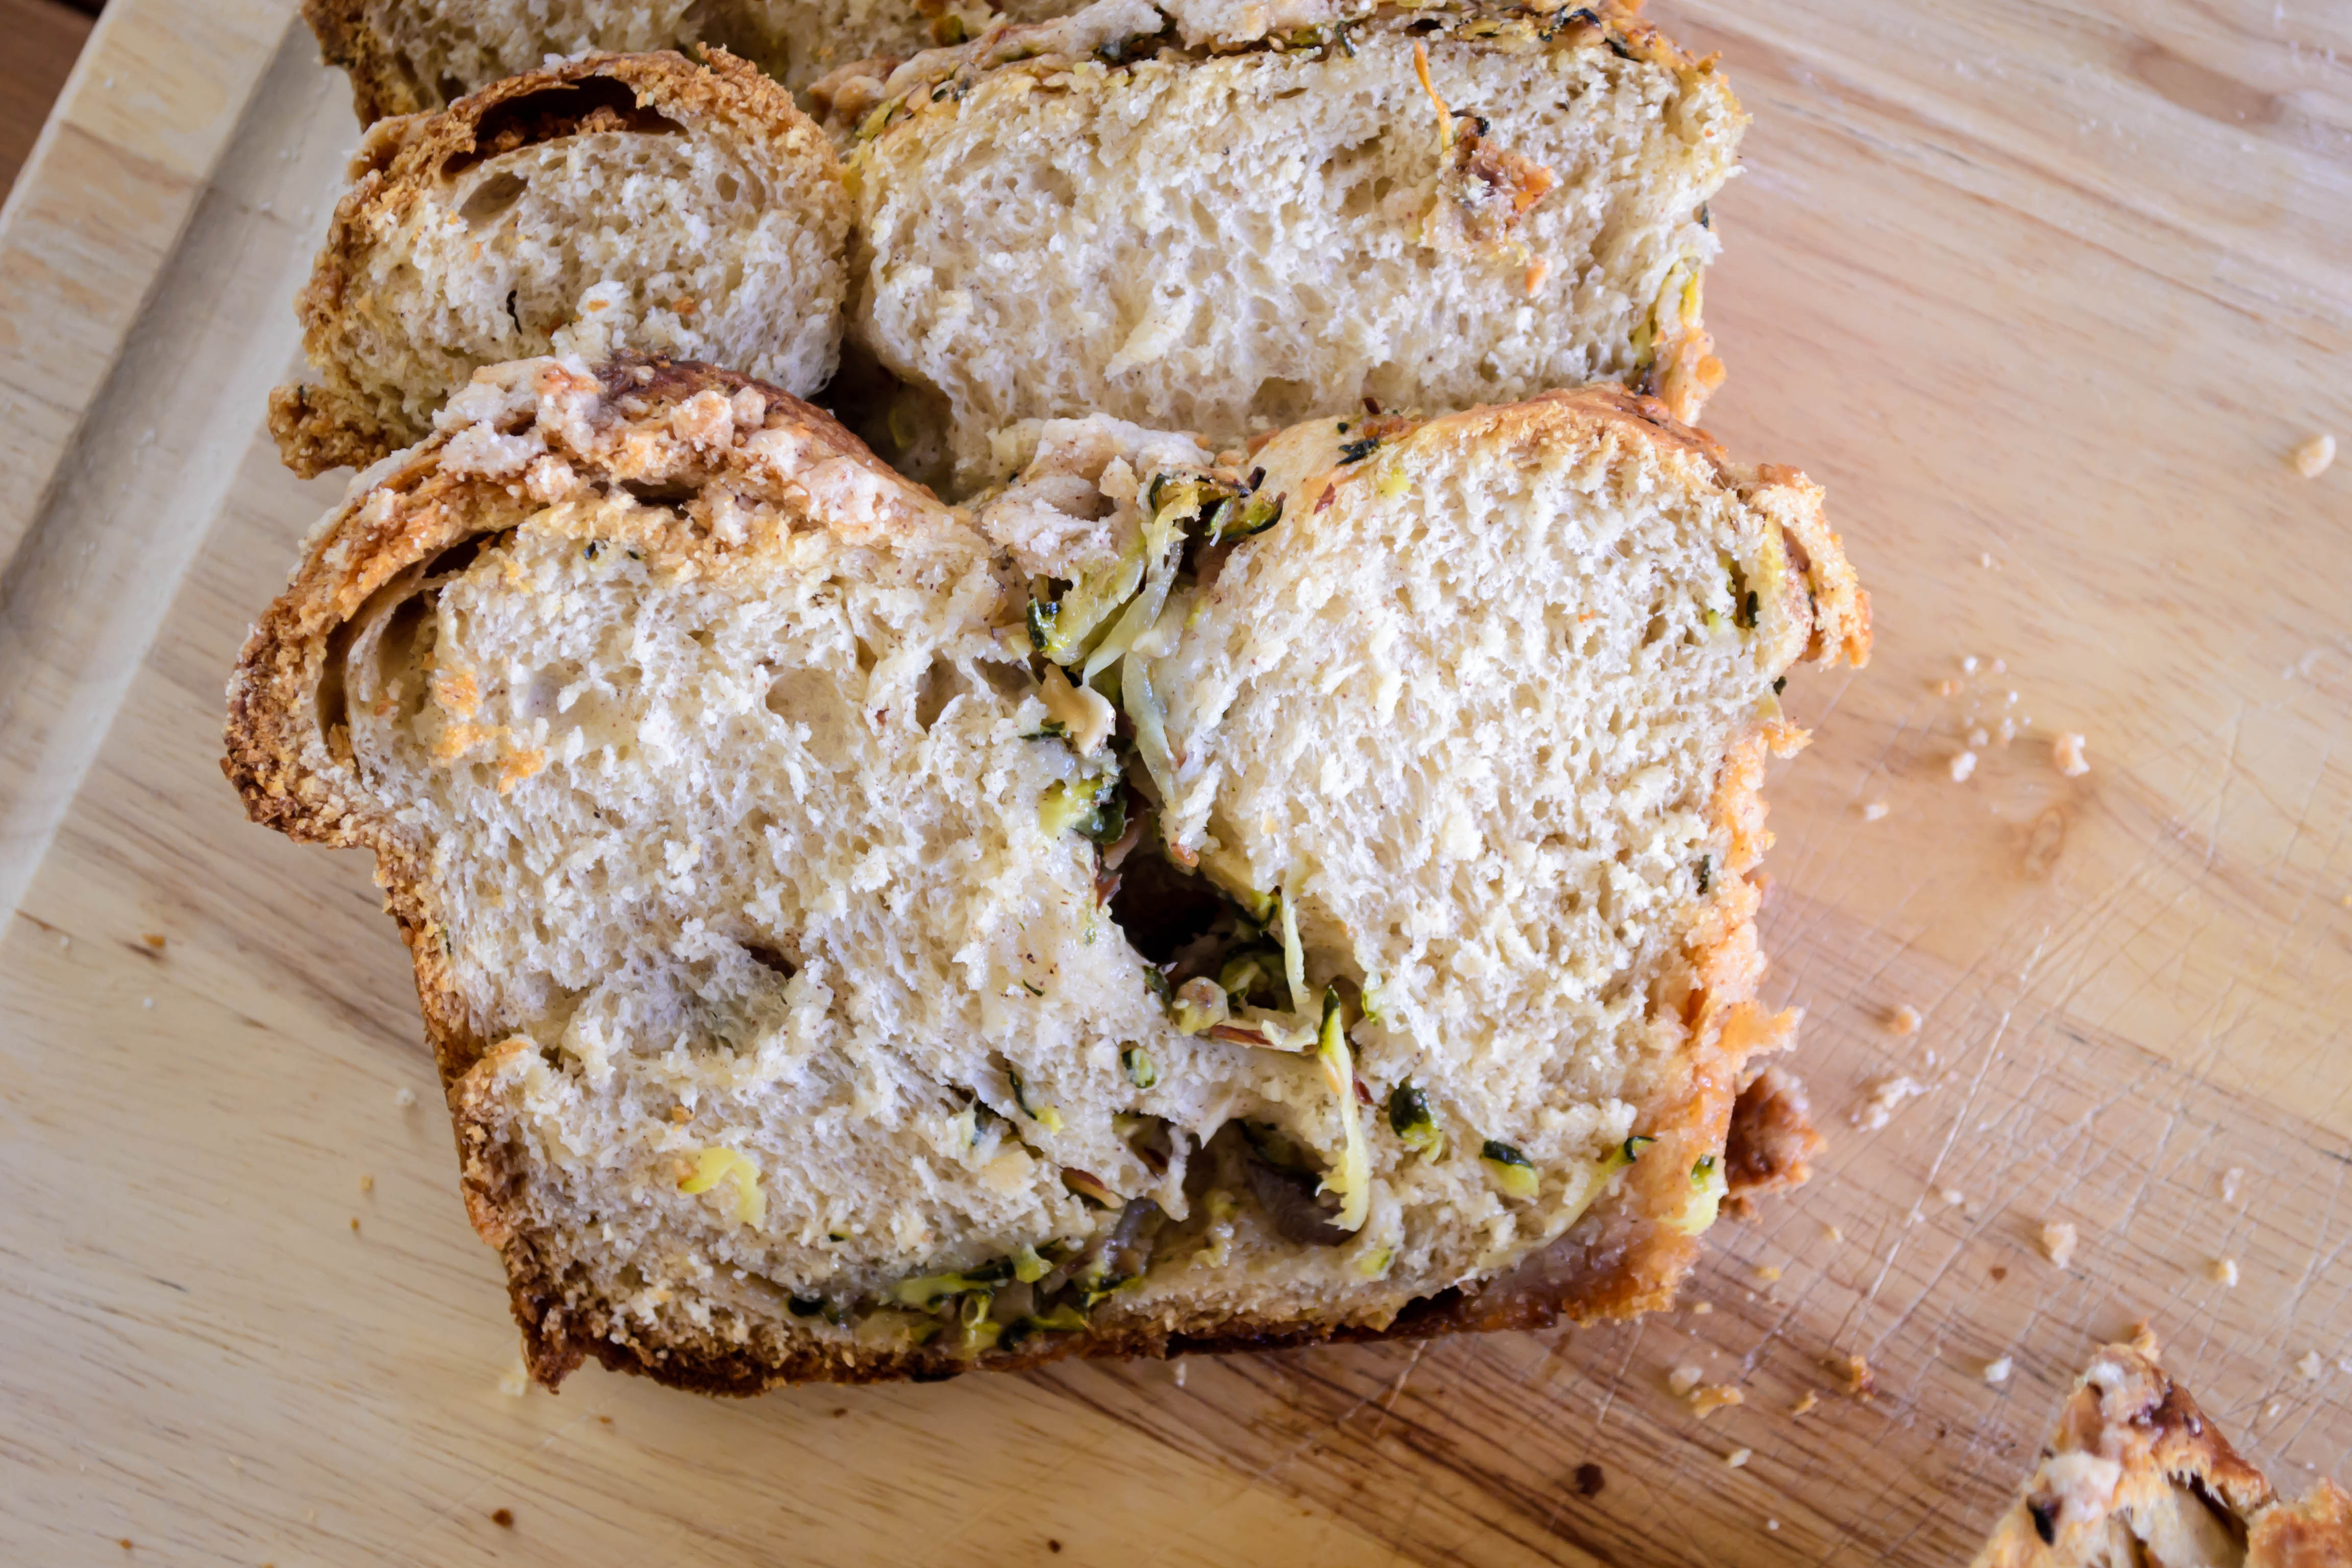
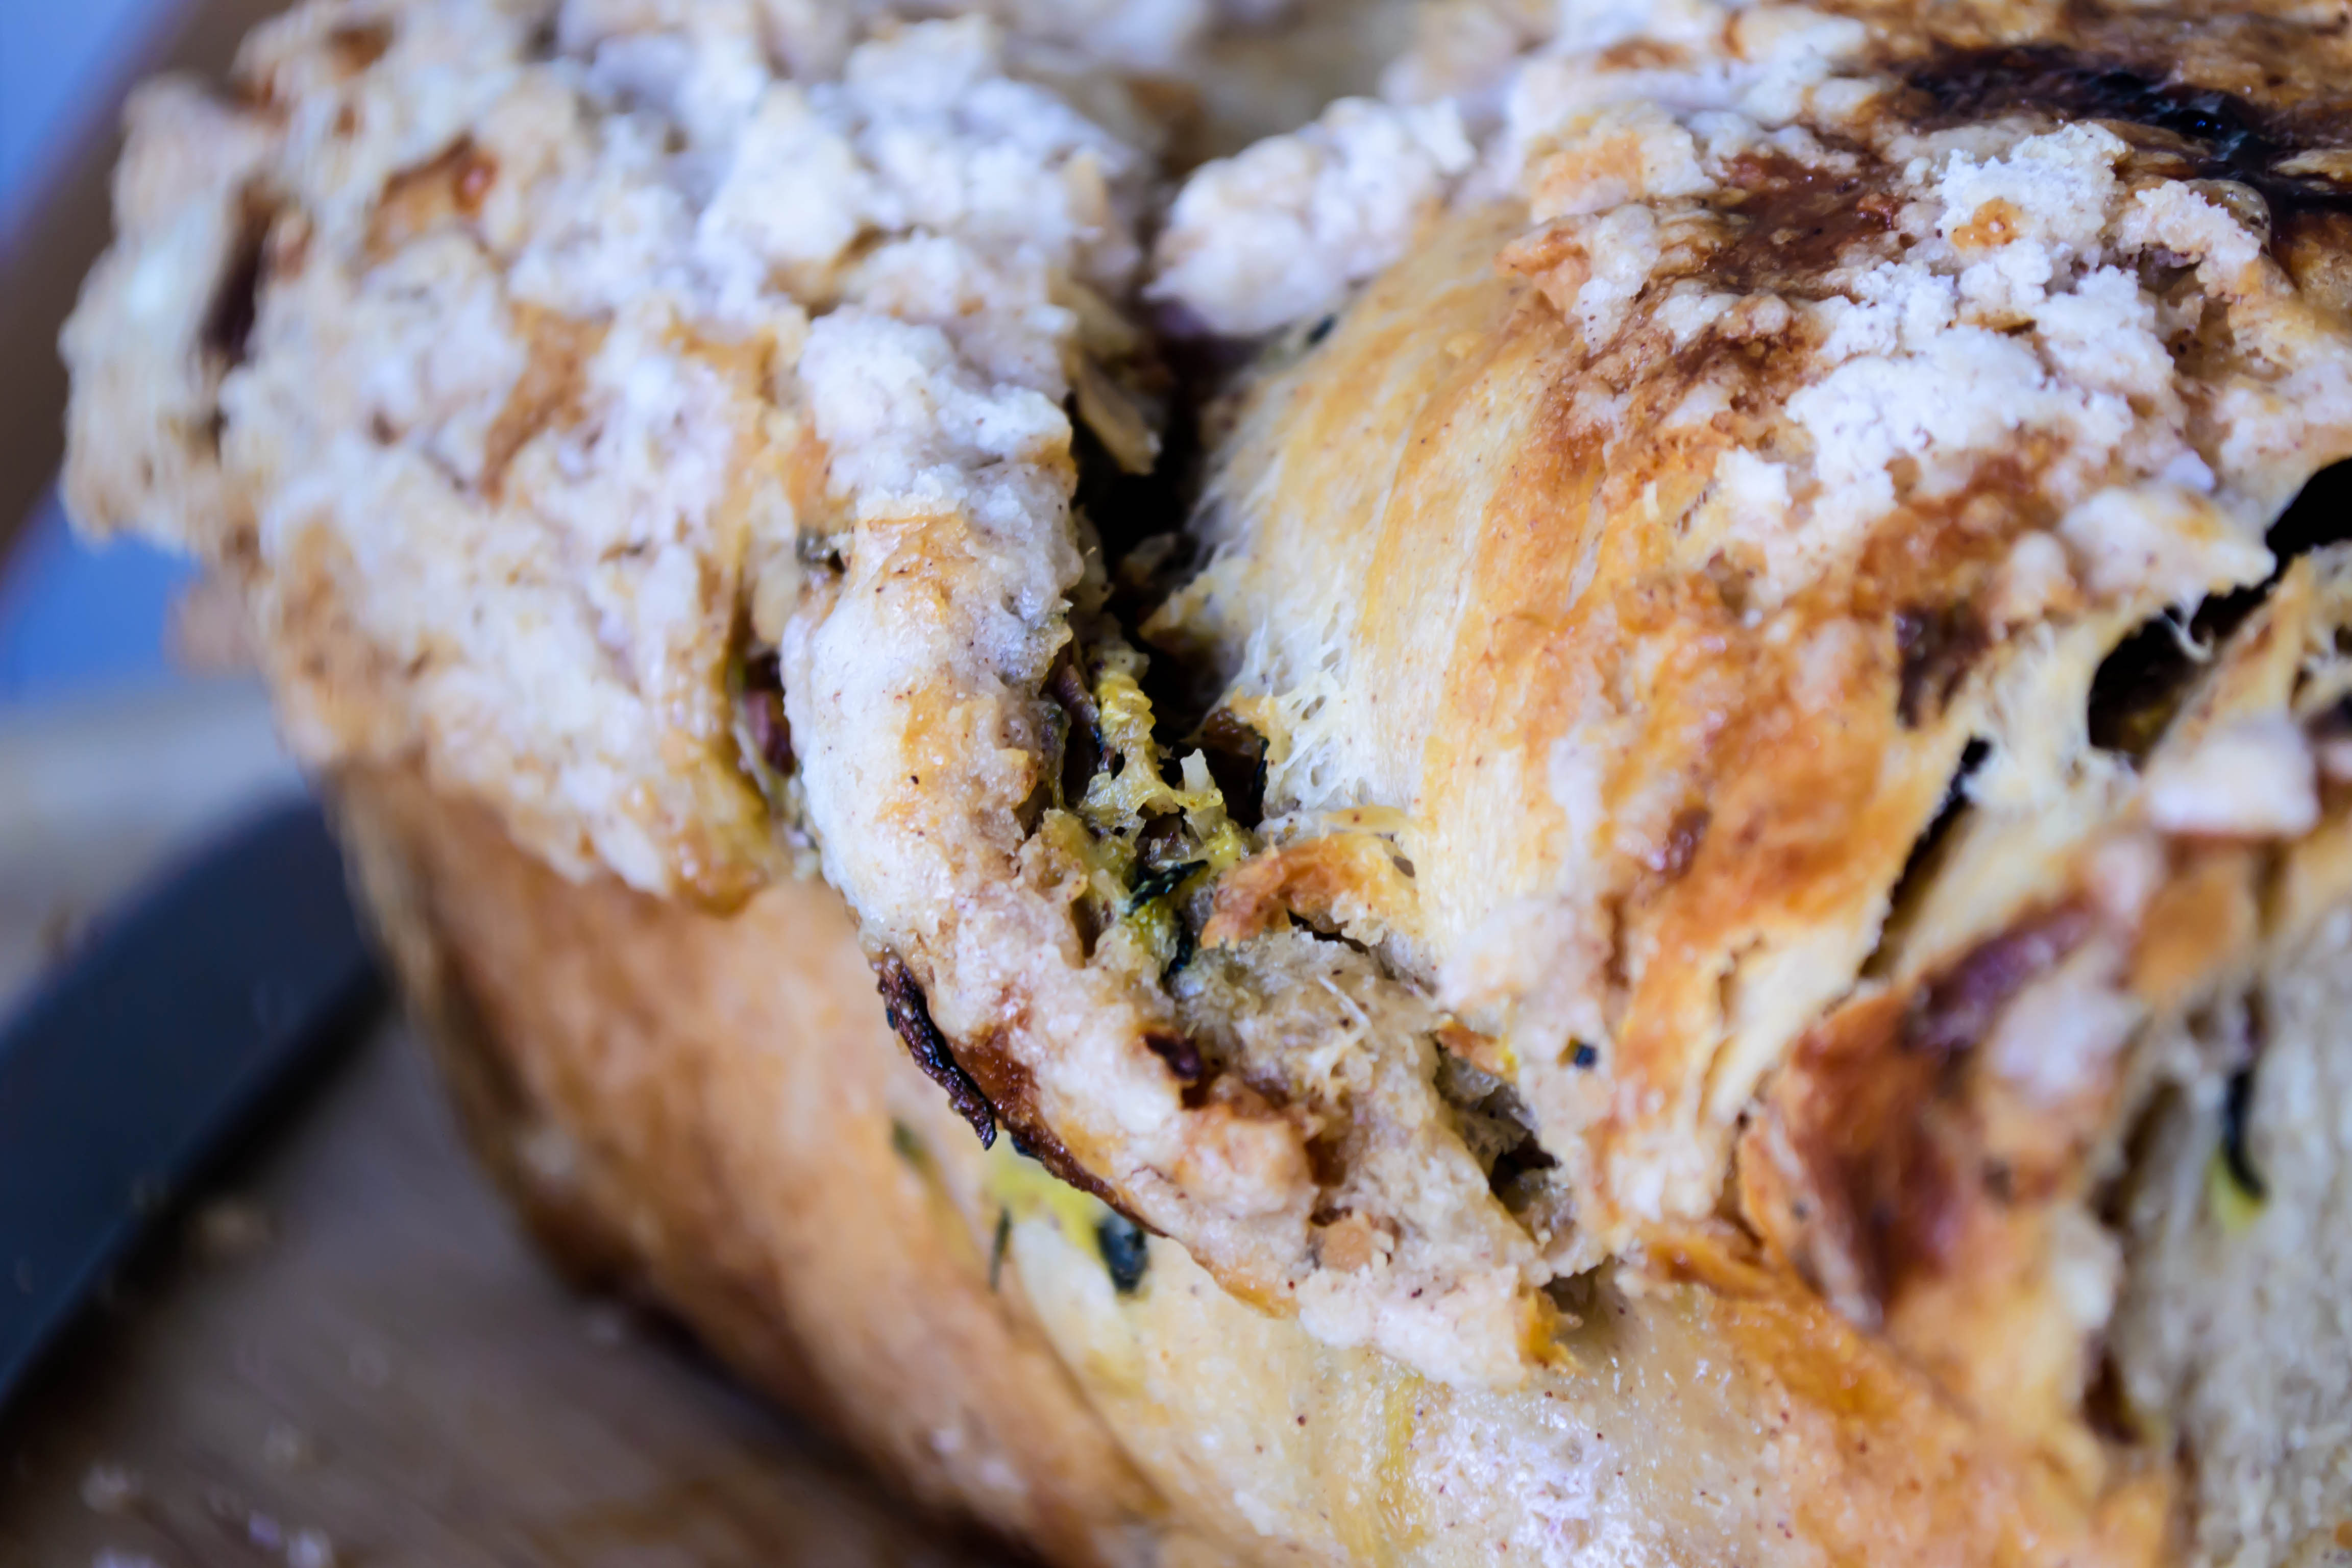
My god, this was good. The pastry cream oozed out of the caverns and crevices left by inexperienced and impatient lattice-work, and these parts gained the same skin as my experiment. This is, if we’re going to be picky, perhaps of a slightly compromised texture – it gets slightly grainy and thick – but it’s not enough to be a bother. Because once you get beneath the outer layer and your teeth sink into the delicately sweetened, pumpkin lushness below, you won’t ever want to eat anything again. And the dough itself is no slouch either. It bakes up warm with spices and beautifully textured. The combination is like… well… it’s like nothing I can really think of. The bread is like a sweet roll or a yeasted coffeecake; not as light as a doughnut, but not as heavy as your standard loaf of bread. The cream inside makes it (almost) too decadent to be a breakfast, but it’s a more than suitable dessert or afternoon pick-me-up. To make it even better, this bread actually tastes better the second or third day after you bake it (or even the seventh… I’ve kept our leftovers wrapped in plastic wrap and in the fridge, and a week later it is still moist and perfect).

Food Blog November 2013-2798Food Blog November 2013-2808

Gingerbread spiced sweet bread with pumpkin pastry cream
Makes one 14-16 inch lattice-top loaf (and about 2 ½ cups pastry cream to fill)
For pumpkin pastry cream:
2 cups half and half (or, if you’re me, nearly 1 cup heavy cream and a little over 1 cup whole milk)
½ cup sugar, divided
Pinch salt
4 egg yolks
3 tablespoons cornstarch
½ cup pumpkin puree (not pumpkin pie filling)
½ teaspoon cinnamon
1 teaspoon vanilla
2 tablespoons cold butter
  • In a medium saucepan, heat the half and half, 6 tablespoons of the sugar, and the salt to a bare simmer over medium heat. Separate the eggs and mix the yolks with 2 tablespoons of the sugar, beating until you can only feel a slight graininess from the sugar in the mixture. Whisk in the cornstarch until combined. The mixture will become pale yellow in color and thicken noticeably.
  • Dribble about two tablespoons of the simmering half and half mixture into the egg yolks, whisking quickly as you go. This tempers the yolks, warming them up just enough to prevent them from scrambling when they hit the heat of the milk.
  • Add the yolk mixture to the half and half in the saucepan, whisking constantly as it returns to a simmer over medium heat. The whole mixture will become thick and glossy, and a few reluctant bubbles may sputter to the surface.
  • Turn off the heat and add the pumpkin, cinnamon, vanilla, and butter. Whisk until incorporated and smooth.
  • Position a wire or mesh sieve over a medium glass bowl and dump in the hot pastry cream. Using a spatula, stir and push the cream through the sieve down into the bowl. If there are any scrambled bits or undissolved material, this will catch it and prevent anything from marring the divinely perfect texture.
  • Place a layer of plastic wrap flat against the pastry cream and refrigerate until cold. This thickens the cream and lets it achieve its most glorious texture.
  • While it chills, make the bread dough.
For dough:
2 teaspoons yeast
½ cup warm milk
Pinch sugar
¼ cup brown sugar
½ teaspoon salt
2 eggs
6 tablespoons room temperature butter
2 teaspoons cinnamon
1 teaspoon ginger
1 teaspoon nutmeg
½ teaspoon cloves
3 – 4 cups flour (all-purpose or bread flour both work well)
  • Combine the yeast, ½ cup warm milk, and a pinch of granulated sugar in a small bowl. Let sit for 5 minutes while the yeast wakes up a bit.
  • Meanwhile, add the brown sugar, salt, and eggs to the bowl of a stand mixer and beat with the paddle attachment into a sludgy homogenous mixture. Add the yeast mixture and the butter and mix again until mostly combined.
  • Add the spices and 3 cups of the flour, and mix with the paddle attachment just until a wet dough comes together.
  • Switch from the paddle to the whisk attachment and knead 6 – 8 minutes, adding more flour, if needed, in ¼ cup increments. Try not to add too much flour, as with each addition the dough becomes a bit denser and tougher.
  • After 6 – 8 minutes of kneading, the dough will still be sticky and loose. Cover it with plastic wrap and let it sit in a warm place for 90 minutes, or until it has doubled in volume.
  • Punch down the dough by depressing your knuckles gently into its center to release the accumulated gases.
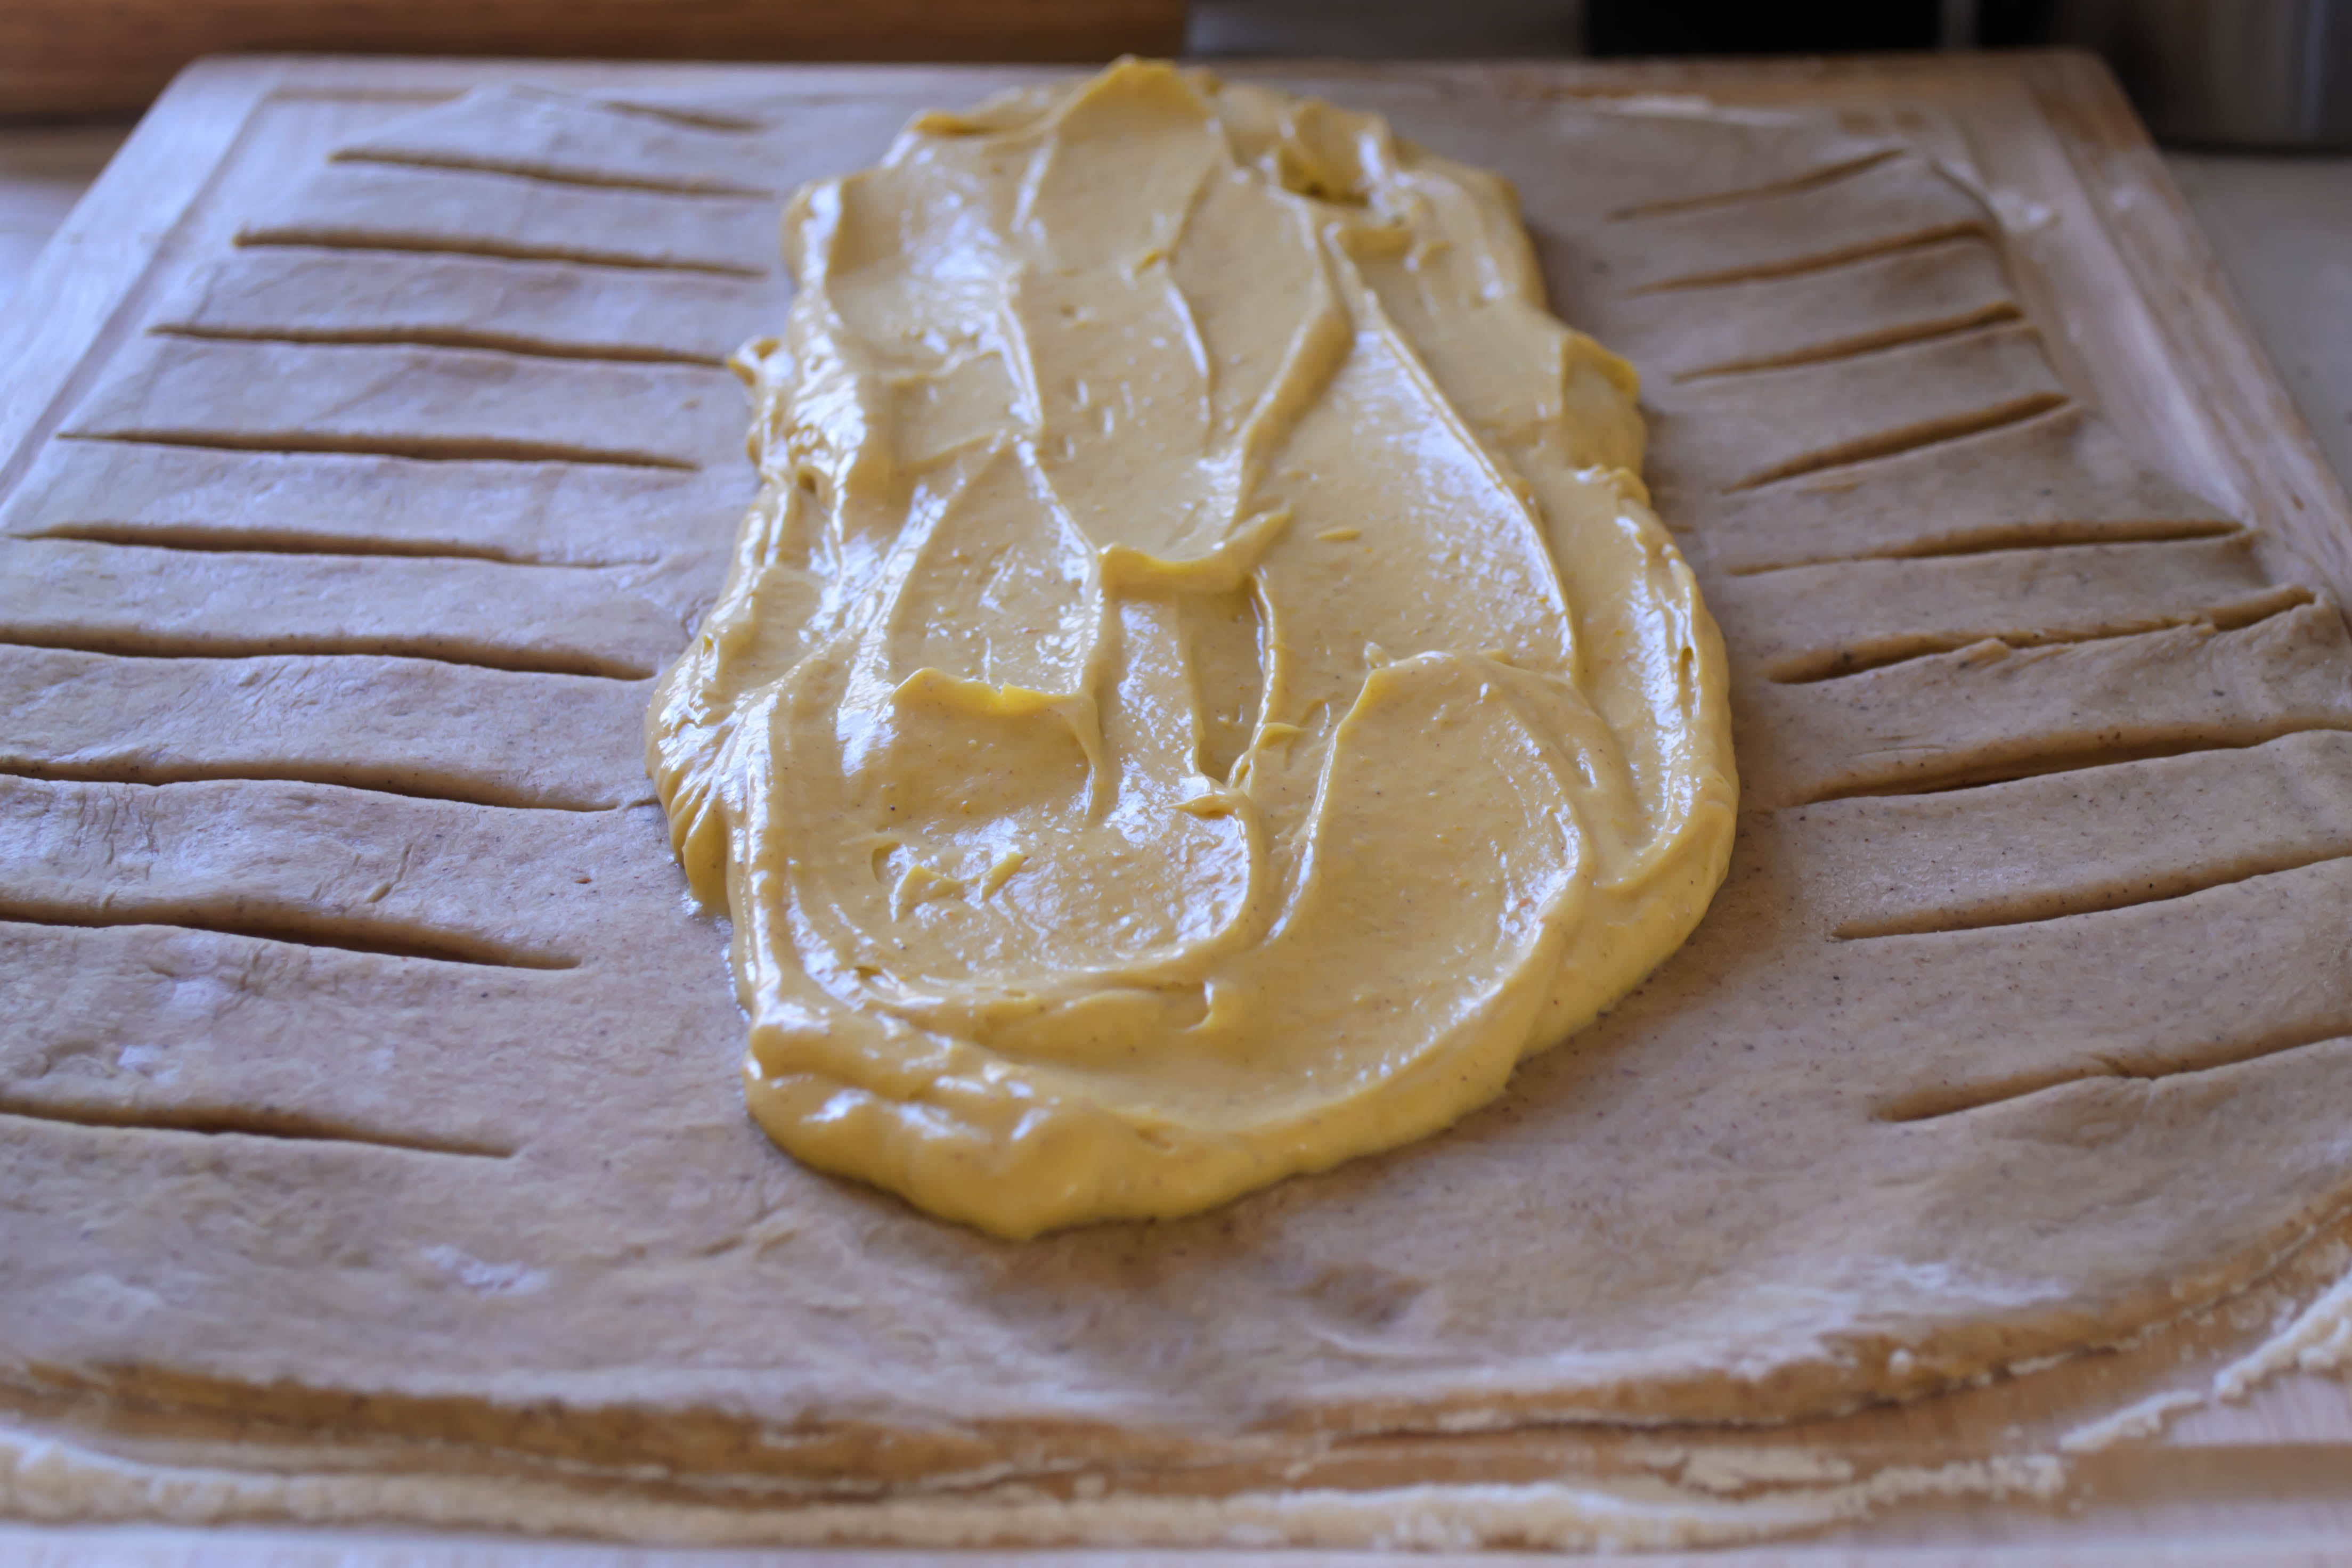
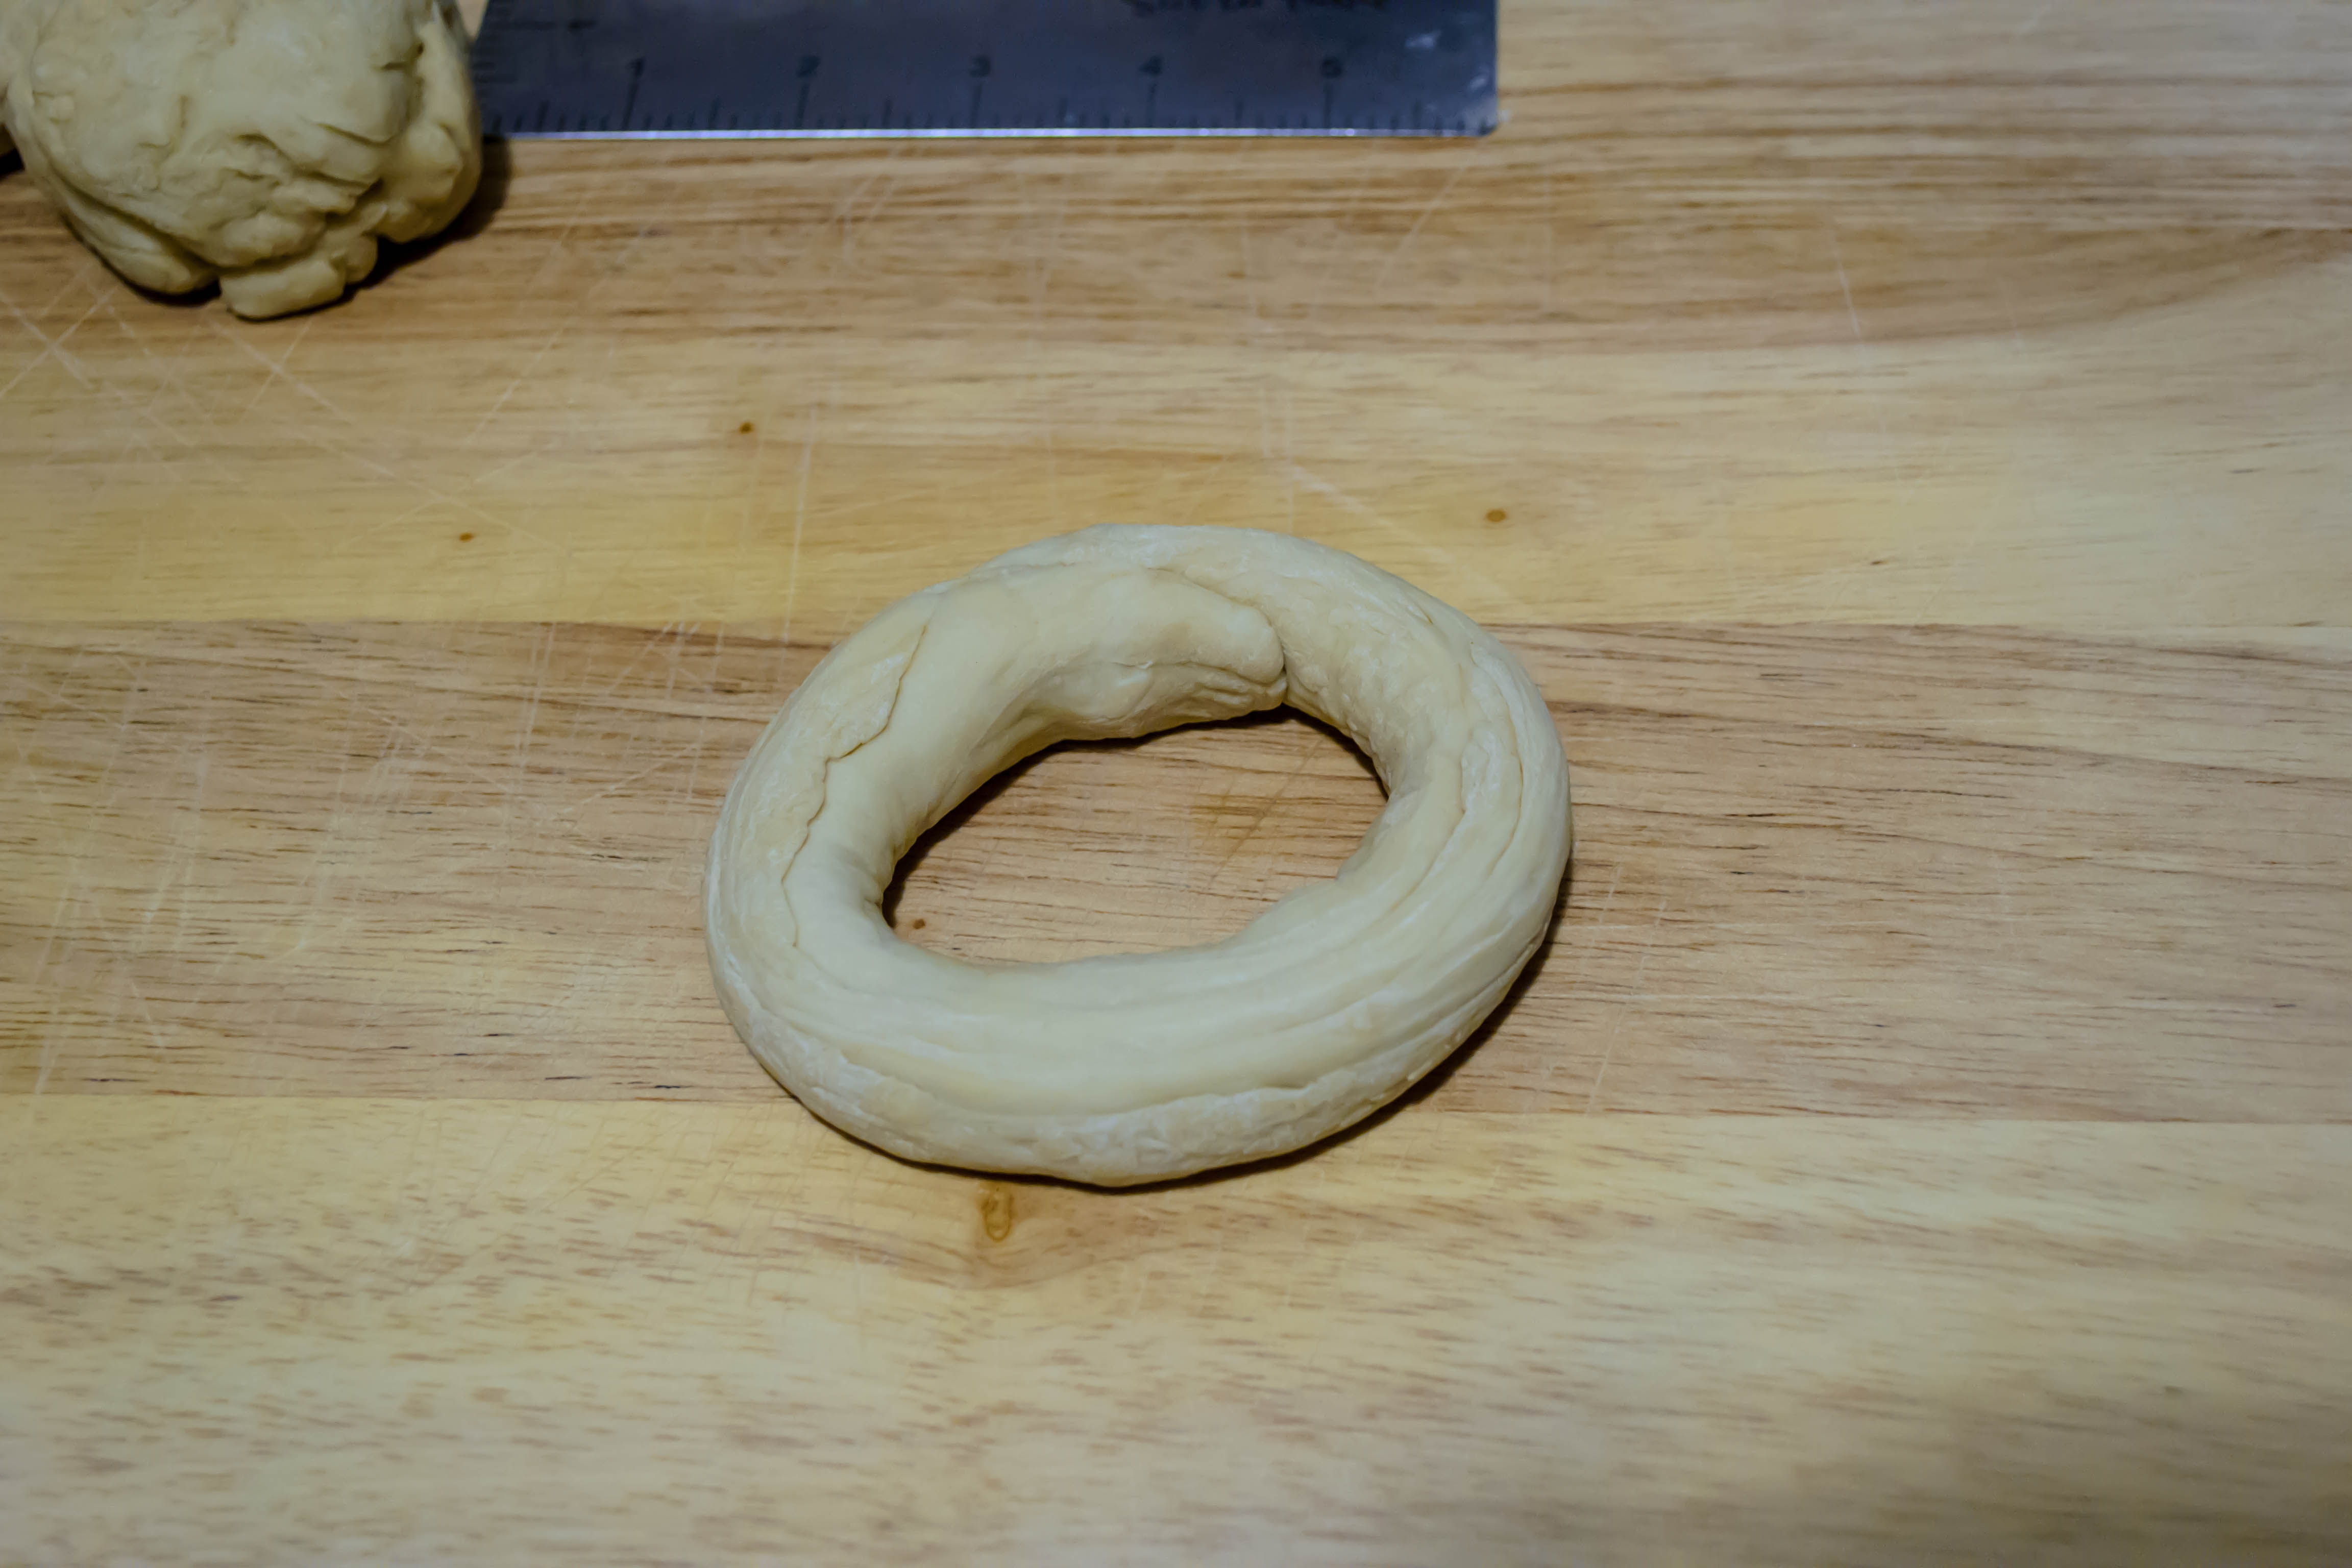
  • Turn out the dough onto a well floured board (I did this by just inverting my mixer bowl and letting it sit until the dough flopped out). Flour the dough lightly as well, and roll with a rolling pin into a 12 x 16 inch rectangle. If the dough springs back on itself immediately, let it sit for 5 minutes and then try again.
  • To create the lattice-top look, use a sharp knife to cut slits at a slight angle in the outer edges of dough at 1 inch intervals. Each slit should only be about 2 inches in – you need plenty of room in the center for the pastry cream, and the dough will stretch as you weave it. See photo above for a visual.
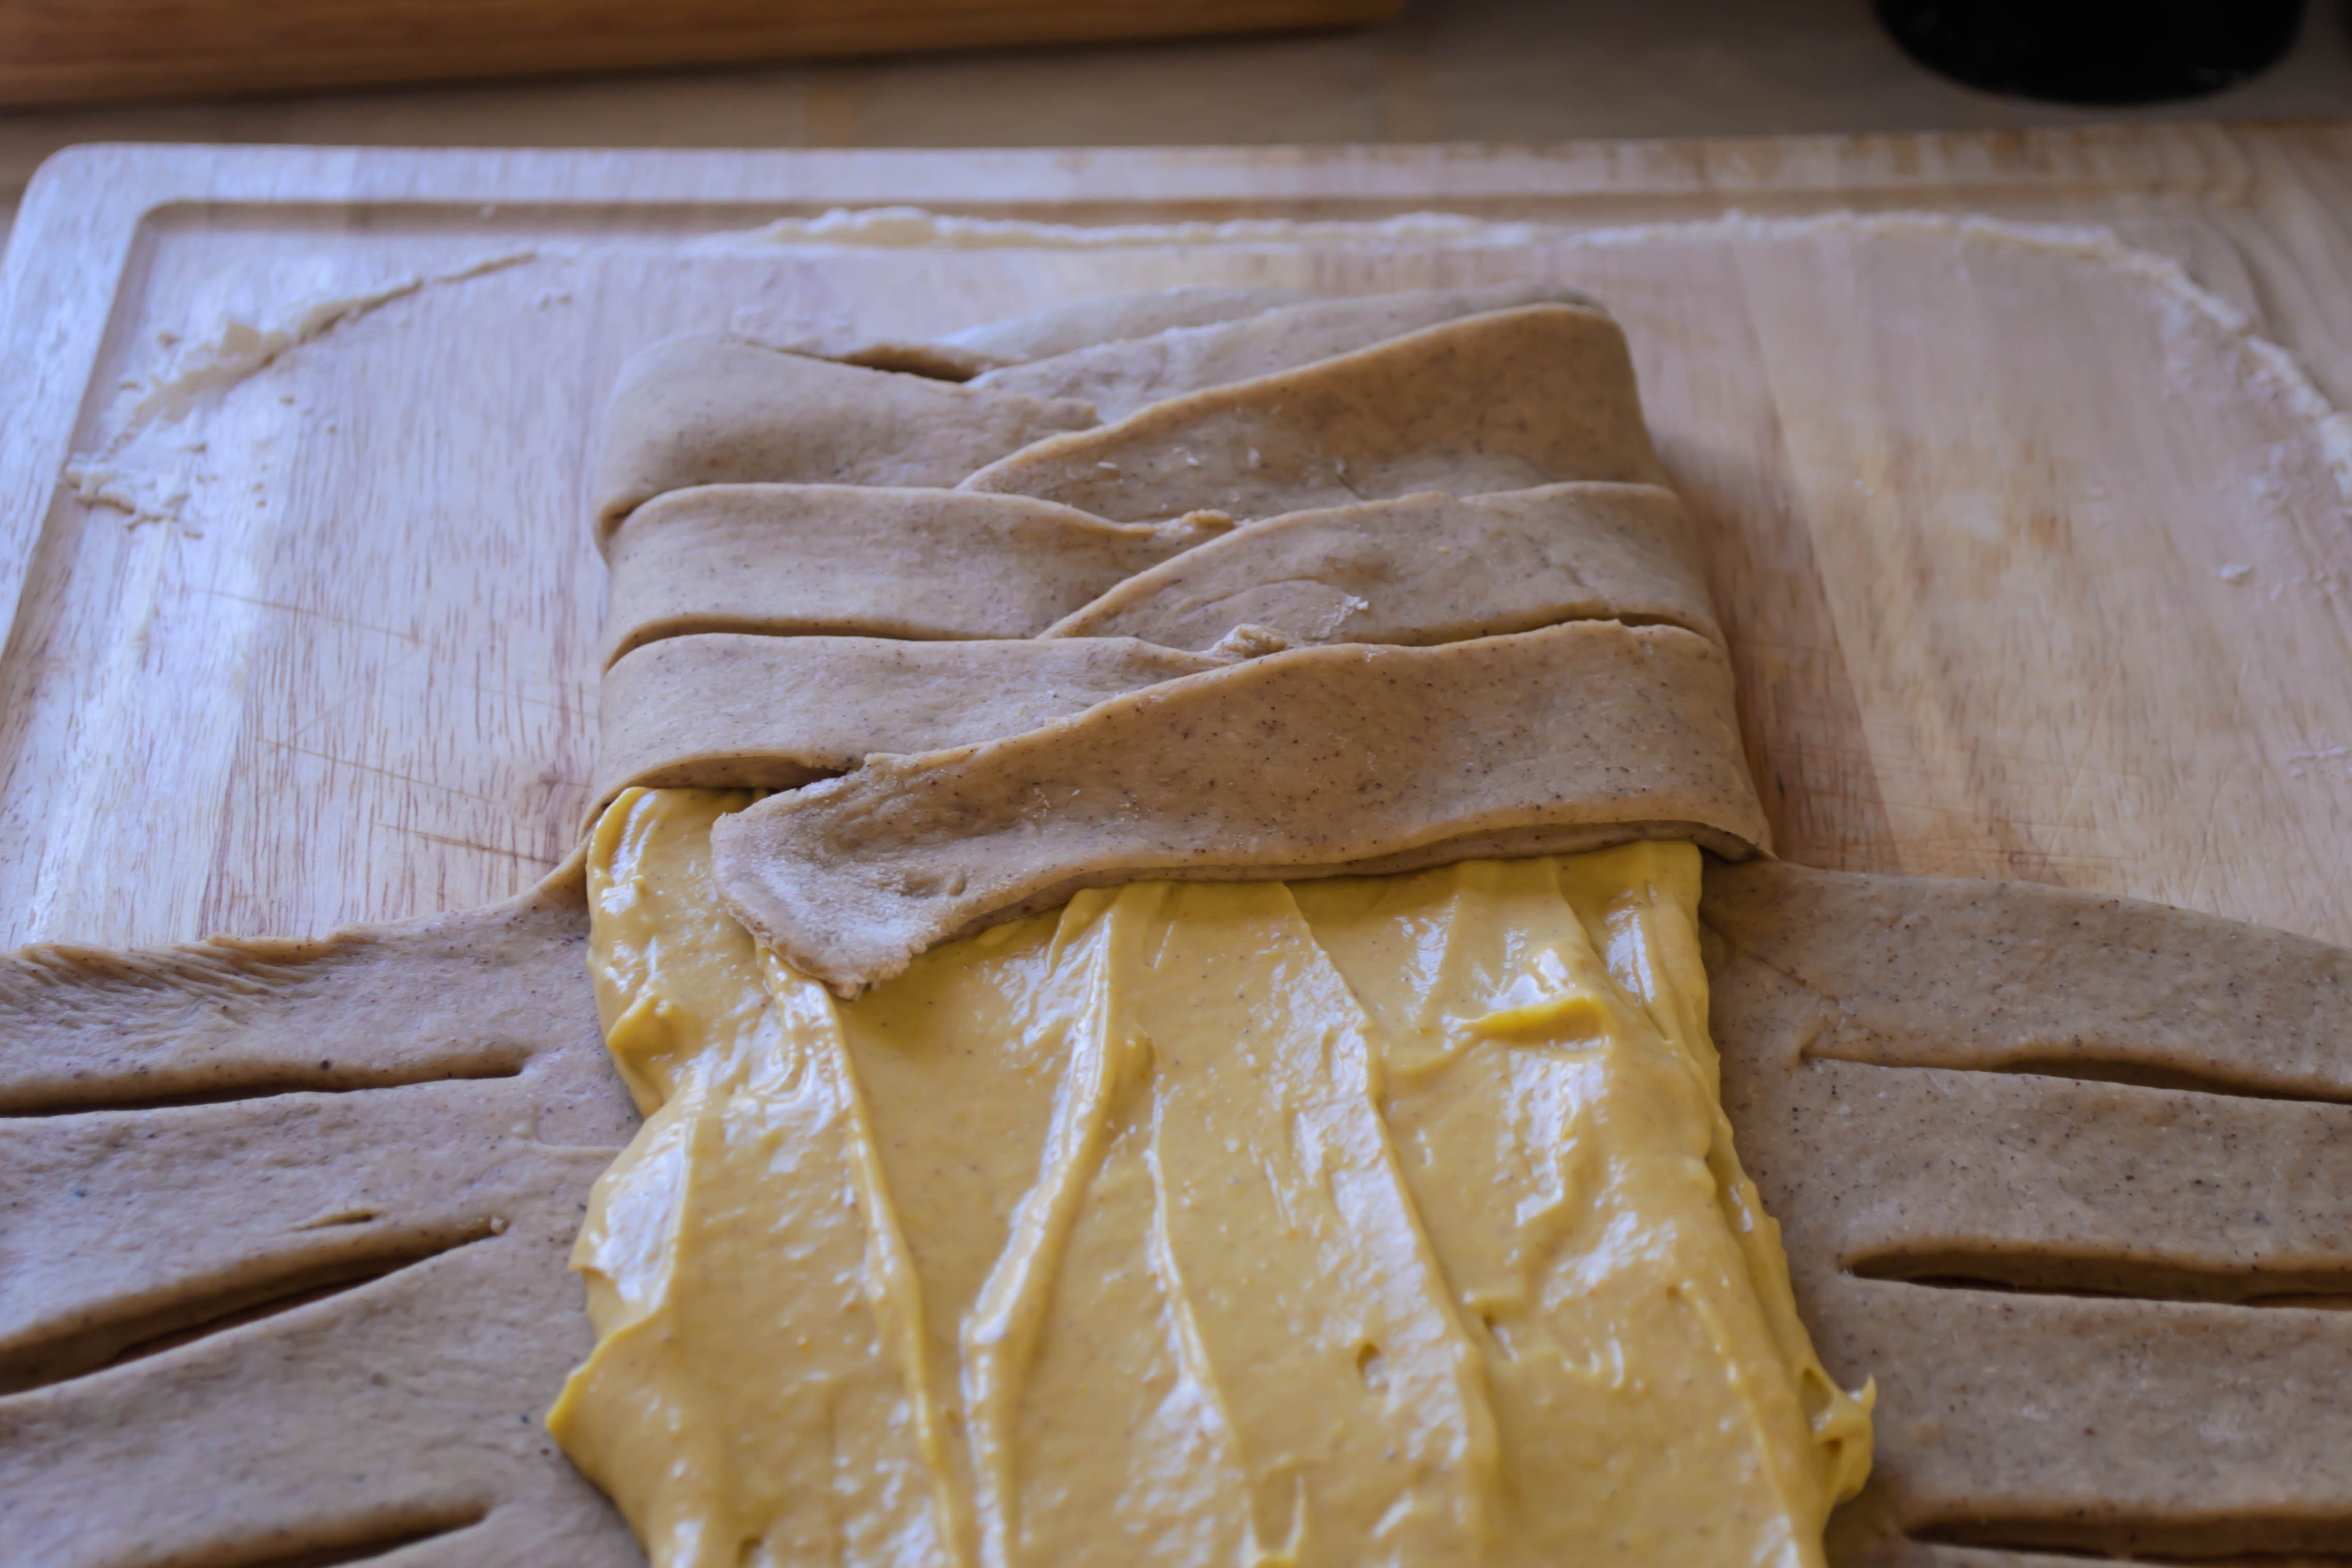
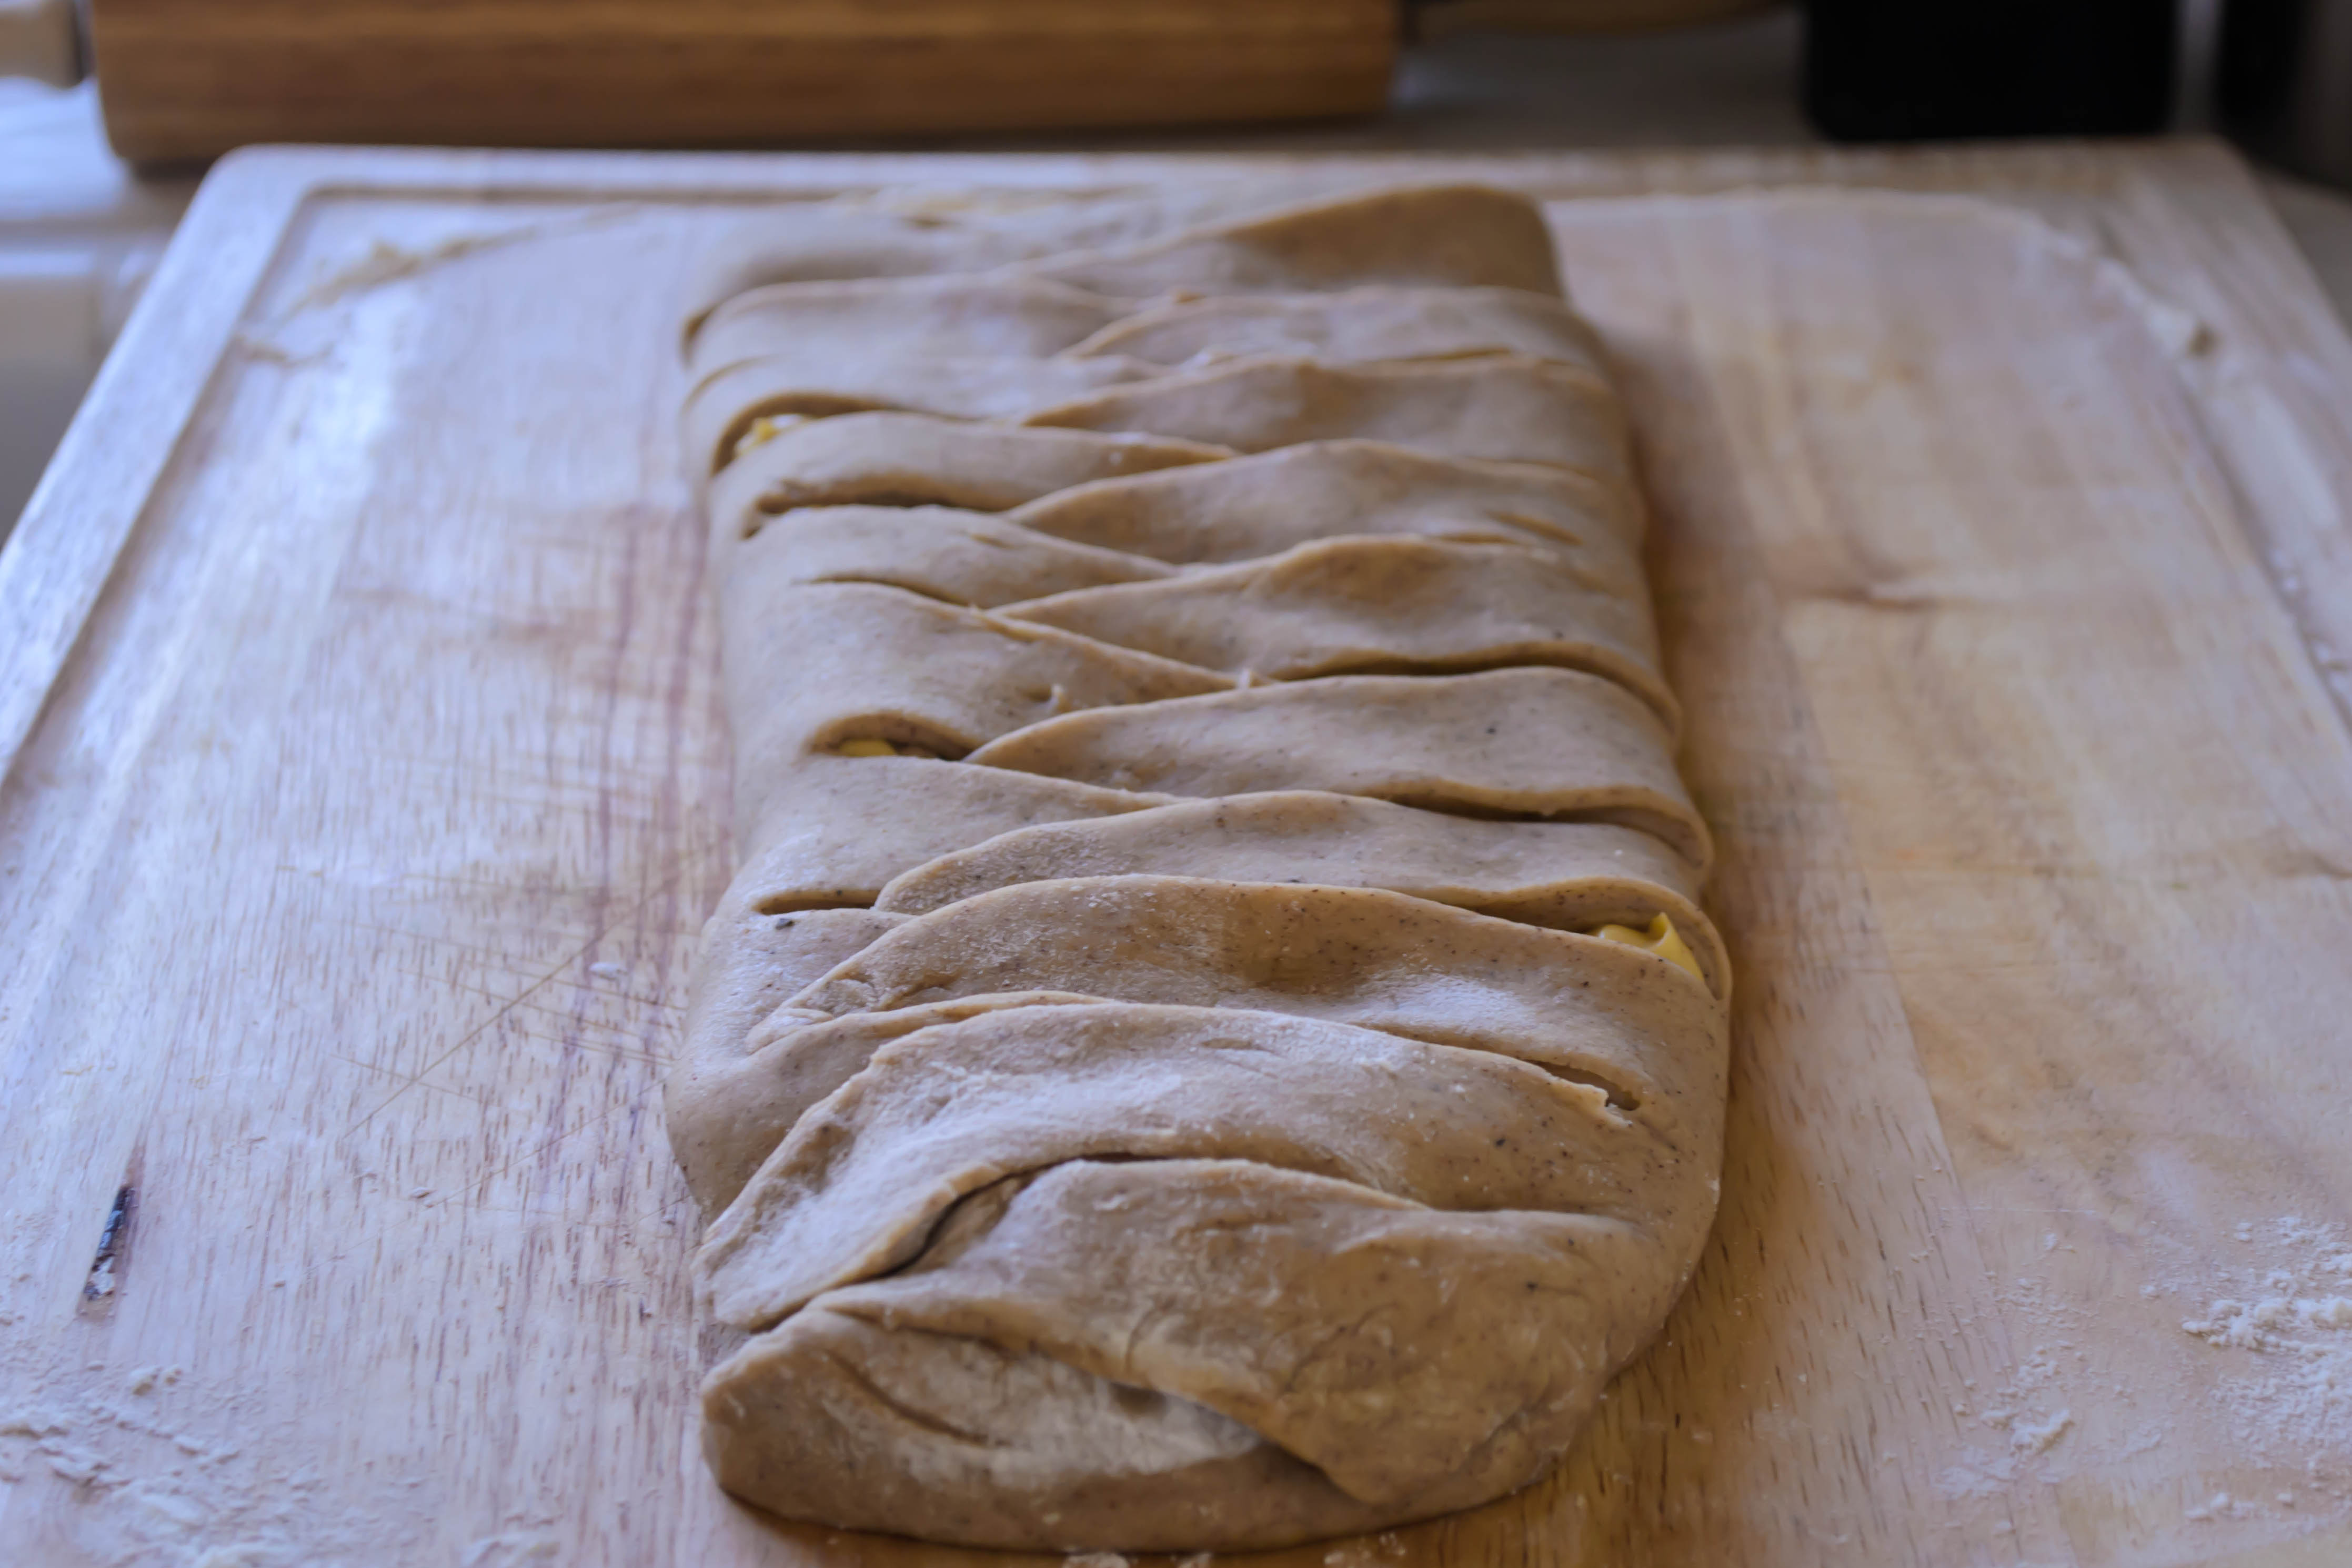
  • Transfer your dough to a lightly greased cookie sheet so you can shape it without having to move it again. Spread about 2 cups of the pastry cream onto the uncut center panel of dough, leaving about a ½ inch margin on all sides (what you do with the remaining cream is up to you. I won’t tell anyone). Then, fold up one of the end pieces over the top of the pastry cream and start weaving: fold up one dough strip at a time, taking one from one side and one from the other in turns, the way you would lace a shoe. Fold over the center gently – if you push down too much, pastry cream will go everywhere.
  • When you get to the end of the latticework, fold up the remaining edge and pinch it with the final set of folded strips to seal it. Cover it with plastic wrap and let it rise for 30 minutes.
  • During this final rise, preheat the oven to 350F.  Now, here’s where I must be honest. In the excitement of how firmly I believed this was going to be the best loaf of sweet bread ever, I failed to write down how long I baked this for. But I’m going to say you should start with 20 minutes, and see how things look. The top should get dusty and browned and feel slightly hollow when you knock against it. If it isn’t browned at all or still looks conspicuously raw, give it another ten minutes.
  • When done, remove from oven and cool completely before slicing. To store, wrap in plastic wrap and keep in the refrigerator. To snack, I preferred my slices straight out of the fridge, where the cream was cold and glossy and the bread was chewy and thick.

Sweet Potato Apple Oatmeal Bread

I seem to be increasingly fond of dishes with long titles. There’s nothing particularly extravagant about this quickbread (though I must admit, the prep work involved makes it not all that quick), but the title is lengthy because it does have a lot going on.  Harvest color from a baked, mashed sweet potato, juicy chunks of apple, a hearty, wholesome boost from the oats, plus a hefty dose of brown butter, buttermilk, cinnamon, and a streusel topping crammed with walnuts and dried apple rings. But I didn’t want to overload you, so sweet potato apple oatmeal bread it is.

Food Blog October 2013-2708This bread turned out to be a lovely little response to October’s Twelve Loaves theme: root vegetables. Upon first reading this mandate, I was a little concerned. I’ve already done loaded potato biscuits. Carrot cake is, eponymously, not bread. Beets and rutabegas and parsnips and all those other decidedly savory tubers I’d welcome in a roasting pan or in a latke just don’t seem like a good fit in bread, yeasted or otherwise.

Food Blog October 2013-2701Los Angeles has recently decided that, since it’s almost the middle of October now, Fall might be okay. It might be acceptable to hover below 80 degrees during the day,* and nights could, possibly, occasionally, fall to the chilly (hah!) mid-50s. This has put me in mind of all the harvest flavors I love which, predictably, takes me to Thanksgiving. Once there, it’s only a tiny hop to the humble sweet potato.

Food Blog October 2013-2687Sweet potatoes are true root vegetables. Unlike taro or ginger, which are technically modified stems, or even the grand old potato itself, which is a tuber but not a “true” root (I know, I was shocked too!), sweet potatoes are the root of the plant.

Food Blog October 2013-2680Food Blog October 2013-2685Food Blog October 2013-2682Thankfully, they are also delicious. I love their mellow, starchy sweetness in savory and sweet applications, but I’d never tried incorporating them into bread before. I knew almost immediately I wanted a quickbread rather than a yeasted loaf, and from there it only remained to pair a few flavors. Apples seemed like a nice match for sweet potato: big, fresh Honeycrisps have been showing up at our Farmers’ Market lately, and their juicy tartness would be a good foil for the dependable mellow of my main player. Oatmeal would bulk up the bread a little, giving it strength to support the onslaught of apple and sweet potato I had in mind. I found an oatmeal quickbread recipe that sounded promising on Flour Child, but things really cemented when I read Irvin’s post on Spiced Brown Butter Apple Walnut bread on his blog Eat the Love.

Food Blog October 2013-2688So, sweet potato, baked rather than steamed or boiled to cut down on moisture, an excessive mound of apples, left in sizable chunks that, when you start to mix them in will seem like far too many, rolled oats to bake into a breakfast-worthy slice, and the usual players – brown sugar and cinnamon and just enough salt – get topped off by a streusel you will want to eat not just on this bread, but on everything.  Walnut pieces, more oats, cinnamon for flavor and flour for texture, enough butter to hold things together, and the crowning touch: roughly chopped dried apples that, when baked, dehydrate even more into crispy, gloriously tart-sweet candy. I’m already imagining it on oatmeal, or pancakes, or baked on its own into a take on granola.

Food Blog October 2013-2699This is a moist loaf, and hearty, but not particularly dense. It can’t quite support its own weight, which means slices collapse easily on themselves because they are groaning under the quantity and size of the apples. It is also not terrifically sweet. I was aiming for a breakfast or a mid-morning snack kind of loaf. If you want something more dessert-like, or if you just have a determined sweet-tooth, try increasing the quantity of brown sugar by a few tablespoons.


* This morning’s meteorological news, however, may have made a liar out of me.

Food Blog October 2013-2707

Sweet potato apple oatmeal bread
Adapted from Flour Child and Eat the Love
makes one large loaf
For bread:
1 ½ cups flour
1 cup old-fashioned rolled oats
1 teaspoon baking powder
½ teaspoon baking soda
½ teaspoon salt
1 teaspoon cinnamon
½ cup butter (8 tablespoons or 1 stick)
½ cup buttermilk
2 large eggs
½ cup brown sugar
1 cup baked, mashed sweet potato (from one medium)
2 apples, peeled, cored, and cut into generous ½ inch pieces (I used Granny Smiths)
For streusel:
2 tablespoons oats
2 tablespoons flour
2 tablespoons brown sugar
½ teaspoon cinnamon
¼ cup roughly chopped walnuts
¼ cup roughly chopped dried apple rings
2 tablespoons softened or melted butter


  • If you have not already baked your sweet potato, preheat your oven to 400F, pierce the flesh of the sweet potato a few times with a knife or the tines of a fork, and bake until the potato is evenly soft – anywhere from 35-60 minutes, depending on the size of the root.  When done, remove from the oven and cool completely before halving lengthwise and mashing the flesh. Discard the skin (or just eat it – it’s sweet and soft and good for you!).
  • Turn the oven down to 350F (or, if you haven’t just baked a sweet potato, preheat it to 350F) and butter, grease, or spray a loaf pan.  Set aside.
  • Begin by browning the butter. Melt your ½ cup of butter in a small pot over medium-low heat. As it melts, it will foam and sizzle a bit and some scummy stuff will appear on the surface. That’s okay. Water is evaporating and leaving us with a more concentrated product. After a while, little brown bits will begin to form on the bottom. This is what we want, but watch carefully – it takes a matter of seconds for butter to go from perfectly brown to burned. When the brown bits are nice and toasty, turn off the heat and set aside to cool.
  • While the butter cools, it’s a good time to make your streusel so you’re prepared later. In a small bowl, combine all streusel ingredients except the butter and whisk lightly together with a fork. Add butter and toss with the fork again or with your fingers until the mixture begins to stick together in clumps. Set aside.
  • Now, back to the bread. In a medium bowl, combine the flour, oats, baking powder, baking soda, salt, and cinnamon. I like to use a whisk for this – it aerates the flour and evenly disperses the leavening agents.
  • In a large bowl (or the bowl of your standing mixer), combine the buttermilk, eggs, brown sugar, and mashed sweet potato. Add the brown butter and beat until a soupy, homogenous mixture is formed.
  • Add the dry ingredients to this wet mixture in two batches, beating just enough to combine after each. Once the flour mixture is incorporated and you have a thick, stiff batter, fold in the apples using a stiff spatula. It will seem like there are too many for the quantity of batter, but don’t worry. It will all work out.
  • Scrape the batter, which might seem more like just battered apple cubes, into the loaf pan.  Tap it once or twice on the counter to release air bubbles and help it settle a bit.
  • Pack on the streusel.
  • Bake in a preheated 350F oven for 1 hour and 30 minutes, or until the topping is deeply bronzed and a toothpick or knife inserted in the center of the bread comes out with just a few moist crumbs. Since the size and juiciness of your apple chunks may vary, check for doneness the first time after an hour, so you can gauge how much more time you might need.
  • If your bread is not done yet but outlier edges of dried apple or walnut threaten to burn, treat this like you’d treat a pie crust: tent the offending areas loosely with aluminum foil to keep them from getting too dark.
  • Cool completely before attempting to slice or remove from loaf pan.  Trust me.

Zucchini Almond Babka

This is the time of year when people who frequent food blogs are probably looking for one of two things: simple, delicious dishes to use up lots of late summer produce, or inspiration for encroaching harvest, autumn-centered meal plans.

Food Blog September 2013-2597Sorry to disappoint.

Food Blog September 2013-2578Yes, this week’s recipe uses a good pile of zucchini, shredded into a mass of green and white ribbons, and yes, it combines the warm, welcome flavors of cinnamon, nutmeg, and brown sugar that you might expect from a really good zucchini bread. But it takes those flavors and, peevishly, wraps them up in one of the more involved sorts of bread out there.

Food Blog September 2013-2585Babka is a sweet bread, raised with yeast and stuffed with butter and eggs. Most frequently, it is filled with chunks of chocolate until it is gasping under the weight, then rolled up, twisted, folded, twisted again, piled with streusel, and then baked until it is golden and crusty and melty and decadent. It tends to be a holiday treat which, considering the quantities of butter and time that go into producing a loaf, makes good sense. Though the bread itself is most likely of Eastern European origin, it probably didn’t intersect with chocolate until the mid 20th century at the hands of some, I must say, entirely sensible and clever American Jews. I mean, bread and chocolate all in one? Yes, please!

Food Blog September 2013-2586I wanted to make a lighter version (hah). I’ve been making zucchini bread for years, and I have a recipe I like, but with this year’s focus on dough, I needed something a bit more complex. I don’t remember exactly where the idea came from, but the idea of sweet, slightly vegetal zucchini flavored with the warm spices of zucchini bread and rolled up in a sweet, doughy loaf was something I had to taste. When the recipes for zucchini babka that I found used the zucchini threads in the dough itself, rather than rolling them up in the middle, I got determined.

Food Blog September 2013-2589The biggest problem here, of course, is how watery zucchini is. My great fear was that this would produce a loaf that was overcooked on the outside but still underdone in the center, as the great leaking mass of zucchini kept things too wet to bake properly. This fear was, thankfully, unfounded. A lengthy draining session followed by a firm squeezing made the zucchini, while still quite moist, apparently dry enough to use as a filling. Paired with well toasted almonds, brown sugar, and butter, it baked into a curious, almost custard-like texture. The stubby ribbons of zucchini were still in evidence, but the edges of dough around them mellowed into beautiful creaminess, like a little central vein of bread pudding.

Food Blog September 2013-2596Is this easy? Not especially. But it will use up some of your fall harvest, and it will impress whoever it is you most want to impress at this moment. Even, perhaps most importantly, you!

Food Blog September 2013-2599Food Blog September 2013-2610

Zucchini Almond Babka
Adapted from Martha Stewart
Makes one large loaf
For bread:
½ cup milk
1 ½ teaspoons yeast
¼ cup granulated sugar
1 large egg
1 egg yolk
1 teaspoon vanilla
2 cups flour
2 teaspoons cinnamon, divided
¼ tsp nutmeg
½ teaspoon salt
10 tablespoons butter (1 stick + 2 tablespoons), divided
2 medium zucchini, grated, drained, and squeezed
½ cup brown sugar
½ cup finely chopped toasted almonds
1 egg white (use the one you separated from the yolk above)
1 tablespoon milk
For streusel topping:
½ cup powdered sugar
1/3 cup flour
4 tablespoons butter
½ teaspoon cinnamon


  • First, prep your zucchini: grate it with the large holes on a box grater and set it in a colander, preferably lined with cheesecloth or a paper towel, so it can drain while you mix up the dough.
  • Heat milk in a small bowl until just warm to the touch. Sprinkle yeast over milk and let it stand until it is foamy and smells like bread; about 5 minutes.
  • In a bowl, whisk together the granulated sugar, the egg, the egg yolk, and the vanilla. Add egg mixture to the yeast and milk, whisk to combine.
  • In the bowl of an electric mixer fitted with the paddle attachment, combine the flour, 1 teaspoon of cinnamon, nutmeg, and salt. Add the egg mixture, and beat on low speed until the flour is mostly incorporated and forms a shaggy, craggy mass. This should take about 30 seconds.
  • Switch from the paddle attachment to the dough hook. Add 6 tablespoons of butter one at a time in 1-inch chunks, beating until incorporated after each addition. The dough will come together briefly, then fall apart into wet bits, and then come together again into a smooth, elastic, rich dough. This should take about 10 minutes.
  • Turn the dough out onto a lightly floured surface and knead a few times until it is smooth. It will feel moist and elastic against the heels of your hands.
  • Butter or oil your mixing bowl and place the ball of dough back into it, turning the dough to coat it with fat on all sides. Cover the bowl with plastic wrap and set it aside to rise for about 1 hour. During this time, it should double in bulk.
  • When your dough is almost done rising, squeeze your drained zucchini to eliminate as much water as possible, then combine the zucchini, brown sugar, remaining 1 teaspoon of cinnamon, and 4 tablespoons of butter in a small bowl. Stir or smoosh these together, then set the mixture back into a colander to drain again.
  • Butter or oil a 9×5 inch loaf pan and line it with parchment paper if desired. Beat the remaining egg white with milk and set it aside.
  • Gently punch down the dough by pressing your fist into the center. It will depress as the air releases. Set it on a generously floured surface and let it rest for 5 minutes.
  • Once dough has rested, roll it out into a 16-inch square; it should be about 1/8 inch thick.
  • Brush edges of the dough with the egg wash. Distribute all but about 2 tablespoons of the zucchini mixture evenly over the dough, leaving a ¼ inch border.
  • Roll the dough up tightly like a jelly roll, enclosing the zucchini mixture inside. Pinch ends together to seal. Twist 5 or 6 times.
  • Brush the top of the roll with egg wash, then carefully crumble the remaining 2 tablespoons of zucchini mixture over the left half of the roll, being careful not to let it slide off. Fold the right half of the roll over onto the coated left half. Fold ends under, and pinch to seal. Twist the roll 2 turns, and fit it into the prepared pan. This may make a bit of a mess, but be bold. It will all work out.
  • Heat your oven to 350F and prepare your streusel by combining the powdered sugar, flour, butter and cinnamon together in a small bowl. Two forks work well for this, but your fingers work better.
  • Brush the top of the loaf with egg wash, then crumble the streusel topping over it. You may have some extra, but don’t be afraid to load it up.
  • Loosely cover the loaf with plastic wrap and let it stand in a warm place for 20-30 minutes while the oven heats up and the loaf swells again.
  • Bake the loaf, rotating it halfway through if possible, until it is golden on top. This will take about 55 minutes. Lower the oven temperature to 325F and continue baking until the loaf is deep golden, 15 to 20 minutes more.
  • Remove from oven, transfer to wire rack until completely cool before you attempt to remove it from the pan and cut it into thick slices to serve. Beware: removing it from the pan and slicing too early will result in a failure in structural integrity! Be sure to let it cool.


Fig and Brie Flatbread #TwelveLoaves September

When I was a kid, my parents made me cassette tapes from several Disney albums to listen to in the car.  I mean real albums: records.  45s and 78s, that spun, some wobbly and warping, on a turntable at a speed that, when I was much smaller, seemed unreal.  But the cassette tapes were for long car trips, and we all learned every word in every song (this wasn’t so bad, according to my parents, with the Disney songs.  One of the other tapes – a John Denver greatest hits album – wasn’t so lucky.  I requested it so many times that the tenuous black strip of tape got tangled in the player, and even after attempts to repair it by winding it manually back into the plastic casing, one day it mysteriously disappeared.  I’m still convinced that my dad, sick to death of hearing the plaintive desire for country roads to take us home, chucked it out the window).

Interestingly, one of my favorite songs from that collection was from a movie I’ve never seen: Disney’s The Happiest MillionaireThe song, “Fortuosity,” was a happy ditty about luck and opportunity, and “fortuitious little happy happenstances,” and I loved it.  It’s an idea that I like, and the song itself comes back to me every once in a while at random moments, most often when I think about the word “fortuitous,” with which the song obviously plays, and when I remember road trips with my family.

Food Blog September 2013-2570This is a long-winded way of introducing the idea that this week’s post, and this month’s Twelve Loaves challenge, aligned entirely by fortuitous coincidence.  Last week I asked N. to grill up some leftover pizza dough, which I smeared with double cream brie, nestled in some halved figs straight from the farmers’ market, and drizzled with barley malt syrup and sprigs of fresh thyme.  Then I checked the Twelve Loaves challenge only to see that September’s theme is Farmers’ Market food.  Fortuosity indeed.

Food Blog September 2013-2566The idea for this combination – creamy cheese, soft, sweet figs, and a hit of herby freshness, came from a party N. and I attended recently.  Our hostess, who works with N. (we should have them over soon, N., if you’re reading this…), had quartered some black mission figs, settled them in around a wedge of brie, and dosed both liberally with honey and thyme.  My spin was based on the desire to use more of the barley malt syrup I bought for last month’s bagel experiment, and the obsessive love we have for homemade pizza, which means there is frequently a ball of dough either in the fridge or in the freezer, hoping to be put to tasty use.

Summer 2013-2503

Visitor to our thyme bush. I named him Algernon, because he looked like he might be impersonating someone.

We loved this combination.  The barley malt syrup is a roastier contestant than, say, maple syrup, and was therefore a welcome balance.  It is sweet, but there is an almost bitter edge to its flavor – no doubt the malt part.  It is, in fact, just a lower grade extract than what brewers use for beer, so the darker component makes good sense.  Drizzled judiciously across the blistered surface of our cheese and fruit studded flatbread, it enhanced both main players.  Though Los Angeles played some mind games with me last week, cooling off just as I published a post asserting that autumn hadn’t arrived yet, it has warmed up again.  Since this flatbread cooks on the grill, it’s perfect for a warm evening when you can’t bear the idea of firing up the oven.  But if you don’t have a grill, and you’re willing to risk the house-heating power of indoor cooking, I’ve also included directions for the oven.  Food Blog September 2013-2574

Food Blog September 2013-2569
Fig and Brie Flatbread
Serves 3-4 as an appetizer; 2 as a main course
Directions for grilling adapted from Elizabeth Karmel and Bob Blumer’s Pizza on the Grill
12 oz. ball of pizza dough, purchased or homemade (I’m still working on perfecting my recipe; once it’s foolproof, I’ll post it for you)
Olive oil for stretching dough
6-8 fresh black mission figs, halved from stem to blossom end
8 ounces brie cheese, cut into thick slices
2 tablespoons barley malt syrup or your favorite honey
2 teaspoons fresh thyme leaves (in small sprigs is fine – the stems are tender enough to eat near the end of the sprig)
  • If your dough is in the refrigerator, remove it about half an hour before you intend to cook it and let it rest, unwrapped, on a lightly floured or oiled surface.
  • While the dough rests, preheat your oven or grill.  For a gas grill, this will take about 10-15 minutes with the burners set on high.  Once the grill has preheated, turn down the burners to medium.  For a charcoal grill, this will take a little longer – perhaps up to 30 minutes for the coals to begin turning gray.  For an oven, preheat to 500F (or as close to this as your oven will go!).
  • Once you’ve got your heat source preheating, prep your toppings.  Halve the figs, slice the cheese, pinch the thyme into individual leaves or small clumps.  This is all going to go pretty quickly once we start cooking, so you’ll want to be ready.
  • When the dough has rested, set a 9×13 inch glass baking dish bottom side up on your counter.  Rub the bottom (now facing upwards) with olive oil, then push and stretch your pizza dough out on the bottom of the dish so it hangs over all edges, creating a rustic but relatively even rectangle.  If it springs back or threatens to tear as you stretch it toward the edges of the dish, let it rest a bit longer and then try again.
  • Bring your dough, still on the bottom of the baking dish, out to the grill.  If the dough is sturdy enough to lift without tearing, pick it up by two ends and lay it across the grill grates, flopping the sides drooping below your hands toward the back edge of the grill, in the same motion you would use to swing a tablecloth over a table.  If the dough is not so sturdy, put some gloves on, and carefully invert the baking dish only an inch or so above the surface of the grill. The dough will slowly disengage and drop gracelessly onto the grill grates.  Once dough and grates are in contact, close the lid of the grill and leave it closed for about 3 minutes, or until the bottom side of the dough is well browned with nice grill marks.
  • Use a pair of long-handled tongs to transfer the flatbread to a pizza peel or a rimless baking sheet.  Use the peel or baking sheet to help you flip the rectangle of dough over and slide it back onto the grill, unmarked side down.  Close the lid of the grill and leave it closed for another 3-5 minutes, or until the whole thing is browned, marked, and nicely puffed.  I like the look of a few big airy blisters on the surface.
  • If you are using an oven, flop your dough onto a preheated pizza stone or the bottom of an oiled cookie sheet and bake for 10-12 minutes.
  • Once your flatbread crust is browned and blistered to your liking, transfer it from the grill or oven to your cutting surface.  Smear the whole top of the dough with the slices of brie cheese (I used the back of a spoon.  You could also use a spatula).  Nestle the figs in, spacing them evenly over the surface.
  • Drizzle the barley malt syrup over the top of the flatbread in a thin stream.  Don’t overdo it – the stuff is sweet.  You might not need the full 2 tablespoons.  You just want a light zigzag of caramel over figs and cheese alike.
  • Sprinkle on the thyme leaves, slice, and consume.

* You could, I suppose, top the dough either before cooking, if you are using the oven method, or immediately after flipping, if you are using the grill, and cook the toppings.  I didn’t do this, because I wanted the freshness of the figs, and knew the heat of the bread itself would be enough to melt the cheese.  If you choose to cook the toppings and you are using a grill, add the toppings after flipping, but turn off the burners on one side of the grill to create indirect heat, and cook your topped flatbread over the unlit burners for 7-10 minutes. This will allow the toppings to cook and the cheese to melt without burning the dough.

Jalapeño Cheese Bagels

August 2013-2541Seeing as it’s now been more than half a year since I started this dough resolution, I think it’s high time for a check-in.  When I began this project, I was afraid of pie crust.  I found baking bread an intimidating procedure: proofing yeast was a touchy business; sticky dough made me wring my hands in despair.  My first few loaves came out with black bottoms, and I didn’t have a real sense of the difference between bread flour and all-purpose.

August 2013-2537Fast forward.  This past weekend, I made bagels.  Real, crisp crusted, chewy, bagel-y bagels, studded with jalapeño slices and dripping with sharp cheddar cheese.  I’d been thinking of making them anyway, but when this month’s Twelve Loaves challenge came along with a demand for savory breads, it sealed the deal.  I know, I’ve used this flavor combination before.  In fact, I used it for another Twelve Loaves challenge.  You could say I’m rather fond of it.  Maybe I need a bit of an intervention.  But… jalapeño and cheese!  How can you resist?  See, the cheese transforms into a delicate crackling lace encasing the top of the bagel, and the pepper slices roast and shrivel in the oven’s high heat, and the whole thing becomes just so savory and interesting, that I want to put it on everything.

August 2013-2534Bagels are an odd-ball bread.  The additional protein of plain old bread flour is not enough for them – they require the even heavier duty high gluten flour, and sweetener in the form of barley malt syrup, both products I’d never heard of (see note on ingredients below).  After a lengthy turn with a dough hook that I thought would break my stand mixer (the heaving strain of the machine was almost too much to take), the stiff, dense dough gets portioned out, rolled into wormy logs, curled and pressed and sealed into rings, and then refrigerated overnight to allow for a long, slow rise that enhances the flavor and texture of the finished product.  Upon retrieval from the chill-chest, the rings are plunged into a vat of boiling water before being sprinkled with toppings and levered into a hot, hot oven to bake up shiny and crisp and chewy.

(Obligatory apology for the weird lighting in the pre-topped, pre-baked photos.  That’s what happens when you bake at night…)

August 2013-2516 August 2013-2518 August 2013-2519 August 2013-2520 August 2013-2521 August 2013-2522 August 2013-2523These are not the easiest baked good I’ve tried.  They involve odd ingredients, special equipment (I can’t imagine kneading this dough by hand.  Baking Illustrated, my guide for this recipe, says you shouldn’t even try), and considerable time.  They require not one, but two methods of cooking, and they make a lot of dishes for a willing but sometimes reluctant dishwasher sous chef helper to wash up.

August 2013-2524 August 2013-2525Yet I think, if you are up for the challenge, that you should take it on.  Watching them transform from a scrappy, tough dough into firm rings, and then seeing the crust take on that glossy shine and texture surrounding a chewy, densely-spongy interior, is not far short of amazing.  Several times during the process, astounded by how bagel-like they actually were, I said to N., “I can’t believe I’m making bagels!  Actual real bagels!”  The finished product is a far cry from the soft, fluffy offerings you’d find on a grocery store shelf.  The extra labor and the strain they put on my stand mixer (seriously, guys, you should have heard the motor.  I thought it was going to die on me right there) make these only a truly special occasion project, but one that was certainly worth doing.

August 2013-2528 August 2013-2530Note on ingredients: I couldn’t find high gluten flour, but Baking Illustrated told me it could be readily ordered from King Arthur flour, if you have that kind of time, and the sweet, helpful woman who swept in to help me navigate the rows of flour in our Whole Foods market said it was sometimes at “crunchy granola” sorts of markets.  I used, at her recommendation, a combination of bread flour and a few tablespoons of vital wheat gluten instead.

Barley malt syrup is a sweetener made from sprouted barley with an intriguing, earthy taste, less saccharine than white sugar or honey, not nearly as intense as molasses.  I found it at my Whole Foods, but again, if you can’t find it, you might try a natural foods store or the internet.

August 2013-2542Jalapeño Cheese Bagels
Adapted from Baking Illustrated
Makes 8 bagels
4 cups high-gluten flour OR 3 ¾ cups bread flour and ¼ cup vital wheat gluten (22 oz)
2 tsp salt
1 TB barley malt syrup
1 ½ tsp yeast (I used active dry yeast; you could also use instant)
1 ¼ cups water (at 80 degrees – it should feel just barely cool to the touch)
3 TB cornmeal, for dusting the baking sheet
1 cup shredded extra sharp cheddar cheese
1 green jalapeño, sliced wafer thin


Day 1:

  • If you are using active dry yeast, sprinkle it over the water and leave it to burble for a few minutes while you collect the rest of your ingredients.
  • Combine the flour, salt, and barley malt syrup in the bowl of your stand mixer with the paddle attachment.  Add the yeast and water (if you are using instant yeast, skip the proofing step and measure it straight into the bowl) and mix on the lowest setting with the paddle attachment for about 4 minutes, until the dough is in dry tangles.  Baking Illustrated says until it “looks scrappy, like shreds just beginning to come together,” which is a perfect description (124).
  • Exchange the paddle attachment for the dough hook, and continue to knead on medium-low speed until the dough comes together into a stiff but slightly elastic ball, about 8 to 10 minutes more.
  • Turn the ball of dough onto a work surface.  It won’t be very sticky, so you probably won’t need to flour your board at all.  Divide the dough into 8 even portions, roll each one into a smooth ball and cover them all with a towel or plastic wrap for 5 minutes.
  • Once the dough balls have rested, form each one into an 11 inch rope of even thickness by firmly rolling from the bottom joints of your fingers down to the heel of your hands.  I found I had the best luck angling my hands slightly away from each other and pushing down and forward, which helped lengthen both sides of the rope simultaneously.
  • Shape each 11 inch rope into a circle, allowing for a 1-2 inch overlap.  Dampen the dough surface where it will overlap, and press together, squeezing and pinching tightly to seal the edges.  To secure the seal, put your fingers through the dough ring, resting it at the base joint where your fingers meet your palm, and roll the dough circle over the board a few times with the overlapped portion against your palm.
  • Dust a baking sheet with the cornmeal, evenly space the dough rings on it, and cover securely with plastic wrap.  Refrigerate for 12-18 hours.


Day 2:

  • 20-30 minutes before baking, remove the baking sheet from the refrigerator to let the dough rings warm up just a bit and get the yeast ready for quick action.  With the rack in the middle position, preheat your oven to 450F.  Pour water into a large stockpot or a wok to a depth of about 3 inches and bring it to a boil.
  • With the water boiling, drop the dough rings 4 at a time into the water; stir and submerge them with tongs, a slotted spoon, or a little skimmer for about 30 seconds.  They will puff very slightly as the yeast expands and then is extinguished by the heat.
  • Remove the dough rings from the boiling water and drain them on a wire rack, bottom-side down.
  • While the rings are still wet, sprinkle them with the cheese and stud them with jalapeño slices, then transfer each to a cookie sheet lined with parchment paper.
  • Bake 14 minutes, or until they are crisp and golden, and the cheese has transformed from drippy and melted to lacy and crunchy, and the jalapeños are just toasty and shriveled.  Transfer to a wire rack to cool before serving.

Plum Upside Down Irish Soda Bread Cake #TwelveLoaves

Food Blog July 2013-1940As you can perhaps intuit from the title of this post, this month’s Twelve Loaves challenge was just that for me: a challenge.  Called upon to incorporate stone fruit into a bread item, my mind went in a thousand directions at once and came up blank.  For me, stone fruits belong in pies and cakes.  The idea of combining cherries, or peaches, or apricots, or nectarines with the slow, yeasted rising of a bread was an odd one (although now that I’ve considered it, chocolate and cherry bread sounds fantastic.  Inspiration, if anyone still needs an idea for this month?).  So I struggled.  I wrote down ideas that sounded like madness:

Caramelized apricot yeasted mini loaves, baked in muffin tins  too weird.

Plum cobbler  not really a bread.

Peach upside down cake  not a bread at all!

Irish soda bread with… stone fruit… somehow…

And that was where I landed, nibbling at the edges of this idea.  It would be, I decided, a skillet bread: fruit caramelized in the bottom of a cast iron skillet, soda bread dough mounded atop it and then baked and flipped, like the weirdest version of a pineapple upside down cake bread you’ve ever heard of.

Food Blog July 2013-1919Once this weirdness was determined, I settled immediately on plums as my fruit choice.  I always forget how much I love plums as a cooked component.  None of the insistent fuzziness of peaches to deal with, but bursting with juice, brightly veined, and hiding just the right hit of tartness in that secret microscopically thin layer between skin and flesh.  I love that part.

Food Blog July 2013-1923Food Blog July 2013-1926Food Blog July 2013-1929I envisioned bubbling slices of that sweet tartness in a slick of butter and brown sugar, mounding on heaps of gussied up Irish soda bread dough and baking the whole thing into a puffed, flippable cake/bread to have for breakfast, afternoon “tea” (N. and I rarely drink hot tea in the 3pm hour, but love the idea of stopping for a bit of a snack), or maybe even wedges wrapped up in wax paper to take on the road as we head into vacation.

Food Blog July 2013-1931Food Blog July 2013-1932
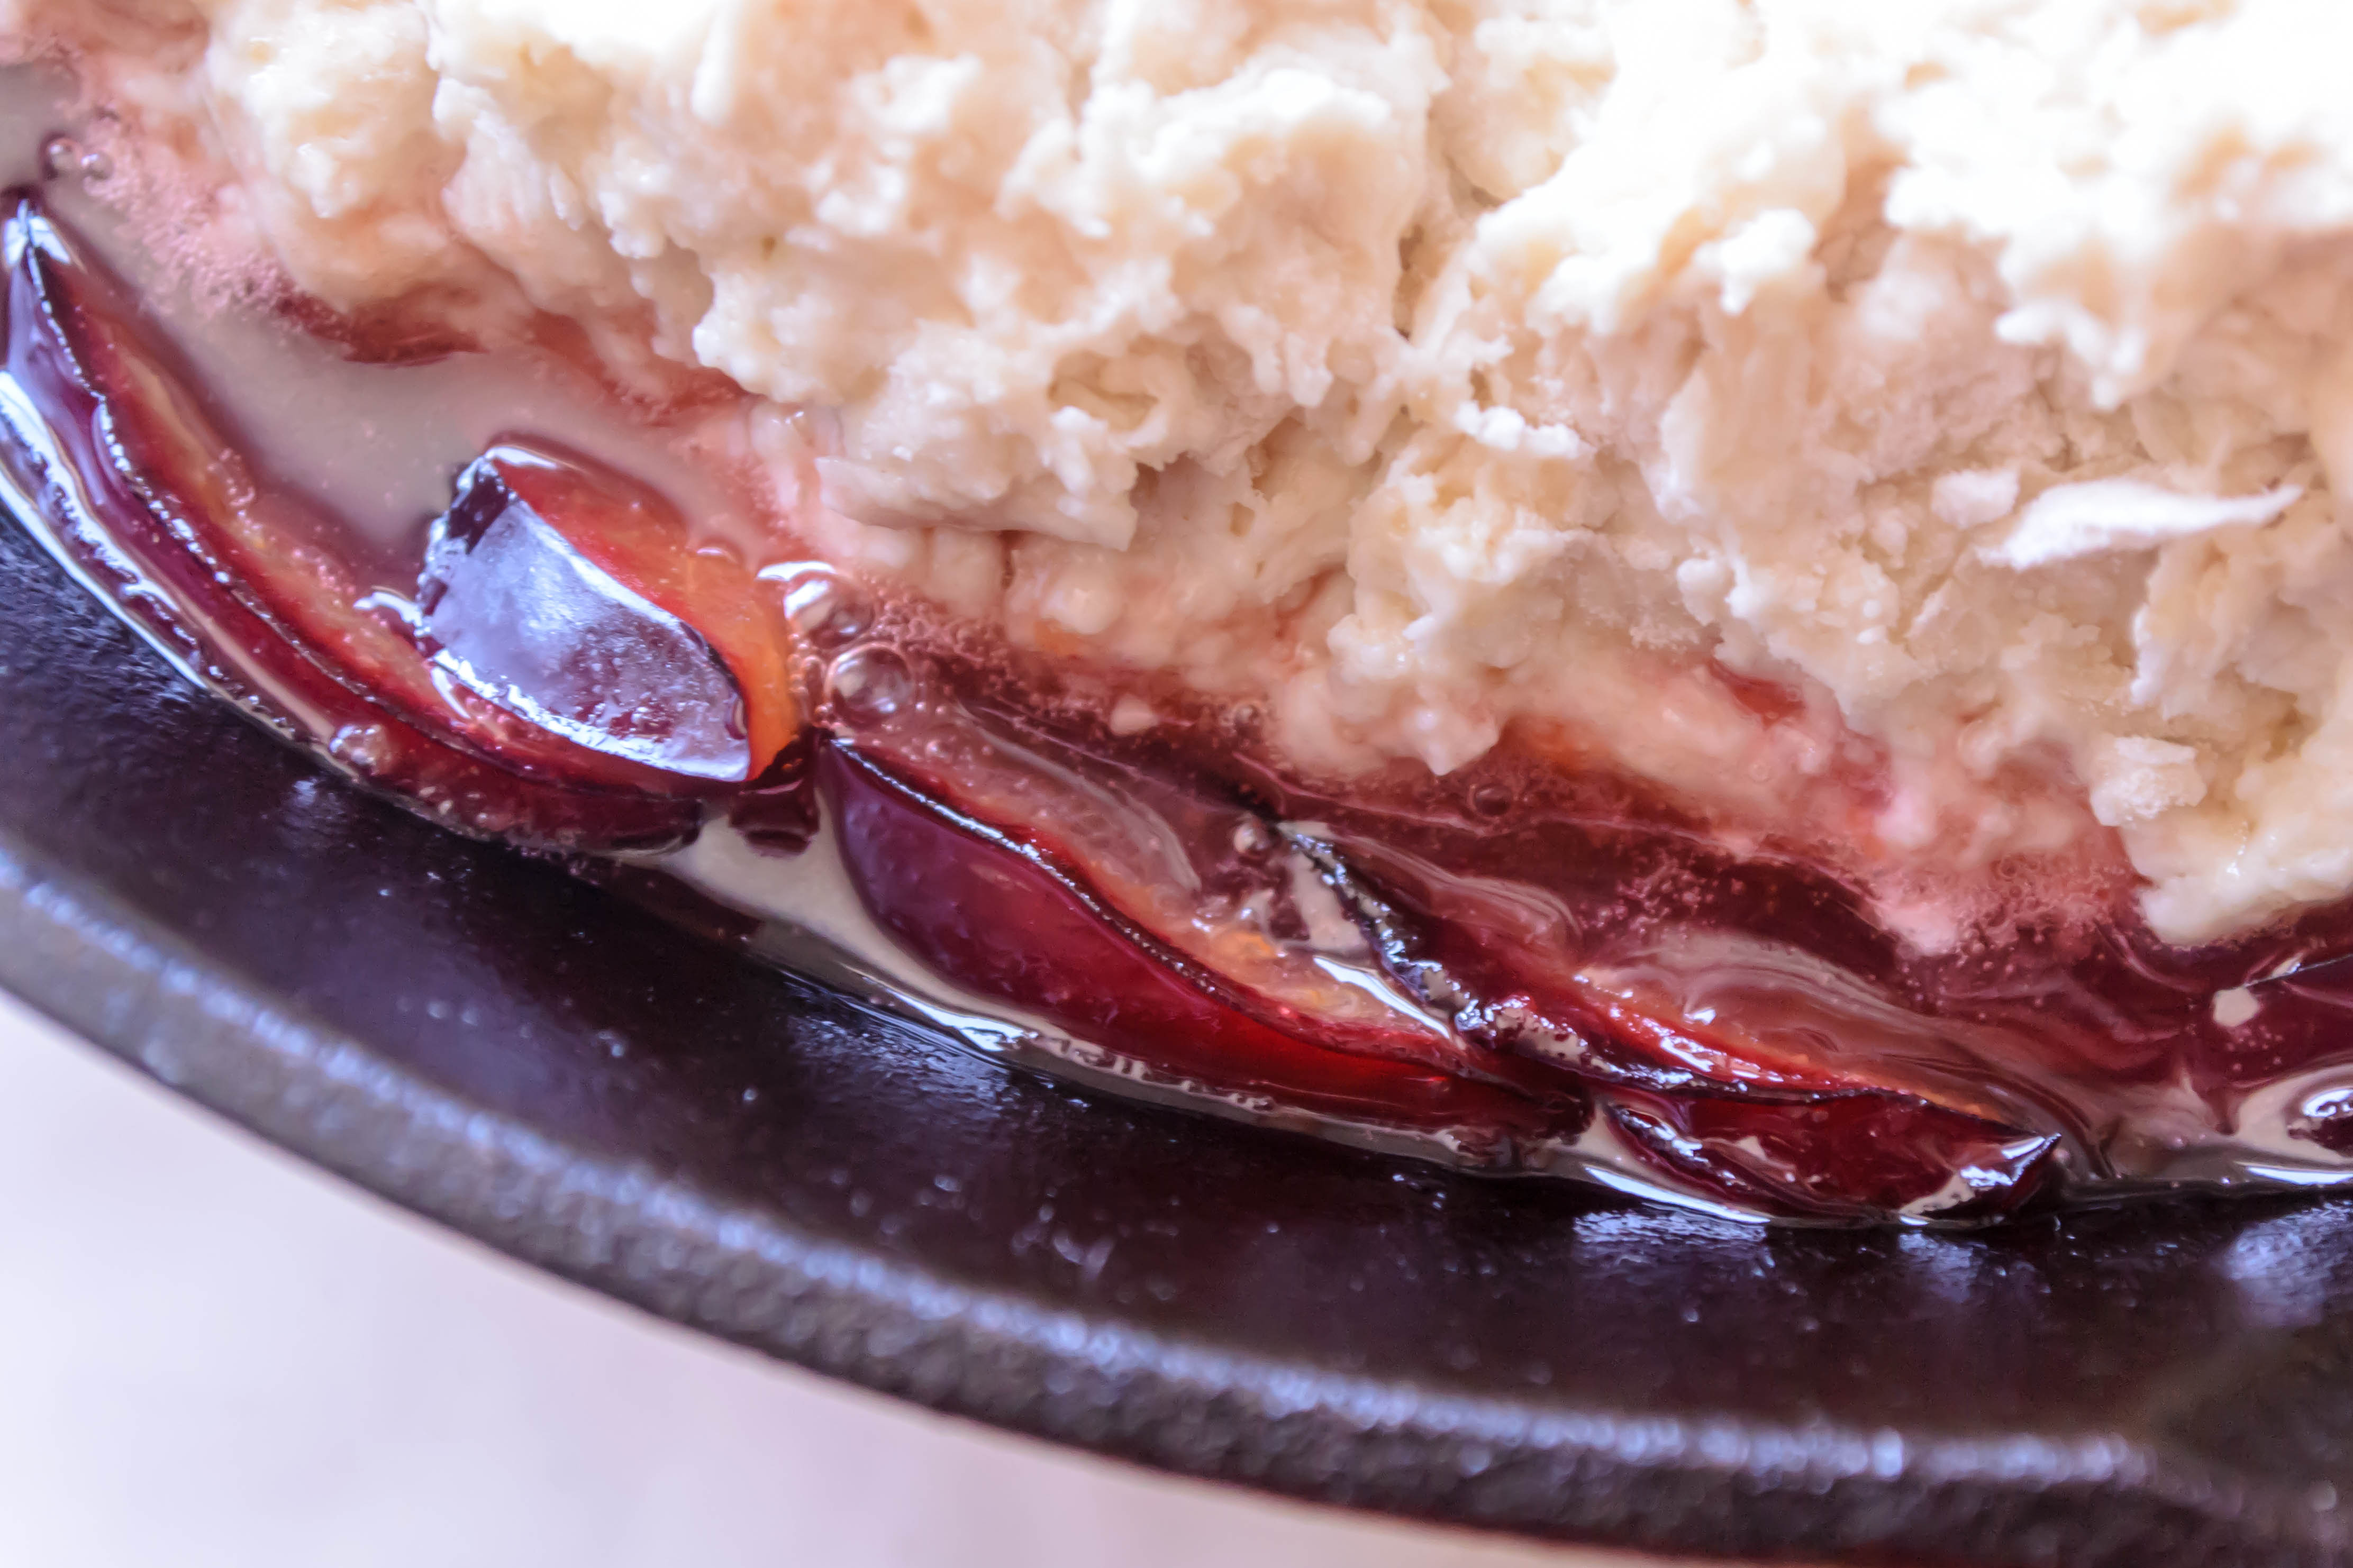
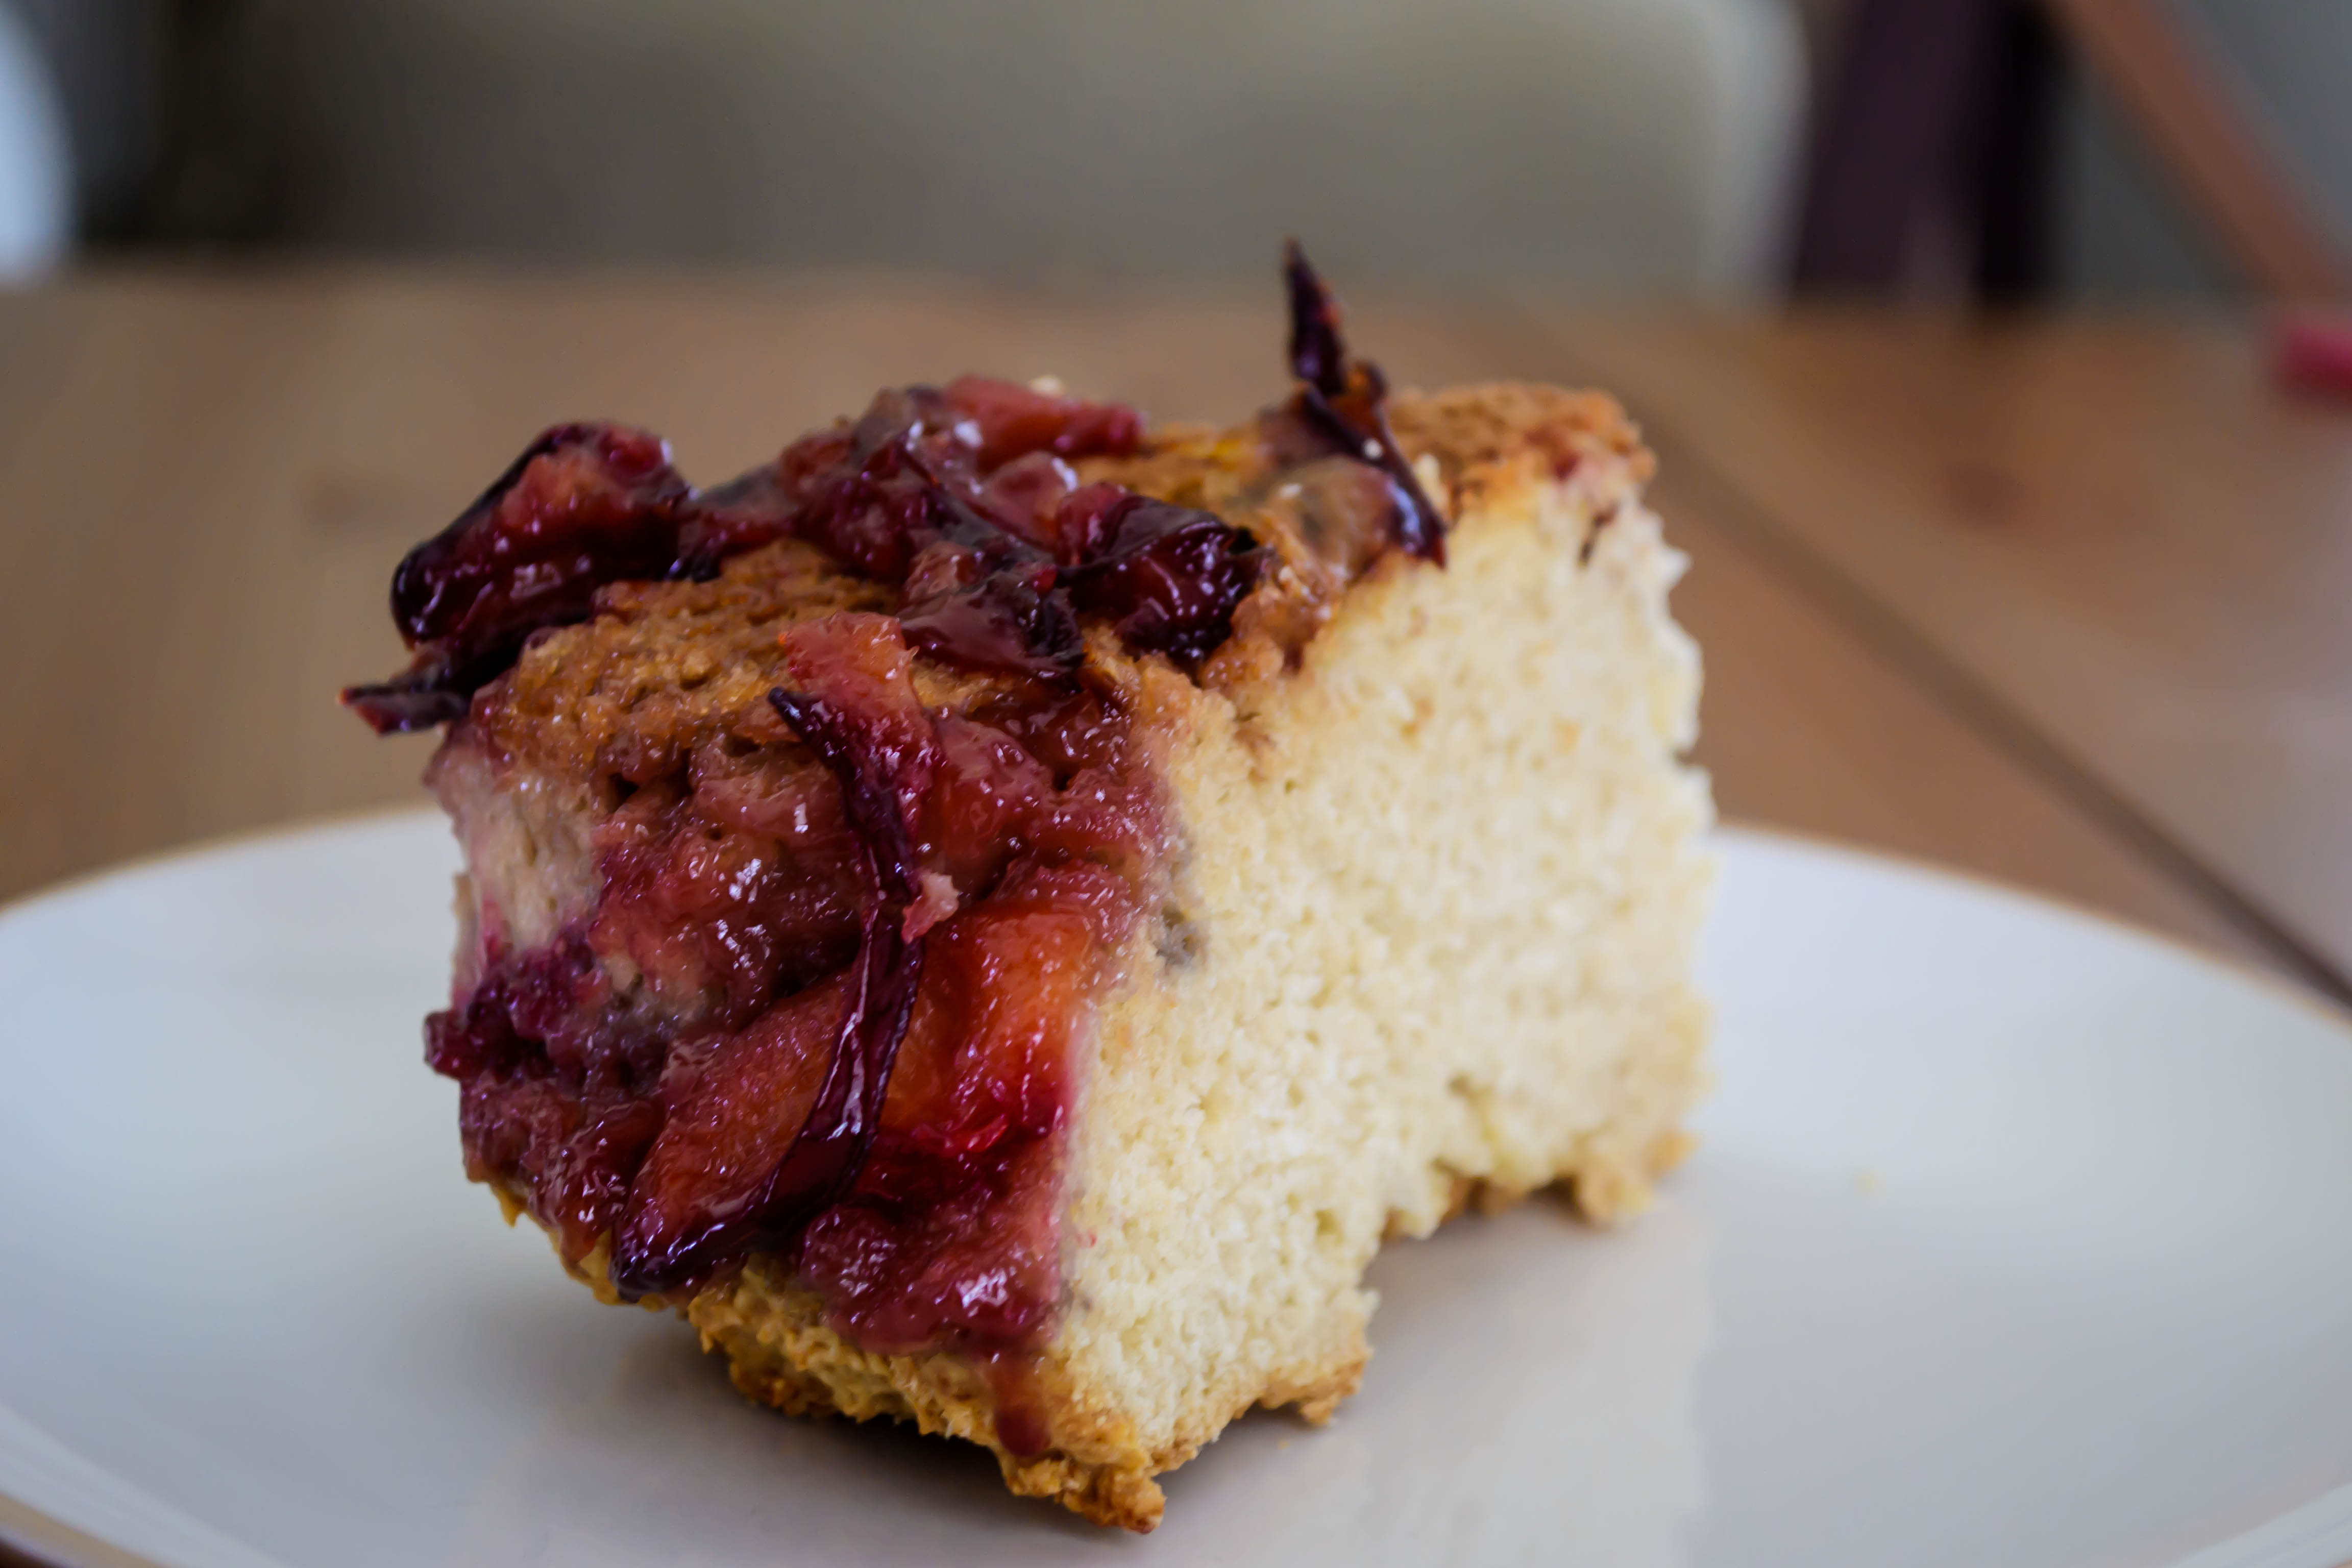
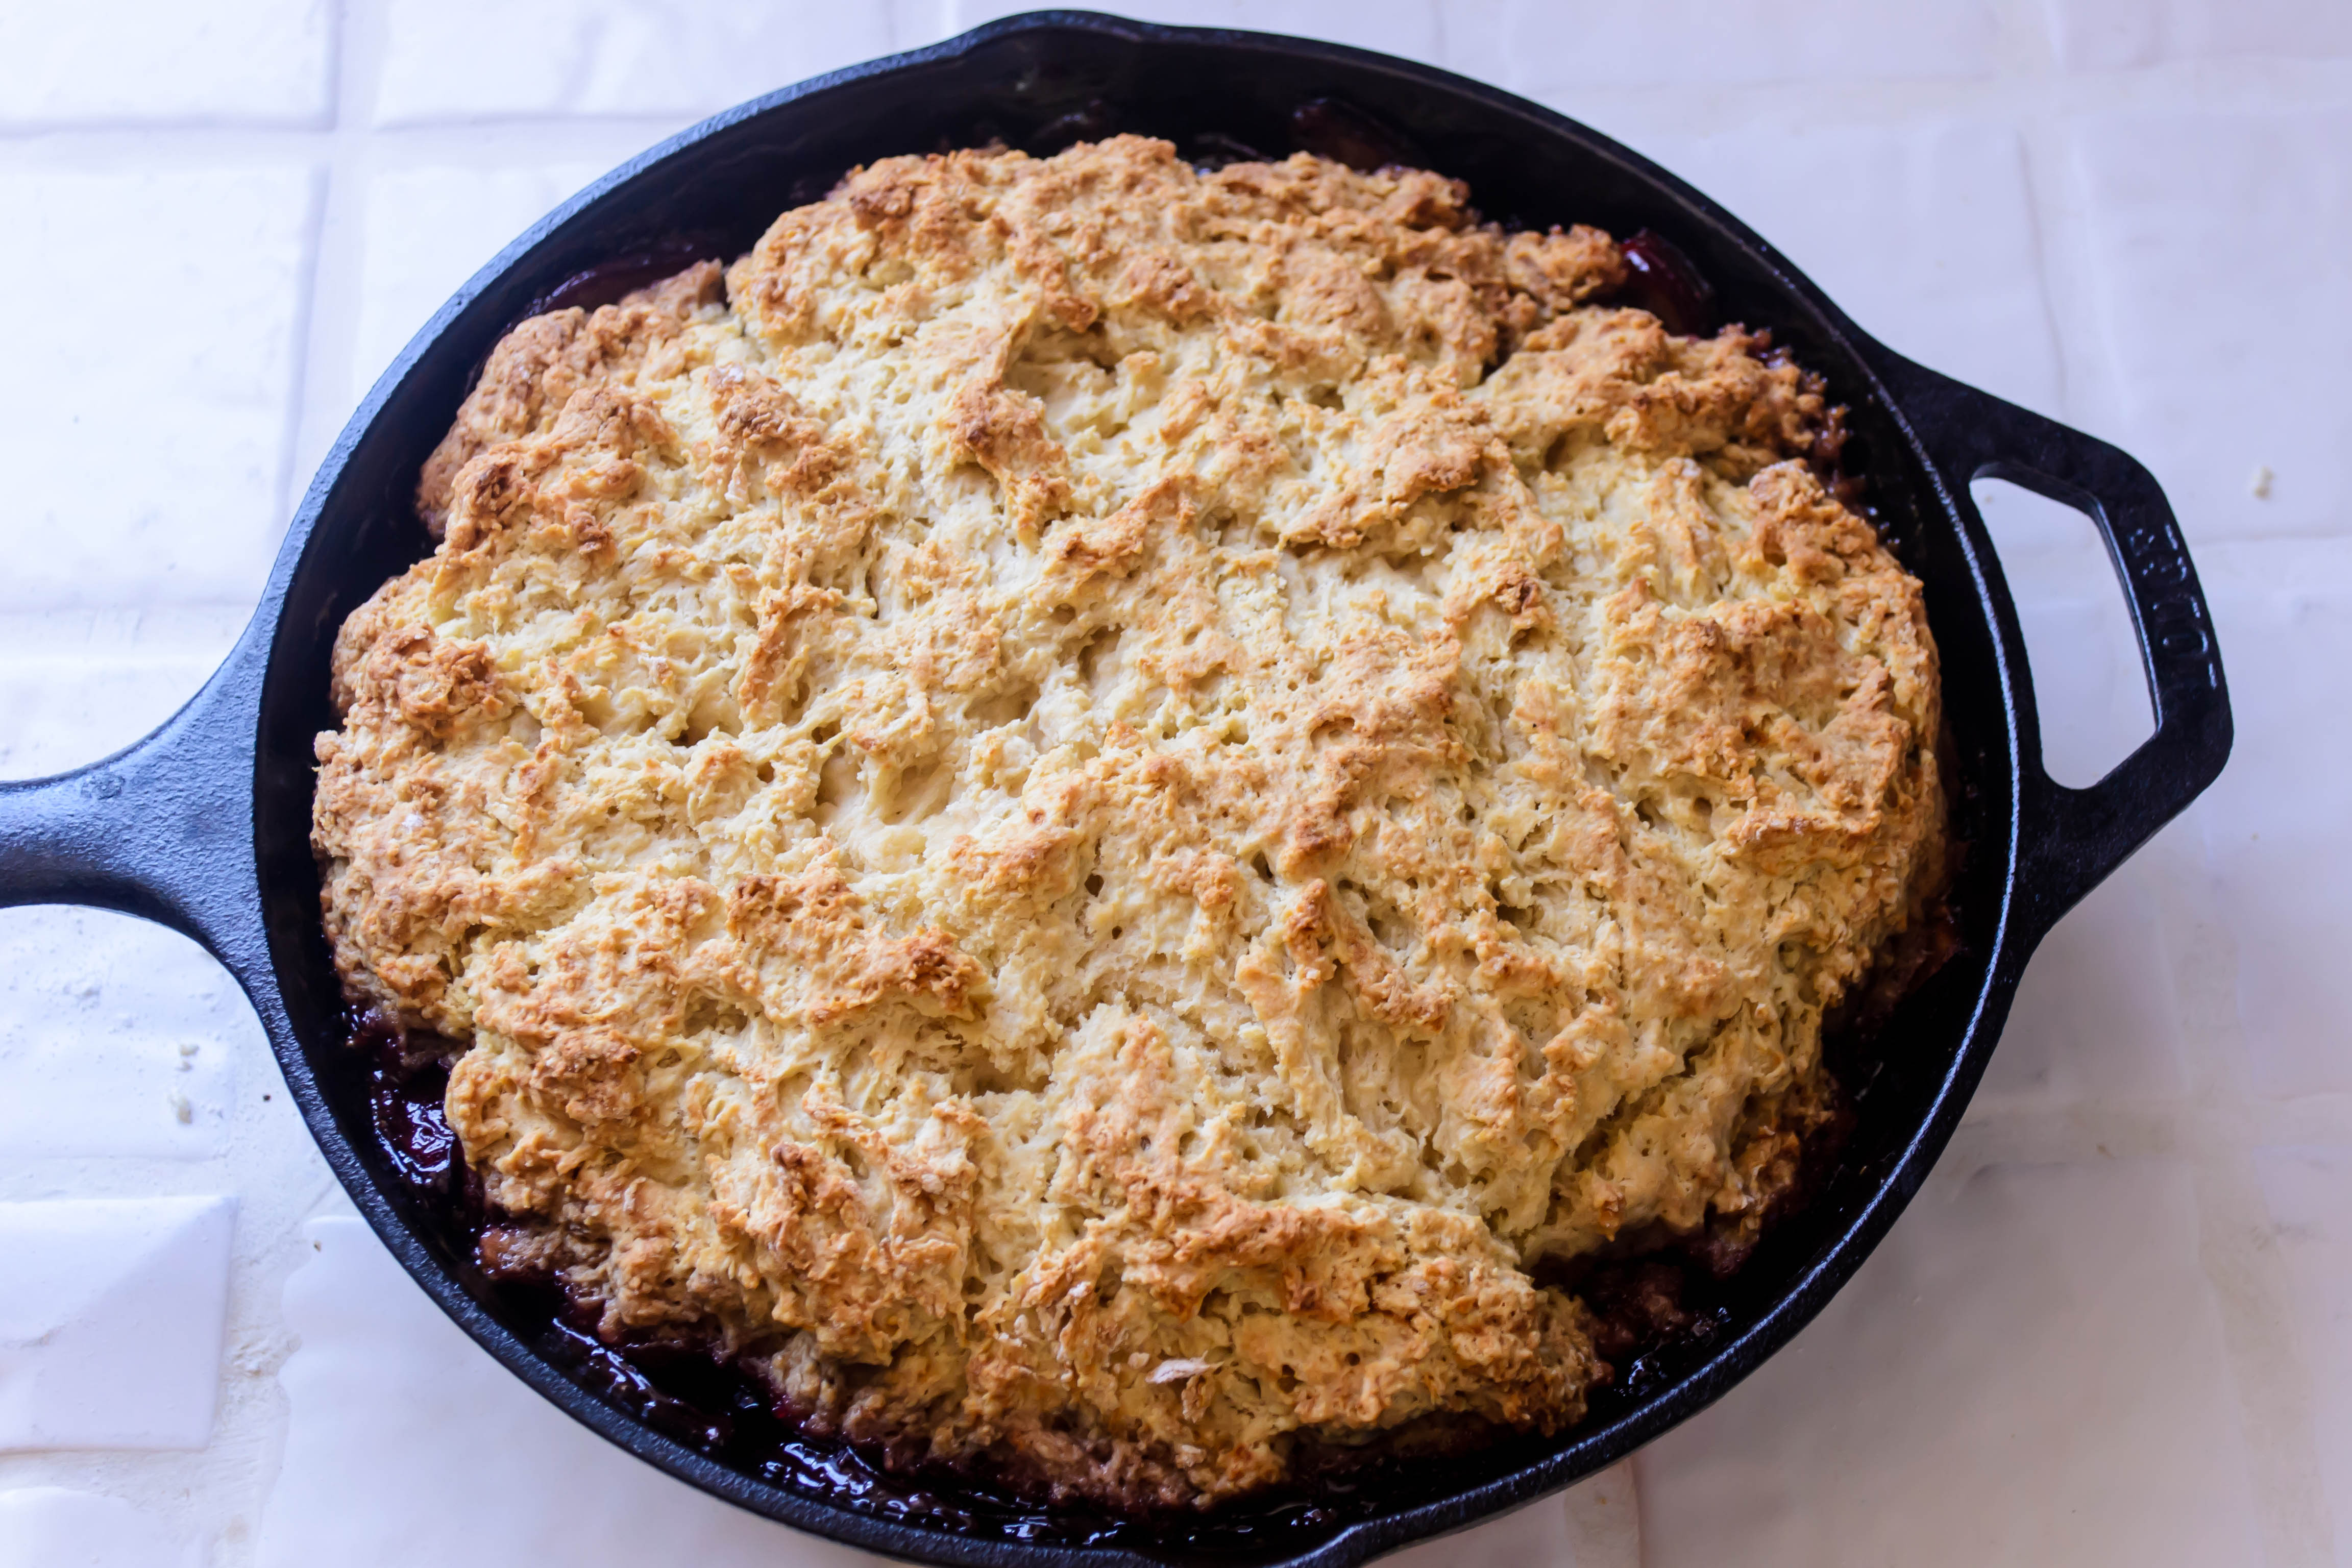
What I got was a stunner-in-progress.  I’m going to give you the recipe for exactly what I made, but I know this is not the final iteration of this dish for me.  The plums were perfect: juicy, melting into the caramel and the bottom of the bread, sticky and jammy and reminiscent of a triumphant batch of plum butter my mom made one summer with pounds and pound of plums delivered to our door in a brown paper bag straight from a neighbor’s tree.  The bread itself was good: solid Irish soda bread, a little richer and a little sweeter from the addition of brown sugar, extra butter, and an egg, perfect for the breakfasts and snacks I envisioned, and better the second day than the first.  But as I dug in, I found myself wanting the bread part to be more like cake: more egg, less flour, a hint of vanilla or nutmeg or maybe cardamom.  The plums were so good, so gloriously gooey and tooth-sticking-ly caramelized, that they deserve a proper dessert – something you can watch a scoop of ice cream melt over.
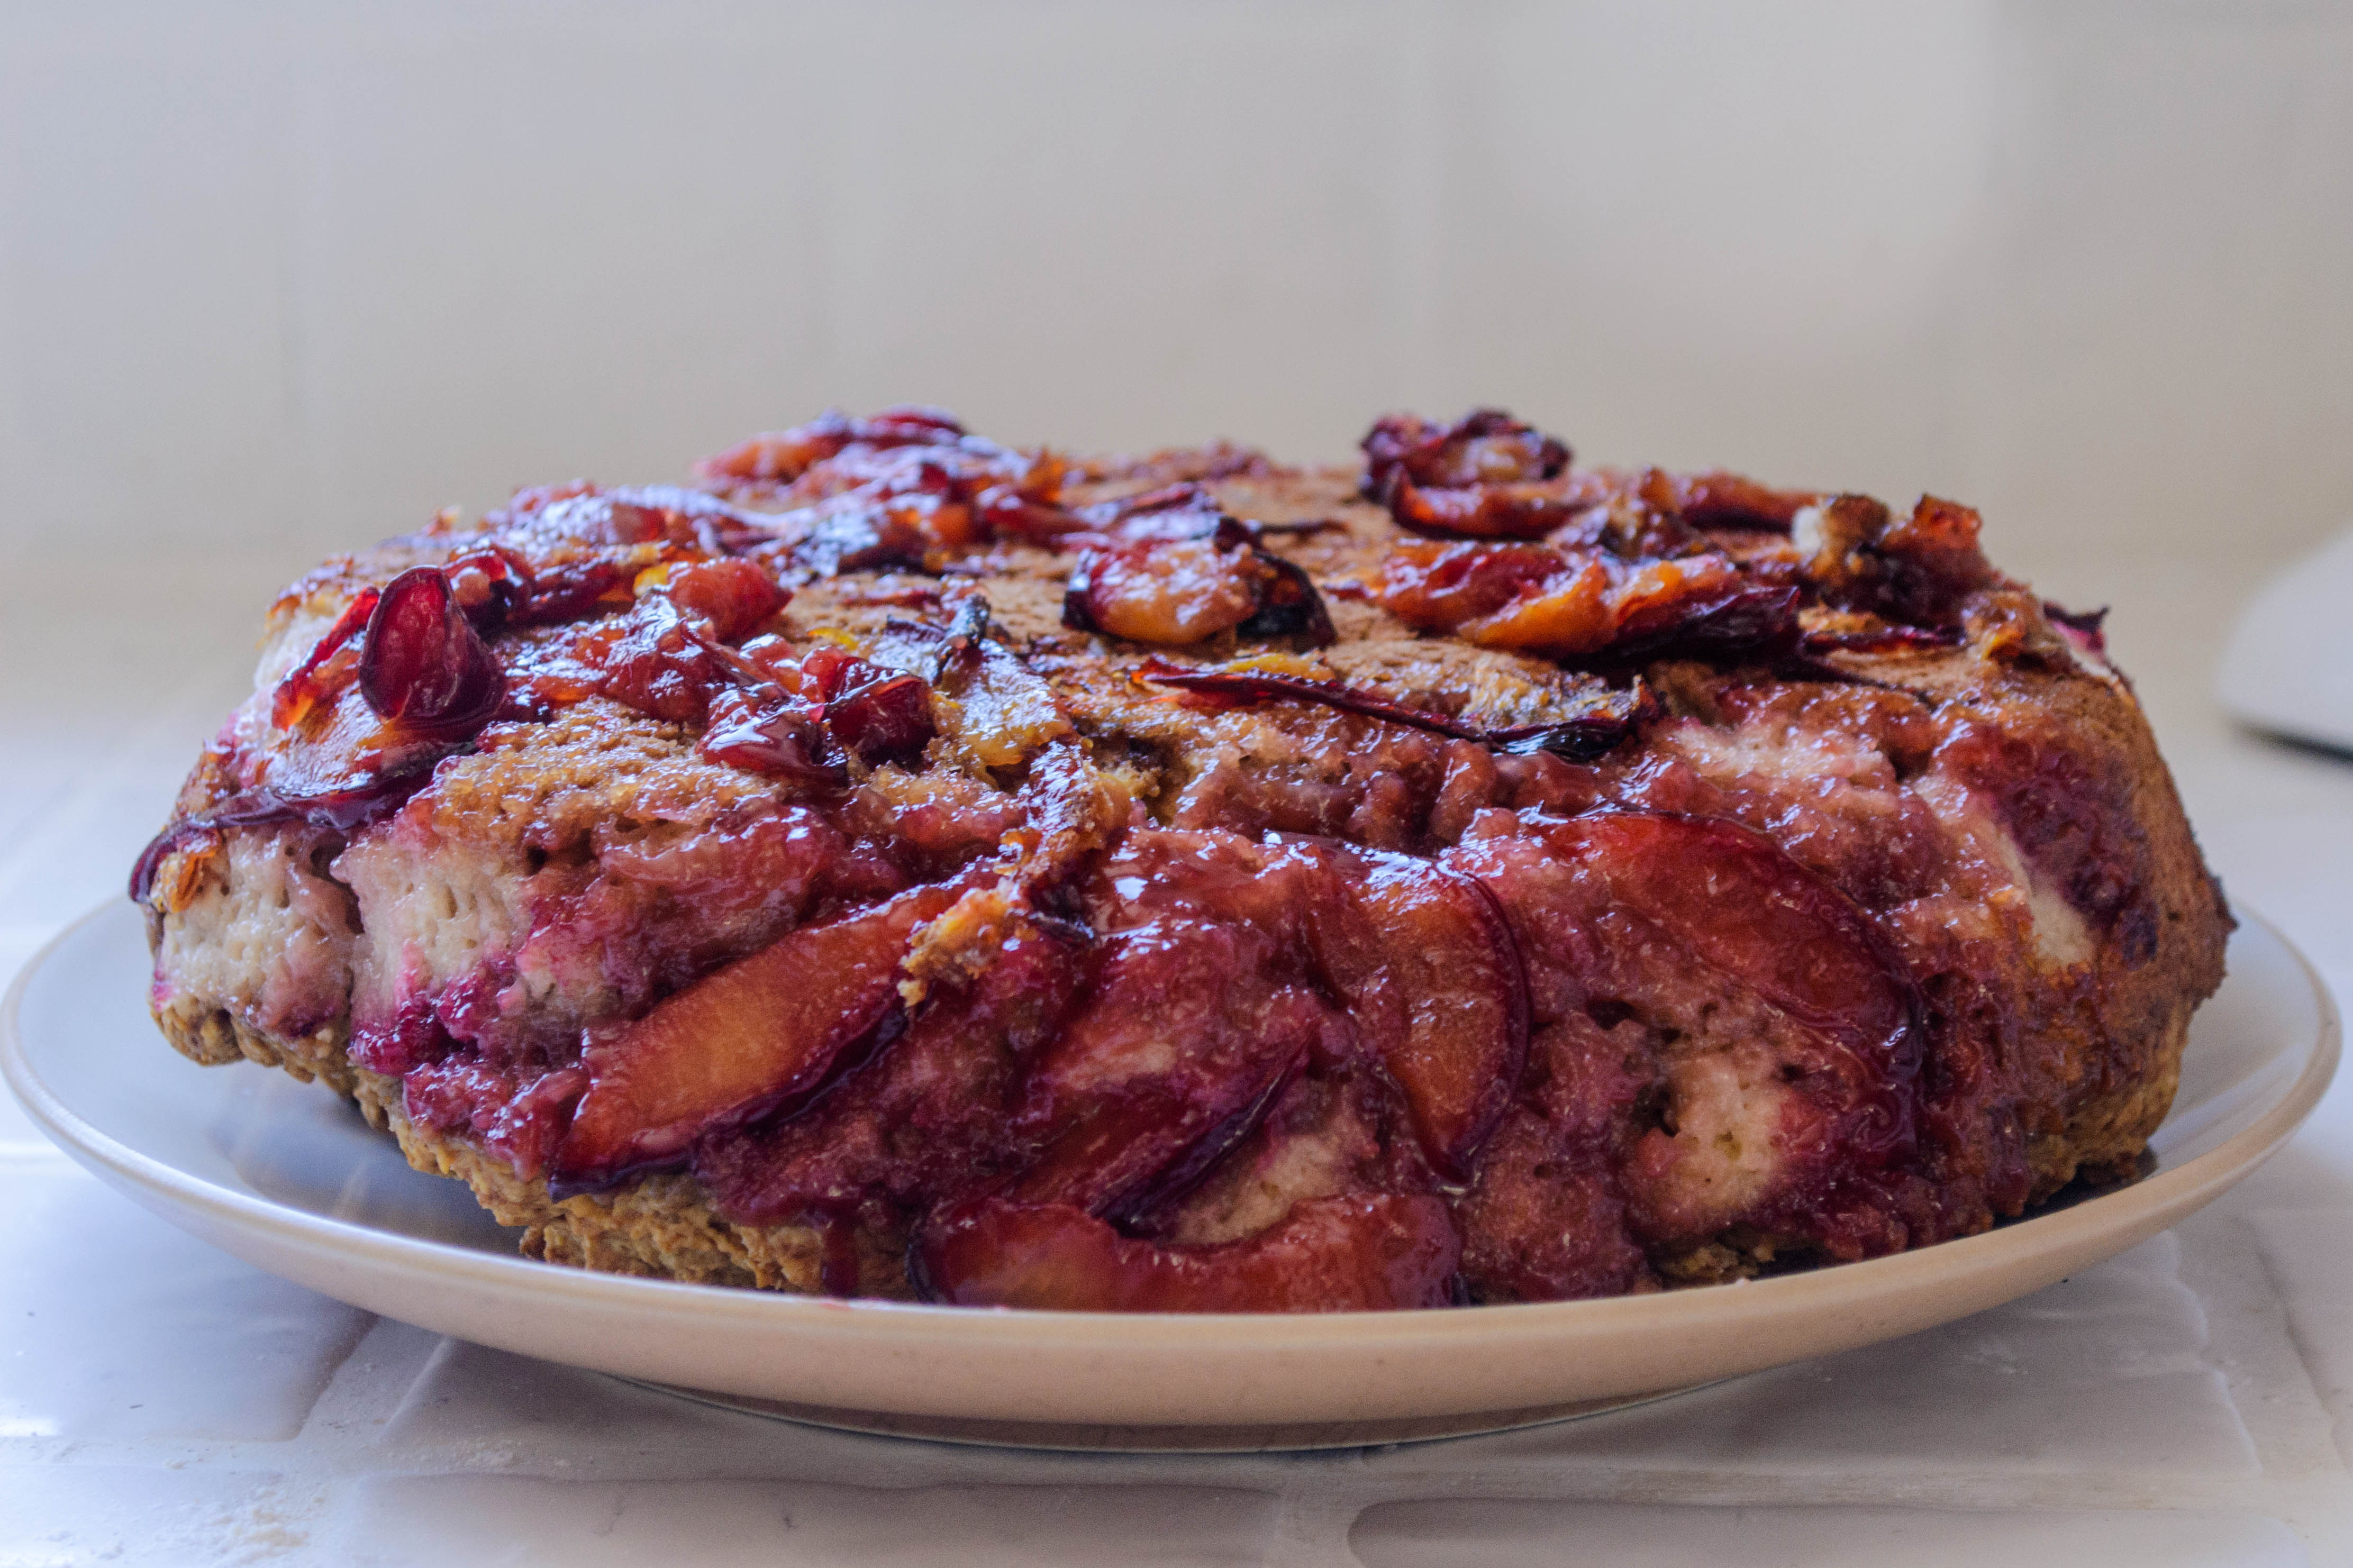
Food Blog July 2013-1938Make this.  It’s solid and scrumptious: the perfectly not-too-sweet energy boosting slice.  But consider yourself warned: this won’t be the last time you see upside down plum something here…

Food Blog July 2013-1945

Plum Upside Down Irish Soda Bread Cake
Serves 8-10
2-3 plums, thinly sliced
2 TB butter
¼ cup brown sugar
2 cups all-purpose flour
2 cups cake flour (this adds some lightness – if you don’t have cake flour, you can use all AP flour instead with slightly denser results)
¼ cup brown sugar (again)
1 ½ tsp baking soda
1 tsp salt
¼ cup melted butter
1 ½ cups buttermilk
1 egg


  • Preheat the oven to 400F.
  • In a cast iron skillet (or other oven-safe skillet), melt the 2 TB butter and toss in the first ¼ cup brown sugar.  Stir around until butter and sugar melt together into a sticky, bubbly mass.
  • Pull the skillet off the heat and add the plums in an even, single layer right on top of the caramel you’ve created.  You can place them in concentric rings if you want, for aesthetics, but so long as you have a complete single layer, you’re in good shape.  Set the skillet aside.
  • In a medium bowl, whisk the flours, the remaining ¼ cup brown sugar, the baking soda, and the salt until well blended.
  • In a small bowl or a 2-cup glass measuring cup (I like it easy), combine the melted butter, buttermilk, and egg.  Beat thoroughly with a fork.  Some of the melted butter will solidify again when the colder buttermilk hits it, but that’s okay.  It will all work out.
  • Pour the liquid mixture into your whisked dry ingredients.  You can make a well in the center first if you want, but the important thing is just to get them in there.  Combine with a fork, as you would with the liquid in biscuits, just until everything is incorporated into a rough, lumpy heap of dough.
  • Plop the dough onto the layer of plums and use a spatula or your hands to press it down a bit into an even layer that covers the fruit below.
  • Bake in a 400F oven for 30-40 minutes, until the bread is puffed, golden, and reaches an internal temperature of about 180F.
  • When the bread is done, let it cool for 5-10 minutes.  You can use this time to gather your courage, because the step that comes next is a little bit scary.
  • Place a large plate over the top of your cast iron skillet.  Being very careful, and using pot holders because that sucker is still smokin’ hot, invert the plate-skillet contraption so that the skillet is resting on the plate, bottom side up.  What we’re after is for the bread to give up its hold on the skillet and drop gently onto the plate with the plum layer on top.  This may take another 5-10 minutes.
  • Once the loaf has unstuck itself from the skillet and landed on the plate, remove the skillet and scrape out any remaining plum slices to add to the top of the cake itself.
  • Serve warm, room temperature, or cold, but I think this bread tastes better on day two, when the flavors have had time to meld and deepen a bit.