Peppermint Marshmallows

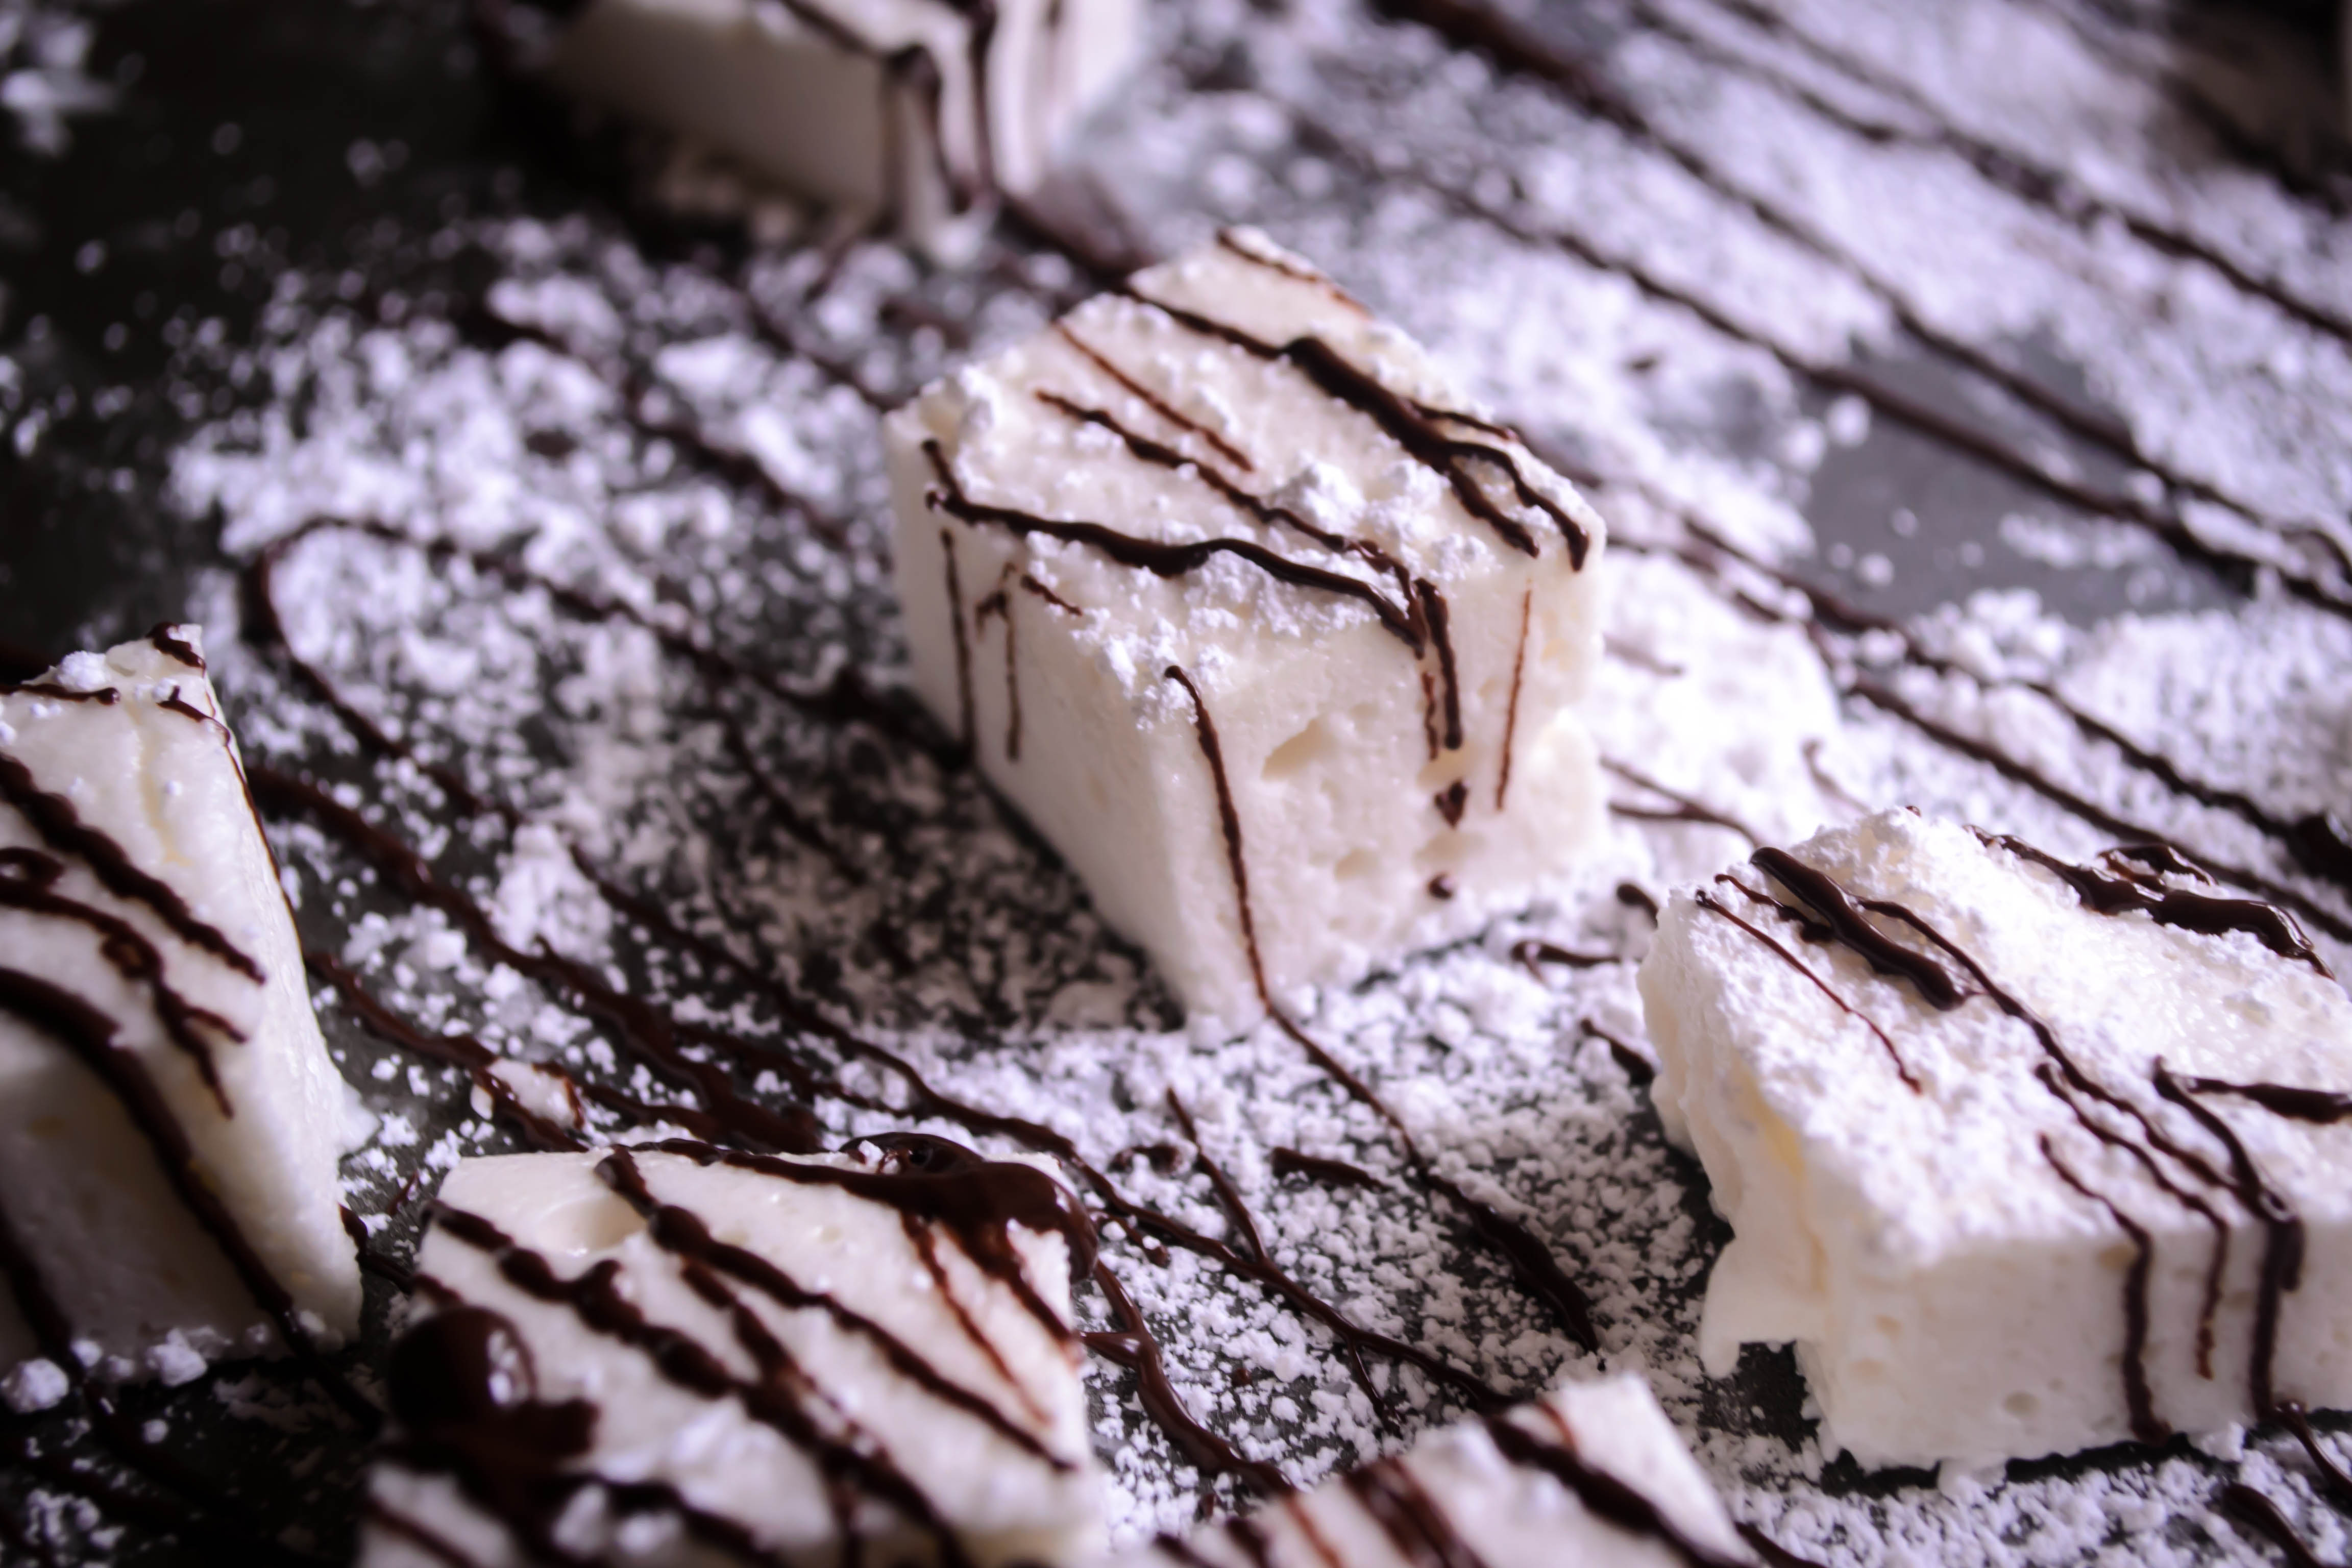
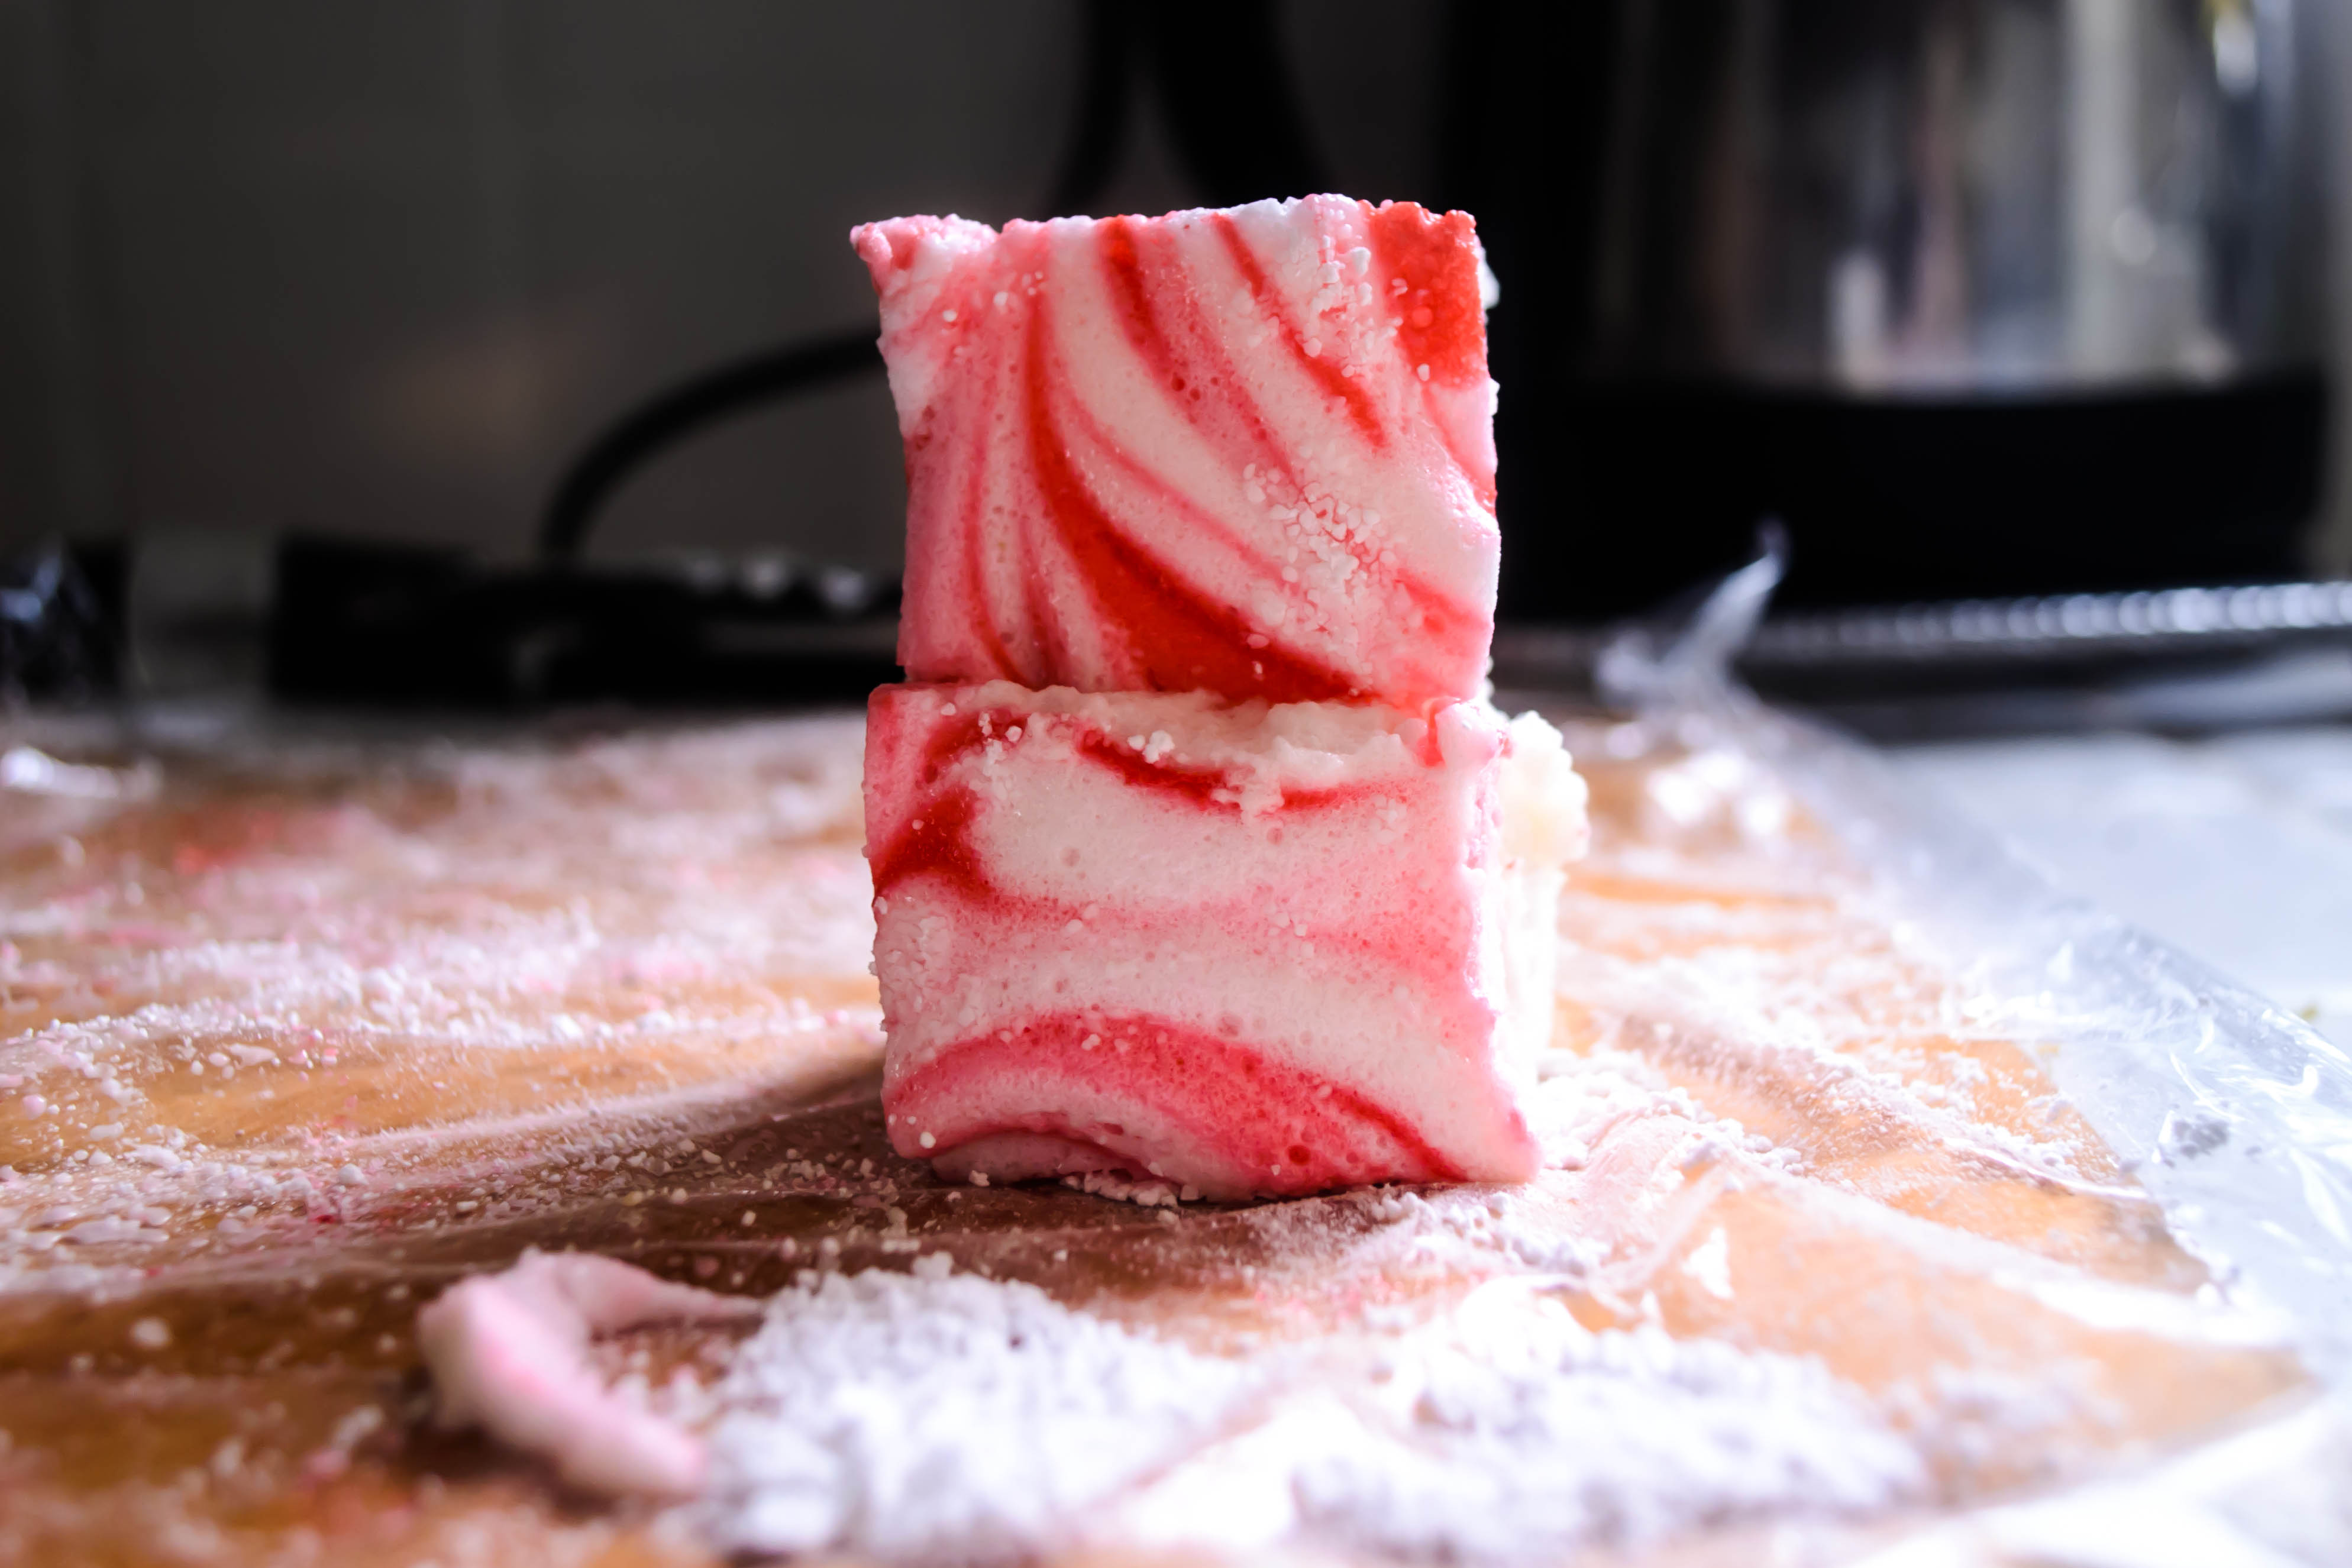
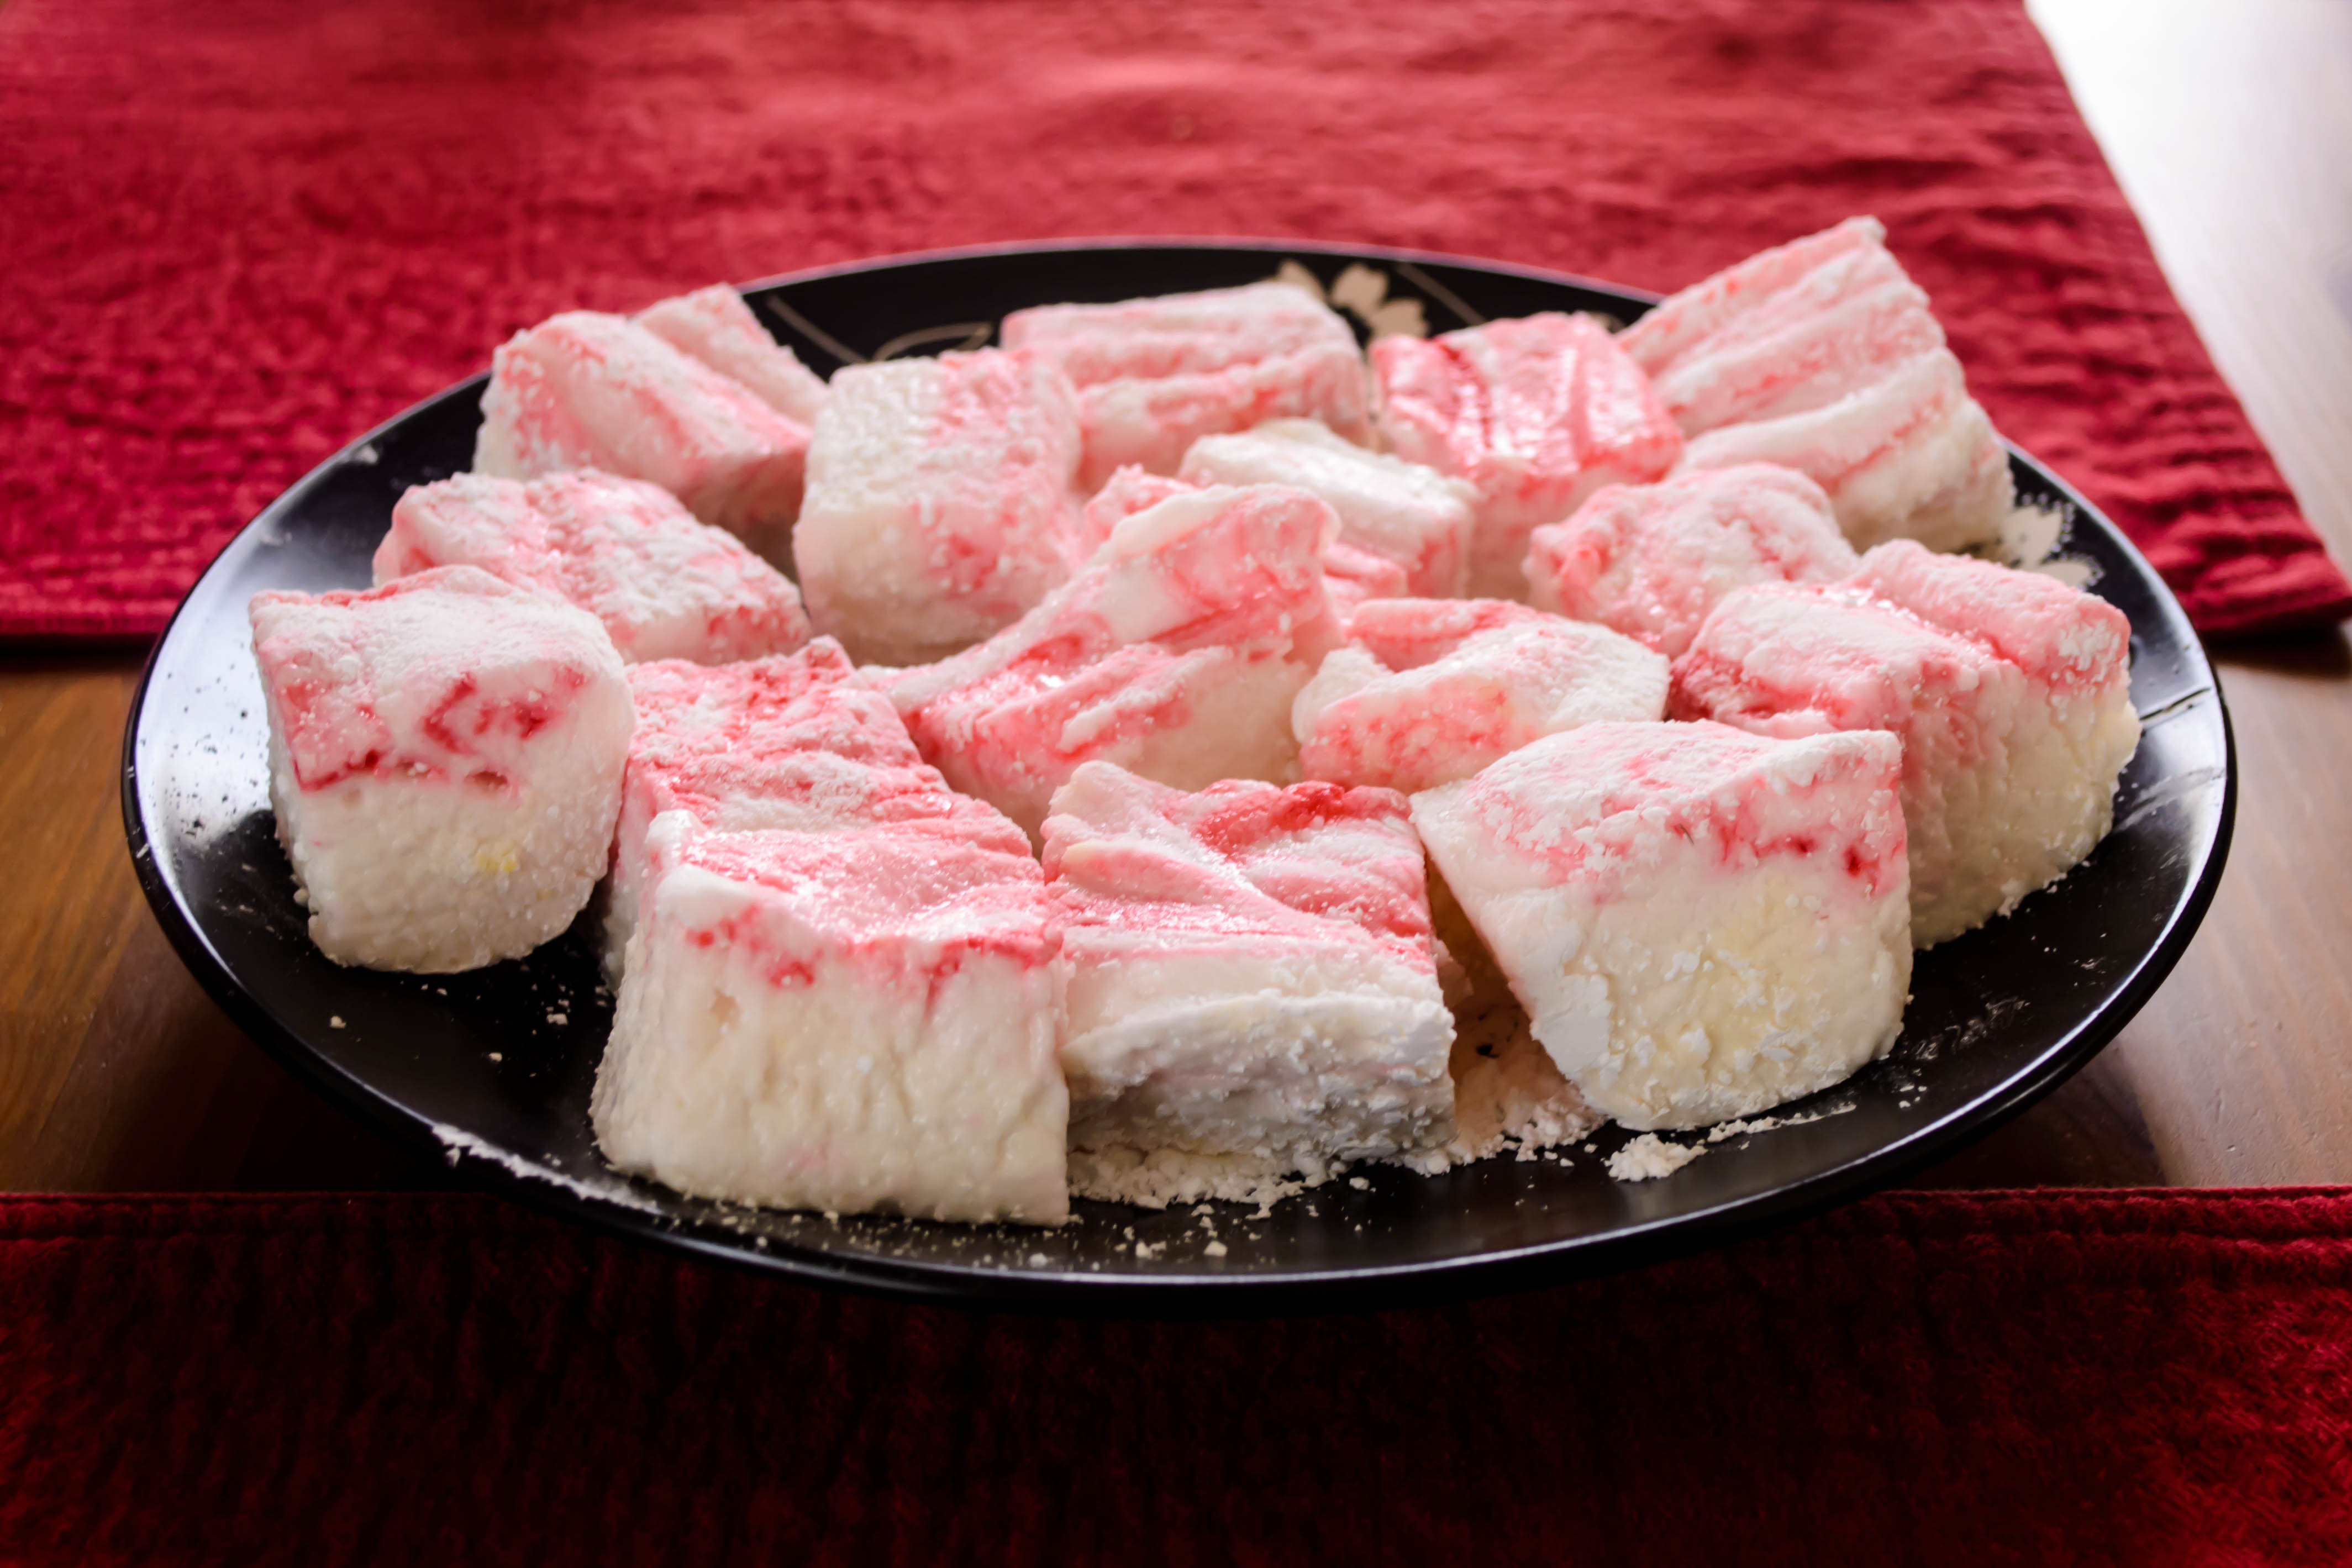
Last week I promised you something sweet and holiday inspired, but gave you very little else to go on.  I didn’t know, yet, that what I would have to offer would be a beautiful red and white swirl, a puffy, gooey, perfectly melting cube of magic, like a candy cane exploded into clouds and rained powdered sugar all over my kitchen.

Food Blog December 2013-2952Marshmallows.

Food Blog December 2013-2944
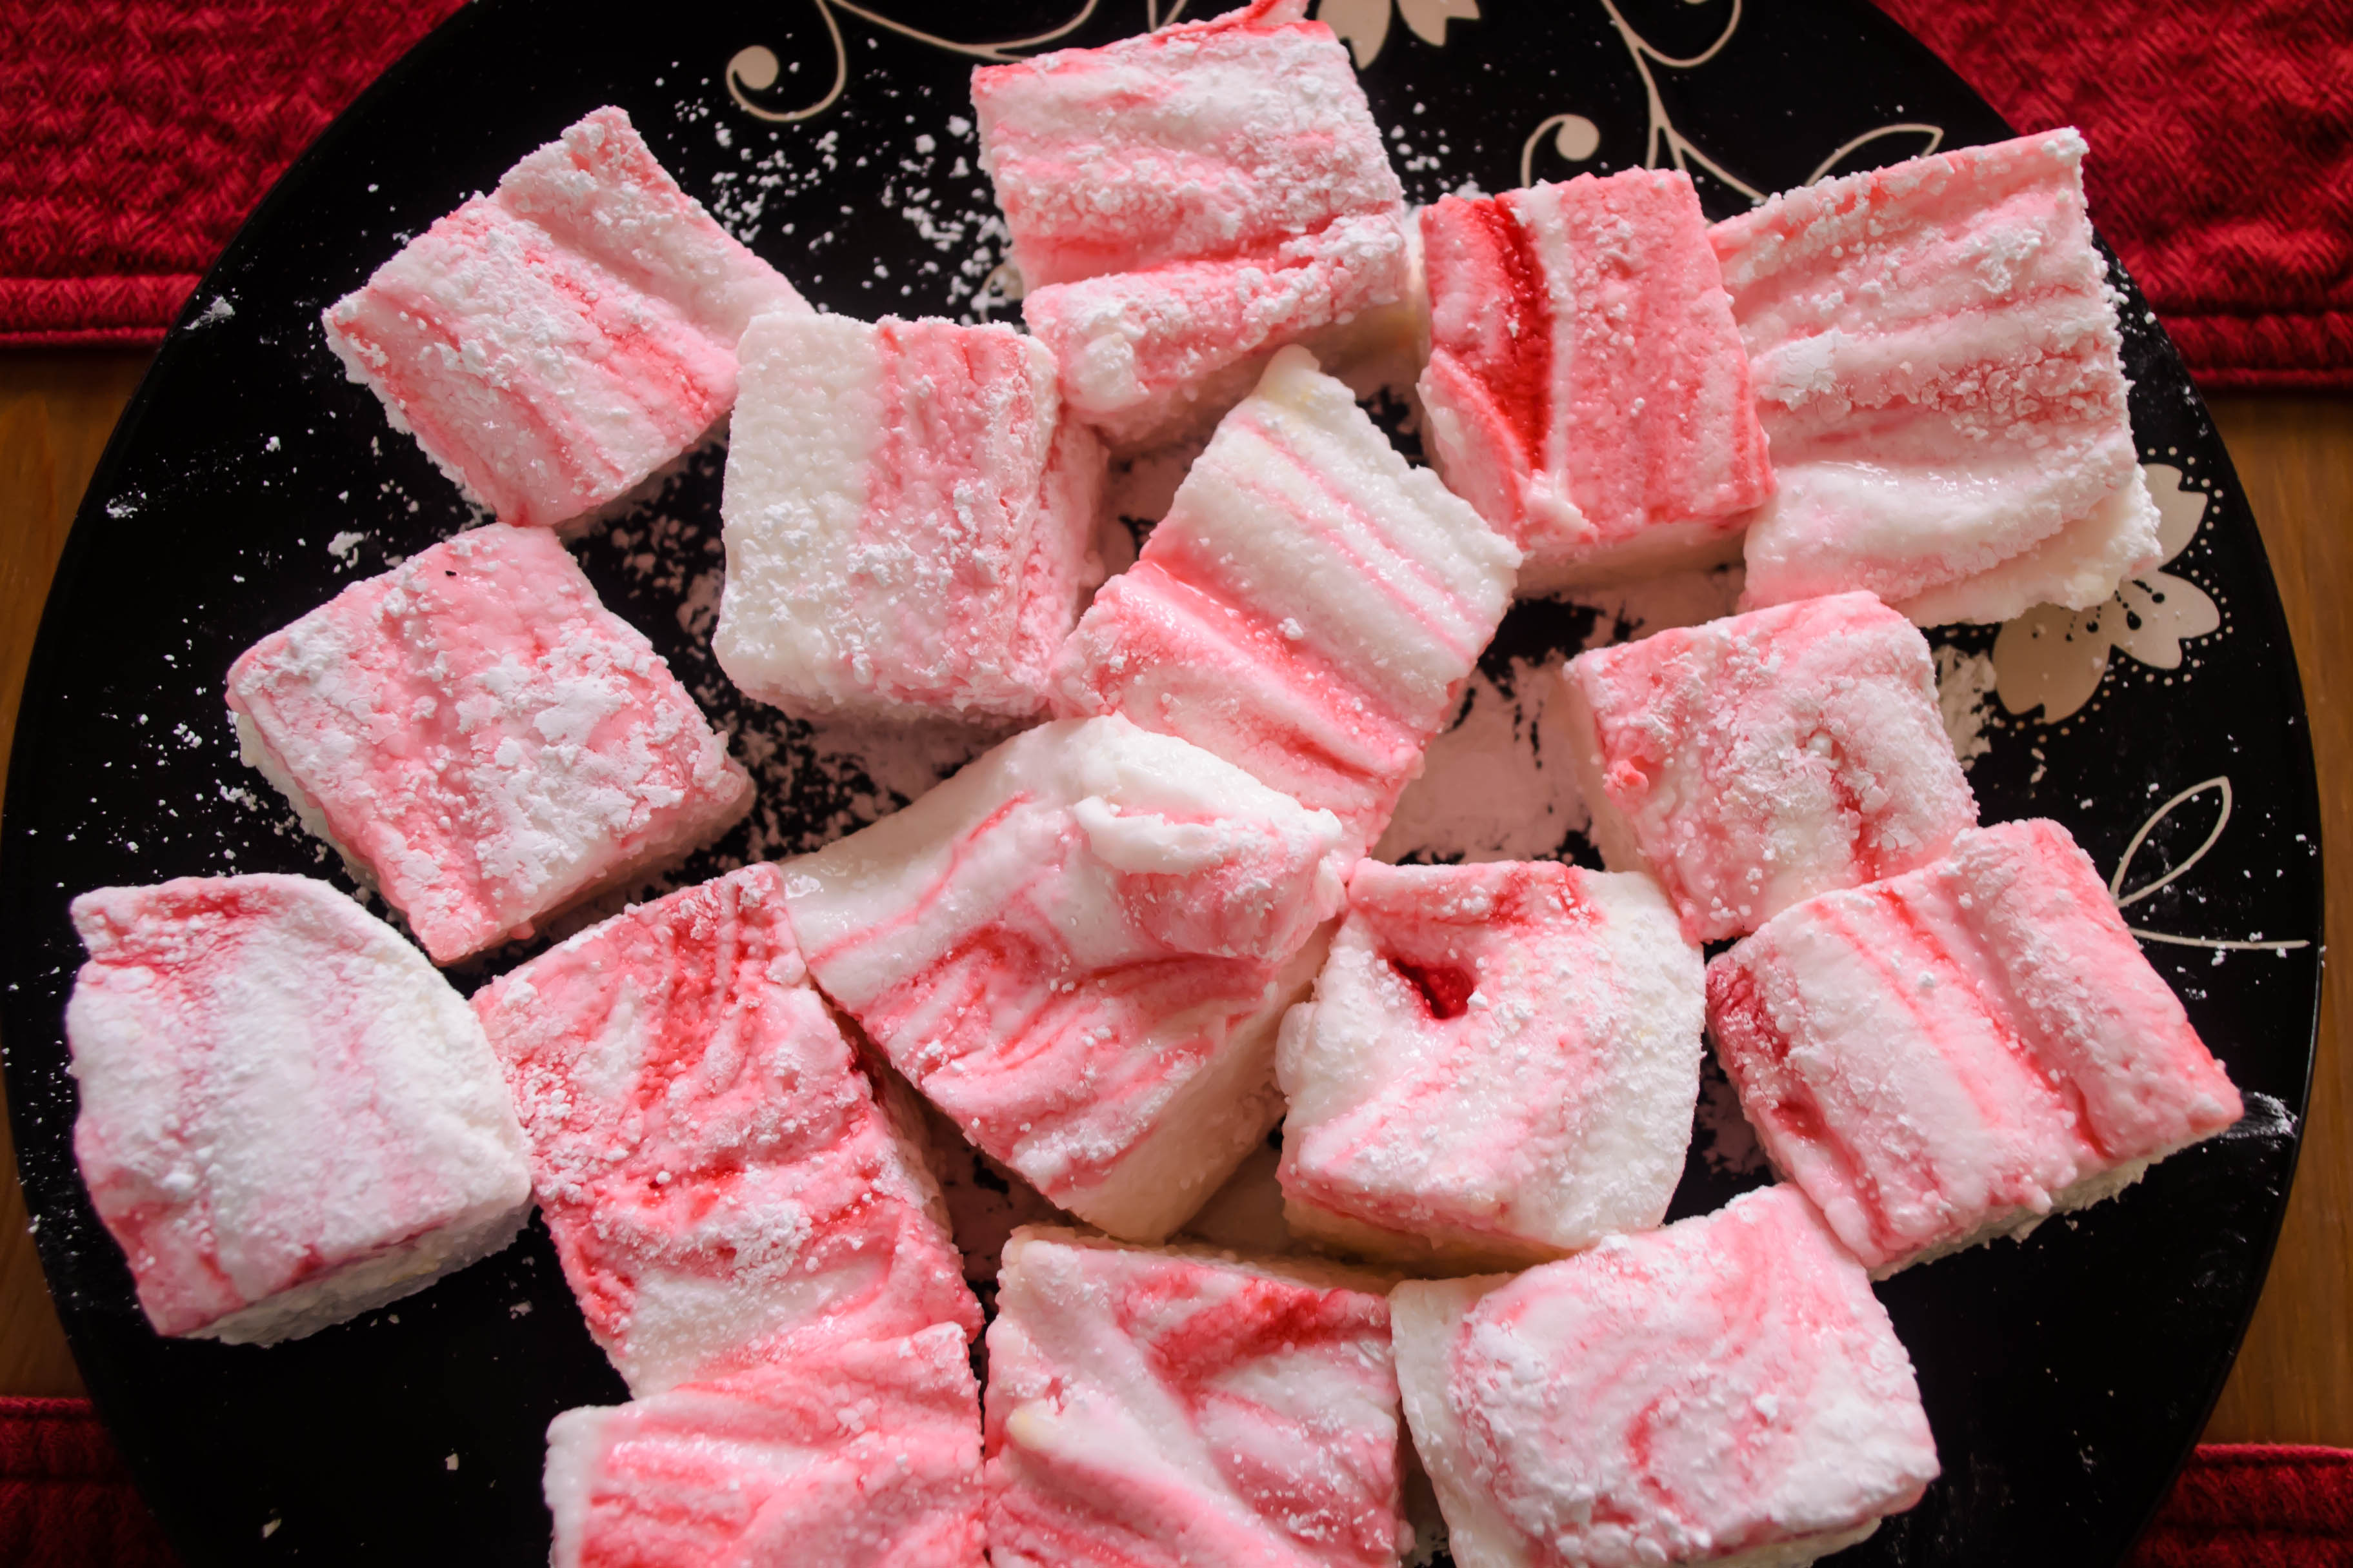
Specifically, peppermint marshmallows, flavored with mint extract and swirled with a few drops of red food coloring to emulate the striping in a candy cane.

Food Blog December 2013-2935Marshmallows look like an ambitious cooking project, and I’ll admit they are not quite as easy as, say, your average chocolate chip cookie or gingerbread recipe. But they are so, so worth trying. When you compare store-bought marshmallows to homemade they are, as I explained yesterday, like the difference between those sheets in a discount motel, and the Egyptian cotton sheets with the sky-high thread count you dream about treating yourself to maybe that’s just me…). The homemade ones are soft and luxuriously puffy, and they linger on your taste buds without that powdery residue you get from the kind that come out of a bag. Plus, you get to play with gelatin and egg whites.

Food Blog December 2013-2921Food Blog December 2013-2927Food Blog December 2013-2930Food Blog December 2013-2931
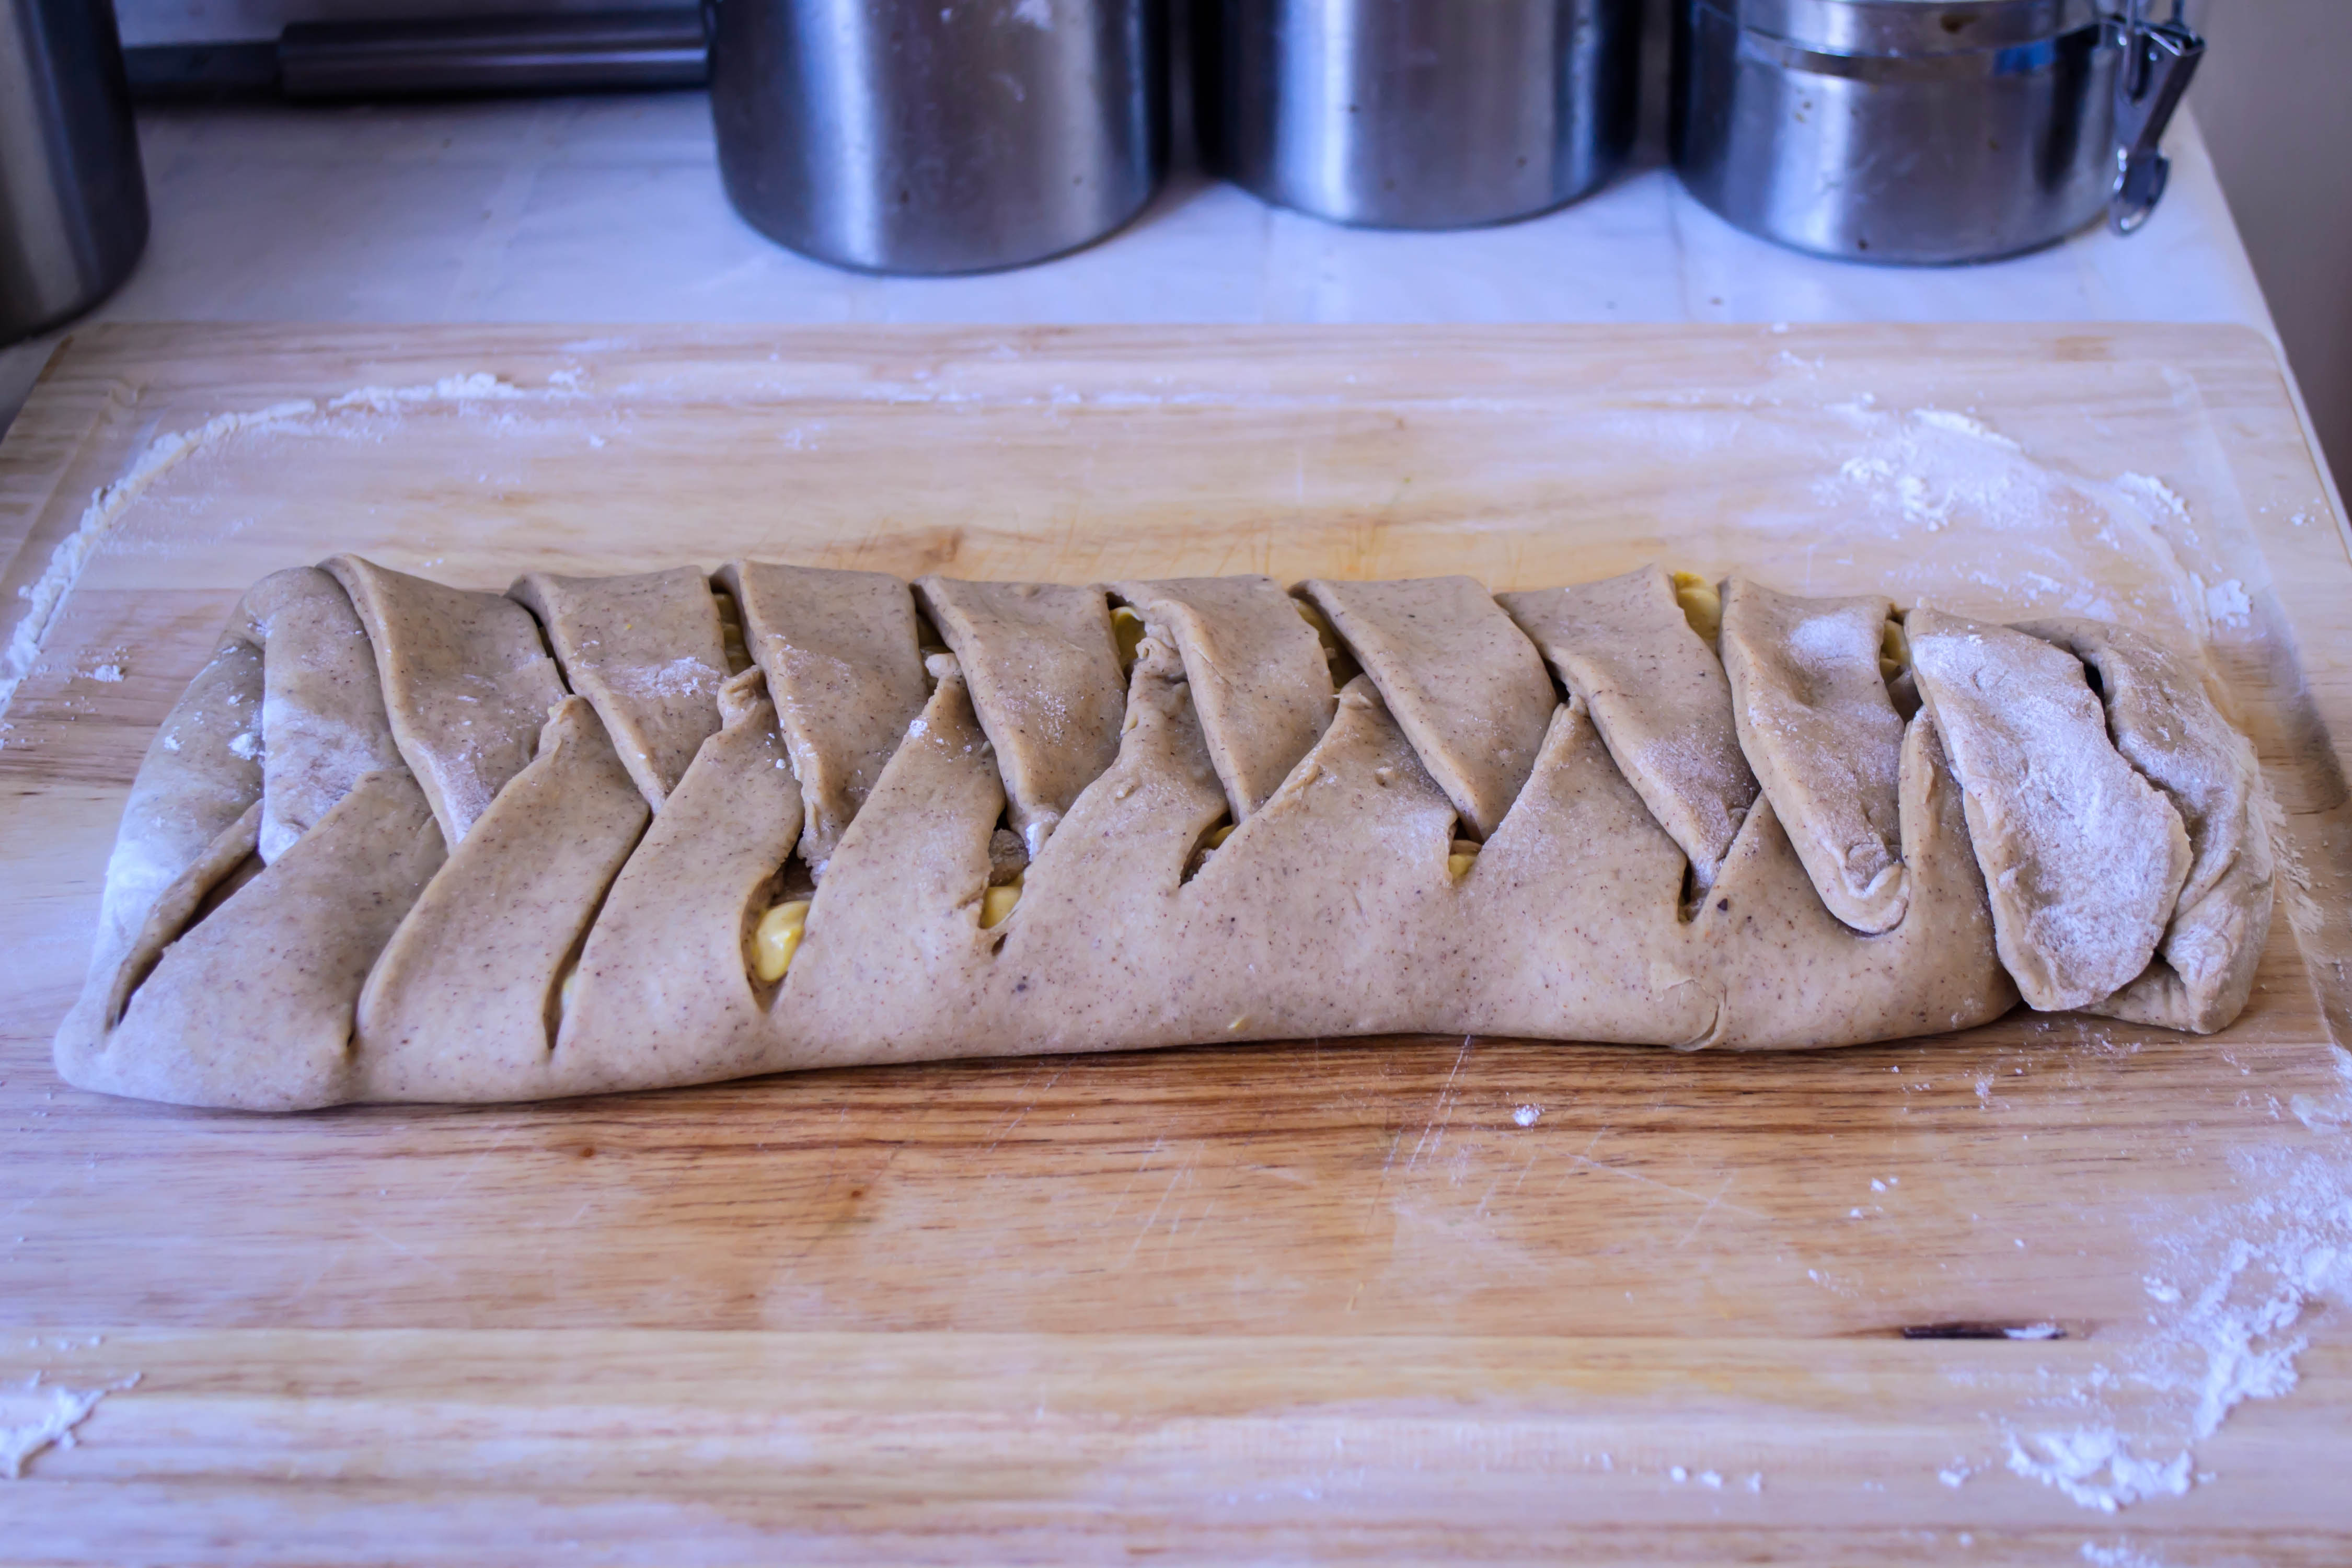
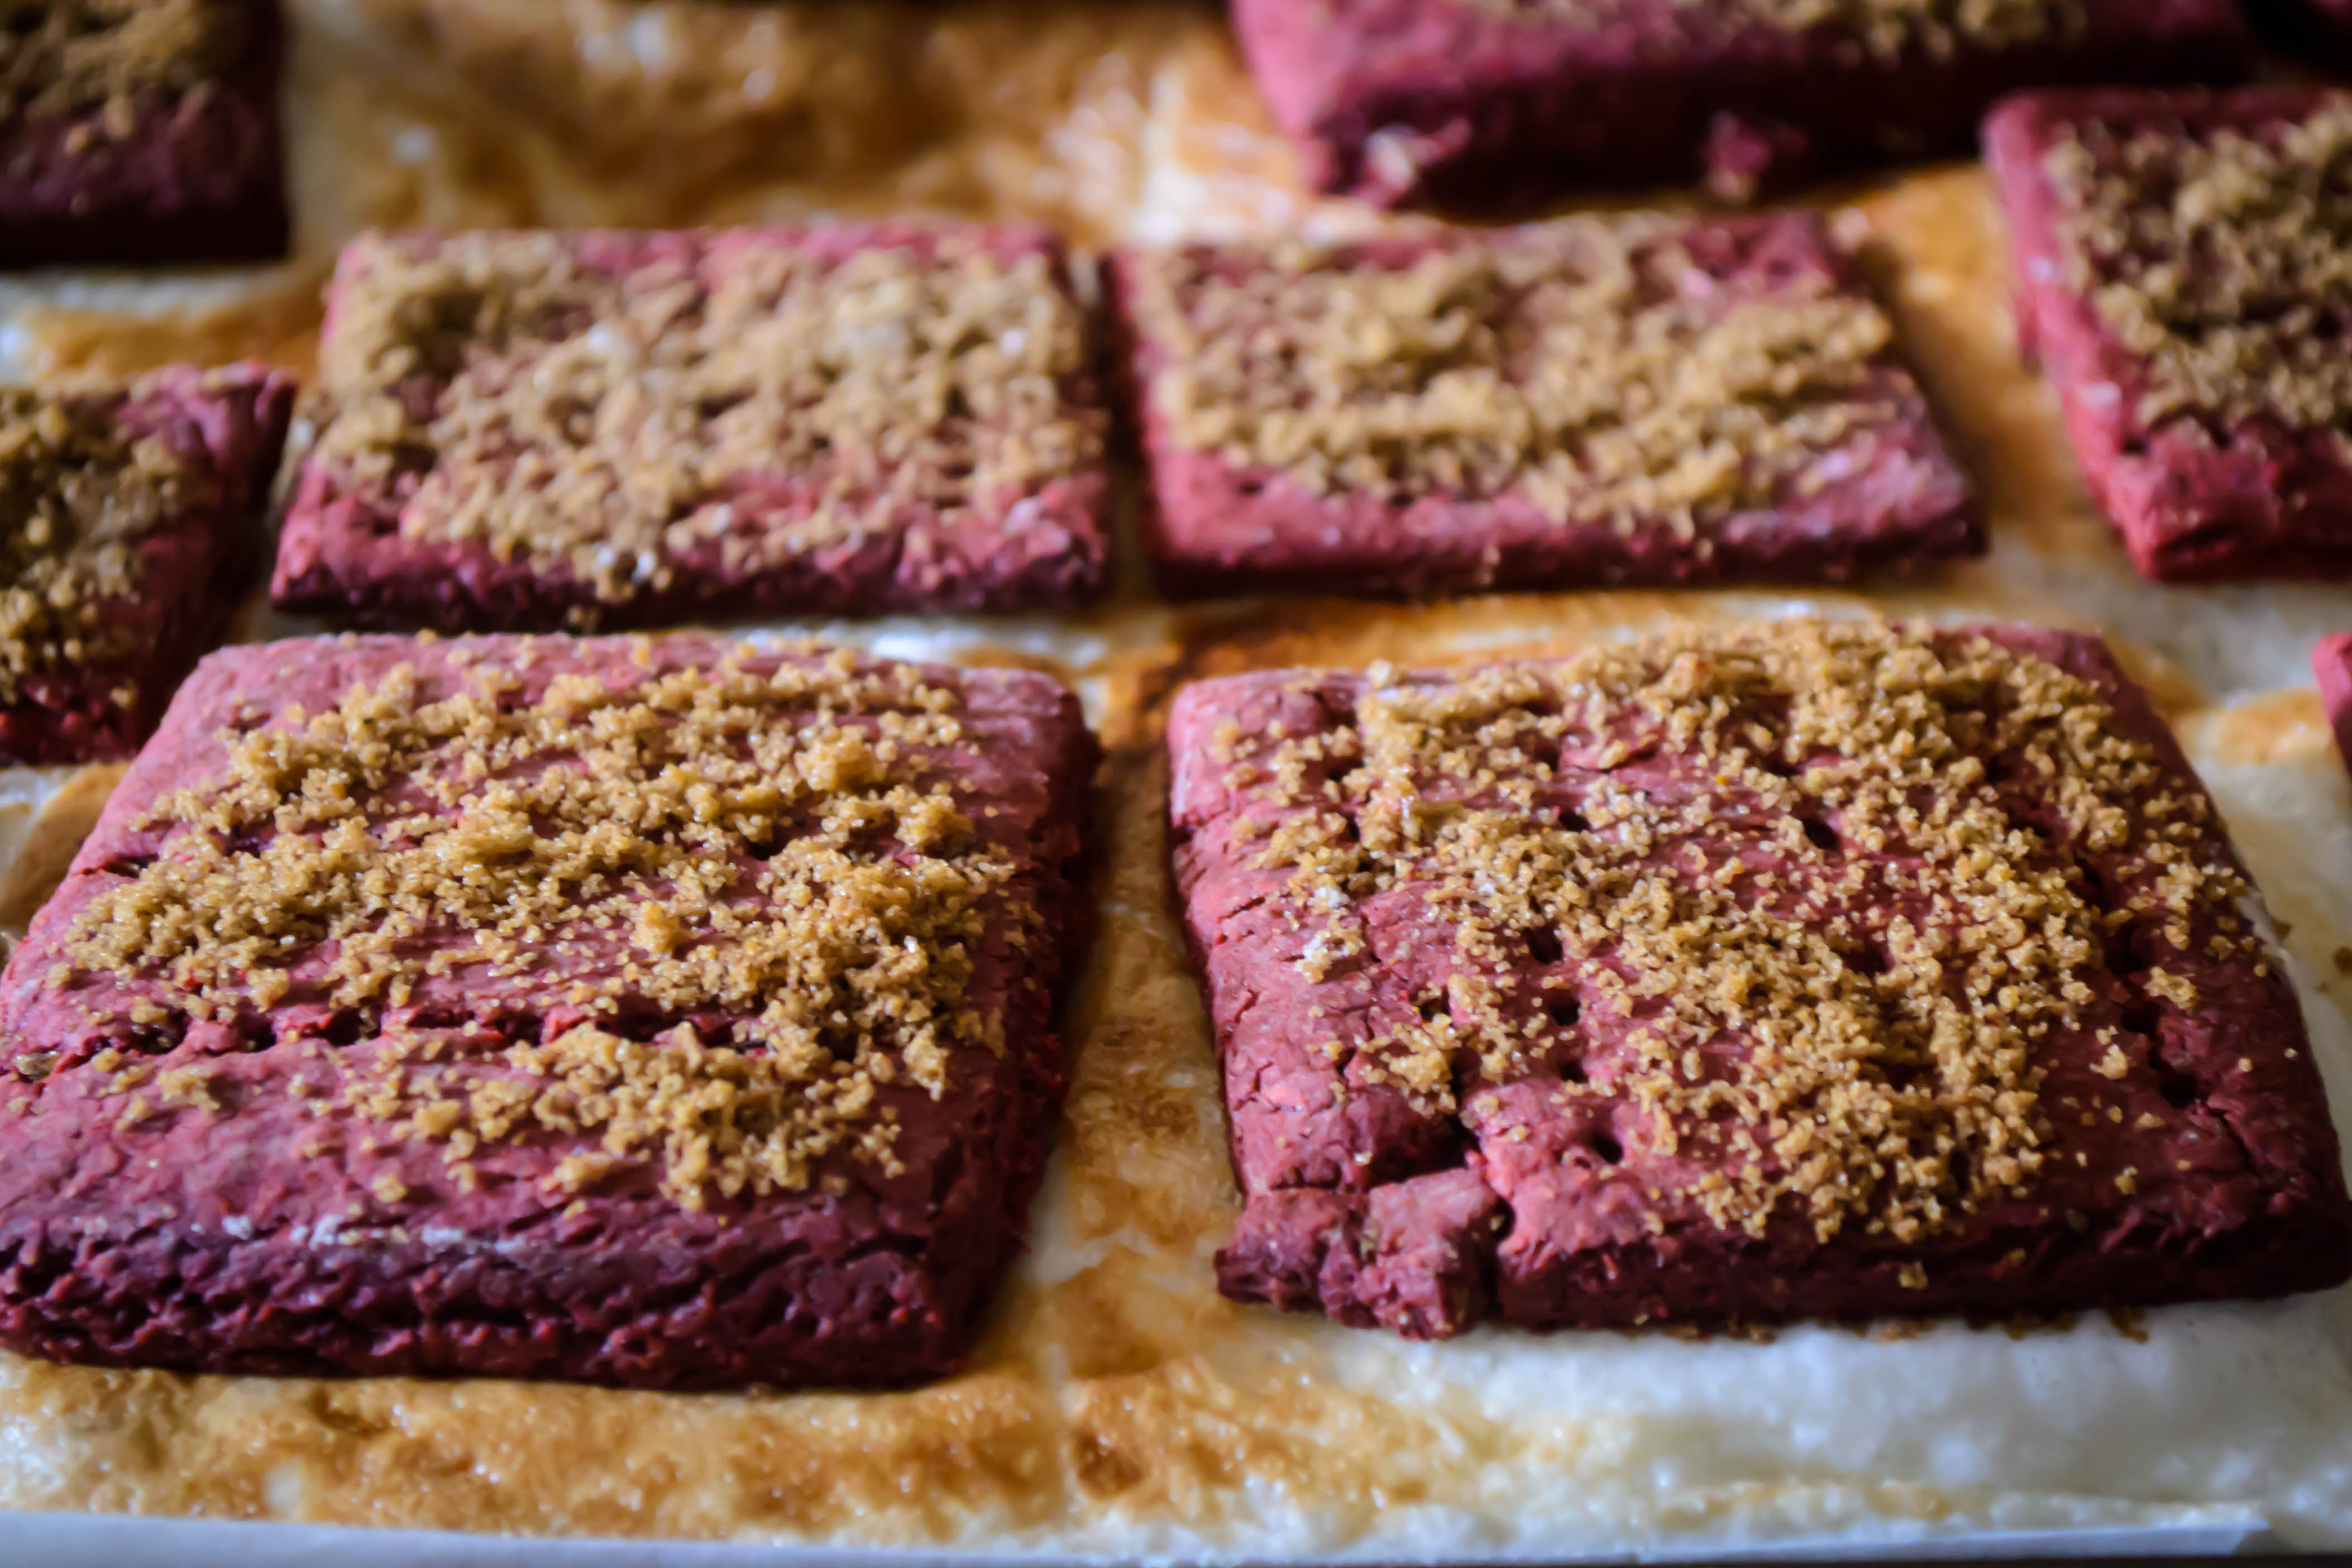
To make mine, I looked to two of my sweets inspirations: David Lebovitz and Irvin Lin. I’ve been reading these two men’s blogs for years now, continually impressed as they churn out ambitious baking projects I never, three or two or even one year ago, would have considered attempting. Then over this summer my sister and I decided to try Irvin’s red velvet s’mores with cream cheese marshmallows, and the recipe he put together was so precise and, once I got over my fear of the boiling sugar syrup, so unthreatening that I decided homemade marshmallows should become at least a semi-regular part of my repertoire.

Food Blog December 2013-2923
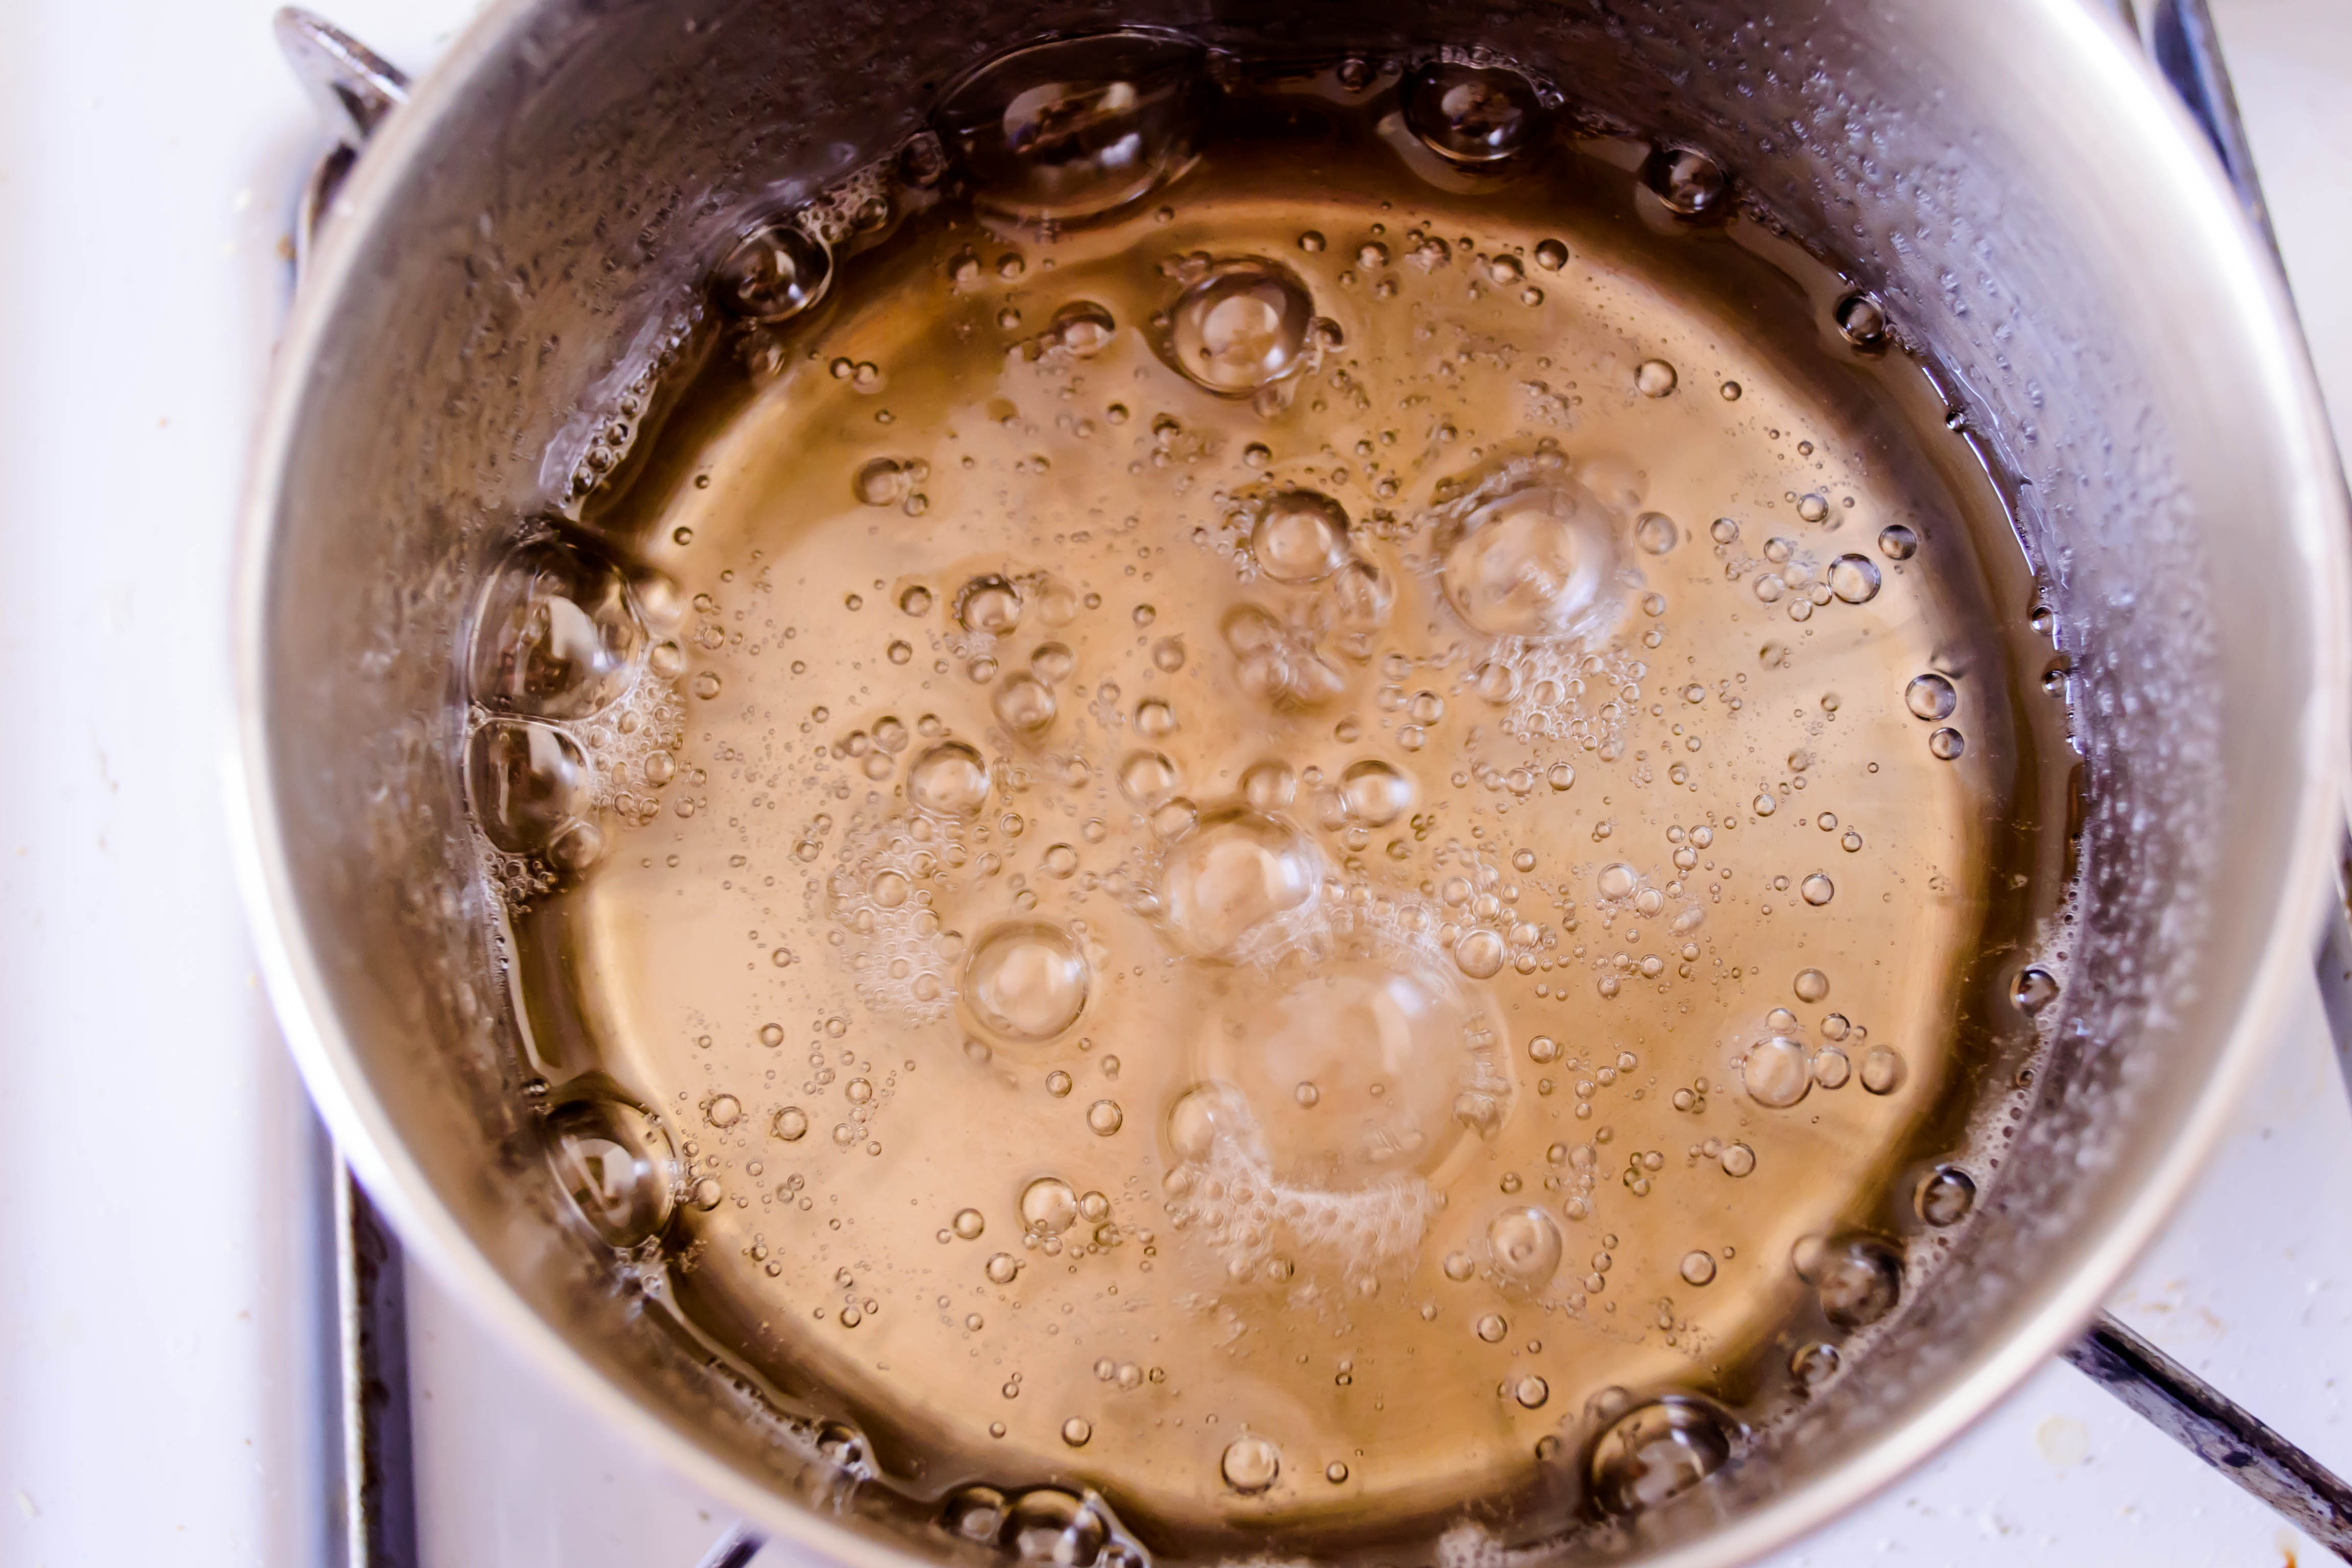
This is essentially a three-part recipe. First, you dissolve some gelatin in cold water.  While it softens and thickens and turns into a curious gooey business that resembles nothing so much as that sticky glue magazine companies use to affix perfume fold-outs and coupons to their pages (how delicious does that sound?!), you melt some sugar with corn syrup and a touch more water, making a barely golden syrup that bubbles and thickens but doesn’t hurt you, because you stir carefully and make sure you have shoes on, in case of disasters. It takes some time for the syrup to come up to the requisite 240F degrees, so while you wait, you whip some room temperature egg whites to soft peaks, helping them along the way with a pinch of cream of tartar.

Food Blog December 2013-2936Food Blog December 2013-2942Food Blog December 2013-2941Then all that remains is to combine. Off the heat, you scrape the gelatin, now congealed into this weird, pecan-pie-filling consistency, into the syrup, whisk to combine, and then pour the still-hot gelatinized syrup carefully into your egg whites. You whip them for a long time – ten minutes long! – and they expand triumphantly until you aren’t sure your stand mixer can hold them all. At the last minute, you add some vanilla and mint extract, and then deposit into a well-greased baking dish, swirl with some food coloring if desired, and stow in the fridge overnight to cure.  The next day, you have a wide dish of marshmallow, which you can slice, toss with powdered sugar, and use for whatever purposes your heart desires.

Food Blog December 2013-2945I found, through intense and repeated experimentation (I do these things for you…) that they melt with almost no resistance in cocoa, and would be a revelation dipped in dark chocolate. You could likely torch them just a bit to top a peppermint variation of a grasshopper or chocolate cream pie. But I find that with this peppermint flavor in particular – swirled for the holidays and almost aggressively minty – I like them best straight out of the refrigerator.

Food Blog December 2013-2951

Peppermint Marshmallows
Adapted from Eat the Love and David Lebovitz
Makes one 9x13x2 inch pan slab of marshmallow, which you can cut to your desired size
2 envelopes unflavored gelatin (about 14.5 grams, though the quantities on the Knox brand box are not very forthcoming)
¾ cups water, divided
4 egg whites, at room temperature (being at room temp helps them whip faster)
¼ teaspoon cream of tartar
1 cup granulated sugar
⅓ cup light corn syrup
1 teaspoon vanilla
1 teaspoon peppermint extract (or less – it’s quite strong)
10-12 drops red food coloring (optional)
1-2 cups powdered sugar, for coating cured marshmallows to prevent sticking


  • Grease a 9x13x2 inch baking dish with non-stick spray. Mine was butter flavored and looked a little yellow – I’d advise a white or clear version.
  • In a small bowl, sprinkle the gelatin powder over ½ cup of the water, then set aside to gel.
  • In a small saucepan, combine the sugar, corn syrup, and remaining ¼ cup of water, then stir over medium heat. Use a candy thermometer to moderate the temperature – you are looking to heat this to 240F.  This will probably take about 8-10 minutes, with the last 10 degrees taking the longest. You can turn away from this now and then, but be sure to stir regularly as the sugar dissolves to prevent it from burning.
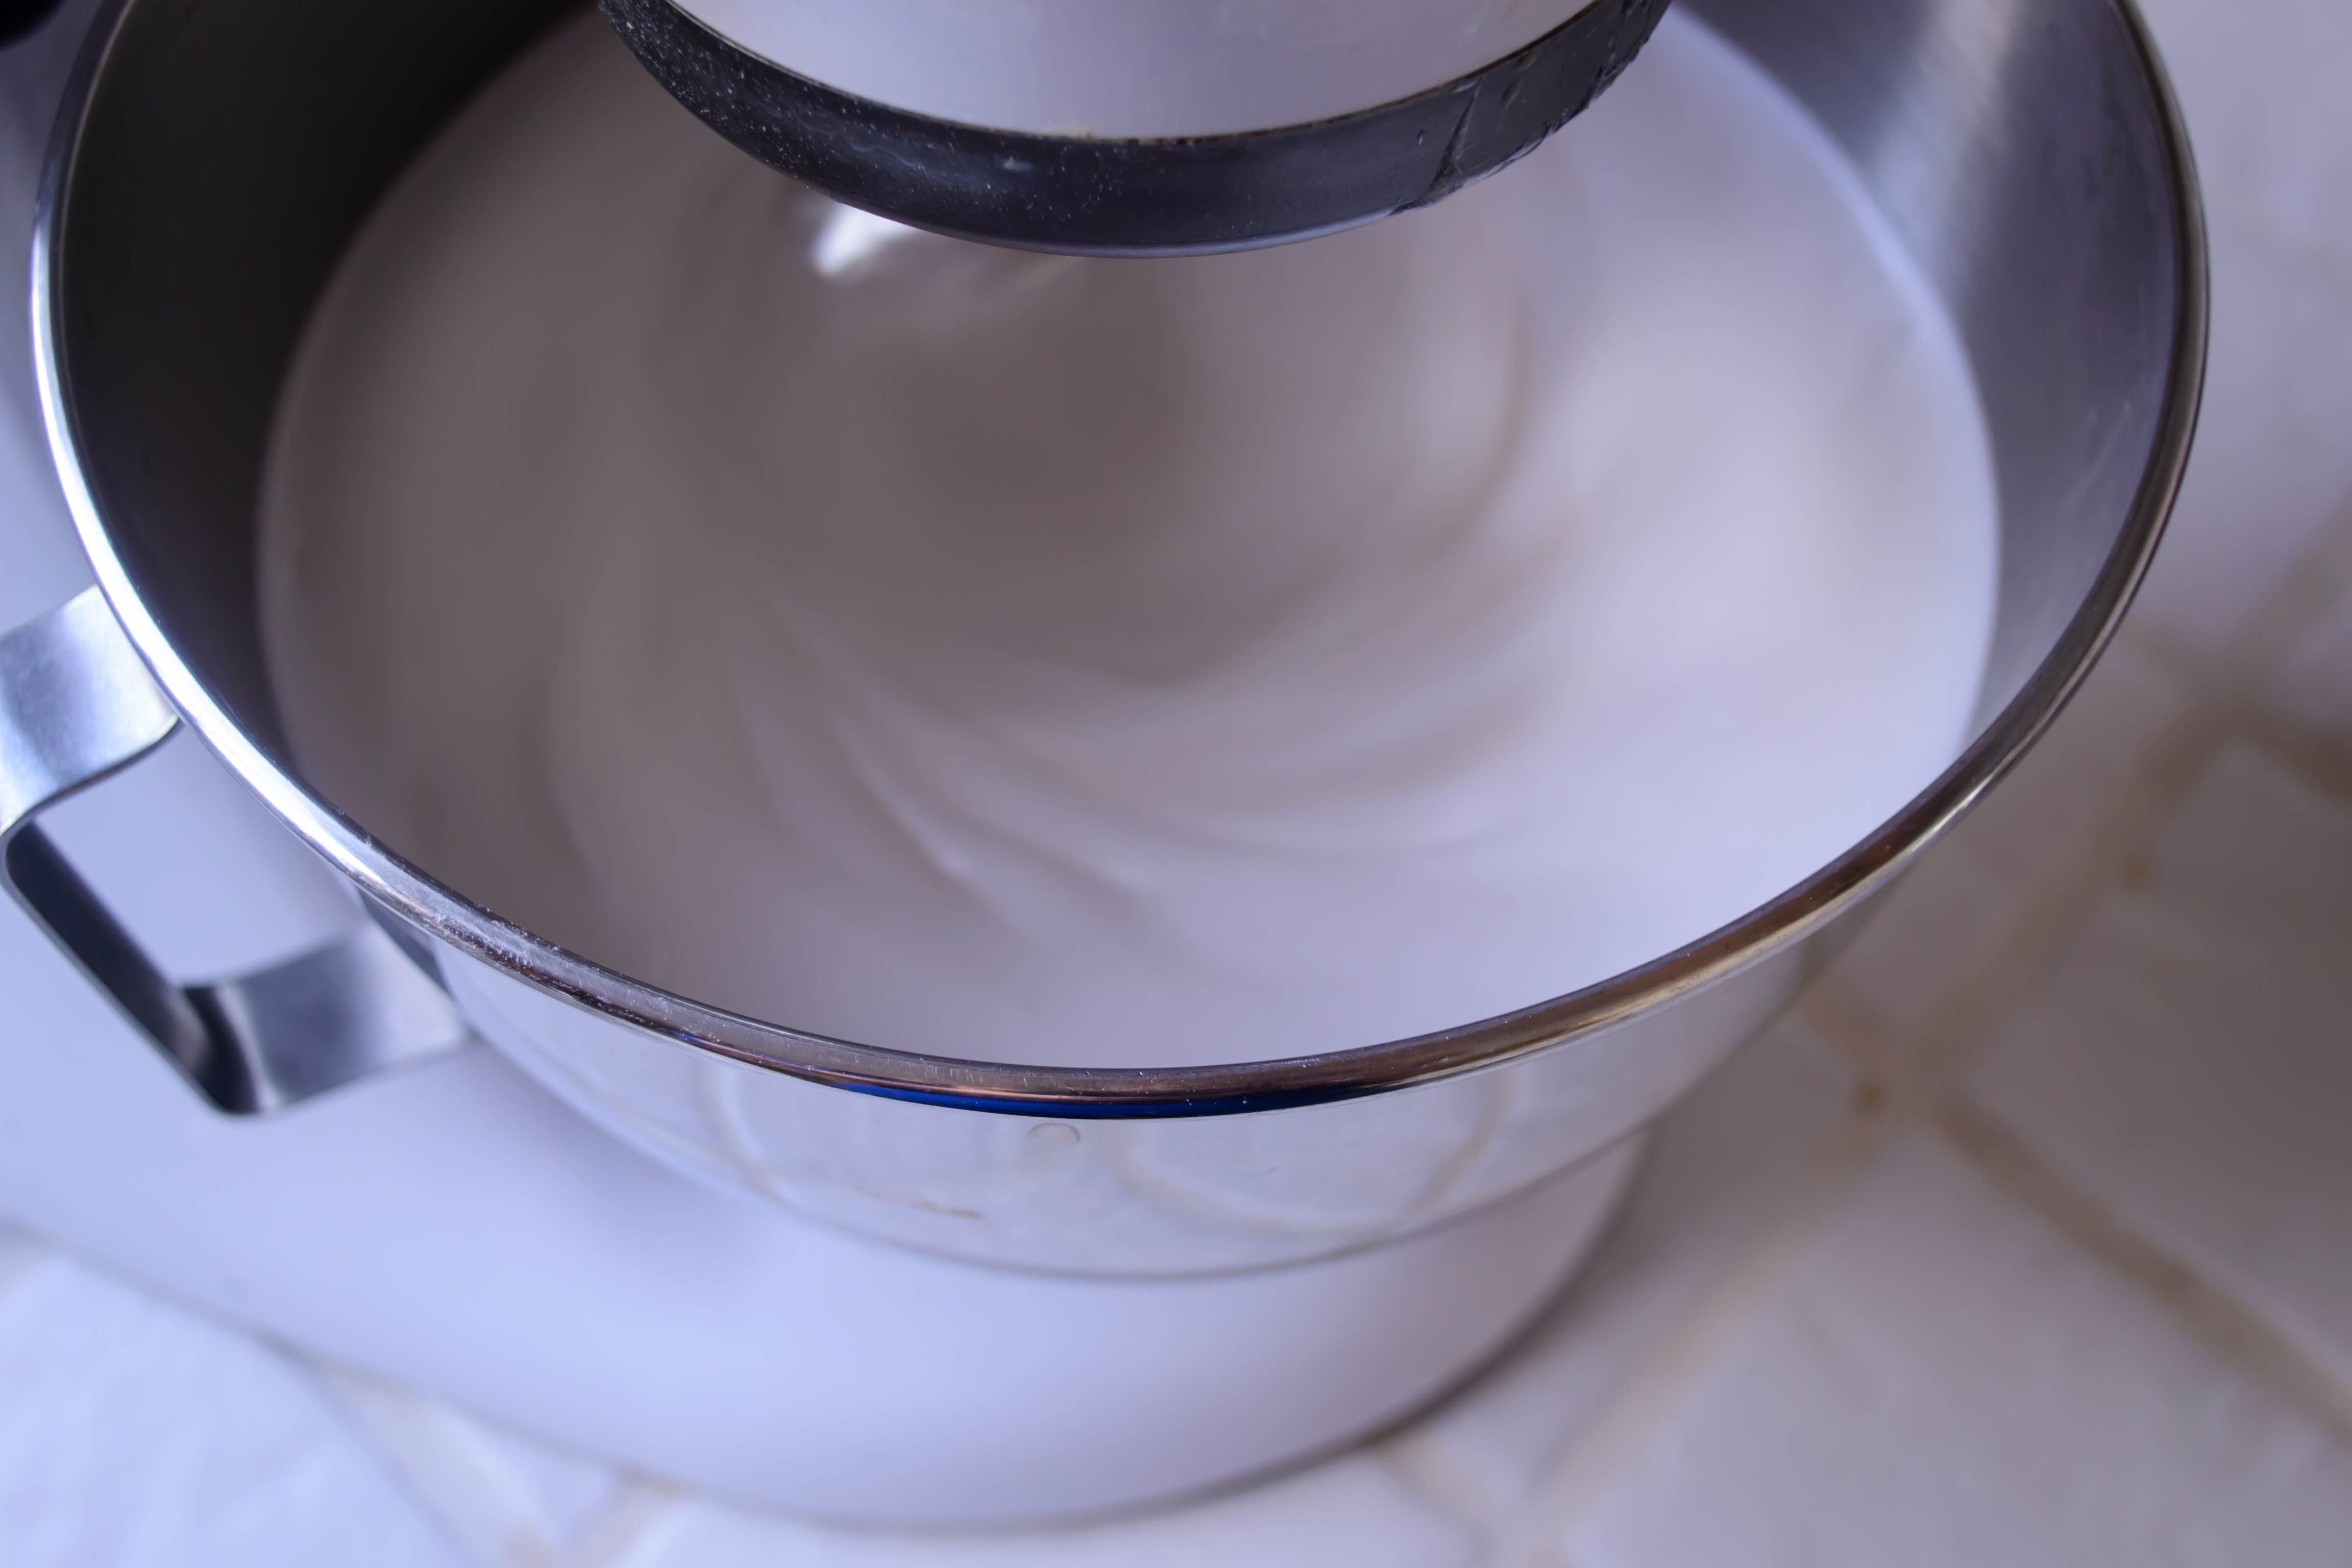
  • While the syrup heats, beat the egg whites with the cream of tartar in the bowl of an electric stand mixer (or in a large bowl with a hand-held mixer, but using a stand mixer is much easier and faster) until they form soft peaks. When the whisk or beater attachment is pulled out of the eggs, what remains on the attachments will droop a bit back toward the bowl – those are soft peaks – peaks that fold over.
  • When the syrup reaches 240F, remove it from the heat and scrape the gelatin into the hot syrup, stirring with a whisk to dissolve. Drizzle a few tablespoons of the hot syrup mixture into the egg whites and mix gently, just to warm them up so they aren’t shocked.  Then, with the mixer on medium speed, pour the syrup into the egg whites in a slow but steady stream, being careful to aim for the whites themselves, not for the whisk or the side of the bowl, which can cause droplets of hot syrup to fly out onto you. As Irvin says, this sounds scarier than it is. Just be careful and you’ll be fine.
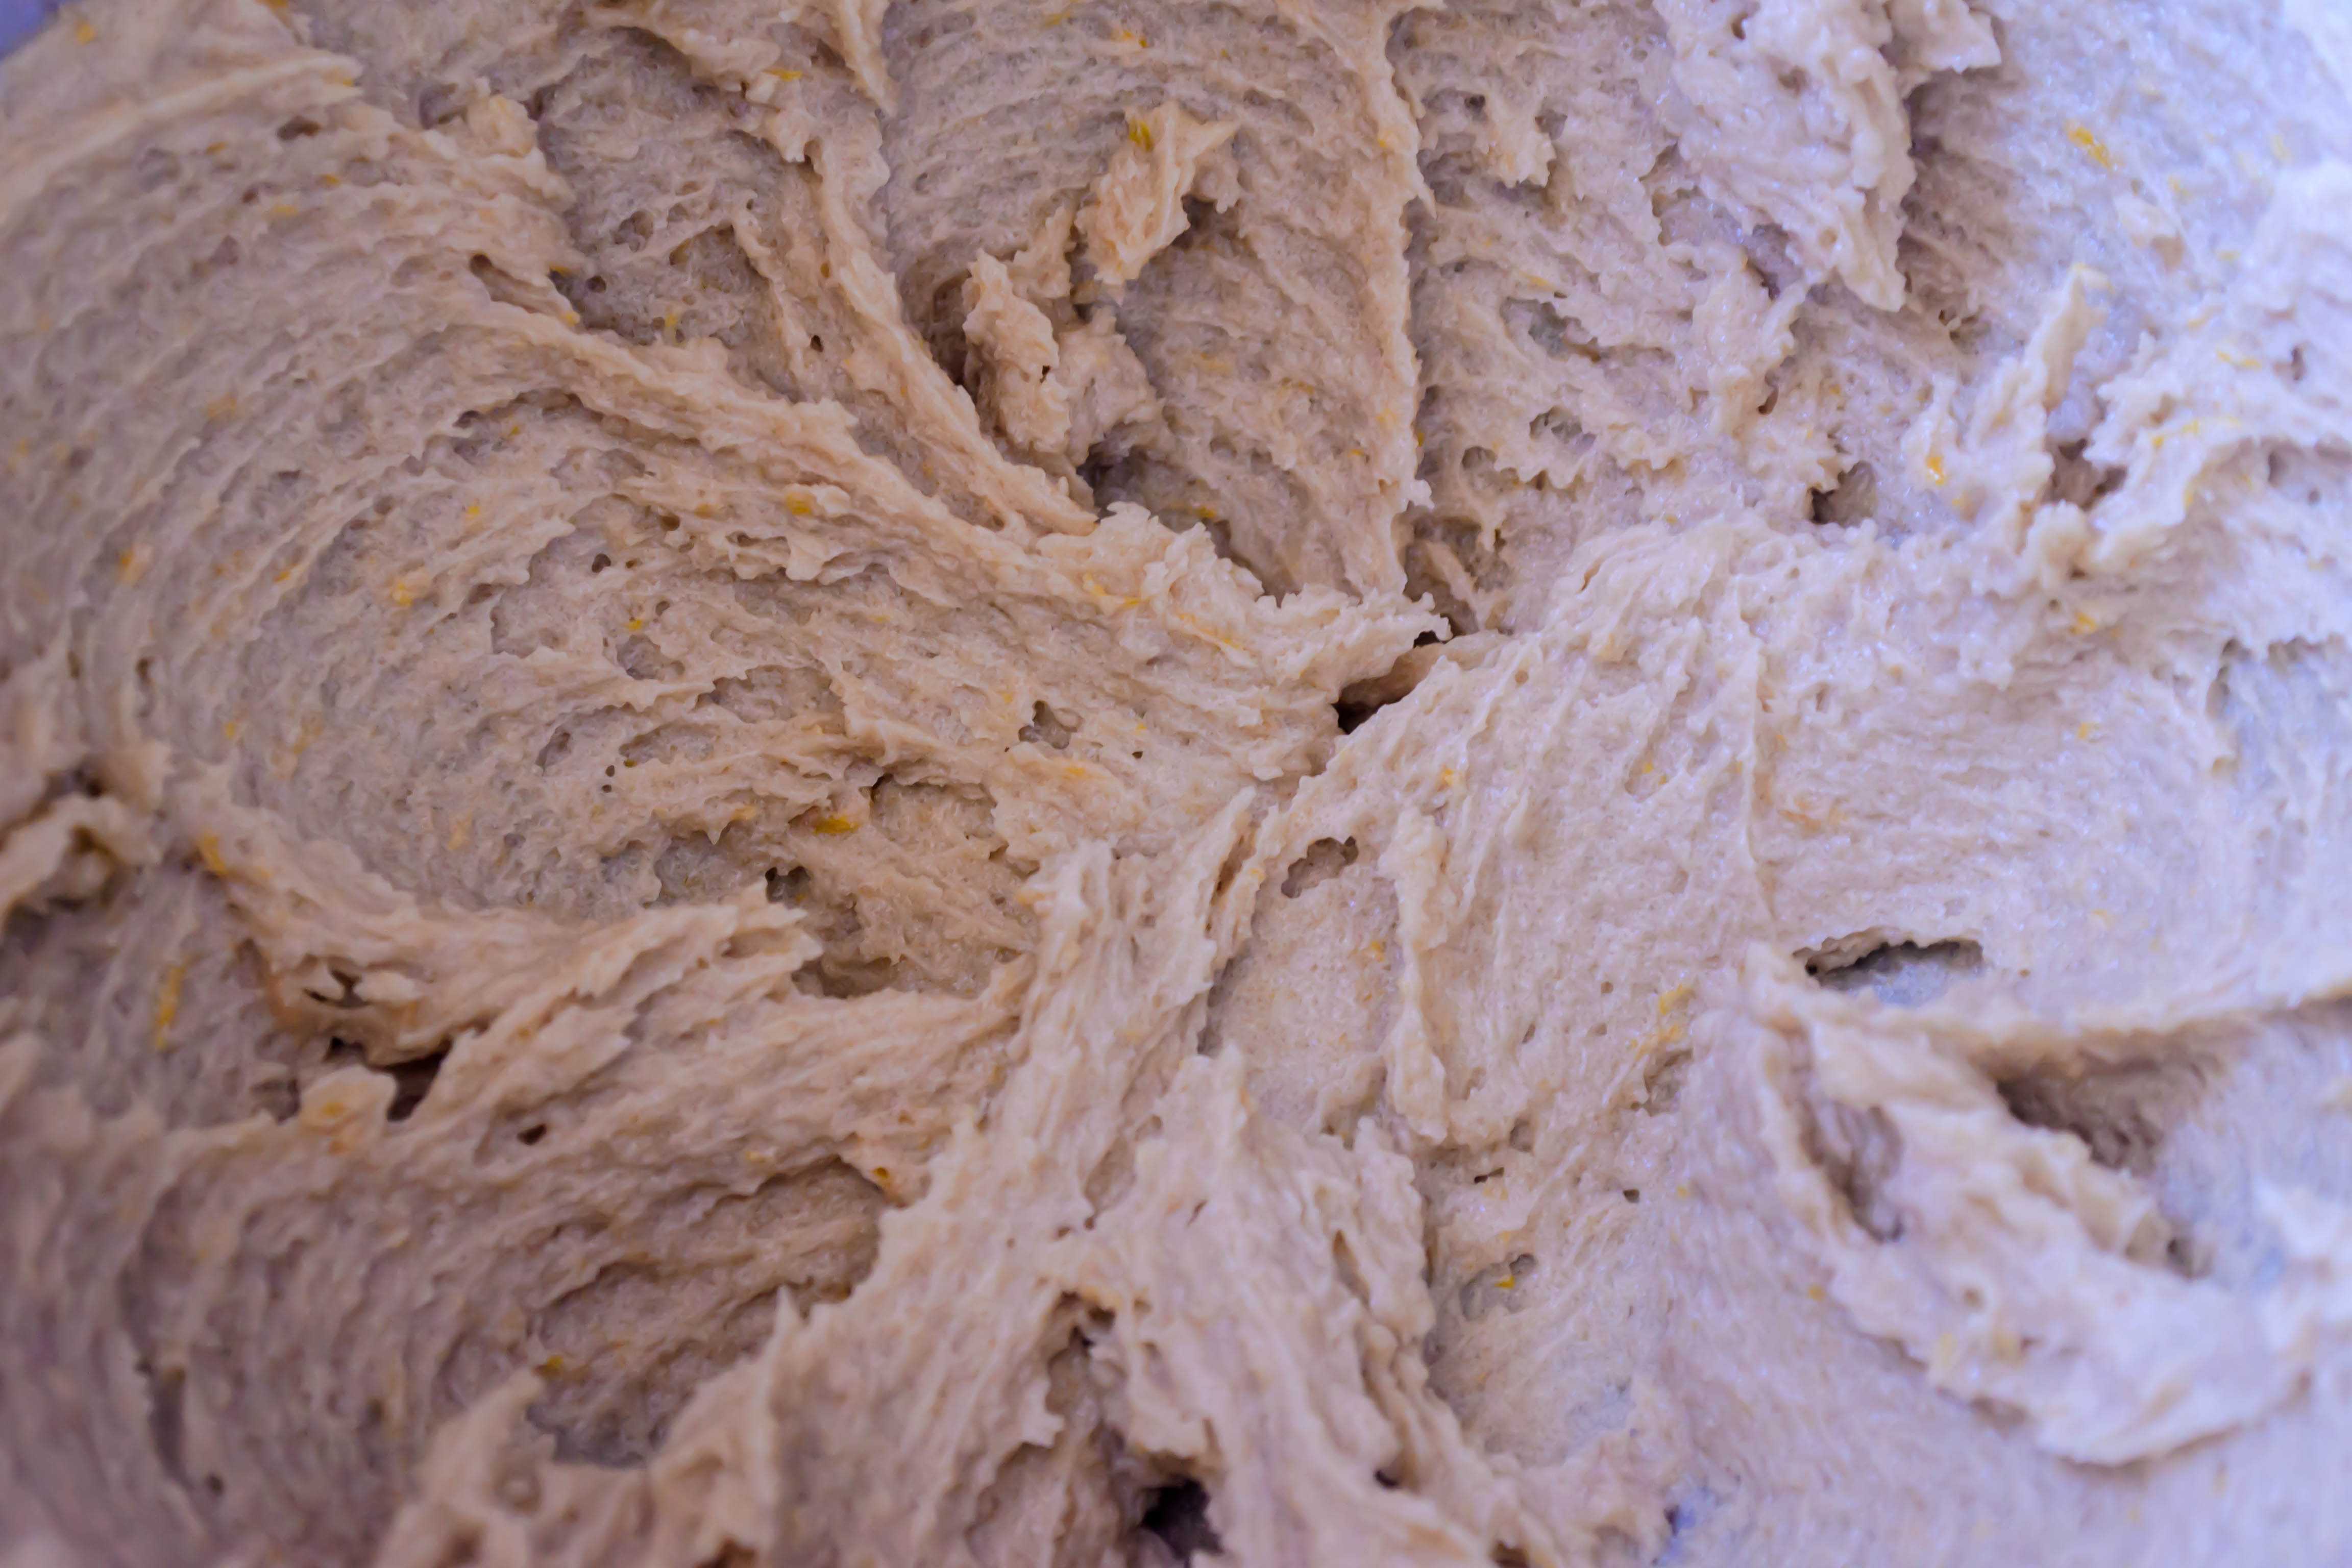
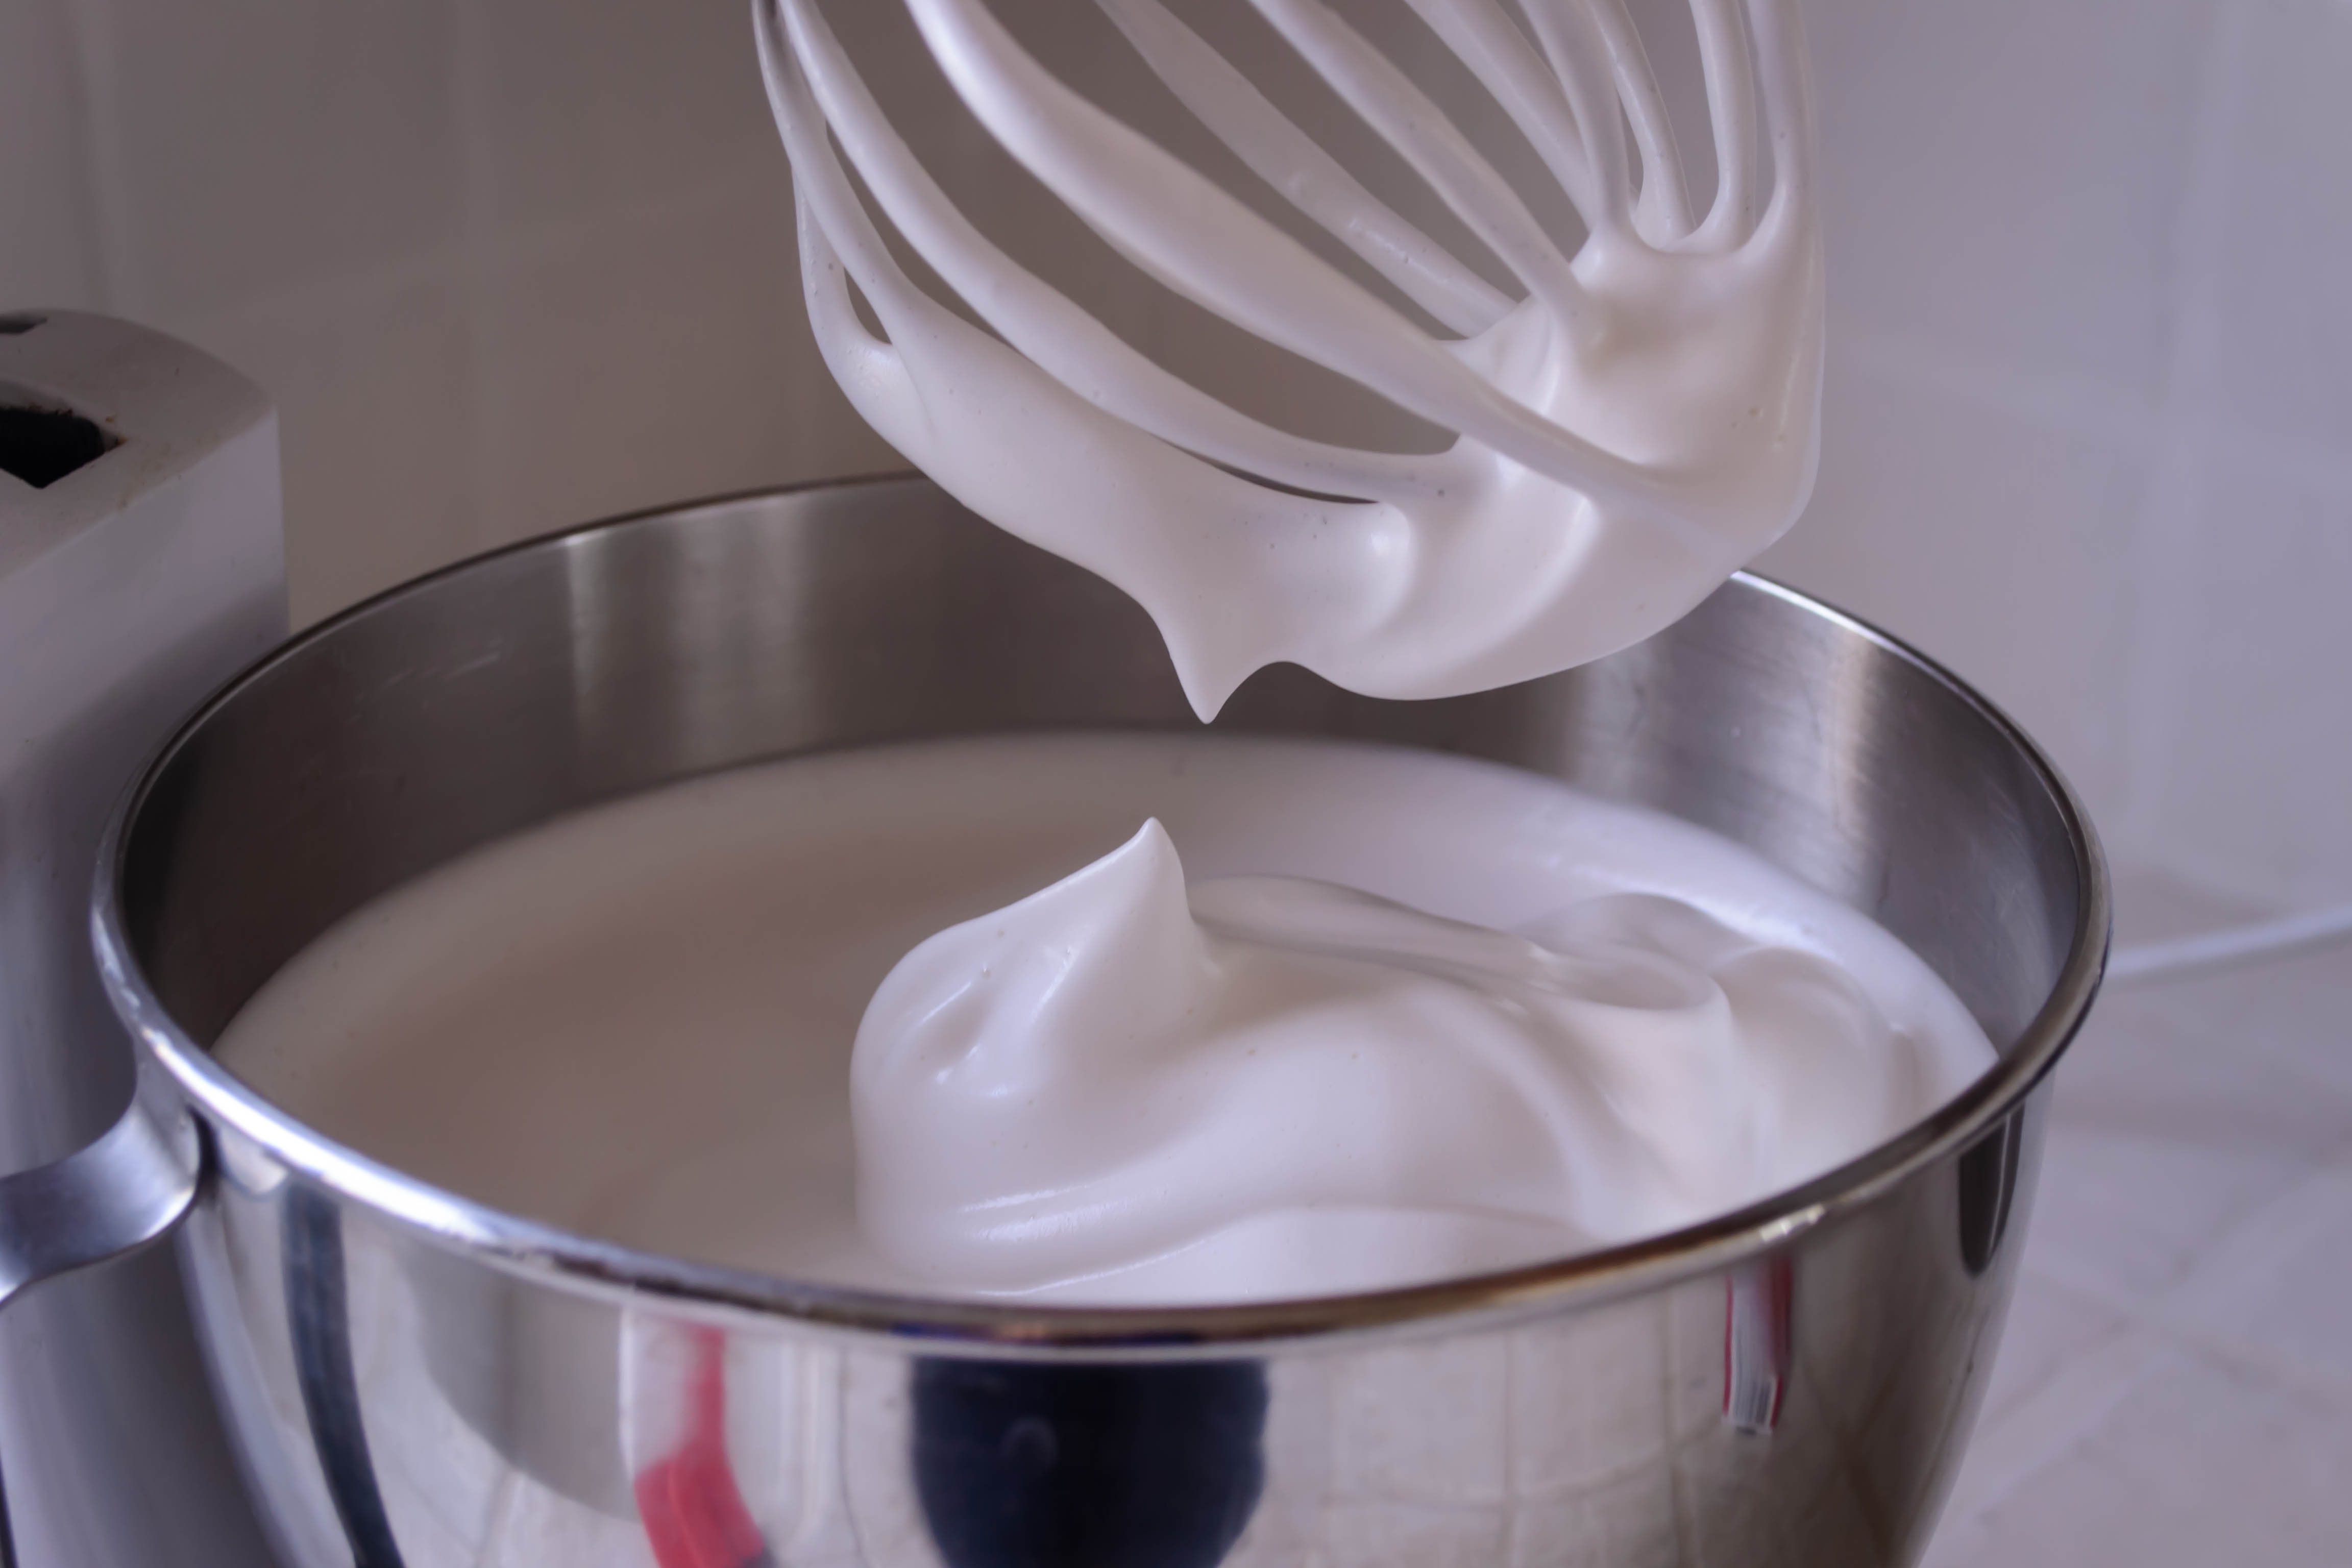
  • With all of the syrup poured in, turn the mixer speed up to medium-high and beat for 5 minutes. The egg whites will take on the consistency of a thick whipped cream.
  • After five minutes, add the vanilla and peppermint extract, then increase the mixer speed to high and beat for another five minutes. The mixture will increase dramatically in volume, become glossy and thick, and resemble that marshmallow fluff you can buy in jars.
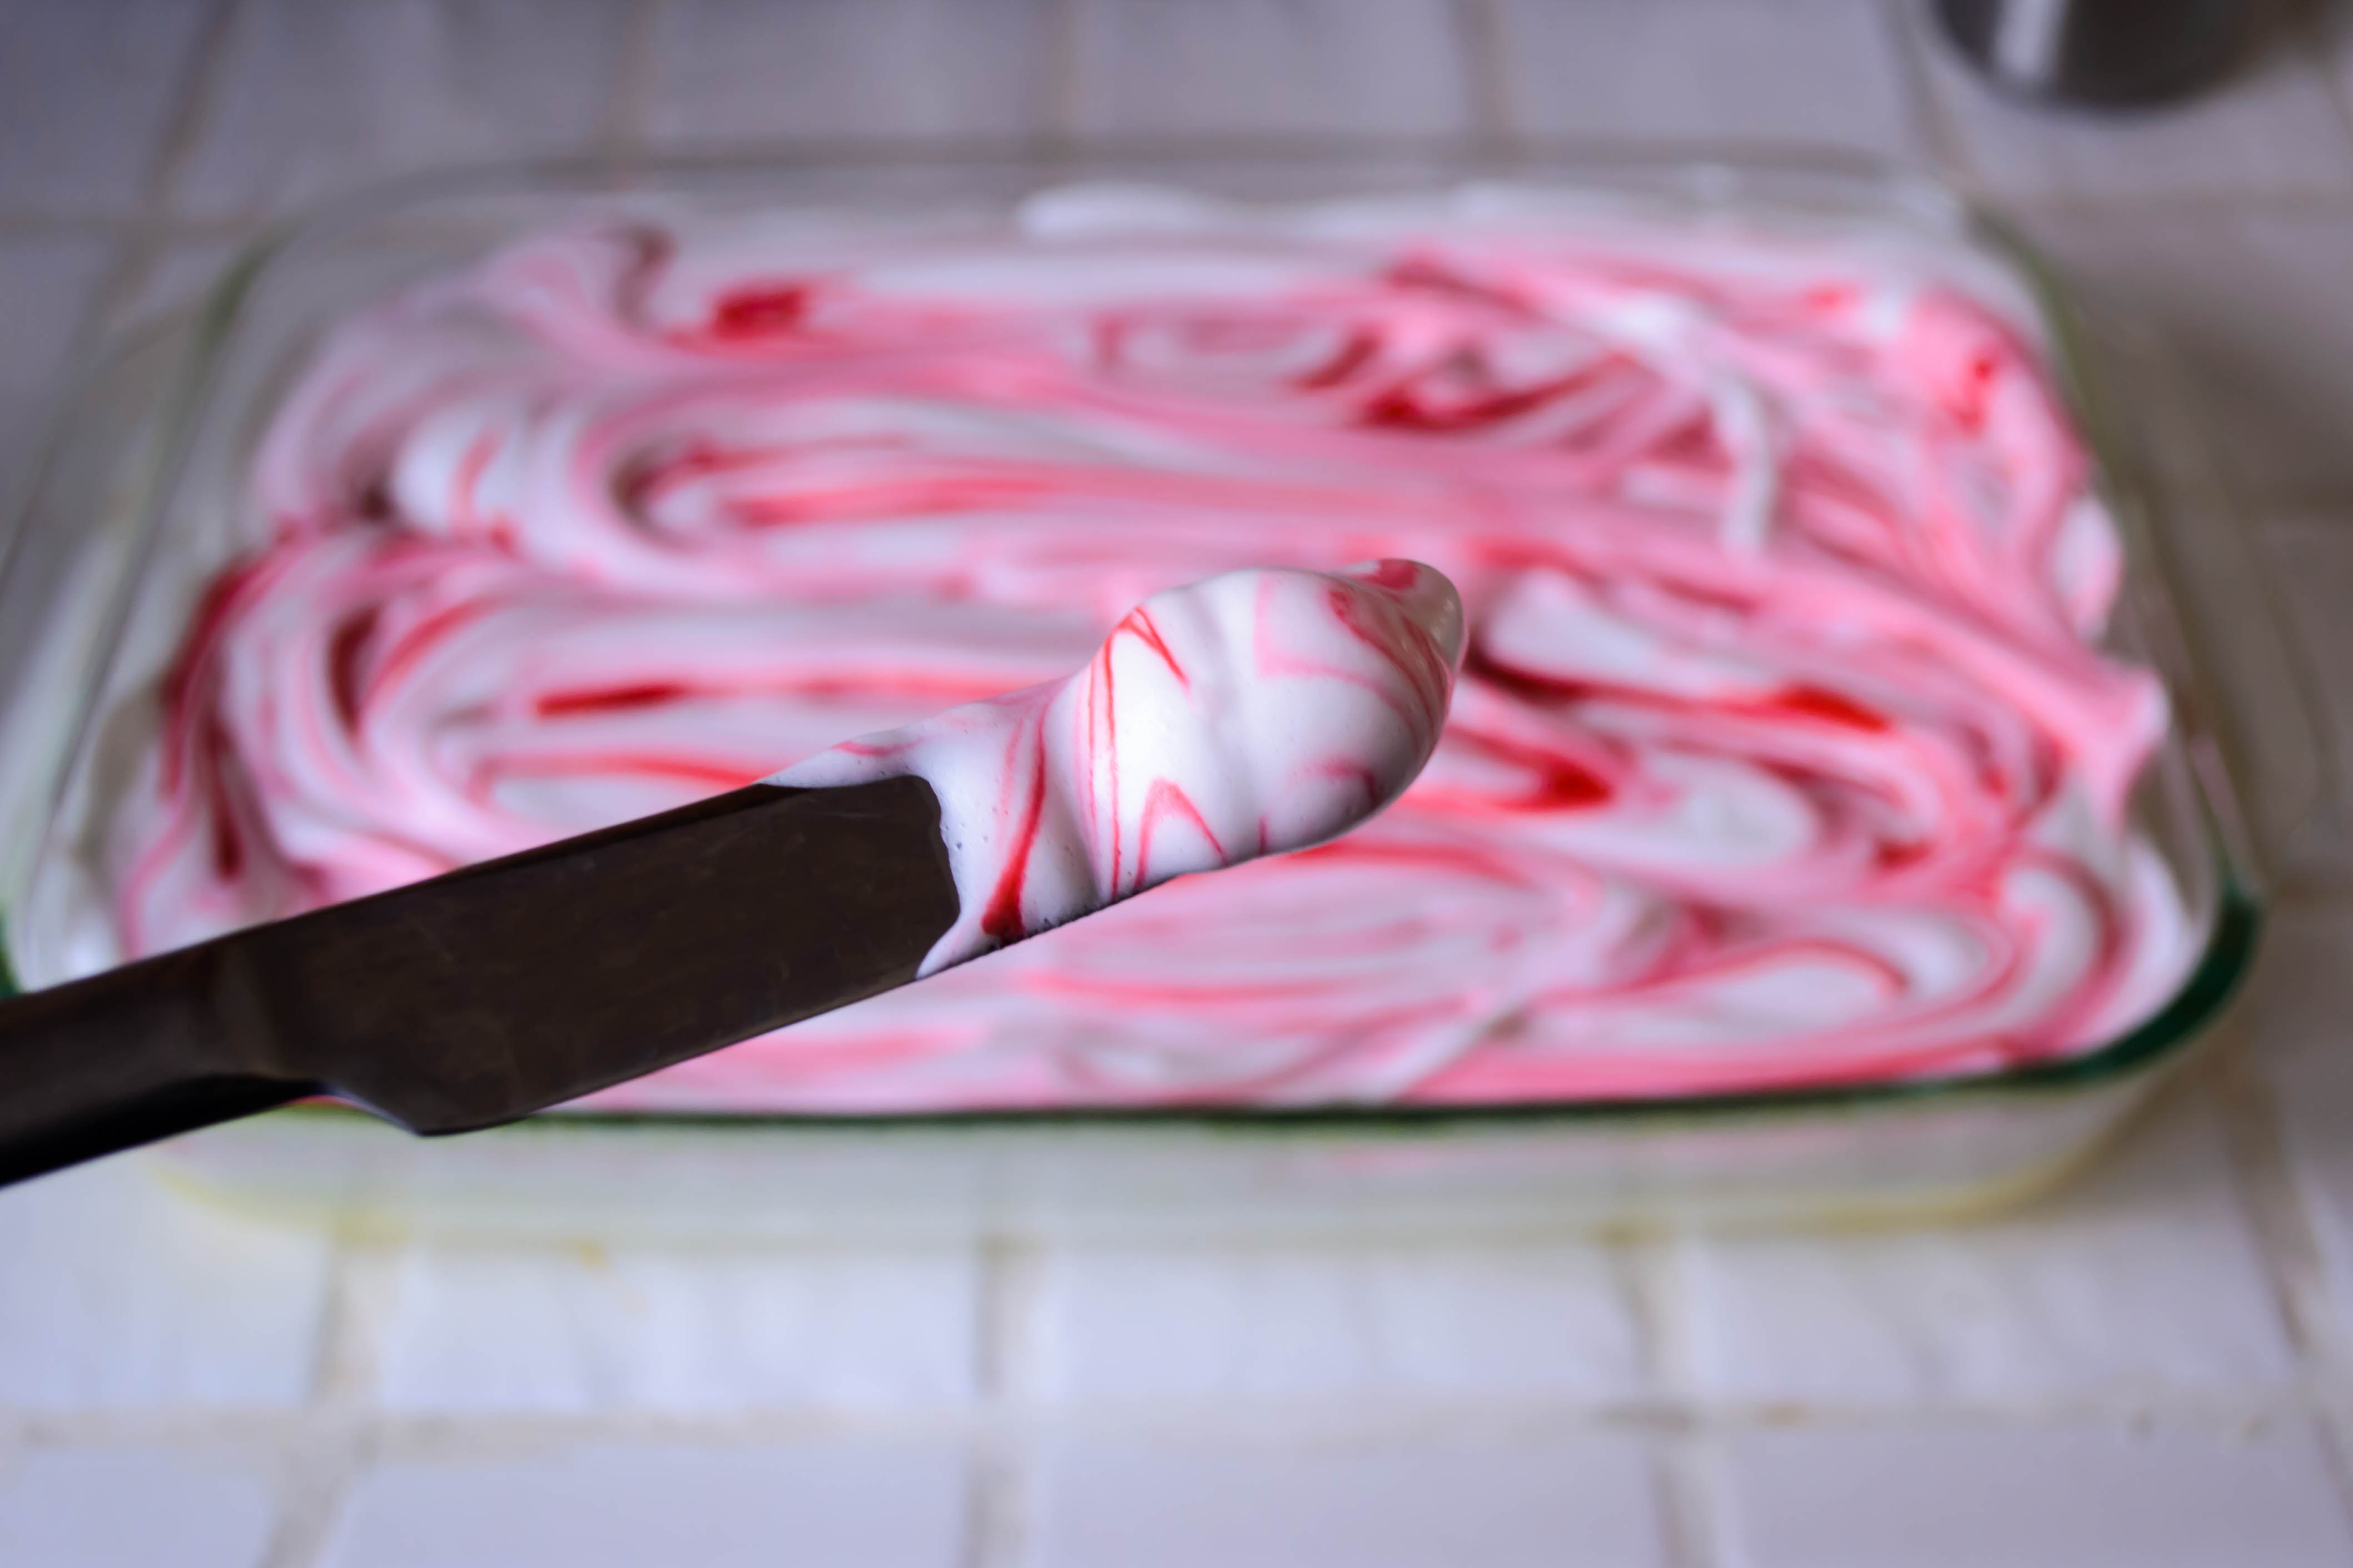
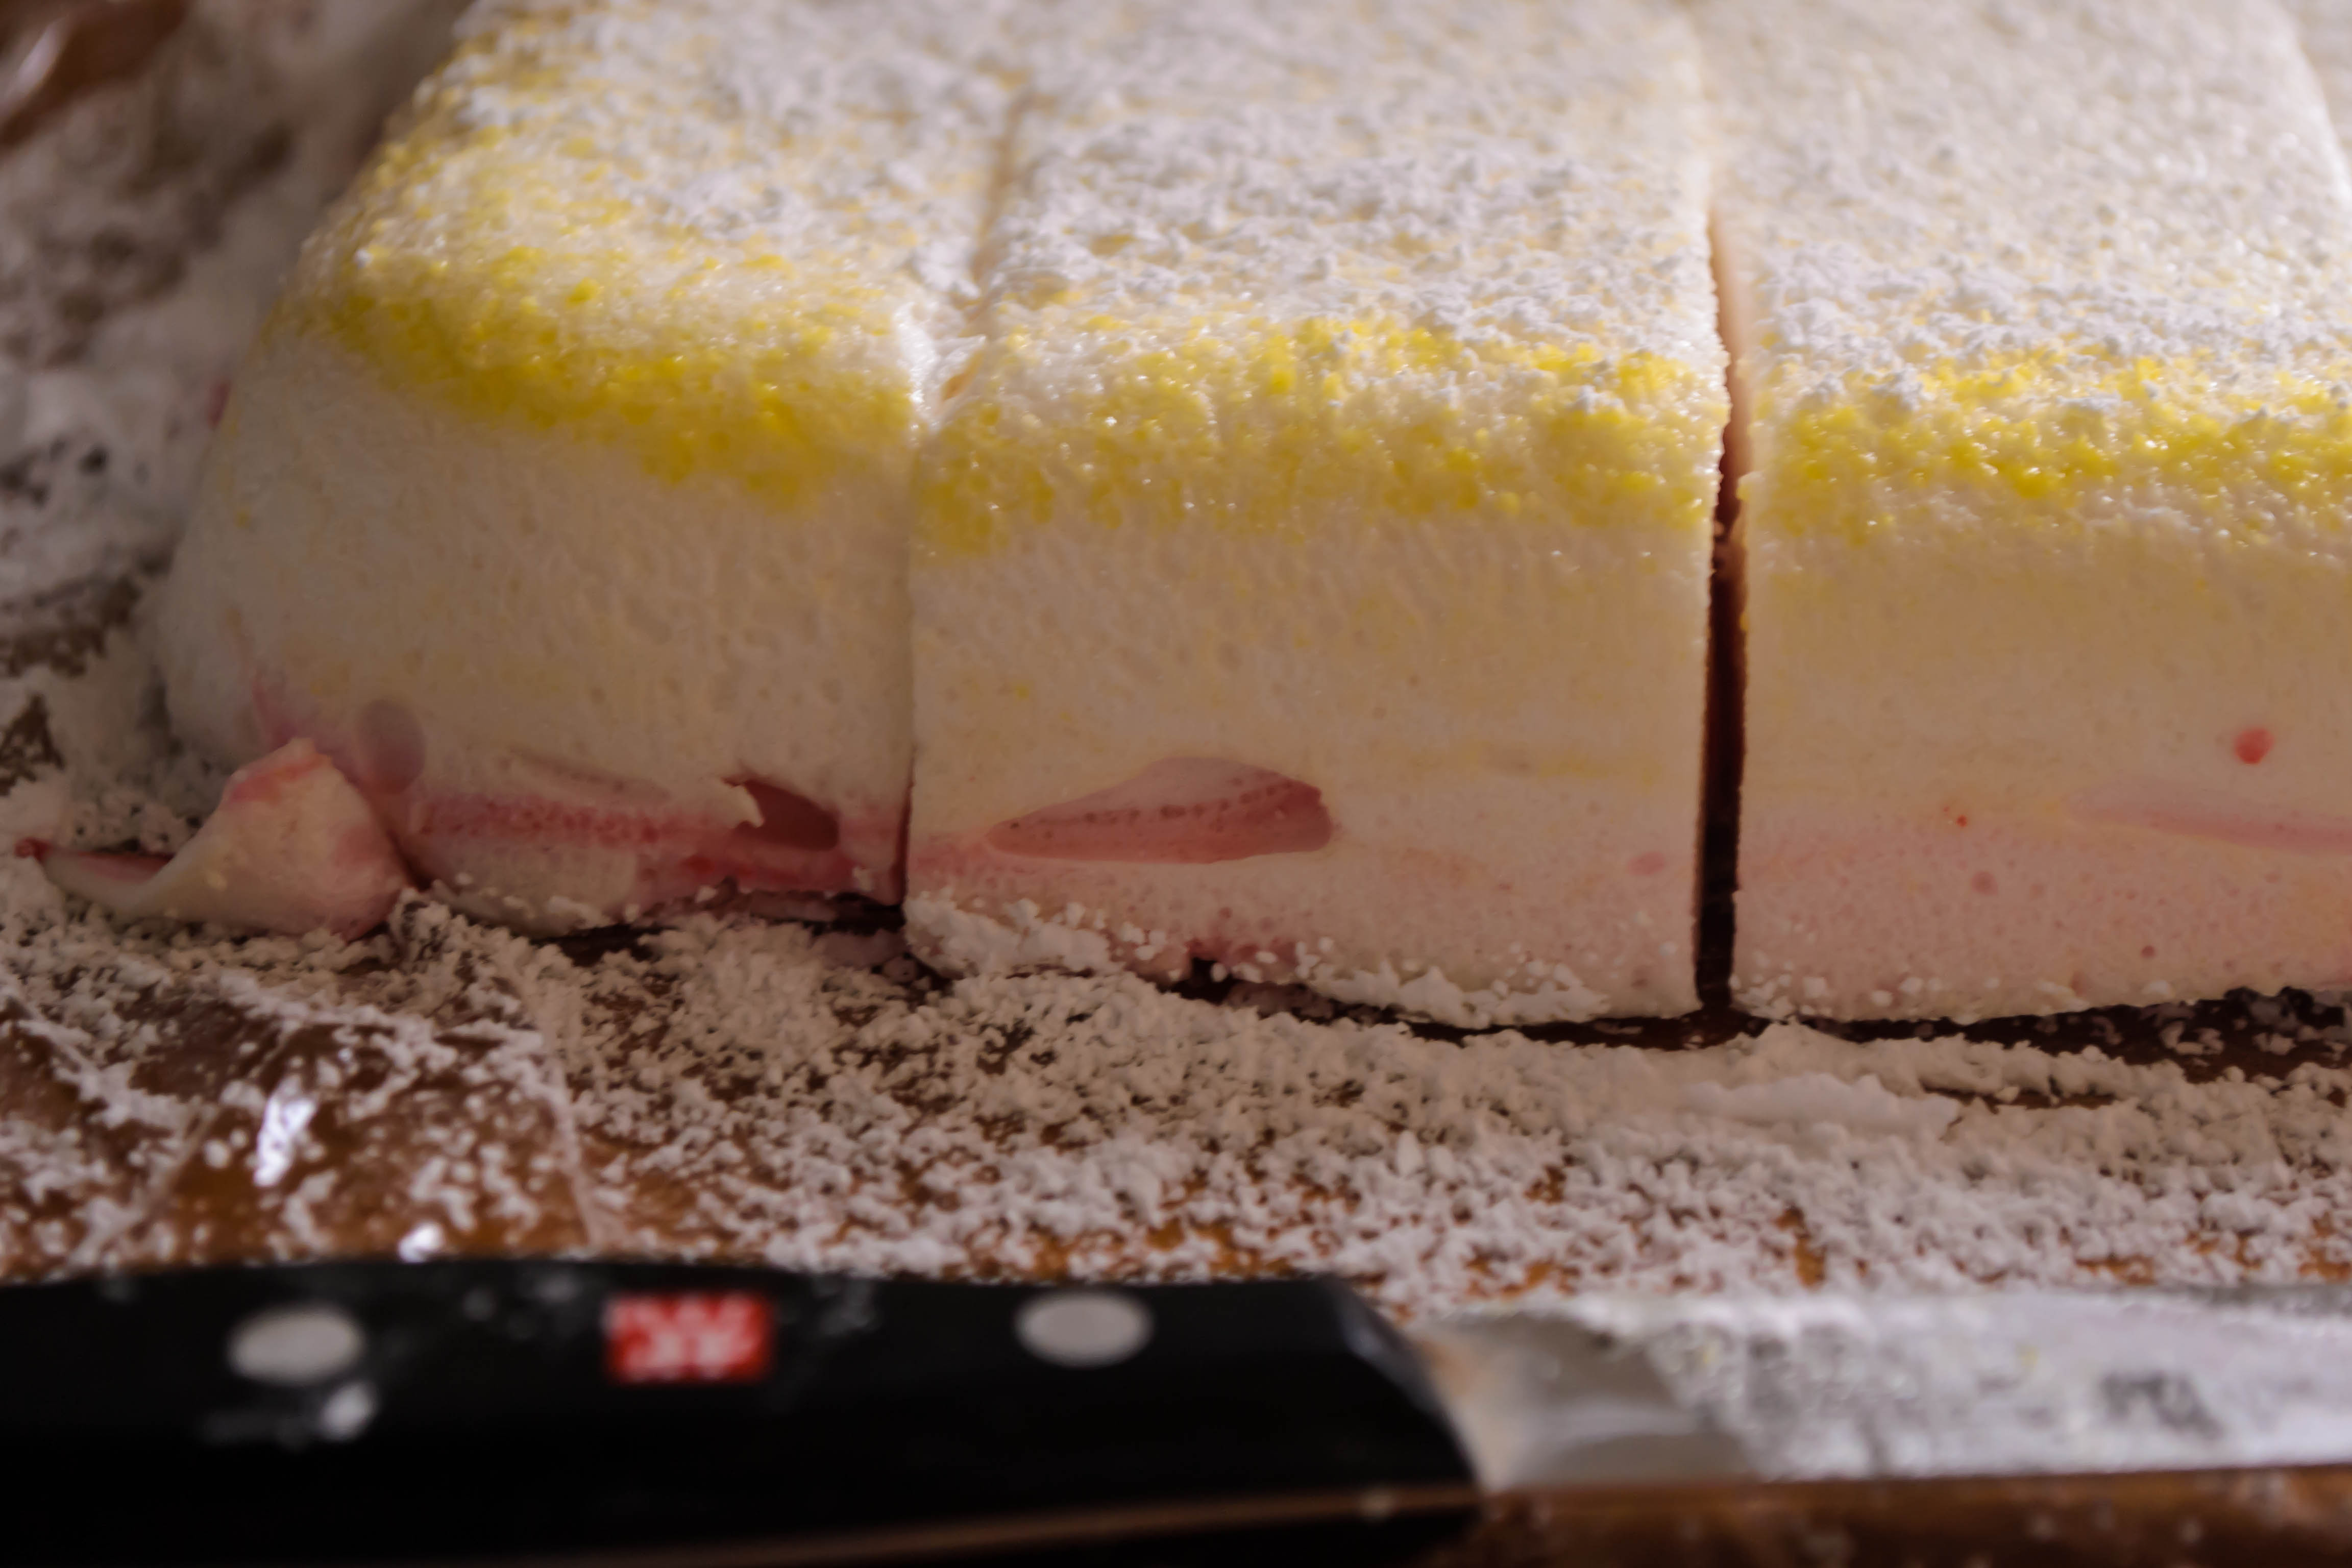
  • You’ve now beaten your egg whites for a total of ten minutes. Use a rubber spatula, greased for extra insurance if you wish, and pour/scrape the mixture into your greased 9×13 inch pan. For the swirly candy cane effect, drip 10-12 drops red food coloring over the surface of the marshmallow, spacing the drops evenly for best coverage.
  • Gently insert the tip of a butter knife into the marshmallow mass and swirl around, dragging the food coloring over and through the pan to create a swirled effect. Don’t overdo it, though – you want well-defined swirls, not pink marshmallows.
  • When you are satisfied with your swirls, cover the pan tightly with plastic wrap, taking care not to let it touch the top of the marshmallows (it would stick like crazy), and stow it in the fridge overnight, or at least 8 hours, to let the marshmallows cure.
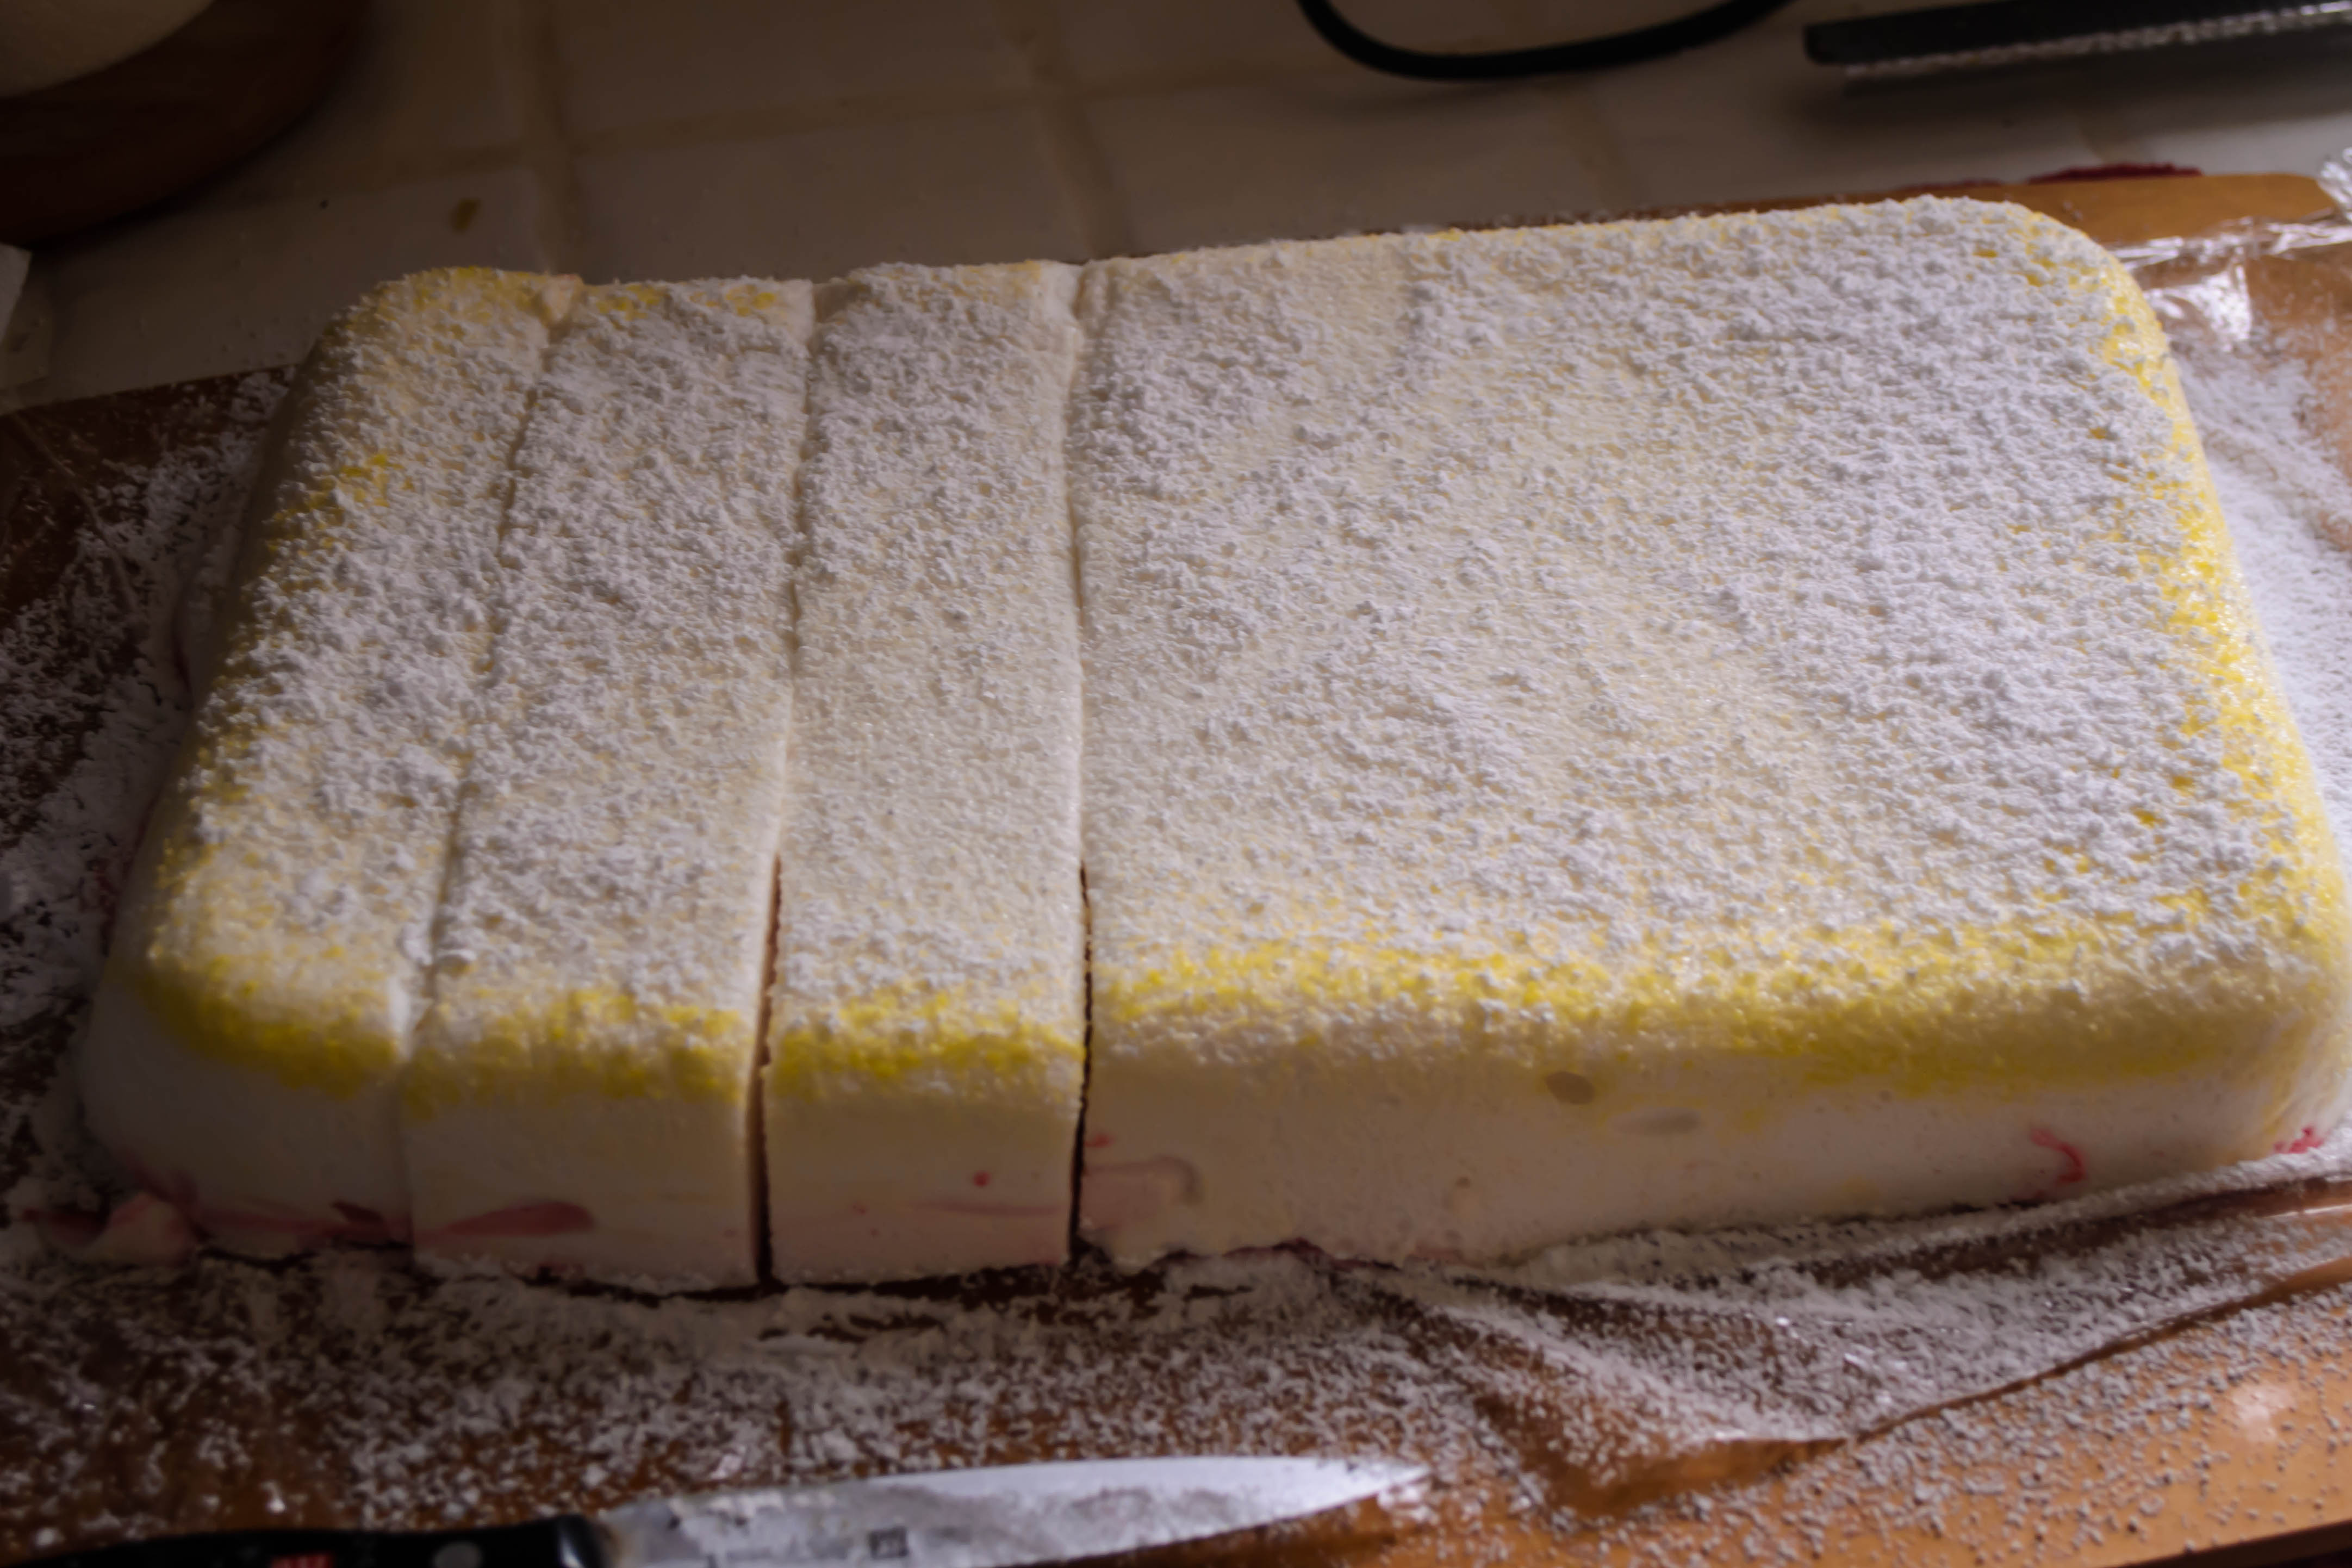
  • After marshmallows have cured, all that remains is to liberate them from the pan, slice them to your desired size (I used a pizza wheel for this), and toss them in powdered sugar to keep them from sticking to everything they come in contact with. To do this, I put 1-2 cups sifted powdered sugar in a brown paper bag, added the marshmallows, and shook them gently until they were evenly coated. Then, remove and consume as desired!

Cranberry and White Chocolate Sweet Rolls

When I read this month’s Twelve Loaves premise of holiday breads, I was stumped for a few days. To me, and to my family, holiday bread means challah, and not only have I done that one here, but I’ve done it for another Twelve Loaves challenge! I certainly couldn’t reprise it. “Holiday” would have to mean “in the spirit of,” and not “in my own traditions.” I’d been kicking around the idea of pairing fresh cranberries and hunks of white chocolate in a cookie for some time, and somehow* this flavor combination morphed into the conception for a sweet roll. Softly sweet, chewy and rich, embracing a sweet tart filling, and drizzled all over with a white chocolate and cream cheese glaze, and the holidays are basically accounted for.

Food Blog December 2013-2912I used my Nana’s sweet dough again – it is proving to be such a reliable and user friendly recipe that I see no reason to change it. The dough comes together into an almost play-dough consistency when it’s been kneaded enough, and it rises, slow and steady, tender but elastic, easily rollable, and neutral enough in flavor to accept any filling you throw at it. I opted to dress it up for the season with a touch of vanilla. A grating of orange peel would probably be lovely as well.

Food Blog December 2013-2886Food Blog December 2013-2891Food Blog December 2013-2894Food Blog December 2013-2900These take two rises – one to let the dough expand and form gluten chains, and one after rolling out, filling, and slicing, to redistribute the yeast and develop the flavor a bit more – before a quick 20 minutes in the oven. I went for mini sized rolls, so I could have more of them, which entailed dividing my dough in two.

Food Blog December 2013-2898Food Blog December 2013-2899Food Blog December 2013-2902You could certainly also do full-sized rolls, which might require a slightly longer baking time. While they are still hot, golden and just crusty on top, but bubbling around the sides with the escaped gush of cranberries, you tip a smooth, ivory stream of melted cream cheese and white chocolate over them, and let them cool as long as you can stand it before serving. The brightness of the cranberries peeking out from under the frosting makes a nice contrast that does reference the Christmas holiday, especially if you really go for the obvious and serve it on a green plate. Not that I would ever do such a thing.

Food Blog December 2013-2901Food Blog December 2013-2904We thought these were quite tasty, and a refreshing twist; certainly worthy of ending up in my department mailroom as a last-week-of-school treat, but if I’m honest, they are not the “match made it heaven” combination I had thought they would be. Cranberries and white chocolate are a holiday fling – experimenting, having fun, but they know it won’t last. They will probably break up come January, and cranberry might skitter home to orange to make amends. White chocolate, on the other hand, stimulated by cranberry’s tartness, might shack up with raspberries for a while, and you guys, what about tender raspberries and shards of white chocolate all wrapped up in a soft, champagne cake roulade? I think I just made you a come-summer promise…

Food Blog December 2013-2907* “Somehow” probably means Deb, whose recent post on cranberry sweet rolls could just possibly have kicked my brain into this direction.

Food Blog December 2013-2916

Cranberry and white chocolate sweet rolls
Makes 18 mini sweet rolls
For the dough:
2 teaspoons yeast
½ cup warm milk
1 egg
1 teaspoon vanilla
¼ cup softened butter
1 teaspoon salt
¼ cup sugar
2 ¼ cups bread flour
For the filling:
12 ounces fresh cranberries
½ cup sugar
8 ounces white chocolate, broken into small pieces (or you can use white chocolate chips)
¼ cup melted butter
For the icing:
4 ounces cream cheese
4 ounces white chocolate, broken into small pieces (don’t use chips here – they contain a stabilizer that prevents them from melting silky smooth)
1 tablespoon milk or cream


  • In the bowl of a stand mixer, combine the warm milk and the yeast and let them stand for five minutes while the yeast wakes up. It will begin to smell bready and bubble slightly.
  • Add the ¼ cup softened butter, the egg, and the vanilla to the yeast and milk combination and mix with the paddle attachment just until combined.
  • Add the sugar, salt and two cups of the flour to the wet ingredients and mix with the paddle attachment just until a wet, softly shaggy dough forms. Switch to the dough hook attachment and knead for 6-8 minutes or until the dough comes together into a firm ball and is somewhere around the consistency of play-dough. If the dough is extremely sticky, add the additional ¼ cup of flour, 2 tablespoons at a time, just until the dough is workable again.
  • After 6-8 minutes of kneading, place your ball of dough in a buttered or oiled bowl (I just lift it out of the stand mixer bowl, spray it with non-stick spray, and put the dough back in), cover with plastic wrap, and let it rise until doubled – usually about 90 minutes. My house was on the chilly side on the day I made this, so it took me more like two hours.
  • While the dough rises, make the filling components: place the cranberries and the ½ cup of sugar in a food processor and pulse three times for three seconds each. This sounds fussily precise, but you don’t want to decimate the cranberries; just break them up a bit so they will cook faster. Chop the white chocolate and melt the butter, and you are ready to go.
  • Punch down the dough by depressing your fist gently into the center of it to release the trapped gasses. Let it sit for five minutes to get its breath back.
  • If you are making mini rolls, divide the dough in half. Place the half you are going to work with on a floured board, and reserve the other half in the bowl you let it rise in.
  • Using a floured rolling pin, roll out the dough into a rectangle of about 9×12 inches, or as close as you can get. It will be quite thin, but that’s okay. It’s going to expand when it rises again on the counter and in the oven.
  • Brush the rectangle of dough with the melted butter, leaving at least a ½ inch margin on all sides. Then, respecting the same margin, sprinkle on half of your cranberry mixture and half of your chopped white chocolate.
  • Now roll up the dough: starting with the long edge closest to you, begin rolling in the middle, then moving out evenly to each side, to create a long log. Crimp the long edge on the other side firmly to the roll itself to prevent deconstruction later. A few cranberry bits may fall out as you do this; that’s okay. Just stuff them back in.
  • Slice the log into 1-inch slices with a sharp serrated knife, moving the knife back and forth across the surface but applying very little pressure. This will produce truly round sweet rolls, rather than smashed, oddly-shaped ones.
  • Place the slices cut side up, so the red-spiked spiral shows, in each of two greased 9-inch cake pans. They should be spaced evenly, and don’t worry if there is room in between them, since they are going to rise again.
  • Cover each pan with plastic wrap and let rise again in a warm place for 30-45 minutes. Meanwhile, preheat the oven to 375F.
  • Once the rolls have puffed again, jostling and pressing against each other in the pan, stow them in the preheated oven for 18-20 minutes, or until lightly browned on top and cooked through. Remove from oven and set on wire racks to cool.
  • While the rolls bake, you can make the icing. In a small pot, combine the cream cheese, white chocolate chunks, and milk or cream. Over low heat, stir constantly until everything has melted together into a velvety, smooth sauce (I mean it – if you step away, this is almost guaranteed to seize, getting grainy and unsalvageable). Once you have liberated the sweet rolls from the oven, pour the sauce liberally over them, using a spatula to spread it around evenly, if needed. Let everything cool before serving, so the sauce can solidify into icing, and the rolls themselves can firm up and stay together better.
  • These taste just as good straight out of the refrigerator as they do warm in the pan. Store them in the fridge covered with foil or in an airtight container for two to three days.

Gingerbread spiced sweet bread with pumpkin pastry cream

Sometimes I agonize over what I’m going to cook. I leaf listlessly through cookbooks and batter my keyboard with demands of something new and fresh and better and, dare I say it? Original. But this month, faced with the Twelve Loaves challenge of baking bread with spices, I knew almost immediately what I wanted to do. I don’t know where the idea came from, but I knew it was going to be a variation on my Nana’s sweet roll dough, stuffed with luscious swirls of pumpkin pastry cream and baked into a decadent loaf.

Food Blog November 2013-2810The problem with this idea, as I started to do some research, turned out to be that no one had done it. I’m not saying this is a bad thing; it’s tough to think you’ve invented something, and then Google it, only to find dozens hundreds probably billions of results that are either more amazing-sounding than you’d imagined, or more beautifully photographed than you have the ability to do.

Food Blog November 2013-2781This one came up with nothing. I started wondering: can you bake pastry cream? If you can, why has no one done this? I tried multiple searches, I leafed through my cookbook collection again, feverishly this time; I even polled friends to see whether this was a thing. One foodie friend speculated unpleasant melting would result. Baking forums promised curdling. Every recipe I located for something remotely similar advocated baking the dough and then piping chilled pastry cream into it. I was contemplating using Nana’s old cream horn molds to wrap little crescents of bread and then shoot pumpkin pastry cream into them, and then I found this. It’s a recipe for something called Torta Della Nonna, which translates to “grandmother’s cake,” and consists of a lovely tender dough, filled sometimes with sweetened ricotta, sometimes with mascarpone, but sometimes with a layer of vanilla or lemon pastry cream!

Food Blog November 2013-2785Victory, if not ensured, at least not a total shot in the dark, I got to work. Pastry cream, if you’ve never made it, is one of those projects that sounds terrifying – hot milk, egg yolks sure to curdle, frantic whisking with scalding and scrambling around every corner – but isn’t really that tricky. It’s another one of those “read ALL the directions first and have your ingredients prepped” kinds of recipes, and suddenly the milk and eggs you were whisking away at thicken into this magical, glossy, extravagant slosh of something an éclair would beg to be filled with. And when you finish eating half of it tasting it to make sure it’s edible, you have only to strain it (in case of accidental scrambled bits), refrigerate it, and then decide what to do with it.

Food Blog November 2013-2790I opted, to be sure the Italian grandmothers I was never lucky enough to have knew what they were doing, to bake up just a little custard cup of it. If it was going to melt all over the place, I’d take a new direction. It didn’t. The top layer formed a thin skin, like custard or pudding left to set without a layer of plastic wrap pressed over it, but below that exposed skin (which, if I’m honest, I don’t really mind) was a tiny vat of this stuff, rich, creamy, better-than-pudding, and I knew we were on our way to great things.

Food Blog November 2013-2783From there, it was a matter of making up a batch of dough, a little more decadent than usual thanks to the addition of an extra egg and a few extra tablespoons of butter (hey, if you’re going to pack it with pastry cream anyway, you might as well go whole hog), and spicing the whole thing with the flavors of the winter holidays: cinnamon, ginger, nutmeg, cloves.

Food Blog November 2013-2788Food Blog November 2013-2791I decided to make a lattice-top loaf, which entailed rolling, slicing strips along both edges of the dough, spreading the glossy, velvet perfect orange cream inside, and weaving the whole thing together. However, I did this on my bread board (it made sense at the time), not considering that the dough, flexible and buttery already, was about to double or triple in weight thanks to the addition of the cream, and be unwilling to transfer to my baking sheet. Thus, after considerable hand-wringing and fancy spatula work, I ended up with something like a horseshoe, only slightly structurally compromised. I suggest filling and finalizing your loaf on the greased baking tray you’ll be putting into the oven.

Food Blog November 2013-2793Food Blog November 2013-2794Food Blog November 2013-2795Food Blog November 2013-2797My god, this was good. The pastry cream oozed out of the caverns and crevices left by inexperienced and impatient lattice-work, and these parts gained the same skin as my experiment. This is, if we’re going to be picky, perhaps of a slightly compromised texture – it gets slightly grainy and thick – but it’s not enough to be a bother. Because once you get beneath the outer layer and your teeth sink into the delicately sweetened, pumpkin lushness below, you won’t ever want to eat anything again. And the dough itself is no slouch either. It bakes up warm with spices and beautifully textured. The combination is like… well… it’s like nothing I can really think of. The bread is like a sweet roll or a yeasted coffeecake; not as light as a doughnut, but not as heavy as your standard loaf of bread. The cream inside makes it (almost) too decadent to be a breakfast, but it’s a more than suitable dessert or afternoon pick-me-up. To make it even better, this bread actually tastes better the second or third day after you bake it (or even the seventh… I’ve kept our leftovers wrapped in plastic wrap and in the fridge, and a week later it is still moist and perfect).

Food Blog November 2013-2798Food Blog November 2013-2808

Gingerbread spiced sweet bread with pumpkin pastry cream
Makes one 14-16 inch lattice-top loaf (and about 2 ½ cups pastry cream to fill)
For pumpkin pastry cream:
2 cups half and half (or, if you’re me, nearly 1 cup heavy cream and a little over 1 cup whole milk)
½ cup sugar, divided
Pinch salt
4 egg yolks
3 tablespoons cornstarch
½ cup pumpkin puree (not pumpkin pie filling)
½ teaspoon cinnamon
1 teaspoon vanilla
2 tablespoons cold butter
  • In a medium saucepan, heat the half and half, 6 tablespoons of the sugar, and the salt to a bare simmer over medium heat. Separate the eggs and mix the yolks with 2 tablespoons of the sugar, beating until you can only feel a slight graininess from the sugar in the mixture. Whisk in the cornstarch until combined. The mixture will become pale yellow in color and thicken noticeably.
  • Dribble about two tablespoons of the simmering half and half mixture into the egg yolks, whisking quickly as you go. This tempers the yolks, warming them up just enough to prevent them from scrambling when they hit the heat of the milk.
  • Add the yolk mixture to the half and half in the saucepan, whisking constantly as it returns to a simmer over medium heat. The whole mixture will become thick and glossy, and a few reluctant bubbles may sputter to the surface.
  • Turn off the heat and add the pumpkin, cinnamon, vanilla, and butter. Whisk until incorporated and smooth.
  • Position a wire or mesh sieve over a medium glass bowl and dump in the hot pastry cream. Using a spatula, stir and push the cream through the sieve down into the bowl. If there are any scrambled bits or undissolved material, this will catch it and prevent anything from marring the divinely perfect texture.
  • Place a layer of plastic wrap flat against the pastry cream and refrigerate until cold. This thickens the cream and lets it achieve its most glorious texture.
  • While it chills, make the bread dough.
For dough:
2 teaspoons yeast
½ cup warm milk
Pinch sugar
¼ cup brown sugar
½ teaspoon salt
2 eggs
6 tablespoons room temperature butter
2 teaspoons cinnamon
1 teaspoon ginger
1 teaspoon nutmeg
½ teaspoon cloves
3 – 4 cups flour (all-purpose or bread flour both work well)
  • Combine the yeast, ½ cup warm milk, and a pinch of granulated sugar in a small bowl. Let sit for 5 minutes while the yeast wakes up a bit.
  • Meanwhile, add the brown sugar, salt, and eggs to the bowl of a stand mixer and beat with the paddle attachment into a sludgy homogenous mixture. Add the yeast mixture and the butter and mix again until mostly combined.
  • Add the spices and 3 cups of the flour, and mix with the paddle attachment just until a wet dough comes together.
  • Switch from the paddle to the whisk attachment and knead 6 – 8 minutes, adding more flour, if needed, in ¼ cup increments. Try not to add too much flour, as with each addition the dough becomes a bit denser and tougher.
  • After 6 – 8 minutes of kneading, the dough will still be sticky and loose. Cover it with plastic wrap and let it sit in a warm place for 90 minutes, or until it has doubled in volume.
  • Punch down the dough by depressing your knuckles gently into its center to release the accumulated gases.
  • Turn out the dough onto a well floured board (I did this by just inverting my mixer bowl and letting it sit until the dough flopped out). Flour the dough lightly as well, and roll with a rolling pin into a 12 x 16 inch rectangle. If the dough springs back on itself immediately, let it sit for 5 minutes and then try again.
  • To create the lattice-top look, use a sharp knife to cut slits at a slight angle in the outer edges of dough at 1 inch intervals. Each slit should only be about 2 inches in – you need plenty of room in the center for the pastry cream, and the dough will stretch as you weave it. See photo above for a visual.
  • Transfer your dough to a lightly greased cookie sheet so you can shape it without having to move it again. Spread about 2 cups of the pastry cream onto the uncut center panel of dough, leaving about a ½ inch margin on all sides (what you do with the remaining cream is up to you. I won’t tell anyone). Then, fold up one of the end pieces over the top of the pastry cream and start weaving: fold up one dough strip at a time, taking one from one side and one from the other in turns, the way you would lace a shoe. Fold over the center gently – if you push down too much, pastry cream will go everywhere.
  • When you get to the end of the latticework, fold up the remaining edge and pinch it with the final set of folded strips to seal it. Cover it with plastic wrap and let it rise for 30 minutes.
  • During this final rise, preheat the oven to 350F.  Now, here’s where I must be honest. In the excitement of how firmly I believed this was going to be the best loaf of sweet bread ever, I failed to write down how long I baked this for. But I’m going to say you should start with 20 minutes, and see how things look. The top should get dusty and browned and feel slightly hollow when you knock against it. If it isn’t browned at all or still looks conspicuously raw, give it another ten minutes.
  • When done, remove from oven and cool completely before slicing. To store, wrap in plastic wrap and keep in the refrigerator. To snack, I preferred my slices straight out of the fridge, where the cream was cold and glossy and the bread was chewy and thick.

Espresso Molasses Spice Cookies

As Molly said a few weeks ago, sometimes recipes are so good they need no long-winded, story-laced introduction.  These cookies are like that.  You should just go and make them right now.  But for the sake of propriety, or normalcy, or expectations, I’ll just explain how these – perhaps the best cookies I’ve ever made – certainly the best cookies I’ve tinkered with my own recipe for – came about.

Food Blog July 2013-1915Perhaps months ago, a friend mentioned molasses spice cookies on Facebook (incidentally, and perhaps obnoxiously, have you acquainted yourself with the blackberry eating Facebook page?  Come on by, if you’d like), and suddenly I had to have them.  So I poked around, checking one recipe and another, and finally, as I often do, turned to Smitten Kitchen to see what Deb’s take on the issue looked like.

Food Blog July 2013-1890I mixed up a batch of Deb’s recipe, subbing out white sugar for all brown, adding some espresso powder for a bit of kick and rolling the cookies in coarse, crunchy turbinado sugar rather than standard granulated.  And then in between bouts of shoving them into our faces, I sent a stack to a few friends, who proclaimed them some of the best cookies they’d eaten.

Food Blog July 2013-1891For normal people, I’d wager this assessment of “best ever” would be enough to declare the recipe finished.  But I’ve never been entirely normal.  Yes, these cookies were good.  They were soft and spicy and warm, and the crunchy sugar on the outside was a perfect contrast.  They crinkled into little cracks on top and would have made ideal “bread” for a sandwich of ginger ice cream.  But I wasn’t done.  I upped the quantity of espresso powder so you could really taste a hint of it against the molasses.  I added orange zest for perfumed freshness and black pepper for an additional and different kind of zing.

Food Blog July 2013-1894And then I thought about texture.  For years, my dad has been searching for the perfect chewy chocolate chip cookie (more on this achievement in the future, I suspect…), and remains unsatisfied with recipes that churn out cakey or fluffy domes of dough.  The first batch of these molasses wunderkind were like that – lovely spice and flavor, but a bit on the soft side for me.  Some of this softness was my choice of sweetener; using all brown sugar is always going to leave you with a softer product than white sugar.  So will honey.  Both are hydrophilic, which simply means they attract moisture and thus stay flexible and soft, even after a few days (case in point: my friends who received theirs via post had no complaints about stale cookies!).  But some of this textural challenge is also related to flour.

Food Blog July 2013-1895Let’s talk about flour for a moment, if you’ll permit me.  “All-purpose flour” is one of the most misleading claims in the baking universe.  Flour – at least wheat flour – does what it does thanks to gluten, which are the little strands of protein that form snaky, chewy chains that result in the stretchy but still pillowy texture of bread.  The higher protein content your flour has, the more gluten it has and the more developed those chains will be.  The issue is, all-purpose flour is going to have a different protein content depending on the company whose flour you buy, the particular type of wheat used, and, to some extent, the year’s harvest itself.  So if you’ve ever made a batch of cookies that turned out perfectly the first time and then somehow, subtly different in texture the next time, you might have used a different batch of flour with a higher or lower protein content.

Food Blog July 2013-1896So how does this relate to the chewiness I was after?  Here, as should surprise no one (at least no one who knows me), I turned to Alton Brown.  If higher protein flour results in chewier cookies, why not sub in the flour made specifically for gluten development?  Bread flour.  And that was it.  Replacing just a ¼ cup of the all-purpose flour from the original recipe with bread flour produced a cookie that still crackled on top and felt appealing between our teeth, but held up with a bit more resistance, demanding an extra chew or two.  The perfect chewy cookie.  We planned to bring a batch of these to my family when we went to visit them last week, but as we each took yet another from the bag mid-drive, we realized there were only three left from the whole endeavor – enough for my family to each taste just one.

Food Blog July 2013-1905
Espresso Molasses Spice Cookies
adapted from Smitten Kitchen, who got them from the Cooks Illustrated Best Recipe Cookbook
makes 18-20 large cookies
2 cups all-purpose flour
¼ cup bread flour (this makes the cookies a bit chewier.  If you don’t care or you don’t have bread flour, use 2 ¼ cups all-purpose.  The cookies will be a touch softer, but still amazing)
2 tsp baking soda
½ tsp salt
1 ½ tsp cinnamon
1 tsp ginger
¾ tsp cloves
1 TB instant espresso powder
¼ tsp black pepper
12 TB room temperature butter (1 ½ sticks)
2 tsp orange zest
1 cup brown sugar, packed (I used golden brown; I’m sure dark would be delicious as well)
1 egg
1 tsp vanilla
1/3 cup unsulphured molasses
1/3 turbinado or other coarse sugar, for rolling
  • Position your oven racks in the top third of the oven, preheat to 375F, and line two baking sheets with parchment paper.
  • In a medium bowl, whisk flours, baking soda, salt, and spices through the black pepper.  This will leave you with a beautifully flecked mixture.
  • In a large bowl (I used the bowl of my stand mixer), cream the butter with the orange zest and the brown sugar for about 2 minutes, or until light and fluffy.  Scrape down the sides of the bowl.
  • Slosh in the vanilla, the egg, and the molasses, and mix well.  Scrape down the sides of the bowl again so everyone is included.
  • Add the dry ingredients to the creamed mixture and beat until all signs of flour are evenly mixed into a thick,sludgy dough.  Again, scrape down the sides of the bowl to ensure full incorporation.
  • Pour the 1/3 cup coarse sugar onto a plate or a shallow bowl.
  • Scoop 2 TB (1/8 cup) portions of cookie dough, roll them in your hands briefly to make a ball, and coat the ball in the coarse sugar on all sides by pushing it lightly around the plate or shallow bowl.
  • When each ball of dough is coated in coarse sugar, set it on your prepared cookie sheets.  Cookies should be spaced an inch or two apart; I wouldn’t do more than 6 per sheet, as they are large and do spread a bit.
  • Bake each sheet 11-13 minutes, or until cookies are puffed and set at the edges.  The middles will still be soft, but don’t despair.  They will continue to cook as they cool.
  • Cool cookies on their sheet for 2-3 minutes, then remove to a wire rack to cool completely before consuming, if possible.
  • You’ll hardly need to know this, I suspect, once you put one in your mouth, but enclosed in a zip-top bag these will stay fresh for up to a week.