Apricot Goat Cheese Biscuits

2016 Food Blog May-0756One of my first big Sandra Lee-type triumphs in the kitchen was with biscuits. At the time, I was using Bisquick, and after a number of successful productions, I decided there was no reason I shouldn’t make the fluffy little drop biscuits more interesting by adding herbs, or green onions, or cheese, and then that my creations would probably be better with buttermilk rather than skim milk, and then at some point, with contributions from Mark Bittman and Michael Ruhlman, the Bisquick box disappeared altogether and the biscuits got fluffier, and higher, and packed densely with all kinds of interesting additions.

2016 Food Blog May-07262016 Food Blog May-0728
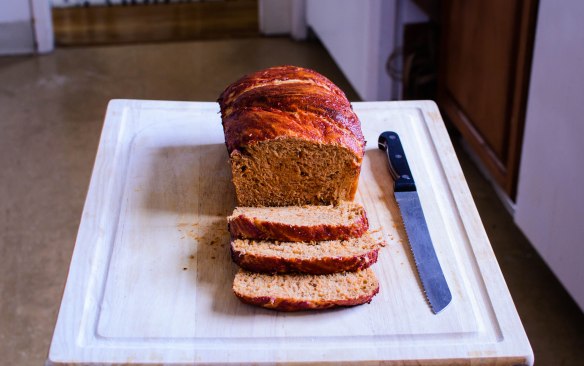
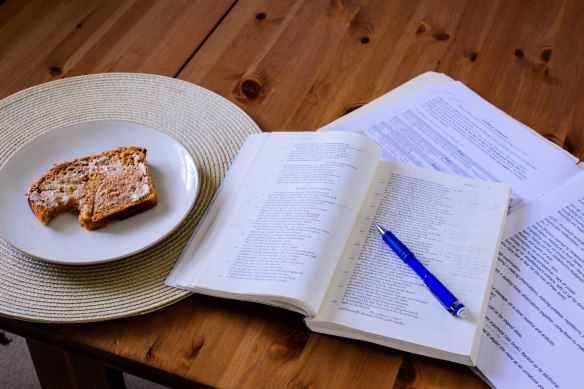
There are probably enough biscuit recipes on this site – adding another seems superfluous. But they are so tasty, and so comforting, and so simple, and they accept additions that drive them into the realms of sweet or savory so well, that they keep popping up on my list of food ideas. This time, with half a bag of dried apricots in my pantry and a partial log of goat cheese in my fridge, there were no excuses for a special weekend breakfast.

2016 Food Blog May-07332016 Food Blog May-07362016 Food Blog May-07382016 Food Blog May-0743
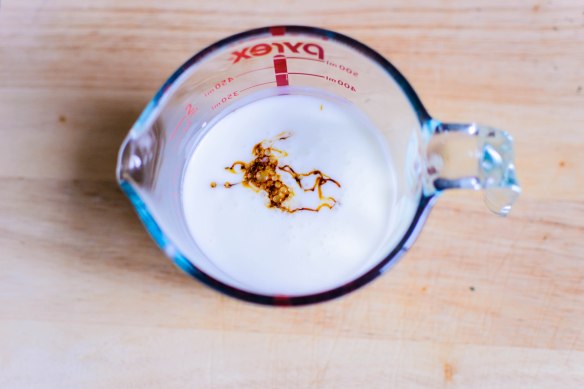
Biscuits are a comforting baked item because they are easy. No yeast, so no long rise times or careful shaping or temperature concerns. No special flours or long ingredient list, and you don’t even have to have actual buttermilk to make buttermilk biscuits; you can just add a tablespoon of vinegar or lemon juice to regular milk, stir it up, and let it sit for two minutes, and you suddenly have perfectly serviceable “buttermilk” to work with. Mine are complicated just a tiny bit by a lazy-person’s adaptation of Michael Ruhlman’s method for lots of moist, fluffy layers, much like those beautifully sodden pillows from the can that you have to rap on the edge of the counter – you know what I mean – but this only entails a few extra folds and rolls of the dough before punching or cutting out your biscuit shapes.

2016 Food Blog May-07482016 Food Blog May-07532016 Food Blog May-0750Most magical of all, biscuits survive freezing spectacularly. Once mixed and rolled and cut, you can stow them in the freezer overnight, which means hot, fresh, flaky biscuits for breakfast can be yours in just over twenty labor-free minutes – time easily used to start the coffee, or find your slippers, or get some Lou Reed going to groove breakfast to.

2016 Food Blog May-0761

Apricot and Goat Cheese Biscuits
Makes 10-12 biscuits (2-3 inch diameter)
2 cups all-purpose flour
1 teaspoon salt
1 tablespoon raw sugar (I use turbinado)
2 tablespoons baking powder
¾ cup chopped dried apricots (chop to your desired size – I like a mix of rough and fine)
6 tablespoons cold butter, cut into chunks
½ cup crumbled goat cheese
6 ounces cold buttermilk (or faux buttermilk: stir one tablespoon white vinegar or lemon juice into the milk and let it sit for 2 minutes before using)


  • Line a baking tray with parchment paper. If you are cooking the biscuits immediately, preheat the oven to 400F. If you are cooking the biscuits the next day, clear some space in your freezer.
  • In a medium bowl, whisk together the flour, salt, sugar, baking powder, and dried apricots until well combined. Tumble in the butter and the goat cheese and, with a pastry blender, a fork, or two knives (I’ve never mastered this method, though), work in the chunks until well distributed in small pebbly bits throughout the mixture.
  • Now, pour in the buttermilk and, using a fork, turn and mix and work until a clumpy, wet dough forms. Dump this out onto a well-floured board and, with lightly floured hands, work it into a ball.
  • Use your hands or a floured rolling pin to flatten the dough ball you’ve formed into a rectangle or oval about 1 inch thick. Then, fold up the flattened shape into thirds, turn it 90 degrees, and flatten again. Repeat this process of folding, turning, and flattening twice more. When the biscuits bake, they will rise high with lots of fluffy layers.
  • With your folded and flattened dough back at about 1 inch thick, punch out biscuit rounds by pushing a biscuit cutter or the lip of a glass straight down through the dough. Don’t twist! Twisting disrupts all the layers you’ve just made and the biscuits won’t rise as high or as evenly.
  • When you have punched out all the biscuits you can, gather the dough back together into a ball, knead gently once or twice, and then flatten out again and punch remaining biscuits. You should be able to get 10-12 out of this amount, depending on the diameter of your cutting tool.
  • Space your punched-out biscuits at least half an inch apart on your prepared baking sheet. If you are baking immediately, place the loaded tray into your preheated oven and bake for 12-14 minutes, until the biscuits are just golden on top. If you are waiting, shove the tray straight into your freezer. The next morning (or whenever you need freshly baked biscuits), remove the tray from the freezer, preheat the oven to 400F, and bake for 18-20 minutes. There’s no need to defrost first – the extra time in the oven will do the job.
  • Either way, serve steaming. We like ours with butter and honey.

Ginger Blackberry Scones

2016 Food Blog March-0656It’s going to sound a bit cliché to do this – a literature major starting a post with quotes about April – but it has again proved itself to be the cruelest month. Really, as a medievalist I should be referencing Chaucer, and I do prefer his April – with its sweet showers and sleepy birds and waking pilgrims – to T.S. Eliot’s earthy disturbance of memory and desire, but this year Eliot is unfortunately more apropos. April is a thief. It stole things from me, and from others I love. It sapped me on a personal and a professional plane, and on levels both trivial and profound.

2016 Food Blog March-06192016 Food Blog March-06242016 Food Blog March-0625In the wake of April’s larceny, which began on the very first day of the month, something had to give, and that something was this something. The ease with which I slipped in a substitute post was insidious, and to manage my own needs, I had to allow that ease to linger.

2016 Food Blog March-0627Now that April has blustered its way out of our lives, now that I’m picking my way delicately up the slope that everything I dropped created, I think we need something warm and comforting, but bright. Something to wake up those sleepy birds and push us forward on our pilgrimages. There are several search terms for the 2016 project that involve blackberries, which is no surprise. However, I just couldn’t see my way ‘round “blackberry sauerkraut party meatballs” (any ideas?), so I settled on “ginger blackberry scones” instead, borrowing a bit from a Bon Appetit base recipe for cream scones.

2016 Food Blog March-06382016 Food Blog March-0641There is much, and also not a great deal, to say about scones. Richer than a biscuit, drier than a cake, they are a crumbly compact package I would eat at any time of day. Studded with chopped crystallized ginger, bright with citrus zest and weeping with the purple stain of lurking blackberries, they are capable of offering comfort even in the final days of the “stony rubbish” that is that cruelest of months (Eliot 20).

2016 Food Blog March-0647Ginger Blackberry Scones
Makes 8 large, 16 medium, or 24 small
Adapted from Bon Appetit
¼ cup granulated sugar
zest of one lemon or one lime
2 teaspoons baking powder
½ teaspoon baking soda
½ teaspoon kosher salt
3 cups all-purpose flour, plus more for dusting your board
½ cup (8 tablespoons or one stick) cold unsalted butter, cut into cubes
1¼ cups (about 12 ounces) fresh blackberries
¼ cup finely chopped crystallized ginger
1 large egg, beaten
1¼ cups heavy cream, plus more for brushing
raw sugar, optional, for sprinkling


  • Preheat the oven to 375F. In a medium bowl, rub the sugar and citrus zest together until the zest is evenly integrated and the sugar and your hands smell of its brightness. Whisk the zested sugar with the baking powder, baking soda, salt, and three cups of flour.
  • Add the butter chunks and, using a pastry blender or your fingers, work the butter into the flour until only small pieces remain – some will be the size of oats; some will be more like peas.
  • Add the blackberries and chopped ginger and toss gently to incorporate.
  • Make a well in the center of the mixture and add the egg and the 1¼ cups cream. Use a fork to mix, incorporating the wet and dry ingredients gently, until a shaggy dough forms. Lightly knead in the bowl just until it comes together – a few dry patches are fine. Some of the blackberries will lose integrity, bleeding through the dough. That’s okay too.
  • Turn the sticky, shaggy dough out onto a floured board and pat it into a round (more traditional) or a rectangle about 1 inch thick. Cut into wedges/triangles (a pizza cutter works well for this), or punch out rounds with a cutter, and transfer to a parchment lined baking sheet.
  • Brush tops of scones with a bit of cream, then sprinkle with raw sugar if desired. Bake at 375F: 25-30 minutes for large scones, 20-25 minutes for medium or small. They will blush pale gold when they are done, and the bottoms will bronze a bit darker.
  • Remove gently to a wire rack and let cool a few minutes before eating. If desired, you can leave off the brush of cream and sugar, and instead, when the scones are cool, drizzle them with a well-whisked mixture of 1 cup powdered sugar, ¼ cup lemon juice, and 2 teaspoons vanilla.

Barmbrack with Plums

2016 Food Blog March-0543I’m not sure whether it’s a blessing or a curse that, as the semester picks up, this recipe happens to fill both of my current projects for the month of March: the Twelve Loaves assignment, and my own search term theme. It’s a blessing, in that it’s only one loaf that needs to be baked, which is certainly all I can handle in one weekend. It’s a curse, in that it means I have to come up with something else to make this month, since combining these two leaves an extra week out in the open.

2016 Food Blog March-0511Still, though, it’s fortuitous in an utterly delicious way that these work together. The Twelve Loaves theme for the month is “Irish Breads,” and last year someone found my little site searching for “Irish bread with plums.” Aside from soda bread, the standard go-to Irish loaf, I knew nothing about Irish breads at all. Well, I suppose I knew about scones, but those are really British Isles in general to me, and not as specific to Ireland as I wanted to get.

2016 Food Blog March-0509After a little research, I hit upon barmbrack, or barm braec. In Gaelic, “braec” means speckled, and so this lovely rich bread is threaded through with dried fruit. Usually the speckles are raisins and sultanas (or golden raisins, as we somewhat unimaginatively call them in the U.S.). This seemed, though, like a perfect place to add the requisite plums from the search. They would need to be dried, both because it’s not stone fruit season yet and because the moisture levels of fresh plums would make the bread too wet. Still, though, chopped prunes along with the traditional raisin component seemed promising. I love prunes, with their rich, concentrated flavor and their dense, almost meaty texture, but they don’t often find their way into baked goods, which I think is a shame.*

2016 Food Blog March-0510Barmbrack can be made both as a yeasted loaf and as a simple round raised with baking soda. I decided on yeast, since sometimes I find soda breads a bit too dense for my taste. Since this was already going to be weighed down by the fruit, I wanted to give it a good bit of lift. In either case, it’s usually a holiday bread celebrating the harvest season, and there are sometimes small treasures like rings or coins baked into it as part of a fortune-telling game (I must admit I skipped this part).

2016 Food Blog March-0515I surveyed a number of recipes, and finally combined two with features I liked. Interestingly, this bread is often made with tea: the dried fruits, and sometimes candied or fresh citrus zest, are soaked in strong black tea for a few hours, or even overnight, before being kneaded into the spiced, slightly enriched dough. I didn’t have any Irish Breakfast Tea, so I gritted my teeth and chose between Earl Grey and English Breakfast. In the end, I went with the Earl Grey. I realize the reference to British politics and aristocracy might ruffle some feathers, but at least it didn’t outright have the word “English” in the name. In any case, do forgive me, and use proper Irish tea for your loaf.

2016 Food Blog March-0527Because there is a lot of moisture from the fruit in this loaf, you can expect a quite sticky dough. Don’t be afraid of it, though; just add some more flour to your board and knead away. You’ll be rewarded, after two rises and the better part of an hour in a hot oven, with a deeply browned loaf studded with a rubble of raisins and prune pieces, moist and richly chewy, but with a firm and almost crackly crust. Because it is baked in a round cake pan, it rises with a glorious even dome, and just around the edge where the loaf leaves the pan, there’s a curiously lovely pale golden stretch mark encircling the bread.

2016 Food Blog March-0535The Saveur recipe I borrowed from suggests, as the end of the baking time nears, brushing the top of the loaf with warm honey and then baking for an additional two minutes. I did not do this, in both an effort avoid too much sweetness and to maintain its lovely crusty exterior. If you should want to, though, they recommend ⅓ cup.

2016 Food Blog March-0542Despite wolfing down a thick slice the day I baked it, N. has since forgotten about this homely little loaf, and I haven’t bothered to remind him, because that means more for me. Even after a few days wrapped in aluminum foil, the interior remains moist and rich but not too dense, and the outside stays perfectly crusty – a rugged, deeply browned layer that I’ve tried all week to think of ways to describe. “Imagine if a brown paper bag were a crust,” I said to N. at one point, but we agreed that didn’t sound particularly delicious. “Perfectly crusty” remains the best thing I can come up with, and you’ll have to believe me that it’s part of what makes the loaf worth hoarding. Perfect still warm from the oven, great at room temperature, and glorious toasted, this is good plain but revelatory with a thick pat of salted butter and, obviously, a cup of tea.

2016 Food Blog March-0551* if you aren’t a prune fan, you can stick with the traditional raisins and sultanas, or test out other dried fruit options: currants would be great here, and dried cranberries or dried cherries might also be good. Dried apricots also sound promising to me along with the sultanas, provided they were quite finely chopped. Perhaps a dollop of clotted cream or even mascarpone cheese over the top of the slice wouldn’t go amiss.

Prune and Sultana Barm Brack
Adapted from Saveur and RTÉ Lifestyle
Makes one 8-inch round loaf
About 5½ hours, including steeping and rising time, or overnight
2 cups strong black tea (I used 2 tea bags)
¾ cups chopped prunes (dried plums)
¾ cups sultanas (golden raisins)
2 tablespoons each orange and lemon zest, plain or candied
¼ cup whole milk, warm or at room temperature
2 teaspoons active dry yeast
2-2½ cups bread flour
1 teaspoon salt
¼ cup light brown sugar
½ teaspoon ground cinnamon
¼ teaspoon ground nutmeg
¼ teaspoon ground cloves
8 tablespoons softened unsalted butter, divided
1 egg
(optional: ⅓ cup honey, warmed, to brush over the loaf)


  • In a medium glass bowl (I used my 4-cup measuring cup), pour 2 cups of boiling water over 2 teabags and let steep for 4-5 minutes. Add the chopped prunes, the raisins, and the mixed zest, and let soak for at least 2 hours, or as long as overnight. When you are ready to make the dough, drain the fruit and zest in a strainer, but reserve the soaking liquid.
  • Meanwhile, sprinkle the 2 teaspoons active dry yeast and a pinch of sugar over the warmed milk and let sit for 5-10 minutes until the yeast fizzes and foams up. Mine raised quite a dome.
  • While you wait for the yeast, combine 2 cups of flour, the salt, the brown sugar, the cinnamon, the nutmeg, and the cloves in the bowl of a stand mixer, or another large bowl.
  • When the yeast is foamy, add the egg and mix briefly, then pour into the dry ingredients, add 6 tablespoons of the softened butter, and mix with the paddle attachment to bring together. Mine was a bit crumbly at this point.
  • Switch to the dough hook and knead at medium speed for 5-7 minutes until you have a smooth but slightly sticky dough. If the dough seems too dry and is just not coming together, add a tablespoon or two of the reserved tea. If it gets too wet, add flour a tablespoon or two at a time until it is a workable consistency.
  • When your dough is smooth and elastic but still a bit sticky, turn it out onto a well-floured board (I’m not kidding). In three or four additions, knead the drained fruit into the dough. I tried this in the mixer bowl with the dough hook, but it made a huge mess. By hand with flour and a dough scraper nearby is the best strategy.
  • With the fruit incorporated, form the dough into a loose ball and deposit it into a large bowl you’ve buttered with 1 tablespoon of the remaining softened butter. I used the stand mixer bowl; you don’t even have to rinse it out in between. Cover the bowl tightly with plastic wrap and set aside to rise for 1-1½ hours, until nearly doubled.
  • Punch down the risen dough by depressing your fist gently into the center; the dough will spring back only slightly. Turn it out onto a floured board and knead lightly 2 or 3 times, then shape it into a tight ball and position it in an 8-inch cake pan, which you’ve buttered with the last remaining 1 tablespoon of softened butter. Drape lightly with plastic wrap and let rise another 30-60 minutes. Mine was ready to go in 45 minutes.
  • About 30 minutes before you are ready to bake, preheat your oven to 400F with a rack in the middle position. When the loaf fills the pan and is nicely domed, remove the plastic wrap and carefully place in the oven to bake for 35-45 minutes, until the bottom sounds hollow when thumped, or an instant-read thermometer measures 180-200F.
  • If you wish, now is the time to remove from the oven, brush on the ⅓ cup warm honey, and return to the oven to bake an additional 2 minutes. I skipped this because I wanted the crust to stay, well, crusty.
  • Let cool in the cake pan at least 10 minutes, then turn out onto a wire rack to cool an additional 20 minutes before cutting into unapologetically thick slices, slicking thickly with butter, and eating alongside a strong cup of tea.


#TwelveLoaves is a monthly bread baking party created by Lora from Cake Duchess and runs smoothly with the help of Heather of All Roads Lead to the Kitchen, and the rest of our fabulous bakers.

This month we are baking Irish Breads. For more bread recipes, visit the #TwelveLoaves Pinterest board, or check out last month’s inspiring selection of #TwelveLoaves RED Breads!

If you’d like to bake along with us this month, share your Irish Breads using hashtag #TwelveLoaves!

“Parsley Pie”

2016 Food Blog February-0492Whereas last month’s blog experiment entry left me stumped for a while, not only do I know which post led this searcher to my blog; the dish I wanted to create coalesced pretty quickly in my mind. The search term “parsley pie,” with its bright green focus, seemed appropriately spring-y for this first warm week in Southern California. Though I had my own ideas already, I did a quick image search to see what other sorts of “parsley pies” turned up, and the answer is: not many. Most of what I saw were meat pies, with the addition of parsley to lighten up the filling or, in one case, add fiber. Some of these concoctions were the classic British pork pie, with high, golden sides and, sometimes, a hard boiled egg or two cunningly tucked into the filling, while some were shepherds pies, with parsley added to the ground lamb or to the mashed potato topping.

2016 Food Blog February-04372016 Food Blog February-04572016 Food Blog February-0458What I’d envisioned, quite contrary to these heavy options, was a pie where parsley dominated: something like a quiche Lorraine would be a neutral base, and allow for greater visibility for the heaping mounds of the freshly chopped herb in question. I suppose if I’m being absolutely honest I should call this a parsley quiche, but it does have a proper crust and a filling, and since that ultimate internet authority Wikipedia (hah!) classifies quiche as a “savoury pie,” I’m going to cross my fingers behind my back and declare that this counts.

2016 Food Blog February-04632016 Food Blog February-04732016 Food Blog February-0476Because there are no bulky chunks in the filling to hold it up, this must of necessity be a shallow pie. Thus it was a perfect opportunity to use the tart pan I bought myself for Christmas (though a pie pan would work fine). Along with eggs, milk, and of course the eponymous parsley, I whisked in a combination of other herbs: basil, cilantro, dill, and a few chives, to add some variety to the flavor. And because I can’t help myself, I topped the green freckled custard with crumbles of feta cheese, which admittedly adds a pleasant brininess that the pie would suffer without.

2016 Food Blog February-0500A few thoughts: if you’re going to make this, you have to like parsley. This seems a distressingly obvious revelation, but I mean it – this really, really tastes like parsley. If it’s too herbaceous for you, or you’re looking for a bit more to sink your teeth into, crumbled, crisp prosciutto, or lumps of crab, or slick slices of smoked salmon, would bulk it up nicely. Alternatively, a side salad with a thick wedge would make a perfect spring lunch. As for construction, if you use a tart pan you really have to be sure your crust forms an unbroken layer around the bottom edge of the pie. Cracks or very thin areas can lead to egg leakage in the oven. Don’t ask me how I know this.

2016 Food Blog February-0503

“Parsley Pie”
Makes a 9-inch pie
About 2 hours, including crust resting time
For crust:
6 ounces all-purpose flour (about 1¼ cups)
½ teaspoon salt
4 ounces unsalted butter (1 stick or 8 tablespoons)
2-4 ounces cold buttermilk (water would be fine too)
For filling:
4 large eggs
1 cup whole milk
1 cup chopped parsley
1 cup chopped mixed soft green herbs (such as basil, chives, tarragon, cilantro, dill, etc)
½ teaspoon salt
¼ teaspoon pepper (I used black, but white pepper would work too)
4 ounces crumbled feta cheese


  • To make the crust, combine the flour and ½ teaspoon salt in a food processor. Cut the stick of butter into 12-16 slices, then add these to the processor as well and pulse at 1 second intervals until the butter is mostly broken up into blueberry or cherry-sized chunks. With the processor running, dribble in the buttermilk just until the mixture starts to come together into a dry ball. You may not need all of the buttermilk. Turn the mixture out onto a large piece of plastic wrap and use the plastic wrap to help you quickly and decisively form the mixture into a flat disc about 6 inches in diameter. Wrap it up and stow it in the fridge for at least half an hour. Not only does this chill the butter, making for a flakier end result, but it allows the buttermilk to hydrate the flour.
  • While you wait for the dough to chill, preheat the oven to 350F with a rack in the middle position, oil or butter a 9-inch tart pan or pie plate, and prep the filling ingredients. Whisk the eggs with the cup of milk and add in the chopped herbs, the ½ teaspoon of salt, and the ¼ teaspoon of pepper. Note: 1 cup chopped parsley means you chop before you measure, so you do need a rather large bouquet of herbs to meet the required amount.
  • You can whisk the feta in with the herb and egg mixture, or you can crumble it over the top of the custard when it’s poured into the crust. Or, of you prefer, you can do a little of both, mixing some in and saving some to sprinkle on top. You do you.
  • After at least half an hour in the fridge, remove the dough disc and unwrap it onto a floured board. Now, this is crucial: let it sit about ten minutes to warm up just a tad before you try to roll it out. When it has had a chance to shake the chill off, sprinkle its surface with a little flour and, with a floured rolling pin, roll it out into a circle about 11 inches in diameter. I like to start in the middle of the disc and push away from me first, then bring the rolling pin back all the way towards me. Then I turn the disc of dough 90 degrees and repeat, flipping it over if needed, until I have a rough circle.
  • Use the rolling pin to help you transport the circle of dough into the prepared pan. Drape the dough gently down into the edges and, if you are using a tart pan, be sure to press it lightly into the grooves on the side of the pan, and carefully patch any thin areas or cracks along the bottom. For extra insurance, place the tart pan on a cookie sheet – this makes for easier transport to and from the oven and, if you do suffer some leakage, keeps the mess contained, not on your oven floor.
  • Whisk up your filling mixture again to ensure even distribution, then gently pour it into the crust. Sprinkle some or all of the crumbled feta over the top, if desired, and carefully transport to the oven.
  • Bake 45-60 minutes until the crust is pale gold and the filling is set and has puffed slightly in the center. Remove to a wire rack and let cool at least fifteen minutes before you carefully remove the tart pan (if using) and center the pie on a serving platter. I used a cake stand because I like to be fancy for you. Serve warm or at room temperature.

Tomato Basil Loaf

2016 Food Blog February-0424N. and I first discovered Panera when we were living in Eugene. This seems a bit counterintuitive, since Eugene doesn’t have any Paneras. But on a visit or two with my parents, and N.’s parents, it became an easy place to pick up lunch, or a dinner for a sunset hike, and I was quickly sold on their vegetarian sandwich, not just because it came layered with pickled red peppers and fresh greens and spicy spread and crumbled feta, but because the bread it used – a fluffy tomato and basil flavored loaf with an intriguing, slightly sweet streusel across the top crust – was addicting. When we could, N. and I started buying a whole loaf of the bread on our last day in California, to take home to Eugene with us.

2016 Food Blog February-0378Now that we are in Los Angeles, there are Paneras everywhere (in fact, I just checked: there are at least five within a 5 mile radius of our house). Despite that proximity, though, we don’t go there very often. There are several reasons for this, but mostly, if I’m going to spend my money on restaurant fare, I’m going to explore what Los Angeles has to offer rather than a national chain. Regardless, the tomato basil bread, with that intriguing streusel, remains a favorite of mine, and when “red” was declared as February’s Twelve Loaves theme, I decided this was the right time to try a little re-creation attempt.

2016 Food Blog February-0370My bread combines lush, densely flavored scarlet tomato paste with a generous dusting of dried basil. The loaf itself is moistened and sweetened with buttermilk and molasses, and though it does bake up more orange than red, it makes perfect sandwich slices for cucumber and mozzarella, or pesto chicken, or just well-buttered toast.

2016 Food Blog February-0375The challenge here was the streusel. There are a number of “copycat” recipes out there for Panera’s loaf, but few of them make any attempt at the dark, sweet, sticky crumble adorning the top crust. I finally found a suggestion for a glaze made from tomato paste and brown sugar, thinned with a little water, and brushed over the top of the loaf. Since my first attempt was a little heavy on the tomato paste in the dough itself, reserving some for the top seemed like a smart adjustment. It did look a bit distressingly like a meatloaf with the traditional ketchup coating when I first applied the glaze, but the flavor of the finished product was strikingly similar to my inspiration.

2016 Food Blog February-03832016 Food Blog February-03892016 Food Blog February-0394Panera’s loaf is scored straight down the center so that the top crust puffs and pulls away from itself in two fat rounds, leaving the top of a slice looking almost heart shaped. I decided I wanted to try something new, so I went for a twist instead, separating my dough into two sluggish, sticky logs and wrapping them around each other before depositing into a loaf pan.

2016 Food Blog February-04042016 Food Blog February-0406A second rise, a glaze, and a quick 40 minutes in the oven, and I was rewarded with a loaf that, despite not being truly red, may be as close to the original as I’ll ever get. The interior is tender and chewy and springy, and the glaze hardened into gleaming sticky shellac (though it loses its crustiness as it sits). The tomato and basil flavor are both easily discernible, and the combination of tomato paste and brown sugar burnishing the top crust is just the right toasty sweetness, since despite the molasses, the bread itself is fairly savory.

2016 Food Blog February-0416Because the dough is pretty sticky, the loaf is moist and tender, which also means it’s a bit delicate. Take care when slicing into it, and be sure to give it at least half an hour to cool before attempting a slice at all. Conveniently, we found we liked the flavor better once the bread had cooled completely. As noted above, the glaze resorts to stickiness after a few hours, but it is still quite tasty, and will “crisp” up again just slightly after a trip through the toaster. Slicked with salted butter, it makes a perfect accompaniment to lesson-planning on a blustery afternoon.

2016 Food Blog February-0430

Tomato Basil Loaf
Makes 1 large sandwich loaf
4-4½ hours, including rising and baking time
1 cup cold buttermilk
⅓ cup boiling water + more to thin the glaze
3 tablespoons molasses
2 teaspoons active dry yeast
3 ¾ cups bread flour (you may not use all of it) + additional flour to dust the board
2 teaspoons salt
1 tablespoon dried basil
½ cup tomato paste, divided
3 tablespoons brown sugar


  • In a 2-cup glass measuring cup, combine the cold buttermilk and the boiling water. This creates a yeast-friendly temperature without having to wait for the buttermilk to warm up. Stir in the molasses and the yeast, and let sit for 5-10 minutes until the surface of the mixture foams up and it smells bready.
  • While the yeast is working, combine 3 cups of the flour with the salt and basil in a large bowl. I use the bowl of my stand mixer. After the yeast has had a chance to wake up and is foamy, add the liquid slowly to the flour mixture and mix on low with the paddle attachment (or with a wooden spoon) to combine. Scrape in the tomato paste and again, mix just to combine.
  • Now, if you are using a stand mixer, switch to the dough hook. If you are not using a stand mixer, turn out onto a well-floured board. Knead at medium speed for 5-7 minutes, adding in more flour if needed ¼ cup at a time, until the dough pulls away from the sides of the bowl and takes on the consistency of soft, sticky play-dough.
  • Oil the inside of your work bowl (I use a non-stick spray), turn the ball of dough over inside a few times to coat it evenly, and then cover the bowl tightly with plastic wrap and stow in a slightly warm spot for 1½-2 hours, until almost doubled.
  • Once the dough has risen adequately, punch it down by gently depressing your fist into the center to release the air, then let rest about ten minutes to get its breath back. Meanwhile, spray or butter a standard loaf pan.
  • Turn the dough out onto a lightly floured board and divide it into two equal portions. Roll each half out into a pudgy log about 9 inches long. Pinch one end of each log together tightly to connect, then create a twist by lifting the left strand over the right, then repeating (because now what was the right strand will be the left one) until you come to the other end of each log. Pinch these remaining ends together tightly, then tuck underneath the twist you’ve created and gently place it in the prepared loaf pan. Cover lightly with plastic wrap and set aside to rise again for 45-60 minutes.
  • About 30 minutes before you put the dough into the oven, preheat to 350F, and make the glaze by combining the remaining 2 tablespoons of tomato paste, 3 tablespoons of brown sugar, and 1-2 tablespoons of hot water to thin to a barely pourable glaze. When ready to bake, remove the plastic wrap, brush the glaze over the top of the loaf in a thin layer, and gently slide it into the preheated oven. Bake 35-40 minutes, or until the interior tests 180-200F on an instant read thermometer.
  • Cool at least 10 minutes in the loaf pan, then turn out onto a wire rack and cool at least 20 minutes more before slicing and eating. We found the flavor was better once the bread had completely cooled.


#TwelveLoaves is a monthly bread baking party created by Lora from Cake Duchess and run with the help of Heather of All Roads Lead to the Kitchen, which runs smoothly with the help of our bakers.

This month we’ll be baking breads with a RED theme in honor of National Heart Month, Valentine’s Day, and the Oscars (red carpet) – any red ingredient goes! For more bread recipes, visit the #TwelveLoaves Pinterest board, or check out last month’s mouthwatering selection of #TwelveLoaves enter last month’s breads featuring a “new to you” type of flour!

If you’d like to bake along with us this month, share your “RED” themed bread using hashtag #TwelveLoaves!

“Rumpled Donuts”

2016 Food Blog January-0343Some of the blog search terms I’ll be using for this year’s project are straightforward, and some made proto-recipes fly immediately into my head. This one did not. Part of the reason I chose to do it first was simply because I wasn’t sure what “rumpled donuts” should be, and wanted to figure it out before I was too deep into the spring semester.

2016 Food Blog January-0316Though I can think of what many “rumpled” baked goods might look like – particularly rumpled pancakes, which might be crepes, or maybe that lovely giant Dutch baby or German pancake that rises up past the edges in the pan – I couldn’t fathom what a rumpled donut might be. If you’re still out there, searcher, what were you after? When I think “rumpled,” I think unmade bed sheets. It’s uneven. It’s piled and layered, and that meant my dough, whatever I opted for, would also have to be uneven. Clearly this is a problem for regular dough – in almost all baked goods you want your dough or batter to be rolled or spread or patted out to the same thickness all the way across, for even cooking. It would need, then, to be a non-traditional dough.

2016 Food Blog January-0319I’m not sure what eventually led me to phyllo. Certainly I thought of my favorite donut, the perfectly delicious but sometimes overlooked apple fritter, and somewhere in the contemplation of apple and cinnamon and unmade beds, I thought of a crumpled layer of phyllo dough, and I knew exactly what I would do. Phyllo would get twisted and wrapped around a ring of apple, then fried until crisp and dredged in a healthy layer of cinnamon sugar. Bingo. Rumpled donut. The apple slices would have to be cooked for a while first, though, since the phyllo would fry so quickly.

2016 Food Blog January-0312Next to making caramel, frying is the cooking project that puts me most on edge. The oil takes a long time to come up to temperature, it seems like so much, and there’s always the fear that, well, you have a vat of boiling oil on your stove right next to your hands, and arms, and legs, and all those body parts you’d prefer remained un-fried. In this case, there was also the complication of working with phyllo, which needs to be treated quickly and delicately to avoid tearing or drying out. For that reason, even after deciding exactly what I would do, I put off making these for three weeks. Surely, I thought, they would be more trouble than the end product was worth.

2016 Food Blog January-0330Untrue. I’m not in a rush to make them again, but for a pure experiment they were amazing. The apple rings are meltingly tender after a sauté in butter and brown sugar spiked with a cinnamon stick. The loose buttery caramel they leave behind is the perfect slick to brush between phyllo layers to help them cook through and to sweeten the tasteless, papery dough. Once fried, which only takes about a minute on each side, the phyllo is impossibly crisp, not particularly greasy, and deeply golden. It’s like a croissant and an apple fritter had a beautiful affair. I made six of these, since that’s how many rings I divided my apple into, and since each one consisted only of one slice of apple and one sheet of phyllo, N. and I felt no compunction whatsoever about eating three each over the course of the afternoon and evening.

2016 Food Blog January-03392016 Food Blog January-0337Here’s the thing, though. Most of the recipes I post here, I want you to cook. I try to make them precise, and organized, and exact, so you can replicate them successfully, with your own touches, if you wish. This one is different. Unless you’re really into what you’re seeing here, don’t make these. They were outstandingly delicious, yes, but they were also a giant pain to execute. The apples tore, the phyllo tore, there was sugar everywhere, and as you’ll see below, the process of folding and twisting and wrapping is tricky to describe and to do (and impossible to take pictures of – I gave up). What I’d advise instead, and what I will likely do when a craving for fried phyllo arises, is to forget about the donut ring shape. Just make packets – twist or roll or wrap up a sautéed slice or plank of apple in phyllo layers and drop it into the oil that way. It will still produce sweet, tender apples in flaky, crispy layers of dough that shatter everywhere upon impact, but you’ll save yourself a lot of irritation in the construction phase. And if apples aren’t your jam, I’d imagine you could use almost anything: a smear of pesto, a dollop of nutella, a slice of brie spread with fig or apricot preserves and wrapped in prosciutto inside that papery crispy envelope.

2016 Food Blog January-0309Just in case, though, what follows is my procedure, as clearly as I can describe it, for my attempt to invent the “rumpled donut.” Enjoy!

2016 Food Blog January-0344

Rumpled Donuts
Makes 6
45-60 minutes, roughly, depending on how many donuts you fry at a time
1 large green apple
4-5 tablespoons of butter
2 tablespoons brown sugar
1 cinnamon stick
pinch of salt
6 sheets phyllo dough (or however many apple rings you end up with)
1-2 quarts vegetable oil
½ cup granulated sugar
2 tablespoons cinnamon


  • Begin to heat the oil to 350F in a deep pot. I use one with straight sides, but a wok would probably also work nicely. Oil should be at least three inches deep.
  • While the oil heats, prep your ingredients. Skin the apple and core it, leaving a hole down the center at least 1 ½ inches in diameter. Cut the cored apple into ¼ inch thick rings – for me, this made 6 even slices.
  • Melt 4 tablespoons of the butter in a skillet over medium heat. Add the brown sugar, the cinnamon stick, and the pinch of salt and stir or whisk together the sugar is fully dissolved into the butter. Add the apples in a single layer and sauté until tender, about 2 minutes per side. When apple slices are tender but not mushy, turn off the heat, remove apple slices from the pan, and set them aside to cool until room temperature, or just barely warm.
  • While the apples are cooling, combine the granulated sugar and cinnamon in a small dish, and prepare a work station for the phyllo dough. You will need a large board and two slightly damp kitchen towels. Lay one towel down on a countertop, place the 6 sheets of phyllo on it, then cover the phyllo with the other towel. Phyllo dries out fast, and when it dries it becomes brittle and even more difficult to work with. Set out a wire rack with paper towels, or a cookie sheet, or a large plate underneath – this is where you will set your finished rumpled donuts.
  • Carefully separate one sheet of phyllo from its companions and spread it out on the large board. Cut it in half width-wise so you end up with two fatter rectangles (as opposed to two thinner ones, as you would if you cut it lengthwise). Use the leftover butter and sugar mixture in your pan to brush lightly over each rectangle (if this has solidified and seems unbrushable, add the additional tablespoon of butter, put it over low heat, and stir or whisk together until melted and spreadable again). Fold each phyllo rectangle in half lengthwise for two longer, thinner strips. Repeat, brushing and folding again, for each piece so you have two thin strips of phyllo.
  • Now comes the pesky part. Take one of your apple rings and carefully insert one of the phyllo strips through the hole in the center. Pull the apple through about ¼ of the length of the phyllo, and wrap that ¼ back around the apple ring. Draw the remaining phyllo strip around the apple ring and back through the hole. This is easiest if you draw the end of the phyllo through as though you were threading a needle, rather than pushing from the middle of the phyllo strip, which can encourage tearing. Continue to draw the phyllo through and carefully wrap it around the apple ring in a spiral, and repeat with the second strip. You will need both to form a full spiral of dough around the apple, completely encircling it. Tuck the ends of phyllo into the central hole of the apple to secure.
  • Repeat with the remaining apple rings and sheets of phyllo.
  • When you have wrapped your apples and your oil has reached a temperature somewhere in the window of 350-365F, you are ready to fry. Use a skimmer or a kitchen spider to carefully lower the “donuts” into the oil one at a time. If your pot is wide, you can fry more than one at once. I just did one at a time.
  • Fry the “donuts” until deeply golden, then flip and repeat. For me, this took about 1 minute per side. Carefully remove with the skimmer and let it drain over the pot of oil for a few seconds, then sprinkle liberally with the cinnamon sugar mixture (be sure to get both sides!), and set gently on the wire rack to cool for at least 5-10 minutes. This will ensure that all surfaces stay crispy. Keep an eye on your oil temperature, ensuring that it remains in the 350-365F range.
  • Repeat with remaining donuts, and eat as soon as they are cool enough to handle, with plenty of napkins at the ready. We did not save any, so I don’t know how they store, but my guess is the phyllo will not retain its perfect crunch overnight.