Project Sauce: Hollandaise

I’m reasonably certain that most people, when faced with the prospect of serving homemade hollandaise sauce, are immediately overcome with the desire to crawl underneath a table somewhere and stay there, quivering, until their guests agree to go out for brunch.
Food Blog April 2014-3593Hollandaise has a reputation for being fussy – a kind of yolk-based response to the temperamental touchiness a soufflé evokes for the whites crowd. Words like “break” and “emulsify” and “scramble” haunt your vision, and the pale lemon-yellow fluffiness cloaking a restaurant-made eggs benedict feels like an impossibility.
Food Blog April 2014-3584I started this project with flour-thickened sauces almost by accident. Wanting familiarity, I didn’t realize my first three sauces, the béchamel, the mornay, and the velouté, were fairly close cousins: fat, flour, liquid. No huge recipes for disaster there, aside from the possibility of clumping. But this second trimester, the egg exploration, is a little more complex. Fat comes from multiple sources now, and the egg yolks provide the protein and coagulation as well as some measure of fat. Balancing water, and acid, and dribbling in the butter just so, feels like a major project. But so long as you are in possession of arm muscles, just a little bit organized, and not in a huge rush, and, for all that is holy, not performing this for the first time in front of company, you are probably going to be okay.
Food Blog April 2014-3585I used an approximation of Ruhlman’s Ratio recipe for this. Almost more useful than the recipe, though, was his advice: “Do not be afraid of its breaking. Sauces can sense fear and will use it to their mischievous advantage. I have broken many sauces and am still a happy, productive member of society and an advocate of the emulsified butter sauces. If you make them, you can and will break them” (187-88).
Food Blog April 2014-3586An emulsified sauce, of which hollandaise is just one example, means a sauce that is thickened – held together, if you will – by a tenuous relationship. Think salad dressing. Remember those bottles from childhood, packed in on the door of the fridge? Remember how, during the week in between salad courses, they would slowly blurp into separate layers – oil on vinegar on water? An emulsion is when those disparate layers, unfriendly, incompatible, are coaxed together into a homogenous mix. Vinaigrette is an emulsion – perhaps one of the simplest. Fat, acid, harmonious.
Food Blog April 2014-3578Because emulsions can be unstable – leave that vinaigrette too long and you end up with a layer of oil and a layer of vinegar – they need to be treated with some care. A “broken” sauce is when the butter, added too quickly, upsets the mix and causes the fat and the water in the sauce to separate. This is the deep dread of homemade hollandaise. But I’m a survivor now. It can be done.
Food Blog April 2014-3577You would think, as would most reasonable people, that making hollandaise would be daunting enough, and I would choose some sensible preparation to share with you like… steamed asparagus.
Hah.
Hahahahahaha.
I went with eggs benedict.
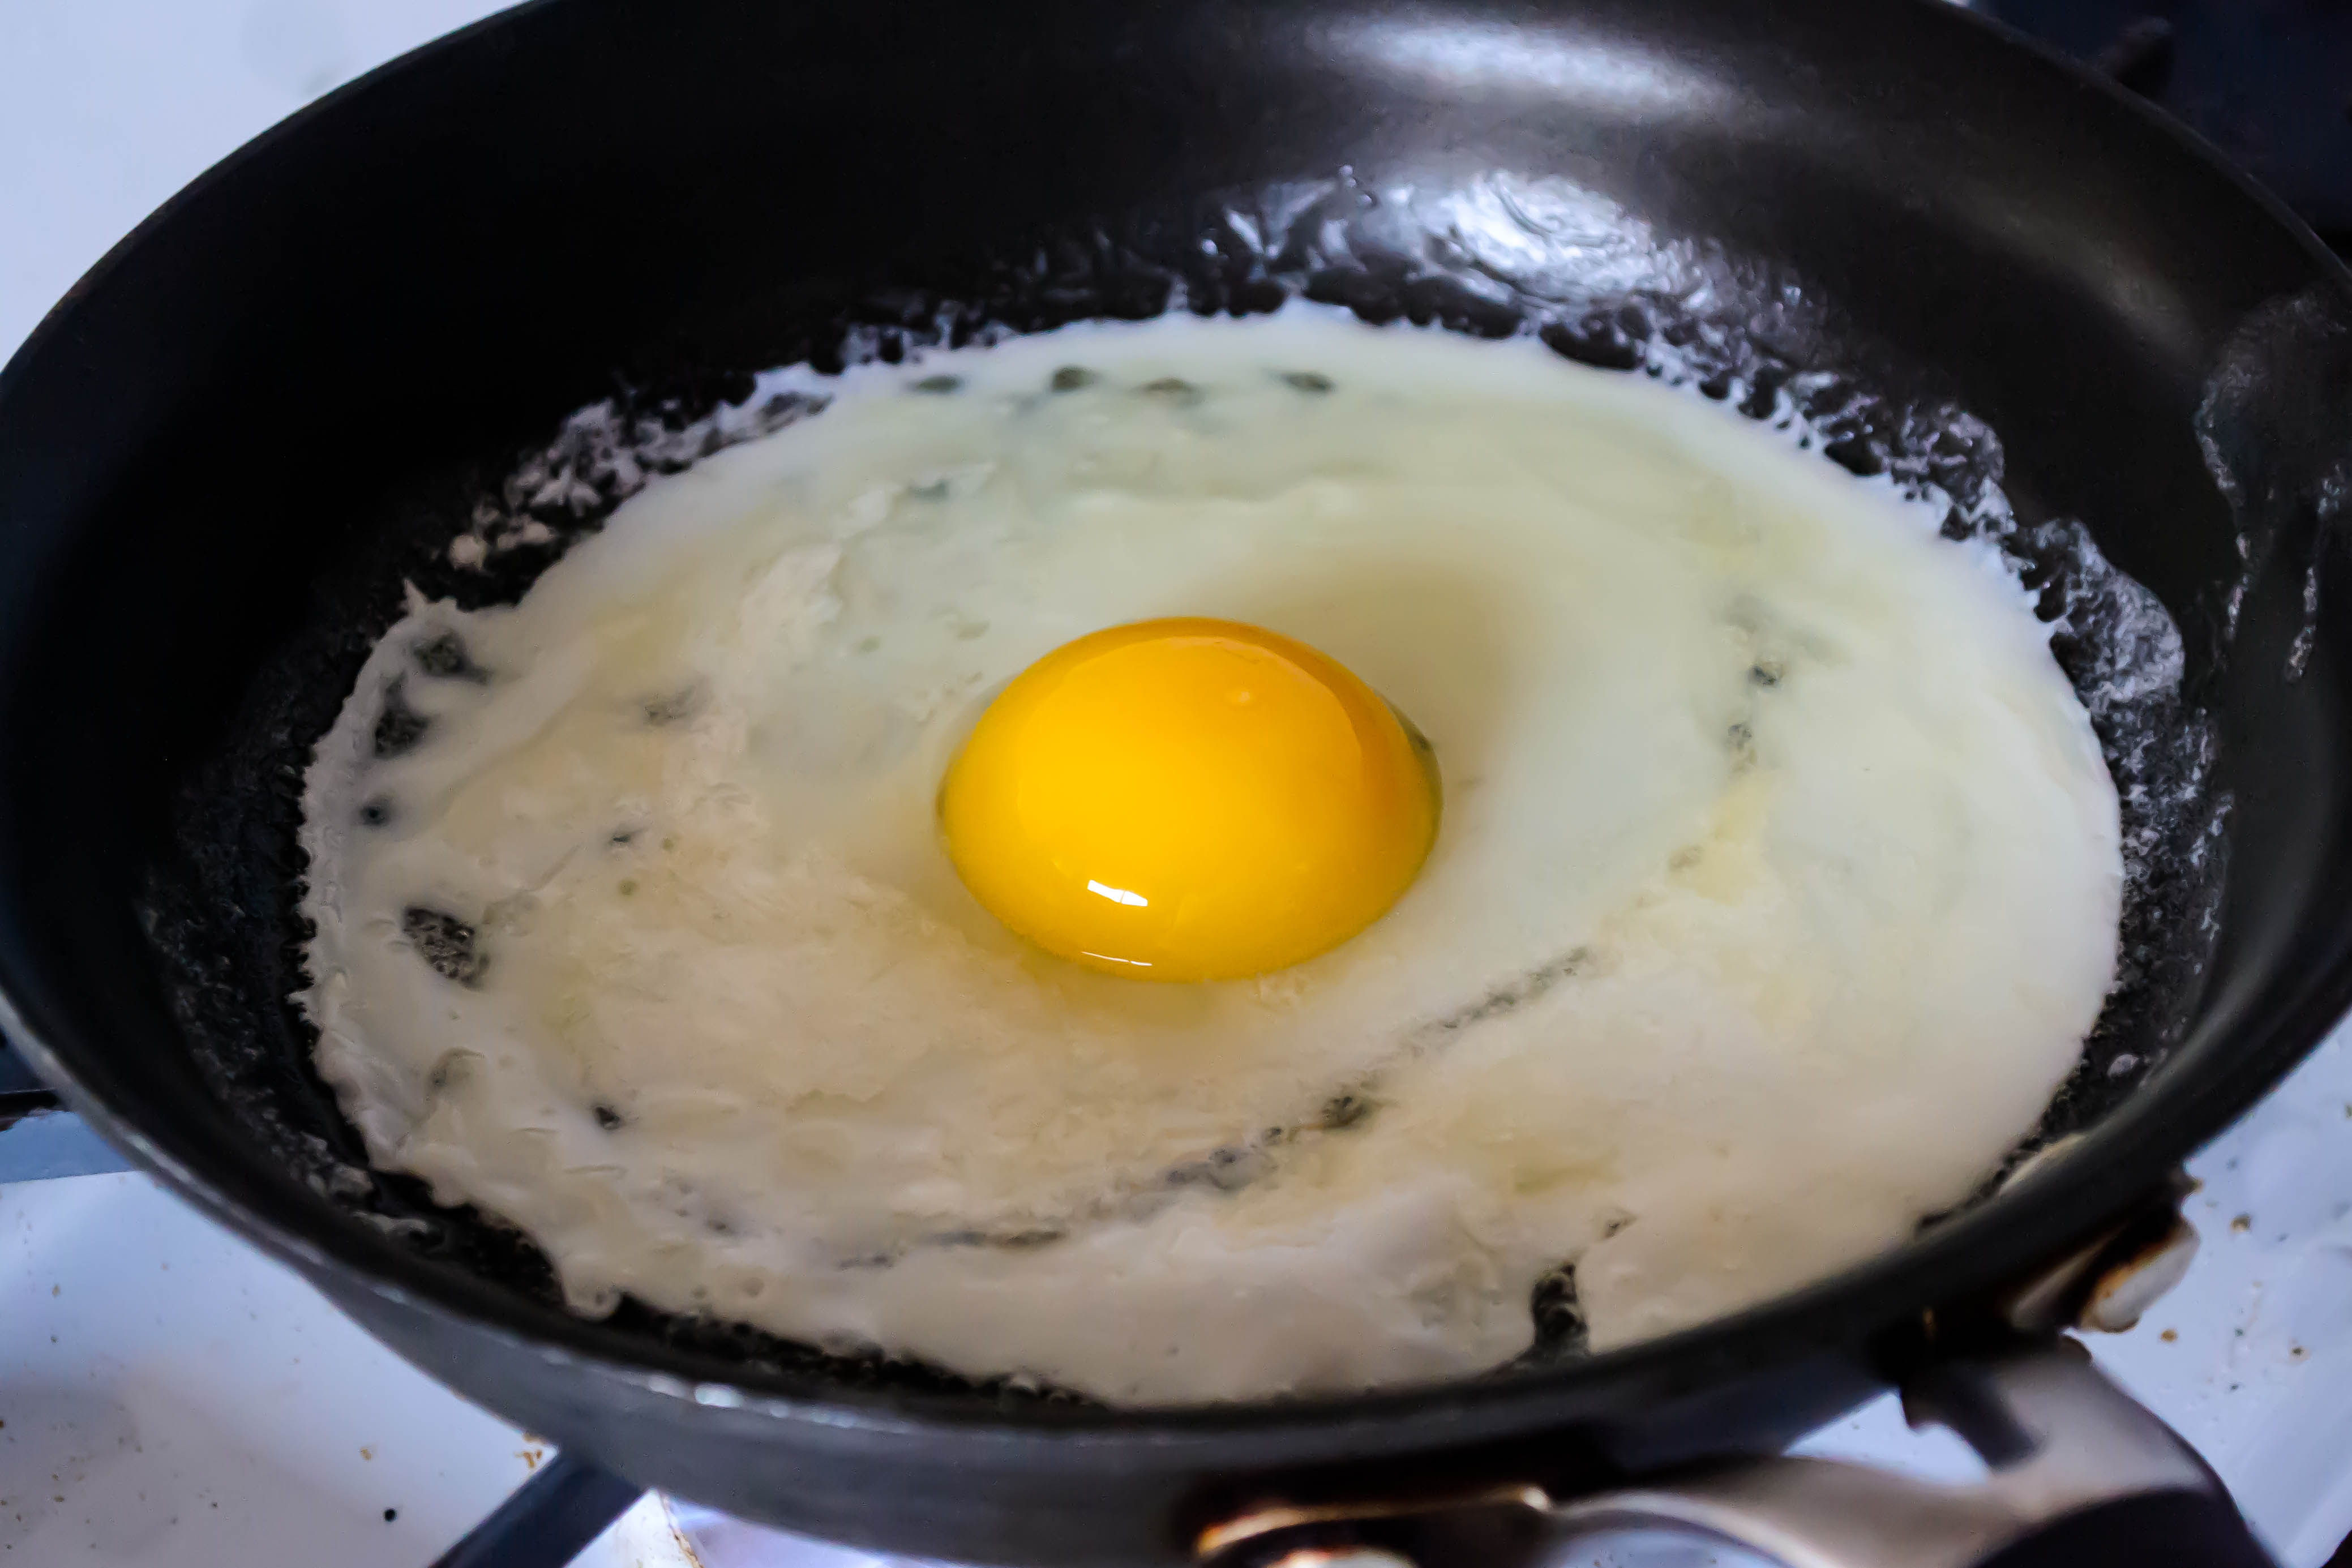
I’ve never poached an egg before.
Food Blog April 2014-3580As it turns out, no single one of the components of eggs benedict is, so long as you are relaxed and paying attention, particularly tricky. The issue is having everything ready to put together all at once. Fortunately, poached eggs, once they are poached, are forgiving. Doubly fortunately, hollandaise is one of those blessed creations that actually tastes better warm than it does hot. This means, if you’re keeping score, that if it cools off a touch while you are applying that last toaster session to your English muffins, that all is not lost.
Food Blog April 2014-3592This recipe will make enough hollandaise for two plates of eggs benedict. Since I was only serving me (albeit an unreasonably greedy me), I draped it across two eggs and had enough for a dish of the aforementioned steamed asparagus as well. That afternoon was a blur of food coma, but let me tell you, I’d do it again.
Food Blog April 2014-3593
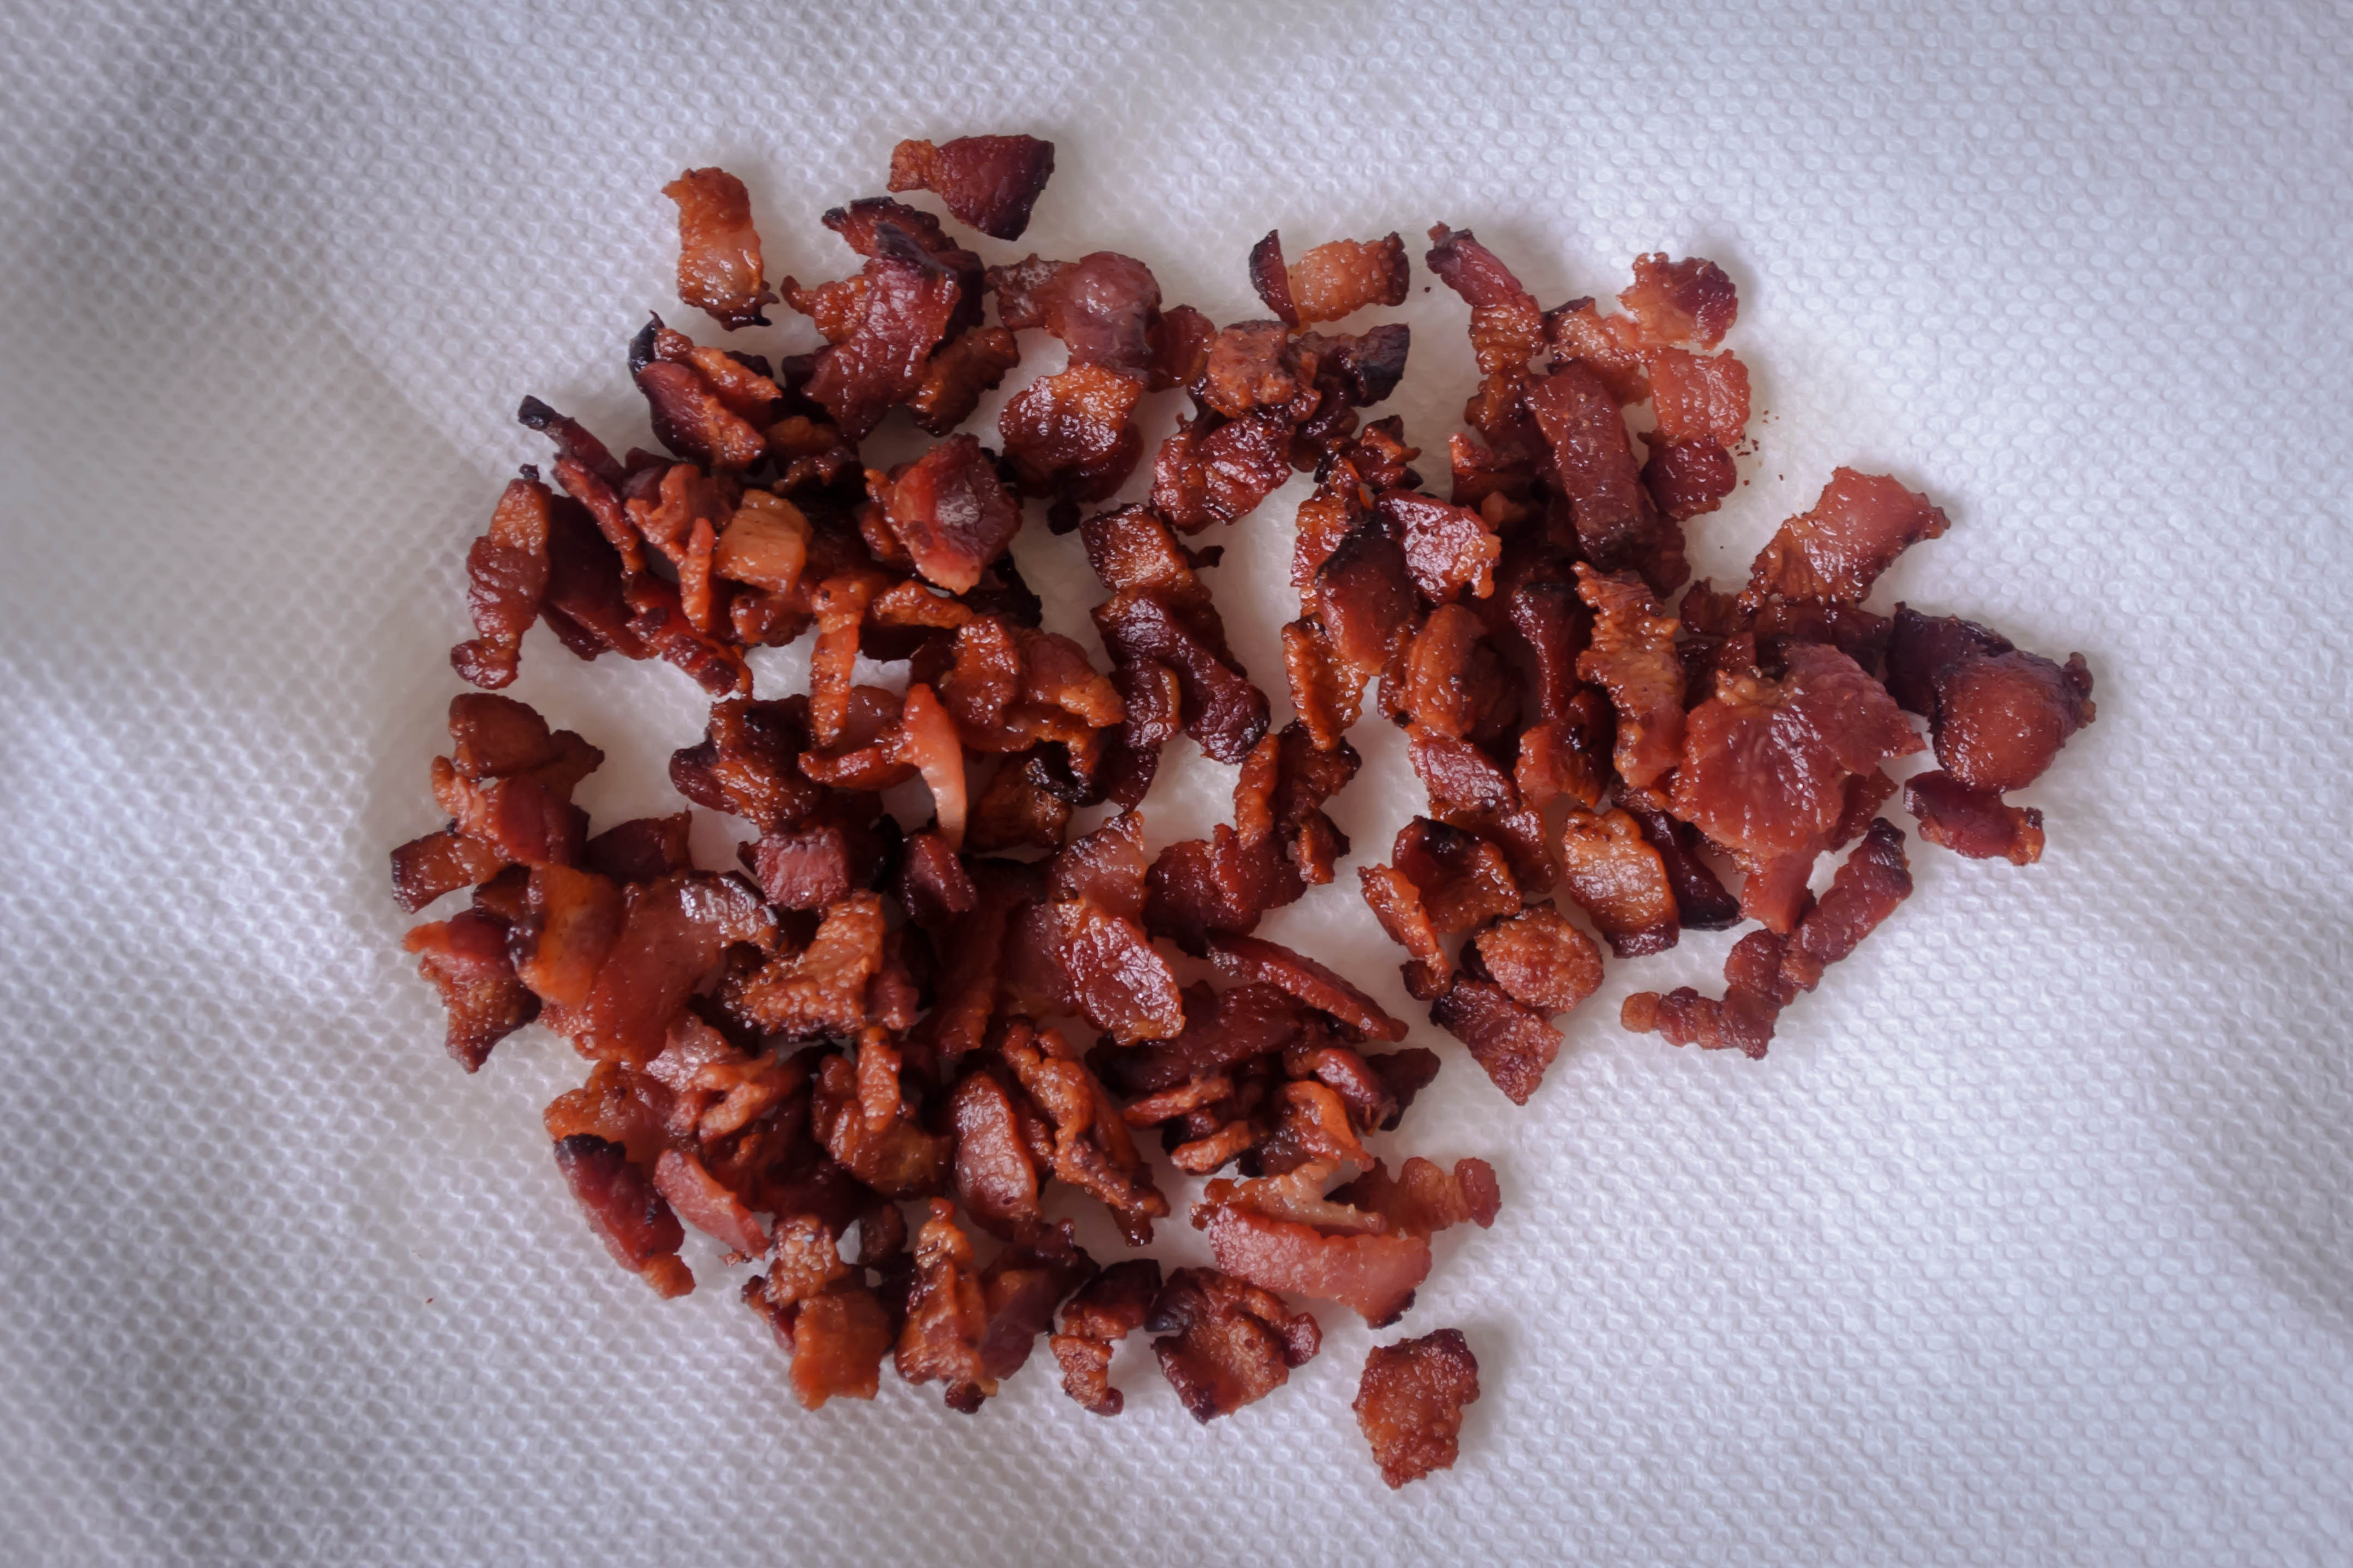
Note: if you are making eggs benedict as your vehicle for this sauce, my recommendation is to poach the eggs first (Deb has a good step-by-step recipe which I used pretty much verbatim), then set them aside in a bowl while you make the hollandaise. When the hollandaise is ready and you’ve pulled it off of the pot of water, pop the English muffin into the toaster and slip the poached eggs into the pot of hot water you just vacated. While the muffin toasts, the eggs will heat up and the hollandaise will cool slightly. By the time you’ve draped some smoked salmon or Canadian bacon across your muffins (I’m partial to the salmon, though. It’s like velvet), the poached eggs should be warm enough to serve, and hey presto! Eggs benedict for brunch, just like that.

Food Blog April 2014-3599

Hollandaise for 1 or 2
1 teaspoon cider vinegar (regular white vinegar or white wine vinegar would be fine too)
2 teaspoons water
Pinch of salt
1 egg yolk, at room temperature
3 ounces butter (6 tablespoons), melted
1-2 teaspoons lemon juice, to taste
Black or cayenne pepper, to taste
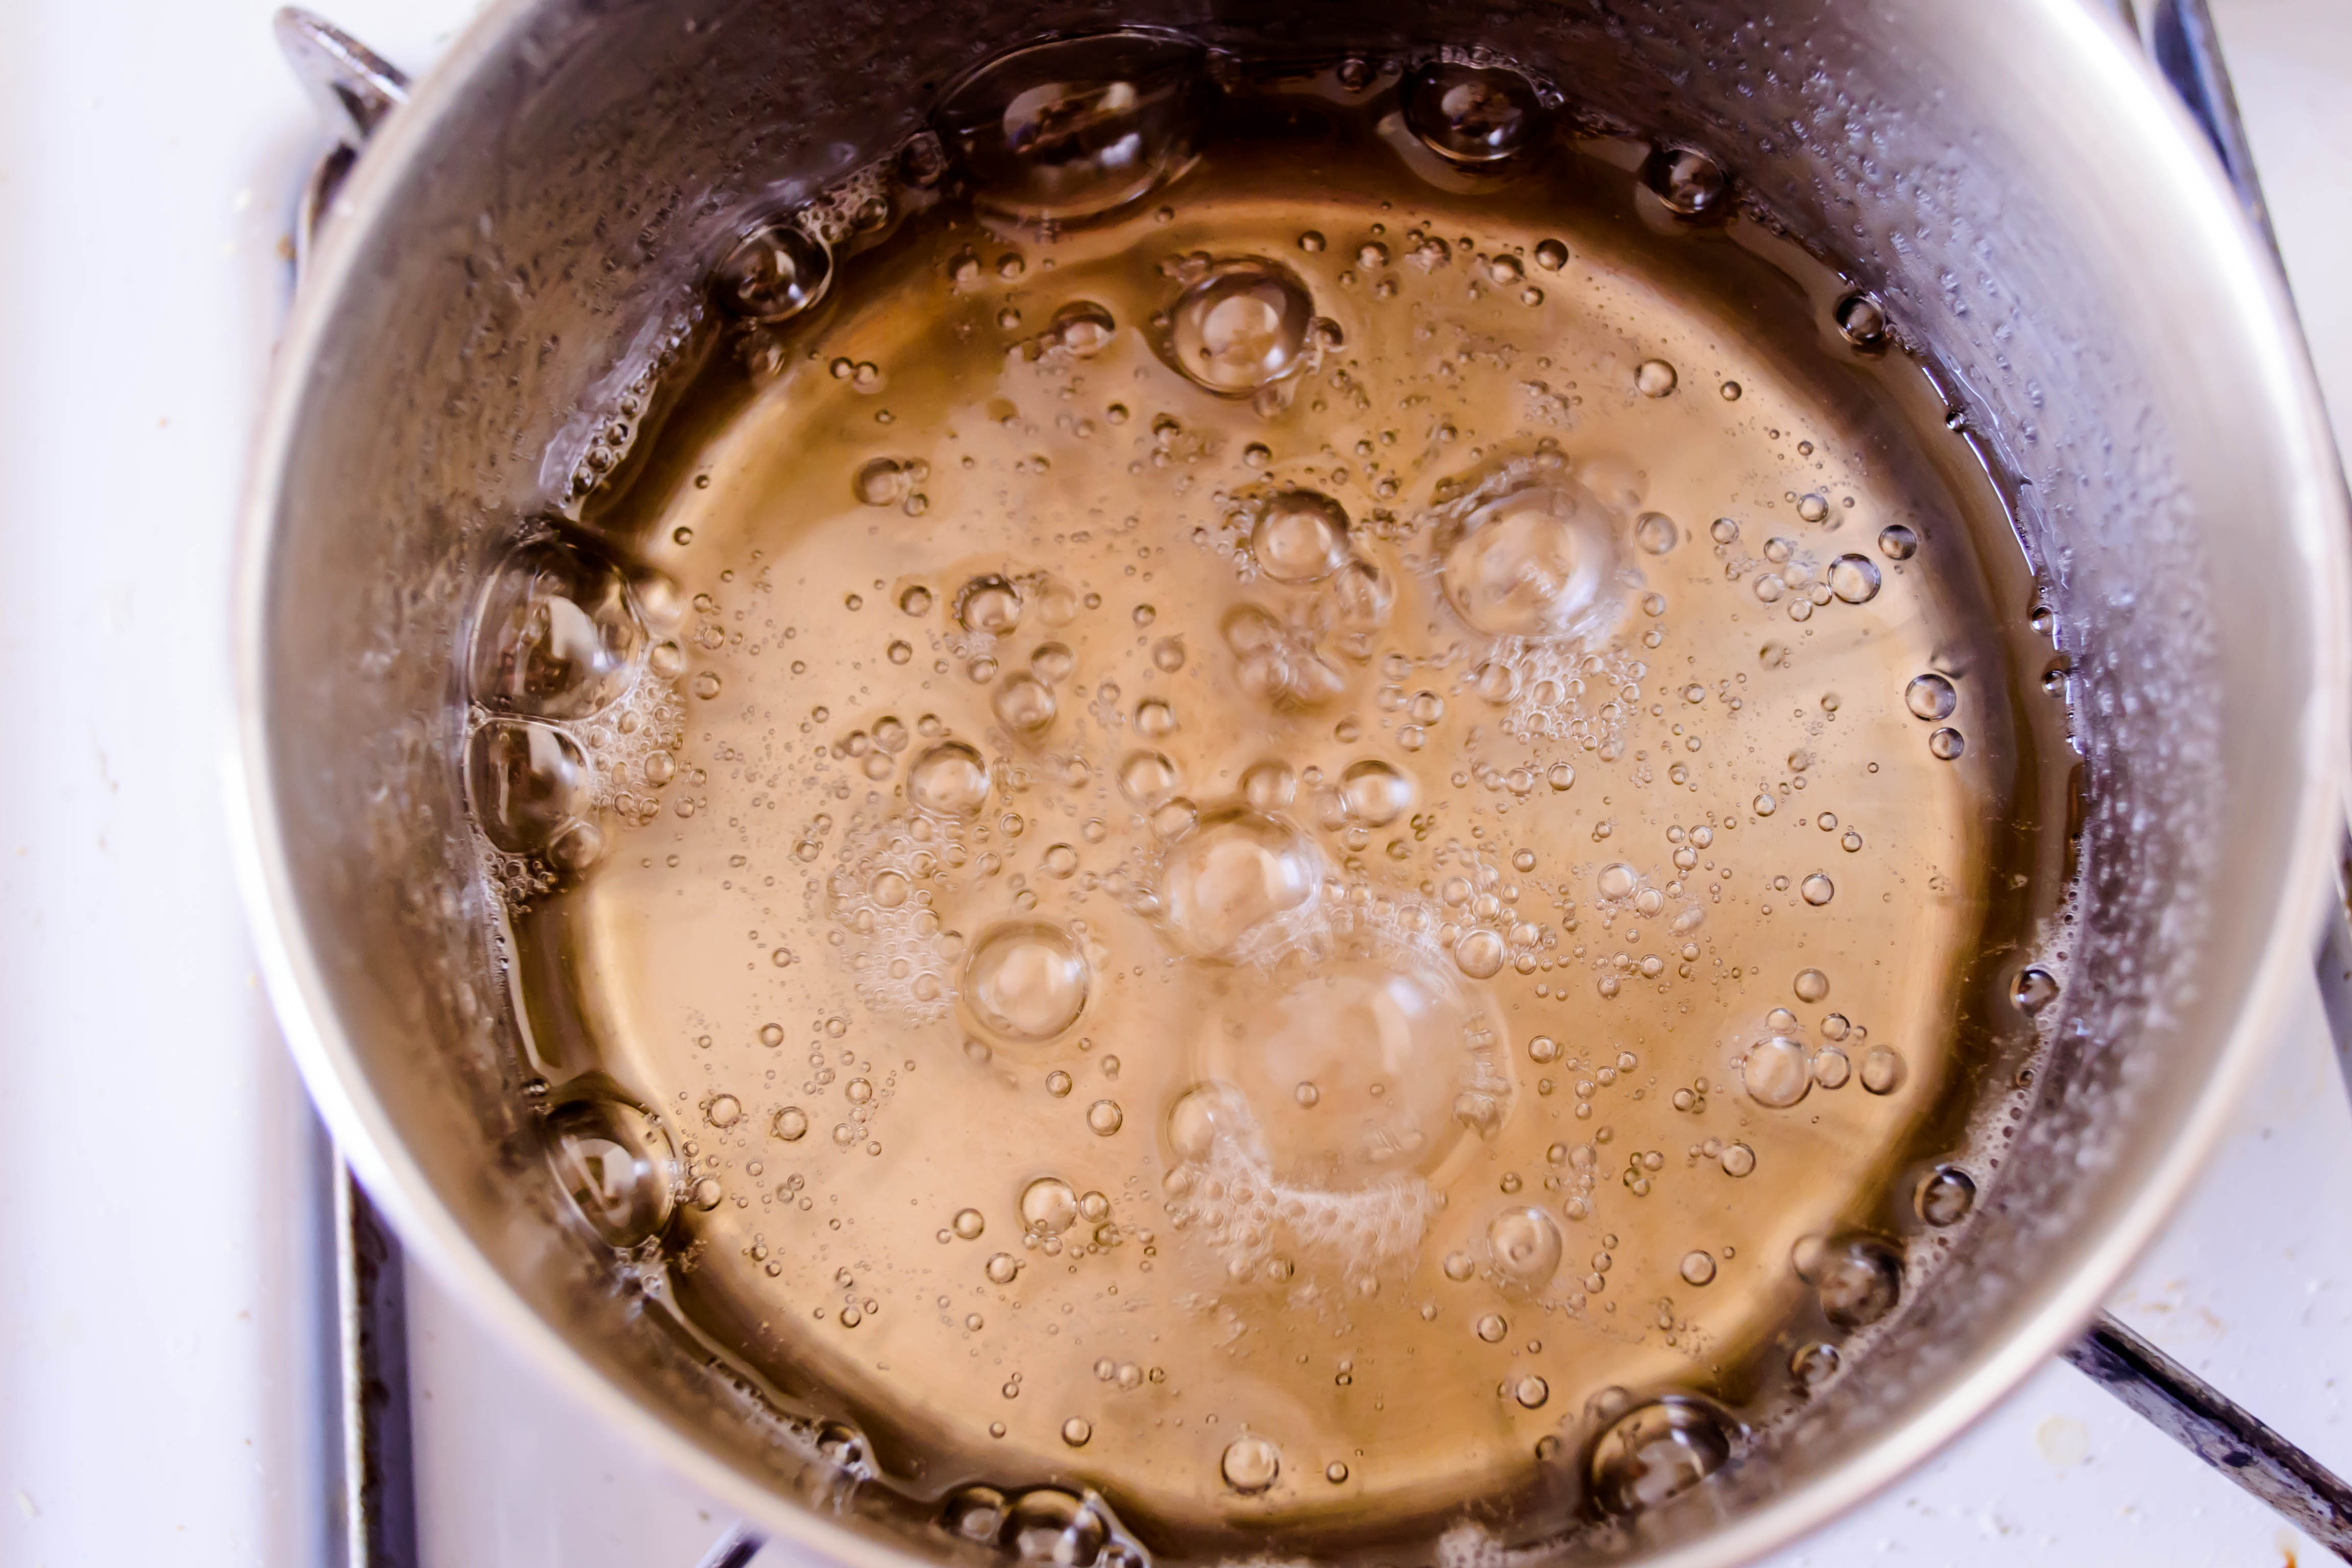
  • Heat water in a medium pot to a bare simmer. It does not need to be boiling.
  • While the water heats, combine vinegar, water, and salt in a glass bowl. Stir or swish to dissolve the salt.
  • Add the yolk and whisk up a bit.
  • Place the bowl over a pot of hot water, but don’t let it touch the water. Keep the water at a low simmer; we are not looking for a rolling boil, or even a boil at all. This should be a gradual cooking process, so the yolk doesn’t scramble.
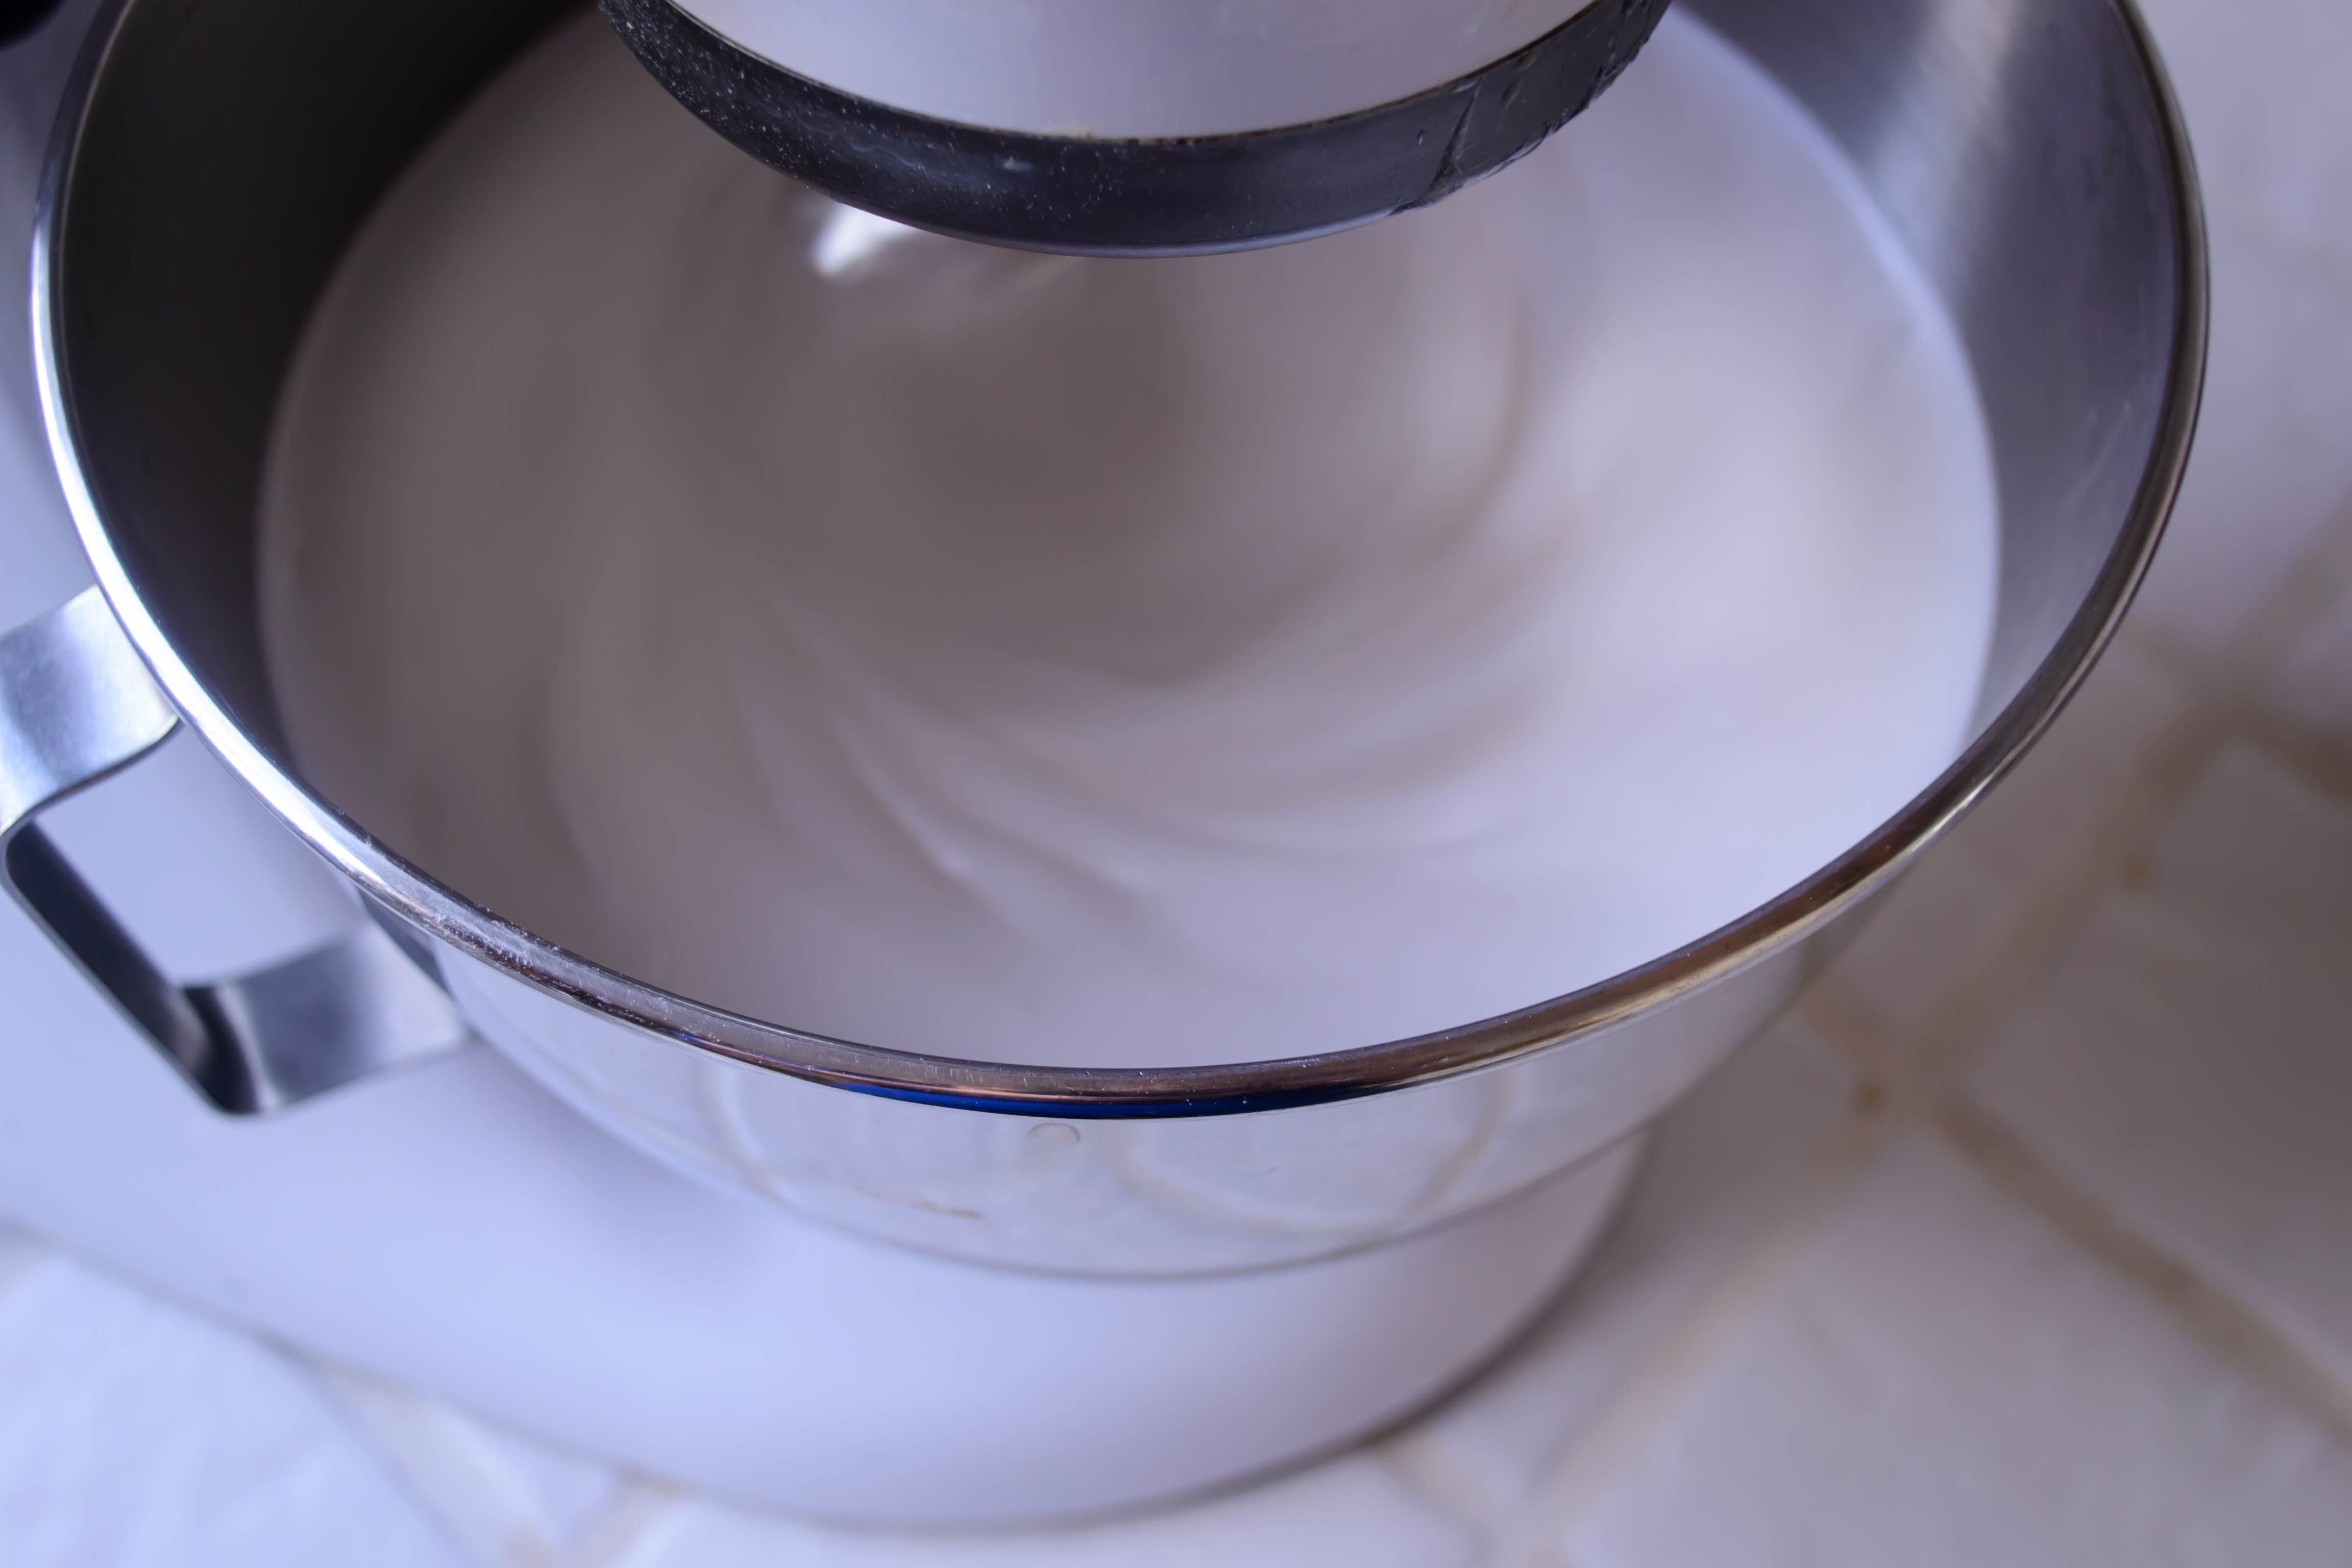
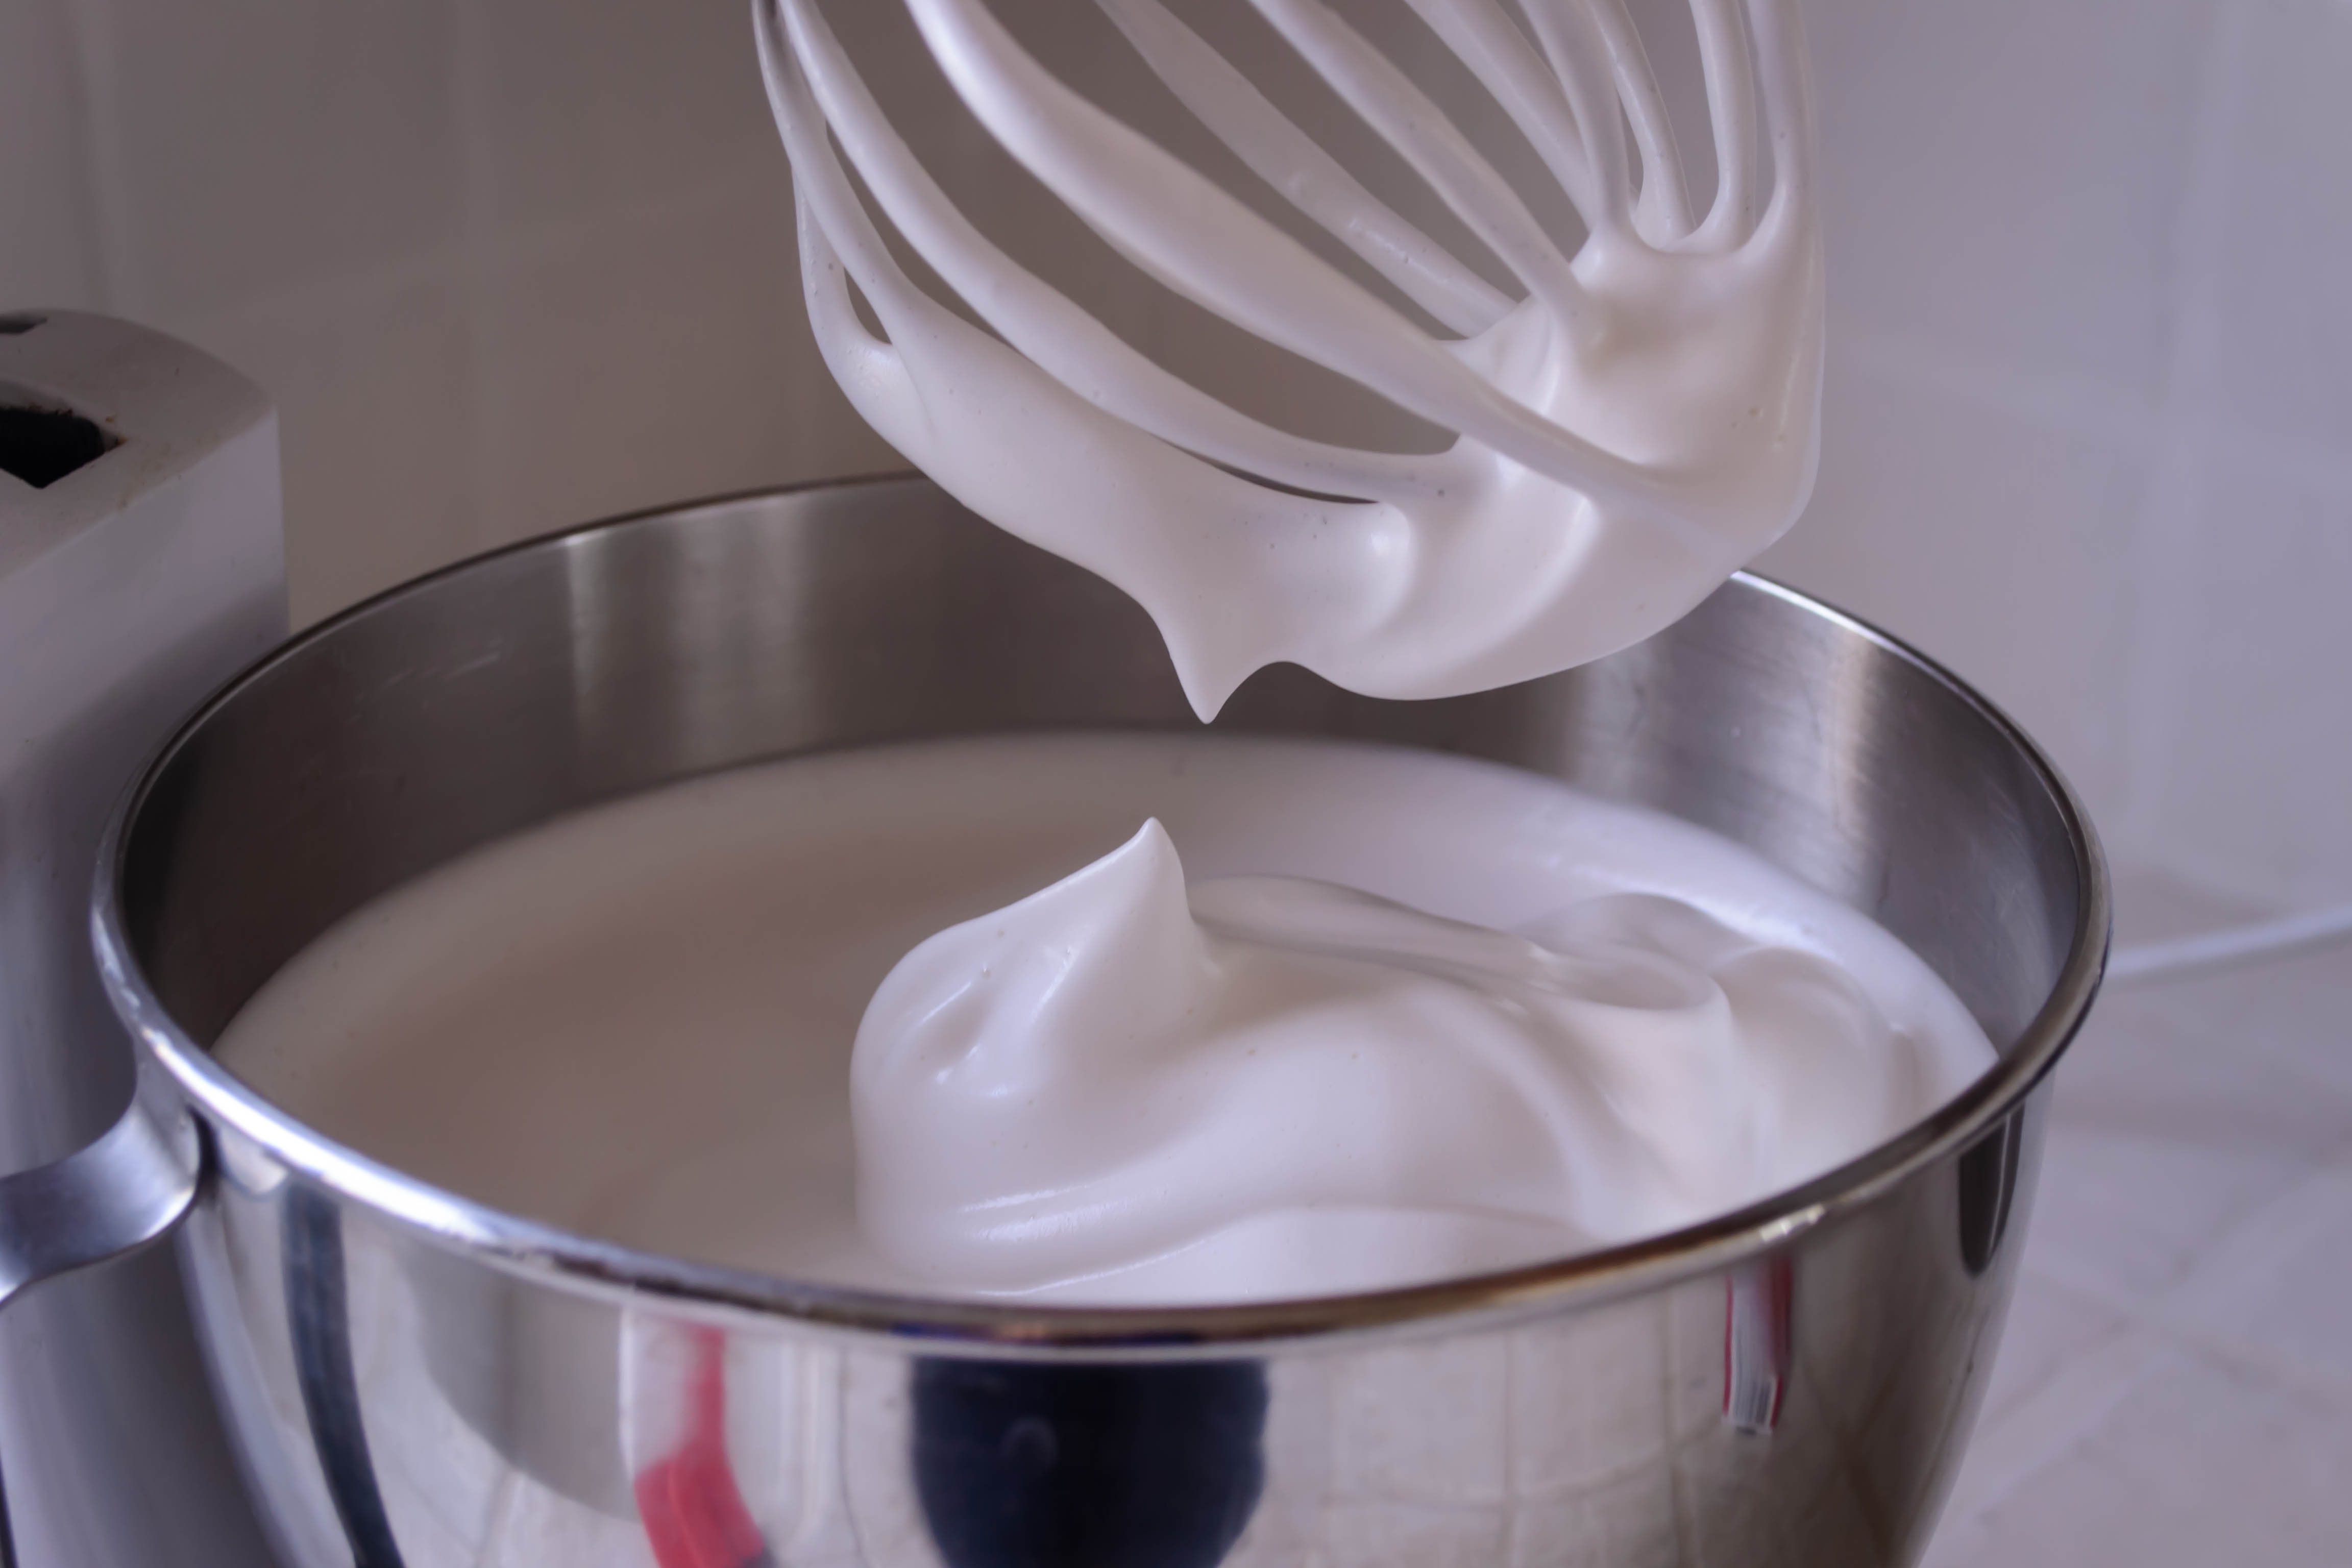
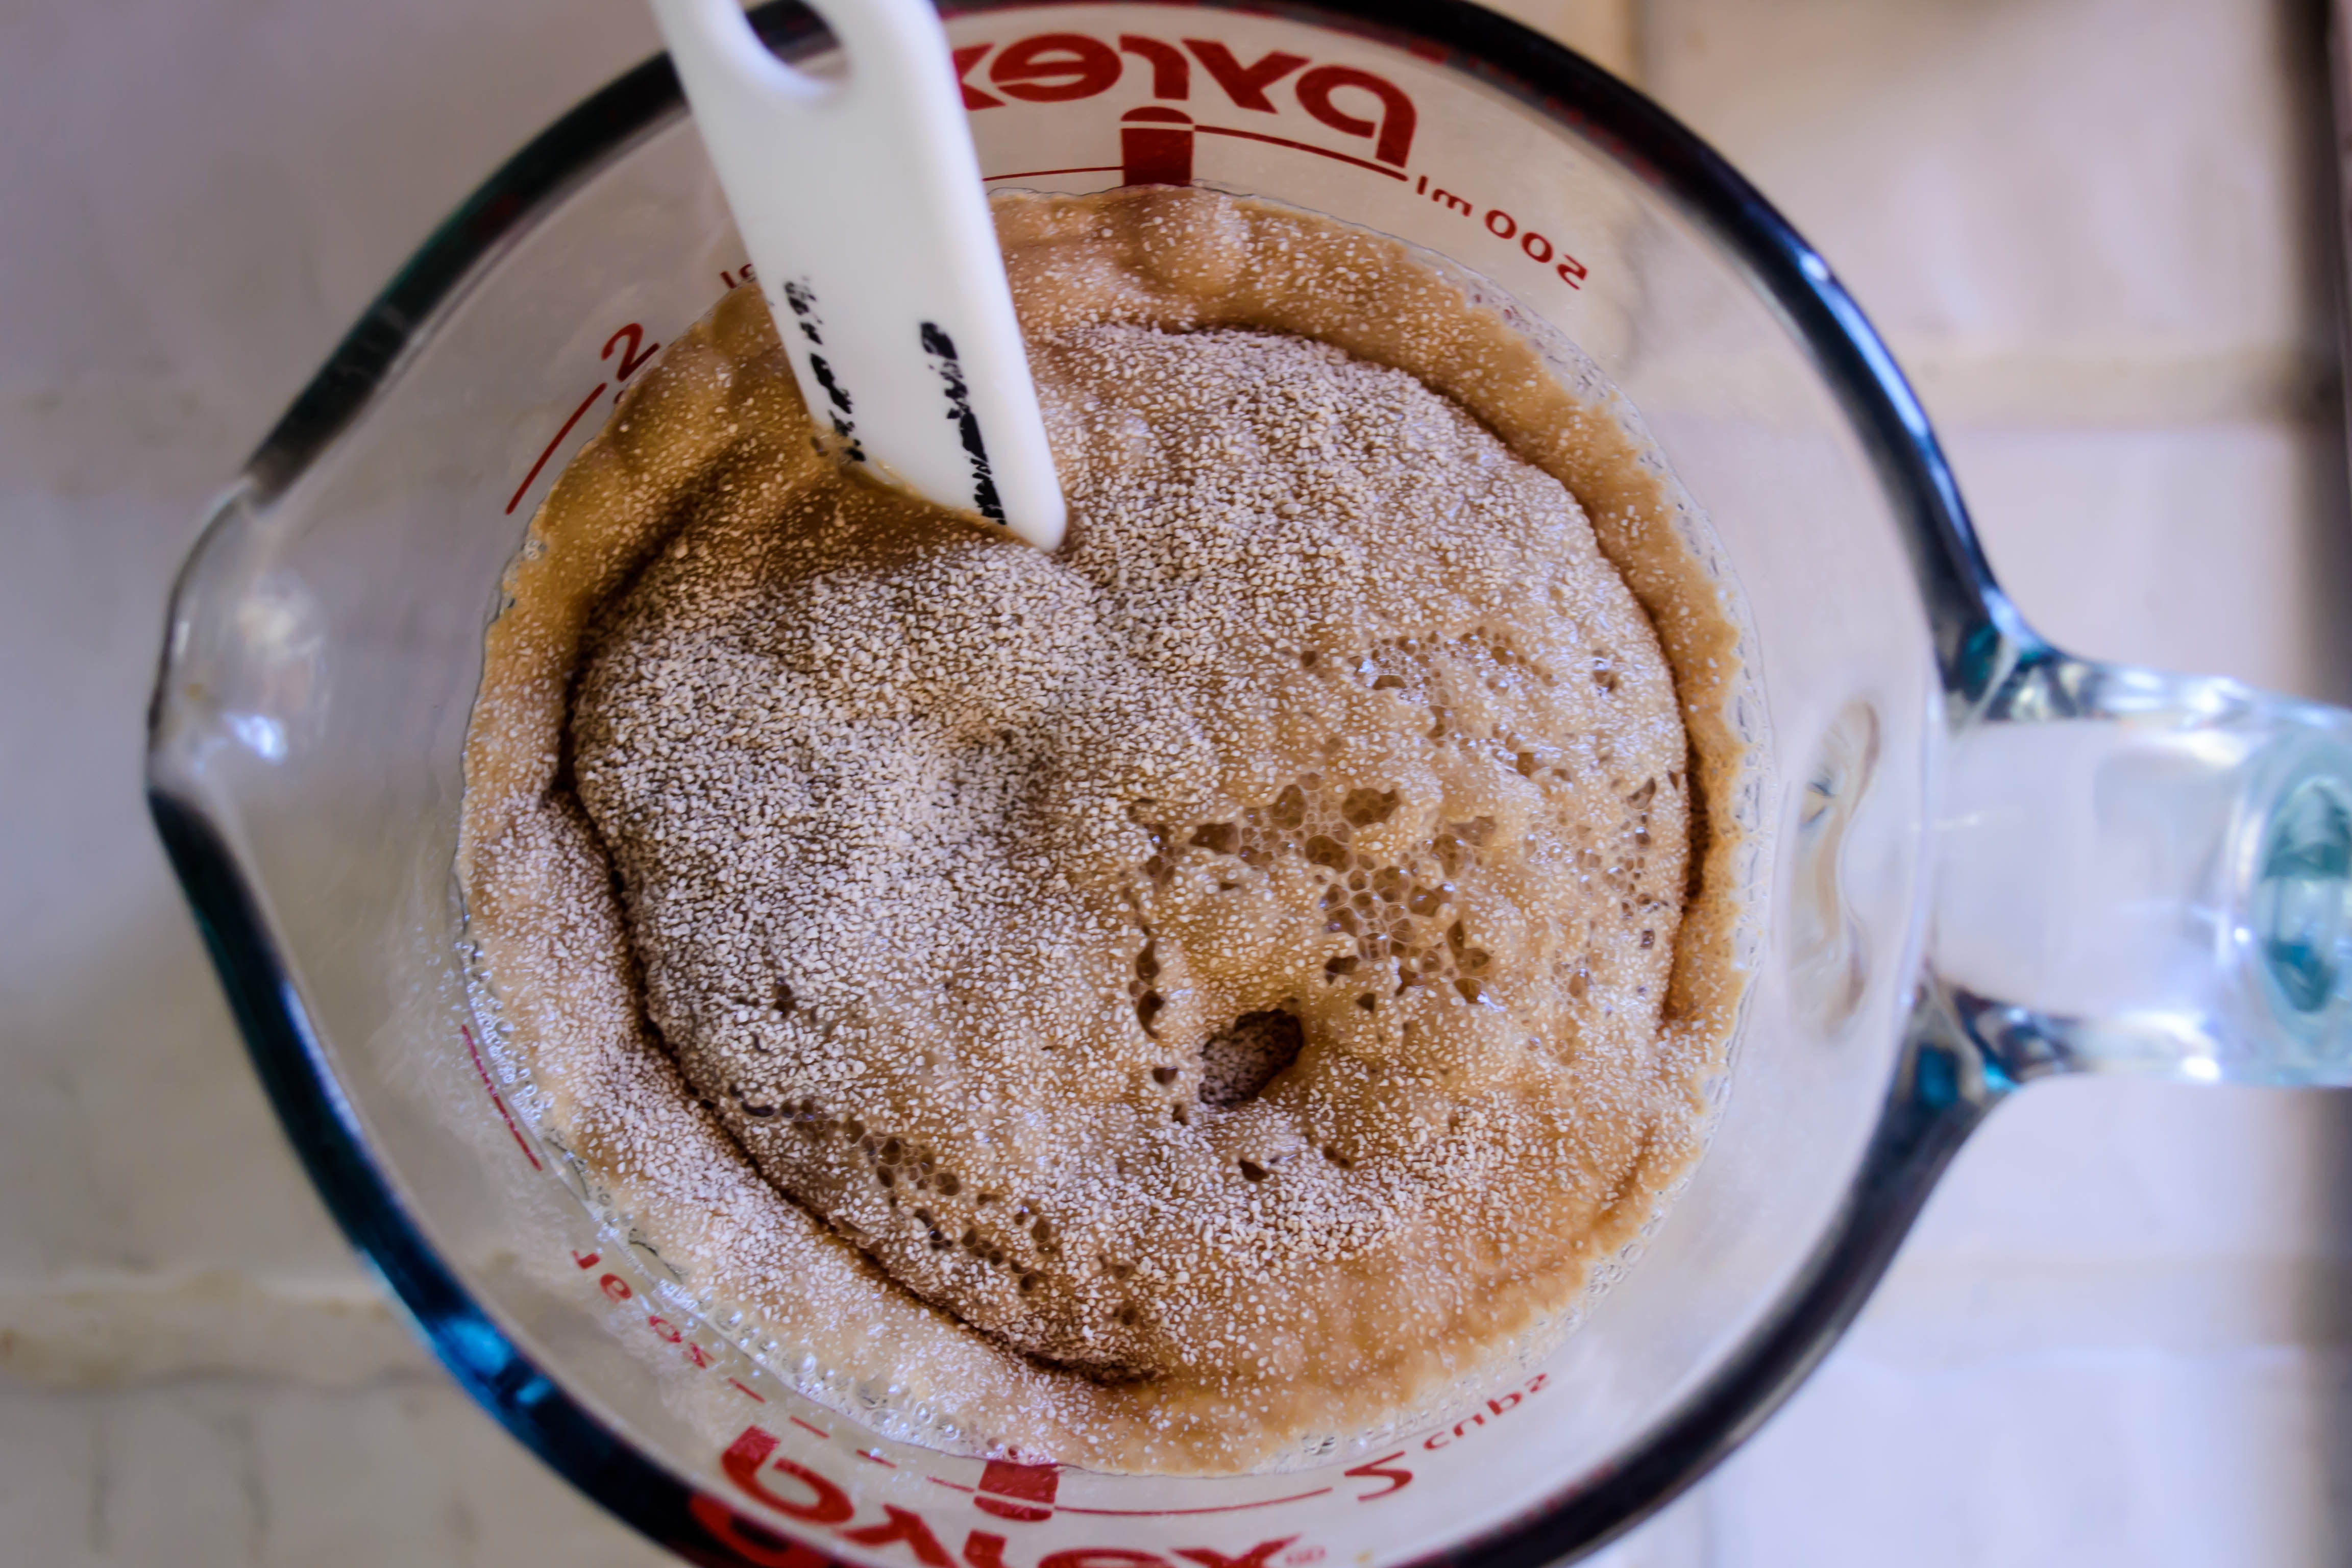
  • Bring the water to a simmer, whisking the mixture constantly. First there will be small, fizzy bubbles, but as you keep whisking the yolk will get very pale in color and start to gain volume. It becomes quite fluffy and starts to look like, well, like hollandaise sauce. This may take 3 or 4 minutes, or it may take more like 7 or 8. It depends on the speed and ferocity with which you whisk it.
  • When the sauce volume has at least doubled, turn off the heat and start drizzling in the melted butter, slowly, whisking CONSTANTLY. The sauce will get thick and creamy. If it suddenly looks really shiny or like it’s going to separate, whisk hard, lay off on the butter for a few seconds, and add another teaspoon of water.
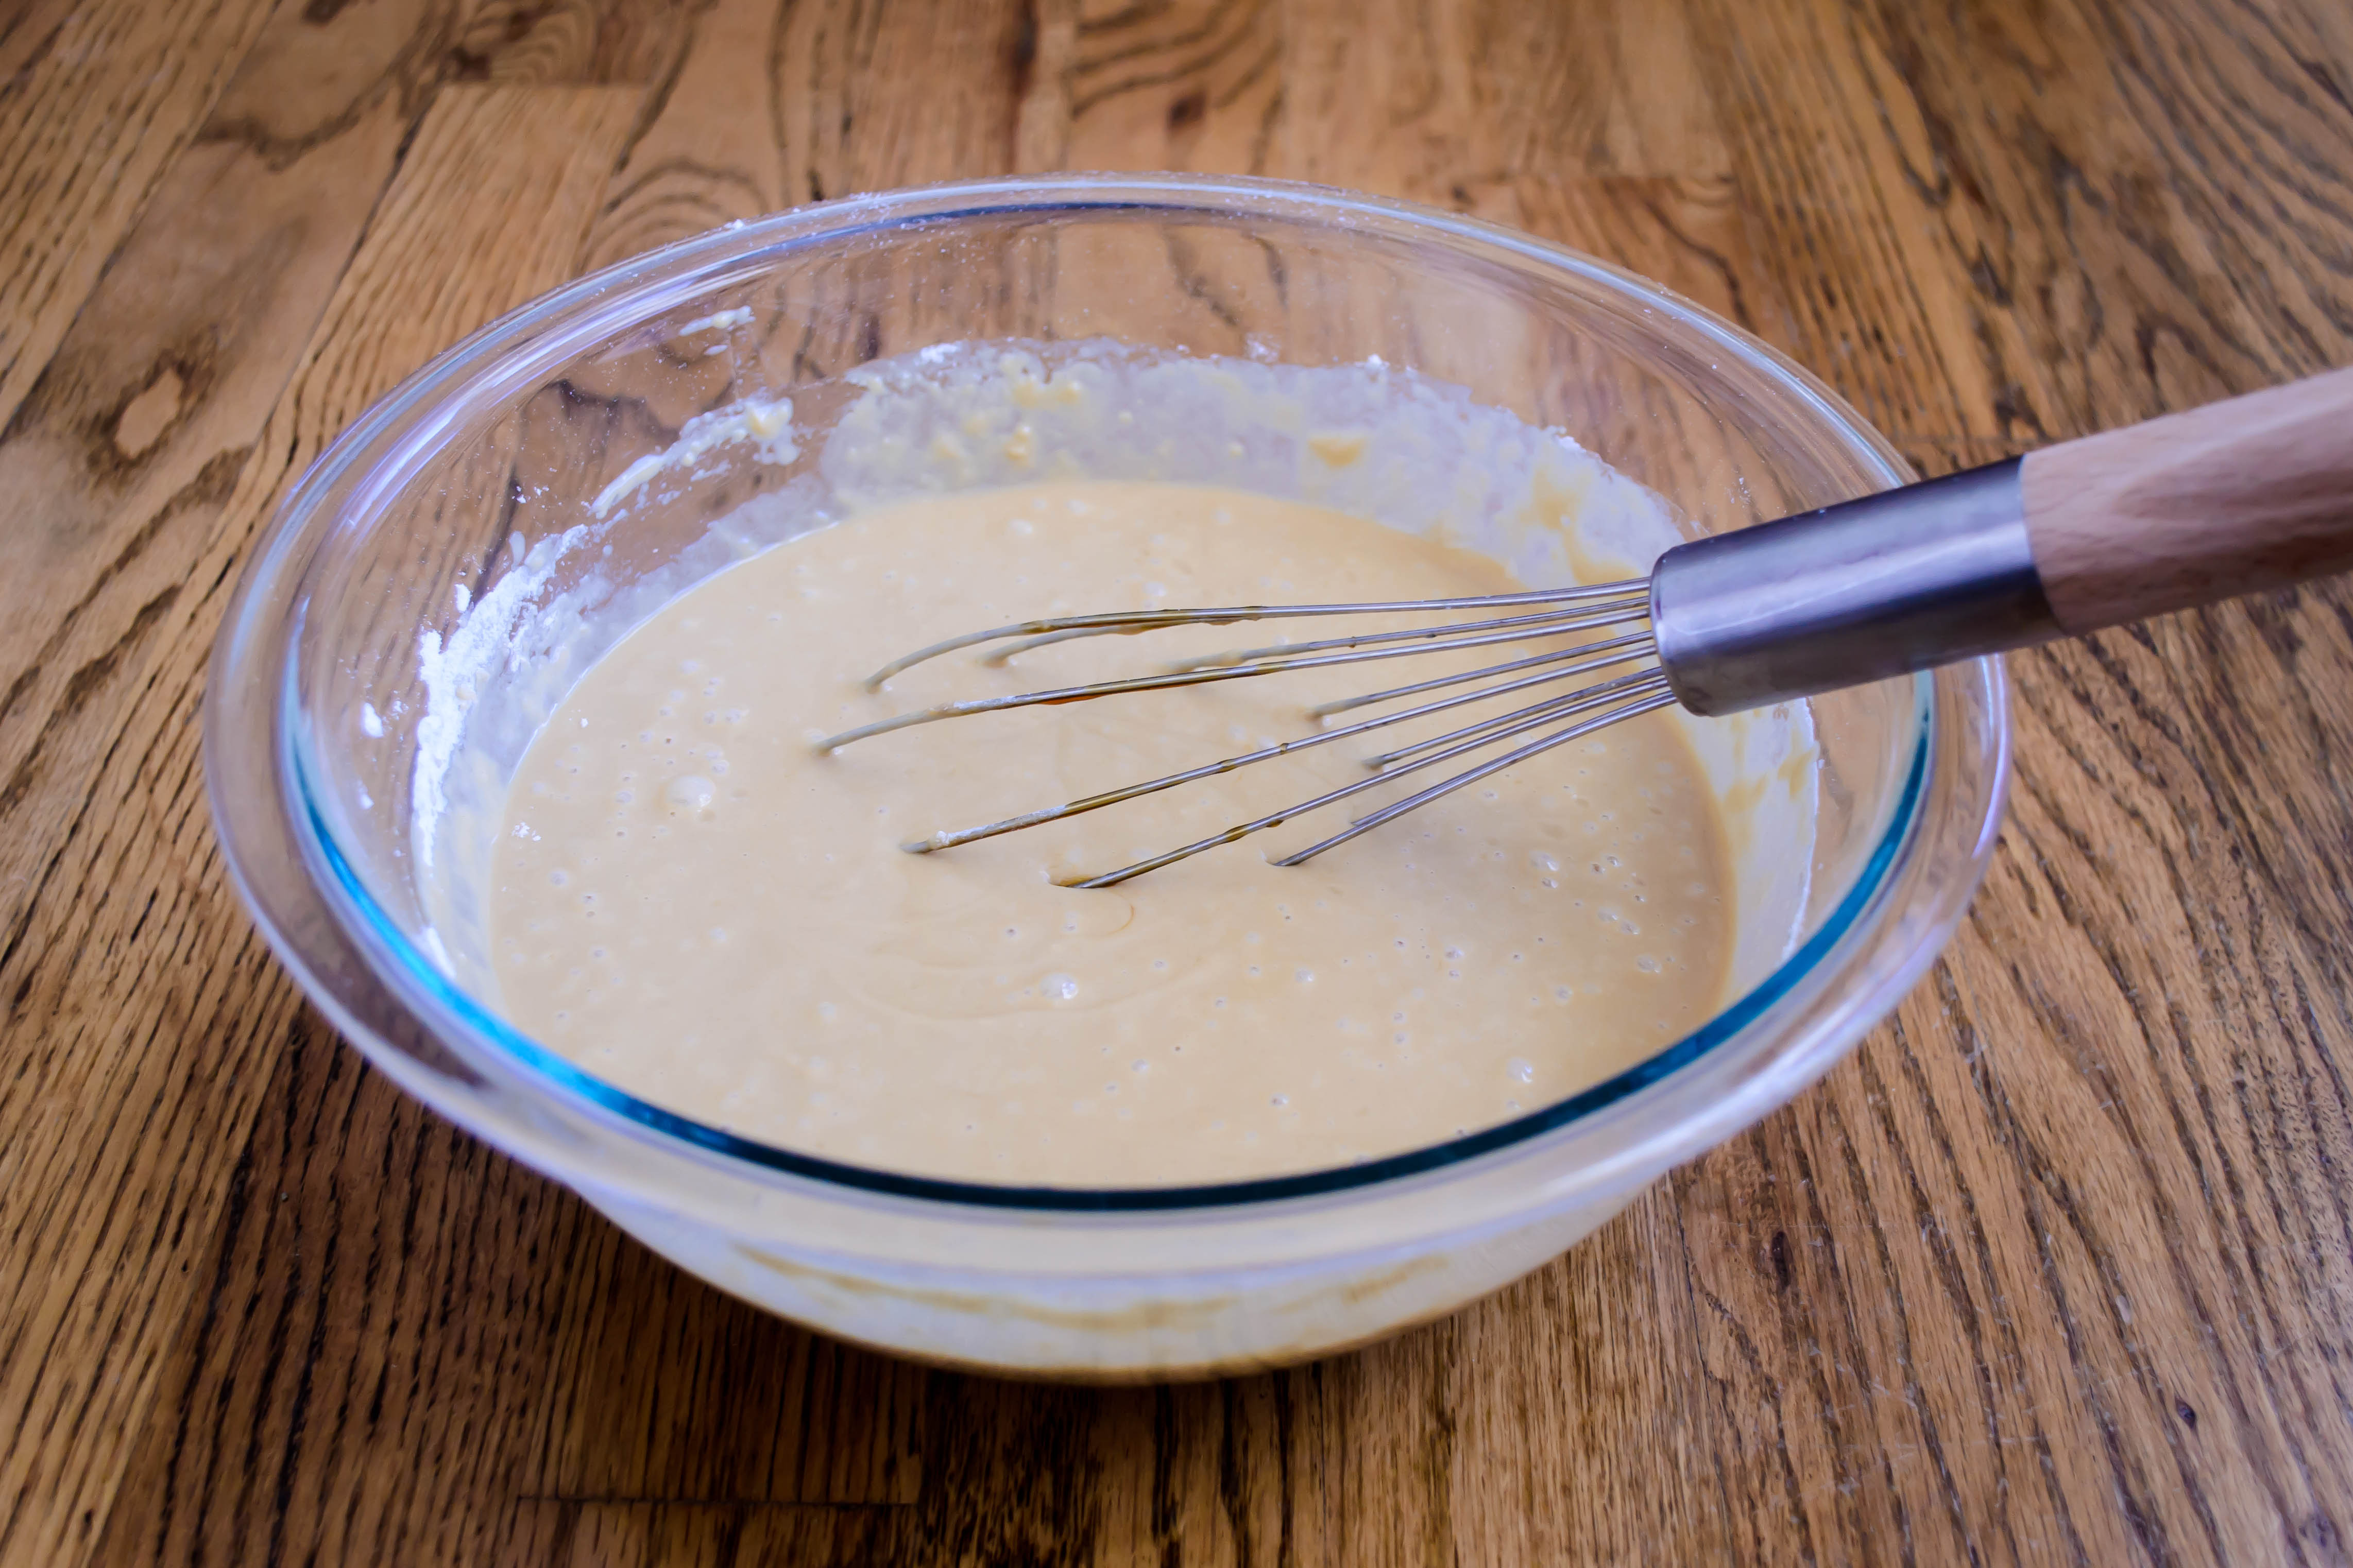
  • After you’ve added all the butter, and the sauce is thick, creamy, and rich looking, add the lemon juice and pepper, if using. Season to taste with salt, if needed. To prevent overcooking and unattractive clumpiness, remove it from the pot of water until ready to serve.
  • Serve over poached eggs or steamed asparagus, warm but not piping hot – the flavor intensifies as it cools a bit.

Peppermint Marshmallows

Last week I promised you something sweet and holiday inspired, but gave you very little else to go on.  I didn’t know, yet, that what I would have to offer would be a beautiful red and white swirl, a puffy, gooey, perfectly melting cube of magic, like a candy cane exploded into clouds and rained powdered sugar all over my kitchen.

Food Blog December 2013-2952Marshmallows.

Food Blog December 2013-2944Specifically, peppermint marshmallows, flavored with mint extract and swirled with a few drops of red food coloring to emulate the striping in a candy cane.

Food Blog December 2013-2935Marshmallows look like an ambitious cooking project, and I’ll admit they are not quite as easy as, say, your average chocolate chip cookie or gingerbread recipe. But they are so, so worth trying. When you compare store-bought marshmallows to homemade they are, as I explained yesterday, like the difference between those sheets in a discount motel, and the Egyptian cotton sheets with the sky-high thread count you dream about treating yourself to maybe that’s just me…). The homemade ones are soft and luxuriously puffy, and they linger on your taste buds without that powdery residue you get from the kind that come out of a bag. Plus, you get to play with gelatin and egg whites.

Food Blog December 2013-2921Food Blog December 2013-2927Food Blog December 2013-2930Food Blog December 2013-2931To make mine, I looked to two of my sweets inspirations: David Lebovitz and Irvin Lin. I’ve been reading these two men’s blogs for years now, continually impressed as they churn out ambitious baking projects I never, three or two or even one year ago, would have considered attempting. Then over this summer my sister and I decided to try Irvin’s red velvet s’mores with cream cheese marshmallows, and the recipe he put together was so precise and, once I got over my fear of the boiling sugar syrup, so unthreatening that I decided homemade marshmallows should become at least a semi-regular part of my repertoire.

Food Blog December 2013-2923This is essentially a three-part recipe. First, you dissolve some gelatin in cold water.  While it softens and thickens and turns into a curious gooey business that resembles nothing so much as that sticky glue magazine companies use to affix perfume fold-outs and coupons to their pages (how delicious does that sound?!), you melt some sugar with corn syrup and a touch more water, making a barely golden syrup that bubbles and thickens but doesn’t hurt you, because you stir carefully and make sure you have shoes on, in case of disasters. It takes some time for the syrup to come up to the requisite 240F degrees, so while you wait, you whip some room temperature egg whites to soft peaks, helping them along the way with a pinch of cream of tartar.

Food Blog December 2013-2936Food Blog December 2013-2942Food Blog December 2013-2941Then all that remains is to combine. Off the heat, you scrape the gelatin, now congealed into this weird, pecan-pie-filling consistency, into the syrup, whisk to combine, and then pour the still-hot gelatinized syrup carefully into your egg whites. You whip them for a long time – ten minutes long! – and they expand triumphantly until you aren’t sure your stand mixer can hold them all. At the last minute, you add some vanilla and mint extract, and then deposit into a well-greased baking dish, swirl with some food coloring if desired, and stow in the fridge overnight to cure.  The next day, you have a wide dish of marshmallow, which you can slice, toss with powdered sugar, and use for whatever purposes your heart desires.

Food Blog December 2013-2945I found, through intense and repeated experimentation (I do these things for you…) that they melt with almost no resistance in cocoa, and would be a revelation dipped in dark chocolate. You could likely torch them just a bit to top a peppermint variation of a grasshopper or chocolate cream pie. But I find that with this peppermint flavor in particular – swirled for the holidays and almost aggressively minty – I like them best straight out of the refrigerator.

Food Blog December 2013-2951

Peppermint Marshmallows
Adapted from Eat the Love and David Lebovitz
Makes one 9x13x2 inch pan slab of marshmallow, which you can cut to your desired size
2 envelopes unflavored gelatin (about 14.5 grams, though the quantities on the Knox brand box are not very forthcoming)
¾ cups water, divided
4 egg whites, at room temperature (being at room temp helps them whip faster)
¼ teaspoon cream of tartar
1 cup granulated sugar
⅓ cup light corn syrup
1 teaspoon vanilla
1 teaspoon peppermint extract (or less – it’s quite strong)
10-12 drops red food coloring (optional)
1-2 cups powdered sugar, for coating cured marshmallows to prevent sticking


  • Grease a 9x13x2 inch baking dish with non-stick spray. Mine was butter flavored and looked a little yellow – I’d advise a white or clear version.
  • In a small bowl, sprinkle the gelatin powder over ½ cup of the water, then set aside to gel.
  • In a small saucepan, combine the sugar, corn syrup, and remaining ¼ cup of water, then stir over medium heat. Use a candy thermometer to moderate the temperature – you are looking to heat this to 240F.  This will probably take about 8-10 minutes, with the last 10 degrees taking the longest. You can turn away from this now and then, but be sure to stir regularly as the sugar dissolves to prevent it from burning.
  • While the syrup heats, beat the egg whites with the cream of tartar in the bowl of an electric stand mixer (or in a large bowl with a hand-held mixer, but using a stand mixer is much easier and faster) until they form soft peaks. When the whisk or beater attachment is pulled out of the eggs, what remains on the attachments will droop a bit back toward the bowl – those are soft peaks – peaks that fold over.
  • When the syrup reaches 240F, remove it from the heat and scrape the gelatin into the hot syrup, stirring with a whisk to dissolve. Drizzle a few tablespoons of the hot syrup mixture into the egg whites and mix gently, just to warm them up so they aren’t shocked.  Then, with the mixer on medium speed, pour the syrup into the egg whites in a slow but steady stream, being careful to aim for the whites themselves, not for the whisk or the side of the bowl, which can cause droplets of hot syrup to fly out onto you. As Irvin says, this sounds scarier than it is. Just be careful and you’ll be fine.
  • With all of the syrup poured in, turn the mixer speed up to medium-high and beat for 5 minutes. The egg whites will take on the consistency of a thick whipped cream.
  • After five minutes, add the vanilla and peppermint extract, then increase the mixer speed to high and beat for another five minutes. The mixture will increase dramatically in volume, become glossy and thick, and resemble that marshmallow fluff you can buy in jars.
  • You’ve now beaten your egg whites for a total of ten minutes. Use a rubber spatula, greased for extra insurance if you wish, and pour/scrape the mixture into your greased 9×13 inch pan. For the swirly candy cane effect, drip 10-12 drops red food coloring over the surface of the marshmallow, spacing the drops evenly for best coverage.
  • Gently insert the tip of a butter knife into the marshmallow mass and swirl around, dragging the food coloring over and through the pan to create a swirled effect. Don’t overdo it, though – you want well-defined swirls, not pink marshmallows.
  • When you are satisfied with your swirls, cover the pan tightly with plastic wrap, taking care not to let it touch the top of the marshmallows (it would stick like crazy), and stow it in the fridge overnight, or at least 8 hours, to let the marshmallows cure.
  • After marshmallows have cured, all that remains is to liberate them from the pan, slice them to your desired size (I used a pizza wheel for this), and toss them in powdered sugar to keep them from sticking to everything they come in contact with. To do this, I put 1-2 cups sifted powdered sugar in a brown paper bag, added the marshmallows, and shook them gently until they were evenly coated. Then, remove and consume as desired!

Beer Batter Waffles with Bourbon Caramel Sauce

It’s getting dark.

I told N., as he stood over the sink sampling a triangle of hot waffle and I finagled my plate of stacked waffle pieces around the counter searching for more light, any light, that I’m going to have to start making blog-worthy meals as weekend lunches. He shrugged, swallowed, and reached for another piece of waffle. I don’t think he’s averse to this idea.

Food Blog November 2013-2756The cat-like, dozy, quilt-loving part of me worships autumn’s time change day. An extra hour of sleep, waking to find it light out but there’s still plenty of time for grading chores whatever (but if we’re honest, probably grading), and the following few blissful weekdays when getting up at 6am doesn’t feel like masochism. But the blogger in me dreads its coming. Most of what I post here – the savory stuff, anyway – is planned and eaten as our evening meal. Amidst getting home from work, walking the dog, and catching up with each other, by the time I start cooking I’m chasing daylight. When we turn back the clocks and darkness creeps ever earlier, the little amateur photographer in me wails with despair. The light! Where is the light?! It’s a cruel trick, made crueler by the enjoyment the non-blog-obsessed part of me reaps from it.

Food Blog November 2013-2740Speaking of tricks, let’s talk Halloween. What did you do? Who (or what) did you dress as? We did not have a single trick-or-treater, which devastated me, but delighted my students, who received the candy I didn’t give out (or eat myself, but who’s counting?). To fill my costume yen, I had to turn to Facebook stalking, and my easy favorite was a former colleague’s daughter, who dressed as a jellyfish. They fitted a clear plastic umbrella with a jumble of LED lights, and she wore a frilly tutu and held the umbrella over her head to emulate those weird, beautiful, alien creatures. Genius.

Food Blog November 2013-2736On the treats front, aside from the Almond Joys I compulsively scarfed as the afternoon went on (reminding myself they were “fun size” totally assuages my guilt), I decided Halloween dinner should be special. A few months ago we gorged ourselves on beer batter waffles during an unexpected brunch at a little cerveteca in Venice and were delighted by the incredible yeasty flavor. I decided this was the night to do some recreating.

Food Blog November 2013-2743I started with a recipe for maple bacon yeast waffles in a King Arthur Flour catalog, trimmed down the ingredient list, and replaced the called-for milk with beer and the maple syrup with barley malt syrup to emphasize the malty flavor even more. The batter is a floppy, burpy, smelly sourdough sponge sort of concoction, which burbles sullenly for an hour or two before you ladle it by half-cups or so into a waffle iron and sizzle it into solidity. It’s easy, for a yeast-laden item, and as long as you think about the rising time before you suddenly decide you’re starving and dinner needs to happen NOW, it’s doable for a weeknight.

Food Blog November 2013-2745The thing about a recipe like this, though, is that the rising time gives you time to think. If you’re a normal person, you might use this blessed extra hour to catch up on housework or relax and watch television. If you’re me, you start thinking about sauces. I like maple syrup, but I get tired of it. These waffles, with their yeasty aroma and almost savory flavor, needed something special. As a salute to Halloween, I decided to make a quick bourbon caramel drizzle to top them. I mean, why not? It was a holiday, after all.  Butter, brown sugar, bourbon, and salt, bubbles stacking up on themselves in a tiny pot, and a swig of milk (or cream) to thicken and mellow and relax everyone.

Food Blog November 2013-2749So back to the darkness problem. Usually, when I arrange a plate of dinner to photograph it, N. waits until I’m done to serve himself and head in to the table to eat. On Halloween, as I angled and shimmied and adjusted, trying to catch the last glimmers of fading light and listening to my shutter speed get slower and slower, he stacked waffles onto his plate, drenched them with the caramel sauce, and disappeared around the corner to start his dinner. That, to me, proves its deliciousness beyond all doubt.

Total treat. No tricks. Food Blog November 2013-2755

Beer Batter Waffles
Adapted from King Arthur Flour
Makes about six 7-inch waffles
1½ cups (12 ounces) lukewarm beer (I used a nice roasty porter, heated in the microwave about 30 seconds)
1½ teaspoons active dry yeast
3 tablespoons barley malt syrup (you could likely replace this with maple syrup or honey, but I haven’t tried it. If you do, let me know!)
6 tablespoons (3 ounces) melted butter, cooled
1 teaspoon salt
2 large eggs
2 cups all-purpose flour
  • In a 2 cup glass measuring cup, or a small microwave safe bowl, heat the beer until just warm to the touch. Add yeast and the barley malt syrup (or whatever sort of sweetener you are using) and let them mingle for 5-10 minutes. The yeast will foam up considerably, thanks to the extra sugars and yeast already in the beer.
  • While the yeast proofs, whisk together the cooled melted butter, the salt, and the eggs in a large bowl. Be sure there’s room for the batter to expand.
  • Add the beer and yeast mixture and whisk to combine, then add the flour 1 cup at a time, whisking to combine thoroughly.
  • When the flour is fully incorporated and no lumps remain, cover the bowl with plastic wrap and set it on the counter for 1-2 hours.  The mixture will slowly develop lethargic bubbles and begin to smell quite bready.
  • Once it has had a chance to rise for an hour or two, either stow in the refrigerator overnight, or preheat your waffle iron!
  • Drop the batter in generous ½ cup batches (or more, if your waffle iron can take it) onto a preheated, greased waffle iron. Close the lid and cook for the recommended amount of time, or until the waffle is crisp on the outside and deeply golden.
  • Serve hot with bourbon caramel syrup. If you need to keep the waffles warm, stow them on a wire rack over a baking sheet in a 250F oven until you are ready to eat.


Bourbon caramel sauce
Makes about ¾ cup
2 tablespoons butter
½ cup packed brown sugar
½ cup bourbon (I like Knob Creek myself)
1 teaspoon salt
¼ cup whole milk or cream (cream will make for a thicker, more luscious end product)
  • Combine the butter, brown sugar, bourbon, and salt in a small saucepan over medium-low heat. Stir to combine as the butter and sugar melt.
  • Continue to stir frequently as the mixture comes to a simmer. Bubbles will begin stacking up on themselves, and you want to prevent both the sugar from burning and the bubbles from climbing too far up the sides.
  • Let the mixture reduce a bit – it will thicken and some of the alcohol will burn off.
  • Just before you are ready to serve, add the milk or cream and stand back, as the caramel may bubble up furiously.  Stir to combine and keep over low heat just to warm the mixture through. Drizzle generously and enjoy.

Goat Cheese and Bacon Biscuits

I’m not one of those people who is crazy for bacon in everything.  The idea of pairing it with chocolate still weirds me out a little, and I’ve never tried it in brownies or ice cream.  That being said, bacon is probably the top reason I would have trouble being a vegetarian.  Crisp, sandwiched with some dripping heirloom tomato slices and lettuce on toasted sourdough, and I’m dreamy happy.  Salty fatty fried chunks studding my bowl of baked beans, and my evening is made.
Food Blog April 2013-0990
What I am generally crazy for is breakfast.  But not at breakfast time.  I can’t handle a big savory meal early in the morning.  A fried egg sandwich, okay (and with a little sriracha in the mayonnaise?  Be still my heart!).  A pancake or three, maybe on occasion.  The big, multi-course breakfast is, for me, wasted on the morning.  I’m a breakfast-for-dinner kind of girl.
This week, in need of comfort as spring break drew to a close and allergy season burst wide open, we decided breakfast sandwiches were just what we needed.  Eggs, bacon, fluffy buttery biscuit, and why not, a little goat cheese?!  But layering these components together would not suffice.  Thick slices of bacon smashed against a cloud of scrambled egg and crumbles of goat cheese seemed like a mess waiting to happen.  I’ve incorporated cheese into biscuits before with great success, why not do the same with the bacon?
Food Blog April 2013-1002
The result: goat cheese bacon biscuits.  A simple revelation, but let me tell you, a spectacular base for a scrambled egg sandwich.  Crisp squares of bacon, cold cubes of butter, crumbles of chevre, and a healthy glug of buttermilk.
These are pretty cinchy to make, though thanks to the addition of the goat cheese your biscuit dough will be a little stickier than usual.  Try not to add too much flour – you don’t want them to get dense.  They bake up into lovely little puffs, and the bacon stays crisp against the soft dough.  The goat cheese wasn’t as strong a flavor as we were expecting, though after the biscuits cooled a bit we did pick up a pleasant tang from the larger crumbles.  Loaded up with a simple layer of scrambled egg, and you have a perfect, three-bite sandwich with all the right trimmings.  And because it’s only three little bites, you can have two or three without any guilt to speak of.  Or four… or…
 Food Blog April 2013-1013
The funny, blackened stakes lying in a pile in the background of this photo are roasted rainbow carrots.  They were incredible.  And don’t just take my word for it – I knew they were the real deal when N. carefully sampled one, turned to me, and said “wow.”  If you’ve been reading this blog for any length of time you will know that N. is not intentionally grudging when it comes to food praise; he’s just not particularly effusive about it.  A “wow” is like fireworks.
Breakfast-for-dinner slam dunk, then.  What’s your favorite?
 Food Blog April 2013-0993
Goat Cheese Bacon Biscuit Sandwiches
2 cups flour (All-Purpose is fine)
2 tsp sugar
1 tsp salt
2 TB baking powder
4 slices bacon, diced and fried until crisp, drained and cooled (do this a bit ahead of time so the bacon has time to cool off – if you toss it into the mixture hot, you’ll heat up the butter and your biscuits will be less fluffy)
6 TB cold butter, cut into chunks (chunking it isn’t absolutely necessary, but it does make it easier and quicker to incorporate)
½ cup crumbled goat cheese
6 oz. buttermilk
 Food Blog April 2013-0995
  • Preheat your oven to 400F and line a baking tray with parchment paper.
  • In a medium bowl, combine the flour, baking powder, sugar, and salt.  Whisk in the cooled, crisp bacon.
  • Add the butter and incorporate using a pastry blender or your hands.  When the chunks are about the size of lima beans, tumble in the goat cheese and blend it in until there are no more large pieces.  The pebbles of butter should be about the size of peas when you are done.
  • Pour in the buttermilk and fold it into the dry mixture.  I find using a fork works best for this – the tines pick up and jostle around the flour mixture better than a spatula or wooden spoon.  Don’t overmix, but be sure the buttermilk is well incorporated.
  • When your mixture is evenly damp, abandon the fork.  You can turn the whole mess out onto a floured board, or you can just reach in with flour dusted hands and knead the dough a few times in the bowl until it comes together.
Food Blog April 2013-1000
  • Pat the dough into a plump something-like-a-rectangle on a floured board.  The thickness and therefore the size of the rectangle is really to you, but mine was probably just under an inch thick.  Using a biscuit cutter or the floured top of a glass, punch out biscuit rounds by pushing straight down all the way through the dough.  Don’t twist your cutter as you go down; you’ll disrupt the craggy layers in the dough and the biscuit won’t rise as high or as evenly.
Food Blog April 2013-1001
  • When you’ve punched out as many rounds as the rectangle of dough will allow, place them on your parchment lined baking sheet at least an inch apart, gather the dough scraps, knead them together a bit, and pat them back into a new rectangle.  Continue punching out biscuits and reshaping the scraps until you run out of dough.  Given the small size of cutter I chose, I managed 16 sweet little biscuits.  You will have more or less depending on size and thickness.
Food Blog April 2013-1007
  • For a small biscuit (2 inch diameter), bake at 400F for 12-14 minutes, or until the layers have puffed and the top is golden.  Larger or extremely thick biscuits will take longer; try 15 minutes to start.
Food Blog April 2013-1011
If you just want to eat them as is – and I’d sympathize completely if you did – you’re all set to go.  Dig in.  If, however, you want them as sandwiches, split them down the middle of the puffy, buttery layers and insert a fold of softly scrambled egg.
Food Blog April 2013-1003
Food Blog April 2013-1004
These are best the day they are cooked, so I’d advise only baking as many as you and your dinner partner(s) are going to eat.  The remaining biscuits can be frozen, still unbaked, and enjoyed another day.  To freeze them, set them on a piece of wax paper or parchment in a single layer on a plate or baking tray.  Wait until they are frozen, then relocate them to a zip-top freezer bag.  They don’t even need to be defrosted, just pop them into a preheated oven for a few extra minutes (maybe 15-18 for a small biscuit) and dinner – or breakfast – is served!
Food Blog April 2013-1010