Pandemic Potato Salad

This is a recipe born out of need and change and a series of odd connections. I bought a bag of red potatoes intending to make a gratin, but a sudden upswing in temperature made the idea of roasted anything feel oppressive. Meanwhile, my beautiful heads of romaine lettuce in my garden started to bolt, and my parsley was already flowering. I thought of salad, of course, and then of potato salad, and then of likely ways I could combine them. A potato salad with green beans and parmesan I had in Eugene crept back into my mind, and parmesan reminded me of pesto. Pesto is such a convenient way of using excess greens, even when they are getting bitter, so I wondered if lettuce pesto would be tasty. The garlic and parmesan of pesto along with the lettuce reminded me of Caesar salad, and suddenly I was adding anchovies and mayonnaise and hard-boiled eggs for good measure, and this franken-potato-salad was born.*

This is not one of those “not your average gloopy potato salad” iterations. I must admit, as an ardent mayonnaise lover, I resent those complaints about gloopiness. This one is gloopy. It is unapologetically gloopy. It is a potato salad for mayonnaise aficionados. But I have an important secret when it comes to those “gloopy” mayonnaise based summer salads, whether their bases are potato or pasta: you have to add the dressing while the starch base is still warm. If the potato chunks or noodles are cold, the dressing just weakly sits beneath and around them. If it’s stirred in while they are warm – or even hot – the dressing soaks in. The texture is better, the flavor is better, and you can get the hot part of the process out of the way hours before you intend to serve anything. At least 2 hours in the fridge after everything is combined ensures nicely melded flavors – the anchovy mellows, the garlic relaxes, the lettuce emerges not as a strong presence but as a juicy green background taste we found quite pleasant.

Because I’m me, I couldn’t quite leave well enough alone: since the lettuce and anchovy and parmesan allude to Caesar salad, and since lately we’ve been all about crunch and texture, I wanted to give a nod to the crouton component. A shower of panko crumbs well toasted in olive oil right over the top added crunch, though if you wanted to be a little less excessive, you could probably used well-toasted almonds instead. I’d suggest a rough chop for rubbly texture.

* As I wrote this, I was weirdly reminded of my most recent and ongoing scholarly project, which suffers from organizational stress. A few weeks ago a fellow academic tweeted “How has anybody ever structured a piece of writing? It’s an impossible con, all the things to be said must be said at exactly the same time or none of them will make sense” (Jones). I felt that as I tried to explain the intersecting idea strands for this salad: in my brain, the connections happened nearly instantaneously. Here, which do you mention first? The potato salad with parmesan that reminded me of pesto? The lettuce that evoked Caesar? Words prohibit the all-at-once-ness that feels so natural when we think…

Pandemic Potato Salad
Serves 6-8 as a side, not that you’re having anyone over right now…
2 ½-3 hours, including chilling time
6-8 ounces green beans or haricot verts
10-12 medium red potatoes
4-6 cloves garlic
5-9 anchovy filets (wide range, but adjust according to how much you love anchovies)
zest and juice from 1 lemon
1 head romaine lettuce, core removed, leaves roughly torn
1 cup packed parsley leaves and stems
1 cup mayonnaise
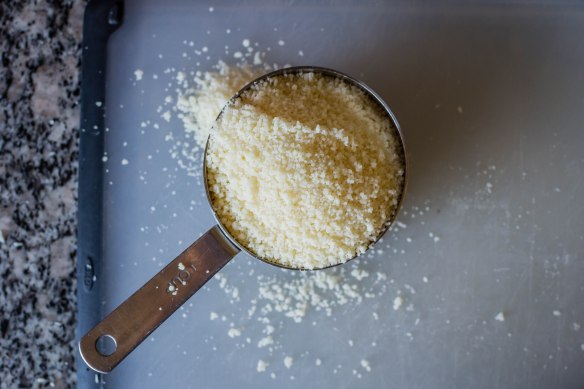
1 cup grated parmesan cheese
3 hard-boiled eggs, peeled and roughly chopped
salt and pepper to taste
Optional: 2 tablespoons olive oil and ½ cup panko breadcrumbs or ½ cup roughly chopped almonds


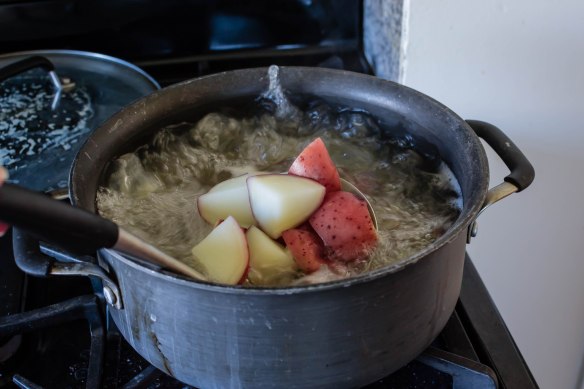
  • Blanch the green beans in a large pot of boiling salted water. This will take 2-3 minutes for large size beans, or about 90 seconds for skinny little haricot verts. Remove from the pot and douse in cold water to stop them from cooking further. Reserve the salted cooking water. Quarter the potatoes (or if they are gigantic, cut down into large bite-sized pieces) and place them in the same pot. Fill the pot with more water if needed to cover the potatoes, then bring back to a boil over high heat. Turn down to medium and simmer until the potatoes are just tender when pierced with a fork. Drain and set aside while you make the dressing.
  • If you need to grate the cheese, load the belly of your food processor with small chunks of parmesan, then run on high speed until the cheese is adequately broken down. Empty the processor, measure out the required cup of cheese, and set aside to add later.
  • Process the garlic cloves, anchovy filets, and lemon zest and juice together first into a clumpy paste. Use a rubber spatula to scrape down the sides of the processor, then add about half of the torn lettuce leaves and the parsley and pulse a few times to break them down. When there is enough room in the processor, add the remaining lettuce and parsley and process on high until the mixture is finely chopped.
  • Scrape down the sides of the processor again and add the mayonnaise and reserved parmesan cheese. Process on high speed until well combined. Taste for seasoning; add salt and pepper as needed. It’s important to wait until now to add the salt, since the anchovy, mayonnaise, and cheese are all salty already.
  • Add the still-warm potatoes and the drained green beans to a large bowl. Stir in about ¾ of the dressing until the vegetables are evenly coated. Gently fold in the chopped hard-boiled eggs. Add more dressing, if needed.
  • At first this will probably taste too salty. Refrigerate for at least 2 hours to allow the flavors to mellow and combine. Bring back to room temperature before serving.
  • This is ready to serve as is. But if you like a little excess (or if crunch is important to you), heat the optional 2 TB olive oil in a small skillet, then stir in either ½ cup panko breadcrumbs or ½ cup roughly chopped raw almonds and toast until deeply golden. Sprinkle over the top of the potato salad just before serving.

Watermelon Gin Slushies

As I’m sure is true for many of you, over these past couple of weeks I’ve been discovering hidden treasures (and also “treasures”) in corners of my pantry, fridge, and freezer. One of the latter was a jar of apple butter I don’t want to talk about that I uncovered while cleaning up a spill on the top shelf of my refrigerator. One of the former was a small jar of instant coffee granules that allowed me to experiment with the recent “Dalgona coffee” trend various parts of the internet are extolling. Short story: you need equal parts of each component, it really does whip up like that, and it really is delicious (I’ve heard some people complain that “it still tastes like instant coffee, though.” So it’s only fair, I guess that I confess I’m not a coffee connoisseur). Next time I’m adding in some cocoa powder for a mocha version.

As I’m also sure is true for many of you, I’ve been very careful lately – much more careful than normal – about not letting food go to waste. If it’s in the fridge, it needs to be eaten. Even if I’m tired of it or it wasn’t my favorite. This has led to some creative triumphs – potatoes and lentils cooked with warm Indian-inspired spices, chard from the backyard stirred in to wilt, and topped with a scoop of yogurt and some of the char stems, thinly sliced and pickled – and some creative… well… one-time-only (features) – a pot pie with overly herbed filling and under-salted crust.

Most recently, I combined these two truths in a cocktail: it emptied the remaining few swallows in the bottle of gin I discovered unceremoniously jammed under several bags of almonds at the back of the freezer, and it allowed me to use up some chunks of watermelon from a pre-cut fruit medley N. really wanted but that wasn’t particularly ripe or flavorful.

This is not the most original, or seasonal, or precise of recipes. How’s that for a convincing argument? But honestly, I’m sure the internet has gushed widely about combining watermelon, some sort of alcohol, and ice in a blender and piling it into a tall, frosty glass for a perfect summer afternoon. I did the same (except it’s April, and my watermelon was on the edge). And I’d encourage you to do the same as well! These were bright, they were tasty (at first I wasn’t convinced, but then I realized that even though I knew they were gin and watermelon, I really wanted them to taste like strawberry margarita), and best of all, they are easily adaptable, and offer one small, boozy way to ensure you aren’t letting a single precious (or not-so-precious) item in your well-stocked fridge go unused.

Watermelon Gin Slushies
For 2 small cocktails
About 1 cup frozen watermelon chunks (or other fruit of your choice)
About 1 cup ice cubes
2 shots gin (or other alcohol of your choice)
2 TB simple syrup, or to taste *
juice of half a lime, or to taste
lime wedges, to serve


  • Once the watermelon has frozen quite solid, add it, along with everything else except the lime wedges, to a blender. Blend to combine using about 3-second pulses. My blender has a smoothie setting, which does effectively the same thing: short, high-speed pulses until the mixture has become an even-textured, pale pink slush.
  • Taste and adjust quantities of lime juice and sugar syrup to your liking. Blend again briefly to combine if needed, then pour into glasses, garnish with a thin lime wedge, and serve. We had ours with lemon and pepper spiced popcorn and wouldn’t change a thing.

* If you don’t have simple syrup, you can easily make up a batch while the watermelon freezes: just combine equal parts sugar and water in a small pot, bring to a simmer, stir briefly, and when all of the sugar has dissolved and the liquid is clear and just barely thickened, you’re done, and need only cool it down and find a suitable storage container.

Banh mi salad (no recipe)

I don’t have a recipe for you today, but I do have a suggestion that, like my almost-too-late discovery of the aperol spritz in Venice, has probably already occurred to you. But just in case. It turns out that banh mi, that beloved Vietnamese sandwich that, along with pho, is probably the nation’s most well-known dish in the United States, translates amazingly well into a salad. You chop or stack all the ingredients from the sandwich – well seasoned and seared tofu, or pork, or chicken, fresh cucumbers, wafer-thin jalapeno slices, assorted vegetable pickles, soapy-fresh cilantro sprigs – atop crisp, juicy romaine or crunchy shredded cabbage (or a combination of both). You toss it gently with a dressing made from mayonnaise, sriracha, fish sauce, and lime juice or rice vinegar. Finally, since banh means “bread” in Vietnamese, so it couldn’t be banh- anything without a bread component, you fry the torn innards of a baguette in a generous quantity of oil, sprinkle them with a little salt, and pile them to precarious heights on top.

And if you already have some of these items lying around – like, say, you had banh mi sandwiches a few day before – it comes together in the time it takes you to fry the croutons.

Boom. Lunch is served.

Pot Pie Empanadas with Cheddar Crust

Food Blog March 2014-3536Unless you are feeding a large family, or your small family is a bunch of sauce junkies, chances are if you make something like the velouté I shared last week, you are going to have some leftovers. Mine worked out to just under a cup of sauce (you will probably have a touch more – I oversauced my chicken a bit because I was taking photos of the stream of velvet I was pouring), which was clearly too much to trash but, it seemed, not enough to do much with. True, I could have just warmed it up again and scarfed another cutlet, but that didn’t seem very original. Additionally, this sort of flour-thickened sauce doesn’t always reheat particularly well – think about the resolute globs of leftover Thanksgiving gravy. It was going to need some help.
Food Blog March 2014-3537Food Blog March 2014-3543When I thought velouté, I thought pot-pie. However, a mere cup of sauce didn’t seem like enough. Smaller quantities of sauce would require smaller packages. I’ve been tossing around the idea of hand-pies for a while (see what I did there? Yeah.), and suddenly it became clear that this final bit of sauce would become the base for the filling of pot pie empanadas, spiced up with chunks of cheddar cheese in the crust.
Food Blog March 2014-3513Food Blog March 2014-3515Yes. This was happening.

I think every culture has a snack food created by enclosing a savory little morsel in a puff of dough. Samosas, gyoza or pot-stickers, pierogies, Cornish pasties, think about it. For Spain, and for Central and South American cuisines, empanadas are that snack. A tumble of meat, cheese, and spices (with the occasional vegetable – a few summers ago I had a spectacular one filled with cheese and fresh spinach) wrapped up in a lovely soft dough that is sometimes baked but more often lovingly tipped into the deep fryer: it’s quite possibly my dream food.
Food Blog March 2014-3524Food Blog March 2014-3526Food Blog March 2014-3528And here I was about to Americanize it beyond belief. The leftovers of my grad school training screamed things at me about colonization and cultural appropriation, but I swatted them down. It’s improving the classic by acknowledging and incorporating a new angle. Yeah.

And it was so worth it.

The dough here is baked, not fried. I don’t have a deep fryer, and to be honest, crammed with cheddar as it was, the crust did not provide the most airtight of seals. I would have been nervous about dropping these into hot oil.
Food Blog March 2014-3519Food Blog March 2014-3522
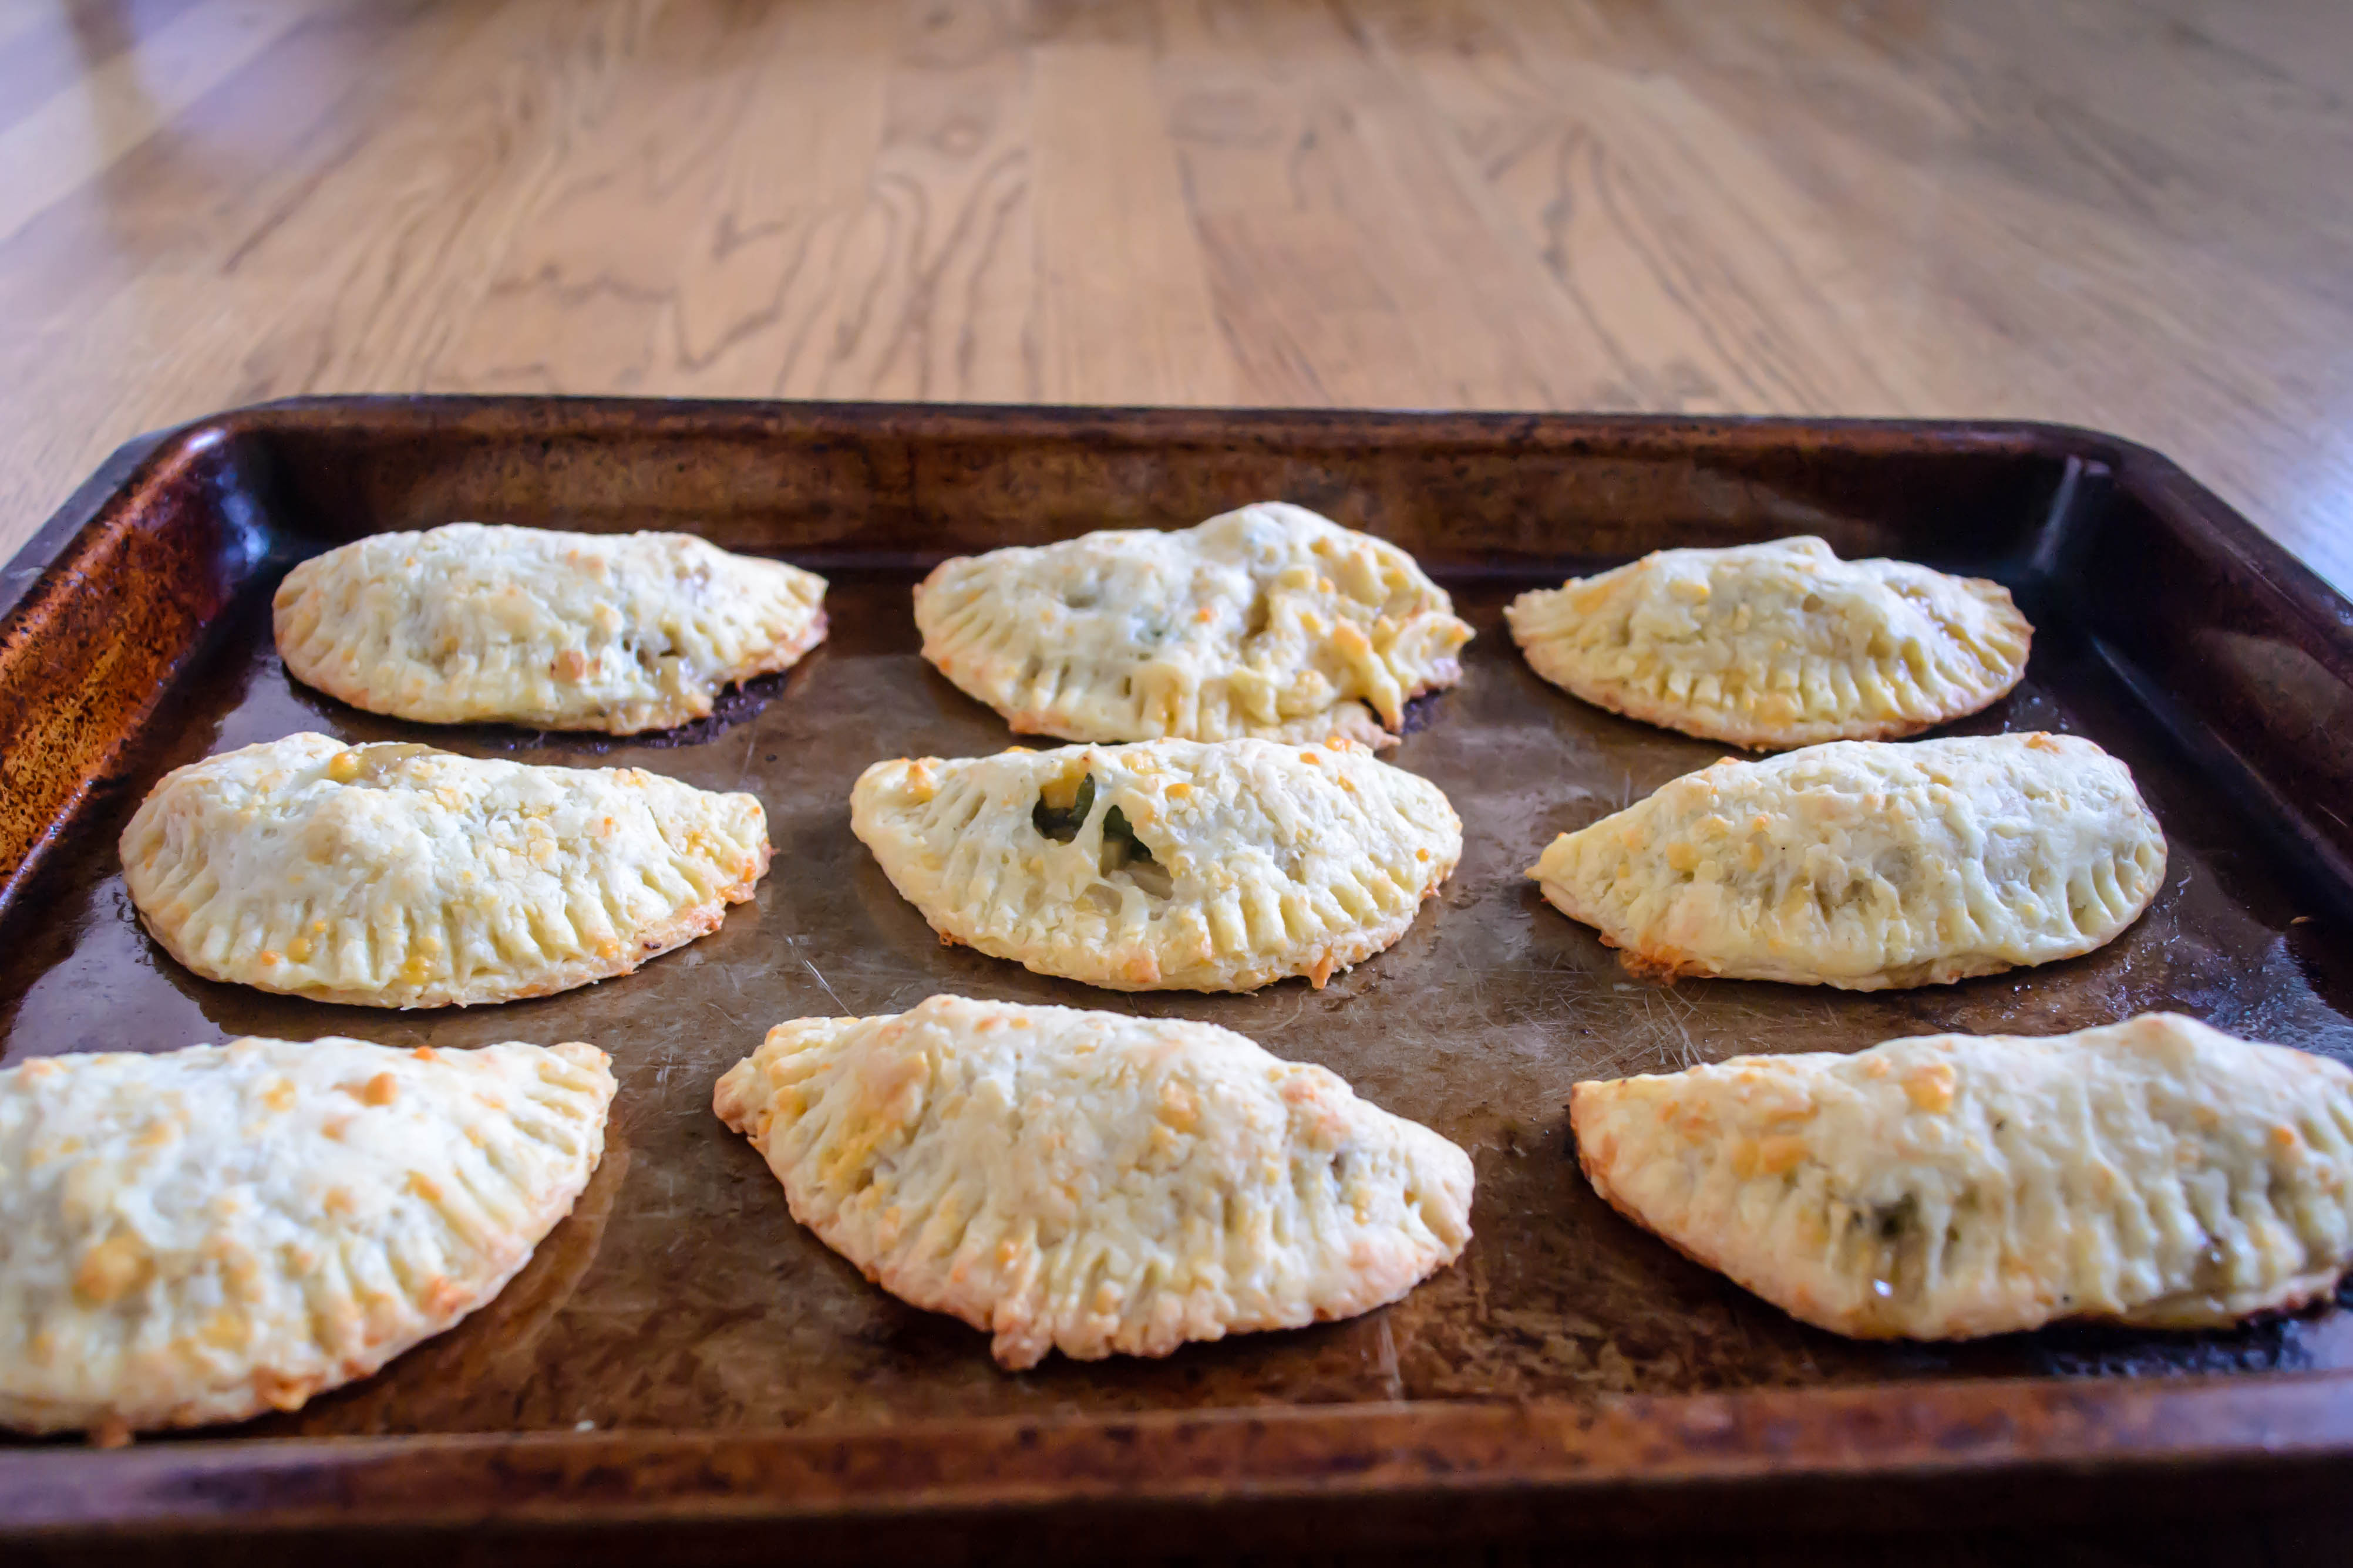
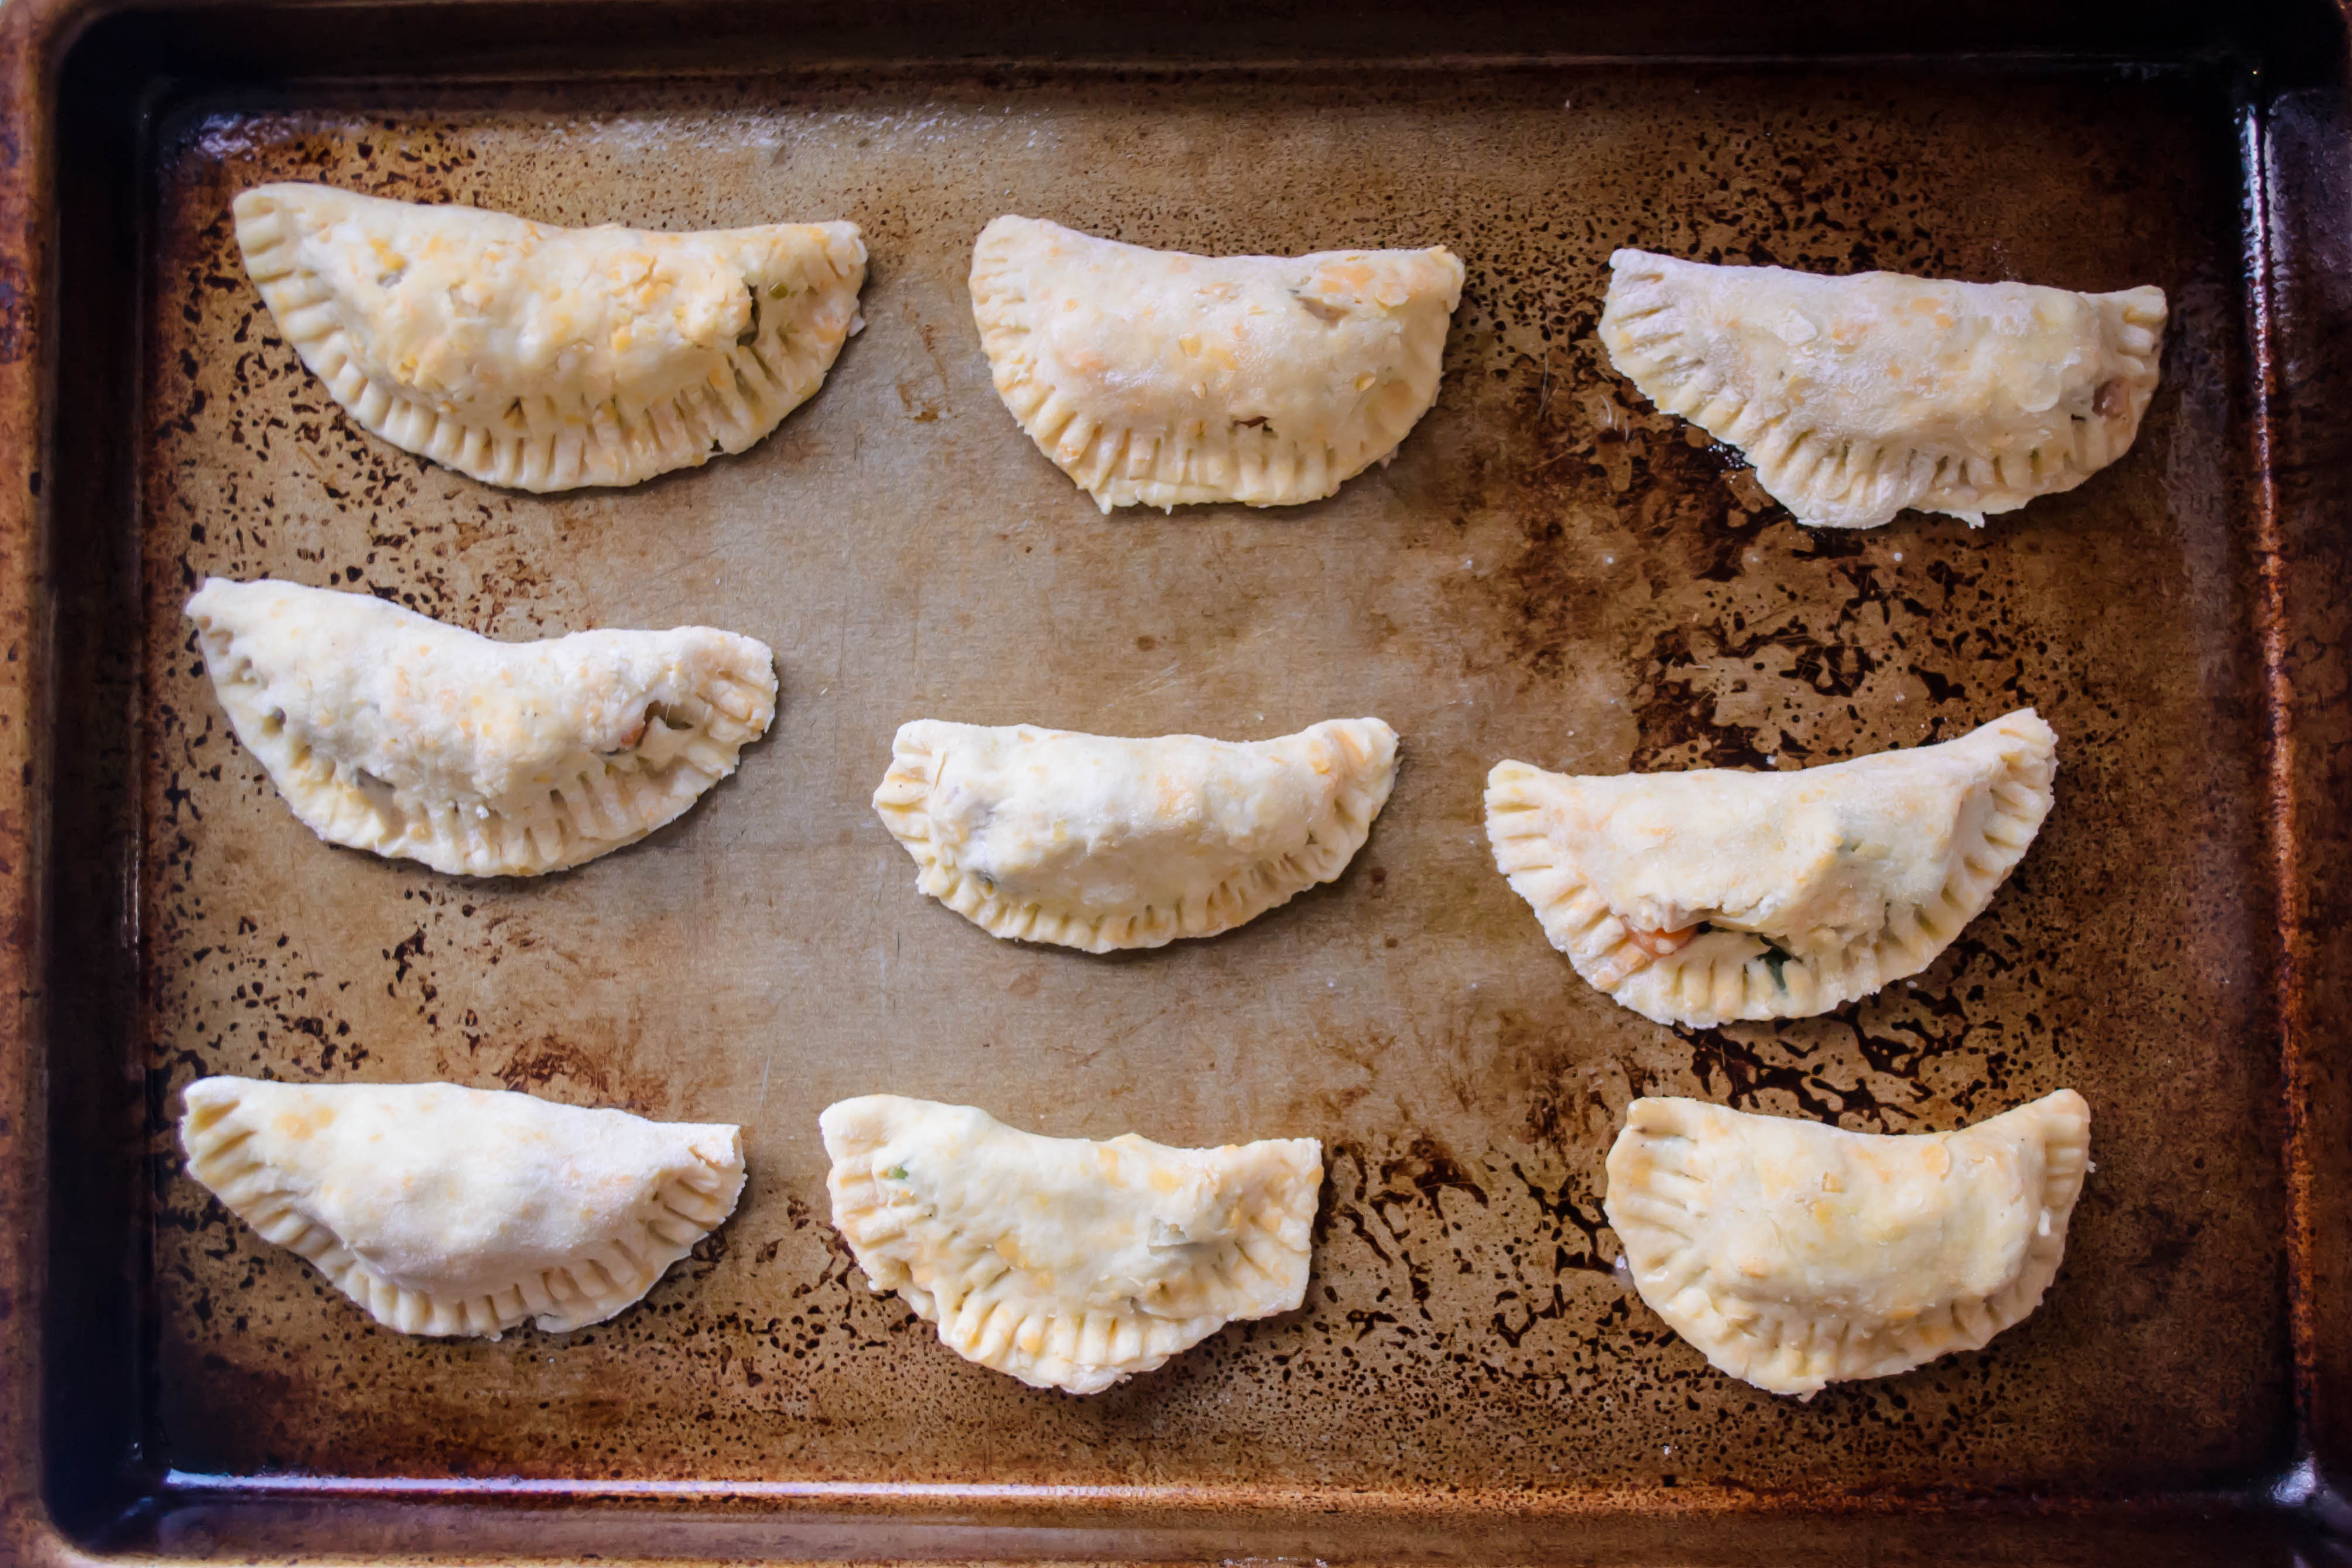
There’s nothing to be nervous about when it comes to the taste, though. You can stuff these with whatever you’d like in a pot pie, meats or vegetables. I opted for potatoes, carrots, a few mushrooms, green onions, a breath of garlic, and some green beans that had been in my fridge for a touch longer than they should have. A bit of shredded up chicken breast completed the pot. These get cooked in the leftover velouté with a splash of white wine (and a bit of water, if you feel there isn’t enough liquid) until they are tender, then, once they are cool, jammed a mere tablespoon at a time into circles of sticky but pliable dough. A quick fold, a squeeze, and a crimp with the tines of a fork, and they are ready to bake.
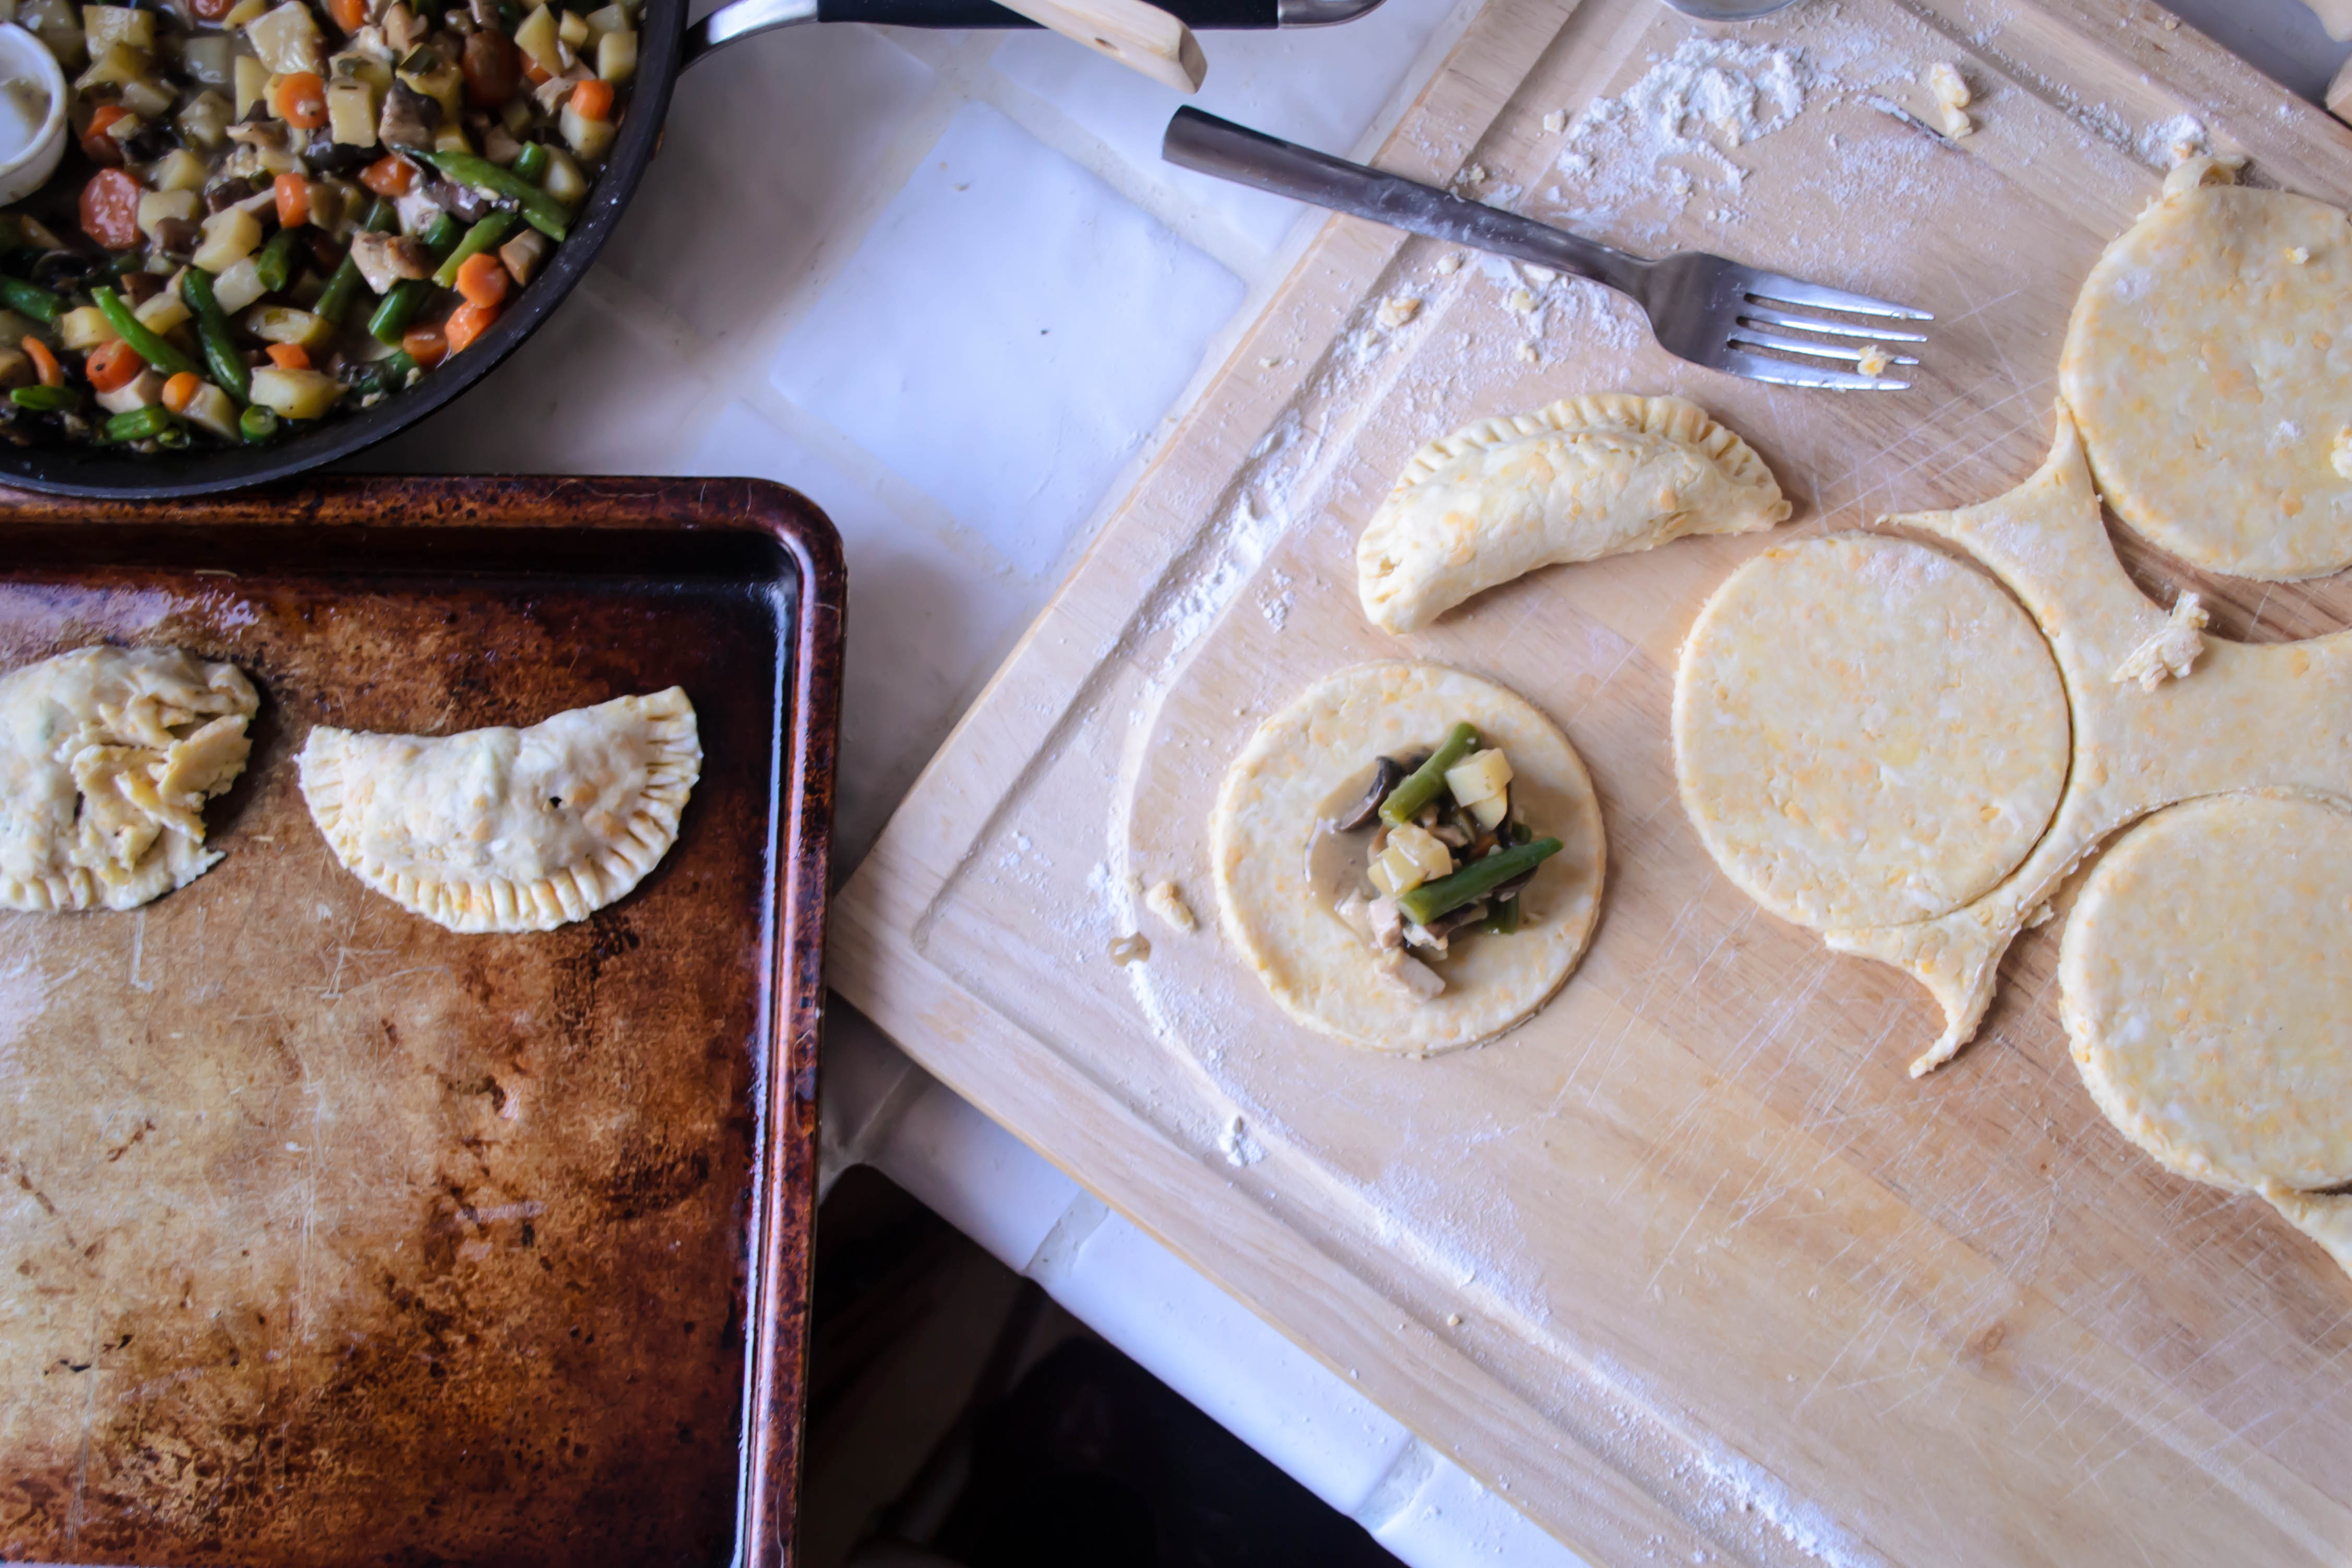
Food Blog March 2014-3529Food Blog March 2014-3532I had designs on serving these alongside a salad for a balanced meal, but we never made it to the salad. We just ate these, burning our fingers and our tongues as we picked up one and another and another. These are pot pies for crust lovers. The dough becomes rich and crisp and flaky, and the cheddar cheese is, I have to admit, a bit of a stroke of genius. It’s a perfect little package, and writing about it now, I desperately want another.

Sometimes leftovers are better than the original. This, friends, is one of those times.

Food Blog March 2014-3534Cheddar dough
Makes enough for 18-20 empanadas, if re-rolled once or twice
2 ¼ cups all-purpose flour
½ teaspoon salt (this doesn’t seem like much, but the cheese is salty and the filling will be seasoned)
8 tablespoons very cold butter (1 stick), cut into cubes
½ cup extra sharp cheddar cheese, cut into cubes
1 egg
⅓ cup ice water
1 tablespoon vinegar

  • Dump the flour and salt into a food processor and pulse once or twice to mix them.
  • Add the cubes of butter and cheese and pulse 4 times for 3 seconds each. This seems fussily precise, but it worked very well.
  • In a small bowl, beat the egg lightly with the water and vinegar. Add to the food processor and pulse once or twice until the mixture comes together in large clumps. You’ll know it’s ready when it stodgily mashes against the side of the processor bowl, reluctant to whiz in circles anymore.
  • Turn this mixture out onto a large square of plastic wrap. Using the plastic wrap to help you, form it into a disc 5 or 6 inches in diameter, then wrap up and refrigerate for at least 60 minutes. This will allow the flour granules to absorb some of the liquid and fat, which makes for easier rolling, and the butter (and cheese) to firm up again, which makes for better texture.
  • While the dough chills, make the filling.

Pot pie filling
These quantities may not seem like enough, but remember, you are using only minute quantities of filling for each empanada. Overfilling dumplings is somewhere in the top ten of my frequent cooking mistakes, so trust me. You will have plenty.
2 tablespoons butter
1-2 cloves garlic, finely minced
2 green onions, thinly sliced in little moons
3-4 mushrooms, diced
2 small carrots (or one large), diced
1 small Yukon gold potato, diced
6 green beans, stems removed, sliced into ½ inch pieces
½ cup cooked shredded chicken
¼ cup white wine
1 cup velouté
Salt and pepper, and herbs of your choosing, to taste

  • In a saucepan, melt the butter over medium heat, then add the garlic, onions, and mushrooms. Cook, stirring occasionally, until the mushrooms begin to brown, 5-8 minutes.
  • Add the potatoes and carrots, stir to combine.
  • Add the wine and velouté. Season with salt and pepper, if needed, and any herbs you feel inclined to add. Simon and Garfunkel’s usual suspects would certainly be welcome.
  • Cook over a healthy simmer until the carrots, which will likely take the longest, are almost tender. If the pan looks dry, add a little water or chicken broth. Depending on how small you have cut the vegetables, this could take anywhere from 10-20 minutes. Mine took about 15.
  • When the carrots are almost tender, add the green beans and simmer until they are just losing their raw crunch.
  • Kill the heat and add the shredded chicken, then let the whole mess cool to room temperature.

To assemble and bake:

  • Preheat the oven to 425F and spray two baking sheets with non-stick spray or line them with parchment paper.
  • Remove the dough from the refrigerator and unwrap it on a floured board. Using a rolling pin or a straight-sided wine bottle (it totally works!), roll it out into a rectangle or oval about ¼ inch thick. With the floured lip of a glass, a jar mouth, or a biscuit cutter, cut out into 4-inch rounds. When you cut, to avoid extra stickiness or tearing the dough, press straight down without twisting all the way through the dough. Once you have cut all the way through the dough, then you can twist the cutter a bit to loosen the round from the board.
  • Once you have made all the circles you can with the dough, gather up the scraps and roll them out again. One or two re-rollings should produce 18-20 dough circles.
  • Add about 1 tablespoon of the cooled filling to each round of dough. You will be tempted to add more. Don’t do it! A solid 1 tablespoon is about all that can fit without making a tremendous mess.
  • As you place each tablespoon of filling in the middle of the dough round, fold it in half and press the edges together with your forefinger and thumb. To seal each little half-moon package, set it down on the floured board again and press down on the edges all the way around with the back of the tines of a fork. This really crimps it closed, but it also looks pretty, which I’m a fan of.
  • Settle each empanada on your prepared baking sheet. They aren’t going to spread, so they don’t need too much room in between them, but you don’t want them touching each other. Each needs to get the full oven experience without its neighbors interfering.
  • Bake in your preheated 425F oven for about 20 minutes, until the crust is golden and crisp to the touch, and any filling that has had the misfortune of leaking out is bubbling assertively.
  • You will probably need to let these cool for 5-10 minutes before eating. Just enough time to, if you’re feeling virtuous, toss together a quick salad. Or, you know, not.

Smoky Summer Spice Rub

Let’s talk about your spice cabinet.  No?  Okay, then let’s talk about mine.  I really started cooking when I moved to Oregon, and that first Christmas, coming back home to Northern California after three months of what seemed like non-stop rain, the gift I wanted more than anything else was a spice rack.  This, I was sure, would be the essential catalyst in my longed-for transition from college-graduate-experimental-cook to full-scale domestic goddess.  Mom and I went to kitchen store after kitchen store, looking for the right one.  It needed to hang, so it couldn’t be too big.  It had to have a fair number of bottles, but I wanted them empty, not filled, because I wanted to choose my own spices.  We finally found it in Cost Plus World Market, which was convenient, because it was immediately adjacent to their spice selection.  We picked out ten or twelve of the usual suspects, and then Mom said “okay, now turn around while I put it in the cart, and forget what you saw here,” which has, since the days of Santa Claus, always been our funny way of buying presents for each other in full view of the giftee.

Food Blog June 2013-1526This little spice rack worked fine, and hung proudly from a nail above my stove, until my spice requirements exceeded the twelve little bottles the shelves would hold.  Suddenly whole AND ground cumin were necessary.  Tumeric and cayenne and cream of tartar and even the dreaded pre-mixed pumpkin pie spice found their way into my kitchen and demanded homes.

So I’ve ended up with something I am going to guess looks familiar to many of you:

Food Blog June 2013-1529This is not a good system.  There, I said it.  It’s just not!  It holds the whole collection nicely, but it’s dark back there, and things fall over, and sometimes I don’t feel like digging around to see if I have any poultry seasoning, and then it’s Thanksgiving and I’m in a dark, cranky place and I think “screw this noise!” and buy a new bottle.  So then I have four.   What I really need, what I covet and dream about, is something like Aarti’s magnetic spice wall.

In the absence of space or motivation to build something that fancy, though, I stick with my system.  Every once in a while, I summon the courage and the patience to investigate the dark reaches of the cabinet, to get a sense of what’s in there, what needs replacing, and what deserves a space in my weekly menu.  The early days of summer are a good time to do this, because they offer a prime opportunity to make a smoky, spicy, aromatic rub for grilling.

Food Blog June 2013-1532Food Blog June 2013-1534I started with a recipe from Fine Cooking originally designed for beer can chicken, and then I tweaked and adjusted and adapted for what was, as you might have guessed, in my spice collection.  It’s got cumin, it’s got crushed red pepper, it’s loaded with garlic powder and mustard seeds and sea salt and just a hint of ginger for an intriguing and different kind of heat.

Food Blog June 2013-1535This is a tasty rub for grilled meat, obviously (we like it for chicken, patted on before a liberal slather of equal parts Dijon mustard and apricot jam), but I think it would also be great on slabs of pressed tofu, or buttered corn, or potato wedges (you make your steak fries on the grill in the summer, right?).  And if you were really feeling adventurous, you might even add some to a light, lemony vinaigrette to carry the flavors through your side salad.

Food Blog June 2013-1540This recipe makes enough for several applications, which means you’ll have enough to last part of the summer.  It keeps well in a sealed zip top bag.  And in between grilling, you can just store it… in… your spice cabinet.  Oh.  Well, just jam it in at the front, for easy access.  Maybe it will help you forget the mess nightmare treasure trove behind it.  Plus, it’s got so many tasty flavors in it, you surely won’t need anything else for the rest of the summer, right?  Right.

Food Blog June 2013-1542Happy grilling!


Smoky Spice Rub
Adapted from Fine Cooking Magazine
Makes about ¼ cup
2 tsp cumin seeds
1 tsp mustard seeds
1 tsp coriander seeds
1 TB coarse sea salt
2 tsp garlic powder
1 tsp crushed red pepper flakes
1 tsp freshly ground black pepper
½ tsp ground ginger


  • If you are feeling especially ambitious, toast your cumin, coriander, and mustard seeds in a small, dry pan over medium-low heat for 5 minutes, or until the cumin starts to pop a bit and look just a touch oily.  Once that has happened, turn the heat off and let cool before moving on.
  • If you are feeling lazy less ambitious, skip the toasting step and put the cumin, coriander, and mustard into a spice grinder (or your husband’s coffee grinder.  If there’s a little residual ground coffee in there, all the better!  Extra shot of flavor you didn’t have to work for!) and pulse until the seeds become a fine powder.
  • Mix together ground seeds and all remaining ingredients in a small bowl or, if you are lazy especially efficient, the zip-top bag you’ll be using to store your mix in.
  • Ta-da!  Apply liberally, patting and massaging for good coverage and adhesion, to whatever you’ll be grilling for a smoky, slightly spicy kick.

Goat Cheese and Bacon Biscuits

I’m not one of those people who is crazy for bacon in everything.  The idea of pairing it with chocolate still weirds me out a little, and I’ve never tried it in brownies or ice cream.  That being said, bacon is probably the top reason I would have trouble being a vegetarian.  Crisp, sandwiched with some dripping heirloom tomato slices and lettuce on toasted sourdough, and I’m dreamy happy.  Salty fatty fried chunks studding my bowl of baked beans, and my evening is made.
Food Blog April 2013-0990
What I am generally crazy for is breakfast.  But not at breakfast time.  I can’t handle a big savory meal early in the morning.  A fried egg sandwich, okay (and with a little sriracha in the mayonnaise?  Be still my heart!).  A pancake or three, maybe on occasion.  The big, multi-course breakfast is, for me, wasted on the morning.  I’m a breakfast-for-dinner kind of girl.
This week, in need of comfort as spring break drew to a close and allergy season burst wide open, we decided breakfast sandwiches were just what we needed.  Eggs, bacon, fluffy buttery biscuit, and why not, a little goat cheese?!  But layering these components together would not suffice.  Thick slices of bacon smashed against a cloud of scrambled egg and crumbles of goat cheese seemed like a mess waiting to happen.  I’ve incorporated cheese into biscuits before with great success, why not do the same with the bacon?
Food Blog April 2013-1002
The result: goat cheese bacon biscuits.  A simple revelation, but let me tell you, a spectacular base for a scrambled egg sandwich.  Crisp squares of bacon, cold cubes of butter, crumbles of chevre, and a healthy glug of buttermilk.
These are pretty cinchy to make, though thanks to the addition of the goat cheese your biscuit dough will be a little stickier than usual.  Try not to add too much flour – you don’t want them to get dense.  They bake up into lovely little puffs, and the bacon stays crisp against the soft dough.  The goat cheese wasn’t as strong a flavor as we were expecting, though after the biscuits cooled a bit we did pick up a pleasant tang from the larger crumbles.  Loaded up with a simple layer of scrambled egg, and you have a perfect, three-bite sandwich with all the right trimmings.  And because it’s only three little bites, you can have two or three without any guilt to speak of.  Or four… or…
 Food Blog April 2013-1013
The funny, blackened stakes lying in a pile in the background of this photo are roasted rainbow carrots.  They were incredible.  And don’t just take my word for it – I knew they were the real deal when N. carefully sampled one, turned to me, and said “wow.”  If you’ve been reading this blog for any length of time you will know that N. is not intentionally grudging when it comes to food praise; he’s just not particularly effusive about it.  A “wow” is like fireworks.
Breakfast-for-dinner slam dunk, then.  What’s your favorite?
 Food Blog April 2013-0993
Goat Cheese Bacon Biscuit Sandwiches
2 cups flour (All-Purpose is fine)
2 tsp sugar
1 tsp salt
2 TB baking powder
4 slices bacon, diced and fried until crisp, drained and cooled (do this a bit ahead of time so the bacon has time to cool off – if you toss it into the mixture hot, you’ll heat up the butter and your biscuits will be less fluffy)
6 TB cold butter, cut into chunks (chunking it isn’t absolutely necessary, but it does make it easier and quicker to incorporate)
½ cup crumbled goat cheese
6 oz. buttermilk
 Food Blog April 2013-0995
  • Preheat your oven to 400F and line a baking tray with parchment paper.
  • In a medium bowl, combine the flour, baking powder, sugar, and salt.  Whisk in the cooled, crisp bacon.
  • Add the butter and incorporate using a pastry blender or your hands.  When the chunks are about the size of lima beans, tumble in the goat cheese and blend it in until there are no more large pieces.  The pebbles of butter should be about the size of peas when you are done.
  • Pour in the buttermilk and fold it into the dry mixture.  I find using a fork works best for this – the tines pick up and jostle around the flour mixture better than a spatula or wooden spoon.  Don’t overmix, but be sure the buttermilk is well incorporated.
  • When your mixture is evenly damp, abandon the fork.  You can turn the whole mess out onto a floured board, or you can just reach in with flour dusted hands and knead the dough a few times in the bowl until it comes together.
Food Blog April 2013-1000
  • Pat the dough into a plump something-like-a-rectangle on a floured board.  The thickness and therefore the size of the rectangle is really to you, but mine was probably just under an inch thick.  Using a biscuit cutter or the floured top of a glass, punch out biscuit rounds by pushing straight down all the way through the dough.  Don’t twist your cutter as you go down; you’ll disrupt the craggy layers in the dough and the biscuit won’t rise as high or as evenly.
Food Blog April 2013-1001
  • When you’ve punched out as many rounds as the rectangle of dough will allow, place them on your parchment lined baking sheet at least an inch apart, gather the dough scraps, knead them together a bit, and pat them back into a new rectangle.  Continue punching out biscuits and reshaping the scraps until you run out of dough.  Given the small size of cutter I chose, I managed 16 sweet little biscuits.  You will have more or less depending on size and thickness.
Food Blog April 2013-1007
  • For a small biscuit (2 inch diameter), bake at 400F for 12-14 minutes, or until the layers have puffed and the top is golden.  Larger or extremely thick biscuits will take longer; try 15 minutes to start.
Food Blog April 2013-1011
If you just want to eat them as is – and I’d sympathize completely if you did – you’re all set to go.  Dig in.  If, however, you want them as sandwiches, split them down the middle of the puffy, buttery layers and insert a fold of softly scrambled egg.
Food Blog April 2013-1003
Food Blog April 2013-1004
These are best the day they are cooked, so I’d advise only baking as many as you and your dinner partner(s) are going to eat.  The remaining biscuits can be frozen, still unbaked, and enjoyed another day.  To freeze them, set them on a piece of wax paper or parchment in a single layer on a plate or baking tray.  Wait until they are frozen, then relocate them to a zip-top freezer bag.  They don’t even need to be defrosted, just pop them into a preheated oven for a few extra minutes (maybe 15-18 for a small biscuit) and dinner – or breakfast – is served!
Food Blog April 2013-1010