Goat Cheese and Bacon Biscuits

I’m not one of those people who is crazy for bacon in everything.  The idea of pairing it with chocolate still weirds me out a little, and I’ve never tried it in brownies or ice cream.  That being said, bacon is probably the top reason I would have trouble being a vegetarian.  Crisp, sandwiched with some dripping heirloom tomato slices and lettuce on toasted sourdough, and I’m dreamy happy.  Salty fatty fried chunks studding my bowl of baked beans, and my evening is made.
Food Blog April 2013-0990
What I am generally crazy for is breakfast.  But not at breakfast time.  I can’t handle a big savory meal early in the morning.  A fried egg sandwich, okay (and with a little sriracha in the mayonnaise?  Be still my heart!).  A pancake or three, maybe on occasion.  The big, multi-course breakfast is, for me, wasted on the morning.  I’m a breakfast-for-dinner kind of girl.
This week, in need of comfort as spring break drew to a close and allergy season burst wide open, we decided breakfast sandwiches were just what we needed.  Eggs, bacon, fluffy buttery biscuit, and why not, a little goat cheese?!  But layering these components together would not suffice.  Thick slices of bacon smashed against a cloud of scrambled egg and crumbles of goat cheese seemed like a mess waiting to happen.  I’ve incorporated cheese into biscuits before with great success, why not do the same with the bacon?
Food Blog April 2013-1002
The result: goat cheese bacon biscuits.  A simple revelation, but let me tell you, a spectacular base for a scrambled egg sandwich.  Crisp squares of bacon, cold cubes of butter, crumbles of chevre, and a healthy glug of buttermilk.
These are pretty cinchy to make, though thanks to the addition of the goat cheese your biscuit dough will be a little stickier than usual.  Try not to add too much flour – you don’t want them to get dense.  They bake up into lovely little puffs, and the bacon stays crisp against the soft dough.  The goat cheese wasn’t as strong a flavor as we were expecting, though after the biscuits cooled a bit we did pick up a pleasant tang from the larger crumbles.  Loaded up with a simple layer of scrambled egg, and you have a perfect, three-bite sandwich with all the right trimmings.  And because it’s only three little bites, you can have two or three without any guilt to speak of.  Or four… or…
 Food Blog April 2013-1013
The funny, blackened stakes lying in a pile in the background of this photo are roasted rainbow carrots.  They were incredible.  And don’t just take my word for it – I knew they were the real deal when N. carefully sampled one, turned to me, and said “wow.”  If you’ve been reading this blog for any length of time you will know that N. is not intentionally grudging when it comes to food praise; he’s just not particularly effusive about it.  A “wow” is like fireworks.
Breakfast-for-dinner slam dunk, then.  What’s your favorite?
 Food Blog April 2013-0993
Goat Cheese Bacon Biscuit Sandwiches
2 cups flour (All-Purpose is fine)
2 tsp sugar
1 tsp salt
2 TB baking powder
4 slices bacon, diced and fried until crisp, drained and cooled (do this a bit ahead of time so the bacon has time to cool off – if you toss it into the mixture hot, you’ll heat up the butter and your biscuits will be less fluffy)
6 TB cold butter, cut into chunks (chunking it isn’t absolutely necessary, but it does make it easier and quicker to incorporate)
½ cup crumbled goat cheese
6 oz. buttermilk
 Food Blog April 2013-0995
  • Preheat your oven to 400F and line a baking tray with parchment paper.
  • In a medium bowl, combine the flour, baking powder, sugar, and salt.  Whisk in the cooled, crisp bacon.
  • Add the butter and incorporate using a pastry blender or your hands.  When the chunks are about the size of lima beans, tumble in the goat cheese and blend it in until there are no more large pieces.  The pebbles of butter should be about the size of peas when you are done.
  • Pour in the buttermilk and fold it into the dry mixture.  I find using a fork works best for this – the tines pick up and jostle around the flour mixture better than a spatula or wooden spoon.  Don’t overmix, but be sure the buttermilk is well incorporated.
  • When your mixture is evenly damp, abandon the fork.  You can turn the whole mess out onto a floured board, or you can just reach in with flour dusted hands and knead the dough a few times in the bowl until it comes together.
Food Blog April 2013-1000
  • Pat the dough into a plump something-like-a-rectangle on a floured board.  The thickness and therefore the size of the rectangle is really to you, but mine was probably just under an inch thick.  Using a biscuit cutter or the floured top of a glass, punch out biscuit rounds by pushing straight down all the way through the dough.  Don’t twist your cutter as you go down; you’ll disrupt the craggy layers in the dough and the biscuit won’t rise as high or as evenly.
Food Blog April 2013-1001
  • When you’ve punched out as many rounds as the rectangle of dough will allow, place them on your parchment lined baking sheet at least an inch apart, gather the dough scraps, knead them together a bit, and pat them back into a new rectangle.  Continue punching out biscuits and reshaping the scraps until you run out of dough.  Given the small size of cutter I chose, I managed 16 sweet little biscuits.  You will have more or less depending on size and thickness.
Food Blog April 2013-1007
  • For a small biscuit (2 inch diameter), bake at 400F for 12-14 minutes, or until the layers have puffed and the top is golden.  Larger or extremely thick biscuits will take longer; try 15 minutes to start.
Food Blog April 2013-1011
If you just want to eat them as is – and I’d sympathize completely if you did – you’re all set to go.  Dig in.  If, however, you want them as sandwiches, split them down the middle of the puffy, buttery layers and insert a fold of softly scrambled egg.
Food Blog April 2013-1003
Food Blog April 2013-1004
These are best the day they are cooked, so I’d advise only baking as many as you and your dinner partner(s) are going to eat.  The remaining biscuits can be frozen, still unbaked, and enjoyed another day.  To freeze them, set them on a piece of wax paper or parchment in a single layer on a plate or baking tray.  Wait until they are frozen, then relocate them to a zip-top freezer bag.  They don’t even need to be defrosted, just pop them into a preheated oven for a few extra minutes (maybe 15-18 for a small biscuit) and dinner – or breakfast – is served!
Food Blog April 2013-1010

Finish line

The problem with cramming for final exams – as many of my students were doing only a few weeks ago – is that you end up trying to process too much information, and just as quickly as you learn new things, the old things you thought you knew start sliding away. That’s the glory and the power of writing. Once it’s on the page, it’s solid. No matter how many holiday dinners you eat (I’m onto my third or fourth at this point), those words will still tell you exactly what you did and (sometimes) how you felt about it.

I feel like I’m cramming for my final. Last week, before the holiday, before the family time, before the outpouring of memories and laughter and swallowed tears of all kinds and barking and yelling and joy, I made three Bittmans in a desperate bid to stay on top of the project.

42. Brussels Sprout Sliders: Trim and halve large brussels sprouts, toss with olive oil and roast at 400 degrees until tender but not mushy. Using the brussels sprout halves as you would hamburger buns, sandwich them around a piece of crispy bacon or ham, maybe a little caramelized onion, and a dab of whole grain mustard. Keep everything in place with toothpicks.”

I always intended to make this one for a Halloween party. It seemed fitting: for some, brussels sprouts are a frightening, disdained vegetable. But this new perspective on them makes them fun and perhaps even appetizing to those disbelievers who see them only as a bitter waterlogged grenade of disappointment. But I never did. So they became an appetizer for two:

6 brussels sprouts, trimmed and halved

2 strips bacon, cut into eight even pieces (you’ll use six for the brussels. Eat the other two, or share with a tall, handsome somebody who shows up in the kitchen when the smell becomes too enticing to ignore)

dab (maybe 1 tsp total?) whole grain mustard

Preheat the oven to 400F.

Line a small baking dish (I used a 9” cake pan) with aluminum foil and drizzle the foil with olive oil. Brush or rub the olive oil into an even layer so every millimeter of foil is covered.

Set the sprouts, cut side down, on the oiled foil, spacing them evenly so none are touching. This will ensure even roasting rather than steaming.

Food%2520Blog%25202011-2013-0204

Roast for 15 minutes, until the cut edges are browned and just crisp. Using tongs, flip over each sprout so they teeter on their curved sides. Roast for another 15 minutes.

While sprouts are roasting, cook the bacon. Mine was already cooked – saved from another porky occasion – so during the last five minutes of sprout roasting I added the bacon pieces to the pan to heat them up a little.

When the sprouts are browned and lightly tender, set them aside until they are cool enough to handle. As soon as you can bear to touch them, add a tiny spread of mustard across one cut edge, seat the bacon atop it, and place another sprout half on top to complete the sandwich. Drive a toothpick through the whole thing and serve as an hors d’oeuvre.

Food%2520Blog%25202011-2013-0205

We gobbled these down like we hadn’t eaten in weeks. They were delightful and I highly recommend them as a party item: crisp bacon, zesty mustard, and the nutty crunchy slight bitterness of roasted brussels sprouts, all collected together in one perfect bite. Perhaps a New Year’s Eve treat to help the hours pass.

Food%2520Blog%25202011-2013-0210


Soup and bread seemed like a good meal to follow our sprouts.

82. Cornmeal Flatbread with Onion and Sage: Mix 1 cup cornmeal with 1 teaspoon salt; slowly whisk in 1½ cups water. Cover and let sit for an hour (or up to 12 hours in the refrigerator). Put ¼ cup olive oil in a 12-inch ovenproof skillet along with a thinly sliced red onion; stir. Heat the skillet in a 400-degree oven for a few minutes, then stir and pour in the batter. Bake at 375 degrees until the flatbread is crisp at the edges and releases easily from the pan, about 45 minutes.”

I followed these directions fairly exactly, with the exception that I used only half an onion. The olive oil and onion went into the oven for five minutes at 400F, at which point the onion slices were sizzling and the oil was shimmering beautifully.

Bittman neglects to note where and when to add the sage, so I stirred a tablespoon of finely chopped fresh sage into the batter just before adding it to the skillet.

Food%2520Blog%25202011-2013-0203

This concoction baked for 45 minutes, until it was set, the onions were crisp-tender, and the whole thing loosened easily from the skillet and slid almost gracefully onto a serving tray.

Food%2520Blog%25202011-2013-0212

We cut large wedges and tasted. It was unlike any other bread I’ve come across – more like baked squares of polenta than anything else, which made sense when I stopped and thought about it. Were I renaming this dish, I think I would call it Polenta Pizza. It was well oiled and spongy in texture, squishing pleasingly between our teeth and driving us back for additional tastes. N. wasn’t sure he liked it at first, but then he went back for a second slice and then a third. When I ribbed him about this, he said he was still deciding what he really thought, and needed more samples to truly make up his mind.

Food%2520Blog%25202011-2013-0214

This odd little bread course could easily be dunked in saucers of warmed marinara sauce, or sprinkled with mozzarella or parmesan for a pleasing salty bite. Though the onions and sage were good, you could probably saute almost anything in that skillet before adding the batter: sausage, peppers, mushrooms… anything you’d put on a pizza.

A decadent appetizer and a well-oiled pizza/bread need a sober, sensible kind of soup to balance them out.

19. Saute chopped onions, garlic, celery and carrots in olive oil, then add chopped tomatoes (boxed are fine) with their juice, lentils and stock or water to cover. When everything is soft, add a squeeze of lemon juice or a splash of red wine vinegar. Garnish with parsley.”

Since we were leaving town the next day, I didn’t want huge quantities. (This still made enough for four, but I froze the leftovers so nothing was lost)

½ red onion (left from the flatbread, so convenient), diced

4-6 small cloves garlic, minced

1/3 cup each celery and carrots, sliced

¾ cup lentils

13.5 oz can petite diced tomatoes

2½ cups chicken broth (or vegetable broth, or water)

1 TB lemon juice

2 TB fresh, finely chopped parsley

salt and pepper to taste

I heated 2 TB olive oil over medium heat, then tossed in the onions to sweat for a minute or two before adding the garlic and the other vegetables. When the onions were translucent and tender, I added the tomatoes, lentils, and broth and turned the heat up to medium high until the whole pot came to a boil.

Once boiling, I gave it a healthy stir and then turned the heat down so the soup would just simmer, letting the lentils soften gently and the vegetables tenderize.

Simmer for at least 35 minutes, then taste the lentils to see if they are tender enough for your taste. We like them soft but not mushy, with minimal resistance but still able to hold their shape.

Just before serving, squeeze in the lemon juice, stir gently, and dip into serving bowls. Scatter the surface with a grassy sprinkle of parsley.

Food%2520Blog%25202011-2013-0215

We liked this, though it wasn’t the best lentil soup I’ve ever had. The flavors were enticing and the lemon juice made it a bright, rather than heavy, soup. The problem with it was that I like my lentil soup more like a stew or a chili. The brightness of the lemon made the shower of shredded pepperjack cheese I was considering adding seem extraneous and out of place, and I tend to get crotchety when denied cheese. But alongside the flatbread and the richness of the brussels sprouts, it was hearty but didn’t weigh us down.

2012 is fading like the last sheen of daylight across the hills in winter. 2013 charges toward us, all mystery and sharp promise. I thought about cheating and saying I was done; these three dishes are the final three, I made it, all boxes are checked, all questions answered, funtoosh, kaput (extra points if you can name my source!), but I just can’t. I’m too close. This final exam is too important. This resolution needs to be one I keep. I have two dishes left. I have two days, one of which will be spent driving from the Sierra Nevada foothills where N.’s parents live back to Los Angeles and my little house. I hope I’m going to make it. The finish line is in sight. Now I just have to stagger across it.

Fading light. And bourbon.

My home office – the room where grading, blogging, photo editing, and general work happens – has the most wonderful light in our house.  A huge sliding glass door lets sunlight pour in during the morning hours, and in the afternoon I get brightness mediated by the roof of the house.  Even when it’s overcast, there is still so much natural light that it makes for wonderful food shots.

But winter is a problem.  I’m discovering that if I make a dish for dinner, I’m not going to be able to photograph it from my office because it’s too dark by 5pm.  And wedded to this blog and this project as I am, there’s no way we’re having dinner at 4:30 in the afternoon just so I can get the best light in the house.  So I’m trying out new angles, and new placement, and new adjustments.  I’m learning more about artificial light: which arrangements I find glaring and which I find acceptable.  Bear with me, and look forward to the return of Daylight Savings Time!

“17. Sauté chopped onion in butter, then chunks of sweet potato and stock or water to cover. Simmer until the sweet potatoes can be pierced with a knife, then add chopped kale and cook until wilted.”

This was easy, and quick, and tasty.  I made a few additions to Bittman’s recommendations and think the soup really benefited from them.  I used:

4 TB butter Food blog 2011-0133

½ a medium onion (mine was yellow)

1 big sweet potato, peeled and cut into small chunks (the smaller the chunks, the faster they will cook, so make your decision based on how much time you have and what size is most pleasing to you)


Salt, pepper, ground nutmeg to taste

4 cups broth – vegetable or chicken, depending on your preference

6 oz. kale

1 tsp red wine vinegar

Heat the butter in a pot over medium heat.  When it has melted, add the onion and cook gently, stirring occasionally, until the onion is soft and translucent but not bronzed.

Add the sweet potatoes and seasoning, stir to combine for a minute or two, then add the broth.  The quantity of liquid you need will depend entirely upon the size of your sweet potato.  You may need more or less than the 4 cups listed here.

Let the soup simmer until the sweet potatoes are tender but not falling apart.  Mine took about 15 minutes.

Add the kale and stir to combine.  You will be bewildered by how quickly it collapses on itself, wilting from smoky green to a brighter, more vibrant hue as it is immersed in the liquid.  Cook just until it reaches the texture you like against your tongue – I let it simmer for about 5 minutes, because I like my kale to still put up some resistance and retain its bright color.

I tasted and thought this needed something.  Extra salt to heighten the flavor of the kale, certainly, but there was a kind of dullness about the whole concoction.  Remembering my soup lessons from Alton Brown, I sprinkled in just a hint of red wine vinegar, and the difference was amazing.  The whole thing was brighter, somehow, even though you couldn’t taste anything harsh or stringent.

We consumed this happily with freshly toasted, garlic-rubbed slices of pugliese.  It was good, but could have been stuffed with even more flavor: I’d consider adding garlic, ginger, maybe even rice or ramen noodles.

Food blog 2011-0137

“4. Onion jam with bacon and bourbon: Thinly slice red onions and cook in olive oil with chopped bacon until soft. Add a little bourbon and brown sugar to taste and cook until the jam thickens.”

Bourbon is new for me.  N. has been enjoying the occasional scotch for a few years now, but we recently acquired a bottle of Knob Creek and I’ve been appreciating the floral notes of it – so much less musty and boggy than its British cousin.

4 slices thick-cut bacon, halved lengthwise into long strips, then sliced into small rectangles

½ large red onion, thinly sliced

¼ cup bourbon

2 TB brown sugar

Freshly ground black pepper

1 small sprig rosemary

Food blog 2011-0144

I used about a tablespoon of olive oil to start the pan, but I don’t think you really need it.  Just toss in the bacon slices over medium heat and let them work for about 5 minutes.  You will get a shimmer of fat across the bottom of the pan that is more than enough to start the onions sizzling in.

Add the onions and cook over medium or medium-low for at least ten minutes, until the onions soften and the bacon is mostly cooked.  Stir with some frequency to ensure even cooking.

Off the heat (especially if you are using a gas stove) add the bourbon and the brown sugar.  Stir to combine, then return to medium heat and simmer slowly for about 20 minutes, to let the flavors mingle and the bourbon soak into the onions and bacon.

After a few minutes of cooking, I added pepper and rosemary for additional flavor components, and I think they were a good choice.  The rosemary’s woodsy flavor was a nice contrast to the fatty bacon and sweet onions.  Everything cooked down into a sticky, caramelized jam that I draped across some baked rounds of polenta.

Food blog 2011-0148

This was delicious, but misplaced.  The meaty, smoky bacon was intensified by the bourbon, and the brown sugar and onions had a nice note of molasses.  It didn’t belong on polenta.  It belonged, I think, on a freshly toasted piece of crostini, possibly smeared with a thick slice of brie.  The funkiness of the cheese could stand up nicely to the sweet smoky strength of this jam.

We paired our misguided polenta with green beans, lightly blanched and then seared in a hot pan and deglazed with a bit of red wine.  These, too, were delicious, but not the ideal pairing for the sweet saltiness of my jam.  Apples, maybe, or red grapes would make better pairings.  Regardless, we ate with joy and returned to the pan once or twice for a final sweet chunk of sticky, gooey jammy bacon to sweeten our palates, even though dessert was still to come.


“91. Pears in Red Wine: Simmer 2 cups red wine with ½ cup sugar, 2 cloves, a cinnamon stick and a few slices of ginger in a pot for a few minutes, then gently poach peeled and cored pears (use a spoon to hollow them from bottom), until soft. Cool or chill, and serve with a bit of the poaching liquid.”

This is supposed to be one of the most sophisticated desserts you can offer: not overly sweet, laden with mulled flavor, perfect for a gourmet adult party in celebration of autumn.  Pears, with their temperamental habits and signature grainy texture, are perhaps the same kind of acquired taste as wine or coffee or any of those other “adult” tastes.  As dessert for our onion-jam-crusted dinner, I decided to attempt these.

Food blog 2011-0140

I used 2 pears, but followed the rest of Bittman’s quantities exactly.

Food blog 2011-0142Well, one exception to note: I thought about getting fancy and adding things like citrus peel or rosemary (apparently I’m hooked on the stuff these days).  But in the end, I just splashed in a bit of bourbon to link the flavor profile back to our dinner: red wine from the beans, bourbon from the jam, and this dessert would fit right in.

After the first simmer, in which I stirred gently to let the sugar dissolve and the spices mull gently into the wine, I prepared the pears.

The issue with pears is that inside their tender skins they are slippery little beasts.  You can’t grasp them too firmly or they sigh into bruises.  You can’t hold them too delicately or they slide out of your hands and threaten to slip from the edge of the kitchen counter.

I dove into my attempt to core the pears only after peeling them.  This, and the attempt to do so with a spoon, may have been a mistake.  The spoon tore through the tender flesh of the pear but was too wide to remove only the core.  Further, I wasn’t sure how much core I was supposed to be removing, so I ended up with two pale, naked, slightly mutilated pears, which I slid into their (hopefully) healing bath of alcohol.

I let them simmer, turning them occasionally to dye all sides a lovely burgundy, for about 15 minutes.  Then I turned off the heat and let them sit a further 20 minutes until we were ready for dessert.

Surrounded by a moat of spiced wine, these were achingly tender and nicely flavored.  I would choose pears that were less ripe if I attempted this dessert again, because a bit of additional texture might have done them good.  As it was, though, much of the graininess disappeared in the poaching, and the soft floral flavor was really nice against the wine and assertive spices.  A scoop of vanilla ice cream on the side would have made this a richer endeavor, but I think the creaminess would have matched well with the fruit and the wine.   Or maybe I just need the extra comfort as we roll into December…

Food blog 2011-0150

Three for One

Sometimes you are faced with not enough: not enough time, not enough money, not enough to do…

And sometimes you are faced with too much: too much bounty, too much responsibility, too much joy.  These are both their own kind of problem.  And if I have to choose, faced with these Januses, I will always go for too much.  Even if I fall short.

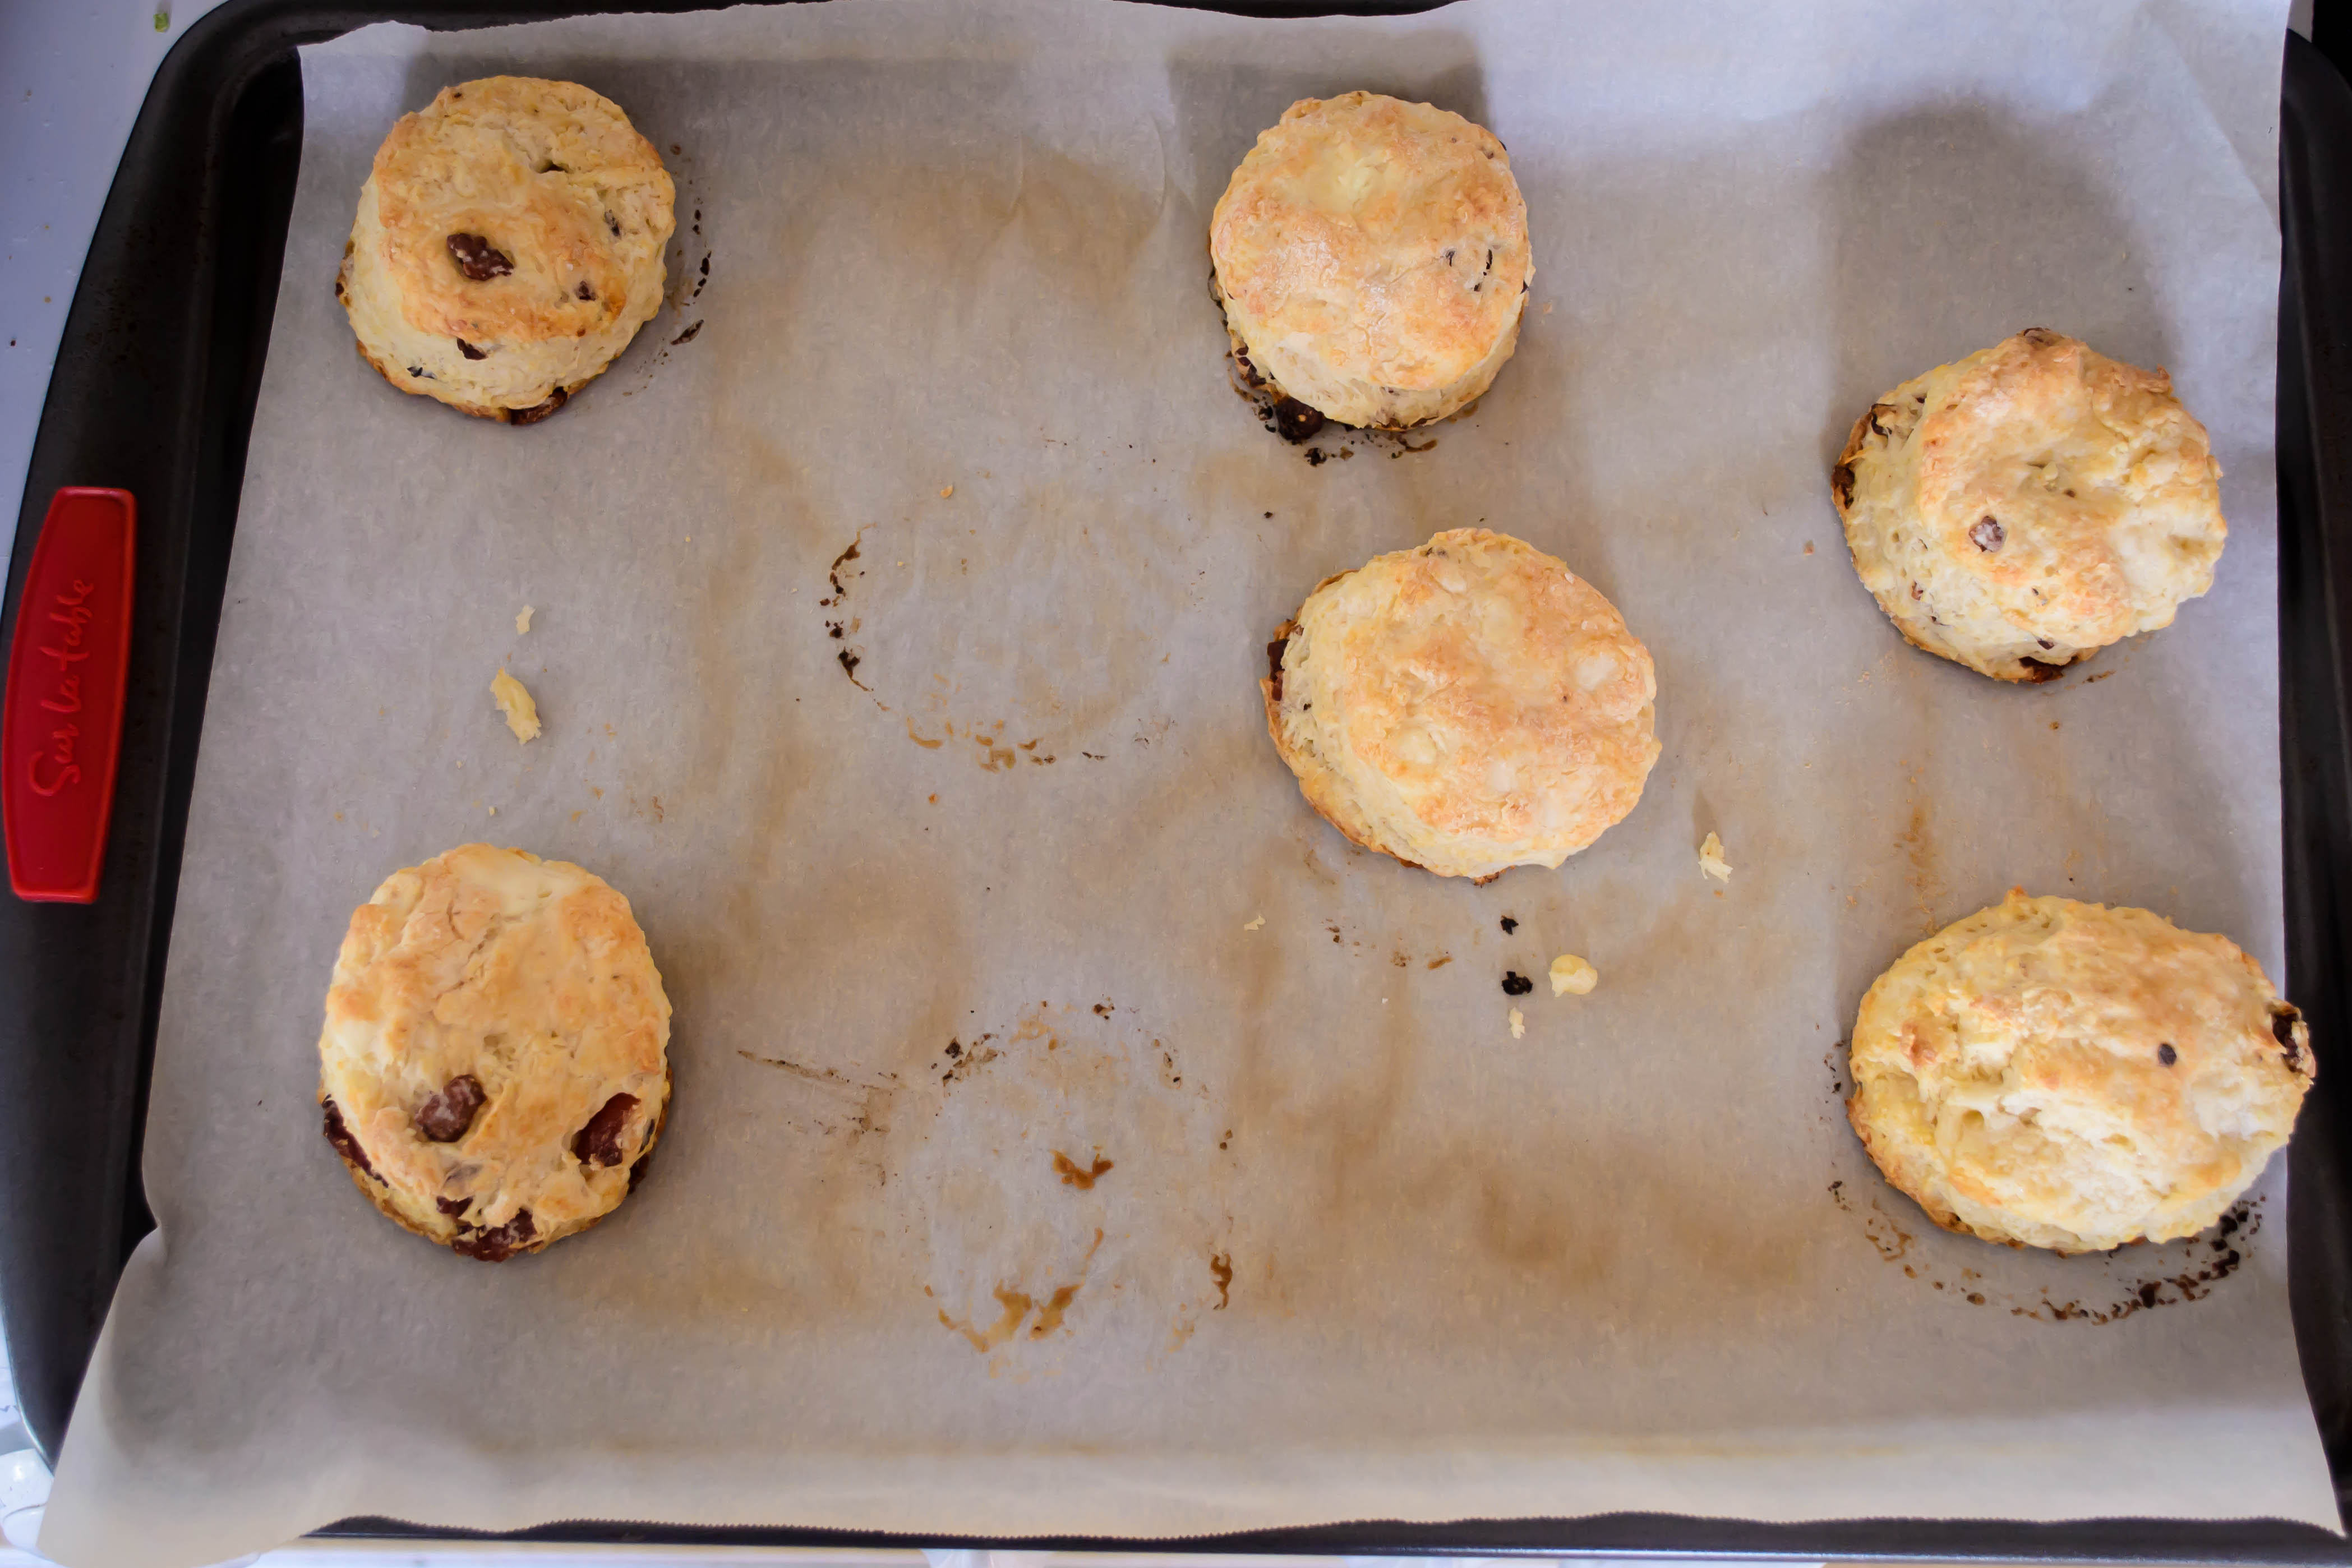
Last week I only managed one Bittman.  This week, in a startling display of ambition and motivation, I did three.

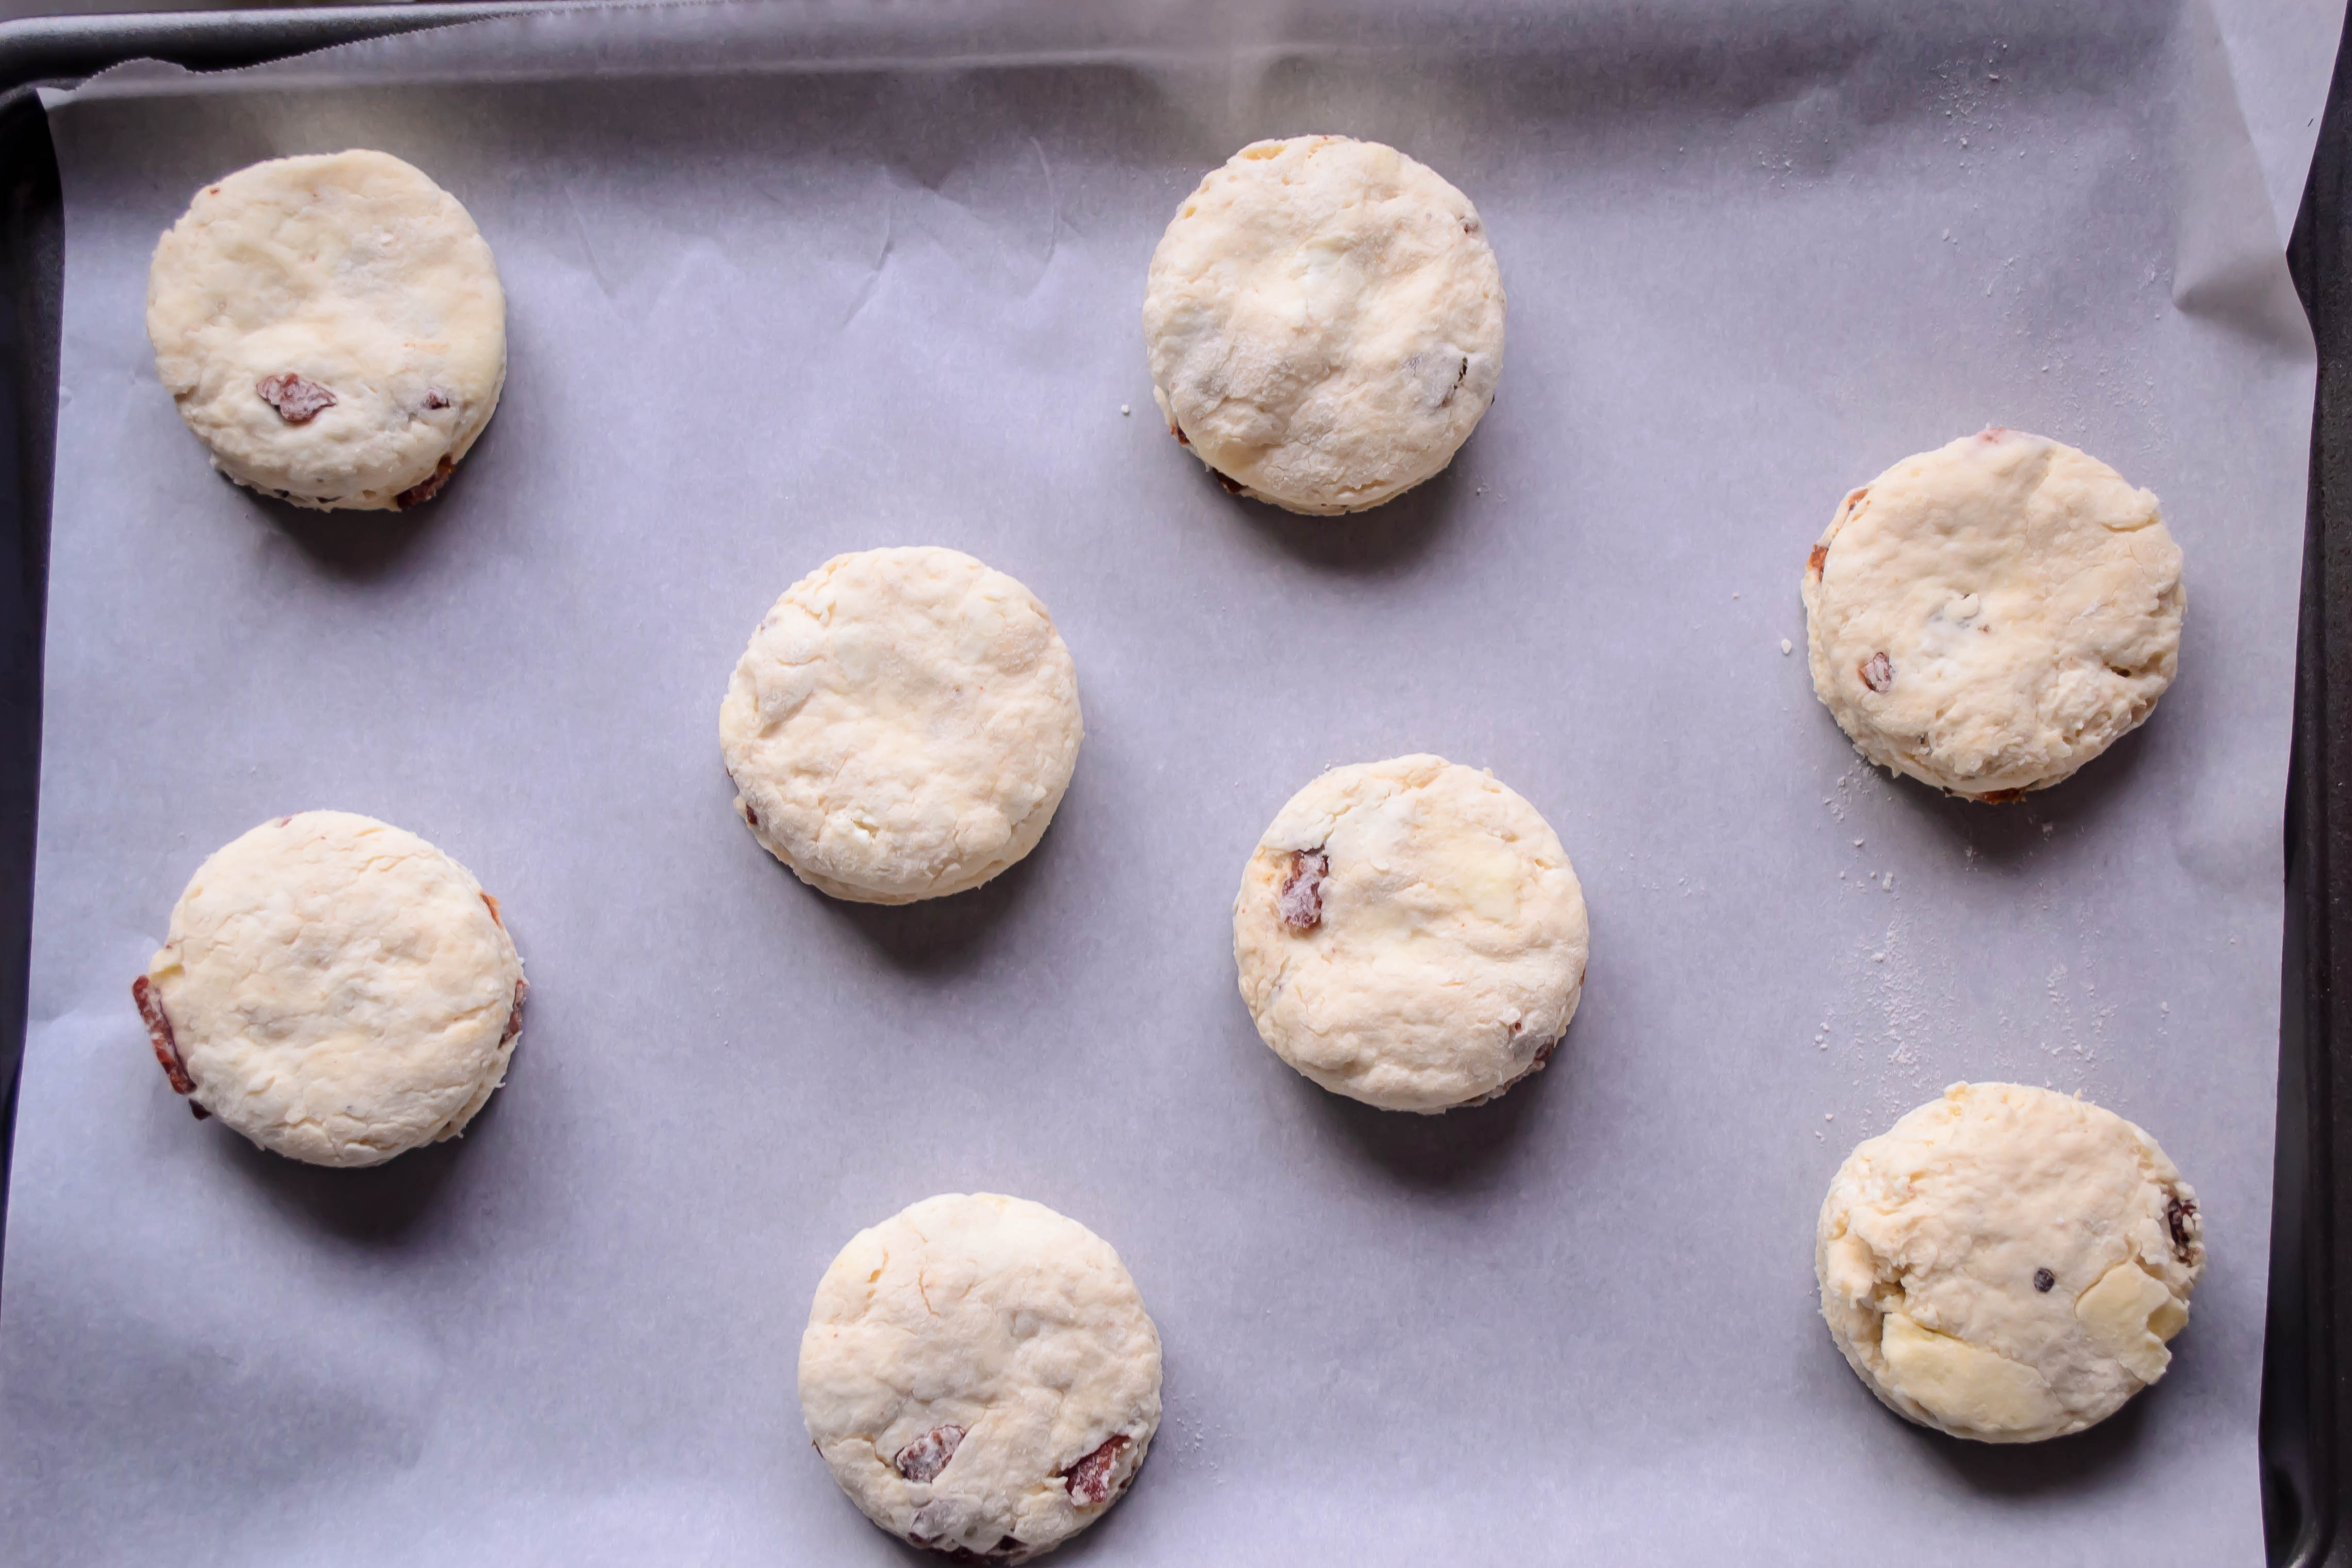
One of the biggest challenges of this project (aside from cooking, photographing, and writing about the food… you know… actually doing it…) has been deciding what to serve these dishes with.  I’m not up for roasting a chicken or a turkey every week to emulate the Thanksgiving spirit of the project, so I try to piece them together with other entrees.  As you’ve seen, if you’ve been following the project for any length of time, sometimes I choose well, and sometimes I decidedly don’t.

This week, riffling through the slowly diminishing options, it occurred to me for the first time that I could serve them as complements to each other.  They were all, after all, conceived for the same imagined table.  They should work together quite nicely.

“7. Cranberry-Orange Sauce: Cook a bag of fresh cranberries with orange and lemon zest, cut up (peeled) orange segments, ¼ cup sugar (or to taste) and a bit of minced jalapeño or chipotle.”

This sounded good and, with the slightly cooler temperatures we’ve been privileged to receive lately, a nice symbol of our entry into Fall.  Cranberries and oranges are a frequent couple – almost too expected – but there’s a reason they appear together so frequently.  And with the addition of lemon juice and some spice, this seemed far enough from traditional to avoid being boring.

1 bag cranberries (probably 1 pound?)

Zest of 1 lemon

Zest of 1 large or two small oranges (mine were little Valencias from our Farmers’ Market)

Segments of 1 large or two small oranges

¼ – ½ cup sugar, depending on your taste and the tartness of your berries

Dash of spice, depending on your taste

I bounced the cranberries into a pot, zested the lemon and oranges over them, and then cut the peel from the orange and sliced out supremes.  For good measure, I squeezed as much juice from the wasted scraps of orange as I could, then topped the mix with sugar and a dusting of cayenne (I had neither jalapeno or chipotle available) and pushed it onto the back burner.

I let the pot come to a boil over medium heat, stirring occasionally to melt the sugar evenly and prevent it from burning until the cranberries released some juice to protect the mixture.  Once it boiled, I lowered the heat and let the whole thing simmer for about 20 minutes.  At one point I tasted, decided there wasn’t enough sugar or cayenne, and added more of both.  The addition of sugar was a good thing.  The addition of more cayenne was less so.  I’d caution you to start with less than you think you will want.  The mixture does not taste at all spicy while it’s hot.  When it cools, though, it becomes fiery.  It was still tasty, though.  We ate it sticky and thick and room temperature, dabbing up popped clusters of ruby and letting it linger on our tongues – but not too long – enough to wake our taste buds from the spice.  As an autumnal side, this works very well and is a pleasant update to the traditional cranberry sauce.  It would also make a glorious topping for a baked brie, perhaps with some rosemary or red wine glugged in for good measure.

While the cranberry sauce was heating, I turned my attention to its companion.

“59. Blanch thinly sliced potato and leeks until tender but not mushy; drain well. Layer the vegetables in an oiled or buttered baking dish, then top with a mixture of bread crumbs and lightly sautéed chopped bacon (some cheese mixed in is pretty good, too). Broil until golden brown.”

Potatoes and leeks are a combination that, a mere year or so ago, I didn’t realize existed.  Now it’s such a natural pairing I can’t believe I never knew about it before.  Sliced blanched potatoes and sautéed leeks now fill every frittata I make.  I collected:

2 russet potatoes, peeled

1 massive leek, tough tops and root ends removed, halved vertically (rinse it out well at this point) and sliced into slim, slim, oh-so-slim half moons
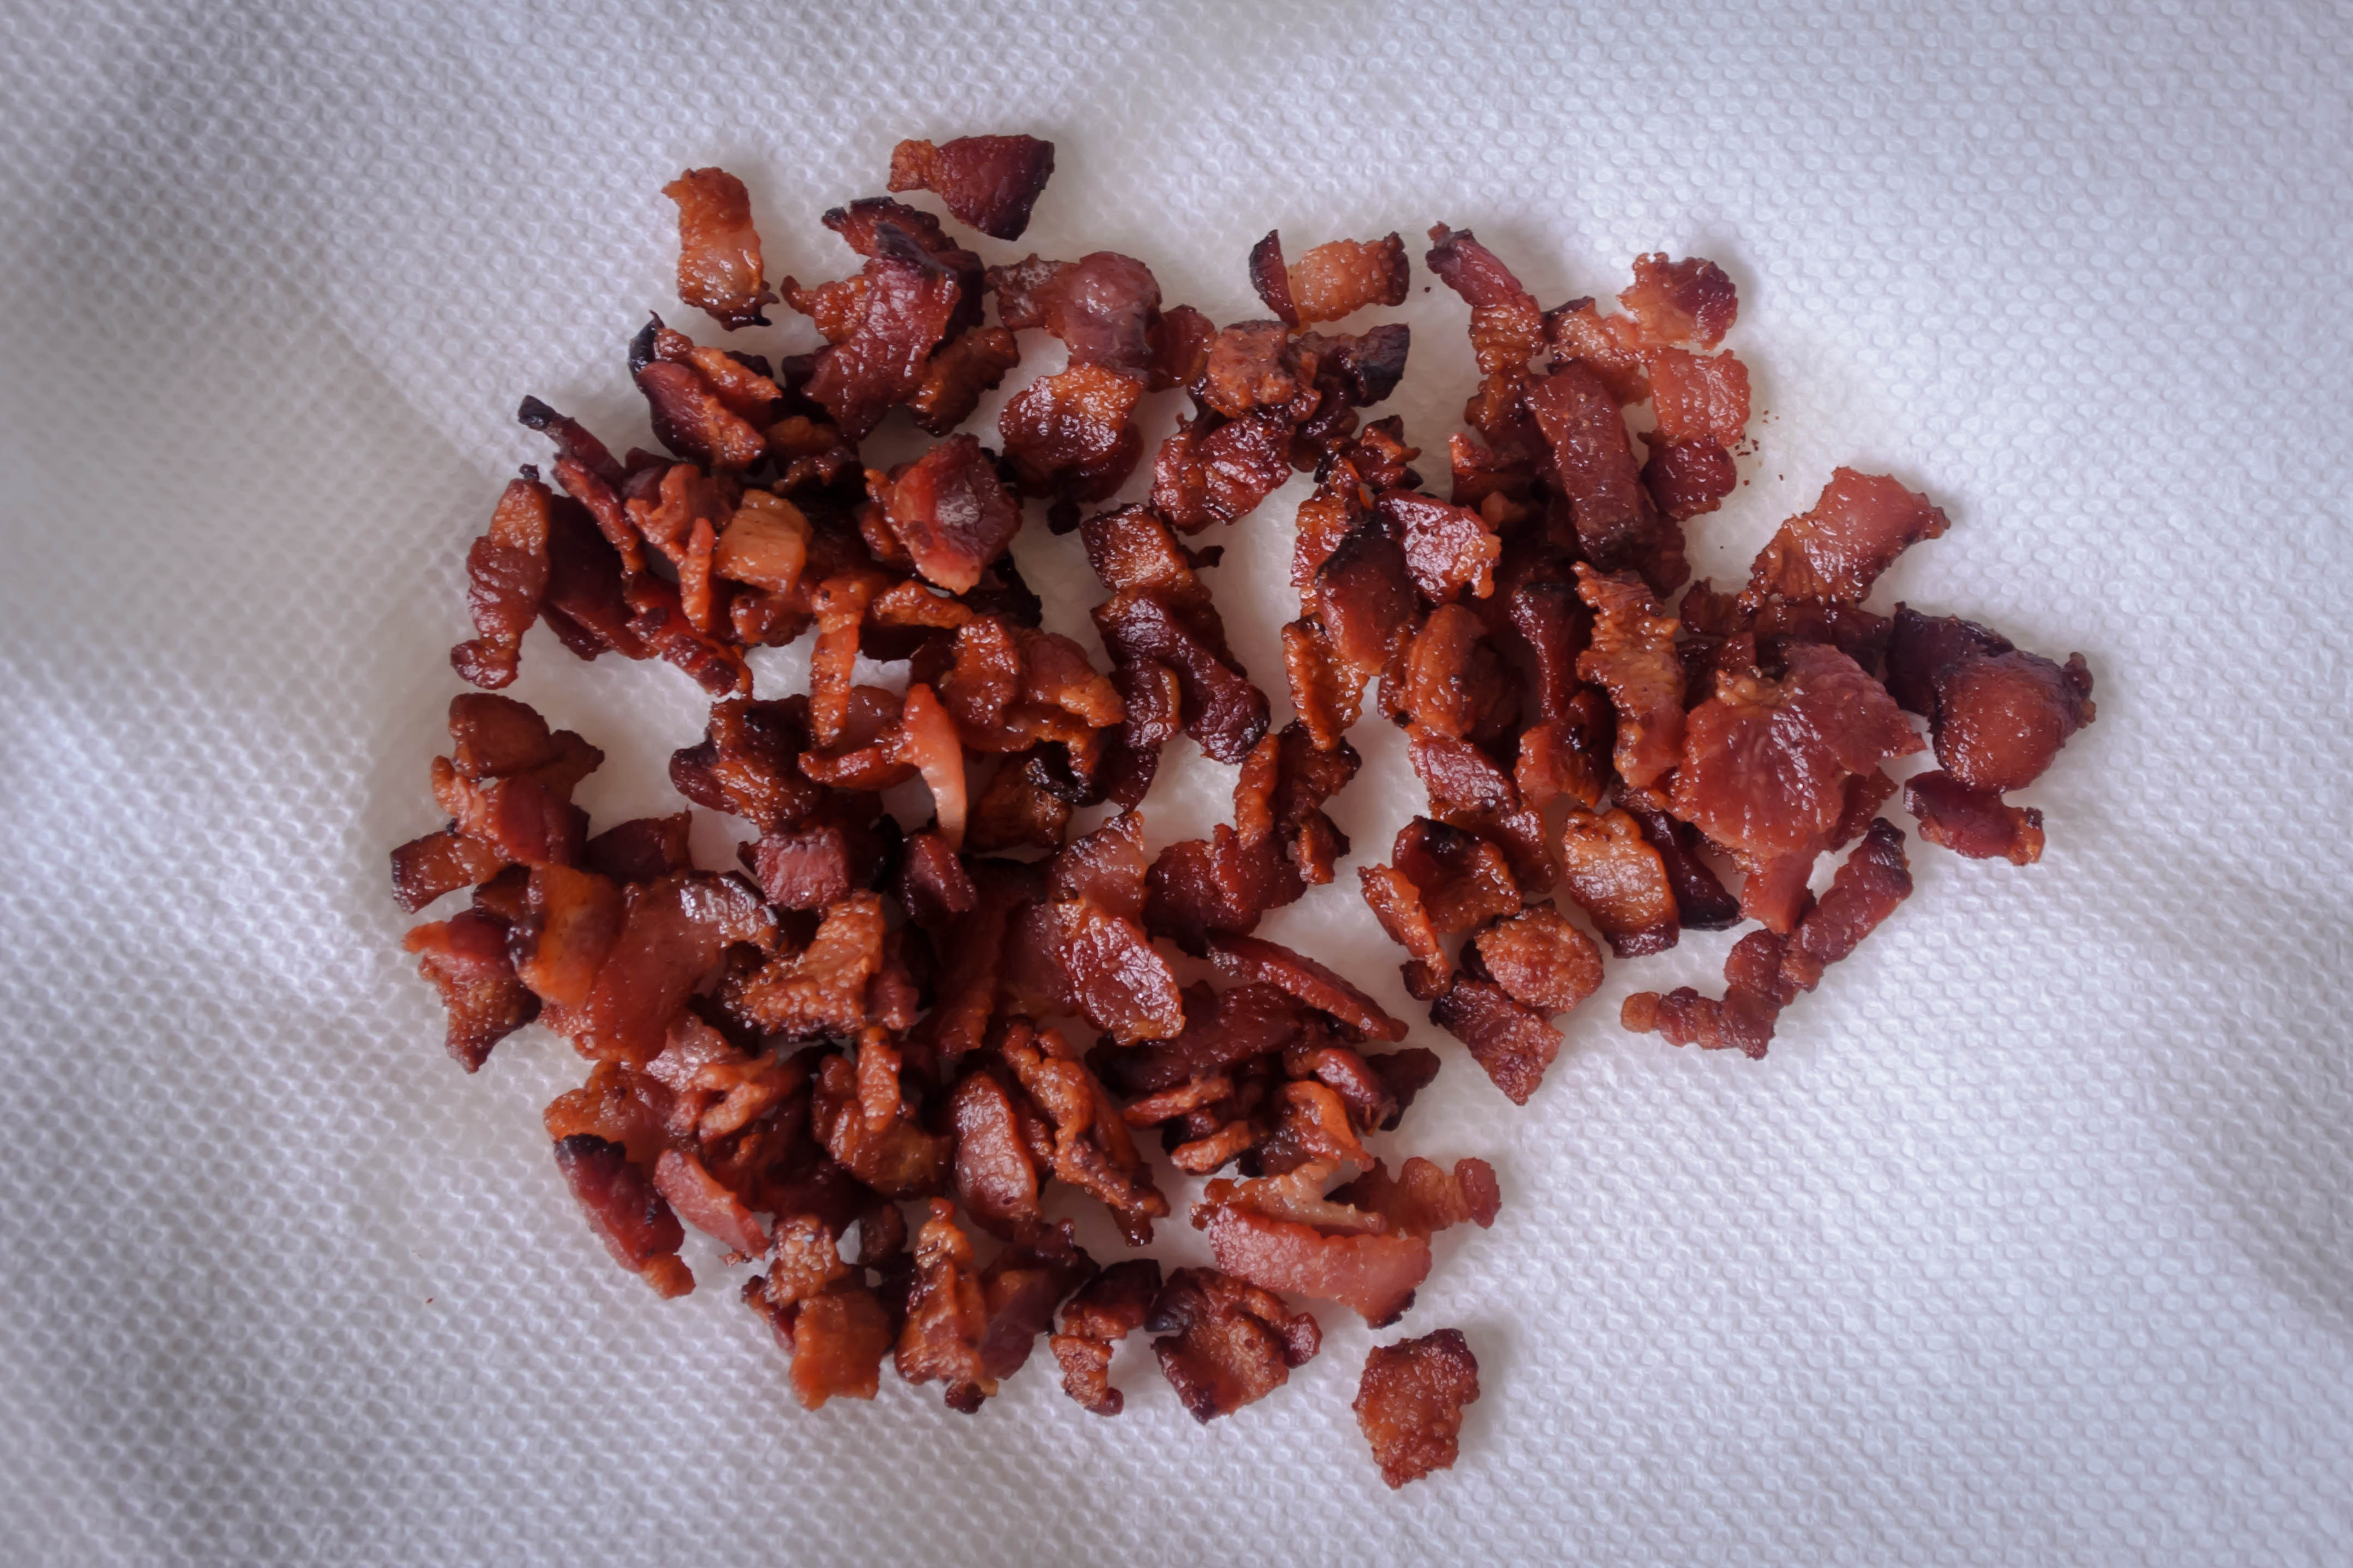
1 lb. bacon

½ – 1 cup bread crumbs (I used Italian seasoned)

Knowing how good leeks can be when they are sweated and barely brown, and conscious that the beauty of bacon grease shouldn’t go to waste, I made a few changes to Bittman’s directions.

First I cooked the bacon.  You likely don’t need a whole pound of it, but this guaranteed an appetizer: one still sizzling slice each for N. and for me.  If you aren’t cooking for or with someone else, go wild and have two all by your lonesome.

While the bacon cooked and the cranberries simmered and popped, I put a pot of water on to boil.  When its aggressive bubbling demanded attention, I carefully lowered in the potato slices and gave them free reign for five or ten minutes.

When it was edging toward crisp, I set the bacon aside to cool and drain a bit on a paper towel lined plate.  I dumped the potatoes into a colander when they were barely cooked through.

Time for the leeks.  I scraped my board free of the slender, just green shards, capturing a satisfying fizz as the vegetation hit the pan.  You want to stir with some frequency here, and not raise the heat above medium; we’re looking for a light sauté, not a heavy brown.

The shards collapsed into resistant-less ribbons, and I pushed them to one side to add the drained, cooling potatoes.  With adept wooden spoon manipulation, I managed to achieve something like layering: half the potatoes flat on the bottom of the pan, the leeks draped across them, and the rest of the potato slices on top.

I turned on my broiler, and while it heated I crumbled the bacon, tossed it with bread crumbs, and dusted the potatoes with the mixture.  But dust wasn’t enough.  They required a landslide.  I drizzled the top with olive oil, knowing the bread crumbs would need it to brown, and slid the whole pan into the broiler (note: if you use a skillet or pan for this, rather than a casserole dish, be sure you wrap any plastic or rubber with aluminum foil before you put it into the broiler.  We don’t want your nice pan handles to melt…).

Five minutes later, the parts of the crumble I had oiled were beautiful brown (the other parts remained sandy and unaltered, much to my chagrin) and the dog was close by, nose moist with curiosity and the urge to assist.

We loaded our plates, completing the meal with a completely unnecessary slice of toasted jalapeno cheese bread, and ate.

As has proved often the case with Bittman’s layered vegetable dishes, I expected this one to be a gratin, and it just wasn’t.  Some cream, some cheddar cheese, some binding between the vegetables, would have been ideal.  But not crucial.  They weren’t supposed to be scalloped potatoes, after all.  The bacon and bread crumbs made them exciting, and the leeks were almost creamy nestled between the thick slices.  Honestly, forgetting to salt the water I boiled the potatoes in was the only real unfortunate mistake.  Two down, with only one mistake (two, I suppose, if you count the overly spicy cranberries, which I suppose I do), is pretty promising.


To make this a trifecta, on another night I chose another autumnal option.

“64. Mushroom Bread Pudding: Put 6 cups of good bread (day-old is best) cut into 1-inch chunks into a buttered baking dish. Beat 4 eggs with 2 cups of milk and ½ cup grated Parmesan and pour over the bread. Sauté 4 cups of sliced mushrooms until tender with a teaspoon or two fresh thyme leaves and mix into the bread. Bake until just set, about 40 minutes.”

Mushrooms and thyme are so nice together.  They are earthy and deep and musty, like the back of a dark pantry into which no anxious hands have reached for some time.  Since they were more precise than usual, I followed Bittman’s ingredient quantities almost to the letter.

I sautéed the mushrooms and thyme in butter, taking time to let the slices soak up the butter, then expel their own liquid.  Only after that, as the moisture from the mushrooms evaporates from the pan, can the mushrooms take on the same kind of crisp brown sear as a steak pressed into a screamingly hot pan.

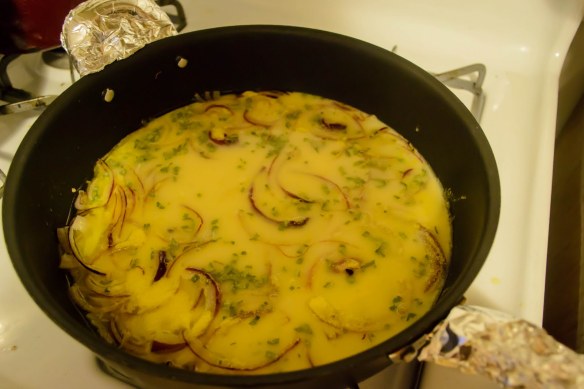
While the mushrooms cooled, I tore up the crusts of a month’s worth of sourdough bread (I keep them in the freezer for just these sorts of occasions) and pressed them gently into a buttered square glass baking dish.  I grated cheese – swiss and parmesan – and cracked eggs from the Farmers’ Market into a bowl, marveling at the rich orange yolks you just can’t get in the grocery store.  I stabbed them, flooded them with milk, and whisked in the cheese.

I turned to assembly.  First, mushrooms must be tossed with bread.  Attempt even distribution.  Then, a careful, rich pour of the dairy component, taking care to attend to the corners, until the bread almost floated in a puddle of would-be custard.


One of the things I’ve learned in my years of bread pudding production is that pressure and soaking time yield the best results.  I carefully pressed a layer of plastic wrap over the top of my pudding and set it in the fridge for an hour, while N. and I answered the velvet brown eyes begging for “walkies.”

Upon our return, it was as simple as preheating the oven to 375F (pull the pudding out of the fridge and let it approach room temperature as your oven heats), sliding the baking dish onto a rack, and reluctantly grading a paper or two as 45 minutes ticked by (I like my bread pudding a little more than “just” set).

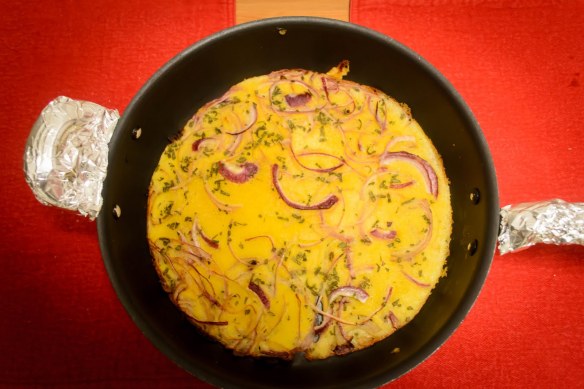
A puff in the center signifies doneness.  Mine levitated just barely in the middle, but the custard was set and the edges of bread not submerged were crisp and darkly golden.

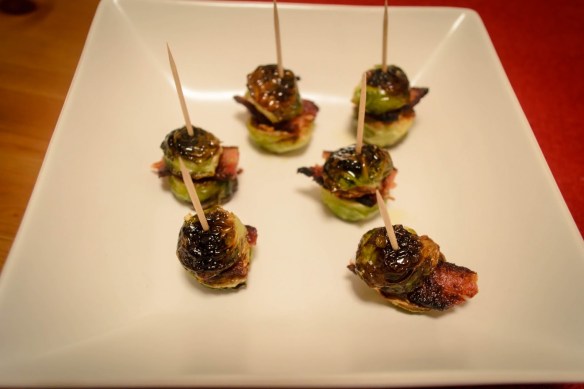
The serving spoon broke sharply through the crisp top but then exhaled through the custard underneath.  Piled on our plates next to an amazing skillet casserole of deeply browned sautéed Brussels sprouts and chopped walnuts drizzled with a balsamic glaze, we accepted its golden softness.  With a higher ratio of eggs to milk than most bread puddings I’ve made, this had almost a soufflé quality, though vastly more substantial.  It was rich and earthy and savory, and I suspect it will be just as good for breakfast as it was for dinner. 

Three more down.  This can be done.  2012 has already been a year of many accomplishments.  Why not go for too many, rather than hesitating at not enough?