Mushroom Kale Quesadillas

Food Blog March 2015-0538Because I have the habit of wanting to impress you, the simple, day-to-day dinners I make often don’t end up here because they don’t strike me as “blog-worthy,” as I’m fond of saying. But much as I want to blow you away all the time, this is a silly habit. The point is not over-the-top impressive, outrageously original, faultlessly styled plates. At least it shouldn’t be. The point is good food. And yet because I get sucked in by things like Pinterest and Tastegawking and Foodspotter and vice versa, we had these mushroom kale quesadillas three or four times in a month because they were so damn delicious I couldn’t stop thinking about them before I realized they might be something I should share with you. Even though they are simple. Even though they are just quesadillas.

Food Blog March 2015-0533Because, seriously? Mushrooms. Kale. Cheese. Toasted tortillas. What a combination! Quesadillas are, weirdly enough, a kind of touchstone for me. If I wrote one of those memoir/cookbook mash-ups, a quesadilla would have to find its way in there somewhere, because when I stop and think about it for three seconds, my life contains a number of memory-charged quesadilla incidents. Example: when my family moved from Southern to Northern California shortly after I graduated from high school, some of the first ingredients in our new fridge were tortillas, cheddar, and salsa. As my mom unpacked the kitchen and the movers unloaded box after box after box from the massive truck into our new garage, we realized the morning had wasted thin and we were starving. Cue Chelsea at the stove with a skillet and spatula rinsed free of box dust seconds ago, flipping quesadillas. They weren’t magnificent, because they were just cheddar folded inside a flour tortilla, but when the cheese melted and sizzled out the sides, and the fat hidden in that deceptively dry flour tortilla browned in huge freckles all over the surface, no one wanted anything else for lunch, including the movers. We used up the whole package of tortillas and most of the cheese, but it was nice to watch everyone unfolding the fried half-moons and pouring liberal doses of salsa over the molten orange goo inside.

Food Blog March 2015-0527Quesadillas are best when you don’t think about them too much. What I mean is, they are best when they contain a quantity of cheese you’d rather not cop to. During our second year of living together, my college roommate K. wondered briefly why she liked my quesadillas so much more than hers. Part of it was undeniably the fact that food tastes so much better when someone makes it for you. But part of it, we determined, was that I used more cheese than she did. Great blocks of monterey jack sacrificed themselves to feed our quesadilla longing, and K. placed me permanently in charge of quesadilla production, as long as I never told her how much cheese I was folding inside. In those days, we upgraded from spooning a scoop up jarred salsa inside to smashing a velvet green half of avocado over the top, and maybe a luscious scoop of sour cream. These lunches were probably, now that I think about it, the base of much of my weight gain that year (the post-break-up pints of Godiva ice cream were likely the other culprits). But in retrospect, my “sophomore sixteen” is so much less important than how good those quesadillas were with their different kinds of softness and the crisp, almost oily tortilla in between.

Food Blog March 2015-0523Food Blog March 2015-0525
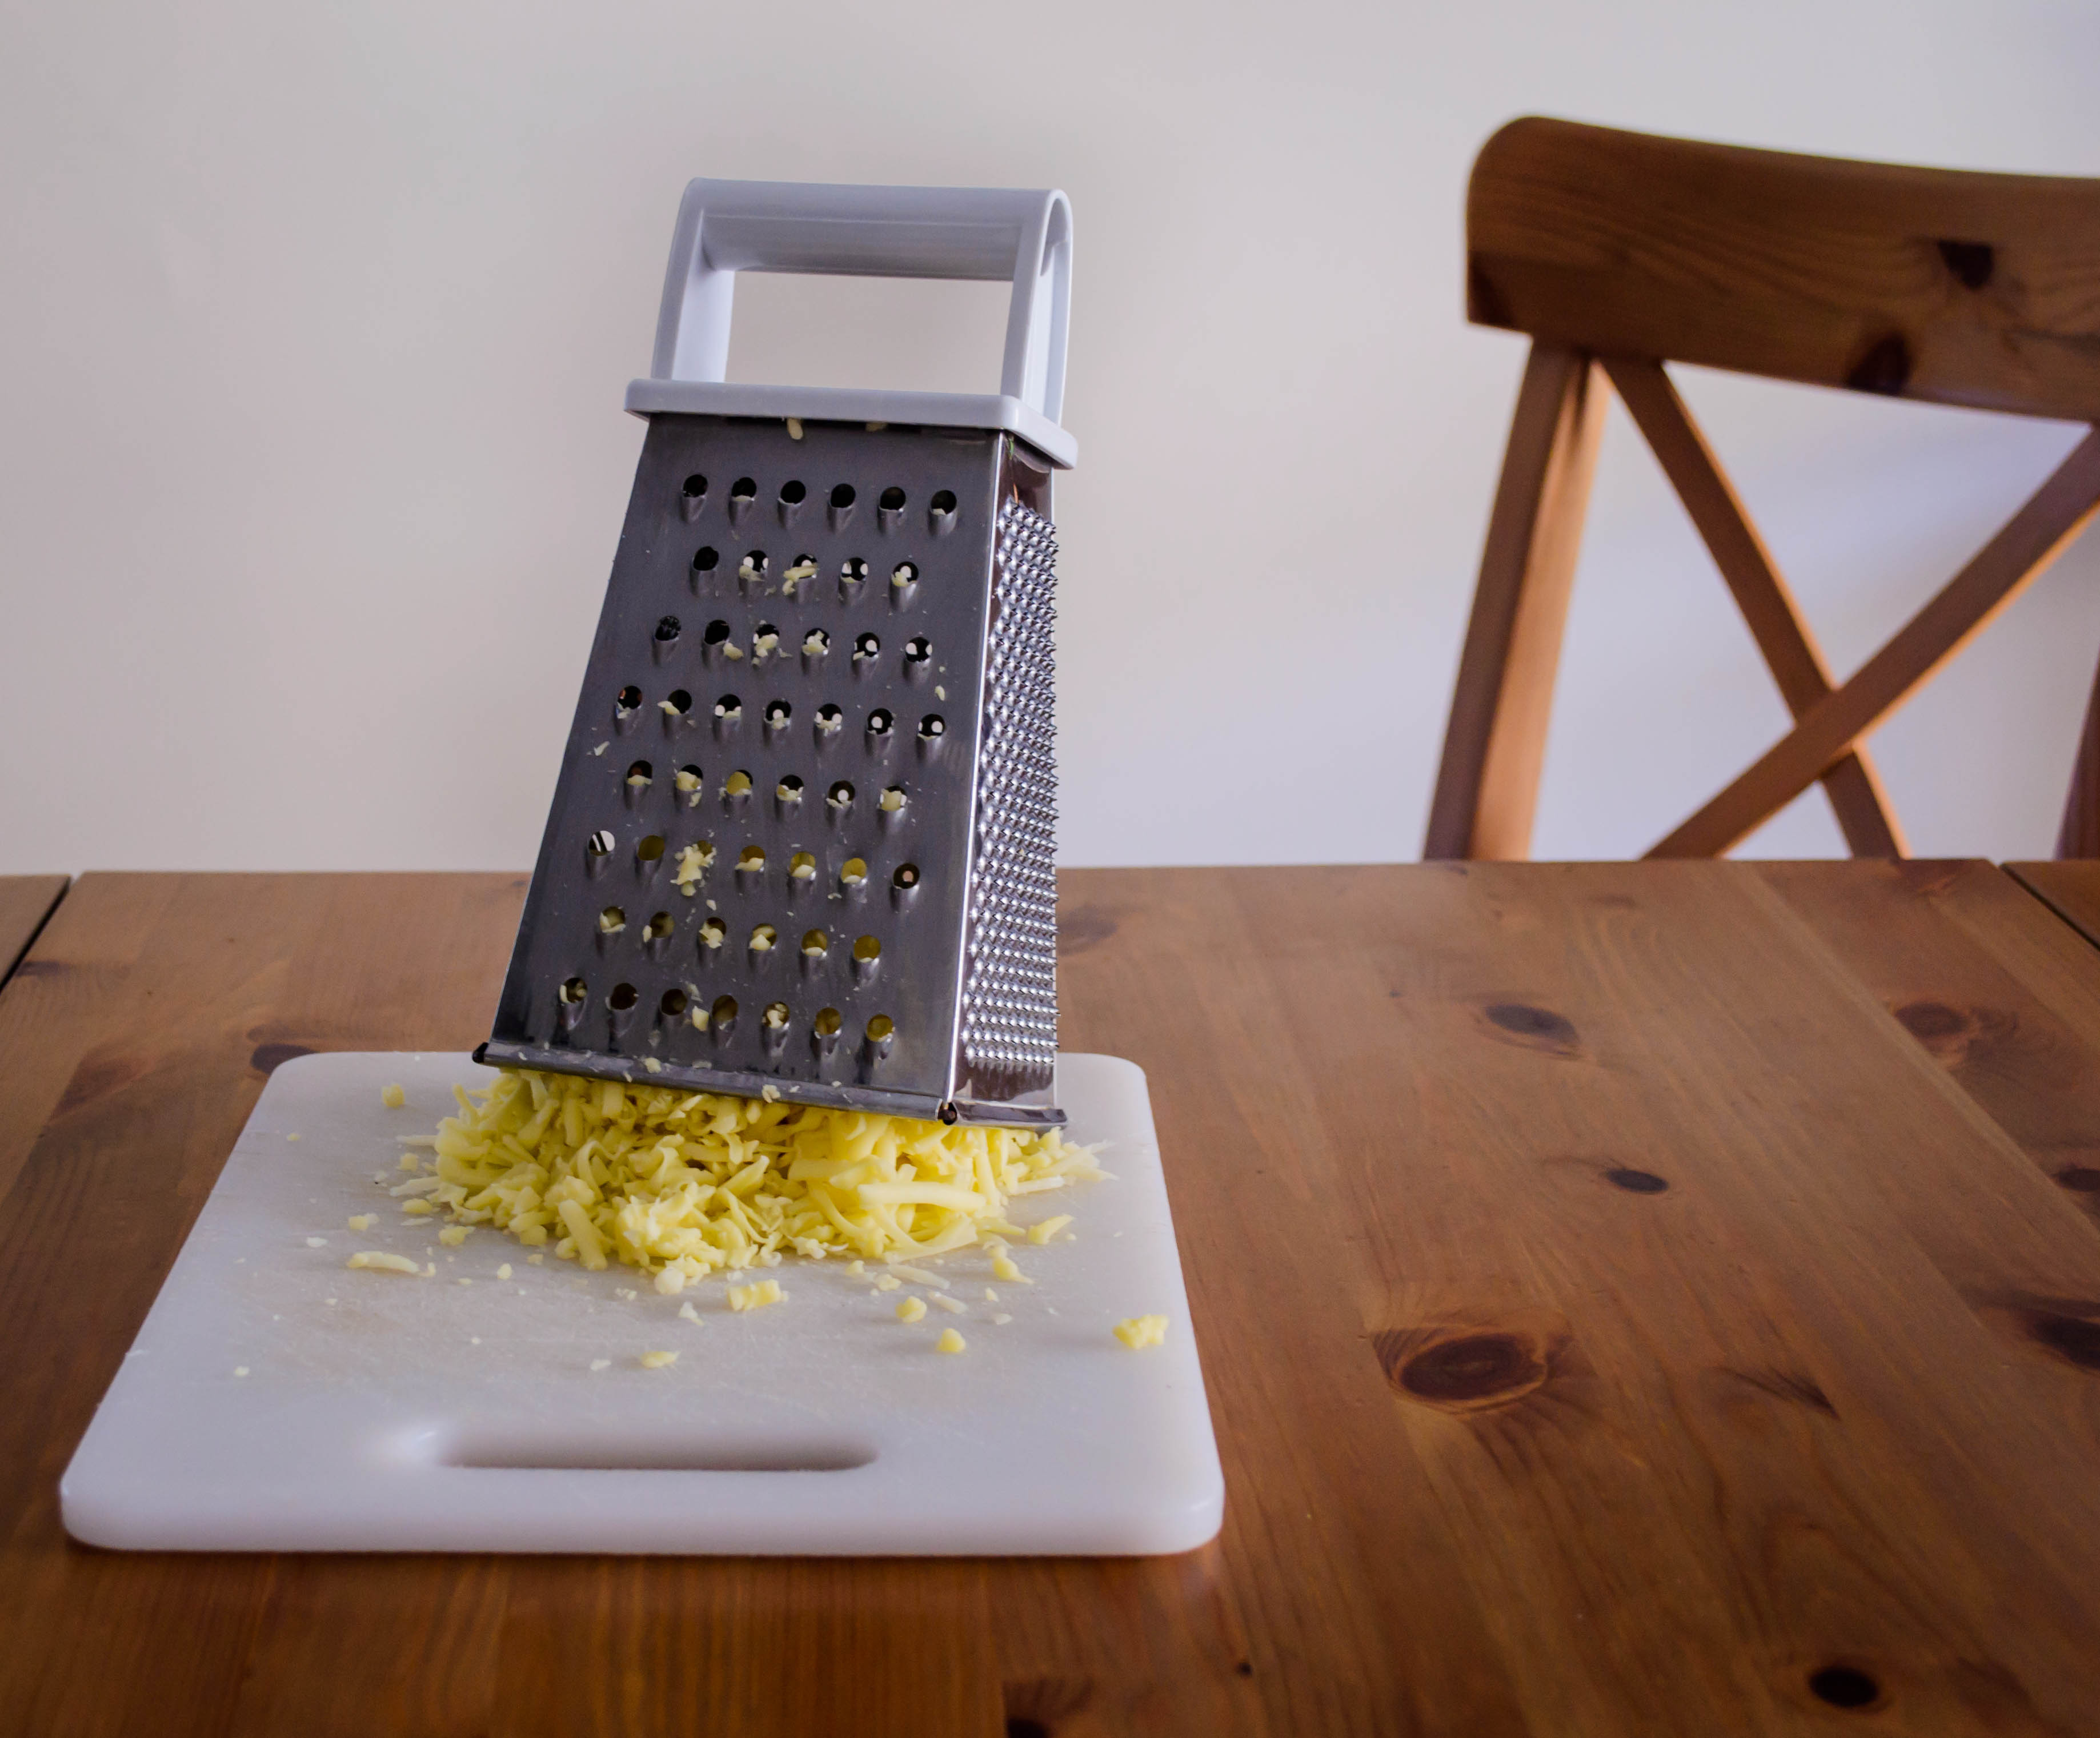
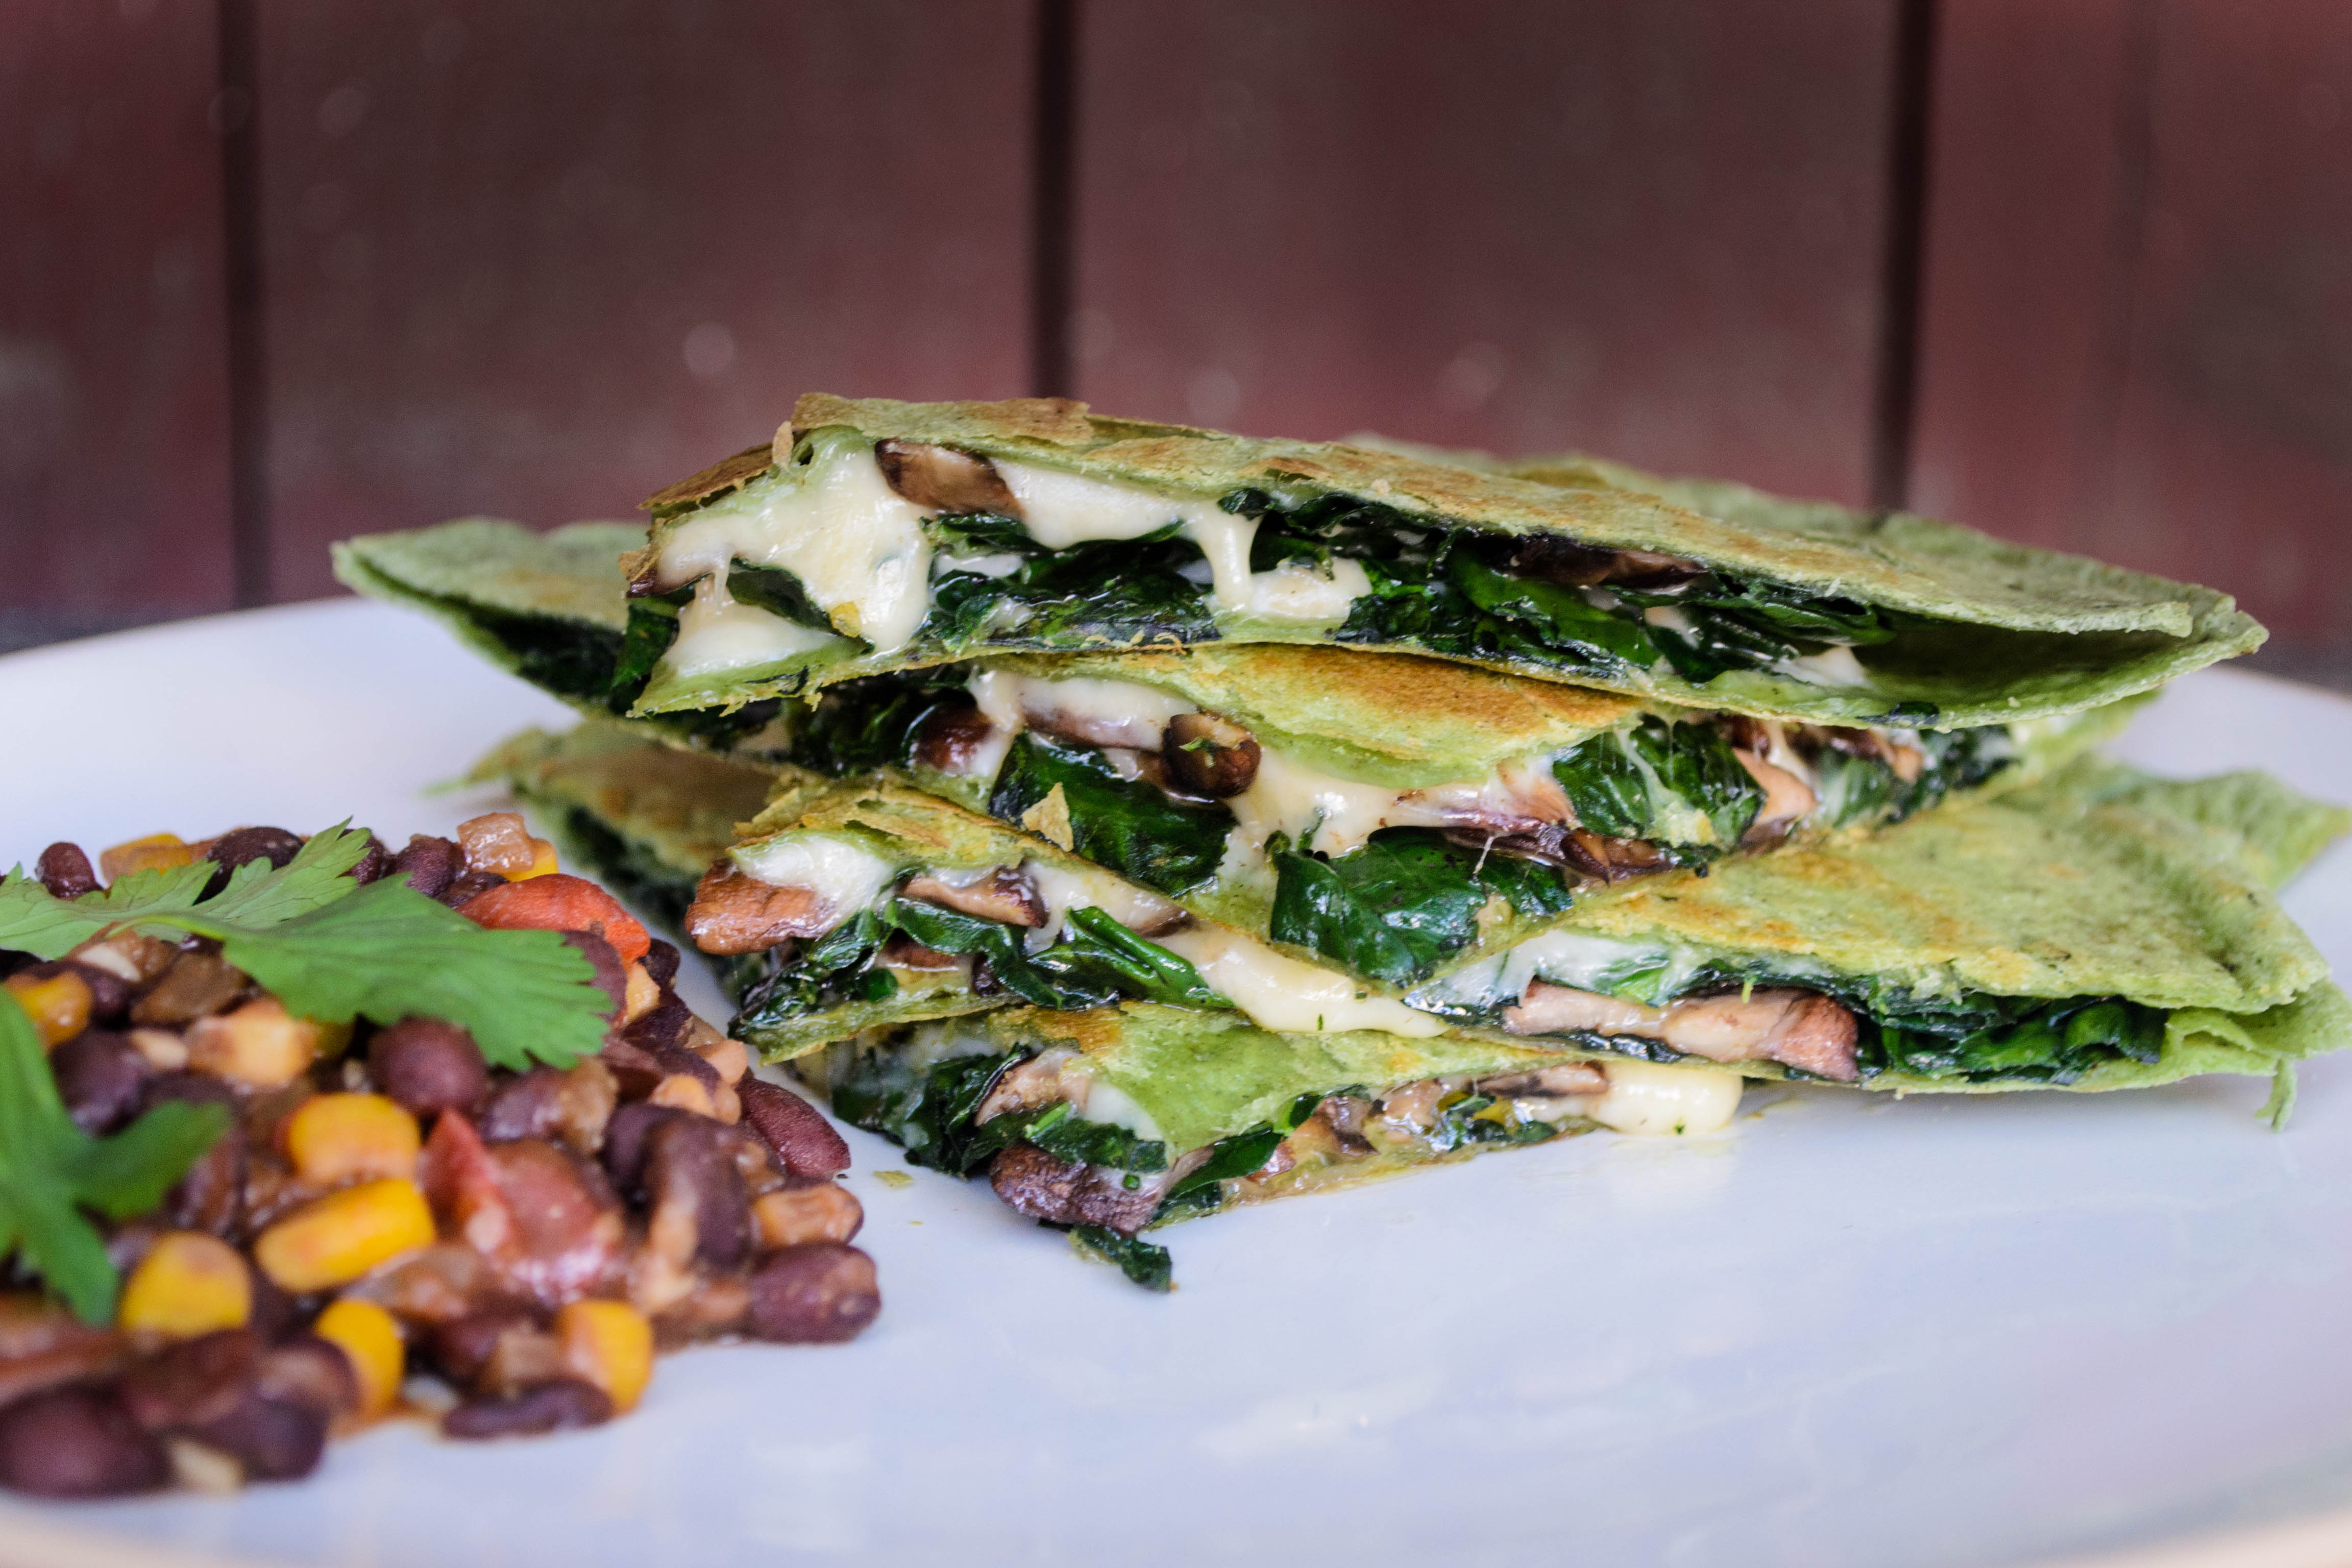
Though I’m still on board with a simple monterey jack quesadilla with avocado, guacamole, or salsa of any kind smeared over the top, I gradually realized quesadillas could also be employed to funnel vegetables into us. I don’t skimp on the cheese – no sense forgetting what I’ve learned – but now I jam in layers of corn or spinach or, in this version, thinly sliced mushrooms pan roasted until golden and almost crisp, folded together with torn leaves of kale barely wilted with some olive oil and salt. In quantity, cheese is non-negotiable, but the variety you mound on is a personal choice. I’m partial these days to pepperjack for that lovely extra kick, but regular, dependable old monterey jack, or a combination of jack and fontina or gouda would also be glorious. Here I’m using spinach tortillas in a combination vain attempt to make these seem healthier, and because I just dig the flavor, but you could use plain flour tortillas, or even corn, though they will obviously require less filling.

Food Blog March 2015-0528I’m not going to make the claim that these quesadillas will turn a mushroom and kale hater into a mushroom and kale lover, because we’re really not hiding the vegetables; we’re celebrating the way they complement the cheese and toasty tortilla. But they might turn a mushroom tolerator into an almost-fan, and someone who is tired of kale might find in them a gasp of fresh breath. And they will without question provide you with a quick, delicious dinner item that is absolutely perfect with a side of these beer braised beans.

Food Blog March 2015-0540

Mushroom Kale Quesadillas
Serves 2 as a main dish, 4-6 as an appetizer
2 tablespoons olive oil
16 ounces crimini mushrooms (1 pound)
5-6 ounces kale, tough stems removed
2 cups monterey jack or pepperjack cheese, or a mixture of soft white cheeses
4 burrito size tortillas (I like the spinach ones)
  • Heat the 2 tablespoons olive oil over medium heat until glistening. Add the sliced mushrooms and sauté over medium for 8-10 minutes, until they are nicely golden and some are barely crisp.
  • Add the kale to the cooked mushrooms and sauté for another 3-4 minutes until barely wilted but still bright green; season with salt and pepper if desired. Remove from heat and set aside to cool slightly.
  • To build the quesadillas, lay out the bottom tortilla and scatter ⅔ cup of the cheese evenly across it. Add half the mushroom and kale mixture, then scatter ⅓ cup of cheese on top of the vegetables. Top with the second tortilla. This construction – cheese, vegetables, cheese – holds in the vegetables because the cheese melts on both sides of them, binding them inside. This makes for easier, cleaner flipping.
  • Cook the quesadilla in a dry pan (I use the same one I cooked the mushrooms and kale in, just wiped clean with a paper towel) over medium to medium-high heat until the bottom tortilla is nicely browned (or slightly charred, if you like that), and the bottom layer of cheese is well melted; 3-4 minutes. Flip and repeat.
  • While the first quesadilla cooks, build the second one as described above.
  • When both sides of the quesadilla are nicely browned and crisp, remove from heat. Wait 1-2 minutes before slicing to avoid losing too much cheese. Repeat with second and all subsequent quesadillas.
  • Repeat with second and all subsequent quesadillas.
  • To serve, cut in quarters (or smaller wedges) and offer with guacamole, sour cream, salsa, or just bare and crisp and oozing and perfect.

Roots Latkes

Most kids, upon reviewing what they ate during college, will talk about late night burrito runs. There will be a fair share of ramen noodle stock-up stories, and an assessment of the school’s dining facilities. For a student who has moved off campus, such a topic is likely to provoke a discussion of microwaveable meals. I had my share of those as well, I’ll readily admit, particularly during the month after a stunningly disorienting and unexpected breakup during which I subsisted mainly on Coca-Cola, boxed stuffing mix, Godiva ice cream, and carne asada burritos to-go from a restaurant next door to the grocery store where I was buying the rest of my supplies.

Food Blog November 2014-0694Thankfully, that month or so was an exception. For much of my off-campus college career, I lived with one other girl in a duplex her mom rented to us, and we fed each other. Sometimes it was easy stuff: pancakes, omelets, pasta with jarred red sauce, sometimes something a bit junkier like Oreo milkshakes. But we definitely introduced each other to our classics. One of mine was a modification of an old Ghirardelli oatmeal chocolate chip cookie recipe. One of hers was a simple, lovely little roasted vegetable dish her family just called “roots.” Roots consisted of, well, roots. Russet potatoes, sweet potatoes, carrots, parsnips, rutabagas, turnips, and sometimes beets got peeled, cubed, and tossed with salt, pepper, and olive oil. The first time she made it for us, K. said that she wasn’t sure how much olive oil to use, but that her mom said it should be just enough that the raw cubes of vegetables “glistened.” Then we loaded them into large glass casserole dishes and roasted them until they were done.

Food Blog November 2014-0681Roots comprised whole meals for us during those years. Sometimes there would be some kind of green side, but mostly we just sat down (never at the table, always on the couch) with big bowls of autumnal cubes, toasty and brown on the outside, starchy and pillowy soft on the inside, and inhaled them. It was reasonably good for us, it was filling, it was delicious, and best of all, it was cheap. The biggest disadvantage to the whole endeavor was getting a cashier at the grocery store who didn’t recognize “weird” vegetables like rutabagas and parsnips, and would take a long time looking up the codes to ring them up.

Food Blog November 2014-0682Over the years, I’ve made roots more times than I can count. They are a lovely comfort food dish: simple to make, hot and forgiving, and easily changed up depending on what vegetables and herb combinations you like the best. Over time, I’ve eliminated beets from the equation, and opted to add plenty of chopped rosemary to the requisite salt, pepper, and olive oil.

But recently, I got thinking about roots again and wondered what it would be like to turn these simple cubed, roasted vegetables into a latke. This would increase the ratio of crisp edges to soft interior, always a good thing, and cut down a bit on preparation as well as cooking time – you can just shred everything in a food processor before frying it up, rather than cubing by hand before waiting out the hour or more the original takes in the oven.

Food Blog November 2014-0687This was, as it turned out, exactly the right thing to do. I opted for potato, carrot, parsnip, and rutabaga as my key players. They whiz into a tangle of starchy threads. Half an onion joins the party – it’s part of a standard latke, and it’s a root vegetable too. As a nod to the common practice of serving latkes with applesauce, I added a tart green apple to the vegetable combination and was pleased with the sweet sharpness it contributed. And I preserved my own love of rosemary with a hefty tablespoon in the mix.

A few eggs, a toss with some flour, and salt and pepper to season, and you carefully drop-pour dollops of the sticky mixture into hot vegetable oil, preferably in a nicely seasoned cast iron pan. It sizzles, it browns, you flip it, and within ten minutes from your first addition of batter, you are passing out hot roots latkes to your delighted diners. Or, if you want to serve everything together, you can stow each batch in the oven on a rack in a baking tray to keep them warm and crisp.

Food Blog November 2014-0690What you are left with is a reasonably quick, reasonably easy (both provided you have a food processor with a shredding disk) meal that doesn’t cost much but tastes exactly right for the approach of chillier weather. The flavors are more complex than your standard latke – there’s a mix of sweetness from the addition of the carrot and the apple. The parsnip and rutabaga have a spicy, earthy flavor that reminds me somehow of incense, a feeling pleasantly intensified by the rosemary.

Since I’d already captured the applesauce element by adding apple to the batter, I served these with a dollop of sour cream as a nod to another classic pairing.

Food Blog November 2014-0695

Roots latkes
Makes about a dozen  3-inch latkes
1 yukon gold potato
1 large carrot, peeled
1 large parsnip, peeled
1 medium rutabaga, peeled
1 large tart apple, cored
½ large white or yellow onion, ends and papery skin removed (either color is fine, so long as it’s not a sweet onion)
1 tablespoon minced rosemary
1-½ cups all-purpose flour
2 eggs, lightly beaten
1 teaspoon salt, or to taste
½ teaspoon pepper, or to taste
½-1 cup vegetable oil
Sour cream, for serving (optional)


  • Begin heating ½ cup of vegetable oil in a large cast iron skillet over medium heat – it will take a few minutes, but you are looking for it to just shimmer when swirled around the pan. If you plan to make the whole batch at once and need to keep them warm, preheat the oven to 300F and position a baking sheet with a wire rack on it inside the oven.
  • Fit a food processor with the shredding disk, or address the largest holes on a box grater with care for your knuckles. Cut the vegetables into the size needed to fit comfortably down the feeding chute of the food processor, and carefully feed the potato, carrot, parsnip, rutabaga, apple, and onion through the machine to create long, thin shreds of vegetable.
  • Dump the whole mess into a large bowl and mix them up a bit with your fingers to distribute evenly. You’ll be left with strands of vegetable confetti.
  • Add the rosemary and flour to the vegetable shreds and toss well with your fingers to combine. Then add the eggs and the salt and pepper, and mix well to combine. You could use a spoon or spatula for this, but I just use my fingers. They do a better job ensuring everything is evenly distributed.
  • When the oil is shimmering, plop ¼ – ⅓ cup dollops of the mixture into the oil. In my 10-inch skillet, I can fit three dollops of batter comfortably without touching – don’t crowd them. When they hit the oil, they should sizzle lightly. If the oil spits aggressively, it’s too hot. Turn the heat down or remove the pan from the heat for a minute to cool it down.
  • Sizzle the latkes for 4-5 minutes on the first side, until it is evenly golden-brown and crisp. Flip carefully (oil splatters) and cook for 2-3 minutes on the second side, until it too is brown and crisp. Move to the rack in the oven to keep warm, or directly to a plate for immediate consumption.
  • Repeat until batter is used up. If the oil level gets low or the latkes begin to brown unevenly, add additional vegetable oil to the skillet, giving it time to heat up before adding more batter.
  • Serve with sour cream, if desired, or applesauce, or just an anxious fork.

Project Sauce: Sole Meunière

We are now, with one exception that you’ll see in a week or two, deep into the butter portion of this sauce project. It makes sense. Most of the big deal “mother” sauces are French, and the French do have a soft spot for butter. And that makes sense too. I mean, all you have to do is melt a few tablespoons of butter and you’ve already got a sauce. Think of the way it softens with the maple syrup on your pancakes, becoming something so much richer and more complex than either would have been by themselves! So let’s talk about some buttery details for a minute, and then I’ll take you to our sauce this week: meunière, a classic butter and lemon sauce specifically intended to be served with a sautéed filet of sole.

Food Blog August 2014-0418As I continue to learn about sauces, I’m seeing emulsion after emulsion. A fat bound to a liquid, often with some thickening agent that gives body to the sauce and helps the normally separate ingredients get along. Think vinaigrette: the fat is the olive oil, the liquid is the vinegar. Dropped into a glass together, they form distinct layers. But beat them vigorously, often with a dollop of mustard to help them blend, and they become a thick, rich dressing. Kitchen magic.

Food Blog August 2014-0402What I’m finding quite interesting about butter is that whole butter, the sort we buy in paper-wrapped sticks, is in fact an emulsion in itself. The butterfat, which is what solidifies when milk is churned, is the fat portion. But there is also some water in butter, and there are milk proteins too, which stabilize the emulsion. So in that one stick you have a liquid component and a fat component, hanging together in stasis.

Food Blog August 2014-0409When you brown butter, that darling of savory and sweet concoctions alike, several things happen. First, as the butter melts and bubbles furiously, you are seeing the water content boil off. If you stop at this point, skimming off any solids on the surface and reserving just the molten gold of the butterfat, you have clarified butter. But if instead you keep cooking it, the milk proteins that once acted as emulsifiers start to toast, and become deeply bronzed, and you have brown butter. You can even see those proteins roasting and browning in the photo above.

Meunière sauce capitalizes on brown butter. And with the water content of the butter boiled off, it needs a liquid to play with again, so we add the tart brightness of lemon juice. And then, for an herbal note, a scattering of parsley. That’s it. It’s so simple it feels almost like cheating. And yet it’s a classic, likely because how could a splash of butter and lemon be anything but delicious?

Food Blog August 2014-0410Unlike most other sauces, aside perhaps from hollandaise, meunière is pretty dish specific. It doesn’t really stand alone; it’s a sauce but also indicates preparation: sole meunière, or sometimes trout meunière. And though I obeyed and ladled mine over two delicate white filets, I could just as easily see this sauce, essentially a hot vinaigrette, serving as a bright gravy for mashed potatoes or roasted chicken. I would ladle it over a great tray of steamed green beans, or even stir some pasta into it and add shaved parmesan to the top (sidenote: as a kid who didn’t like marinara sauce on pasta, I would have welcomed this alternative with wide-open taste buds).

Food Blog August 2014-0405But as I said, I went traditional here. Not as traditional as sautéing or deboning the fish tableside, as some classic preparations demand, but I resisted my usual urge to add twists or additional ingredients. I wanted to see what this was about.

Okay, so I added some lemon zest to the salt and pepper I used to season the fish before dredging it in flour. But really, such a tiny alteration hardly counts, right? And when you serve the filet tenderly over some rice pilaf and drag your green beans through the last remnants of the sauce, well, words fail (no, seriously. I’ve sat here for fifteen minutes trying to think of how to tell you it was good!). Bring on the butter. She is clearly justified as the diva of the sauce world.

Food Blog August 2014-0412


Sole Meunière
Adapted from Ina Garten and Anne Burrell
Serves 2
4 tablespoons butter, divided
2 filets of sole, 3-4 ounces each
Salt and pepper for sprinkling
Zest of 1 lemon
1 cup all-purpose flour
1 tablespoon lemon juice
1-2 tablespoons minced parsley


  • Preheat your oven to warm (200F or so) and place a sheet tray with a rack balanced over it inside. This will allow you to keep the fish warm and crisp while the sauce finishes.
  • Heat 2 tablespoons of the butter in a large skillet over medium-high heat.
  • While the butter melts, unwrap your fish and season both sides with a sprinkle of salt, pepper, and lemon zest.
  • Dredge the filets lightly in flour and then lay them flat straight into the pan, being sure they are not touching. If they sit around in their floury state, they will not get crisp.
  • Sauté for 2 minutes over medium-high, until the fish begins to look opaque. It will be about ⅔ cooked at this point. Flip each filet carefully, again, being sure they are not touching, and cook another 1-2 minutes until the bottom is golden and comes away easily from the pan. Remove each filet to the rack in the preheated oven.
  • Wipe out the pan and heat the remaining 2 tablespoons of butter, again over medium-high heat. When it is melted and bubbling furiously, add the lemon juice and stir to combine.
  • As the butter starts to brown, which should only take about a minute, season the sauce with salt, add the parsley, and remove from heat.
  • Transfer the fish to a plate or serving platter and spoon or carefully pour the sauce over the fish to serve.

Coconut and Cumin Fried Plantains

Food Blog June 2014-3874One of my great pleasures in the summer is the hot cooked lunch. I’m a big believer in leftovers, and during the school year it’s easy and delicious (and cheap, let’s be honest) to just pack some of last night’s dinner into a Tupperware and take it to school with me. But in summer, when I’m home and puttering, being able to sashay into the kitchen around lunchtime and cook something quick and tasty is a pleasure I always forget about until suddenly I get to do it again.

Food Blog June 2014-3856This year, I finished my semester a week or so before N., which meant an additional treat when it came to constructing these lunches. We’ve talked before about my bachelor meals. I like to cook for other people, but they don’t always like all the same things that I like, and it’s a sad thing to have to wait for restaurant meals to order some of my favorites. So when I’m eating alone, I try to take advantage of those items my dining partner just isn’t crazy about. Sometimes, Chopped-style, I try to fit as many of these ingredients into my solo meal as possible.

Food Blog June 2014-3858In addition to crustaceans, coconut tops the list of foods N. is just not interested in (this means we never have to squabble over coconut shrimp, the most perfect meal ever invented; I get to eat it ALL). Bananas, too, are an unacceptable item unless they are mashed beyond recognition and folded into quickbread, in which case he’s all over it. Plantains, those longer, starchier relations, look just too much like their cousins to be acceptable as a food product to him. This seemed, to me, a perfect opportunity.

Food Blog June 2014-3878I’m a big believer in the fried plantain. Whether it’s sliced thick, lightly sautéed, and then mashed flat and returned to the oil to become tostones, or just cut into chunks and fried until golden on all surfaces and mixed into fluffy, buttery rice, I would probably be happy eating plantains every day for lunch all summer long, provided the oil was hot, the edges were crisp, and the salt was liberal. They take a while to ripen – most often they are sold in the grocery store still green, and can languish in a fruit bowl for a full week or two before they soften and their skins get brown and stringy. But I think they are worth it.

Food Blog June 2014-3864For this lunch treat, I decided to take a cue from my delight in the green bean poriyal I made a few months ago and add a liberal showering of N.’s other fruit nemesis. This became all about texture. The cumin, sizzling and fragrant, offers a crunch of earthy perfume. The plantain slices themselves, crisp exteriors tearing effortlessly into creaminess, contrast well with the coconut, which stands up for itself in toasty, chewy-crunchy shards. Add a squeeze of lime, and maybe a few torn leaves of cilantro, and lunch is served. Oh sure, you could dress it up or make it a bit more substantial by adding a scoop of basmati rice, or serving this as a side for shrimp or barbecued chicken. It would also play well, I suspect, with a roasted pork loin dressed in tropical flavors like mango or jerk seasoning. It could be easily doubled, or tripled, and if you are serving it as a side, I’d suggest allowing for about half a plantain per diner. But I gave it a solo, starring role, and I ate every single bite.

Food Blog June 2014-3872It’s a simple lunch, when you come right down to it, but it tastes like summer. And that, delightfully enough, is exactly where I want to be. Food Blog June 2014-3867

Coconut and cumin fried plantain
Serves 1 as a main, 2 as a side
1 ripe plantain (the skin should be dark yellow, well mottled with black or dark brown, and the fruit inside should feel tender)
2 tablespoons vegetable oil
1 teaspoon whole cumin seeds
½ teaspoon salt
Black or cayenne pepper to taste, if you want a bit of heat
½ cup unsweetened shredded coconut (try an Asian or Indian market, or maybe Whole Foods)
Lime wedge, optional
A few sprigs of cilantro, optional


  • Heat the oil and cumin seeds together over medium high heat in a large skillet.
  • While the oil heats, peel and then slice the plantain on a bias into ½ inch slices.
  • When the cumin is sizzling and aromatic, add the plantains to the skillet in a single layer. Sprinkle with salt and pepper, if using.
  • Fry the plantains for 3 minutes, or until the bottoms of each slice are golden brown and have a crisp crust.
  • Flip each slice, turn the heat down to medium, and fry an additional 2 minutes.
  • Add the coconut and agitate the pan a bit to be sure all of the shreds find their way to the oil, then continue to cook for 1-2 minutes more, until the majority of the coconut is toasty-brown, with only a few white strands remaining.
  • Remove from heat and serve with a squeeze of lime and a few sprigs of cilantro, if desired.

Cheesy Brussels and Bacon Mashed Potato Cakes

Generally speaking, N. and I are boring restaurant attendees. One drink apiece, no appetizers, an entrée for each, and by then we are too full for dessert. The most exciting thing we do (hold your breath, folks) is to share plates, particularly when we are torn between what we want to order. This is likely borne out of graduate school poverty, though in a world of extravagant portion size it seems like a reasonable practice to continue.

Food Blog January 2014-3026But once in a while, an appetizer or a side dish sounds so luscious, or so interesting, or so, I don’t know, good (are we still allowed to use that word?), that we can’t resist it. At one of our more favorite haunts a week or two before the holidays, we were enticed by just such a side – a craggy mass of mashed potatoes threaded with strands of Brussels sprouts and bacon, a suggestion of cheddar, and broiled until the top was smattered with crusty dark bits. It sounded like a dream. It was… fine.

Food Blog January 2014-3014Photo Friday 2013-2940Food Blog January 2014-3015As I ate it, I couldn’t help but feel that the flavors could have been stronger. More cheese. More bacon. More crunch. It needed to be, perhaps not a heap of mash subjected to broiling, but shaped into tender cakes and fried in a pan. Yes, cheesy patties shot through with ribbons of Brussels sprouts and chunks of bacon, fried up in the very bacon grease the meaty bits had expelled as they cooked. Crunchy, creamy, melting, with enough green that a very imaginative person could just barely declare them virtuous.

Food Blog January 2014-3016What I ended up with was a marriage of that classic British leftovers dish bubble and squeak (though certainly in a modern reinterpretation), and a latke so unkosher that we might as well have piled shrimp on top and called it a day.

Food Blog January 2014-3052Yukon gold potatoes have quickly become my standard for mash (I could even call them the “gold” standard, but you might groan at that, eh?), and this dish is no exception. Their flavor is terrific – hearty and rich – and they whip into lovely buttery fluff. And here, where texture is intentional, there is no need to peel them. The tissue-thin skins shred into the mix and echo the ribbons of Brussels sprouts. Chewy crisp hunks of bacon stud the cake with smoky saltiness, and do yourself a favor and use the sharpest cheddar cheese you can find – it needs to be saliva-inducing to stand up to the other flavors here. A single egg, lightly beaten and worked in, holds the cakes together, and then it’s just a question of heating up your cast iron skillet and frying them to order. I can imagine scarfing these for breakfast, lunch, or dinner, and I’m admitting nothing, but they are even acceptable stolen cold out of the fridge.

Food Blog January 2014-3053*A note about bacon grease: I found, as I fried these, that bacon grease lends terrific flavor, but because it can be shot through with remnants of browned bits from frying the bacon, it can make the exterior of the cakes quite dark. To prevent this, as in the directions below, I recommend that you pour out the grease, reserving only a tablespoon or two. If you’re feeling particularly fussy, you can strain this reserved portion, but I wouldn’t be too worried about that. Discard the rest (or save for some other application) and wipe out your pan in between frying the bacon and frying the cakes. When it is time to fry again, combine the reserved bacon grease with some olive oil. You’ll still get the smoky, unctuous flavor, but the olive oil raises the smoke point and will produce a golden, rather than an almost-black, crust.

Food Blog January 2014-3054Cheesy Brussels and Bacon Mashed Potato Cakes
Makes 12-14 cakes of 3-inch diameter
4 medium Yukon gold potatoes (about 1 pound), each cut into large chunks of roughly equal size
2 tablespoons milk
Salt, pepper, and garlic powder to taste
8 ounces Brussels sprouts (about 12 large), stemmed and stripped of any discolored or damaged outer leaves
8 ounces bacon, diced
4 ounces shredded cheddar cheese, the sharpest you can find
1 egg, lightly beaten
2 tablespoons bacon grease reserved from frying the bacon
2-4 tablespoons olive oil
  • Deposit potato chunks in a pot of salted water, bring to a boil, and cook until they are fork tender but not mush. This should take, depending on the size of your potato chunks, 7-10 minutes after the water comes to a boil. Drain and cool potatoes completely.
  • While potatoes are cooling, fry the bacon pieces in a skillet (my preference is cast iron) over medium heat until they are golden, almost crispy, and cooked through. Fish them out with a slotted spoon and set aside on a plate lined with paper towels. Reserve 1-2 tablespoons of the grease, discard the rest, and wipe out the pan to clear any bacon bits residue (see note above).
  • Using the slicer disc on a food processor (or a very steady hand and a sharp knife), shred up the Brussels sprouts into a mixture of ribbons and wafer-thin slices.
  • Shred the cheddar cheese.
  • By this time, your potatoes should be just about cool! When they are at room temperature, place them in a large mixing bowl and add the milk, salt, pepper, and garlic powder. Whiz them up with an electric mixer until more or less evenly combined. It won’t be a completely smooth mixture, because we’ve left the skins on, but it will come together into a buttery golden mash.
  • Add the cheese, Brussels sprouts shreds, and bacon pieces to the potatoes and mix well. I started out using a rubber spatula for this, but quickly switched to my hands, which did a much more thorough job. Taste for seasoning and add more salt, pepper, and garlic powder if needed.
  • Add the lightly beaten egg and mix to combine.
  • Using your hands, shape the potato cakes. Gently form rounds slightly bigger than a golf ball, then flatten them into patties about 3 inches in diameter. As you finish each patty, set it aside on a plate.
  • When your patties are formed, heat the olive oil and the reserved bacon grease in your skillet (to save on dishes you can, and should, use the same skillet you cooked the bacon in) over medium-high heat. When the oil shimmers, add the cakes. Don’t crowd them, though. Each one should have space around it – they shouldn’t touch one another. In my 9 inch cast iron skillet, 4 at a time was perfect.
  • Once you have placed the cakes, don’t mess with them. Leave them alone for 4-5 minutes (4 minutes and 30 seconds was perfect for me) before flipping. You will need to do this with deliberation. Slide a thin spatula under each one quickly and firmly, then flip and leave alone for another 4-5 minutes. Disrupting the cakes too early, or fussing with them too much, will result in sticking, smashing, and general disintegration. They need time to form a stiff crust on each side before they will consent to flip cleanly.
  • Continue, frying 4-5 patties at a time for 4-5 minutes on each side, until all cakes have been cooked. You may need another dollop of olive oil after a few batches to re-slick the skillet. If the oil starts to smoke or the cakes are frying up darker than you like, turn the heat down to medium.
  • As you finish each batch, serve them immediately, or to hold them until all are cooked, stow on a cookie sheet lined with a wire rack in a 200 degree oven.
  • As with all fritter-type beasts, these are best consumed as soon after taking them out of the oil as possible.