Peach Caprese Toasts

Food blog June 2015-0973If I were a TV chef, this would be one of those dishes I would cook outside. I’d greet you from my back patio kitchen (because of course I’d have one of those, complete with a great beehive shaped brick pizza oven), offer you a virtual cocktail, and commence a cheery narrative about summers in France when I was a kid, or how this particular combination of ingredients speaks to some cherished family memory. The peaches would have come from my backyard tree, I’d delight you by plucking the basil myself from a tiered herb garden right next to the outdoor bar, and obviously the mozzarella would have come from some local artisan selling fresh knobs of it at the local farmers’ market.

Food blog June 2015-0947But seeing as I don’t have an outdoor kitchen, and since I’d be a terrible TV chef (uncoordinated, messy, with a penchant for cooking in ripped jeans), I’ll admit that this lovely little snack emerged because I’m basically obsessed with caprese right now. After the triumphant caprese inspired meatballs of two weeks ago, my brain catapulted into summer, and all I want is fresh produce and grilled everything. Nothing says summer to me like a wide tray of gushing tomato wedges, mozzarella almost too soft to slice, and torn basil. If you add a drizzle of thick, syrupy balsamic, you’d better pour me a glass of wine, too, because I’m staying for a while.

Food blog June 2015-0954
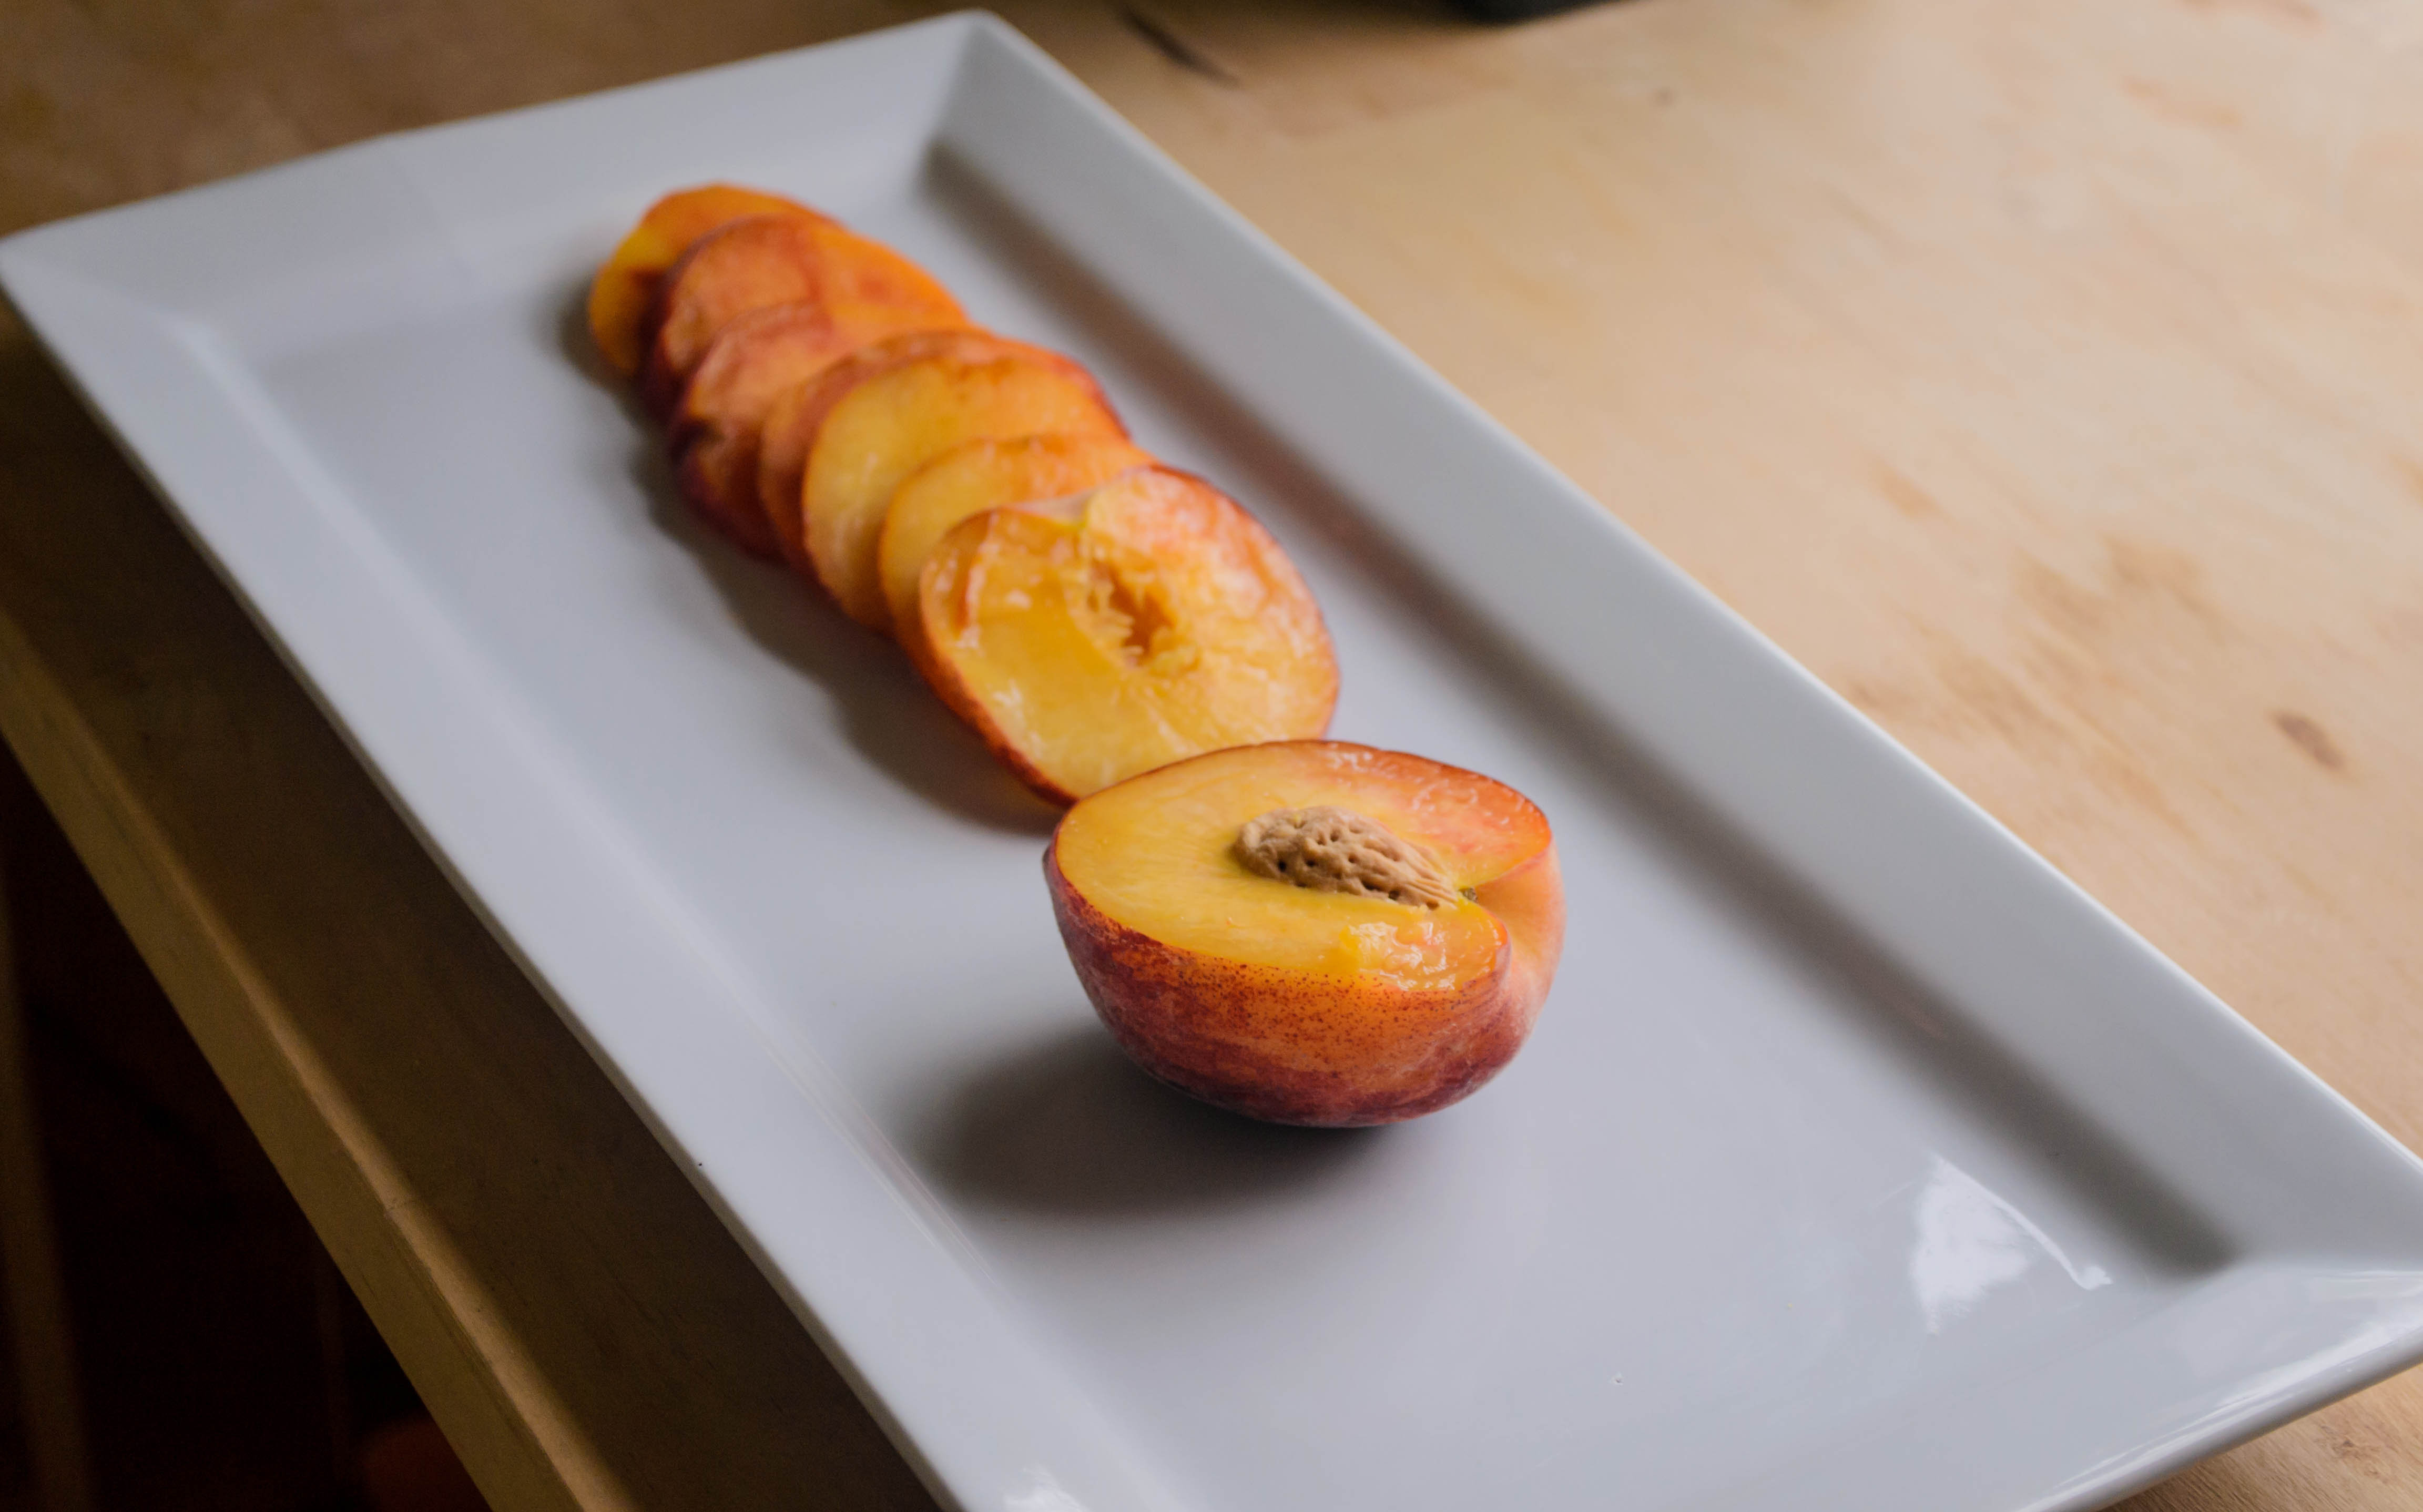
Despite the whole Southern California thing, though, I’m not ready to buy tomatoes just yet. Not even at our local farmers’ market (where I shamefully wasn’t locavore enough to look for mozzarella cheese). It’s just not time yet. There is, though, a vendor whose stall is always packed that had a nice selection of stone fruits this week. It seems a bit early for these as well, but when I could smell the peaches from a few feet away, I decided to risk it.

Food blog June 2015-0960Food blog June 2015-0962Though this rarely happens, these turned out exactly how I’d imagined them. Usually I can’t help myself from changing something as I go along, or skipping over or adding a step or ingredient, and it’s hard to stop the universe from offering up its own brand of “help” to produce unexpected results.

Food blog June 2015-0967
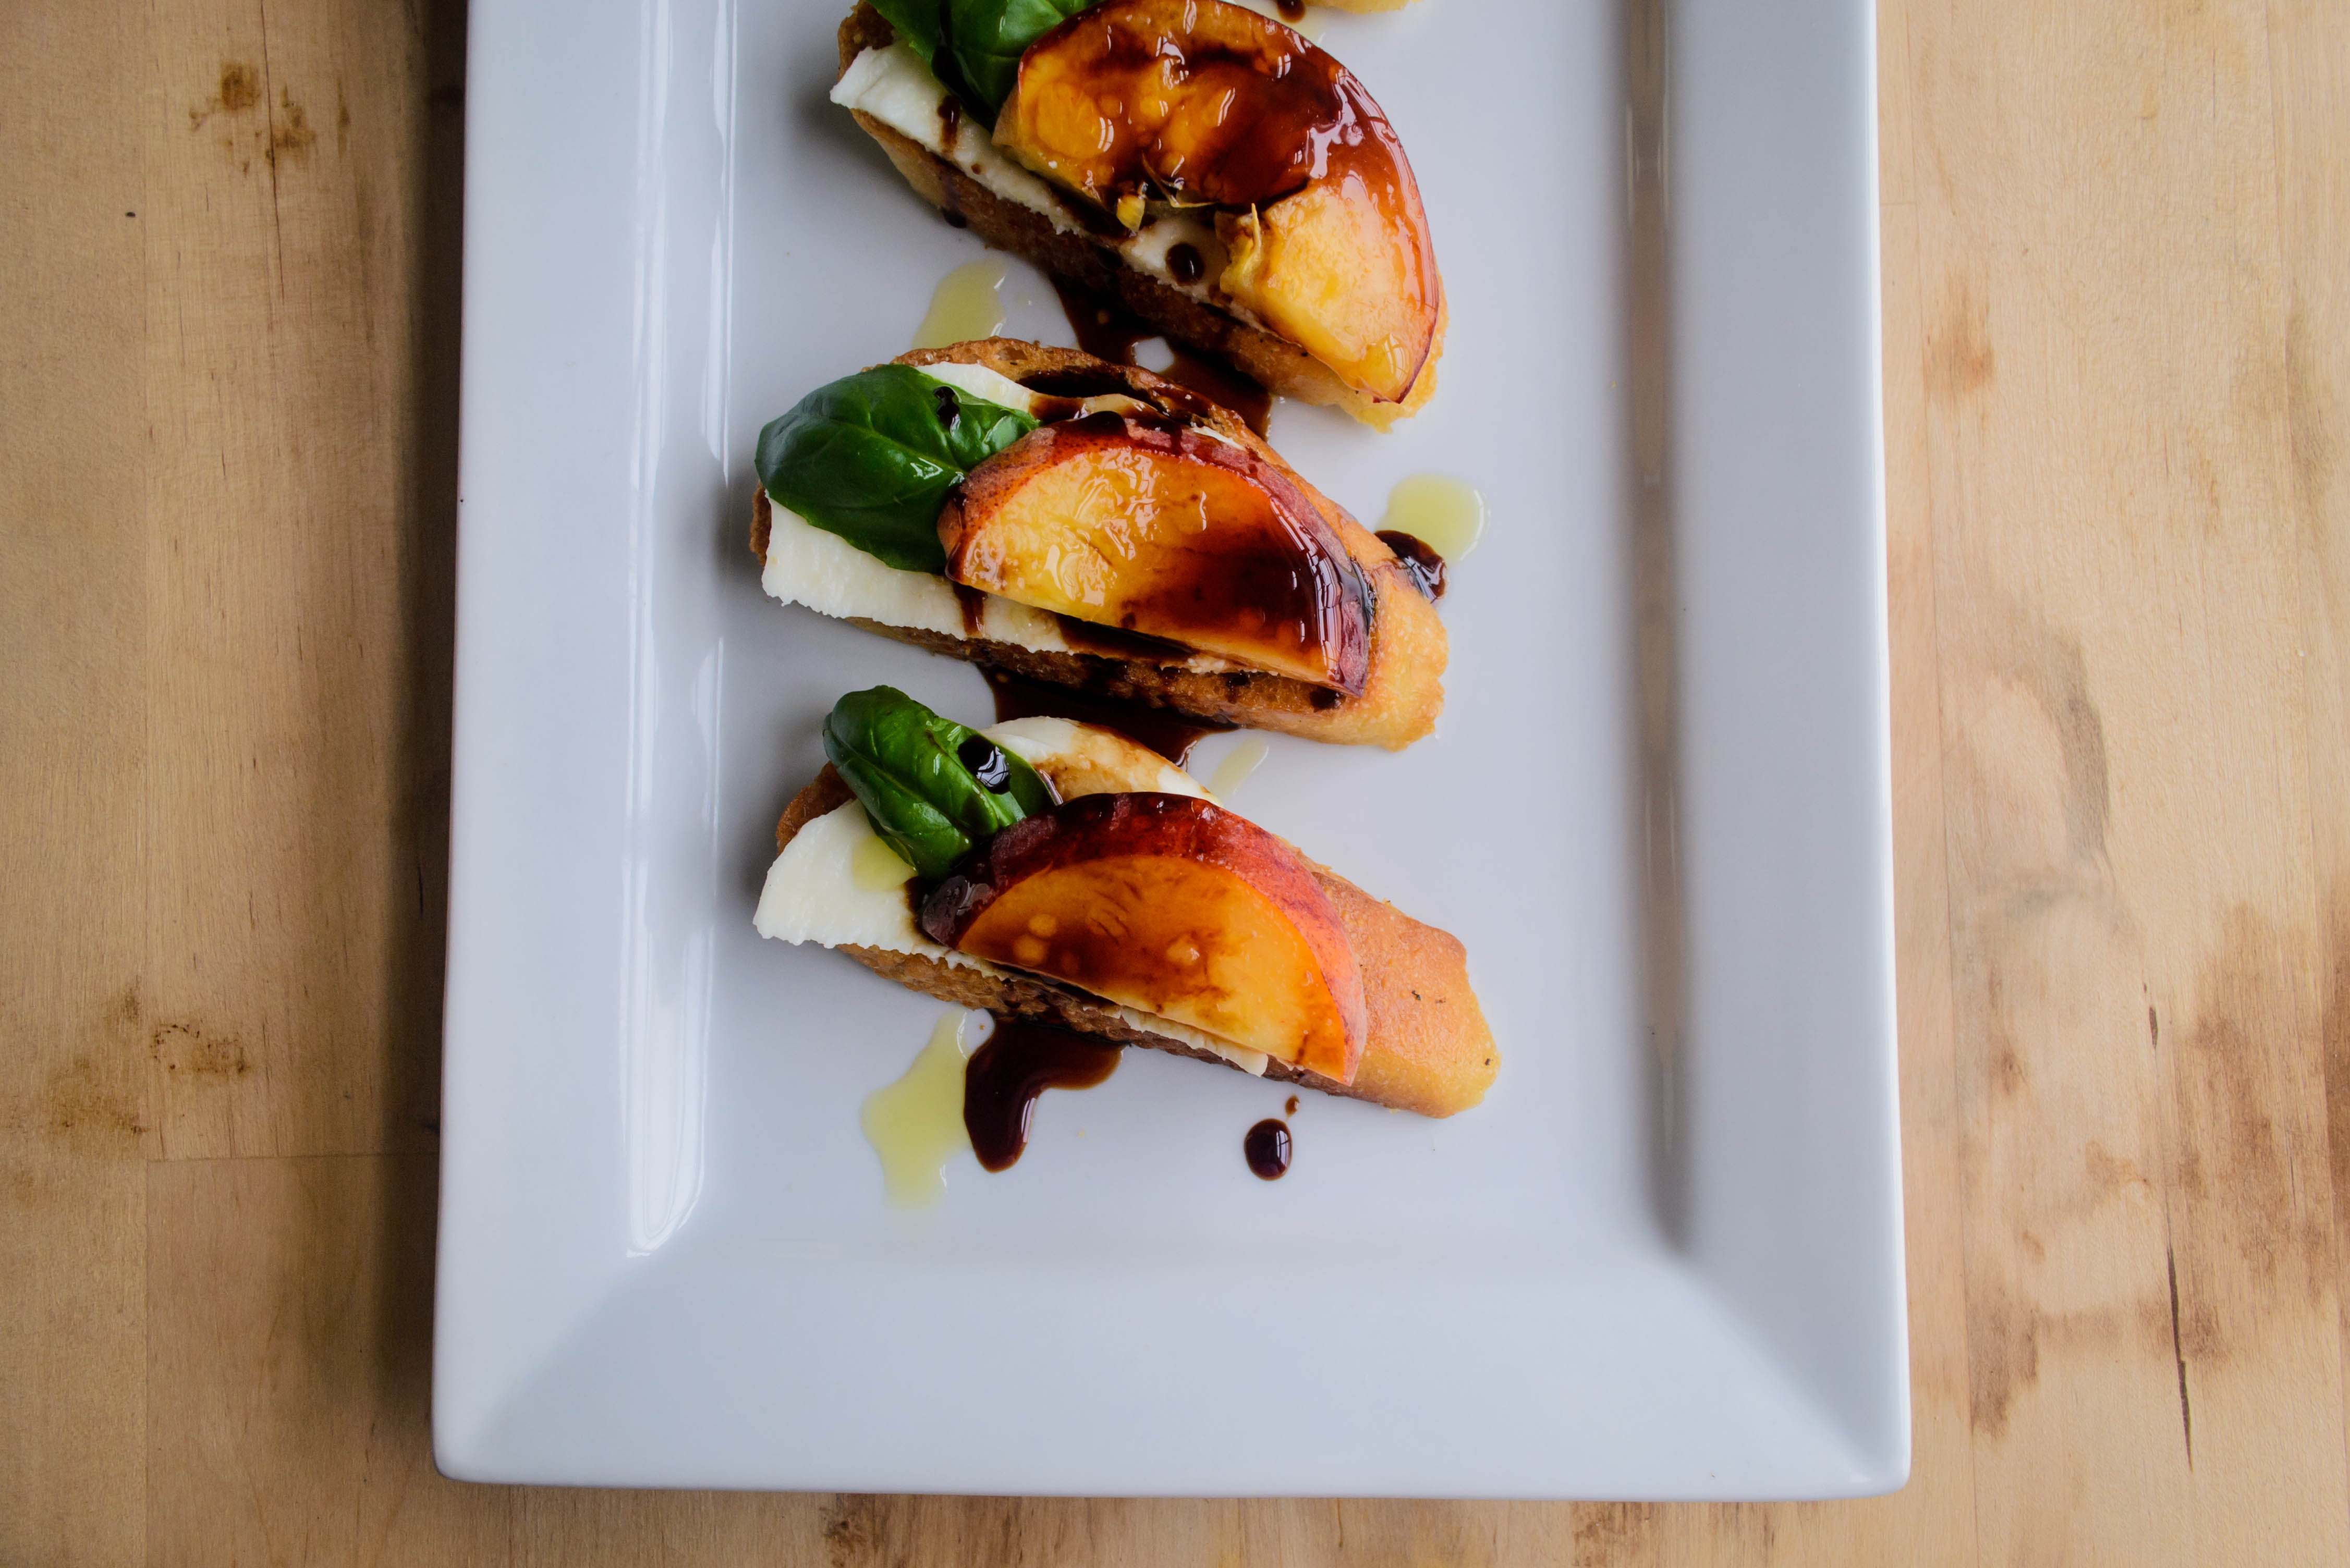
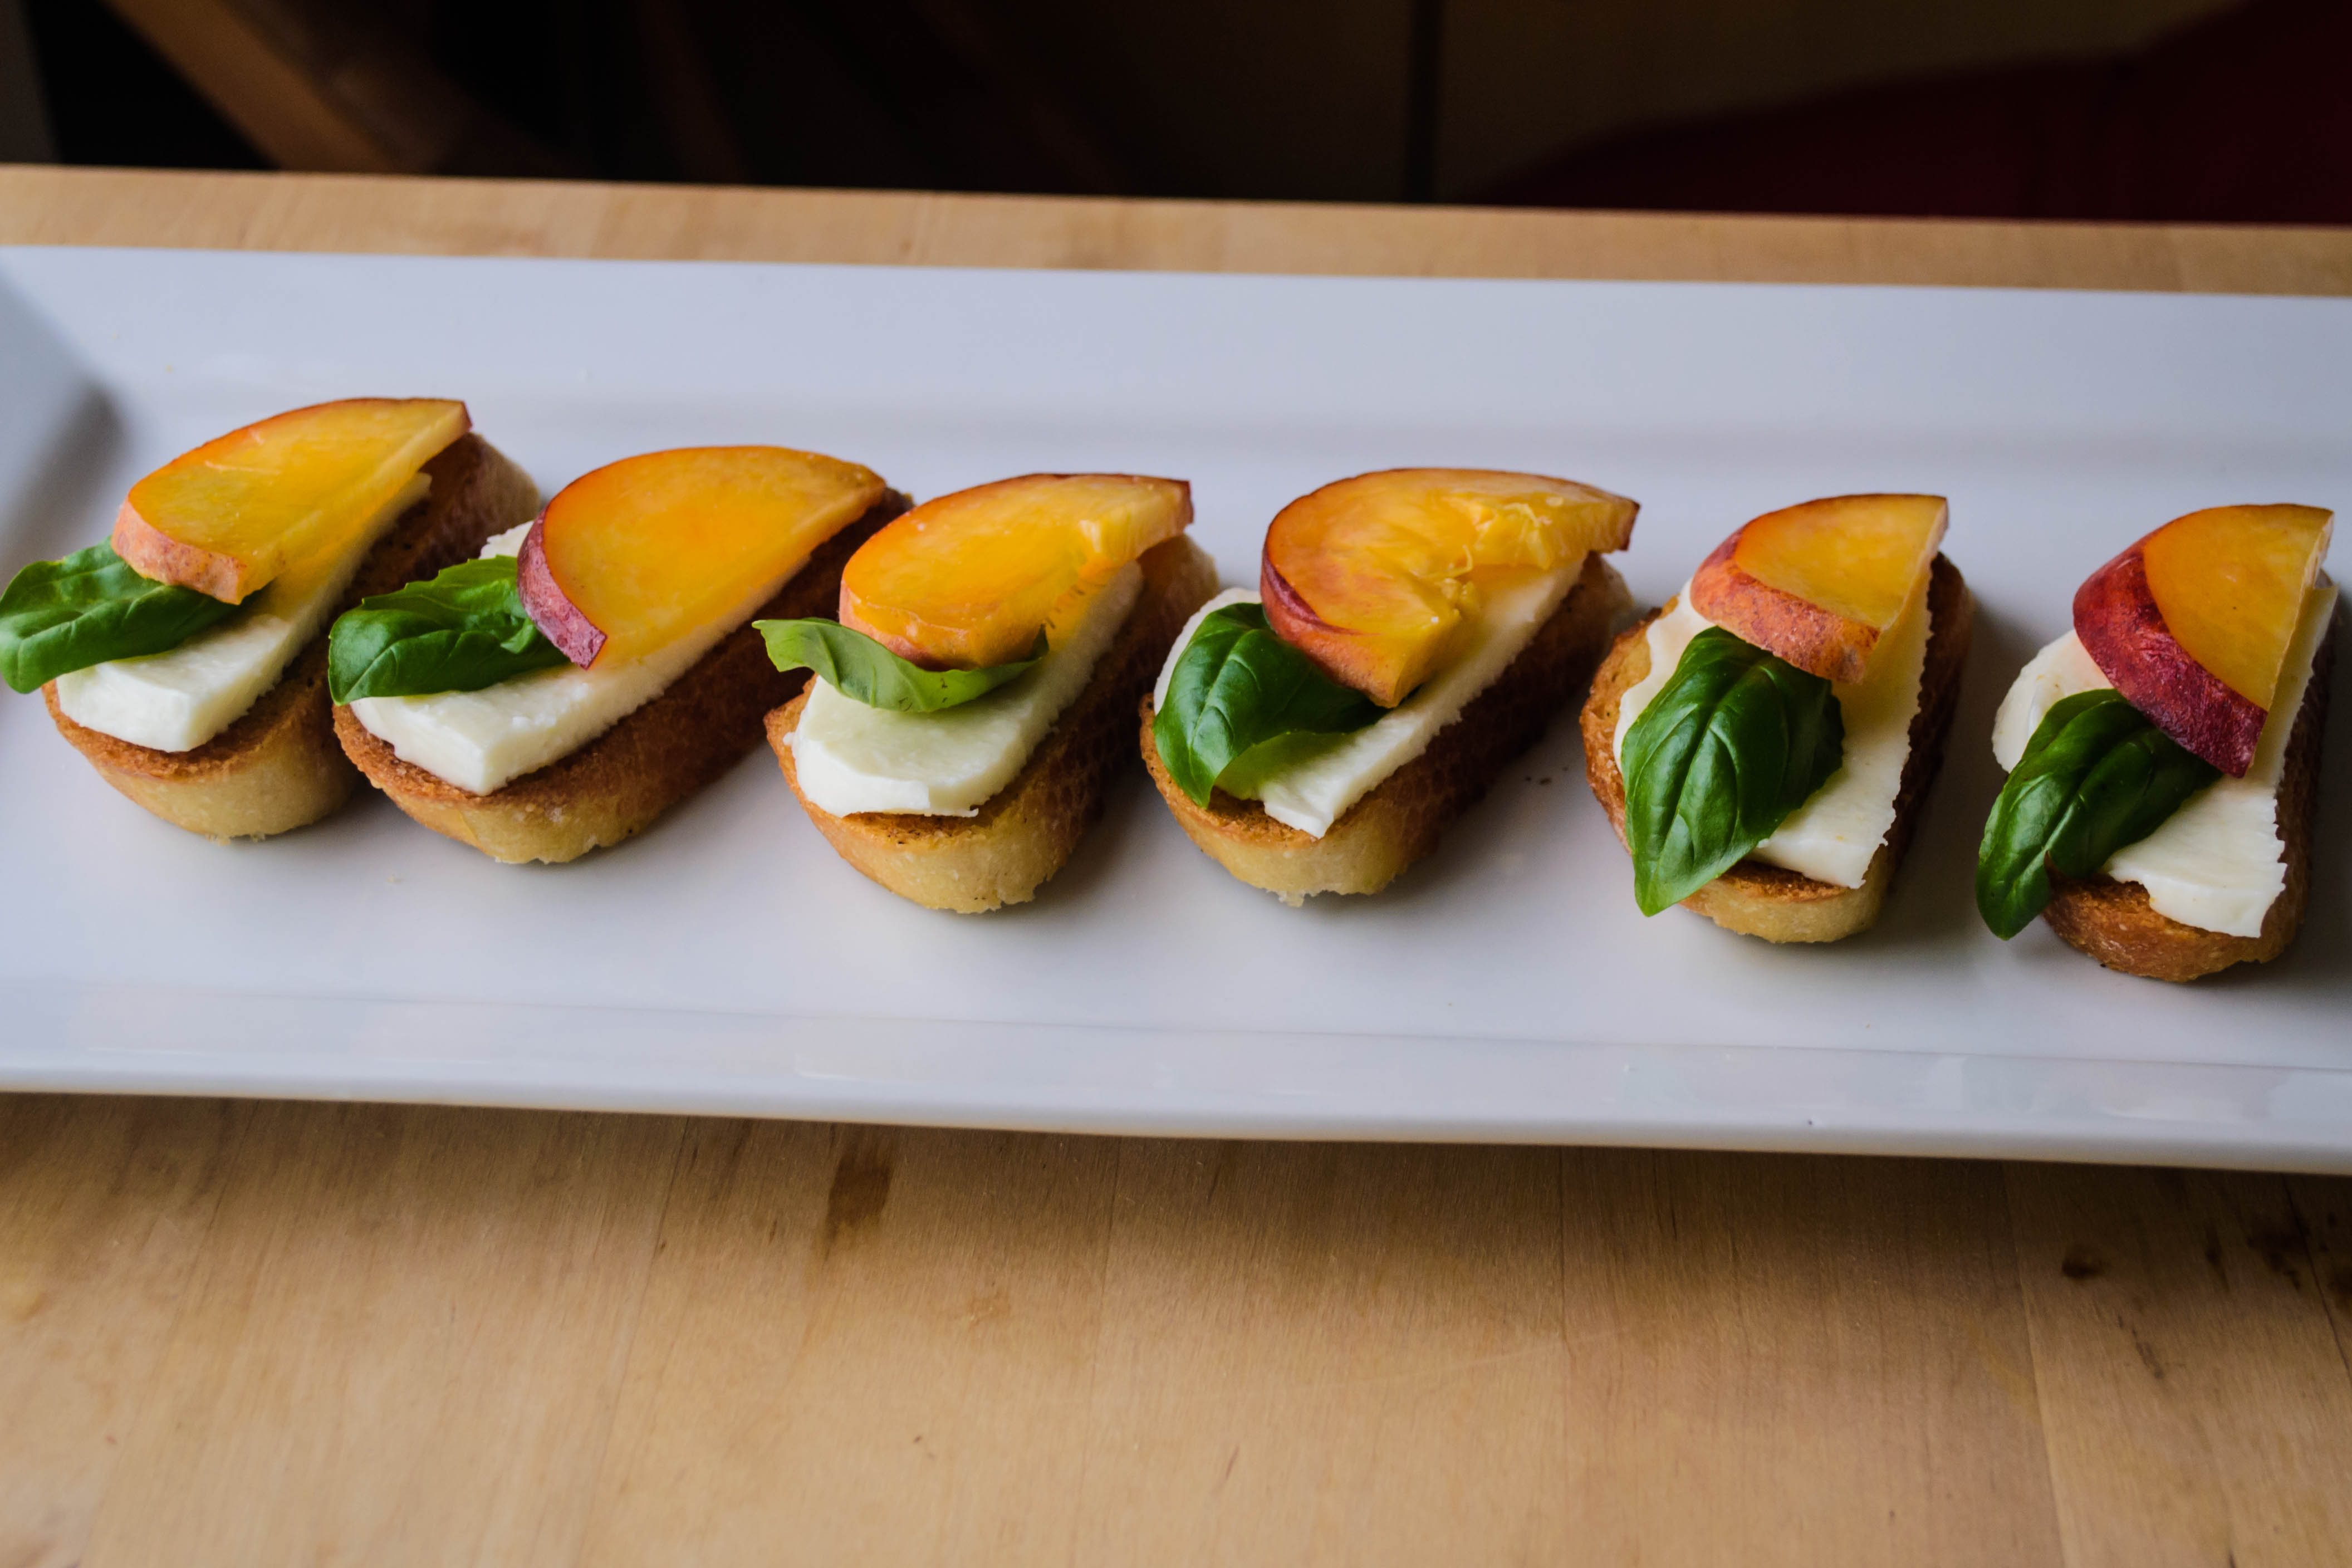
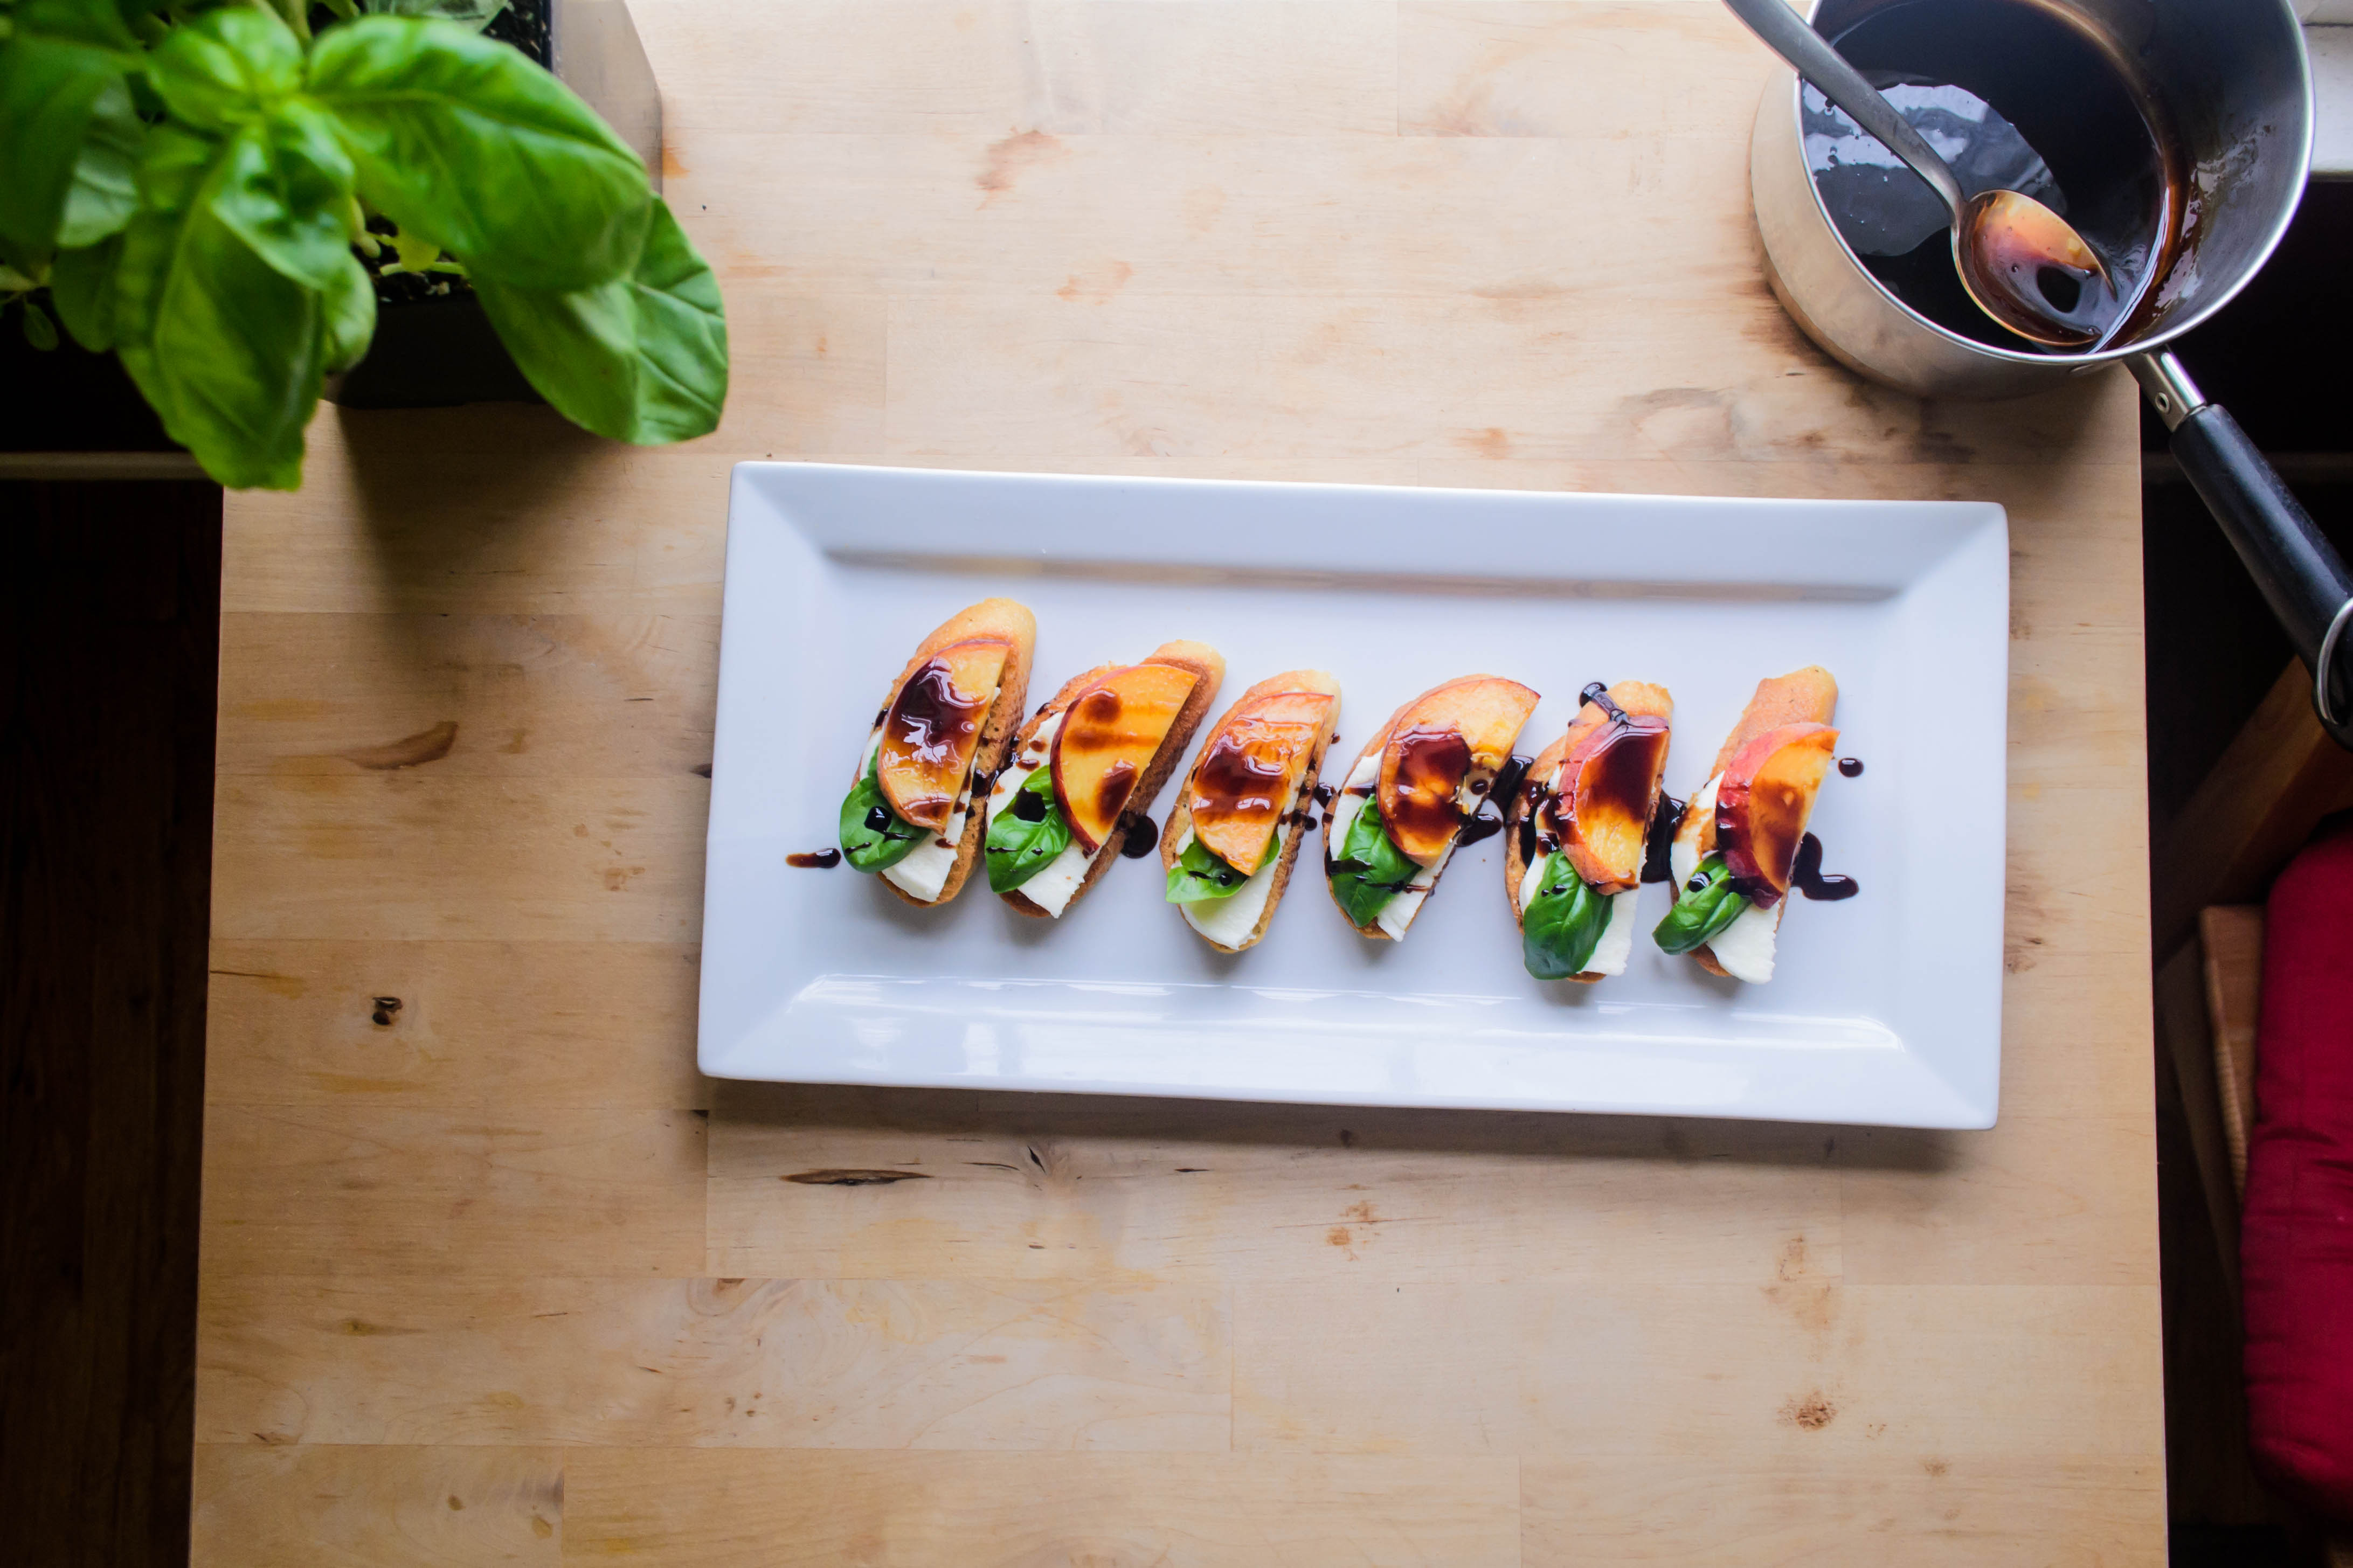
Not this time. The peaches were juicy, the mozzarella was creamy and perfect, the basil was fresh and crisp, and I didn’t even burn the toast (believe me, that’s an accomplishment). I reduced my balsamic vinegar with a tablespoon of brown sugar, and I may never do it any other way; the sugar thickened it up faster, and it played well with the peaches, eliminating just the edge of the puckering tartness balsamic can have. Obviously, the whole thing went perfectly with a glass of cold, cold, slightly effervescent pink wine.

Food blog June 2015-0968Suggestions: as we were eating these, I was already talking about alternatives. You could, for example, add the cheese 30 seconds or so before removing the toast from the broiler, to start it melting into the bread for a softer end product. You could grill the peach slices, with or without a brush of butter or brown sugar, for a caramelized fruit flavor. You could even eschew the toast altogether and just offer a platter of layered peach and cheese slices with basil tucked in, as you would with a traditional caprese, and serve it up alongside whatever you’d grilled in your outdoor kitchen. Maybe even add in some cucumber slices for extra crunch. And not that it’s likely you’d have leftovers, but if you, say, casually stacked the peach slices and remaining balsamic syrup over a scoop or two of vanilla ice cream, and then you called me, I’d be happy to come and share it with you.

Food blog June 2015-0980

Peach Caprese Toasts
Serves 2-3 (easily doubled or tripled… go crazy!)
Most quantities here are according to your tastes (translation: approximate). Take the basics and do them up the way you like them best. No fuss. It’s summer.
½ cup balsamic vinegar
1 tablespoon brown sugar
12 slices of baguette, about ¾ inch thick (French or sourdough)
olive oil for drizzling
salt and pepper for sprinkling
2 small peaches
ball of fresh mozzarella (burrata would also be lovely, though a touch messy)
12 leaves fresh basil


  • Preheat your broiler. While it warms, make the balsamic syrup. Pour the balsamic vinegar and the brown sugar into a small pot and cook over medium heat until it comes to a boil. Lower the heat and simmer until the mixture reduces by half, then turn off the heat and let it sit. It won’t seem very thick during the boil, but just wait! It thickens as it cools into a tart, glossy syrup.
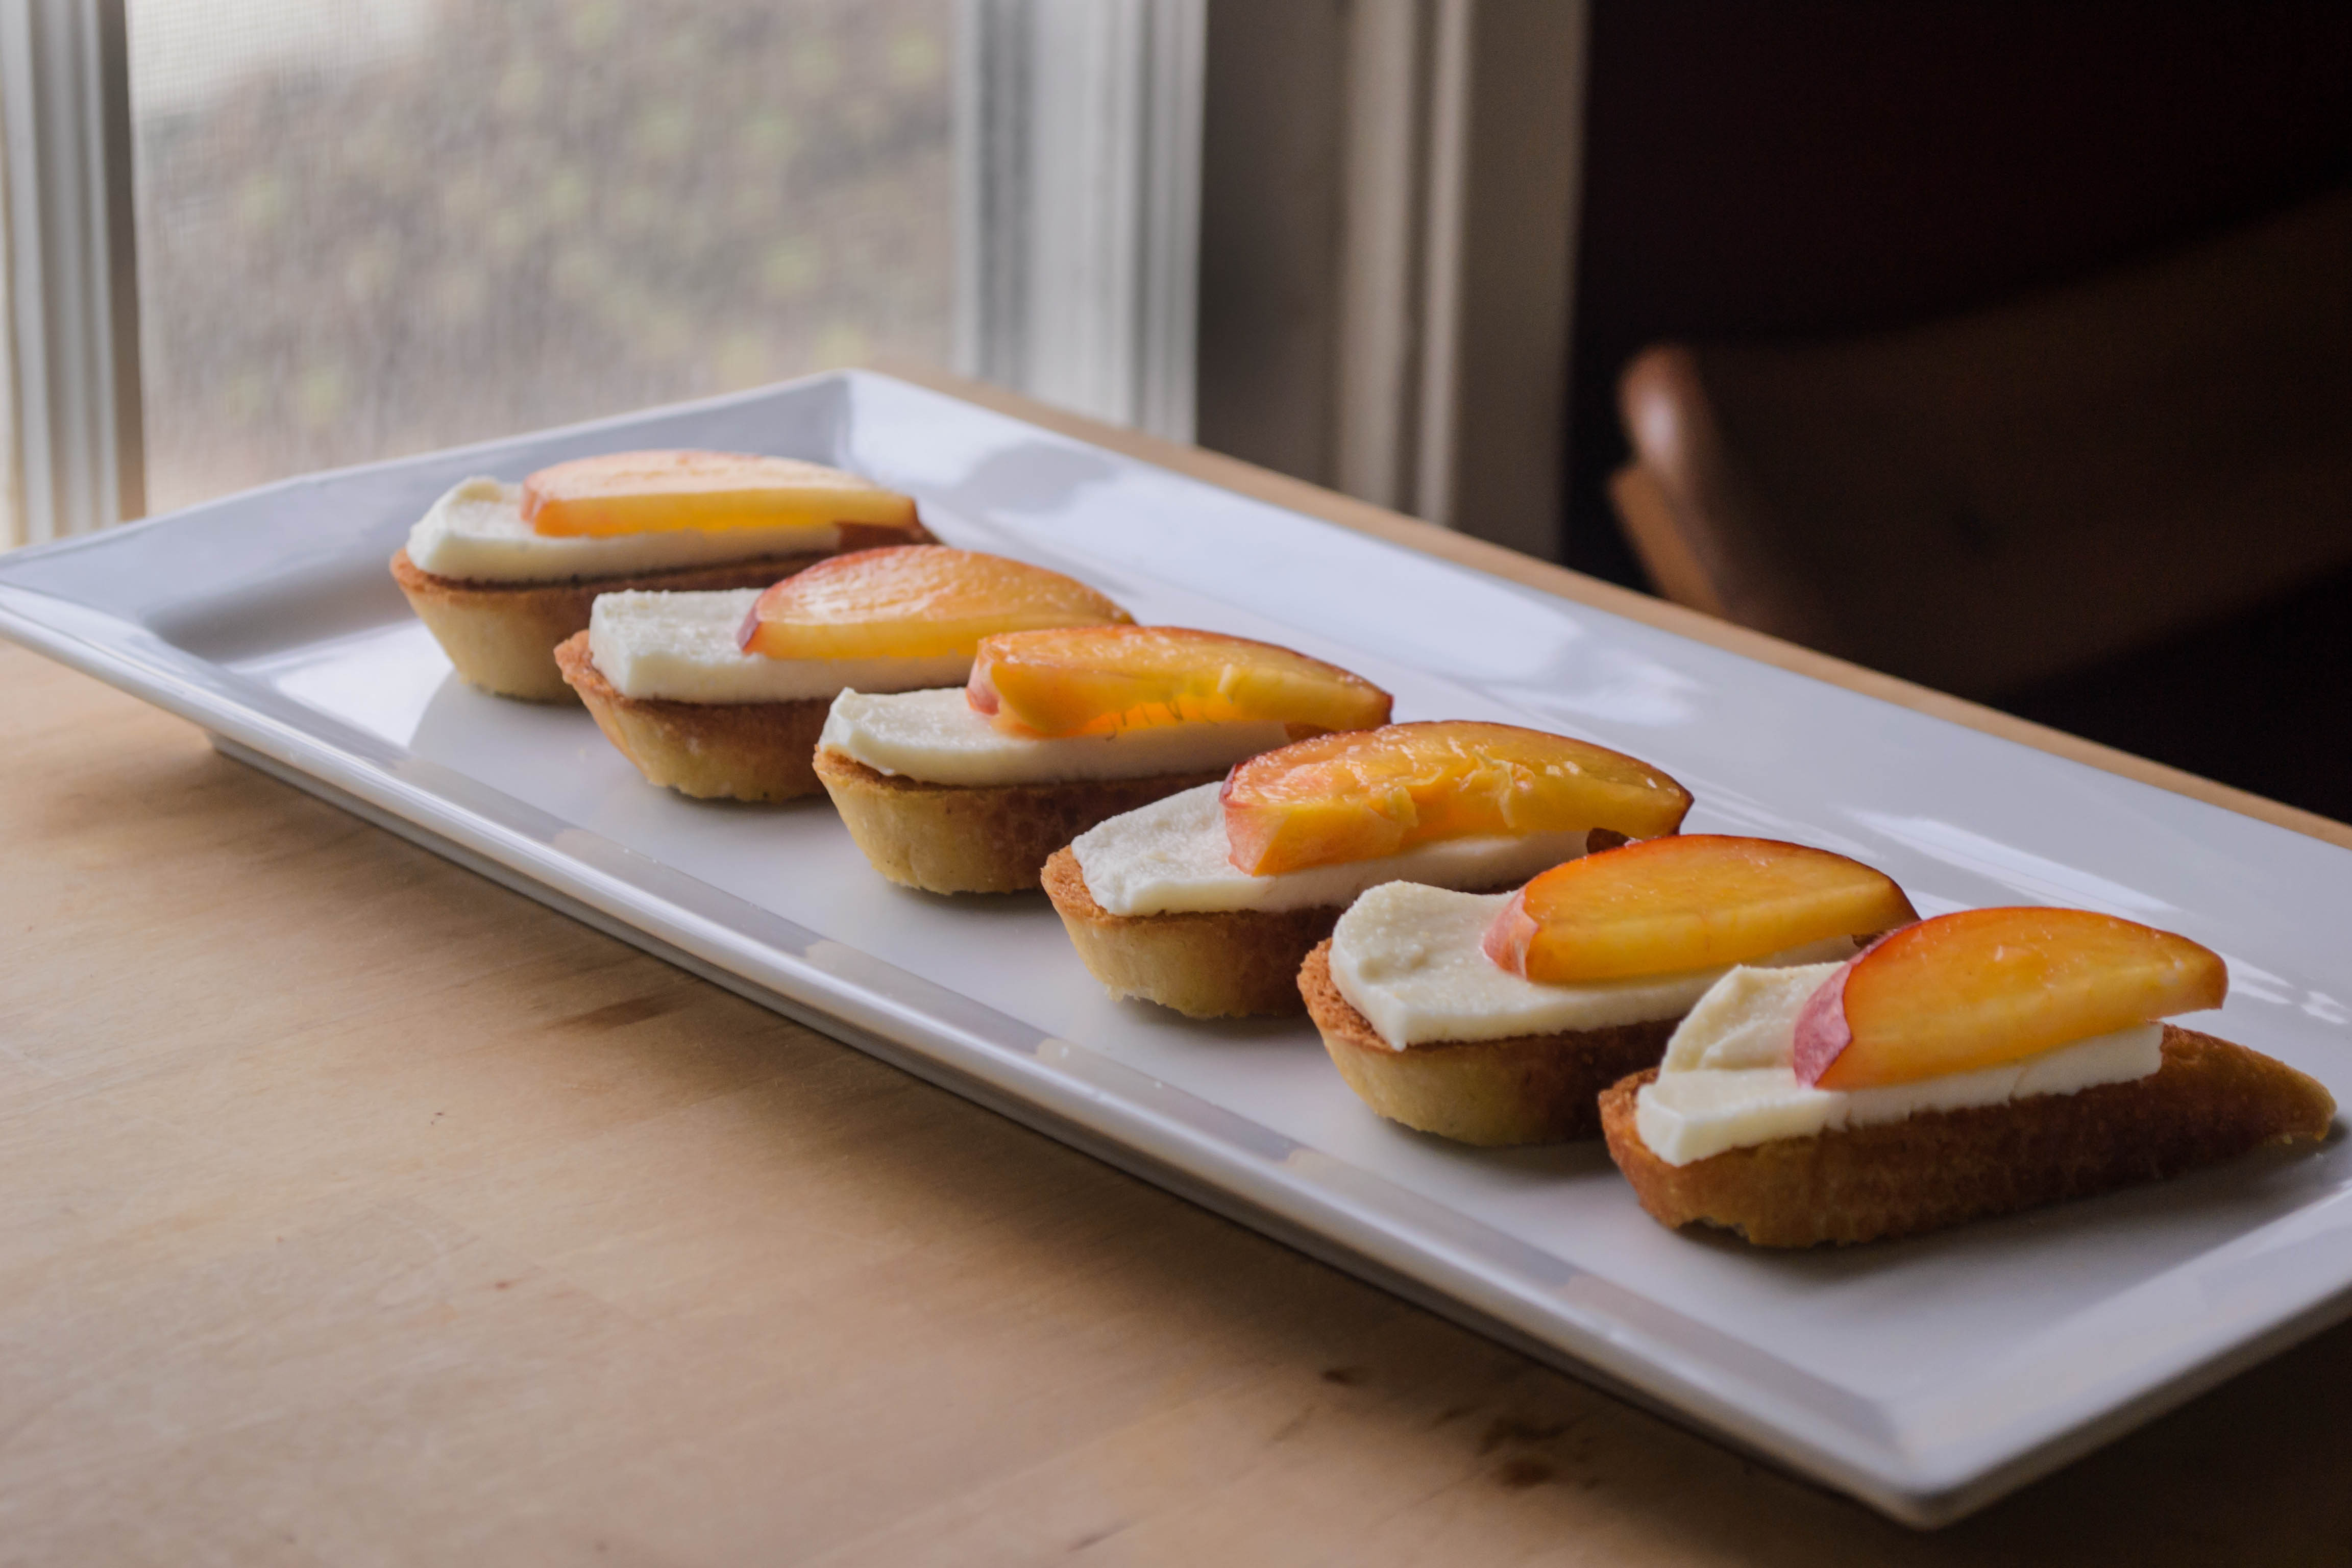
  • Spread baguette slices out on a cookie sheet and drizzle them with olive oil, salt, and pepper. You want a fairly even coating of oil for even browning. Broil, watching carefully to prevent burning, until the toasts are golden and crisp on top to your liking. For me this took about 3 minutes. Remove and let cool slightly, OR top each toast with mozzarella slices and broil just another 30-60 seconds until the cheese begins to melt.
  • To assemble, place a slice of mozzarella cheese on each toast (unless, of course, you already did with the melted option). Top that with a basil leaf, then a peach slice. Place on a platter or serving dish.
  • Use a spoon to drizzle on some of the balsamic syrup – I like a thin striped pattern back and forth across the whole thing.
  • If desired, you can also drizzle the top of the toasts with olive oil, and sprinkle with sea salt for a little extra lushness.
  • Serve immediately as an appetizer, preferably with something sparkling to drink.


Green bean and roasted red potato salad with blue cheese

Food blog May 2015-0733As buried in pages as I am, it’s difficult to believe that I’m only one week away from “summer.” Well, four days of class and about 120 mixed papers and exams. This is difficult to bear – something about this semester has been more burdensome than usual. It’s hard to know how to feel when there is so little time but so much work between me and those glorious two and a half months of no work but also no paycheck.

Food blog May 2015-0705As if matching my own cloudy-with-a-chance-of-vacation feeling, our weather lately has taken turns back and forth between what looks like summer and what, for here, passes as wintry. Typically June mornings in Southern California are overcast such that they even have their own nickname: June gloom. We’ve hit this a trifle early, it would seem, with the last week sporting what my officemate helpfully titled “May gray,” and temperatures barely grazing 70F. This is, it would seem, an uncertain entree to summer.

Food blog May 2015-0707Speaking of entrees, let’s talk food. Specifically, let’s talk potato salad. It’s not summer just yet, so it’s a little soon to dive into a platter of mayonnaise-robed spuds shot through with crisp cubes of onion and pickle. But because I surely am not the only one longing for everything a good potato salad represents, this adaptation from The Bon Appétit Cookbook is a perfect compromise. Here, roasted potatoes provide warmth and comfort, all caramelized edges and creamy softness, but a sharp, tangy mustard vinaigrette and crisp-tender green beans push the dish salad-ward.

Food blog May 2015-0711To fill my yen for green vegetables, I’ve doubled the amount of green beans and reduced the quantity of oil from the original. I’ve also eliminated walnuts and changed up the herbs to suit my fancy, and gone with whole grain rather than dijon mustard, because I like the tart pop of the little seeds. This can be eaten at room temperature as well as slightly warm, but because a generous scattering of blue cheese adds a creaminess and funk to the party, you don’t want things too heated, lest melting commence.

Food blog May 2015-0717This is the kind of dish that contents me as an entree. I suspect it would happily welcome a handful of crisp crumbled prosciutto or diced hard salami, if you want a little meaty component. If you’re treating it as a side dish, I highly recommend sausages of any variety to round out the plate, or a nicely roasted or grilled pork tenderloin.

Food blog May 2015-0725As most things are, this was just as good on day two heated up just enough to take the chill off, and topped with a fried egg still runny enough in the yolk to offer a velvet golden cascade that turned the salad into something more like a hash, my own ideal of comfort food. It’s the very thing you need, when you know summer is coming but you can’t quite see the light yet.

Food blog May 2015-0738

Green Bean and Roasted Red Potato Salad with Blue Cheese
Adapted from The Bon Appétit Cookbook
Serves 6 as a side dish
For dressing:
¼ cup whole grain mustard
3 tablespoons white wine vinegar
½ cup olive oil
3 tablespoons finely minced chives
2 teaspoons finely minced sage
For salad:
2 pounds red skinned potatoes, cut into 1-inch chunks
16 ounces green beans, trimmed of stem ends and halved on an angle
⅔ cup crumbled blue cheese


  • For the dressing, combine the mustard and vinegar in a 2-cup measuring cup or a small bowl. Gradually whisk in the oil until well emulsified. Add the herbs and season to taste with salt and pepper, keeping in mind the flavor will be much sharper alone than when it’s coating the salad.
  • Preheat oven to 450F. Toss the potato chunks with ¼ cup of the dressing in a 9×13 inch baking dish. Roast for 20 minutes at 450F.
  • After 20 minutes, reduce the oven temperature to 375F. Shuffle the potatoes around for even browning, then roast 30-45 minutes more, until tender. Stir and shake once or twice during the cooking process to minimize sticking and ensure even cooking. When potatoes are tender, remove from oven and set aside to cool slightly.
  • While potatoes cook, bring a large skillet of salted water to a boil and drop in the green beans. Cook until crisp-tender, 2 to 3 minutes, then drain and cool.
  • When the beans and potatoes are still warm but not piping hot, combine in a large bowl (or just keep them in the original baking dish, as I did), add cheese and ¼ cup of the dressing (you may need to re-whisk the dressing first, as it will separate as it sits), and toss gently. Taste for dressing and seasoning, and adjust to your preferences (I added about 2 tablespoons additional dressing and a bit of black pepper).
  • Serve warm or at room temperature.

Rice Rolls

Food blog April 2015-0598As I revealed last week, my trio of vegetable pickles are just one part of a larger project: a meatball banh mi. These rice rolls are part two. Banh mi, in Vietnamese, really refers not to the wonderful sandwich layered with pate or pork or tofu and stacked with vegetables, pickles, and spice, but to bread itself. Colonization brought the French baguette to Vietnam, and the blending of flavors is a much nicer postcolonial remnant than such occupations frequently bring.

Food blog April 2015-0567Food blog April 2015-0570Though the culinary melding is quite harmonious, banh mi bread brings with it a great deal of internet controversy. Though most shops that sell the popular sandwich buy their baguettes from Vietnamese bakeries rather than making them in-house, crazy people people like me who want to re-craft the “genuine article” share their complaints, secrets, and professed revelations all over forums and comment threads, arguing over proportions and procedure and shape, and at some point, the argument usually involves discussion of flour type, gluten development, and protein content.

Food blog April 2015-0572Food blog April 2015-0574Food blog April 2015-0580The main debate when it comes to banh mi bread is the texture and composition. Though I’ve had these sandwiches on bread ranging from baguette or french roll to essentially a toasted hot dog bun, the ideal is a crisp, thin crust with a soft interior. The phrase “shatteringly crisp” is used with reverence. The internal structure should be light and soft and more delicate than the spongy chew of ciabatta. Rice flour is supposed to be the answer. Because it does not contain gluten, it will not result in the formation of the chewy texture a well-kneaded baguette can produce. However, food writer Andrea Nguyen, who knows a thing or two about Vietnamese food, asserts (assertively, even!) that rice flour is not a necessity, and in fact may even hinder the lightness and delicacy of the bread interior. However, without access to her cookbook or the combination of vital wheat gluten and vitamin C tablets she makes use of, I stuck with my usual method: a combination of promising-looking recipes plus my own instinct. Despite the to-rice-or-not-to-rice controversy, I decided to use a small percentage of rice flour. After all, I had some. Why not give it a shot.

Food blog April 2015-0581I also decided, veering far from tradition, to add some rye flour to the mix. According to Simply a Food Blog, a little bit of rye flour adds a compelling flavor and some additional sugars to the dough for the yeasts to gobble up. I like the gentle toastiness of rye flour, so I incorporated some of that as well.

Food blog April 2015-0586Food blog April 2015-0588In addition to the Simply a Food Blog suggestion, I also used Rice and Wheat and A Bread A Day in my recipe creation, and ended up with an ingredient list and procedure that created something much closer to a sausage roll or a bun than a crisp crusted baguette.

Food blog April 2015-0589Yes, I’ll admit, these are not the banh mi wrappers of your dreams (well, at least not if you are bivouacked in the “shatteringly crisp” camp). Though these rolls have a thin crust, it is just enough for the teeth to play with, not a staggering crunch you can hear across the table. At first I was perturbed by this, but it only took splitting one open, still warm and fluffy from the oven, and slicking the interior with butter to show me that while this might not be a traditional Vietnamese baguette, it is a delicious piece of bread. Though I filled ours with the meatballs I’ll show you next week, it would be more than welcome at any summer grilling event, whether your intended fillings are kielbasa or veggie dogs.

Food blog April 2015-0590As I thought more about this issue of inexactness, I decided I didn’t care. After all, this is my sandwich. A thin crust that shatters upon impact is fine, but my version keeps the roof of your mouth unscraped and your placemat a lot less crumb-scattered. As Joe Pastry pointed out just recently, tender bread is a boon for a sandwich. Mine offers a pleasant depth of flavor from the addition of the rye flour, and its soft, fluffy interior is exactly the kind of squashy that I favor in a sandwich. Besides (I compellingly convinced myself), the crisp crunch of the vegetables stacked up between the halves of the roll provide sufficient textural contrast. Why not, then, surround them with something a bit on the softer side?

Food blog April 2015-0594These rolls are best just cooled from the oven. They are okay on the second day, but I highly recommend toasting them for consumption on any day following the one they were made.
Food blog April 2015-0596

Banh Mi Rice Rolls
Makes 8
1 tablespoon active dry yeast
1 teaspoon sugar
2 cups (16 ounces) lukewarm water
1 cup rice flour (about 5 ounces)
½ cup rye flour (about 2.5 ounces)
2 teaspoons salt
3-4 cups all-purpose flour (we don’t want the extra chewiness of bread flour)
2 tablespoons soft butter
  • Combine the yeast and sugar with the water and stir, then let sit for 5-10 minutes until it is bubbly and smells like warm bread.
  • In the bowl of your stand mixer, combine the rice flour, rye flour, butter, and water and yeast mixture with the paddle attachment. It will be very, very wet – basically a liquid. Let it sit for 10-20 minutes – rice flour needs extra time to absorb water. It will seem a bit floppier when you return.
  • After 10-20 minutes resting time, add 2½ cups of the all-purpose flour and all of the salt, then mix with the dough hook attachment on medium speed to form a soft but not overly sticky dough. After about 5 minutes, the dough will start to gather into a ball and stretch to slap the sides of the bowl as it whizzes around. If the dough is not coming together after about 5 minutes, add an additional ¼ cup of flour as needed. I ended up with a little more than 3 cups of all-purpose flour in the mix. Knead on medium speed until the dough is smooth and elastic, a total of 7-10 minutes.
  • Oil the bowl and turn the dough ball over to lubricate on all sides, then cover with plastic wrap and let rise until doubled; 45-60 minutes. In my warm home office, it only took 45 minutes.
  • Turn the risen dough out onto a board dusted with rice flour and cut into 8 equal pieces. Roll each into a ball, flatten into a disc with the heel of your hand, then let rest 5-10 minutes.
  • Roll each flattened piece of dough into an oval about 8 inches long by 6 inches wide. Working from the long side, roll up each oval into a cylinder of about 8 inches long (the dough will want to stretch – try to keep it at the 8 inch mark). Pinch the exposed edge into the side of the cylinder to create a seam.
  • Place each dough cylinder seam-side down on a parchment lined baking sheet. (If you don’t mind the buns touching, all 8 will fit on the same sheet. If you want them to remain separate, don’t put more than 4 on the same baking sheet). Cover lightly with plastic wrap or a clean kitchen towel and let rise 30-45 minutes until puffy. To determine whether they’ve risen enough, poke gently; the depression made by your finger should recover about halfway – if the depression disappears completely, it has not risen long enough.
  • While the dough is rising, preheat the oven to 450F with a baking stone inside for even heating. Prepare a spray bottle full of water to spritz the loaves.
  • When risen, slash the loaves at a 45 degree angle (or angle of your choosing; mine are clearly not 45) with a razor blade or serrated knife, then spray lightly with water and quickly place into the preheated oven. Bake for 2 minutes, then spray loaves again lightly with water. Bake 3 minutes more, then spray lightly again.
  • Reduce the oven temperature to 400F and bake an additional 10-15 minutes, or until loaves register 200-210F inside.
  • Let cool at least 10 minutes before splitting, spreading, or just going in for a big bite.

Vegetable pickles, three kinds

Food Blog April 2015-0565Not long ago, I finished Cooked, Michael Pollan’s latest, in which he seeks to elucidate the magic of our kitchens. He looks at the transformative power of each of the four elements when applied to ingredients, and works to understand the connections we draw from and through what we eat as it ceases to be raw materials and becomes food. I couldn’t put it down. I tore through it like a fluffy bedtime novel, as my friend S. probably knew I would when she sent me a copy.

Food Blog April 2015-0548In a number of ways, Pollan’s investigation reminded me of my own scholarly work a few years ago when I was a graduate student. Though I was focused on medieval literature, I was intensely interested in what we could learn about human – and not-so-human – beings by examining the literary depictions of how and what they ate. Dietary habits, I thought, along with sexual practices, might be what determines humanness within this field of literature. Too much, too little, or too weird, and your food habits moved you outside what we think of as human, and into something else.

Food Blog April 2015-0546Unsurprisingly, as anyone who has researched food and its cultural impacts deeply knows, this led me to anthropologist Claude Levi-Strauss and The Raw and the Cooked, the first volume of his elaborate, complex exploration of human myth and culture. Without getting too academic, I’ll just say that Levi-Strauss thinks a great deal of the development of culture happens as – and as a result of – foodstuffs transforming from raw to cooked. His analogy equates the wild to the raw, and the civilized to the cooked.

Food Blog April 2015-0549Pollan pulls on and plays with this idea, considering that if indeed cooked food represents culture or civilization, then there must be something about the cooking process itself that is civilizing and bridging. The four elements he examines are aligned with four types of cooking methods: fire explores the tradition of barbecue; water looks at stews and braising; air relates his adventures in the magic/science of bread baking; and earth digs into fermentation, the weird, marginally repulsive transformation of fresh food into pickles, or beer, or cheese – food that is prized and yet impacted by earth and death and rot.

Food Blog April 2015-0552This, too, reminded me of my own work (and don’t worry, we’re getting to the recipe part here soon), particularly an article I ran across as I was working on the Chaucer chapter of my dissertation. Subtitled “The Raw, the Cooked, and the Rotten,” the article took on Levi-Strauss’s nature/culture formulation and added a step to accommodate one of the characters in Chaucer’s The Canterbury Tales. If raw food is wild and cooked food is civilized, what happens when that cooked food goes bad? This seemed to equate to my idea of people who had exceeded the limits of humanness through their eating habits, turning food into waste.

Food Blog April 2015-0557But I was looking at food habits from a perspective of too little as well as too much. What about superhuman beings who survived without eating, or whose bodies remained impenetrable, and un-penetrated, by the eventual corruption of food? I hypothesized making this triangle a square: adding preservation as a fourth corner. Suspended in limbo by sealing oneself against the external corruption consumption and digestion can bring, you remain preserved. This is not humanly possible, but it is not considered with disgust in medieval literature. Rather, such individuals hang closer to the divine than to the monstrous or subhuman.

Food Blog April 2015-0551Though this is not quite the four-some Pollan presents, I think fermentation and preservation have some similarities. In being preserved by their “cooking” process, fermented foods and preserved foods are mysterious blends of human and natural magic. Jams and jellies, preserved by being cooked with sugar, are the sweet side of this equation. Pollan opts to explore sauerkraut and cheese and beer. Today, I’m taking on pickles: simple raw, sliced vegetables transformed, “cooked,” and held in briny limbo by vinegar, sometimes sugar, and salt.

Food Blog April 2015-0559When N. and I got serious, we started using pickles as a metaphor for our relationship. In most refrigerators, there is a jar of pickles shoved way in the back, often on the top shelf, getting in the way of the orange juice and the milk and the mayonnaise. When you finally pull that jar out and peer inside, it’s almost never full. There are one or two pickles in there, floating around in the dill-and-peppercorn-laced brine, warty and sour and beautiful. The ubiquity of that pickle jar became our metaphor. As long as there were pickles in our fridge, we would be okay.

Food Blog April 2015-0560As with most Americans, I would wager, the pickles I was accustomed to when I was younger were always cucumber based, and usually dill (though I am a fiend for bread and butter pickles). I had no real sense that other sorts of vegetables could be pickled (aside from beets, thanks to my Nana) until I started frequenting the McMenamins pubs, an Oregon and Southern Washington chain of sorts featuring decent beer, good burgers, and remarkably slow service. Our little graduate crew went often – there were three different locations in the city of Eugene alone. Their hummus platter, ever present on the appetizer menu, came with a variety of vegetables along with triangles of pita, and often the spears of green bean and carrot, and the occasional nub of cauliflower, were pickled. Of course I had little thought of doing this myself until, chasing after an elusive potato salad that included pickled green beans, I started noticing how expensive these various vegetable pickles were in the grocery store. Recreating that potato salad required pickled green beans, dammit, and as a poor graduate student I was both unable and morally opposed to spending $7.99 on a slender little jar.

Food Blog April 2015-0561Fortunately, vegetable pickles are easy and fall within even a humanities graduate student’s budget. Vinegar, sugar, and a healthy shower of salt, heated to a simmer to dissolve the crystals. Jam as many vegetables as you can into a jar, shove in some flavoring agents: bay leaf, mustard seeds, dill, fennel, and pour on the vinegar. Cap, relocate to the fridge, and remember them a few days later when they’ve had a chance to sour up.

Food Blog April 2015-0562Vegetable pickles seem entirely suitable for the season. Fresh, young vegetables are great for pickling, especially while they are still small in size, so the vinegar can penetrate faster. Slender carrots, or plump radishes, or the tiny lanterns of young peppers, are a sign of spring that is often gone too fast. Pickles, though, hold that spring forever, jarred and capped and safe on the top shelf lurking behind the orange juice. Though they are not unaltered – the raw crispness is indeed transformed – in that way too they are like a spring gone by, or perhaps the memories of that spring that remain. It’s not that perfect, warm day anymore, but you remember its brightness – you need only uncap the jar and fish out a crisp briny souvenir.

Food blog April 2015-0616I’ve done three types of pickle here: onion, carrot, and radish. Each is seasoned with a different combination of spices, and because I like to be fancy, I’ve used a different variety of vinegar. The radishes, I must admit, are my favorite. To play on their peppery flavor, I’ve added mustard seeds and a dried chili, but teased them as well with a heaping helping of sugar for the sweet-hot kick.

Food blog April 2015-0634While these are lovely in salads, as part of a cheese or hummus plate, or just bright and sour on a fork, they are dynamite on a sandwich. And as the above photo suggests, it is on a sandwich that they found their sprightly home for us. Specifically, on a banh mi sandwich, that fresh, crisp Vietnamese invention. Even more specifically, on the idea that spawned my whole 2015 project: a banh mi-tball. There are essentially three components to this sandwich. These pickles are the first. Next week we’ll look at the bread (the true banh mi), and in the third and final installment, pork meatballs awash in aromatics, simmered in a miso-spiked broth I wanted to drink all on its own.

But for the moment, let’s just revel in the transformative magic of pickles. You’ll need the week for them to get good and sour before you can properly enjoy the sandwich anyway.
Food blog April 2015-0619

Refrigerator Vegetable Pickles
My jars held 6 ounces (¾ cup), so these measurements are keyed to that.
Carrots:
carrot ribbons from 1 carrot to fill jar (use a vegetable peeler to create long strips)
⅔ cup white wine vinegar
2 teaspoons celery seed
2 teaspoons kosher salt
2 teaspoons sugar
1 teaspoon whole black peppercorns
Sweet/hot Radishes:
thinly sliced radishes to fill jar
1 small dried chili pepper
scant ⅔ cup rice wine vinegar (unseasoned)
2 teaspoons salt
4 tablespoons sugar (¼ cup)
2 teaspoons black mustard seeds
Onions:
thinly sliced red onion to fill jar
1 bay leaf
⅔ cup cider vinegar
2 teaspoons salt
2 teaspoons sugar
1 teaspoon fennel seed
  • For each: fill a heat-safe, lidded jar with vegetable slices (add chili or bay leaf, in the radish or onion case, respectively).
  • In a small pot, combine vinegar, salt, sugar, and other spices. Heat over medium-high, stirring occasionally, until liquid reaches a rolling boil and salt and sugar have completely dissolved.
  • Carefully, pour vinegar mixture over vegetables in jar until full. Gently push vegetables into liquid if needed – they will want to float.
  • Close jars tightly and refrigerate until vegetables are pickled to your liking – at least 2-3 days.

Mushroom Puttanesca Calzone

Food Blog March 2015-0498It would seem that I’m developed a bit of an obsession with well-oiled, aggressively seasoned mushrooms, patiently pan-roasted until deeply, deeply browned and edging toward crisp. Still bouncy on the inside, these golden crusted, meaty little nuggets are finding their way into my cooking more and more frequently. This would be, I think, an entirely good thing in terms of health and waistlines, except I keep drowning them in small mountains of cheese. Last week it was the quintessential quesadilla (which, if you’re wondering, is also stellar in taco format with the addition of tempeh, per my friend S.). This week, a calzone filled with deeply caramelized mushroom quarters, a chunky adaptation of my favorite puttanesca sauce, and of course, the requisite cheese all folded up and pinched inside a swollen half moon of dough.

Food Blog March 2015-0464Food Blog March 2015-0479I love a good calzone, but N. is a little resistant for the same reason he is resistant to lasagna: the not-smooth-enough texture of ricotta cheese. Its strange milky loyalty to both savory and sweet applications is not quite cheese-flavored enough, and the slight graininess of the tiny, tiny residual curds lingering in there weirds him out. Fortunately, in this case as with most cheese-related conflicts, the answer is more. Mashing a healthy dose of grated mozzarella in with the ricotta adds a stronger cheese flavor and ups the salt content, which I think ricotta often needs. Here, I’ve bumped up the flavor and interest even more by folding in a small pile of chopped herbs and some lemon zest. This provided welcomed brightness against the deep earthy mushrooms and puttanesca.

Food Blog March 2015-0471Food Blog March 2015-0476The trick with calzones, as you might expect, is moisture. Because you are sealing up this lovely little packet, it should be baked at a lower temperature than a pizza – the dough tends to be a bit thicker, and because half of it is on the inside, it needs more time to cook all the way through without burning the outside. But what you’ve stacked up inside also has more time to release its own juices, which can result in a bottom crust which is a bit, well, mushy is such an ugly word. Let’s call it soft. Ours certainly was. Calzone dough should be chewy and slightly pillowy but still, there’s a reason it’s called crust.

Food Blog March 2015-0481Food Blog March 2015-0482My thoughts on preventing this are as follows: ensure you are using only the chunky vegetable bits from the puttanesca sauce for the inside. Save the sauce component to spread over the top of the calzone. Additionally, if you have the time, drain the ricotta lump in a strainer lined with cheesecloth or paper towels. Even an hour would allow some of that moisture to escape, which means it would end up in the sink rather than the bottom crust of your dinner.

Food Blog March 2015-0484Food Blog March 2015-0485Food Blog March 2015-0488But even if you do end up with a bottom crust that isn’t as, well, crusty as you might like, you won’t be hurting for flavor. Mushrooms and ricotta – particularly a ricotta jazzed up with mozzarella and aromatics – play incredibly well together, and somehow both hold up to the briny strength of the sauce.
Food Blog March 2015-0492It’s a good dish, then, with which to bid March farewell: still those dark, warm notes of winter, but a lovely springy freshness too, all wrapped up in a chewy, melty package, and just as delicious the next day.

Food Blog March 2015-0499

Mushroom Puttanesca Calzone
Serves 6-8
16 ounces pizza dough, homemade or store bought
8 ounces crimini or button mushrooms, stemmed and quartered
2 tablespoons olive oil
pinch of pepper
sprig of thyme (optional)
4 ounces ricotta cheese, drained if desired
8 ounces (1 cup) low moisture mozzarella cheese, grated and divided
2 tablespoons fresh parsley, minced
1 tablespoon fresh basil, minced
pinch of salt
1 teaspoon lemon zest
For sauce:
2 tablespoons olive oil
4-6 cloves of garlic, minced
1 tablespoon capers, minced
¼ cup coarsely chopped kalamata olives
2 anchovy fillets
pinch of red pepper flakes, to taste
1 teaspoon dried basil
½ cup dry red wine
8-10 ounces diced canned tomatoes, with their juice
  • On an oiled pizza pan, spread out the pizza dough in a rough circle 12 inches in diameter. If it springs back, no worries; let it rest for ten minutes and then stretch it out again. At least half an hour before you are ready to bake, preheat the oven to 375F with a rack in the middle position.
  • In a large skillet, heat the 2 tablespoons olive oil over medium heat. Add the mushrooms, the pinch of pepper, and the thyme sprig if desired and cook until the mushrooms are well-browned. This should take 8-10 minutes with occasional stirring, during which time the mushrooms will suck up the oil, release their liquid, and then accept some of that liquid back again.
  • While the mushrooms cook, combine the ricotta and ½ cup of the mozzarella cheese in a small bowl with the fresh parsley, fresh basil, lemon zest, and pinch of salt to taste. I find a rubber spatula works well for this. Reserve the remaining ½ cup of mozzarella for the top of the calzone.
  • When the mushrooms are done, set them aside in a small bowl and discard the thyme sprig, then put the skillet back over medium heat. Add the remaining 2 tablespoons of olive oil and the minced garlic. Saute for 1-2 minutes, until the garlic is soft and aromatic and edging toward golden. Add the anchovy fillets and mash them around with a wooden spoon to break down. Scrape in the capers and olives and saute for an additional 1 minute.
  • Toss in the red pepper flakes, the basil, and the ½ cup of red wine and bring to a simmer. Add the tomatoes with their juice and simmer over medium heat for 15-20 minutes, until the liquid has reduced a bit and the flavors are well combined. Remove from heat and let cool for a few minutes.
  • To assemble, spread the cheese mixture over half of the stretched dough, leaving a healthy inch margin around the edge. Pile the mushrooms on top of the cheese, and then use a slotted spoon to add the chunky portions of the sauce – the tomato and olive and caper bits – on top of the mushrooms (again, keep and respect that inch margin).
  • With slightly moistened or lightly oiled hands (especially if your dough is sticky), grab the edge opposite the area you’ve been filling and pull up, folding over to meet the half-circle edge along your margin. You’ll form a half-moon shape with the dough. Crimp the edge by pulling the bottom layer of dough up slightly over the top layer in a series of small segments. Press and pinch each one tightly into the top layer of dough about a half inch from the edge. This will form a seal to prohibit the top from opening up during baking. It also looks pretty. Because we care about that.
  • With the calzone fully sealed along the circular edge, brush the top with some of the remaining puttanesca sauce, then sprinkle on the remaining ½ cup of mozzarella cheese. Carefully place into the preheated oven and bake for 30-35 minutes, until the cheese on top is melted and crusty, and the dough is golden and cooked through. After removing from the oven, wait 5-10 minutes before slicing, then serve hot with any remaining puttanesca sauce, if desired.

Mushroom Kale Quesadillas

Food Blog March 2015-0538Because I have the habit of wanting to impress you, the simple, day-to-day dinners I make often don’t end up here because they don’t strike me as “blog-worthy,” as I’m fond of saying. But much as I want to blow you away all the time, this is a silly habit. The point is not over-the-top impressive, outrageously original, faultlessly styled plates. At least it shouldn’t be. The point is good food. And yet because I get sucked in by things like Pinterest and Tastegawking and Foodspotter and vice versa, we had these mushroom kale quesadillas three or four times in a month because they were so damn delicious I couldn’t stop thinking about them before I realized they might be something I should share with you. Even though they are simple. Even though they are just quesadillas.

Food Blog March 2015-0533Because, seriously? Mushrooms. Kale. Cheese. Toasted tortillas. What a combination! Quesadillas are, weirdly enough, a kind of touchstone for me. If I wrote one of those memoir/cookbook mash-ups, a quesadilla would have to find its way in there somewhere, because when I stop and think about it for three seconds, my life contains a number of memory-charged quesadilla incidents. Example: when my family moved from Southern to Northern California shortly after I graduated from high school, some of the first ingredients in our new fridge were tortillas, cheddar, and salsa. As my mom unpacked the kitchen and the movers unloaded box after box after box from the massive truck into our new garage, we realized the morning had wasted thin and we were starving. Cue Chelsea at the stove with a skillet and spatula rinsed free of box dust seconds ago, flipping quesadillas. They weren’t magnificent, because they were just cheddar folded inside a flour tortilla, but when the cheese melted and sizzled out the sides, and the fat hidden in that deceptively dry flour tortilla browned in huge freckles all over the surface, no one wanted anything else for lunch, including the movers. We used up the whole package of tortillas and most of the cheese, but it was nice to watch everyone unfolding the fried half-moons and pouring liberal doses of salsa over the molten orange goo inside.

Food Blog March 2015-0527Quesadillas are best when you don’t think about them too much. What I mean is, they are best when they contain a quantity of cheese you’d rather not cop to. During our second year of living together, my college roommate K. wondered briefly why she liked my quesadillas so much more than hers. Part of it was undeniably the fact that food tastes so much better when someone makes it for you. But part of it, we determined, was that I used more cheese than she did. Great blocks of monterey jack sacrificed themselves to feed our quesadilla longing, and K. placed me permanently in charge of quesadilla production, as long as I never told her how much cheese I was folding inside. In those days, we upgraded from spooning a scoop up jarred salsa inside to smashing a velvet green half of avocado over the top, and maybe a luscious scoop of sour cream. These lunches were probably, now that I think about it, the base of much of my weight gain that year (the post-break-up pints of Godiva ice cream were likely the other culprits). But in retrospect, my “sophomore sixteen” is so much less important than how good those quesadillas were with their different kinds of softness and the crisp, almost oily tortilla in between.

Food Blog March 2015-0523Food Blog March 2015-0525Though I’m still on board with a simple monterey jack quesadilla with avocado, guacamole, or salsa of any kind smeared over the top, I gradually realized quesadillas could also be employed to funnel vegetables into us. I don’t skimp on the cheese – no sense forgetting what I’ve learned – but now I jam in layers of corn or spinach or, in this version, thinly sliced mushrooms pan roasted until golden and almost crisp, folded together with torn leaves of kale barely wilted with some olive oil and salt. In quantity, cheese is non-negotiable, but the variety you mound on is a personal choice. I’m partial these days to pepperjack for that lovely extra kick, but regular, dependable old monterey jack, or a combination of jack and fontina or gouda would also be glorious. Here I’m using spinach tortillas in a combination vain attempt to make these seem healthier, and because I just dig the flavor, but you could use plain flour tortillas, or even corn, though they will obviously require less filling.

Food Blog March 2015-0528I’m not going to make the claim that these quesadillas will turn a mushroom and kale hater into a mushroom and kale lover, because we’re really not hiding the vegetables; we’re celebrating the way they complement the cheese and toasty tortilla. But they might turn a mushroom tolerator into an almost-fan, and someone who is tired of kale might find in them a gasp of fresh breath. And they will without question provide you with a quick, delicious dinner item that is absolutely perfect with a side of these beer braised beans.

Food Blog March 2015-0540

Mushroom Kale Quesadillas
Serves 2 as a main dish, 4-6 as an appetizer
2 tablespoons olive oil
16 ounces crimini mushrooms (1 pound)
5-6 ounces kale, tough stems removed
2 cups monterey jack or pepperjack cheese, or a mixture of soft white cheeses
4 burrito size tortillas (I like the spinach ones)
  • Heat the 2 tablespoons olive oil over medium heat until glistening. Add the sliced mushrooms and sauté over medium for 8-10 minutes, until they are nicely golden and some are barely crisp.
  • Add the kale to the cooked mushrooms and sauté for another 3-4 minutes until barely wilted but still bright green; season with salt and pepper if desired. Remove from heat and set aside to cool slightly.
  • To build the quesadillas, lay out the bottom tortilla and scatter ⅔ cup of the cheese evenly across it. Add half the mushroom and kale mixture, then scatter ⅓ cup of cheese on top of the vegetables. Top with the second tortilla. This construction – cheese, vegetables, cheese – holds in the vegetables because the cheese melts on both sides of them, binding them inside. This makes for easier, cleaner flipping.
  • Cook the quesadilla in a dry pan (I use the same one I cooked the mushrooms and kale in, just wiped clean with a paper towel) over medium to medium-high heat until the bottom tortilla is nicely browned (or slightly charred, if you like that), and the bottom layer of cheese is well melted; 3-4 minutes. Flip and repeat.
  • While the first quesadilla cooks, build the second one as described above.
  • When both sides of the quesadilla are nicely browned and crisp, remove from heat. Wait 1-2 minutes before slicing to avoid losing too much cheese. Repeat with second and all subsequent quesadillas.
  • Repeat with second and all subsequent quesadillas.
  • To serve, cut in quarters (or smaller wedges) and offer with guacamole, sour cream, salsa, or just bare and crisp and oozing and perfect.