Chocolate beauty shot; playing with aperture and depth-of-field.


Chocolate beauty shot; playing with aperture and depth-of-field.
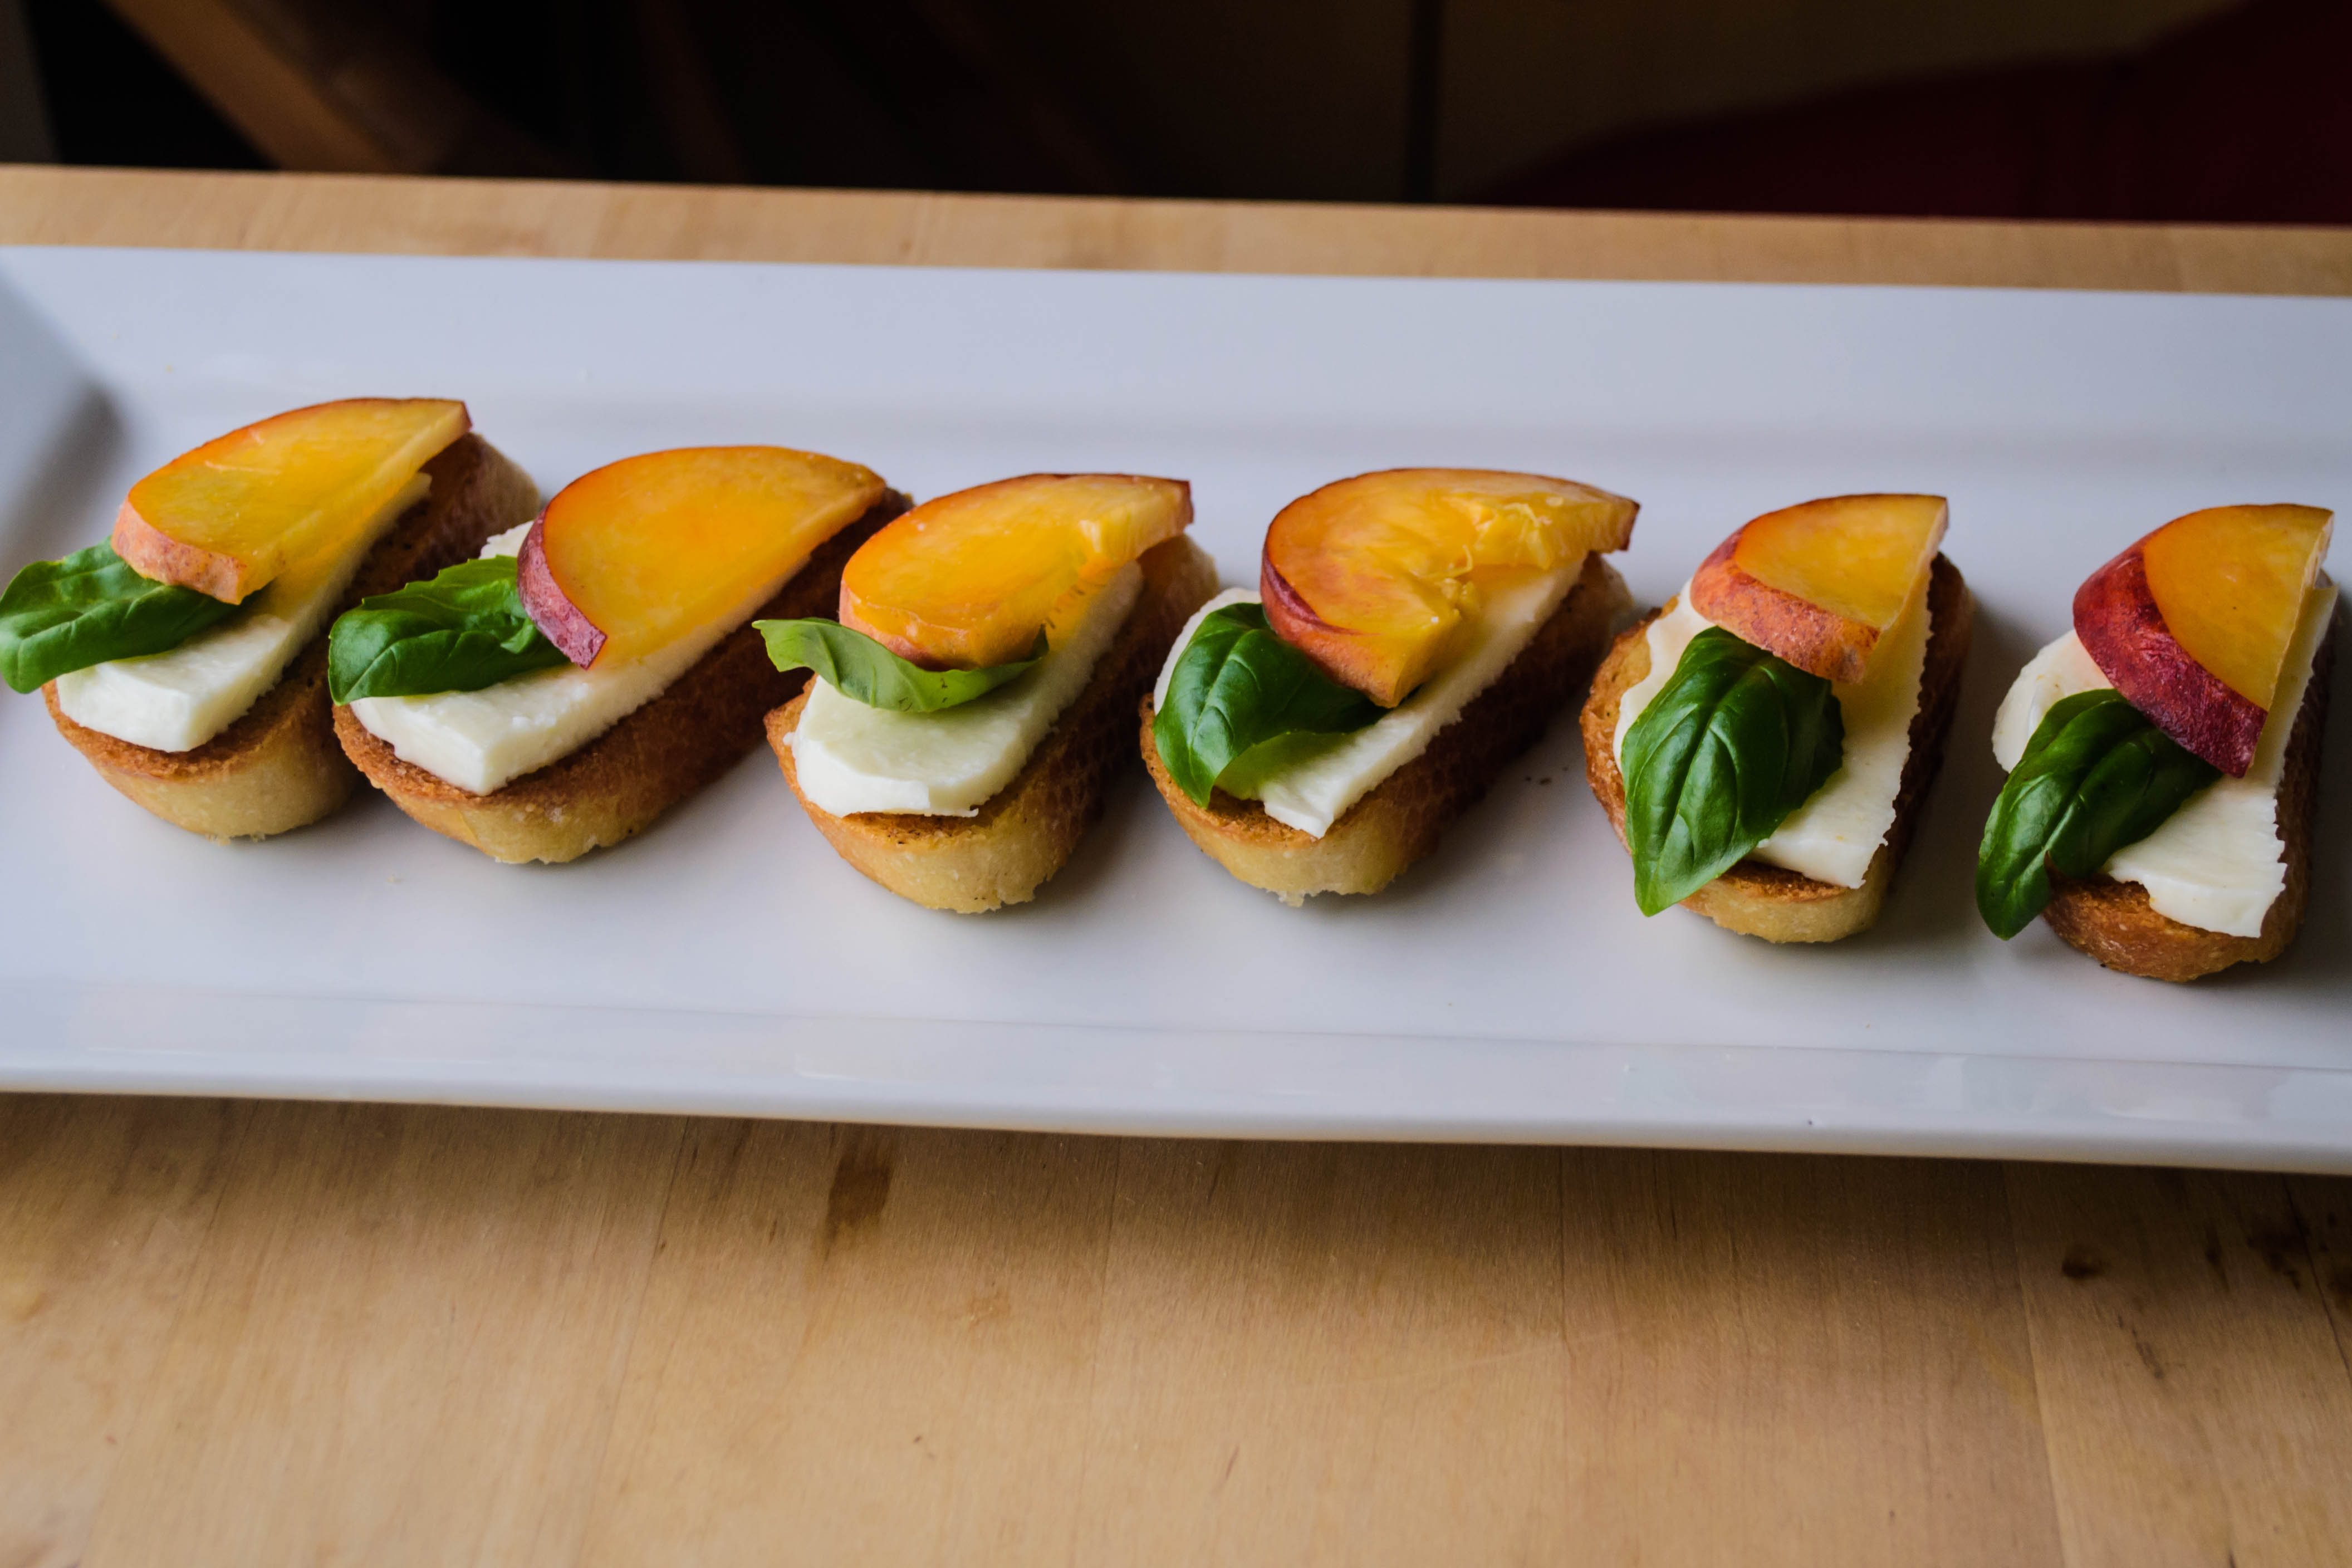
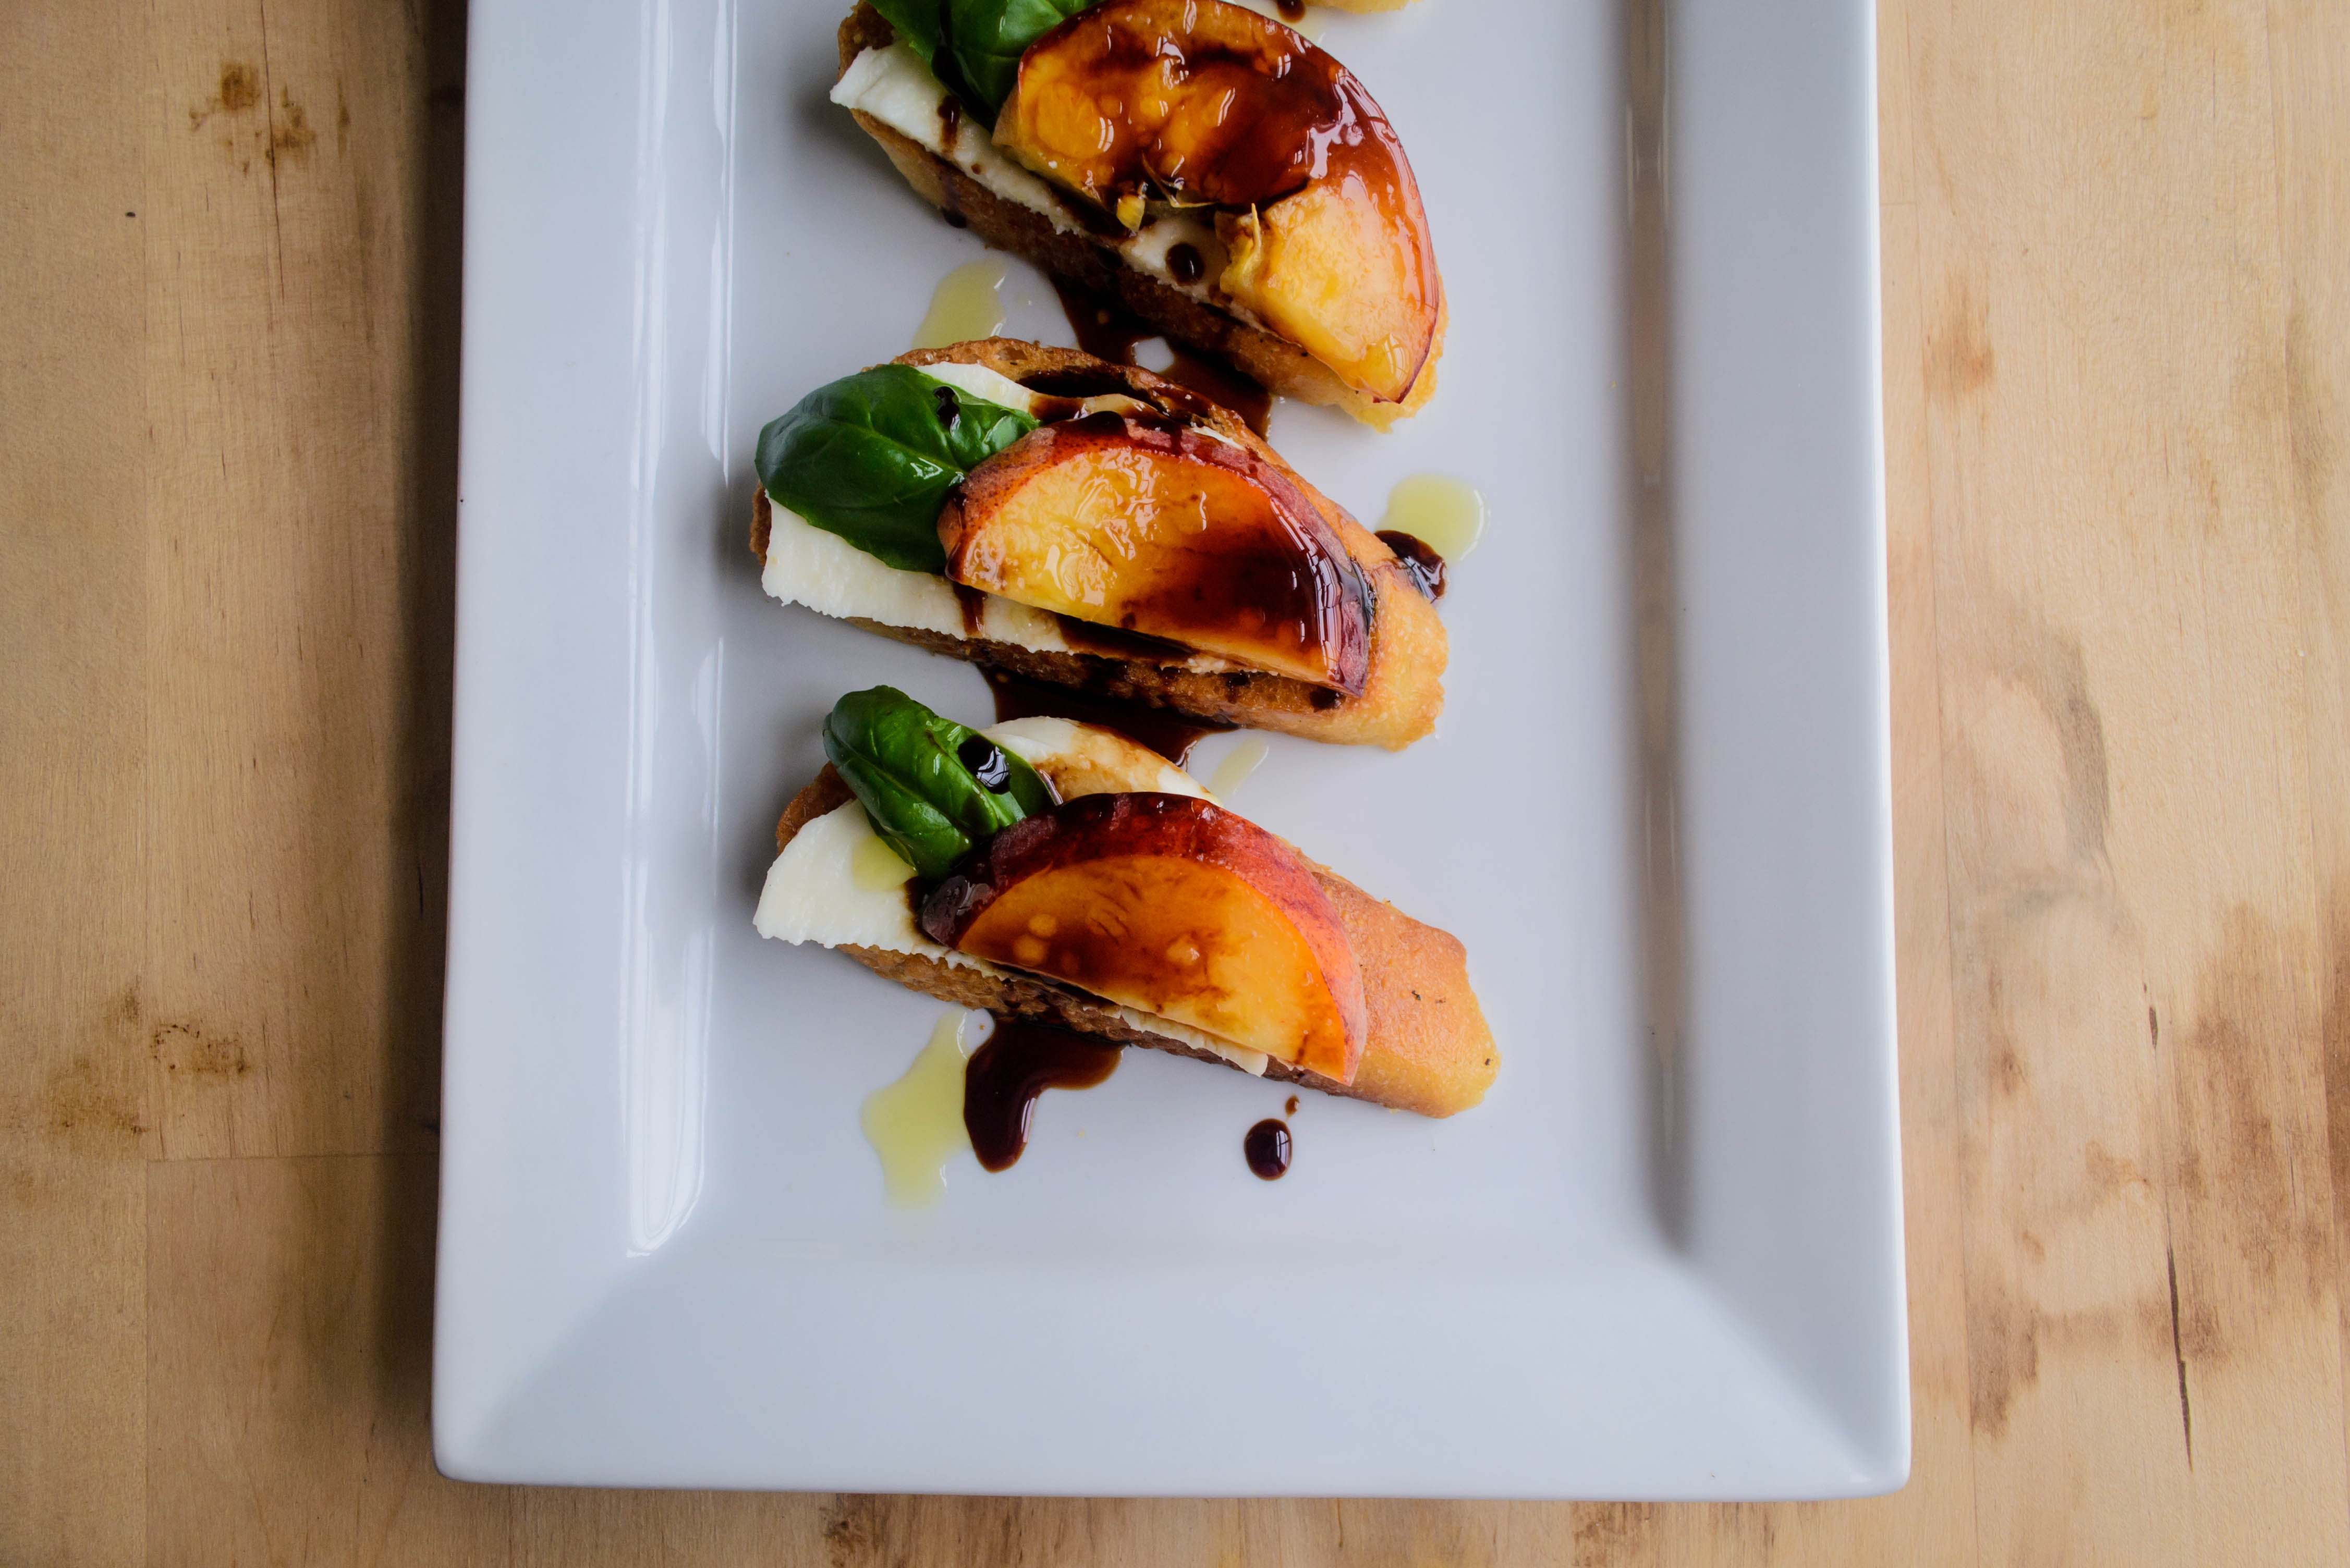 If I were a TV chef, this would be one of those dishes I would cook outside. I’d greet you from my back patio kitchen (because of course I’d have one of those, complete with a great beehive shaped brick pizza oven), offer you a virtual cocktail, and commence a cheery narrative about summers in France when I was a kid, or how this particular combination of ingredients speaks to some cherished family memory. The peaches would have come from my backyard tree, I’d delight you by plucking the basil myself from a tiered herb garden right next to the outdoor bar, and obviously the mozzarella would have come from some local artisan selling fresh knobs of it at the local farmers’ market.
 But seeing as I don’t have an outdoor kitchen, and since I’d be a terrible TV chef (uncoordinated, messy, with a penchant for cooking in ripped jeans), I’ll admit that this lovely little snack emerged because I’m basically obsessed with caprese right now. After the triumphant caprese inspired meatballs of two weeks ago, my brain catapulted into summer, and all I want is fresh produce and grilled everything. Nothing says summer to me like a wide tray of gushing tomato wedges, mozzarella almost too soft to slice, and torn basil. If you add a drizzle of thick, syrupy balsamic, you’d better pour me a glass of wine, too, because I’m staying for a while.
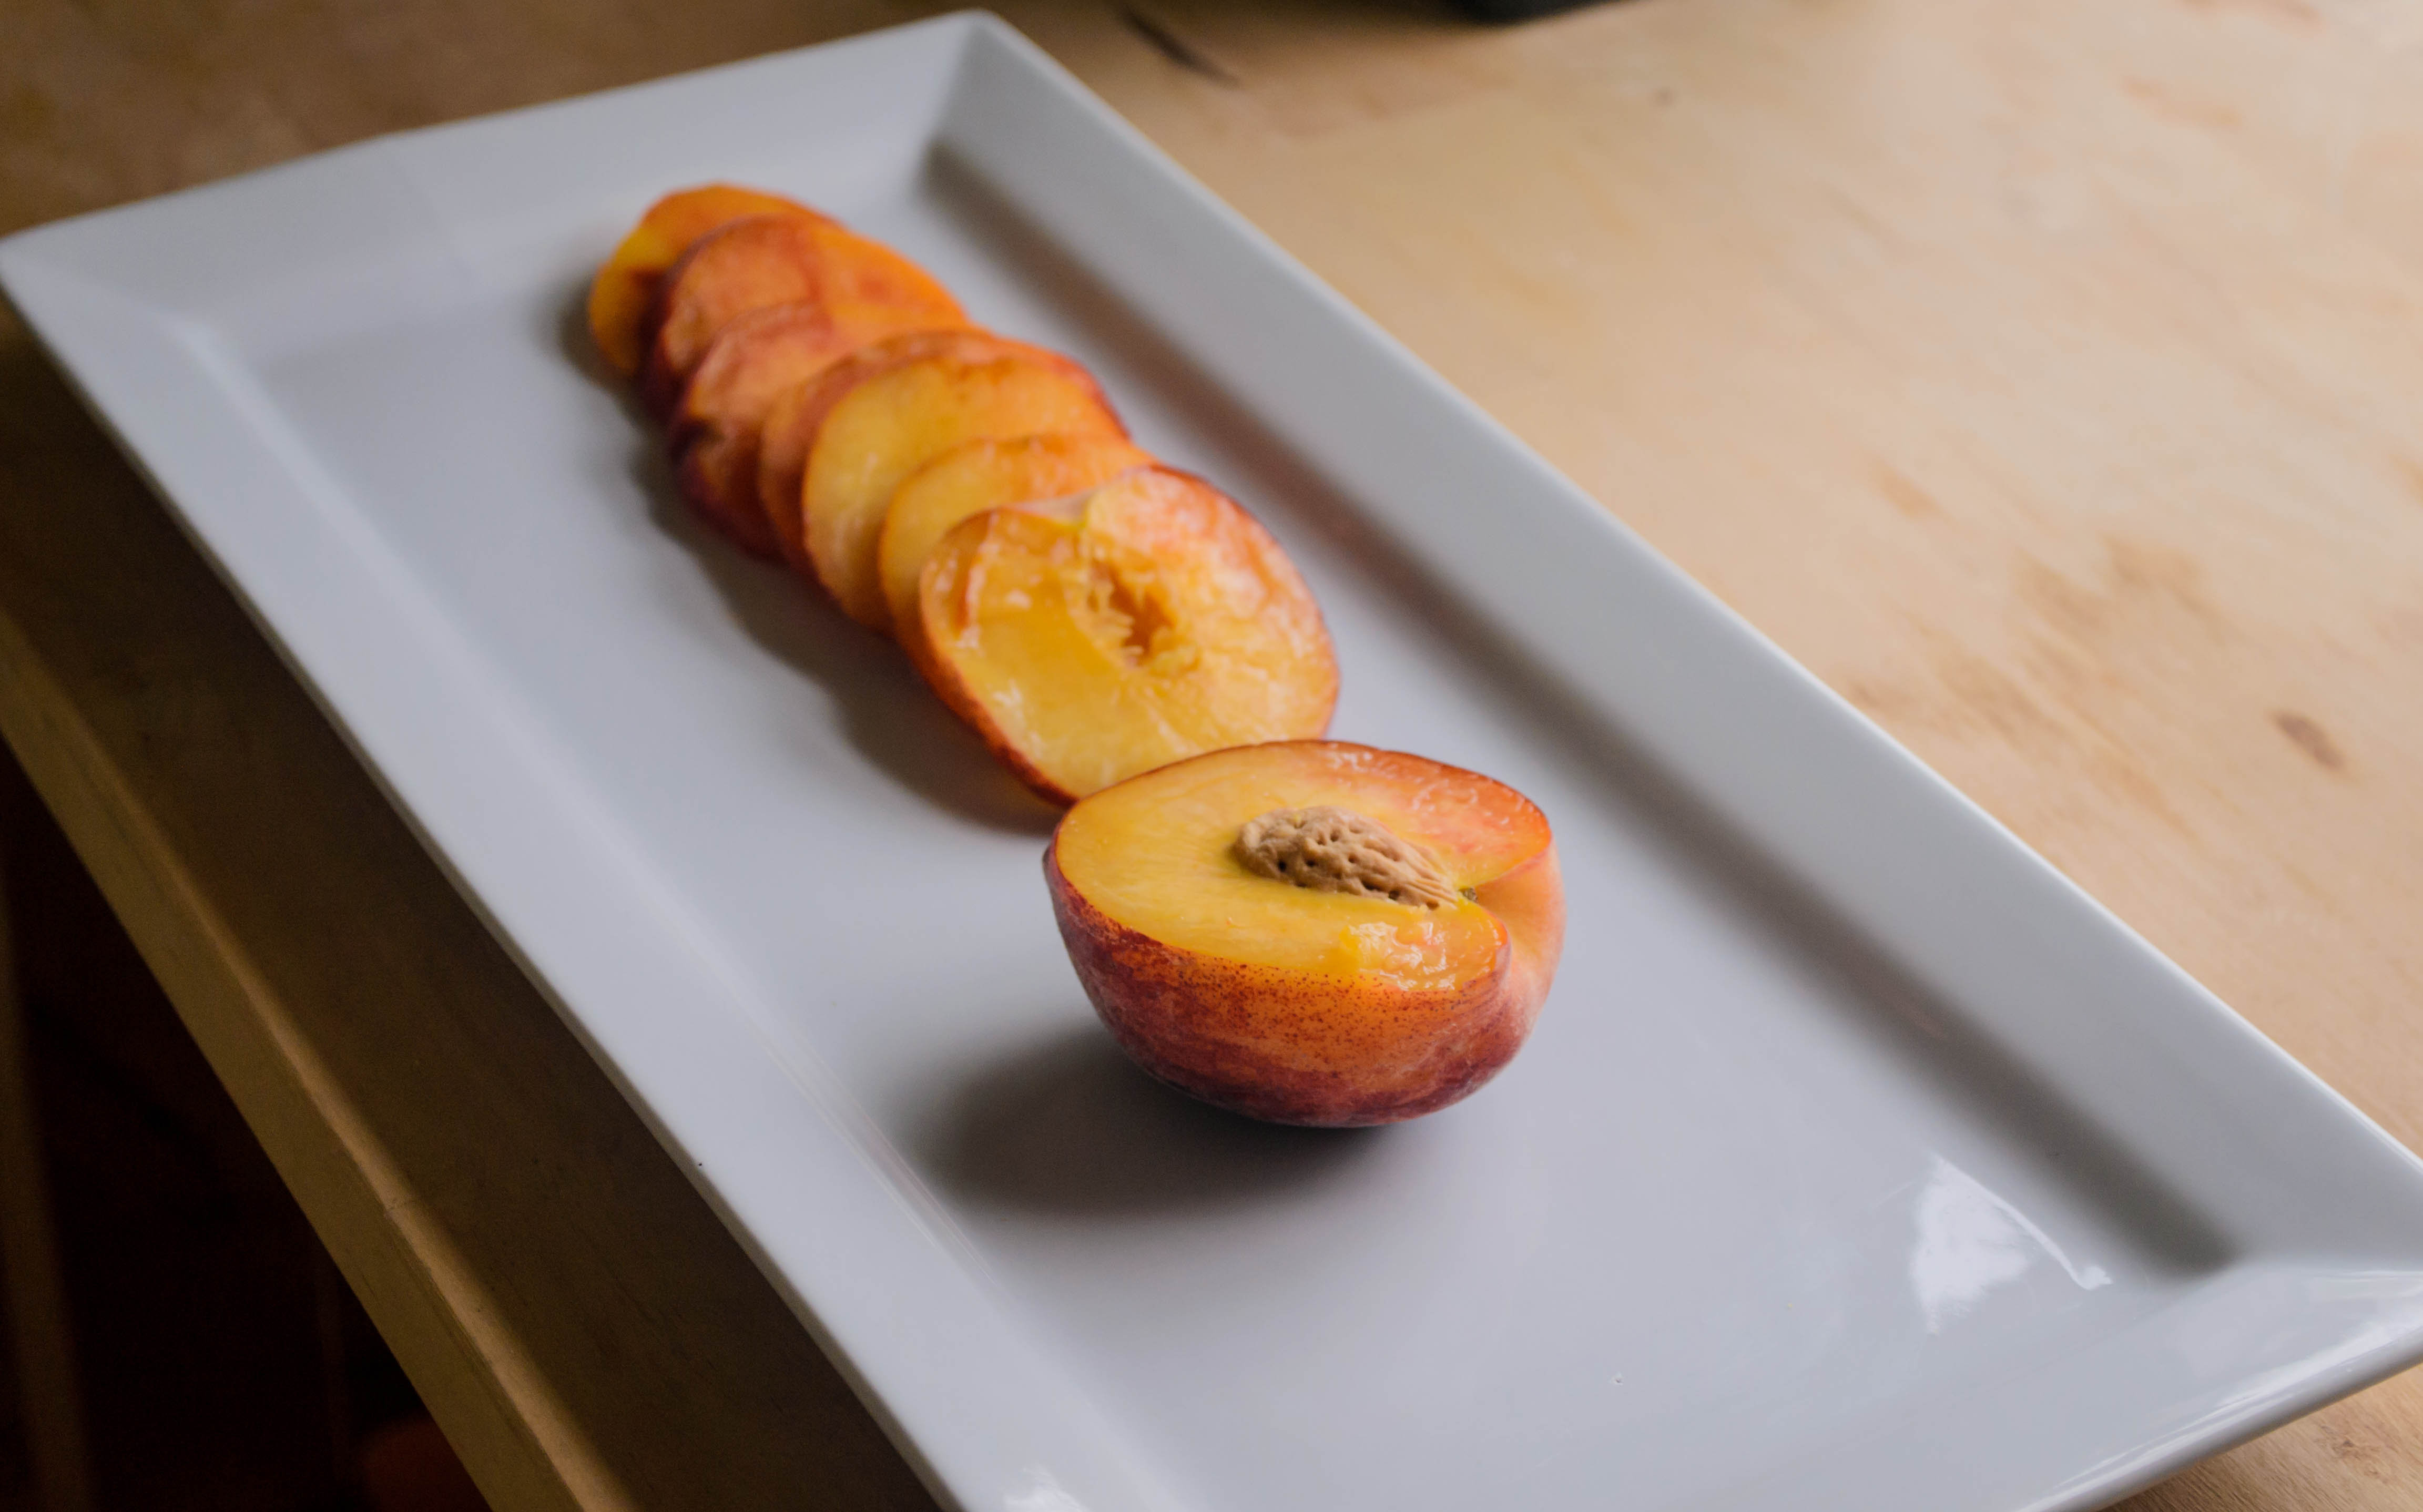 Despite the whole Southern California thing, though, I’m not ready to buy tomatoes just yet. Not even at our local farmers’ market (where I shamefully wasn’t locavore enough to look for mozzarella cheese). It’s just not time yet. There is, though, a vendor whose stall is always packed that had a nice selection of stone fruits this week. It seems a bit early for these as well, but when I could smell the peaches from a few feet away, I decided to risk it.
 Though this rarely happens, these turned out exactly how I’d imagined them. Usually I can’t help myself from changing something as I go along, or skipping over or adding a step or ingredient, and it’s hard to stop the universe from offering up its own brand of “help” to produce unexpected results.
 Not this time. The peaches were juicy, the mozzarella was creamy and perfect, the basil was fresh and crisp, and I didn’t even burn the toast (believe me, that’s an accomplishment). I reduced my balsamic vinegar with a tablespoon of brown sugar, and I may never do it any other way; the sugar thickened it up faster, and it played well with the peaches, eliminating just the edge of the puckering tartness balsamic can have. Obviously, the whole thing went perfectly with a glass of cold, cold, slightly effervescent pink wine.
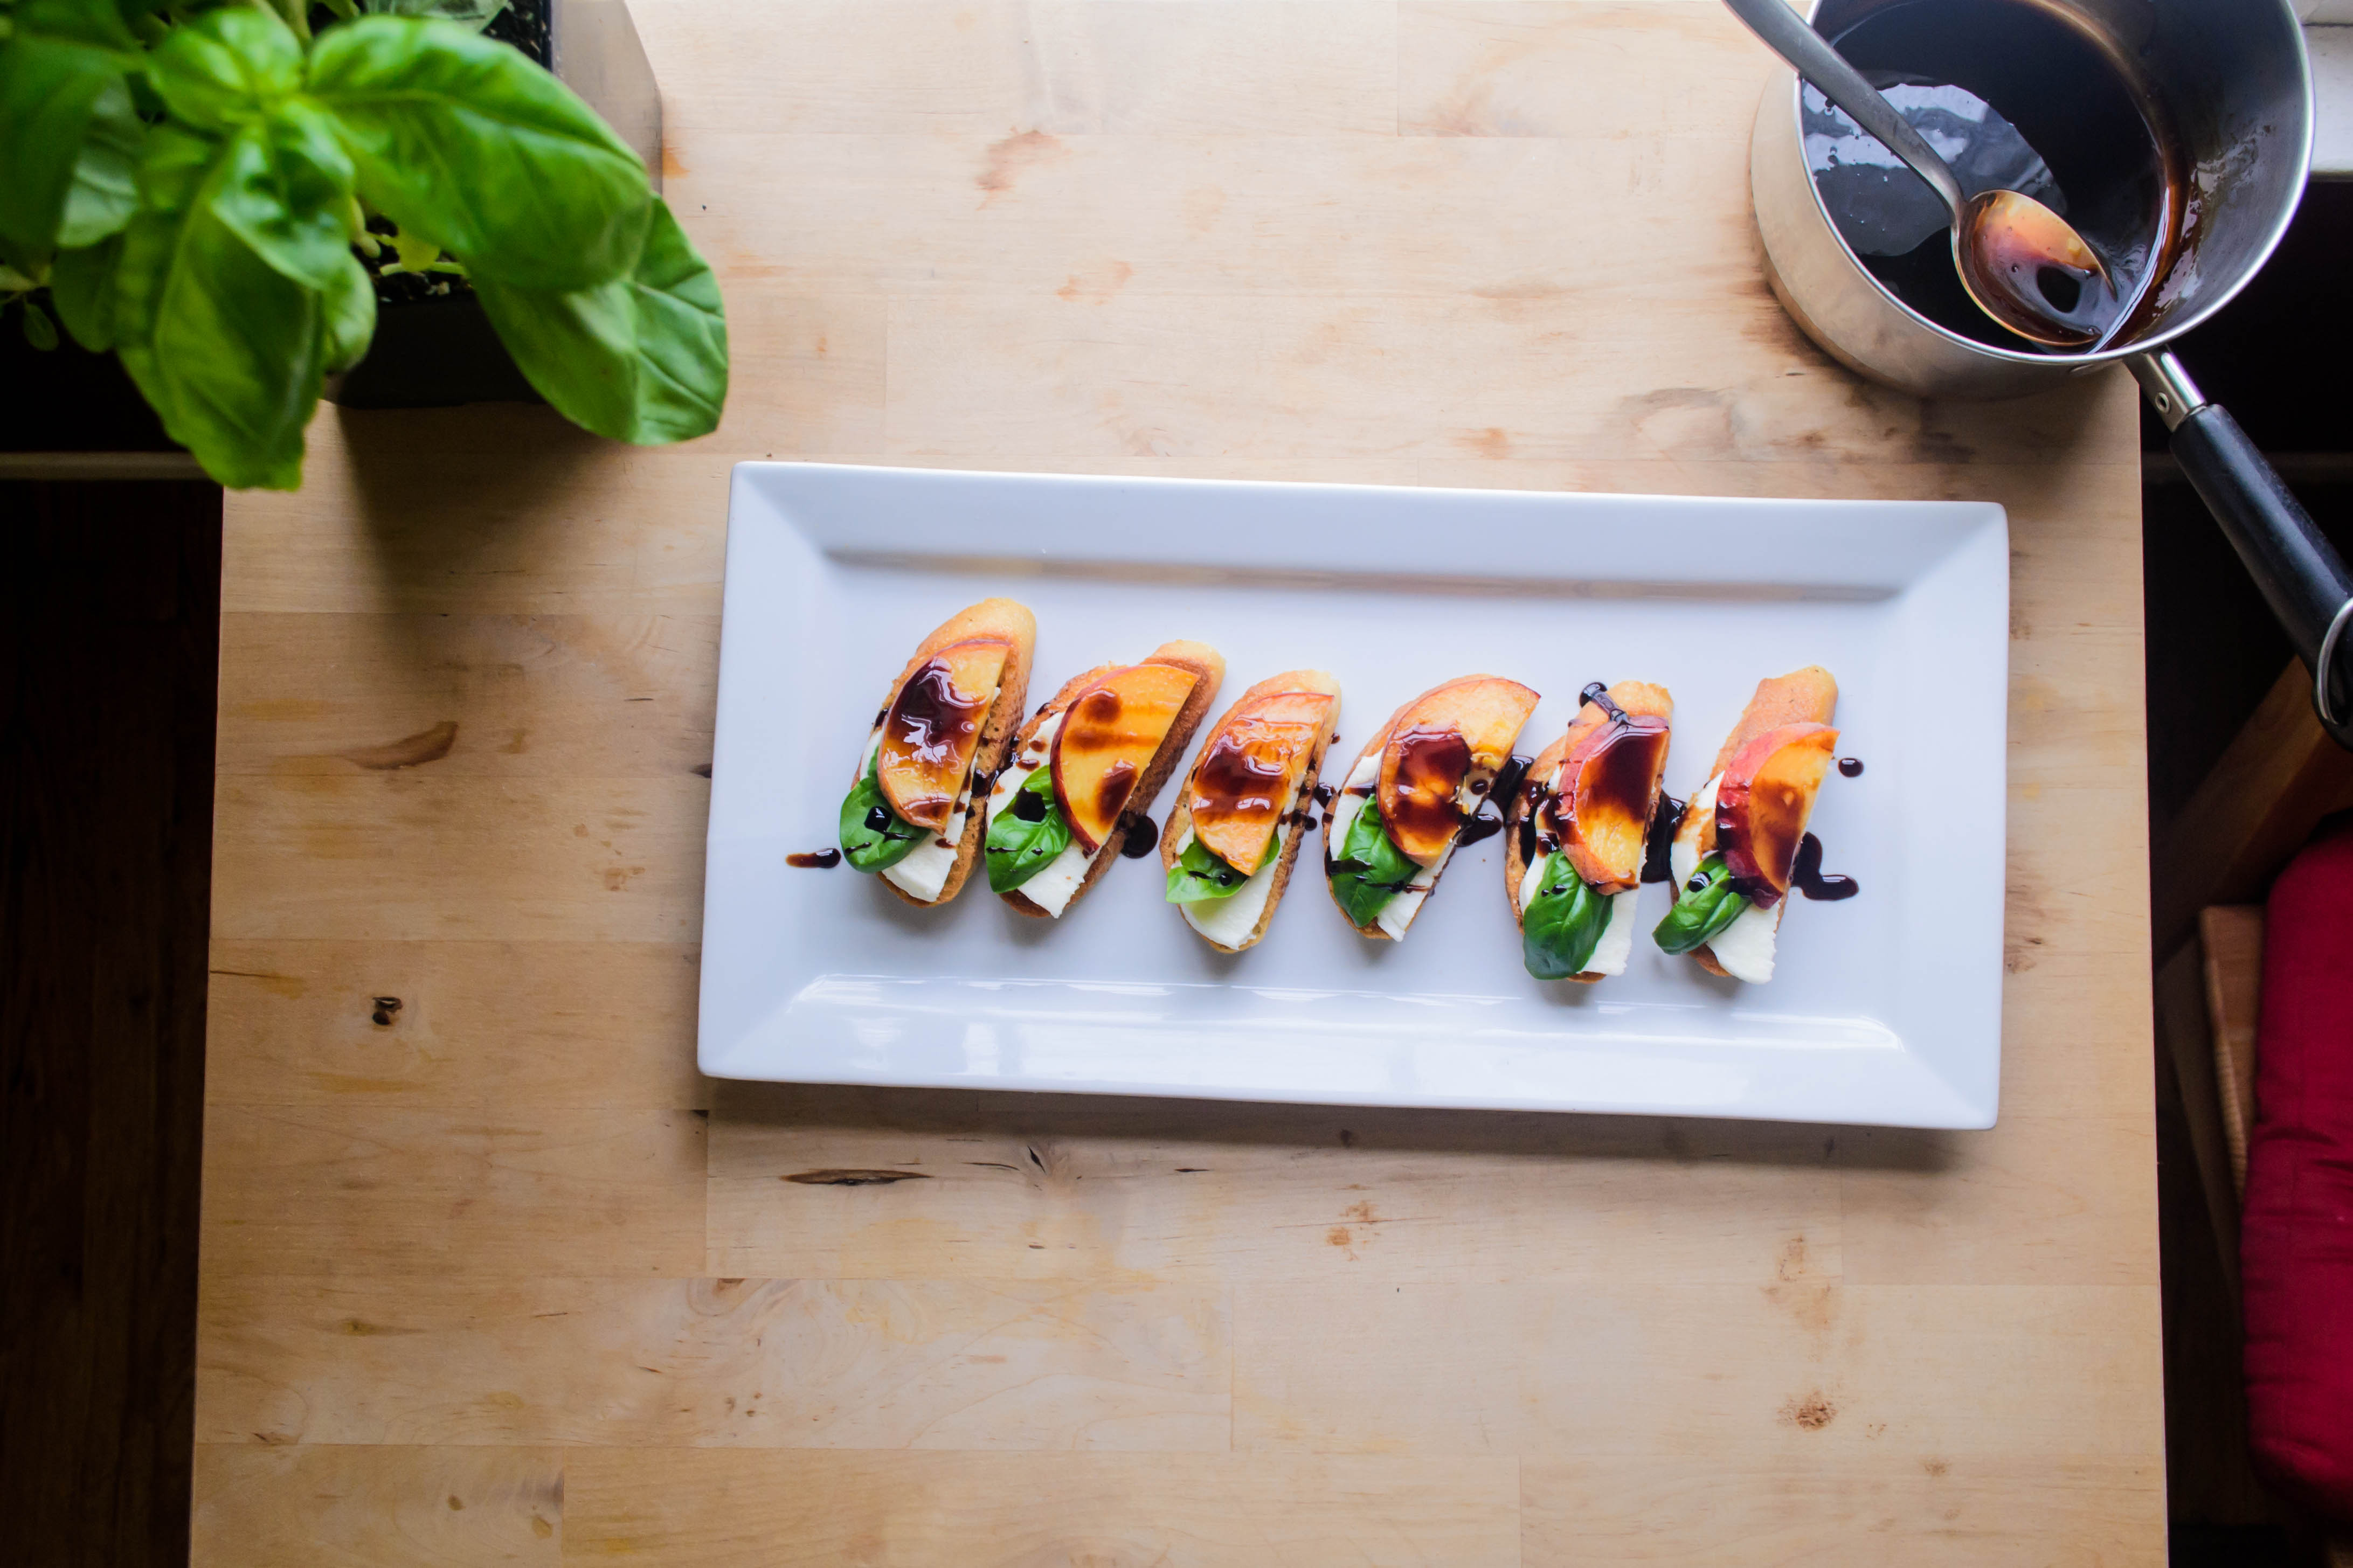 Suggestions: as we were eating these, I was already talking about alternatives. You could, for example, add the cheese 30 seconds or so before removing the toast from the broiler, to start it melting into the bread for a softer end product. You could grill the peach slices, with or without a brush of butter or brown sugar, for a caramelized fruit flavor. You could even eschew the toast altogether and just offer a platter of layered peach and cheese slices with basil tucked in, as you would with a traditional caprese, and serve it up alongside whatever you’d grilled in your outdoor kitchen. Maybe even add in some cucumber slices for extra crunch. And not that it’s likely you’d have leftovers, but if you, say, casually stacked the peach slices and remaining balsamic syrup over a scoop or two of vanilla ice cream, and then you called me, I’d be happy to come and share it with you.

 Around here, we take afternoon snack time very seriously. During the school year, it’s an opportunity to sit down together for a few minutes and work our way through notable moments from the day. During the summer, it’s a good way to reconnect from whatever individual projects we might have lost ourselves in. It feels like a restart, in a lot of ways, which can be important if the day hasn’t gone all that well.
 More than that, though, we are gluttons, and our mid-afternoon snack, or “teatime” as my wannabe Londoner husband likes to call it, is a sacred few minutes reserved for cramming something delicious into our mouths. Usually this is something quick: chips and salsa, or crackers and cheese; on Fridays it often dovetails into an impromptu happy hour of some sort (stay tuned for snack-y developments on this front, by the way…). But sometimes I like to get fancy.
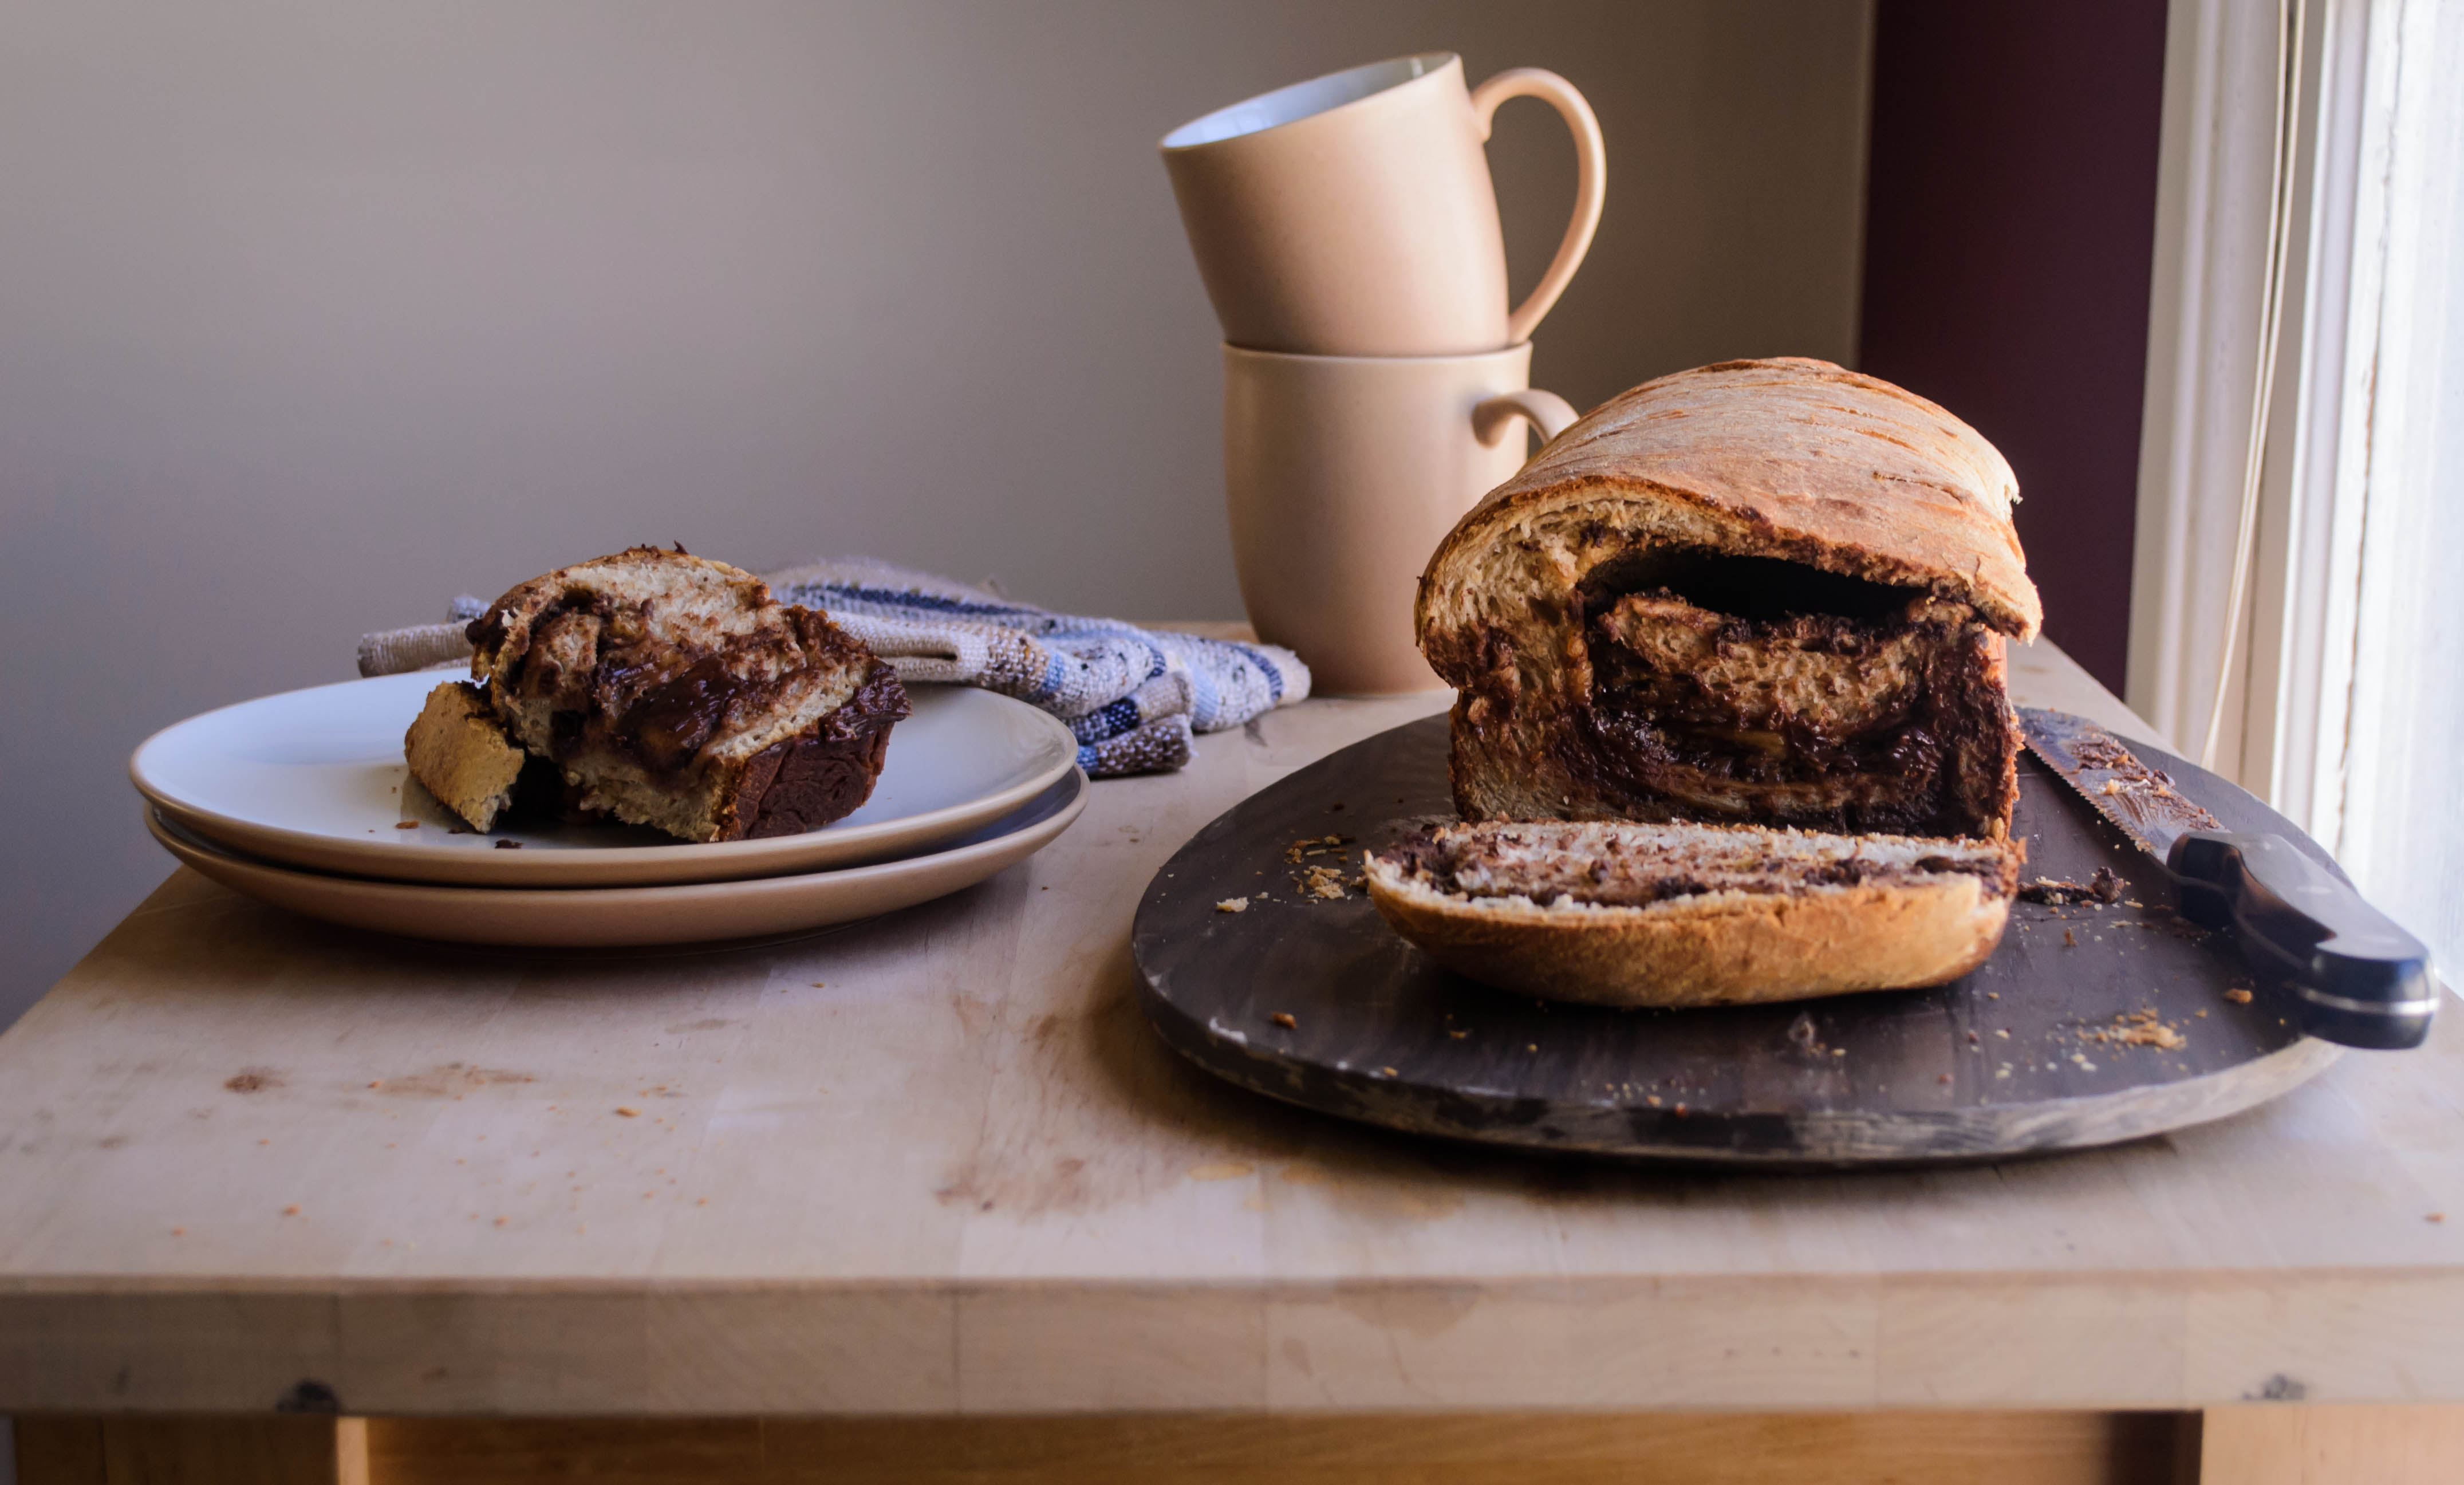
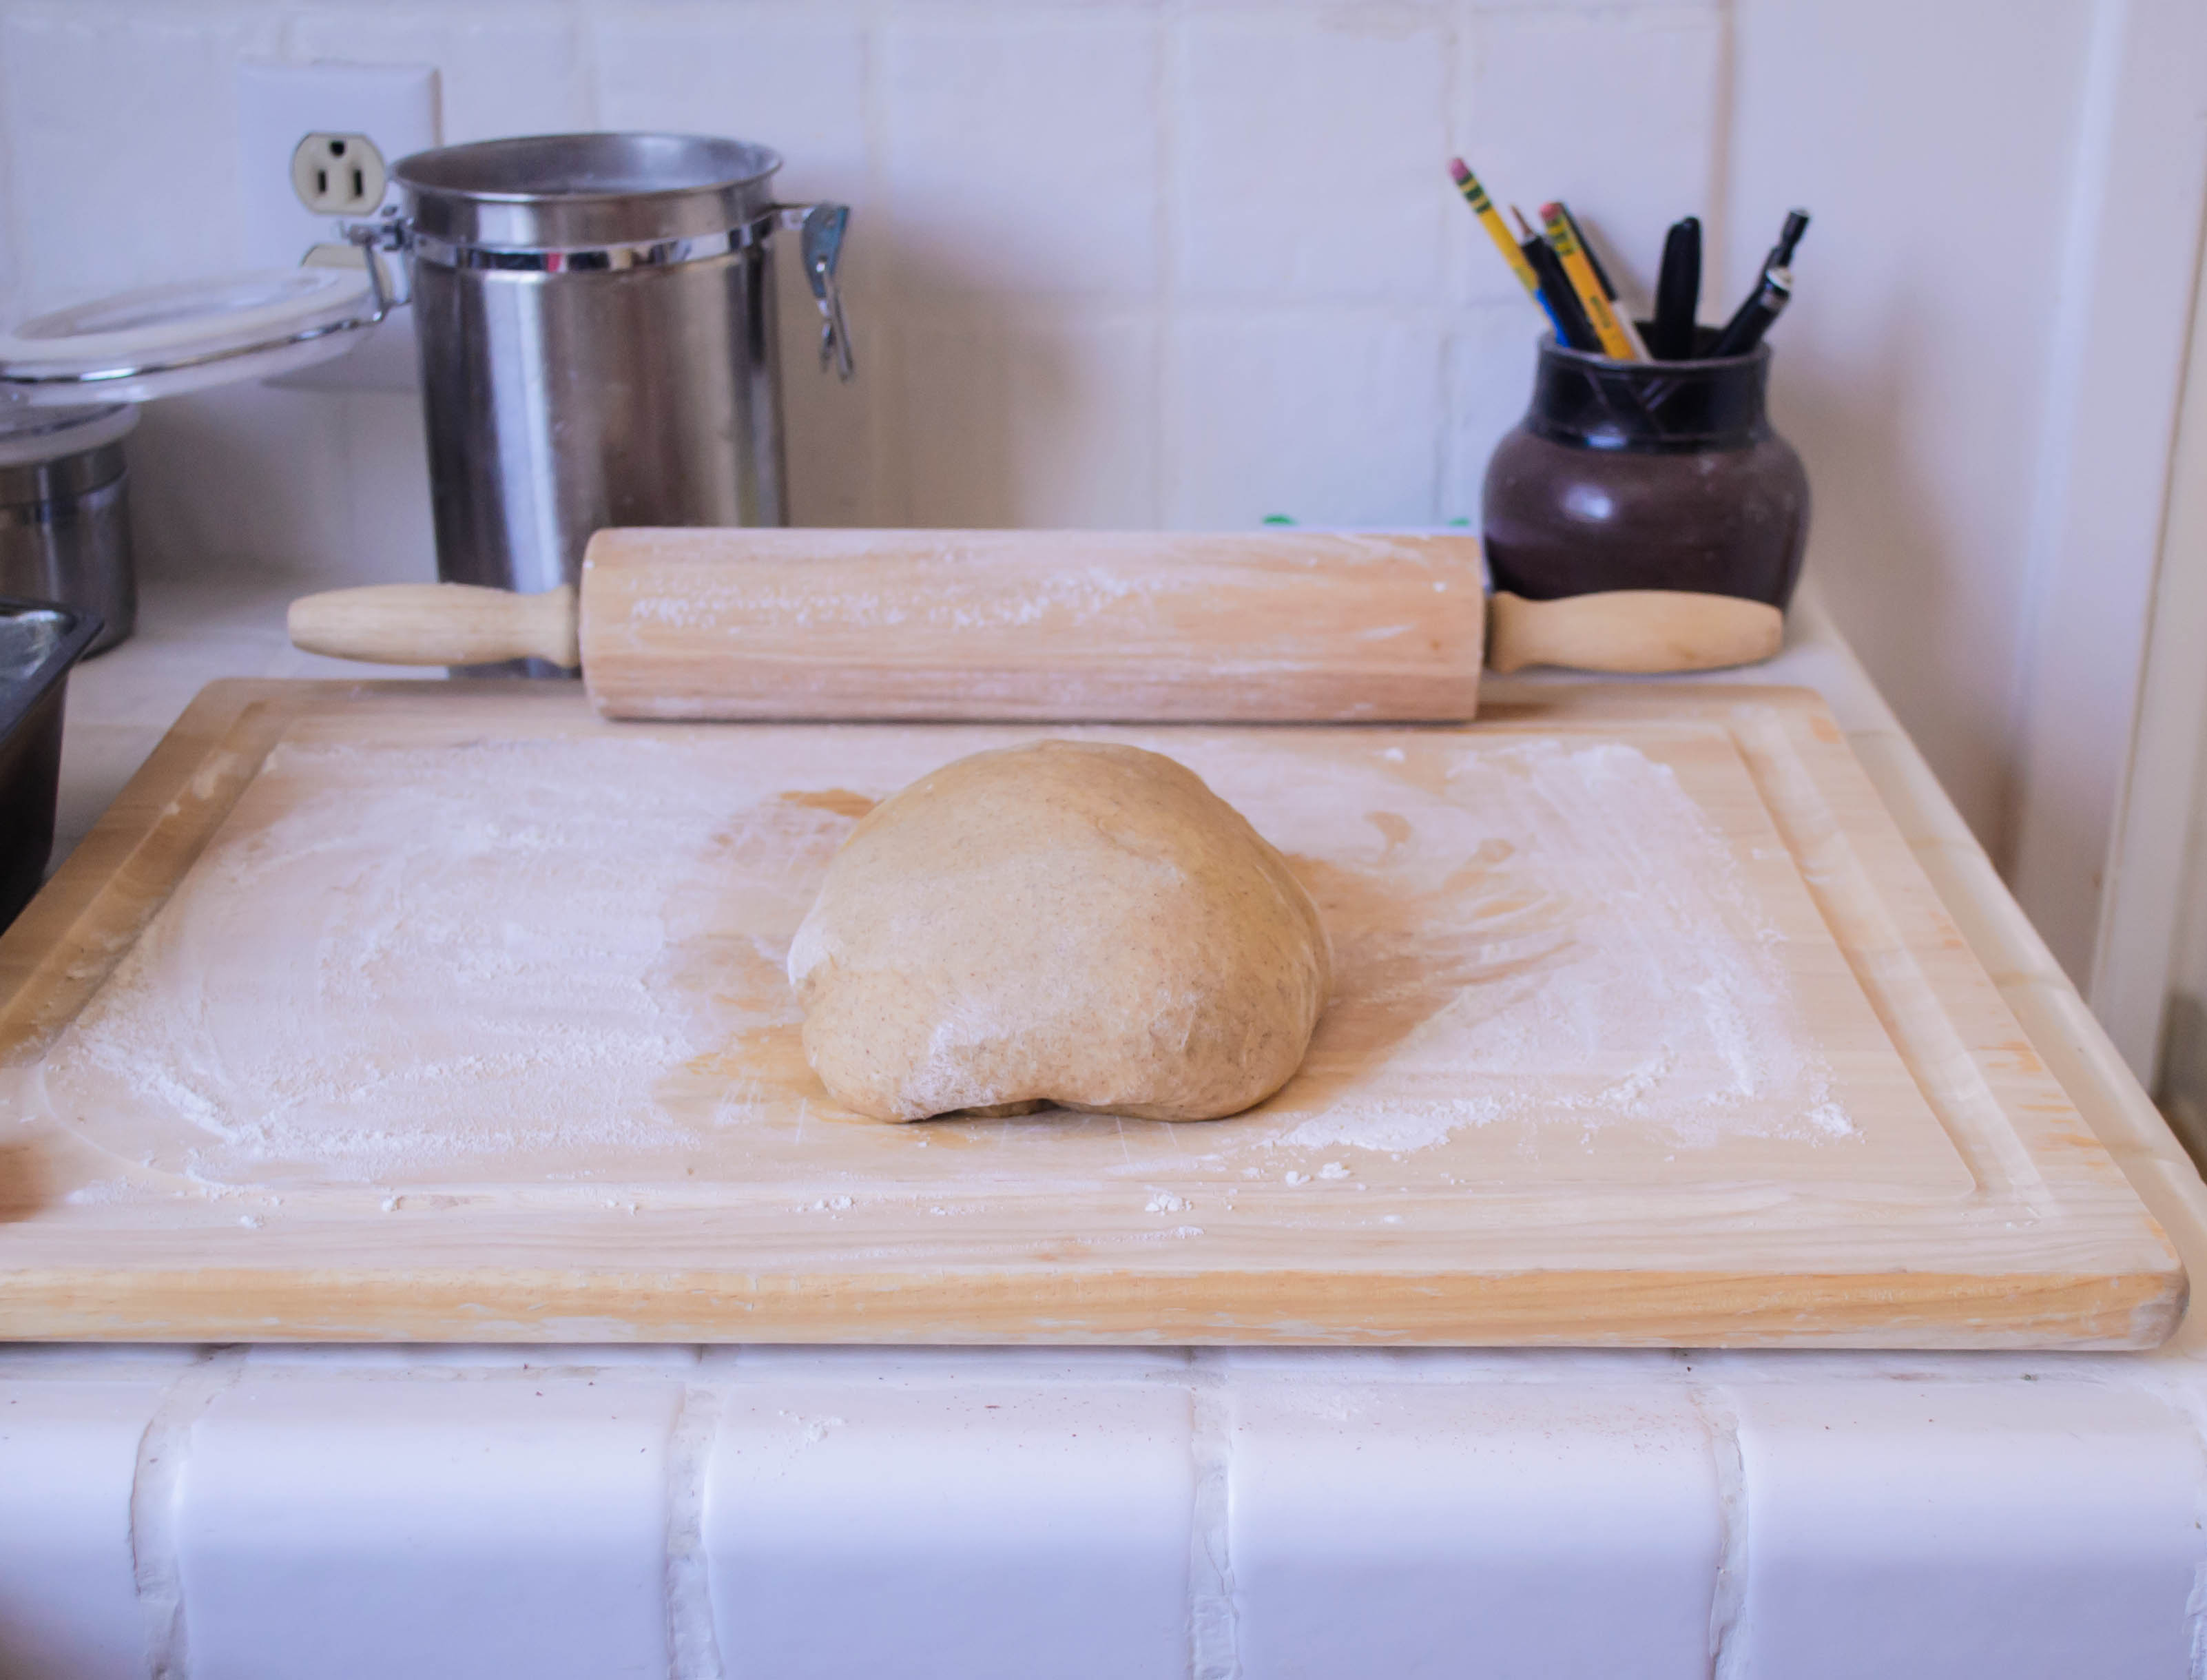
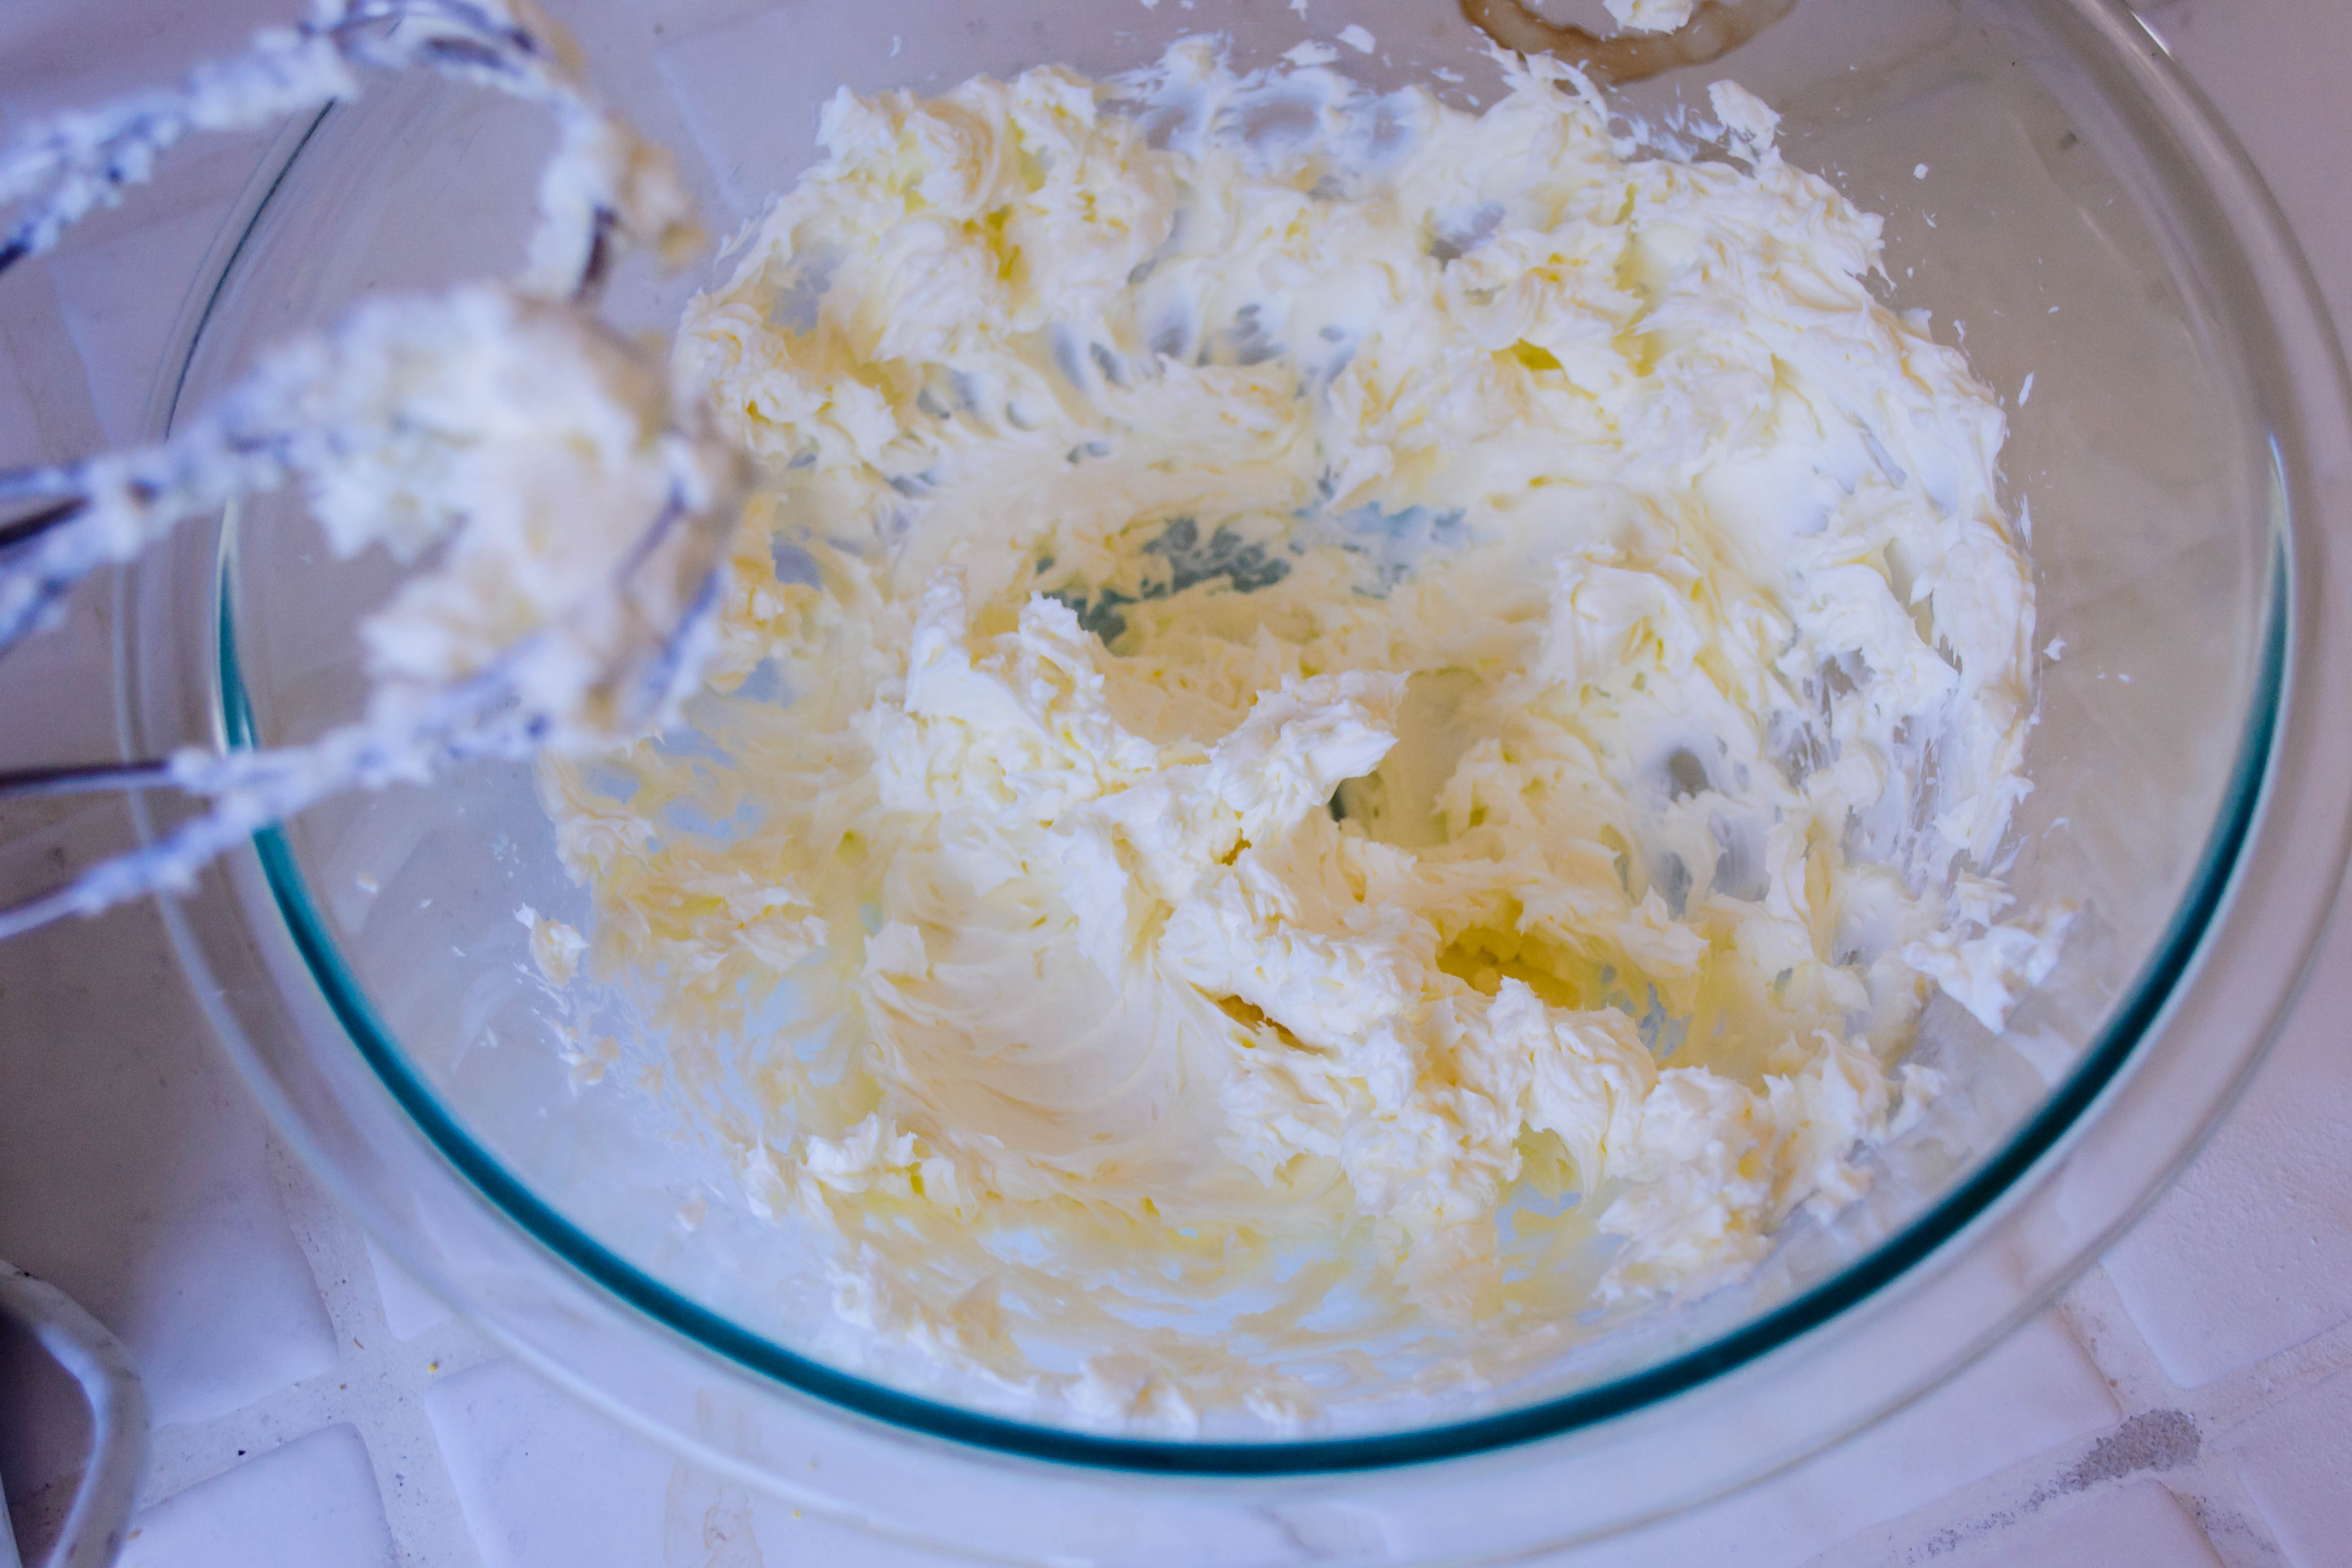 Spurred by this month’s Twelve Loaves theme “A Little Something Sweet,” I decided a special “teatime” loaf was in the works: I wanted a swirled bread, and since N. was working his way through his very last week of school, I decided something with a bit of pick-me-up was called for. Playing with flavors of Mexican chocolate and tiramisu, with a block of cream cheese thrown in for good measure, I ended up with this stunner: a lightly sweet cinnamon spiced loaf, with an unapologetically thick filling of sweetened cream cheese, espresso powder, and chopped semi-sweet chocolate. Yes, please.
 The production of this loaf is fairly standard: a good knead, two rises, with the application of the filling in between, and the better part of an hour in the oven. The most difficult part, honestly, is waiting for the finished loaf to cool enough to slice into it without making a mess. I waited almost long enough.
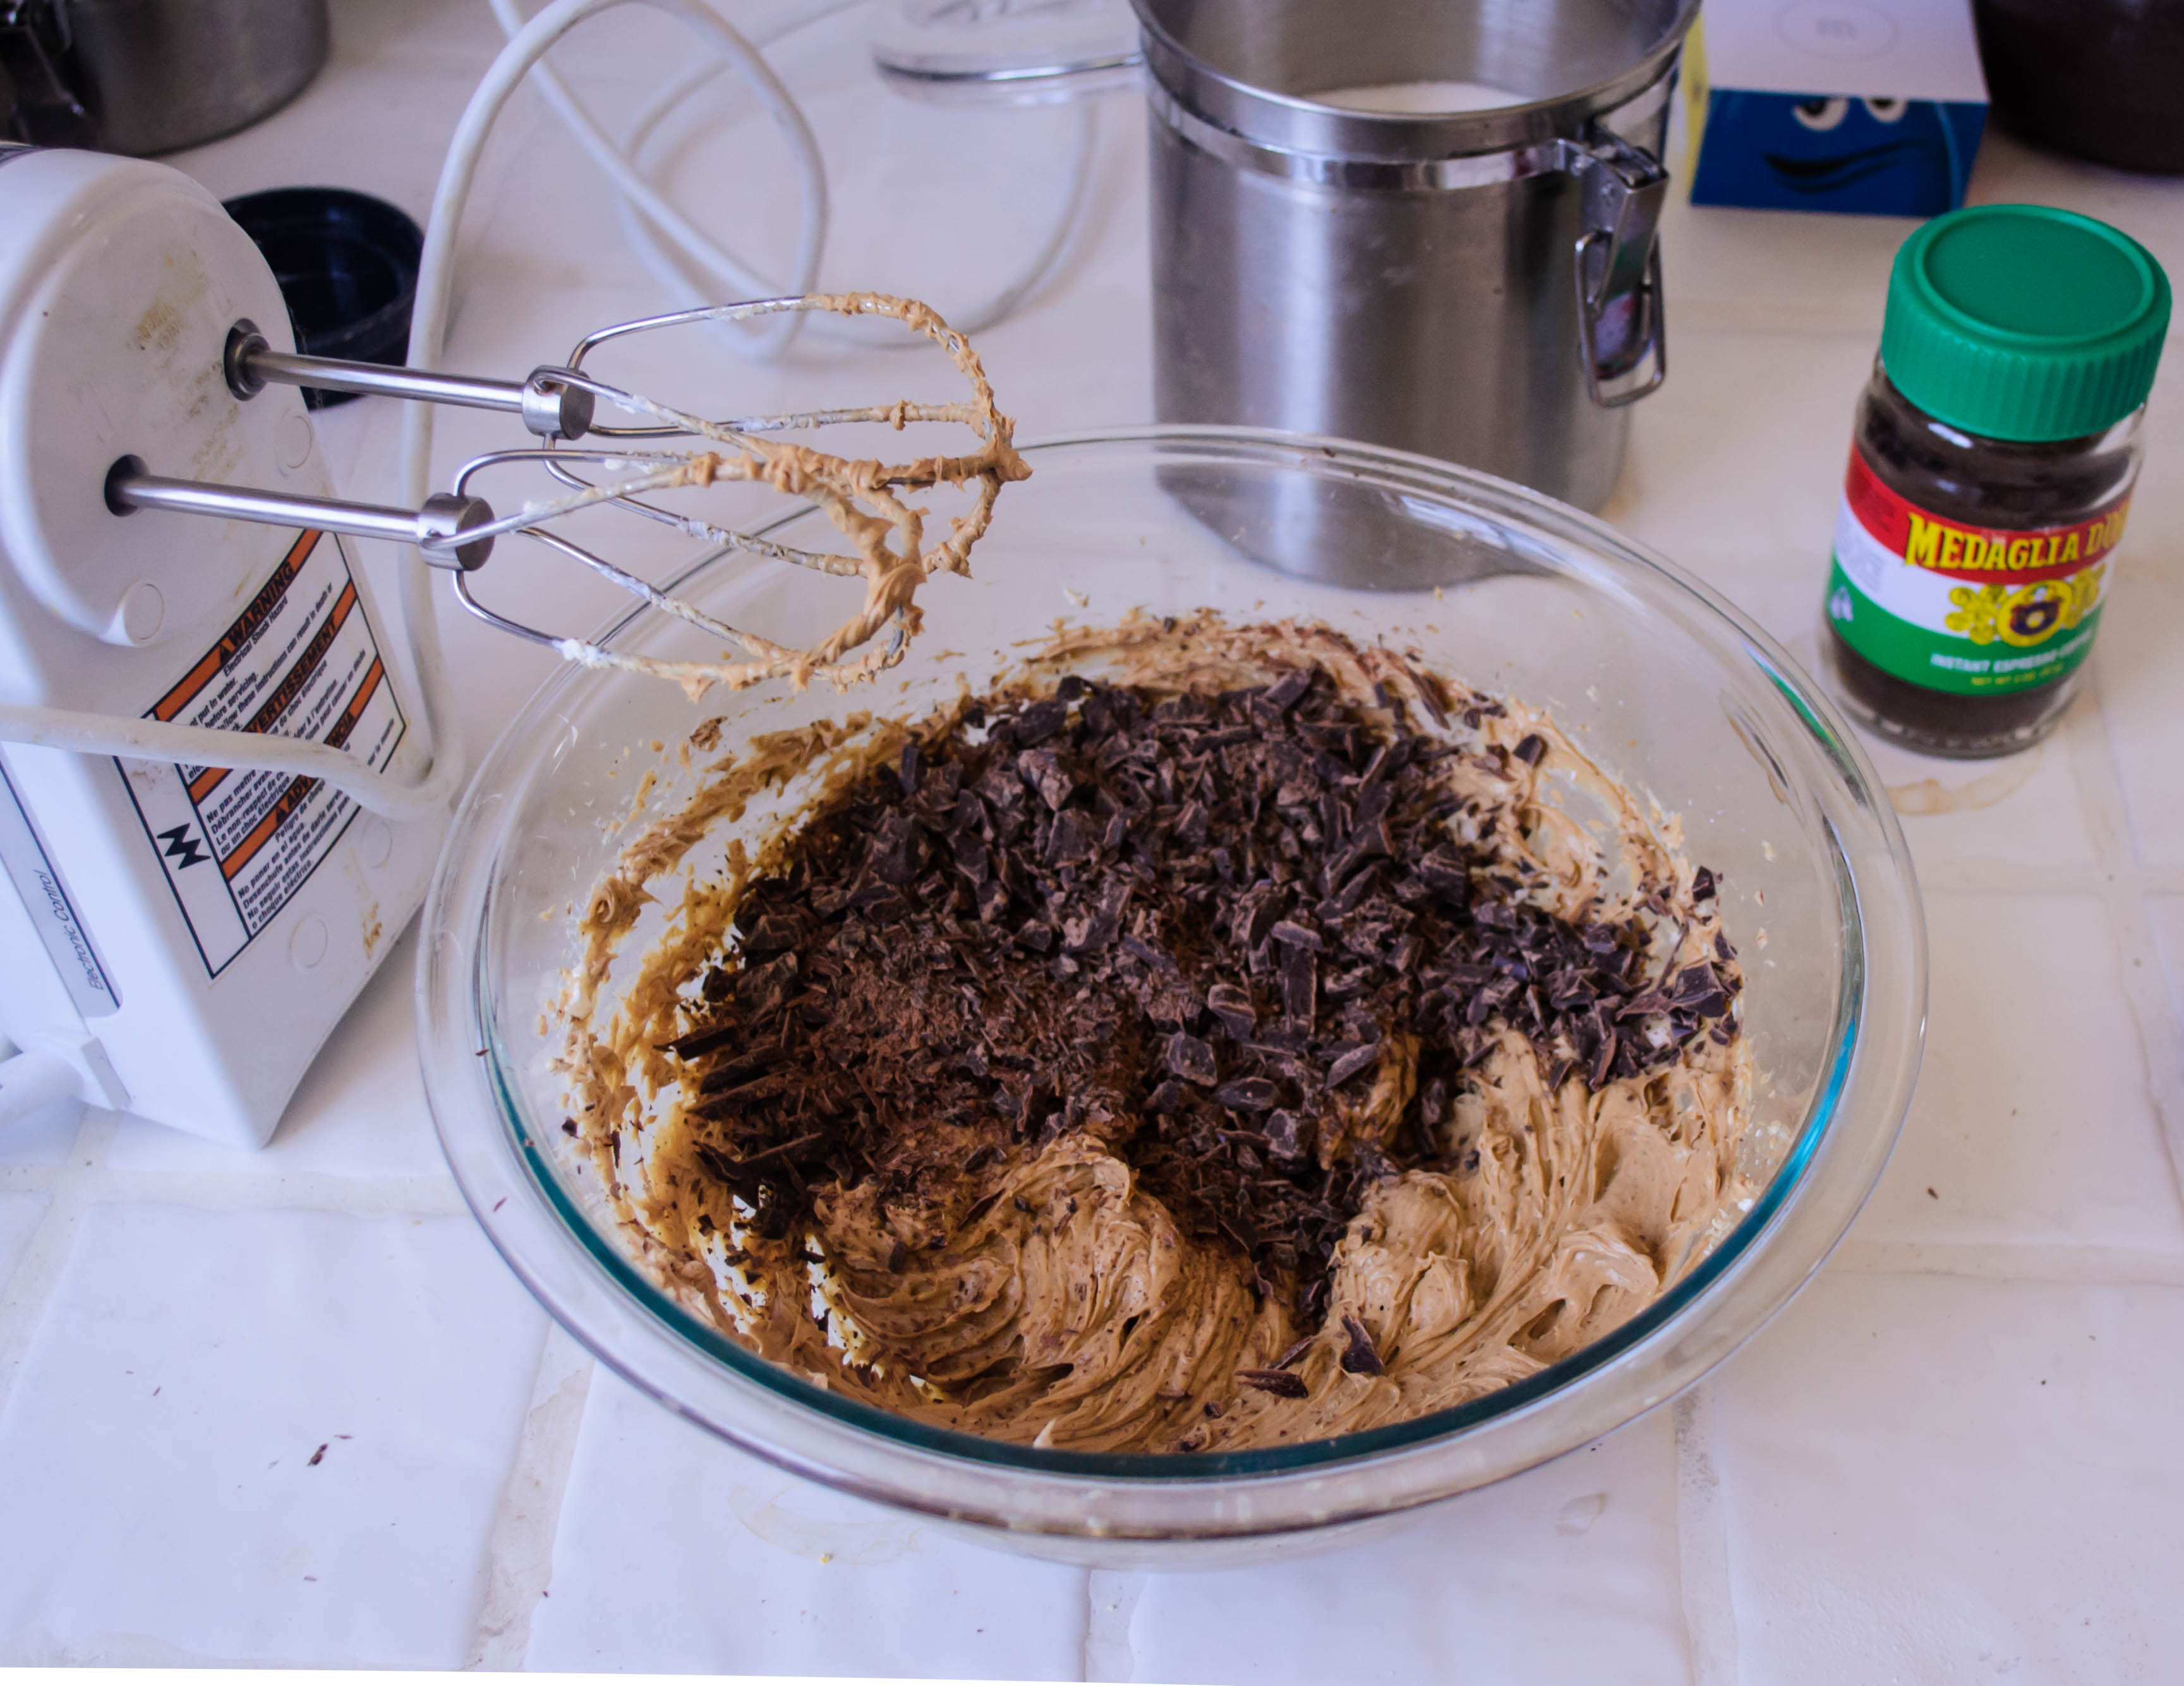 Oddly, despite the Mexican and Italian dessert inspirations, what this reminded me of more than anything else was mocha chip ice cream. You know, the luscious, rich brown scoops with just the right amount of coffee flavor, studded with chunks of dark chocolate. Except in my version, it’s a soft swirl through a moist slice, and the chocolate pieces melt easily on your tongue (one of my biggest complaints about “chip” anything ice cream: the cold, hard chunks of chocolate. I know, I know, first world problems).

 Obviously, this is a rich bread. I’d say it’s more than a “little” something sweet, but let’s indulge anyway. Unless caffeine doesn’t disrupt your sleeping patterns, I’d stay away from it as a bedtime snack. But as a pick-me-up in mid-afternoon, or mid-morning for that matter, it’s solid. I can imagine thick slices on a brunch table as well, maybe even as part of a bridal shower (colors: espresso and vanilla?) since the presentation is so pretty. But then, I’ve got weddings on the brain this summer.
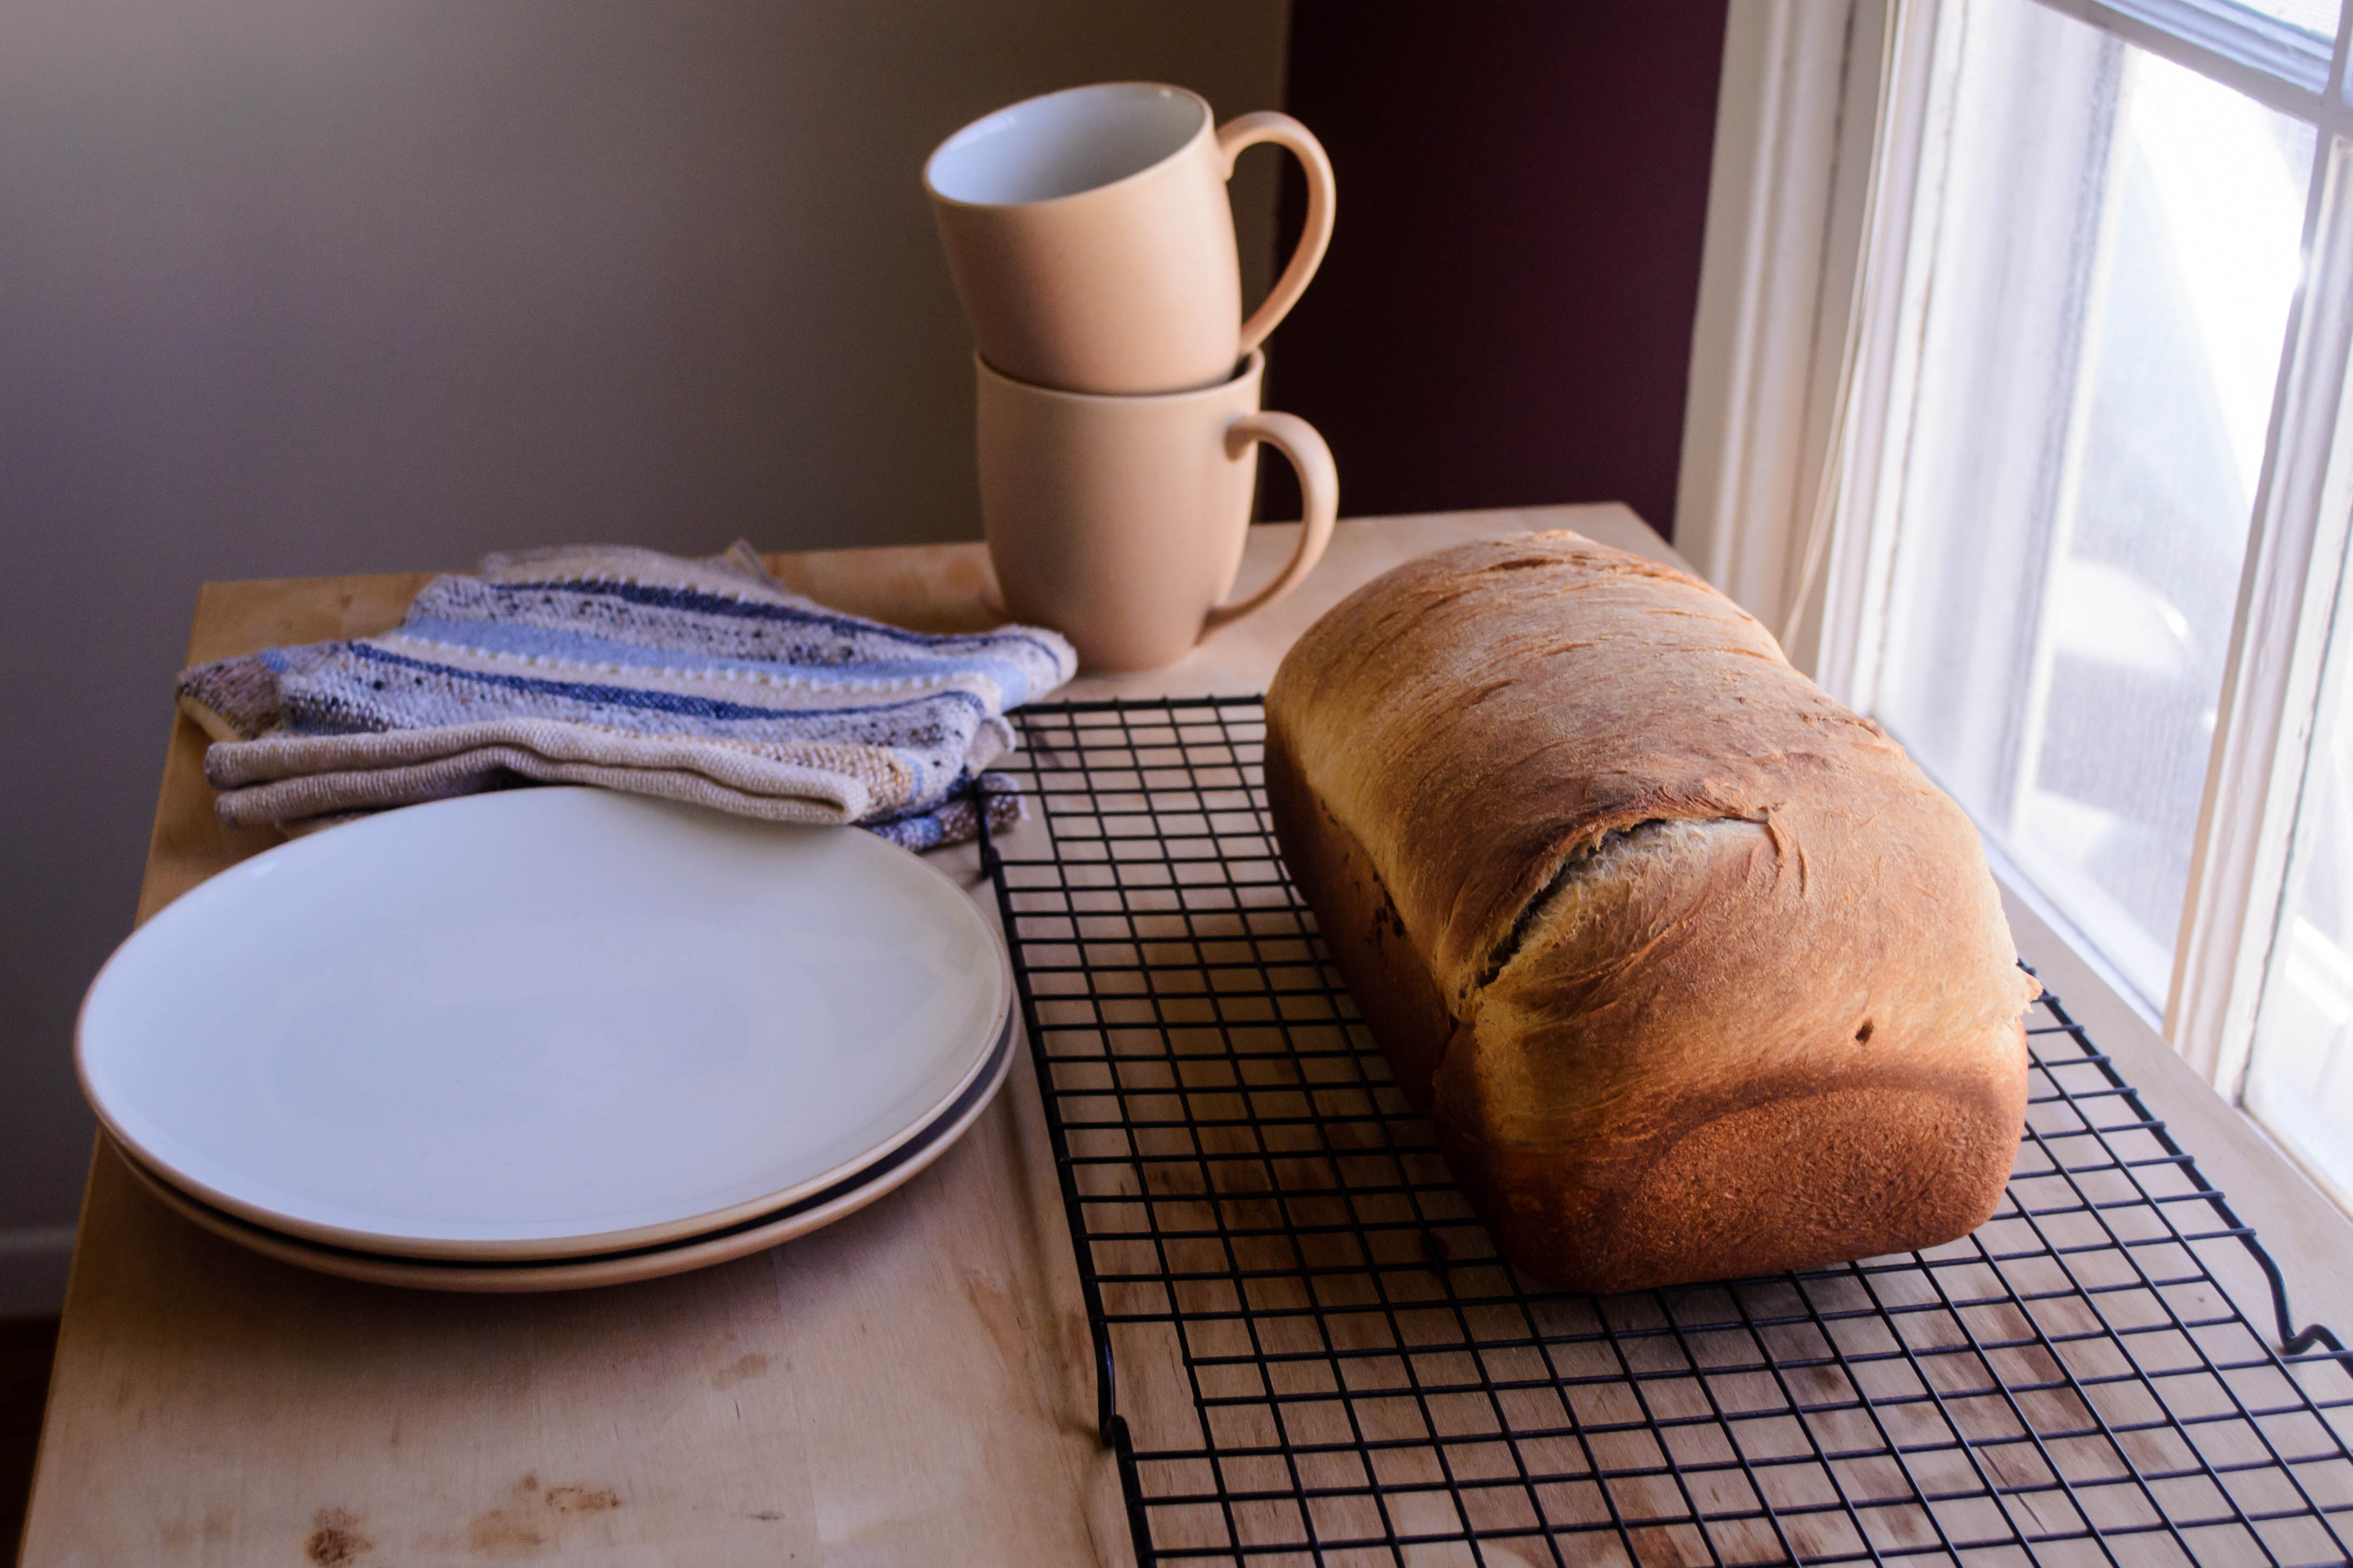 Oh, p.s., like my new “studio” set-up next to the window? My Photo Friday post from the other week had such lovely lighting I decided to make it a more regular shoot location. I’m looking forward to playing more with angles and light at different times of day.


#TwelveLoaves is a monthly bread baking party created by Lora from Cake Duchess and runs smoothly with the help of Heather of girlichef, and the rest of our fabulous bakers.
Our theme this month is A LITTLE SOMETHING SWEET. For more bread recipes, visit the #TwelveLoaves Pinterest board, or check out last month’s mouthwatering selection of #TwelveLoaves Mexican Breads!
If you’d like to bake along with us this month, share your “A Little Something Sweet” Bread using hashtag #TwelveLoaves!
 You may have noticed there was no recipe post on Monday. I could, were I a bit less honest, have sold you on the idea that this was related to the holiday weekend, or me traveling, or some such minor fabrication. But I don’t have a great poker face, so I’ll admit it was in fact because I’ve been feeling a bit of whatever the cook’s version of writer’s block might be called. I had cloudy ideas of things I could cook, I just didn’t really feel like figuring them out.
 Then I went to a wedding in Sacramento on Sunday, and saw a friend I realized I’ve known for over a decade, despite last seeing him something like seven or eight years ago. As we caught up, he told me he’d had to stop reading this blog because it always made him hungry, and licking his computer screen seemed like a bad idea. Despite the concerning image this conjured, it tripped something in my brain. Making you hungry is just what I’m after! That means – at least in his case – this blog is doing its job.
 Thereafter, the block was broken. On the drive back to Los Angeles (only while I was a passenger, of course), I kept having to text myself food ideas. One was these meatballs, which I’m posting off-schedule because I have to get them in while it’s still May! I know you aren’t reading this, J., but I hope you would want to eat them anyway, since it’s your fault thanks to you that they came to be.
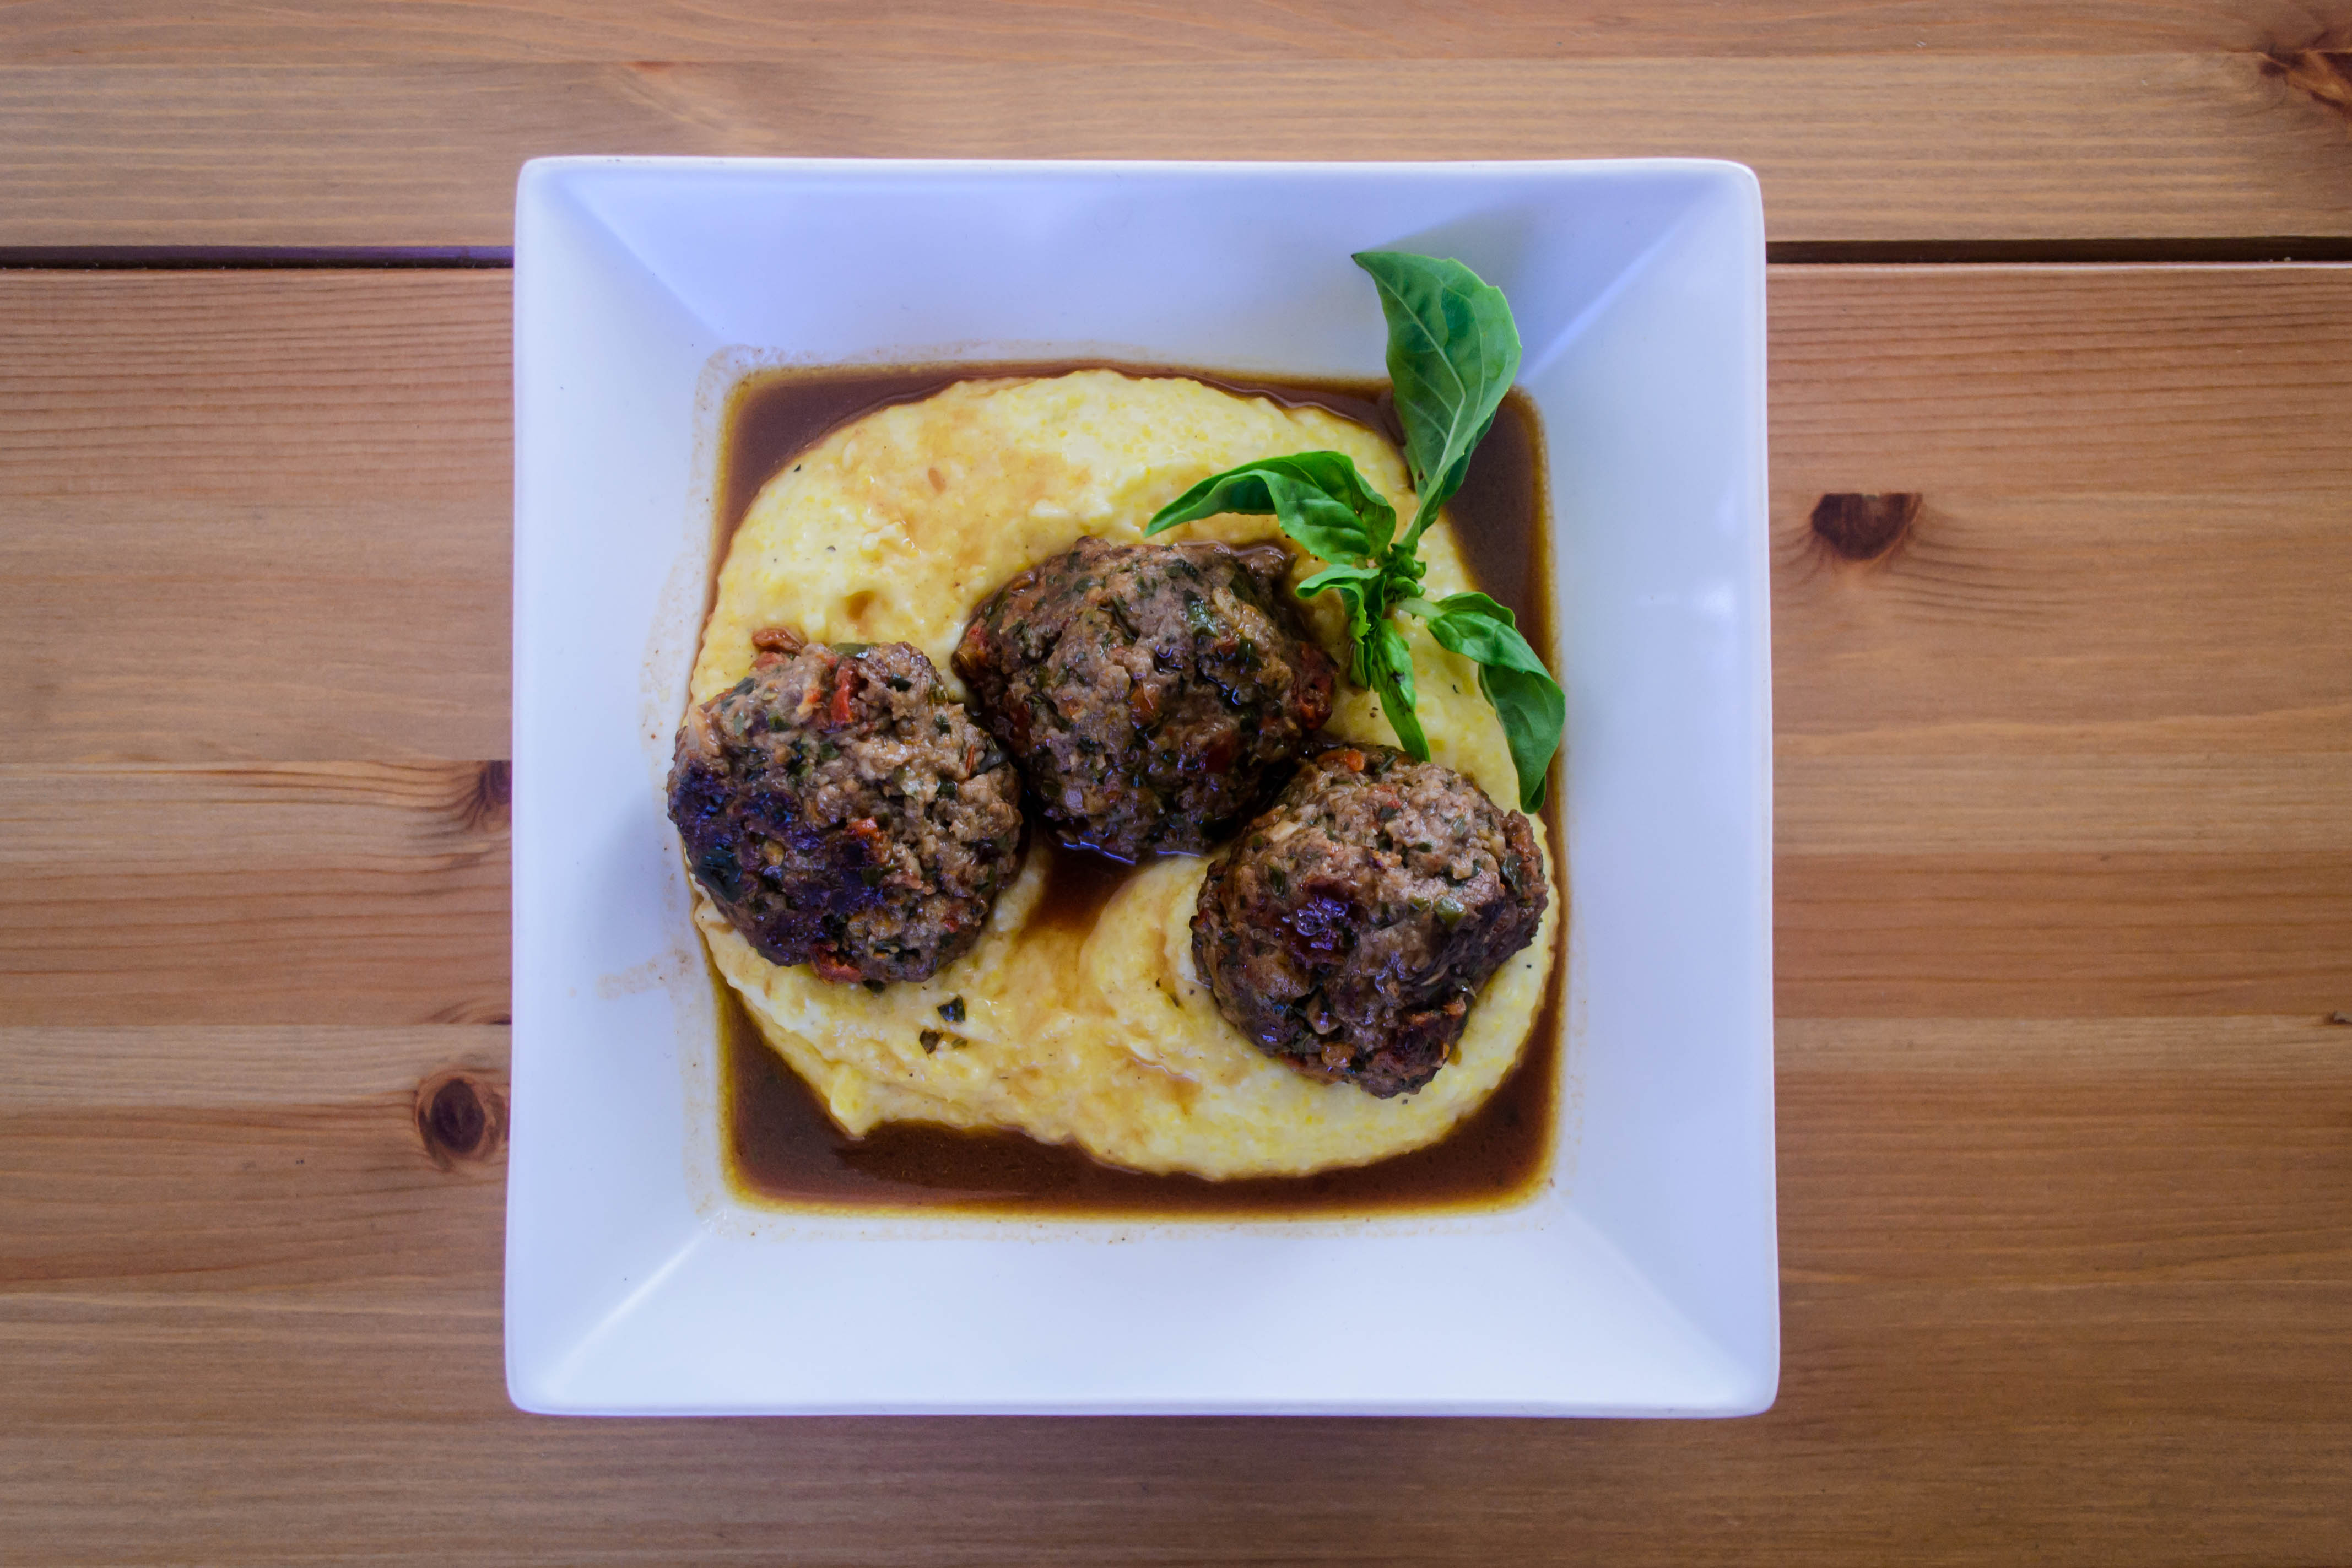
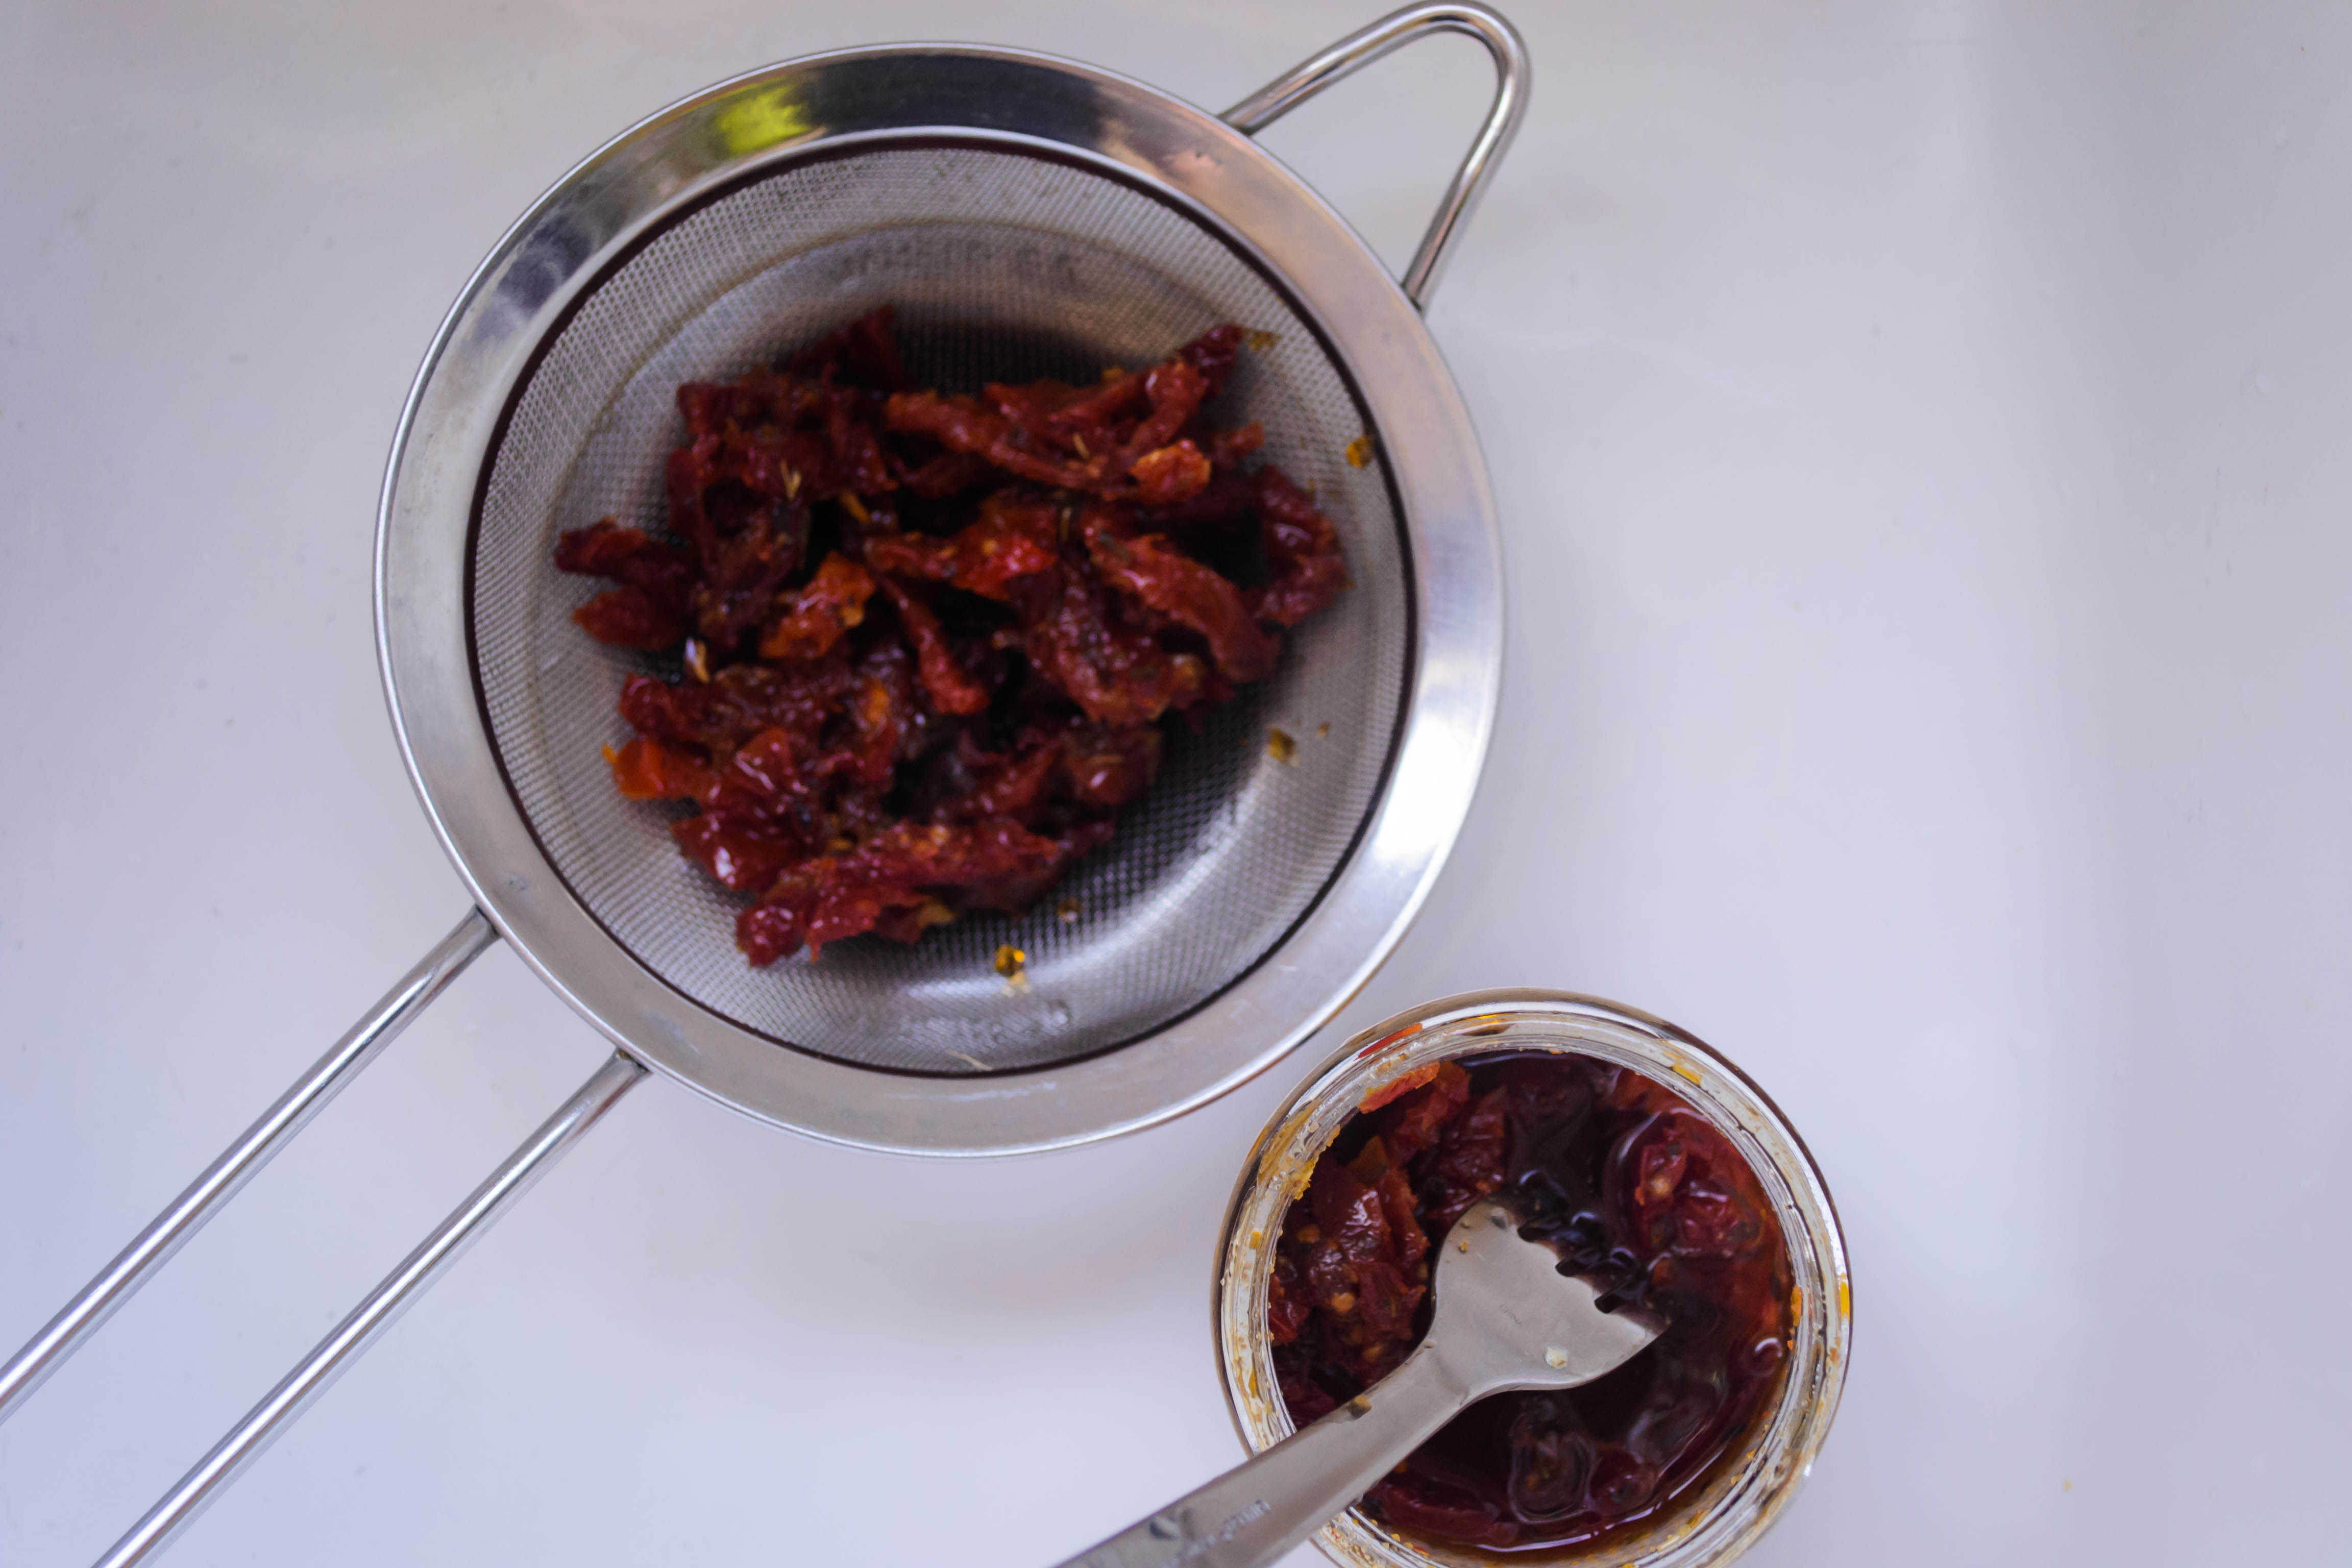
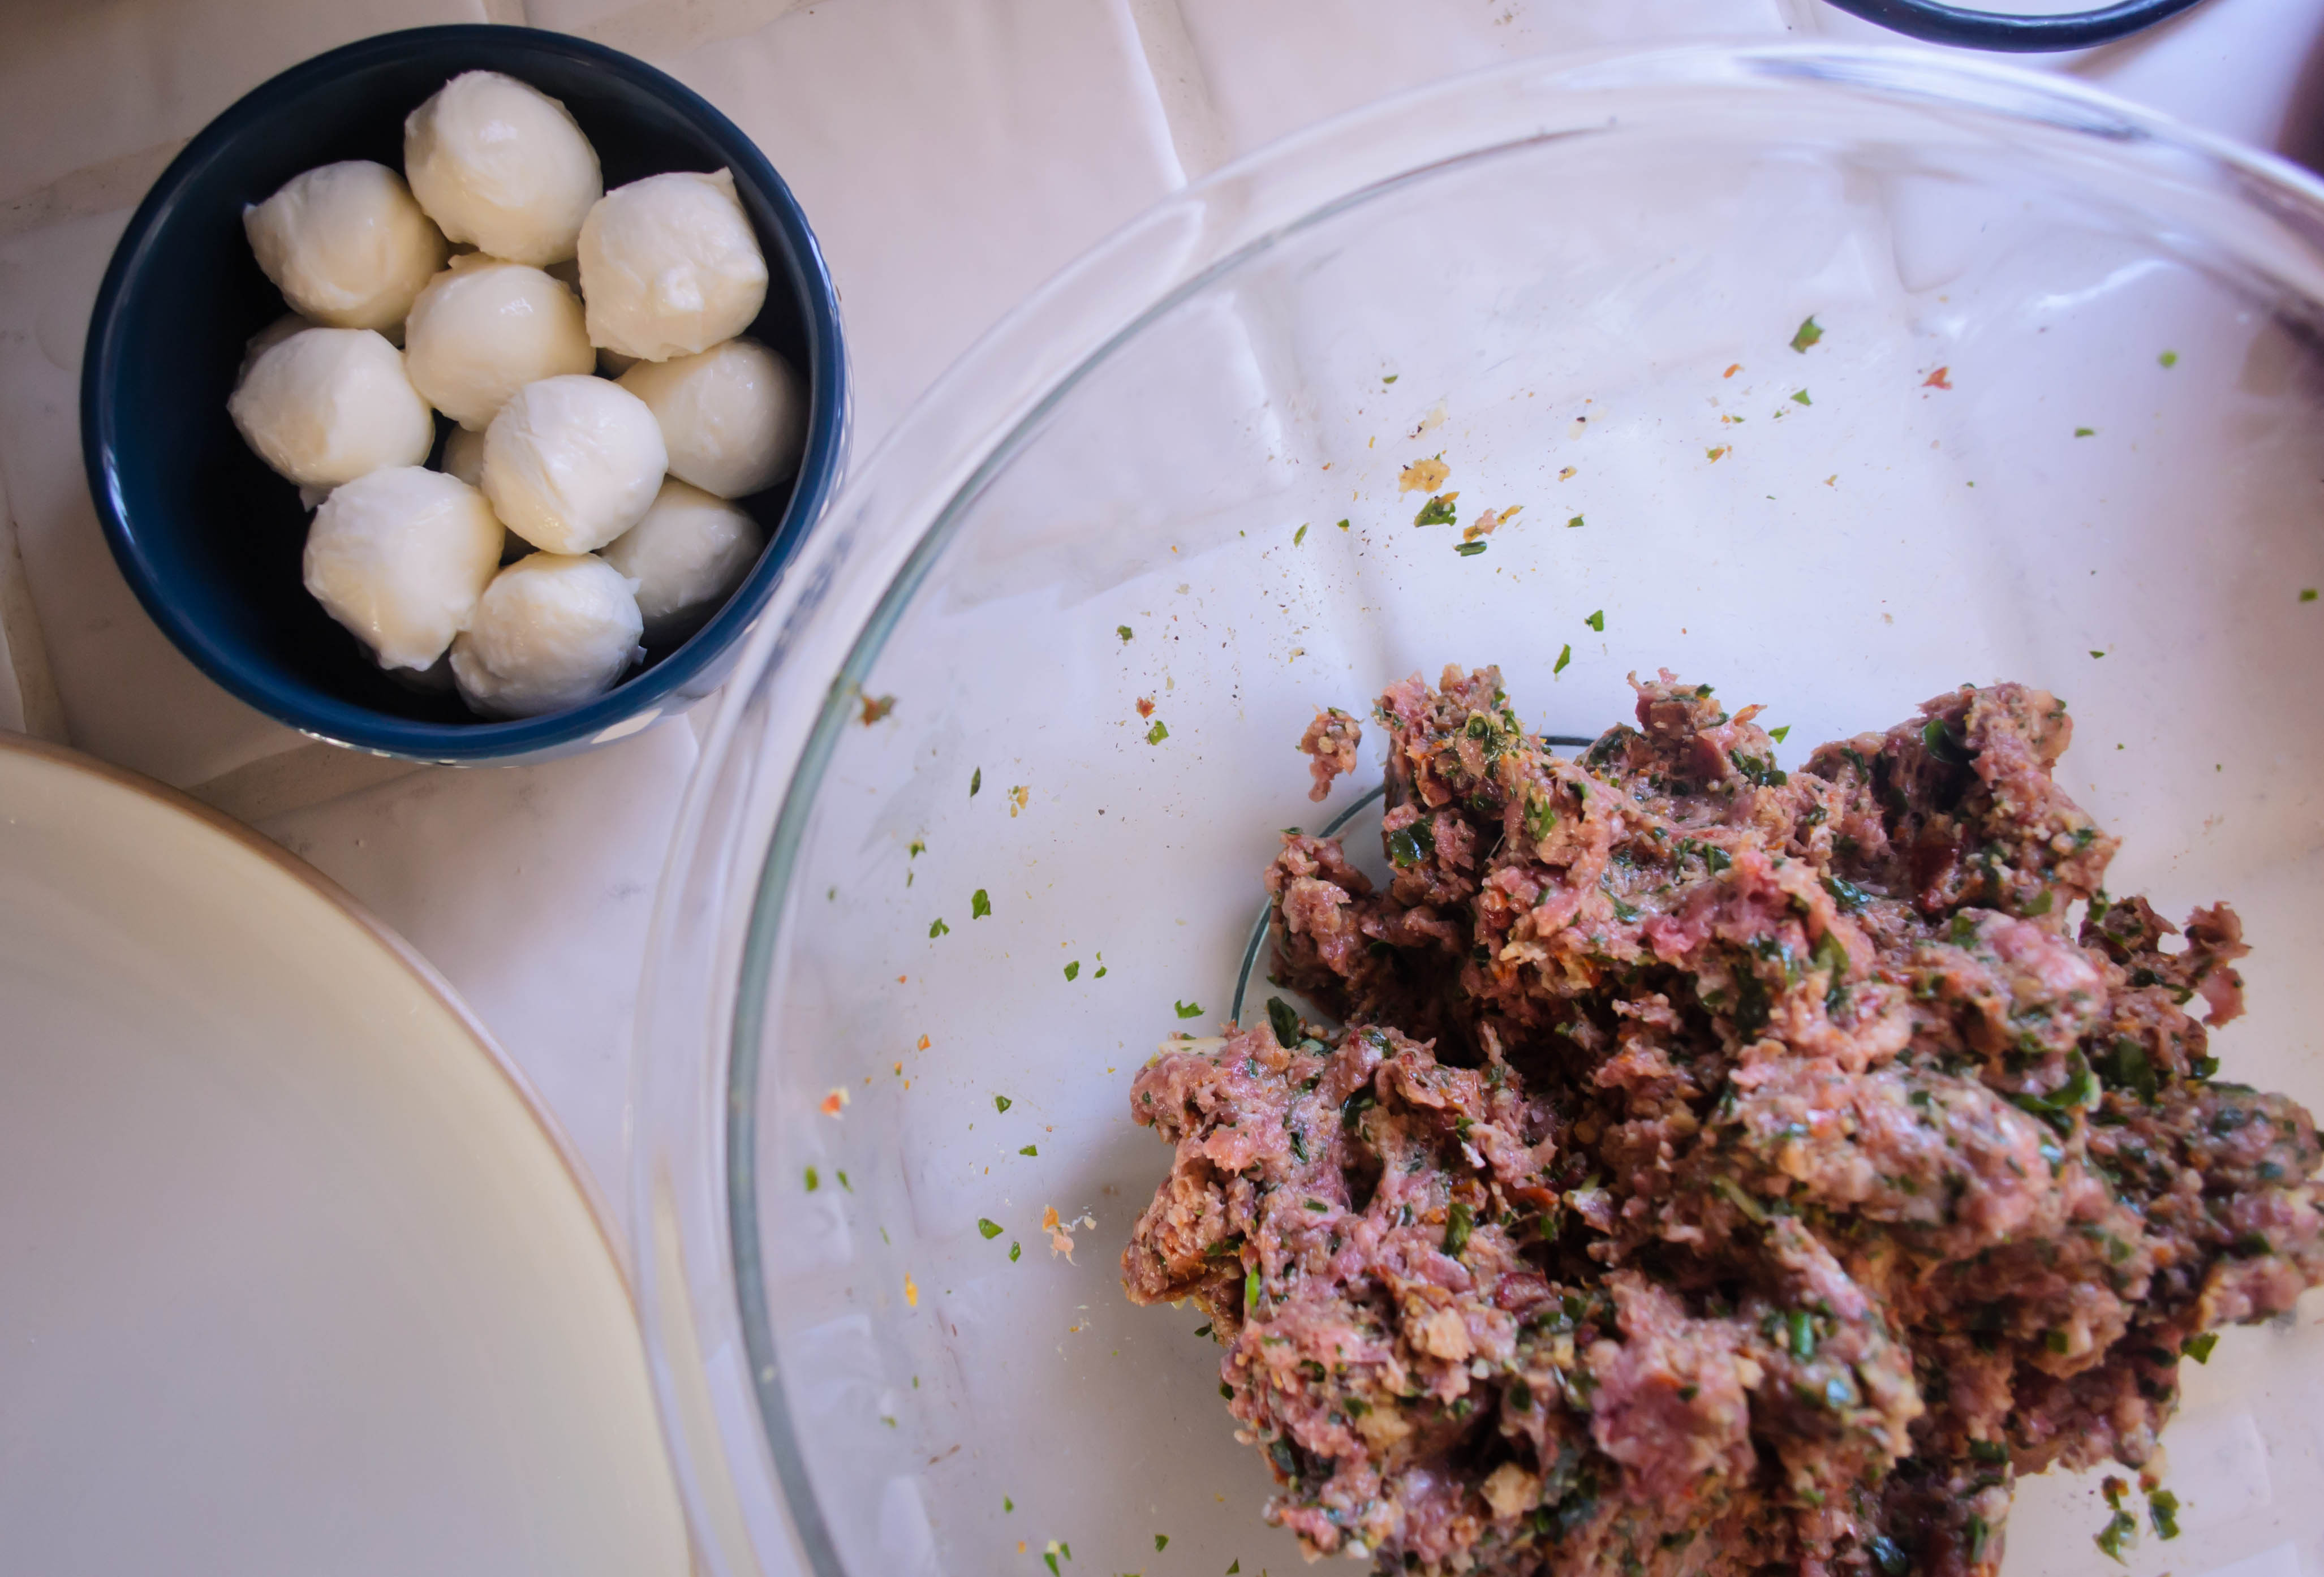
 Previous to my little block, my sister and I had a rapid-fire email exchange of meatball ideas. One of her suggestions – a bruschetta meatball – eventually morphed into what I came up with here: a nod to a caprese salad in a moment when the juicy, swollen garden-ripe tomatoes of your dreams are far from ready. A beef meatball shot through with sundried tomato chunks, ribbons of basil, and roasted garlic. Seared and then simmered in a balsamic vinegar and red wine sauce. And then, the pay-off: the glorious goo of melted mozzarella cheese oozing out from the inside. We snuggled them down in a pillow of soft polenta and gobbled them up before the cheese inside had time to cool.

 Though I prefer these meatballs piping hot with a molten center of oozing cheese, they are also tasty as part of a sandwich or an antipasti platter. In fact, they basically are the platter – tomato, herbs, cheese, and meat already included. They just need a drizzle of olive oil, maybe a few torn leaves of fresh basil or parsley, and a glass of wine to complete the picture.
 A word: as you’ll see from the procedure, these are delicate little beasts. I made mine without the egg I’ve added to the ingredient list here, and half of my meatballs were oozing cheese before they completed their simmer. They were still good, but didn’t have the melty surprise factor I was hoping for. The addition of egg should make the meat and crumbs bind more securely. Still, though, be gentle as you work with these, and be doubly triply sure the cheese is completely enclosed inside the meat mixture before you introduce them to the heat.
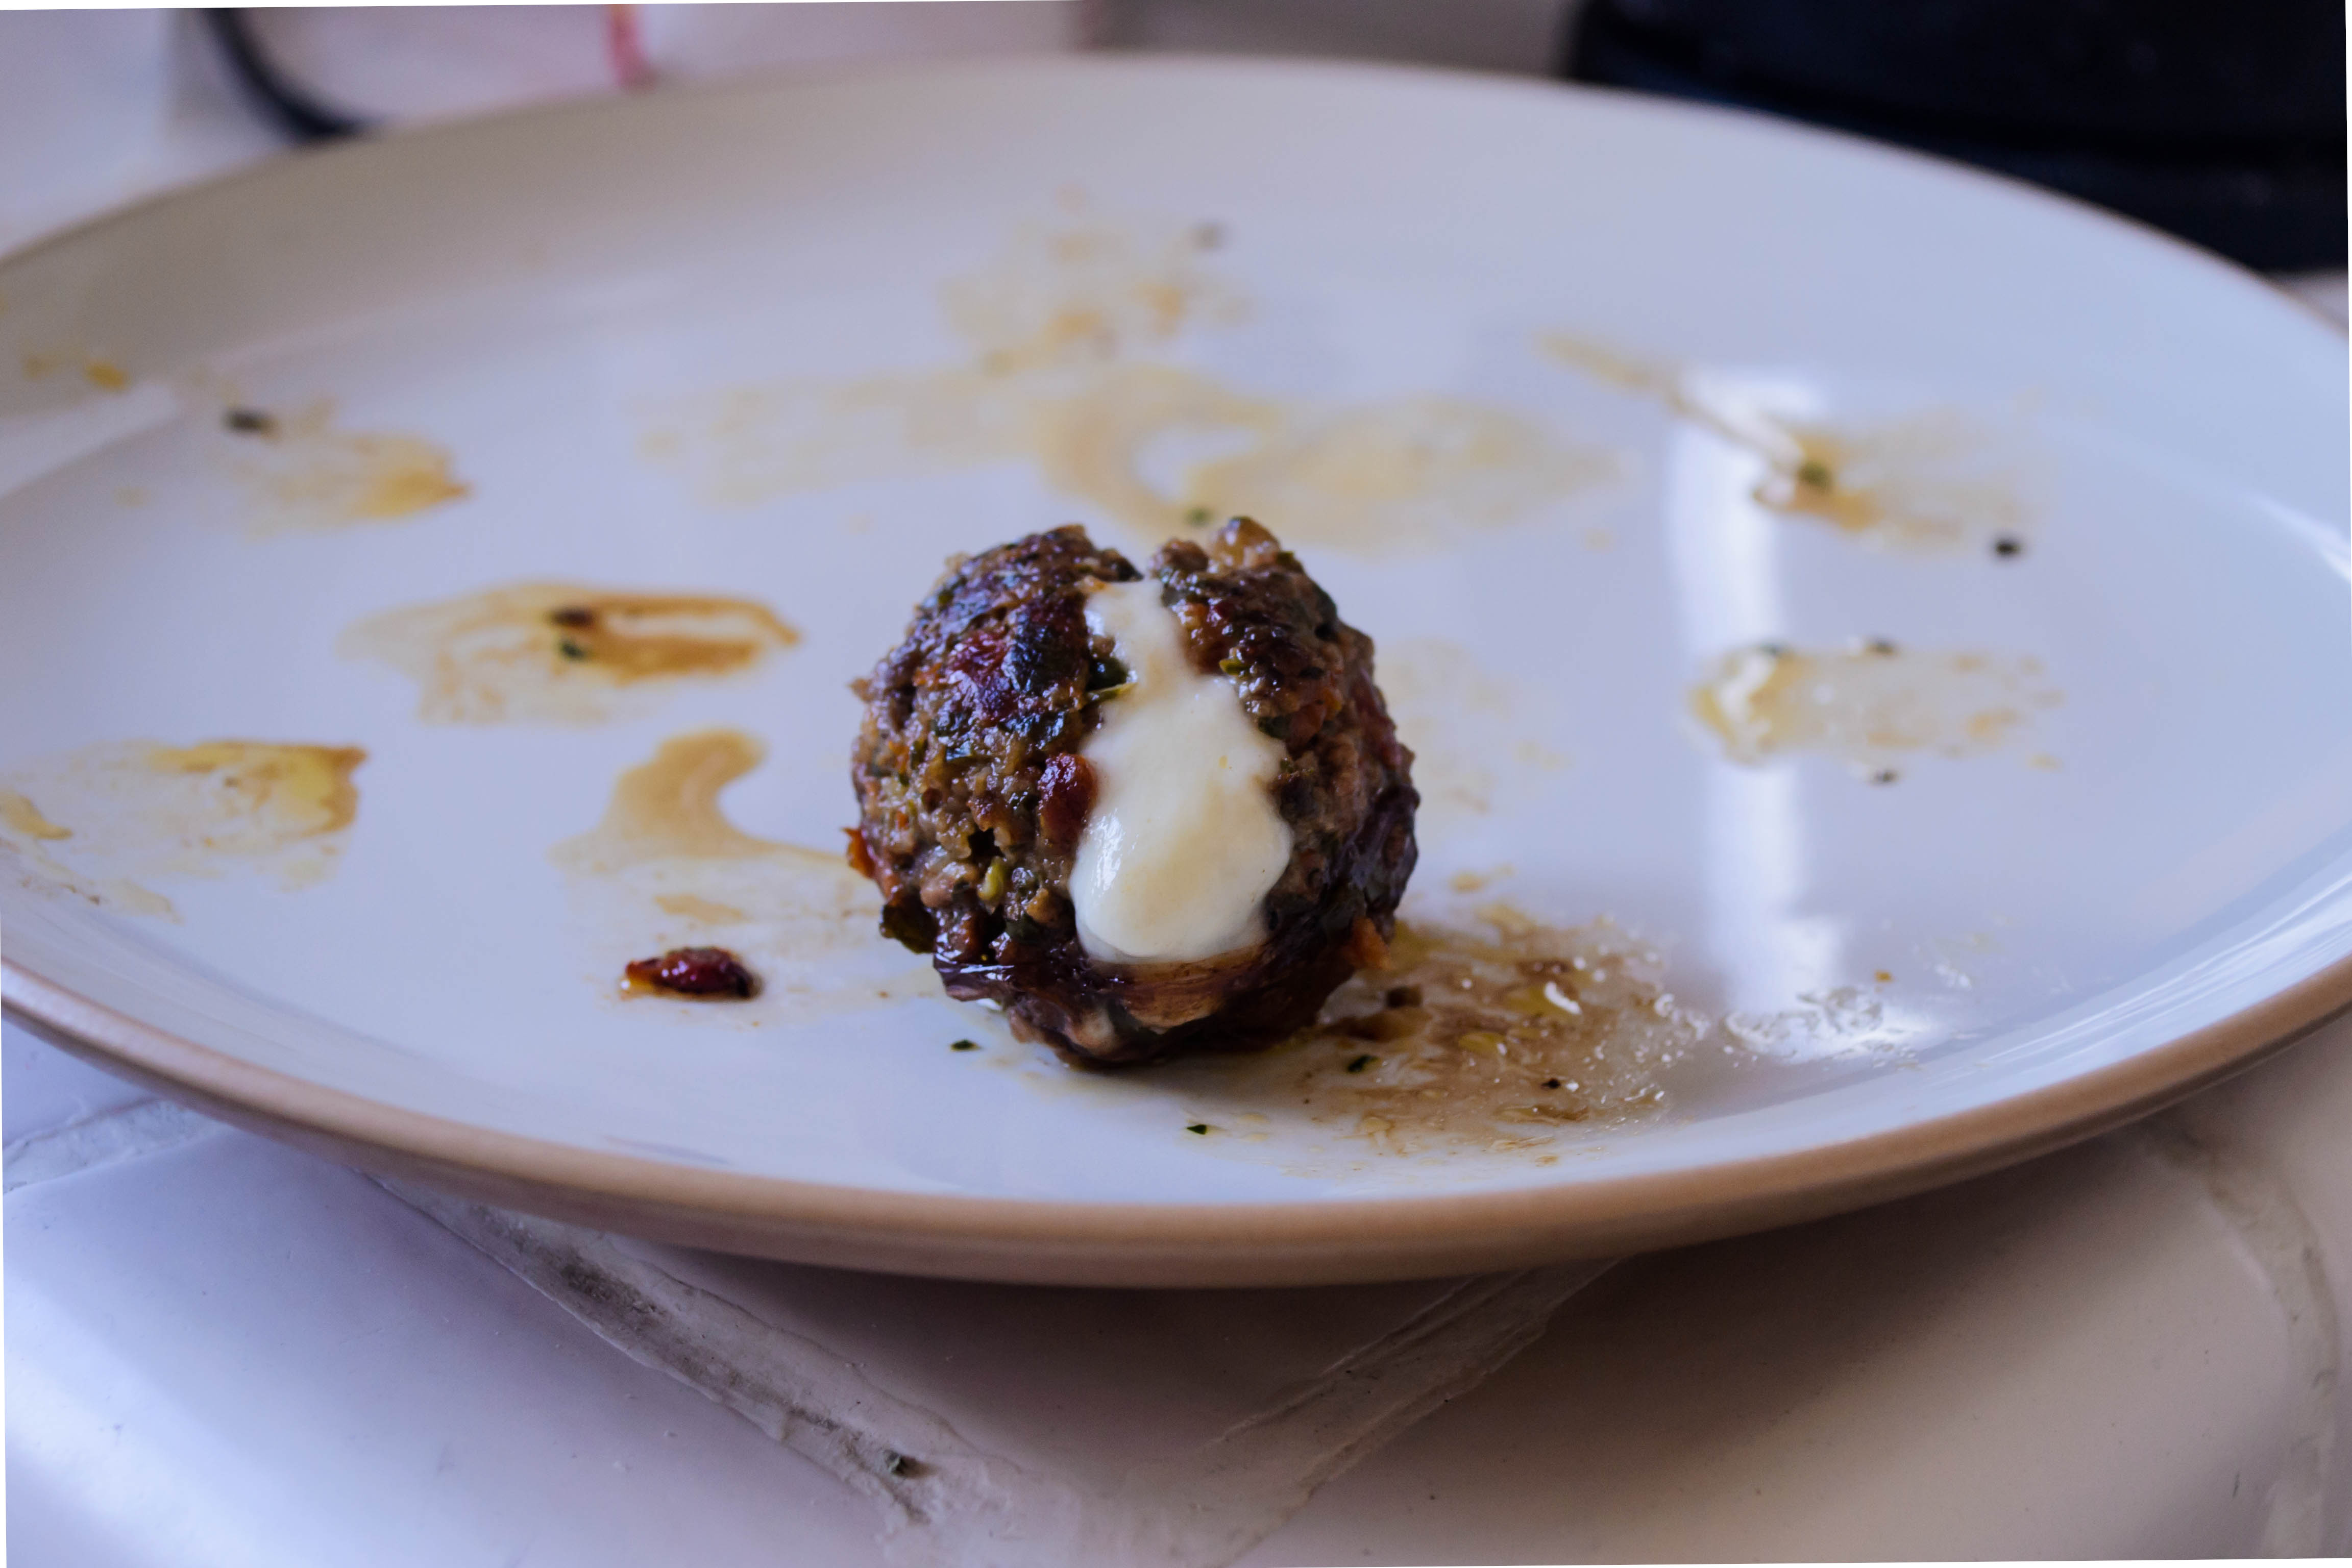

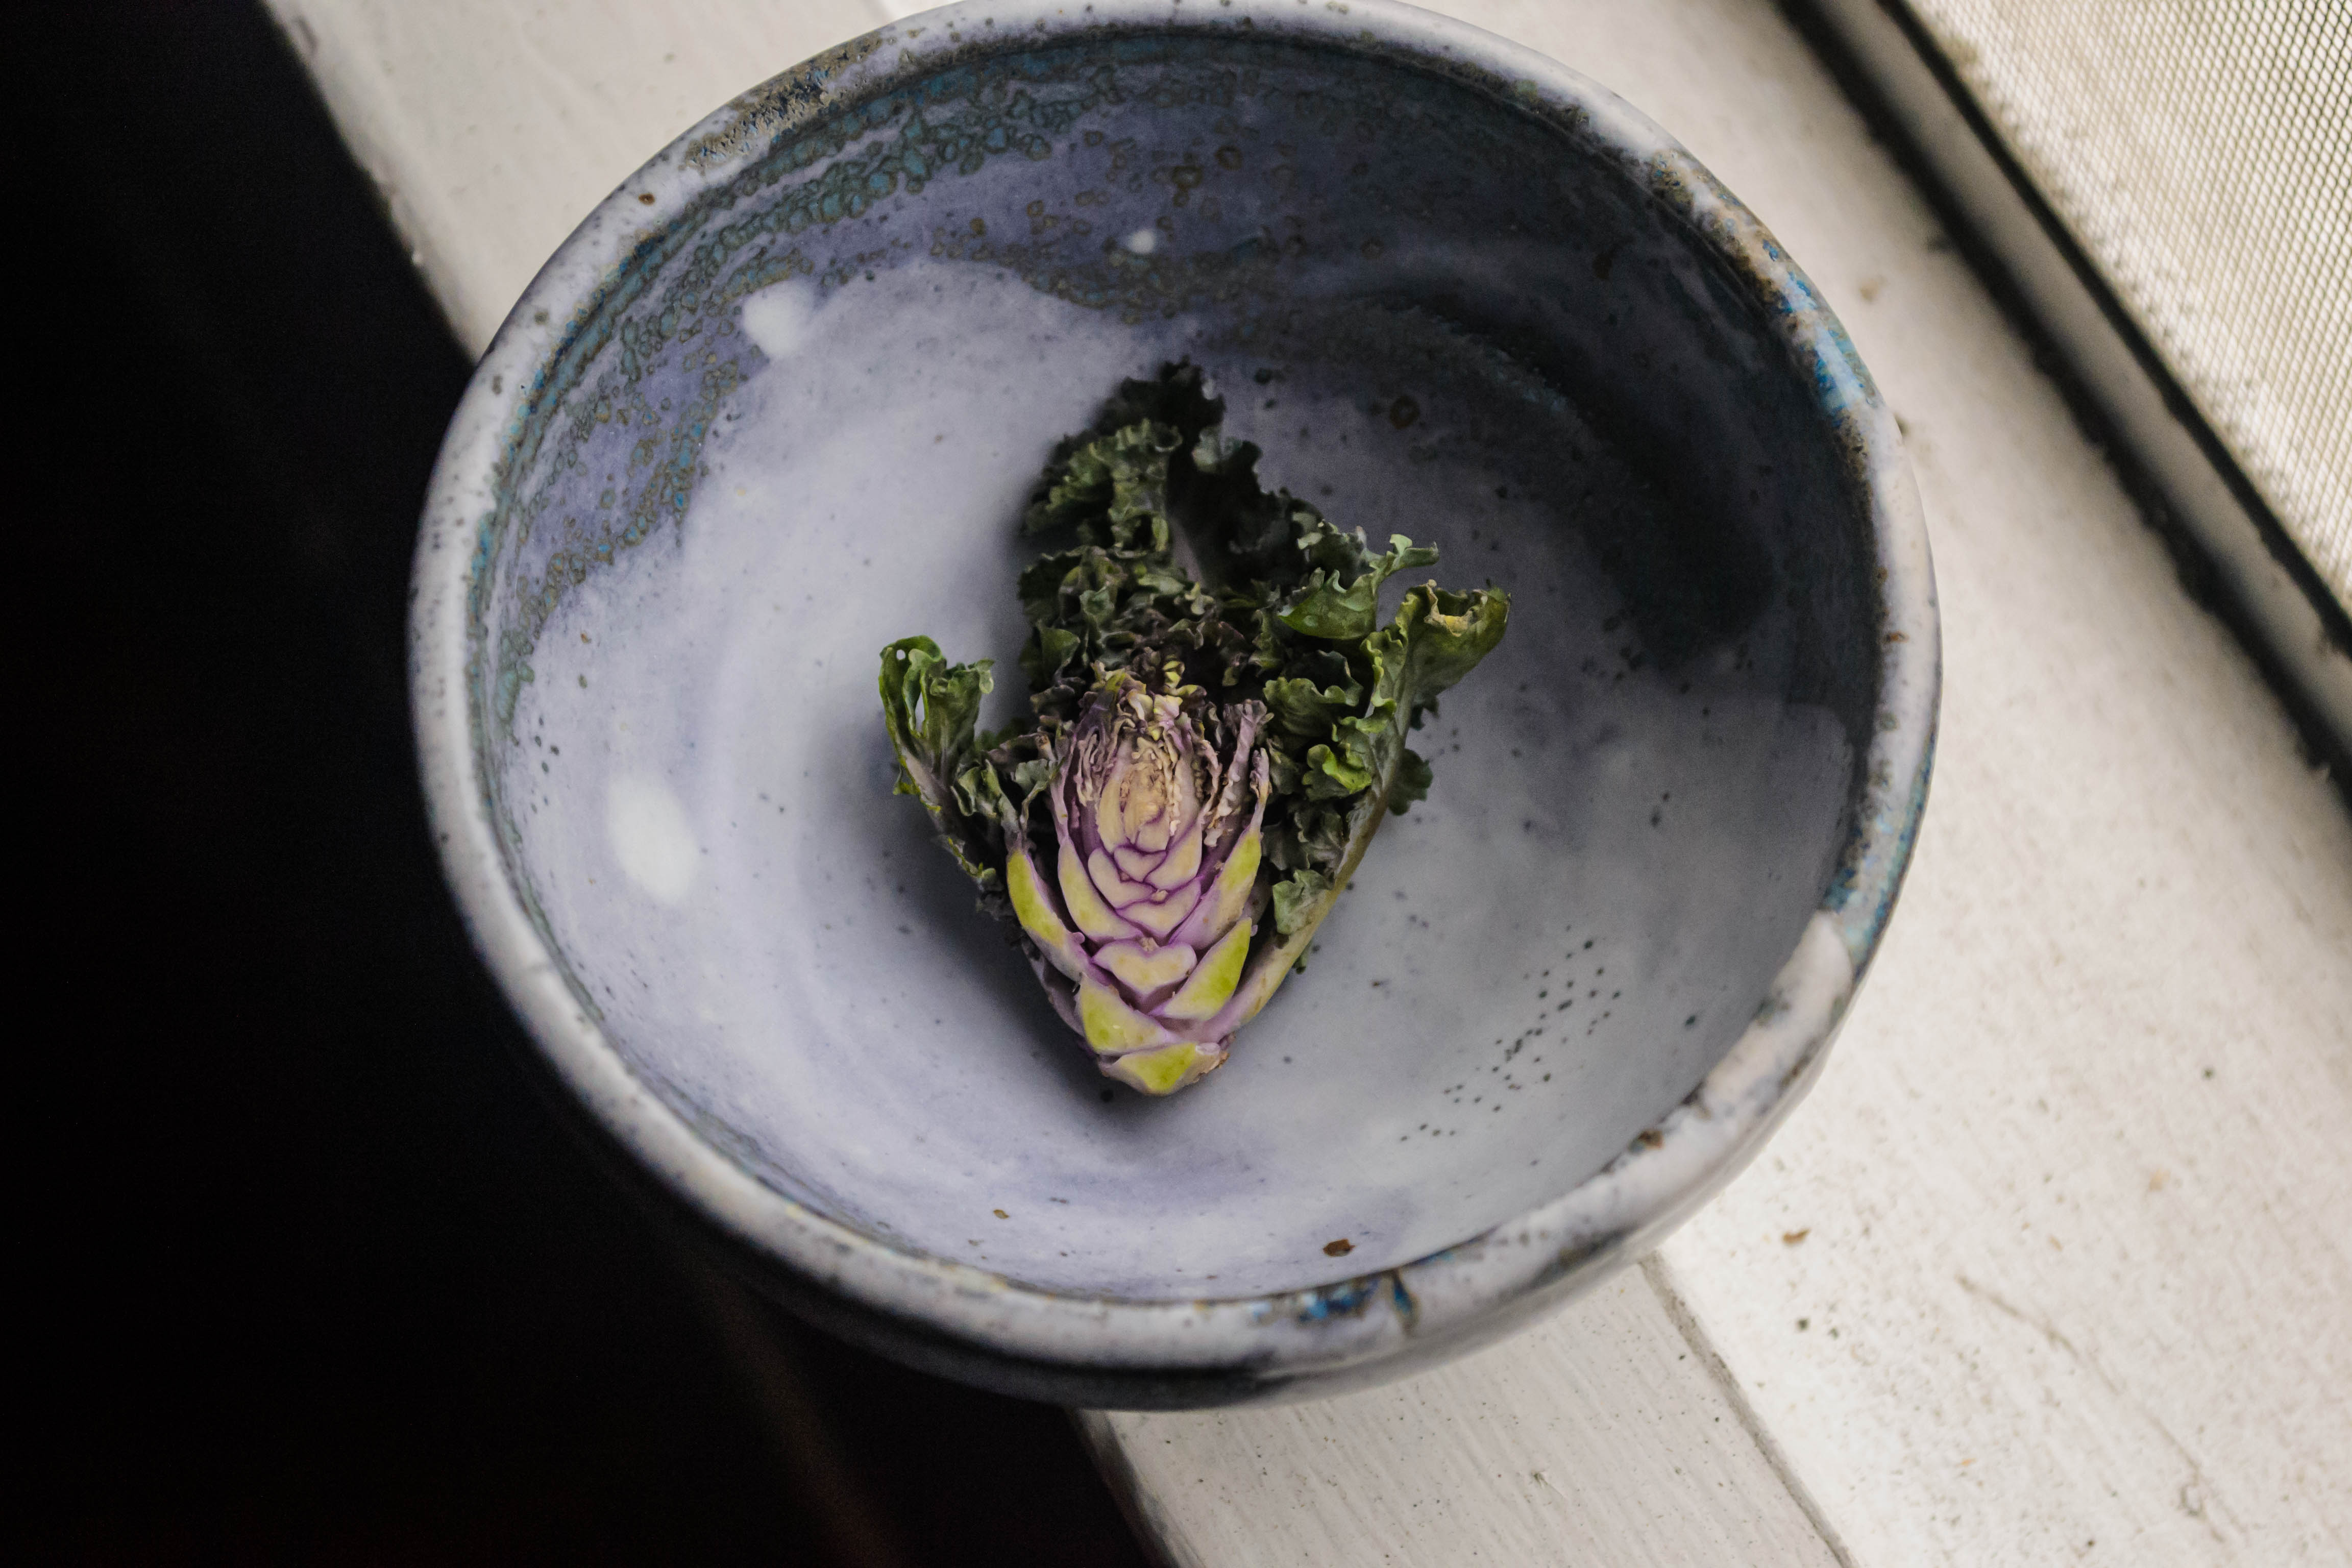
Kale sprout, split in half, in my new favorite set-up: a gray ceramic bowl shows off the food so well, positioned on the edge of a windowsill on an overcast late afternoon.
 Months and months ago, I showed you photos of a tiny shack in Kauai and promised you my own rendition of their signature ahi nori wraps: thick, squared-off cylinders of seared ahi and spears of cucumber, surrounded by brown rice, doused with a mysterious wasabi sauce and wrapped up in a spinach flour tortilla lined with a sheet of nori. A delightful cross between a burrito and sushi, they were one of our favorite meals while on the island. But then, you know, life, with all those pesky obligations, insisted on happening, and now we are a full school year later and I’m finally getting around to it. It’s a cringe-worthy cliche to declare that these are worth the wait, but since we are now on our second version of them in two weeks, I’m going to take the chance.
 Since it has been so long, I’ve had plenty of time to reflect on what make these funny little sushi / burrito mash-ups so good. Well-spiced, lightly seared tuna, still rare or even raw in the middle, is of course the main reason. But only slightly secondary are the issues of texture and temperature. As you’ll know if you like sushi, there’s something amazing about a perfect piece of ahi – it’s meltingly soft but, when seared around the edges, it becomes softness with a bouncy chew. It is hot on the outsides, but still cool in the interior. Flanked by cucumbers, you get a fresh, bright, cold crispness, and the chewy strangeness of the nori seaweed layer is somehow perfect.

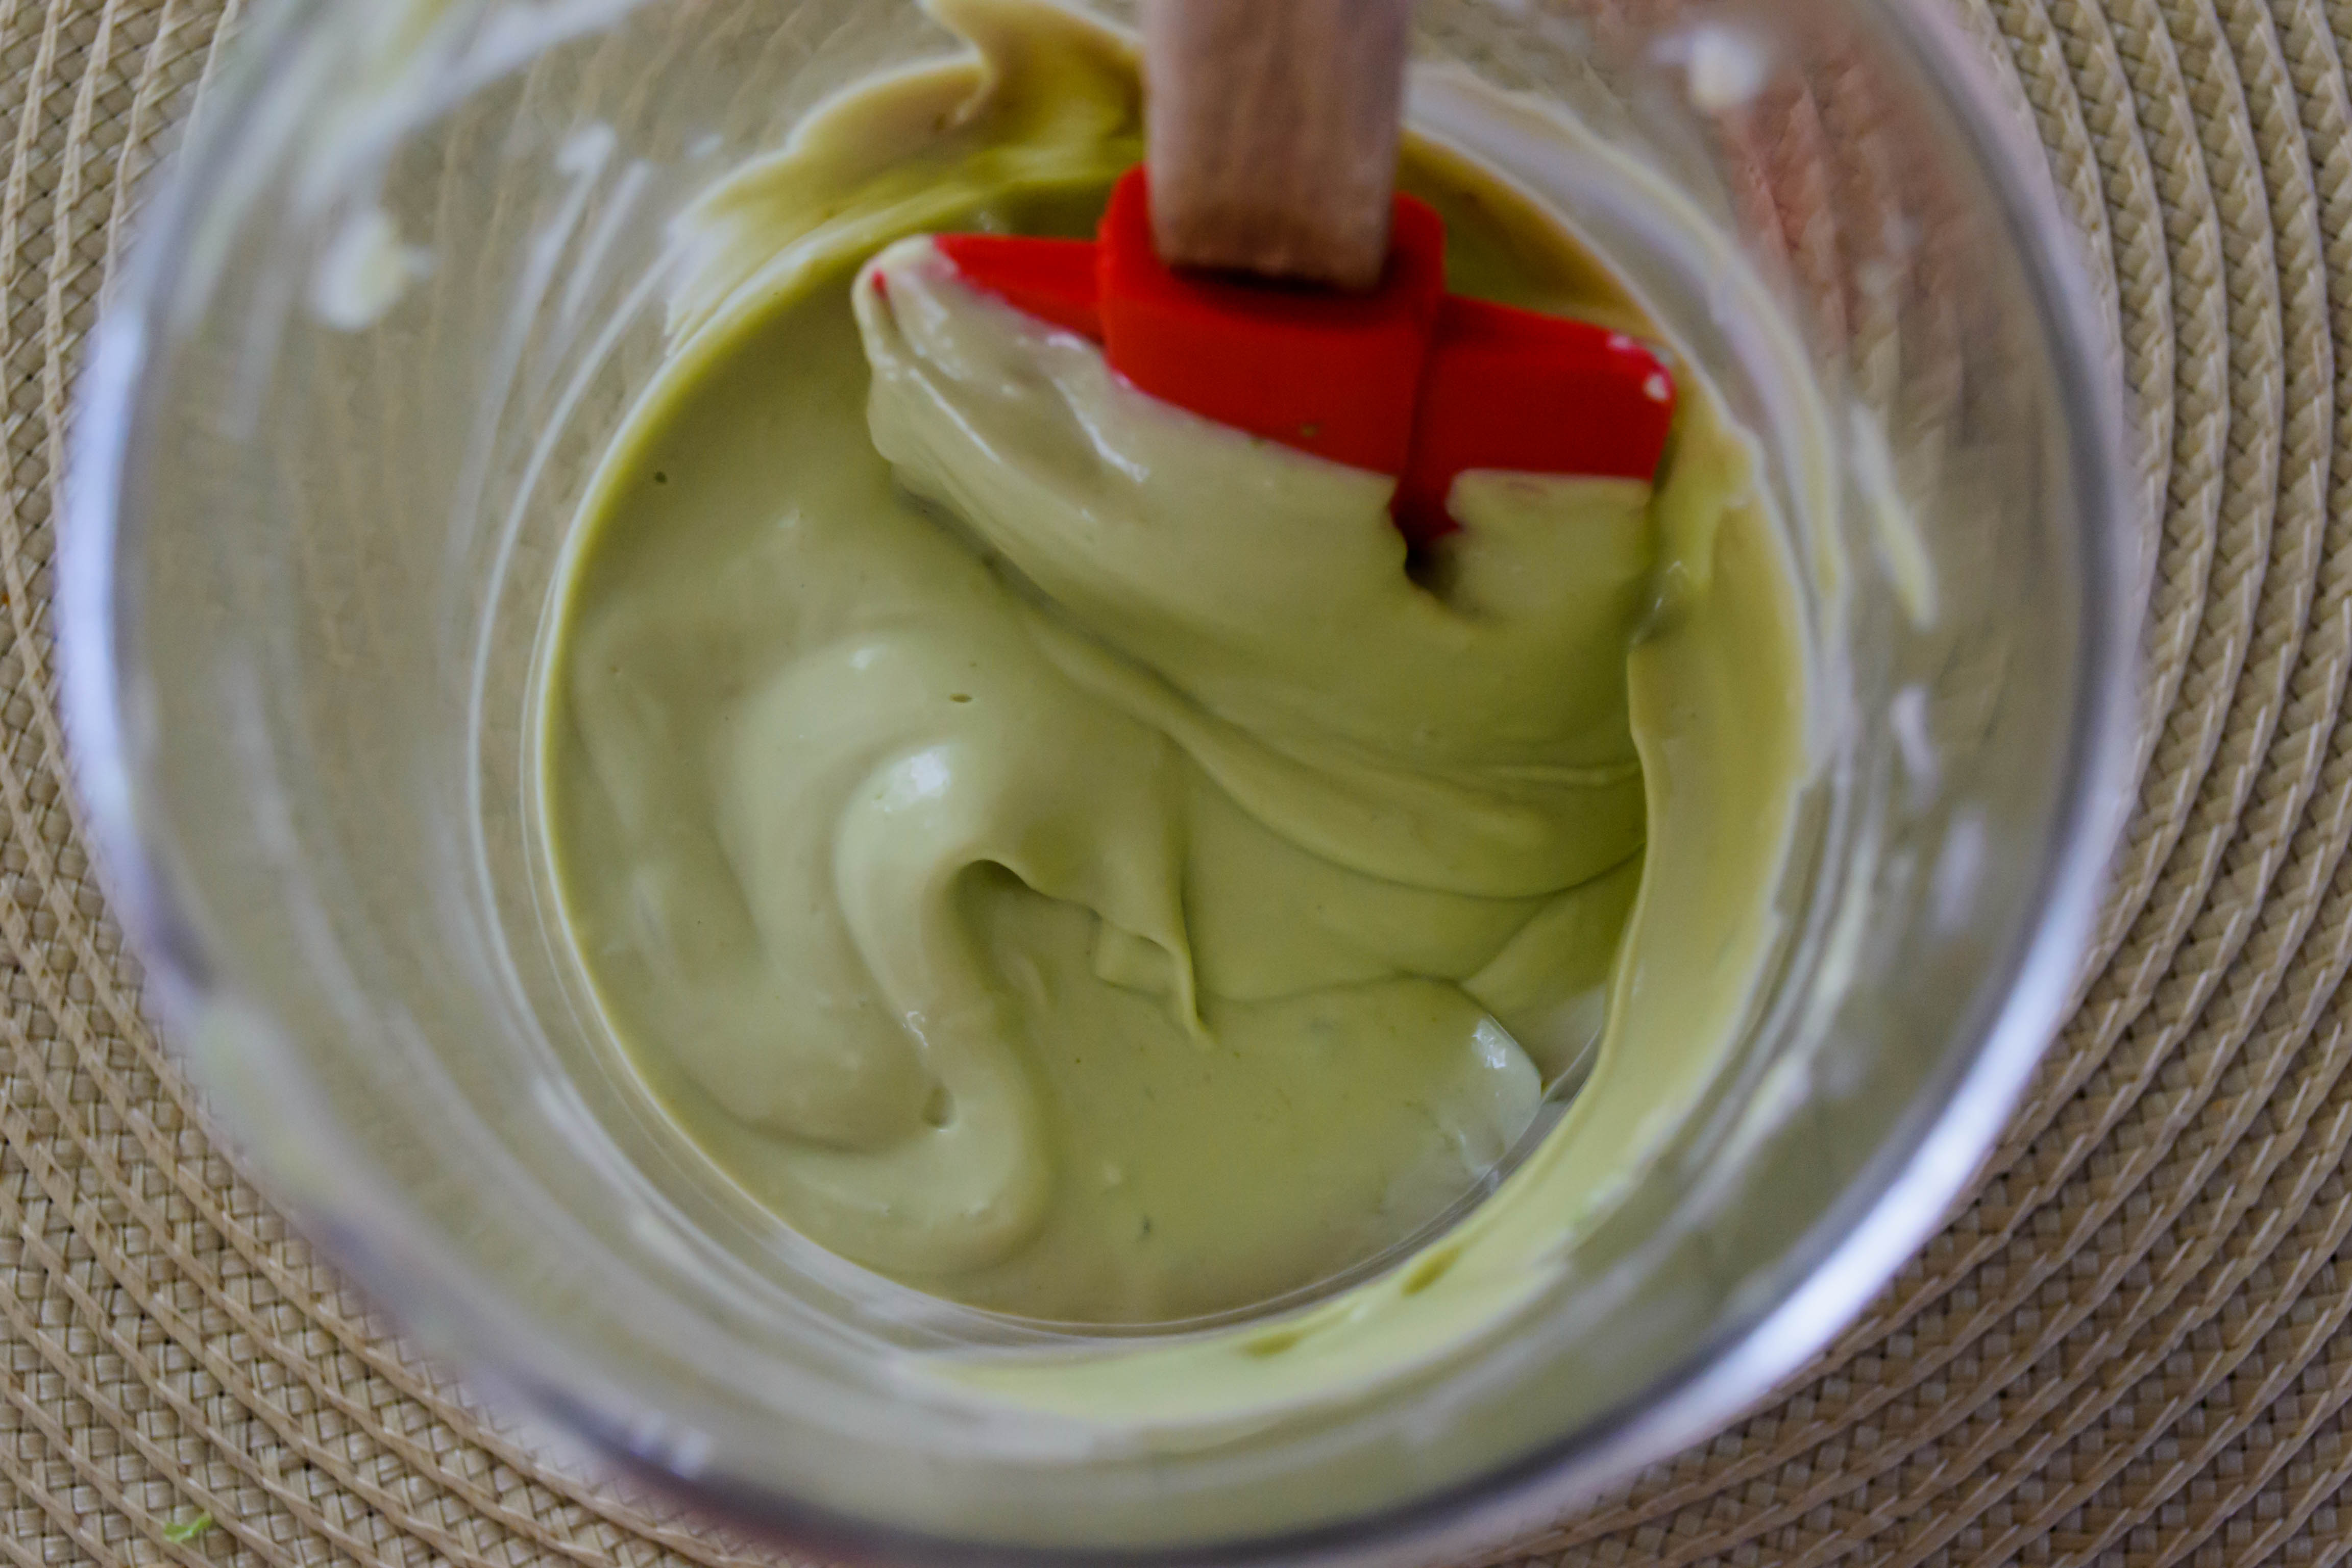 These also offer perfectly contrasting tastes. Of course there’s the glorious fresh fish flavor, but there’s also nostril-piercing heat from the wasabi, and saltiness from the seaweed, and the welcome nutty blandness of the rice. Because I can’t leave well enough alone, I thought the addition of rich, creamy avocado blitzed into a velvet puree with a touch of mayonnaise would be the right vehicle for the wasabi, and insisted on crusting the tuna itself with sesame seeds, lime zest, and some red pepper flakes as well as the customary salt and pepper sprinkle before searing it off.

 We ate these in big gulps, then went back for more. One wrap is plenty for a dinner, especially if you wisely offer yourself a side of mango-spiked salad or lightly sautéed vegetables, but we are not always wise, and opted instead to make a third wrap and split it. Still, even the resulting food coma couldn’t deter our enthusiasm about the meal.
 If you aren’t comfortable with raw fish, you can of course cook yours all the way through, though if you’re going to do that I wouldn’t bother with the pricey ahi. Cut a nice filet of salmon into long strips and crust and sauté or broil until just cooked through. Or, if you want to go an even easier route, sprinkle some lime juice over a few layers of smoked salmon and wrap that up inside instead.
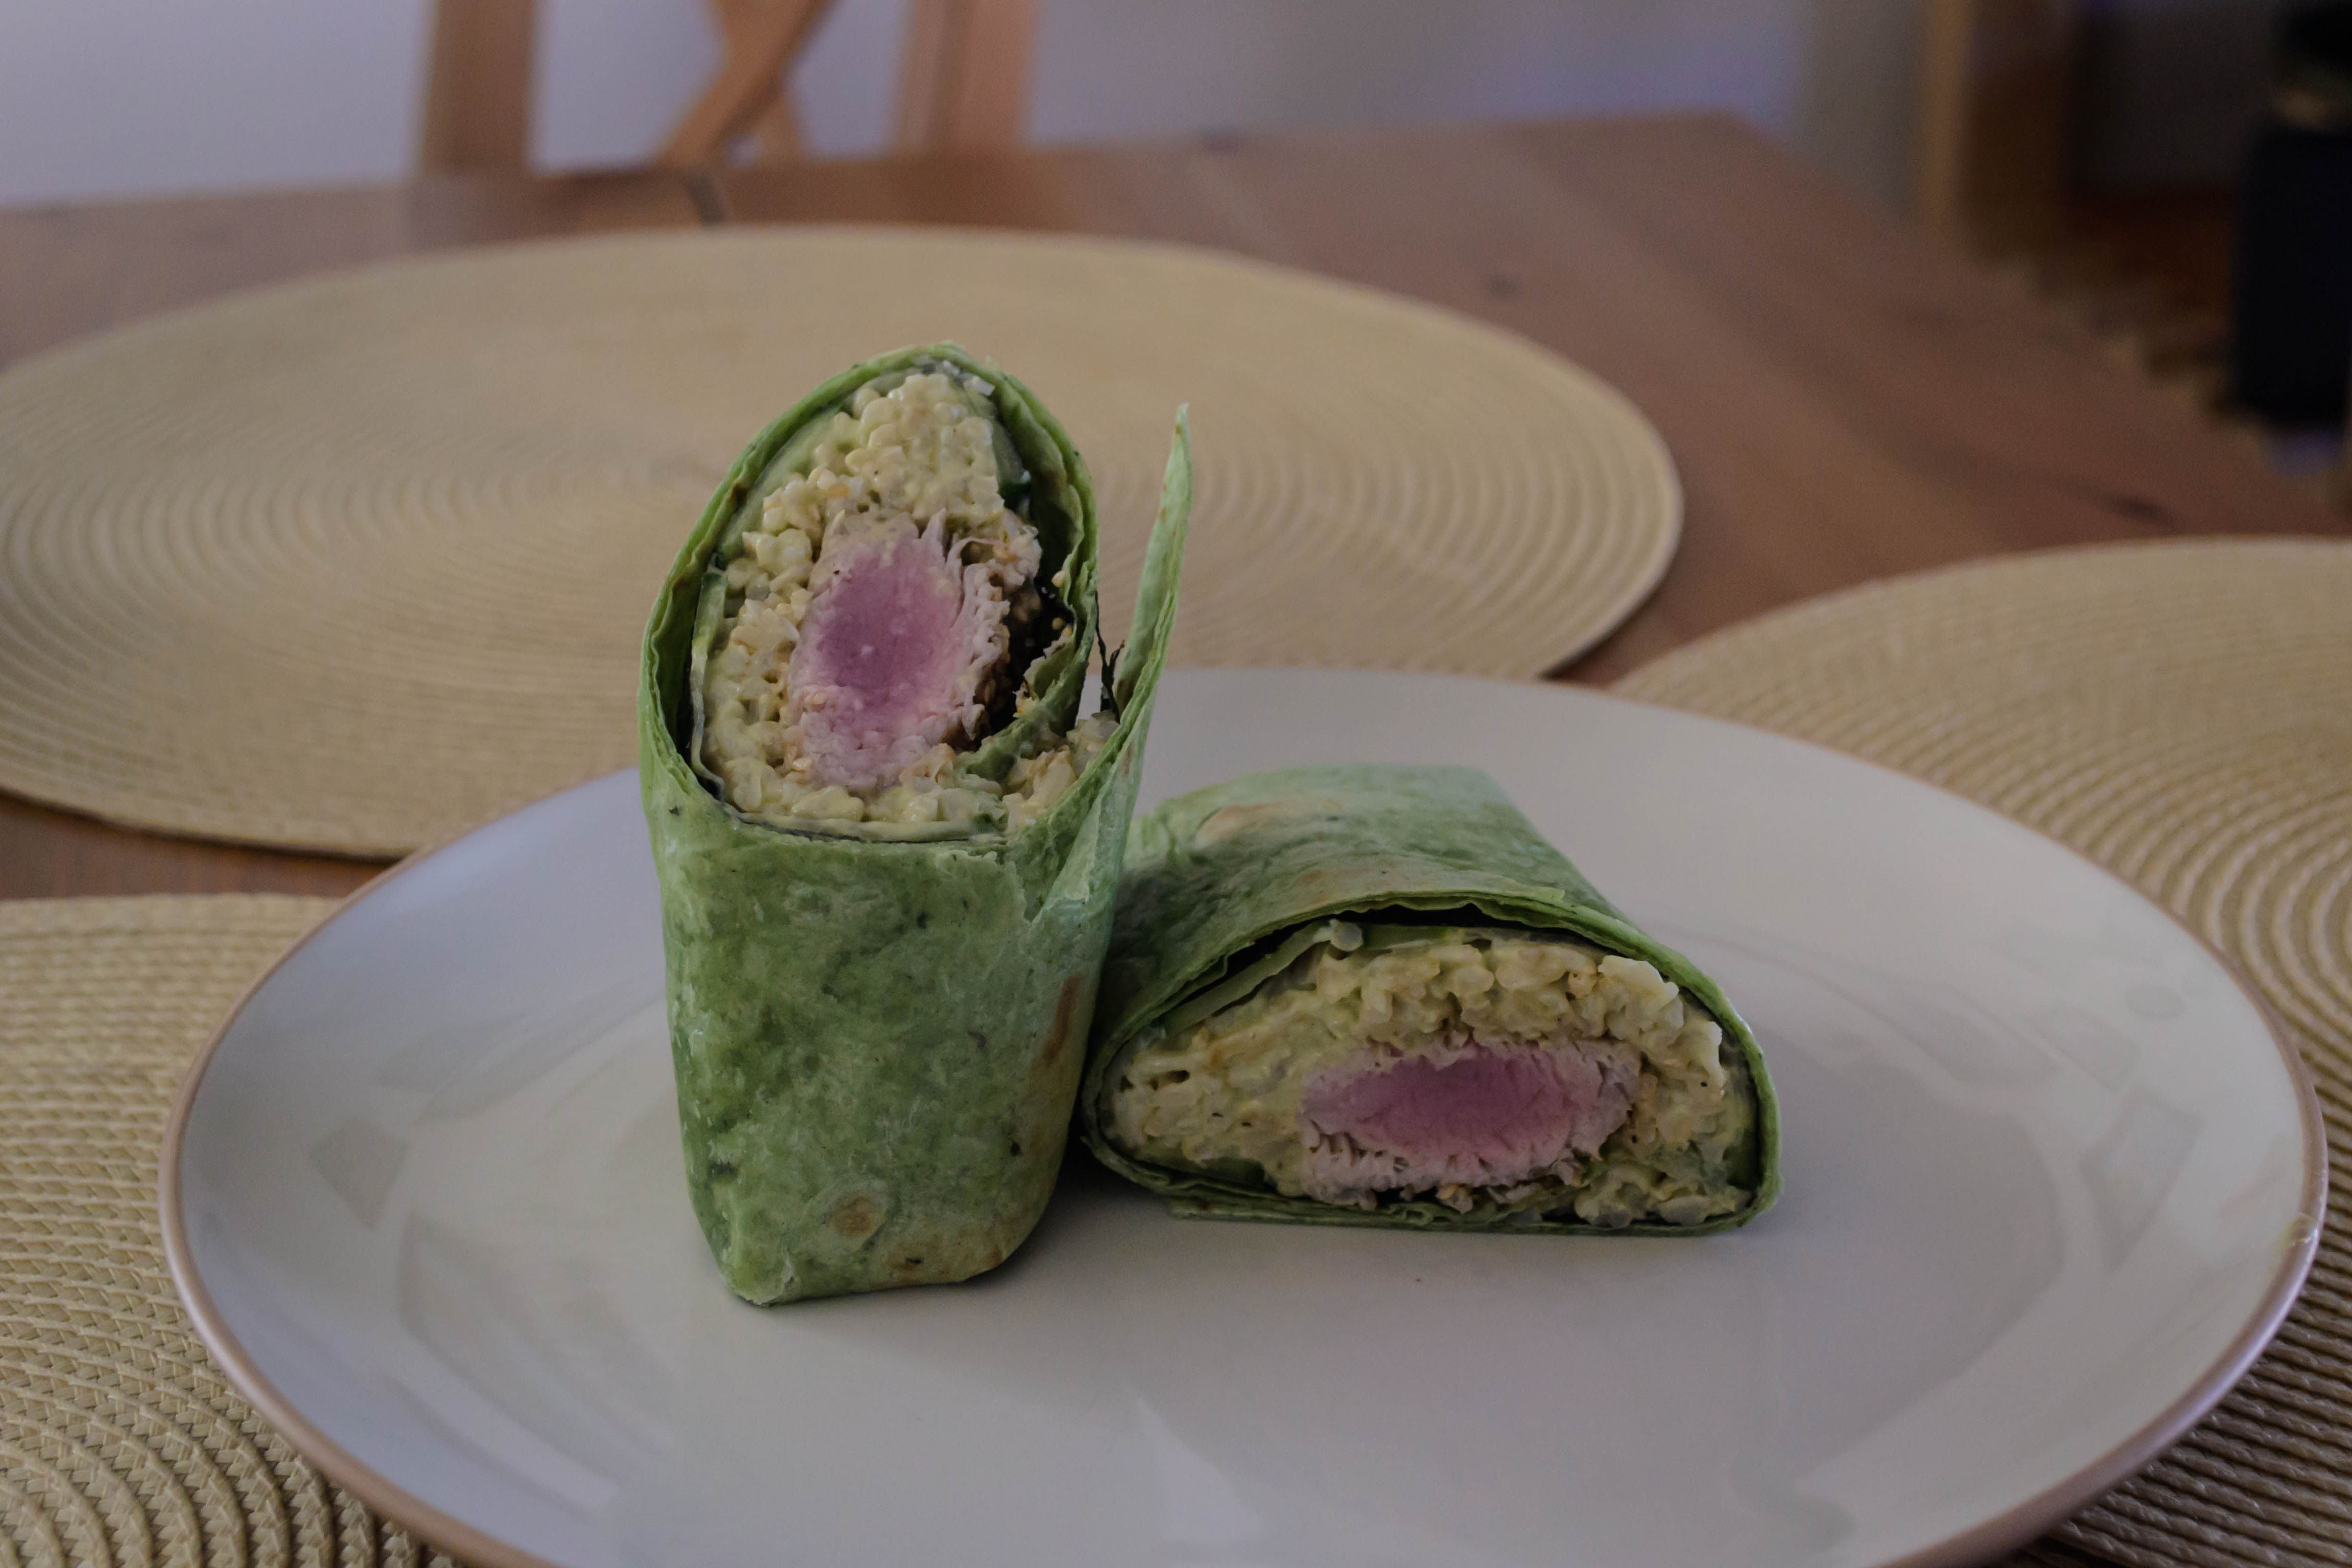
A fabled land of farmers, farm shares, fancy (and not so fancy) restaurants, family meals, food projects and more.
cooking my way through my dissertation, one egg at a time
Fearless cooking from a tiny NYC kitchen.
food, in so many words.
Recreating the famous dishes of famous writers. Part recipe blog, part historical discussion, entirely unabashed love of books.
Epicurean Adventures from Eugene, Oregon
Celebrating the Harvest
Modern Iranian aka Persian Food & Culture Blog - Cuisine, Recipes, Stories , Photos, Pictures, DIY tutorials
Exploring Culinary Traditions of Africa, African America and the African Diaspora
food, in so many words.
food, in so many words.
food, in so many words.
Food-Stories-Recipes-Love
WordPress.com is the best place for your personal blog or business site.
