Pot Pie Empanadas with Cheddar Crust

Food Blog March 2014-3536
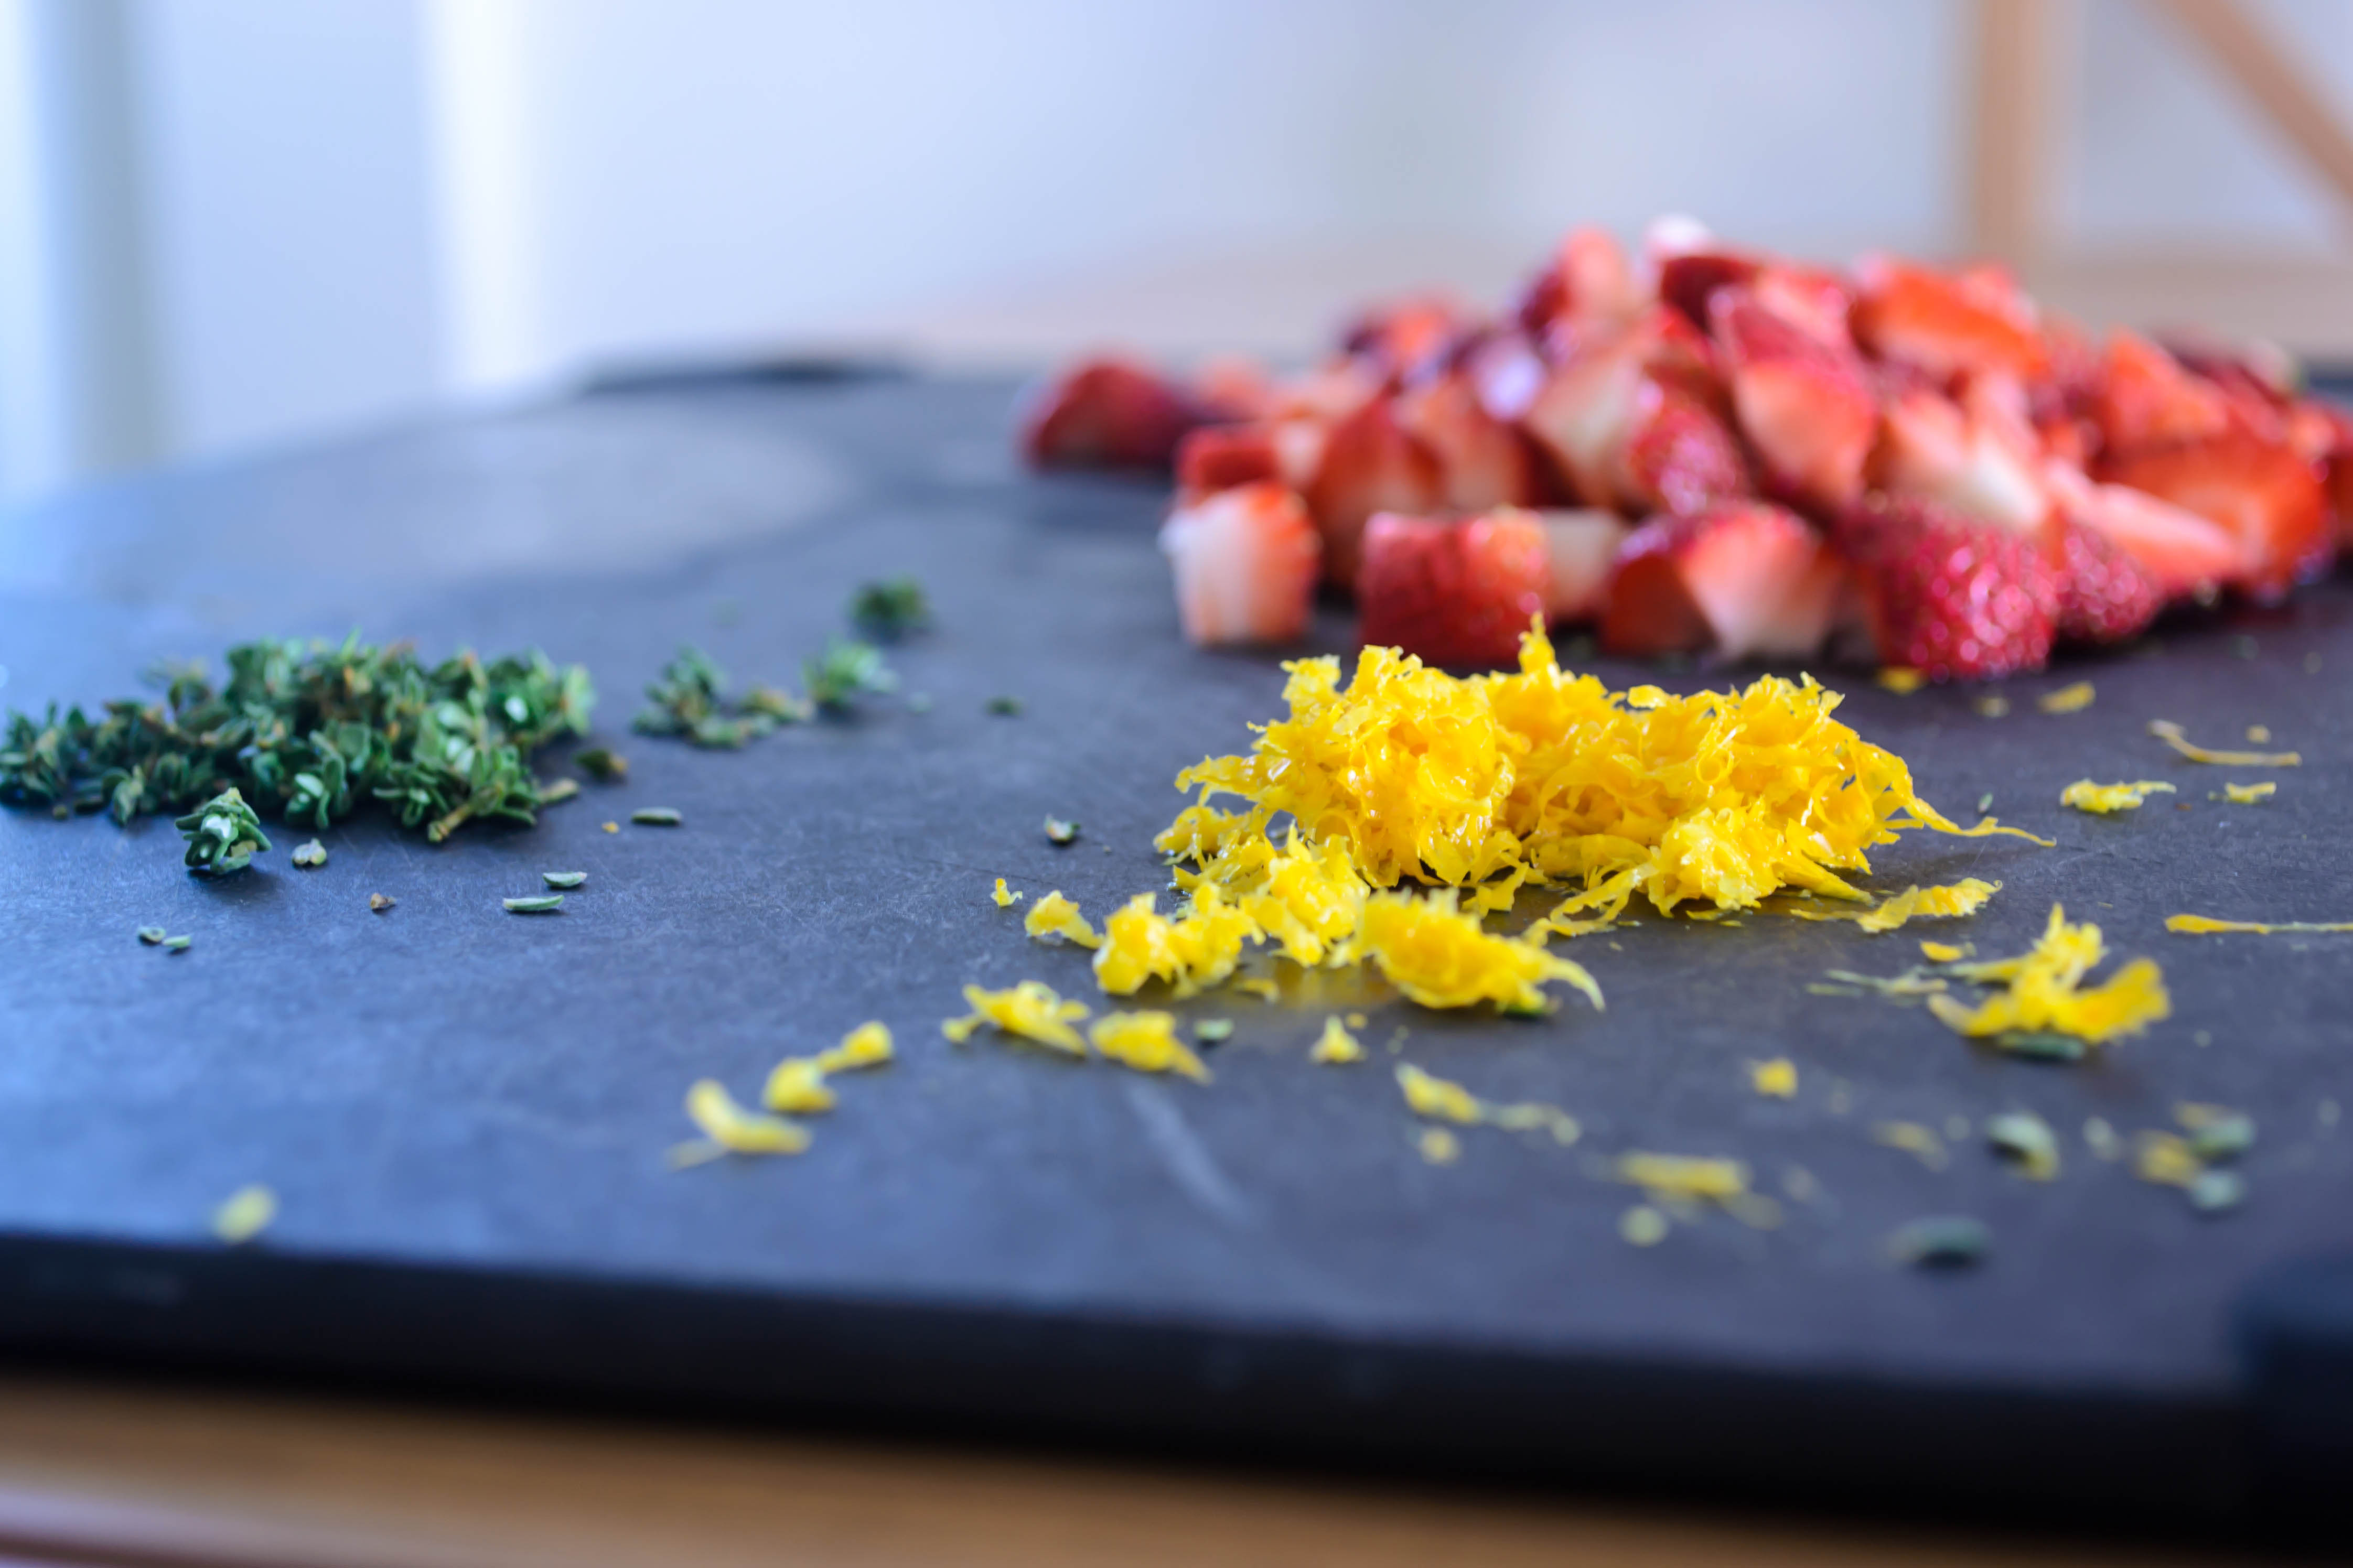
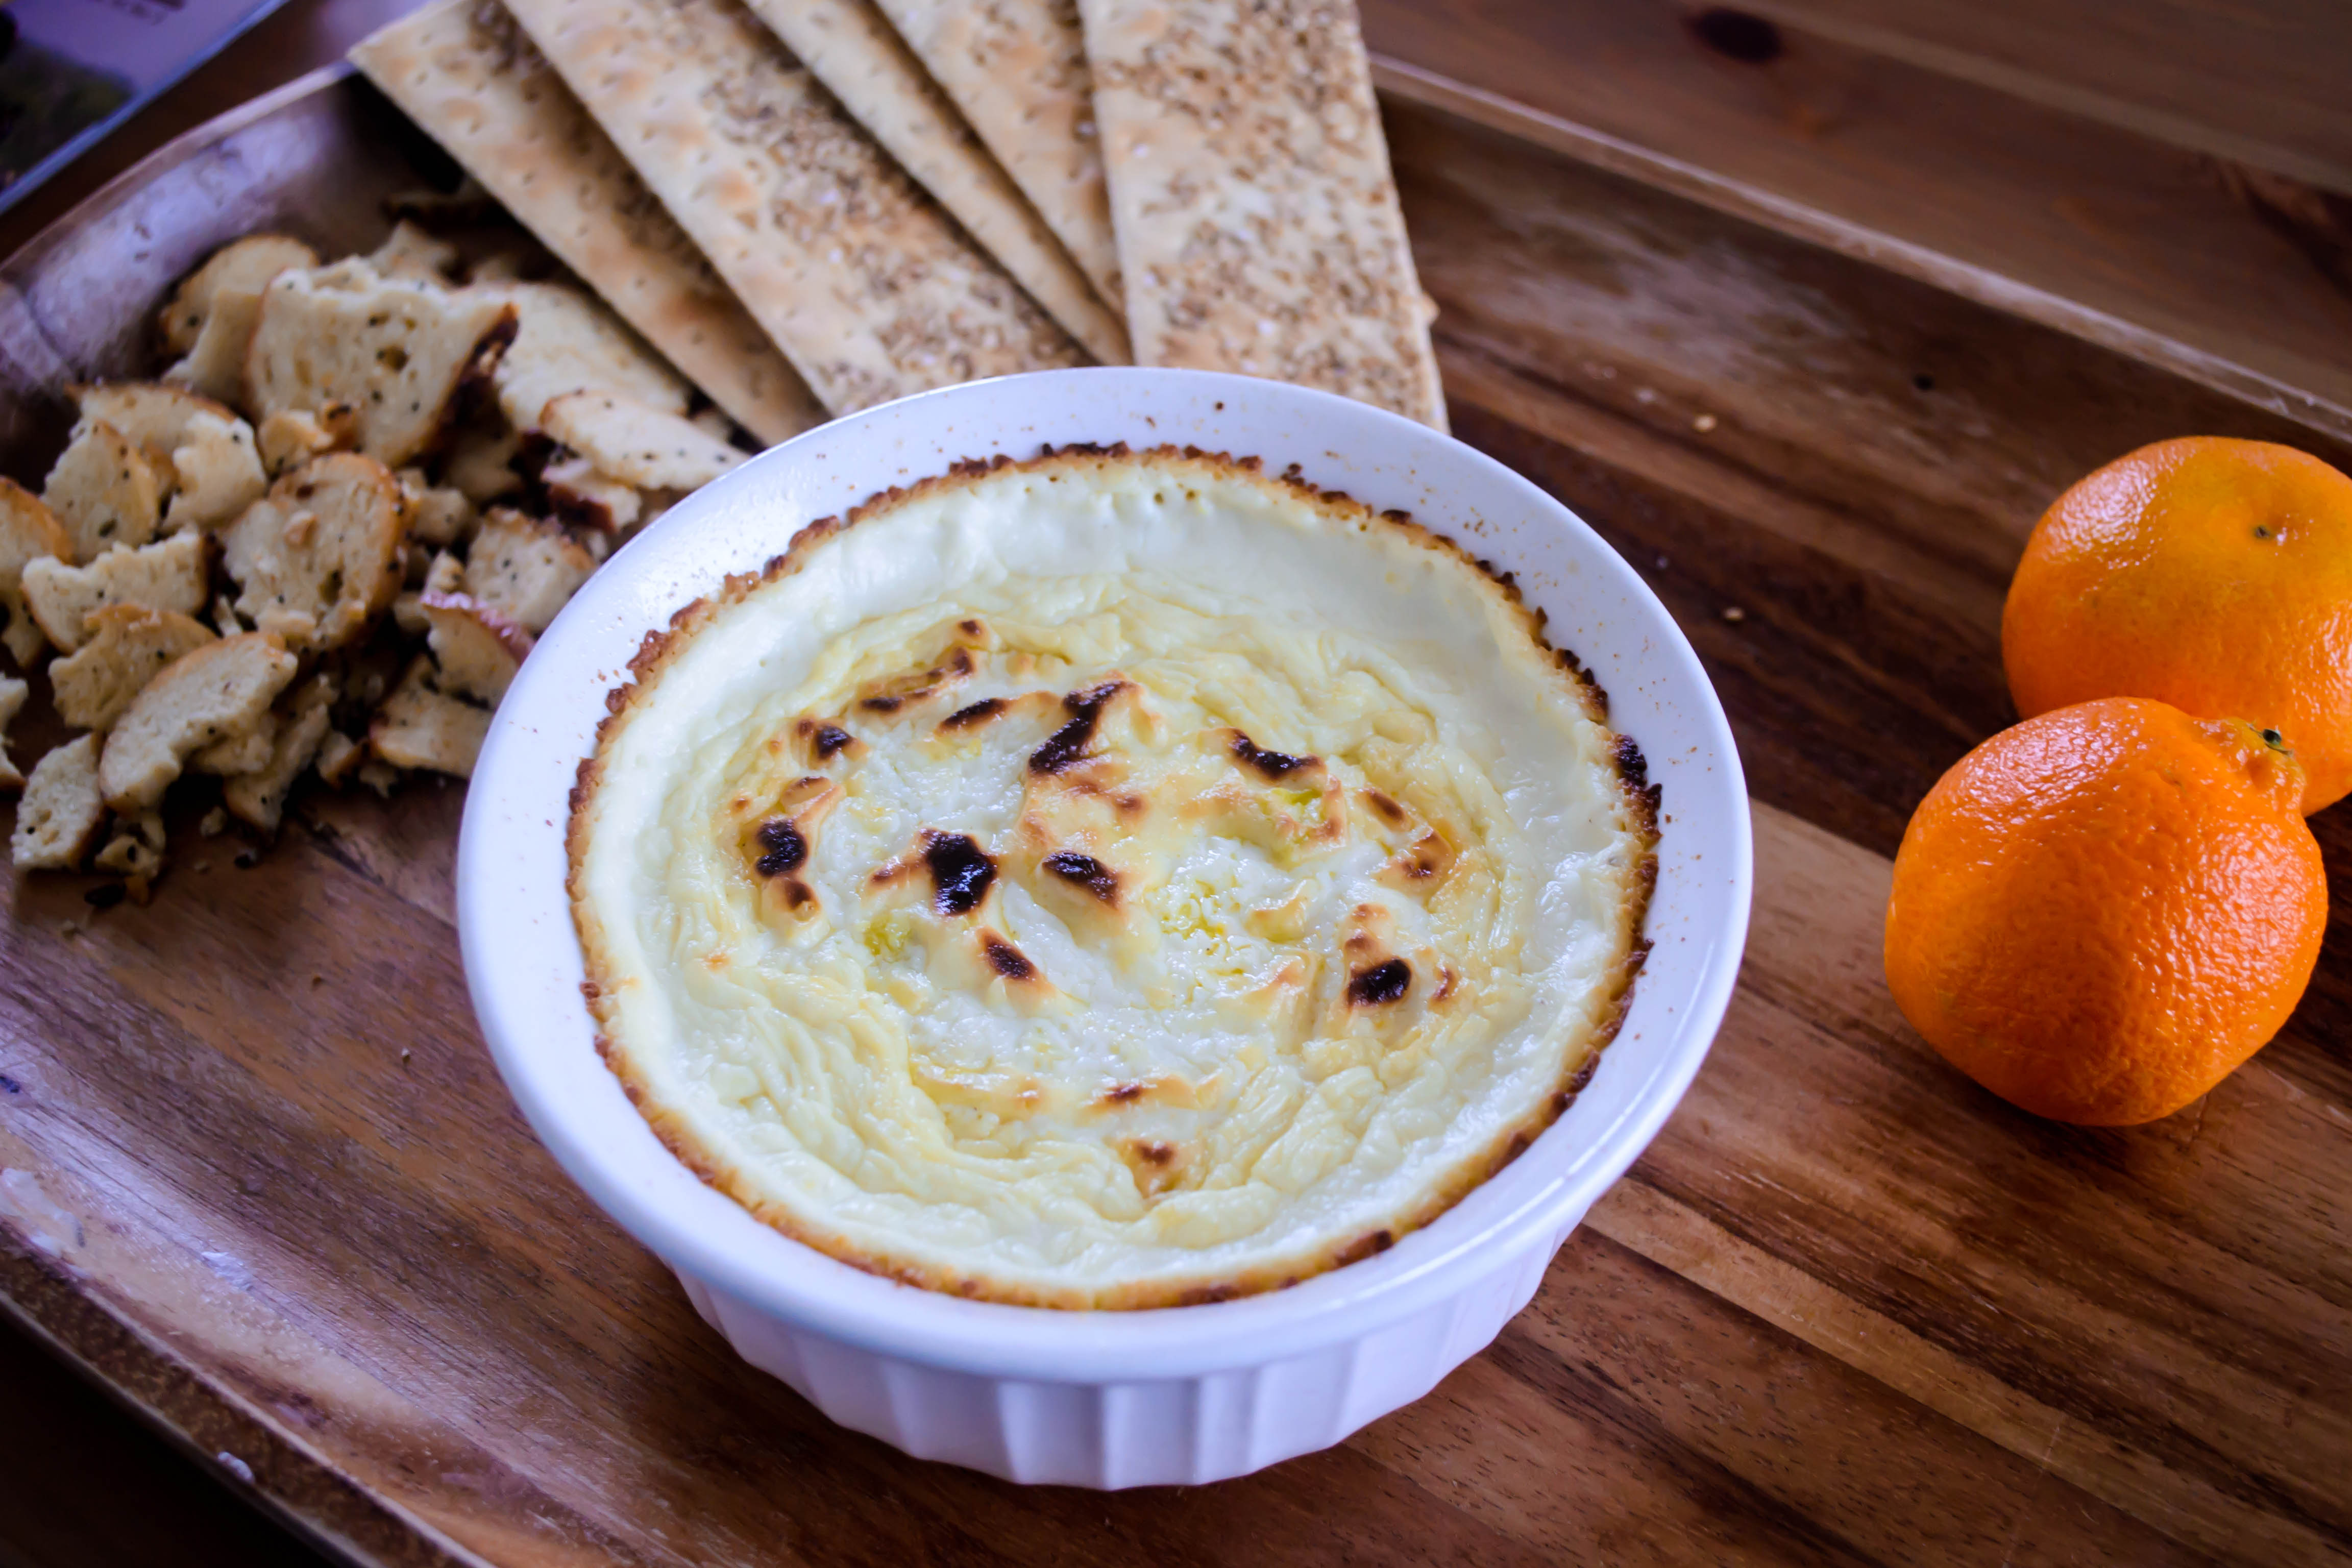
Unless you are feeding a large family, or your small family is a bunch of sauce junkies, chances are if you make something like the velouté I shared last week, you are going to have some leftovers. Mine worked out to just under a cup of sauce (you will probably have a touch more – I oversauced my chicken a bit because I was taking photos of the stream of velvet I was pouring), which was clearly too much to trash but, it seemed, not enough to do much with. True, I could have just warmed it up again and scarfed another cutlet, but that didn’t seem very original. Additionally, this sort of flour-thickened sauce doesn’t always reheat particularly well – think about the resolute globs of leftover Thanksgiving gravy. It was going to need some help.
Food Blog March 2014-3537Food Blog March 2014-3543When I thought velouté, I thought pot-pie. However, a mere cup of sauce didn’t seem like enough. Smaller quantities of sauce would require smaller packages. I’ve been tossing around the idea of hand-pies for a while (see what I did there? Yeah.), and suddenly it became clear that this final bit of sauce would become the base for the filling of pot pie empanadas, spiced up with chunks of cheddar cheese in the crust.
Food Blog March 2014-3513Food Blog March 2014-3515Yes. This was happening.

I think every culture has a snack food created by enclosing a savory little morsel in a puff of dough. Samosas, gyoza or pot-stickers, pierogies, Cornish pasties, think about it. For Spain, and for Central and South American cuisines, empanadas are that snack. A tumble of meat, cheese, and spices (with the occasional vegetable – a few summers ago I had a spectacular one filled with cheese and fresh spinach) wrapped up in a lovely soft dough that is sometimes baked but more often lovingly tipped into the deep fryer: it’s quite possibly my dream food.
Food Blog March 2014-3524Food Blog March 2014-3526Food Blog March 2014-3528And here I was about to Americanize it beyond belief. The leftovers of my grad school training screamed things at me about colonization and cultural appropriation, but I swatted them down. It’s improving the classic by acknowledging and incorporating a new angle. Yeah.

And it was so worth it.

The dough here is baked, not fried. I don’t have a deep fryer, and to be honest, crammed with cheddar as it was, the crust did not provide the most airtight of seals. I would have been nervous about dropping these into hot oil.
Food Blog March 2014-3519Food Blog March 2014-3522
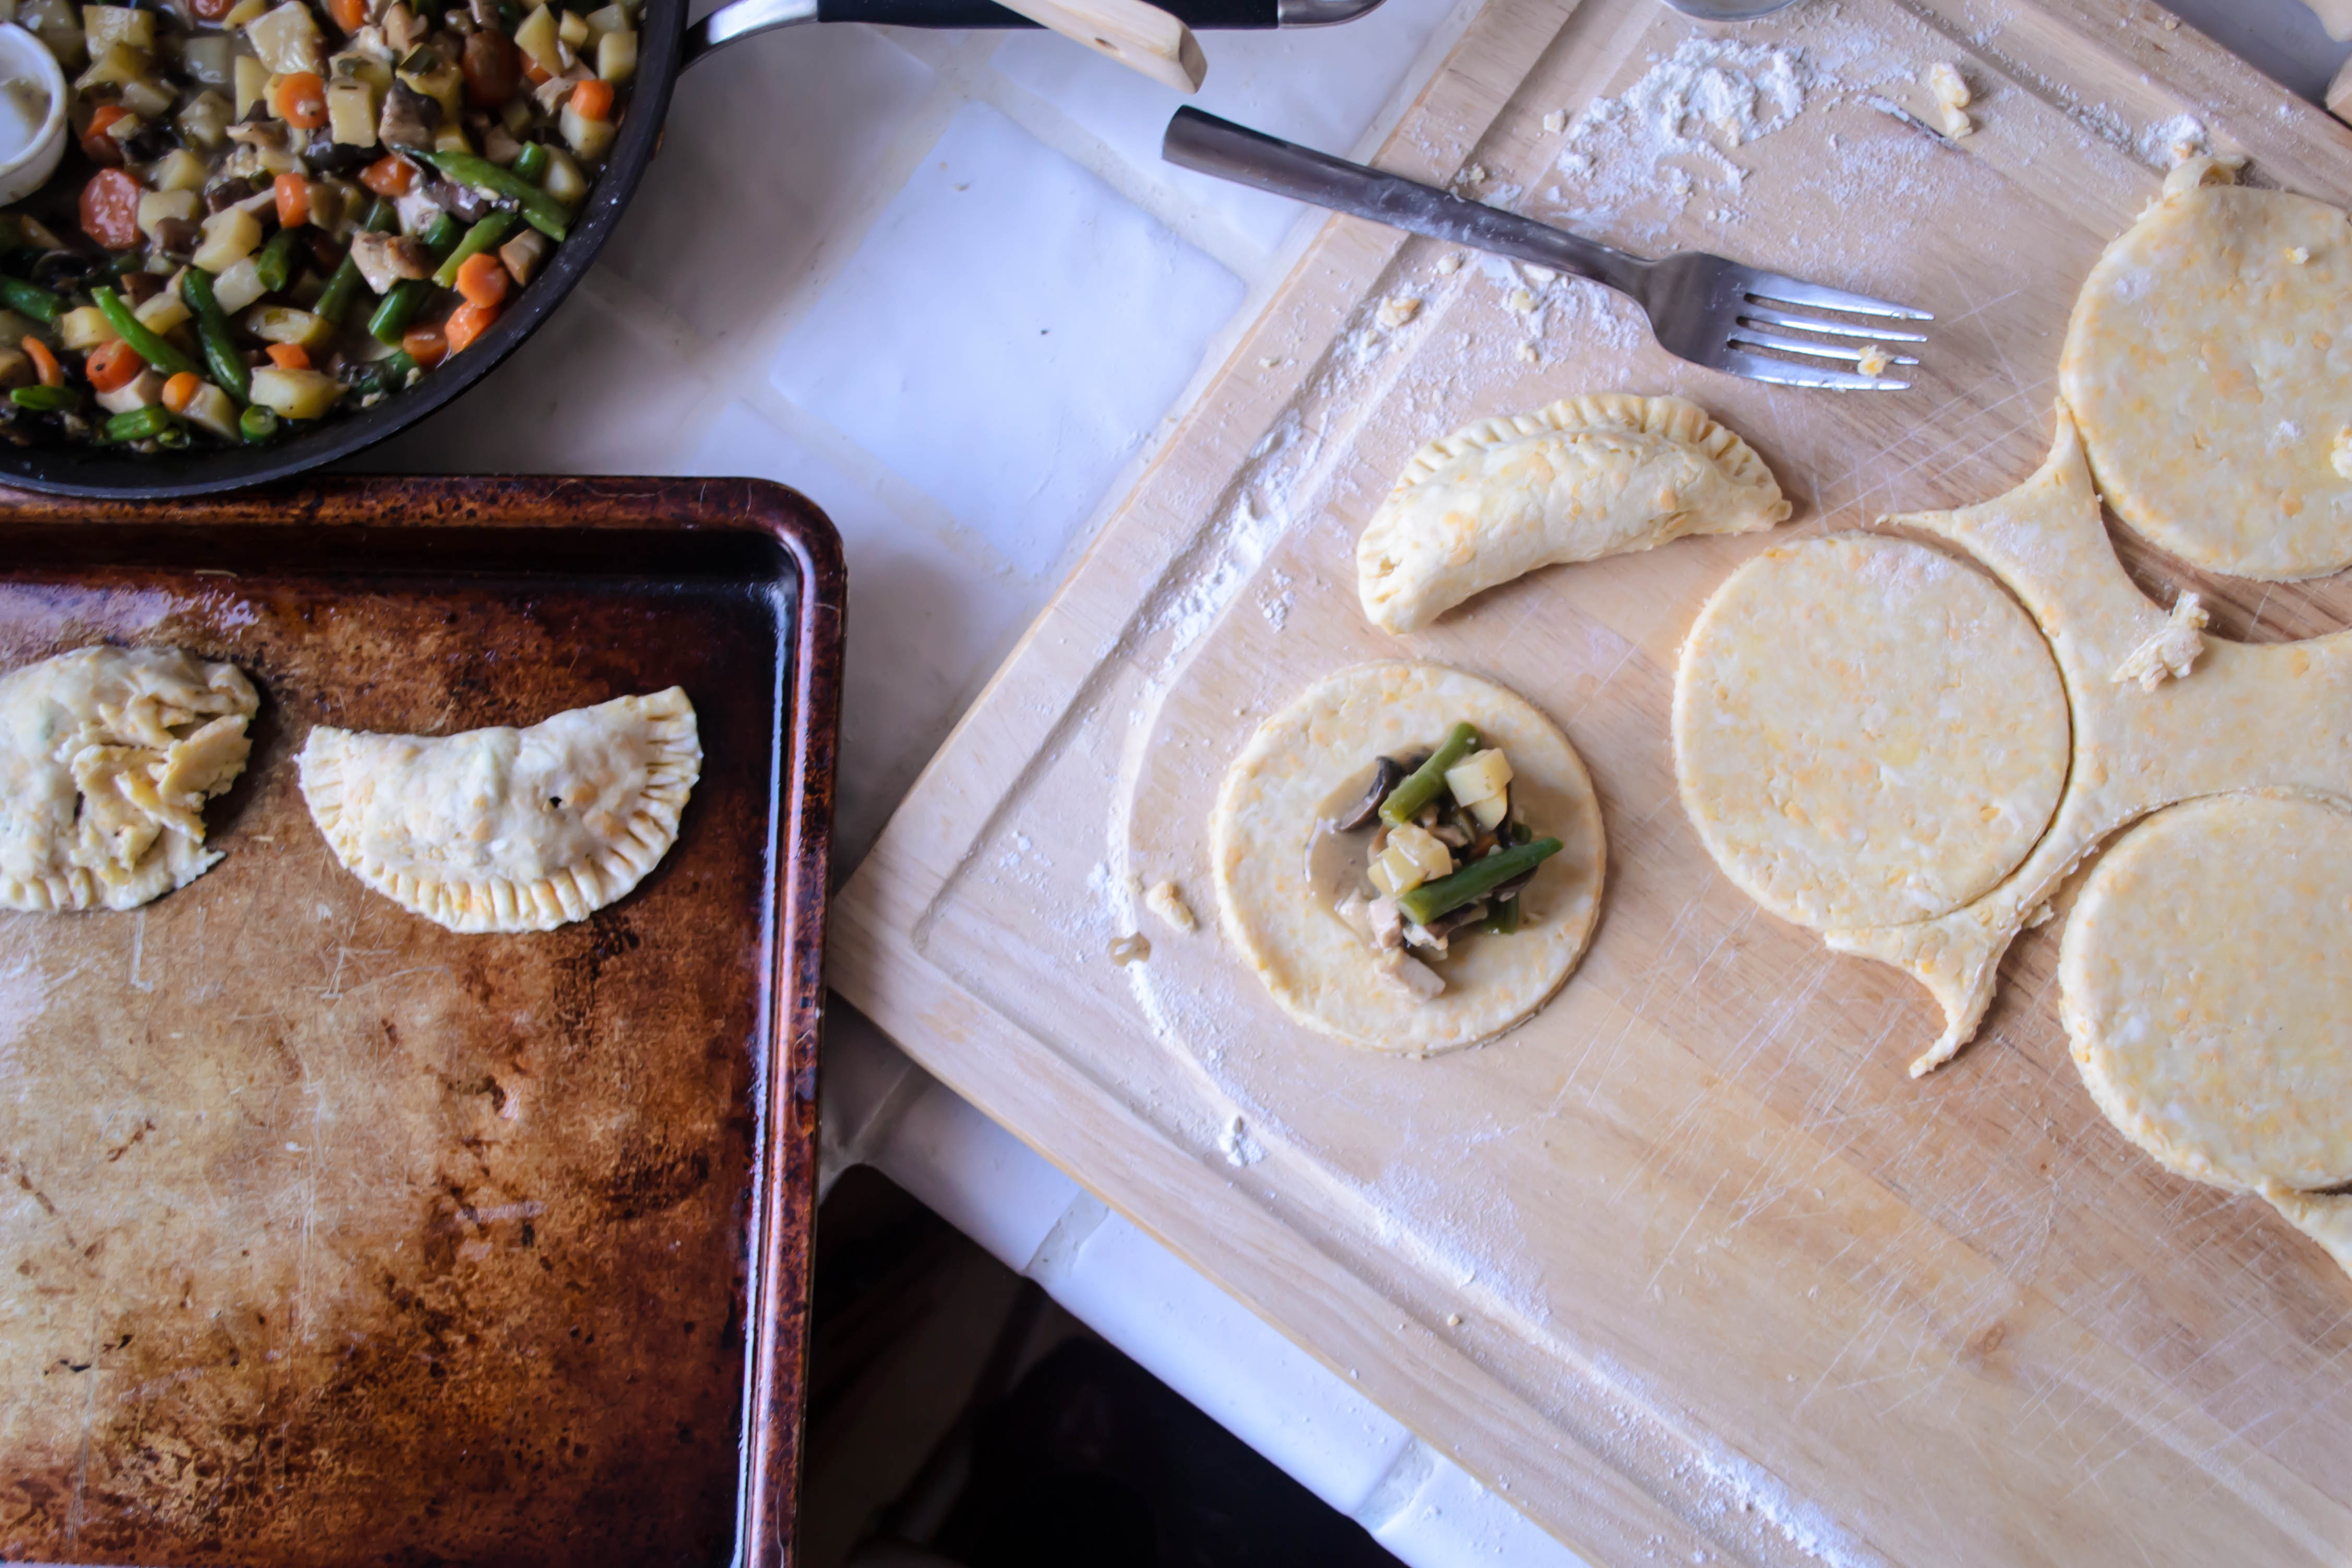
There’s nothing to be nervous about when it comes to the taste, though. You can stuff these with whatever you’d like in a pot pie, meats or vegetables. I opted for potatoes, carrots, a few mushrooms, green onions, a breath of garlic, and some green beans that had been in my fridge for a touch longer than they should have. A bit of shredded up chicken breast completed the pot. These get cooked in the leftover velouté with a splash of white wine (and a bit of water, if you feel there isn’t enough liquid) until they are tender, then, once they are cool, jammed a mere tablespoon at a time into circles of sticky but pliable dough. A quick fold, a squeeze, and a crimp with the tines of a fork, and they are ready to bake.
Food Blog March 2014-3529Food Blog March 2014-3532
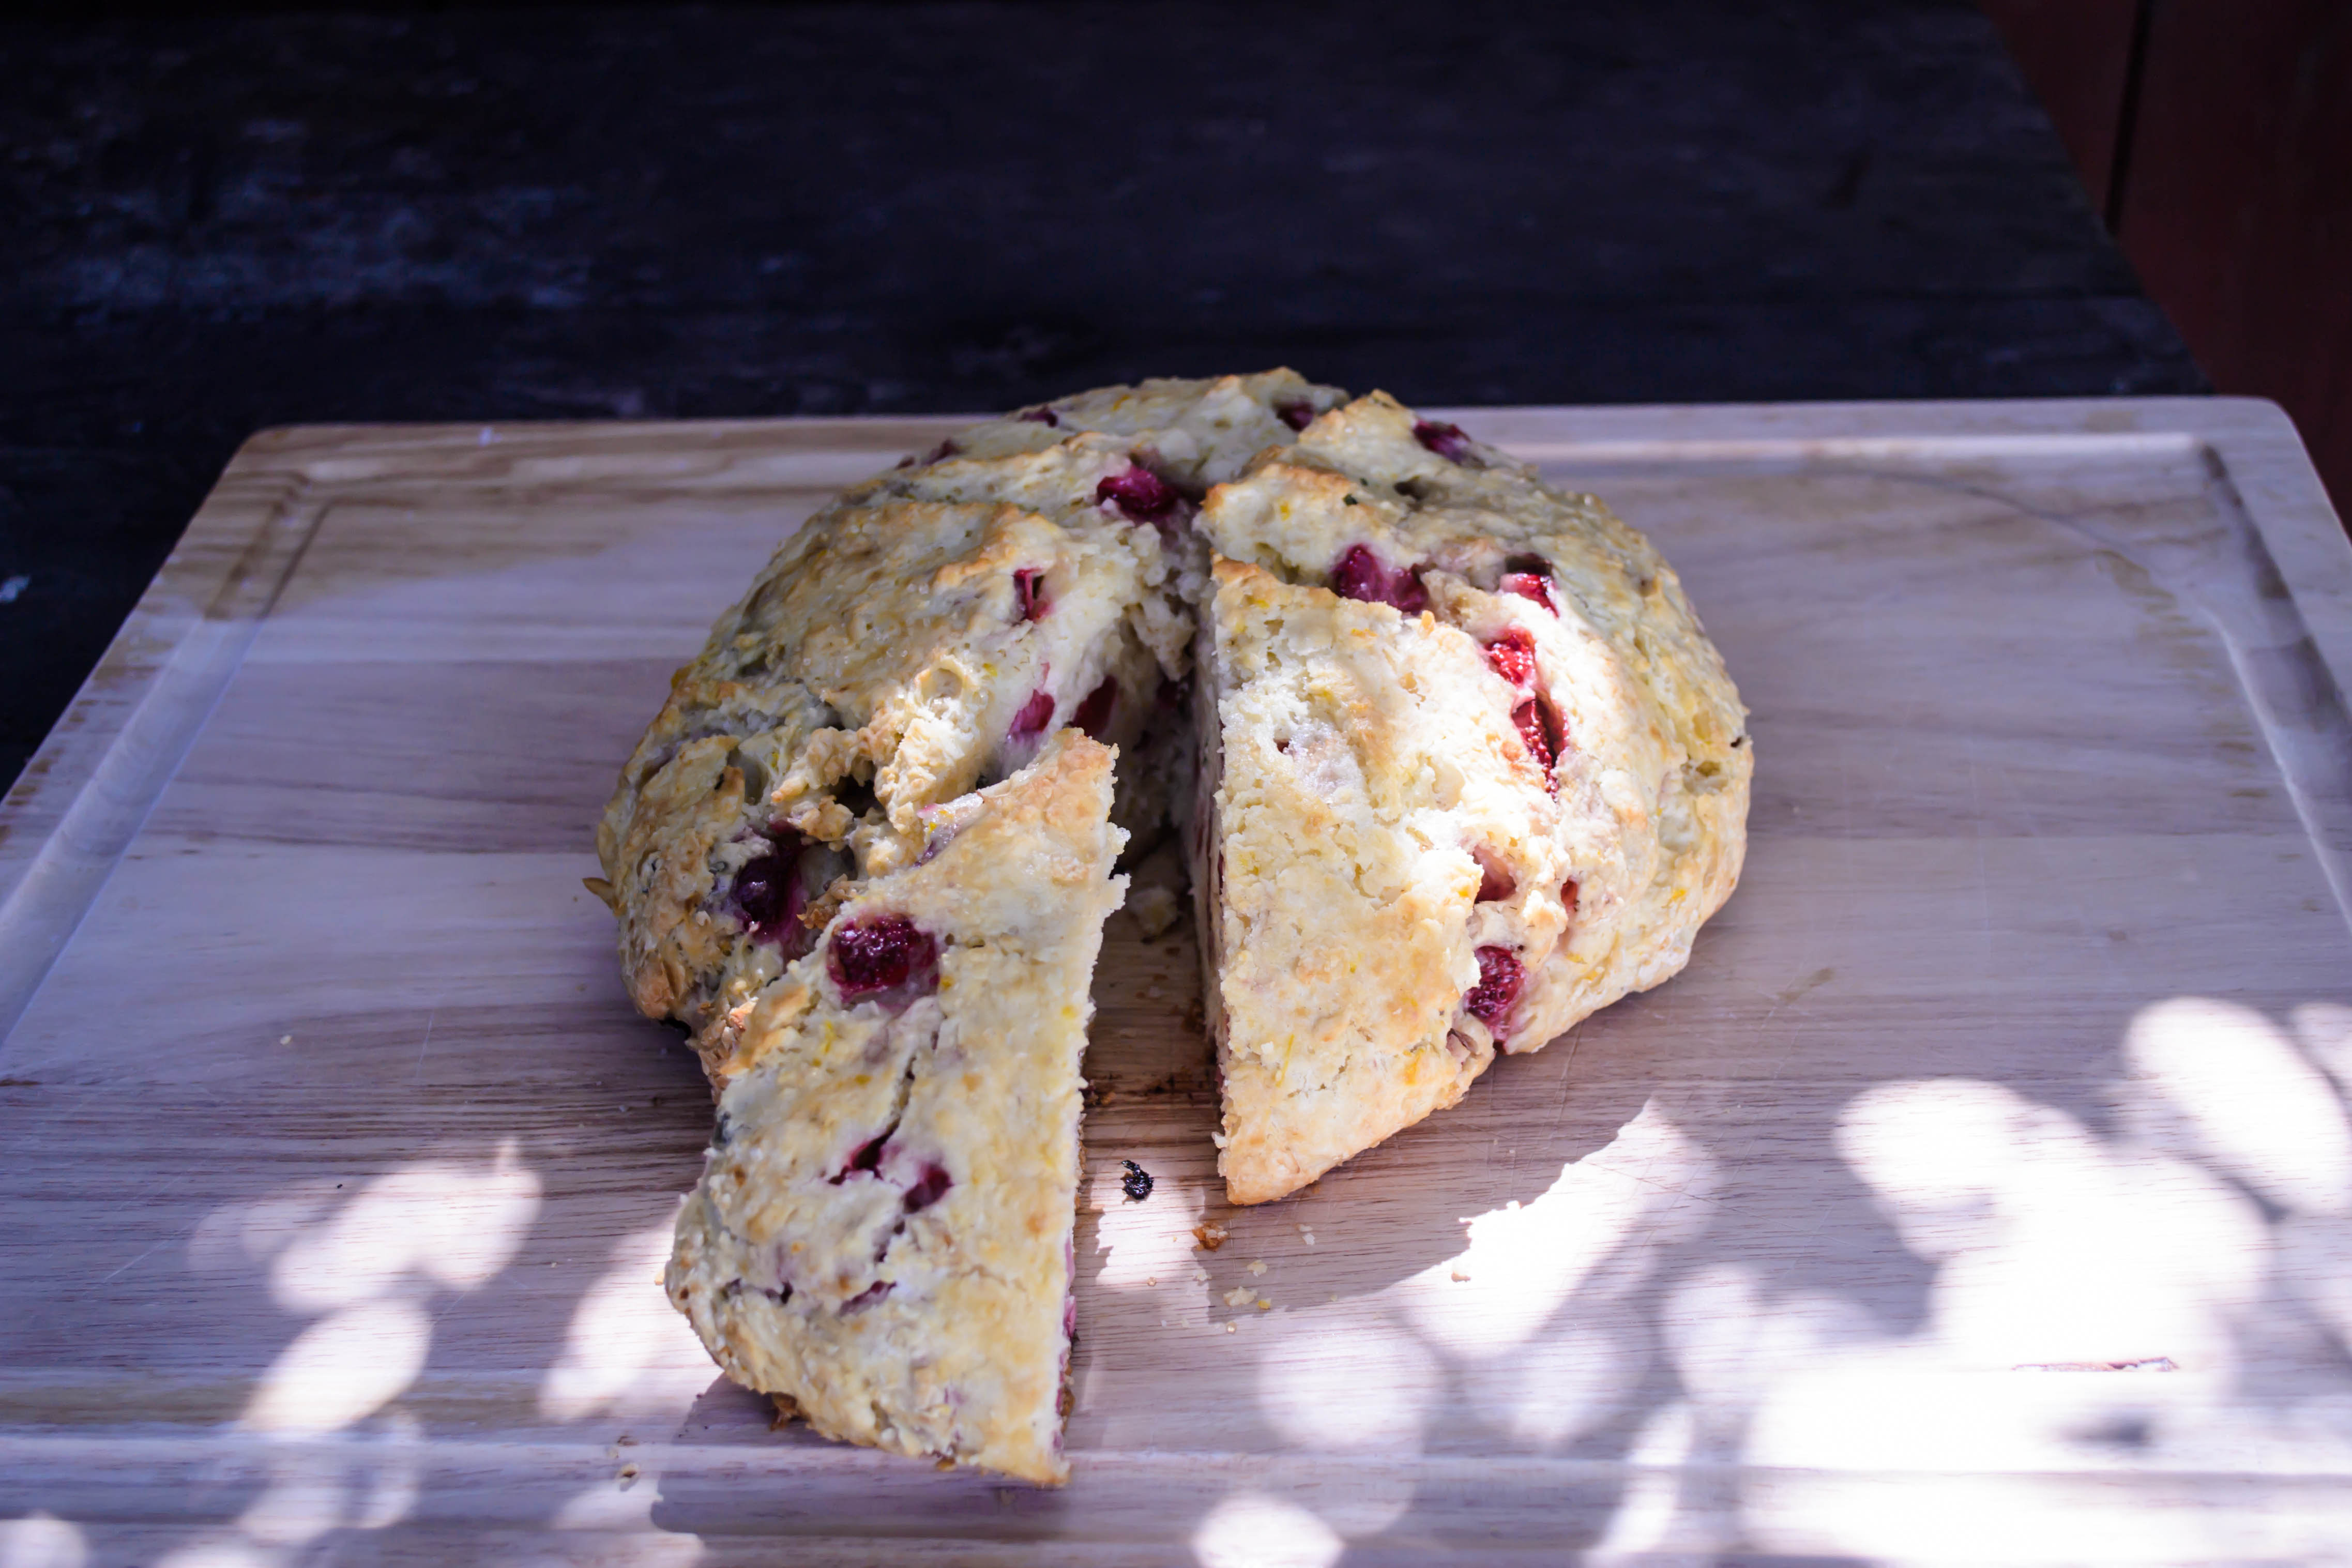
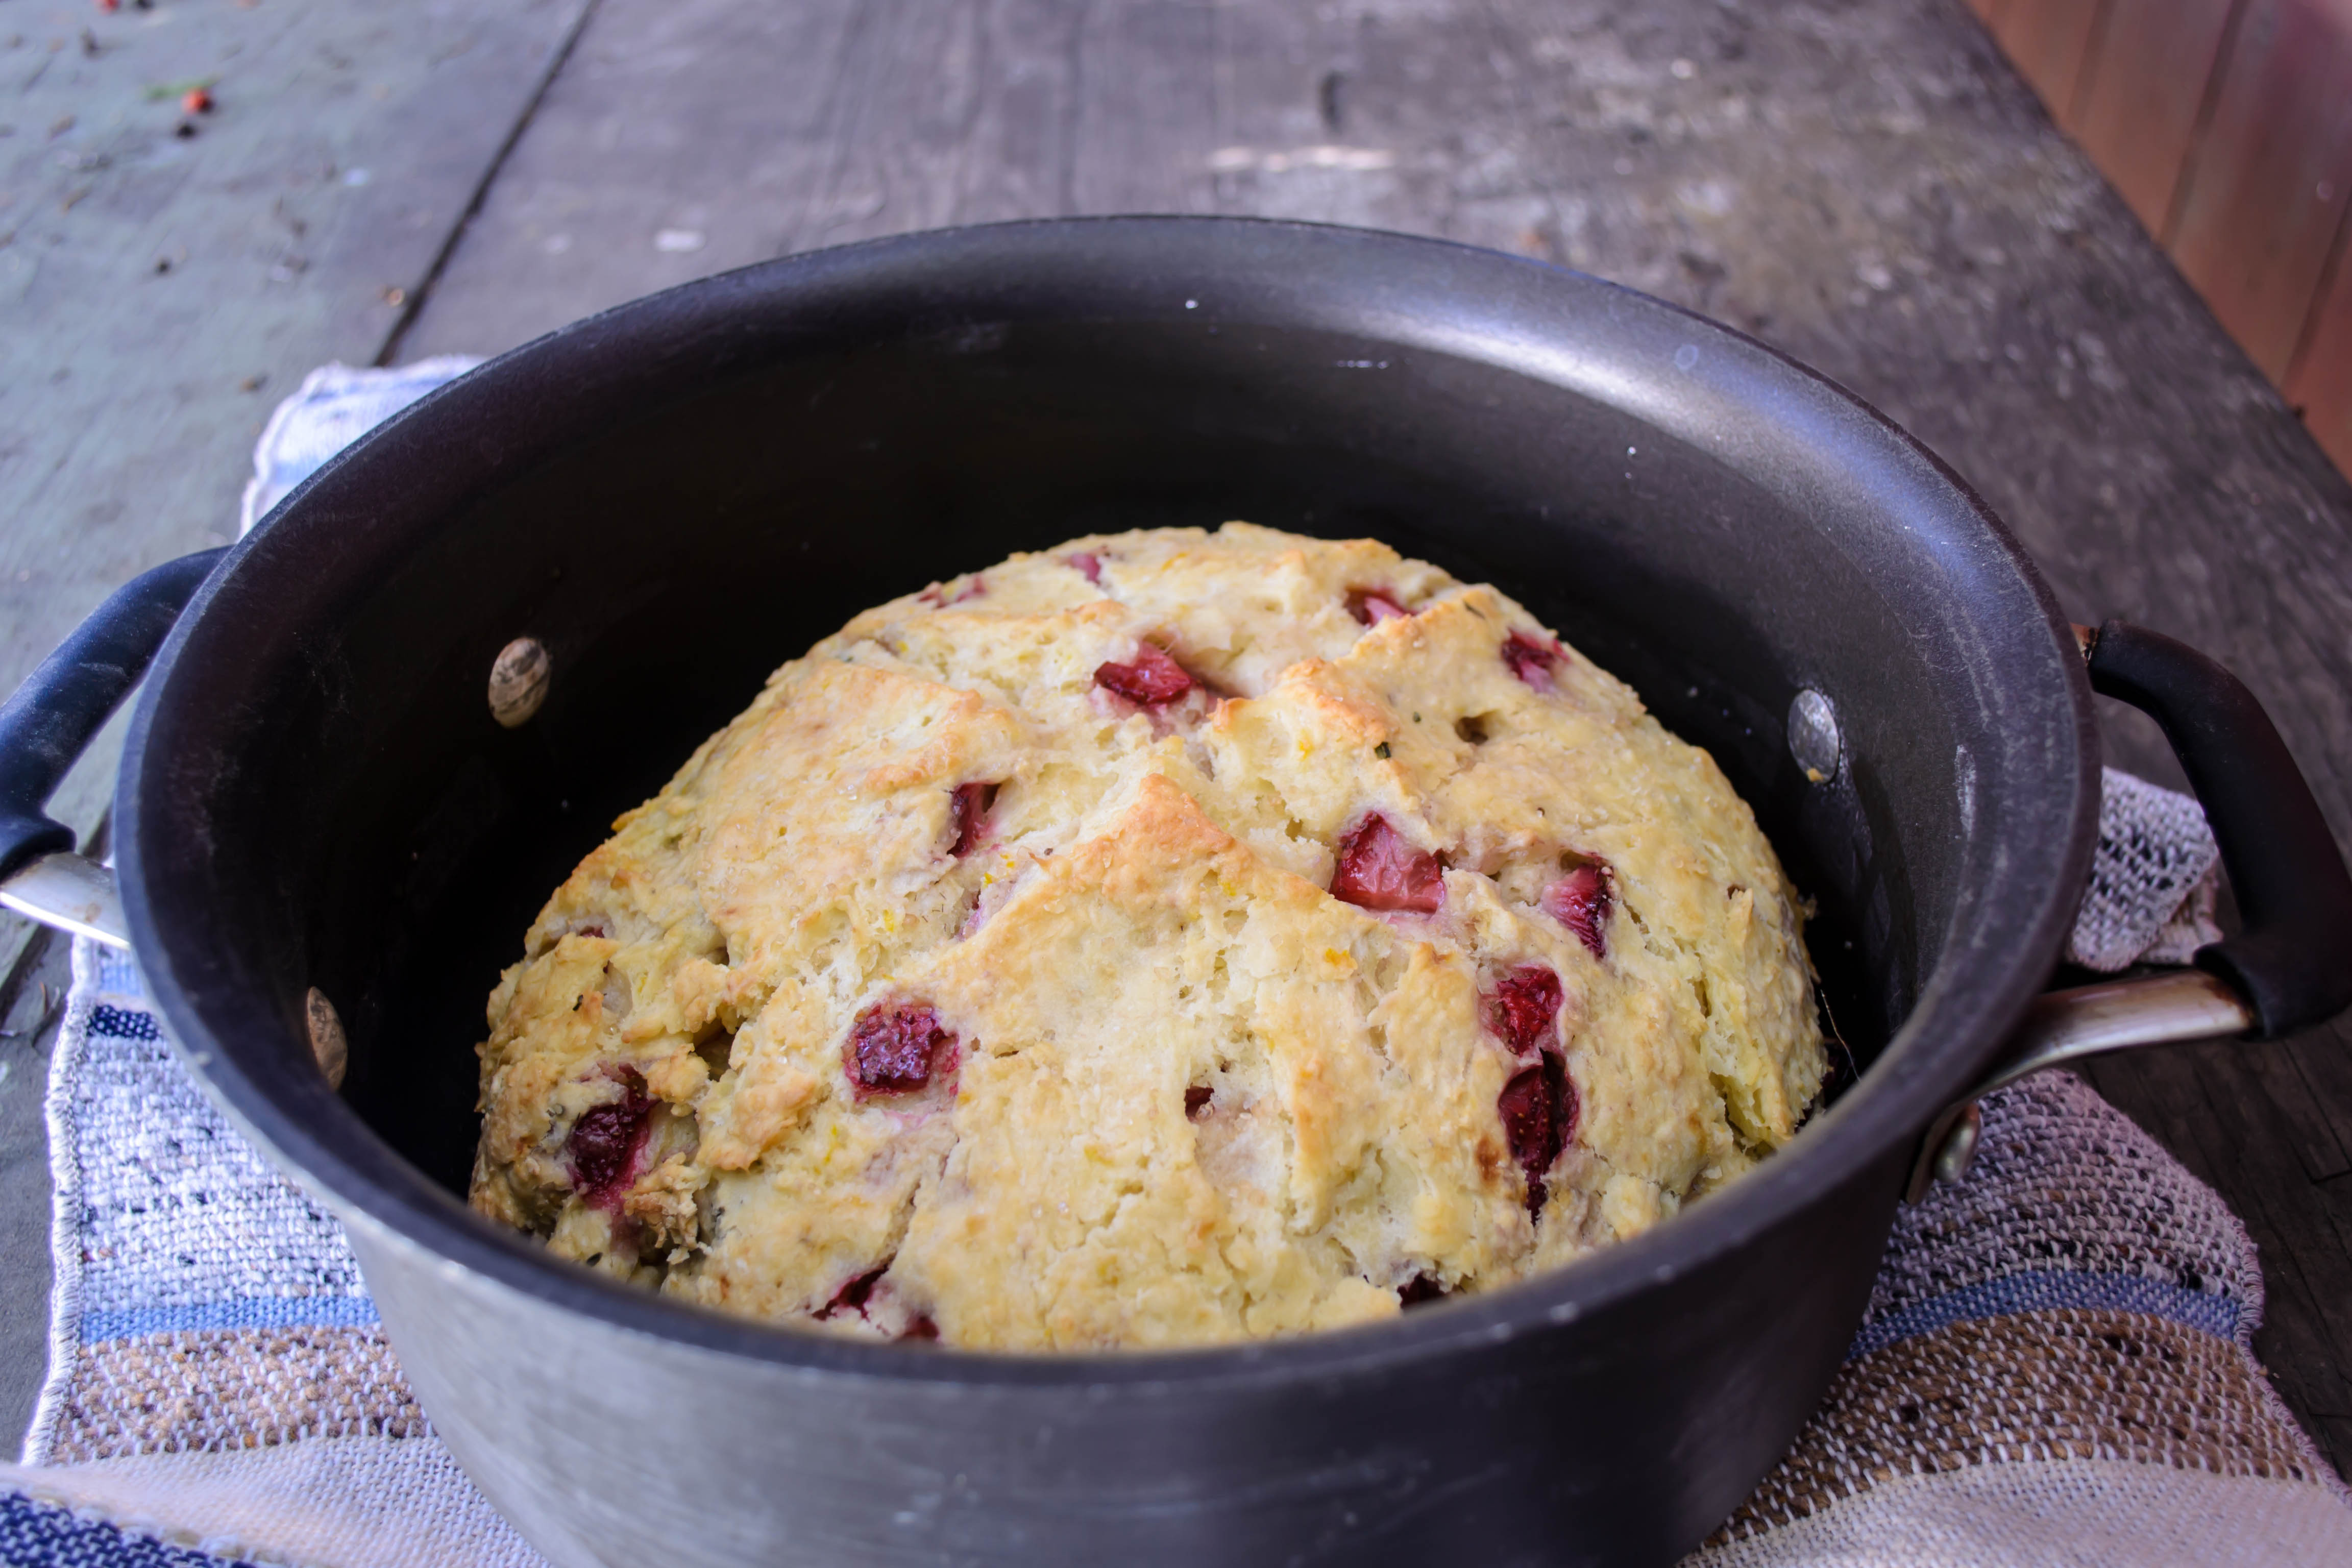
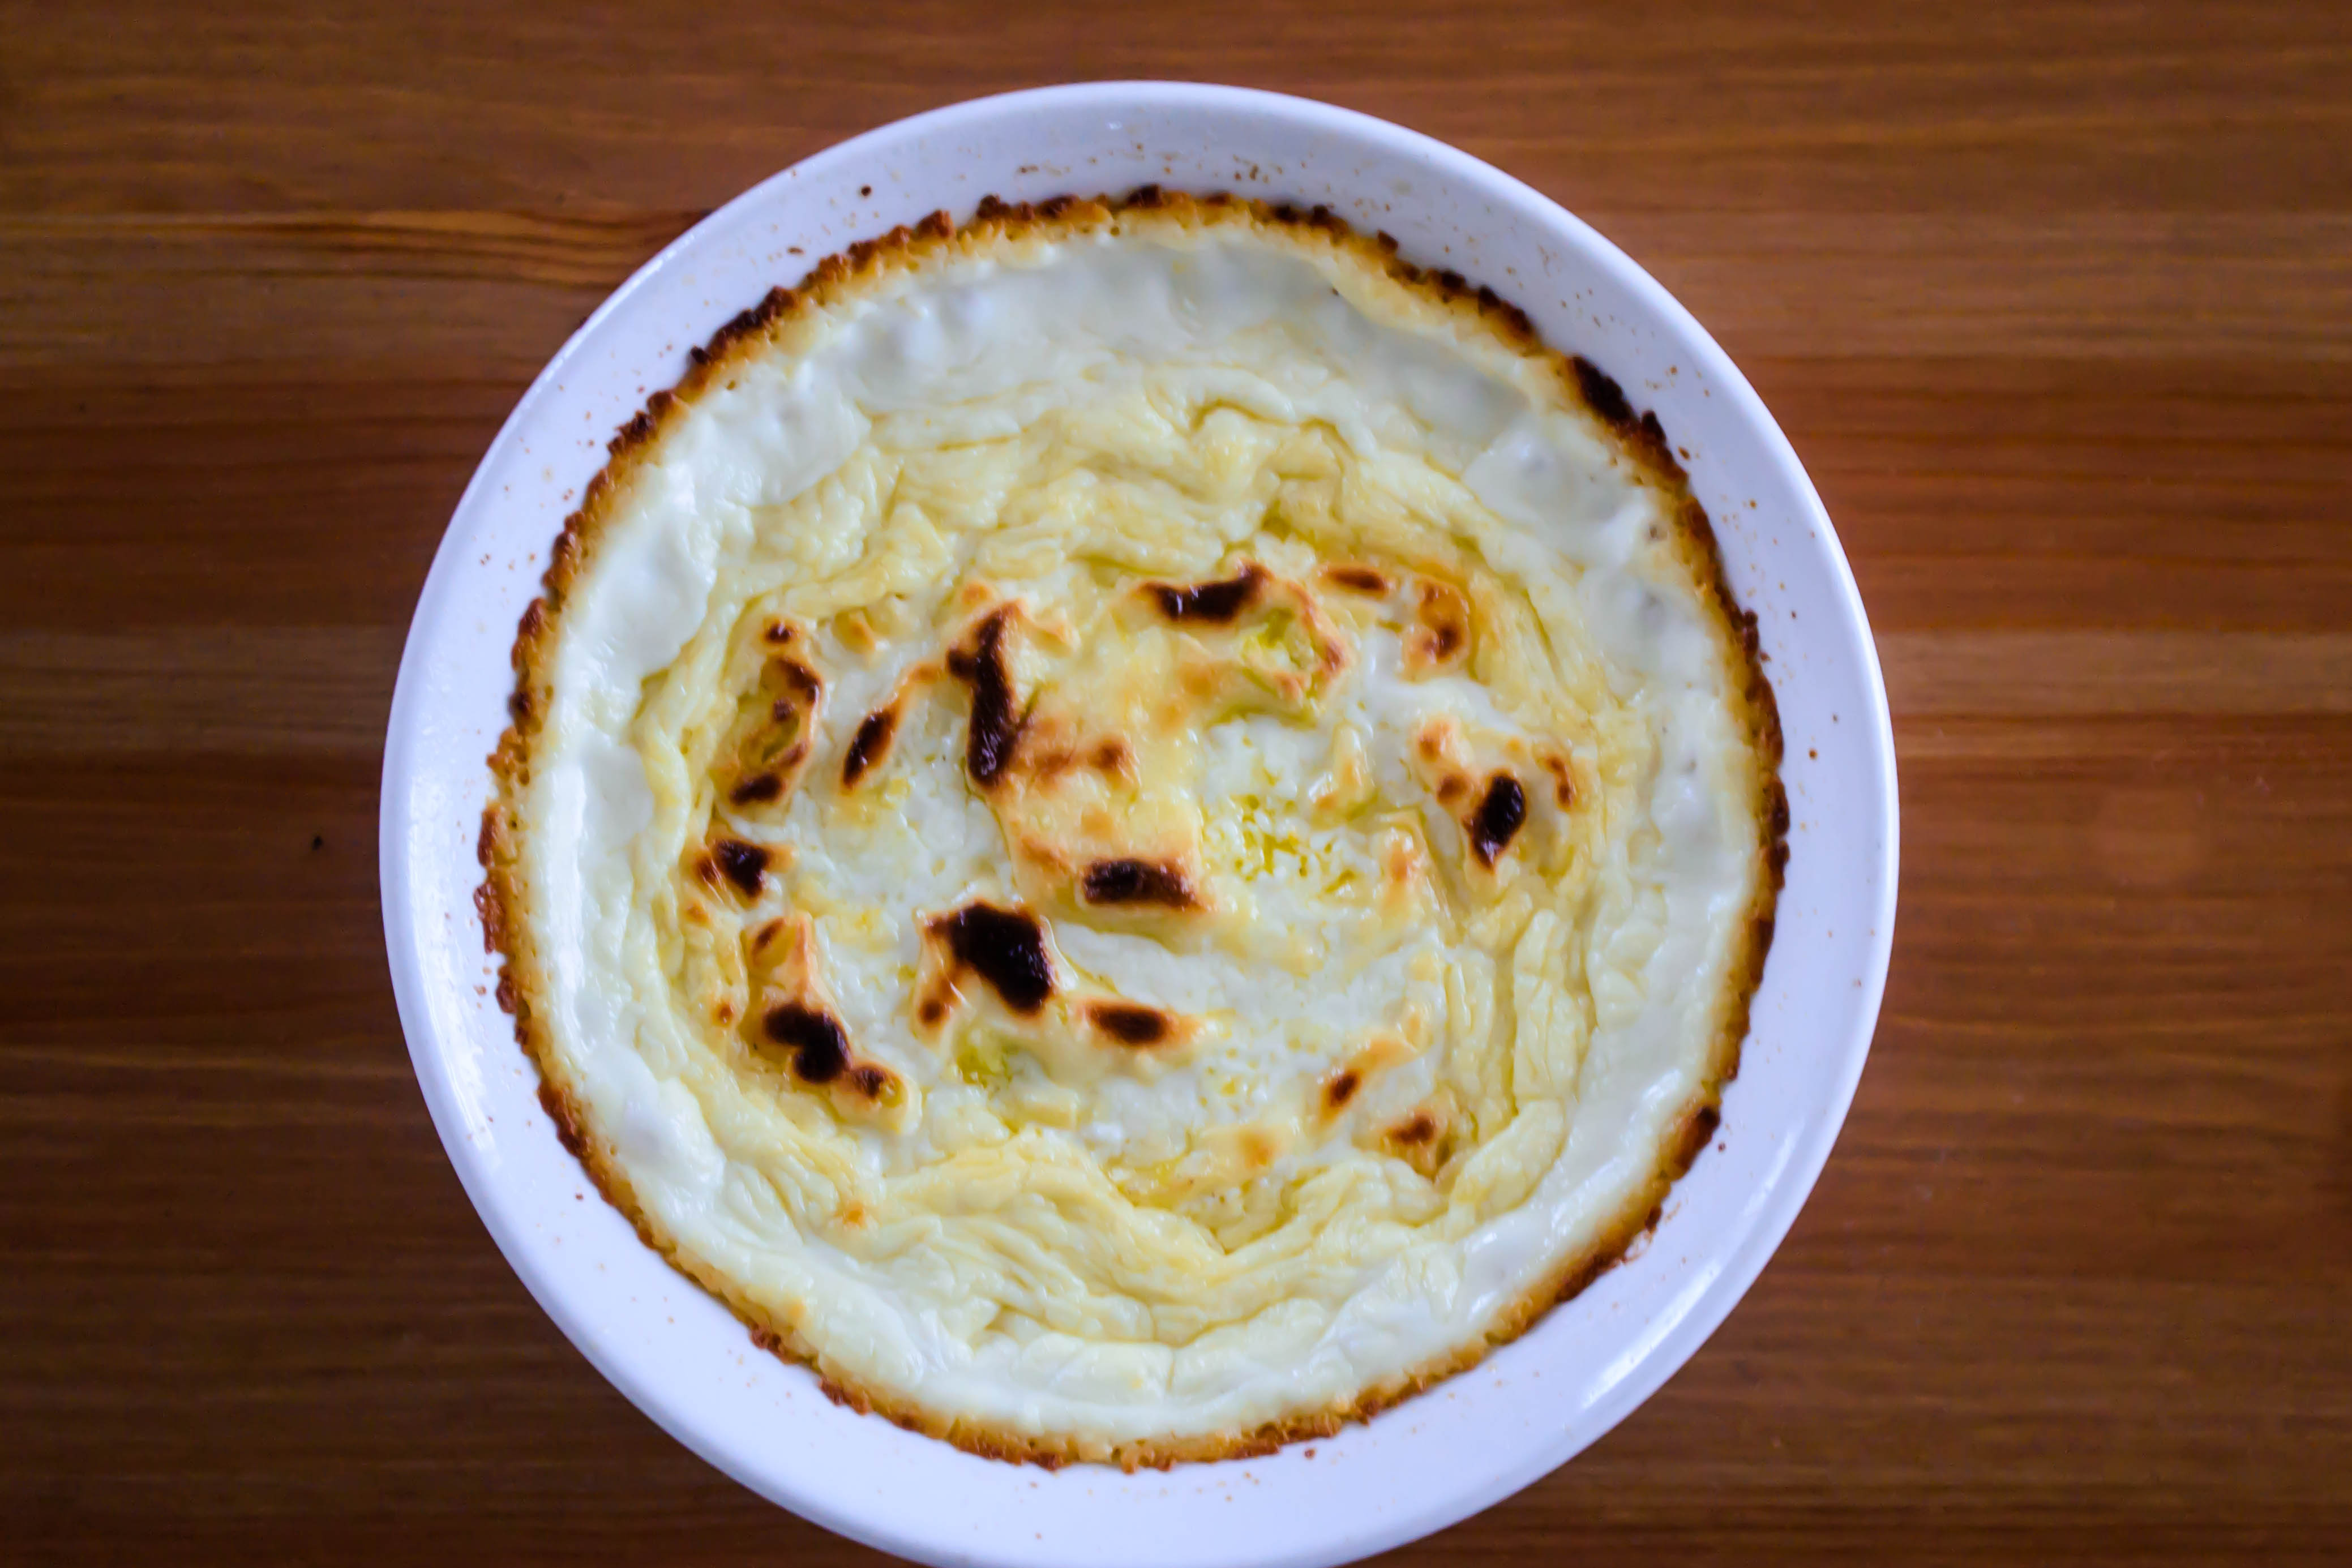
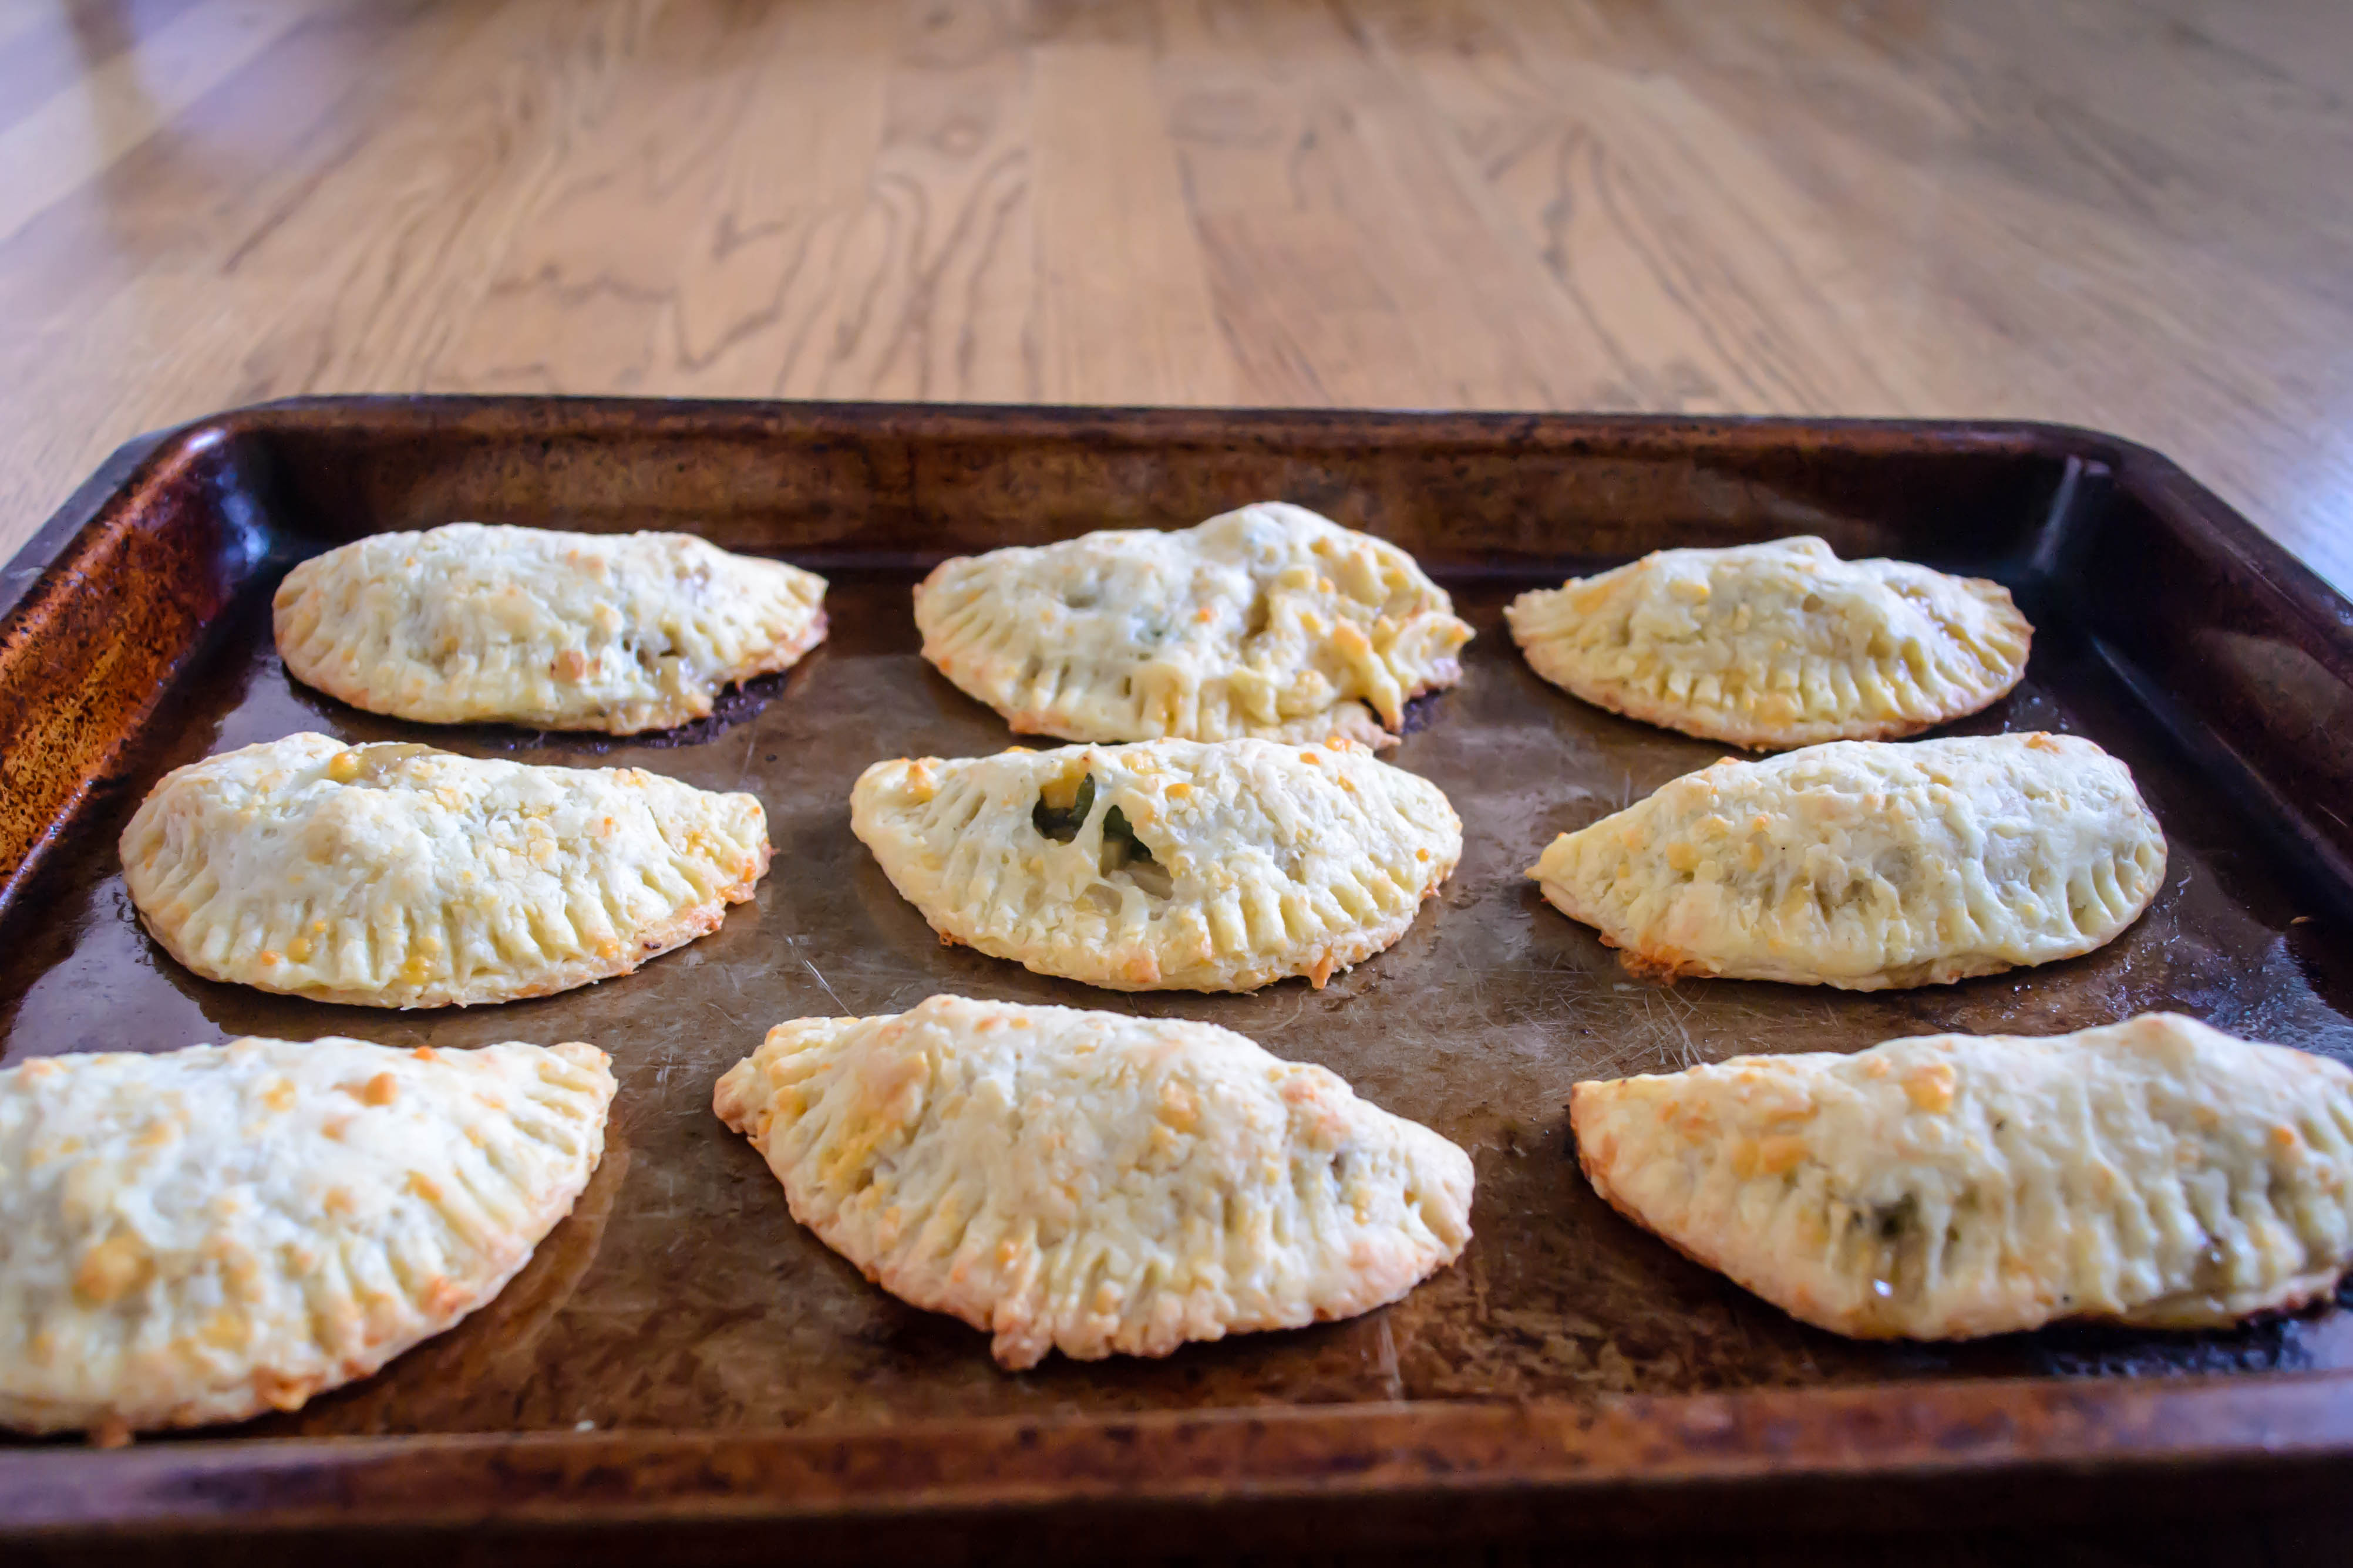
I had designs on serving these alongside a salad for a balanced meal, but we never made it to the salad. We just ate these, burning our fingers and our tongues as we picked up one and another and another. These are pot pies for crust lovers. The dough becomes rich and crisp and flaky, and the cheddar cheese is, I have to admit, a bit of a stroke of genius. It’s a perfect little package, and writing about it now, I desperately want another.

Sometimes leftovers are better than the original. This, friends, is one of those times.

Food Blog March 2014-3534Cheddar dough
Makes enough for 18-20 empanadas, if re-rolled once or twice
2 ¼ cups all-purpose flour
½ teaspoon salt (this doesn’t seem like much, but the cheese is salty and the filling will be seasoned)
8 tablespoons very cold butter (1 stick), cut into cubes
½ cup extra sharp cheddar cheese, cut into cubes
1 egg
⅓ cup ice water
1 tablespoon vinegar

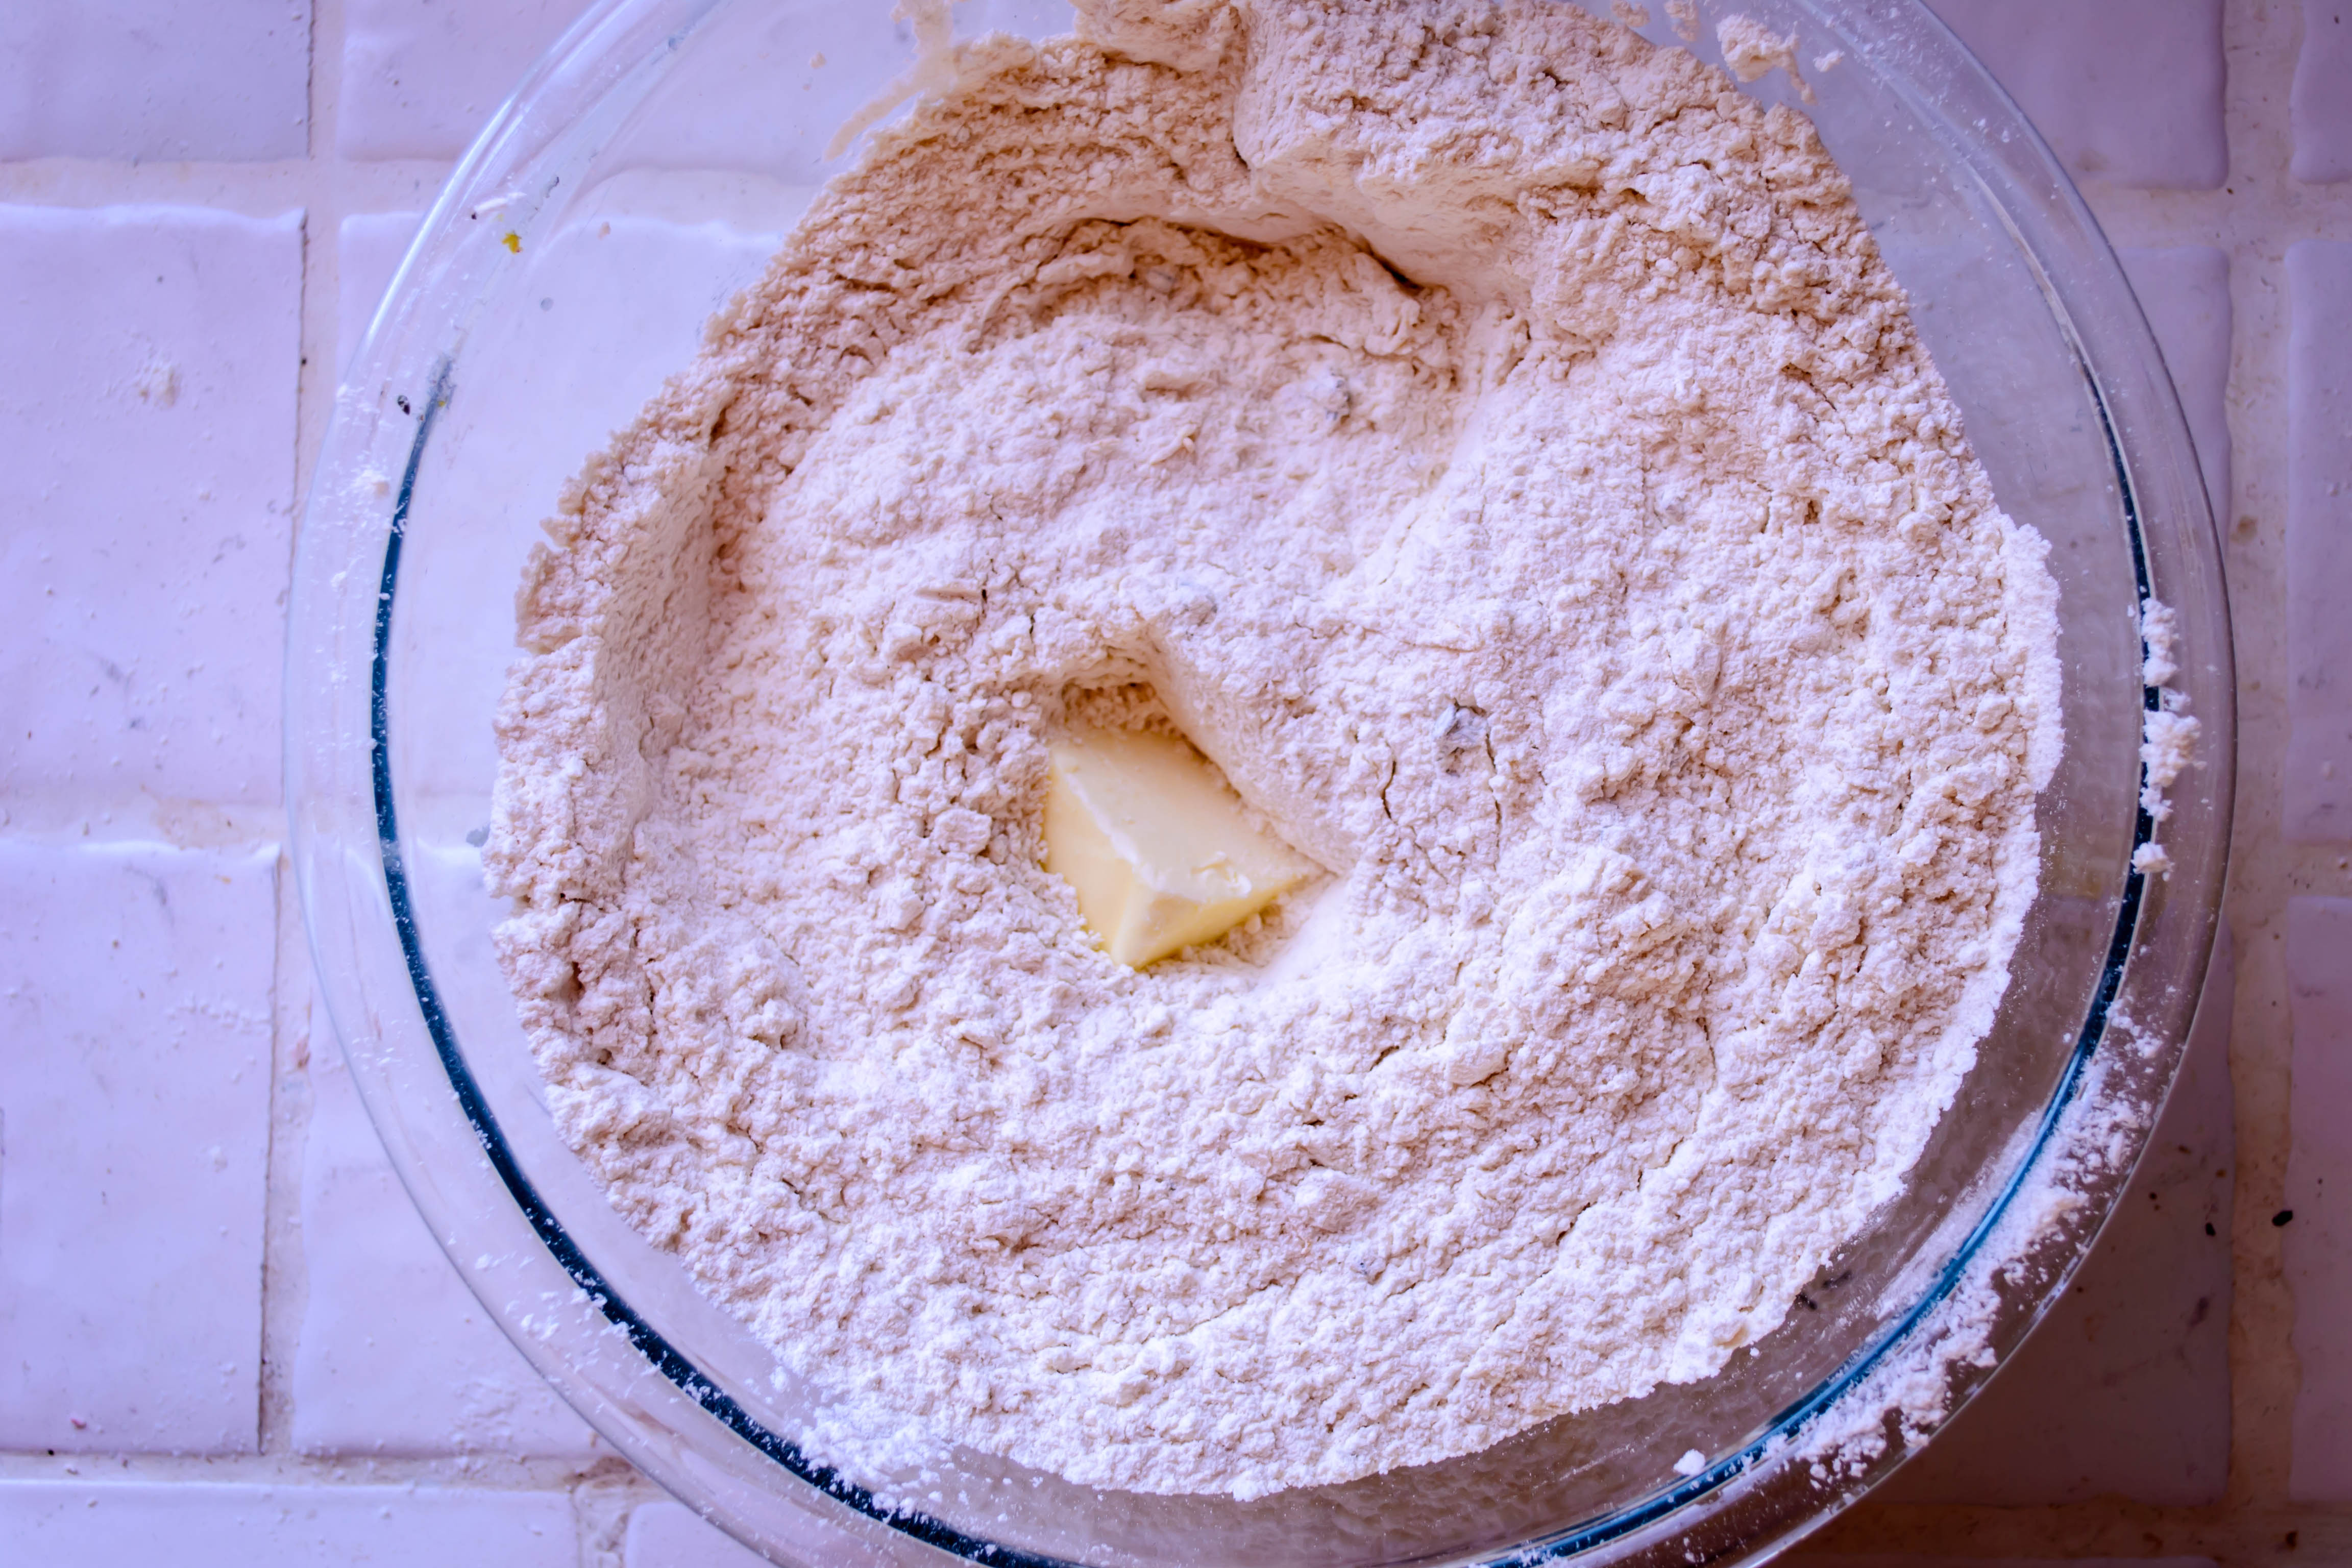
  • Dump the flour and salt into a food processor and pulse once or twice to mix them.
  • Add the cubes of butter and cheese and pulse 4 times for 3 seconds each. This seems fussily precise, but it worked very well.
  • In a small bowl, beat the egg lightly with the water and vinegar. Add to the food processor and pulse once or twice until the mixture comes together in large clumps. You’ll know it’s ready when it stodgily mashes against the side of the processor bowl, reluctant to whiz in circles anymore.
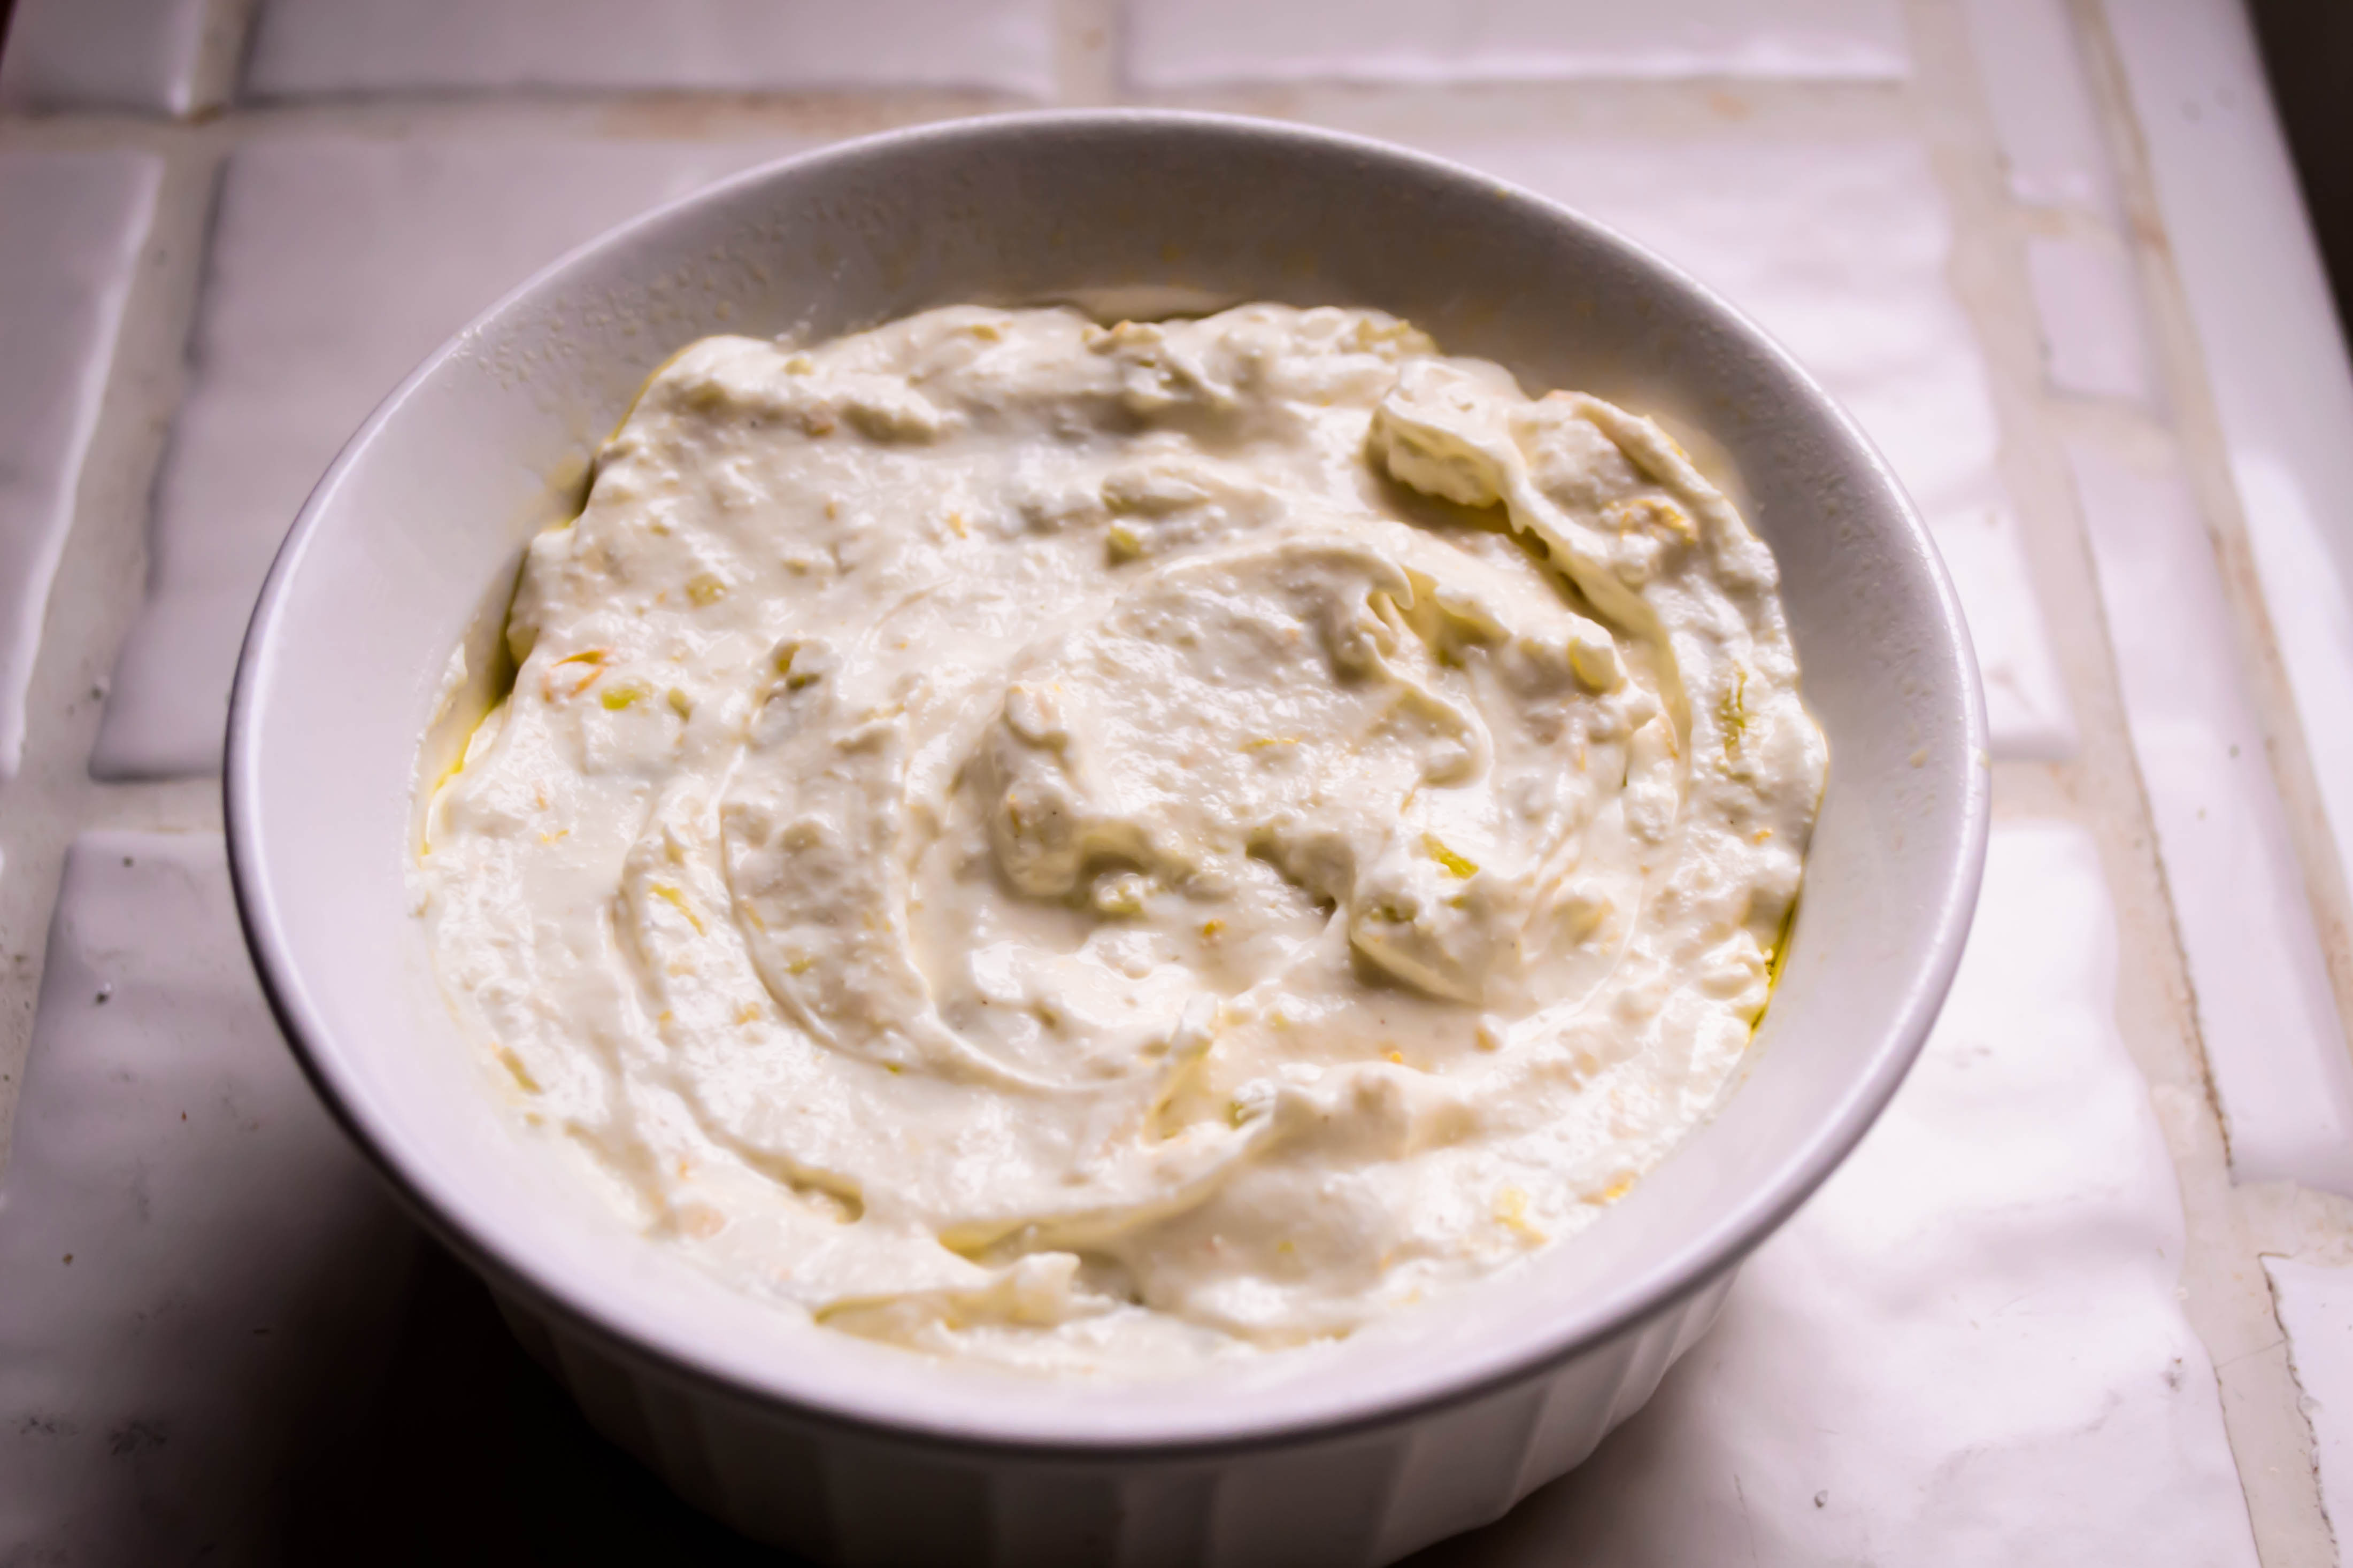
  • Turn this mixture out onto a large square of plastic wrap. Using the plastic wrap to help you, form it into a disc 5 or 6 inches in diameter, then wrap up and refrigerate for at least 60 minutes. This will allow the flour granules to absorb some of the liquid and fat, which makes for easier rolling, and the butter (and cheese) to firm up again, which makes for better texture.
  • While the dough chills, make the filling.

Pot pie filling
These quantities may not seem like enough, but remember, you are using only minute quantities of filling for each empanada. Overfilling dumplings is somewhere in the top ten of my frequent cooking mistakes, so trust me. You will have plenty.
2 tablespoons butter
1-2 cloves garlic, finely minced
2 green onions, thinly sliced in little moons
3-4 mushrooms, diced
2 small carrots (or one large), diced
1 small Yukon gold potato, diced
6 green beans, stems removed, sliced into ½ inch pieces
½ cup cooked shredded chicken
¼ cup white wine
1 cup velouté
Salt and pepper, and herbs of your choosing, to taste

  • In a saucepan, melt the butter over medium heat, then add the garlic, onions, and mushrooms. Cook, stirring occasionally, until the mushrooms begin to brown, 5-8 minutes.
  • Add the potatoes and carrots, stir to combine.
  • Add the wine and velouté. Season with salt and pepper, if needed, and any herbs you feel inclined to add. Simon and Garfunkel’s usual suspects would certainly be welcome.
  • Cook over a healthy simmer until the carrots, which will likely take the longest, are almost tender. If the pan looks dry, add a little water or chicken broth. Depending on how small you have cut the vegetables, this could take anywhere from 10-20 minutes. Mine took about 15.
  • When the carrots are almost tender, add the green beans and simmer until they are just losing their raw crunch.
  • Kill the heat and add the shredded chicken, then let the whole mess cool to room temperature.

To assemble and bake:

  • Preheat the oven to 425F and spray two baking sheets with non-stick spray or line them with parchment paper.
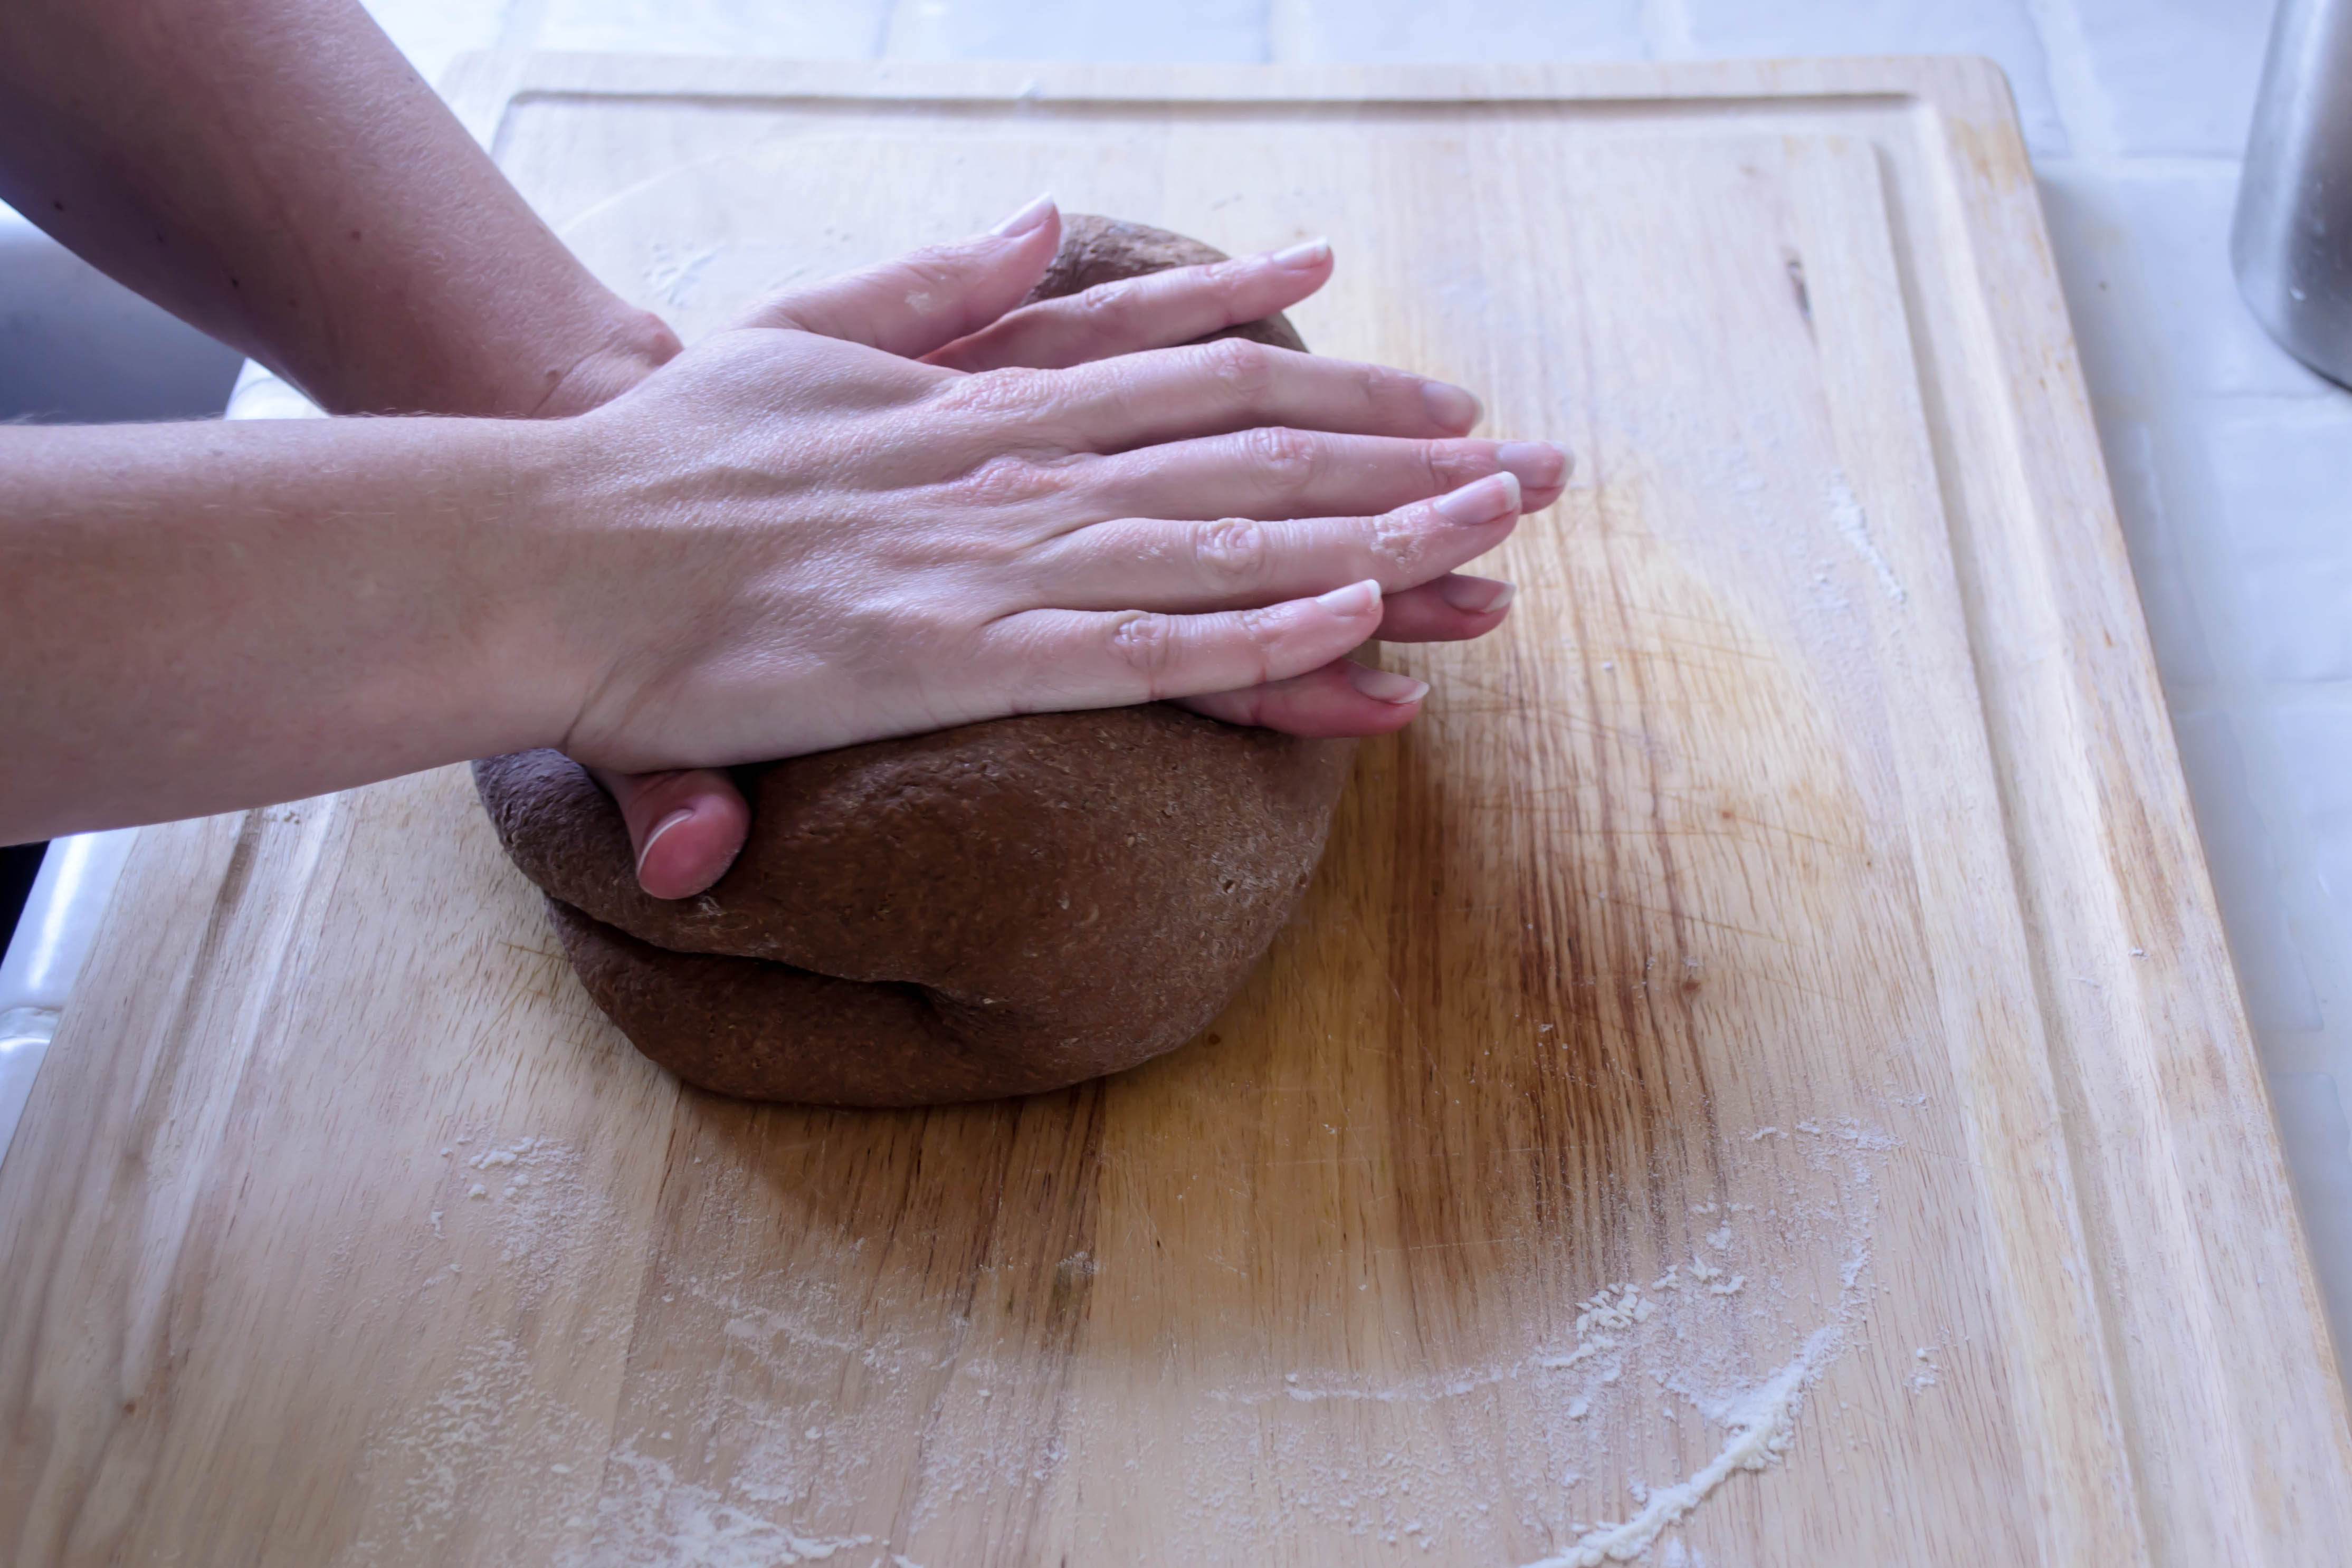
  • Remove the dough from the refrigerator and unwrap it on a floured board. Using a rolling pin or a straight-sided wine bottle (it totally works!), roll it out into a rectangle or oval about ¼ inch thick. With the floured lip of a glass, a jar mouth, or a biscuit cutter, cut out into 4-inch rounds. When you cut, to avoid extra stickiness or tearing the dough, press straight down without twisting all the way through the dough. Once you have cut all the way through the dough, then you can twist the cutter a bit to loosen the round from the board.
  • Once you have made all the circles you can with the dough, gather up the scraps and roll them out again. One or two re-rollings should produce 18-20 dough circles.
  • Add about 1 tablespoon of the cooled filling to each round of dough. You will be tempted to add more. Don’t do it! A solid 1 tablespoon is about all that can fit without making a tremendous mess.
  • As you place each tablespoon of filling in the middle of the dough round, fold it in half and press the edges together with your forefinger and thumb. To seal each little half-moon package, set it down on the floured board again and press down on the edges all the way around with the back of the tines of a fork. This really crimps it closed, but it also looks pretty, which I’m a fan of.
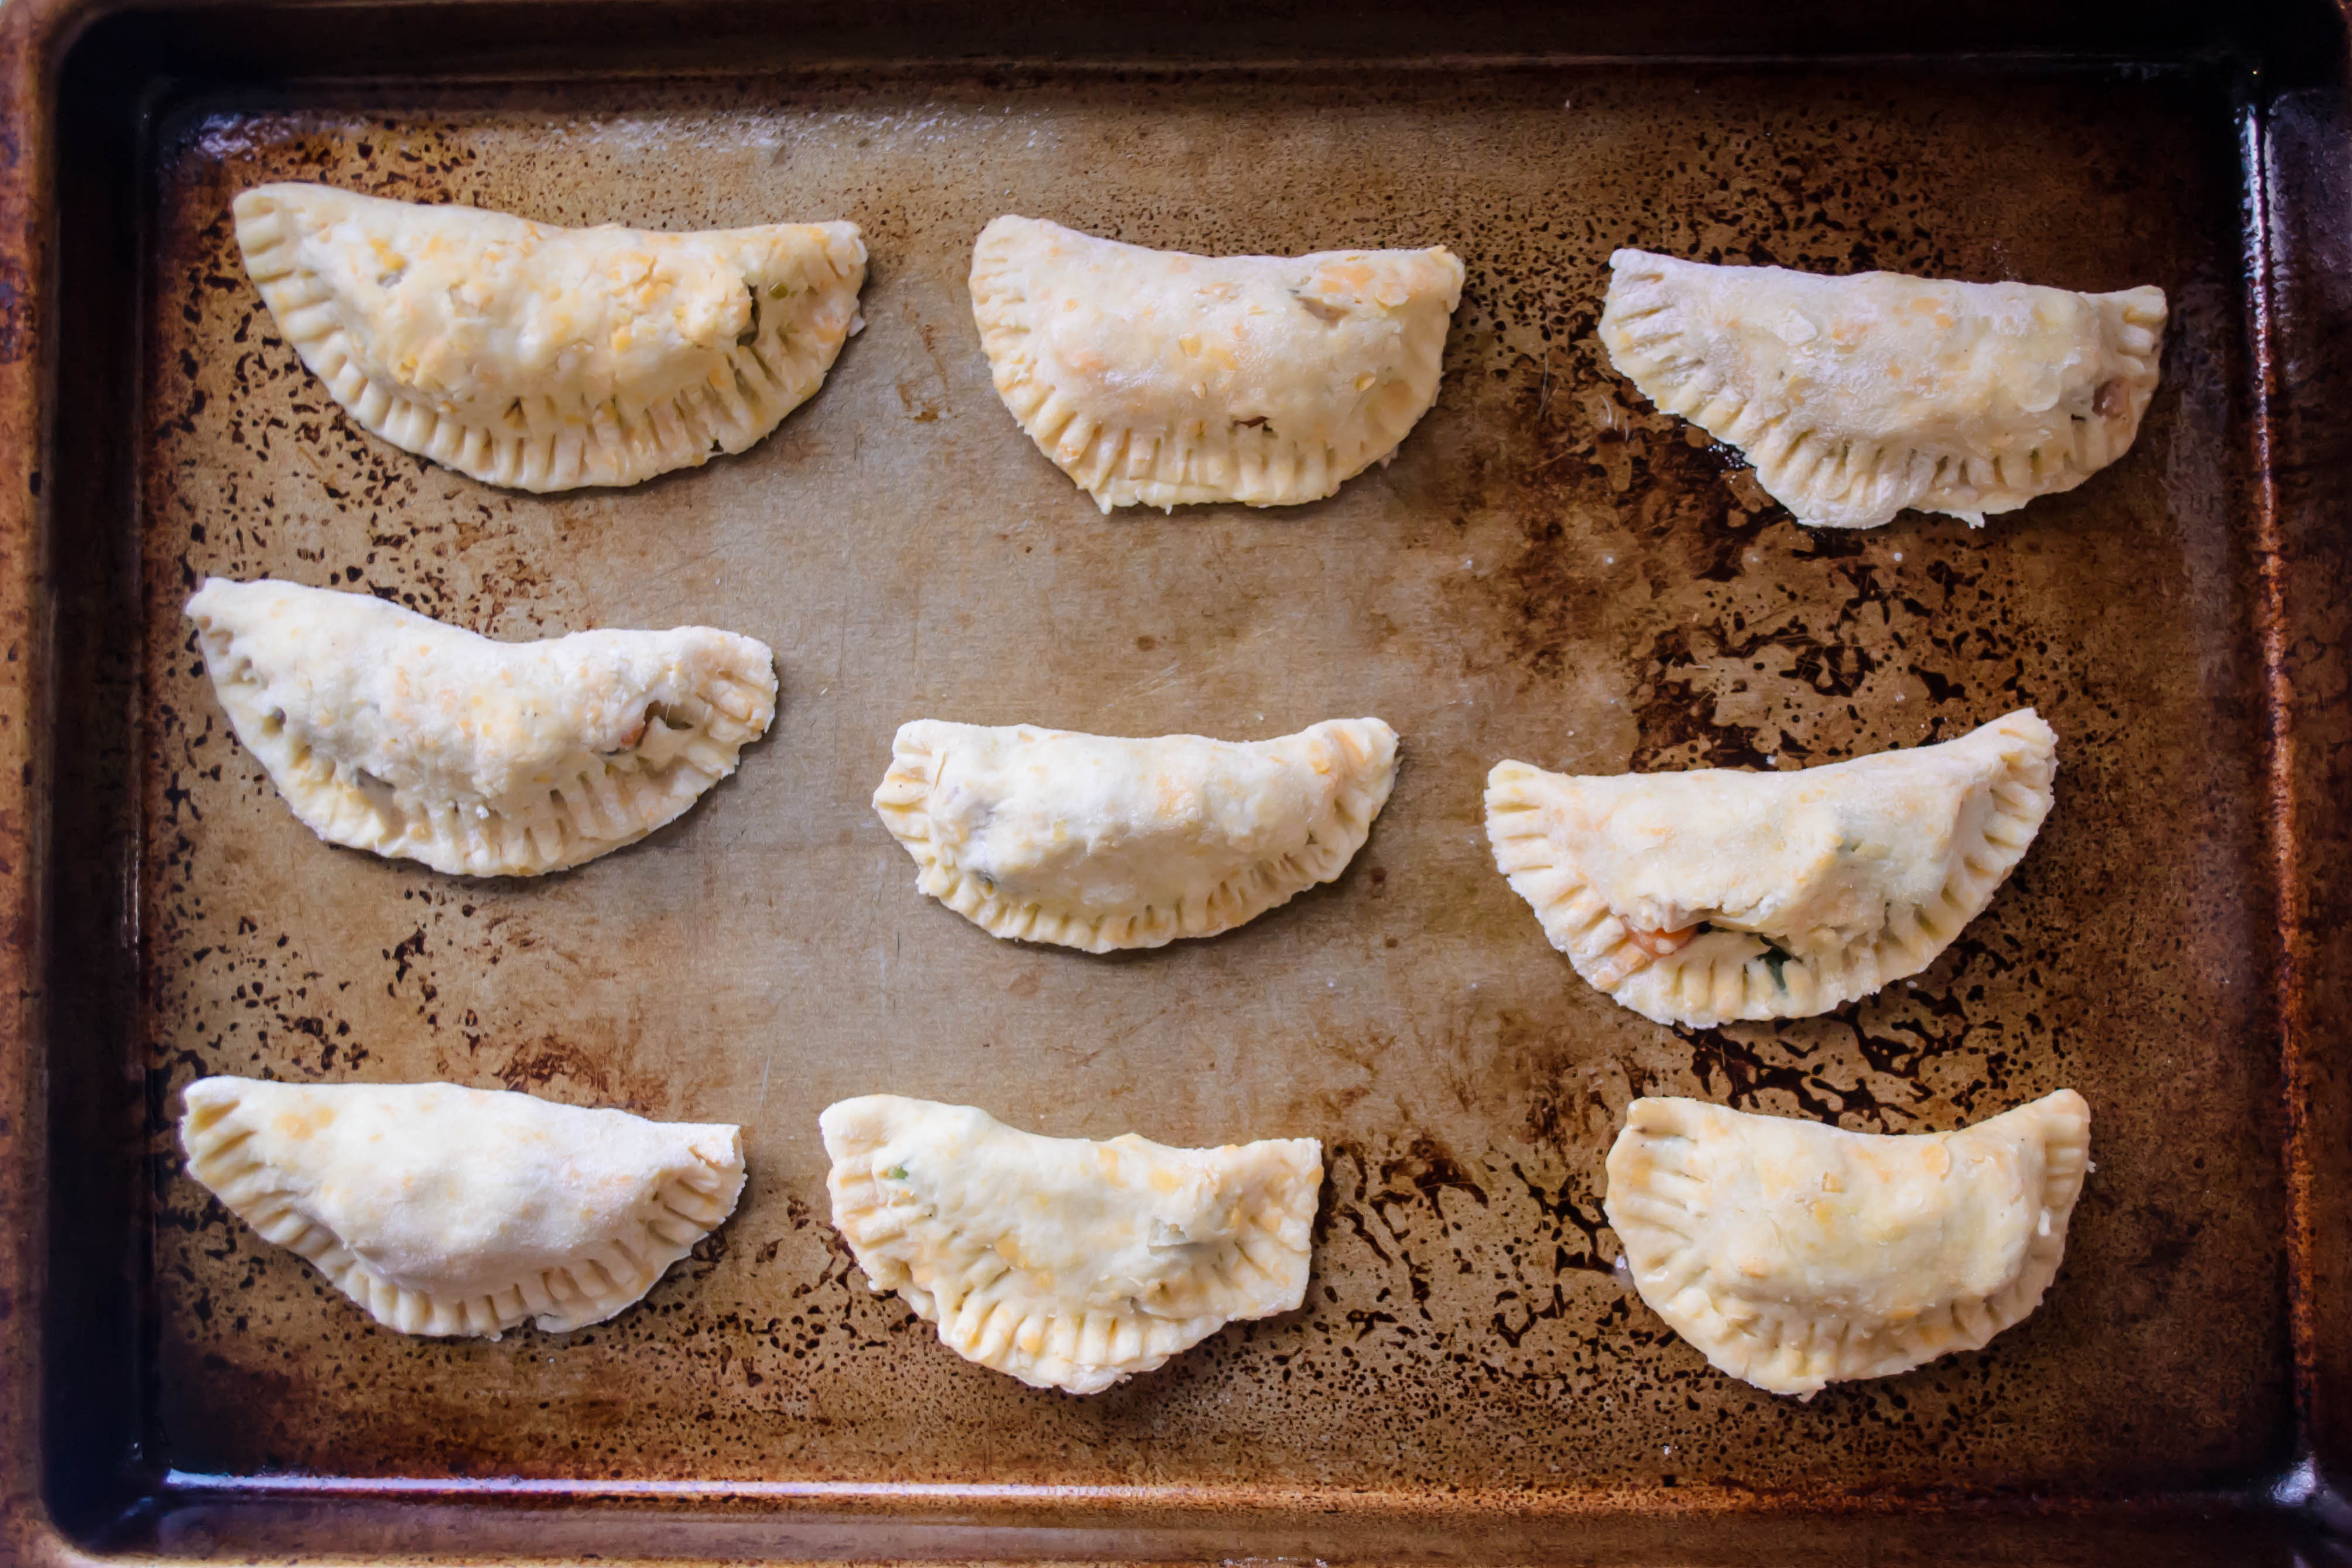
  • Settle each empanada on your prepared baking sheet. They aren’t going to spread, so they don’t need too much room in between them, but you don’t want them touching each other. Each needs to get the full oven experience without its neighbors interfering.
  • Bake in your preheated 425F oven for about 20 minutes, until the crust is golden and crisp to the touch, and any filling that has had the misfortune of leaking out is bubbling assertively.
  • You will probably need to let these cool for 5-10 minutes before eating. Just enough time to, if you’re feeling virtuous, toss together a quick salad. Or, you know, not.

Photo Friday

Challah photo-shoot.

Food Blog Photo Fridays 2014-3503
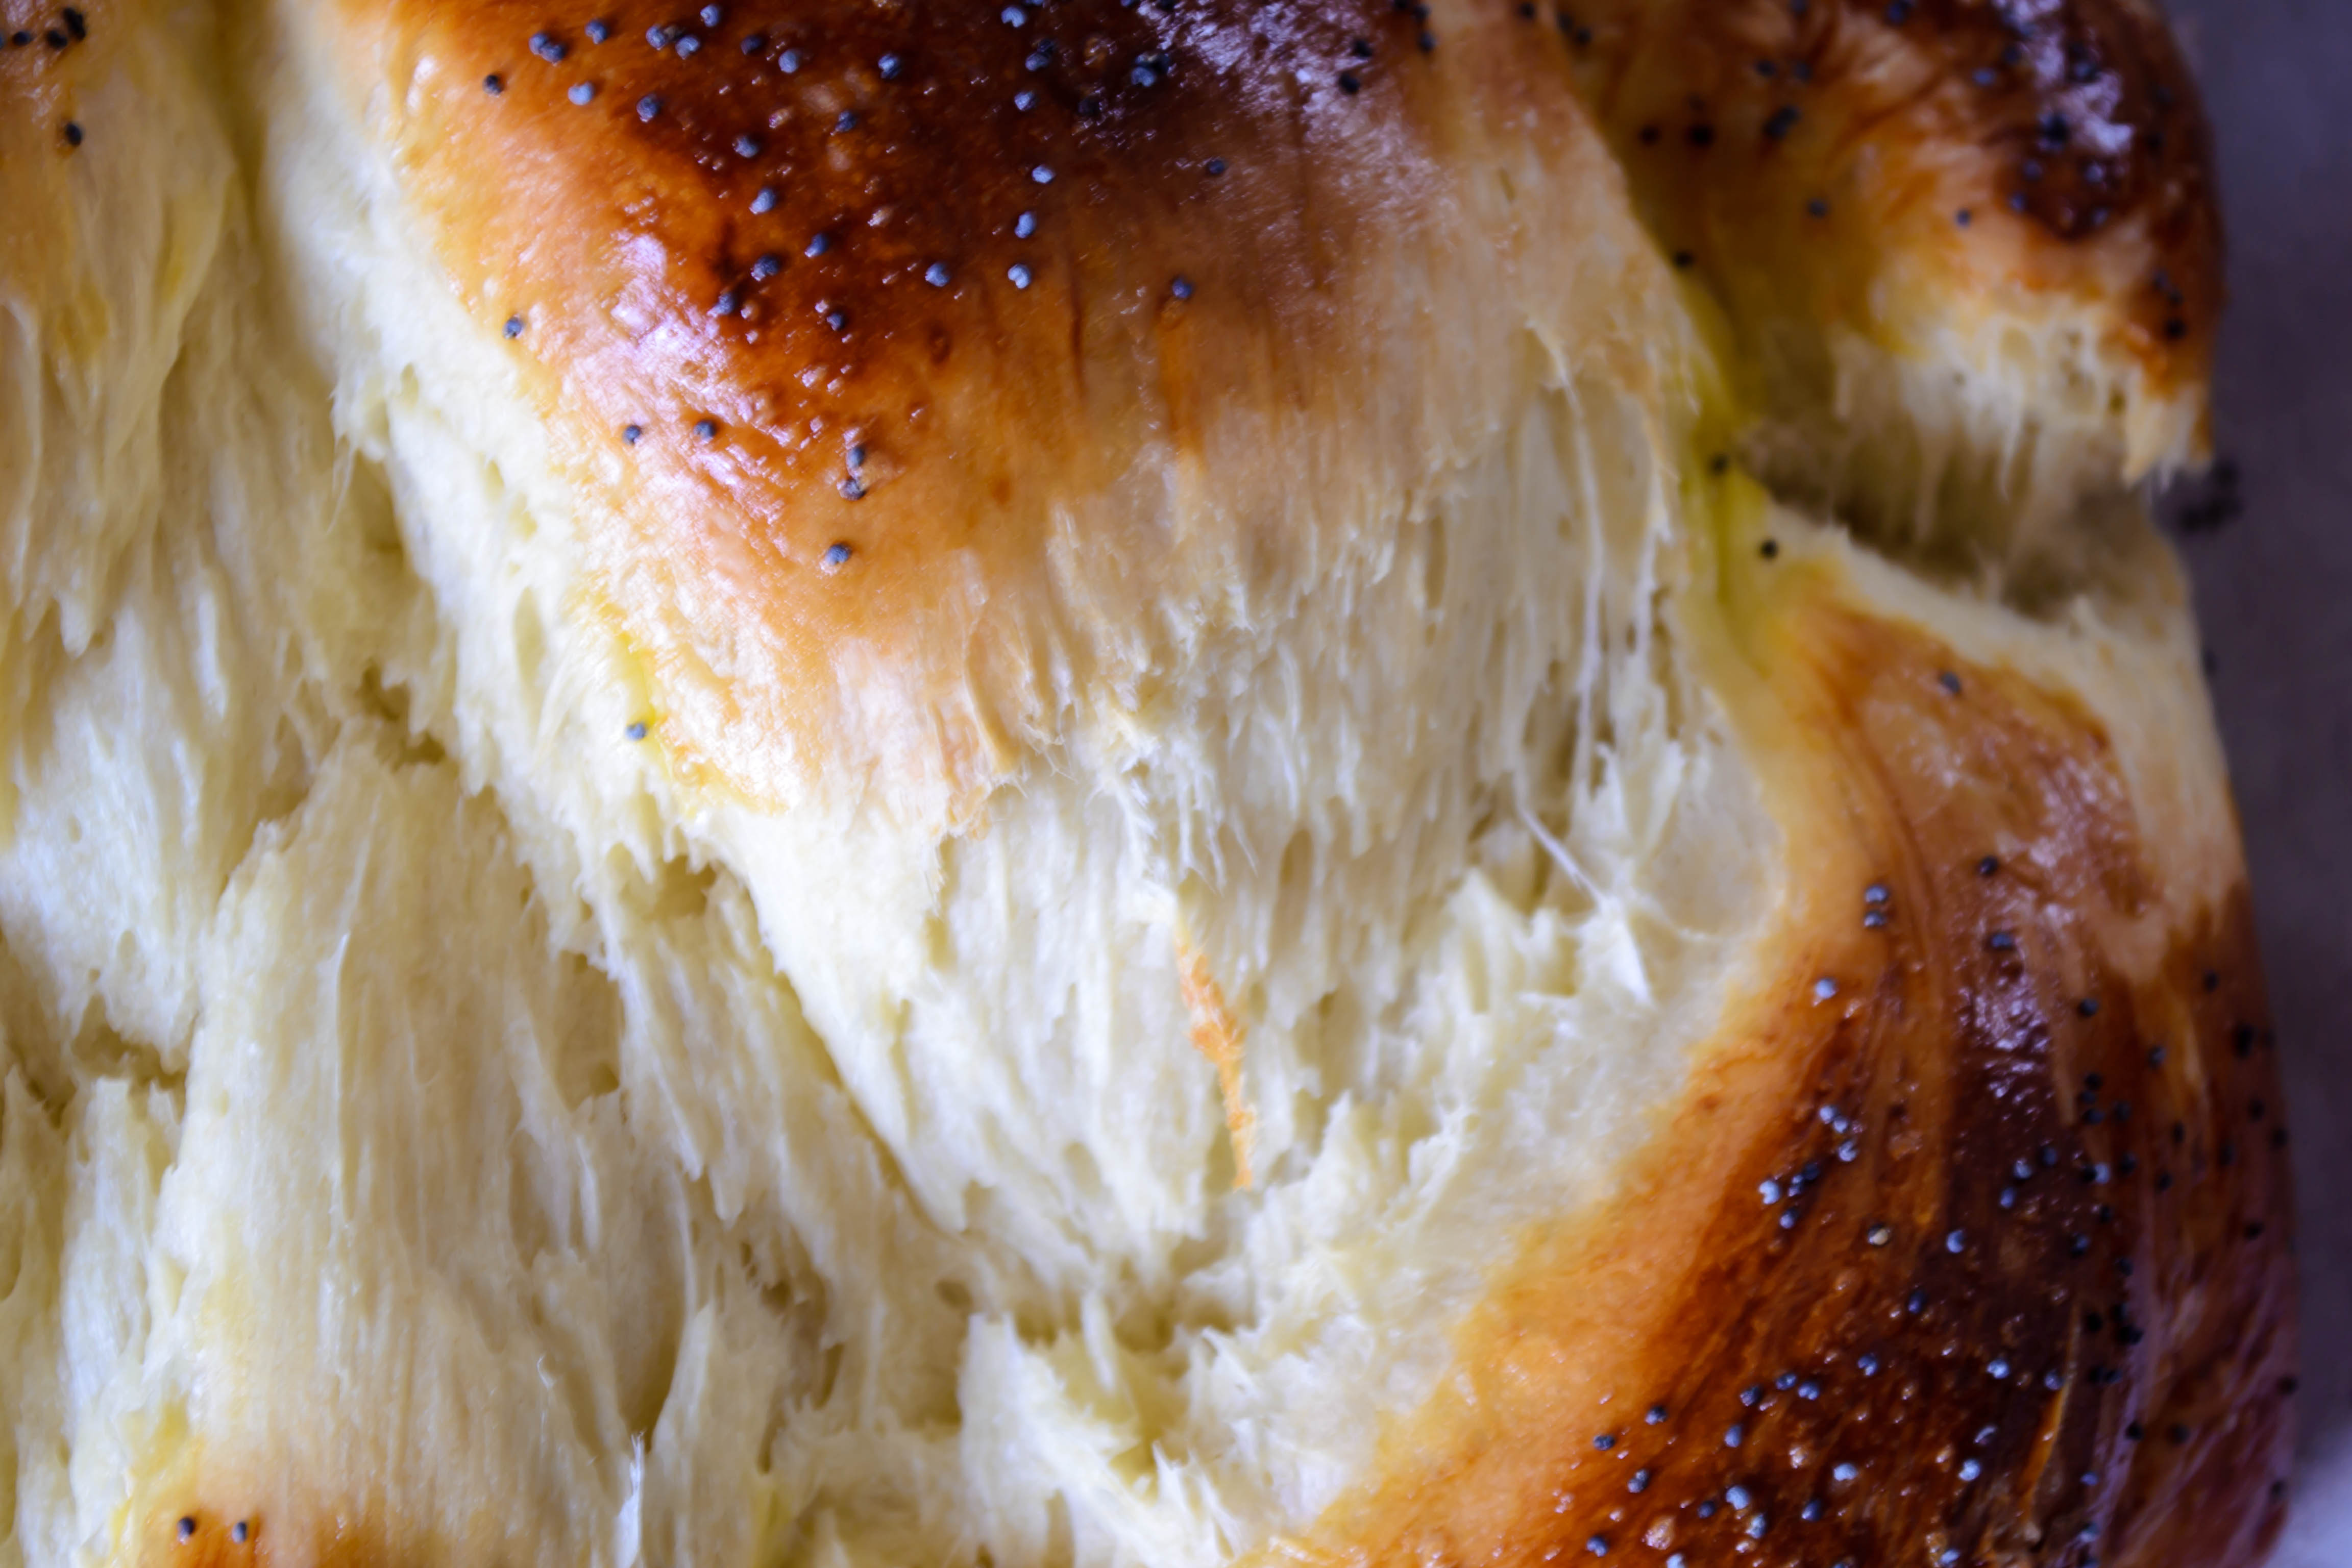
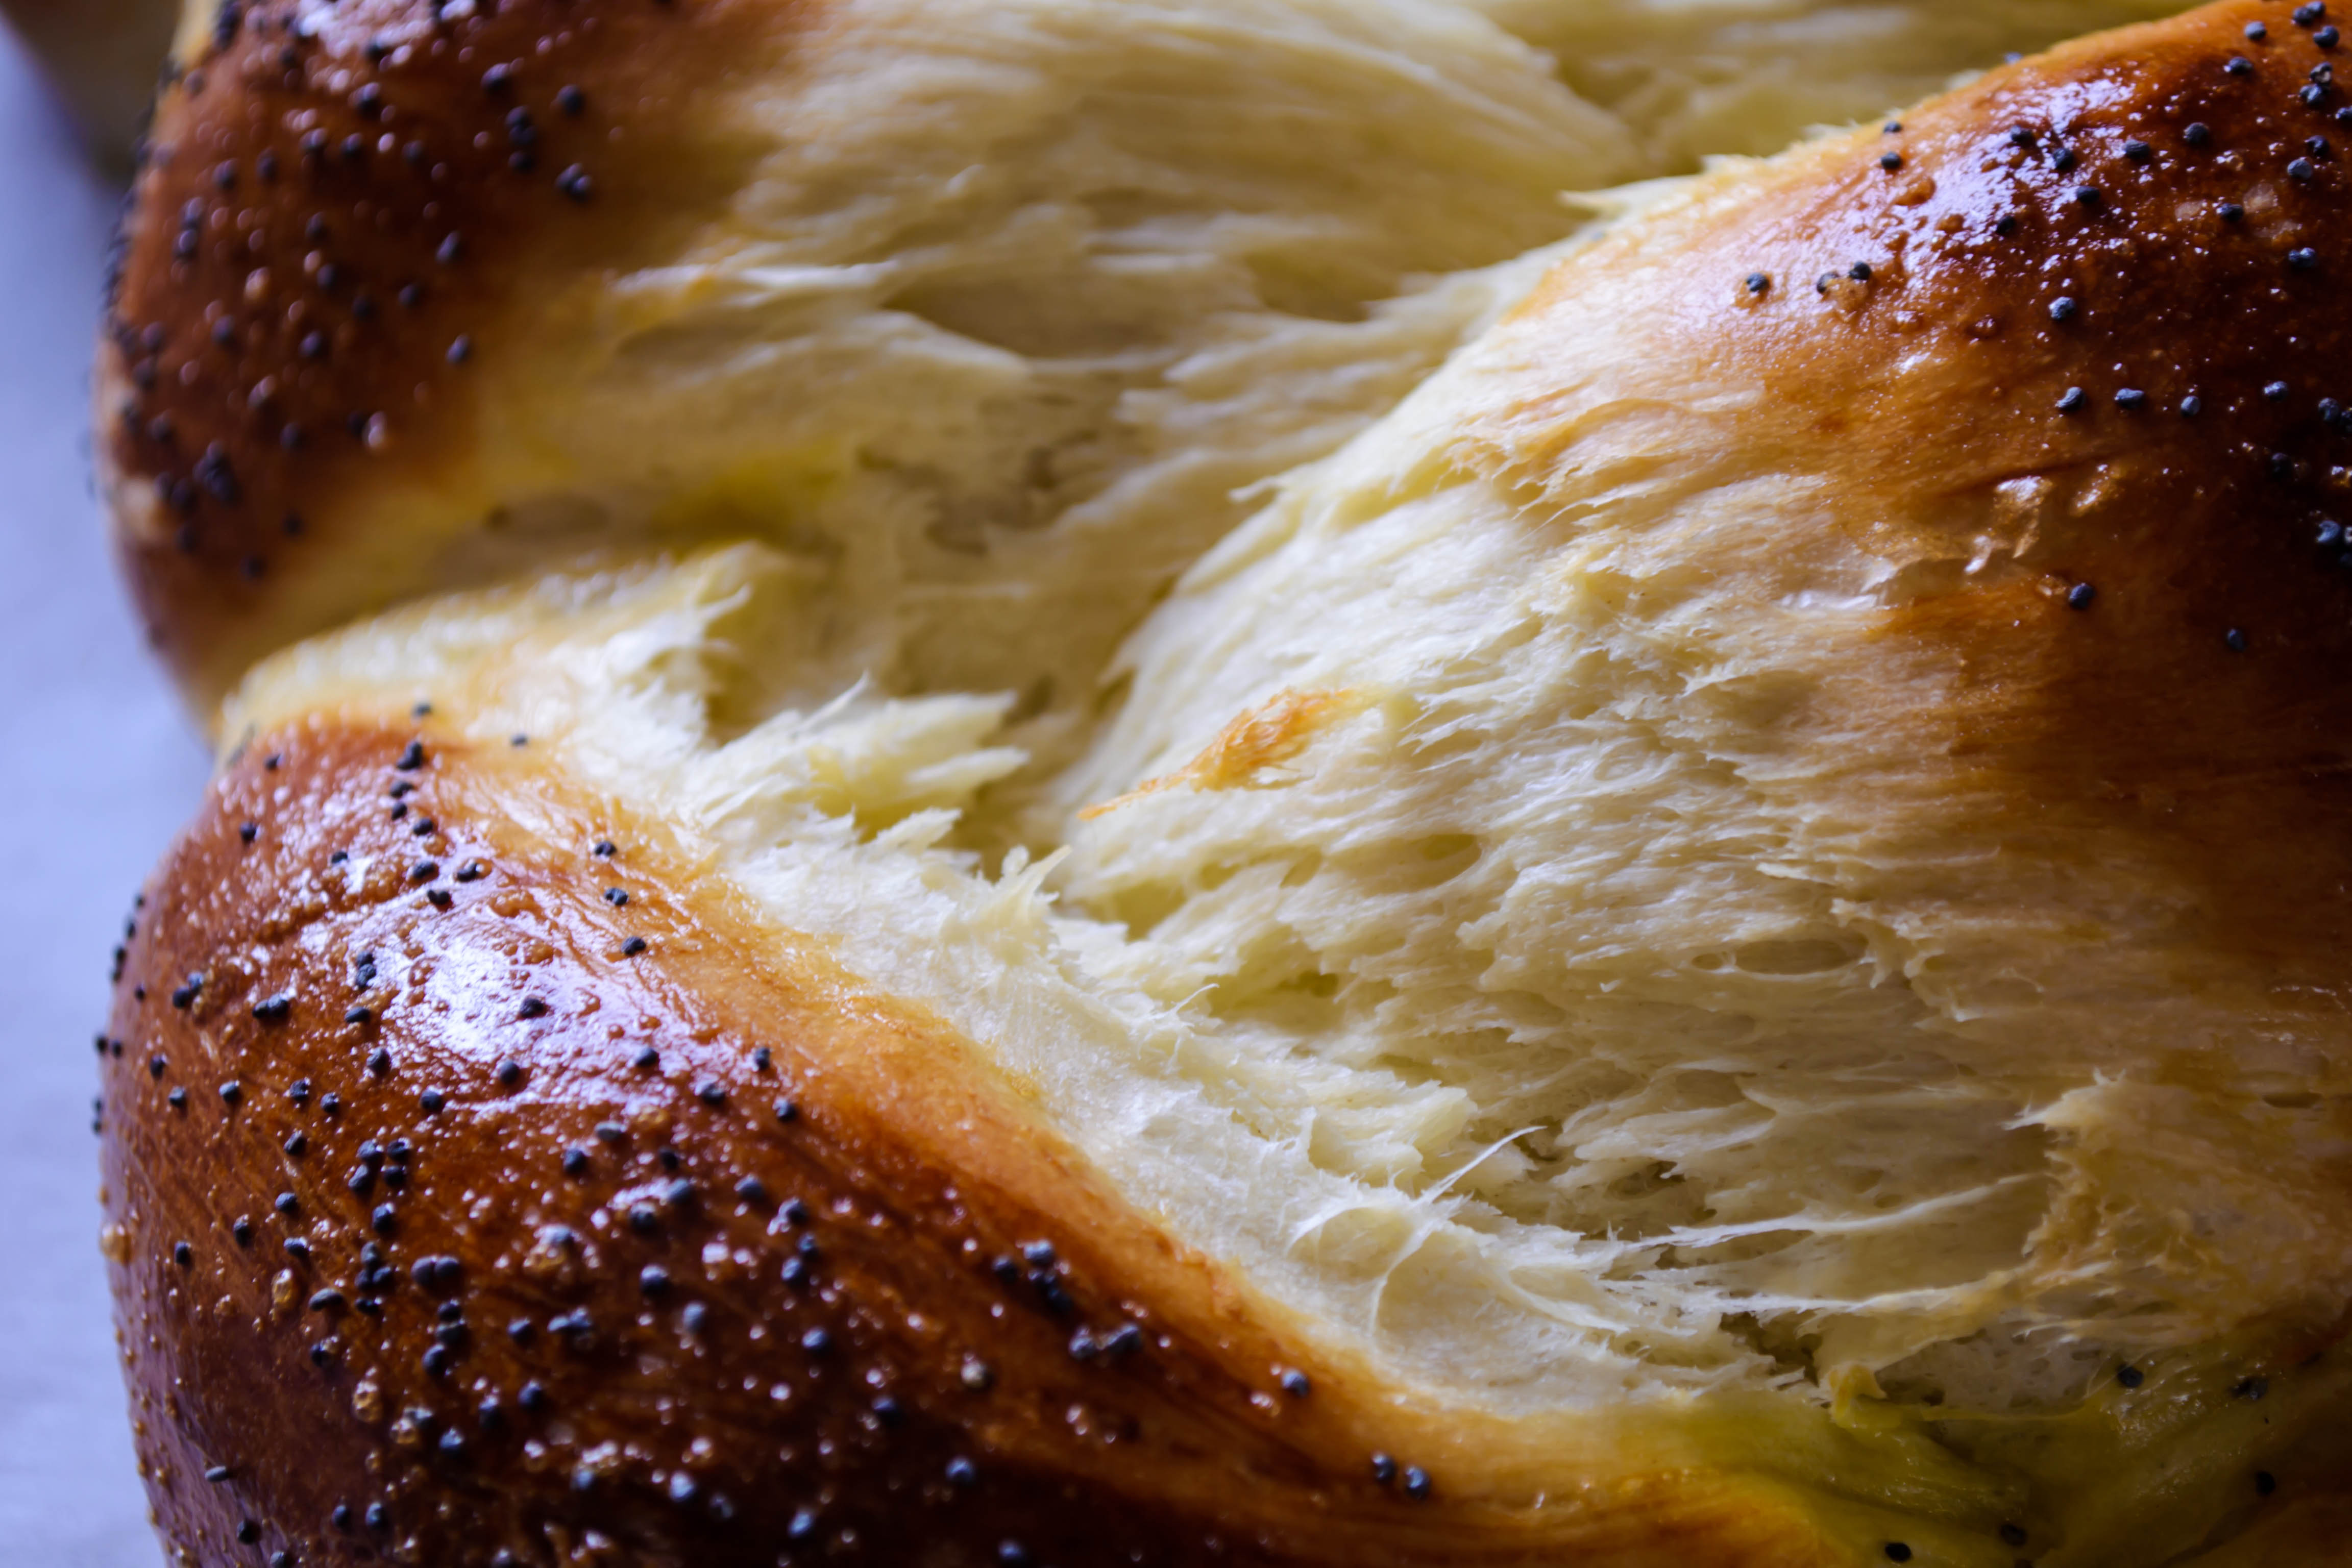
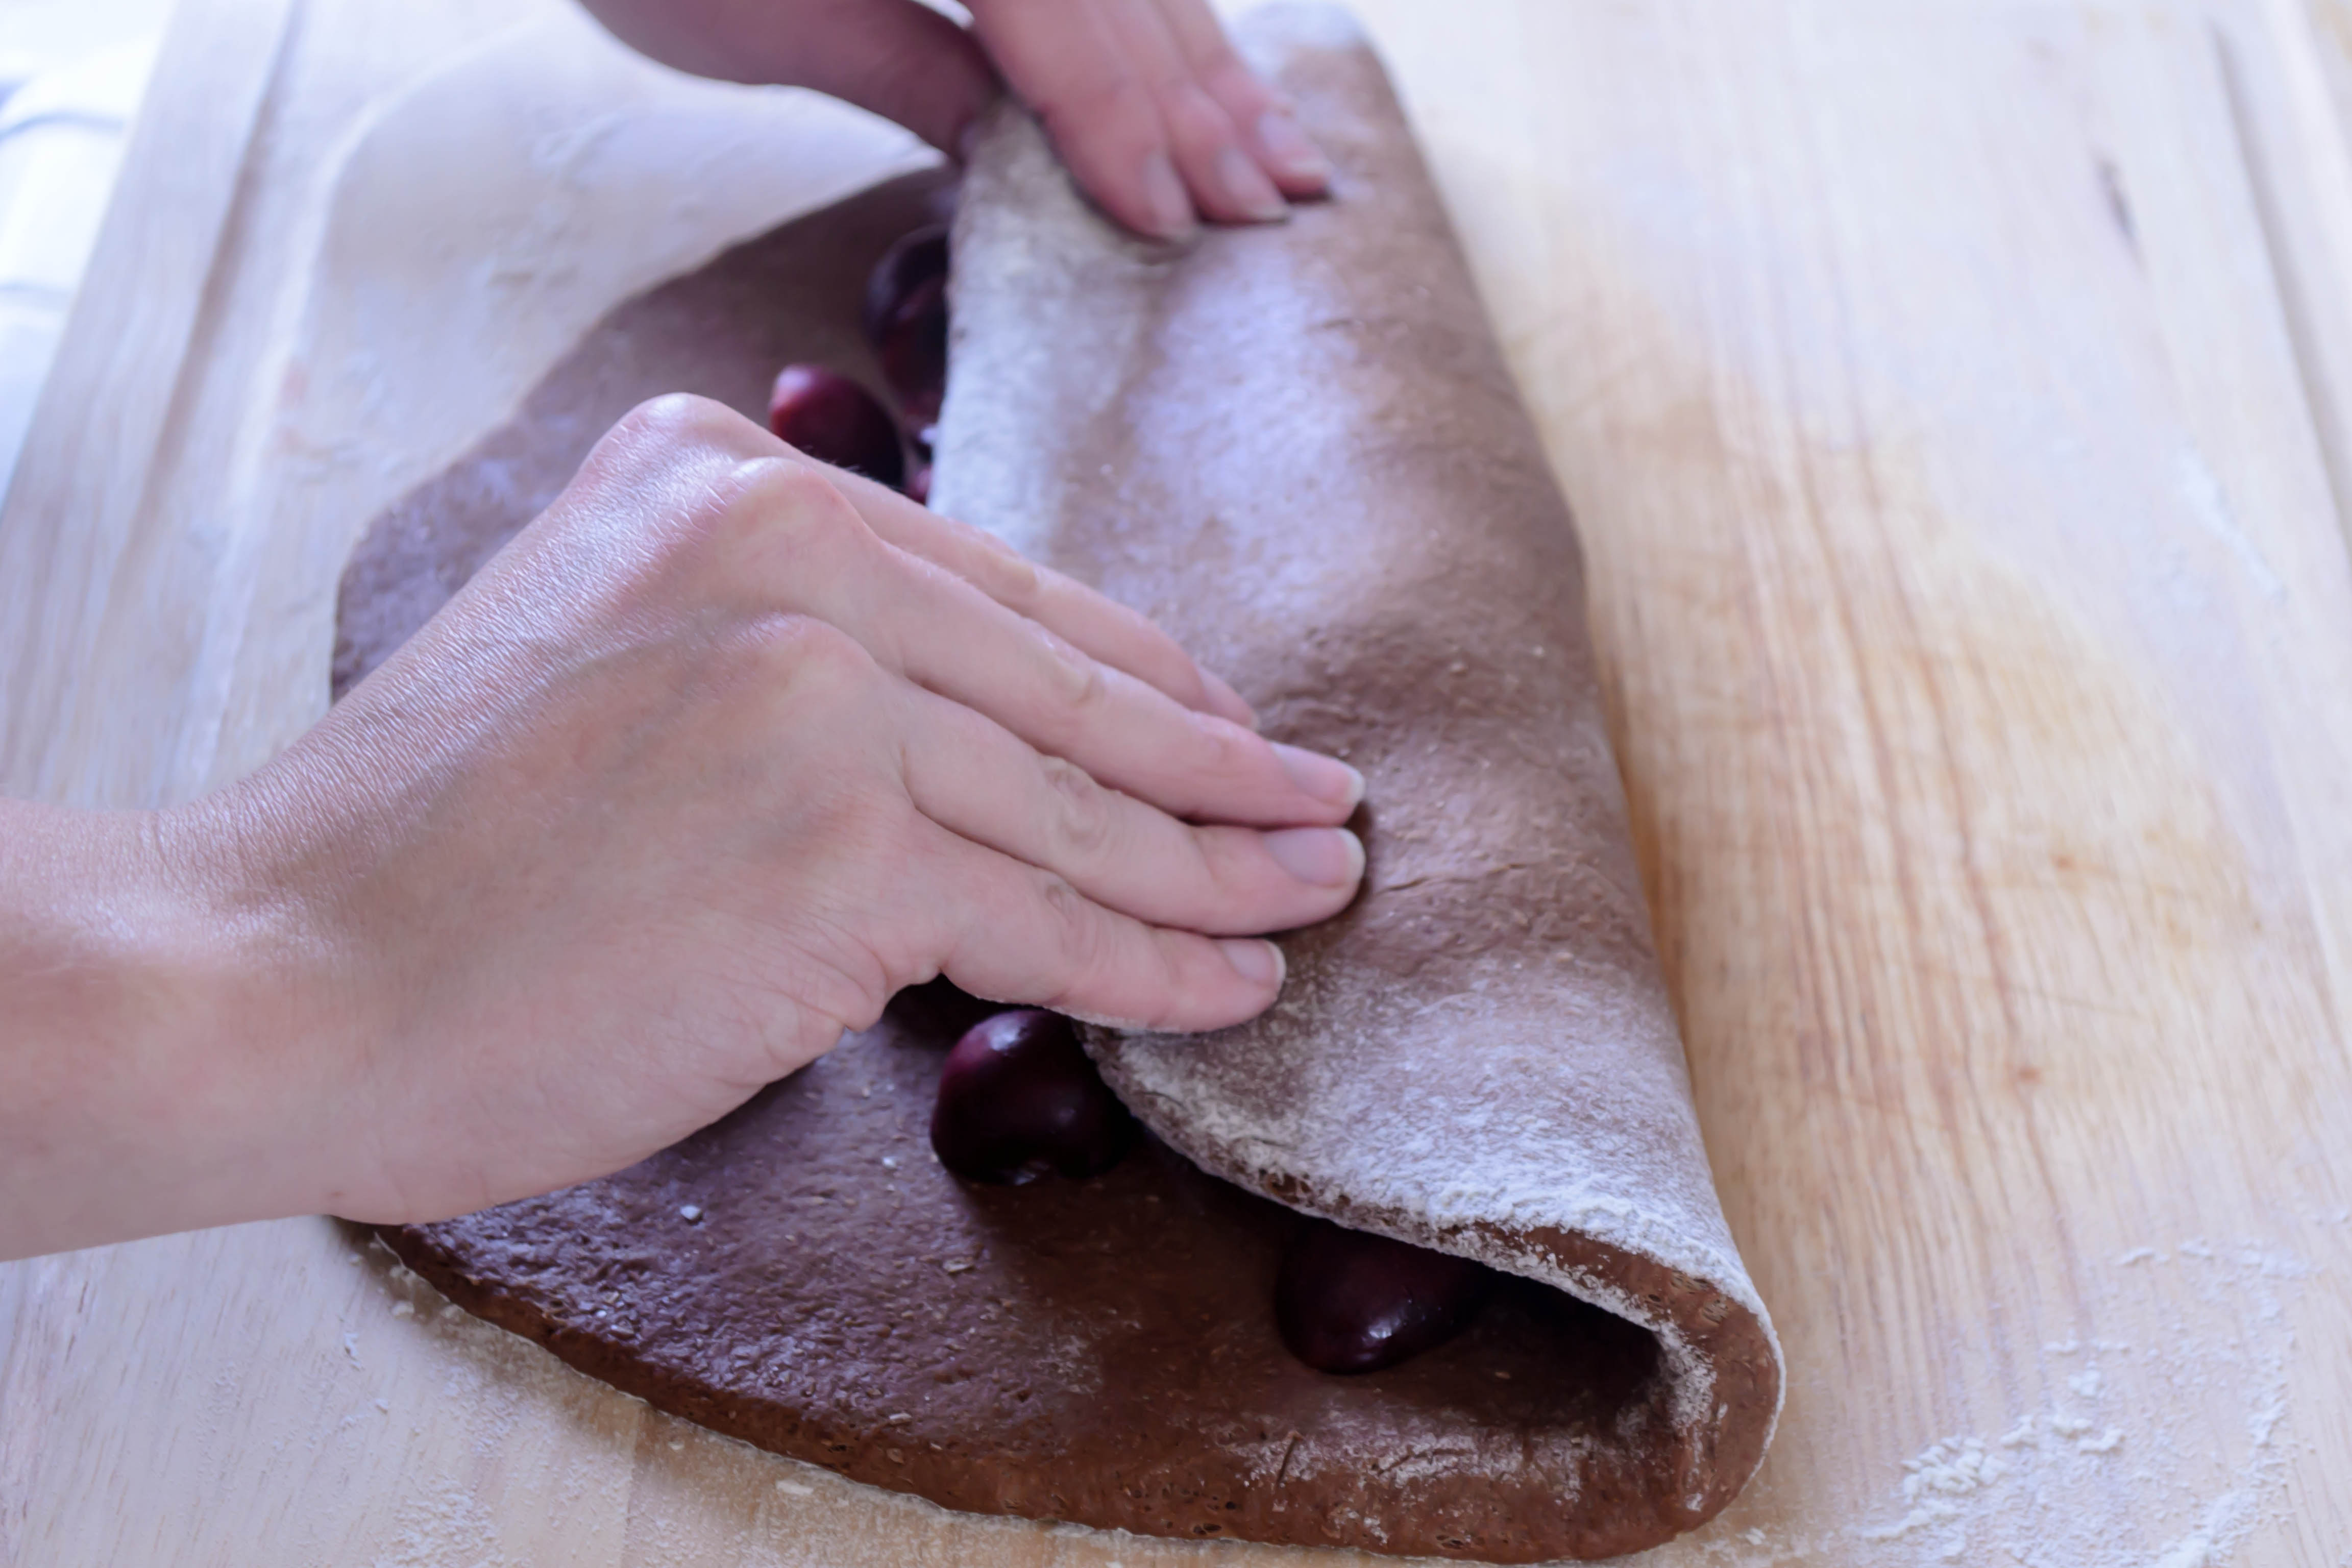
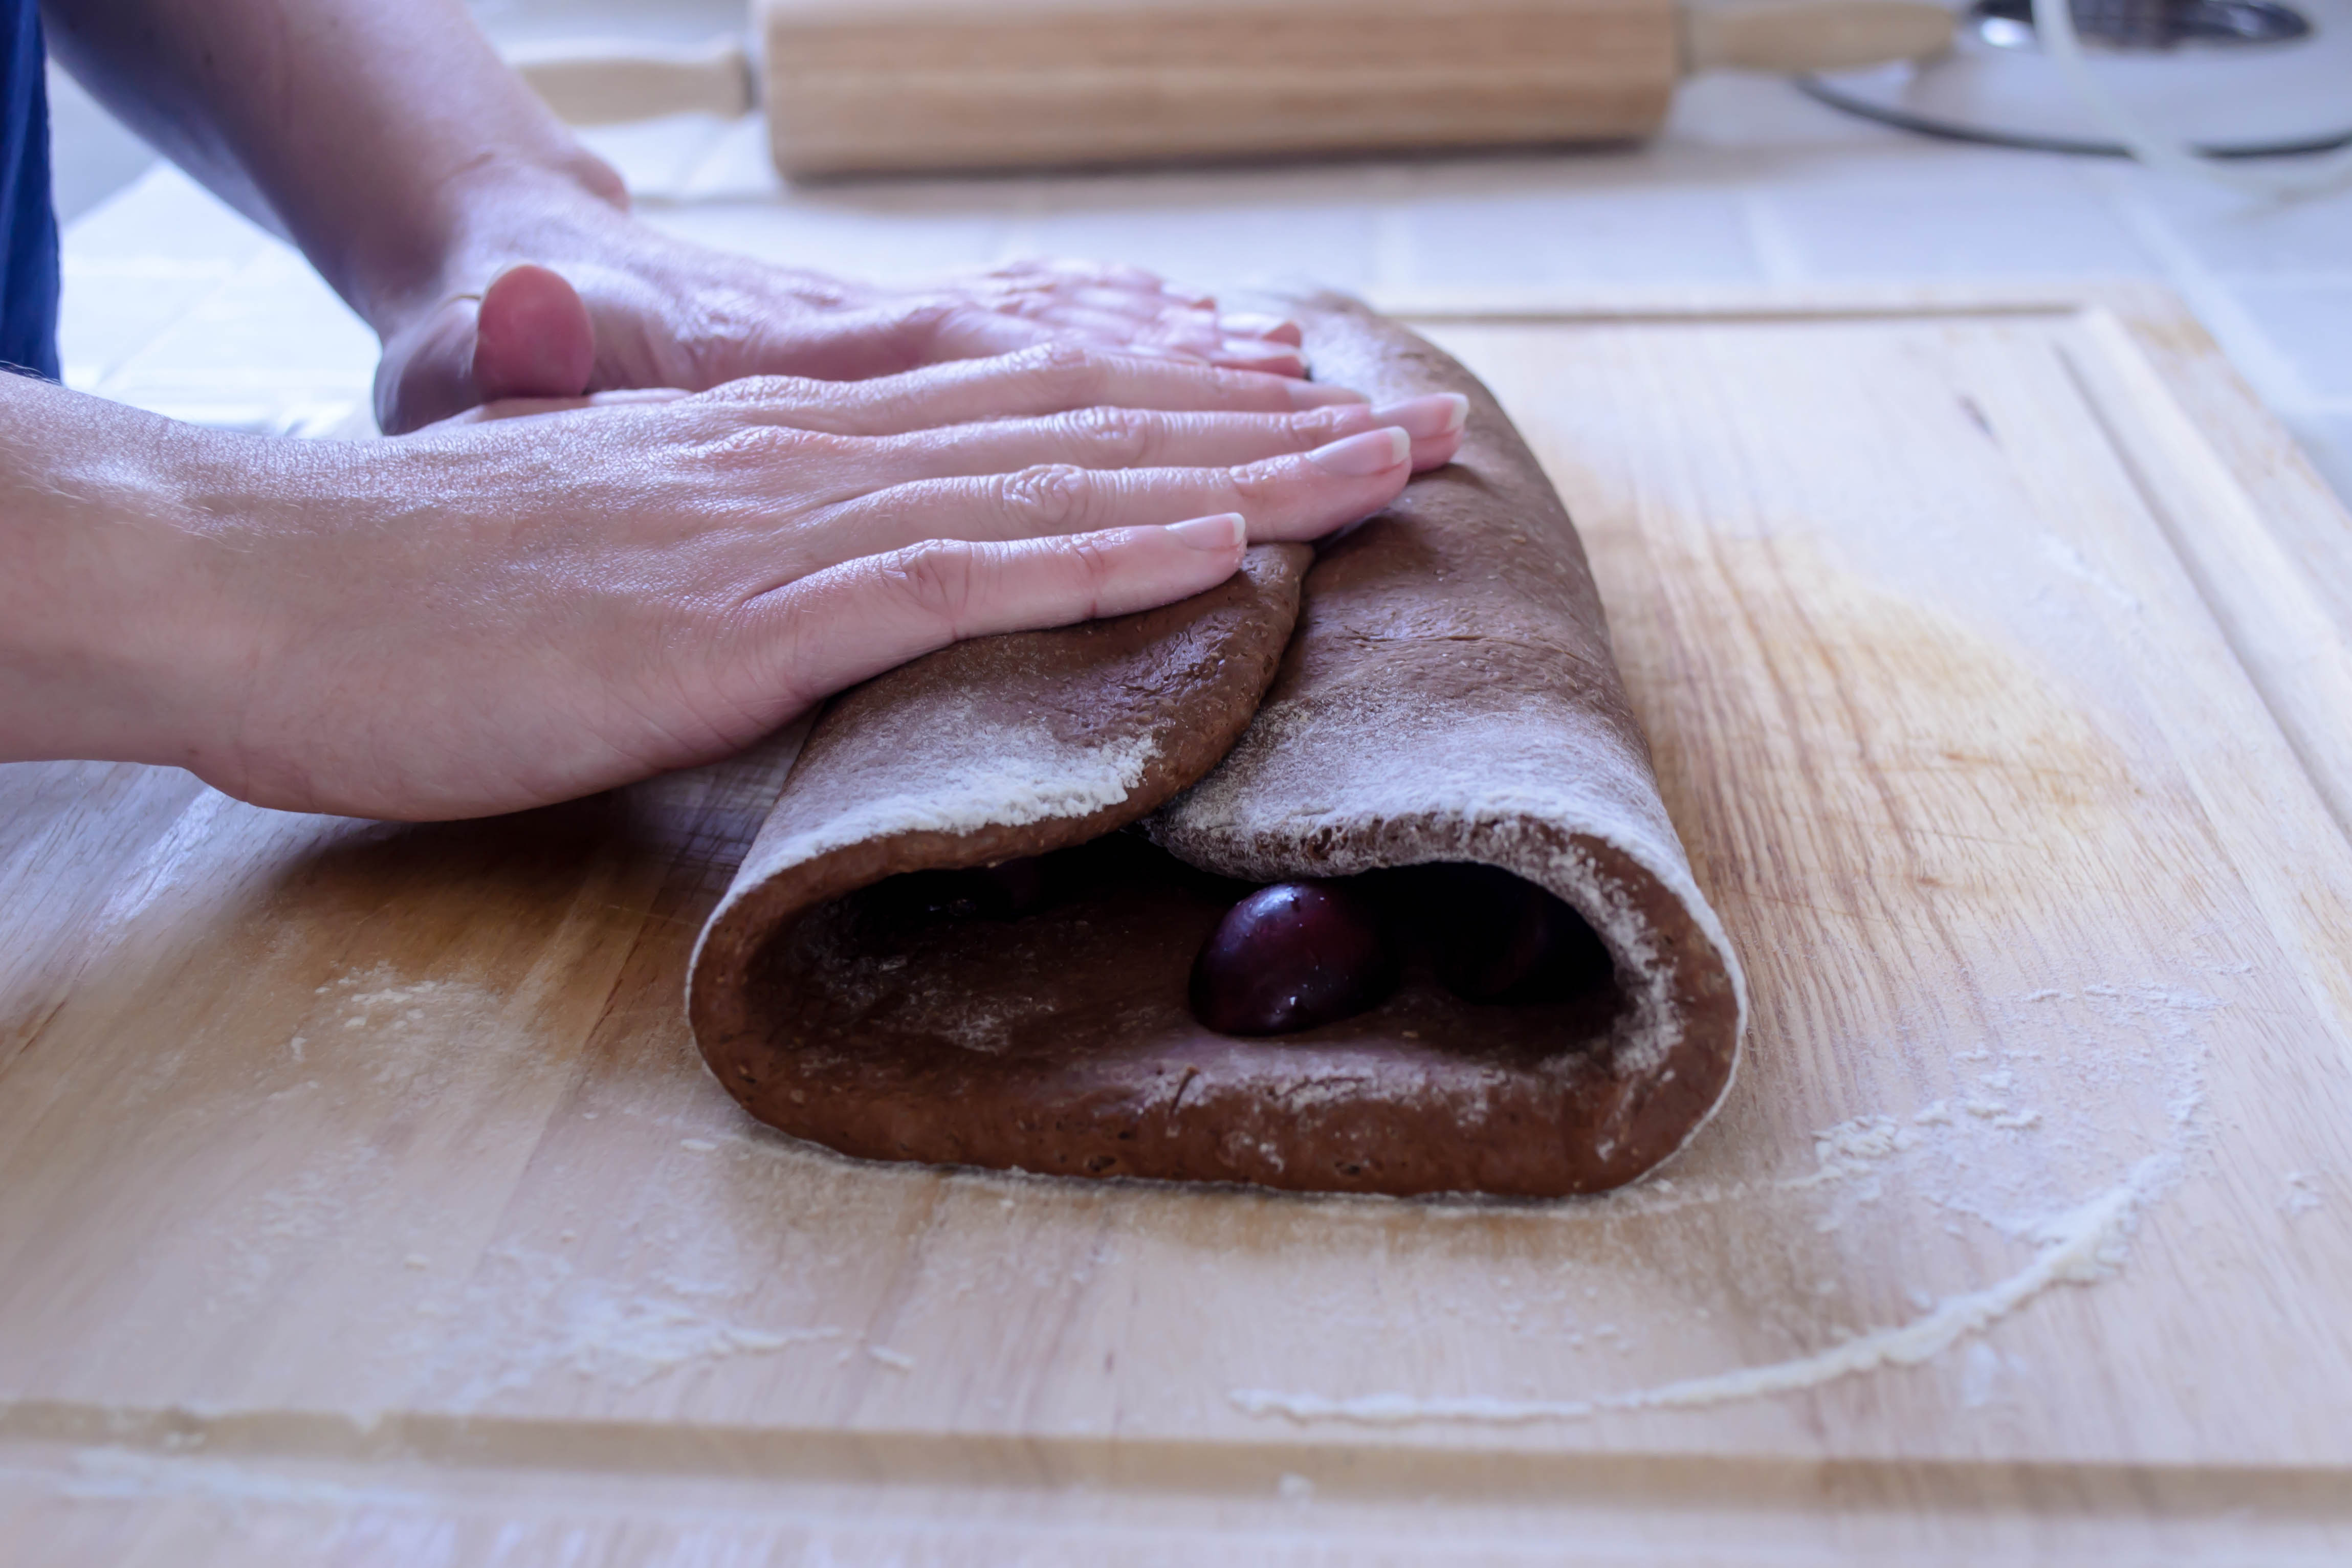
I’m crazy about the way the dough stretched – it looks like you can see the chains of gluten! Let’s see a close-up or six…


Food Blog Photo Fridays 2014-3506 Food Blog Photo Fridays 2014-3507 How about from a new angle?  Food Blog Photo Fridays 2014-3509Food Blog Photo Fridays 2014-3508 Food Blog Photo Fridays 2014-3510Burnished and bronze and eggy and tender… it’s almost enough to make me run back to the kitchen and make another one. You?

Here’s a recipe, just in case.

Strawberry Irish Soda Bread for #TwelveLoaves March

Though I am reasonably certain I have some Irish blood somewhere in my Northern European mongrel veins, the luck of the Irish has never been particularly strong for me. I didn’t end up at the schools I’d crossed my fingers for, my job, while great, wasn’t my initial choice, and my thumbs are, at the best of times, a sickly pea soup color, not truly green. The bare, arid stalks of mandevilla I need to dig out of that pot on my porch speak wonders. I’m not destitute, and I’m far from unfortunate. Yes, things work out, but they mostly work out through just that: work.

Food Blog March 2014-3476This week was no exception. Bound and determined to make something spectacular, I embarked on this month’s Twelve Loaves challenge with plans to produce a tray of flaky, delicate biscuits, tangy with goat cheese and loaded with strawberries, folded and rolled and folded and rolled in the Ruhlman method to produce at least a dozen fluffy, puffy layers. I was going to call them “puff biscuits.” I’d already started writing a post.

Food Blog March 2014-3359But demanding that a full pint of strawberries get jammed into a biscuit dough containing a mere 9 ounces of flour (a scant two cups, if you’re counting) is apparently a recipe for disaster. The berries, juicy and tart, immediately dampened the dough. Every time I chilled, then folded, then rolled the dough, more juice, more moisture, more sticky sodden mess. And when I baked them, even after correcting my mistake of setting the oven temperature too low, they just didn’t rise. I mean, they rose a little, pushing up a half inch or so, but it wasn’t the sky-high triumph I was looking for. No puff. Maybe “button biscuits” would be more appropriate. An investment of over three hours produced a bowl full of terrifically flavored, flat-as-a-pancake discs I deemed, with dough packed under my fingernails and flour streaked in my hair (it was an emotional moment), a complete waste of time.

Food Blog March 2014-3451Except that they were delicious. It took me the rest of the evening, and part of this morning, to decide what had happened, and whether to post about it. In the long run, as I’ve noted, though I want this blog to be about delicious and beautiful food, I also want it to be about learning. In sampling piece after piece (of biscuit after biscuit – honesty is important, people), I was reminded of several puff pastry tarts I’ve made that didn’t cooperate either, and my conclusion is that this is a weight problem. Strawberries, even cut into small pieces, are heavy. Leaking juice and packing the dough, they prevented any kind of substantial rise from taking place, even though, as their flaky surroundings indicated, the baking powder and chunks of butter were doing their work. Additionally, the excessive smears of goat cheese I layered in probably didn’t help matters, overwhelming the dry ingredients with more fat than they could handle. Button-busting biscuits, perhaps.

Food Blog March 2014-3449 Food Blog March 2014-3454 Food Blog March 2014-3456Food Blog March 2014-3460So today, I’m trying my luck in another application that embraces both the strawberry theme and the cultural occasion: Irish soda bread, studded with strawberries, perked up with the added interest of lemon zest and fresh thyme leaves. It’s lousy with springtime.

Food Blog March 2014-3464This soda bread cooks in a pot, rather than on a cookie sheet, a technique I learned a year ago and haven’t gone back on since. Baking in a lidded pot retains the kind of moisture bread likes – the kind that commercial ovens pump in that home cooks have trouble emulating. The final few minutes of baking with the lid off sets a crisp crust, but the dribble of melted butter you brush over the loaf when it emerges from the oven ensures that this crust is tender and flavorful.

Food Blog March 2014-3465When baked like this, strawberries become at once sweeter and tarter (really? tarter? I’d prefer “more tart” but my grammar checker admonished me). Their tartness is enhanced by the lemon zest perfuming this loaf, and the herby note of the thyme makes sure it is not too sweet.

Food Blog March 2014-3467This in-betweennness is, I think, what I like so much about Irish soda bread. It feels eggy and rich, but in fact it has no eggs and only a few tablespoons of butter to it. It feels like a breakfast bread you could spread with jam or honey, but it could just as easily sit beside a thick beef stew (well, maybe minus the strawberries). And you could probably administer a few globs of chocolate hazelnut spread to its tender and willing embrace with no complaints.

Food Blog March 2014-3468In any case, the important thing is that it worked, and it was zingy and springy and delicious. Depending on the juiciness of your strawberries, this loaf may look slightly underdone when you pull it out of the oven. Give it an extra ten minutes, if you must, but once it is between 180-200F it should be fully cooked. The berries may create some doughy-looking pockets here and there, but this is nothing that a quick slick of butter and a toast under a broiler or toaster oven won’t fix.

Food Blog March 2014-3480

Strawberry Irish Soda Bread
Makes one 8-9 inch loaf
3 cups all-purpose flour
1 cup cake flour
2 tablespoons brown sugar
1 ½ teaspoons baking soda
1 ½ teaspoons cream of tartar
1 teaspoon salt
2 teaspoons fresh thyme leaves
Zest from 1 lemon (about 1 tablespoon)
5 tablespoons butter, divided
1 ½ cups buttermilk
1 pint strawberries, roughly chopped
1-2 teaspoons raw sugar, optional


  • Position a rack in the top third of your oven and preheat to 400F.
  • In a large bowl, whisk the dry ingredients, including the sugar, lemon zest, and thyme leaves.
  • Using a pastry blender, a fork, or your fingers, cut in or rub in 2 tablespoons of the butter until it is evenly dispersed in pebbly little bits through the flours.
  • Add the buttermilk and bring the dough together with a fork. It should be damp but a bit crumbly. When there is almost no dry flour remaining, add the strawberries and combine gently.
  • Dump out your dough onto a floured board and knead gently, pressing the dough together into a ball with the heels of your hands. We are looking just to bring this together into a rough, sticky ball, not to knead it firmly. Think of scones, not of yeasted bread dough.
  • Once you are able to form the dough into a ball of about 6 inches in diameter, score the top with a very sharp knife – an x shape is most traditional.
  • Using 2 of the remaining tablespoons of butter, grease the inside of a dutch oven or similar large, oven-safe, lidded pot.
  • Carefully place the loaf in the pot, clamp on the lid, and bake in your preheated 400F oven for 30 minutes.
  • Remove the lid and bake an additional 10 minutes, until the loaf is golden and lightly crisp, and an oven thermometer registers between 180-200F. If it still looks doughy when you peer at the score marks, give it an additional 5-10 minutes in the oven with the lid off. Meanwhile, melt the remaining tablespoon of butter.
  • Immediately upon removing from the oven, brush with the melted butter and, if you wish, sprinkle with the 1-2 teaspoons of raw sugar for a sweet crunch.
  • Let cool in the pot for at least thirty minutes before removing to a wire rack or straight to a bread board for slicing.

Tropical Banana Bread for the Hawaiian Vacation we should all be on

Food Blog March 2014-3354As I type this, I am one week – count it! – one lousy week from Spring Break. That doesn’t sound like much, but as I’m sure any of my students would agree if you asked them, in lived reality it is an eternity. On top of that, the sudden influx of warm weather draping itself all over Southern California this past weekend has enchanted misled my poor little vacation-focused brain into thinking the upcoming break might actually be the onset of summer break. It’s going to be so disappointed.

Food Blog March 2014-3327Because I’m foolishly thinking of summer, it’s finding its way into my cooking. N. and I have promised ourselves a Hawaiian vacation this year, in celebration of various job and life related things, and so I’m feeling a bit tropical in some of my undertakings.

Food Blog March 2014-3330In light of my recent declaration that what I do here inelegantly boils down to messing with classics, I’m bringing you banana bread. Now, my banana bread recipe – the one I’ve used so many times the page in the cookbook is torn and spattered and hard to read – is pretty sacred. I’ve been using it since high school, and it produces a loaf that is thick and moist and golden and just barely crusty on top, and when N. heard that I was going to change it, I am fairly certain he let out a legitimate whimper. Apparently there are some things you just don’t mess with.

Food Blog March 2014-3326But I did it anyway, jamming the moist, fragrant batter with indecent quantities of chopped candied pineapple and crystallized ginger.

To make it even more of a celebration, I finally decided to replace the old, mismatched, stained and eternally sticky-handled (they aren’t dirty, the stickiness just doesn’t wash off anymore) glass bread pans I bought from a thrift store while I was in college with actual 9×5 inch standard loaf pans. Non-stick, too. What a luxury! Unfortunately, the stickers advertising how amazing these pans are had been adhered to the insides with gigantic globs of something that can only be described as superglue derived from elephant snot. When not even liberal doses of rubbing alcohol failed to remove all of the adhesive, I got so angry I actually started hiccuping.

Food Blog March 2014-3335Good thing the resulting bread was so delicious. Truly, with all my recent quasi-failures, this one is a real triumph. It is moist, studded with fruit that softens over the long, low bake. These bits of fruit, especially the ones that sink to the bottom of the loaf, take on an appealing kind of gumminess, and some even attain a whisper of the kind of caramelization you’d find in the fruit of a tarte tatin. Sliced thick, it is rich but not too sweet, making it a perfect companion for morning coffee or mid-afternoon chai (the basic boxed mix combined with vanilla coconut milk is my current favorite, and all the more appropriate for the whole Hawaiian vacation thing). It’s the kind of bread you want to eat barefoot, lightly clothed, on a lanai looking out over the ocean, perhaps after you’ve just enjoyed some –ahem– morning activities that left you wanting a snack. The pineapple and ginger mingle well with the already slightly tropical feel of the banana, and the ginger adds a welcome warmth without being spicy (I used a lot, and the flavor is quite pronounced – see my quantity suggestion below if you are unsure about this).

Food Blog March 2014-3333We should all be on a Hawaiian vacation. We probably all deserve one. But if it’s not possible for you, and if you are still in a part of the country that refuses to let Spring over the threshold, may I humbly recommend this bread? At least your taste buds can hop a quick flight… Food Blog March 2014-3338

Tropical Banana Bread
Makes one 9×5 inch loaf
Adapted from Country Cooking
3 medium overripe bananas
½ cup vegetable or other neutral tasting oil
2 eggs
¼ cup + 1 tablespoon buttermilk (if you don’t have buttermilk, use ¼ cup regular milk + 1 tablespoon white vinegar, stir to combine, and let sit for 2-3 minutes)
1 teaspoon vanilla
1 ¾ cups flour
1 cup sugar
1 teaspoon baking soda
½ teaspoon salt
1 cup roughly chopped candied or crystallized pineapple
½ cup finely chopped crystallized ginger (this results in a strong ginger flavor. If you aren’t sure about this or you’re not overly fond of ginger, reduce to ¼ cup)


  • Preheat the oven to 325F and prepare a 9×5 inch loaf pan. I usually just coat the bottom and sides with non-stick spray, but this time I lined the inside with parchment paper to protect against any lingering elephant snot glue (see above).
  • In a large bowl, or the bowl of your stand mixer, mash the bananas into a pulpy mess. Add the oil, the eggs, the buttermilk, and the vanilla and combine thoroughly.
  • Add the sugar and mix well.
  • Add the flour, baking soda, and salt, and mix just until combined. Be sure to scrape the bottom – sometimes streaks of flour wind up hiding out down there.
  • Add the pieces of pineapple and ginger and combine thoroughly; you want even distribution of the fruit through the batter.
  • Carefully pour and scrape the batter into your prepared loaf pan. Beware: if your pan is smaller than 9×5 inches, you may want to make a few muffins as well, or at least place a cookie sheet under the pan in the oven in case of overflow.
  • Bake at 325F for 80-90 minutes, or until a tester comes out with just a few moist crumbs clinging to it. Check at 80 minutes, but don’t be surprised if it is still a bit raw in the middle. This is quite a large loaf, and depending on the size of your bananas it may take even longer than 90 minutes to bake.
  • Let cool completely (or at least twenty minutes) before removing from the pan and slicing.
  • Keeps wrapped well in foil for at least three days, but I doubt you’ll have that problem.

Chocolate Cherry Bread for #TwelveLoaves February

Food Blog February 2014-3250It’s a good thing I acknowledged and made fragile peace with my own status as an imperfect individual last week, because this week’s cookery was a series of thinly veiled almost-disasters, The sauce mornay I tested for February’s sauce entry was too thin (fix: more cheese!). The battery on my camera pooped out on me just as I was photographing the assembled components for the dish I was testing to go with the mornay (perhaps not a terrible thing after all: see above). I made hummus from scratch using Yotam Ottolenghi’s recipe (it was phenomenal) to add to another Ottolenghi recipe: a “mumbo-jumbo,” as he calls it, of fresh crisp salad, hard boiled eggs, and fried eggplant atop a warm toasty pita. The eggplant was brown and soft through the center. Not my fault, true, but still discouraging. It’s a week that has left me feeling more attracted to the idea of eating cheese and crackers for dinner than storming into the kitchen to whip up a grapefruit glaze for some unknowing salmon filets.

Food Blog February 2014-3225Even this recipe I’m about to share left me feeling challenged. To comply with this month’s entirely apropos Twelve Loaves theme of chocolate, I decided I wanted to make a chocolate cherry bread – a rich, moist loaf studded with halved juicy gems and redolent of cocoa, as I’d tried once at a Farmers’ Market in Eugene, Oregon. In text-chatting with my mom, I discovered she’d just made a marvelous chocolate rye bread that sounded like the perfect starting recipe for my February loaf.

Food Blog February 2014-3234Food Blog February 2014-3236Food Blog February 2014-3238Food Blog February 2014-3239Food Blog February 2014-3240Food Blog February 2014-3241Except.

I was out of rye flour.

The cherries I bought were less than spectacular (it’s not the season, I know. When will I learn?!).

Food Blog February 2014-3244I didn’t let the loaf rise long enough, or bake long enough, ending up with something a bit doughy in the center and dense (but moist!) besides. Oh, and it’s pretty funny-shaped, isn’t it? I know. And to add insult to injury, I couldn’t even get it together enough to post at my regular morning time.

Food Blog February 2014-3247And yet ten minutes after I’d finished eating my first piece, I found myself back in the kitchen slicing another. And when I got home from a warm, dusty walk with Lucy yesterday morning along a trail that runs just below the grounds of Loyola Marymount University (where other dog owners don’t understand what “all dogs must be leashed” means, apparently), all I wanted was a piece of this bread, toasted, slicked with a layer of cream cheese. And now, I’m thinking it probably won’t spoil my dinner if I saw off a thick slice…

Food Blog February 2014-3254This is not a sweet bread. It is bright with cherries and moist, but barely sweetened with a mere ¼ cup of molasses for that dark, treacle roastiness. The cocoa powder makes it a deep, dark brown and offers a strong flavor, but it doesn’t taste like dark chocolate (somewhat unfairly, I think, since it smells like nothing else!) because it isn’t highly sweetened.

It is, in fact, a good bread for February. It is hearty without being too filling or too rich. It’s a good vehicle for something creamy, to satisfy your need for comfort. It has a perky little reminder of springtime buried inside in little mines of sweetness. If you’re not a fan of the admitted heaviness of the whole wheat flour I’ve used here, you could use more (or even all) bread flour instead. If you don’t like cherries, I suppose you could use blueberries or cranberries or even strawberries, but I do think there is something special about the chocolate and cherry combination that I wouldn’t want to replace.

Food Blog February 2014-3255I think it only fair to tell you that am going to revisit this bread, because I think it deserves some fiddling. I am going to gift it with better cherries. I will try a higher ratio of bread flour to whole wheat, and maybe add some of that rye flour I was missing back in. I might up the sweetness quotient with additional molasses. But in any case, give it a swing through your kitchen and see what you think. Because there’s nothing wrong, when it comes to chocolate, with a little experimentation.


Chocolate Cherry Bread
Makes 1 medium round loaf
2 teaspoons active dry yeast
1 teaspoon sugar (optional)
1 cup warm water (just barely above body temperature)
2 cups whole wheat flour (makes a noticeably whole wheat-y loaf)
1 cup bread flour (exchange whole wheat flour and bread flour quantities for a slightly lighter loaf)
¼ cup unsweetened cocoa powder
1 ½ teaspoons salt
¼ cup molasses
1 tablespoon soft butter
1 cup halved, pitted cherries
  • Combine the yeast, warm water, and the teaspoon of sugar in a small bowl or a glass measuring cup and set aside for 5-10 minutes to activate. The sugar is not completely necessary, but it does help the yeast get to bubbling a bit faster.
  • While the yeast wakes up in its spa, whisk the flours with the cocoa powder and the salt in a large bowl (or the bowl of your stand mixer) to create a lovely, rich brown dust.
  • When the yeast is bubbling and frothy and smells like bread, add the molasses and the softened butter and stir together before tipping into the dry mixture.
  • If you are using a stand mixer, insert the paddle attachment and mix for a minute or two just until the dough comes together. If you don’t have a stand mixer, use a wooden spoon and some elbow grease to do the same.
  • Once the dough clings together in a shaggy ball, swap out the paddle attachment for the dough hook (or turn the dough out onto a floured board and use your hands). Knead for 6-8 minutes, until the dough becomes shiny and smooth.
  • Set your dough aside in an oiled bowl, covered with plastic wrap, to rise until doubled. Depending on your flour combinations, your yeast, and the temperature of your house, this could take anywhere from 45-90 minutes.
  • When the dough has puffed to double its previous size, punch it down by gently depressing your fist into its center to release collected gases. Let it rest to regain its breath for 5-10 minutes.
  • While your dough gasps, halve and pit the cherries, then lightly flour a bread board to prepare for rolling.
  • Dump your dough out onto a floured board and roll or pat it into roughly a 9×12 inch rectangle or oval. Spread the cherries in an even layer on top of the dough, then either roll or fold the dough up around the cherries. I folded it, as you can see in the photos above. Once the cherries are folded in, gently knead the dough for a few turns to distribute the fruit through it.
  • Shape the dough into a round (or stow it in a greased loaf pan) and let it rise again, covered with plastic wrap, for 1 hour.
  • During the last 30 minutes of rising, preheat your oven to 375F. If you will be baking your bread on a pizza stone, bread stone, or cast iron pan, preheat that along with the oven.
  • When the oven is preheated and the dough has risen again, gently relocate it to whatever baking surface you’ll be using (i.e. a bread stone or a baking tray). Bake for 30-35 minutes, or until the bottom feels hollow when thumped.
  • Cool at least ten minutes before slicing, to let the structure solidify a bit and be sure the center is cooked through. Then by all means, slice and eat warm, with or without a good healthy smear of cream cheese.

Savory Greek “cheesecake” dip

Food Blog December 2013-2977Ricotta cheese and I have a strange (strained?) relationship. I want to love it. Dishes in which it features – lasagna, calzone, a certain breed of cheesecake – sound to me decadent and worthy. But when I do eat it, I feel torn. It’s a texture thing, isn’t it? It has this graininess – a kind of luscious roughness that doesn’t feel quite right. I want it to make up its mind. Either be feta, all craggy and crumbling and tang, or be mascarpone, relentlessly silken. But ricotta is neither. It resists singularity. It hovers in the middle there, taunting me with its bothness.

Food Blog December 2013-2967Just before our annual in-laws holiday shuffle, I needed to use up some of our perishables, and there was half a container of ricotta, lonely and renounced in the back corner of the fridge. With lemons coming in on my backyard tree, I suddenly thought of a feta dip flavored with lemon zest and oregano and garlic that I’ve made dozens of times, and wondered how it would fare with this creamy cousin as its star player. I’d also been itching to try baked ricotta, after hearing that it transforms in the oven into something airy and rich. With a block of cream cheese also wailing its abandonment and crackers to use up before the trip at the end of the week, hey presto, my lunch menu was suddenly all about a savory Greek inspired dip.

Food Blog December 2013-2972Unlike a standard baked ricotta, I didn’t add any eggs here. This omission, plus the addition of cream cheese, kept the dip quite thin – not the quasi-souffle texture you might be expecting. Were I to make this again, I might add an egg or two just to puff it up a bit more. If you try it that way, let me know how it turns out.

Food Blog December 2013-2973Thanks to these changes, what you’re getting here is essentially melted creaminess that, at least when it’s hot, won’t even need spreading, covered by a layer of golden-brown bubbles that are easily pierced with the persistent corner of a cracker. It’s soft, it’s hot, it’s herby and spicy and perversely fresh, thanks to the lemon zest, and while I had it with crackers, it could be easily compelled to drape itself over sticks of fresh vegetables or bread. Pita chips, too, would be particularly nice. I’d be clever and current and say it would make a superb addition to a Superbowl game day spread, but I’ve narrowly missed that opportunity which, for me, seems somehow fitting. Instead, bake yourself a batch of this to fend off the post-holiday cold of the next month or two, when winter always seems the longest. Food Blog December 2013-2975

Savory Greek “cheesecake”dip
Makes a generous 1 cup
4 ounces ricotta cheese, at room temperature
4 ounces cream cheese, at room temperature
2 cloves garlic, finely minced
Zest of one lemon
¼ teaspoon dried oregano, or ½ teaspoon fresh, finely chopped
3 pepperoncinis, finely minced
Salt to taste (start with ¼ teaspoon)


  • Preheat the oven to 400F and spray or oil a 16 ounce (2 cup) oven-safe dish. I used the smallest soldier in my Corningware collection.
  • In a small bowl, mix the cheeses thoroughly until they are quite smooth. Lumps are the enemy here, as they signal incomplete incorporation.
  • Add the remaining ingredients, mixing well to combine evenly. Taste for salt and add more if needed.
  • Using a rubber spatula, scrape into your prepared dish, smoothly the top a bit for even browning.
  • Bake for 25-30 minutes, or until the top is burbling and oil is sizzling around the edges.
  • If you want more browning, carefully place it under the broiler for a few minutes to let some of the bubbles turn deeply golden and barely crusty.
  • Remove from the oven and let sit for 5 minutes or so, just until it is cool enough to eat without scorching your throat. Serve with chips, thin slices of toast, crackers, or a crudités platter.