The Rachel: lamb sausage and spinach pesto pizza

2016 Food Blog June-0945A few weeks ago, N. opened the fridge, snooped through the shelves, looked at me. “What’s for pizza? Wait. I mean, what’s for dinner?” Sometimes you don’t have to ask them what they’re craving.

2016 Food Blog June-0915Clearly, the following week I made pizza. We each have a favorite variety – though lately my favorite is becoming N’s favorite as well – and we’ve lent our names to them; whenever I write “The Chelsea” on the weekly meal plan, N. gets quite excited. This got me thinking about what toppings would constitute other members of my family. “The Dad” would certainly have red pepper flakes in some quantity, and my mom informed me on Sunday that hers would have plenty of vegetables.

2016 Food Blog June-0917But I decided to go first with my sister, and that meant lamb. I’m not sure whether it outweighs her affection for seafood, but lamb is certainly her red meat of choice. She stalks the meat counter to find it on sale; she buys the toughest cuts (often the cheapest) and grinds them up herself to make lamb burgers; she manufactures ways to integrate it into even traditionally vegetarian dishes. R’s pizza, then, would feature lamb sausage.

2016 Food Blog June-0918Once lamb sausage was on the menu, and some crumblings of feta had joined it in my imagination, I realized there was no way of avoiding a very Mediterranean flavor profile. Neither R. nor I are particularly interested in tomato-based sauces for pizza – “The Chelsea” has only a brush of garlic infused olive oil over its surface – so there would need to be an alternative. I gravitated toward pesto, and despite R’s declaration that she is “devoted to basil,” she’s also a rather non-traditional person in an interesting and glorious way. Given that, a pesto on her pizza couldn’t very well be the standard, and since this pizza was already leaning in such a Greek direction, I had to reach for the spinach, and added some parsley, some sundried tomatoes, some lemon zest, in addition to the standard garlic and pine nuts.

2016 Food Blog June-0925Considering other personality features, I decided to add some heat. R. is a spicy person: she’s quick, she’s feisty, she’s fun; she speaks her mind. Thinly sliced pepperoncini joined my collection of toppings, though some near-transparent wafers of jalapeno would also do the job.

2016 Food Blog June-0933When you construct “The Rachel,” you have some choices, and those choices depend on how much char you like on various ingredients. Obviously the pesto goes on first, in a generous layer. If you want your peppers and green onions to stay soft, they should be next, so they can hide out under the protective coating of mozzarella. If you prefer a bit of color on these greens, let them ride out the quarter hour in the oven right on top. I like to put the sausage underneath the mozzarella; since it’s already cooked, the cheese bubbling over it seems to prevent the meat from drying out.

2016 Food Blog June-0936
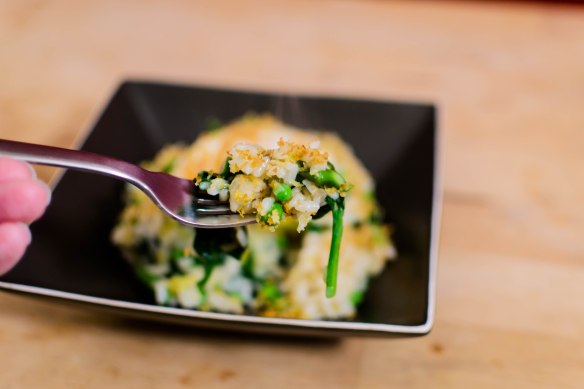
Blistering hot from the oven, this was glorious. The lamb sausage I used was a merguez, which carries some heat of its own, so between that and the pepper slices the pizza was perfectly spicy. The spinach pesto is a solid base – not too aggressive in flavor on its own, just pleasant support for the well-spiced lamb and the briny feta. But interestingly (delightfully), the pizza came into its own as leftovers. When I unwrapped the remaining slices today in my office, door closed and light off as though I were getting away with something, the pizza had been out of the refrigerator long enough to come to room temperature, and though the cheese was no longer stretching into long strings and the crust had lost a bit of crispness, the flavors had come together so compellingly that I’d suggest doing one bit of advance planning: if you can, make the pesto a day in advance. Then, when you spread it thickly over the crust, it will already have had a day to slow dance in your refrigerator.

2016 Food Blog June-0943

The Rachel: lamb sausage and spinach pesto pizza
Makes one 12-14 inch pizza
16 ounces pizza dough of your choice
8 ounces lamb sausage (I used a nice, spicy merguez)
2 tablespoons pine nuts
3 cloves garlic
zest of one lemon
¼ cup oil-packed sundried tomatoes, drained
6 green onions
6 ounces baby spinach leaves
½ cup parsley leaves and stems
2 teaspoons lemon juice
1-3 tablespoons olive oil
salt and pepper to taste
8-12 ounces whole milk mozzarella cheese, grated
3 ounces crumbled feta cheese
3-4 pepperoncini or other pickled peppers
*Note: if possible, I recommend making your pesto a day ahead so the flavors have time to meld. Otherwise, proceed as below.


  • About 45 minutes before you are ready to cook the pizza, preheat your oven to 500F, or as high as it will go. If you are using a pizza stone (highly recommended), be sure to put it in the oven at this point to preheat as well. If your pizza dough is refrigerated or needs time to rise and relax, this is a good time to set it out as well.
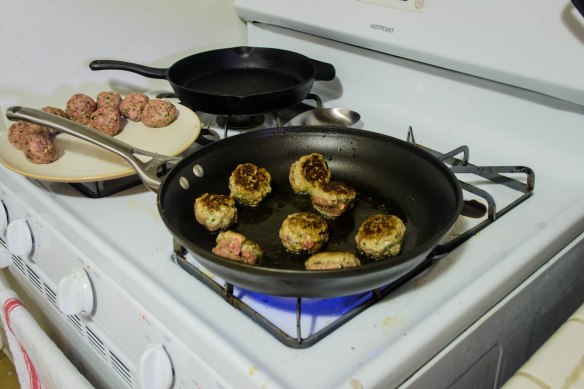
  • Cook the lamb sausage in a medium skillet over medium heat. Use the flat edge of a wooden spatula to coerce the lamb into small pieces. Stir and flip frequently until cooked through and lightly browned, then set aside to cool.
  • For the pesto, add the pine nuts and garlic to a food processor along with the sundried tomatoes, lemon zest, and the white and light green portions of the green onions, reserving the green stalks until later. Process for 4-5 seconds to break down the big chunks of vegetables. Pack in the spinach and parsley and process again, agitating the machine a bit to try and coax the leaves down into the blade. When it is simply not making any progress, add the lemon juice and 1 tablespoon of the olive oil with the machine running. If that’s not enough liquid, add the remaining tablespoons of olive oil one at a time, pausing between each. You are looking for a very thick, paste-like “sauce” – the less moisture we add to the top of the pizza, the better. If things still aren’t coming together after all 3 tablespoons of oil, add a splash of water, but try to keep this to an absolute minimum.
  • Once the pesto is a thick but spreadable texture, taste and season with salt and pepper accordingly. I suggest under-seasoning a bit with the salt, since the feta cheese is quite salty.
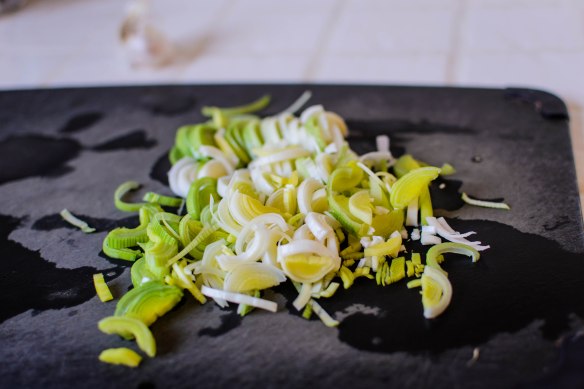
  • Slice the greens of the green onions and the pepperoncinis into thin slices.
  • To assemble your pizza, stretch out the dough to your desired size (I put it carefully right onto the hot pizza stone), then spread generously with the spinach and parsley pesto. Add the remaining ingredients above or below the mozzarella cheese depending upon how browned you want them to get. I suggest lamb sausage underneath, to keep it moist, then the two types of cheese, then green onion and pepperoncini slices.
  • Carefully maneuver the loaded pizza back into the roaring hot oven, and bake for 15 minutes until the crust is crisp and the cheese is nicely studded with golden blisters. Remove from oven and let sit 4-5 minutes. Then sprinkle with additional parsley leaves if desired, slice, and serve.

Grilled Zucchini and Corn Salad

2016 Food Blog June-0899As you can no doubt discern from the dead giveaway of two grilled corn dishes in three weeks, I’m itching for summer. Southern California has dipped into its customary “June gloom,” a period of several weeks that I adore, because the marine layer keeps my morning cool enough for a comfortable dog walk, for a bit of gardening, sometimes even for a (gasp) sweater while I sip a cup of tea. And this would, under normal circumstances, be a satisfying start to summer.

2016 Food Blog June-0877But for the first time in a few years, I’m teaching a summer course. It only lasts six weeks, and so far they are engaged and have made me think new things about some of the stories we’ve read – always a wonderful thing for an English professor. Yet still, upon arriving home this past Thursday afternoon, the end of my initial week with the class, I realized I had to go back on Monday, when all I wanted was grilled food and maybe a beer on the back porch, and certainly not to craft a lecture on Frankenstein.

2016 Food Blog June-0884Since only two of these desires can be realized (Frankenstein must be attended to, whether I want to or not), I decided the grilled food should be as summery as possible. Some weeks ago I attempted a warm vegetable salad like this: corn and zucchini sautéed at high temperature and then doused with a sharp shower of lime, but the vegetables were disappointingly wilted. What they needed for the dish I’d envisioned was the grill.

2016 Food Blog June-08892016 Food Blog June-0890If you haven’t already investigated the trio that is corn, zucchini, and lime, I suggest you do so immediately. Zucchini is such a mild, grassy, vegetal taste, so a hit of acid wakes it up and makes it interesting again. It plays well with corn, which carries its own grassiness along with the starchy sweetness that we so prize. Both benefit tremendously from the savory char of a grill – that taste of fire we seem to cling to particularly as the weather warms outside. Michael Pollan has speculated that there’s something about the process of cooking – of submitting food to heat and to flame – that truly awakens our humanness. Grilling – that barely tamed version of fire as a cooking medium – is perfect for summer dishes, then, because it echoes the looser, easier, perhaps even more primal feel of the season. Besides, aside from, I don’t know, cheesecake or ice cream, I can think of few foods that don’t become better when cooked on an oiled grate over a bright flame.

2016 Food Blog June-0887But in case you aren’t in love already with the summery ease and boost of flavor the grill imparts, dousing the still-warm veg in a dressing of lime, honey, and cilantro makes a sprightly side dish that needs only the crunch of toasted pumpkin seeds and the squeaky saltiness of crumbled cotija to complete it.

2016 Food Blog June-0892Because he’s nursing the same summer bug I am, N. wanted steak, so in addition to the vegetables he grilled a piece of sirloin flap.* As I played with presentation ideas, I realized the now-flexible planks of zucchini with their glorious char marks could be artfully arranged on a long platter, and the steak could be sliced thinly across the grain and draped over top, and I could have something that looked, well, like it came from somewhere a bit fancier than my backyard.

2016 Food Blog June-0903By the same token, though, the salad could simply be piled high on a plate, dusted with cheese and pumpkin seeds, and served alongside anything grilled, or perhaps spiced potatoes, or even wedged inside a tortilla as a quite respectable base for a vegetable taco.

2016 Food Blog June-0910* You should make this, too. I didn’t document it with any kind of precision, but I marinated the steak overnight in some dark beer, crushed garlic and coriander, and a bit of red pepper flake, then N grilled it for something like 3 minutes per side over the cooler side of the grill (ours has some hot spots), and rested it wrapped in aluminum foil for about five minutes to produce an incredibly tender, flavorful main course.


Grilled Zucchini and Corn Salad with Lime Vinaigrette
Serves 2-4 as a side dish
3 ears corn on the cob, husk and silk removed
4 medium zucchini, stem and flower ends removed
6 tablespoons olive oil, divided
1 teaspoon salt, divided
½ teaspoon pepper, divided
¼ cup pumpkin seeds
¼ cup lime juice from 1-2 limes
1 tablespoon honey
¼ cup chopped cilantro
¼ cup crumbled cotija cheese


  • Preheat a gas grill or a grill pan to high heat. While it warms, rub the corn with 2 tablespoons olive oil, ½ teaspoon salt, and ¼ teaspoon pepper. Grill the ears of corn over direct high heat for about 8 minutes, turning every minute or two, until the kernels are cooked and all sides are lightly charred. Remove and set aside until cool enough to handle.
  • While the corn cooks, prepare the zucchini: slice from stem to flower end into ¼ inch planks. In a large bowl, toss with remaining 4 tablespoons olive oil, ½ teaspoon salt, and ¼ teaspoon pepper. Lay out on grates or pan, being careful to keep them in a single layer, reserving any leftover oil in the bowl. Grill until cooked through and nicely marked, 2-3 minutes per side. Remove and set aside.
  • While vegetables are grilling, toast pumpkin seeds and mix dressing. Scatter pumpkin seeds in a small baking tray and cook in a 300F oven for 10-15 minutes. Seeds will take about 10 minutes if the oven is preheated, and more like 15 minutes if you forgot that whole preheating part. When they are browned and starting to crackle, take them out and set them aside.
  • To make the dressing, combine the lime juice, honey, and chopped cilantro in the bowl with the reserved olive oil from tossing the zucchini. Whisk well to combine.
  • When the corn is cool enough to handle, cut off the kernels by standing up the cob on your cutting board (you can use the stem to hold onto, if you’ve left it attached) and carefully cutting straight down the ear with a sharp knife, sawing the blade back and forth a bit to help loosen the kernels. When you get to the bottom of the ear, rotate the cob a half turn or so and cut again, repeating until you have removed all kernels. Some will be individual and some will come off in big chunks; that’s okay. The variety is nice.
  • Add the corn kernels and the grilled zucchini planks to the bowl with the dressing and toss to combine. To serve, either keep the vegetables in the bowl and offer the pumpkin seeds and cotija cheese for individual diners to add to their own portions, or arrange the vegetables on a square or long rectangular platter and sprinkle the seeds and cheese over the top.

Save

Apricot Goat Cheese Biscuits

2016 Food Blog May-0756One of my first big Sandra Lee-type triumphs in the kitchen was with biscuits. At the time, I was using Bisquick, and after a number of successful productions, I decided there was no reason I shouldn’t make the fluffy little drop biscuits more interesting by adding herbs, or green onions, or cheese, and then that my creations would probably be better with buttermilk rather than skim milk, and then at some point, with contributions from Mark Bittman and Michael Ruhlman, the Bisquick box disappeared altogether and the biscuits got fluffier, and higher, and packed densely with all kinds of interesting additions.

2016 Food Blog May-07262016 Food Blog May-0728There are probably enough biscuit recipes on this site – adding another seems superfluous. But they are so tasty, and so comforting, and so simple, and they accept additions that drive them into the realms of sweet or savory so well, that they keep popping up on my list of food ideas. This time, with half a bag of dried apricots in my pantry and a partial log of goat cheese in my fridge, there were no excuses for a special weekend breakfast.

2016 Food Blog May-07332016 Food Blog May-07362016 Food Blog May-07382016 Food Blog May-0743Biscuits are a comforting baked item because they are easy. No yeast, so no long rise times or careful shaping or temperature concerns. No special flours or long ingredient list, and you don’t even have to have actual buttermilk to make buttermilk biscuits; you can just add a tablespoon of vinegar or lemon juice to regular milk, stir it up, and let it sit for two minutes, and you suddenly have perfectly serviceable “buttermilk” to work with. Mine are complicated just a tiny bit by a lazy-person’s adaptation of Michael Ruhlman’s method for lots of moist, fluffy layers, much like those beautifully sodden pillows from the can that you have to rap on the edge of the counter – you know what I mean – but this only entails a few extra folds and rolls of the dough before punching or cutting out your biscuit shapes.

2016 Food Blog May-07482016 Food Blog May-07532016 Food Blog May-0750Most magical of all, biscuits survive freezing spectacularly. Once mixed and rolled and cut, you can stow them in the freezer overnight, which means hot, fresh, flaky biscuits for breakfast can be yours in just over twenty labor-free minutes – time easily used to start the coffee, or find your slippers, or get some Lou Reed going to groove breakfast to.

2016 Food Blog May-0761

Apricot and Goat Cheese Biscuits
Makes 10-12 biscuits (2-3 inch diameter)
2 cups all-purpose flour
1 teaspoon salt
1 tablespoon raw sugar (I use turbinado)
2 tablespoons baking powder
¾ cup chopped dried apricots (chop to your desired size – I like a mix of rough and fine)
6 tablespoons cold butter, cut into chunks
½ cup crumbled goat cheese
6 ounces cold buttermilk (or faux buttermilk: stir one tablespoon white vinegar or lemon juice into the milk and let it sit for 2 minutes before using)


  • Line a baking tray with parchment paper. If you are cooking the biscuits immediately, preheat the oven to 400F. If you are cooking the biscuits the next day, clear some space in your freezer.
  • In a medium bowl, whisk together the flour, salt, sugar, baking powder, and dried apricots until well combined. Tumble in the butter and the goat cheese and, with a pastry blender, a fork, or two knives (I’ve never mastered this method, though), work in the chunks until well distributed in small pebbly bits throughout the mixture.
  • Now, pour in the buttermilk and, using a fork, turn and mix and work until a clumpy, wet dough forms. Dump this out onto a well-floured board and, with lightly floured hands, work it into a ball.
  • Use your hands or a floured rolling pin to flatten the dough ball you’ve formed into a rectangle or oval about 1 inch thick. Then, fold up the flattened shape into thirds, turn it 90 degrees, and flatten again. Repeat this process of folding, turning, and flattening twice more. When the biscuits bake, they will rise high with lots of fluffy layers.
  • With your folded and flattened dough back at about 1 inch thick, punch out biscuit rounds by pushing a biscuit cutter or the lip of a glass straight down through the dough. Don’t twist! Twisting disrupts all the layers you’ve just made and the biscuits won’t rise as high or as evenly.
  • When you have punched out all the biscuits you can, gather the dough back together into a ball, knead gently once or twice, and then flatten out again and punch remaining biscuits. You should be able to get 10-12 out of this amount, depending on the diameter of your cutting tool.
  • Space your punched-out biscuits at least half an inch apart on your prepared baking sheet. If you are baking immediately, place the loaded tray into your preheated oven and bake for 12-14 minutes, until the biscuits are just golden on top. If you are waiting, shove the tray straight into your freezer. The next morning (or whenever you need freshly baked biscuits), remove the tray from the freezer, preheat the oven to 400F, and bake for 18-20 minutes. There’s no need to defrost first – the extra time in the oven will do the job.
  • Either way, serve steaming. We like ours with butter and honey.

Spring Green Risotto with Poached Egg and Lemon Garlic Breadcrumbs

2016 Food Blog March-0614My warmest memory of risotto – and the one that probably says the most about me as a person and as the graduate student that I was – is one wintery evening in Oregon, when I was making risotto while preparing for class. This seems counterintuitive, I know. It is. One cannot truly invest in either the stirring required for risotto or the note-jotting, powerpoint slideshow constructing, or annotating usually needed for quality lesson prep. One can, however, position one’s hand just so to hold up and keep open a paperback book in one hand, while leaving the other hand free for a wooden spoon.

2016 Food Blog March-05952016 Food Blog March-0597The house was cold that night, and I was frantically reading Beowulf in preparation for a lecture the next day in a class for which I was a teaching assistant. Stir, read. Stir, read. Slow, random swipes through the pan, as I drowned myself in Beowulf’s deeds. I probably didn’t get much out of that reading session, but the combination is stuck: warm, creamy rice, and poor Beo fighting against demons of darkness, and of his own overweening.

2016 Food Blog March-06002016 Food Blog March-0602I’ve complained about risotto before, and it’s true that I often find it underwhelming. But when you combine its warm, melting heartiness against the brightness of spring vegetables, and when you declare that decadence befits a spring break that finally arrived – so you give yourself a week off from blogging because SPRING BREAK, people! – and then you layer on a poached egg and a shower of crispy crumbs shot through with garlic and lemon zest, you have a risotto that I’ll put down my book for.

2016 Food Blog March-0611This one features leeks – my favorite, and sadly so underrated, member of the onion family – as well as slim fingers of asparagus, barely wilted spinach leaves, and a rubble of peas stirred in at the last minute. There’s a generous shower of parmesan cheese at the end, and the egg yolk, still oozy but just thickened, forms its own rich, golden sauce for the risotto when you slide your fork down through it. Risotto isn’t difficult, but it is a bit co-dependent: it requires your presence in the kitchen throughout the process. Still, though, if you are organized and get all of your vegetables prepared while the broth is heating, you can have the whole thing done in less than an hour. What’s that? Two entries in a row with reasonable time spans? Happy spring, my friends.

2016 Food Blog March-0615

Spring Green Risotto with Poached Egg and Lemon Garlic Crumbs
Serves 6-8
30-45 minutes
6 cups low-sodium vegetable or chicken broth
4 tablespoons olive oil, divided
4 tablespoons butter, divided
2 large leeks, sliced into thin ribbons as described below
4 finely minced garlic cloves, divided
2 cups short or medium grain rice
½ cup dry white wine
1 teaspoon salt
½ teaspoon freshly ground pepper, black or white
2 1-2 inch sprigs fresh thyme
1 pound slender asparagus spears, woody ends snapped off, spears cut into two inch pieces
1 cup frozen peas
4 ounces baby spinach
1 cup grated parmesan cheese
6-8 eggs (as many as people you are serving)
1 teaspoon white vinegar, for poaching
1 cup panko breadcrumbs
zest from one lemon
salt to taste


  • In a medium pot, heat the broth while you prep the vegetables – by the time you are ready to add it to the risotto, it should be just below a simmer.
  • Heat 2 tablespoons of the olive oil and 2 tablespoons of the butter in a large, high-sided skillet over medium-low heat.
  • Cut off the root end and the dark green leaves of the leek. Slice the remaining log lengthwise, leaving two long rounded planks. Run these planks under running water, flipping through the layers with your thumbs, to release dirt. Then cut each plank in half lengthwise again, and slice horizontally across into thin ribbons.
  • Add the leeks and half of the finely minced garlic (so, the equivalent of 2 cloves) to the butter and olive oil in the skillet, and turn the heat up to medium. Cook, stirring occasionally, until leeks are very tender but have not browned much, 5-10 minutes. To keep them from caramelizing, you may need to turn the heat down a bit.
  • When the leeks are translucent and quite tender, turn the heat up to medium-high and add the rice. Stir constantly for 2-3 minutes until the rice grains have become opaque and smell toasty. Pour in the white wine and continue to stir constantly until it is almost all absorbed.
  • Once the wine is almost completely absorbed by the rice, add about a cup of the heated broth, the salt, the pepper, and the thyme sprigs, and stir to combine. Continue to cook over medium-high heat, stirring frequently, until the broth has been absorbed. The more you stir at this stage, the creamier the risotto will be, as what you’re doing is releasing starch from the rice grains into the liquid, which thickens and enriches the mixture.
  • As each cup of hot broth is absorbed into the rice mixture, add another, stirring frequently while it absorbs. Each addition will take a little longer to integrate.
  • In between stirring and adding, poach the eggs and make the breadcrumbs. For the eggs, heat water in a small pot until barely simmering. Add the 1 teaspoon white vinegar, then use a spoon to stir the water in the pot in a circle to create a tiny vortex. Quickly and carefully crack the egg into the vortex (or you can crack the egg into a small dish first, and pour/dump it into the pot), and use your spoon to encourage the swirling whites to cling to the central yolk as it spins in the water. After about two minutes in the barely simmering water, use a spoon or a rubber spatula to gently detach the egg from the bottom of the pot, if it is stuck. After about three minutes, use a slotted spoon to remove the egg carefully to a bowl of warm (not hot!) water, and let it sit until you are ready to serve. Repeat for all eggs.
  • To make the breadcrumbs, heat the remaining 2 tablespoons olive oil in a small pan over medium heat. When it is shimmering, add the panko and stir to coat evenly with the oil. Toast over medium heat for 3-5 minutes, or until the panko is crisp and golden brown. Quickly add the remaining minced garlic and the lemon zest, and stir assertively to combine – these new wet ingredients may clump up together. Cook for about 30 seconds with the garlic and lemon zest incorporated, then remove from the heat, salt to taste, and set aside until you are ready to serve.
  • As soon as you add the final dose of broth, add the asparagus pieces and stir well. When the broth is almost completely absorbed, add the peas, the spinach leaves, the remaining 2 tablespoons of butter, and the 1 cup of parmesan cheese. Stir to incorporate, and cook just until the peas are warmed through and the spinach has wilted but is still bright green.
  • To serve, spoon a mound of risotto into the center of a shallow bowl. Carefully set the poached egg on top, then sprinkle with a tablespoon or two of the breadcrumbs and serve immediately.

Classic Spaghetti and Meatballs

2015 Food Blog December-0665When I told my parents that my blog project for 2015 was meatballs, my dad immediately said “I know how you should start your first entry.” He recommended the children’s retelling of the old folk song “On Top of Old Smokey” which, rather than a lament about lost love, relates a warning tale about losing your meatball (all covered with cheese) as the result of a poorly timed sneeze. After rolling off the table and onto the floor, the poor meatball rolls out the door, into the garden, and collapses to mush under some shrubbery. Fear not, however! In the springtime, it grows into a tree, presumably studded with fresh, hot, cheesy meatballs.

2015 Food Blog December-0653Since my first entry was a.) already written and b.) decidedly middle eastern, Dad’s song suggestion didn’t seem to fit. It did make me reconsider, though, my initial proclamation against the classic meatballs usually crowning the spaghetti-and– combination. My objections were memories of uninspiring flavor and texture – the classic meatballs can be mealy and soft inside, and they are so drowned in red sauce their own flavors are rendered unapparent.

2015 Food Blog December-0646The decision to make the classic, then, required three challenges: the meatballs themselves had to be light, springy, tender, and flavorful – all of the techniques I’d been honing throughout the year would be put into application here – the pasta had to be perfectly cooked, and there would need to be sauce. The meatballs, as the feature, needed to have the right texture – I decided on milk-soaked breadcrumbs for tenderness, but not too many. Many classic Italian-American meatballs combine multiple types of meat – I chose pork and beef for a strong pairing of fat and flavor. Some meatballs also use ground veal, but I have ethical concerns about veal and so I choose not to purchase it. The pork, with its fattiness, and the beef with its lean flavor, would be perfect. Using pork as well as beef eliminated the need for an egg as a binder. Raw ground pork clings to itself and everything around it, so these meatballs hold together with no trouble.

2015 Food Blog December-0657Flavorings are, I think, the most important part of a meatball. Rather than a bland ball of, well, meat, I wanted these to be interesting in their own right. Parsley was a definite, and I decided I wanted some basil as well. Finely grated onion and garlic sweated down in a bit of olive oil would add flavor as well as moisture, to keep the meatballs from getting dry. Finally, there needed to be parmesan cheese. Ina Garten’s Italian Wedding Soup features baked chicken meatballs oozing with cheese, and the salty gooiness is so appealing; I knew I wanted to imitate it with mine.

2015 Food Blog December-06582015 Food Blog December-0659Meatballs managed, there was then the sauce to contend with. Tomato sauce and I have a long, fraught history. I never much cared for the sort that dripped out of jars, and during my teenage years it flat out upset my stomach. The idea of meatballs burbling away in that acidic, over-processed stuff was beyond unappealing. But I’ve started making my own tomato sauces in the last few years, and I’ve found that rather than tomato paste and sugar, garlic and red wine seem to be the key flavoring components for a satisfying pasta topper. For this one, I started with Smitten Kitchen’s incarnation of a three ingredient tomato sauce, but couldn’t deal with the probably stellar simplicity of it, and succumbed to adding red wine, garlic, basil, red pepper flakes, and – my ultimate pasta sauce weapon – a parmesan cheese rind (I keep them in the freezer when there’s no more cheese to grate from them) to the original trio of canned tomatoes, an onion, and butter.

2015 Food Blog December-06622015 Food Blog December-0663While it would be sacrilege to call this anything like the “best spaghetti and meatballs” (in today’s world, that title is probably copyrighted anyway), it was a very satisfying way to conclude the project.* The meatballs were flavorful and tender and held together well. The sauce was deeply savory but still fresh and light and strongly tomato-y. Crowned with some fresh herbs and a fluffy shower of grated parmesan, it was worth holding onto, and certainly nothing to sneeze at.

2015 Food Blog December-0668*Though I’ll be back next week with a few end-of-year reflections on the project in its entirety.

Classic Spaghetti and Meatballs
About 90 minutes
Serves 4-6
For meatballs:
scant 1½ cups fresh bread crumbs (1-2 slices)
1 cup milk, cream, or half and half
¼ cup olive oil, divided
⅓ cup grated onion (about ½ a large onion)
2 large or 3 small garlic cloves
½ pound ground beef
½ pound ground pork
2 tablespoons chopped fresh parsley
2 tablespoons chopped fresh basil
⅛ teaspoon pepper
½-¾ teaspoon salt
⅓ cup grated parmesan
For sauce:
½ cup dry red wine
28 ounces crushed tomatoes (I like the San Marzano brand)
3 tablespoons butter
½ a large, peeled onion
6 whole, peeled garlic cloves
3-4 inch hunk of parmesan rind, if you have one
2 stalks basil
salt and pepper to taste
1 pound hot cooked spaghetti
¼ cup chopped parsley
extra parmesan cheese, to serve


  • Use a food processor to make your bread crumbs, then add them to the milk in a two-cup glass measuring cup, and let them soak for 10-15 minutes.
  • Use the same food processor (you don’t even have to rinse it out) to process the onion and garlic – toss in the onion in a few pieces, and the whole garlic cloves, and pulse until almost paste – only very small, grated-looking bits will remain.
  • Heat 1 tablespoon of the olive oil in a large skillet over medium-low heat. Scrape in the onions and garlic, sprinkle very lightly with salt and pepper, and sweat until tender and translucent; 5-8 minutes. Turn off the heat and move to a glass bowl to cool slightly.
  • While the onions and garlic are cooking, use the food processor again to chop the herbs and the parmesan cheese. Drain the bread crumbs by squeezing them lightly with your hand, then add the crumbs, the herbs, and the cheese to your cooling onion and garlic mixture. Toss together lightly.
  • When the bread and aromatics mixture is room temperature or only barely warm, add the ground beef, the pork, and the salt and pepper. Use your fingertips to combine – you want to evenly distribute the ingredients, but not overmix. Keep it as light as possible.
  • In the same large skillet you used for the onions and garlic, heat the remaining 3 tablespoons of olive oil over medium heat. Fry about 1 teaspoon of the meat mixture until cooked through, then taste for seasoning, and adjust in the remaining mixture if needed.
  • Roll the remaining meatball mixture into 16 equal sized meatballs (they will be about 3 tablespoons each) . Carefully place them into the skillet, not touching one another (you will probably need to do this in two batches), and sear, undisturbed, for about 2 minutes. When this first side is golden brown, flip over and fry for another 2 minutes, again until golden brown. When browned nicely on all sides, remove to a clean plate and repeat with the remaining meatballs.
  • When all meatballs are browned and removed from the pan, add the wine all at once and use a wooden spoon or spatula to scrape around and remove the browned bits from the bottom into the wine, where they will act as flavoring agents. Add in the canned tomatoes, the onion half, the garlic cloves, the parmesan rind, if using, and the stalks of basil. Stir to combine. As soon as the sauce starts to bubble, turn the heat down to medium low and simmer for 10 minutes.
  • This is a good time to start a pot of salted water for your spaghetti.
  • After the sauce has simmered 10 minutes, taste it and add salt and pepper as needed, but go easy on the salt – the parmesan rind will release some salinity, and the meatballs themselves will as well. Nestle in the meatballs and simmer another 10 minutes, then flip over each meatball and simmer a final 10 minutes, for a total of 30 minutes.
  • Discard the onion, garlic, basil, and parmesan rind, then drain the cooked spaghetti and add it into the sauce. Use tongs to gently work it through the sauce, coating it completely.
  • Serve directly onto warm plates, or carefully slither into a serving bowl. Sprinkle with herbs and fluffy grated parmesan cheese. I recommend a side of garlic bread, and maybe a green salad.

Apple Cheddar Waffles

2015 Blog September-0463Although I object to the idea of swapping all of your usual décor with pumpkins and corncobs the moment calendars proclaim it’s the first day of fall, by the time mid-October rolls around I’m both cool with the harvest theme and starting to crave richer, belly-warming food. I have such ideas about bread, and stews, and short-ribs, and roasted everything…

2015 Blog September-04502015 Blog September-04522015 Blog September-0455Los Angeles is making this hard lately. With temperatures in the 90s during two of the past three weekends, it’s difficult to convince myself to cook anything, much less wax poetic about its warming spices and satisfying heartiness. My bedroom feels like the inside of a dryer. I might have fleeting dreams about fluffy, toasty, steaming biscuits mounded with chili, but all I can truly imagine consuming is a series of popsicles and frozen grapes.

2015 Blog September-04562015 Blog September-0457But I will say, if it’s cool enough where you are that the thought of using heating implements in your kitchen doesn’t throw you into depression, you should make these waffles immediately. I first made them a month or so ago when it didn’t feel like Dante might mistake our kitchen for one of the circles of Hell. They were so good – fluffy and light from their yeasted batter, crisp and burnished with crackling edges of melted cheese – that it was only a week or two before we had to make them again. Like the grilled cheese sandwiches I pushed on you last year, they pull from the classic combination of cheddar cheese and apple pie. A wedge of salivation-inducing cheese against the sweet tartness of apple desserts is a worthy experiment in many cases, and here, soft, tender apple bits and pockets of melted cheese folded into a crisp waffle drowning in maple syrup is a combination you’re going to want to make all season, if the seasons would ever straighten themselves out. And if you simply aren’t enthused by a recipe that advertises itself with a pile of apples and sharp-as-you-can-get cheddar cheese, I’m not sure we can stay friends.

2015 Blog September-0467These start from my basic yeasted beer batter waffles recipe, which is adapted from King Arthur Flour. You can use milk instead of beer if you must, but between the yeast and the heat most of the alcohol is processed out, and the slightly bitter flavor of dark beer is such a welcome addition, balancing the rich cheese and tart apples. The first time I made these I was concerned about the apple pieces cooking all the way through in the short time they are enfolded in the waffle iron, but I needn’t have worried. They are in small enough pieces that they will cook. I like to leave the skins on for extra tartness, but you can peel them first if you prefer. Apples and cheese play well in both sweet and savory directions, so while I think a glug of maple syrup – we like to warm it up with a pinch of red pepper flakes for a little kick – makes these a complete meal, I could also see them providing a perfect raft for a moist thigh of roasted or fried chicken, or even piled with a fresh kale salad studded with walnuts and dried cherries. 2015 Blog September-0464

Apple Cheddar Waffles
Loosely adapted from King Arthur Flour
Makes about six 7-inch waffles
2-2½ hours (45 minutes active time)
1½ cups (12 ounces) lukewarm dark beer, such as a stout or a porter
1½ teaspoons active dry yeast
3 tablespoons maple syrup
6 tablespoons (3 ounces) melted butter, cooled
1 teaspoon salt
2 large eggs
2 cups all-purpose flour
1 green apple, diced into ¼ inch-½ inch chunks (1⅓ – 1½ cups, approximately)
1 generous cup grated sharp or extra sharp cheddar cheese


  • In a 2-cup glass measuring cup, or a small microwave safe bowl, heat the beer until just warm to the touch. Add yeast and let them mingle for 5-10 minutes. The yeast will foam up considerably, thanks to the extra sugars and yeast already in the beer.
  • While the yeast proofs, whisk together the cooled melted butter, the maple syrup, the salt, and the eggs in a large bowl. Be sure there’s room for the batter to expand.
  • Add the beer and yeast mixture and whisk to combine, then add the flour 1 cup at a time, whisking to combine thoroughly. Switch to a rubber spatula and fold in the apple chunks and the cheese. Stir well, as the cheese may want to stick together; we want it evenly incorporated.
  • Cover the bowl with plastic wrap and set it on the counter for 1½-2 hours (how fast it rises and bubbles will depend on how warm your kitchen is, but longer rise = deeper flavor).  The mixture will develop lethargic and then more energetic bubbles, and begin to smell quite bready.
  • Once it has had a chance to rise and is covered with a near-consistent layer of bubbles, either stow in the refrigerator overnight, or preheat your waffle iron!
  • Drop the batter in generous ⅔ cup batches onto a preheated, greased waffle iron (or whatever capacity your iron can handle). Close the lid and cook for the recommended amount of time, or until the waffle is crisp on the outside and deeply golden, with dark crisp cheese lace protruding. Ours took about 7 minutes per waffle. (If you refrigerated your batter for a few hours or overnight, be sure to bring it back up to room temperature before cooking)
  • Serve hot with your choice of sweet pourable topping. We like maple syrup warmed with a pinch of red chili flakes in it, for a little kick. If you need to keep the waffles warm, stow them on a wire rack over a baking sheet in a 250F oven until you are ready to eat.