As I noted last week, I’ve been out of town. In fact, I’ve been off the continent (though not out of the country). Now that we’re back on the mainland, I suppose I owe you a few reflections.
 Kauai is beautiful. But if you’ve ever seen Jurassic Park, or Raiders of the Lost Ark, or even the opening sequence of M*A*S*H, you already know that. It’s a tropical island dotted with beaches and rainforests. It couldn’t be anything but beautiful. But what struck me as we wandered, sandal-and-swimsuit-clad, through the little towns and massive resort complexes, was how friendly it was. I don’t just mean ordinary smiling helpful friendliness. That much is expected too, since so much of the island’s industry is built on tourism and the service jobs it requires. I mean food friendliness. Many, many businesses proudly assert themselves as GMO-free. The Kauai Coffee plantation, which we visited one afternoon (photos to follow, I’m sure), is basically off the grid. They are entirely water powered by rainfall and river flow from one of the island’s mountains, and create enough energy to power parts of nearby towns as well, sometimes. It is one of the most sustainable businesses I’ve come across, but they don’t shove it in your face, just pronounce it matter-of-factly and leave you feeling that yes, this is the right thing.


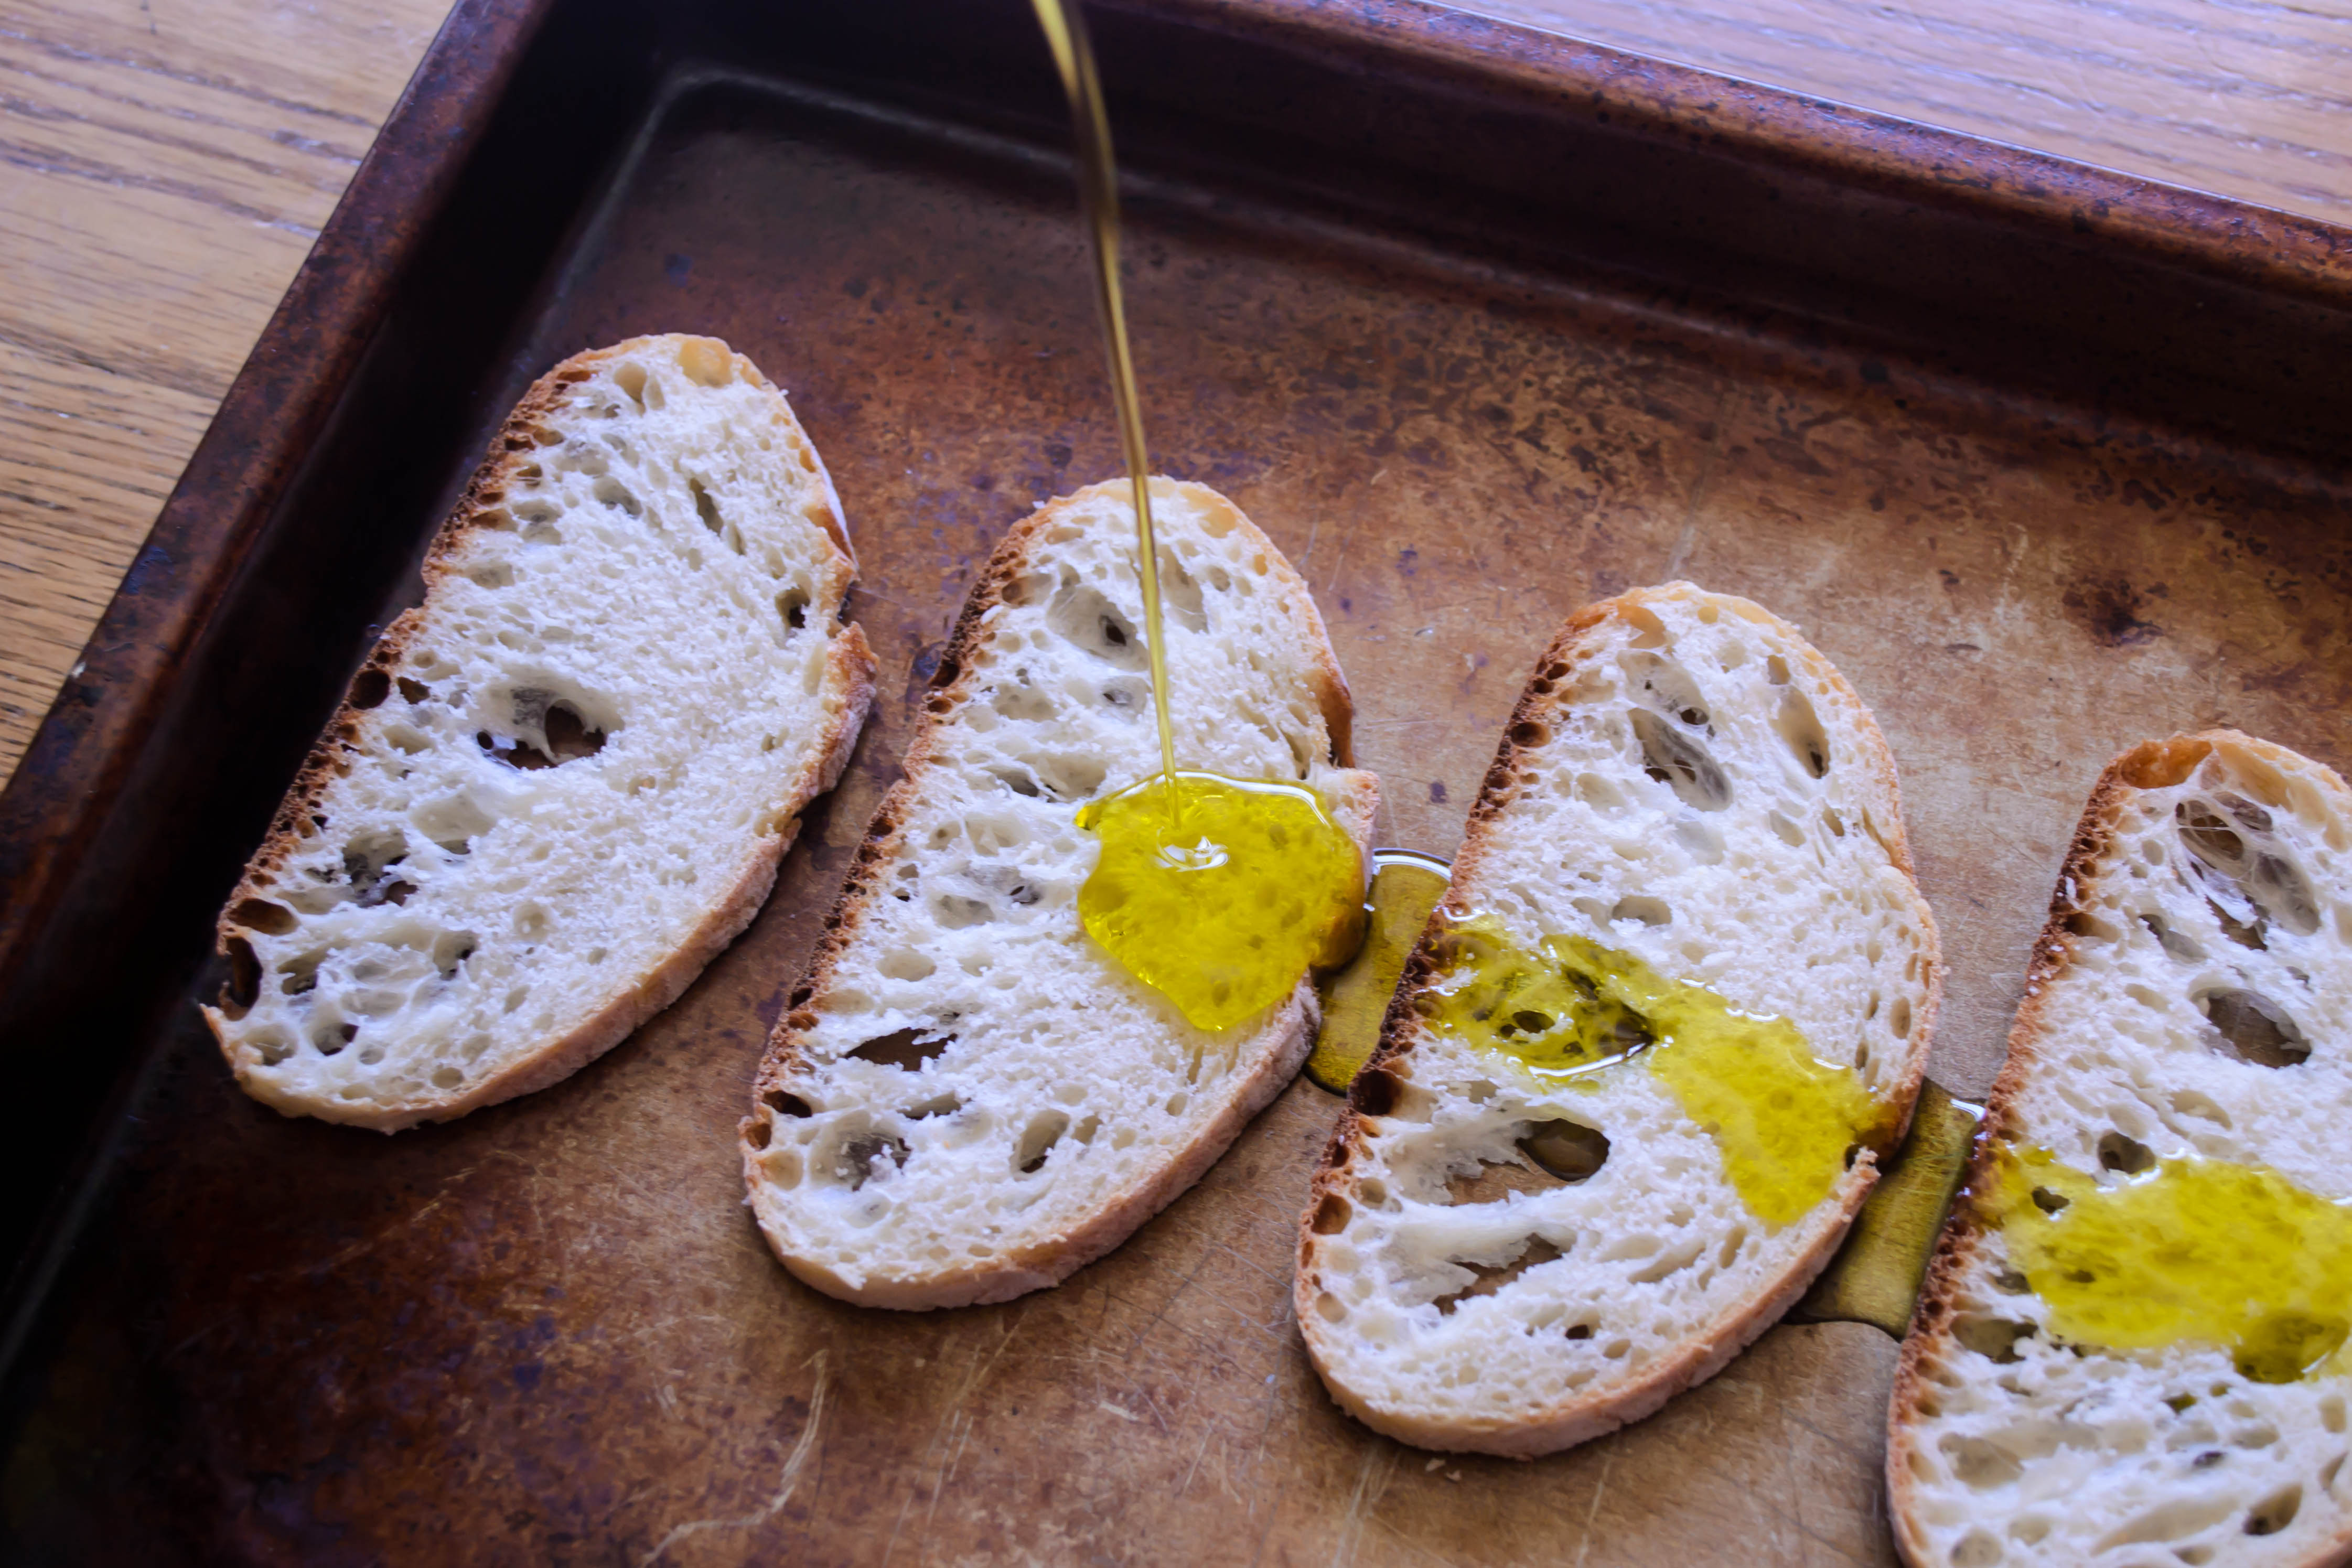
 It’s not just that, though. It has become reasonably common practice in large restaurants or fine dining establishments, and even in some chains, for menus to include vegetarian, vegan, dairy-free, and gluten-free options. On Kauai, even many of the smallest, most local food stands are open and friendly to the idea. I guess maybe “food friendliness” translates to “willing accommodation.” There are menu codes indicating which foods are prepared without gluten, without dairy, and which can be quickly adjusted to include or remove allergens. And what was most friendly, to me, was that many of these adjustments did not involve an extra cost. Why should it, I thought, when sometimes this change is as simple as enshrouding perfectly grilled fish in a corn tortilla rather than flour?*
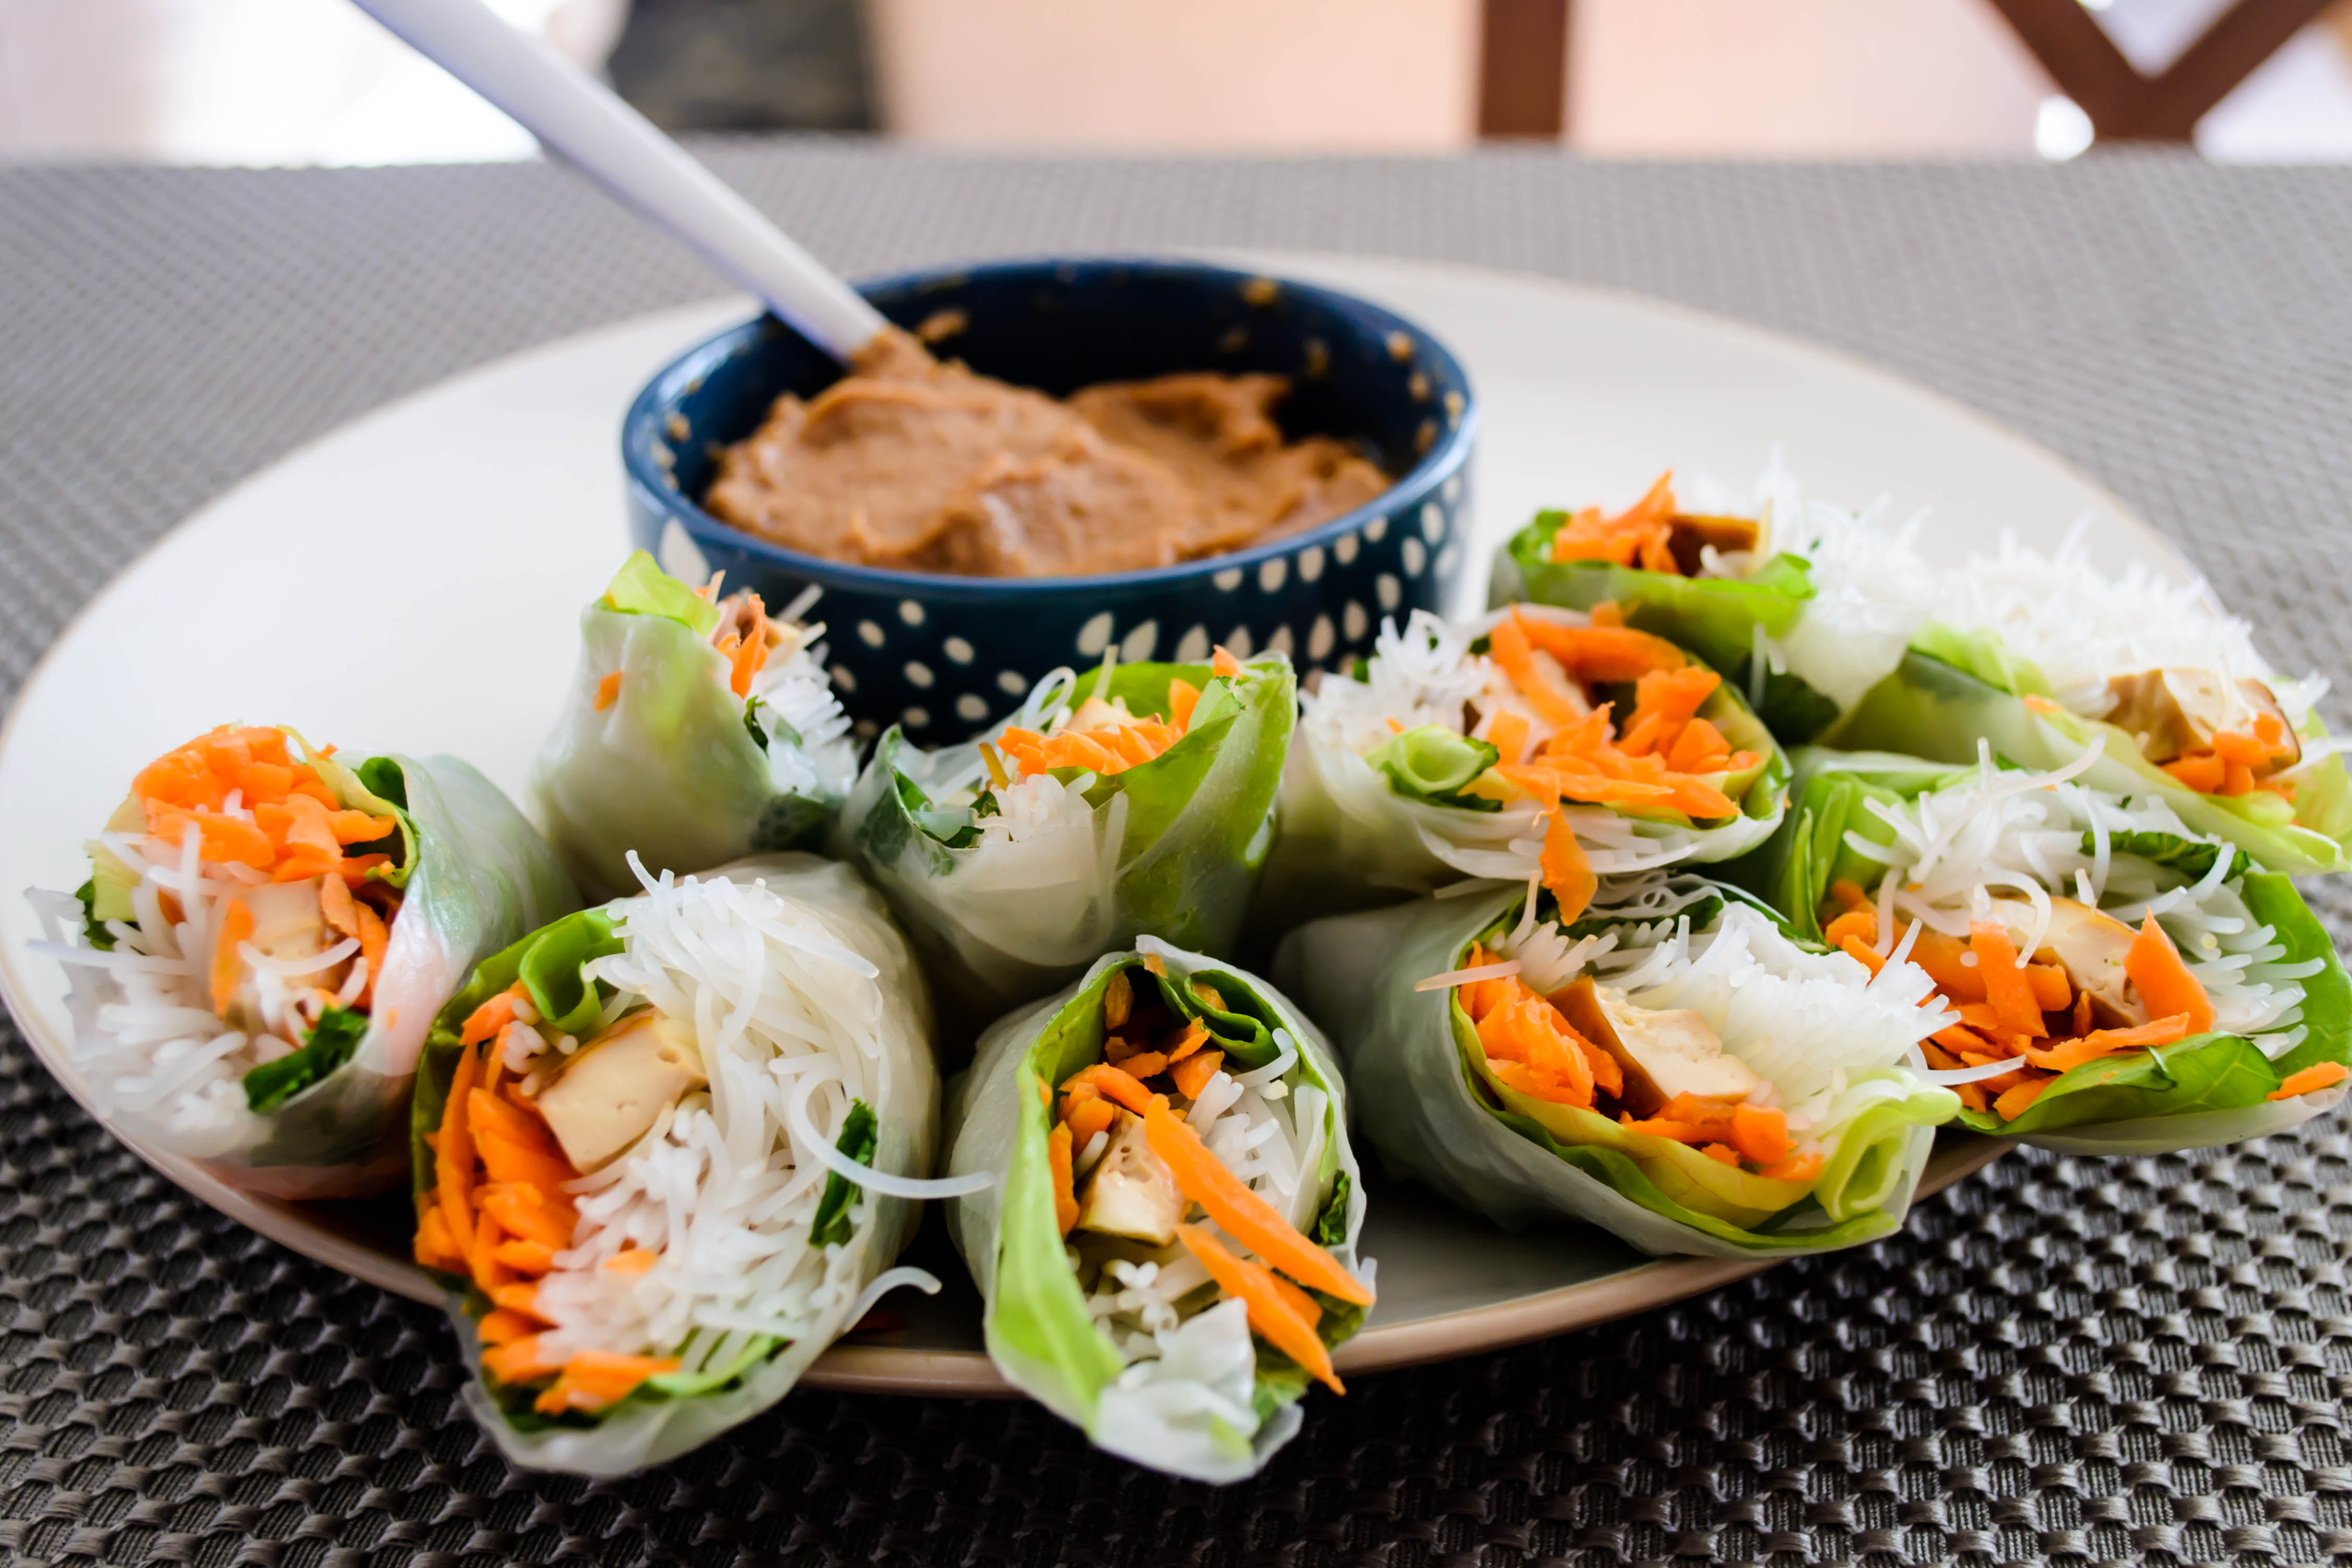
 In that spirit, then (and because I promised my friend Ch I would post this recipe oh, a month ago…), today I want to bring you one of my favorite, most dependable and well-received party snacks that just happens to also be vegan and, if you make it with the right sort of soy sauce (even Kikkoman has a GF option now!), gluten-free as well. These pretty, tasty, surprisingly easy spring rolls involve shreds of bright carrot, bibb lettuce, fresh grassy mint, and rice noodles, a stick of tofu pressed, drizzled with soy sauce, and baked until meaty and firm, all lovingly wrapped in rice paper. Then, if you’re me, you whip up a quick batch of pantry-scavenged peanut sauce to dip them into, and you have something suitable for almost every meal. They aren’t totally allergen-free, because if you can’t have rice you can’t have the noodles or the wrappers these use, and if you have problems with peanuts, peanut sauce is of course out of the question. But they do manage to come close, accommodating the need to avoid animal products and that pesky gluten monster. Plus, they are fairly cheap to make, produce large quantities, and most importantly, are just plain delicious.


 Spring rolls are a good food to take to a party, but they are also a good food to produce party style, because they can easily incorporate an assembly-line style production method. Last month, I had a few friends from work over who wanted to learn to make them, and we sat around the little table in my little “dining room” and spent the afternoon rolling, and, as you might imagine, eating, spring rolls. They kindly acquiesced, probably thanks to the free snacks and wine I was plying them with, to let me snap a few photos of the process, so that’s what you’re seeing here. Thanks, ladies!
 * This doesn’t, of course, guarantee 100% safe dining for people with celiac or other severe gluten intolerances, since kitchen cross-contamination is always a concern. But it is nice that for those avoiding gluten, even casually, there’s a cost-free option.

Baked Tofu Spring Rolls
Makes 18-24, depending on the width of your tofu slices. Each one then gets halved, leaving you with 36-48 snackable pieces.
14 ounce block firm or extra firm tofu, sliced horizontally into three thin squares
¼ – ½ cup soy sauce or tamari (gluten-free soy sauce, but check labels carefully)
3-4 ounces dry rice noodles (sometimes called Maifun or Rice Sticks; I like Dynasty brand)
3 carrots, peeled and grated
1 head butter lettuce, leaves removed, halved, and crisp rib removed
30-40 leaves mint from one bunch
Round rice paper spring roll wrappers (I like the brand with the rose on the label)
Warm water
-
At least three hours before you want to serve your spring rolls, slice the tofu as described and press it by placing the thin squares between layers of paper towels and placing something heavy on top of them. I often use my cast iron pan for this. A baking dish weighted with cans or bottles works well too. Leave the tofu to press for at least 60 minutes to squeeze out some of the water.
-
During the last 15 minutes of pressing, preheat oven to 325F and line a baking tray with aluminum foil. Space out the tofu squares on the aluminum foil, being sure they don’t touch.
-
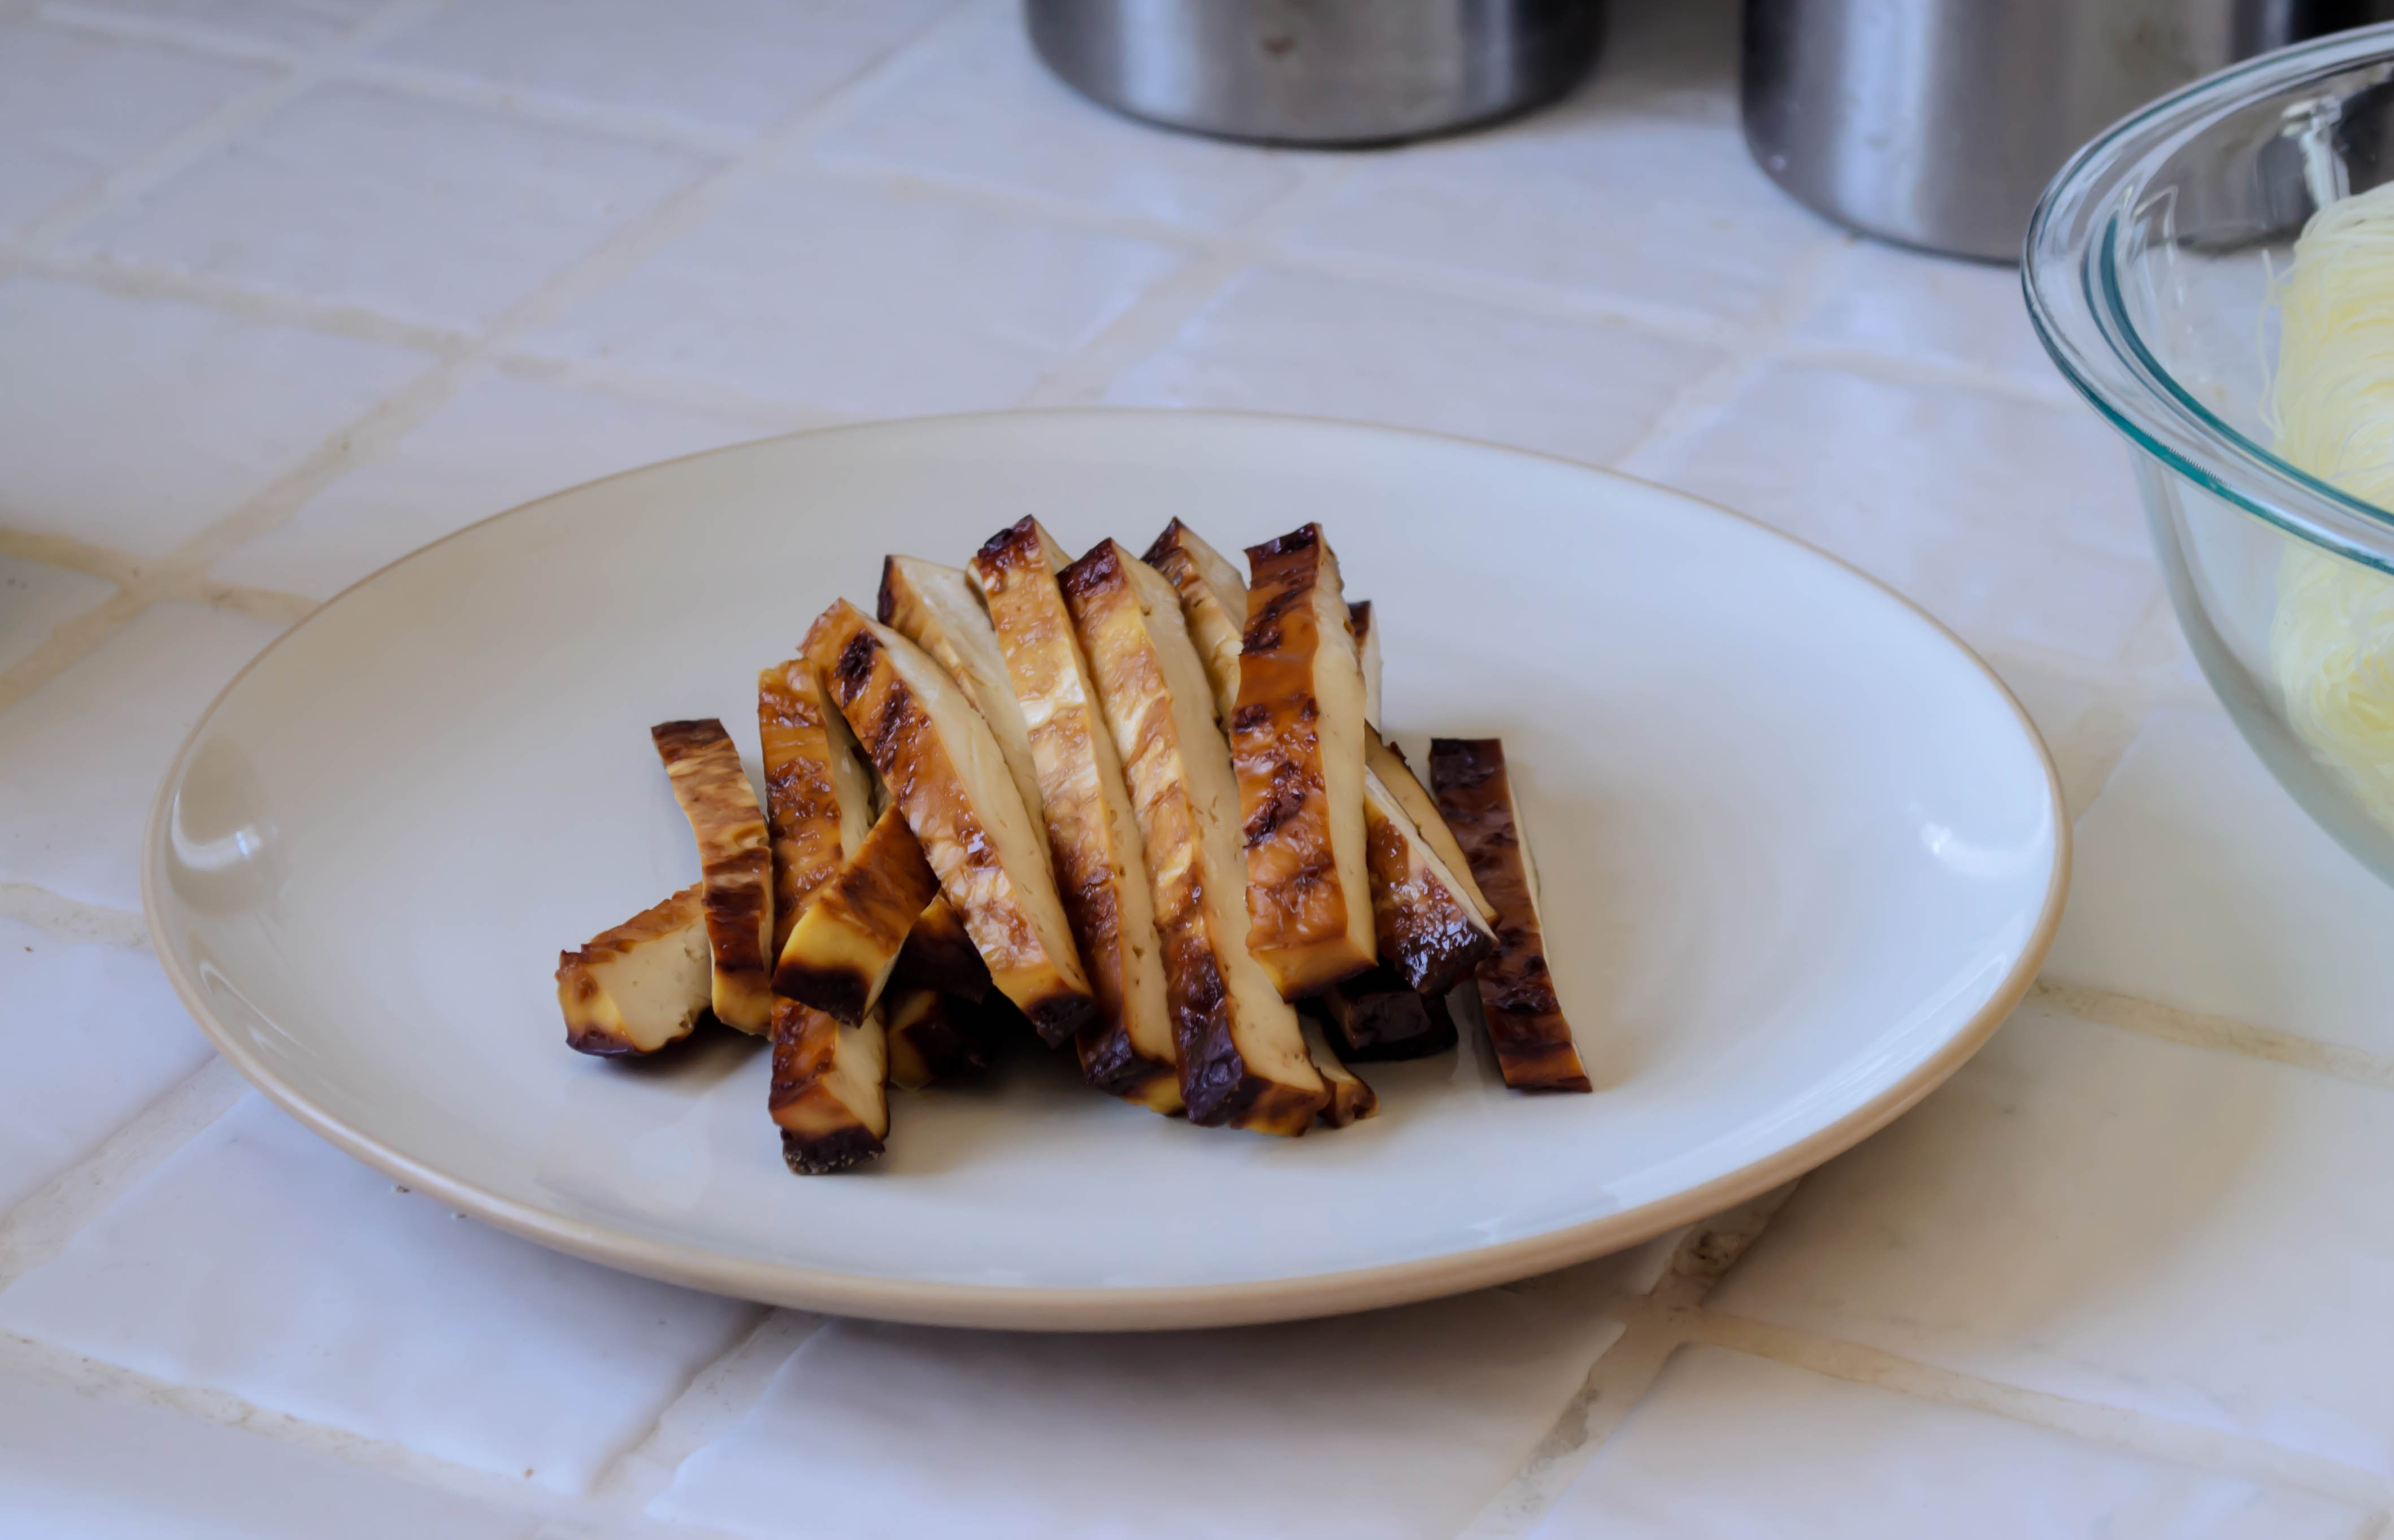
Dribble each square with soy sauce to coat and bake for 60 minutes. After the first 30 minutes, dribble the top of each square with more soy sauce, as the first application will have soaked in. When they are done, the edges of the squares are deep brown, solid, and feel a bit rubbery. Remove and let cool completely, then cut into ½ inch strips (roughly index-finger-width).
-
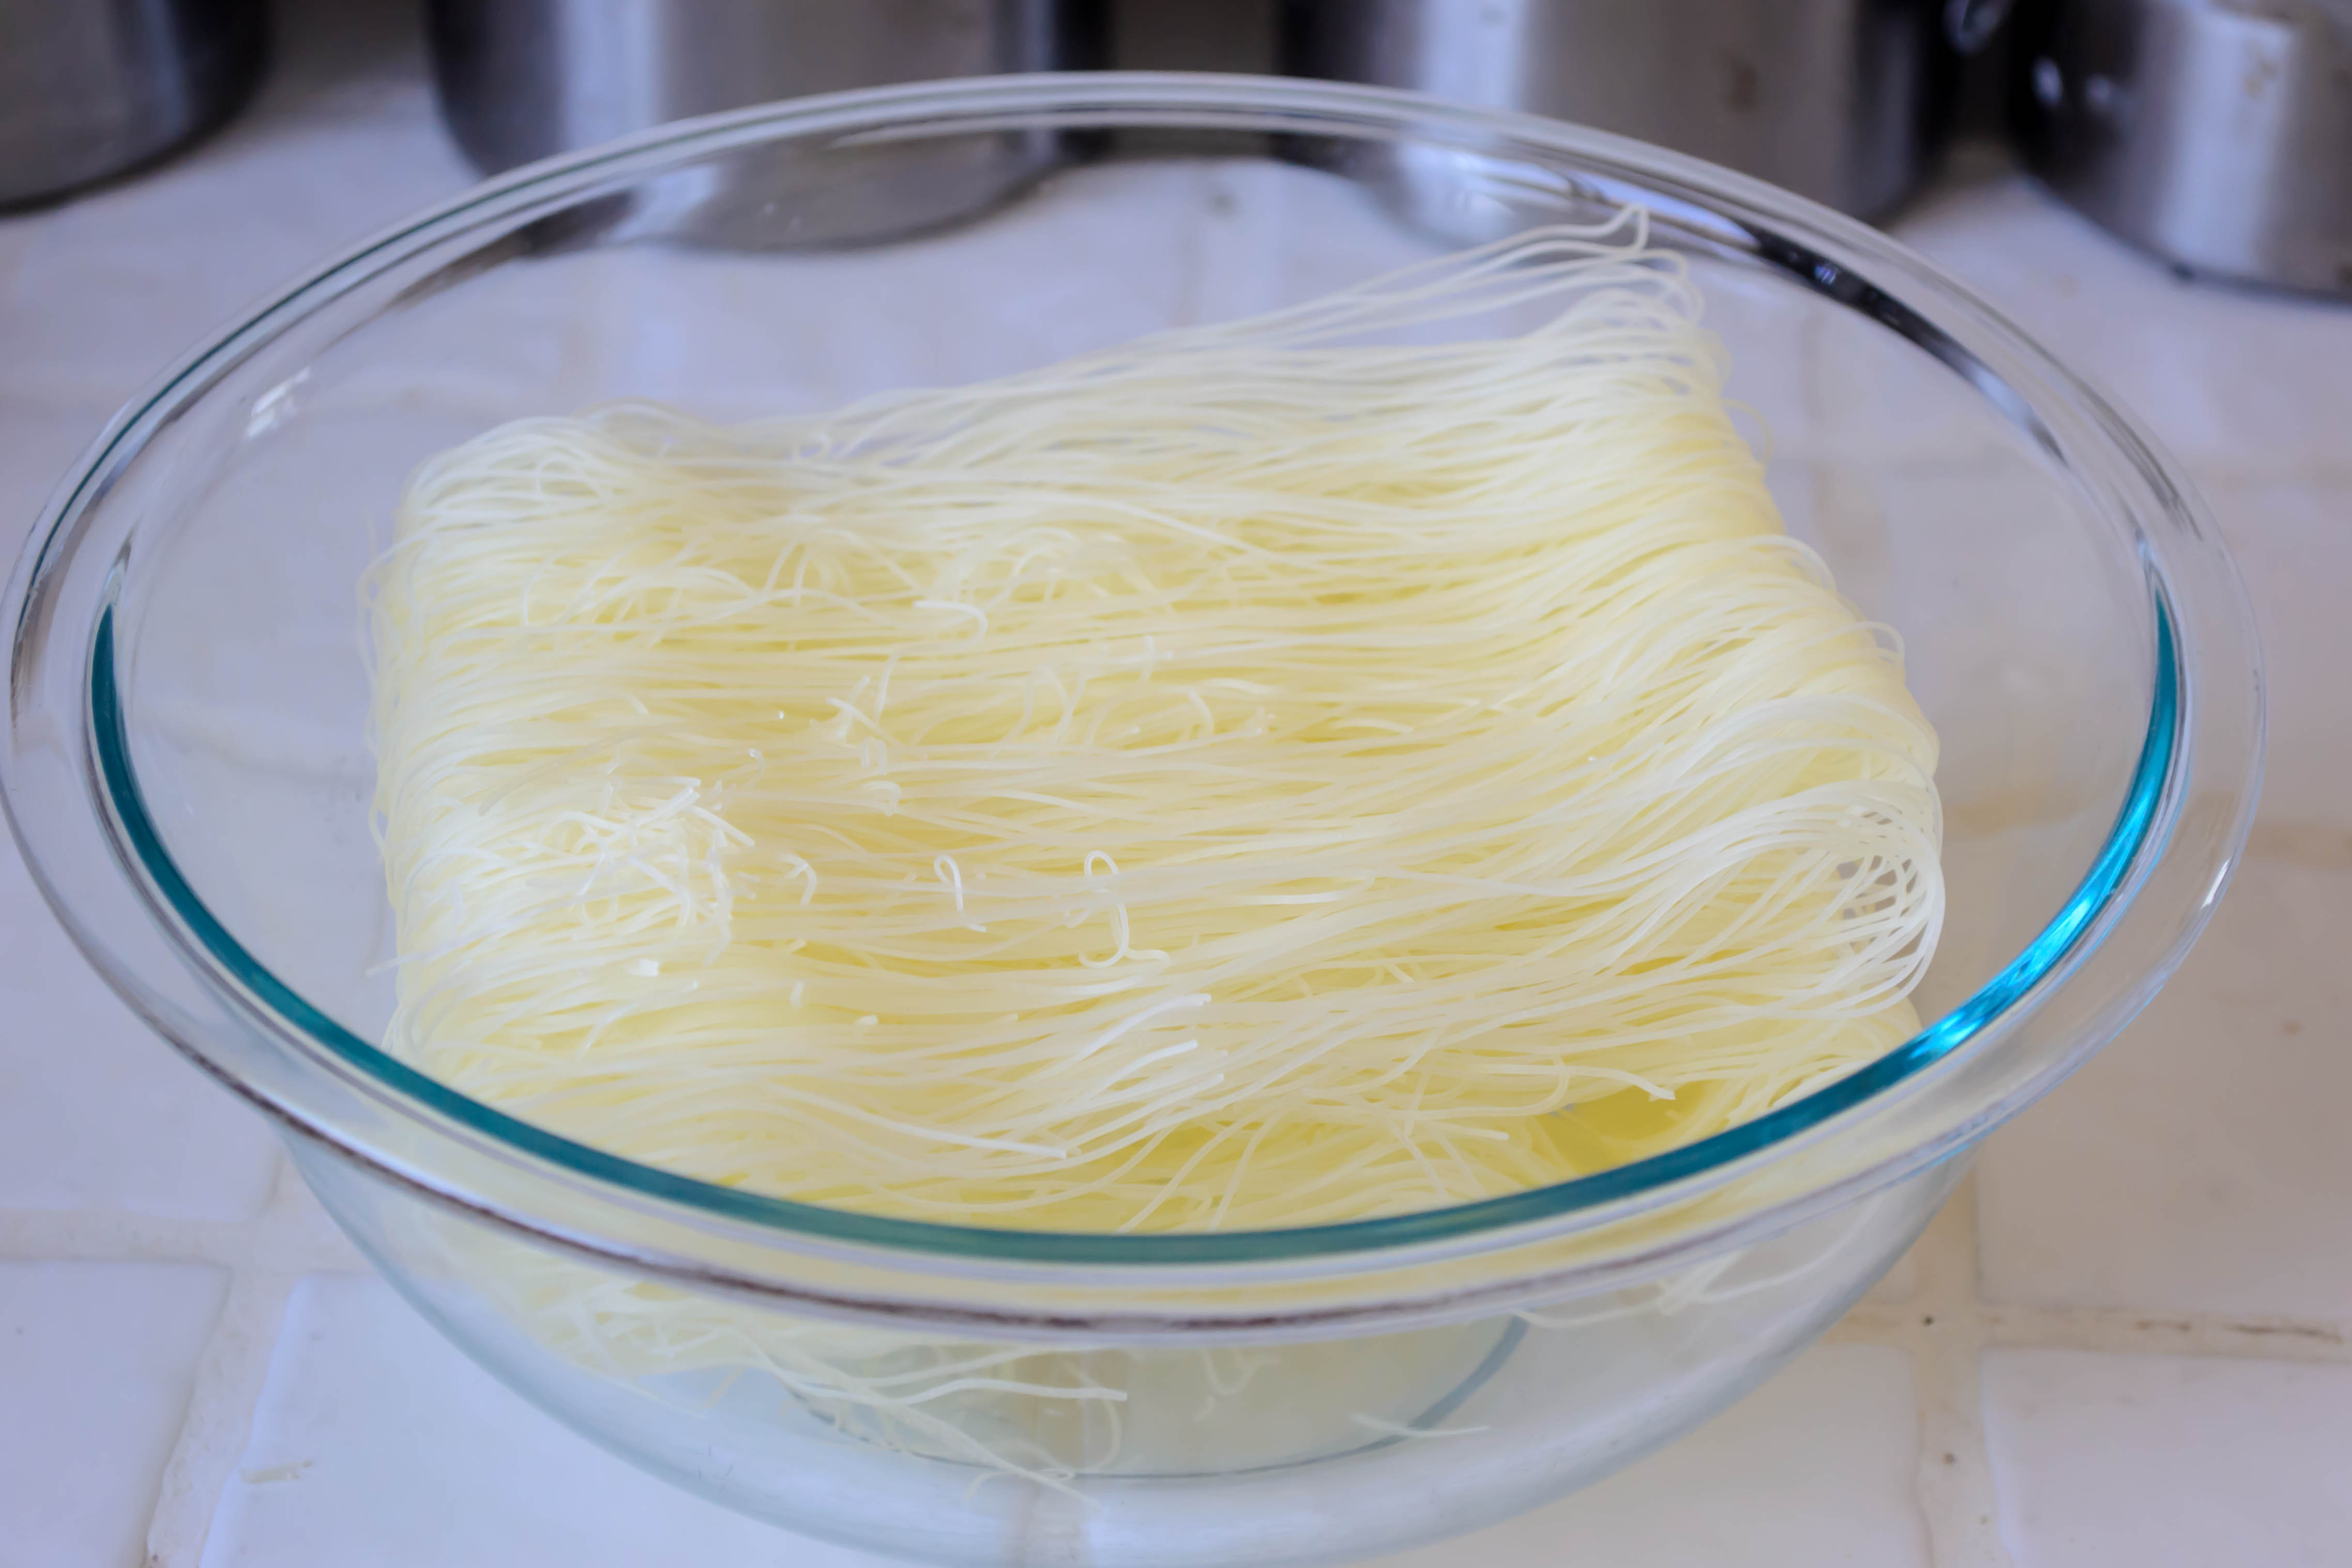
While tofu bakes and cools, prep the other ingredients – grating carrots, stemming mint leaves, separating lettuce leaves, etc. Submerge the rice noodles in hot water and let them steep for 8-10 minutes, until they feel flexible and are tender when bitten. Drain well and set aside to cool.
-
To roll, set up an assembly line – mint, then lettuce, then carrots, then tofu, then noodles. Be sure to have a plate or other vessel on which to place your finished rolls at the end of the line-up. Add warm water to a wide, shallow dish or bowl that the rice paper will fit into. You will address this step first.
-
Here we go: submerge one rice paper wrapper in the warm water and let it sit until it becomes completely pliable. I find this tends to take somewhere between 30 and 45 seconds.
-
When the rice paper is ready, remove and place on a flat surface. If you wish, you can briefly spread it on a paper towel to soak up some of the drips, but this isn’t strictly necessary.
-
Place 1-3 mint leaves around the rice paper wrapper, bottom surface facing up. This ensures the top, more attractive side of the leaf will be visible through the wrapper on the finished roll.
-
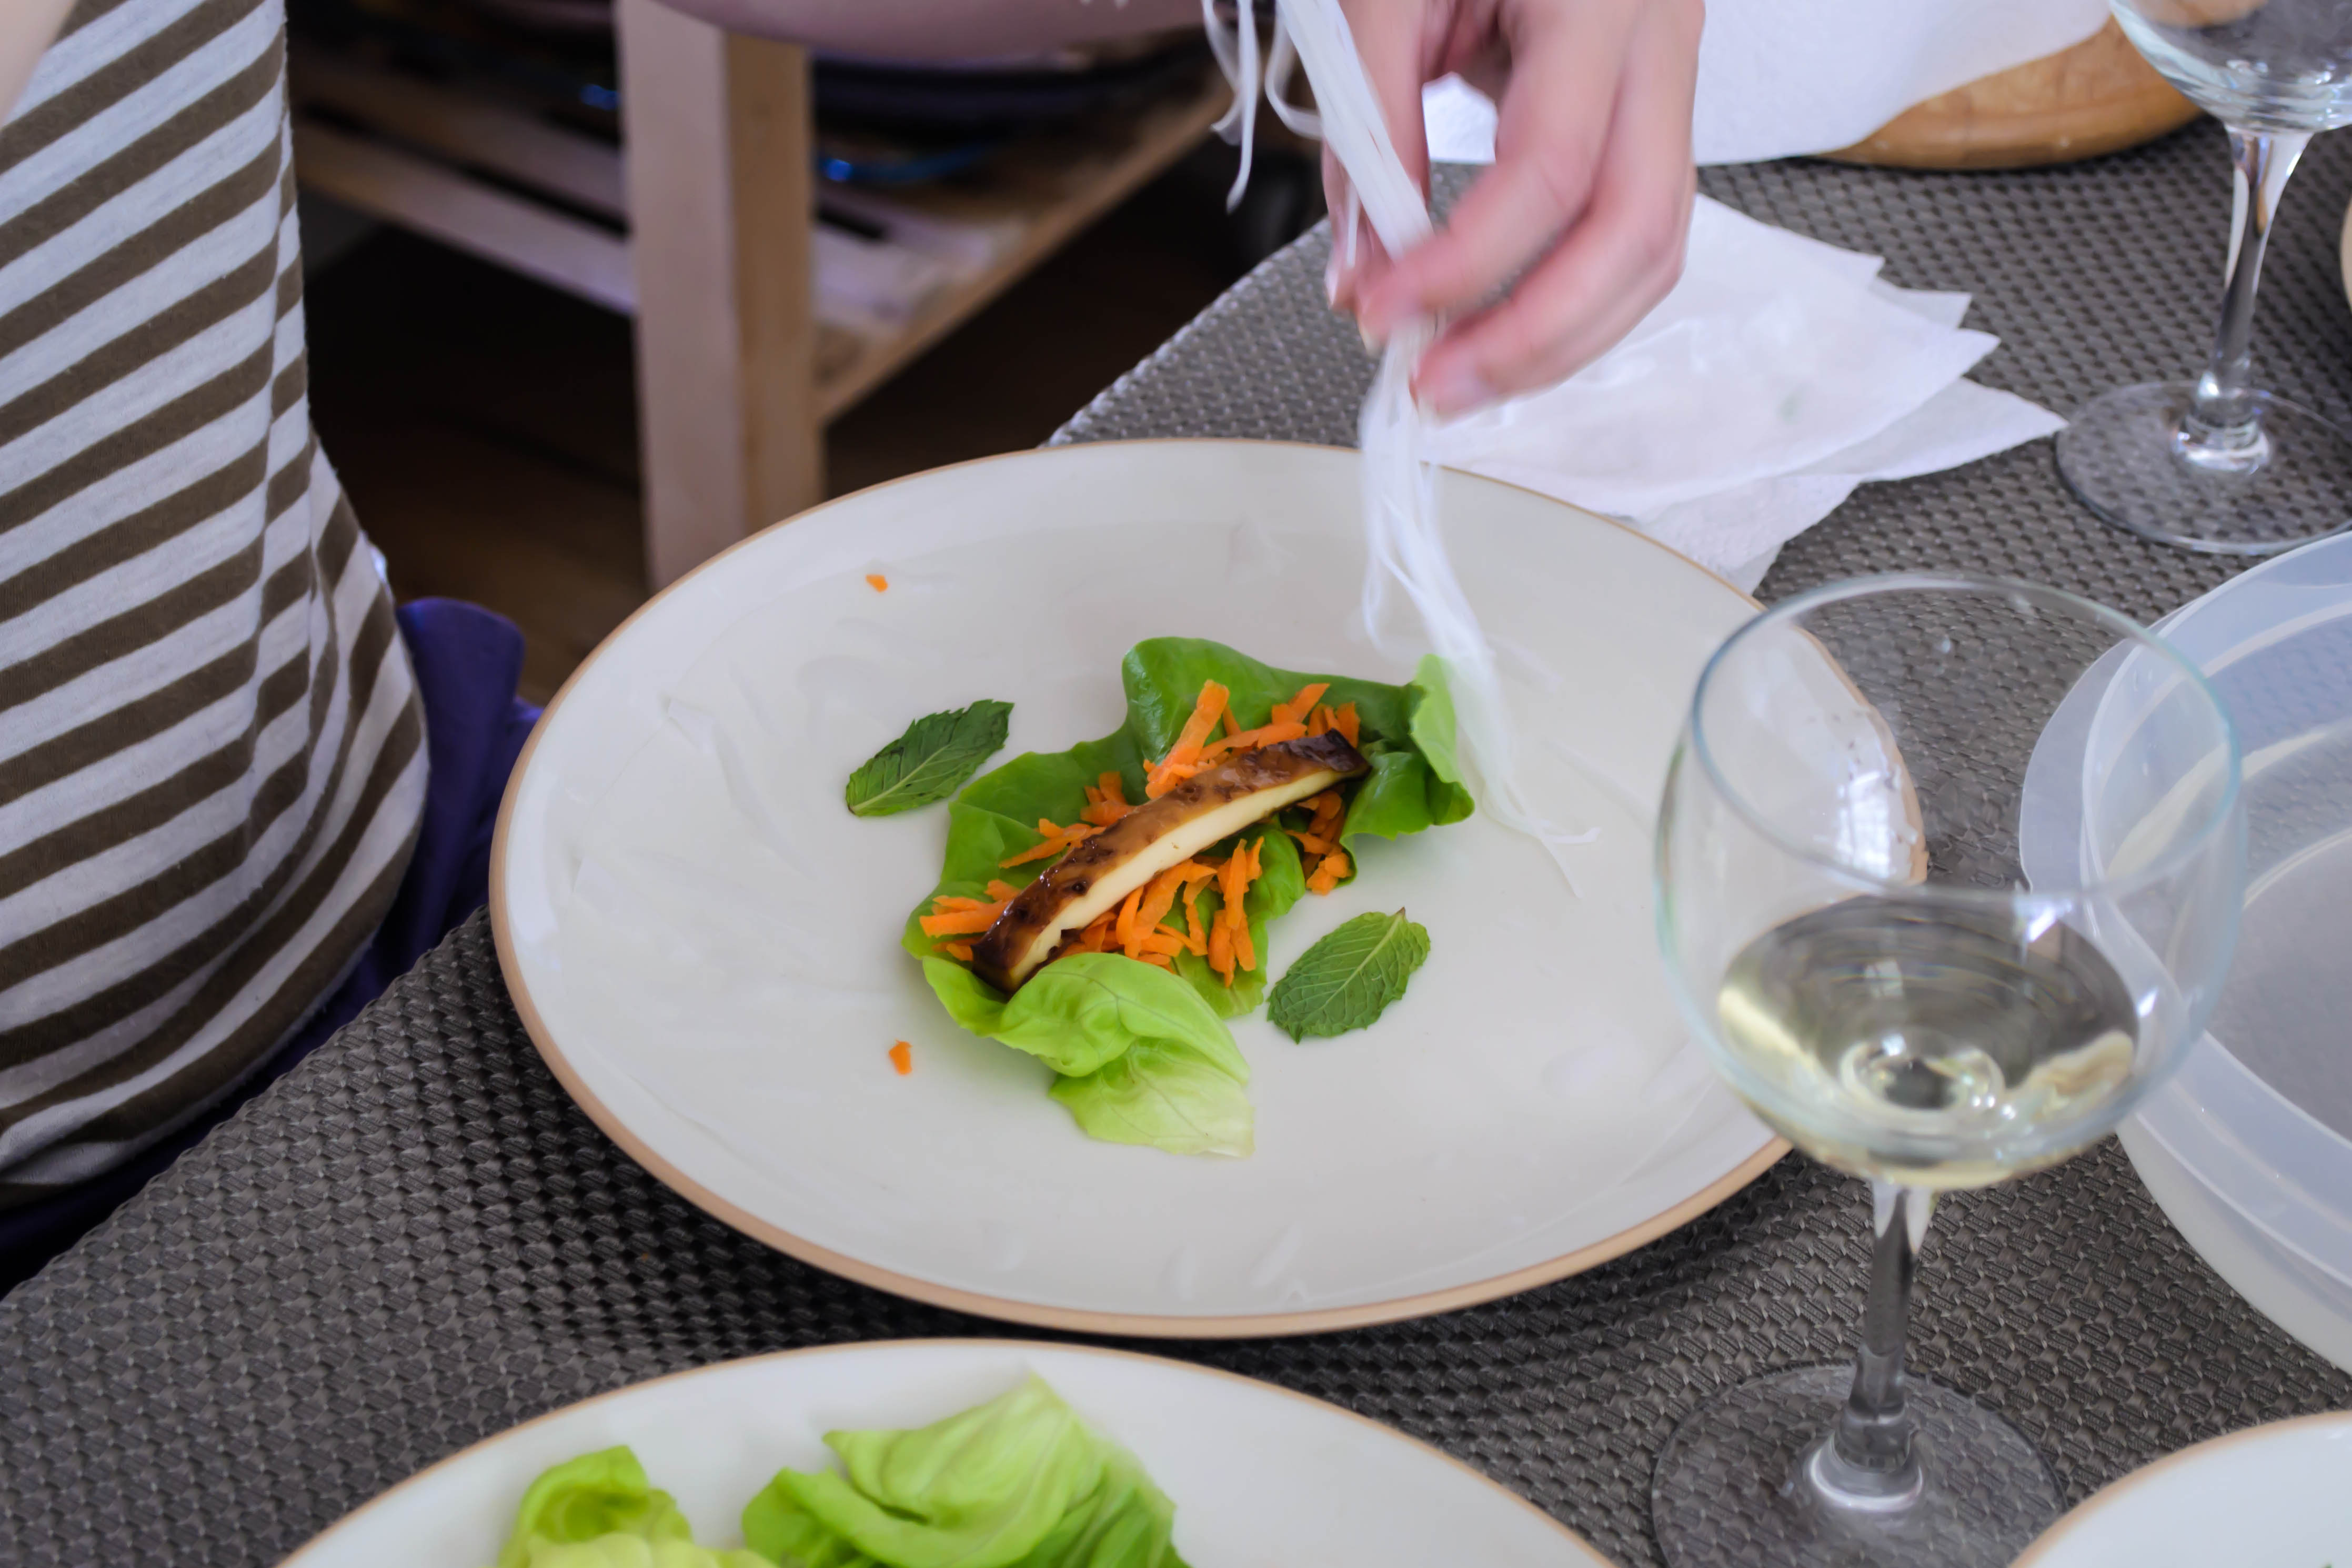
Next, place a piece of lettuce in the center of the wrapper so the longer edge of the lettuce (if there is one) faces you. Sprinkle this with grated carrots (a few teaspoons, though I always eyeball it).
-
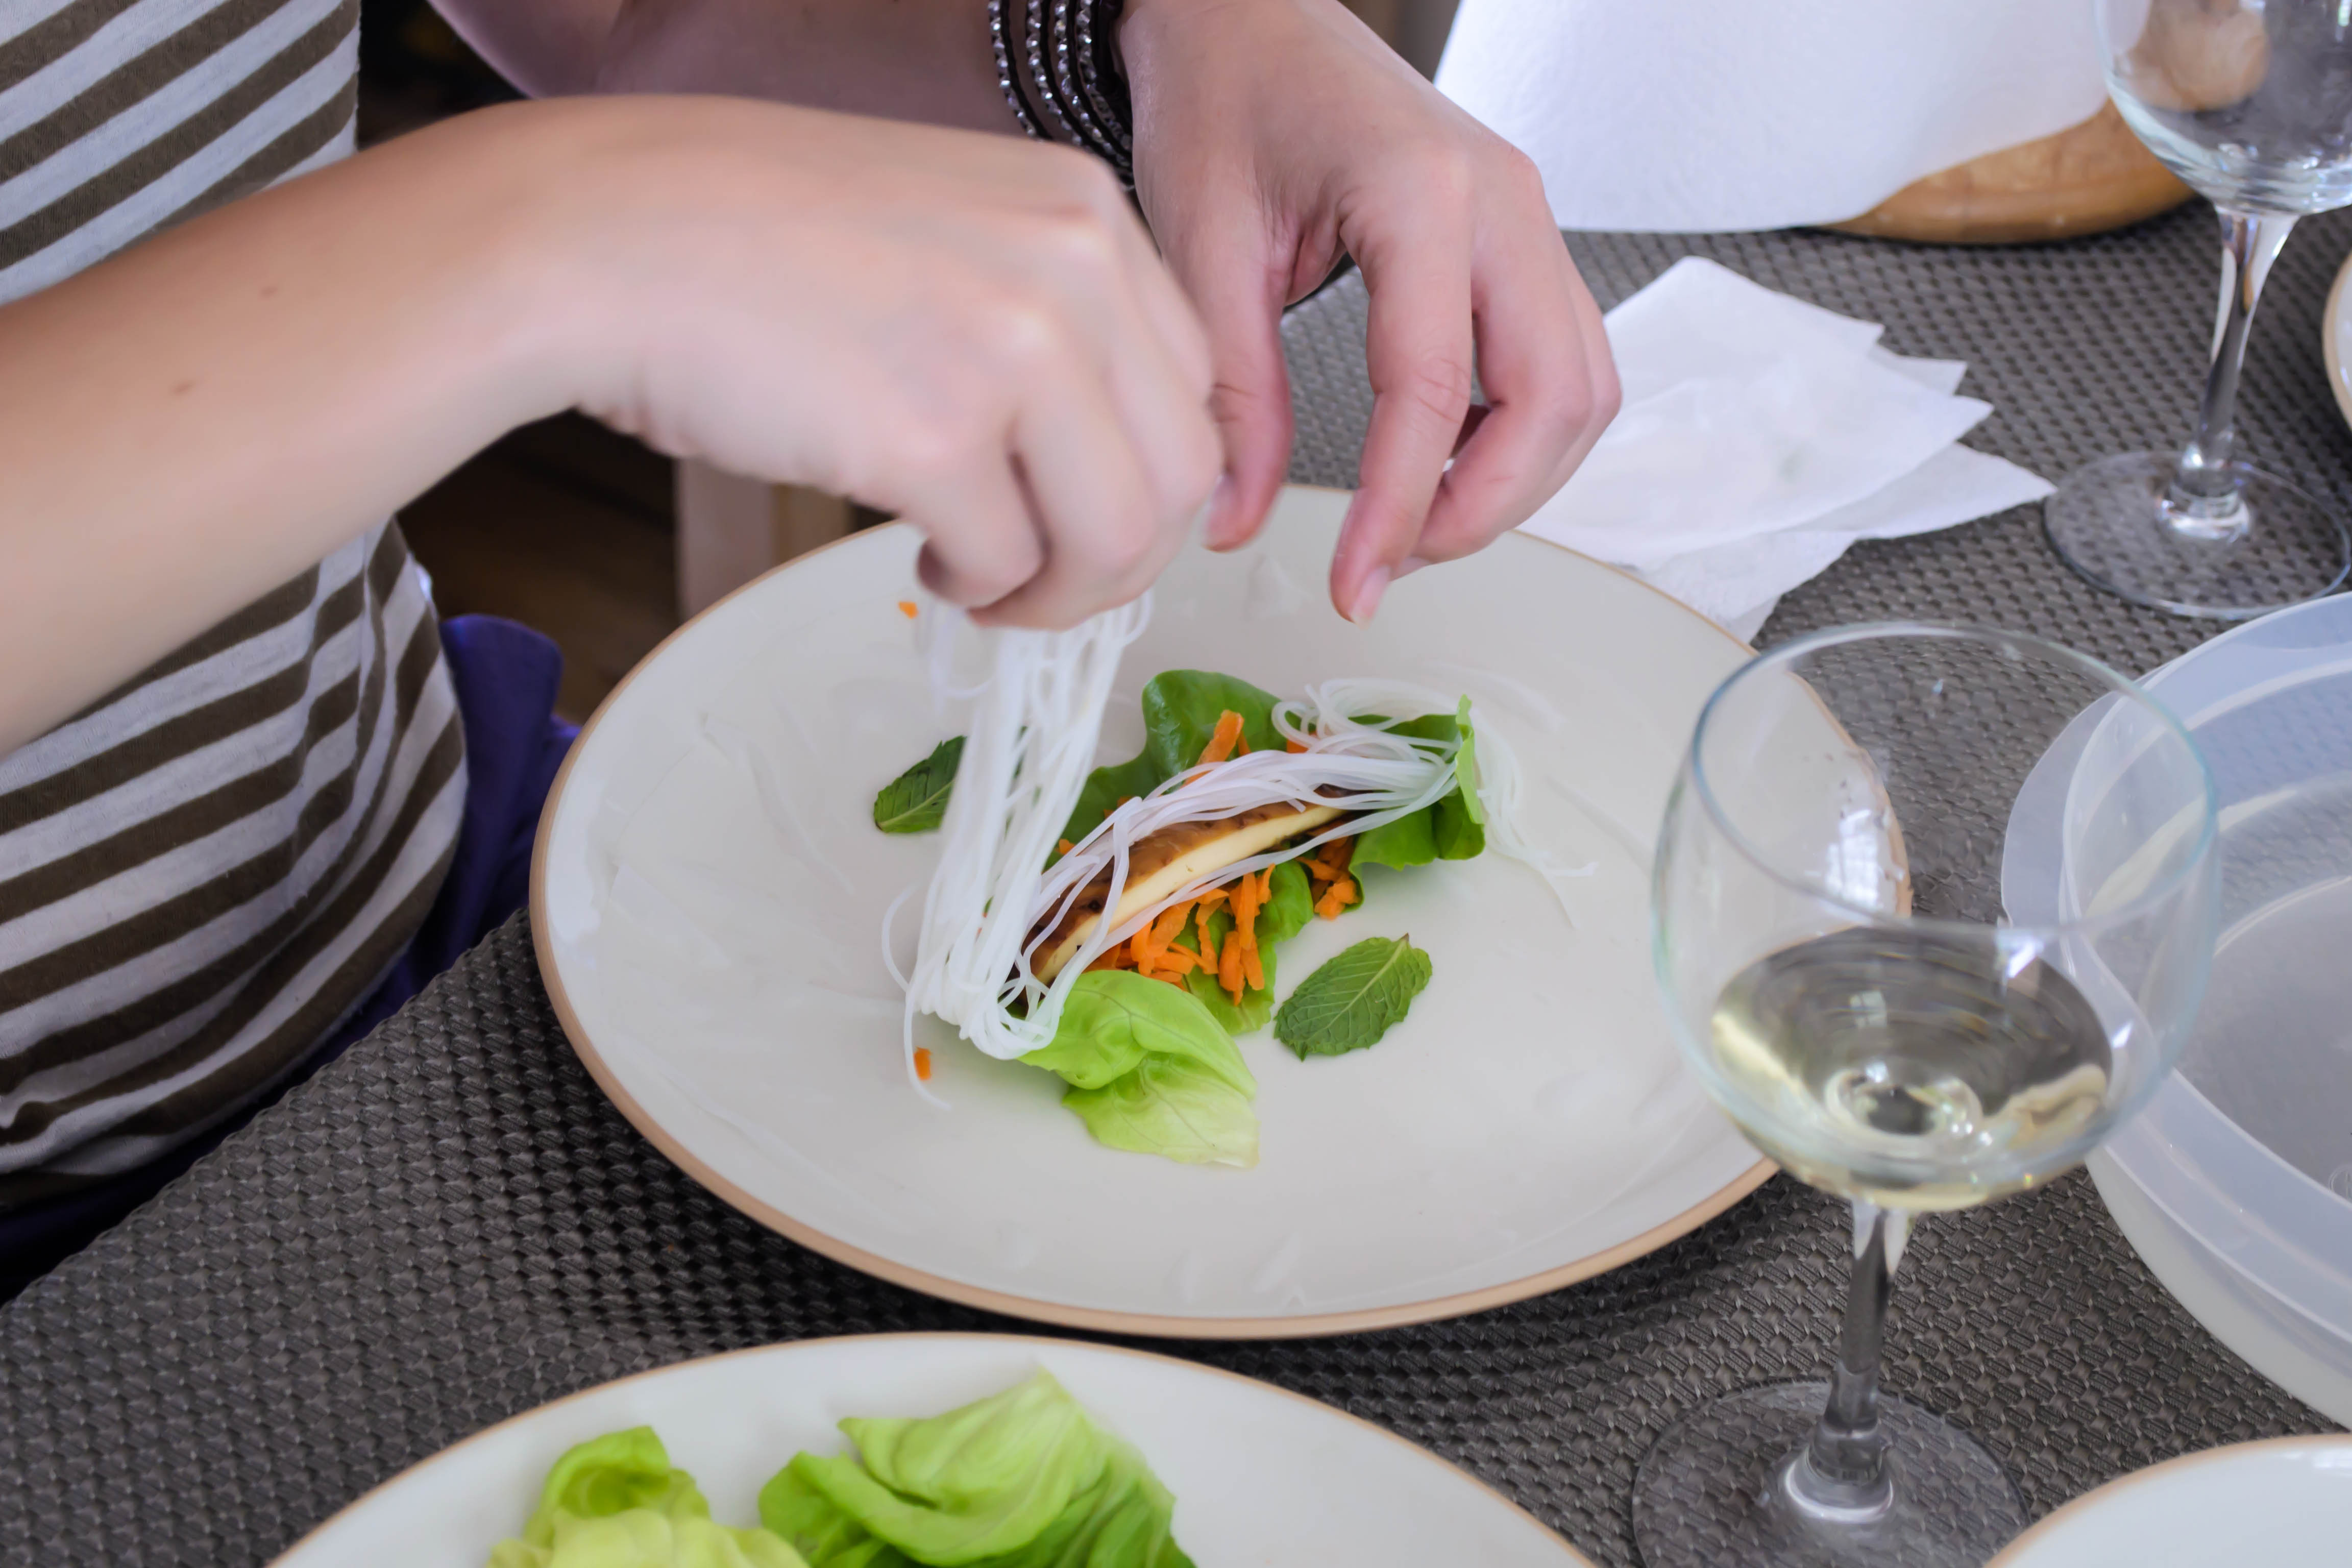
Lay a piece of tofu in the cradle of lettuce and carrots you’ve created, positioning it with the long edge facing you (so, horizontally – see photos above for reference). Top the tofu with a small pile of noodles – no more than a few tablespoons, were we picky enough to measure them out – arranging them across the tofu.
-
Now we roll! As the wrapper faces you, fold in the left and right “edges” over the short sides of the tofu, so what you have looks like a long oval with two squared-off sides. Next, take the side of the wrapper closest to you and fold it completely over your fillings, then pull tight toward you. Roll up the wrapper, tucking each revolution tightly so the fillings are well contained. The tighter rolled, the better they will stay together.
-
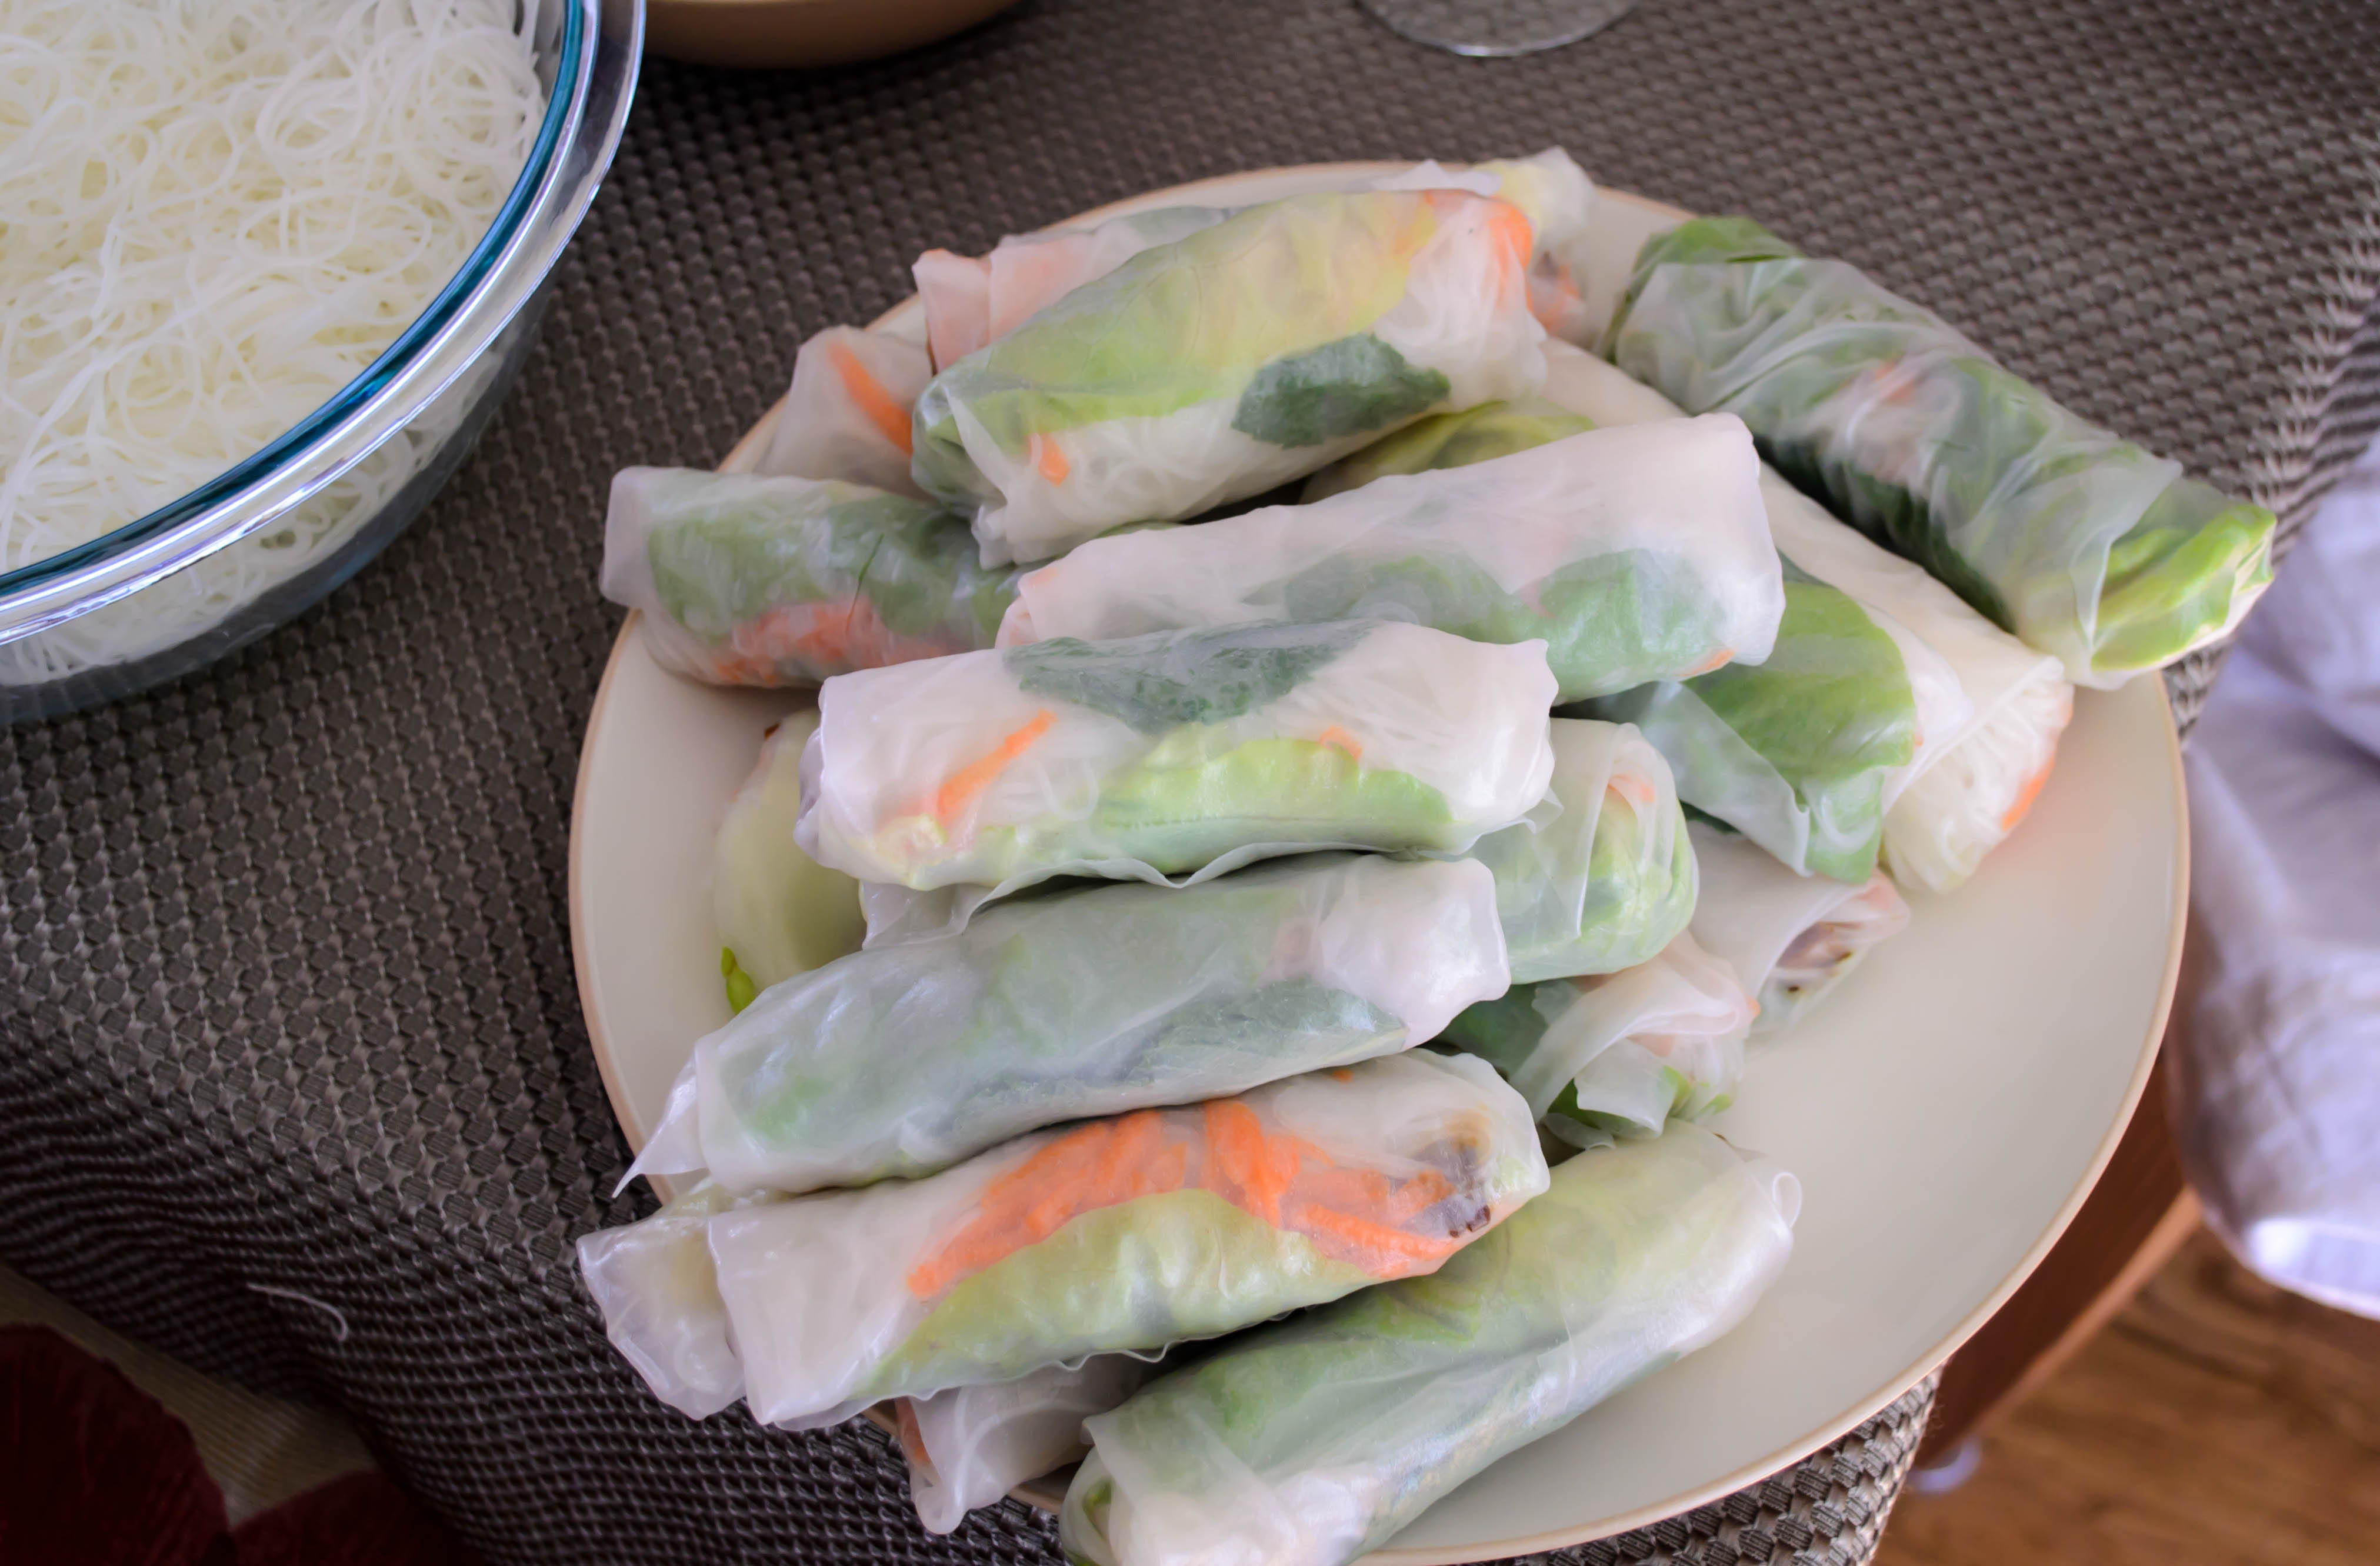
Repeat until you run out of tofu slices! You will get a nice rhythm established. I find I can complete a roll in the time it takes a new rice paper wrapper to soften. Then you are all set to start the next.
-
Just before serving, halve each roll on the bias (with a diagonal cut) for attractive presentation.
-
These will keep, packaged in an air-tight container in the refrigerator, for 1-3 days. Let them come to room temperature before serving, as the rice paper is a little tough when cold.
Peanut Sauce
Makes a generous 1 cup
½ cup peanut butter
½ cup water
2-3 tablespoons soy sauce or tamari
1 tablespoon sriracha or other hot sauce
1 tablespoon grated ginger (if the fresh ginger is frozen, it grates really easily)
1 tablespoon rice vinegar or lime juice
-
In a small saucepan, combine all ingredients over medium low heat. Stir gently with a small spatula or a spoon.
-
As the ingredients melt together, at first the mixture will look watery and very grainy. Keep stirring gently, and it will smooth and thicken to an almost-pourable texture.
-
Taste for seasoning. If it is too salty, add an additional tablespoon each of peanut butter and water. If it is not spicy or salty enough, add more sriracha, soy, or ginger as needed.
-
Serve warm.
-
As it cools, the peanut sauce will separate slightly. Stir vigorously to re-combine.