Green bean and roasted red potato salad with blue cheese

Food blog May 2015-0733As buried in pages as I am, it’s difficult to believe that I’m only one week away from “summer.” Well, four days of class and about 120 mixed papers and exams. This is difficult to bear – something about this semester has been more burdensome than usual. It’s hard to know how to feel when there is so little time but so much work between me and those glorious two and a half months of no work but also no paycheck.

Food blog May 2015-0705As if matching my own cloudy-with-a-chance-of-vacation feeling, our weather lately has taken turns back and forth between what looks like summer and what, for here, passes as wintry. Typically June mornings in Southern California are overcast such that they even have their own nickname: June gloom. We’ve hit this a trifle early, it would seem, with the last week sporting what my officemate helpfully titled “May gray,” and temperatures barely grazing 70F. This is, it would seem, an uncertain entree to summer.

Food blog May 2015-0707
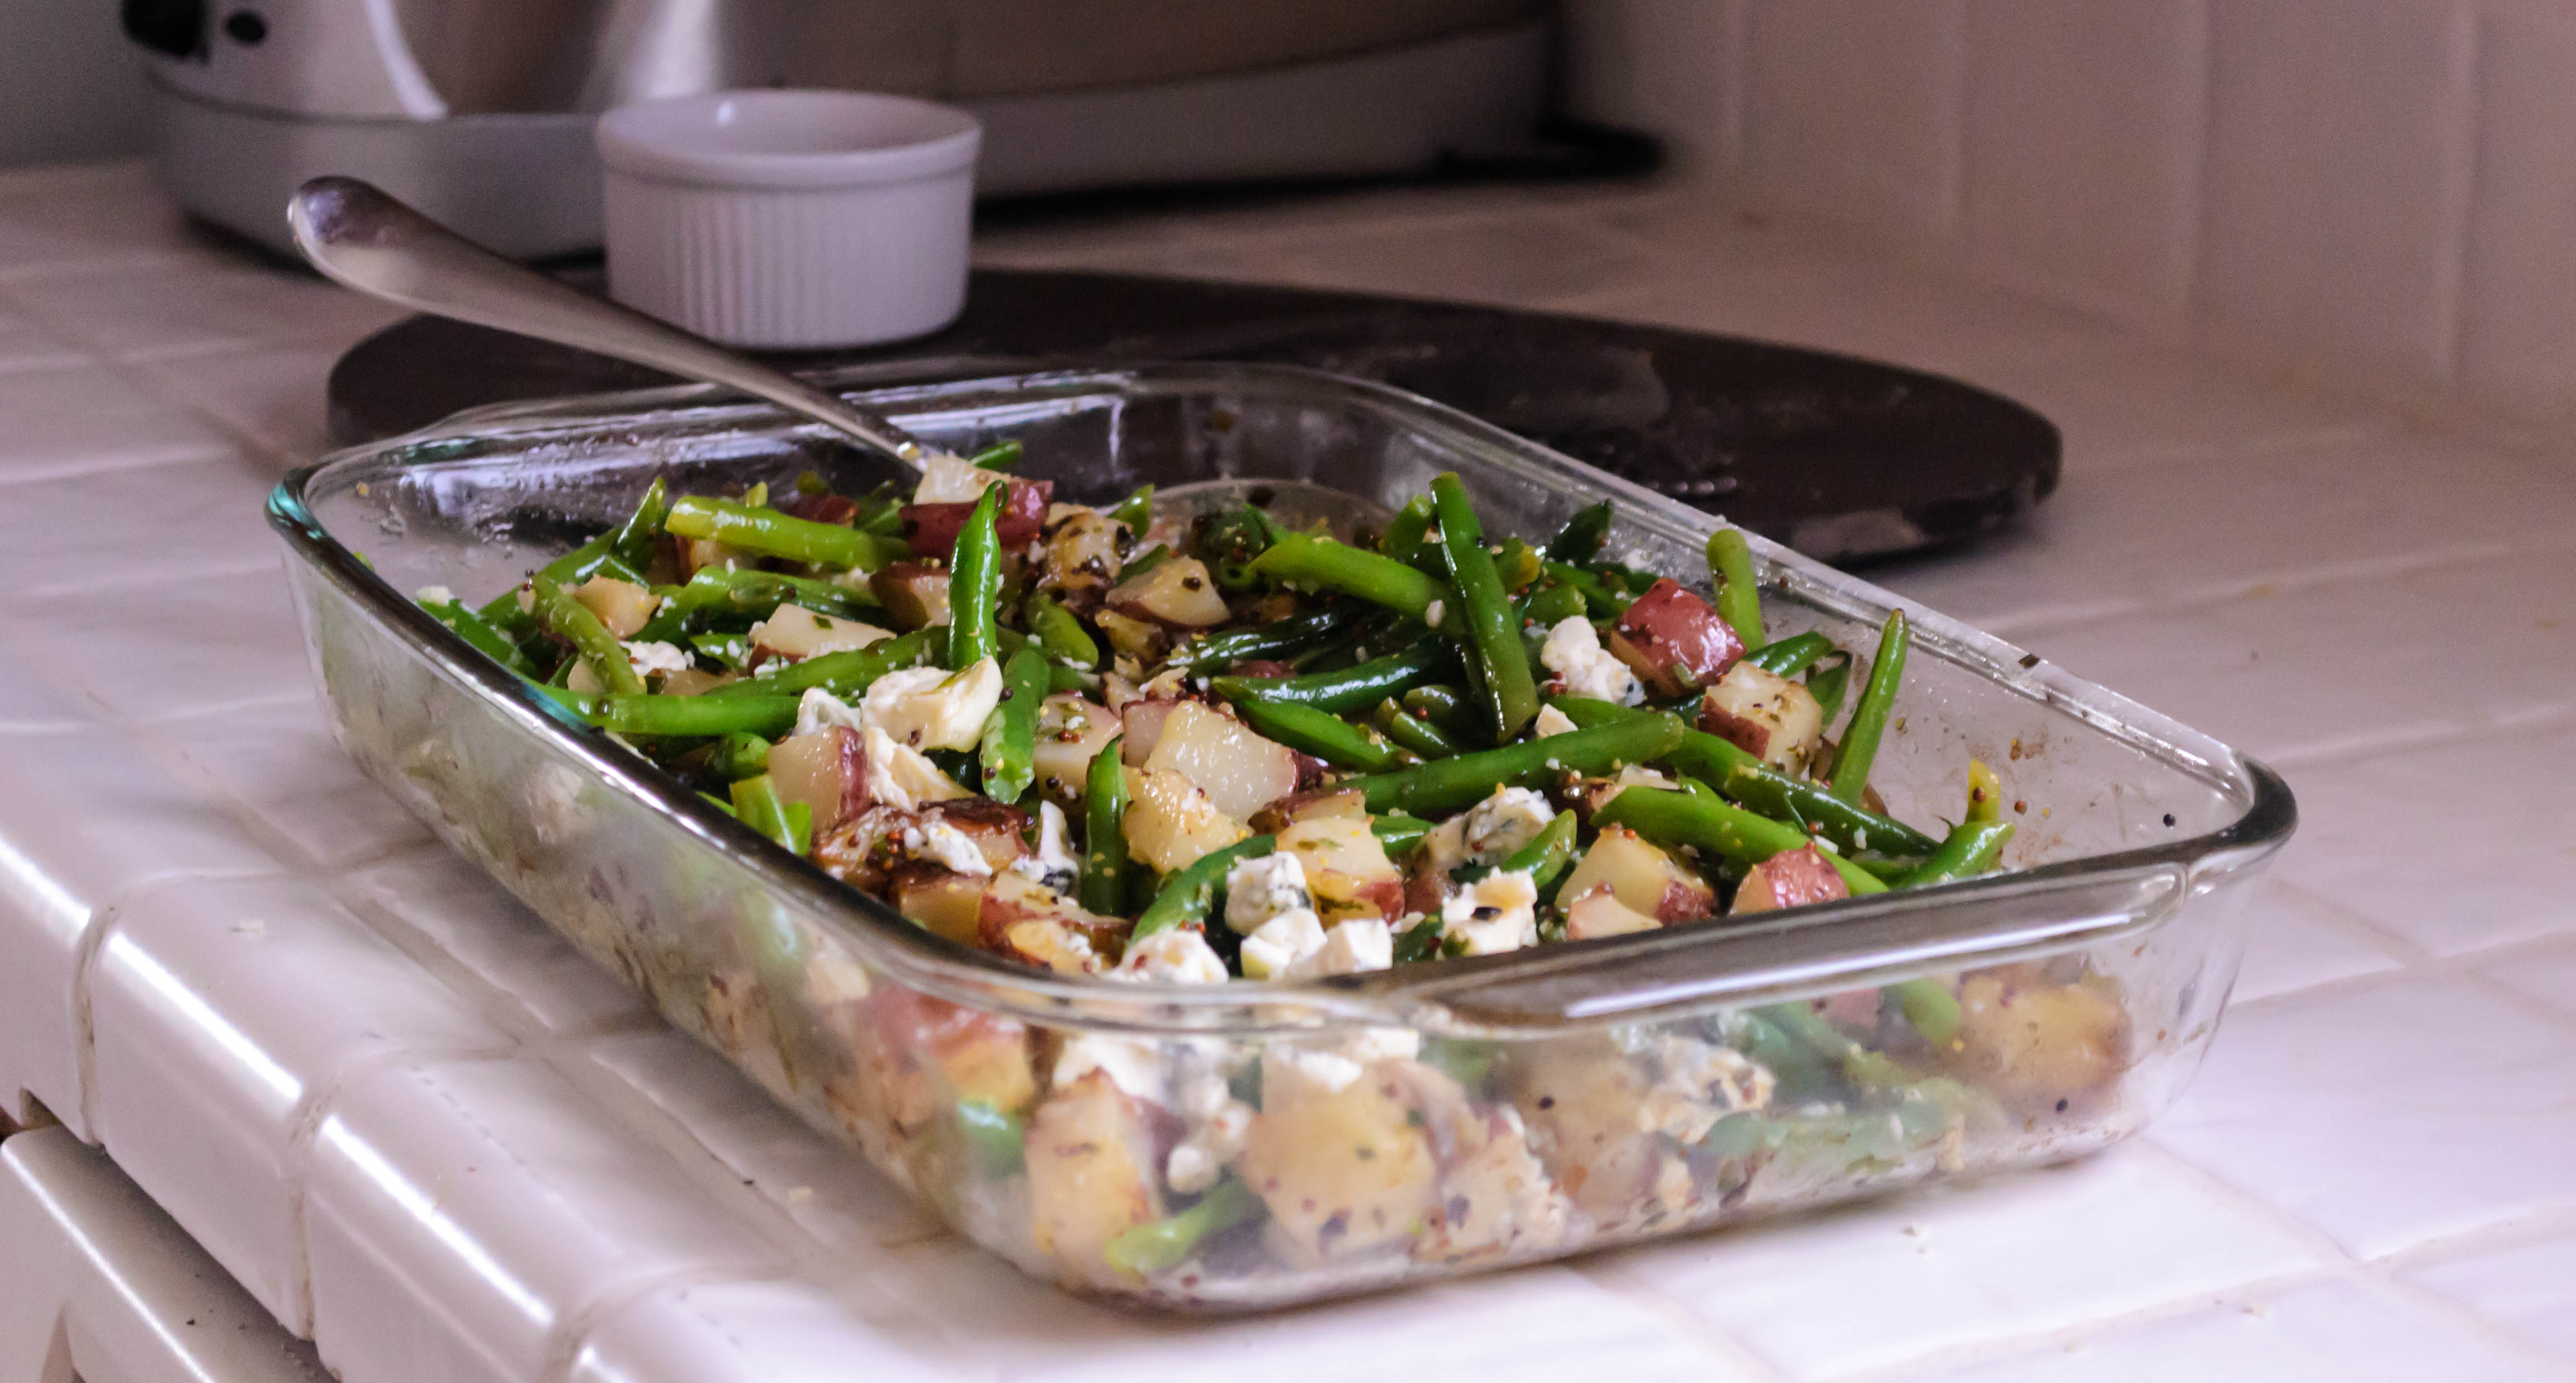
Speaking of entrees, let’s talk food. Specifically, let’s talk potato salad. It’s not summer just yet, so it’s a little soon to dive into a platter of mayonnaise-robed spuds shot through with crisp cubes of onion and pickle. But because I surely am not the only one longing for everything a good potato salad represents, this adaptation from The Bon Appétit Cookbook is a perfect compromise. Here, roasted potatoes provide warmth and comfort, all caramelized edges and creamy softness, but a sharp, tangy mustard vinaigrette and crisp-tender green beans push the dish salad-ward.

Food blog May 2015-0711To fill my yen for green vegetables, I’ve doubled the amount of green beans and reduced the quantity of oil from the original. I’ve also eliminated walnuts and changed up the herbs to suit my fancy, and gone with whole grain rather than dijon mustard, because I like the tart pop of the little seeds. This can be eaten at room temperature as well as slightly warm, but because a generous scattering of blue cheese adds a creaminess and funk to the party, you don’t want things too heated, lest melting commence.

Food blog May 2015-0717This is the kind of dish that contents me as an entree. I suspect it would happily welcome a handful of crisp crumbled prosciutto or diced hard salami, if you want a little meaty component. If you’re treating it as a side dish, I highly recommend sausages of any variety to round out the plate, or a nicely roasted or grilled pork tenderloin.

Food blog May 2015-0725As most things are, this was just as good on day two heated up just enough to take the chill off, and topped with a fried egg still runny enough in the yolk to offer a velvet golden cascade that turned the salad into something more like a hash, my own ideal of comfort food. It’s the very thing you need, when you know summer is coming but you can’t quite see the light yet.

Food blog May 2015-0738

Green Bean and Roasted Red Potato Salad with Blue Cheese
Adapted from The Bon Appétit Cookbook
Serves 6 as a side dish
For dressing:
¼ cup whole grain mustard
3 tablespoons white wine vinegar
½ cup olive oil
3 tablespoons finely minced chives
2 teaspoons finely minced sage
For salad:
2 pounds red skinned potatoes, cut into 1-inch chunks
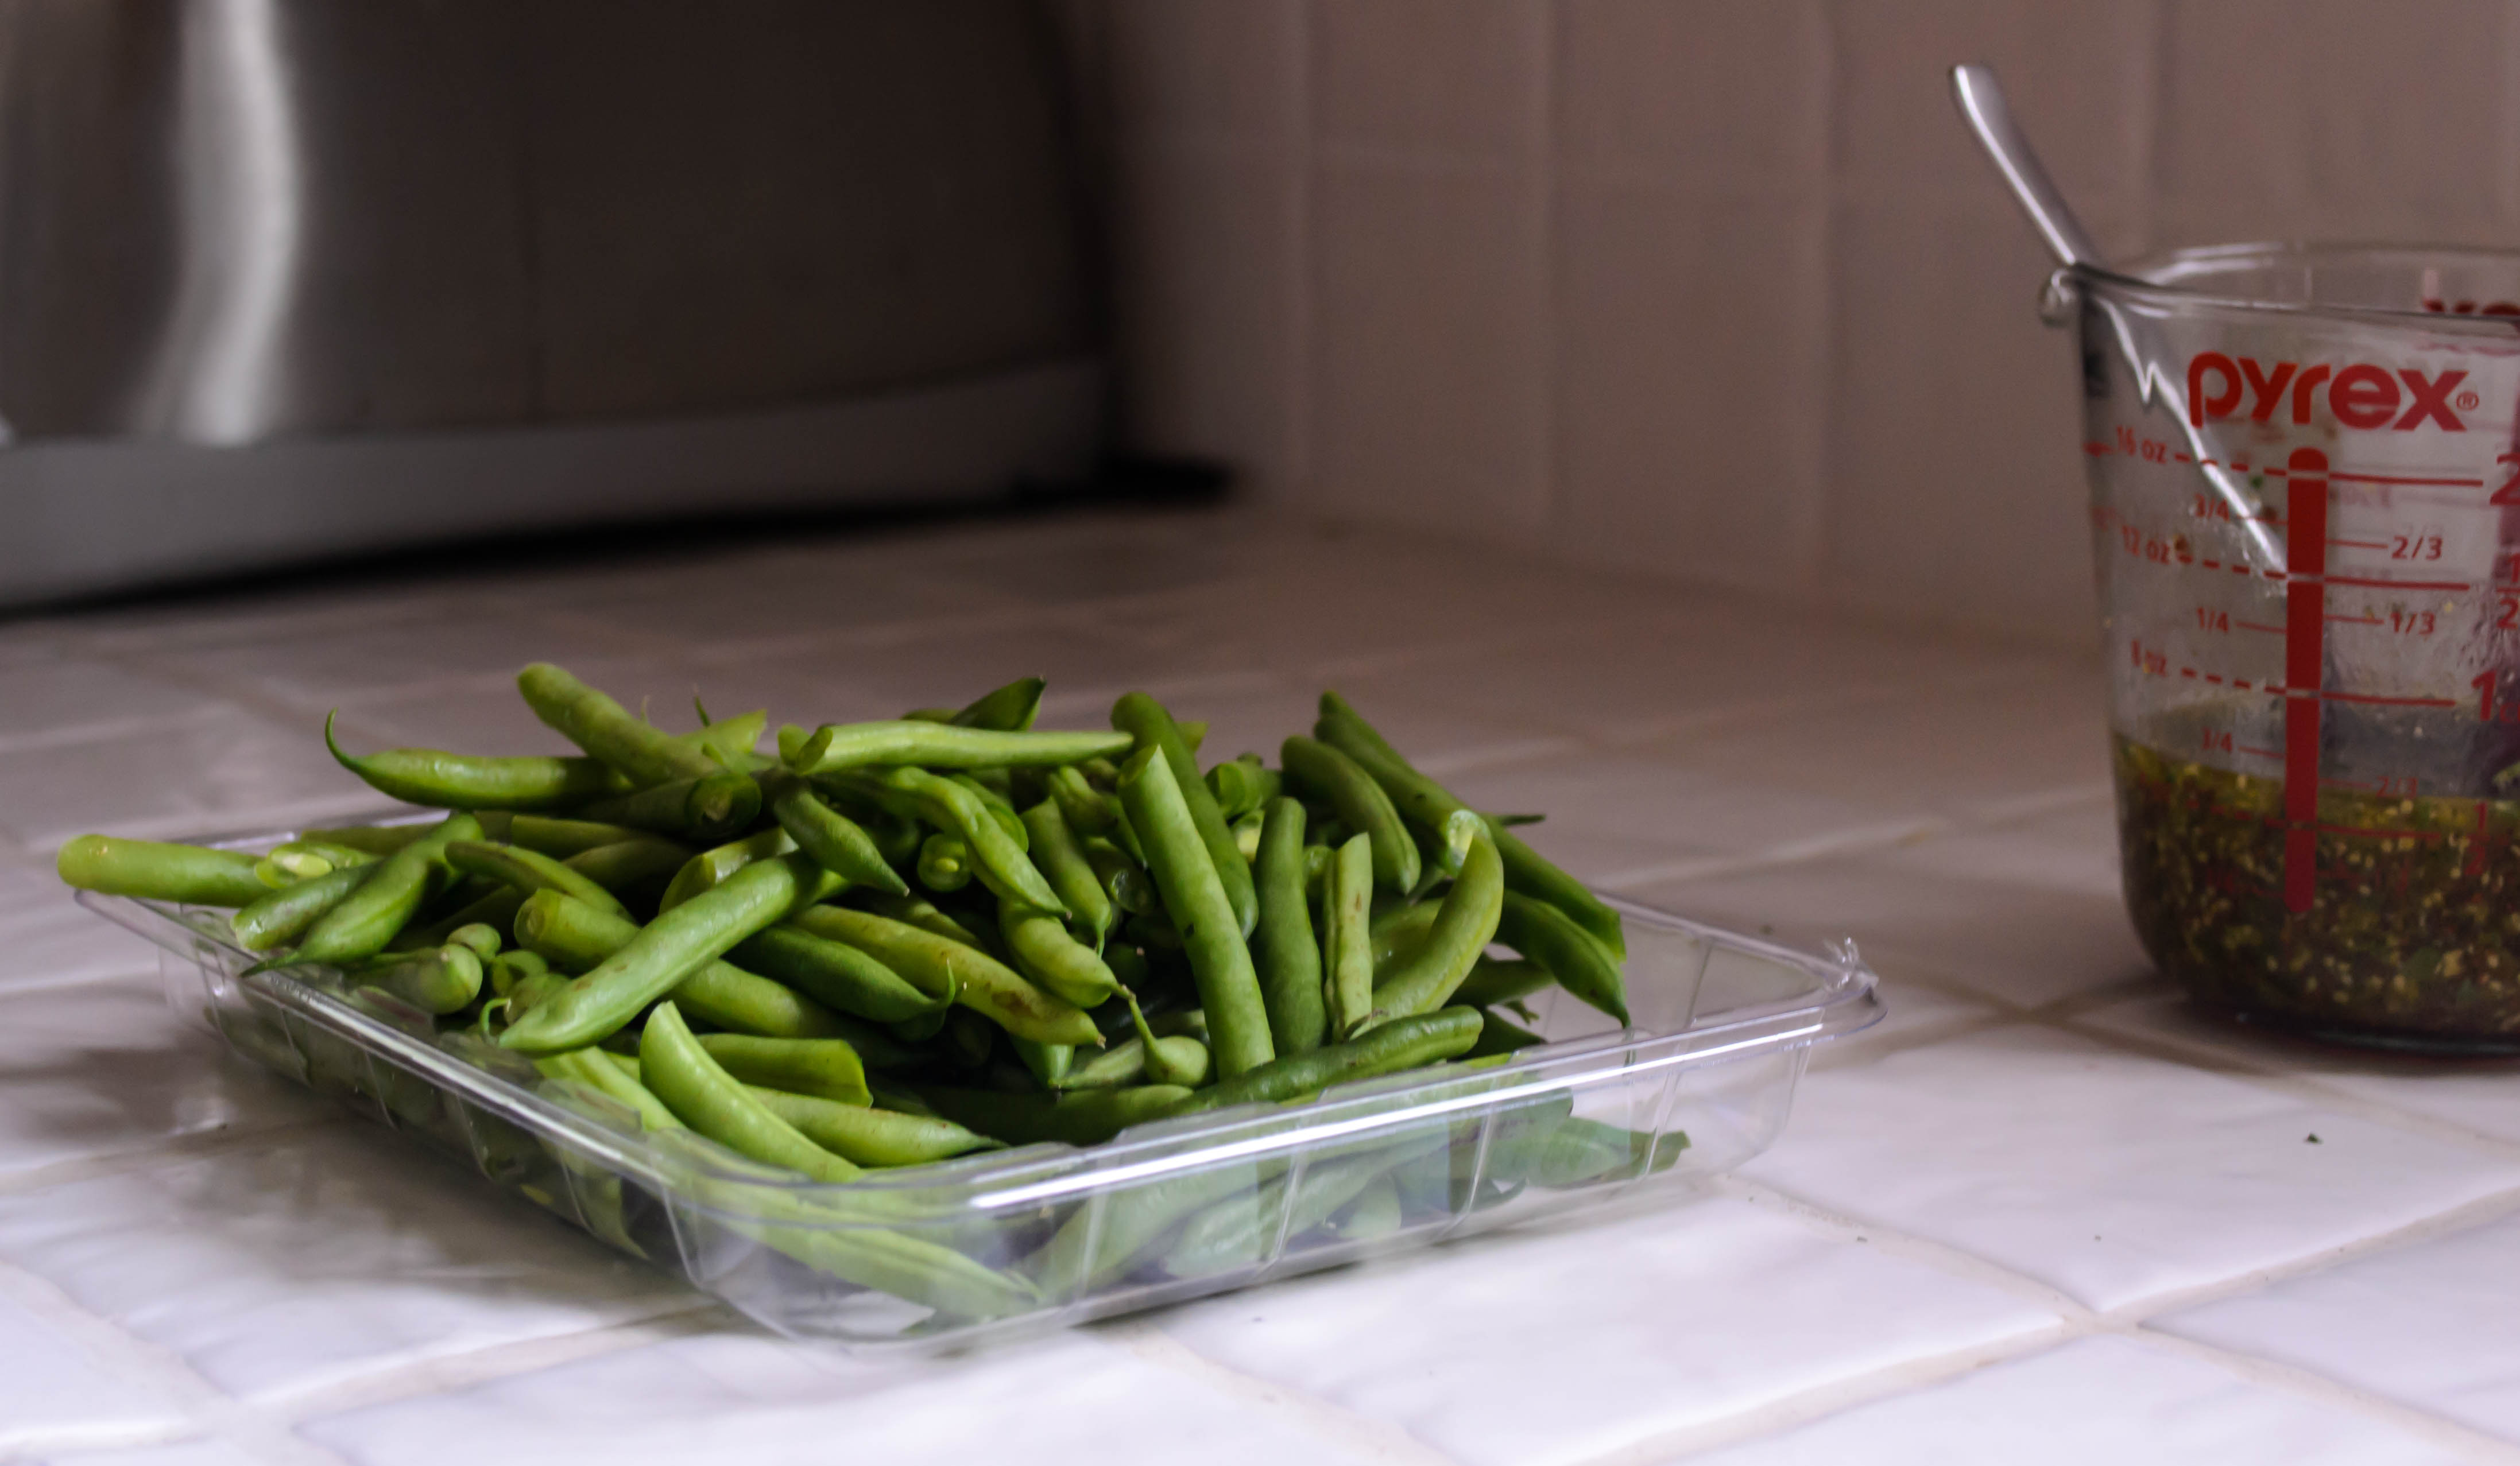
16 ounces green beans, trimmed of stem ends and halved on an angle
⅔ cup crumbled blue cheese


  • For the dressing, combine the mustard and vinegar in a 2-cup measuring cup or a small bowl. Gradually whisk in the oil until well emulsified. Add the herbs and season to taste with salt and pepper, keeping in mind the flavor will be much sharper alone than when it’s coating the salad.
  • Preheat oven to 450F. Toss the potato chunks with ¼ cup of the dressing in a 9×13 inch baking dish. Roast for 20 minutes at 450F.
  • After 20 minutes, reduce the oven temperature to 375F. Shuffle the potatoes around for even browning, then roast 30-45 minutes more, until tender. Stir and shake once or twice during the cooking process to minimize sticking and ensure even cooking. When potatoes are tender, remove from oven and set aside to cool slightly.
  • While potatoes cook, bring a large skillet of salted water to a boil and drop in the green beans. Cook until crisp-tender, 2 to 3 minutes, then drain and cool.
  • When the beans and potatoes are still warm but not piping hot, combine in a large bowl (or just keep them in the original baking dish, as I did), add cheese and ¼ cup of the dressing (you may need to re-whisk the dressing first, as it will separate as it sits), and toss gently. Taste for dressing and seasoning, and adjust to your preferences (I added about 2 tablespoons additional dressing and a bit of black pepper).
  • Serve warm or at room temperature.

Roots Latkes

Most kids, upon reviewing what they ate during college, will talk about late night burrito runs. There will be a fair share of ramen noodle stock-up stories, and an assessment of the school’s dining facilities. For a student who has moved off campus, such a topic is likely to provoke a discussion of microwaveable meals. I had my share of those as well, I’ll readily admit, particularly during the month after a stunningly disorienting and unexpected breakup during which I subsisted mainly on Coca-Cola, boxed stuffing mix, Godiva ice cream, and carne asada burritos to-go from a restaurant next door to the grocery store where I was buying the rest of my supplies.

Food Blog November 2014-0694Thankfully, that month or so was an exception. For much of my off-campus college career, I lived with one other girl in a duplex her mom rented to us, and we fed each other. Sometimes it was easy stuff: pancakes, omelets, pasta with jarred red sauce, sometimes something a bit junkier like Oreo milkshakes. But we definitely introduced each other to our classics. One of mine was a modification of an old Ghirardelli oatmeal chocolate chip cookie recipe. One of hers was a simple, lovely little roasted vegetable dish her family just called “roots.” Roots consisted of, well, roots. Russet potatoes, sweet potatoes, carrots, parsnips, rutabagas, turnips, and sometimes beets got peeled, cubed, and tossed with salt, pepper, and olive oil. The first time she made it for us, K. said that she wasn’t sure how much olive oil to use, but that her mom said it should be just enough that the raw cubes of vegetables “glistened.” Then we loaded them into large glass casserole dishes and roasted them until they were done.

Food Blog November 2014-0681Roots comprised whole meals for us during those years. Sometimes there would be some kind of green side, but mostly we just sat down (never at the table, always on the couch) with big bowls of autumnal cubes, toasty and brown on the outside, starchy and pillowy soft on the inside, and inhaled them. It was reasonably good for us, it was filling, it was delicious, and best of all, it was cheap. The biggest disadvantage to the whole endeavor was getting a cashier at the grocery store who didn’t recognize “weird” vegetables like rutabagas and parsnips, and would take a long time looking up the codes to ring them up.

Food Blog November 2014-0682Over the years, I’ve made roots more times than I can count. They are a lovely comfort food dish: simple to make, hot and forgiving, and easily changed up depending on what vegetables and herb combinations you like the best. Over time, I’ve eliminated beets from the equation, and opted to add plenty of chopped rosemary to the requisite salt, pepper, and olive oil.

But recently, I got thinking about roots again and wondered what it would be like to turn these simple cubed, roasted vegetables into a latke. This would increase the ratio of crisp edges to soft interior, always a good thing, and cut down a bit on preparation as well as cooking time – you can just shred everything in a food processor before frying it up, rather than cubing by hand before waiting out the hour or more the original takes in the oven.

Food Blog November 2014-0687This was, as it turned out, exactly the right thing to do. I opted for potato, carrot, parsnip, and rutabaga as my key players. They whiz into a tangle of starchy threads. Half an onion joins the party – it’s part of a standard latke, and it’s a root vegetable too. As a nod to the common practice of serving latkes with applesauce, I added a tart green apple to the vegetable combination and was pleased with the sweet sharpness it contributed. And I preserved my own love of rosemary with a hefty tablespoon in the mix.

A few eggs, a toss with some flour, and salt and pepper to season, and you carefully drop-pour dollops of the sticky mixture into hot vegetable oil, preferably in a nicely seasoned cast iron pan. It sizzles, it browns, you flip it, and within ten minutes from your first addition of batter, you are passing out hot roots latkes to your delighted diners. Or, if you want to serve everything together, you can stow each batch in the oven on a rack in a baking tray to keep them warm and crisp.

Food Blog November 2014-0690What you are left with is a reasonably quick, reasonably easy (both provided you have a food processor with a shredding disk) meal that doesn’t cost much but tastes exactly right for the approach of chillier weather. The flavors are more complex than your standard latke – there’s a mix of sweetness from the addition of the carrot and the apple. The parsnip and rutabaga have a spicy, earthy flavor that reminds me somehow of incense, a feeling pleasantly intensified by the rosemary.

Since I’d already captured the applesauce element by adding apple to the batter, I served these with a dollop of sour cream as a nod to another classic pairing.

Food Blog November 2014-0695

Roots latkes
Makes about a dozen  3-inch latkes
1 yukon gold potato
1 large carrot, peeled
1 large parsnip, peeled
1 medium rutabaga, peeled
1 large tart apple, cored
½ large white or yellow onion, ends and papery skin removed (either color is fine, so long as it’s not a sweet onion)
1 tablespoon minced rosemary
1-½ cups all-purpose flour
2 eggs, lightly beaten
1 teaspoon salt, or to taste
½ teaspoon pepper, or to taste
½-1 cup vegetable oil
Sour cream, for serving (optional)


  • Begin heating ½ cup of vegetable oil in a large cast iron skillet over medium heat – it will take a few minutes, but you are looking for it to just shimmer when swirled around the pan. If you plan to make the whole batch at once and need to keep them warm, preheat the oven to 300F and position a baking sheet with a wire rack on it inside the oven.
  • Fit a food processor with the shredding disk, or address the largest holes on a box grater with care for your knuckles. Cut the vegetables into the size needed to fit comfortably down the feeding chute of the food processor, and carefully feed the potato, carrot, parsnip, rutabaga, apple, and onion through the machine to create long, thin shreds of vegetable.
  • Dump the whole mess into a large bowl and mix them up a bit with your fingers to distribute evenly. You’ll be left with strands of vegetable confetti.
  • Add the rosemary and flour to the vegetable shreds and toss well with your fingers to combine. Then add the eggs and the salt and pepper, and mix well to combine. You could use a spoon or spatula for this, but I just use my fingers. They do a better job ensuring everything is evenly distributed.
  • When the oil is shimmering, plop ¼ – ⅓ cup dollops of the mixture into the oil. In my 10-inch skillet, I can fit three dollops of batter comfortably without touching – don’t crowd them. When they hit the oil, they should sizzle lightly. If the oil spits aggressively, it’s too hot. Turn the heat down or remove the pan from the heat for a minute to cool it down.
  • Sizzle the latkes for 4-5 minutes on the first side, until it is evenly golden-brown and crisp. Flip carefully (oil splatters) and cook for 2-3 minutes on the second side, until it too is brown and crisp. Move to the rack in the oven to keep warm, or directly to a plate for immediate consumption.
  • Repeat until batter is used up. If the oil level gets low or the latkes begin to brown unevenly, add additional vegetable oil to the skillet, giving it time to heat up before adding more batter.
  • Serve with sour cream, if desired, or applesauce, or just an anxious fork.

Grilled Potato and Radish Salad

In the last three years, I have had the incredible good luck of attending a wedding each summer. Two years ago, I had the great honor of making the cake. One year ago, I sobbed as I watched two women legally and joyfully exchange vows, then start perhaps the greatest dance party I’ve ever attended. And this past weekend my eyes welled as the bride – dressed in a frock she designed herself, alternating white and lemon yellow flounces – betrayed just a tiny quiver in her perfect, crimson lips as her sister read a toast: a poem she’d written herself.

Food blog June 2014-3913The poem was about the bride and groom, but it was also about older and younger sisters: the beautiful friend/family/learning relationship they have as they grow up together. It was, there is almost no need to assert, beautiful. Of course it was. It was about the things the girls had weathered, and how the groom had woven his way into their laughter and music, through music of his own. But it was also about what the bride had taught her sister.

Food blog June 2014-3907Sisters learn funny things from each other, and it is disarming and lovely to be allowed to see what things they consider most important. How to read, how to write, how to sing. And, somehow magically, “how to cook radishes.” Until five or six years ago, I’d never given much thought to cooking radishes. To be honest, I hadn’t given much thought to radishes at all. They were just there, all weird and pinkly peppery, flying saucers scattered through the occasional salad, or sharp and pungent and paired with butter and salt.

Food blog June 2014-3910But here’s a funny thing, about radishes, about weddings, about friends and family and learning: as you get older, you get to choose things. Weddings help us construct the families we choose. But so can friendships, and so can an experience like graduate school, and so, oddly enough, can radishes.

Food blog June 2014-3911When N. and I lived in Eugene, Oregon, we decided to grow a garden. It was easy, there. It was a matter of shoving seeds into a spare bit of dirt, and watching them grow. Until the height of summer, it rained so often you barely had to worry about watering. Peas were one of our first crops, and of course we were invested in our tomatoes. But I’d still never considered radishes. Until, at S.’s house, a friend who has now become family, I was handed a french breakfast radish, pulled from her own little vegetable plot minutes before, a pink and while icicle the neighborhood deer had left quite alone. “You can just eat the whole thing,” S. told me, and I did. And the mild crunch, and the crisp, juicy spiciness, all but made me a convert then and there.

Food blog June 2014-3912After that first year of gardening, I always bought a pack of radish seeds. And they will never not make me think of S: razor wit, funny and honest and lovely and brilliant. She’s a willing and gracious hostess, she’s a fantastic cook, and she’s the mom to my own dog-daughter’s canine BFF. She, like the bride and groom this past weekend, like J & HP whose wedding cake I made, the people I can barely wait to spend fourth of July weekend with, is one of that special and cautiously assembled group: the family I chose.

Food blog June 2014-3915And as the fourth of July approaches, and those lovely people you choose to surround yourself with, to learn from, to sing with and read with and cook with, begin to turn their thoughts to potato salad, let me offer a fresh take to consider. This is not your traditional mayonnaise-laden, pickle-and-onion-and-dusted-with-paprika barbecue offering. (If you are after one of those, may I humbly suggest this one?) But I like this different approach, because it is lighter and fresher, because it does not require stove or oven heat, and because it makes me think of S. Tiny fingerling potatoes and plump lipstick red radishes get quartered, salted and peppered and oiled, and grilled until tender and silky. And then a few green onions, just to get a gentle char. Meanwhile, an assertive vinaigrette gets overburdened with herbs and whisked within an inch of its life to be drizzled over a bed of greens. I like arugula. S. would tell you to use the radish greens (but wash them a few times first – they can be really sandy). Potatoes and radishes get tumbled in, and after a quick toss the greens are barely wilted and the dressing soaks into the grilled vegetables like sponges in a bath.

I don’t know if this is how my bride friend’s sister learned to cook radishes. I suspect not. But the point is, those lovely things we learn, and choose, and become, should be shared.

Food blog June 2014-3913

Grilled Radish and Potato Salad, for Sarah.
Adapted from Cuisine at Home
Serves 2 as a main, 4-6 as a side
1 pound radishes, rinsed well, tops and tails removed
1 pound baby potatoes – the smaller the better
4 tablespoons olive oil, divided
1 bunch green onions or scallions, root ends trimmed off
¼ cup white wine vinegar or lemon juice
2 teaspoons dijon mustard
2 teaspoons finely minced dill
2 teaspoons finely chopped parsley
salt and pepper to taste
2-4 cups loosely packed arugula, or a combination of arugula and well-rinsed radish greens


  • If you are using a gas grill, place a grill tray on the burners and preheat the grill to medium over direct heat. If you are using a charcoal grill, light the coals. As they begin to turn gray, add the grill tray to let it heat up. If you are using an oven, preheat it to 425F with a sheet tray inside.
  • Quarter the radishes and halve or quarter the baby potatoes. You want equal, bite-size pieces – they need about the same amount of time to cook.
  • In a large bowl, toss the potatoes and radishes with 1 tablespoon of the olive oil, and salt and pepper to taste. Transfer them to the preheated grill or sheet tray in a single layer.
  • Grill until tender, 10-15 minutes, agitating as required to prevent burning. If you are using an oven this may take more like 20-25 minutes.
  • Meanwhile, make the vinaigrette: in a large bowl (I use the same bowl as before), whisk the remaining 3 tablespoons olive oil with vinegar, mustard, and herbs.
  • When radishes and potatoes are tender, transfer them to the bowl with the vinaigrette. Add the arugula (and radish greens, if using) and toss to combine.
  • Grill the green onions for 3-5 minutes, until the white bulbs are slightly softened and the greens are nicely charred. Chop and add to the salad, again tossing to combine.
  • Season the salad to taste with additional salt and pepper, if needed, and serve warm or at room temperature.

Homemade Mayonnaise and Toasted Potato Salad

Food Blog May 2014-3905My interests for some time have been food and bodies. Academically, as I’ve noted on my About page, I studied bodies. I’m interested in the way we represent them in literature, and increasingly, the way we represent them in our own self-presentation. This makes me a better teacher, I think, because it keeps me aware of my students as people – as living, breathing bodies who think and act and speak not always according to logic or reason, but to their status as physical beings ruled by whims and appetites. It also makes me, I hope, a better human being, since I recognize what this kind of embodiment means for my fellow beings.
Food Blog May 2014-3895Outside of academics, I love food (I’m sure you would never have guessed this). This pair of interests makes total sense to me. Bodies, after all, require food. It fuels us, it nurtures us, and it affords us pleasure of many sorts. The pleasure of a full belly. The pleasure of a silky custard against the tongue, or a thick hunk of steak between the teeth, dissolving into creamy fat at the edges.
Food Blog May 2014-3886All too often, though, our associations between food and bodies are negative. We use the slippery jiggle of jelly to describe a stomach or a bottom that we deem too ample or not sufficiently firm. Our brains are “fried” or “scrambled” when we feel tired or off our game. “Muffin top” is a newer construction thanks to the popularity of tight and midriff-baring wardrobes (deemed, interestingly enough, one of the most creative words of 2005 by the American Dialect Society). And of course there is the classic complaint of “cottage cheese thighs.”
Food Blog May 2014-3891I want to propose a new one, to break this concentration on the negative textures and attributes we give our bodies, and refocus attention instead on their strength and abilities: mayonnaise arms.
Food Blog May 2014-3889At first glance, this sounds just as negative as the others. The rich fatty consistency of mayonnaise calls to mind a sagging bicep rife with cellulite. But I’m not talking about a visual comparison. I’m talking cause and effect. Though she certainly has a more traditional exercise routine, after my weekend of making mayonnaise from scratch, you could tell me First Lady Michelle Obama’s amazing arms were forged whipping her own condiments and I wouldn’t be at all surprised. The sustained whisking mayonnaise requires, pulling egg yolk and oil together into a magical, fluffy, silky, creamy emulsion, has the potential to produce incredible toned limbs (and then sit down to a perfectly dressed BLT. Just saying).
Food Blog May 2014-3892This is my fifth installment in 2014’s Project Sauce,* and for the first time I have to admit I was quite nervous. Even the fussiness of last month’s hollandaise didn’t throw me off all that much, since I’d made it before. But the idea of whisking a raw egg yolk and some oil into a fluffy spread had me feeling tentative. First of all, despite understanding a bit about the power of emulsions, it seemed so unlikely those humble ingredients could even approximate something like the jar of Hellman’s hanging out on my fridge door. Secondly, even though I knew my chances of getting salmonella from my homemade spread were quite low, I still felt a little uncomfortable about what seemed like dangerous cooking.
Food Blog May 2014-3893However, there’s nothing like the internet for at once increasing and assuaging fears. Amongst articles about salmonella poisoning babies and questions about whether it’s safe to eat macaroni salad that has sat around on a picnic table for hours, I found a few mayonnaise recipes that suggested heating the egg yolk gently to 150F, at which temperature the bacteria that causes salmonella bites the dust. This is also the temperature where egg proteins solidify, but the addition of acid in the form of lemon juice or vinegar raises the coagulation temperature, so you still maintain a liquid yolk even while reducing the already minimal chances of food-borne illness. Other cautious suggestions offered using pasteurized eggs (this heating process is basically pasteurizing them), or washing the shell carefully before cracking (since the shell itself is where bacteria like to hang out). This gentle heating sounded like a reasonable suggestion to me, so using a combination of recipes and procedures (privileging Michael Ruhlman’s suggestions in Ratio, to which I find myself returning again and again), I whisked and measured and heated and cooled and whisked and whisked and whisked and ended up with a bowl of fluffy, creamy, pillowy spread that looked almost identical to the commercially produced stuff I’ve been buying and greedily applying to fried egg sandwiches for years! Several times, in between shaking out my arms as they screamed at the endless whisking, I said aloud, stunned, “It looks like mayonnaise! It actually looks like mayonnaise!” This was, apparently, one of those things I never really conceived of making myself.
Food Blog May 2014-3894So. Mayonnaise is possible. Though like the other sauces I’ve created, it needs a vehicle for consumption. As Ruhlman notes in a defense of fat-based sauces, “you wouldn’t want to eat a bowl of vinaigrette or a cup of mayonnaise or a stick of butter” (165). I laughed – in my deepest, guiltiest heart of hearts a cup of mayonnaise sounds attractive, though probably not without some kind of starch or vegetation to cut the thickness – but he’s right. It’s not a lone ranger.
Food Blog May 2014-3897With Memorial Day upon us and summer leaping ever closer, then, I went to one of my favorites: potato salad. In my version, fingerling potatoes are boiled and then crushed and lightly toasted in olive oil, so their skins get slightly crisp and they break apart gently when mixed with the other ingredients. Hard boiled eggs, capers, dill, garlic, and a generous scattering of green onions provide the colors and flavors for that beautiful blank canvas of potato and mayonnaise to play with. And I can’t resist a little squeeze of mustard. Creamy. Toasty. Fluffy. Perfect.
Food Blog May 2014-3905As summer gets ever closer, instead of complaining about our beer bellies or muffin tops or cottage cheese thighs, I vote we create, and celebrate, mayonnaise arms instead!

*Yes, mayonnaise is considered a sauce, even though the thick, creamy spread we most commonly envision when we hear the term is used primarily as a condiment. But think aioli: basically a thin mayo with garlic added. Even hollandaise is similar to a thin mayo, with the egg yolk heated and emulsified with butter rather than oil. In perhaps my favorite application, Belgian in inspiration, mayonnaise is used to sauce french fries, and what a glorious sauce it then becomes…

Homemade Mayonnaise
Makes a scant cup
Note: this is a quite lemony mayonnaise. If you aren’t fond of that flavor or want to dial back the citrus, use just one teaspoon of lemon juice, and a tablespoon of water instead. Alternately, you can use a vinegar of your choosing to create your preferred flavor of acidity.
Note #2: I strongly recommend you get everything ready for this before you begin the process. I’m talking various bowls, ice bath, oil measured, all that. You’ll be happier for it, I promise.
Note #3: Though this mayonnaise stores just fine in the fridge for a week, it may separate a bit as it chills. Vigorous whisking at room temperature, and in a dire case another dribble of water or squeeze of mustard feverishly incorporated, should bring things back together.
1 large egg yolk (save the white for a meringue or angel food cake or fluffy waffles)
1 teaspoon water
1 tablespoon lemon juice
½ teaspoon salt, or to taste
1 cup (8 ounces) vegetable oil
  • Before you begin, start about 2 inches of water heating in a medium pot. You want to bring this to a bare simmer. While it heats up, fill a large bowl with ice and water and set it in the sink. We are heating the egg yolk in the unlikely event it is harboring bacteria, but mayonnaise is a “cold” sauce, so we will need to cool the yolk quickly once it has reached the appropriate temperature.
  • In a medium, heat resistant mixing bowl (I used glass), whisk together the egg yolk, water, and lemon juice (or vinegar, if you’re using that instead). Set the bowl carefully over the pot of simmering or near-simmering water, being careful not to let the water come to a boil or to touch the bottom of the bowl.
  • Whisk the egg yolk mixture constantly but slowly over the pot until the yolk registers at 150F on a kitchen thermometer, about 4-5 minutes. You don’t need to whisk with particular determination here – we are not looking to change the consistency as we would with a hollandaise; just to keep it moving so it doesn’t scramble.
  • At just under 150F, the yolk will thicken a tiny bit. At first when this happened I thought the whole thing was ruined. It’s not. Don’t worry. The addition of the acid and water will prevent the protein in the yolk from fully coagulating.
  • As soon as you hit 150F, remove the bowl from the heat and carefully float it in the ice bath, continuing to whisk constantly until the yolk mixture cools to room temperature, and taking care not to let any ice water into the mix. You don’t want it to be cold – cold ingredients are reluctant to emulsify (think of bottled salad dressing and the way it separates). Just room temp will do nicely.
  • Once the yolk has cooled, take the bowl out of its ice bath and set it on a counter, wrapping a twisted kitchen towel around the base of the bowl to prevent spinning.
  • Now, add the salt, and begin to drizzle in the oil slowly. You want to add just a few teaspoons at a time, whisking like a madman through the whole process. At first you’ll just have a greasy mess, but slowly as you add more oil, the mixture will get pale and fluffy and creamy, and suddenly will start to look suspiciously like, well, mayonnaise.
  • Continue to drizzle the oil in slowly, whisking the whole time. If your arm gets tired, switch to the other one! If the mixture suddenly starts to look extra shiny or like it might separate, stop adding the oil and whisk extra hard for a minute or two. It should come back together.
  • Once your mayonnaise is fluffy and creamy and stable, taste for salt (this is much, MUCH less salty than a commercial mayo), and use immediately, or store in the fridge for up to a week.
Toasted potato salad with homemade mayonnaise
Serves 1 generously, or 2 as a modest side
10 baby potatoes
2 teaspoons olive oil
2 hard boiled eggs, chopped
4 green onions, thinly sliced on a bias
1 tablespoon capers, chopped
2 teaspoons finely chopped fresh dill
1 clove garlic
¼ teaspoon coarse salt
1 teaspoon Dijon mustard
Black pepper to taste
¼ cup homemade mayonnaise (or more, to taste)
  • Boil the potatoes in salted water until they are fork tender (times will vary depending on the size of your potatoes. Check them after the water has been boiling for 6 minutes, then determine for yourself). When they are done, drain them, remove to a flat surface, and use a potato masher or the back of a fork to lightly crush them. You are looking to split their skins and just flatten them a little bit.
  • In the same (now empty) pot, heat the 2 teaspoons olive oil over medium heat until they slick and shimmer around the pan. Add the crushed potatoes and fry for 3-4 minutes, flipping them over halfway through to reveal golden brown toasted bottoms. When both sides are toasty, remove from heat and let cool.
  • While the potatoes cook, prep the other ingredients, tossing the chopped eggs, green onions, capers, and dill into a medium bowl.
  • To prepare the garlic, smash the clove with the side of a large knife, and remove the peel. Then chop the garlic into a fine dice. Sprinkle the ¼ teaspoon coarse salt over the garlic, and make it into a paste by firmly dragging the flat of the knife across it. The abrasive salt crystals will break down the garlic, making it easier to mix into your salad evenly. Add the pasted garlic and mustard to the bowl.
  • When the potatoes have cooled a bit, add them to the other ingredients, toss together, and add the mayonnaise. Mix gently to incorporate, taste for seasonings, and add black pepper to your liking. If you wish, add additional salt, mustard, or mayonnaise to suit your palate.
    Eat immediately, or chill, covered, in the refrigerator until ready to serve.

Pot Pie Empanadas with Cheddar Crust

Food Blog March 2014-3536Unless you are feeding a large family, or your small family is a bunch of sauce junkies, chances are if you make something like the velouté I shared last week, you are going to have some leftovers. Mine worked out to just under a cup of sauce (you will probably have a touch more – I oversauced my chicken a bit because I was taking photos of the stream of velvet I was pouring), which was clearly too much to trash but, it seemed, not enough to do much with. True, I could have just warmed it up again and scarfed another cutlet, but that didn’t seem very original. Additionally, this sort of flour-thickened sauce doesn’t always reheat particularly well – think about the resolute globs of leftover Thanksgiving gravy. It was going to need some help.
Food Blog March 2014-3537Food Blog March 2014-3543
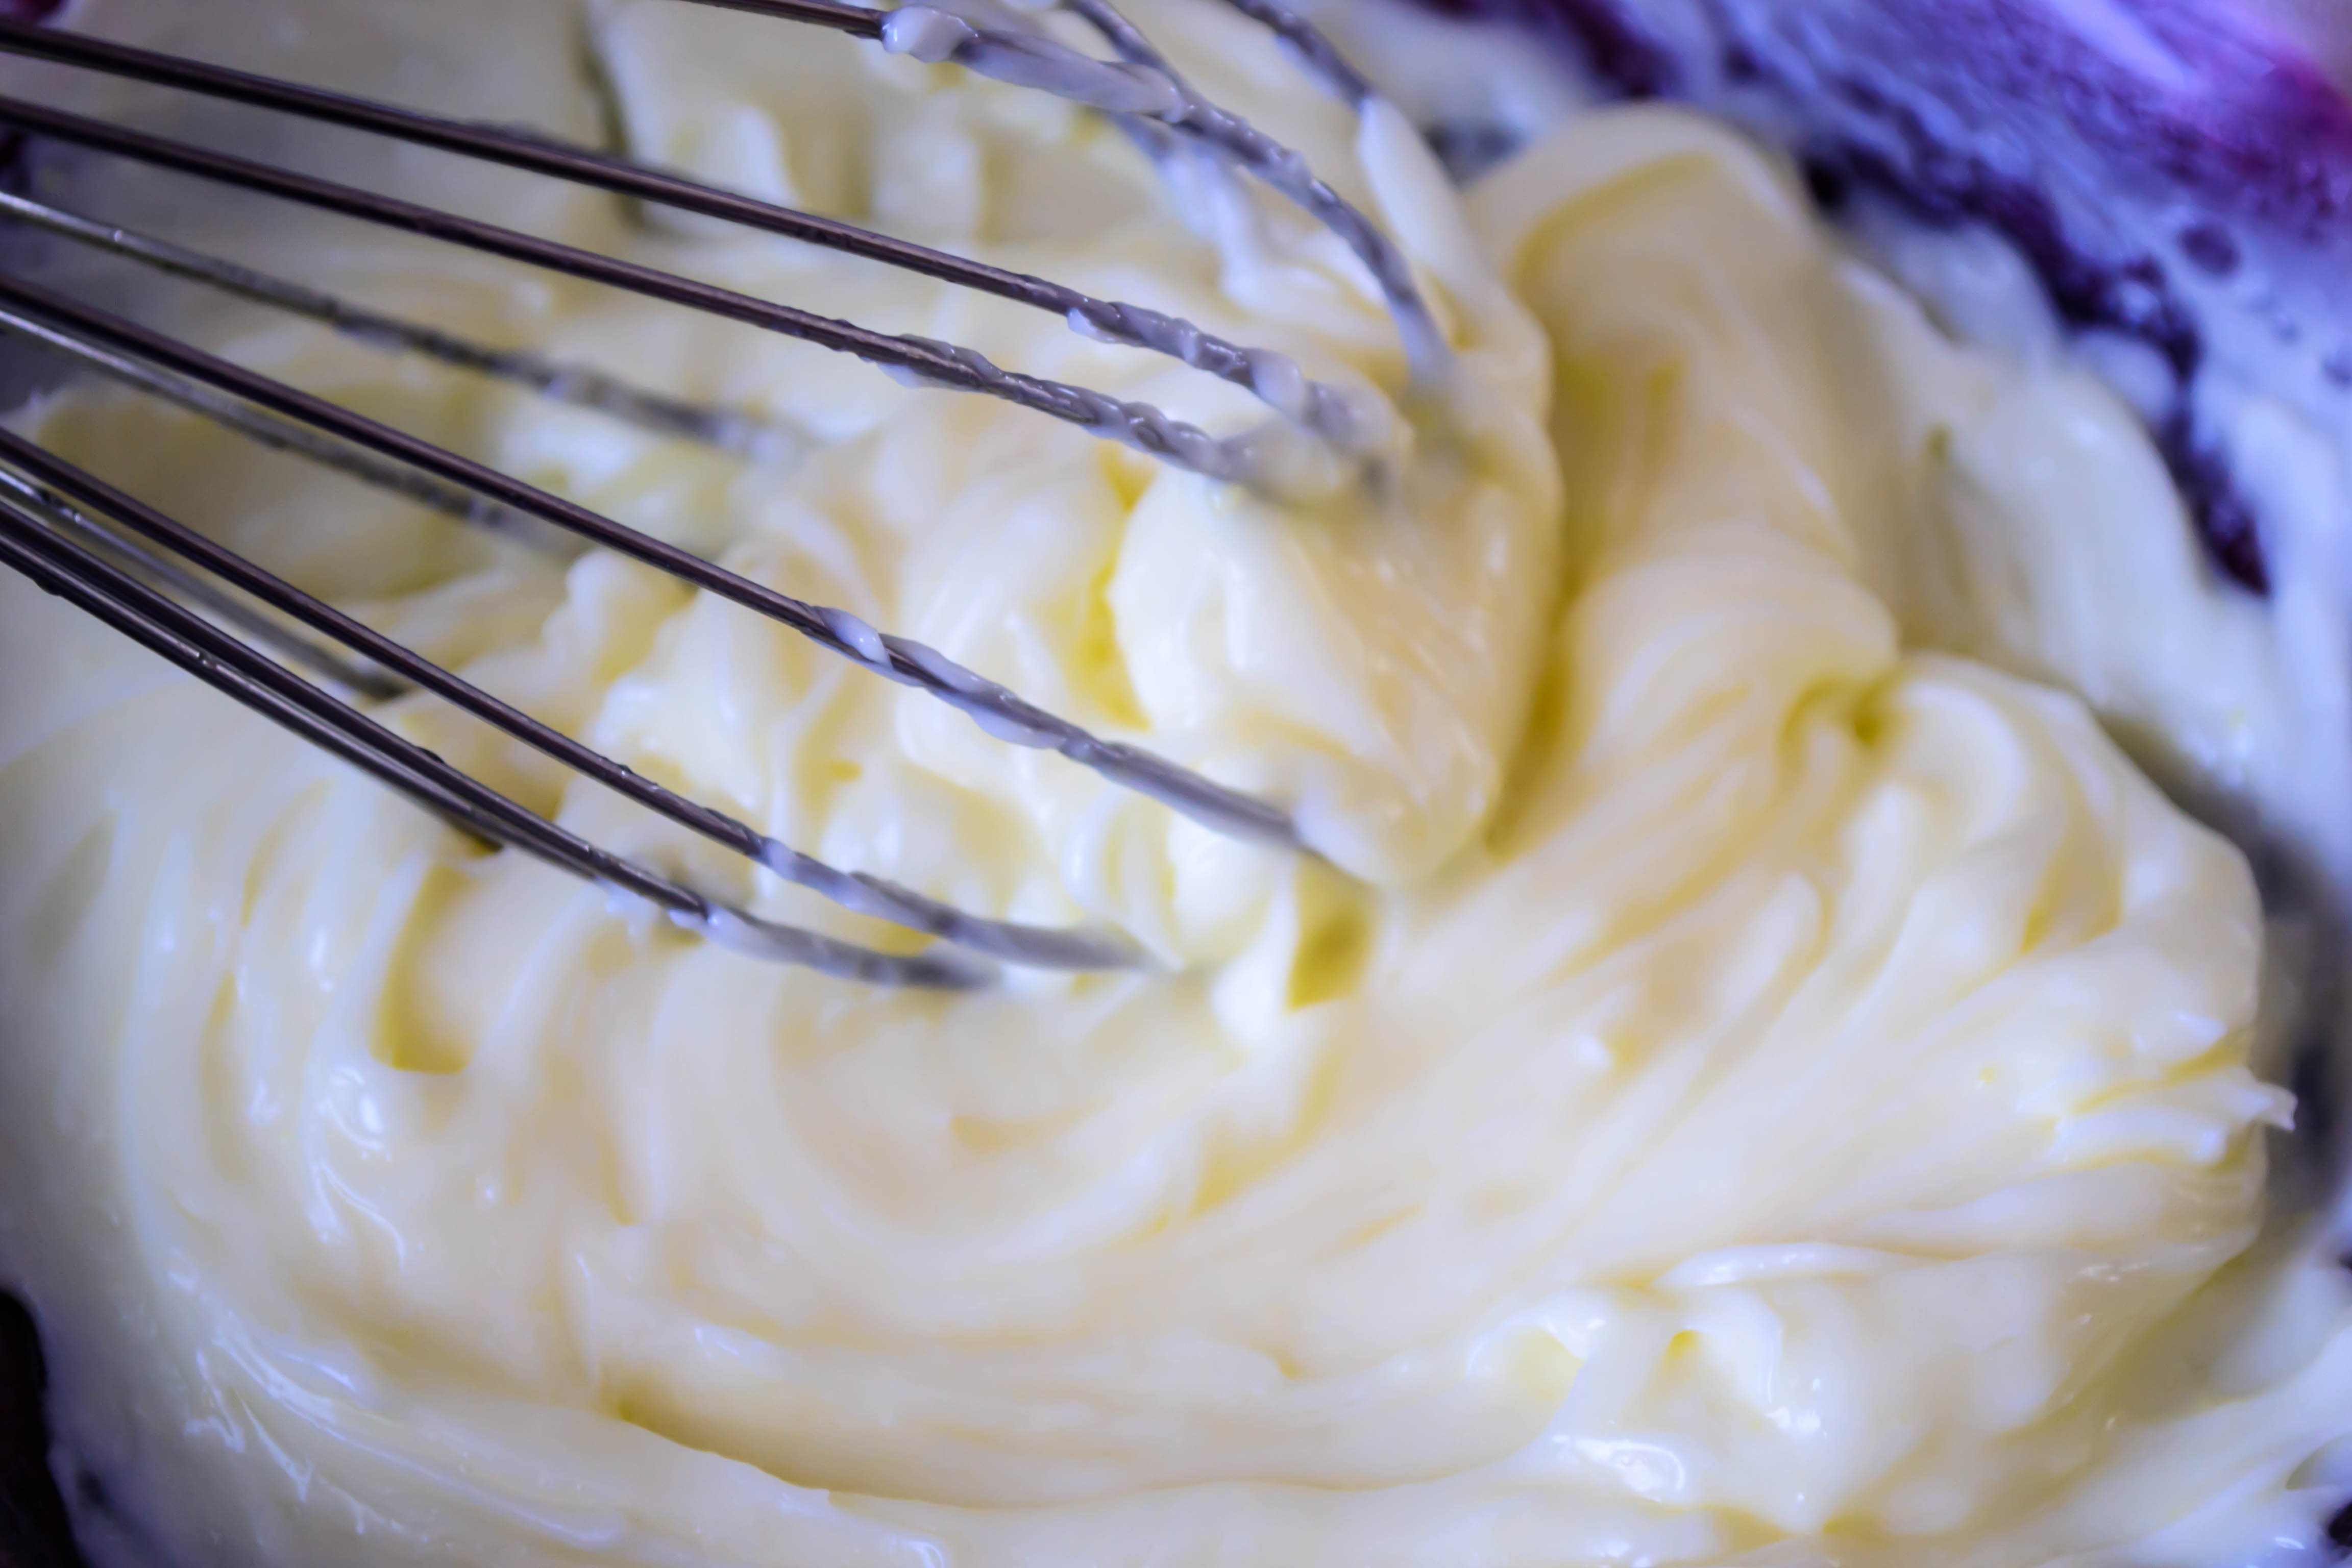
When I thought velouté, I thought pot-pie. However, a mere cup of sauce didn’t seem like enough. Smaller quantities of sauce would require smaller packages. I’ve been tossing around the idea of hand-pies for a while (see what I did there? Yeah.), and suddenly it became clear that this final bit of sauce would become the base for the filling of pot pie empanadas, spiced up with chunks of cheddar cheese in the crust.
Food Blog March 2014-3513Food Blog March 2014-3515Yes. This was happening.

I think every culture has a snack food created by enclosing a savory little morsel in a puff of dough. Samosas, gyoza or pot-stickers, pierogies, Cornish pasties, think about it. For Spain, and for Central and South American cuisines, empanadas are that snack. A tumble of meat, cheese, and spices (with the occasional vegetable – a few summers ago I had a spectacular one filled with cheese and fresh spinach) wrapped up in a lovely soft dough that is sometimes baked but more often lovingly tipped into the deep fryer: it’s quite possibly my dream food.
Food Blog March 2014-3524Food Blog March 2014-3526Food Blog March 2014-3528And here I was about to Americanize it beyond belief. The leftovers of my grad school training screamed things at me about colonization and cultural appropriation, but I swatted them down. It’s improving the classic by acknowledging and incorporating a new angle. Yeah.

And it was so worth it.

The dough here is baked, not fried. I don’t have a deep fryer, and to be honest, crammed with cheddar as it was, the crust did not provide the most airtight of seals. I would have been nervous about dropping these into hot oil.
Food Blog March 2014-3519Food Blog March 2014-3522
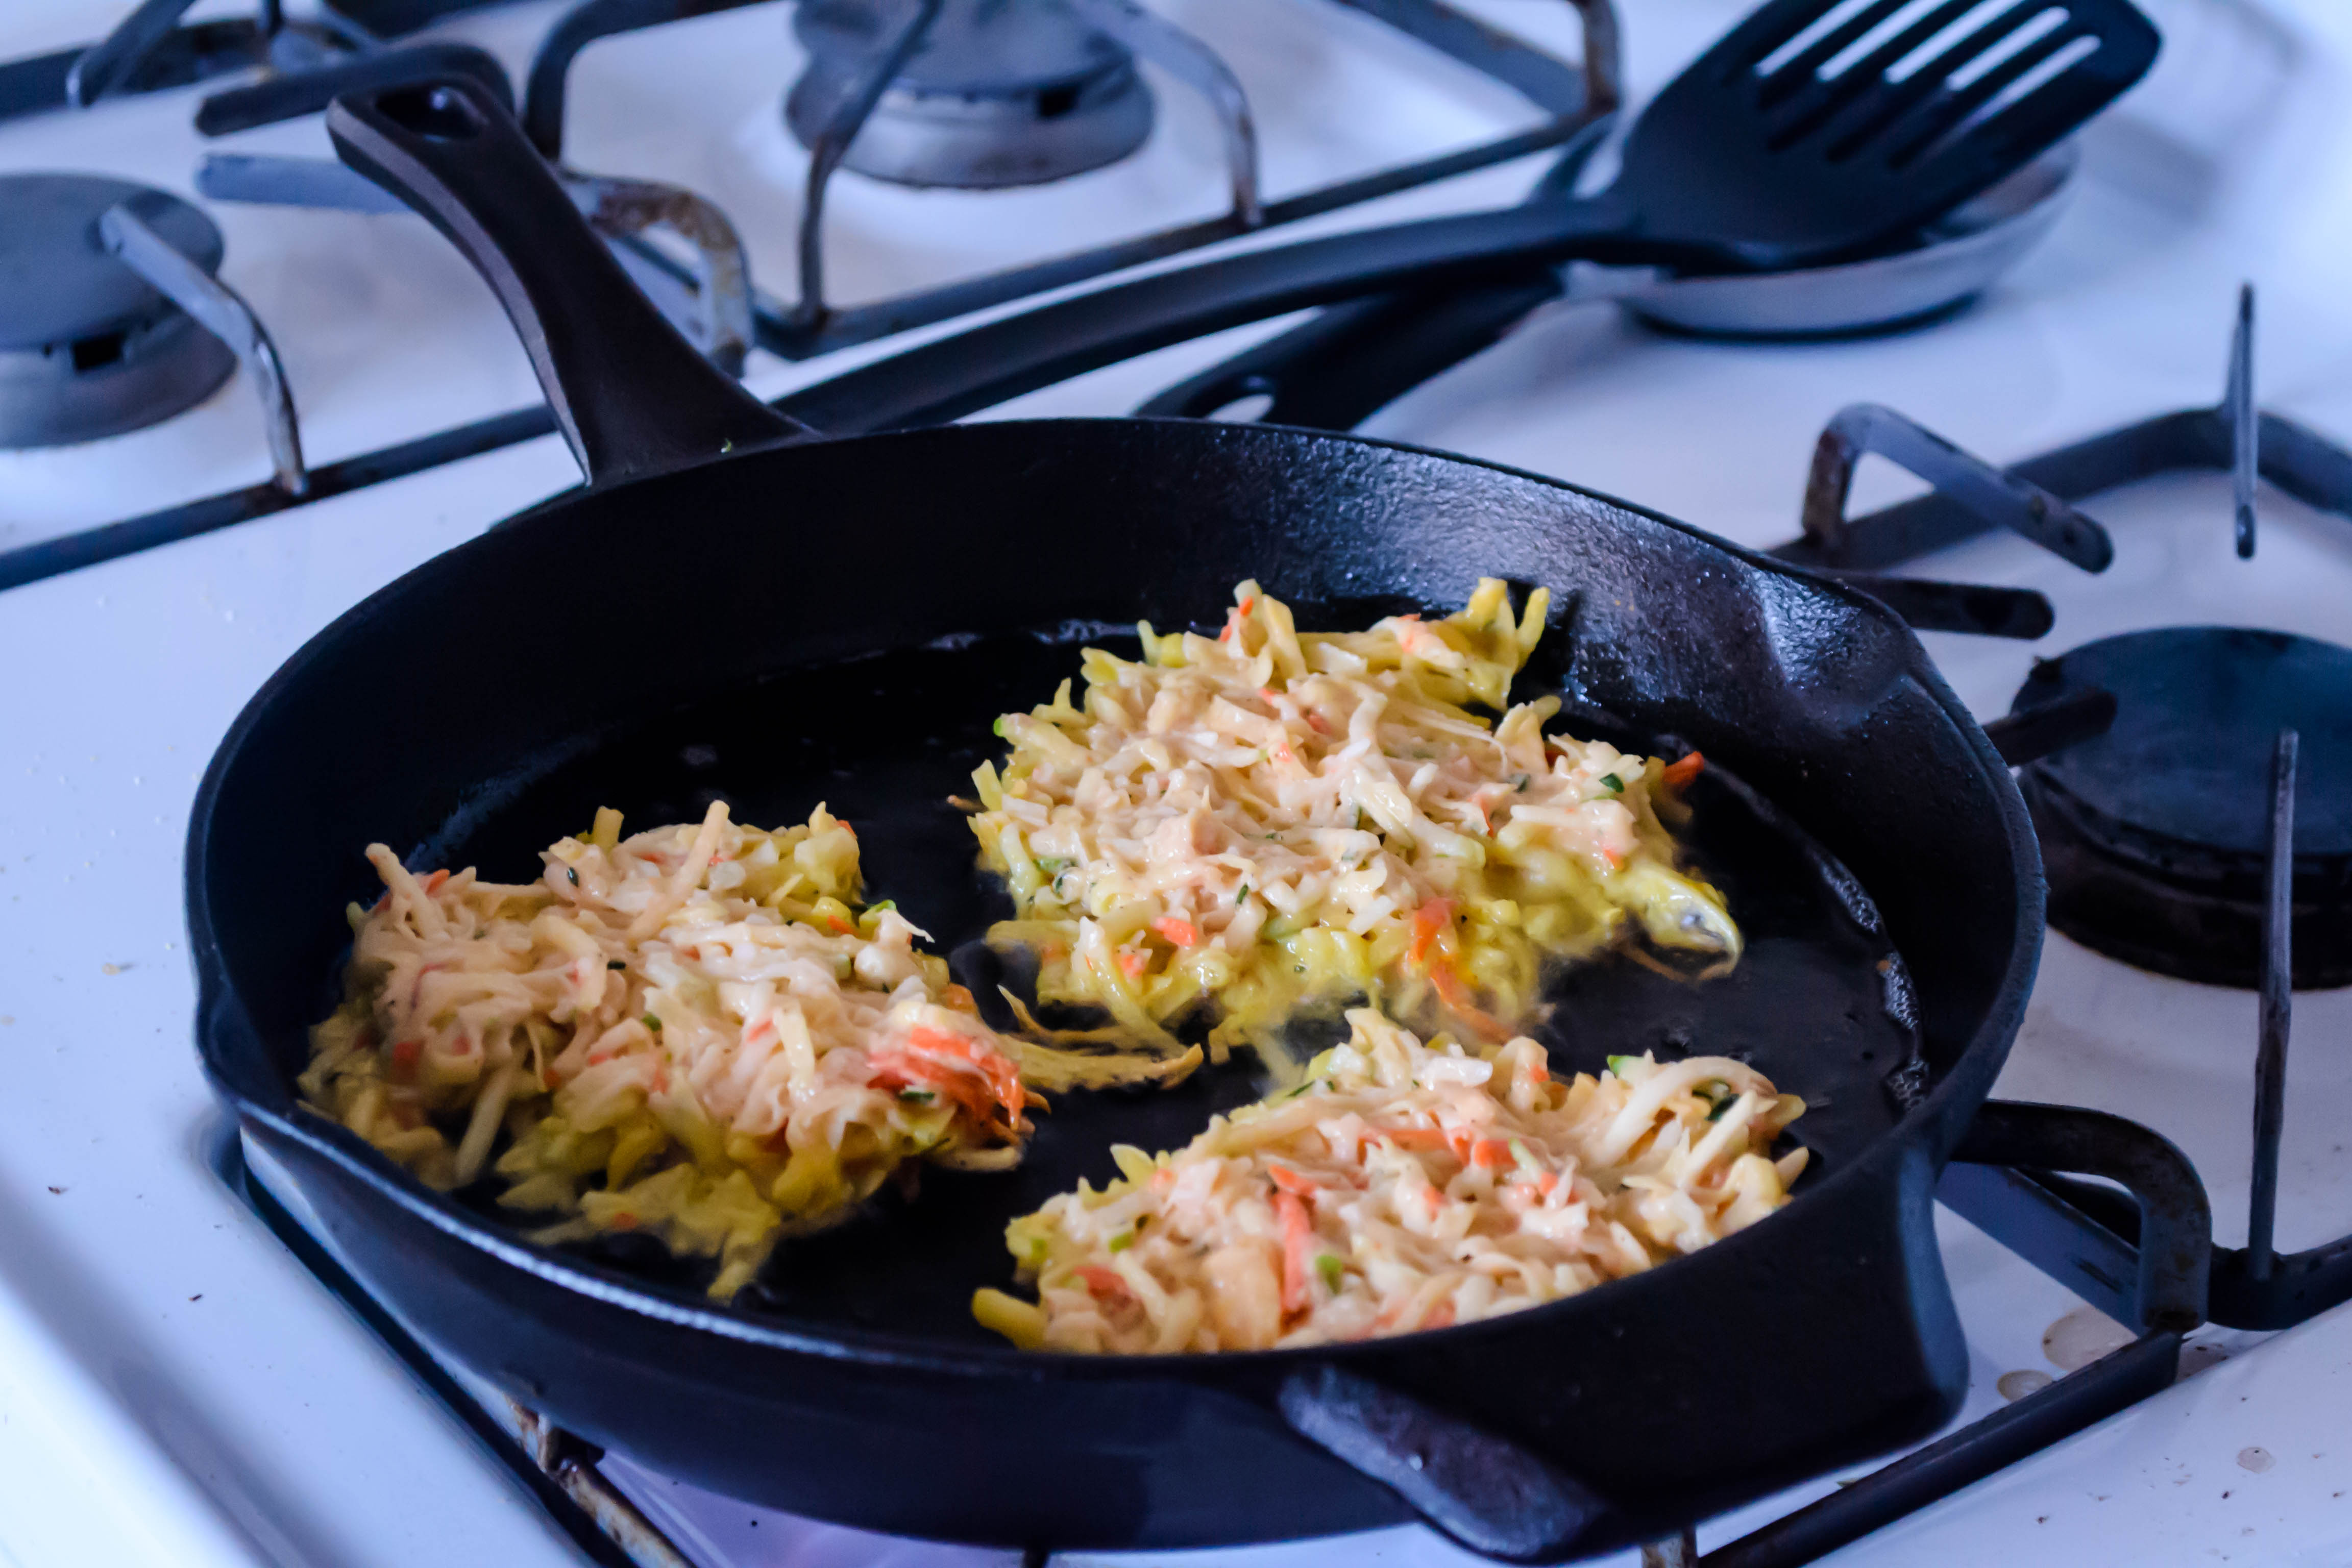
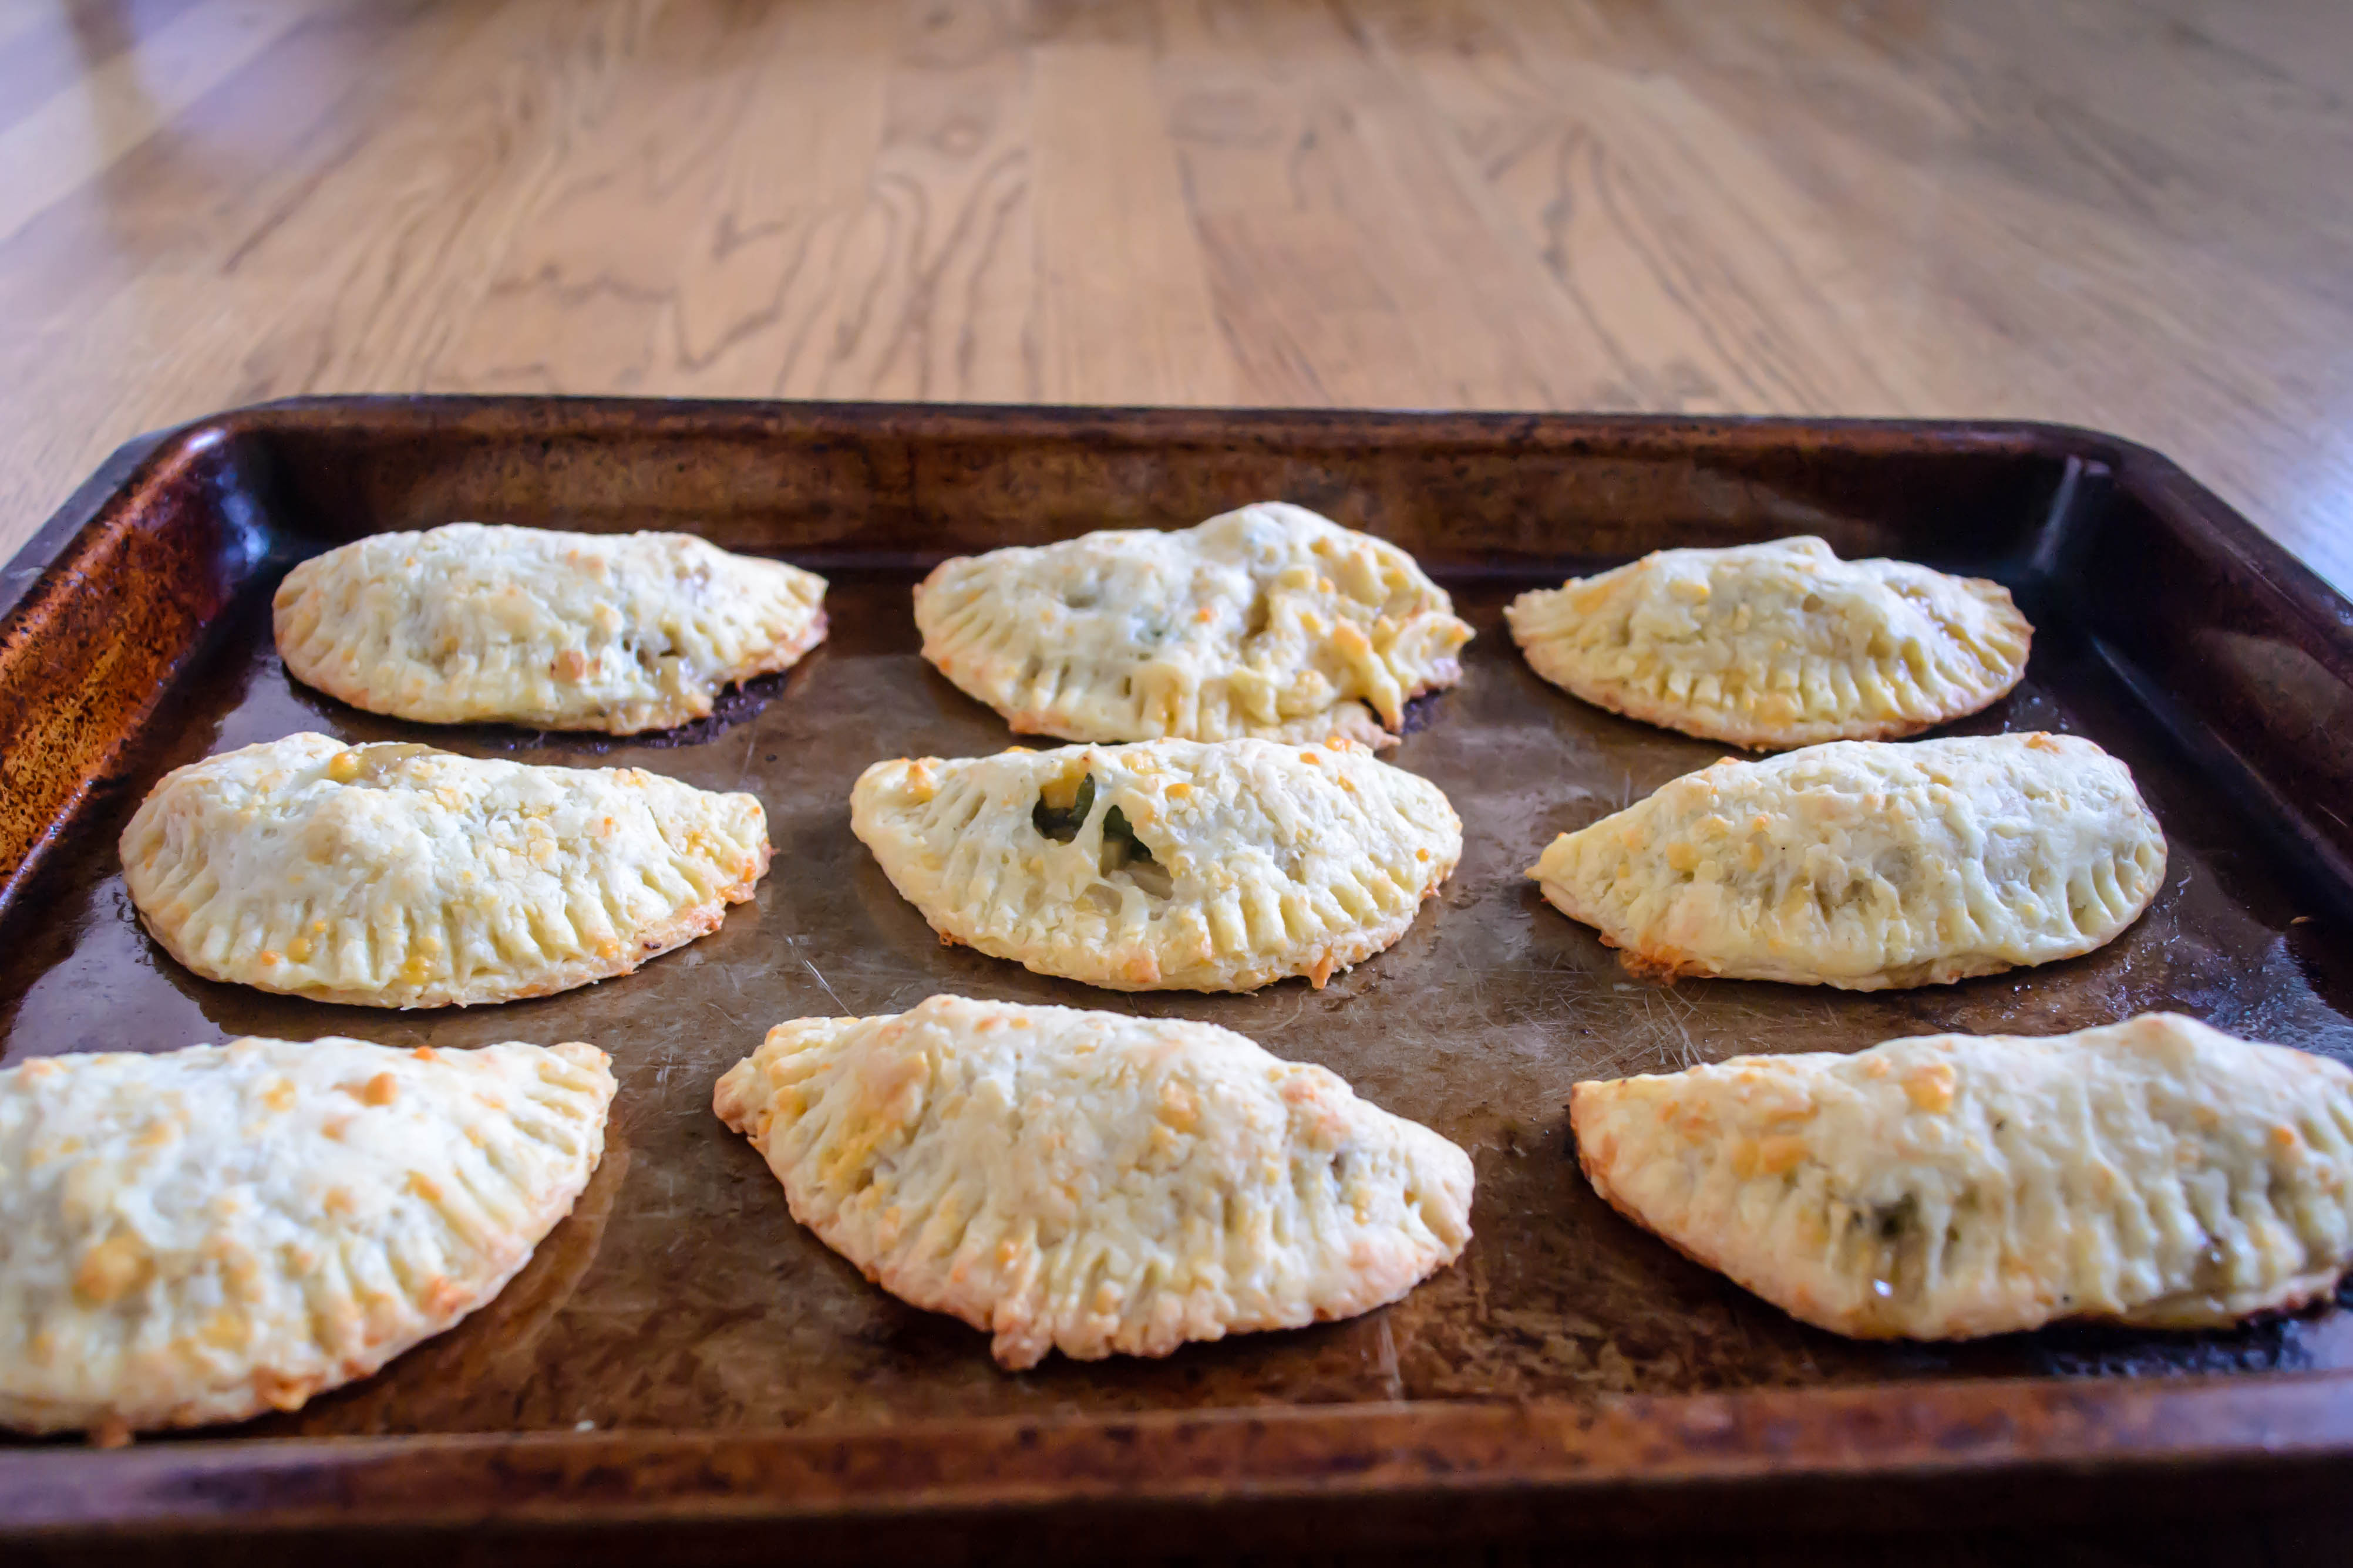
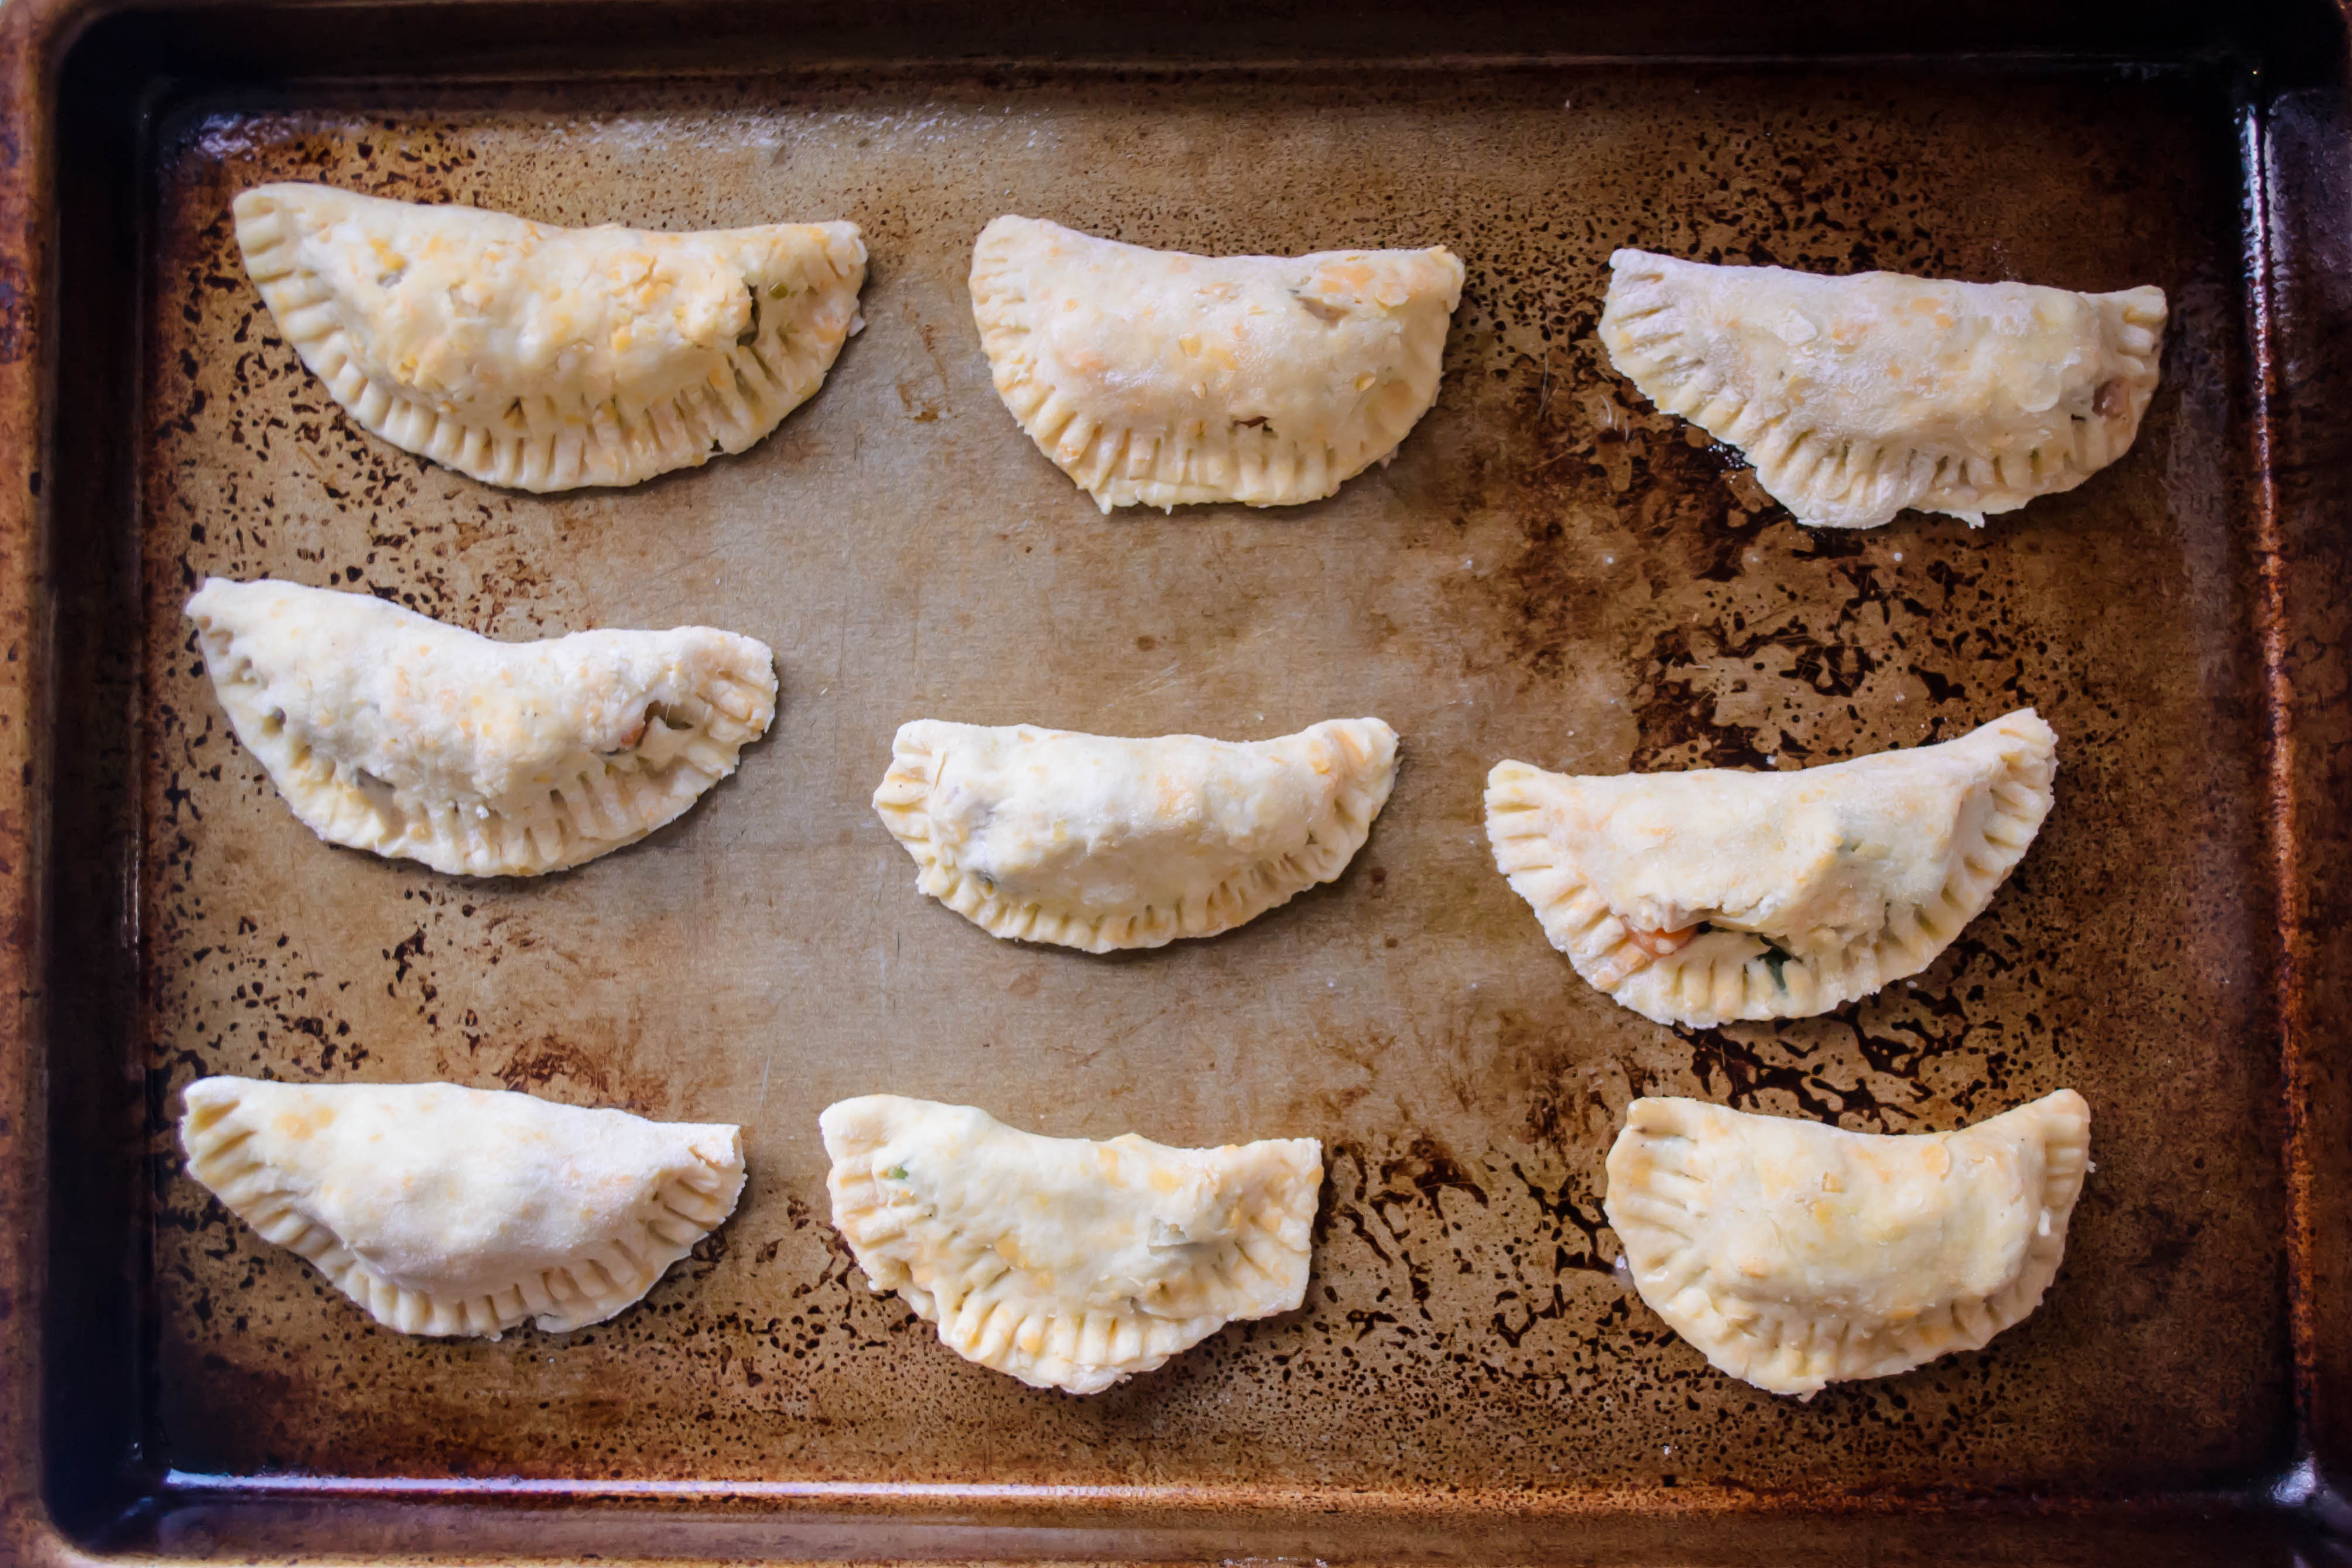
There’s nothing to be nervous about when it comes to the taste, though. You can stuff these with whatever you’d like in a pot pie, meats or vegetables. I opted for potatoes, carrots, a few mushrooms, green onions, a breath of garlic, and some green beans that had been in my fridge for a touch longer than they should have. A bit of shredded up chicken breast completed the pot. These get cooked in the leftover velouté with a splash of white wine (and a bit of water, if you feel there isn’t enough liquid) until they are tender, then, once they are cool, jammed a mere tablespoon at a time into circles of sticky but pliable dough. A quick fold, a squeeze, and a crimp with the tines of a fork, and they are ready to bake.
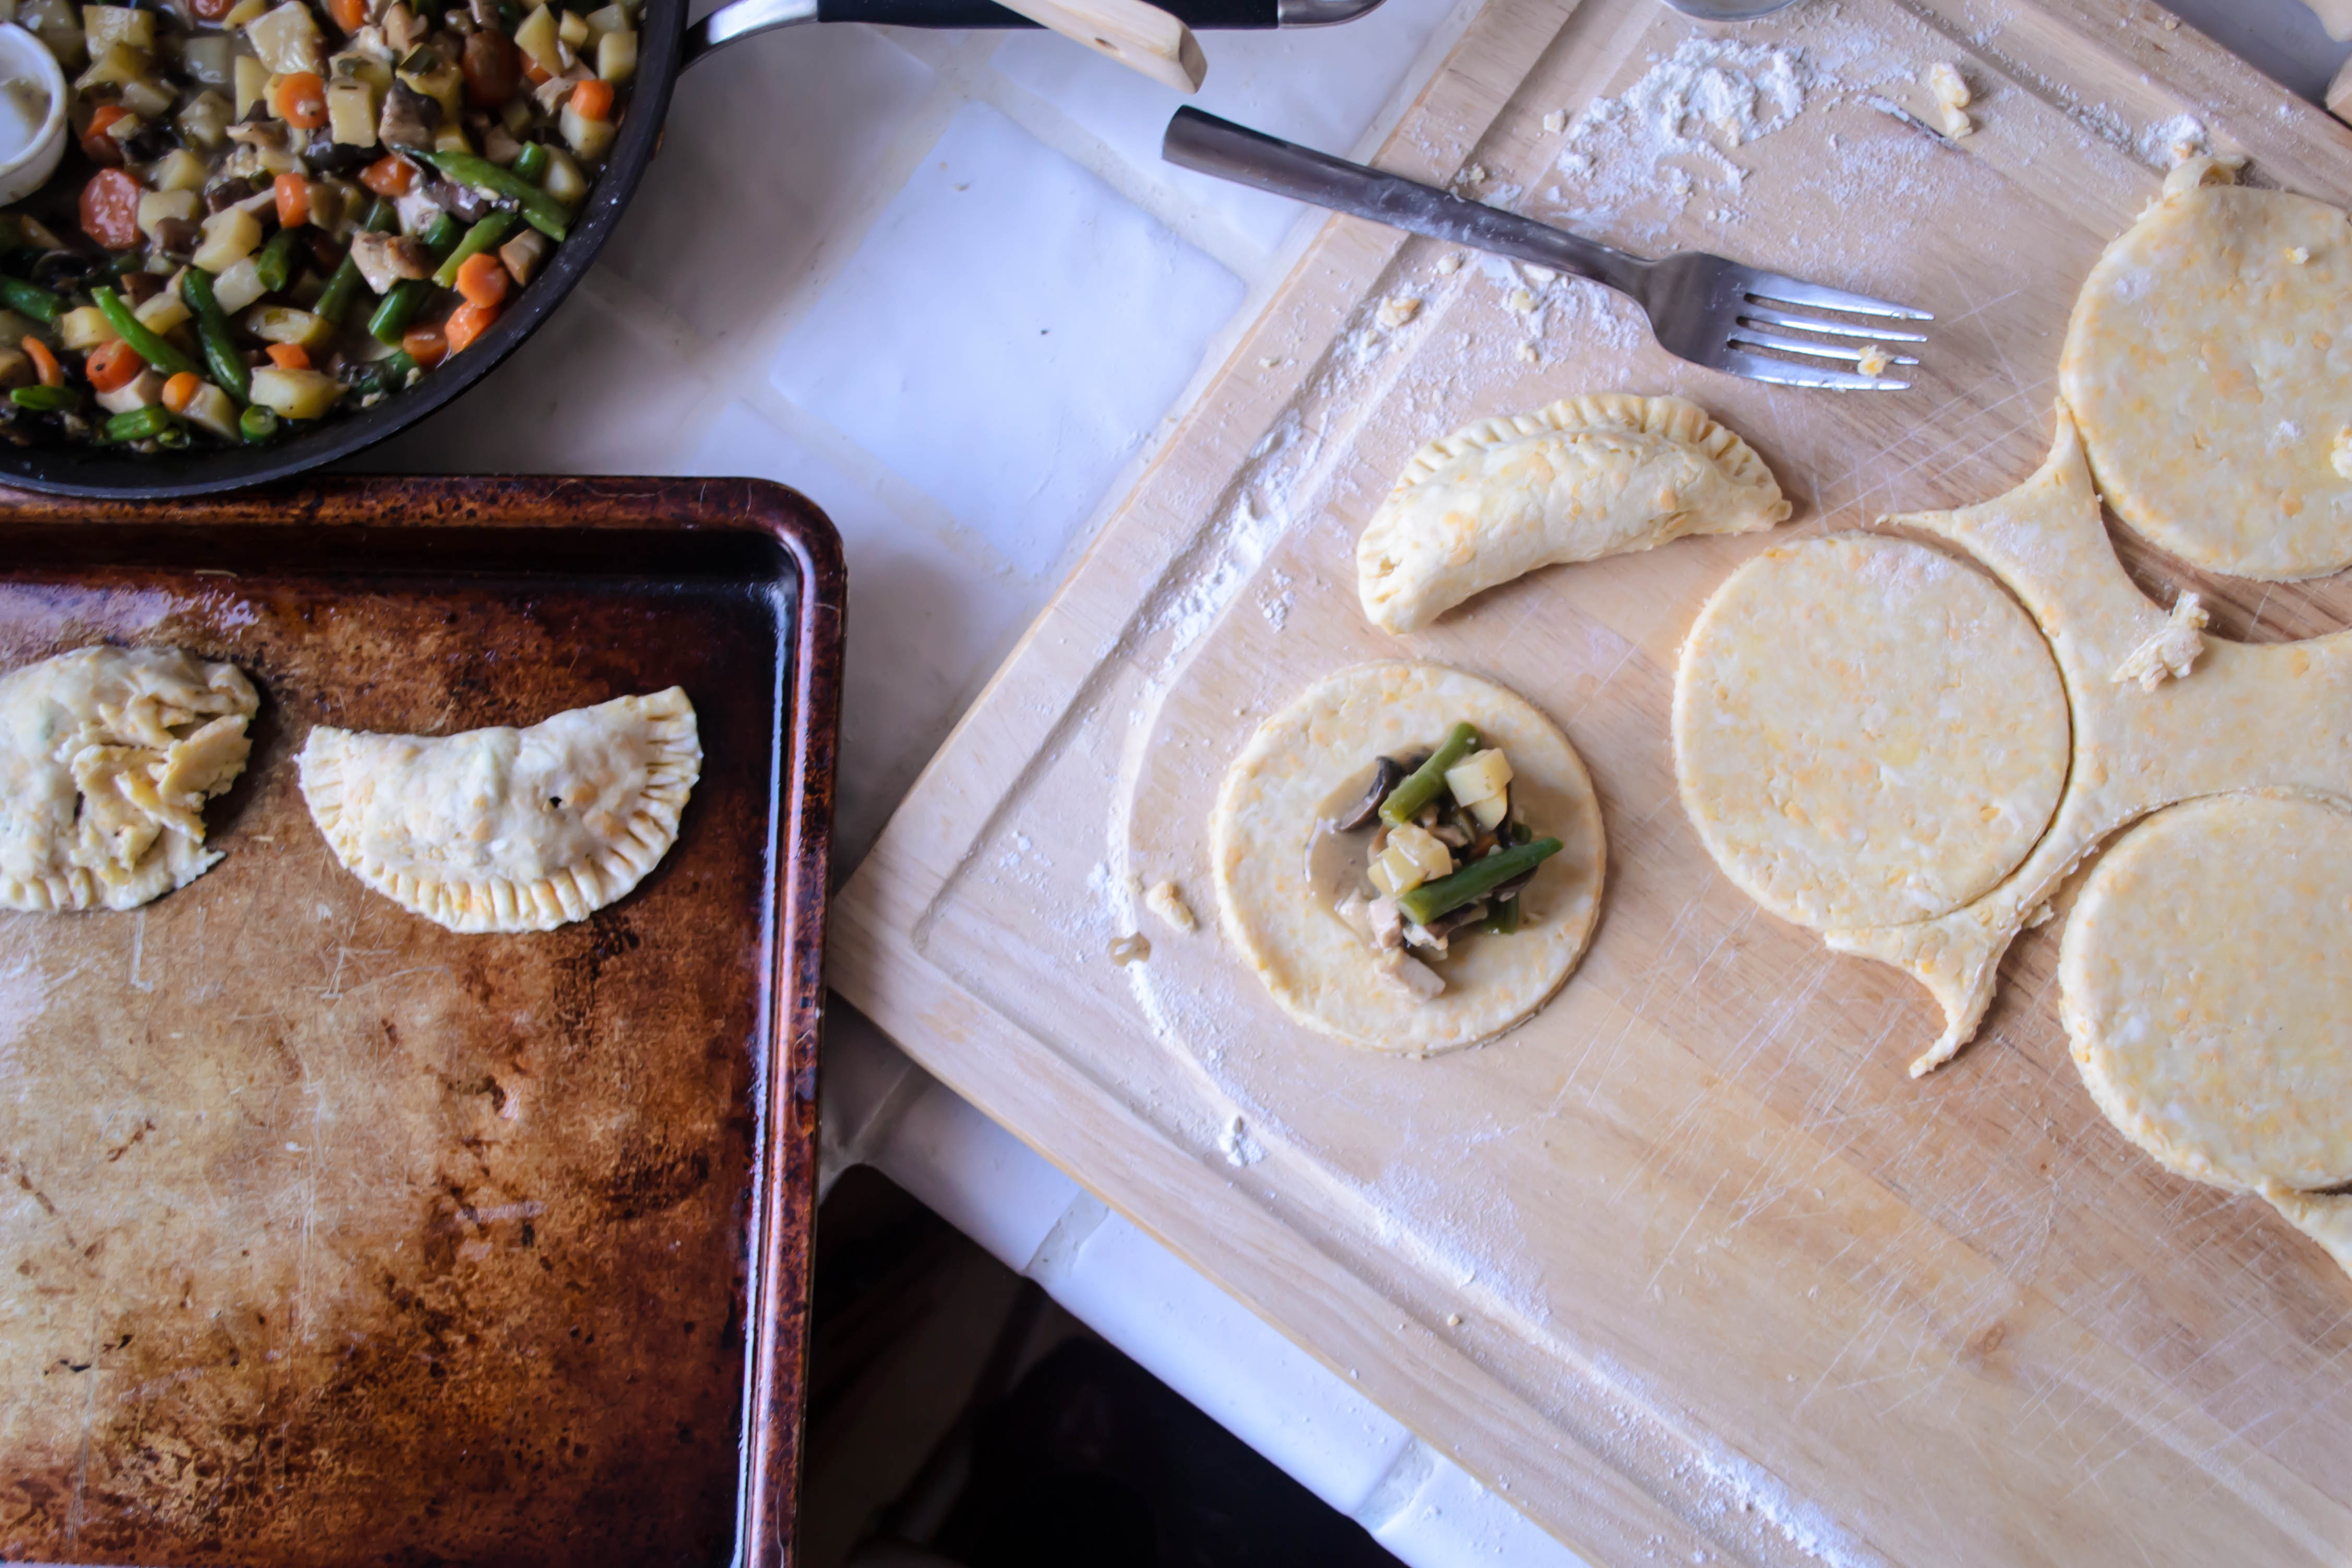
Food Blog March 2014-3529Food Blog March 2014-3532I had designs on serving these alongside a salad for a balanced meal, but we never made it to the salad. We just ate these, burning our fingers and our tongues as we picked up one and another and another. These are pot pies for crust lovers. The dough becomes rich and crisp and flaky, and the cheddar cheese is, I have to admit, a bit of a stroke of genius. It’s a perfect little package, and writing about it now, I desperately want another.

Sometimes leftovers are better than the original. This, friends, is one of those times.

Food Blog March 2014-3534Cheddar dough
Makes enough for 18-20 empanadas, if re-rolled once or twice
2 ¼ cups all-purpose flour
½ teaspoon salt (this doesn’t seem like much, but the cheese is salty and the filling will be seasoned)
8 tablespoons very cold butter (1 stick), cut into cubes
½ cup extra sharp cheddar cheese, cut into cubes
1 egg
⅓ cup ice water
1 tablespoon vinegar

  • Dump the flour and salt into a food processor and pulse once or twice to mix them.
  • Add the cubes of butter and cheese and pulse 4 times for 3 seconds each. This seems fussily precise, but it worked very well.
  • In a small bowl, beat the egg lightly with the water and vinegar. Add to the food processor and pulse once or twice until the mixture comes together in large clumps. You’ll know it’s ready when it stodgily mashes against the side of the processor bowl, reluctant to whiz in circles anymore.
  • Turn this mixture out onto a large square of plastic wrap. Using the plastic wrap to help you, form it into a disc 5 or 6 inches in diameter, then wrap up and refrigerate for at least 60 minutes. This will allow the flour granules to absorb some of the liquid and fat, which makes for easier rolling, and the butter (and cheese) to firm up again, which makes for better texture.
  • While the dough chills, make the filling.

Pot pie filling
These quantities may not seem like enough, but remember, you are using only minute quantities of filling for each empanada. Overfilling dumplings is somewhere in the top ten of my frequent cooking mistakes, so trust me. You will have plenty.
2 tablespoons butter
1-2 cloves garlic, finely minced
2 green onions, thinly sliced in little moons
3-4 mushrooms, diced
2 small carrots (or one large), diced
1 small Yukon gold potato, diced
6 green beans, stems removed, sliced into ½ inch pieces
½ cup cooked shredded chicken
¼ cup white wine
1 cup velouté
Salt and pepper, and herbs of your choosing, to taste

  • In a saucepan, melt the butter over medium heat, then add the garlic, onions, and mushrooms. Cook, stirring occasionally, until the mushrooms begin to brown, 5-8 minutes.
  • Add the potatoes and carrots, stir to combine.
  • Add the wine and velouté. Season with salt and pepper, if needed, and any herbs you feel inclined to add. Simon and Garfunkel’s usual suspects would certainly be welcome.
  • Cook over a healthy simmer until the carrots, which will likely take the longest, are almost tender. If the pan looks dry, add a little water or chicken broth. Depending on how small you have cut the vegetables, this could take anywhere from 10-20 minutes. Mine took about 15.
  • When the carrots are almost tender, add the green beans and simmer until they are just losing their raw crunch.
  • Kill the heat and add the shredded chicken, then let the whole mess cool to room temperature.

To assemble and bake:

  • Preheat the oven to 425F and spray two baking sheets with non-stick spray or line them with parchment paper.
  • Remove the dough from the refrigerator and unwrap it on a floured board. Using a rolling pin or a straight-sided wine bottle (it totally works!), roll it out into a rectangle or oval about ¼ inch thick. With the floured lip of a glass, a jar mouth, or a biscuit cutter, cut out into 4-inch rounds. When you cut, to avoid extra stickiness or tearing the dough, press straight down without twisting all the way through the dough. Once you have cut all the way through the dough, then you can twist the cutter a bit to loosen the round from the board.
  • Once you have made all the circles you can with the dough, gather up the scraps and roll them out again. One or two re-rollings should produce 18-20 dough circles.
  • Add about 1 tablespoon of the cooled filling to each round of dough. You will be tempted to add more. Don’t do it! A solid 1 tablespoon is about all that can fit without making a tremendous mess.
  • As you place each tablespoon of filling in the middle of the dough round, fold it in half and press the edges together with your forefinger and thumb. To seal each little half-moon package, set it down on the floured board again and press down on the edges all the way around with the back of the tines of a fork. This really crimps it closed, but it also looks pretty, which I’m a fan of.
  • Settle each empanada on your prepared baking sheet. They aren’t going to spread, so they don’t need too much room in between them, but you don’t want them touching each other. Each needs to get the full oven experience without its neighbors interfering.
  • Bake in your preheated 425F oven for about 20 minutes, until the crust is golden and crisp to the touch, and any filling that has had the misfortune of leaking out is bubbling assertively.
  • You will probably need to let these cool for 5-10 minutes before eating. Just enough time to, if you’re feeling virtuous, toss together a quick salad. Or, you know, not.

Project Sauce: Veloute with “Blue Plate Special”

I am realizing, as I continue this sauce project, how few of the sauces I’m examining are used “as-is.” Most, including this month’s velouté – the last of the flour-thickened sauces I’ll explore (next month we move on to eggs. I’m scared!) – are made as a base. They are, after all, “mother” sauces, so called not just because they are quite common, but because they are literally mothers: foundations that give birth to more complex sauces.

Food Blog March 2014-3496Velouté is very similar to béchamel, with the exception that here the roux (butter and flour cooked together) thickens a stock or broth, not milk. The stock in question is most commonly chicken or fish stock, which also tells you with which products it is most frequently served. To be technically correct, the stock or broth is supposed to be “white,” that is, made with bones that have not been previously roasted. However, I wasn’t about to make a special batch of stock just for this application, so I dug into my freezer and emerged with some icy golden goodness I’d made from roasting a chicken some months ago. Not exactly traditional (I so rarely am, after all), but manageable for our purposes.

Recipes for velouté vary slightly on particulars. Some begin with mire poix (a French vegetable base consisting of diced onions, carrots, and celery), some recommend herbal accompaniments, some advocate finishing the sauce with a splash of cream, and the quantities of salt and pepper a cook should add differ depending on whose authority you accept. Some recommend adding heated stock to the roux, some call for the roux to be plopped into the heated stock. Either way, you essentially make a roux, combine it with the stock, whisk assertively to banish lumps, and settle in for a long, slow simmer during which time the sauce reduces, thickens, and develops flavor. Velouté means “velvet,” and when your sauce is done simmering you will understand why: it is so silky and fluidly pourable and soft. Mine was a pale matte gold, not quite thick enough to coat the back of a spoon, but sufficiently concentrated to pour in a solid stream rather than a liquid dribble. It smelled incredible – rich and meaty and flavorful – like midafternoon on Thanksgiving, the first time you open the oven to let the turkey aroma escape.

Food Blog March 2014-3486Yet for all its depth of flavor, prolonged cooking time, and high heritage, I couldn’t help but feel comforted by this sauce. There is something fundamentally homey and familiar about it. I realize Escoffier, the father of modern French cooking, will roll over in his grave when I write this, but it’s basically a simple gravy.

In restaurants, it was traditional to have a pot of velouté simmering away, ready to be dipped into to create more complex sauces and flavor bases. I wanted to keep things simple and pure, though, to really understand the sauce and its flavor, so I only made a slight adjustment.

I’ve got two recipes for you. This week, I’m celebrating velouté for its simplicity. Next week I’ll share a preparation that turns this rich, velvety sauce into something a bit more complex, but superbly tasty and comforting.

Food Blog March 2014-3493For the first, capitalizing on velouté’s similarity to a simple poultry gravy, I considered meals that incorporate such a familiar staple, and ended up with a sort of blue plate special: crispy chicken cutlet, buttery smashed potatoes, and lightly steamed green beans.

I often try to trace my thought process as I put dishes together, since the influences I’m incorporating aren’t always obvious. One of the derivatives of velouté is called sauce allemande, which includes egg yolk and mushrooms added near the end of the cooking time. To give this a nod, I decided to incorporate sautéed mushrooms to my sauce. Leery of the egg yolk idea, though, I transferred it to my chicken instead, dusting the breasts with flour and then dipping them in beaten egg before giving them a crisp coating. The mushrooms reminded me of my mom’s rice pilaf, which includes sautéed mushrooms and toasted almonds. Almonds seemed like a good pairing for the chicken, so I chopped them fine and combined them with panko. Almonds are equally nice with green beans, as are mushrooms, so the dish was starting to look cohesive, especially once I imagined my fragrant sauce kissing the whole thing.

Food Blog March 2014-3481Food Blog March 2014-3482Deep and rich thanks to its prolonged simmer, and silky smooth from the flour granules just bursting with all that liquid, this velouté made me realize why the judges on Chopped (don’t laugh, it’s my favorite guilty pleasure show) are always on about how important it is to have a sauce accompanying your dish. This enhanced all of the existing flavors on our plates. I kept going back for different combinations: sauce with chicken, chicken and sauce with potatoes, potatoes and sauce with green beans. All good. It really, as the Dude might have put it, tied the dish together.  Food Blog March 2014-3495

Basic Velouté
Makes about 2 cups
2 tablespoons butter
2 tablespoons flour
3 cups chicken stock or broth
Salt and pepper to taste
1 cup sliced, sautéed mushrooms


  • Heat the broth or stock in a medium saucepan until it comes to the barest simmer.
  • In a small skillet, melt the butter. When it is just melted, sprinkle in the flour and immediately combine with a whisk. I find sprinkling the flour around the skillet, rather than dumping it all in one place, makes for easier combining.
  • Cook the butter and flour together for a minute or two, whisking the whole time, until it takes on the consistency of a loose paste. You’ve now made a blond roux – minimal color, but maximum thickening power.
  • Either scrape the roux directly into the warm stock, or pour the stock slowly into the pan with the roux. Either way, whisk constantly to prevent clumping.
  • Simmer over low to medium-low heat for 30-45 minutes, whisking frequently to break up any lingering clumps or surface residue, until the liquid is slightly thickened, rich, and smells meaty. During this time, it will reduce by about a cup, leaving you with approximately two cups of sauce. You really do need to cook it for this long to achieve the desired consistency and depth of flavor.
  • Season with salt and pepper to taste.
  • Just before serving, stir in the sliced, sautéed mushrooms and warm through.


Sauce Velouté with “Blue Plate Special”
Serves 2
2 chicken breast cutlets (thin cuts of boneless, skinless chicken breasts)
1 cup flour
½ teaspoon salt
¼ teaspoon pepper
½ teaspoon garlic powder
1 egg
1 cup panko bread crumbs
½ cup sliced almonds, finely chopped
Olive oil, to cook chicken
2 large Yukon gold potatoes
2 tablespoons butter
¼ cup heavy cream
½ pound green beans, stem ends trimmed
1 recipe velouté with mushrooms
Additional salt and pepper to taste


For the chicken:

  • First, set up a breading station. I like to use two large plates and a pie pan for this. On one of the plates, combine the flour, salt, pepper, and garlic powder and spread it out to cover the entire plate. If you want additional or different spices, this is your chance to personalize. On the other plate, combine the panko and almonds. Sprinkle some salt and pepper in there as well, if you wish, and again, spread the mixture out for even coverage. In the pie pan, crack the egg and beat it up with a fork. Set these out in order: flour, egg, breading (see above photographs for reference).
  • Preheat the oven to 300F so that the cutlets can stay warm while you cook other elements of the dinner. Place a baking tray with a wire cooling rack on it in the middle of the oven.
  • Now, take a look at your cutlets. We want them no thicker than ½ an inch so they can cook quickly without burning the almonds in the breading. If they are that thin, great. Skip to the next step. If they are thicker, we need to pound them out. To do this, place one cutlet at a time in an unsealed plastic zip-top bag, or just wrap it loosely in plastic wrap. With a meat mallet, a rolling pin, or a heavy saucepan, pound the chicken by beating it with steady, forceful hits that push toward the outer edges of the breast. In other words, you’re not just punching straight down. You’re striking at a slight angle, from the middle toward the outer edges, which helps the meat spread without tearing.
  • When your chicken breasts are evenly ½ an inch thick, it’s time to bread them. Working one at a time, dredge the cutlet in the seasoned flour, pressing it with your fingers to ensure even coating. Flip it over and dredge the other side. Repeat with the egg, then with the panko and almonds, again being sure you press it in firmly to help the breading adhere.
  • Heat a good slick of olive oil in a skillet over medium heat. Once it is glistening, add the first cutlet, placing it down in the middle of the pan and then not moving it for four minutes.
  • After four minutes – no cheating! – peek at the underside of the cutlet. The breading should be golden and crisp but not burned, and thanks to being left undisturbed, not peeling and crumbling off the chicken! Flip the cutlet and sizzle on the other side for another four minutes until cooked through and crisp.
  • While you are cooking this cutlet, dredge and bread the second one.
  • When the first cutlet is golden brown and crisp on both sides, carefully move it from the skillet to your prepared, preheated oven tray. It is already fully cooked (at least it should be, if you’ve pounded it to a true ½ inch), so this will keep it warm and crispy until both pieces are done.
  • Repeat this cooking process with the second cutlet. If you need more time to prepare the rest of dinner, as I always do, these will hold in the warm oven for 15 minutes or so. You don’t want to go much longer than that, lest they dry out, but I was delighted by how moist ours still were.


For the potatoes:

  • Cut the potatoes into small, even sized chunks – the smaller you cut them, the faster they will cook. Plop them into a pot with plenty of salted water, then cover and set over high heat.
  • Bring the water to a boil, and cook, stirring once or twice if the water threatens to boil over, until the potato chunks are fork-tender. Depending on how small you’ve cut your potatoes, this could take anywhere from 10-20 minutes.
  • When the potatoes are done, drain into a colander and set aside.
  • Place the pot back on the stove over medium-low heat and add the butter and cream.
  • As the butter melts and the cream heats, put the drained potato chunks back into the pot and stir to combine. Using a potato masher or the determined back of a spoon, smash up the potatoes to your desired consistency. I like mine just a little chunky, with the thin skins still in there. Season to taste with salt and pepper.


For the green beans:

  • Heat a pan of salted water to a simmer.
  • Add the beans, stem ends trimmed, and simmer for 3-4 minutes, or until they reach your desired tenderness. We like them crisp-tender.
  • Drain the green beans, then return to the empty pan over medium heat with a slick of olive oil or a small knob of butter. Cook, tossing occasionally to distribute the fat, for a minute or two.
  • Season to taste with salt and pepper, and a squeeze of lemon juice or a tiny splash of white wine if desired.


To serve:

  • Consider your plate like a clock face. Position a scoop of mashed potatoes at 9 o’clock. Lay the green beans out in a curved little stack along the top few hours: let’s say 11-1. Now, lay the chicken breast partially atop the mashed potatoes, angling it from 9 down to 5.
  • Pour the warm, mushroom-spiked velouté over the chicken and the potatoes, so it slides and settles, gravy-like. Serve immediately to retain the crispness of the chicken coating.