
 I remember it so clearly: the day my perspective on salads was enunciated aloud. It wasn’t by me. I’d had mixed, un-uttered feelings about salads for years, but it wasn’t until the year after I’d graduated from college, as I watched one of my roommates adding spinach, and then sliced tomatoes, and then garbanzo beans, and then hunks of cheese, and one or two (or five) other ingredients to a big red bowl – one of those bowls with the spout on one side for easy pouring, and a rubber bottom so it wouldn’t slide around the counter – and she looked up at me watching and said “I like my salads with a lot of stuff in them.”
 Yes. That was right. That was why the salads my dad liked to pair with pasta – lettuce, a few tomatoes, maybe a sliver of cucumber or three, and the occasional crouton – didn’t seem worth it to me. That was why the house salad at innumerable restaurants was a chore to crunch through rather than a pleasure (I’d rather have had another basket of bread). There was a whole course for that sort of thing? Boring. Bring on the entree.

 But salads are – can be! – exciting, if we are mindful of my roommate’s assertion. They just need a lot of stuff in them. And at this time of the summer, when all I want for dinner is a big salad, or something charred and fragrant off the grill, it seems the right moment to combine the two for a salad so stuffed with, well, stuff, that it needs no entree to help it along. It is no side; no first course. It is the main event. And this main event has found its way to our table an embarrassing number of times in the past few months.
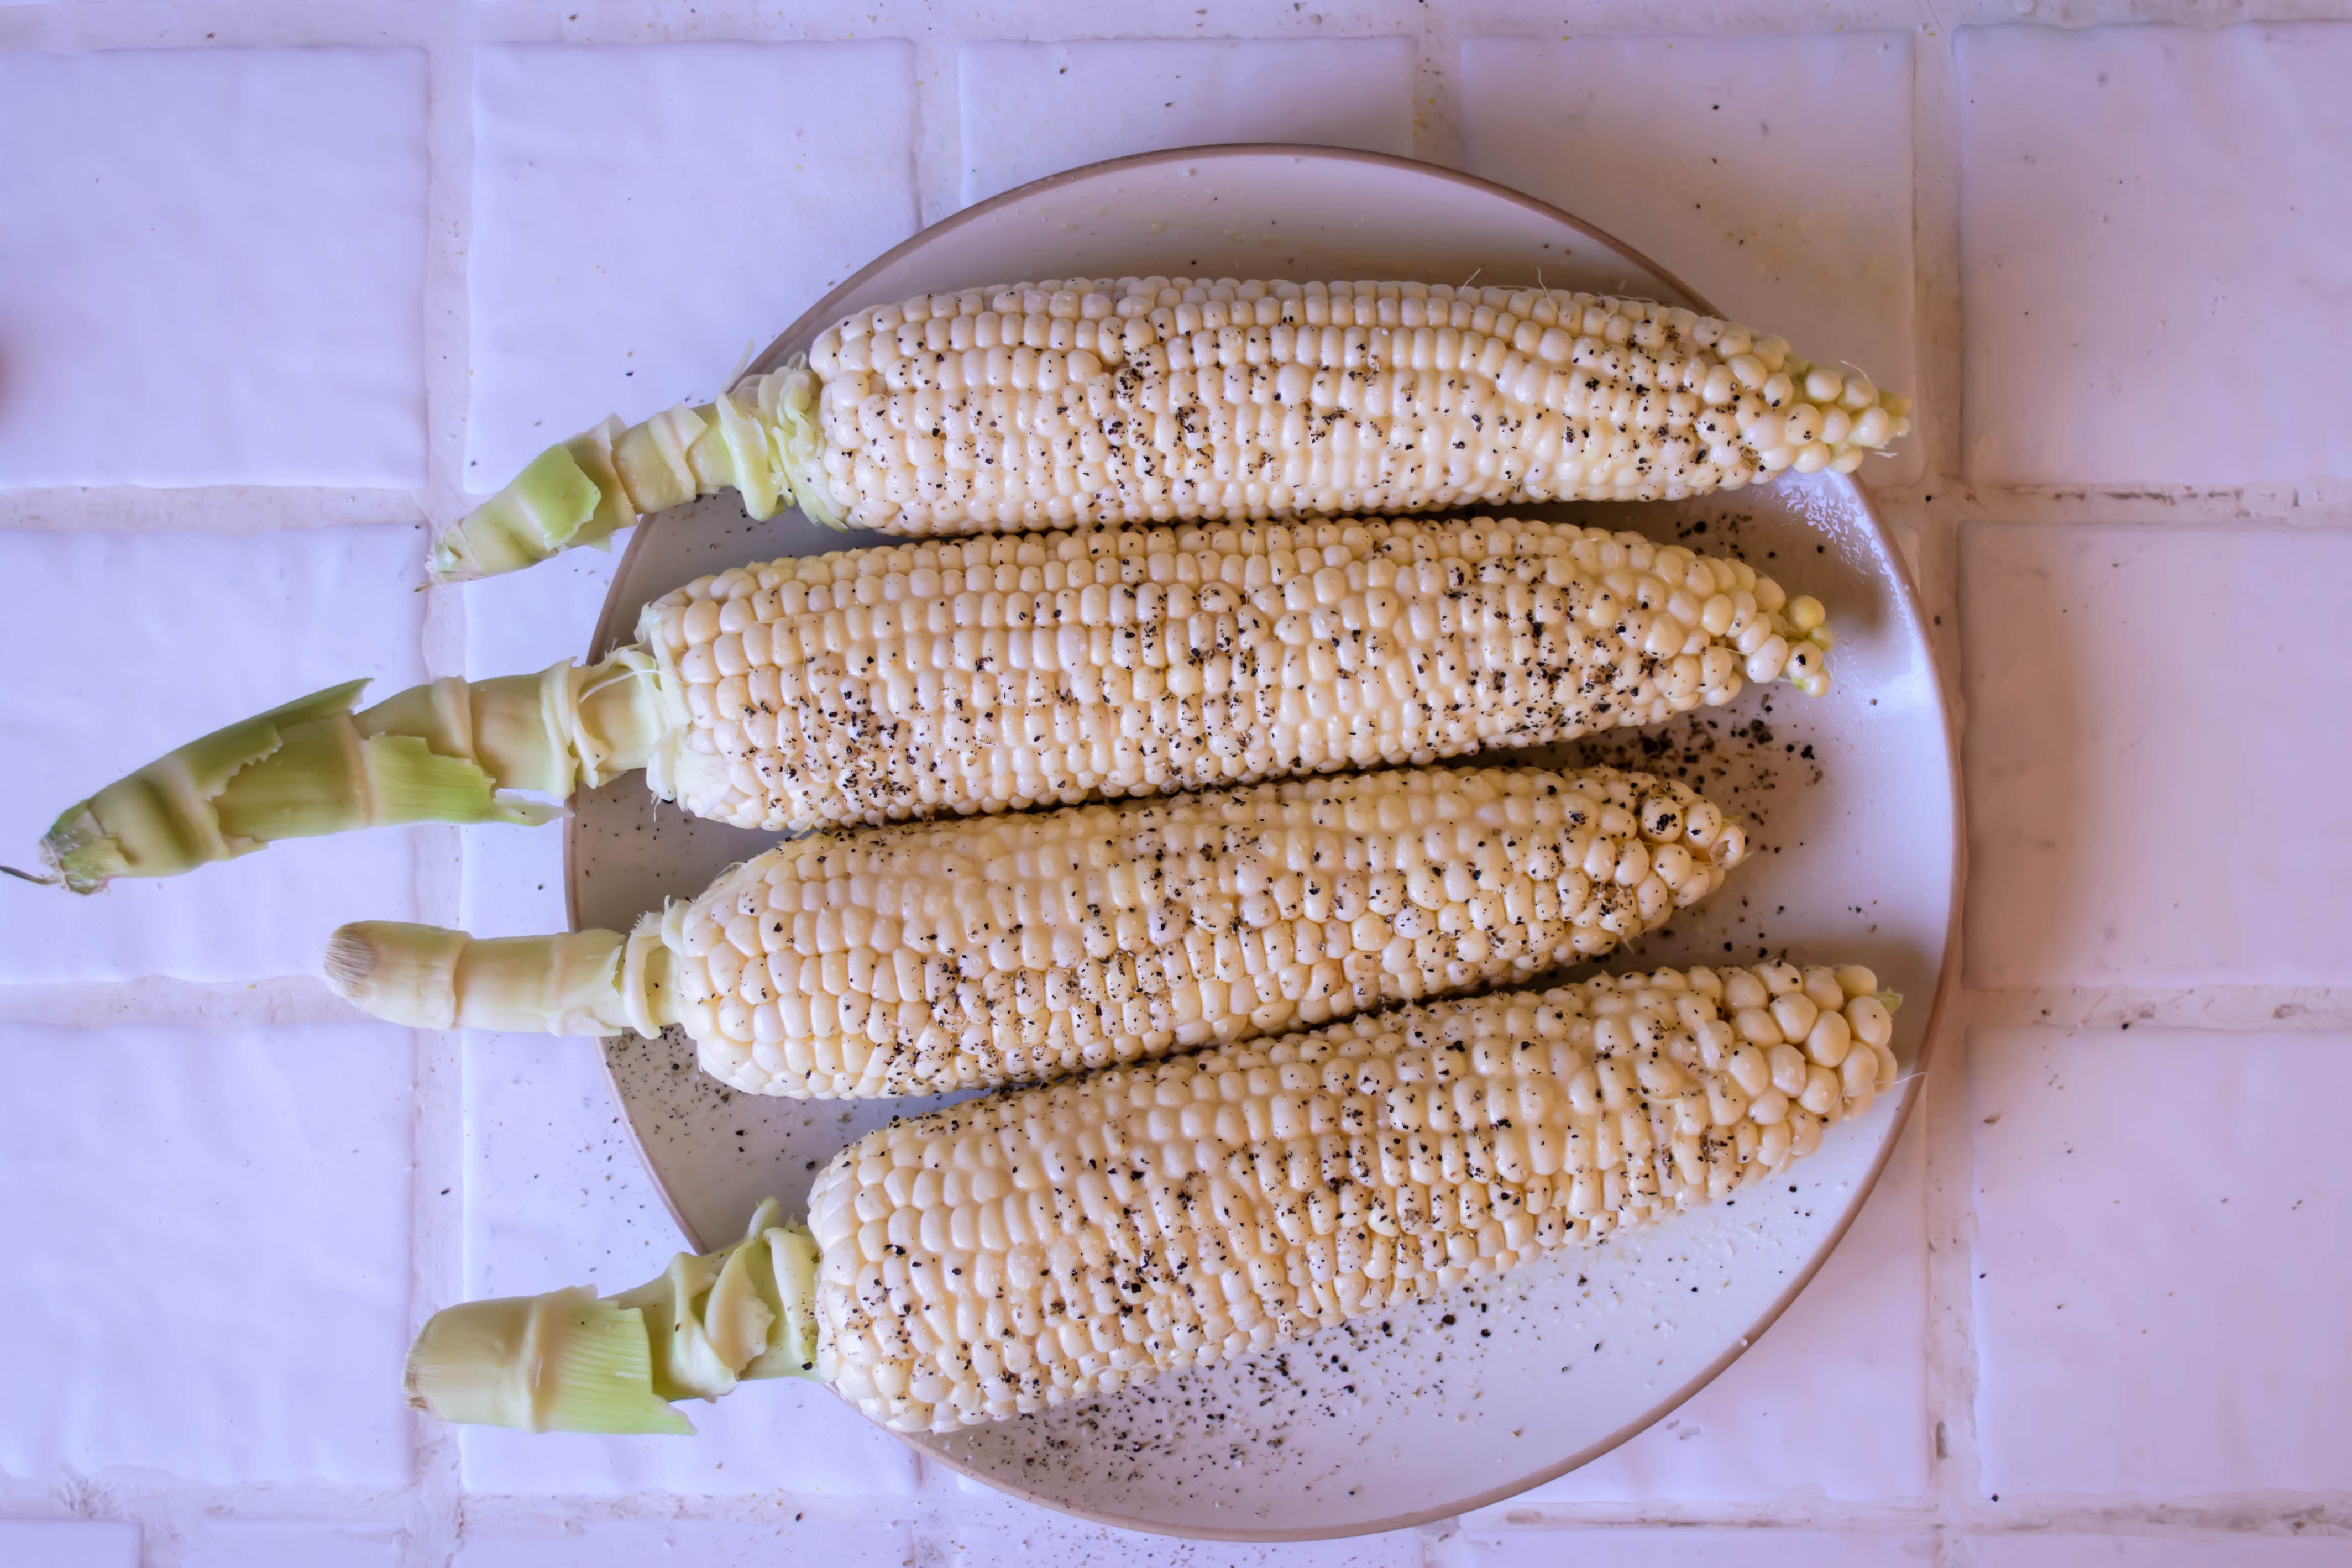
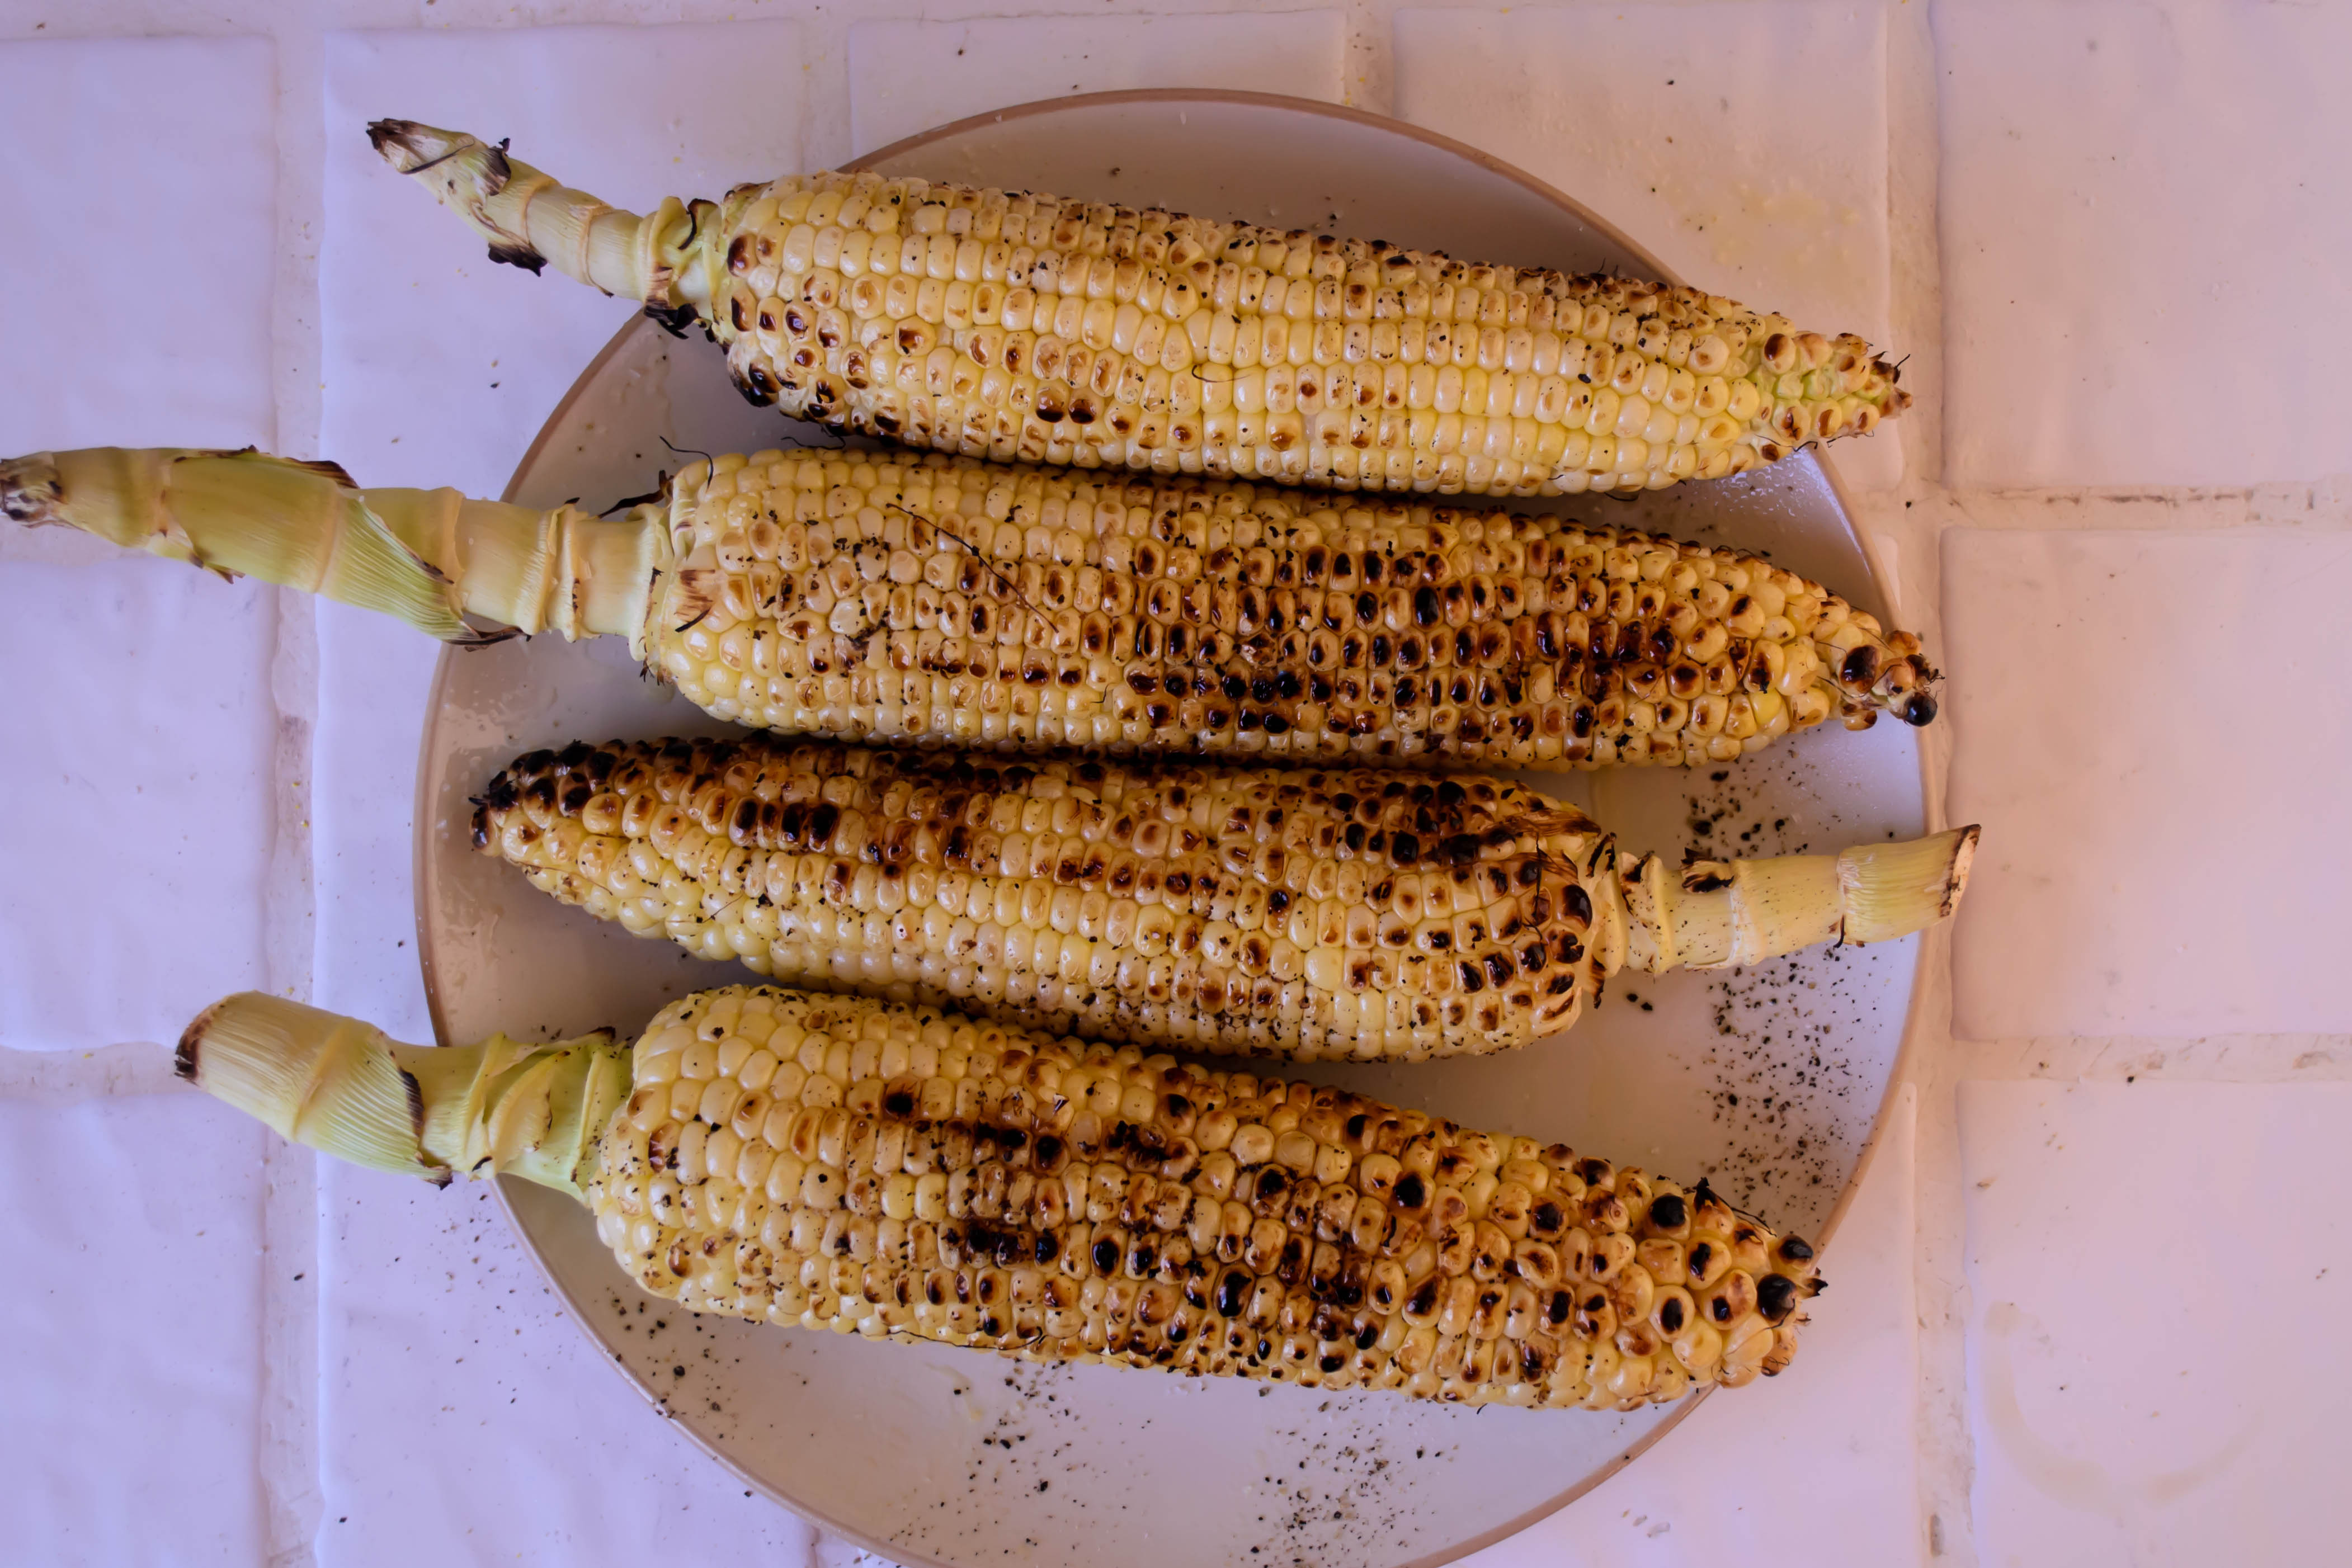
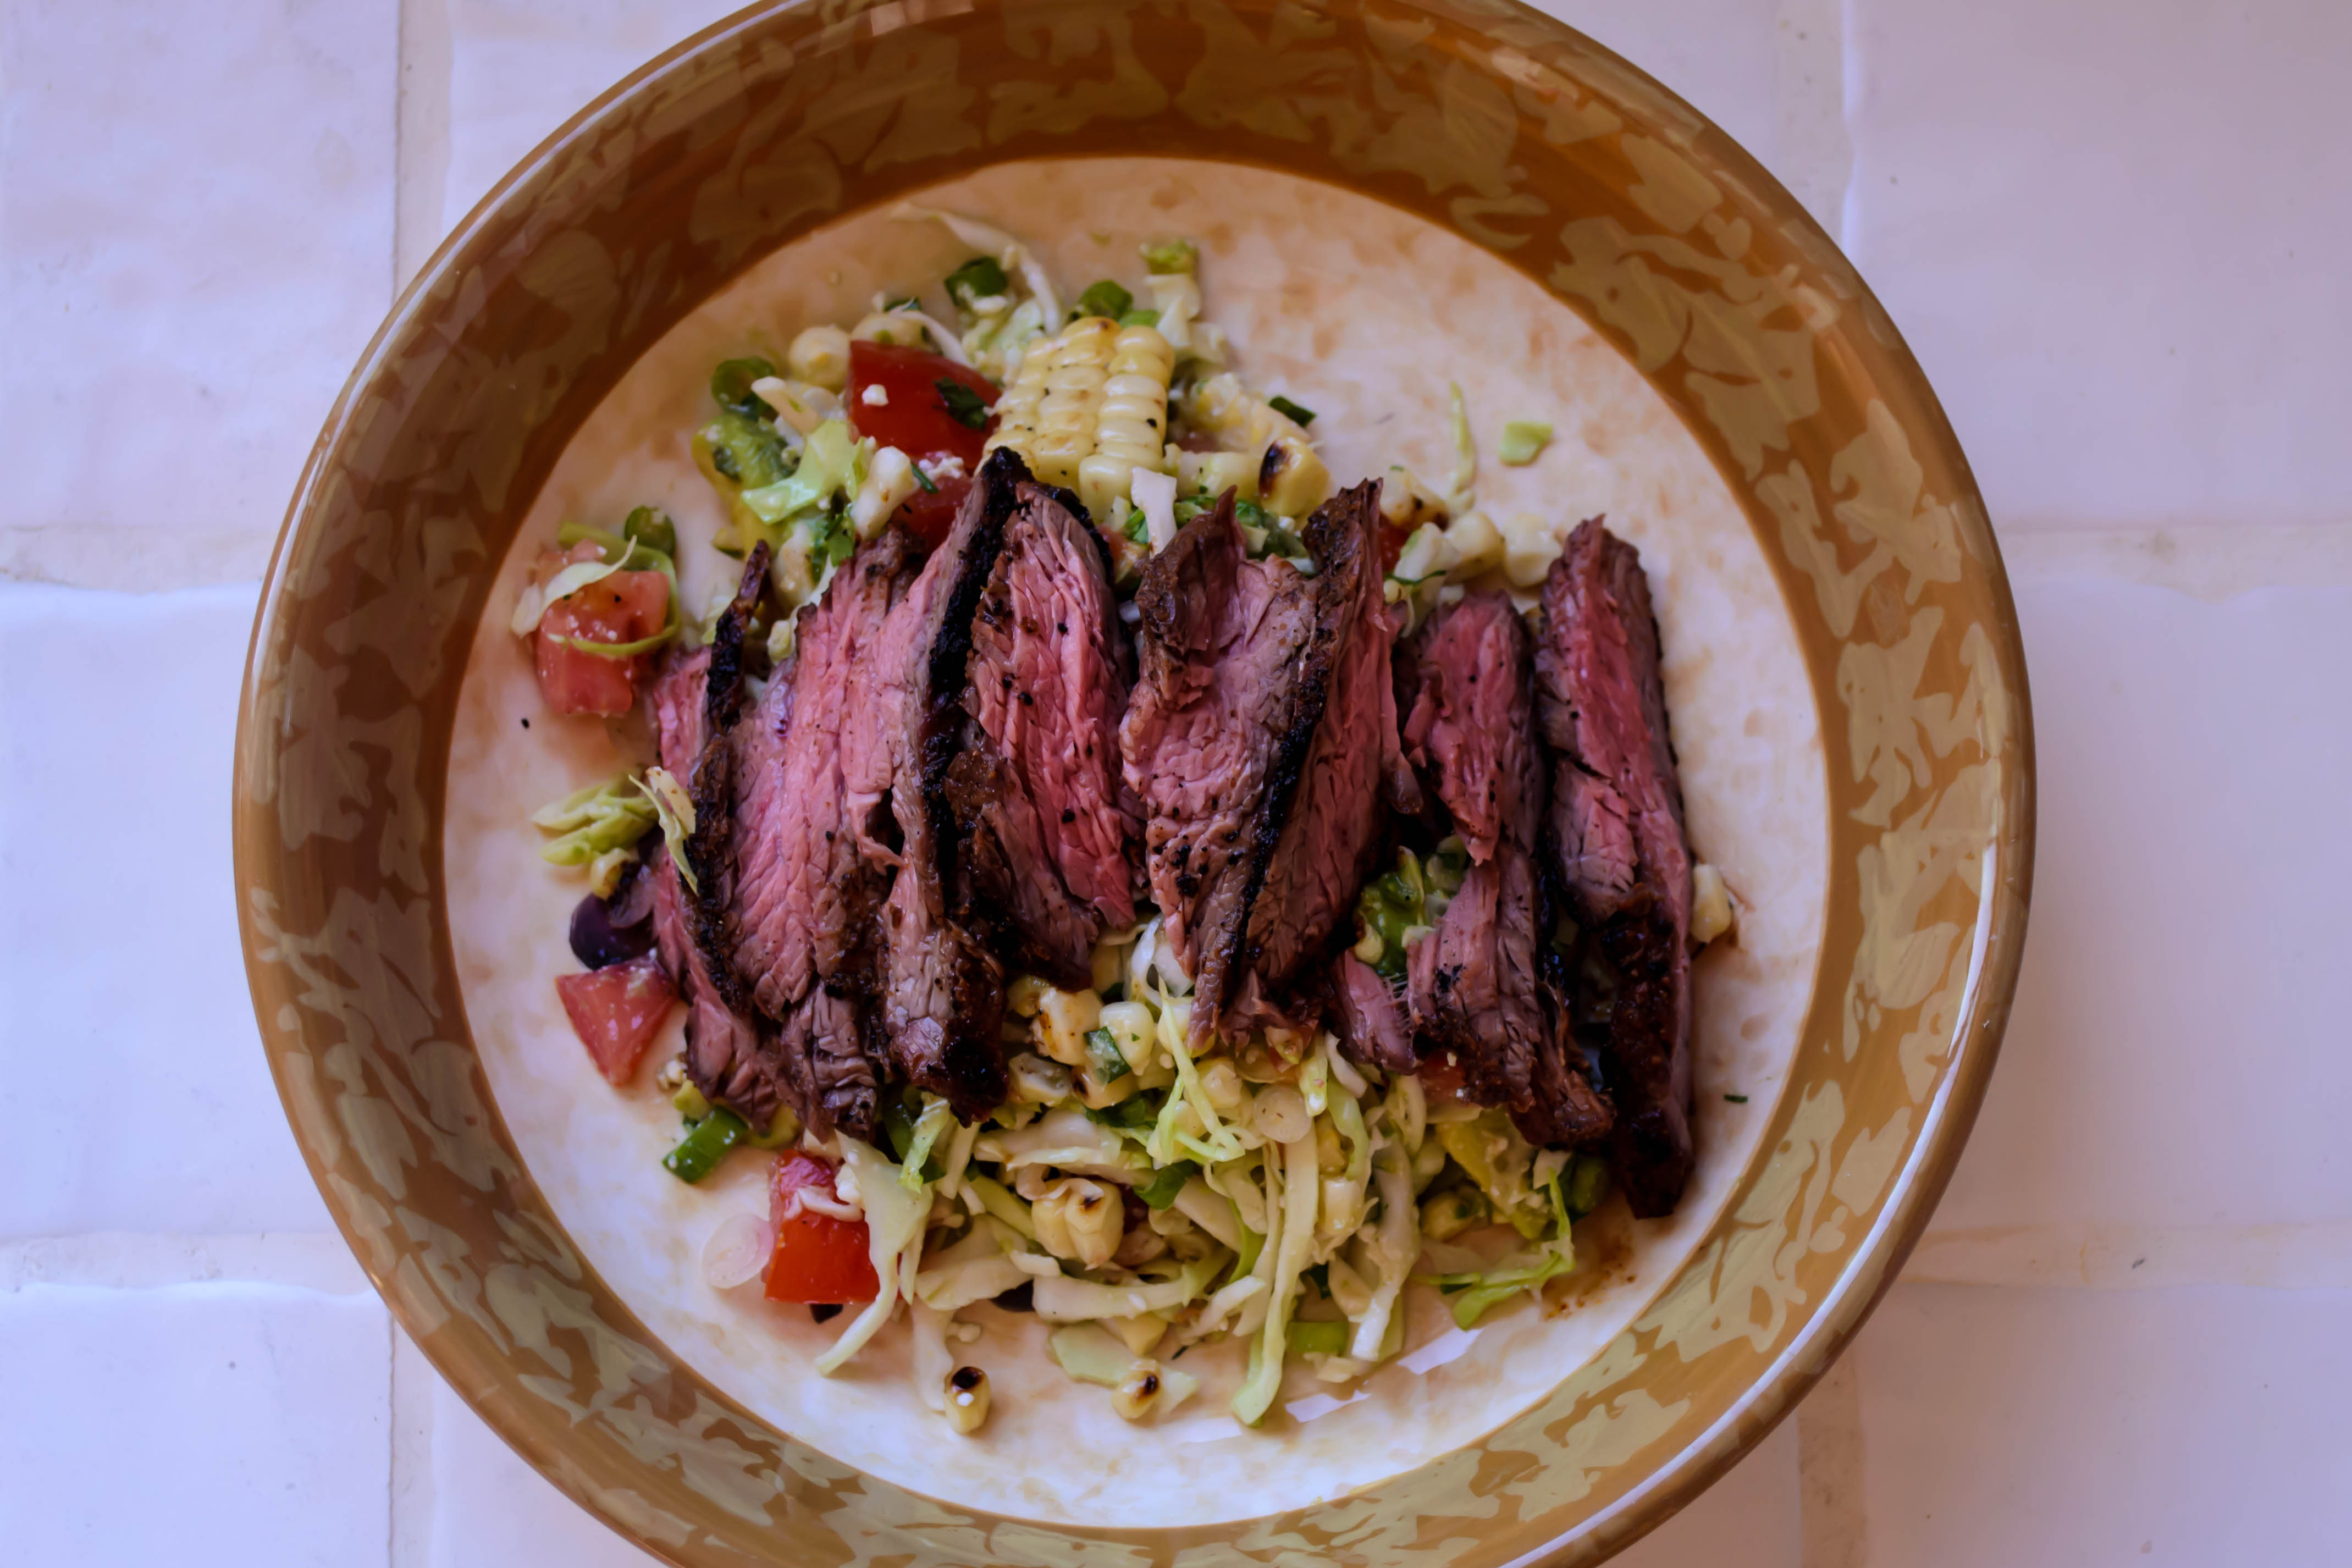
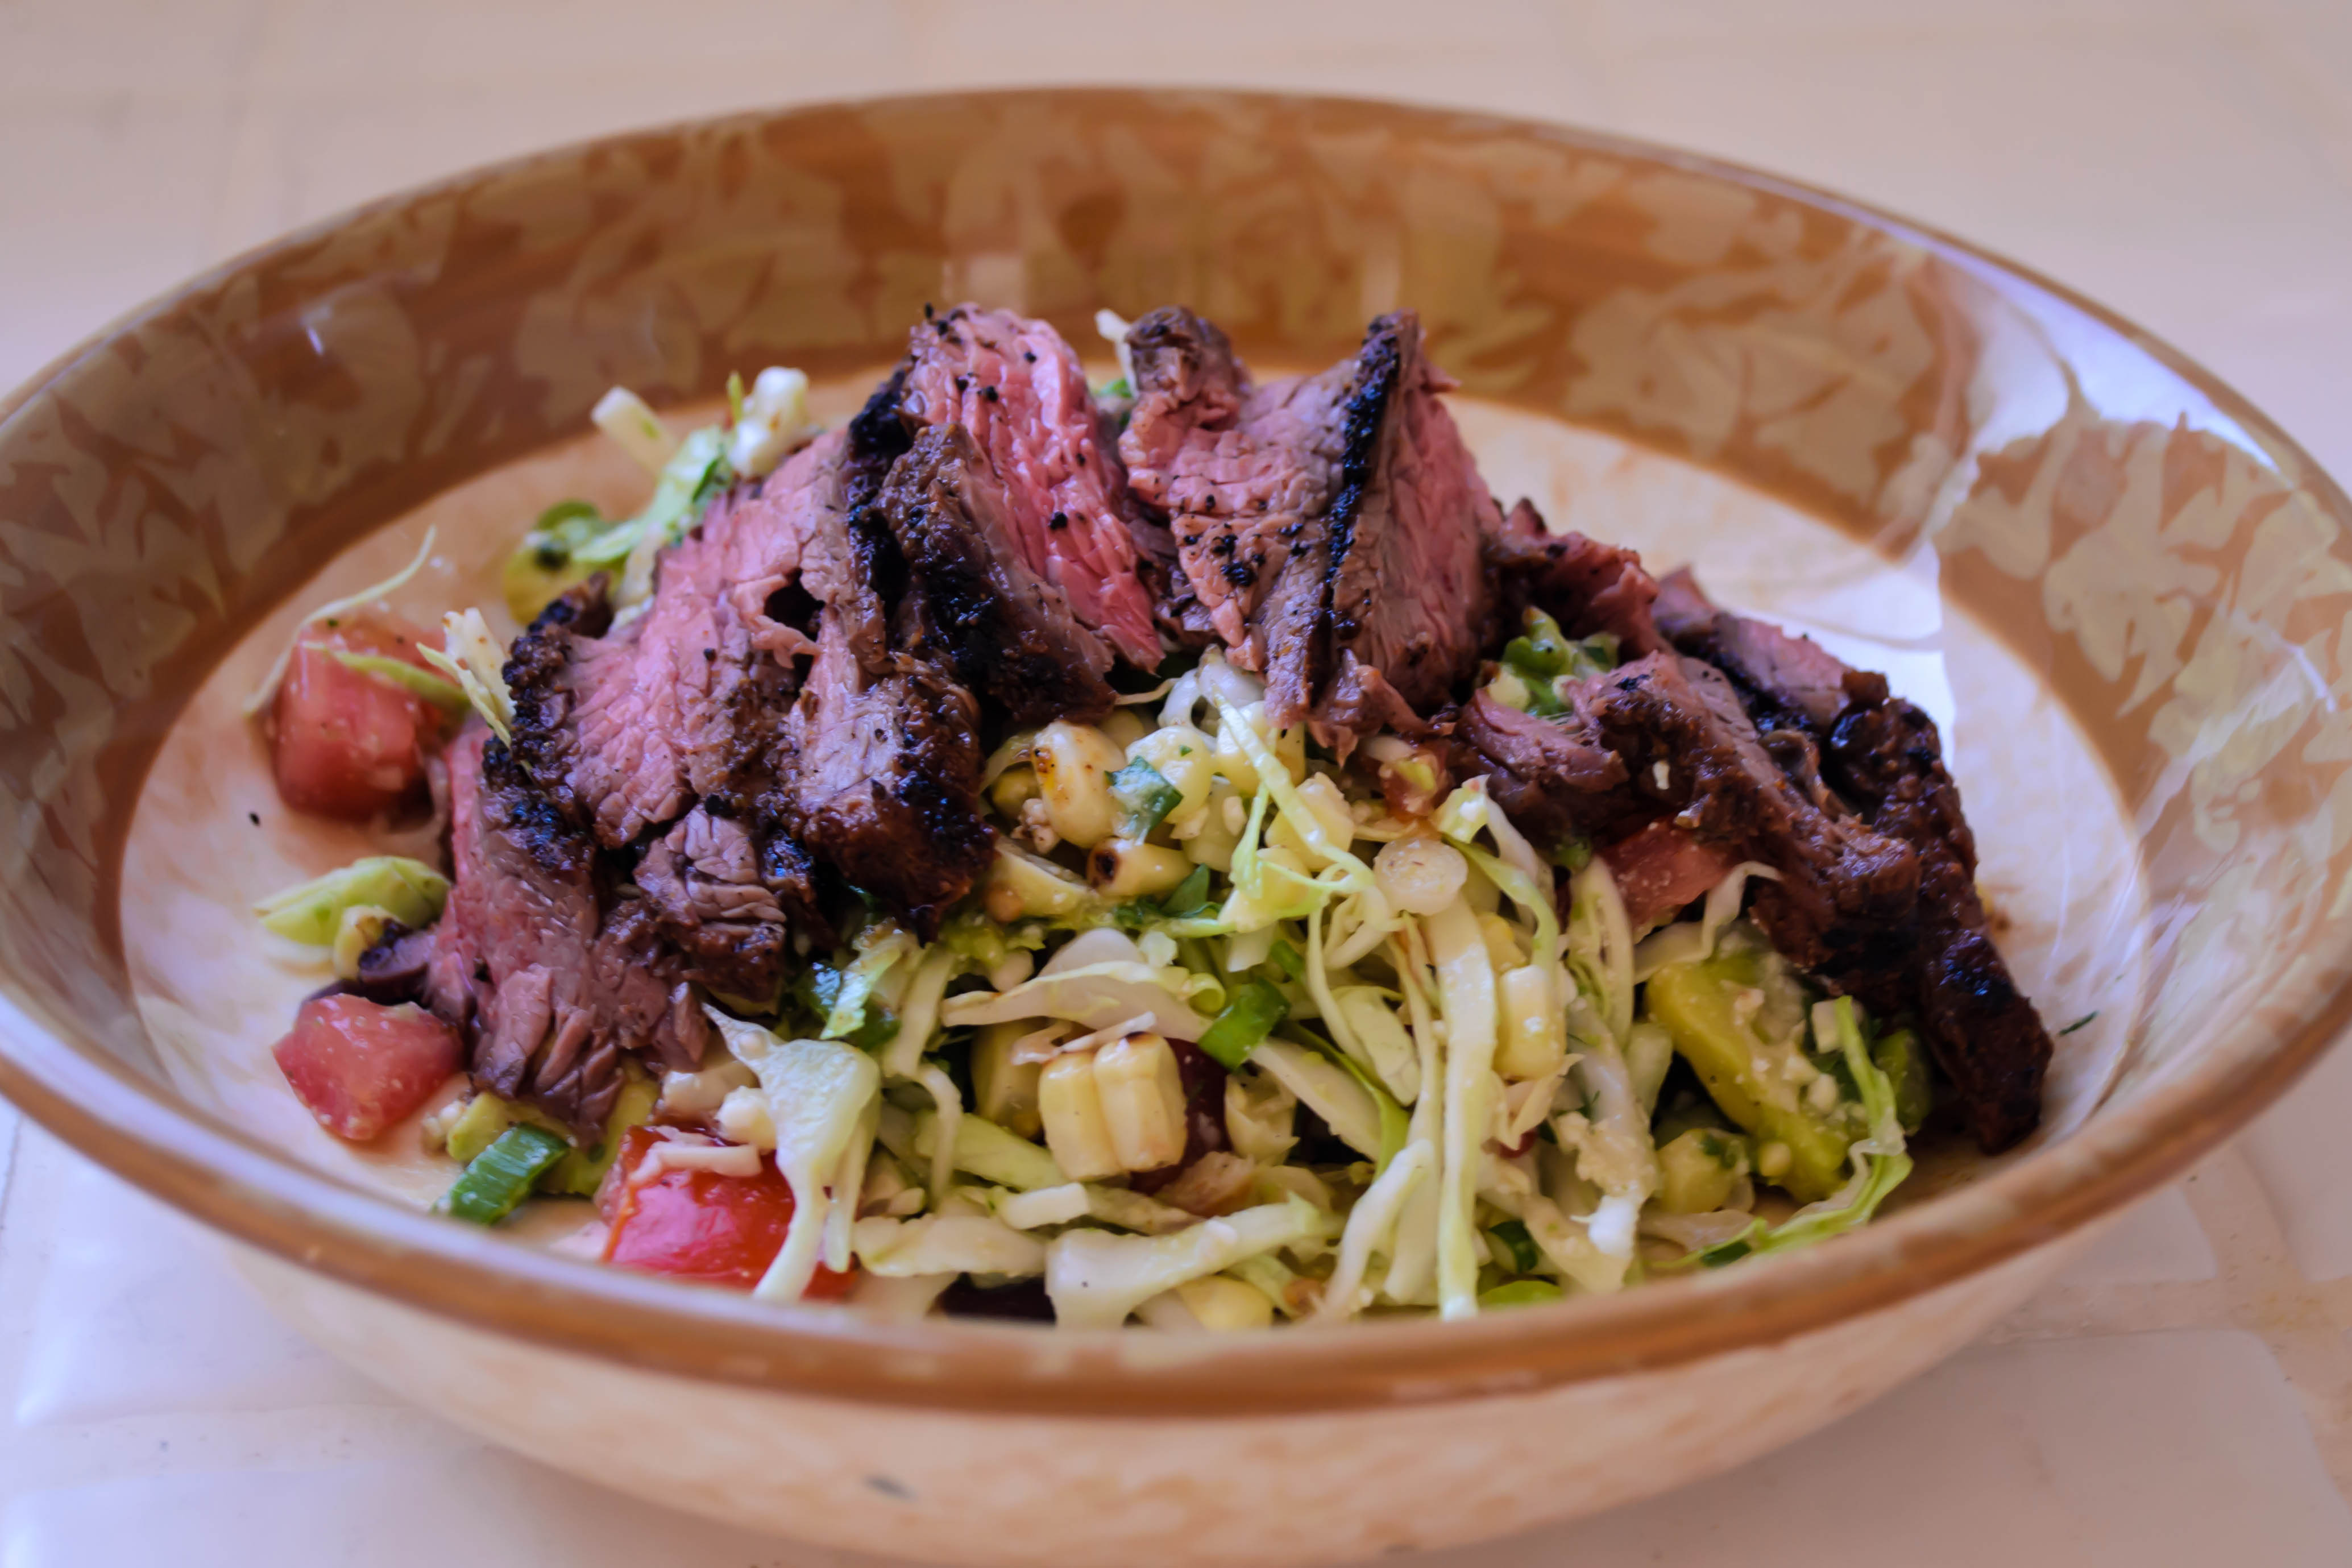
 I took guacamole as my inspiration, and chunked up all the ingredients necessary there – tomatoes, onion, cilantro, a whisper of jalapeno, if spicy suits you, and of course a mound of buttery, creamy cubes of avocado. Lime and garlic found their way in as part of a dressing, the brisk acidity and bite of raw garlic tempered a bit with a drizzle of honey. Because it’s grilling season, I couldn’t help but add some corn on the cob, grilled whole, then kernels lopped off to find their sweet, charred way into the mix. Since the grill was on anyway, the logical thing to do was to grill up a hunk of flank or skirt steak, liberally rubbed with spices, and slice it thin to lay across the top of all that veg. And then, because why not, a generous crumbling of queso fresco. Deconstructed guacamole. Steak. Corn. Cheese. Stuff.
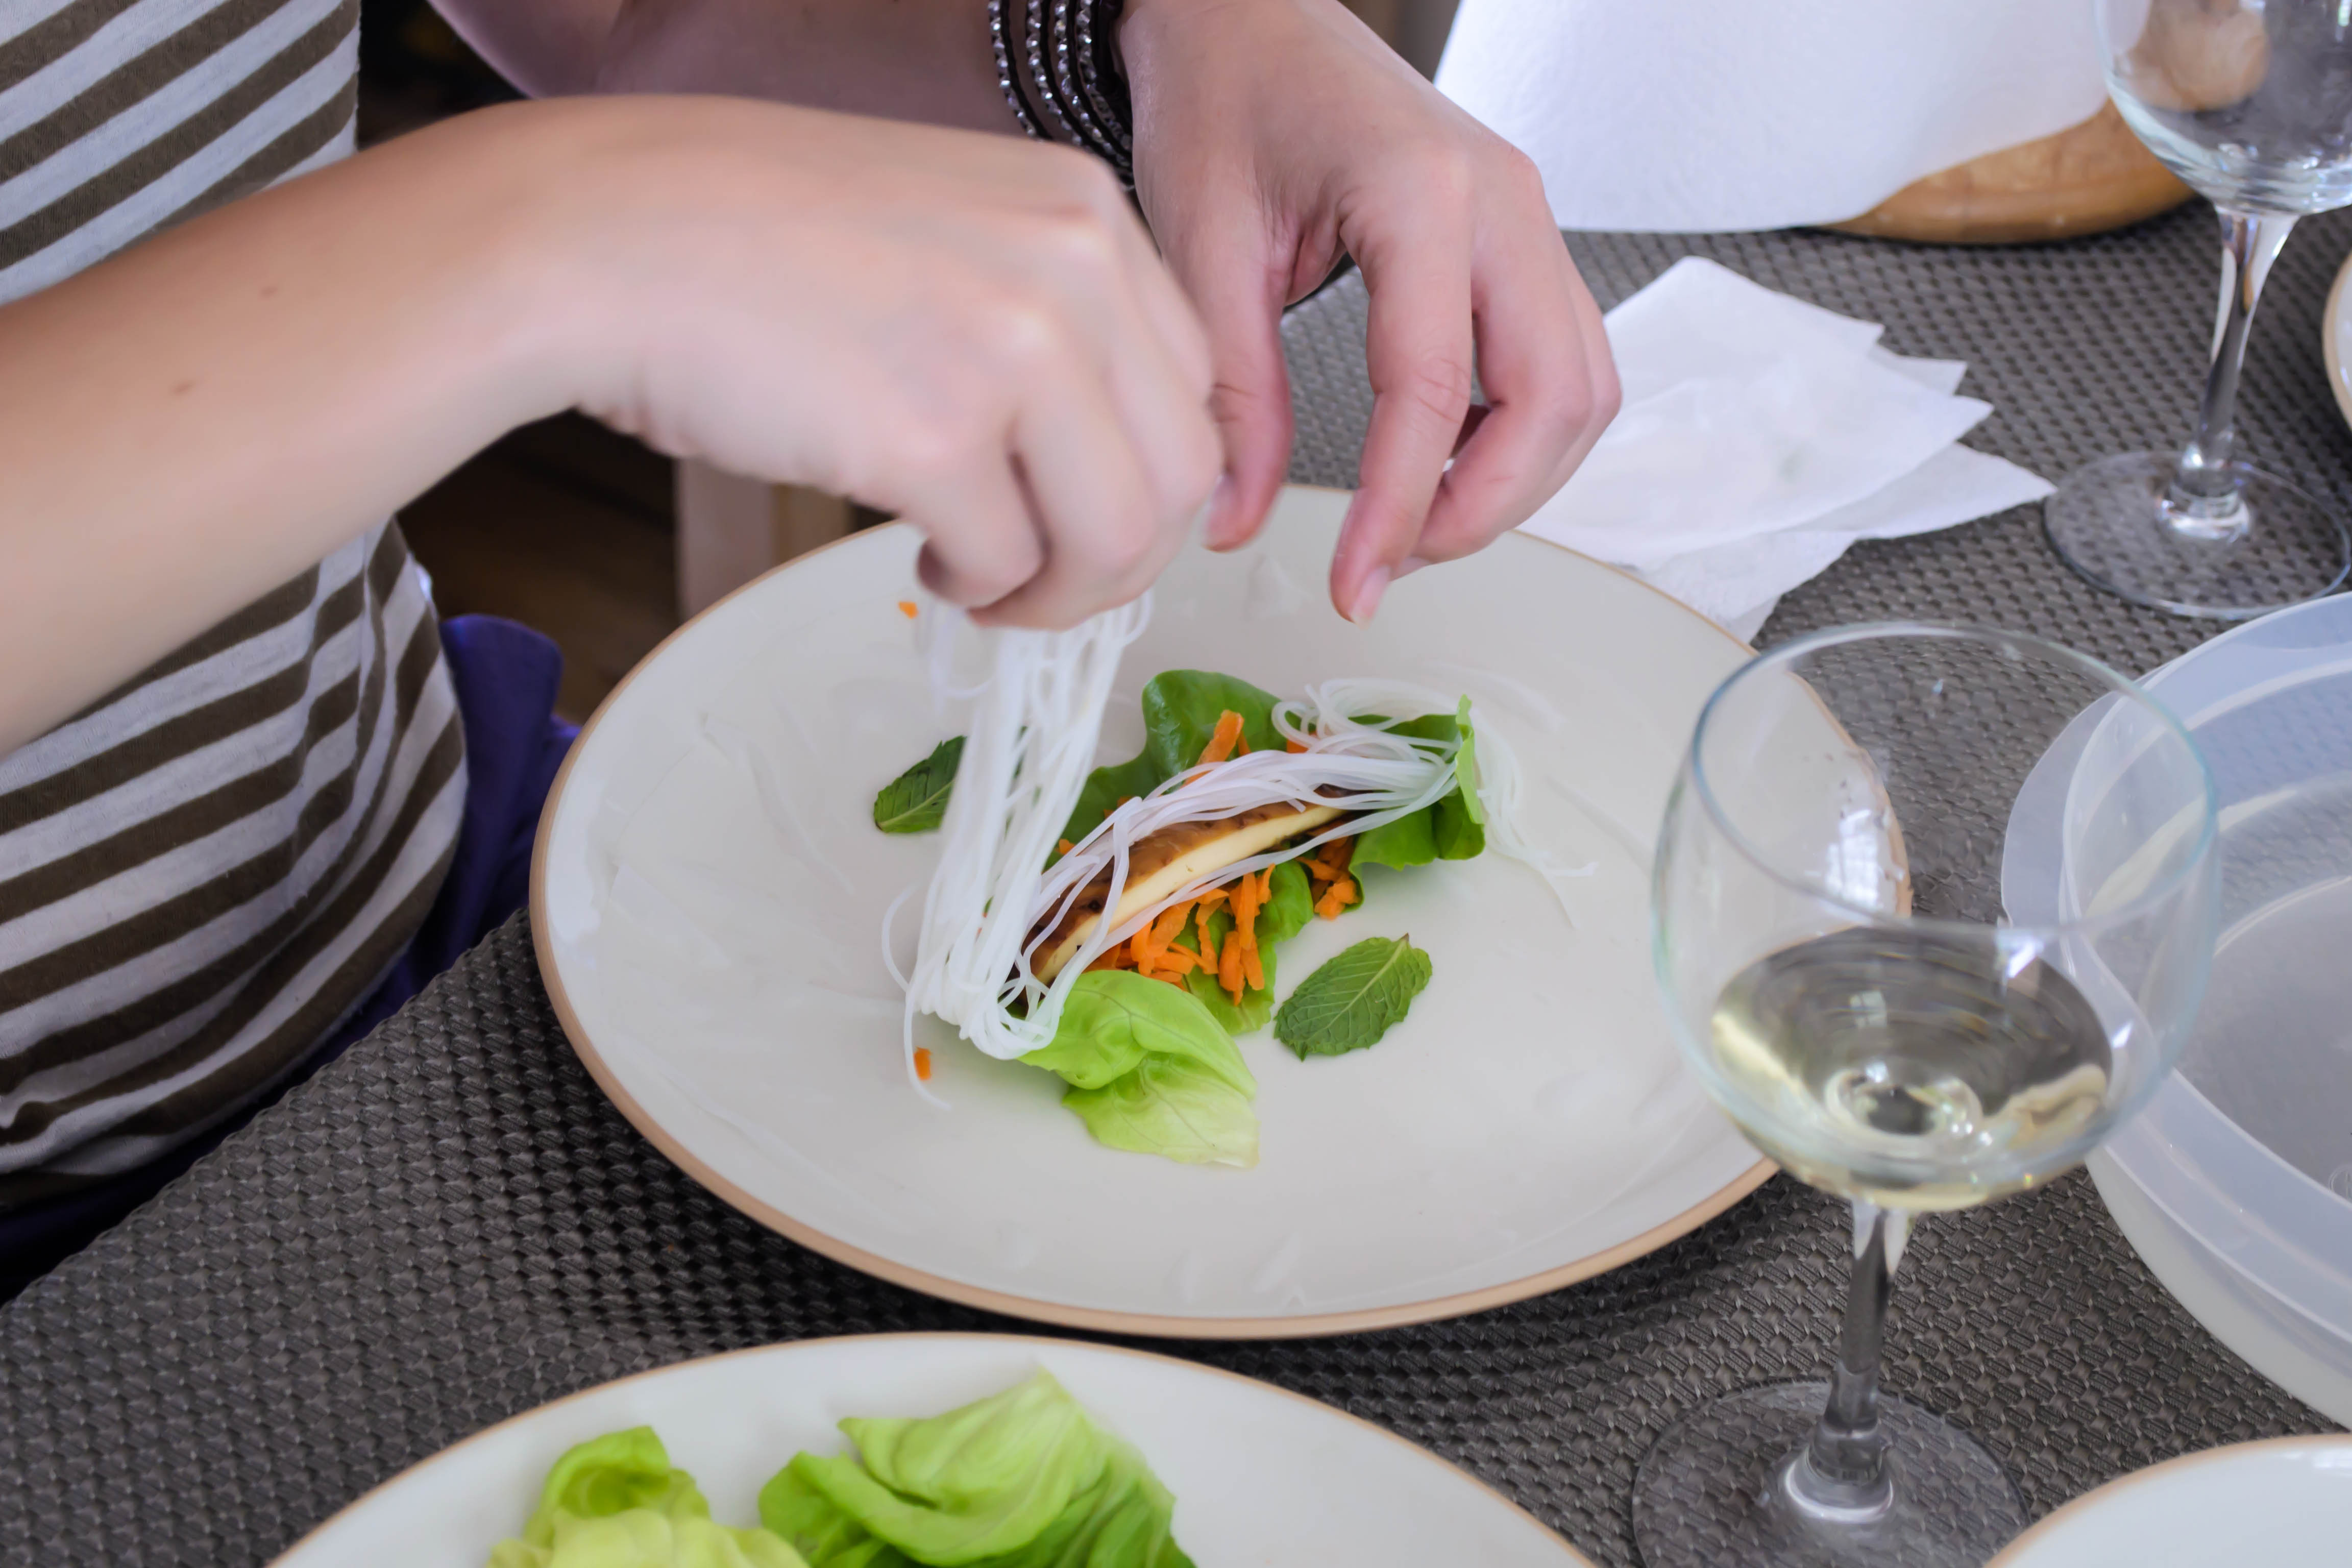
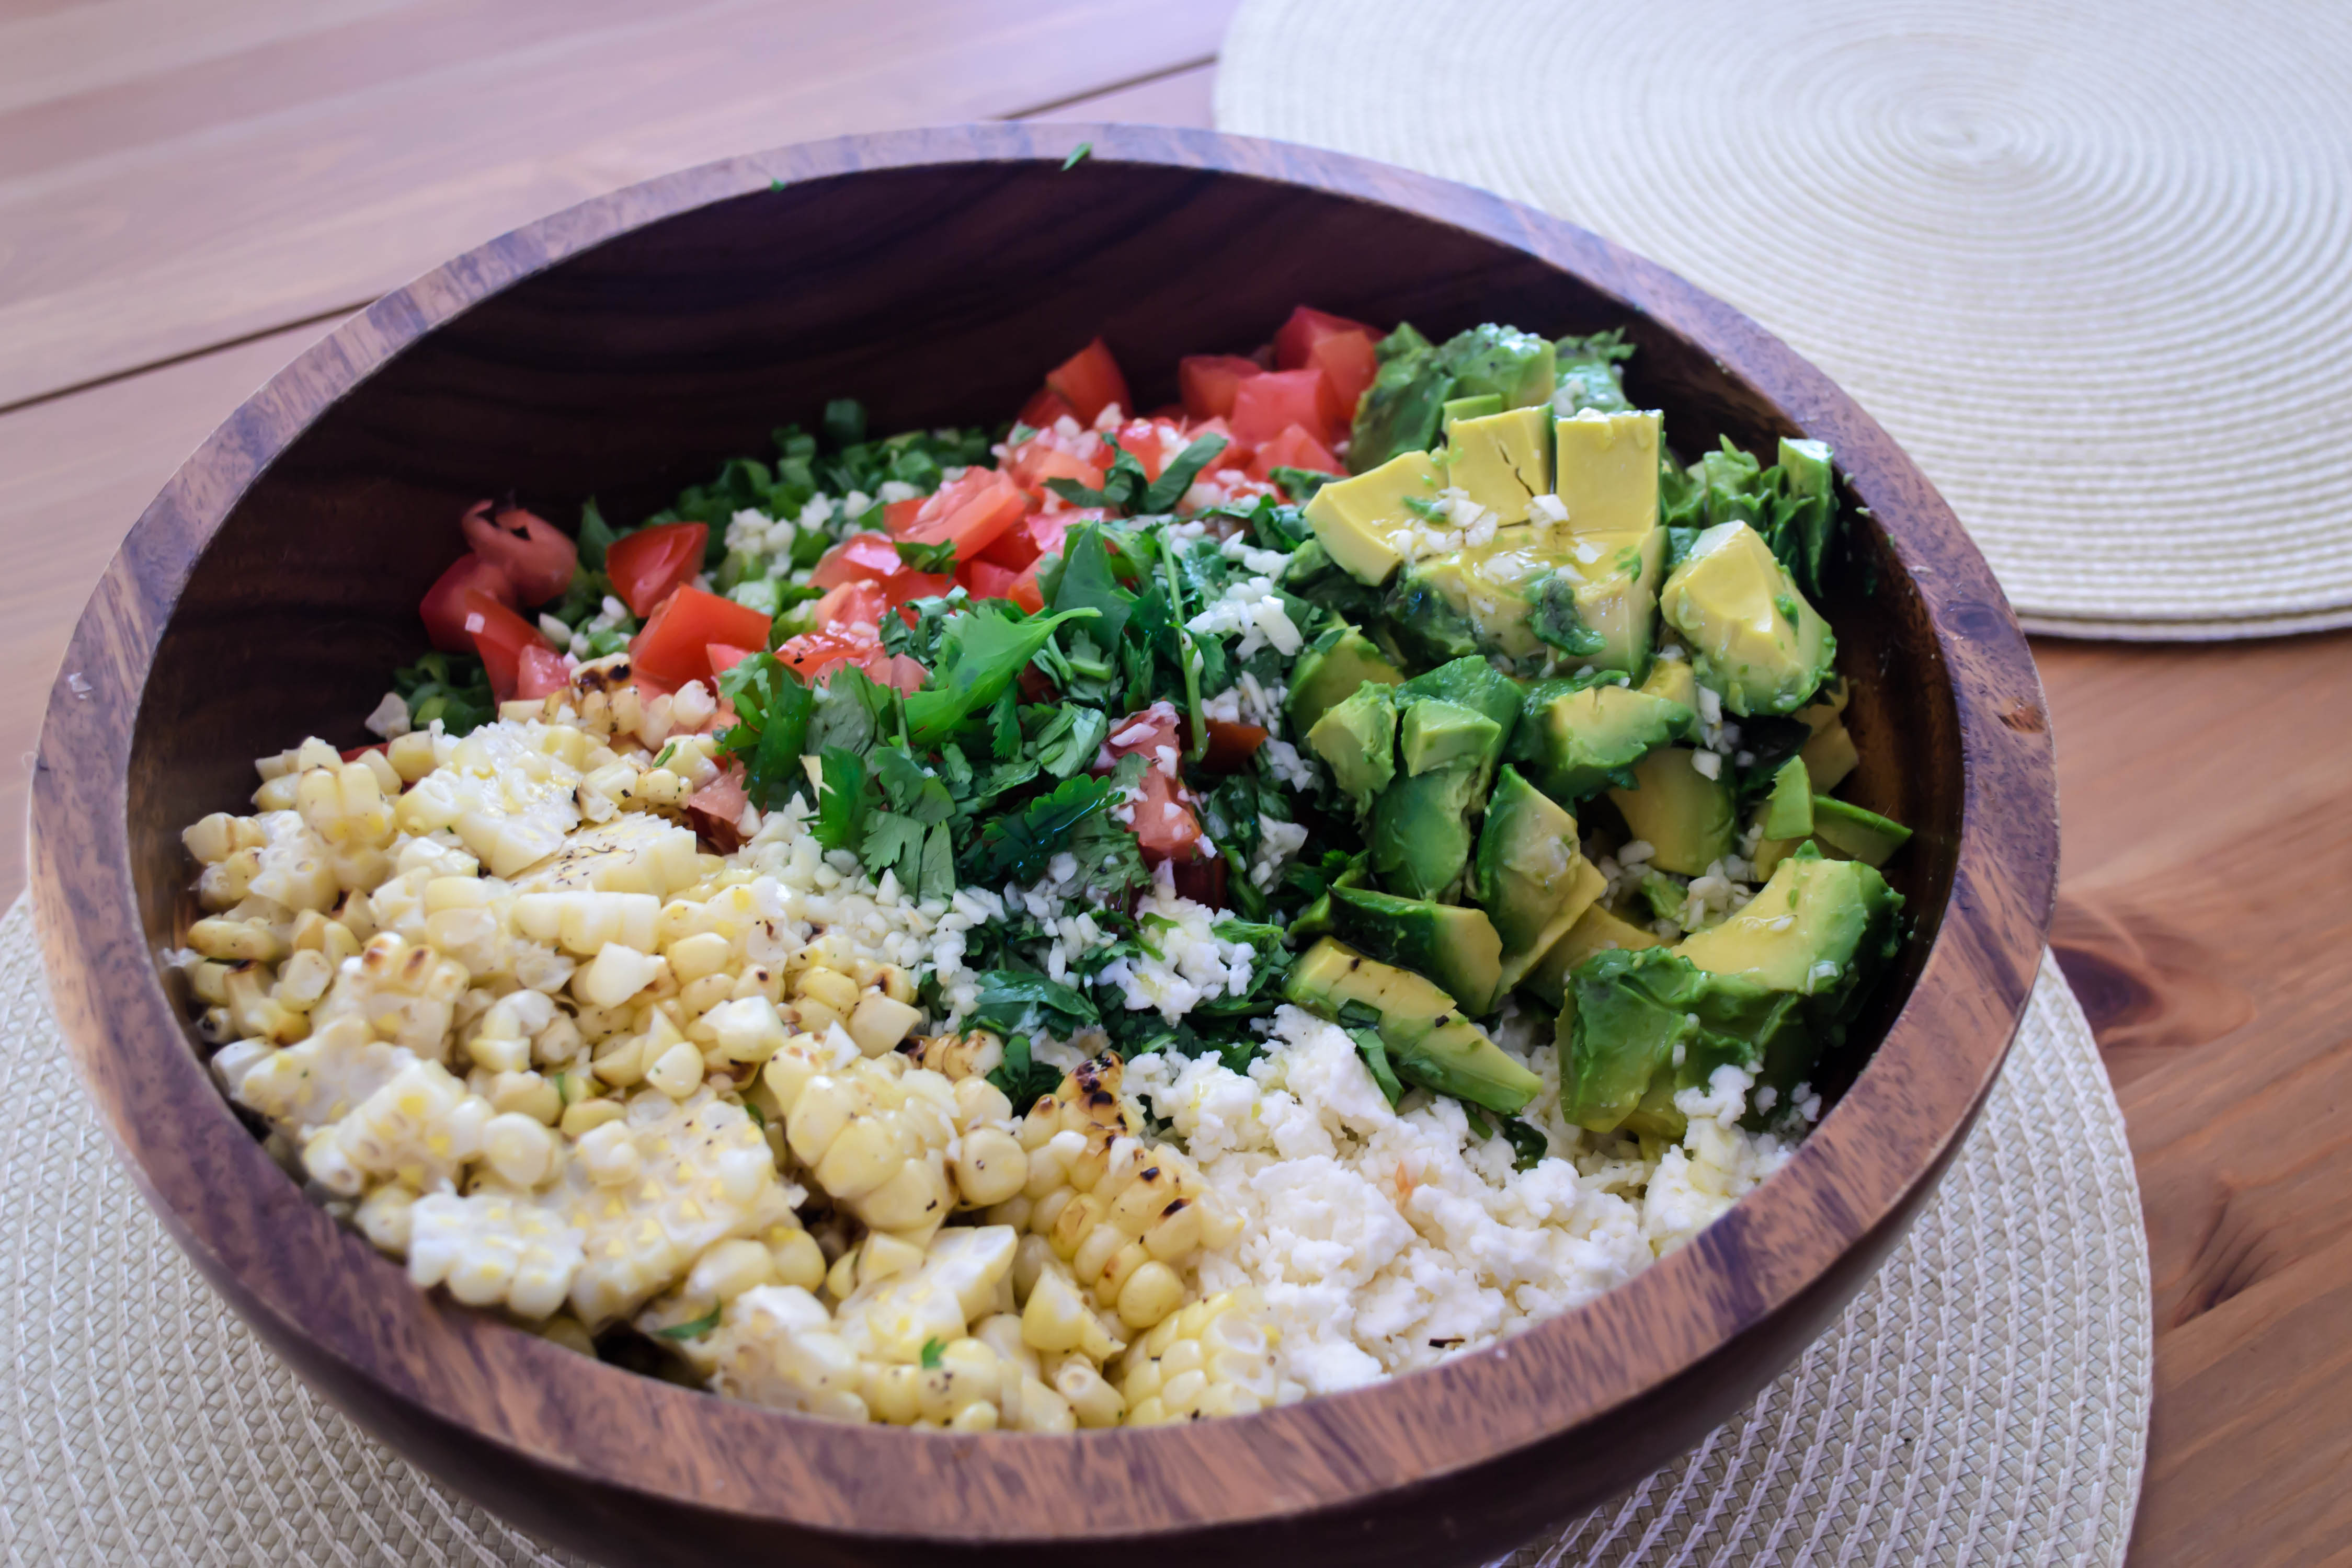 This sounds like a salad only tangentially. I haven’t even mentioned crisp romaine, or toothsome kale, or fresh, grassy spinach. The thing is, as Mark Bittman taught me, the greens part of the salad is neither the starring role, nor (stay with me here) even necessary! Though I did end up including a greens foundation here (I chose cabbage because it stays crisp, and because it’s the green I like most in tacos – you could easily swap it out for lettuce of any sort, or even spinach if you prefer), the salad is bolstered by it, not overwhelmed with it. Any odd forkful is going to include a mix of vegetables, not a pile of cabbage with the occasional tomato you had to hunt around for.
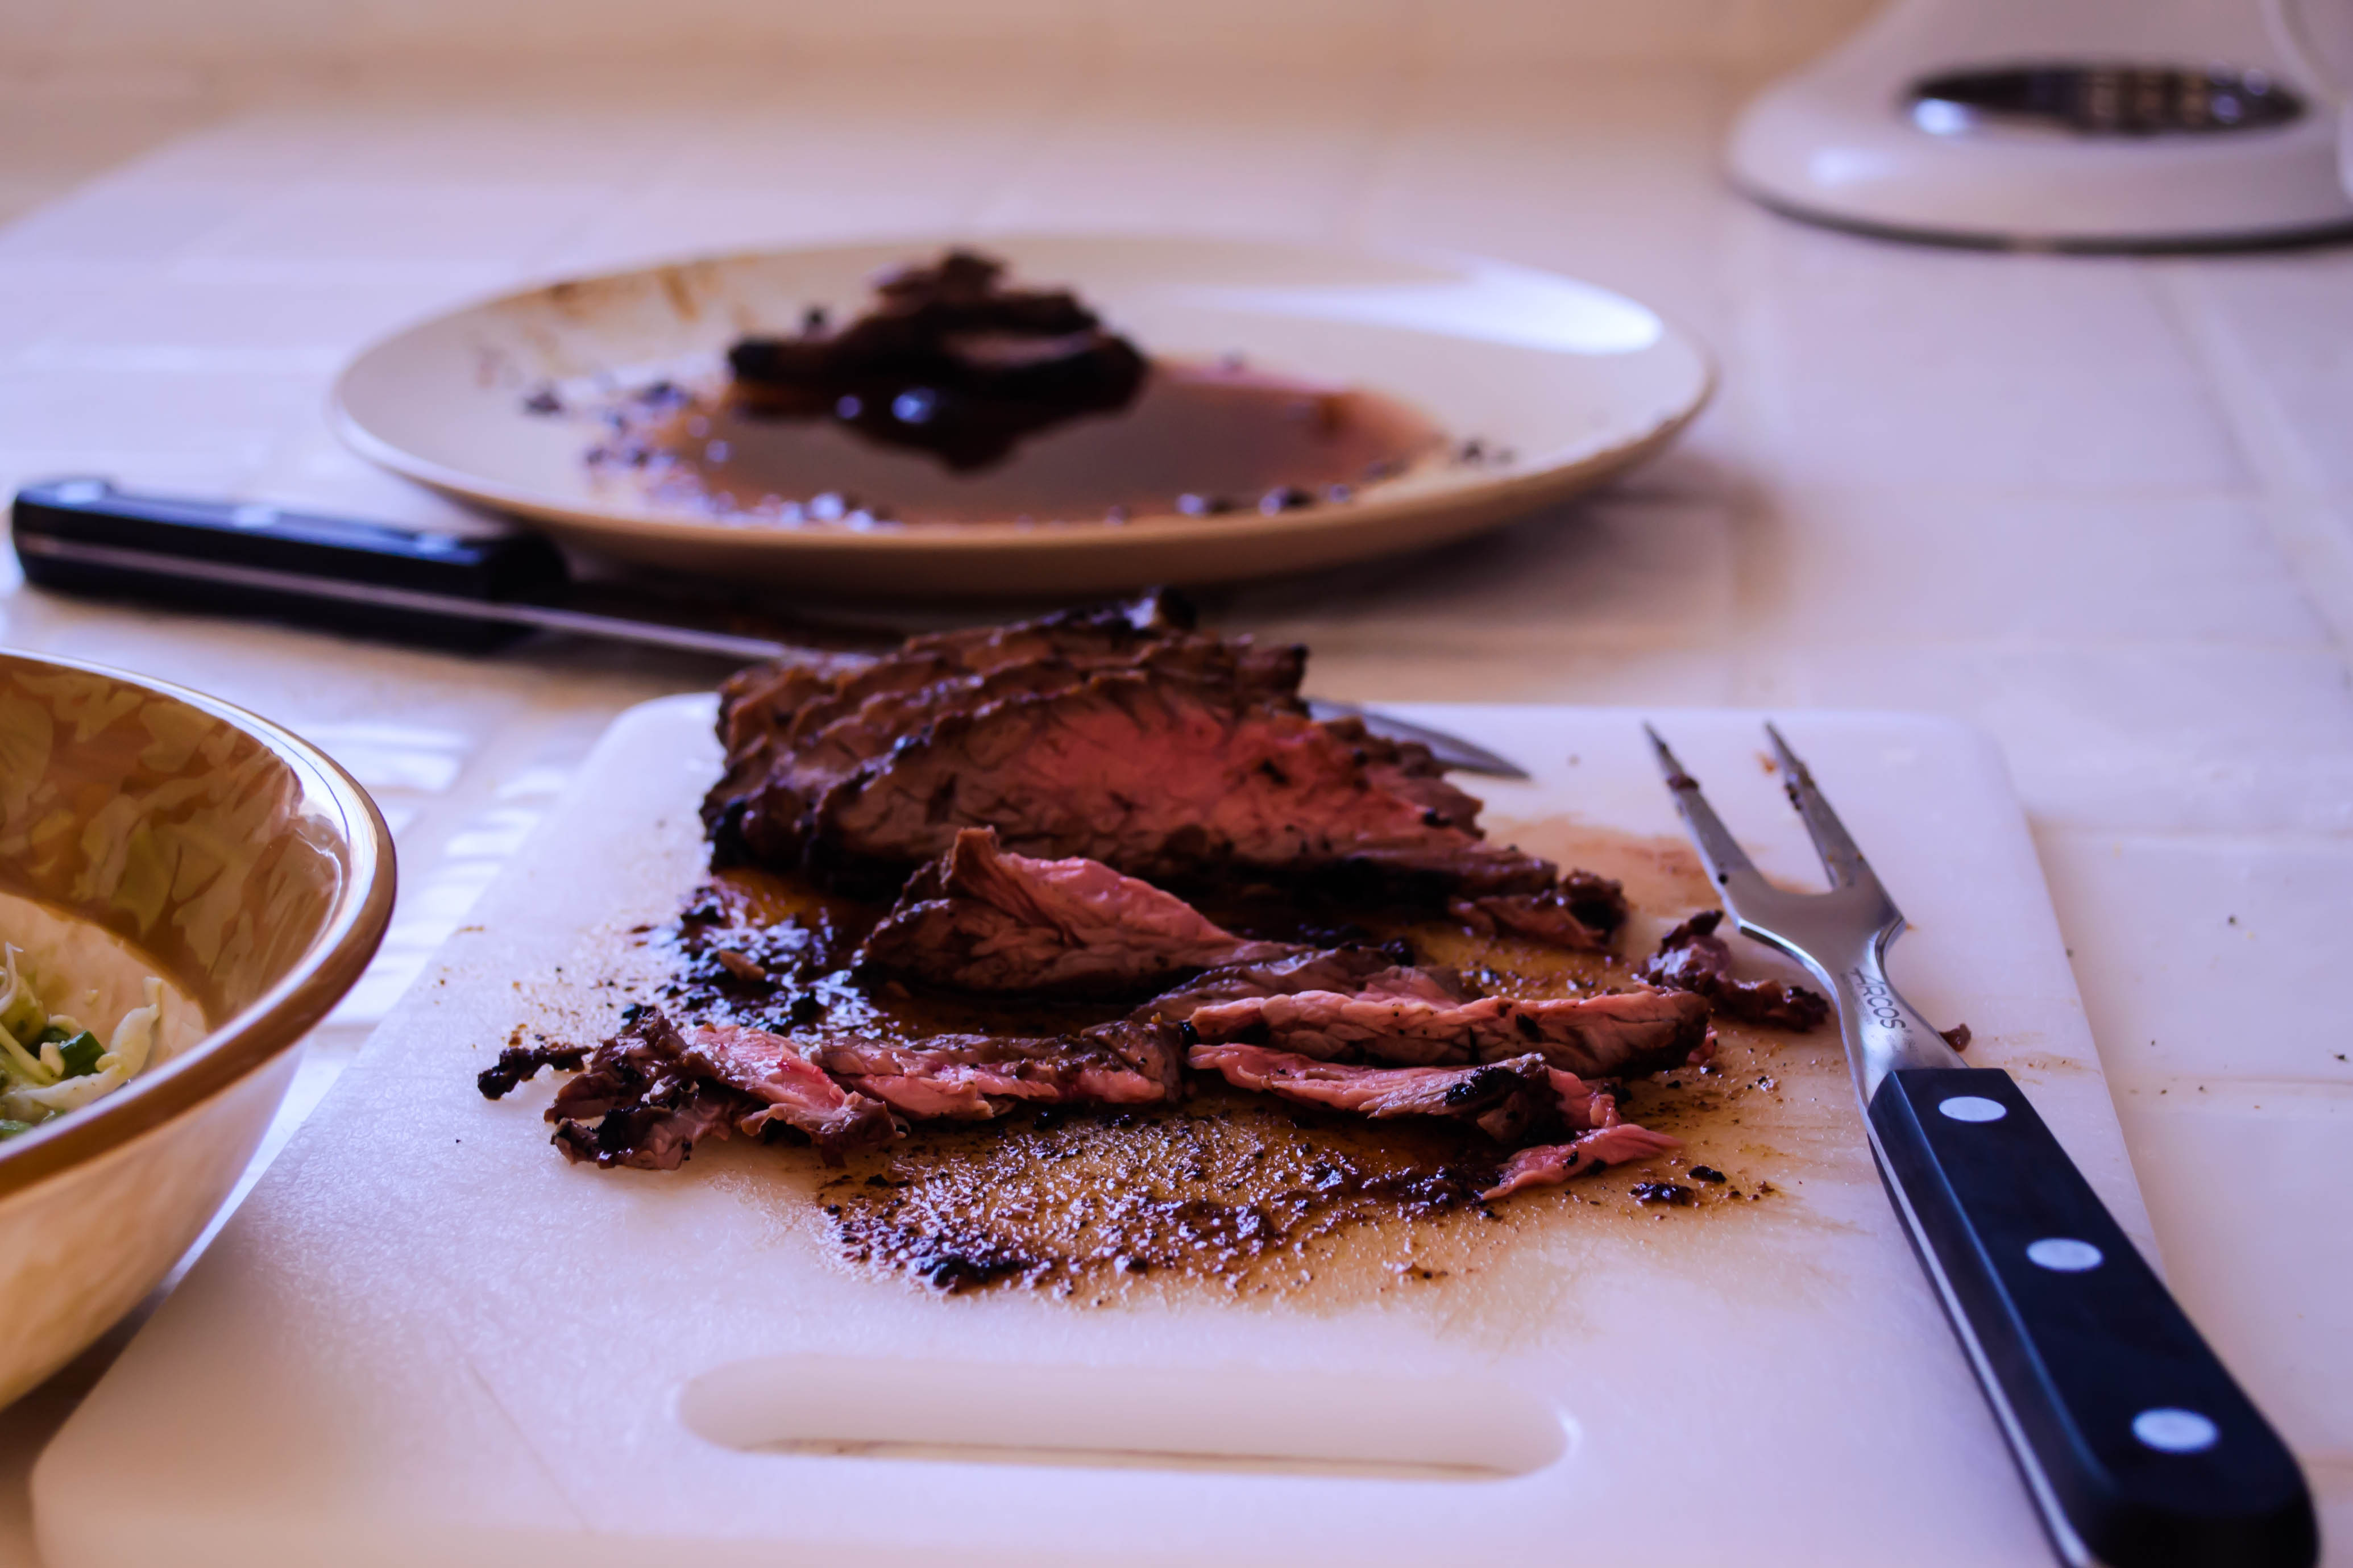 If you’ve got a grill, this salad is executable without even looking at your oven or your stove. It is fresh and light, but still substantial, it carries a pleasant citrus bite but is creamy from the avocado and the cheese, and it makes a big bowlful. The steak is flavorful and slightly spicy; I’ve included my seasoning blend here, but you can use any mixture of spices you like – this is another tasty one. N. and I found ourselves fighting over the last succulent pieces as we went back for seconds. And though the salad stands alone just fine, as noted above, if you simply have to char a few corn tortillas over the grill at the last minute to serve in place of bread or chips on the side, I doubt anyone would argue. Because you, my friend, just won summer.
Guacamole Steak Salad
Serves 4-6
For the steak:
1 pound skirt steak
1 teaspoon salt
pinch of cayenne pepper
1 teaspoon smoked paprika
1 teaspoon garlic powder
1 teaspoon onion powder
1 teaspoon ground cumin
1 teaspoon ground coriander
zest of 1 lime
1 tablespoon olive oil or vegetable oil
For the corn:
2 ears corn, husks and silk removed, stalk end still in place
salt and pepper for sprinkling
a few teaspoons olive oil to drizzle or spray over the corn
For the salad:
8-12 ounces thinly sliced cabbage shreds
16 ounces cherry tomatoes, quartered, OR 4 medium tomatoes, cored and cubed
8-10 green onions, roots removed, thinly sliced
2 avocados, pitted, peeled, and cubed
6 ounces crumbled queso fresco
½ cup packed chopped cilantro, from one bunch
For the dressing:
¼ cup lime juice (estimate 2-3 limes)
2-4 cloves garlic, very finely minced
2 teaspoons honey
⅓ – ½ cup olive oil
salt and pepper to taste
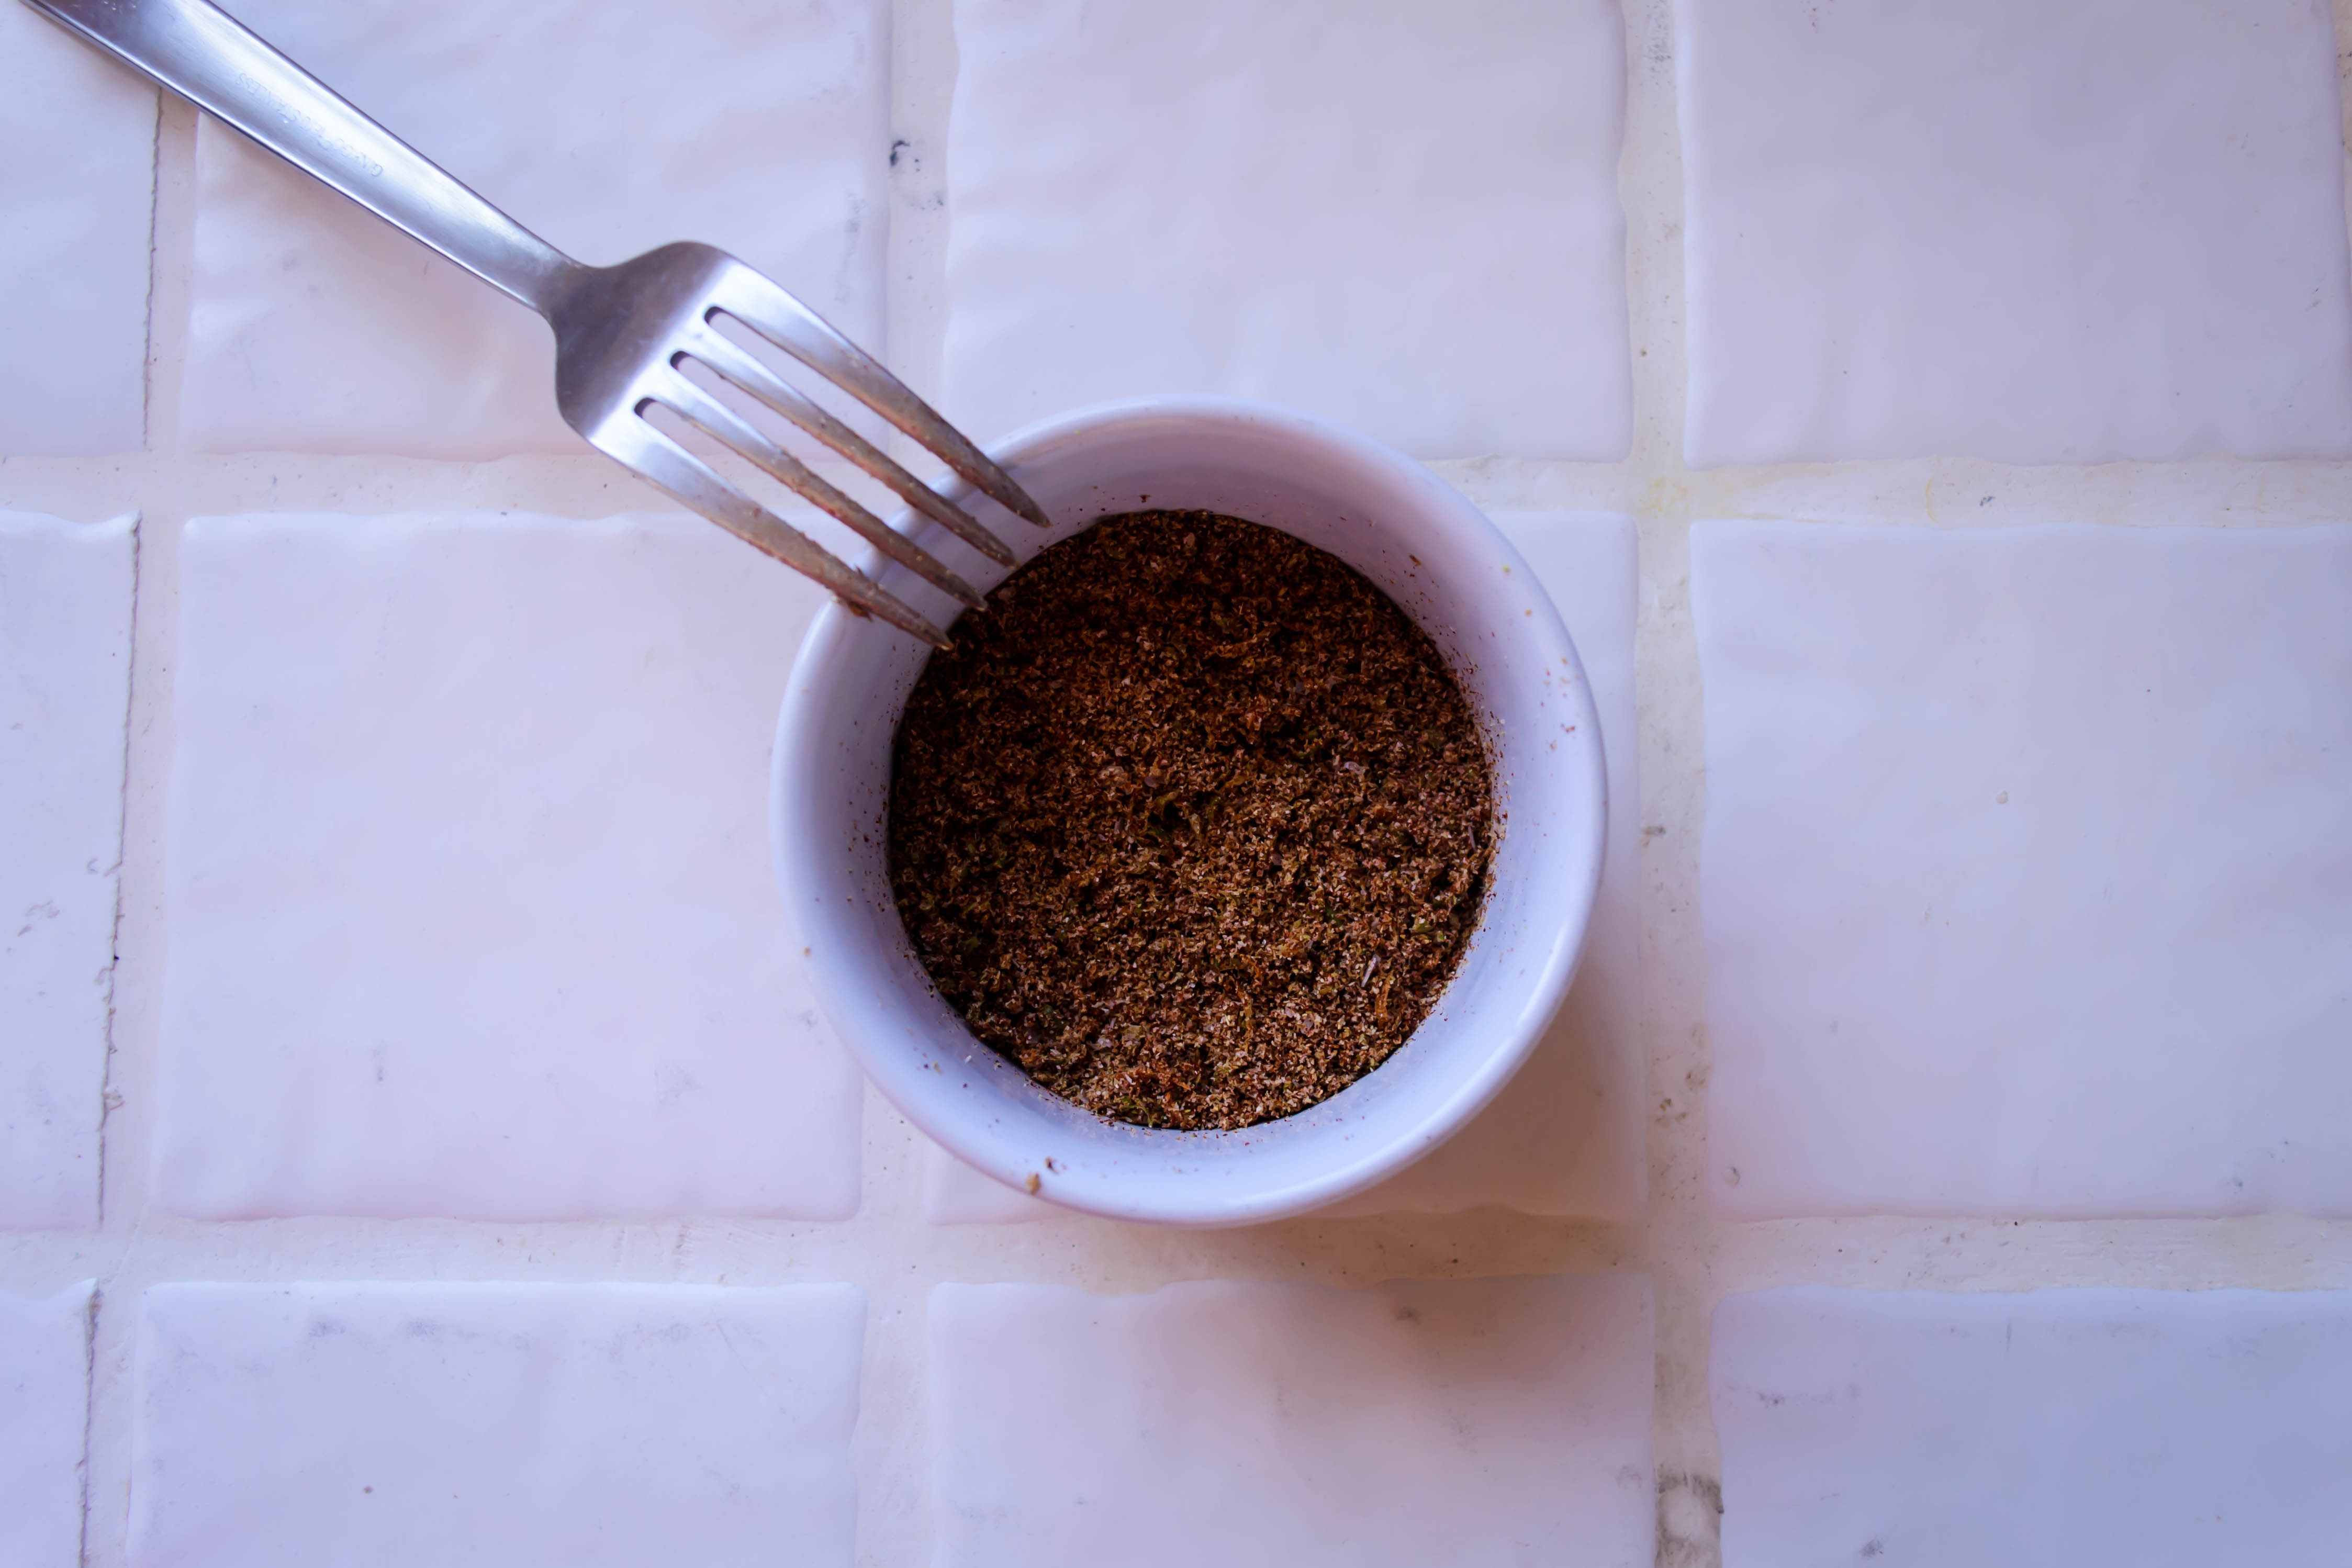
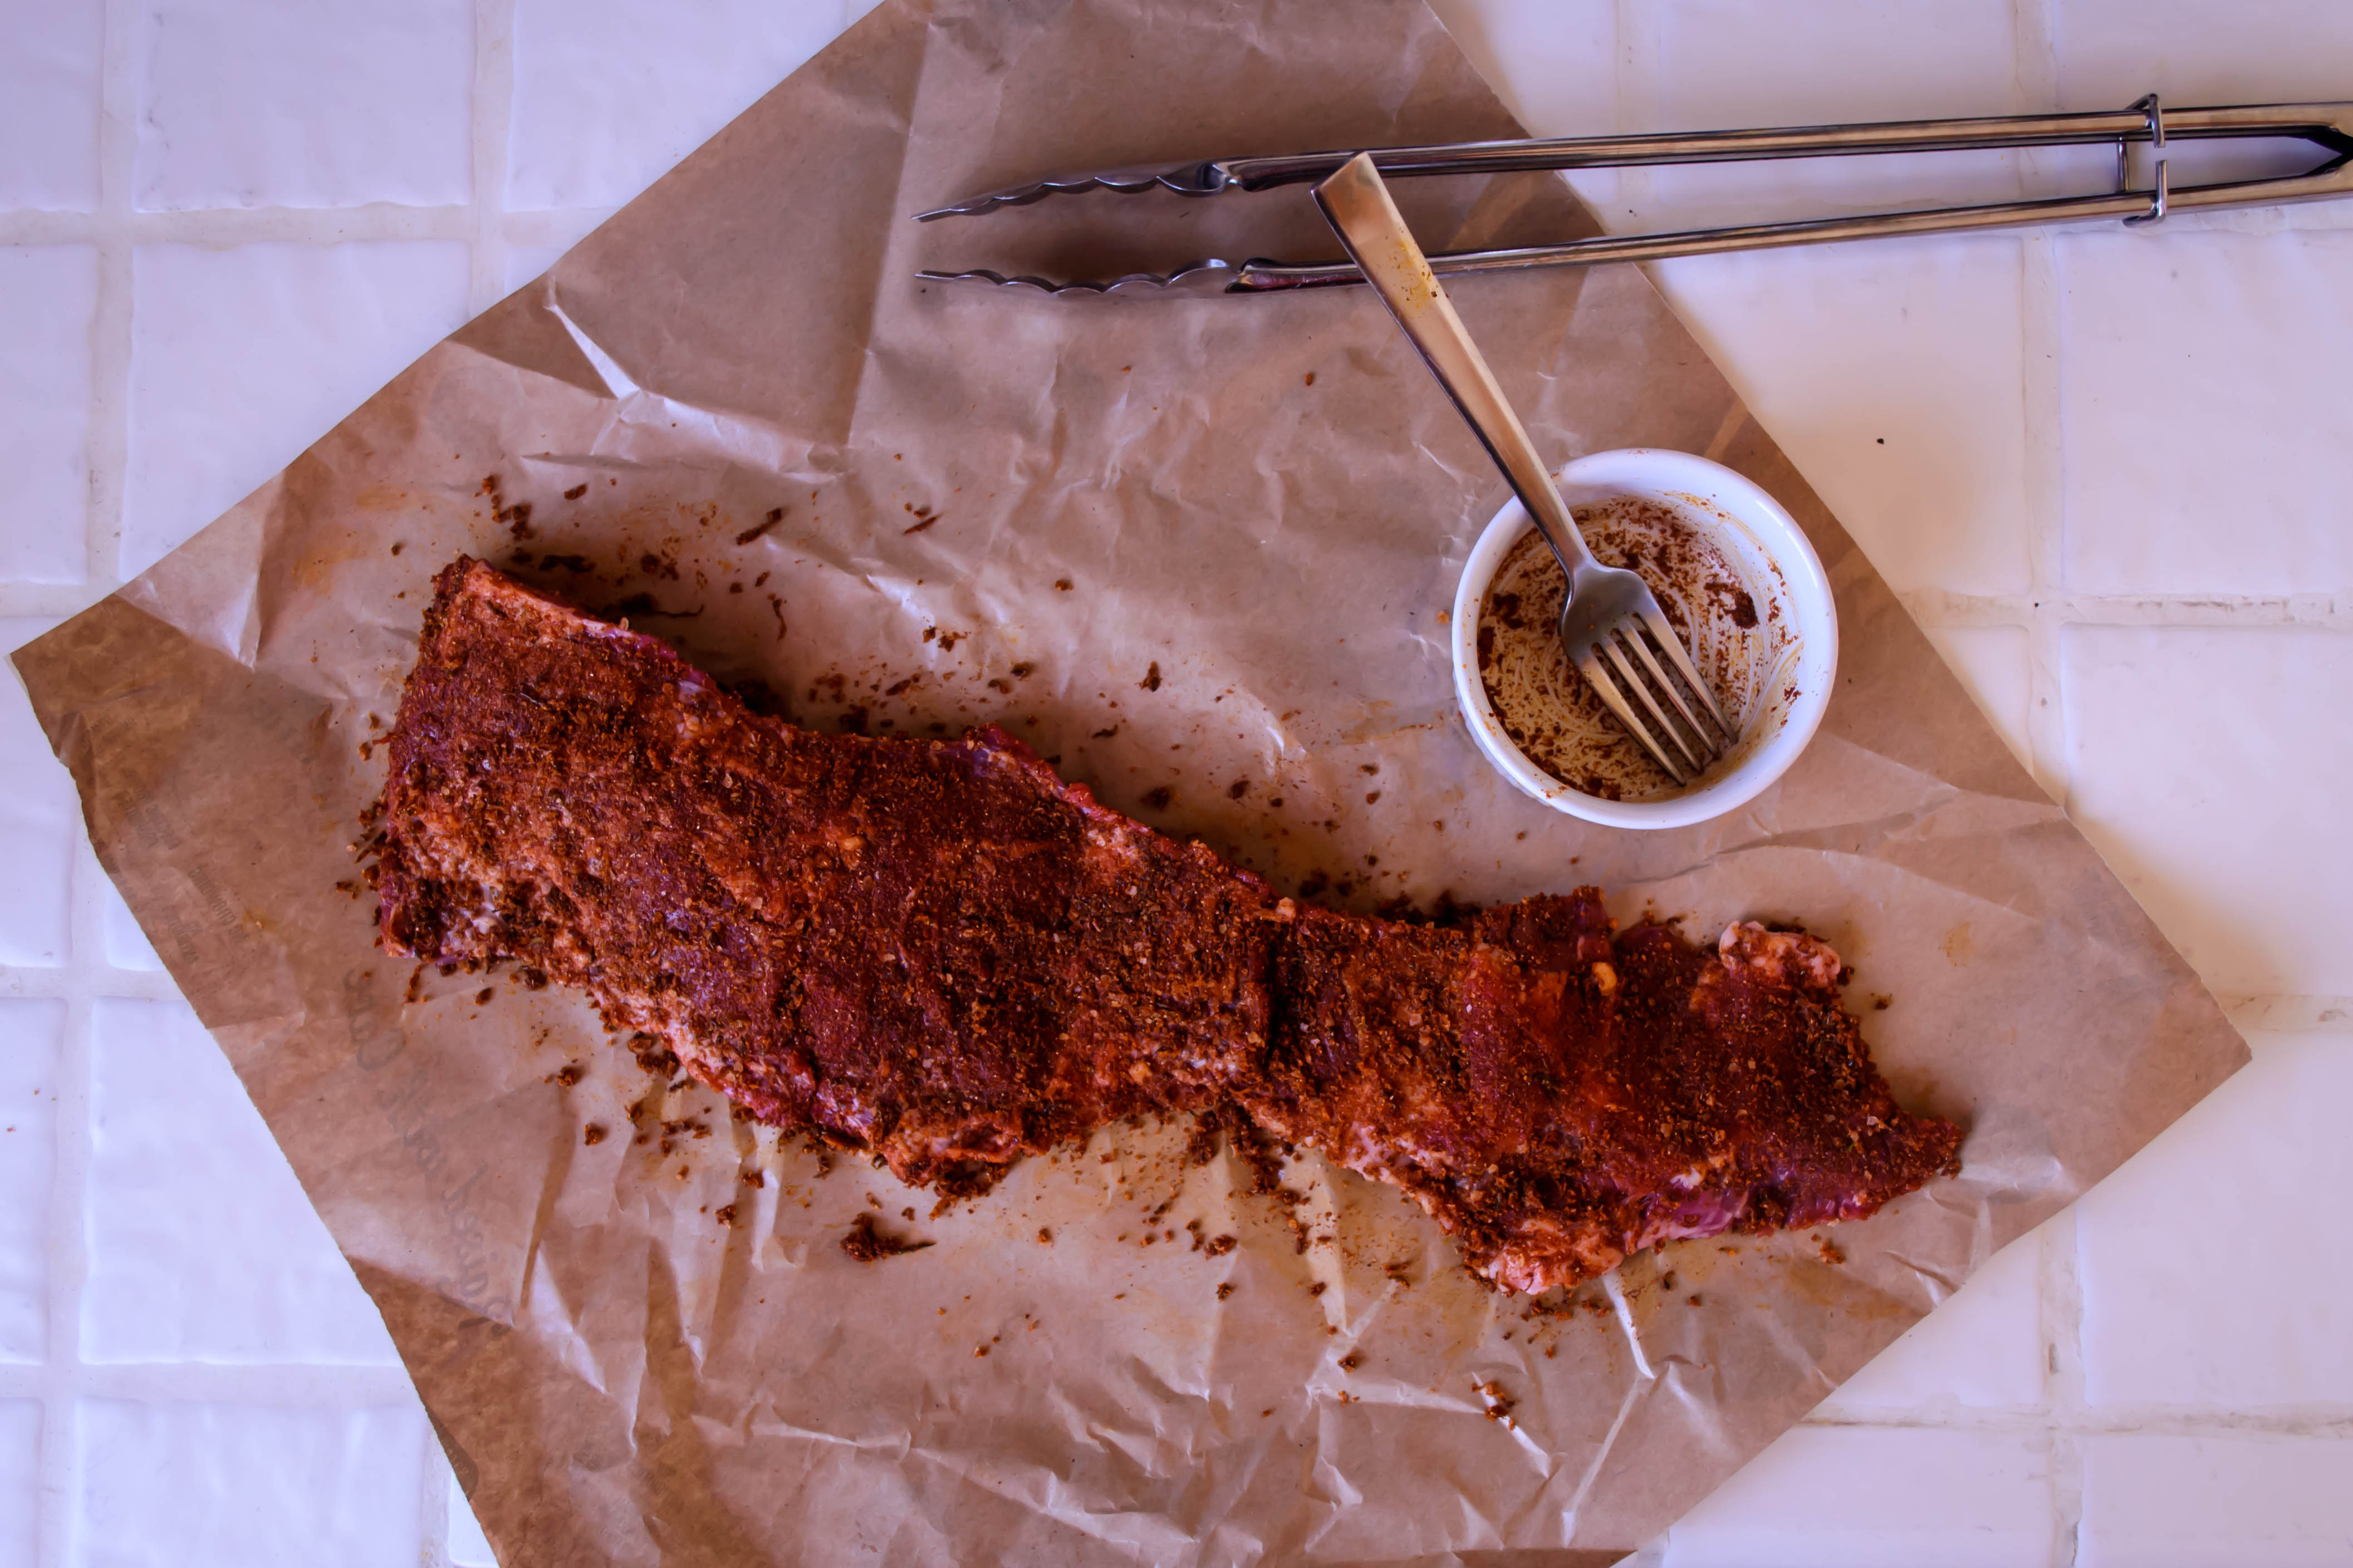
- Preheat your grill to high. While it heats, we’ll prep the steak and the corn. Spread the steak out on a flat surface (I just unwrap it and leave it on the butcher paper wrapping it came in to save on dishes). Place the salt, the cayenne, and the other spices in a small bowl and combine with a fork. Add the lime zest and the olive oil and mix again – it will have the consistency of wet sand.
- Scoop up half the sandy spice mixture you’ve created and rub it over one side of the steak. Be liberal in your application, and don’t be too gentle about it either – really massage it into the surface of the steak. Flip the steak over and repeat the process with the remaining half of the spice mixture, then set the steak aside to drink up some flavor.
- Now we’ll prep the corn. Remove all husks and silk, but leave the stalk end on – it makes cutting the kernels off later on a bit easier because you have a built-in handle. Coat the corn with a drizzle or a few sprays of olive oil, being sure you get it on all sides of the ear. Sprinkle on salt and pepper as well, again, being sure all sides get seasoned.
- Place the seasoned corn directly on the grates of the grill, and grill over high, direct heat for about 8 minutes, turning every few minutes. Your goal is to cook it through, and create a beautiful, golden char on all sides.
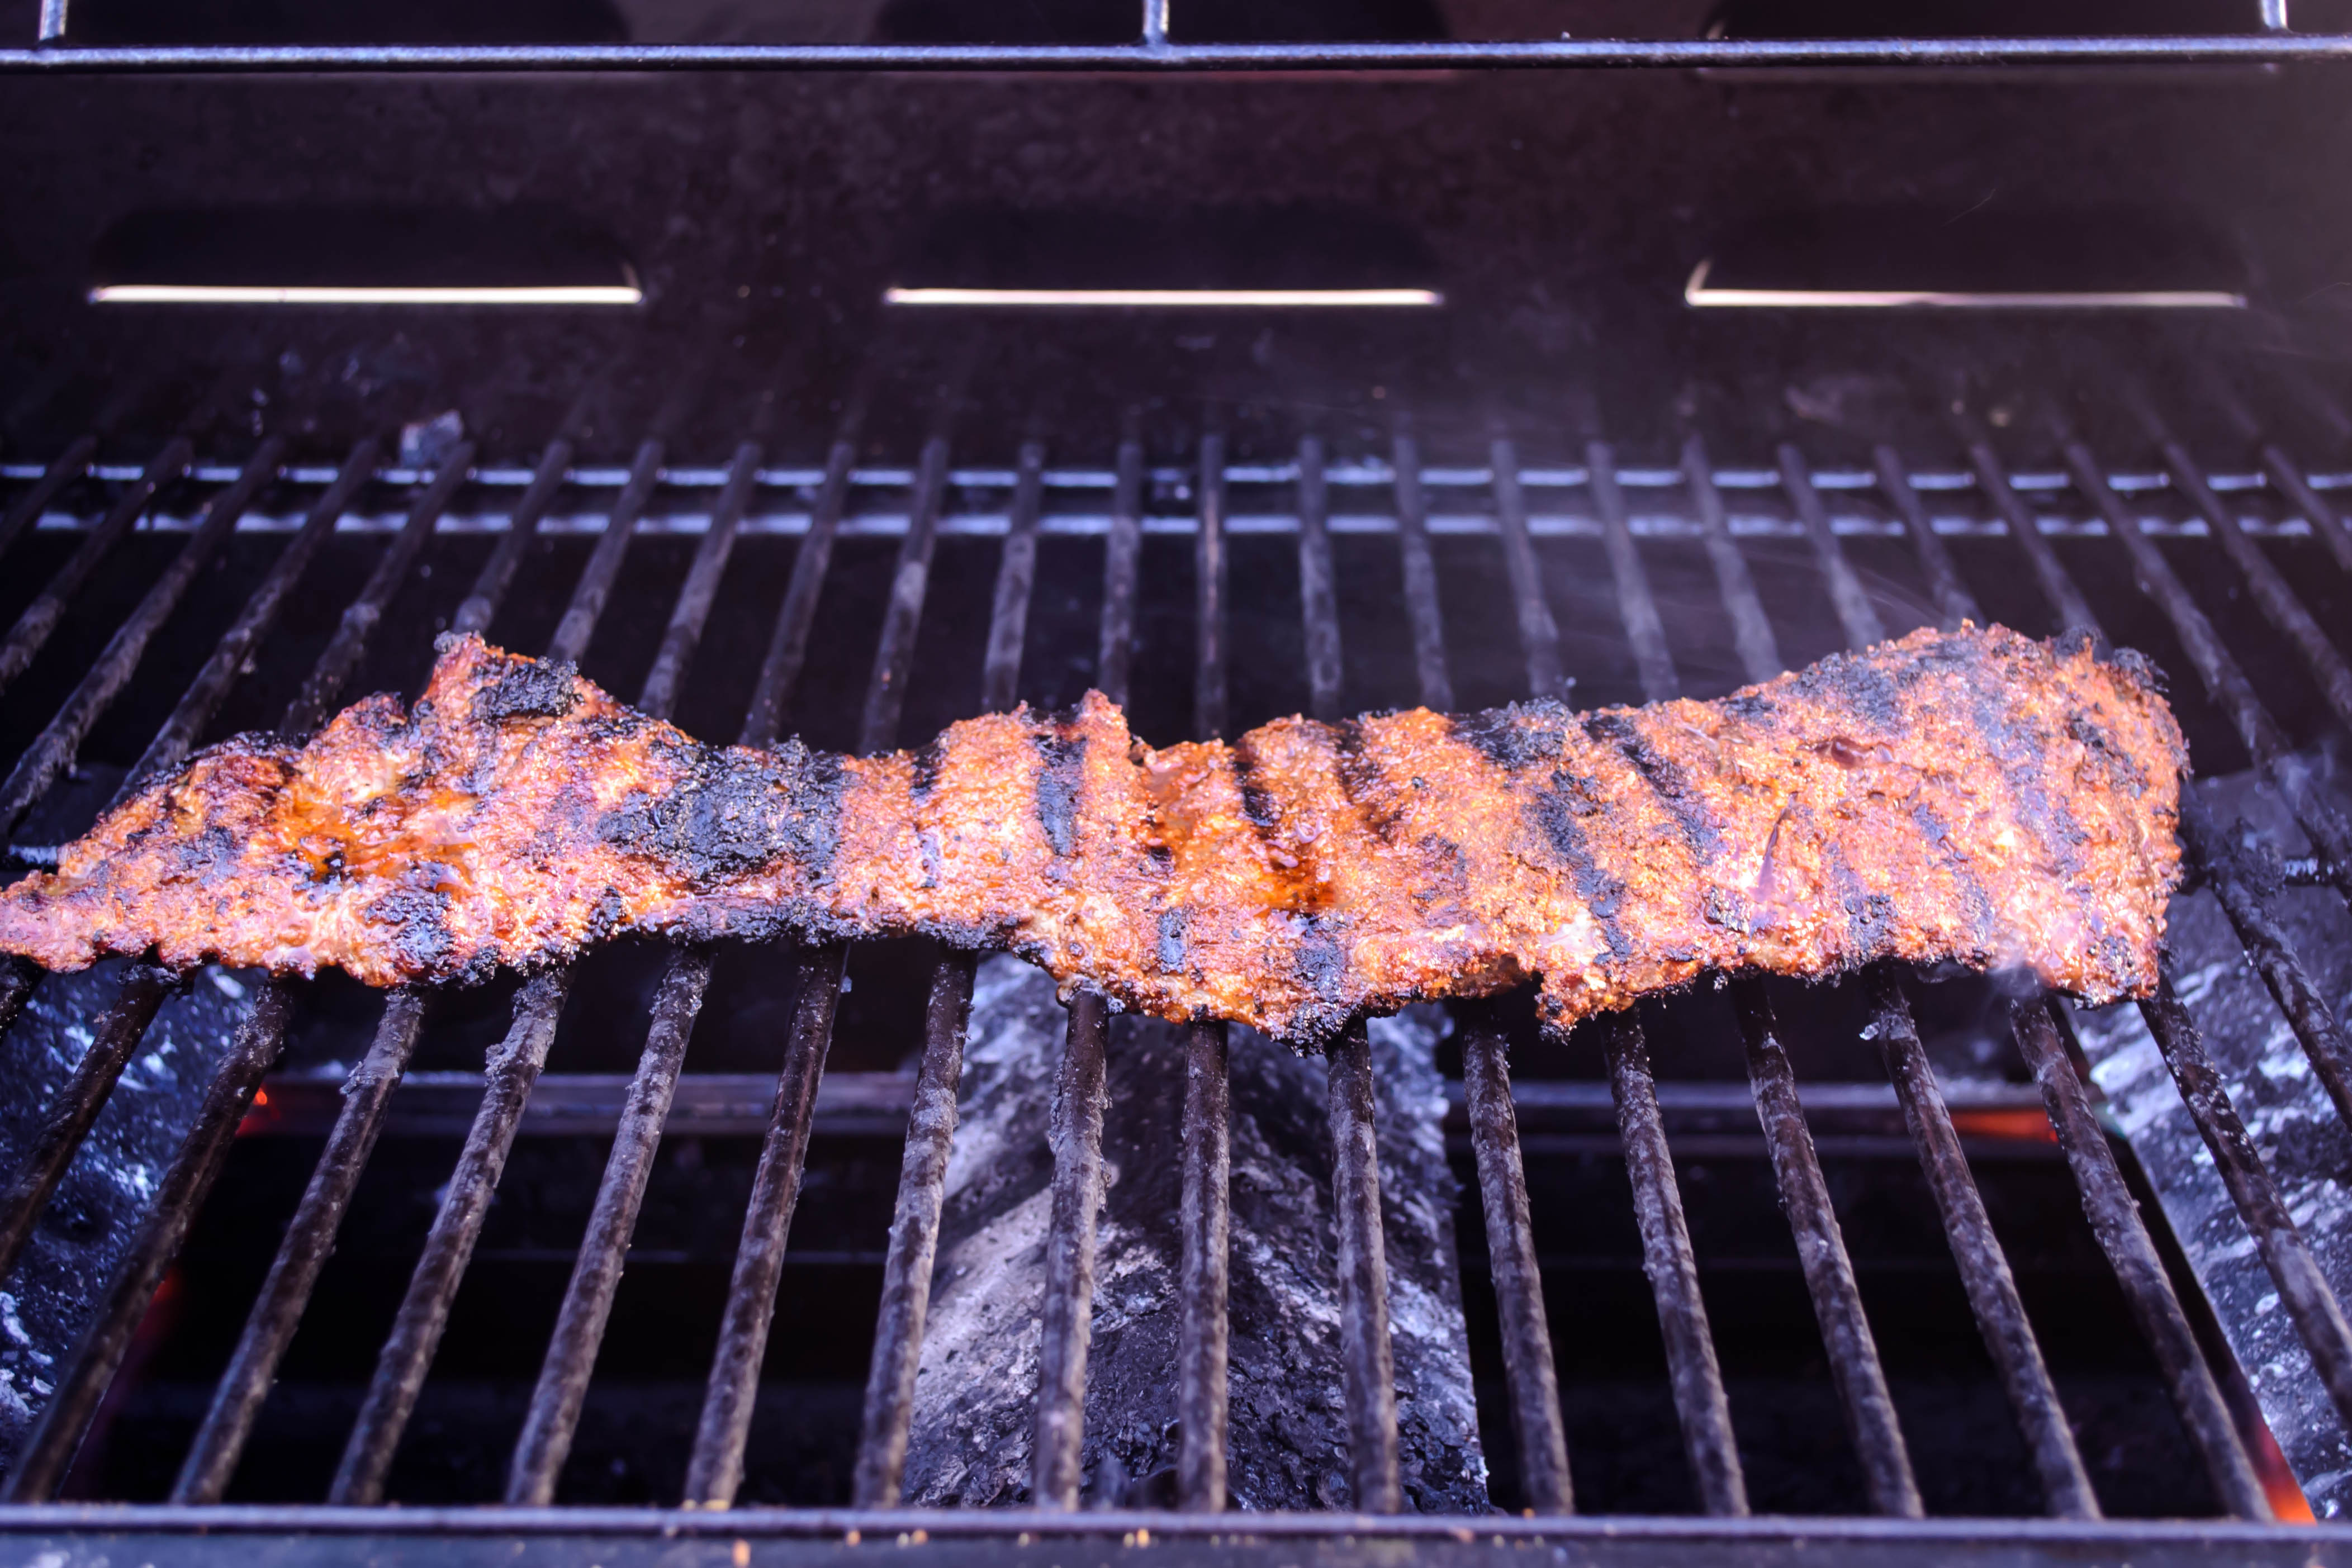
- When the corn is done, set it aside to cool. In its place, flop the steak onto the grill and grill over high, direct heat for 5 minutes undisturbed. Flip it over and grill another 5 minutes, again, undisturbed. Remove to a plate or platter, cover with a layer of aluminum foil, and set aside to rest for about 10 minutes. This gives the juices time to redistribute and it allows for a bit of carryover cooking – by the time you slice it up, the steak will be medium to medium-well (skirt steak can be a bit uneven in thickness).
- While all this grilling and resting is going on, make the rest of the salad. Place the cabbage, tomatoes, onions, cilantro, and queso fresco into a large bowl. You can either mix them all together, or arrange the ingredients in rows atop the cabbage like a cobb salad for pretty presentation.
- To add the corn, stand up one of the grilled ears, which should be cool enough to handle by now, with the stalk sticking up toward you. Hold the stalk firmly and, with a sharp knife, cut straight down the ear, sawing back and forth a bit to help loosen the kernels. As you remove each segment of kernels, rotate the ear a bit to line up a new segment. Add the kernels to the salad. Some will be individual; some will be in big chunks. That’s okay. They will break up as we toss the whole thing.
- To make the dressing, juice the limes and add the finely minced garlic, and the honey. Combine with a fork or a small whisk. Drizzle in the olive oil, whisking continuously, until the dressing emulsifies. Start with ⅓ cup of oil, then dunk in a chunk of tomato and give the dressing a taste to see what you think. Remember, it will taste stronger straight out of the mixing bowl than it will when you’ve tossed the entire salad with it.
- Season the dressing to your liking, adding more of the olive oil if it is too acidic for you. Add the avocados to the salad immediately before you add the dressing, to prevent browning.
- The last step here is to add the meat. Unwrap the steak from its rest and place it on a board or butcher block to slice it. Using a sharp knife, cut thin slices (no more than ¼ inch or so) against the grain at an angle. This will give you lovely tender slices. Drape the slices over the salad, down the center for a pleasing presentation.
- Serve immediately, with a side of charred corn tortillas, if desired.


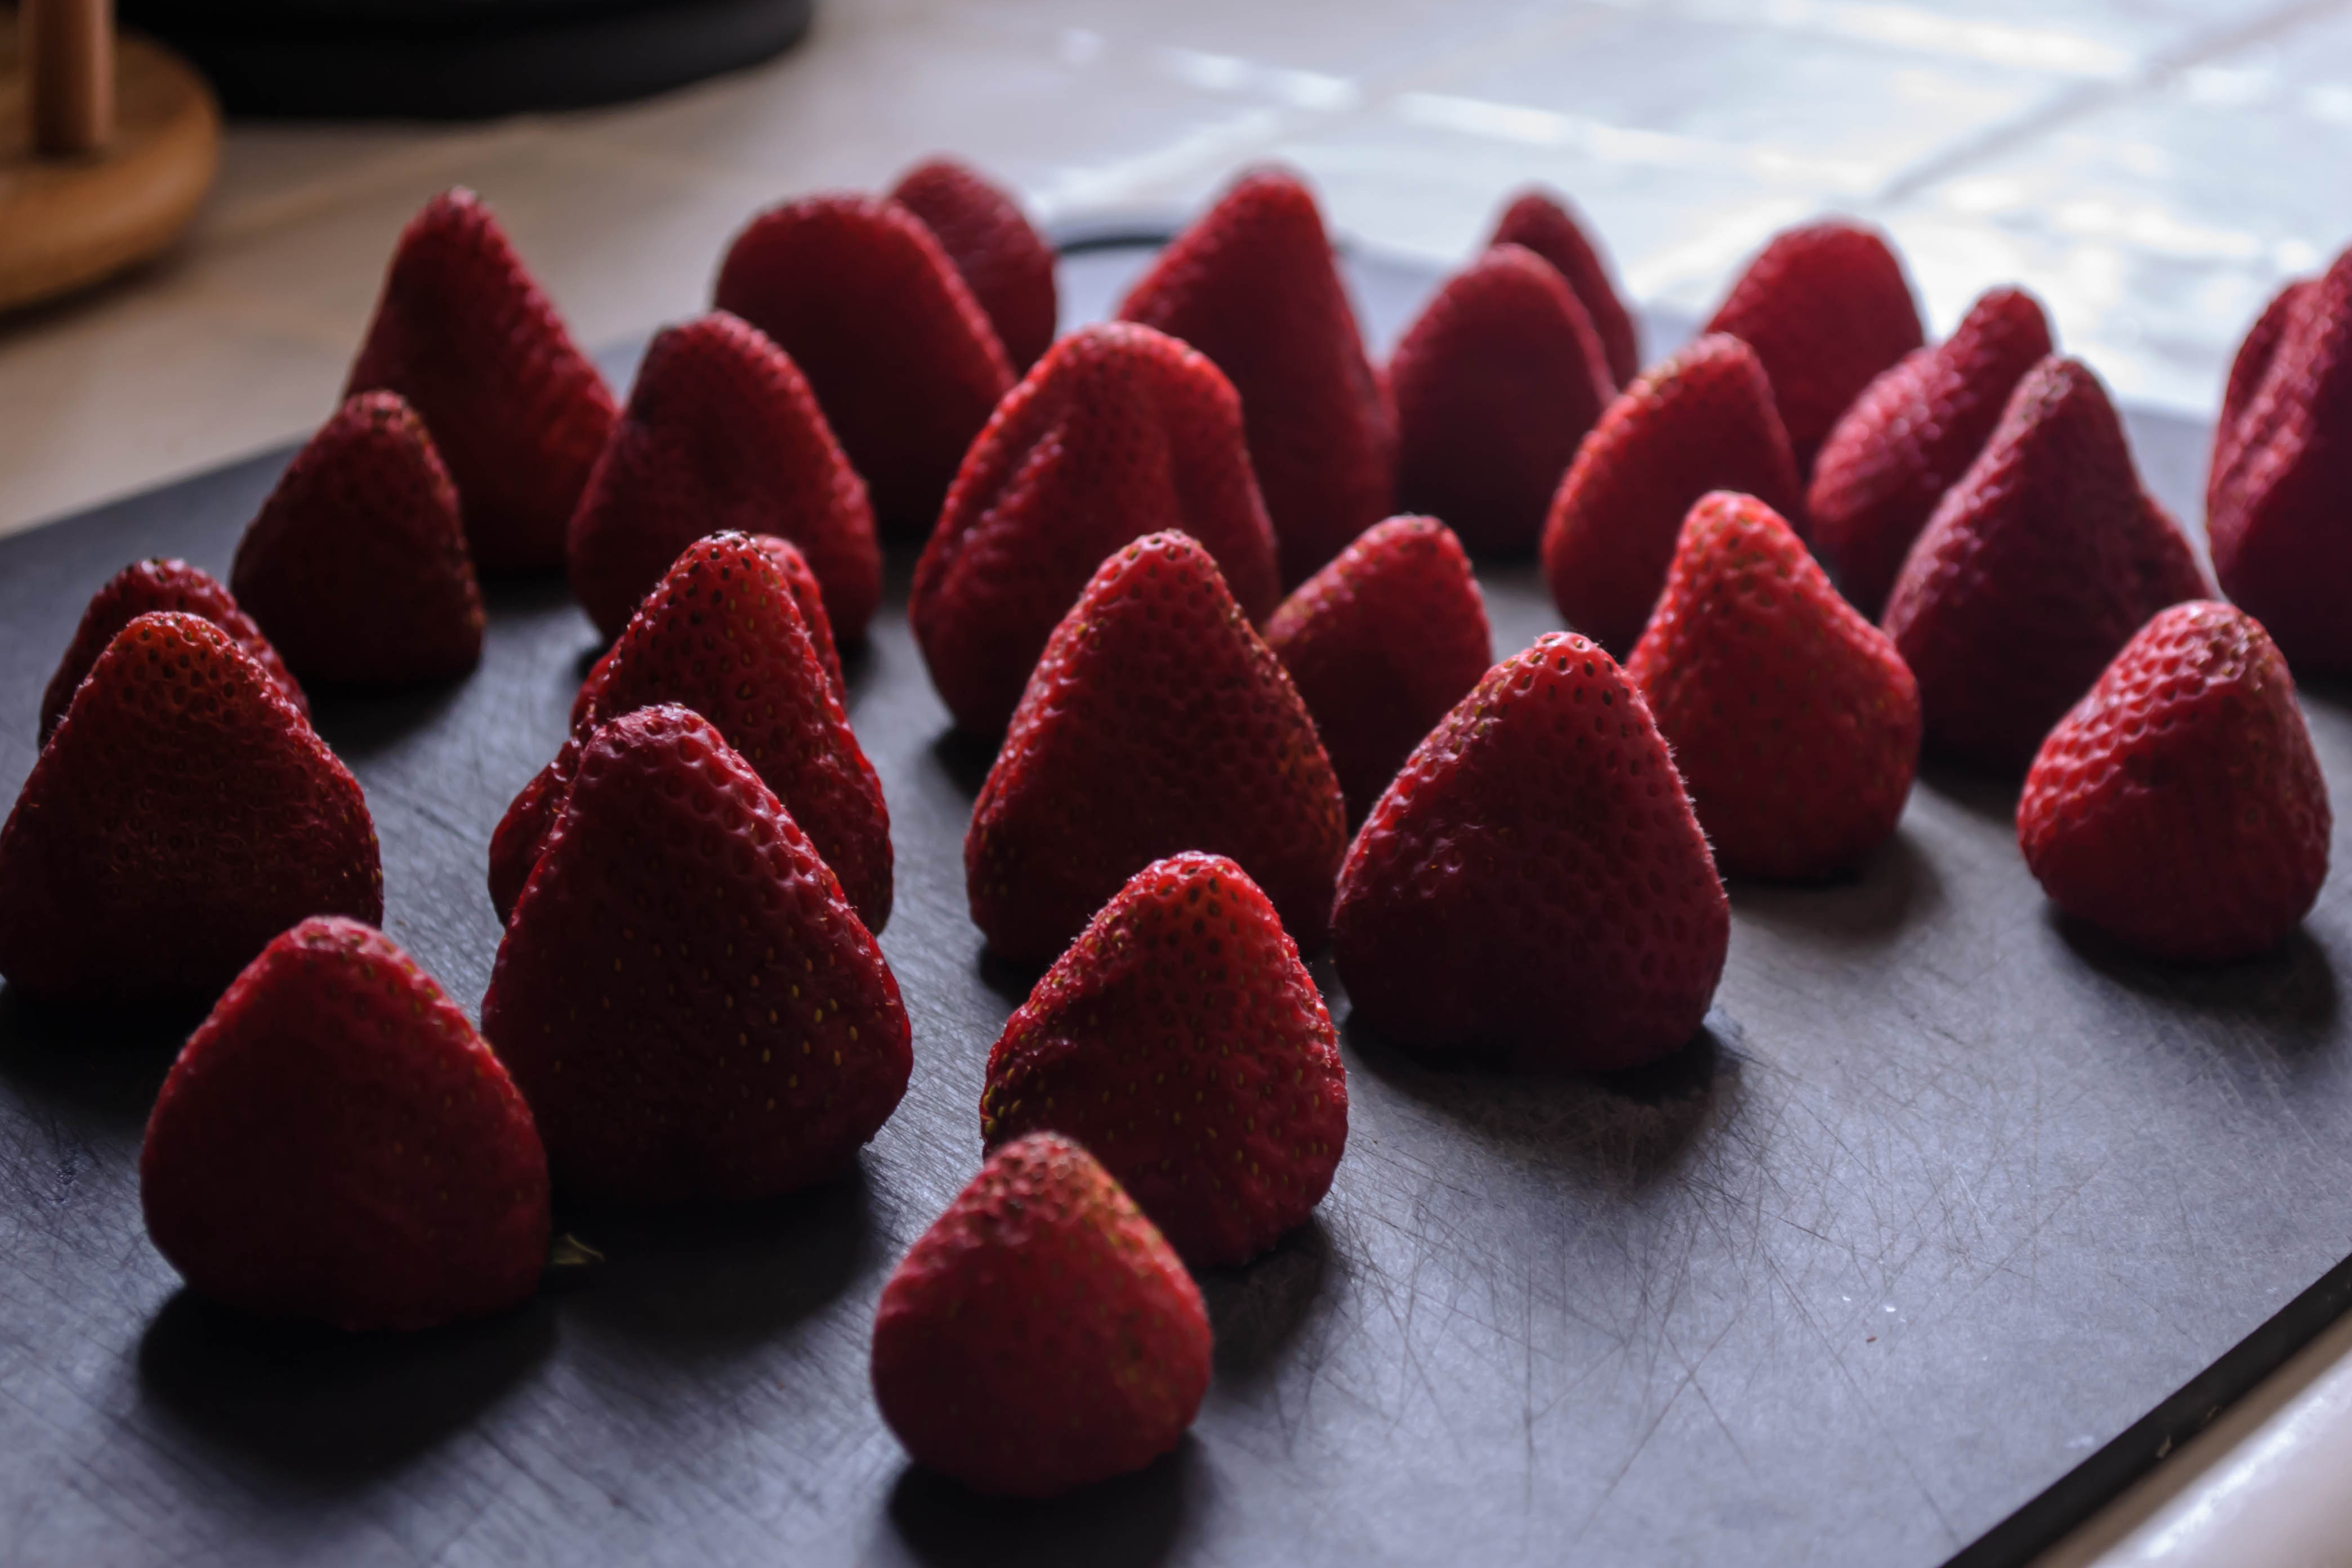
 Strawberries, a few flurries of sugar, a generous squeeze of lemon (freshly squeezed, please), a pinch of salt for its indescribable magic (you won’t taste it, but it will heighten the flavors of the other ingredients), and if you’re feeling sassy, a drizzle of framboise or chambord for extra depth and tingle. I’m nearly always feeling sassy. Then a long, slow simmer, almost an hour, until the fruit breaks down and the bubbles get thick and sluggish. Strawberries don’t have huge quantities of pectin, so this isn’t a tremendously thick jam, but who needs that, in the summer?
 There’s little else to say, because really, a perfect summer beverage in jam form doesn’t need much advertisement, but I suppose we can linger over serving suggestions for a moment. A languid spoonful oozed over toast, or pancakes, or dribbled into the holes of a waffle, is perfectly acceptable. If the day has, as they say, “gotten away from you” in its summery glory, a soft ladle over vanilla ice cream could never be a bad thing. If you’re more of the cocktail type, a drizzle of jam topped with gin and soda would cool and sweeten a sweltering afternoon.


 Everyone starts off in the kitchen somewhere, whether it’s spreading peanut butter thickly onto a piece of barely toasted bread, or stirring spaghetti tentatively with a long-handled wooden spoon and watching it relax into the water, or even scrambling eggs because the planned entrée for that night looks “weird.” In my case, I started with dessert. Cookies and cakes were the first things I “helped” make, which probably explains why I’ve developed such a sweet tooth over the years. Mom would let me stir batter, pour pre-measured cups of sugar, taste a beater. She was there while I jammed my thumbs into an egg trying to crack it, while I spilled powdery fluffs of flour onto the counter and sometimes the floor. She was there, though not watching, when I had my first lesson in ingredient deception: my first taste of cinnamon. A few brown grains on the counter, a small, damp index fingertip, and the sourest face dipping away from the countertop. Vanilla extract was the same way. Each time, I’m sure Mom turned and saw, and probably tried not to laugh, as I learned that in dessert as in so many things, a dose of sugar makes things better.
 Crème anglaise is essentially an all-purpose dessert sauce, and provides a base for so many lovely simple sweets. Egg yolks, cream, sugar, and some vanilla for flavor, cooked gently but whisked fervently, and you have a beautiful, rich sauce that lovingly coats the back of a spoon. Cooled, run through an ice cream machine, and shoved impatiently into a freezer, you’d have vanilla ice cream. A few more yolks and a long, slow bake in the oven, and you’d have crème brulee. Some cornstarch to thicken during the cooking process? Pastry cream. But left liquid and chilled, it makes a beautiful summer treat poured in decadent quantities over a bowl of glistening berries. And if you want to build the whole thing atop a slice of cake, well who am I to stop you? Since Mom and I are both grown-ups now, we added a whisper of bourbon to our creation, for a floral warmth and slightly more complex flavor.
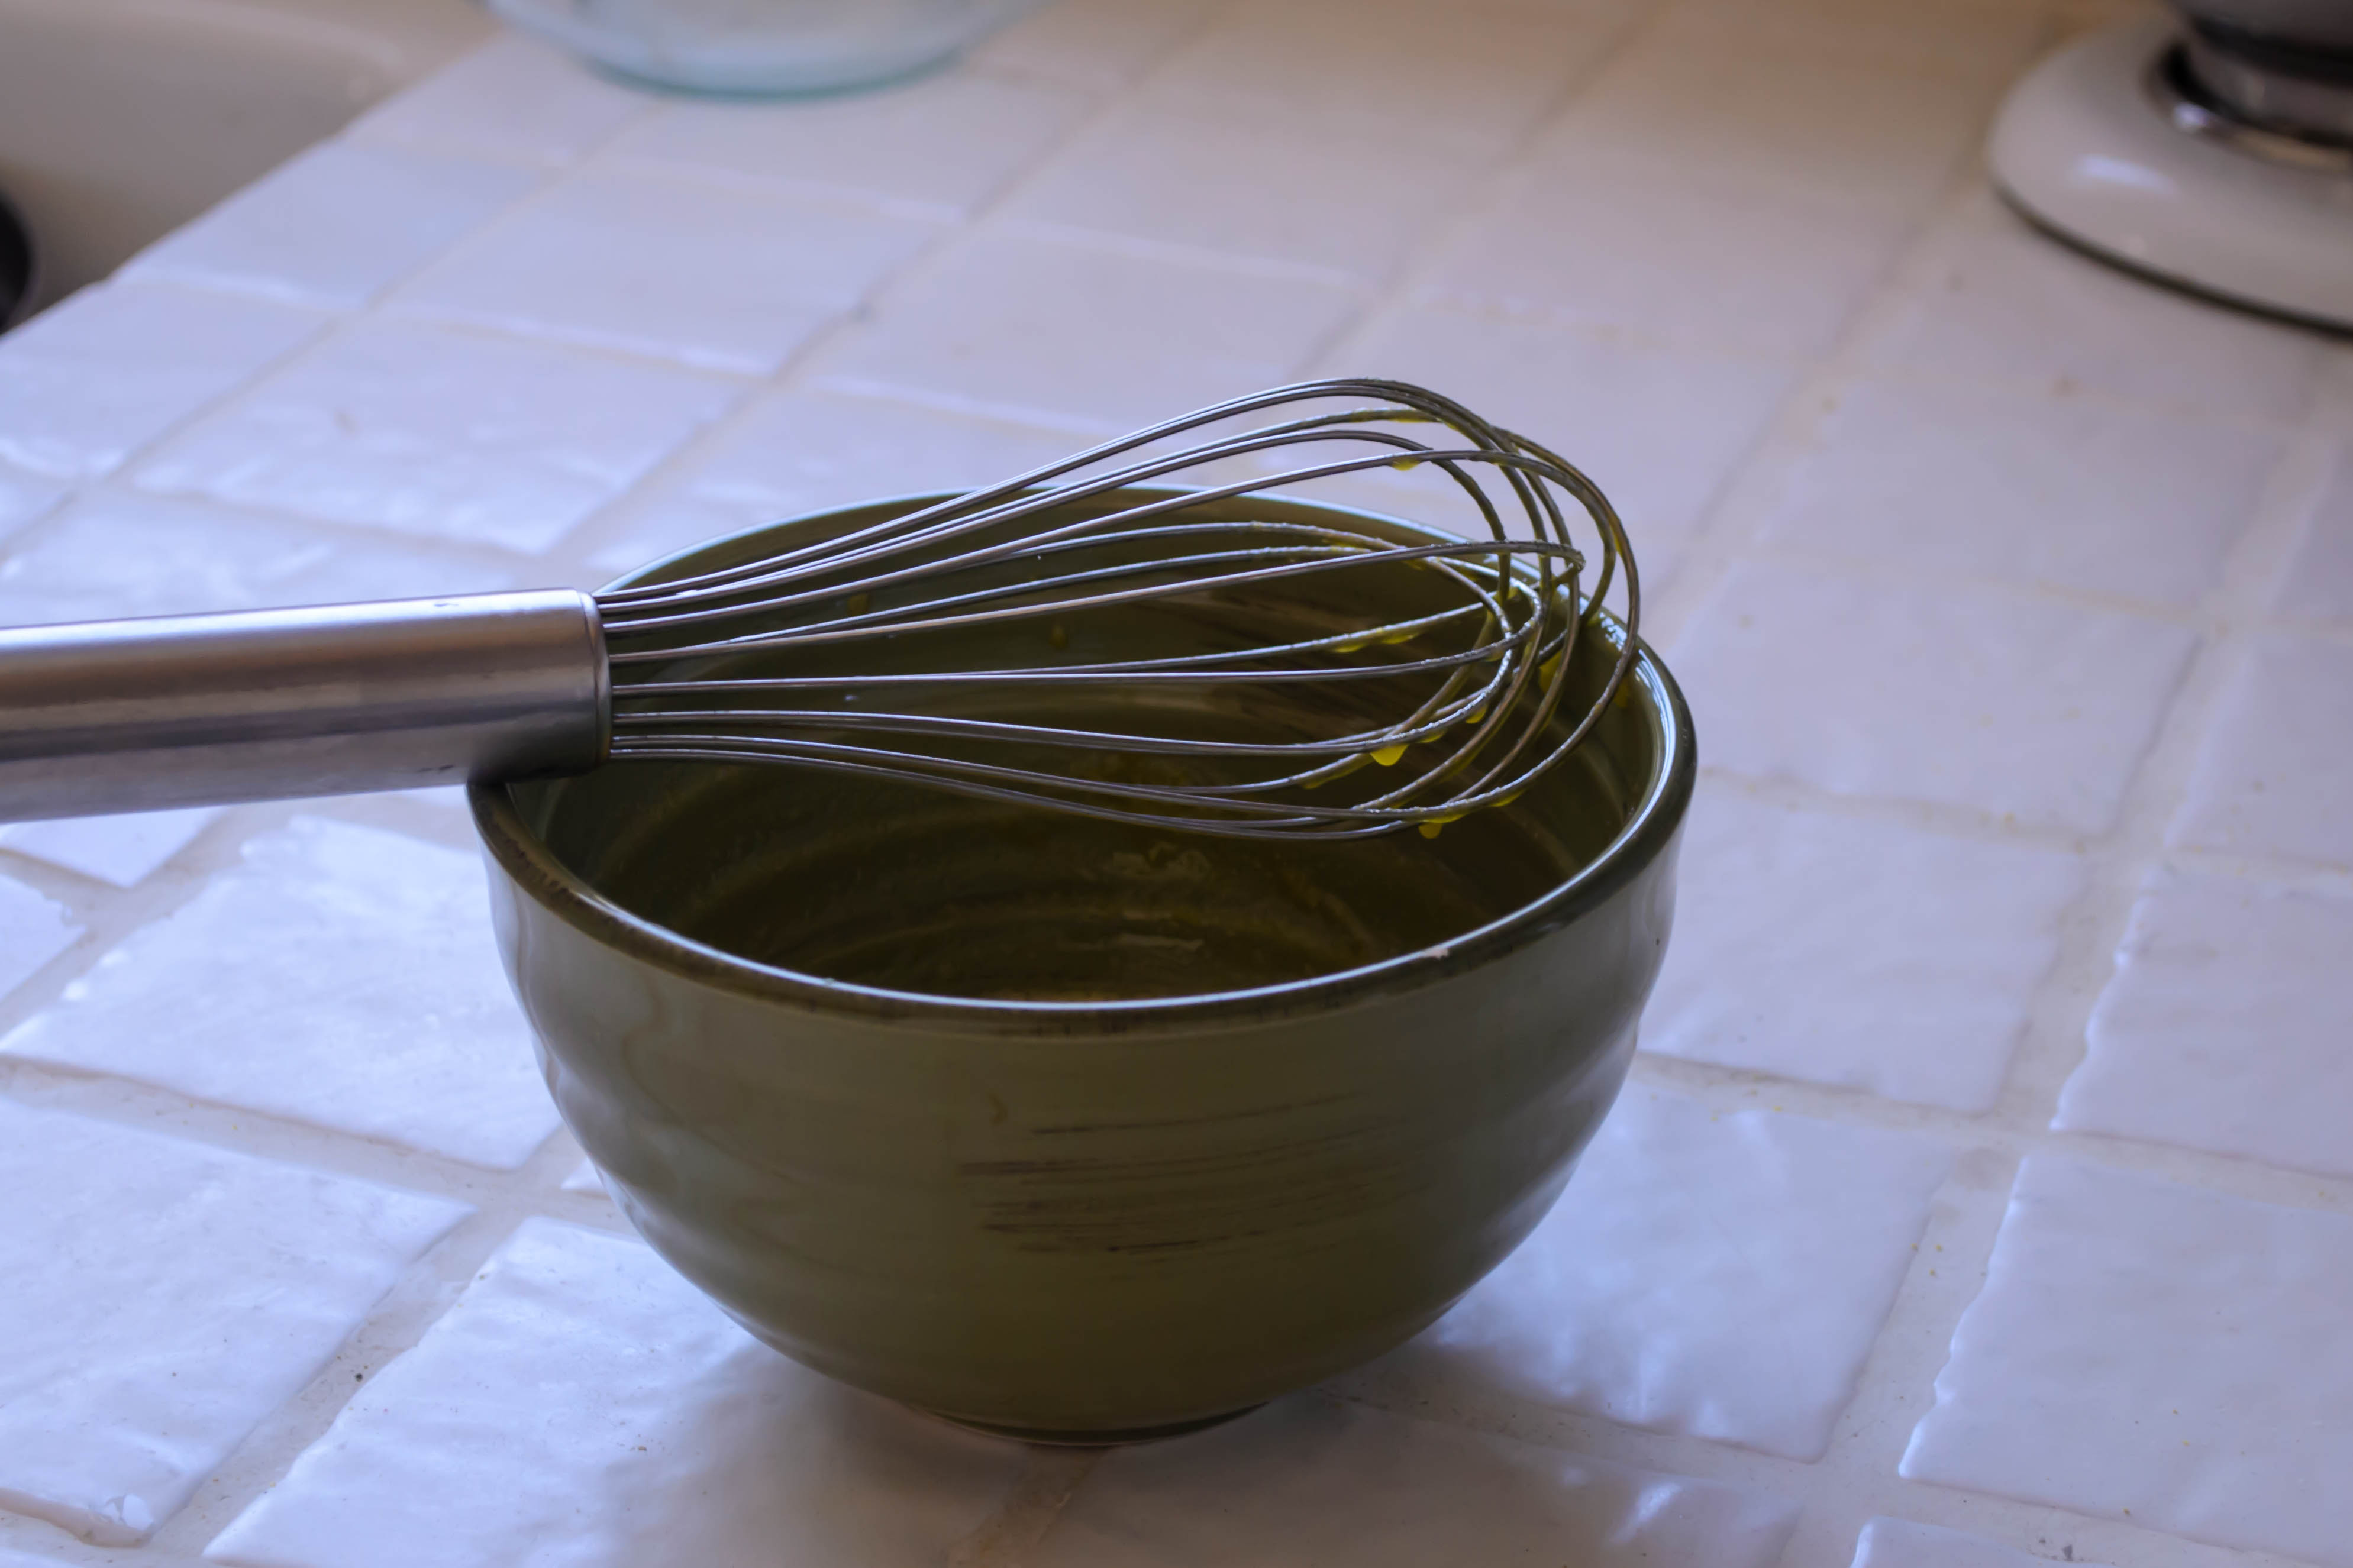
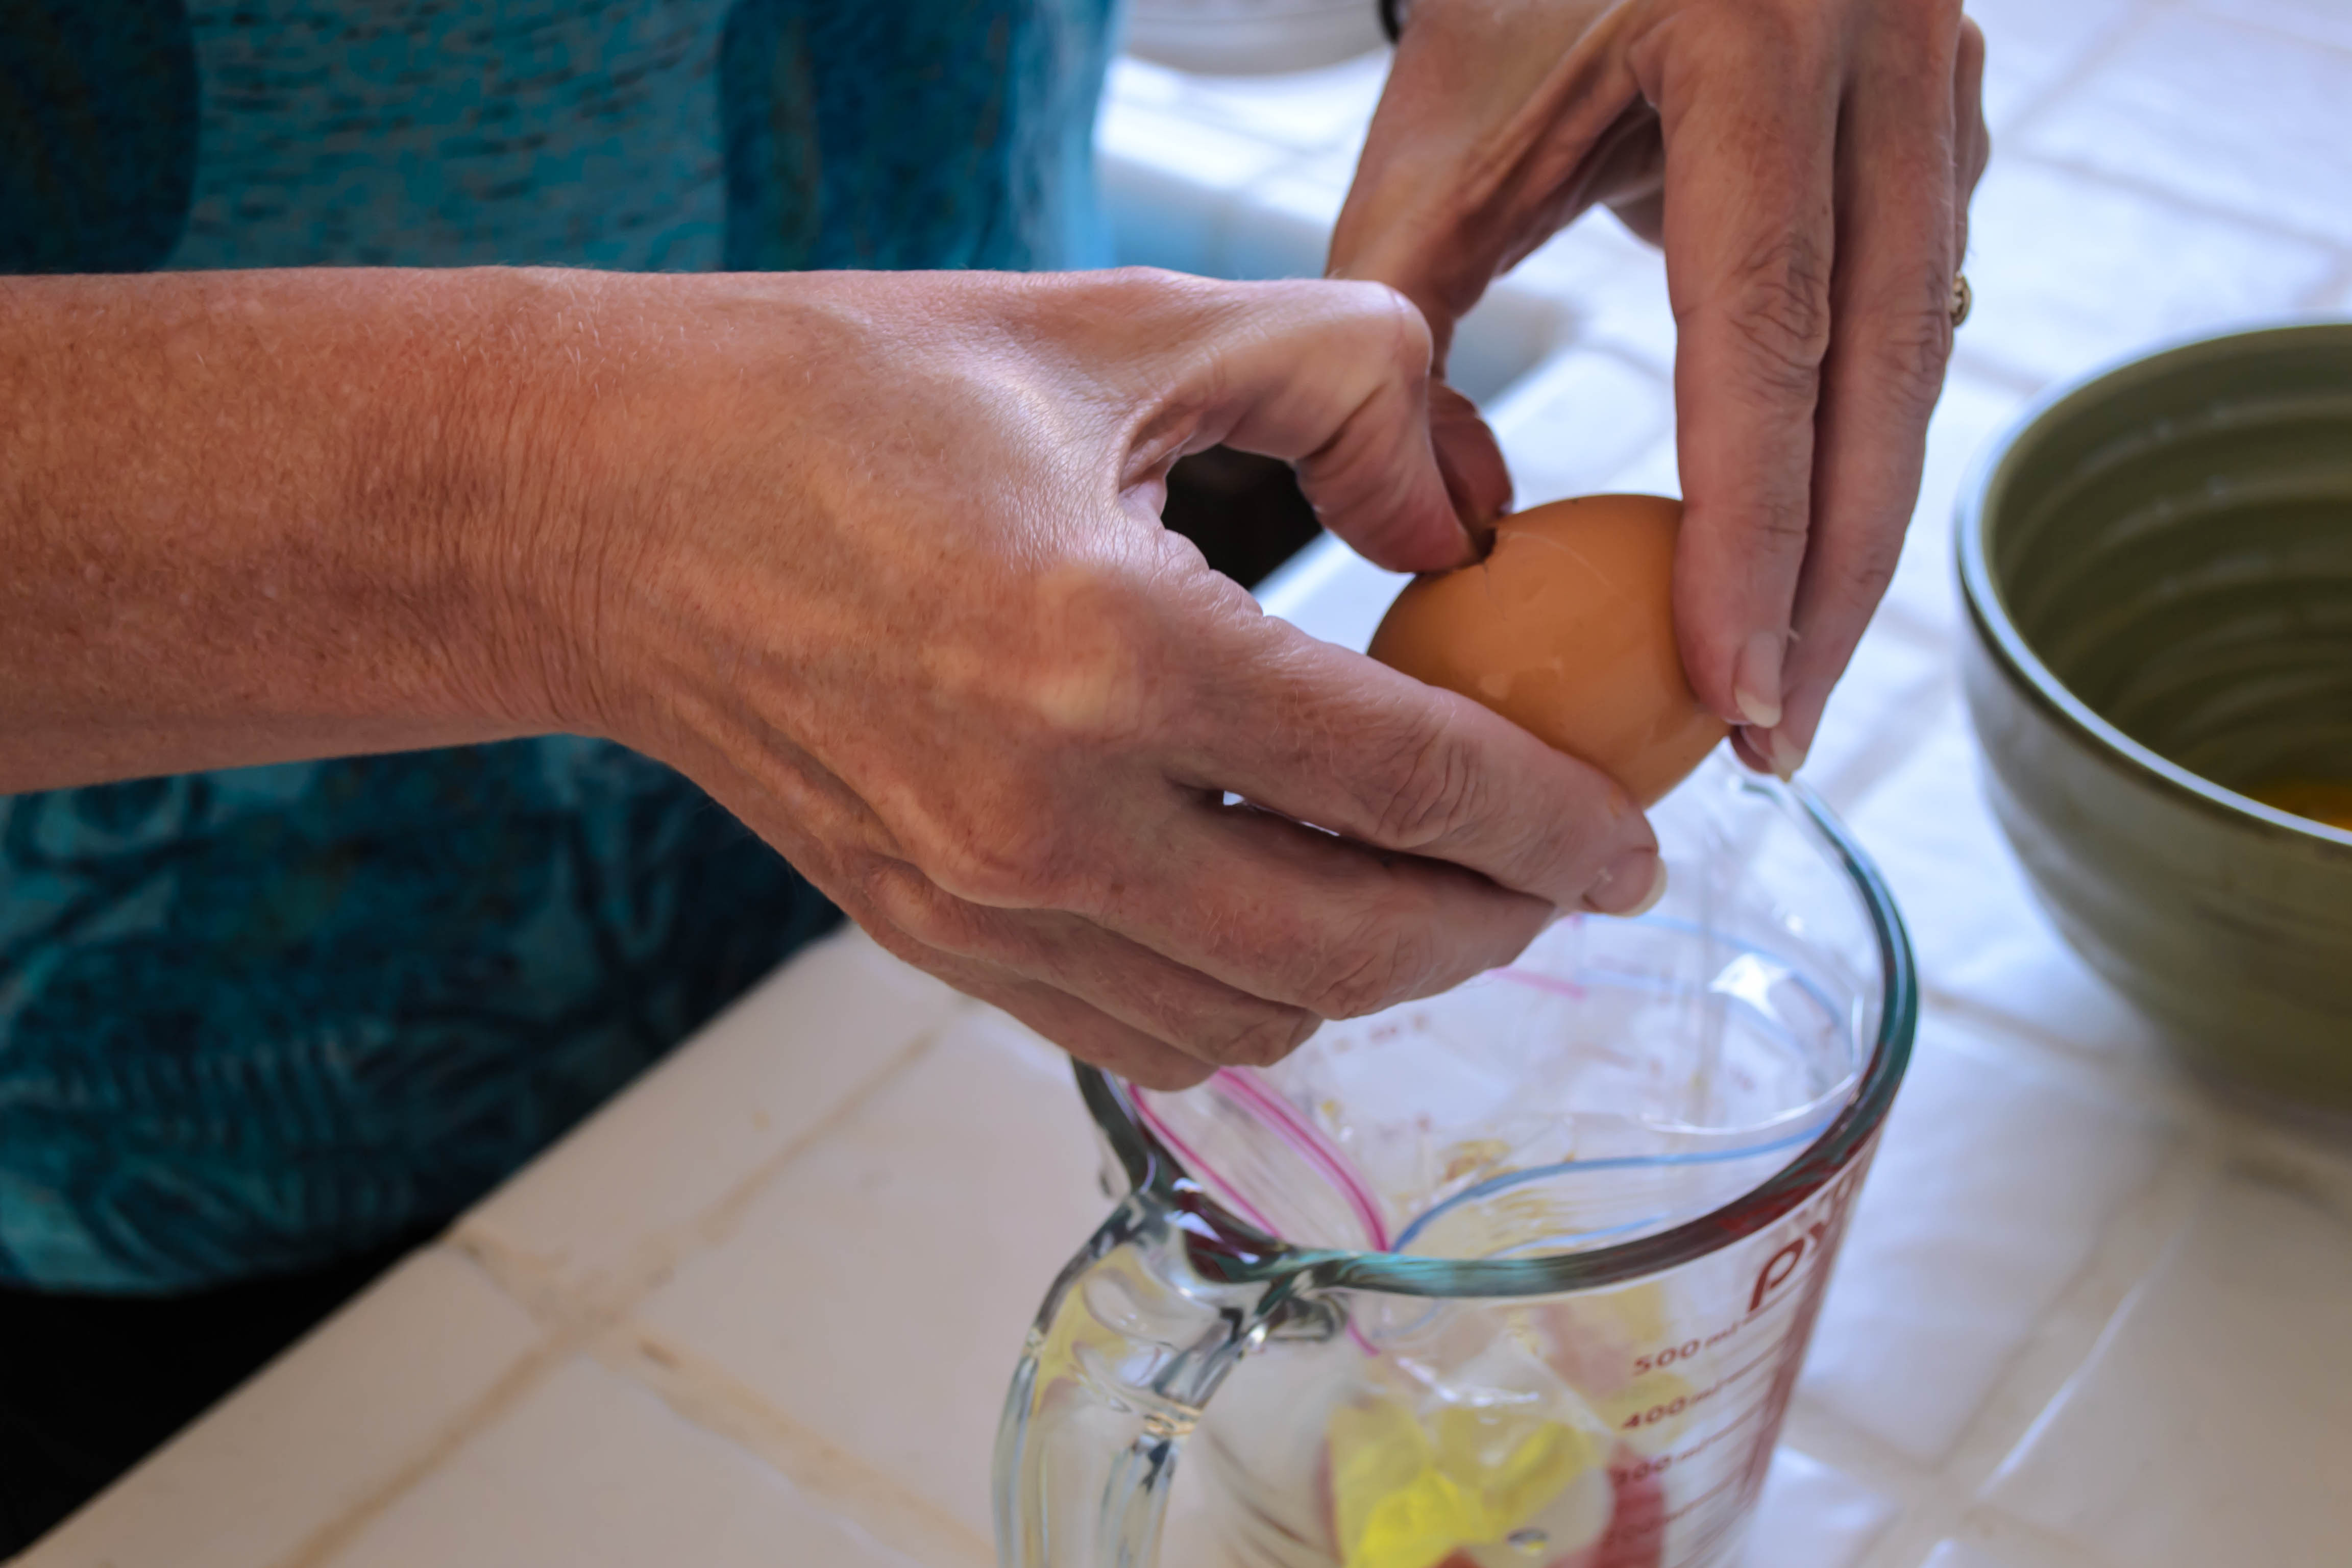


 Eggs managed, it’s a simple prospect of whisking in some sugar with the yolks, heating milk and cream together, adding the warm dairy to the thick, sweetened yolks, and cooking the whole thing to a thickness like, well, melted ice cream, since that’s basically what it is. Incorporate flavorings, strain the mixture to ensure a nicely textured final product, and chill until ready to use.


 For the first – All-Purpose Flour – she made a beautiful wreath of sweet bread, braided and swirled with cinnamon sugar and a trio of summer berries. I determined that I would, indeed, bake this bread. I had yet to try a wreath or crown shape, and was curious about how it would come out.
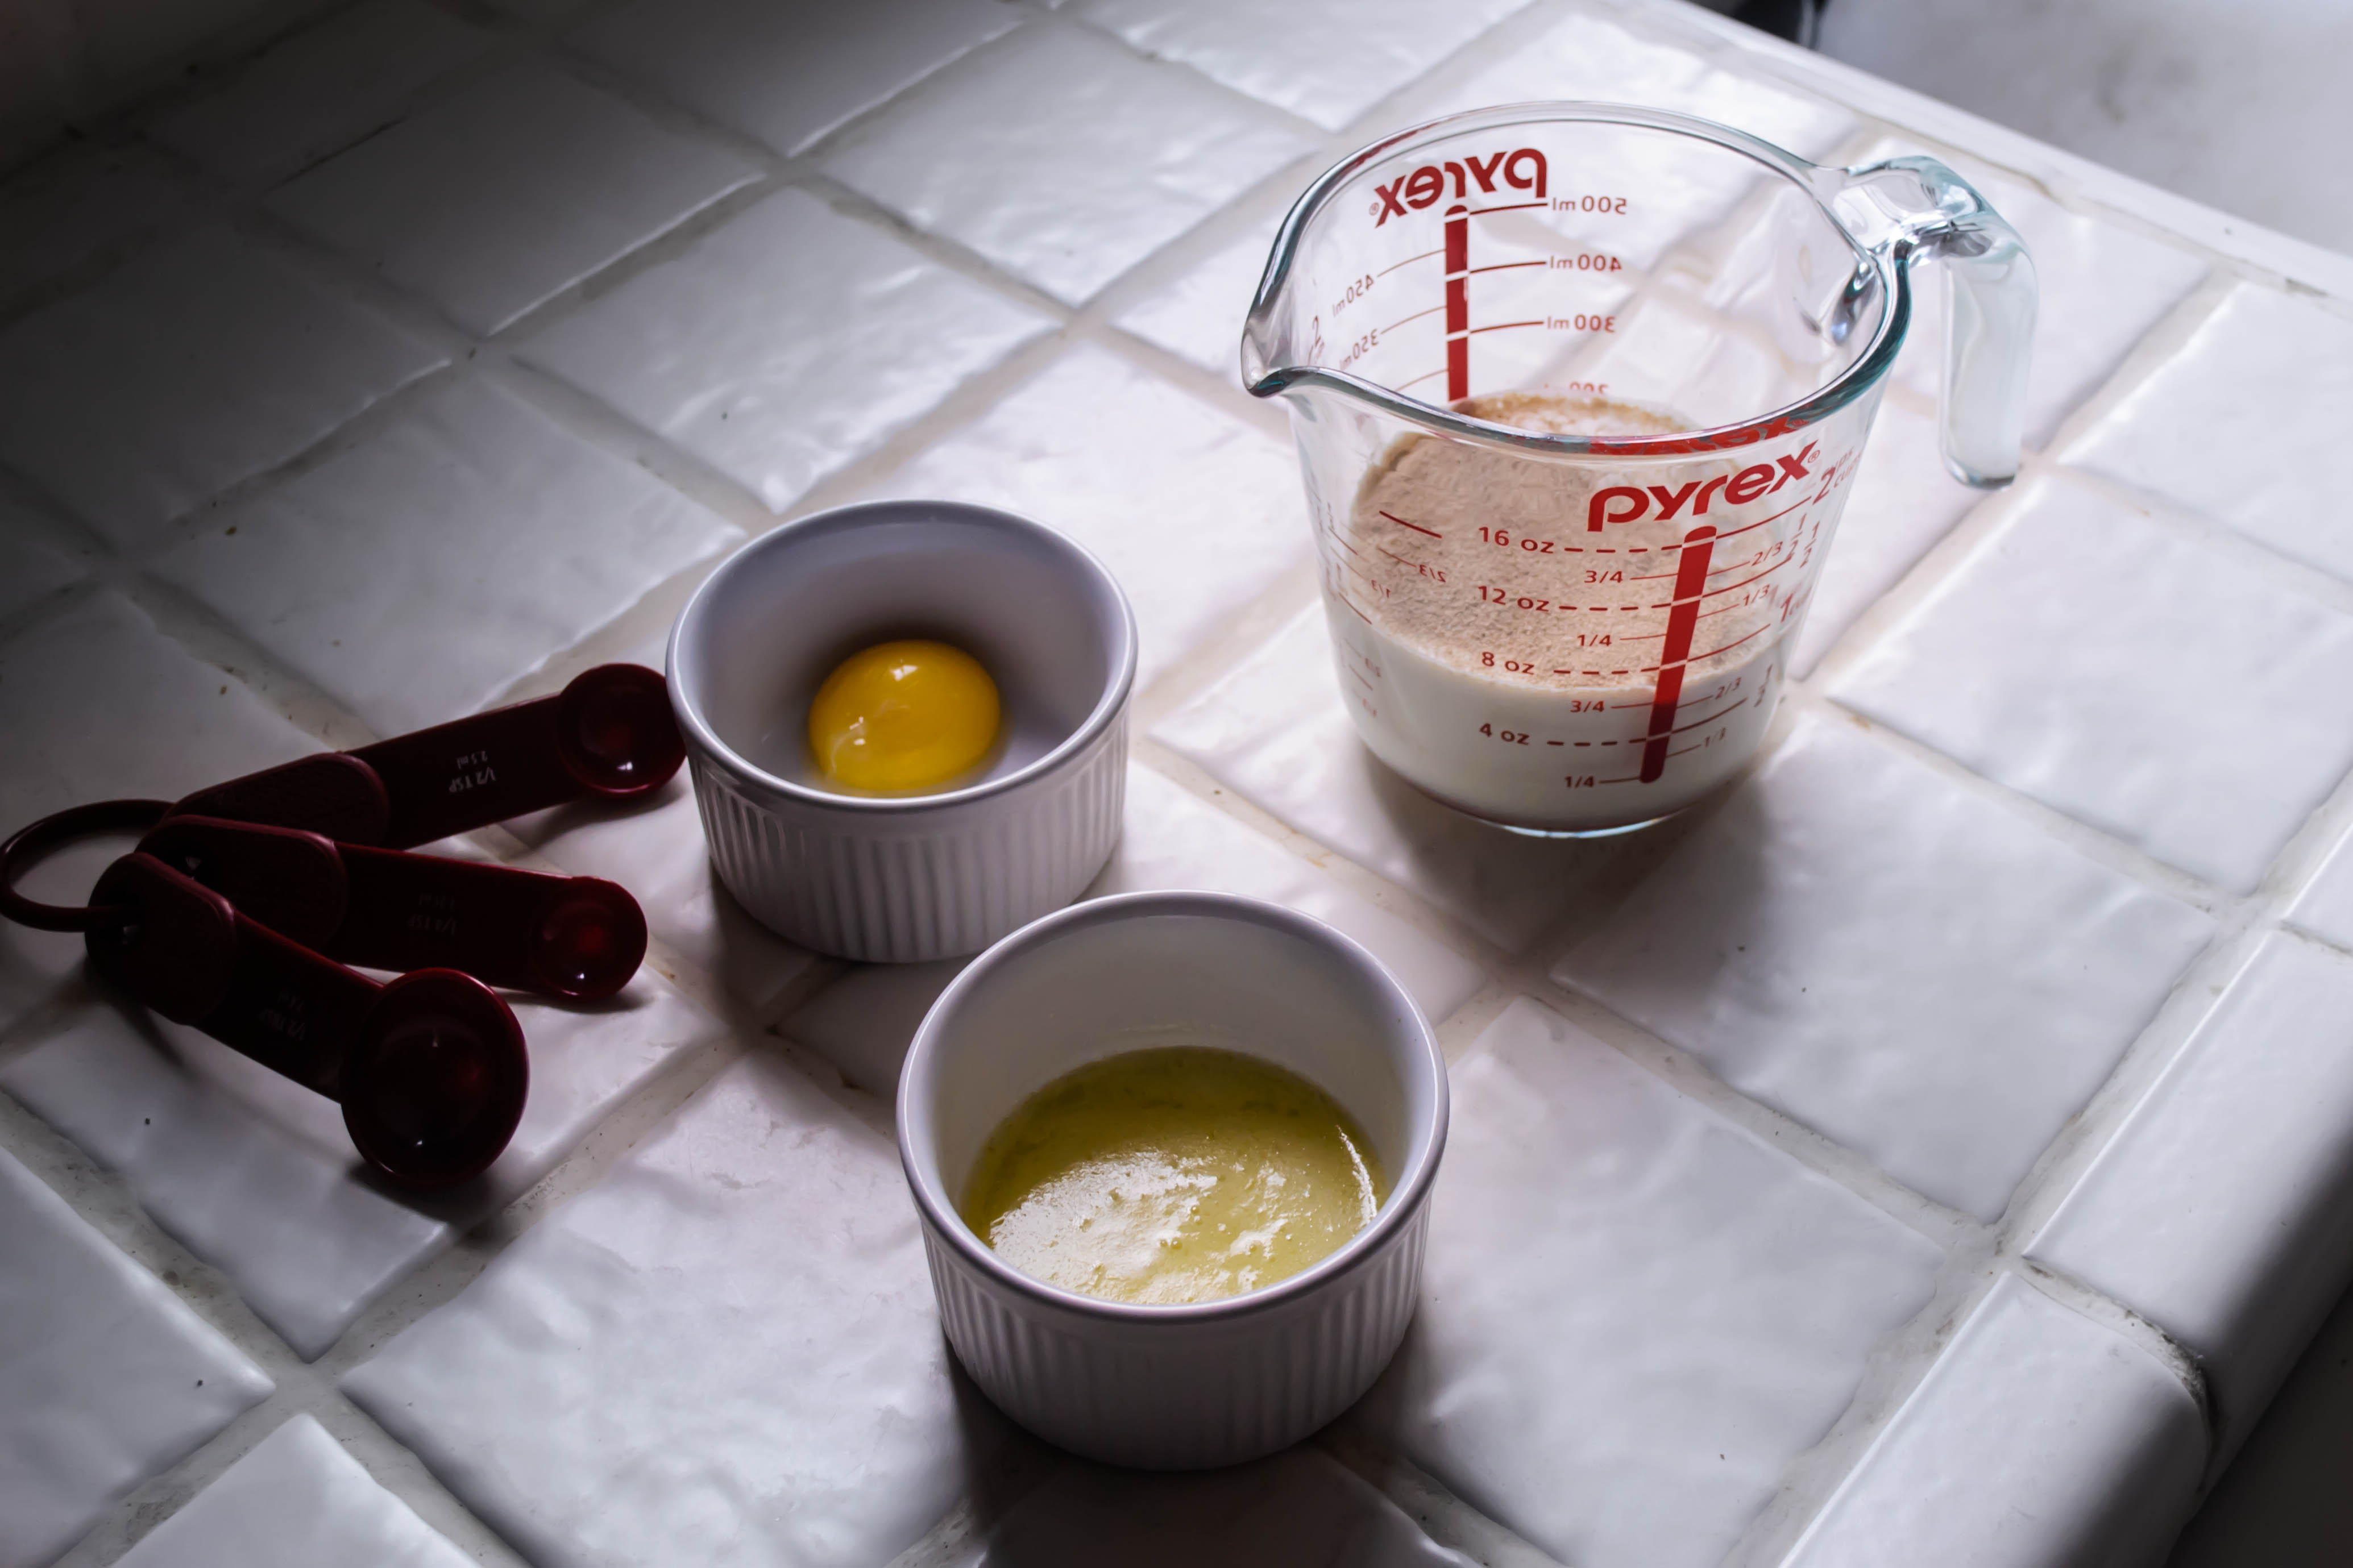
 Here, I’ve replaced Joy’s berries with blood-red bing cherry halves, gushing with juice, their tartness mellowed by baking. Since I’m not crazy about cinnamon with cherries, I have substituted in cardamom, which has an intriguing deep, citrusy scent but offers a spiciness reminiscent of the zingiest flavor in your favorite chai tea blend. To bring together the flavors, I also splashed in a little vanilla.
 The trickiest thing about this bread is shaping the crown. This requires flattening, spreading, stuffing, rolling, and then slicing open that roll to reveal the rebellious little rubies inside, which then all immediately threaten to spill out all over your board. You have to “braid” the bread by lifting one strand over the other down its length, all the while trying to keep the fruity guts inside from escaping. Then, once you’ve tamed it into a beautiful interlaced wreath, you somehow have to pick the whole thing up and nestle it into your baking vessel. I know. Mine collapsed a little bit, but honestly, after it rose during its baking time, it was hard to notice. And once we dug in, crunching through the lightly sugared, spicy-tart sweet layers, we didn’t care. The tartness of the cherries is pleasantly rounded by the oven’s heat, but the real star, to me, was the cardamom. Its flavor is so delightful here – brighter than cinnamon but no less flavorful – that I now want it in everything. I suppose they wouldn’t really be “cinnamon rolls” without the cinnamon, but false advertising (or blasphemy) or not, those may be my next cardamom target.
 Two tips for success when it comes to this bread, then, before we get all this out of the way and charge into the recipe.
 1.) Distribute the fruit evenly. I mean it. Don’t just dump the cherries in the middle and decide that’s good enough. Spread them out across your dough rectangle before rolling it up. Though it’s important to leave a slight border, if you have a lot more cherries in the middle of the dough log, it will be much more difficult to keep them contained while you braid it, and you will end up with a really uneven wreath – one section will be much fatter than the rest and therefore bake unevenly. Take the extra few seconds to spread them out well.
