Grilled Potato and Radish Salad

In the last three years, I have had the incredible good luck of attending a wedding each summer. Two years ago, I had the great honor of making the cake. One year ago, I sobbed as I watched two women legally and joyfully exchange vows, then start perhaps the greatest dance party I’ve ever attended. And this past weekend my eyes welled as the bride – dressed in a frock she designed herself, alternating white and lemon yellow flounces – betrayed just a tiny quiver in her perfect, crimson lips as her sister read a toast: a poem she’d written herself.

Food blog June 2014-3913The poem was about the bride and groom, but it was also about older and younger sisters: the beautiful friend/family/learning relationship they have as they grow up together. It was, there is almost no need to assert, beautiful. Of course it was. It was about the things the girls had weathered, and how the groom had woven his way into their laughter and music, through music of his own. But it was also about what the bride had taught her sister.

Food blog June 2014-3907Sisters learn funny things from each other, and it is disarming and lovely to be allowed to see what things they consider most important. How to read, how to write, how to sing. And, somehow magically, “how to cook radishes.” Until five or six years ago, I’d never given much thought to cooking radishes. To be honest, I hadn’t given much thought to radishes at all. They were just there, all weird and pinkly peppery, flying saucers scattered through the occasional salad, or sharp and pungent and paired with butter and salt.

Food blog June 2014-3910But here’s a funny thing, about radishes, about weddings, about friends and family and learning: as you get older, you get to choose things. Weddings help us construct the families we choose. But so can friendships, and so can an experience like graduate school, and so, oddly enough, can radishes.

Food blog June 2014-3911When N. and I lived in Eugene, Oregon, we decided to grow a garden. It was easy, there. It was a matter of shoving seeds into a spare bit of dirt, and watching them grow. Until the height of summer, it rained so often you barely had to worry about watering. Peas were one of our first crops, and of course we were invested in our tomatoes. But I’d still never considered radishes. Until, at S.’s house, a friend who has now become family, I was handed a french breakfast radish, pulled from her own little vegetable plot minutes before, a pink and while icicle the neighborhood deer had left quite alone. “You can just eat the whole thing,” S. told me, and I did. And the mild crunch, and the crisp, juicy spiciness, all but made me a convert then and there.

Food blog June 2014-3912After that first year of gardening, I always bought a pack of radish seeds. And they will never not make me think of S: razor wit, funny and honest and lovely and brilliant. She’s a willing and gracious hostess, she’s a fantastic cook, and she’s the mom to my own dog-daughter’s canine BFF. She, like the bride and groom this past weekend, like J & HP whose wedding cake I made, the people I can barely wait to spend fourth of July weekend with, is one of that special and cautiously assembled group: the family I chose.

Food blog June 2014-3915And as the fourth of July approaches, and those lovely people you choose to surround yourself with, to learn from, to sing with and read with and cook with, begin to turn their thoughts to potato salad, let me offer a fresh take to consider. This is not your traditional mayonnaise-laden, pickle-and-onion-and-dusted-with-paprika barbecue offering. (If you are after one of those, may I humbly suggest this one?) But I like this different approach, because it is lighter and fresher, because it does not require stove or oven heat, and because it makes me think of S. Tiny fingerling potatoes and plump lipstick red radishes get quartered, salted and peppered and oiled, and grilled until tender and silky. And then a few green onions, just to get a gentle char. Meanwhile, an assertive vinaigrette gets overburdened with herbs and whisked within an inch of its life to be drizzled over a bed of greens. I like arugula. S. would tell you to use the radish greens (but wash them a few times first – they can be really sandy). Potatoes and radishes get tumbled in, and after a quick toss the greens are barely wilted and the dressing soaks into the grilled vegetables like sponges in a bath.

I don’t know if this is how my bride friend’s sister learned to cook radishes. I suspect not. But the point is, those lovely things we learn, and choose, and become, should be shared.

Food blog June 2014-3913

Grilled Radish and Potato Salad, for Sarah.
Adapted from Cuisine at Home
Serves 2 as a main, 4-6 as a side
1 pound radishes, rinsed well, tops and tails removed
1 pound baby potatoes – the smaller the better
4 tablespoons olive oil, divided
1 bunch green onions or scallions, root ends trimmed off
¼ cup white wine vinegar or lemon juice
2 teaspoons dijon mustard
2 teaspoons finely minced dill
2 teaspoons finely chopped parsley
salt and pepper to taste
2-4 cups loosely packed arugula, or a combination of arugula and well-rinsed radish greens


  • If you are using a gas grill, place a grill tray on the burners and preheat the grill to medium over direct heat. If you are using a charcoal grill, light the coals. As they begin to turn gray, add the grill tray to let it heat up. If you are using an oven, preheat it to 425F with a sheet tray inside.
  • Quarter the radishes and halve or quarter the baby potatoes. You want equal, bite-size pieces – they need about the same amount of time to cook.
  • In a large bowl, toss the potatoes and radishes with 1 tablespoon of the olive oil, and salt and pepper to taste. Transfer them to the preheated grill or sheet tray in a single layer.
  • Grill until tender, 10-15 minutes, agitating as required to prevent burning. If you are using an oven this may take more like 20-25 minutes.
  • Meanwhile, make the vinaigrette: in a large bowl (I use the same bowl as before), whisk the remaining 3 tablespoons olive oil with vinegar, mustard, and herbs.
  • When radishes and potatoes are tender, transfer them to the bowl with the vinaigrette. Add the arugula (and radish greens, if using) and toss to combine.
  • Grill the green onions for 3-5 minutes, until the white bulbs are slightly softened and the greens are nicely charred. Chop and add to the salad, again tossing to combine.
  • Season the salad to taste with additional salt and pepper, if needed, and serve warm or at room temperature.

Baking Bootcamp: Cherry and Cardamom Swirl Bread (#TwelveLoaves)

Food blog June 2014-4049Today’s post serves double duty. Last month, Joy the Baker issued a baking challenge. Pairing with King Arthur Flour, she invited readers to join her in baking four different items, each featuring a different flour from the King Arthur line-up.

Food blog June 2014-4023For the first – All-Purpose Flour – she made a beautiful wreath of sweet bread, braided and swirled with cinnamon sugar and a trio of summer berries. I determined that I would, indeed, bake this bread. I had yet to try a wreath or crown shape, and was curious about how it would come out.
Food blog June 2014-4018Of course, I have trouble leaving well enough alone. By the time I was done looking at Joy’s photos of her magnificent loaf, I was already scheming about what tweaks I would apply to my variation. The answer, of course, came from the June Twelve Loaves assignment: cherries.
Food blog June 2014-4032Here, I’ve replaced Joy’s berries with blood-red bing cherry halves, gushing with juice, their tartness mellowed by baking. Since I’m not crazy about cinnamon with cherries, I have substituted in cardamom, which has an intriguing deep, citrusy scent but offers a spiciness reminiscent of the zingiest flavor in your favorite chai tea blend. To bring together the flavors, I also splashed in a little vanilla.
Food blog June 2014-4024
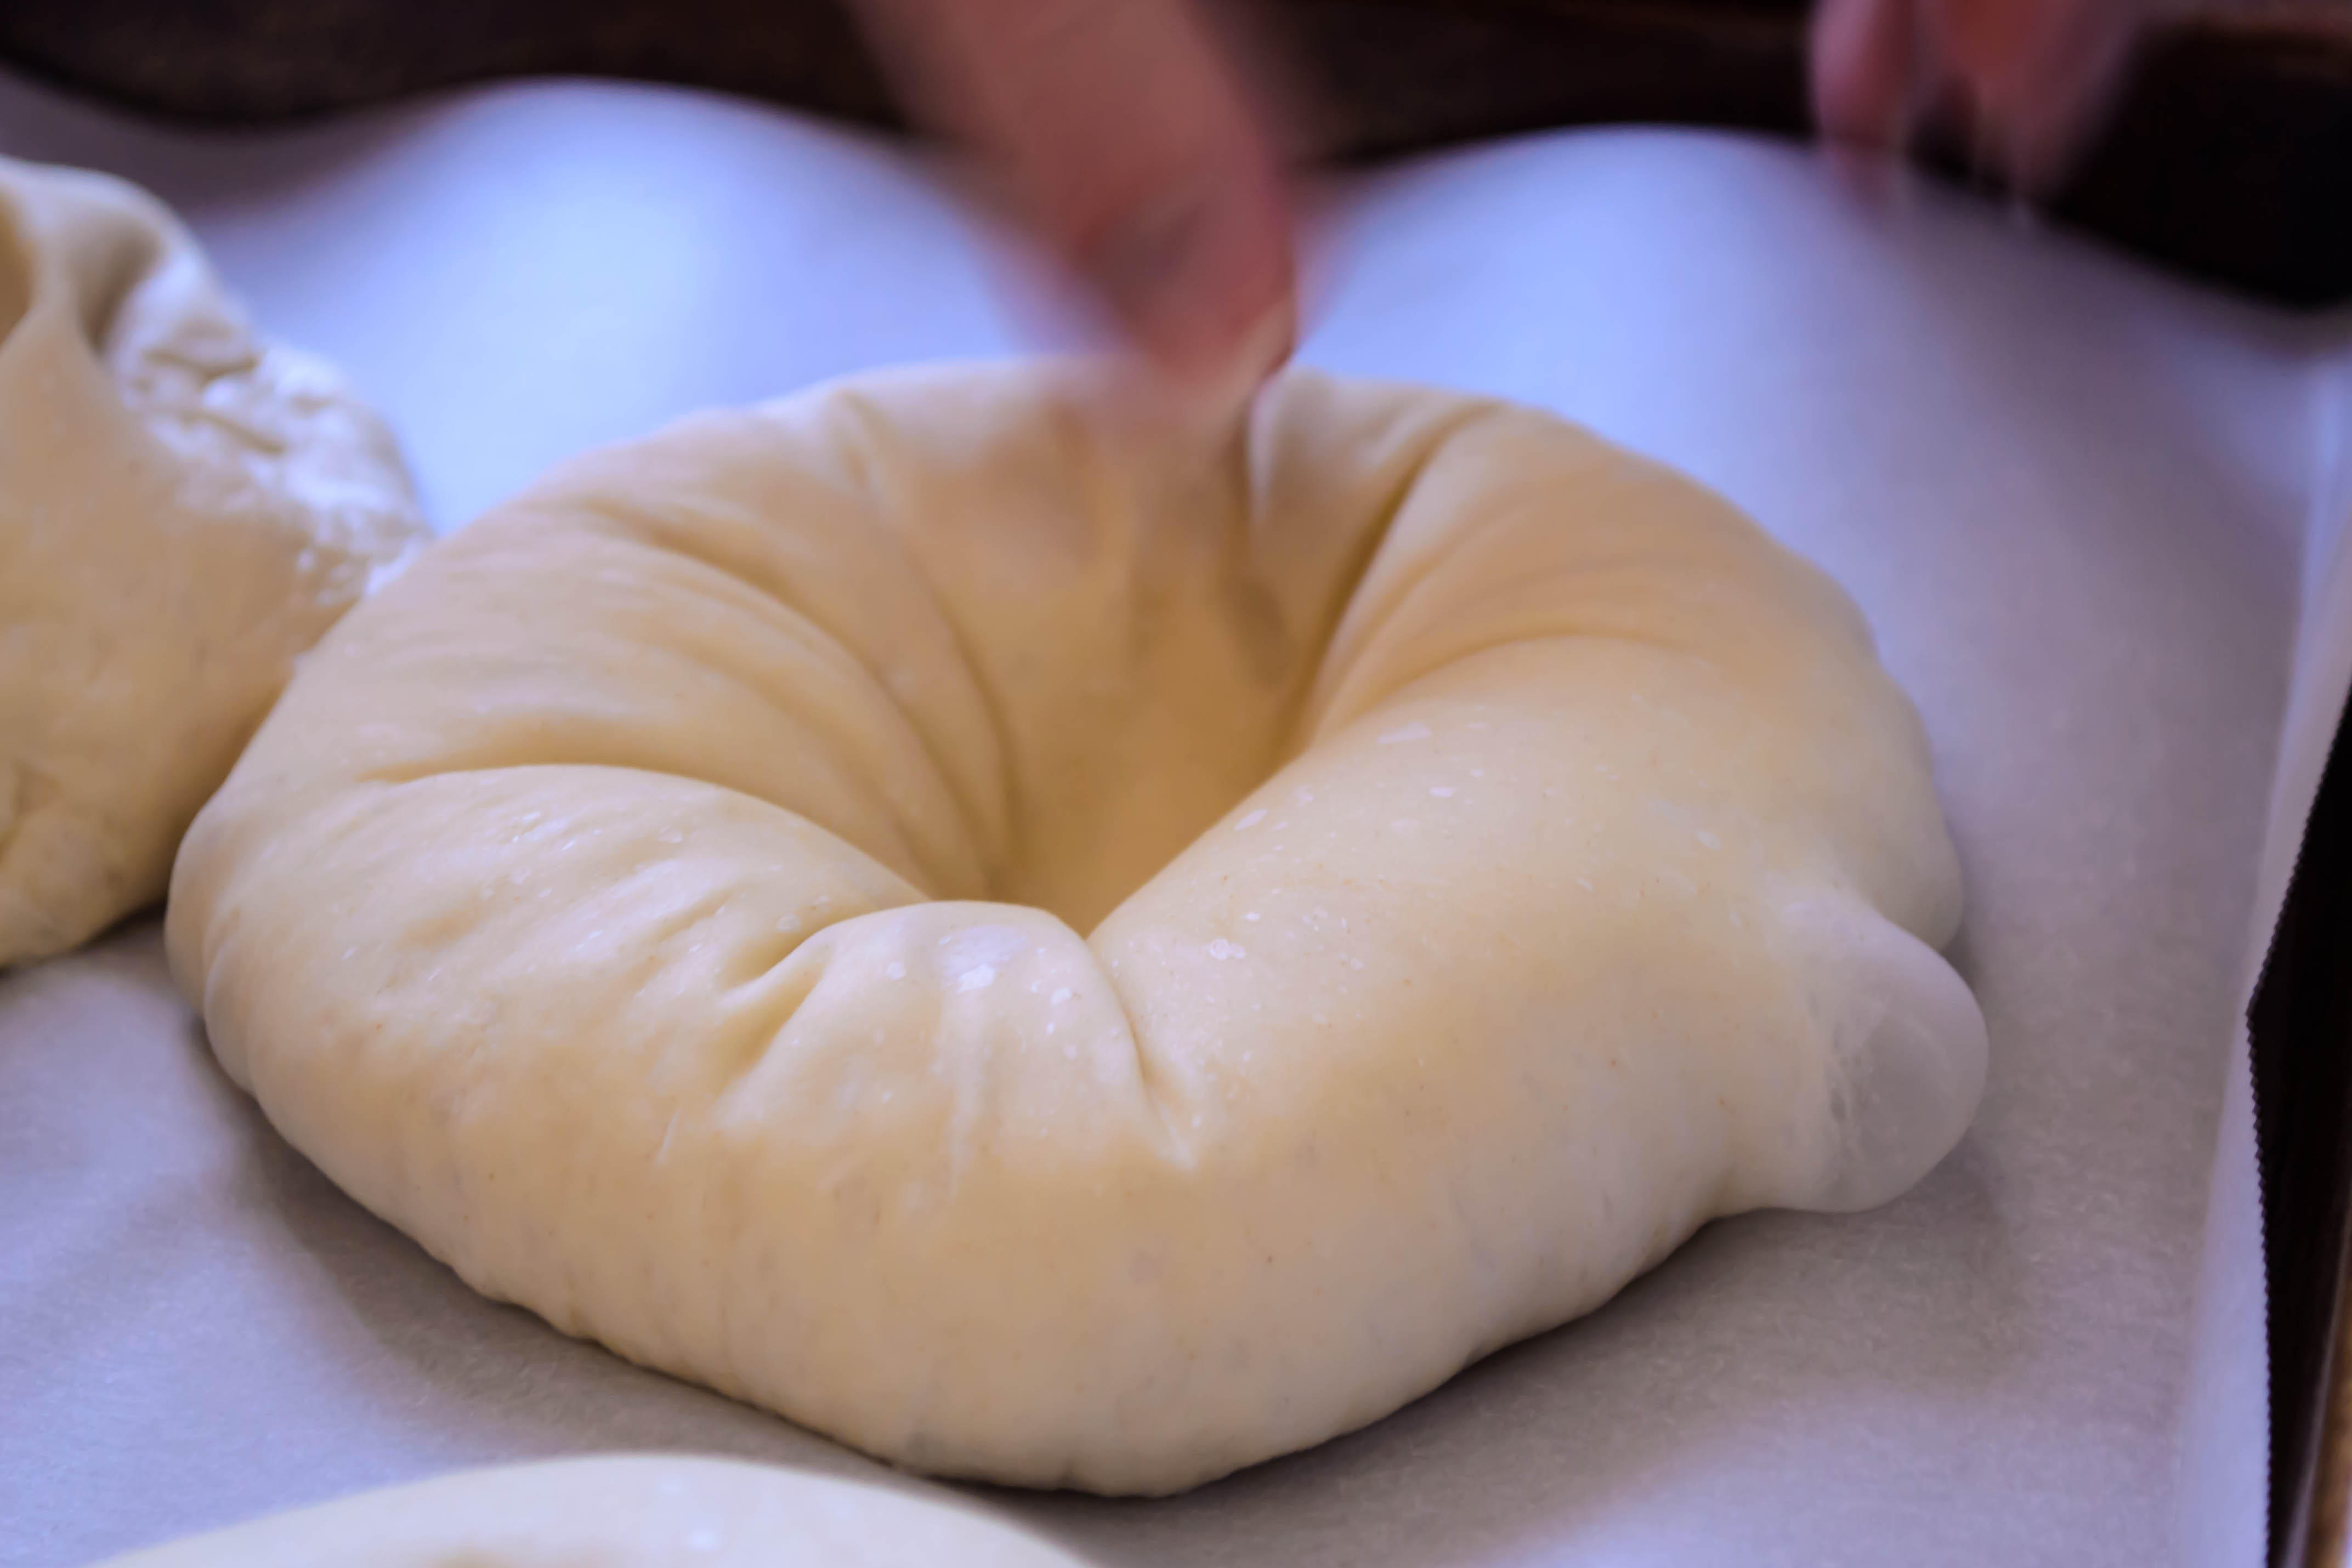
The trickiest thing about this bread is shaping the crown. This requires flattening, spreading, stuffing, rolling, and then slicing open that roll to reveal the rebellious little rubies inside, which then all immediately threaten to spill out all over your board. You have to “braid” the bread by lifting one strand over the other down its length, all the while trying to keep the fruity guts inside from escaping. Then, once you’ve tamed it into a beautiful interlaced wreath, you somehow have to pick the whole thing up and nestle it into your baking vessel. I know. Mine collapsed a little bit, but honestly, after it rose during its baking time, it was hard to notice. And once we dug in, crunching through the lightly sugared, spicy-tart sweet layers, we didn’t care. The tartness of the cherries is pleasantly rounded by the oven’s heat, but the real star, to me, was the cardamom. Its flavor is so delightful here – brighter than cinnamon but no less flavorful – that I now want it in everything. I suppose they wouldn’t really be “cinnamon rolls” without the cinnamon, but false advertising (or blasphemy) or not, those may be my next cardamom target.
Food blog June 2014-4029I didn’t take very many photos of the twisting and shaping process, mostly because I got so involved in the process I just forgot. It happens. But do take a look at Joy’s photo-by-photo instructions if you need help – they are really clear and easy to follow.
Food blog June 2014-4031Two tips for success when it comes to this bread, then, before we get all this out of the way and charge into the recipe.
Food blog June 2014-40341.) Distribute the fruit evenly. I mean it. Don’t just dump the cherries in the middle and decide that’s good enough. Spread them out across your dough rectangle before rolling it up. Though it’s important to leave a slight border, if you have a lot more cherries in the middle of the dough log, it will be much more difficult to keep them contained while you braid it, and you will end up with a really uneven wreath – one section will be much fatter than the rest and therefore bake unevenly. Take the extra few seconds to spread them out well.
2.) While you are manipulating it, be assertive with this dough. Joy, delightfully, notes that the dough can sense fear. I suspect she’s right. If you hesitate as you braid or lift, the dough sags disastrously. Just move smoothly and confidently and with a clear plan. And remember that a trip through the oven and a dusting of powdered sugar repairs many mistakes.

Food blog June 2014-4047

Cherry and Cardamom Swirl Bread
Adapted from Joy the Baker
Makes 10-inch wreath
For the dough:
2 teaspoons active dry yeast
1 tablespoon sugar
¾ cups whole milk, at or just above room temperature
1 large egg yolk
2 tablespoons butter, melted
1 teaspoon vanilla
2 ¼ cups all purpose flour (you could use bread flour too, but this is the AP flour challenge, so I complied)
½ teaspoon salt
Olive oil or vegetable oil to grease the bowl
For the filling:
¼ cup butter, at room temperature
¼ cup sugar
1 tablespoon ground cardamom
2 cups halved, pitted cherries
To finish:
1 large egg, beaten, for egg wash
1-2 tablespoons powdered sugar, for dusting
  • In a 2 cup glass measuring cup, mix the yeast and 1 tablespoon sugar, then add the milk. Whisk with a fork to combine. Add the egg yolk, the melted butter, and the vanilla, and whisk with a fork again. Set aside to work for 5 minutes. The mixture will become foamy and smell (I think) a bit like fresh donuts.
  • While the yeast does its work, whisk the flour and salt together in a large bowl (I used the bowl of my stand mixer with the paddle attachment). Add the milk mixture and combine into a rough, shaggy dough. If you are using a stand mixer, at this point you should switch from the paddle attachment to the dough hook and knead on medium speed for about 5 minutes. If you are working by hand, scoop the dough onto a floured board and knead by gathering the dough together into a ball, then pushing it away from you with the palm of your hand. Gather it back again and repeat. Knead by hand for about 10 minutes. For both methods, the dough should feel moist and elastic, but not terribly sticky. It will be a bit like a stiff play-dough in texture.
  • Spray a bowl lightly with olive or vegetable oil (you can use a clean bowl or the bowl of your stand mixer – just lift up the ball of dough for a minute) and roll the dough around a bit until it is lightly coated with the oil. Cover the bowl with a tight layer of plastic wrap and let it rise in a warm spot for an hour, or until the dough has doubled in size.
  • While the dough is rising, prep the filling. Combine the butter, sugar, and cardamom in a small bowl, mixing well. I used my fingers, but you could use an electric mixer or a fork if you prefer. Just be sure the sugar and cardamom are well integrated. We don’t want chunks of unflavored butter. Halve and pit the cherries as well, and set aside.
  • Preheat the oven to 375F and butter a 10-inch springform pan or 10-inch cast iron skillet. If you are using a springform, I recommend wrapping the bottom with aluminum foil, in case of seeping cherry juice or melted butter.
  • Now, attend to the dough again. Relocate it to a lightly floured surface and knead twice by hand, just to release some of the gathered air. Roll it out to as close to a 12×18 inch rectangle as you can manage, with the long edge facing you.
  • Spread the butter mixture onto the dough rectangle, leaving a ½ inch margin on all edges. Then, scatter the cherries atop the butter mixture, again respecting this margin, and being sure to create an even fruit layer. Uneven distribution makes shaping the loaf more challenging.
  • Begin rolling the dough rectangle into a log, starting with the middle of the long edge and working your way out to the sides to create an even, tight roll. You can mush down the lumps a little, but don’t be too aggressive about it because you don’t want to tear the dough. When you get to the end, pinch the edge firmly into the existing log to seal it.
  • This is where things get interesting. Slice through the log to expose the center, creating two long halves, but leave an inch or two attached at the top to hold the thing together (see sliced log photo above). Adjust halves to face upward, exposing the veins of cherry and buttery filling.
  • Now we twist. Take hold of the left strand and carefully (and assertively!) lift it over the right strand. Adjust to bring the braid back to the center of the board. Now lift the new left strand (previously the right strand) over the new right strand, and repeat this process until you get to the end of the two strands. It should look like an old-fashioned twist donut, but with cherries threatening to spill out of it.
  • When you have completed your twist, pinch the two strands together, and create a wreath shape by pulling the two ends of the twist to meet each other. Pinch these together as well.
  • Deep breath, now. Carefully but quickly, lift up the whole wreath of dough and settle it into your prepared pan, trying to keep the shape as round and as many cherries contained as possible. This is where you have to be confident and assertive. The longer the lift-and-nestle takes, the more the dough will droop, and the more chance you have of tearing or spilling.
  • Brush the exposed top of the wreath with the beaten egg, then bake for 25-35 minutes, until the top is golden and the interior is cooked through but still moist.
  • Let cool at least 30 minutes in the pan, then dust with powdered sugar (through some sort of sifter, please), slice, and serve.

Coconut and Cumin Fried Plantains

Food Blog June 2014-3874One of my great pleasures in the summer is the hot cooked lunch. I’m a big believer in leftovers, and during the school year it’s easy and delicious (and cheap, let’s be honest) to just pack some of last night’s dinner into a Tupperware and take it to school with me. But in summer, when I’m home and puttering, being able to sashay into the kitchen around lunchtime and cook something quick and tasty is a pleasure I always forget about until suddenly I get to do it again.

Food Blog June 2014-3856This year, I finished my semester a week or so before N., which meant an additional treat when it came to constructing these lunches. We’ve talked before about my bachelor meals. I like to cook for other people, but they don’t always like all the same things that I like, and it’s a sad thing to have to wait for restaurant meals to order some of my favorites. So when I’m eating alone, I try to take advantage of those items my dining partner just isn’t crazy about. Sometimes, Chopped-style, I try to fit as many of these ingredients into my solo meal as possible.

Food Blog June 2014-3858In addition to crustaceans, coconut tops the list of foods N. is just not interested in (this means we never have to squabble over coconut shrimp, the most perfect meal ever invented; I get to eat it ALL). Bananas, too, are an unacceptable item unless they are mashed beyond recognition and folded into quickbread, in which case he’s all over it. Plantains, those longer, starchier relations, look just too much like their cousins to be acceptable as a food product to him. This seemed, to me, a perfect opportunity.

Food Blog June 2014-3878I’m a big believer in the fried plantain. Whether it’s sliced thick, lightly sautéed, and then mashed flat and returned to the oil to become tostones, or just cut into chunks and fried until golden on all surfaces and mixed into fluffy, buttery rice, I would probably be happy eating plantains every day for lunch all summer long, provided the oil was hot, the edges were crisp, and the salt was liberal. They take a while to ripen – most often they are sold in the grocery store still green, and can languish in a fruit bowl for a full week or two before they soften and their skins get brown and stringy. But I think they are worth it.

Food Blog June 2014-3864For this lunch treat, I decided to take a cue from my delight in the green bean poriyal I made a few months ago and add a liberal showering of N.’s other fruit nemesis. This became all about texture. The cumin, sizzling and fragrant, offers a crunch of earthy perfume. The plantain slices themselves, crisp exteriors tearing effortlessly into creaminess, contrast well with the coconut, which stands up for itself in toasty, chewy-crunchy shards. Add a squeeze of lime, and maybe a few torn leaves of cilantro, and lunch is served. Oh sure, you could dress it up or make it a bit more substantial by adding a scoop of basmati rice, or serving this as a side for shrimp or barbecued chicken. It would also play well, I suspect, with a roasted pork loin dressed in tropical flavors like mango or jerk seasoning. It could be easily doubled, or tripled, and if you are serving it as a side, I’d suggest allowing for about half a plantain per diner. But I gave it a solo, starring role, and I ate every single bite.

Food Blog June 2014-3872It’s a simple lunch, when you come right down to it, but it tastes like summer. And that, delightfully enough, is exactly where I want to be. Food Blog June 2014-3867

Coconut and cumin fried plantain
Serves 1 as a main, 2 as a side
1 ripe plantain (the skin should be dark yellow, well mottled with black or dark brown, and the fruit inside should feel tender)
2 tablespoons vegetable oil
1 teaspoon whole cumin seeds
½ teaspoon salt
Black or cayenne pepper to taste, if you want a bit of heat
½ cup unsweetened shredded coconut (try an Asian or Indian market, or maybe Whole Foods)
Lime wedge, optional
A few sprigs of cilantro, optional


  • Heat the oil and cumin seeds together over medium high heat in a large skillet.
  • While the oil heats, peel and then slice the plantain on a bias into ½ inch slices.
  • When the cumin is sizzling and aromatic, add the plantains to the skillet in a single layer. Sprinkle with salt and pepper, if using.
  • Fry the plantains for 3 minutes, or until the bottoms of each slice are golden brown and have a crisp crust.
  • Flip each slice, turn the heat down to medium, and fry an additional 2 minutes.
  • Add the coconut and agitate the pan a bit to be sure all of the shreds find their way to the oil, then continue to cook for 1-2 minutes more, until the majority of the coconut is toasty-brown, with only a few white strands remaining.
  • Remove from heat and serve with a squeeze of lime and a few sprigs of cilantro, if desired.

Homemade Mayonnaise and Toasted Potato Salad

Food Blog May 2014-3905My interests for some time have been food and bodies. Academically, as I’ve noted on my About page, I studied bodies. I’m interested in the way we represent them in literature, and increasingly, the way we represent them in our own self-presentation. This makes me a better teacher, I think, because it keeps me aware of my students as people – as living, breathing bodies who think and act and speak not always according to logic or reason, but to their status as physical beings ruled by whims and appetites. It also makes me, I hope, a better human being, since I recognize what this kind of embodiment means for my fellow beings.
Food Blog May 2014-3895Outside of academics, I love food (I’m sure you would never have guessed this). This pair of interests makes total sense to me. Bodies, after all, require food. It fuels us, it nurtures us, and it affords us pleasure of many sorts. The pleasure of a full belly. The pleasure of a silky custard against the tongue, or a thick hunk of steak between the teeth, dissolving into creamy fat at the edges.
Food Blog May 2014-3886All too often, though, our associations between food and bodies are negative. We use the slippery jiggle of jelly to describe a stomach or a bottom that we deem too ample or not sufficiently firm. Our brains are “fried” or “scrambled” when we feel tired or off our game. “Muffin top” is a newer construction thanks to the popularity of tight and midriff-baring wardrobes (deemed, interestingly enough, one of the most creative words of 2005 by the American Dialect Society). And of course there is the classic complaint of “cottage cheese thighs.”
Food Blog May 2014-3891
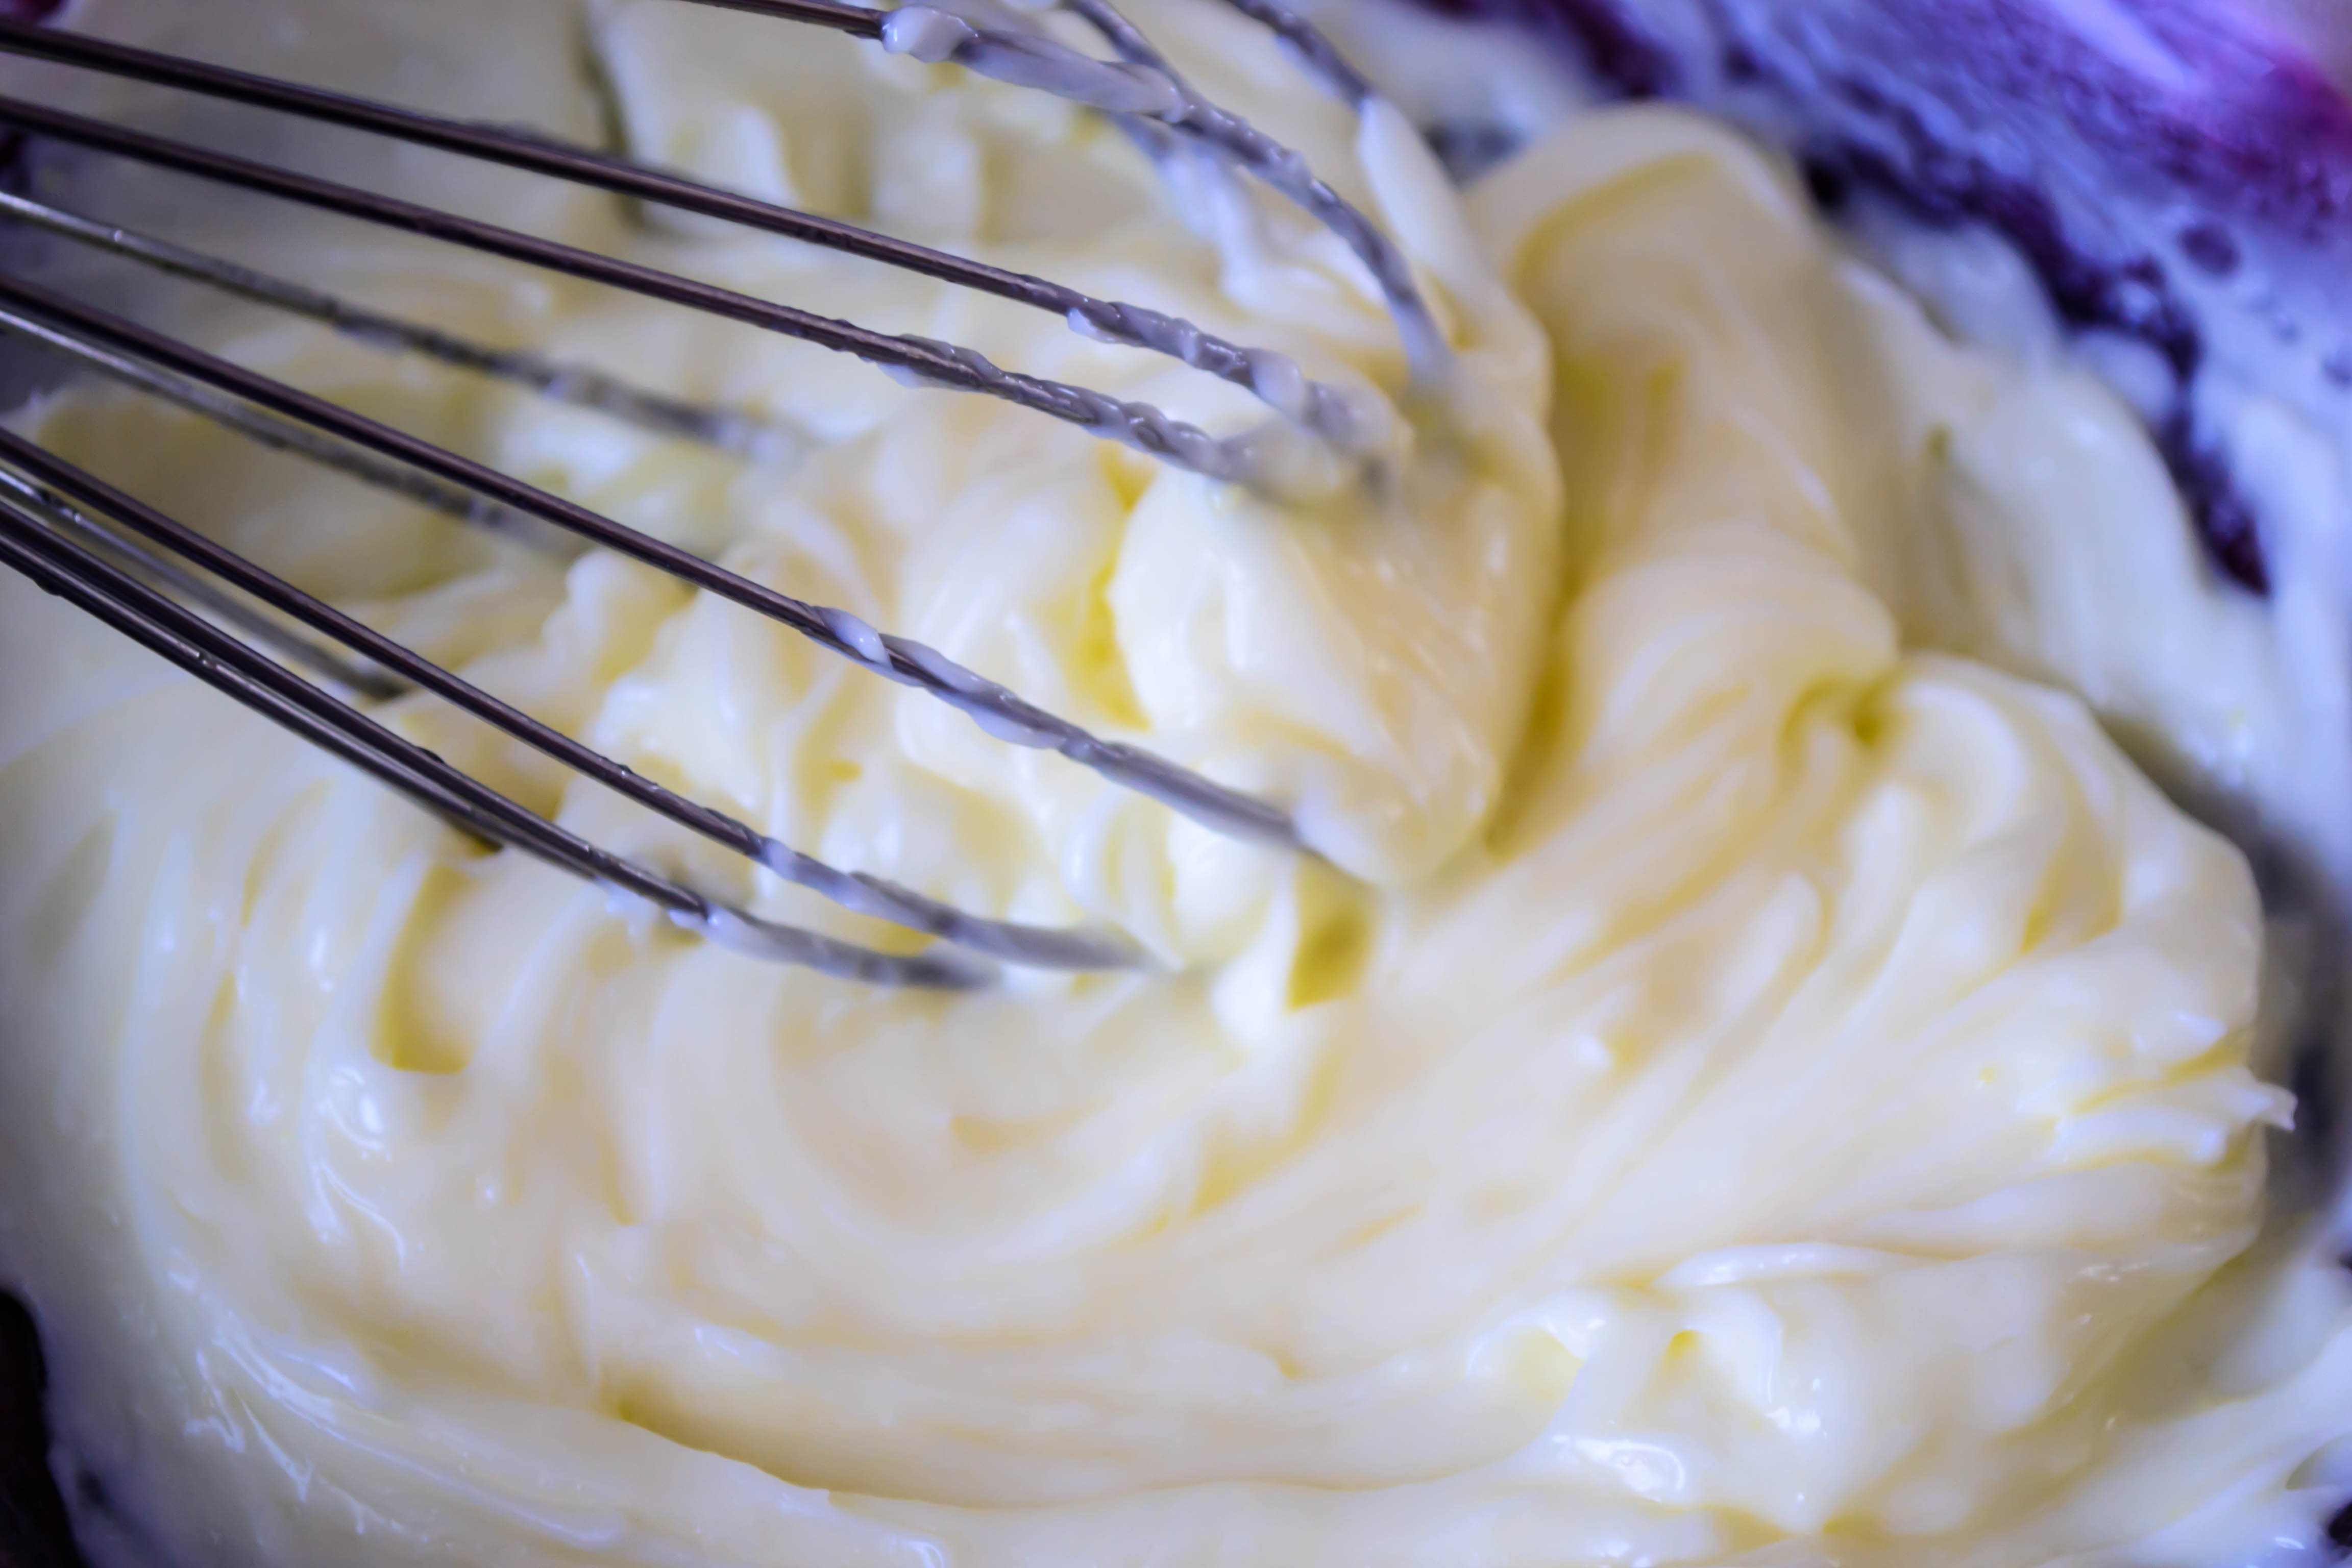
I want to propose a new one, to break this concentration on the negative textures and attributes we give our bodies, and refocus attention instead on their strength and abilities: mayonnaise arms.
Food Blog May 2014-3889At first glance, this sounds just as negative as the others. The rich fatty consistency of mayonnaise calls to mind a sagging bicep rife with cellulite. But I’m not talking about a visual comparison. I’m talking cause and effect. Though she certainly has a more traditional exercise routine, after my weekend of making mayonnaise from scratch, you could tell me First Lady Michelle Obama’s amazing arms were forged whipping her own condiments and I wouldn’t be at all surprised. The sustained whisking mayonnaise requires, pulling egg yolk and oil together into a magical, fluffy, silky, creamy emulsion, has the potential to produce incredible toned limbs (and then sit down to a perfectly dressed BLT. Just saying).
Food Blog May 2014-3892This is my fifth installment in 2014’s Project Sauce,* and for the first time I have to admit I was quite nervous. Even the fussiness of last month’s hollandaise didn’t throw me off all that much, since I’d made it before. But the idea of whisking a raw egg yolk and some oil into a fluffy spread had me feeling tentative. First of all, despite understanding a bit about the power of emulsions, it seemed so unlikely those humble ingredients could even approximate something like the jar of Hellman’s hanging out on my fridge door. Secondly, even though I knew my chances of getting salmonella from my homemade spread were quite low, I still felt a little uncomfortable about what seemed like dangerous cooking.
Food Blog May 2014-3893However, there’s nothing like the internet for at once increasing and assuaging fears. Amongst articles about salmonella poisoning babies and questions about whether it’s safe to eat macaroni salad that has sat around on a picnic table for hours, I found a few mayonnaise recipes that suggested heating the egg yolk gently to 150F, at which temperature the bacteria that causes salmonella bites the dust. This is also the temperature where egg proteins solidify, but the addition of acid in the form of lemon juice or vinegar raises the coagulation temperature, so you still maintain a liquid yolk even while reducing the already minimal chances of food-borne illness. Other cautious suggestions offered using pasteurized eggs (this heating process is basically pasteurizing them), or washing the shell carefully before cracking (since the shell itself is where bacteria like to hang out). This gentle heating sounded like a reasonable suggestion to me, so using a combination of recipes and procedures (privileging Michael Ruhlman’s suggestions in Ratio, to which I find myself returning again and again), I whisked and measured and heated and cooled and whisked and whisked and whisked and ended up with a bowl of fluffy, creamy, pillowy spread that looked almost identical to the commercially produced stuff I’ve been buying and greedily applying to fried egg sandwiches for years! Several times, in between shaking out my arms as they screamed at the endless whisking, I said aloud, stunned, “It looks like mayonnaise! It actually looks like mayonnaise!” This was, apparently, one of those things I never really conceived of making myself.
Food Blog May 2014-3894So. Mayonnaise is possible. Though like the other sauces I’ve created, it needs a vehicle for consumption. As Ruhlman notes in a defense of fat-based sauces, “you wouldn’t want to eat a bowl of vinaigrette or a cup of mayonnaise or a stick of butter” (165). I laughed – in my deepest, guiltiest heart of hearts a cup of mayonnaise sounds attractive, though probably not without some kind of starch or vegetation to cut the thickness – but he’s right. It’s not a lone ranger.
Food Blog May 2014-3897With Memorial Day upon us and summer leaping ever closer, then, I went to one of my favorites: potato salad. In my version, fingerling potatoes are boiled and then crushed and lightly toasted in olive oil, so their skins get slightly crisp and they break apart gently when mixed with the other ingredients. Hard boiled eggs, capers, dill, garlic, and a generous scattering of green onions provide the colors and flavors for that beautiful blank canvas of potato and mayonnaise to play with. And I can’t resist a little squeeze of mustard. Creamy. Toasty. Fluffy. Perfect.
Food Blog May 2014-3905As summer gets ever closer, instead of complaining about our beer bellies or muffin tops or cottage cheese thighs, I vote we create, and celebrate, mayonnaise arms instead!

*Yes, mayonnaise is considered a sauce, even though the thick, creamy spread we most commonly envision when we hear the term is used primarily as a condiment. But think aioli: basically a thin mayo with garlic added. Even hollandaise is similar to a thin mayo, with the egg yolk heated and emulsified with butter rather than oil. In perhaps my favorite application, Belgian in inspiration, mayonnaise is used to sauce french fries, and what a glorious sauce it then becomes…

Homemade Mayonnaise
Makes a scant cup
Note: this is a quite lemony mayonnaise. If you aren’t fond of that flavor or want to dial back the citrus, use just one teaspoon of lemon juice, and a tablespoon of water instead. Alternately, you can use a vinegar of your choosing to create your preferred flavor of acidity.
Note #2: I strongly recommend you get everything ready for this before you begin the process. I’m talking various bowls, ice bath, oil measured, all that. You’ll be happier for it, I promise.
Note #3: Though this mayonnaise stores just fine in the fridge for a week, it may separate a bit as it chills. Vigorous whisking at room temperature, and in a dire case another dribble of water or squeeze of mustard feverishly incorporated, should bring things back together.
1 large egg yolk (save the white for a meringue or angel food cake or fluffy waffles)
1 teaspoon water
1 tablespoon lemon juice
½ teaspoon salt, or to taste
1 cup (8 ounces) vegetable oil
  • Before you begin, start about 2 inches of water heating in a medium pot. You want to bring this to a bare simmer. While it heats up, fill a large bowl with ice and water and set it in the sink. We are heating the egg yolk in the unlikely event it is harboring bacteria, but mayonnaise is a “cold” sauce, so we will need to cool the yolk quickly once it has reached the appropriate temperature.
  • In a medium, heat resistant mixing bowl (I used glass), whisk together the egg yolk, water, and lemon juice (or vinegar, if you’re using that instead). Set the bowl carefully over the pot of simmering or near-simmering water, being careful not to let the water come to a boil or to touch the bottom of the bowl.
  • Whisk the egg yolk mixture constantly but slowly over the pot until the yolk registers at 150F on a kitchen thermometer, about 4-5 minutes. You don’t need to whisk with particular determination here – we are not looking to change the consistency as we would with a hollandaise; just to keep it moving so it doesn’t scramble.
  • At just under 150F, the yolk will thicken a tiny bit. At first when this happened I thought the whole thing was ruined. It’s not. Don’t worry. The addition of the acid and water will prevent the protein in the yolk from fully coagulating.
  • As soon as you hit 150F, remove the bowl from the heat and carefully float it in the ice bath, continuing to whisk constantly until the yolk mixture cools to room temperature, and taking care not to let any ice water into the mix. You don’t want it to be cold – cold ingredients are reluctant to emulsify (think of bottled salad dressing and the way it separates). Just room temp will do nicely.
  • Once the yolk has cooled, take the bowl out of its ice bath and set it on a counter, wrapping a twisted kitchen towel around the base of the bowl to prevent spinning.
  • Now, add the salt, and begin to drizzle in the oil slowly. You want to add just a few teaspoons at a time, whisking like a madman through the whole process. At first you’ll just have a greasy mess, but slowly as you add more oil, the mixture will get pale and fluffy and creamy, and suddenly will start to look suspiciously like, well, mayonnaise.
  • Continue to drizzle the oil in slowly, whisking the whole time. If your arm gets tired, switch to the other one! If the mixture suddenly starts to look extra shiny or like it might separate, stop adding the oil and whisk extra hard for a minute or two. It should come back together.
  • Once your mayonnaise is fluffy and creamy and stable, taste for salt (this is much, MUCH less salty than a commercial mayo), and use immediately, or store in the fridge for up to a week.
Toasted potato salad with homemade mayonnaise
Serves 1 generously, or 2 as a modest side
10 baby potatoes
2 teaspoons olive oil
2 hard boiled eggs, chopped
4 green onions, thinly sliced on a bias
1 tablespoon capers, chopped
2 teaspoons finely chopped fresh dill
1 clove garlic
¼ teaspoon coarse salt
1 teaspoon Dijon mustard
Black pepper to taste
¼ cup homemade mayonnaise (or more, to taste)
  • Boil the potatoes in salted water until they are fork tender (times will vary depending on the size of your potatoes. Check them after the water has been boiling for 6 minutes, then determine for yourself). When they are done, drain them, remove to a flat surface, and use a potato masher or the back of a fork to lightly crush them. You are looking to split their skins and just flatten them a little bit.
  • In the same (now empty) pot, heat the 2 teaspoons olive oil over medium heat until they slick and shimmer around the pan. Add the crushed potatoes and fry for 3-4 minutes, flipping them over halfway through to reveal golden brown toasted bottoms. When both sides are toasty, remove from heat and let cool.
  • While the potatoes cook, prep the other ingredients, tossing the chopped eggs, green onions, capers, and dill into a medium bowl.
  • To prepare the garlic, smash the clove with the side of a large knife, and remove the peel. Then chop the garlic into a fine dice. Sprinkle the ¼ teaspoon coarse salt over the garlic, and make it into a paste by firmly dragging the flat of the knife across it. The abrasive salt crystals will break down the garlic, making it easier to mix into your salad evenly. Add the pasted garlic and mustard to the bowl.
  • When the potatoes have cooled a bit, add them to the other ingredients, toss together, and add the mayonnaise. Mix gently to incorporate, taste for seasonings, and add black pepper to your liking. If you wish, add additional salt, mustard, or mayonnaise to suit your palate.
    Eat immediately, or chill, covered, in the refrigerator until ready to serve.

Bialys for #TwelveLoaves May

Food Blog May 2014-3847I didn’t learn to drive until I was 17, an oddity at my high school where brand new cars to fit their brand new drivers started showing up during junior year. When I did learn, however, my dad took me on biweekly drives through Orange County, making a wide circle that climbed a gradual hill and then descended steeply toward, much to my dismay, a stoplight that was always red. One week I vividly remember Smash Mouth’s “Walkin’ on the Sun” playing as I coasted down the hill, hoping to hit the brakes soon enough to show I was paying attention, but not wanting the downhill glide to end. Another week, I remember stopping at a bagel shop just before getting to that glorious hill, and then, poised nervously at the parking lot exit, fumbling for the gas pedal instead of the brake. You only make that mistake once.
Food Blog May 2014-3833But really, the bagel shop is the important part here. My parents moved a lot when I was a kid, and one of the most important components about making a new city “home” was finding a good bagel place. This meant they were always hole-in-the-wall, never big names. This one in particular, though it was a bit of a drive from our house, was special in that it carried a treat I’d never had before: a bialy.
Food Blog May 2014-3830Bialys, if you’re not in the know (which more than likely means not from the East Coast ), are a bagel relative. A cousin, perhaps. Bagels are special because they are a chewy yeast dough that is boiled before it is baked, and they have that signature hole in the middle. Bialys, though their dough is similar in composition, have a depression rather than a hole in their centers, and that depression is filled with sautéed onions, poppyseeds, and sometimes garlic. Because they contain this little gold mine of flavor, they aren’t boiled, but go straight into the oven for a hot, short bake.
Food Blog May 2014-3849It is their filling – that little pocket of gooey caramelized onion goodness – that makes them right for this week. The Twelve Loaves challenge for May was baking with onions. I was stumped at first, but when N. suggested onion bagels, this chewy crusty treat flooded back at me with all the power of Proust’s madeleine.
Food Blog May 2014-3783The recipe I’m using here is a minor adaptation of Deb’s. I’ve added a few twists, incorporating garlic and sesame seeds in with the onion and poppyseed filling, sautéing the aromatics in butter rather than oil because I love the added richness, and combining a few tablespoons of vital wheat gluten with my bread flour to replace the high gluten flour I don’t have in my pantry. Plain bread flour will likely work as well, but the extra hit of gluten adds a chewiness I wouldn’t forgo.
Food Blog May 2014-3787
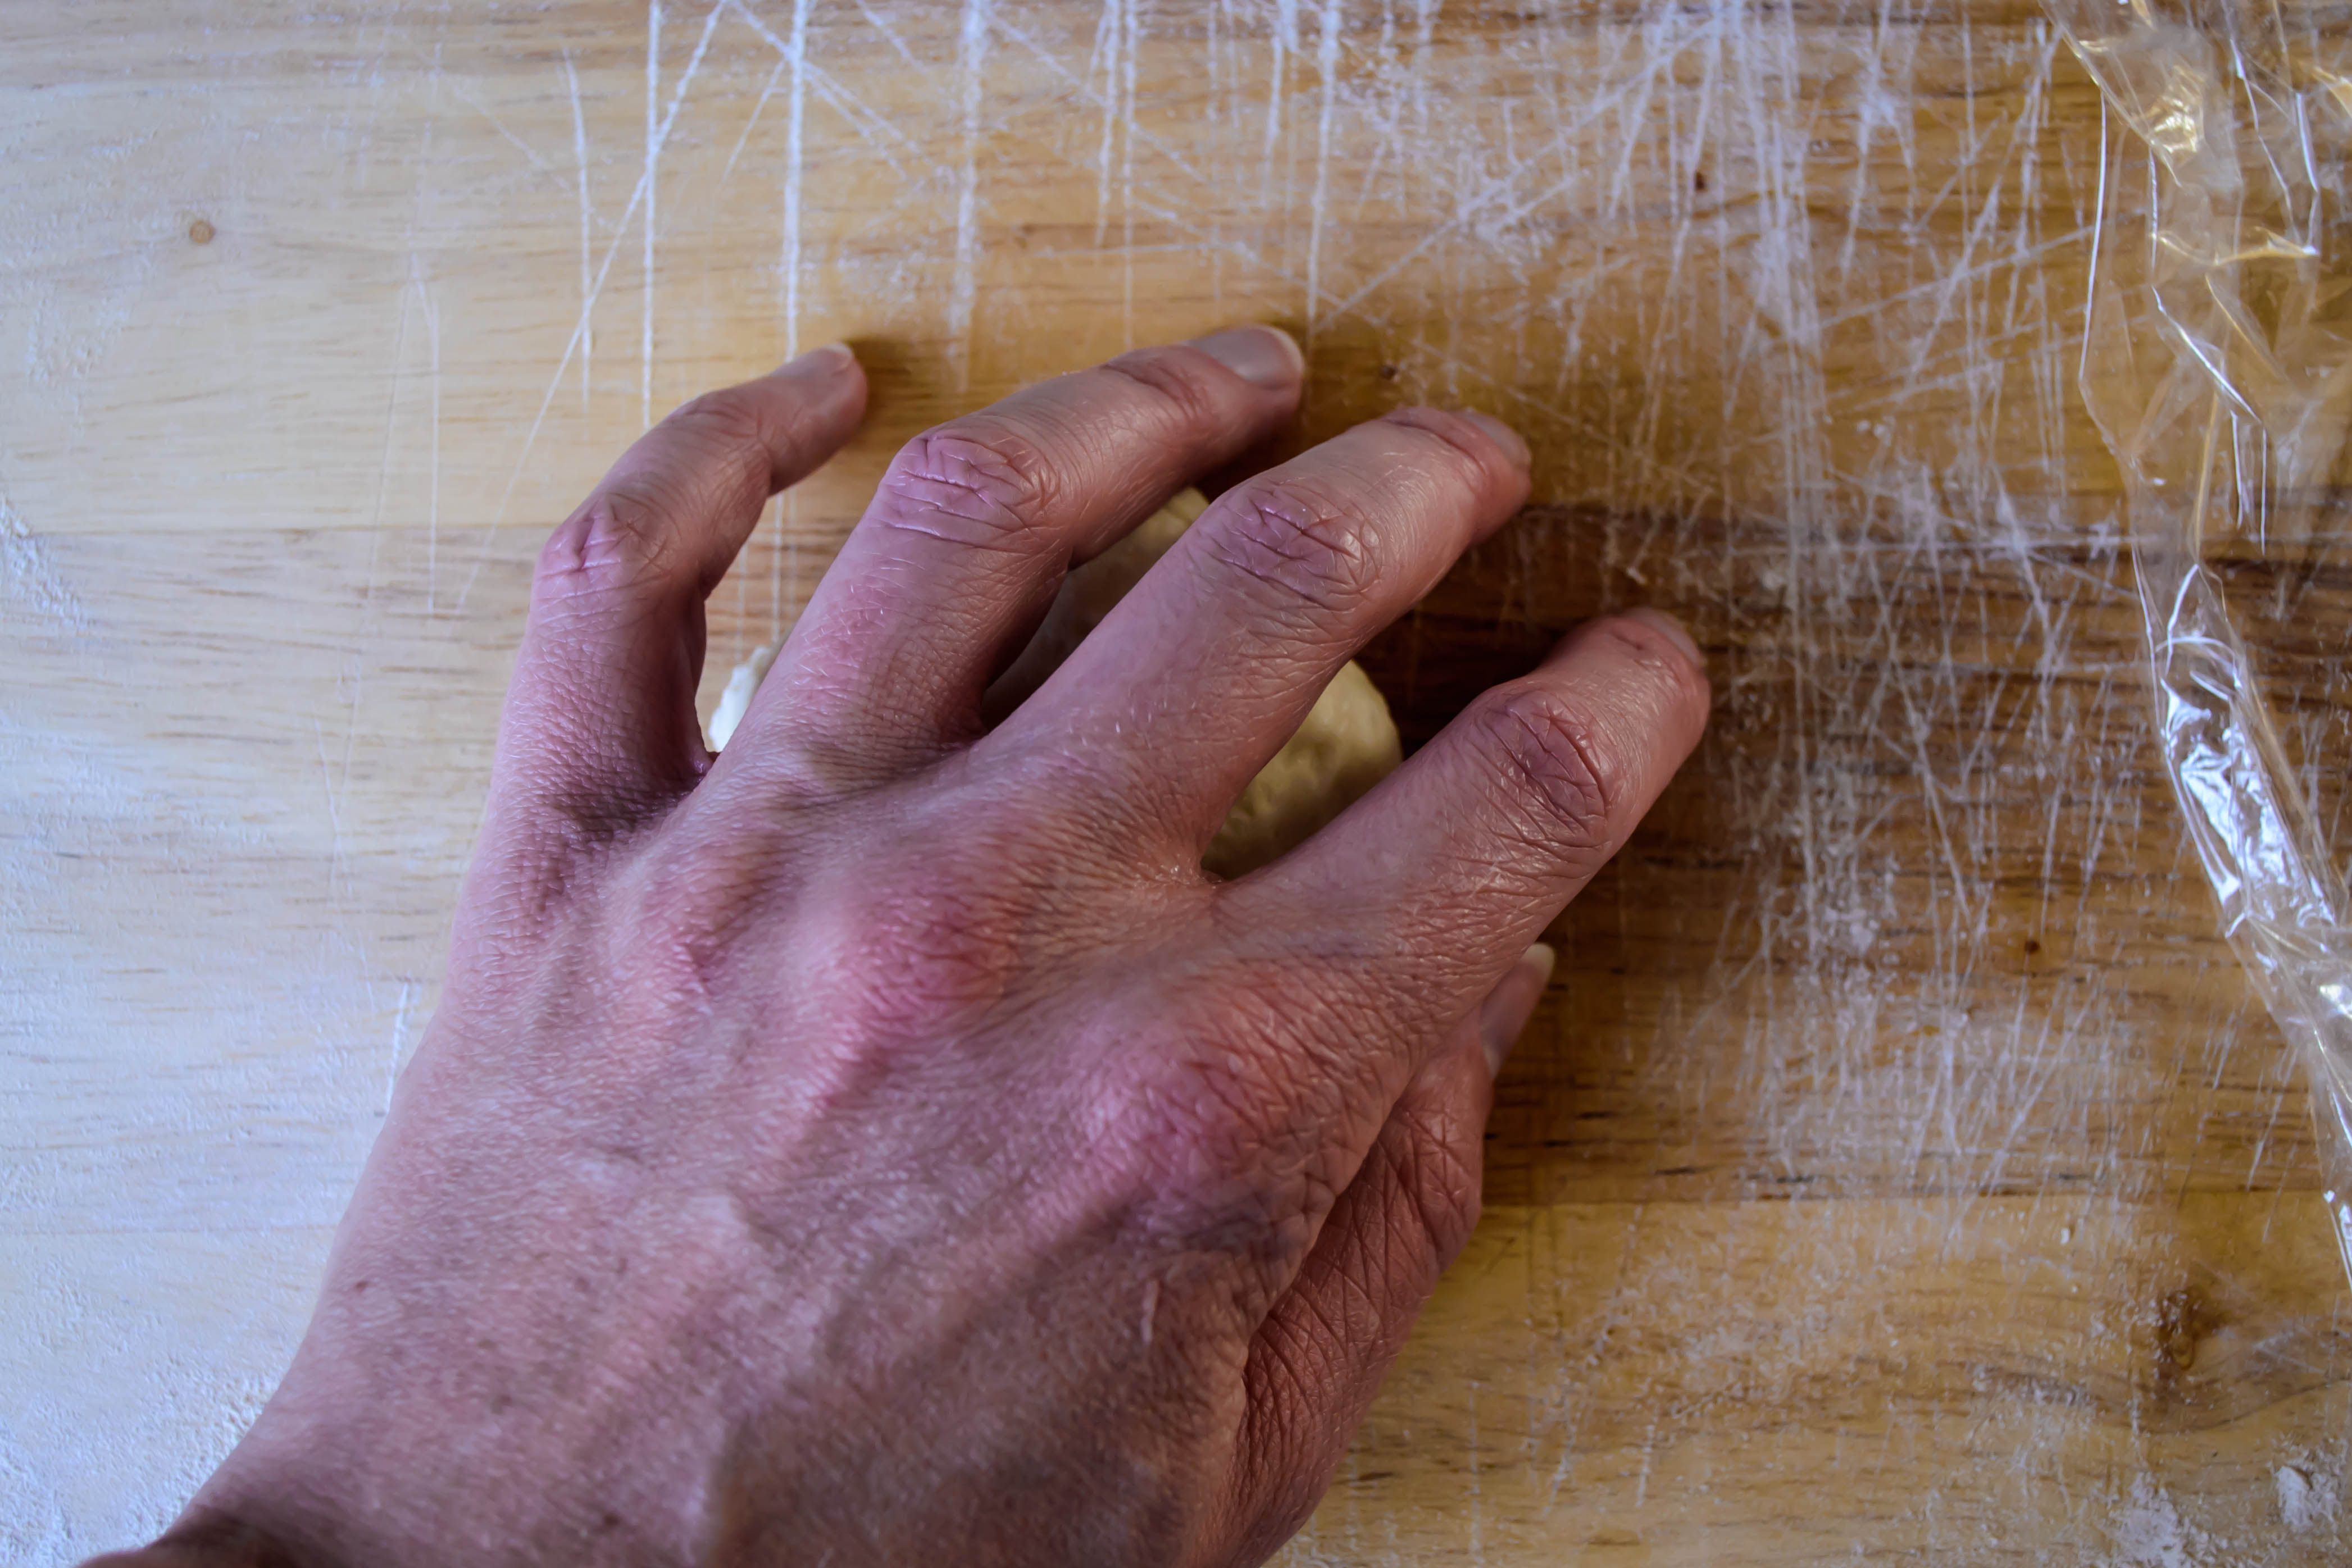
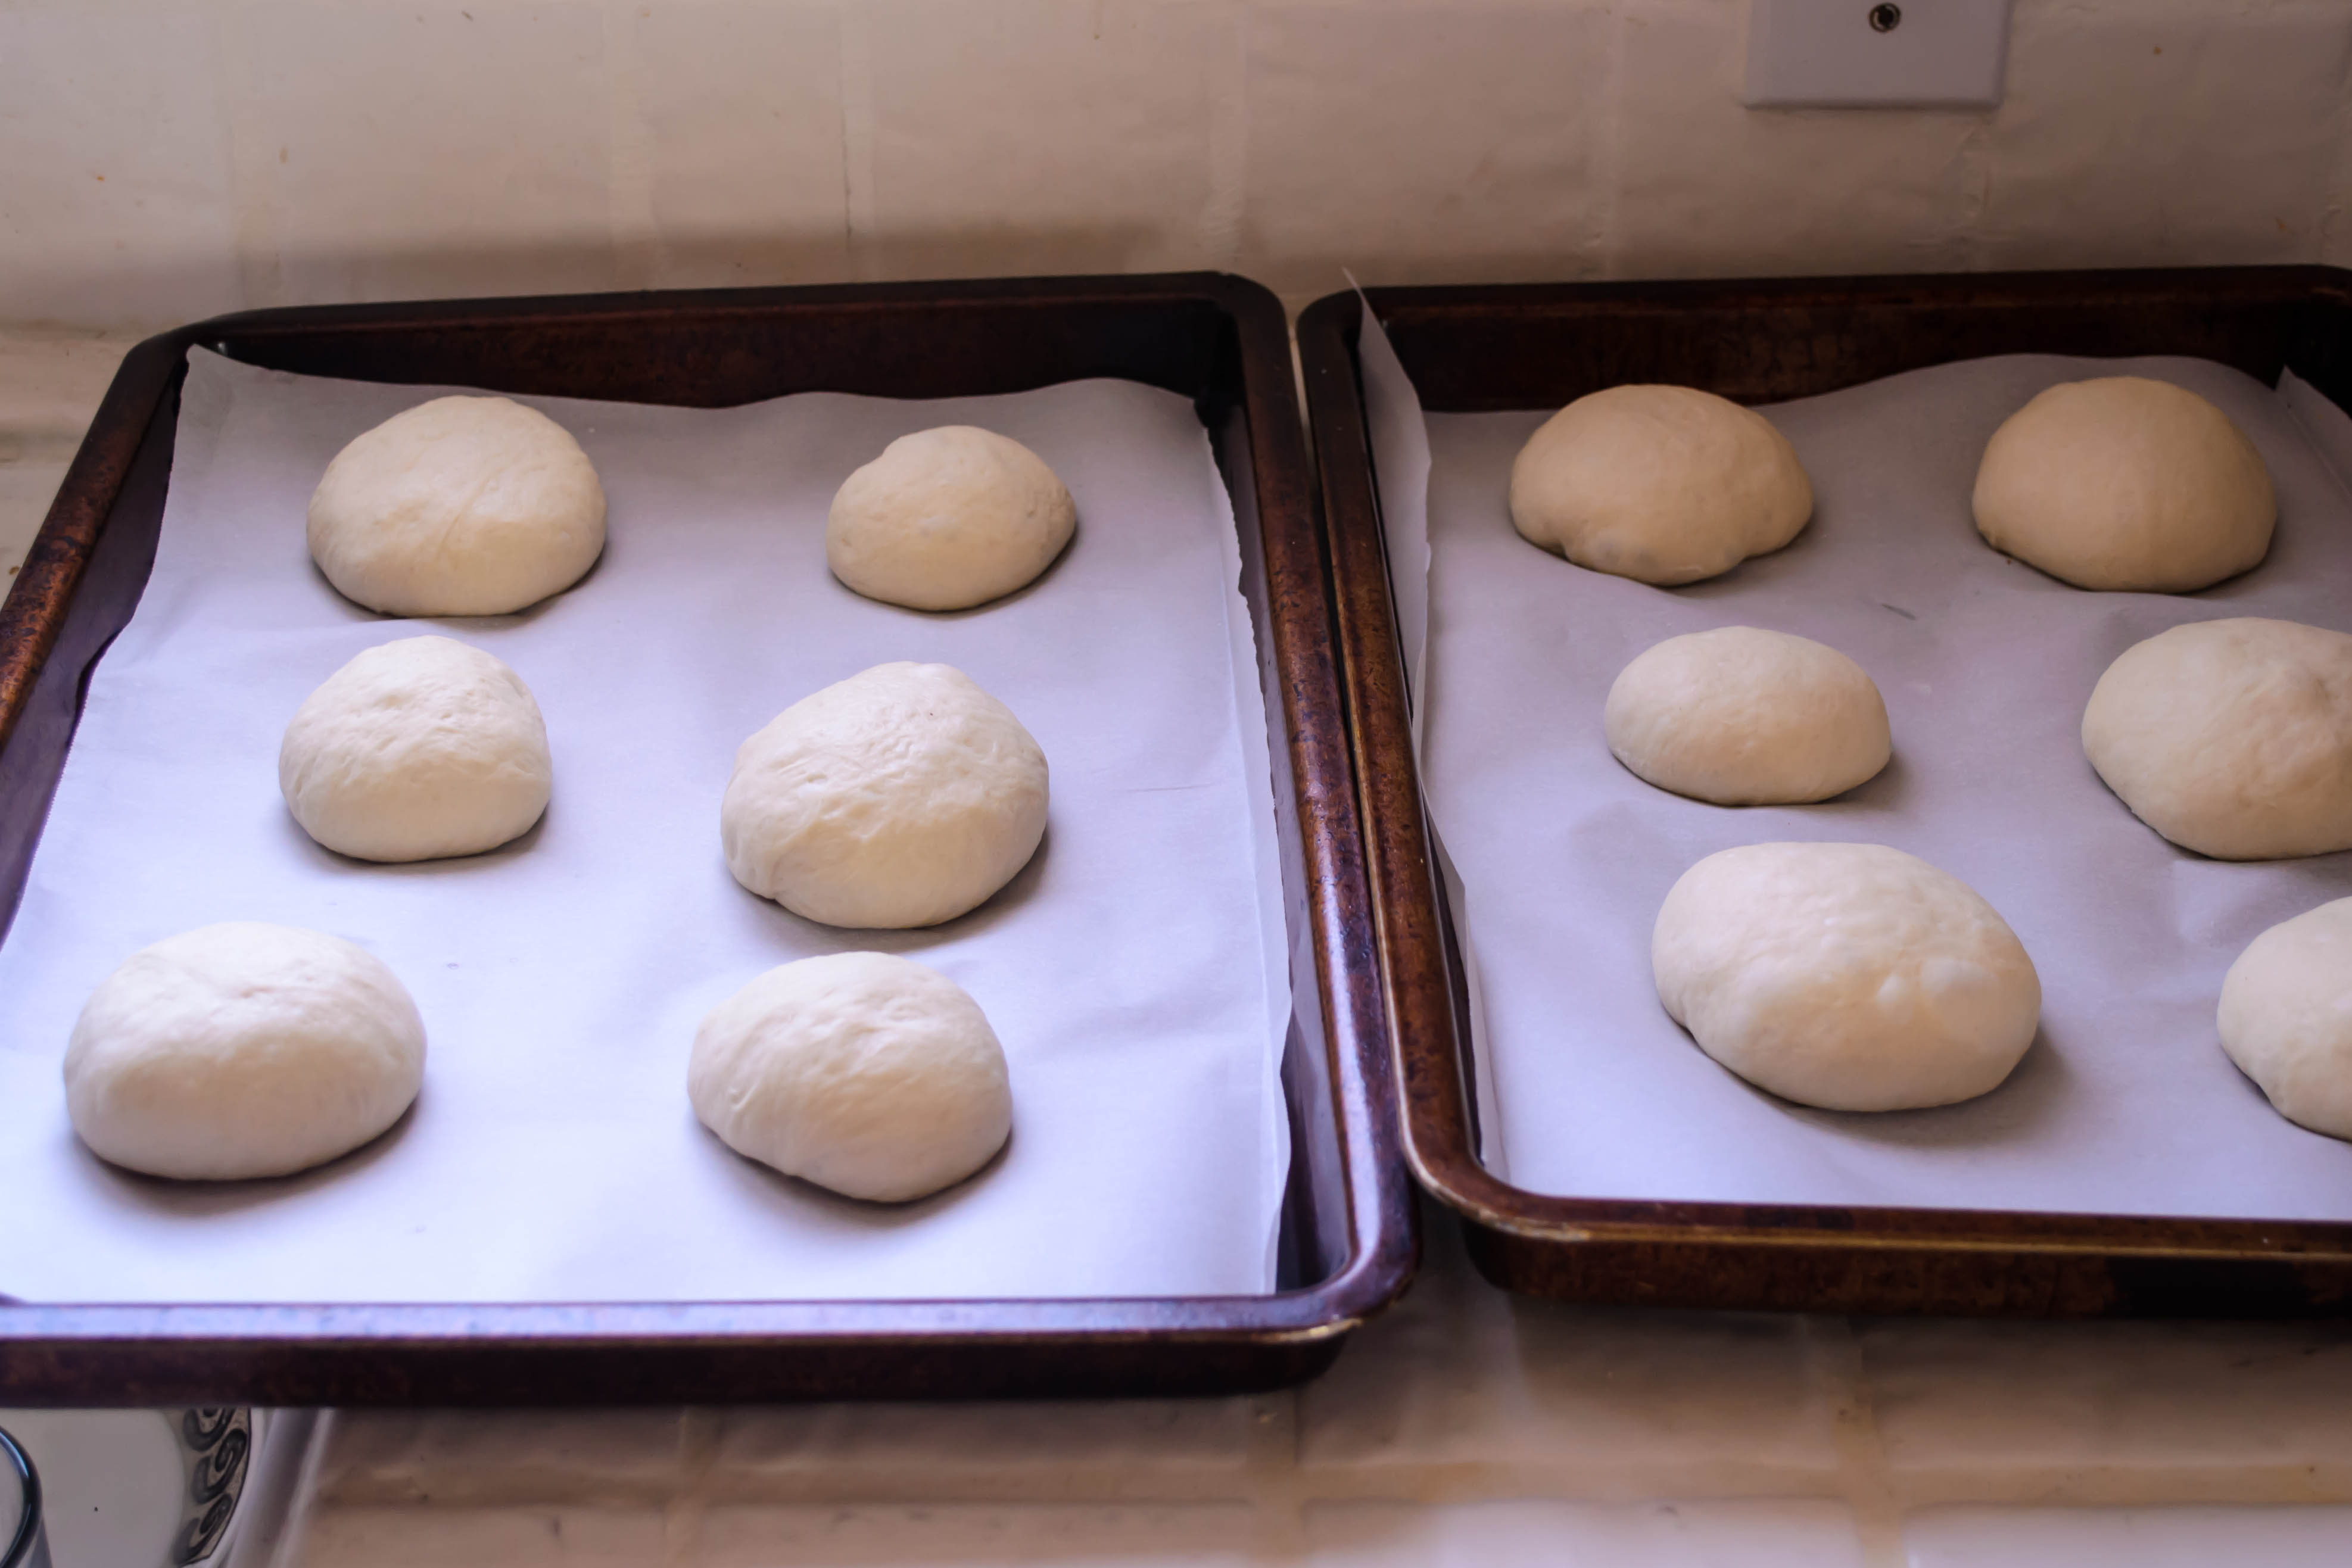
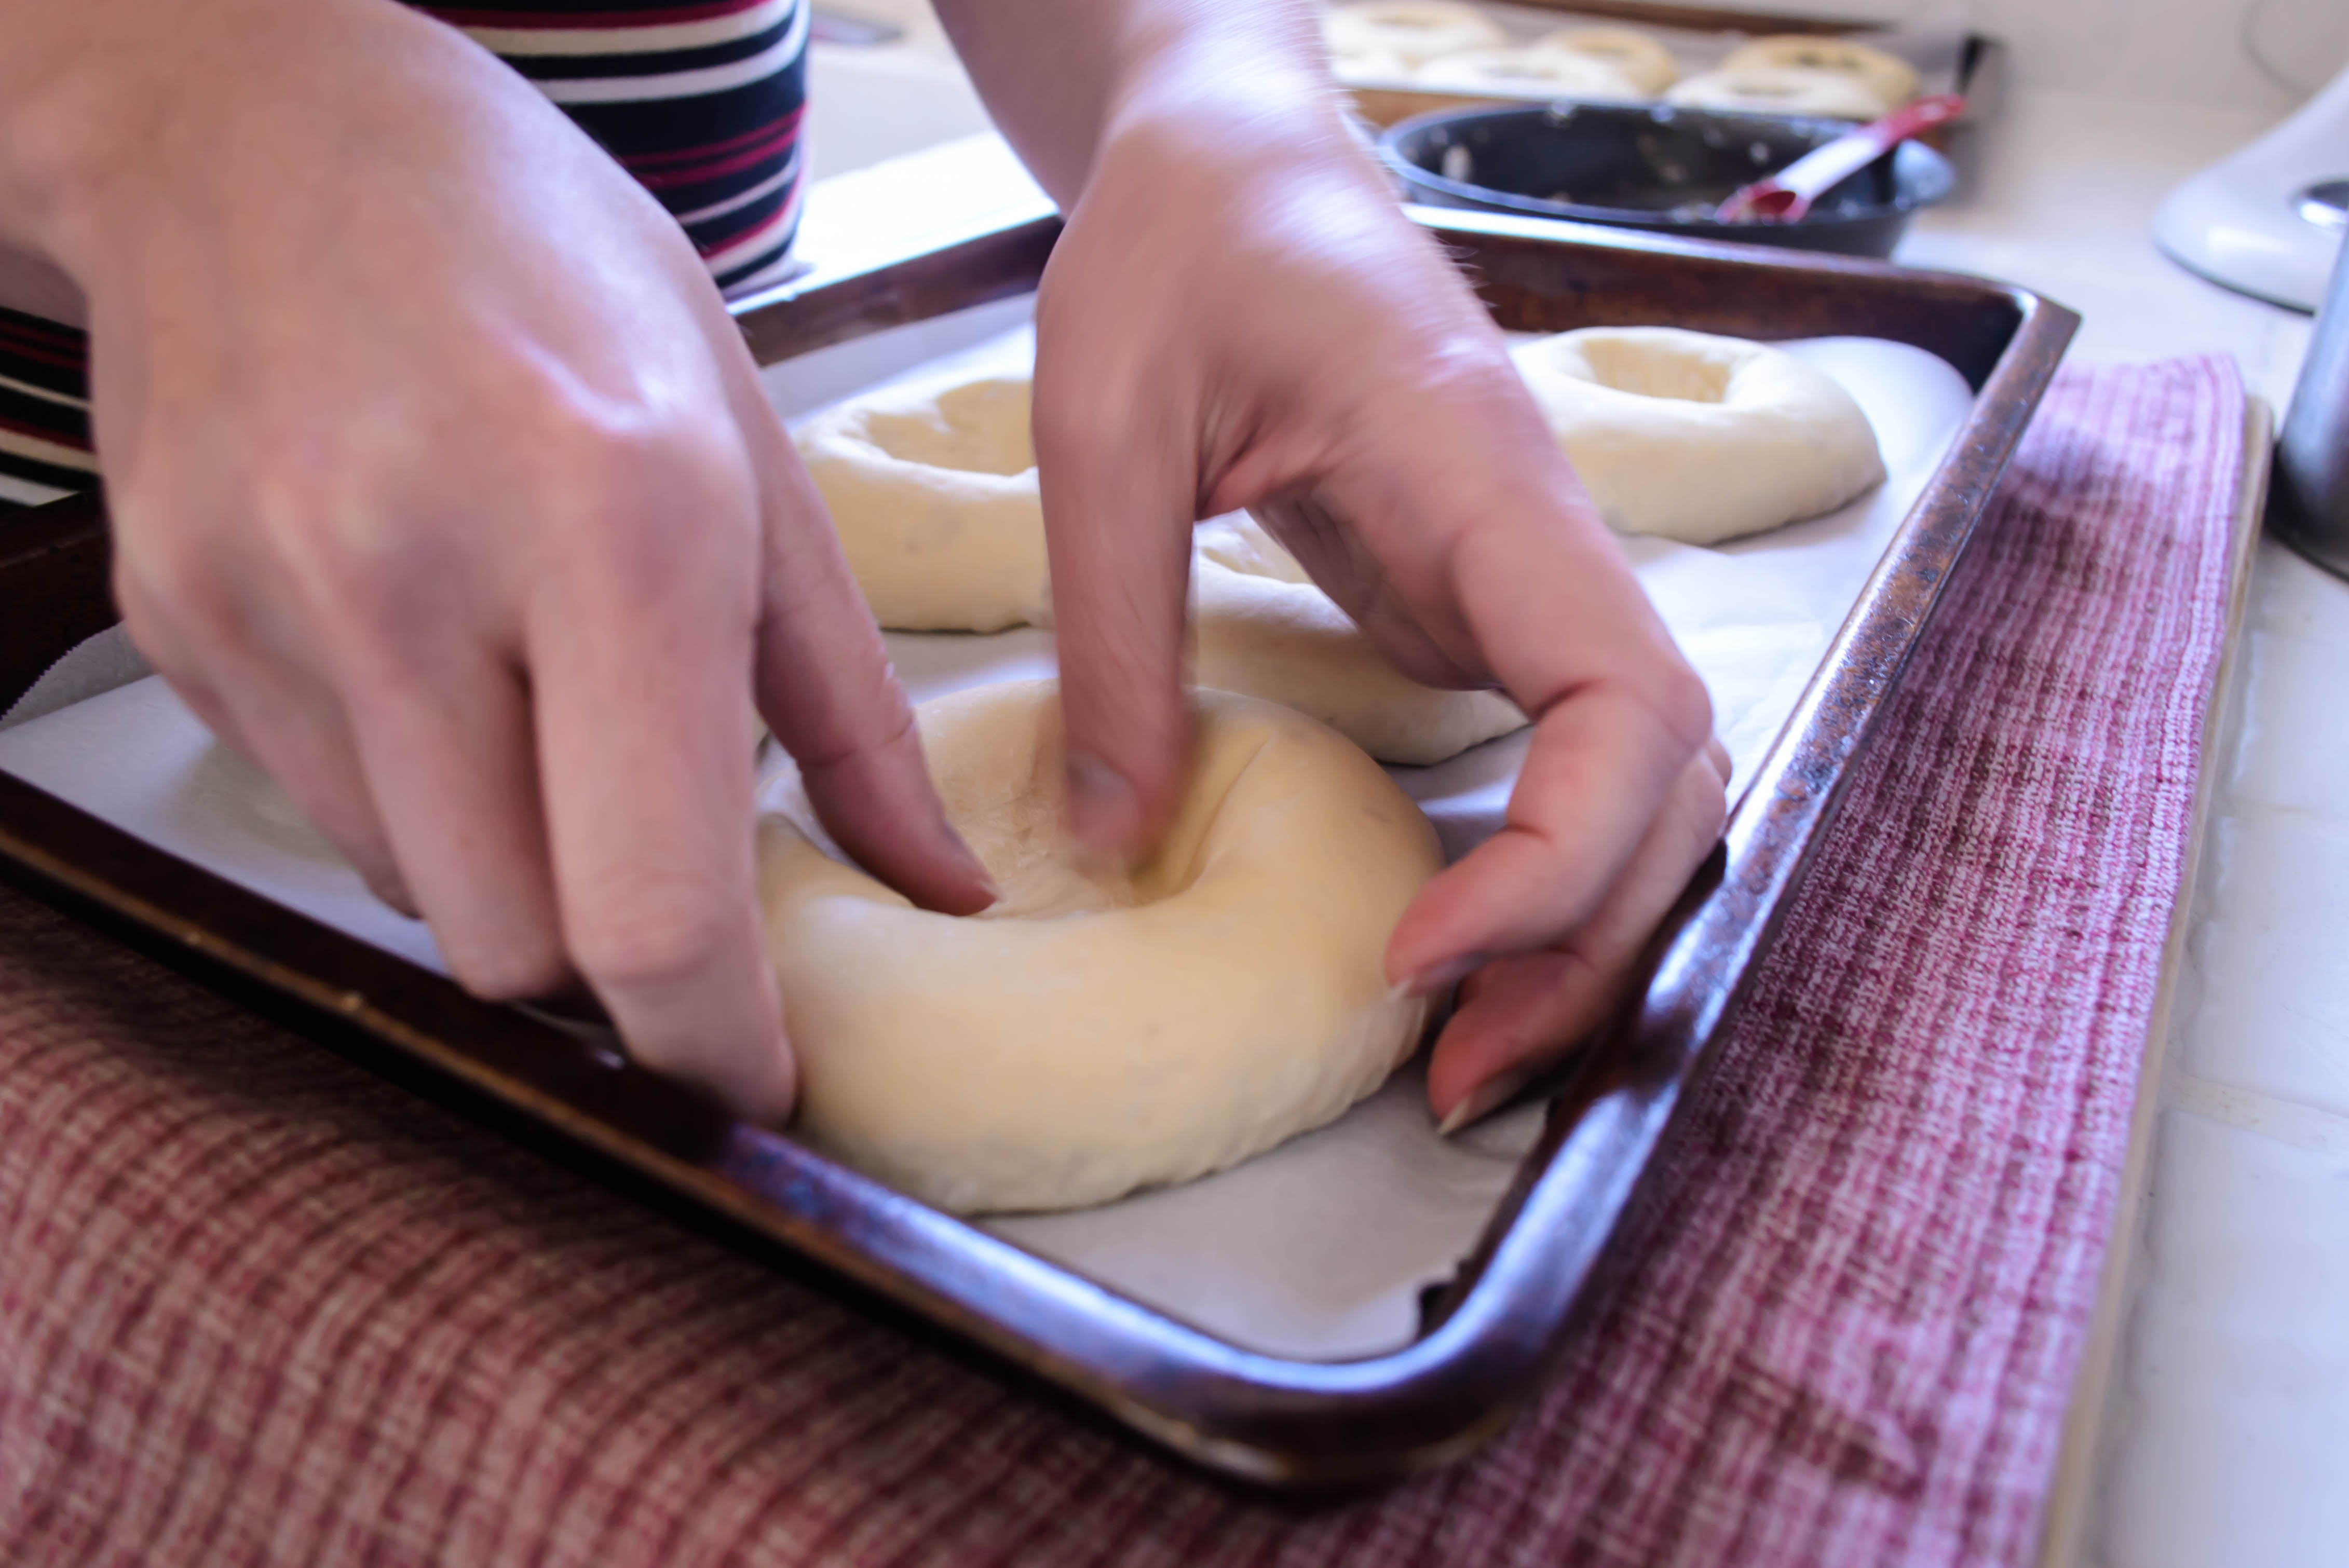
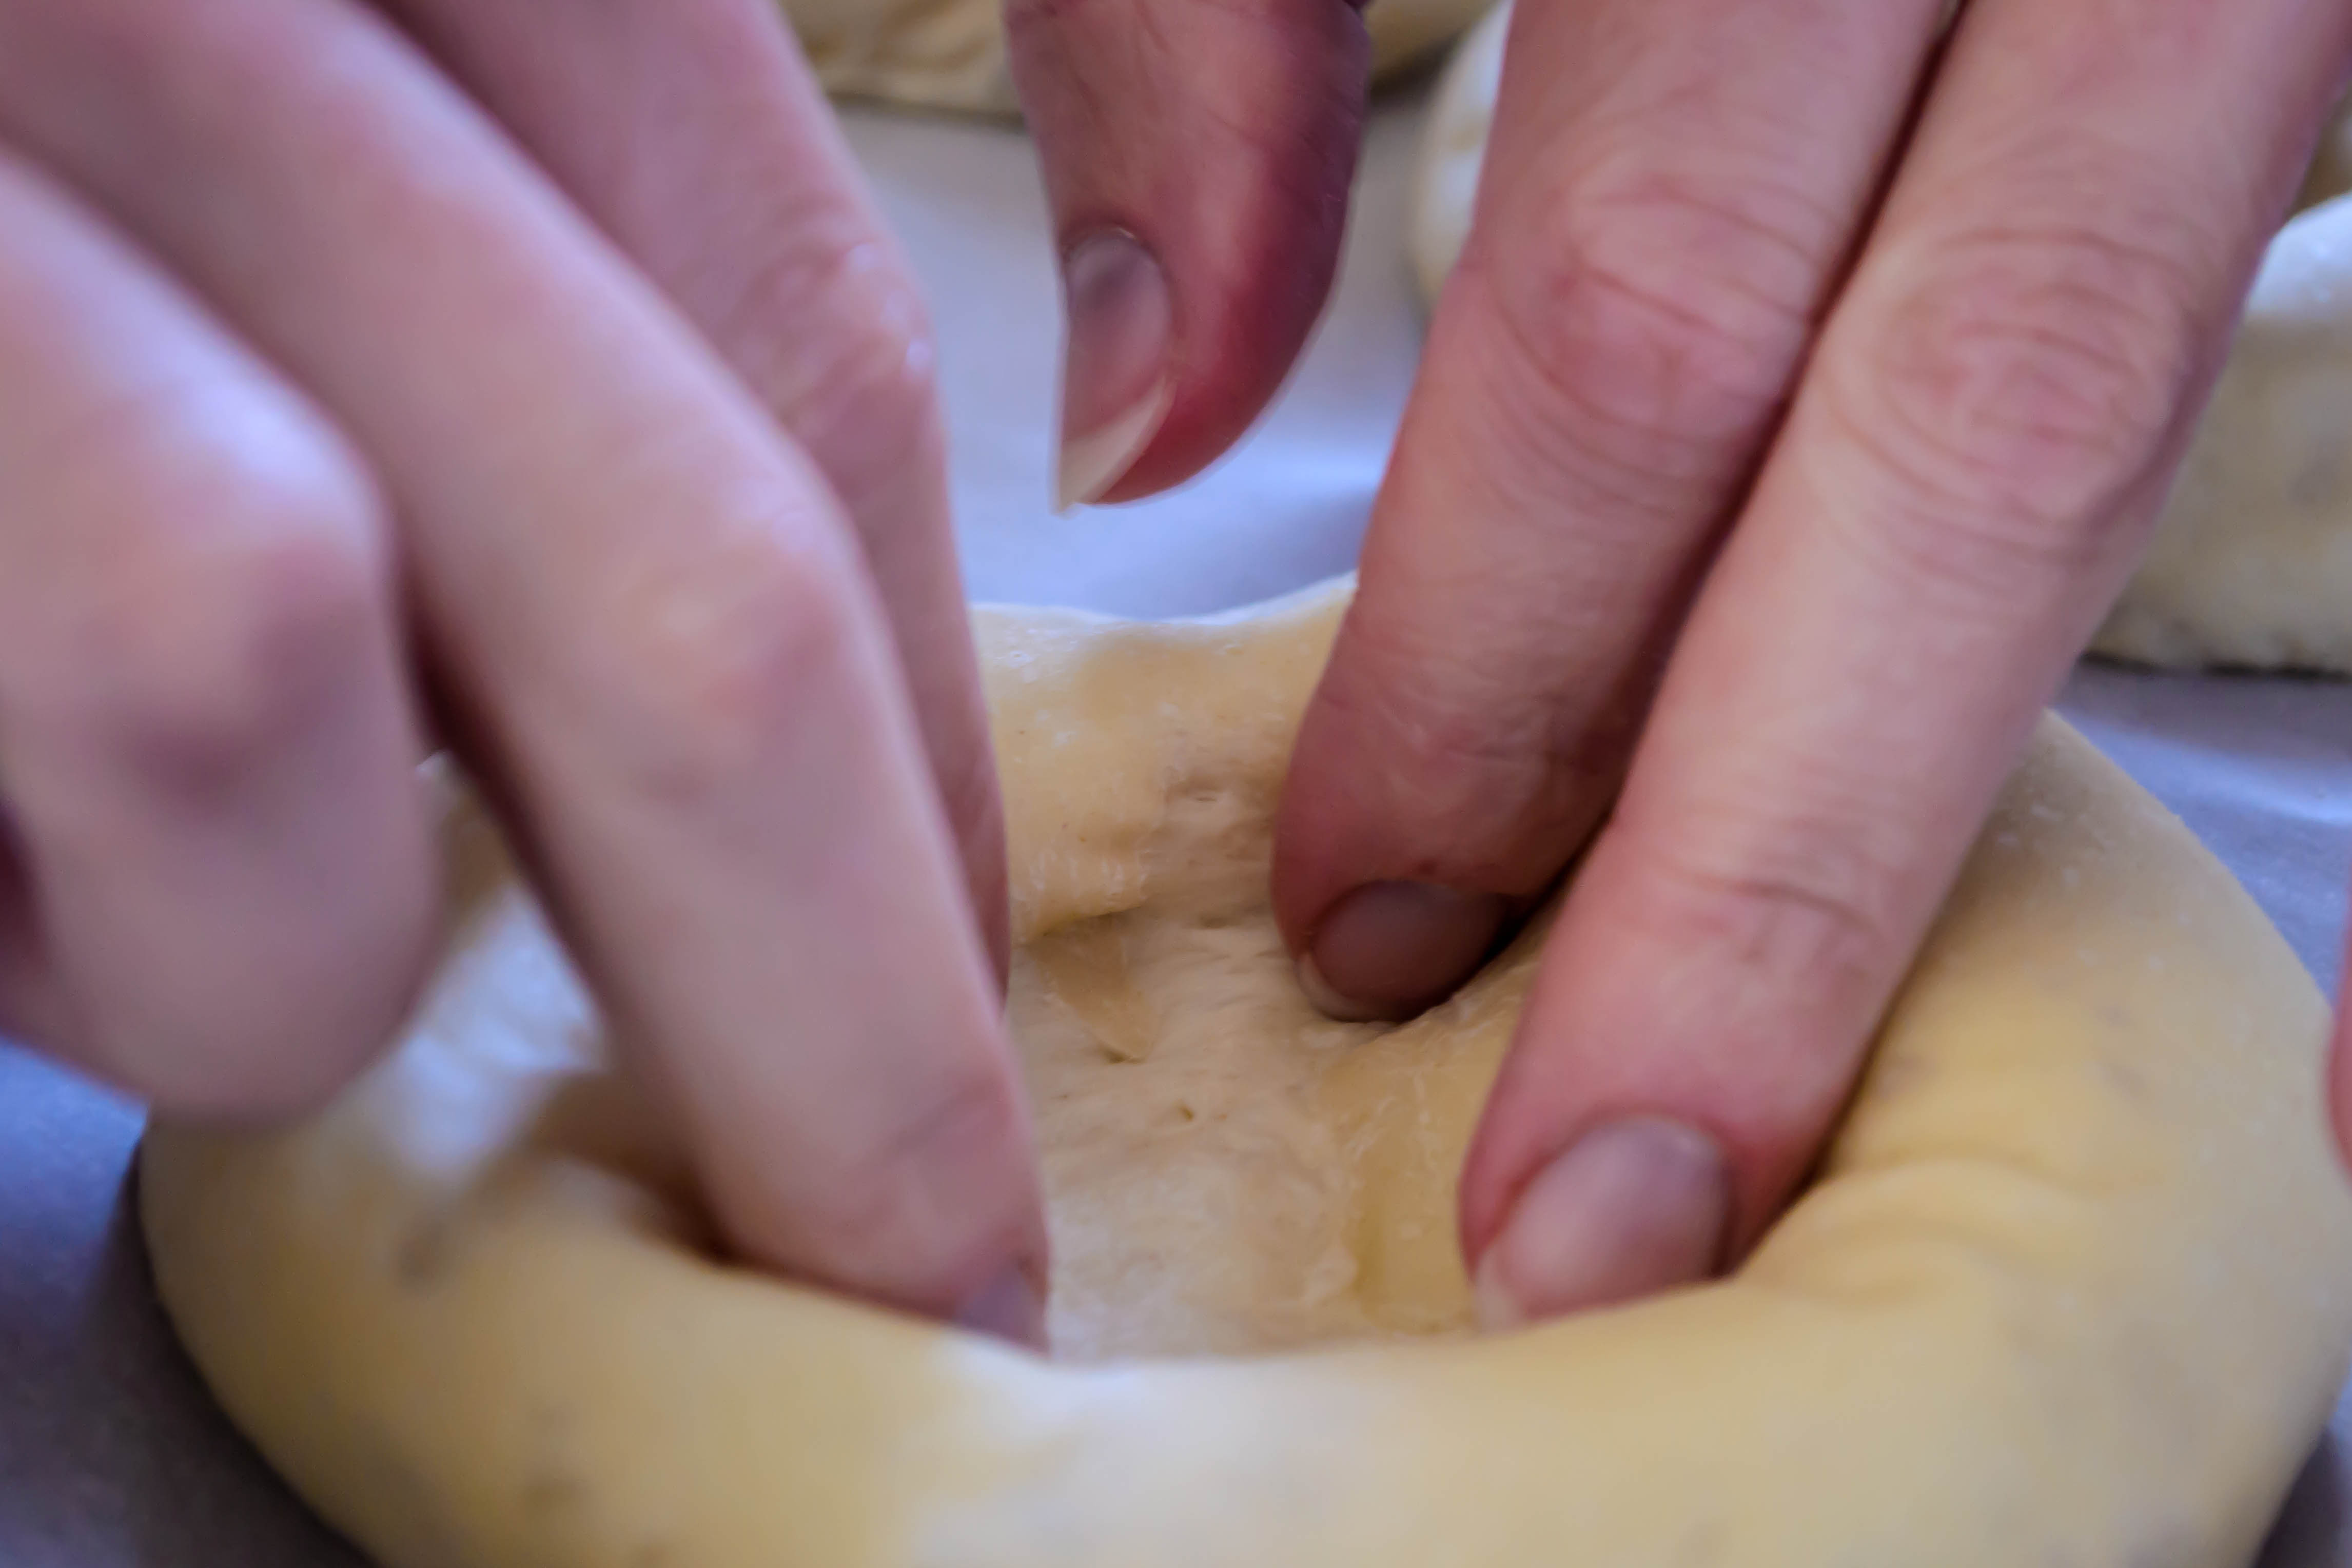
I asked N. to take some photos for me while I rolled, pinched, and prodded the dough, so much of what follows is his work. Some of mine, though, include the rolling pictorials that follow. I’m using my own version of Joe Pastry’s technique, which I’m finding I like quite well. Rather than just slicing off hunks of dough and rolling them, I flatten out a piece, fold up and pinch the edges into a weird starfish, and then follow Joe’s suggestion of lightly rolling the dough in circles around the board inside my lightly curled hand. My system – in pictures – follows, but you can see Joe’s technique here.

Food Blog May 2014-3790 Food Blog May 2014-3791 Food Blog May 2014-3792 Food Blog May 2014-3793 Food Blog May 2014-3794 Food Blog May 2014-3795 Food Blog May 2014-3797 Food Blog May 2014-3798Food Blog May 2014-3800 Food Blog May 2014-3816 Food Blog May 2014-3805 Food Blog May 2014-3807 Food Blog May 2014-3808 Food Blog May 2014-3811 Food Blog May 2014-3820 Food Blog May 2014-3823Food Blog May 2014-3828 Food Blog May 2014-3843
Bialys
Makes 12
For dough:
1 ¾ cups water, at body temperature (it should feel neutral – not hot or cold – when you dip your finger in)
1 teaspoon active dry yeast
½ teaspoon sugar (helps the yeast bloom a bit faster)
4 cups bread flour
2 tablespoons vital wheat gluten
2 teaspoons kosher salt
For filling:
2 tablespoons butter
1 cup finely diced onion
2 cloves garlic, finely minced
1 teaspoon poppyseeds
1 teaspoon sesame seeds
½ teaspoon salt
¼ teaspoon pepper
(optional: ¼ teaspoon celery seed, because I’m obsessed)
  • Add the yeast and the sugar, if using, to the water and set aside for 5-10 minutes until the yeast is thickly bubbly and smells like bread.
  • In the bowl of a stand mixer (it would be quite an intense knead by hand), combine the flour, vital wheat gluten, and salt with the paddle attachment.
  • Slowly add the water and yeast mixture, stopping the mixer when the dough becomes wet and clumpy, as in the photo above. Switch from the paddle attachment to the dough hook and knead for about 7 minutes on medium speed. The dough should become smooth and elastic, and tug itself away from the sides of the bowl a bit. If it seems much too wet or much too dry, add a bit more flour or water, just a tablespoon or two at a time.
  • When it is well kneaded, heft the dough out of the mixer bowl, oil the bowl lightly, and replace the dough. Cover with plastic wrap and set aside to rise for 1½ – 2 hours, or until doubled. In my warm home office, at about 85F, my dough had doubled in 90 minutes.
  • Punch down the dough to release trapped gas by gently but firmly depressing it with your fist. Dump it out onto a well floured board and let it sit for a few minutes to get its breath back.
  • Divide the rested dough into 12 equal pieces (they should be about 3 ounces each), and roll each piece into a ball, keeping the others covered with plastic wrap or a cloth. My technique is as follows (as illustrated above): flatten each section of dough like a mini pizza. Then, fold each edge or bit that pokes out to the center. You will make about 8 folds. Pinch them together where they meet to keep them adhered. Flip this over and, positioning your hand like a cage around the dough, fingers curled down loosely to touch the board and palm just touching the dough, drag your hand lightly in a circle, taking the dough ball along with you. Continue to trace your hand in circles until the dough forms a nice cohesive, homogenous ball.
  • As you form each ball, set it on a parchment paper lined baking sheet. Let these rise, under plastic wrap or a clean kitchen towel, for another 1½ – 2 hours, until they have almost doubled, and an indentation made by pressing your thumb into the middle remains depressed.
  • While they rise, make the filling. Heat the 2 tablespoons butter in a small skillet over medium low heat. When it is melted, add the onions and salt and cook gently for 5 minutes, stirring occasionally. After 5 minutes, add the garlic and cook gently for another 5 minutes, or until the onions reach your desired level of caramelization (not much more will happen during baking).
  • Remove from heat and add the seeds and pepper. Cool to room temperature.
    30-45 minutes before you intend to bake, place a cast iron skillet on the lowest rack. Place the other rack just one slot above this, and preheat the oven to 475F.
  • When the dough has risen again, uncover and create depressions (Deb says “craters,” which I love) in the center of each. Fill with 1-2 teaspoons of the cooled onion mixture. Sprinkle the tops with a bit of flaky salt, if desired.
  • Place in the preheated 475F oven, then carefully dump a mug full of ice cubes into the cast iron skillet just below and close the oven door quickly. This creates a burst of steam like commercial ovens use, which helps create a nice crust.
  • Bake for 8-12 minutes. The tops of each bialy, around the onion filling, will bronze a bit.
  • Cool at least 5 minutes before devouring.

Cabbage and Celery Seed Slaw

Food Blog April 2014-3715All too often, it seems, I find myself either ahead or behind the curve. Last week I was offering you Easter bread the day after Easter. This week, I’ve got a slaw recipe that really merits a space on your Memorial Day table, but May is still barely on the horizon. I can’t really blame anyone for this – not even me (at least that’s what tell myself). The fact is, summer is now so close – I have a mere three weeks of classes left to teach – and, if we’re honest, it’s been such summery weather in Los Angeles for so many weeks now, that the divide between what might be summer and what could have been spring is so dubious it barely existed.
Food Blog April 2014-3703
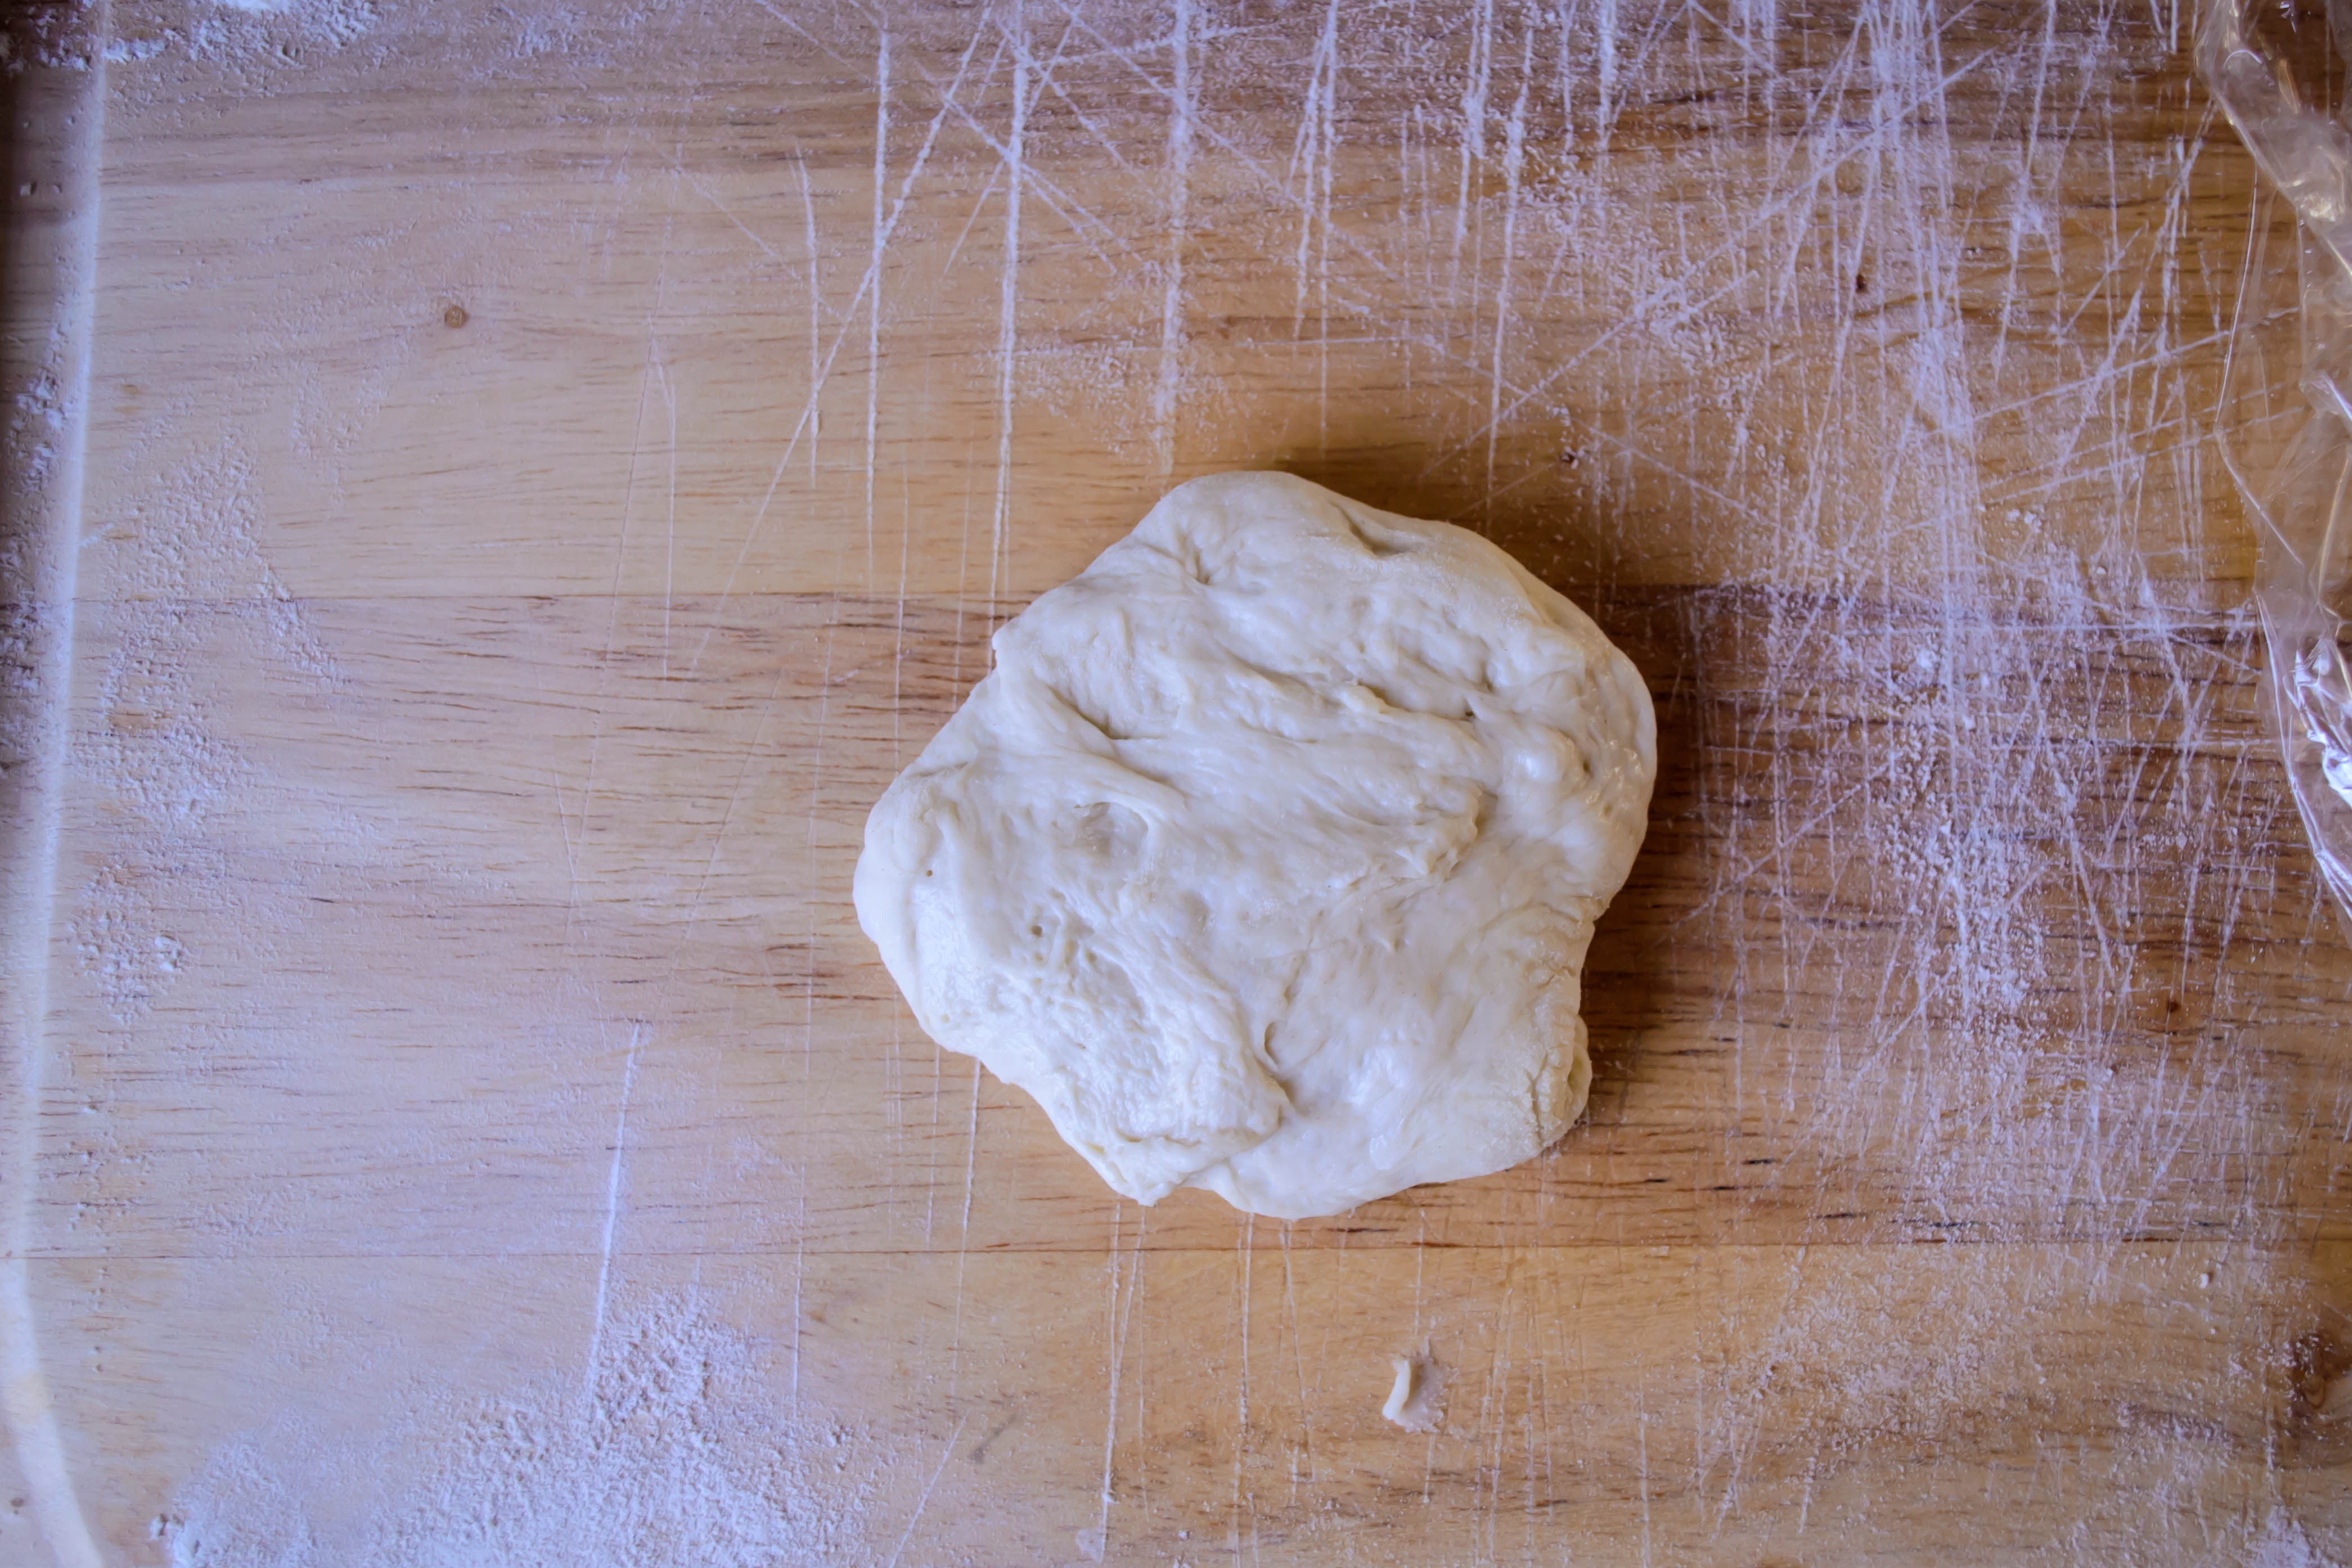
While I wait for real summer, I content myself with small pleasures. Sitting on my patio out back, with the afternoon breeze just strong enough to keep the sun from being too hot. Remembering why I assigned that novel to my morning classes as I gasp my way through Margaret Atwood’s bewildering narrative in its relentless, sharp prose. Devouring, lest you think me too romantic, an entire package of chocolate-dipped marshmallow peeps I found in a clearance Easter candy bin. I know. They were so good, though, tiny milk chocolate eyeballs and all.
Food Blog April 2014-3705
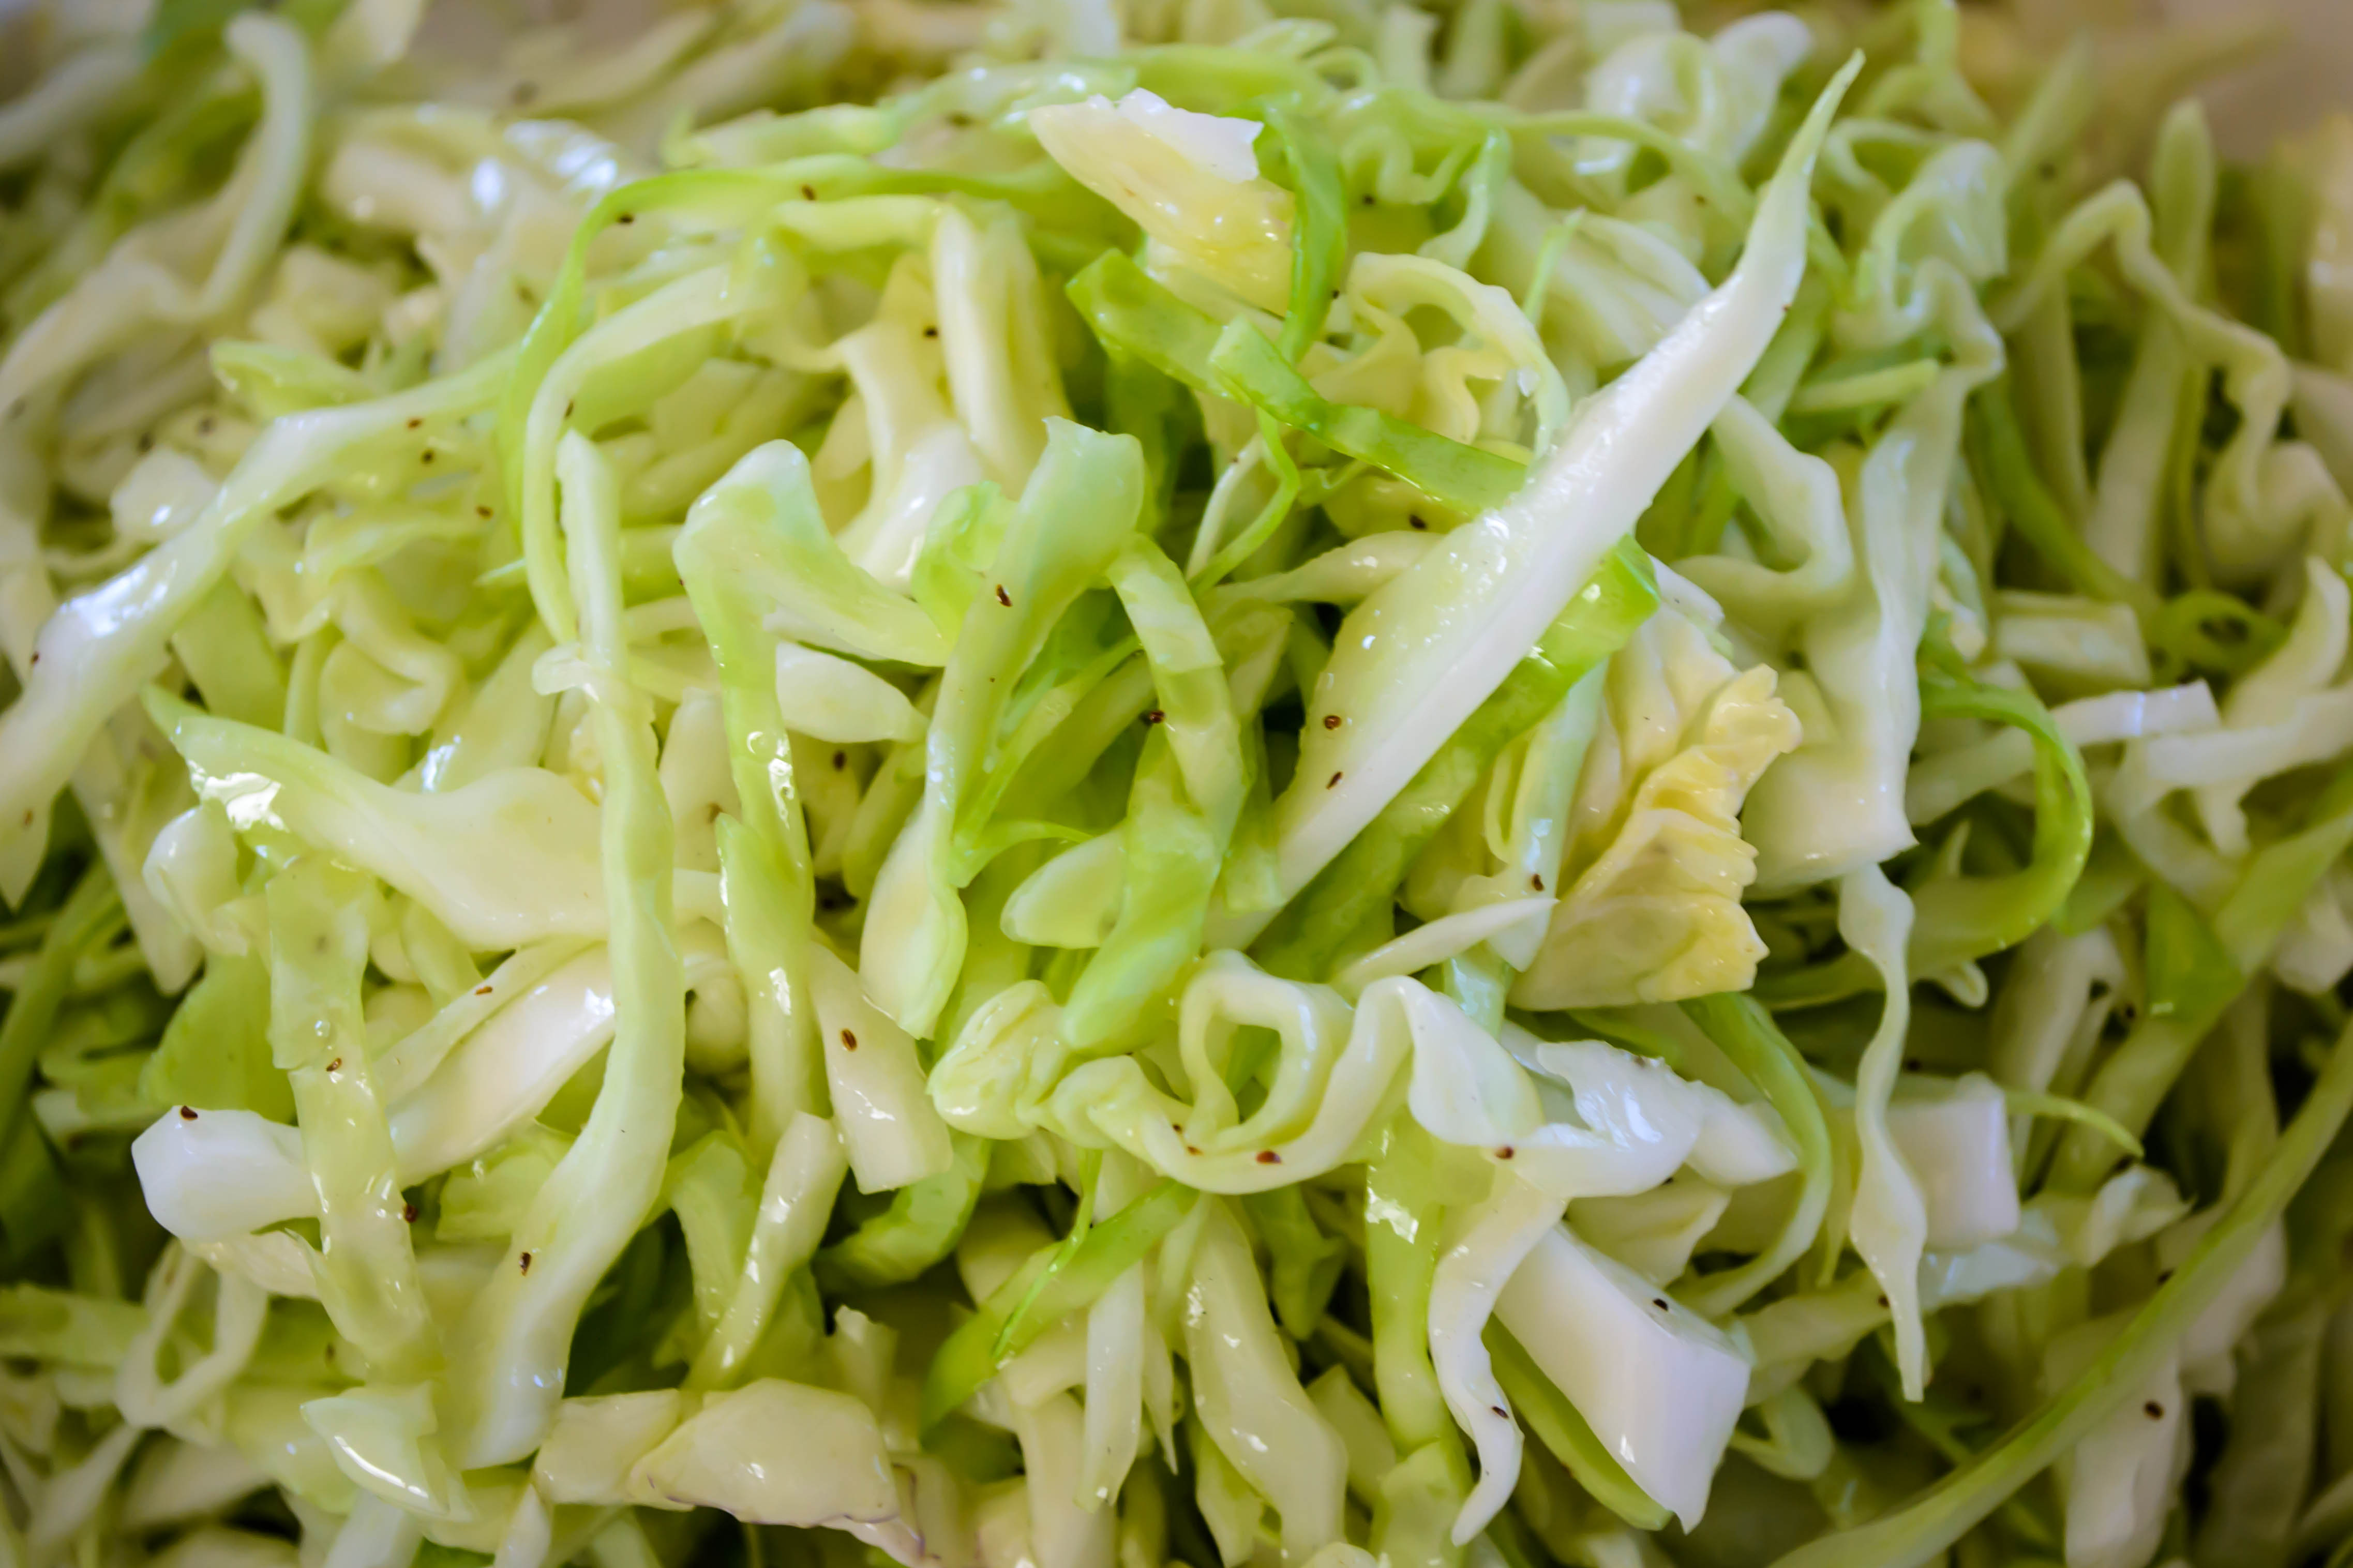
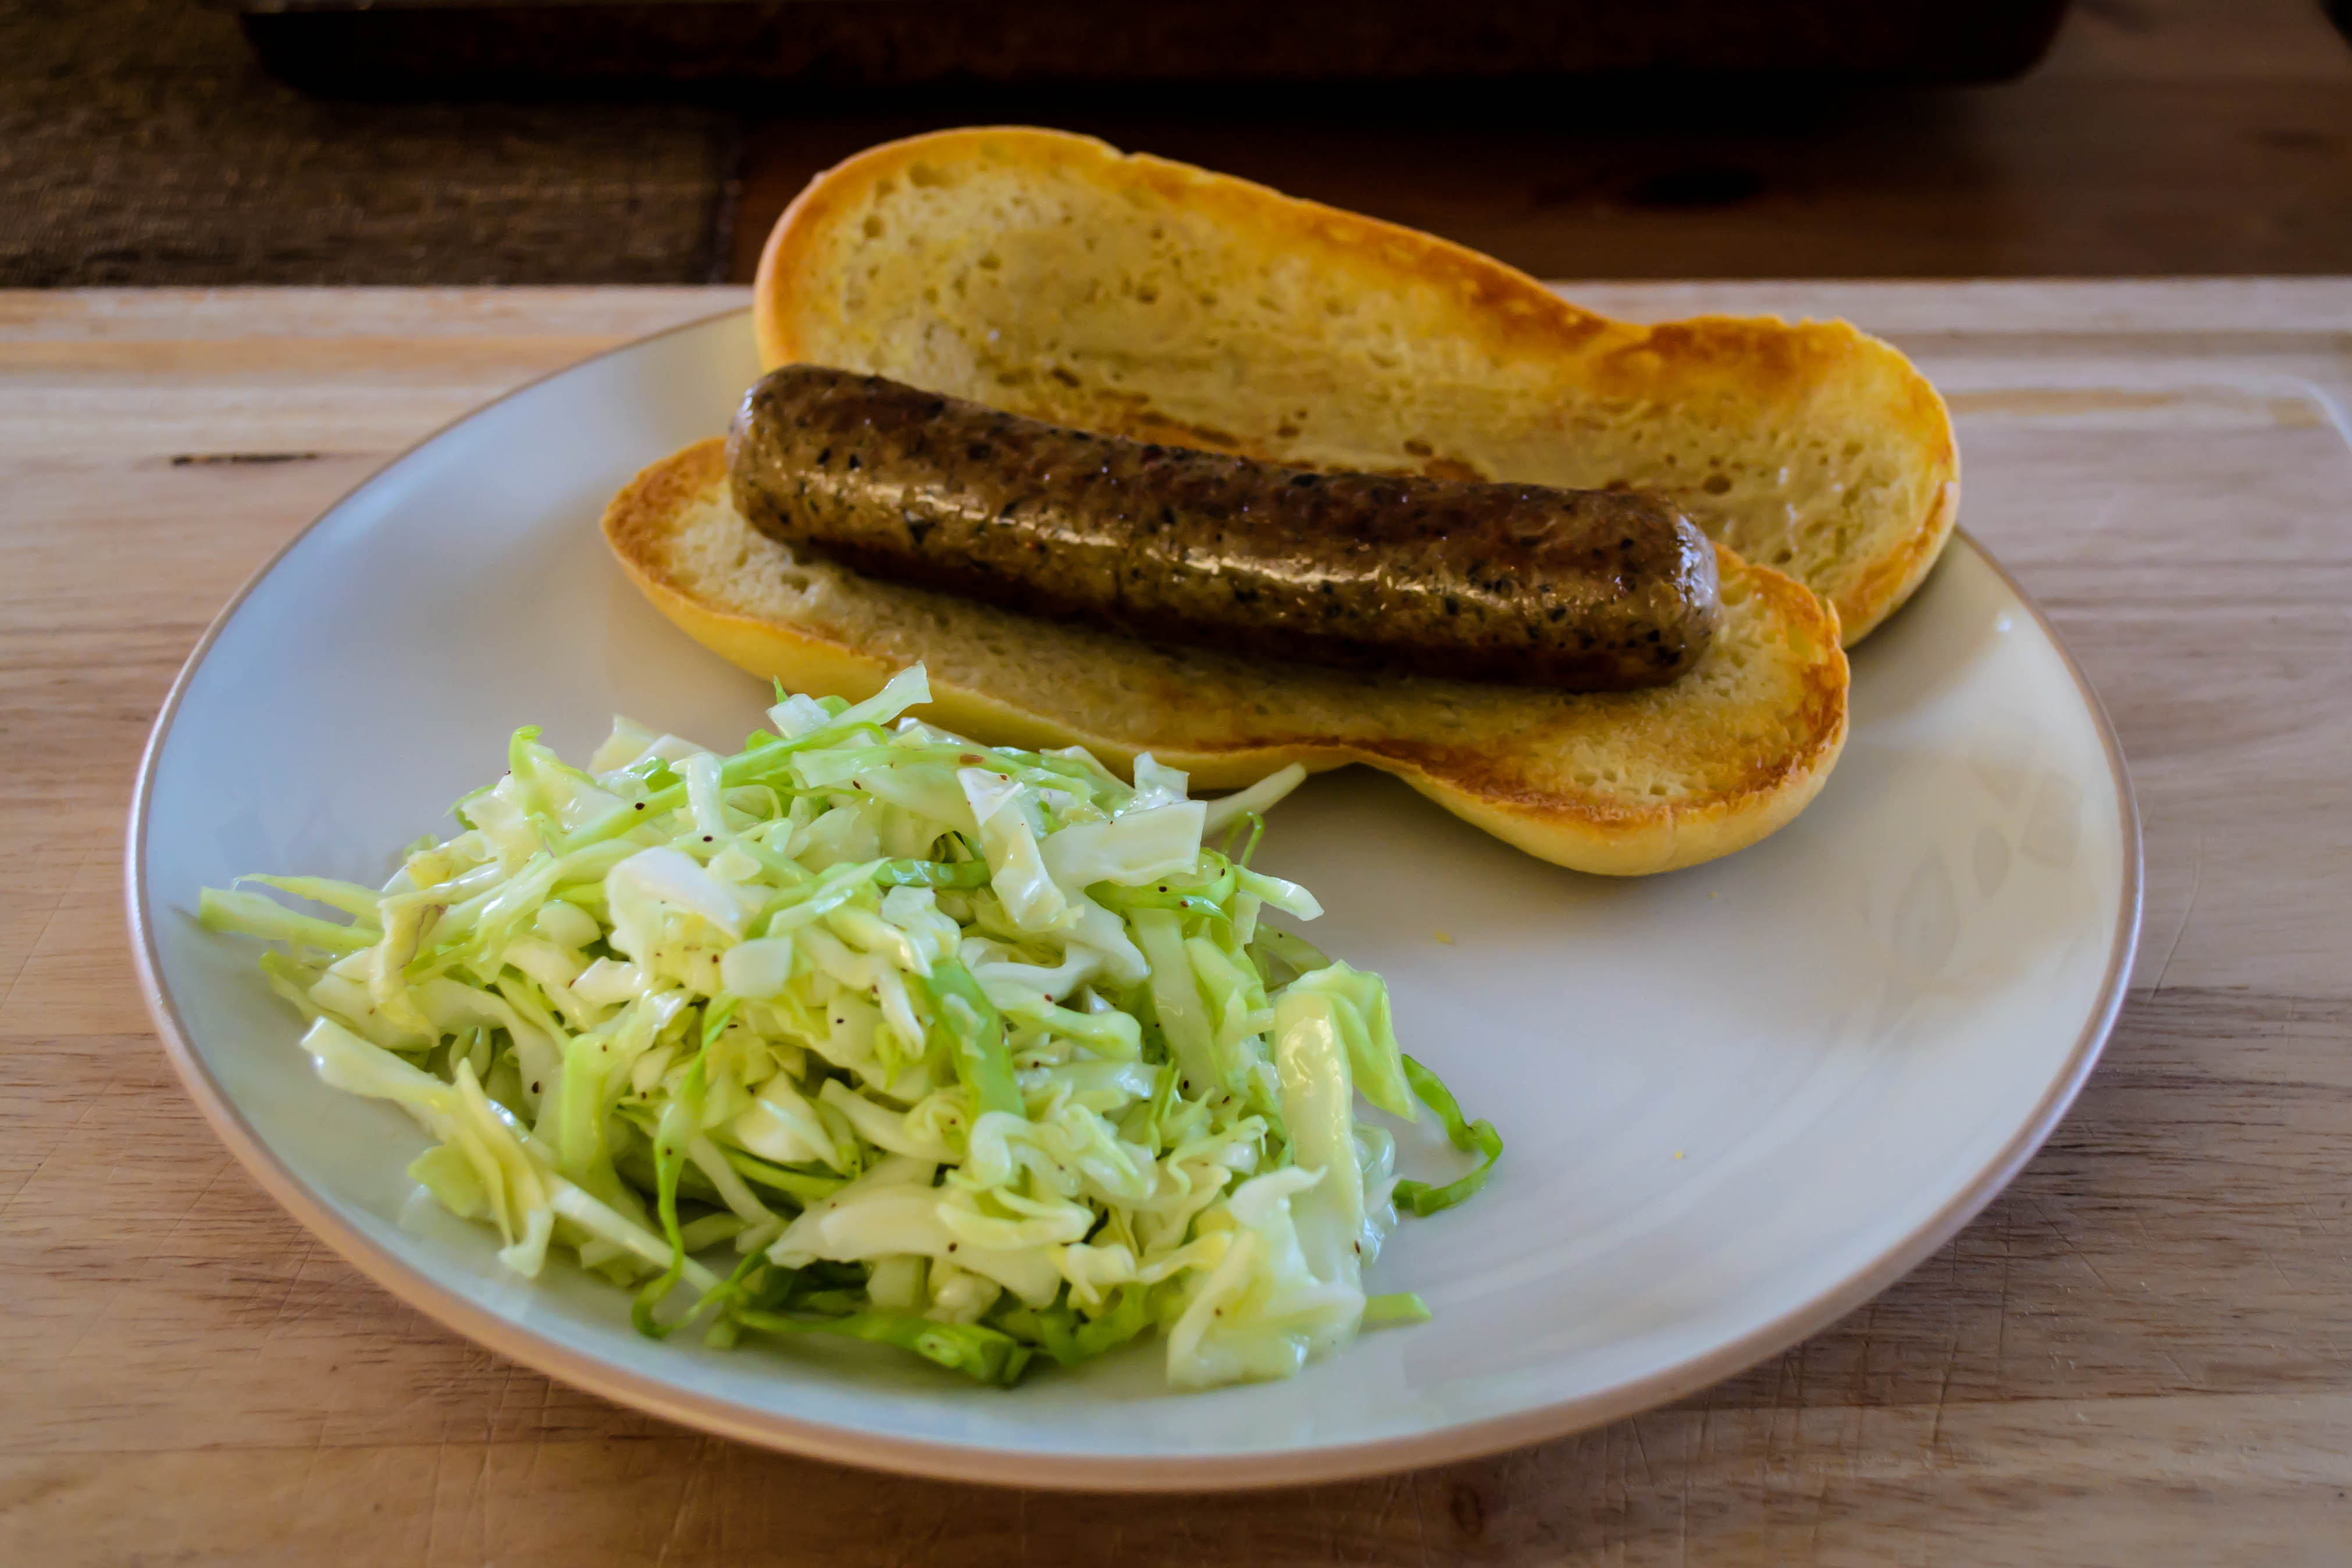
Despite my inability to work “in a timely fashion,” I think you should keep this simple little slaw recipe around. It’s a tangle of cabbage so bright, so fresh, with not a speck of mayonnaise in sight. It would be equally welcome piled high as a side dish for sausages or barbecued anything as it would squashed between soft brioche halves on a pulled pork sandwich. If we’re going to get really dreamy, it could likely sit quite comfortably atop a lobster roll for a man-I-wish-I-were-on-a-beach-somewhere lunch fantasy.
Food Blog April 2014-3706The inspiration for this slaw comes from a side dish N. had with a plate of fish and chips at Mud Hen Tavern in Hollywood, celebrity chef Susan Feniger’s newest venture. I tasted the humble pile of cabbage shreds and became instantly intrigued by the nutty, savory herbal notes that I couldn’t quite place. I don’t often do this, but I asked a server, and was soon speaking to one of Feniger’s cooks, who told me his secret ingredient was celery seed. He gave me a few instructions about how they make it, and from there it was just a matter of playing with quantities.
Food Blog April 2014-3704
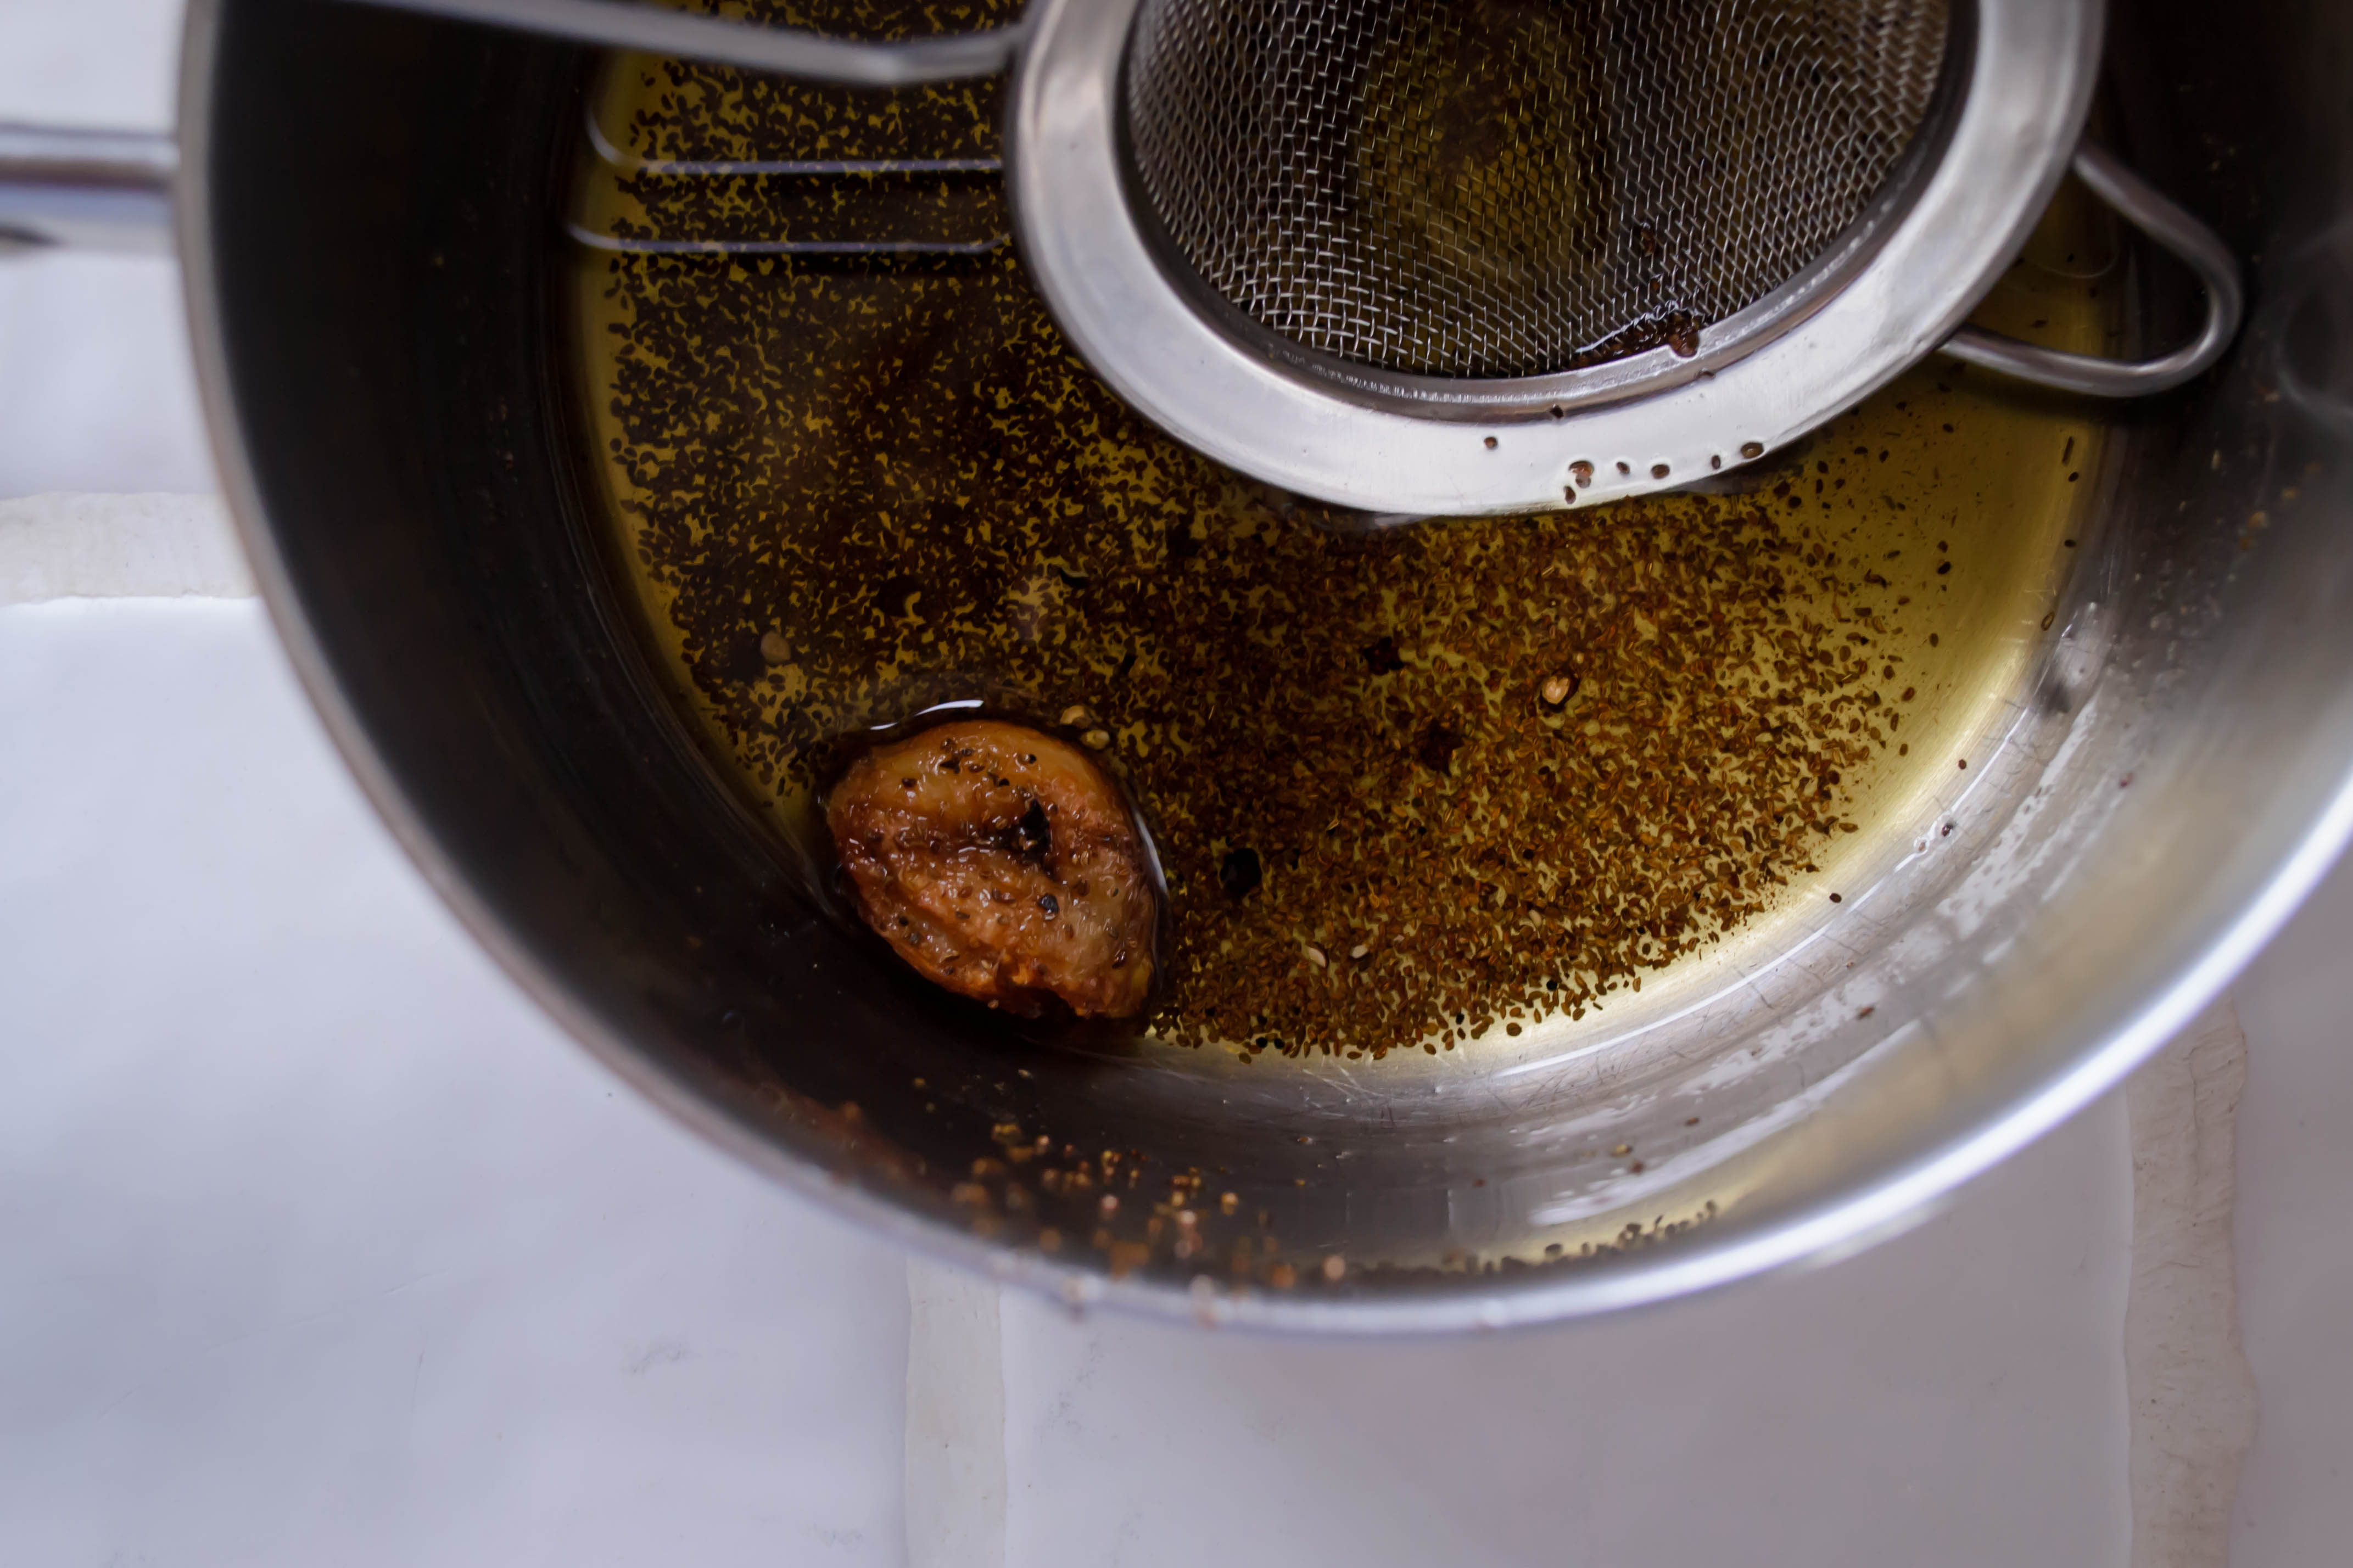
Celery seed is a funny little spice – tiny, musty smelling seeds, but with a distinct sharpness. Crushed raw and solo between your teeth they are too strong: a bitter kick with the aftertaste of raw celery stalks. Toasted, though, or crushed and lightly simmered in olive oil until their flavor blooms, they add a deeply savory note, a mix of umami and something almost floral, that I’m now totally obsessed with and want to add to everything.
Food Blog April 2014-3712This slaw is so simple, provided you’re willing to start the process a few minutes in advance. Celery seed, pepper, and, in my variation, a smashed garlic clove, get simmered in olive oil to infuse their flavors. Once it’s cool, the oil, with some of the celery seed dust (it imparts a lovely speckled look and an extra hit of flavor), gets tossed through a jungle of green cabbage threads along with a sprinkle of sugar, a pinch or two of salt, and a hint of vinegar. That’s it. You can let it sit for a while to allow for integration and mellowing of flavors, or you can eat it immediately, savoring every crisp bite.
Food Blog April 2014-3708Food Blog April 2014-3709Substitutions or alternatives: for a different kind of tang, you could swap out the sort of vinegar you use. Red wine vinegar, champagne vinegar, or, for a salivary inducing sweet brightness, even rice vinegar, would also be lovely. Let your main dish steer you in the right direction. As for the celery seeds, I wouldn’t exchange them for anything. If you must, though, I suppose you could crunch a few mustard seeds or coriander and infuse those into the oil instead. Crushed coriander in the oil and a few judiciously torn cilantro leaves mixed in with the cabbage, for example, might make for a beguiling crunch atop a fish taco…

Food Blog April 2014-3713

Cabbage and Celery Seed Slaw
Makes 4-6 side dish servings
⅓ cup olive oil
1 garlic clove, peeled
3 whole peppercorns, or about 10 grinds of black pepper
1 teaspoon celery seeds
½ teaspoon salt
1 teaspoon sugar
1 teaspoon white wine vinegar
1 lb. cabbage, cut into fine strands with a sharp knife (or use your food processor, or a 16 ounce bag of pre-sliced)


  • In a small pot or saucepan, heat the oil over medium-low heat. While it heats, prepare the seasonings: use the flat blade of a knife to push down gently on the garlic clove and then the peppercorns, crushing them to allow more efficient release of flavor.
  • Using the same flat blade of the knife, crush the celery seeds. Because they are tiny, just pushing down on them as you did with the garlic and peppercorns won’t do much. Instead, spread them out a bit, and then draw the flat of the knife across them, pushing down as you go. Repeat a few times, until at least half of the seeds are smashed almost to a powder.
  • When the spices are adequately crushed, add them to the oil and turn the heat down to its lowest setting. After a sudden sizzle, you want a slow, gentle poach. The oil should just barely fizz around the edges of the garlic clove.
  • Simmer on this low, low, lowest of low heat for 15 minutes, until the garlic clove is evenly browned and soft, and the oil smells incredibly aromatic. Remove from heat and let cool.
  • While the oil cools, prepare the cabbage. I had a 2 pound head of cabbage. To prepare it, slice it in half straight through the core. Then, cut that half in half, again through the core, so you have two quarters. You can then remove the core easily with one diagonal slice for each quarter. To create thin strands, as in the photo above, slice across the quarters perpendicular to the previous cut, creating twin sets of cabbage strings.
  • Once the oil has cooled to room temperature, strain it through a fine mesh strainer straight into your serving dish. You may not need the full ⅓ cup. I would start with 3 or 4 tablespoons and see where that takes you. Some of the celery seed dust will seep through the strainer, but that’s okay. It gives a lovely speckled look and lets you know what flavors to anticipate.
  • Add the salt, sugar, and vinegar to the oil in the bowl and whisk it up a bit with a fork. Add the cabbage, toss well to coat evenly, and then taste for seasoning and moisture. I found I wanted a breath of extra salt. You may want a bit more oil, or additional vinegar, to suit your liking.
  • Serve immediately, or let sit for 10-15 minutes to let the cabbage soften slightly and the flavors meld.