
*
This is not the most photographically alluring side dish I’ve ever made. It doesn’t offer crisp angles or bright colors or sharp contrast. It doesn’t stack neatly or layer into a cup or offer much opportunity for props. It’s essentially just an inelegant heap of cauliflower and breadcrumbs, that most anemic of vegetables tumbled together with toasted panko.
 But here’s the thing: the cauliflower is roasted for a quick half hour at very high heat, so that its florets bronze and crisp but still retain some juiciness, and then the moment it comes steaming out of the oven, you toss it in a mixture of wasabi mayonnaise and chives, and then you douse the whole tray with panko that you’ve toasted in olive oil to an intense golden crunchiness, and you toss, and you pile it onto your plate, and what you find yourself most invested in is the size of the pile, not its aesthetic potential.
 I found the basis for this simple little vegetable side among my mom’s recipes during the Christmas holiday. I typically go through her cookbooks when I visit, and this one was shoved into a binder with a collection of snippets and newspaper clippings from the food section, in her own handwriting, with the word “delicious” written at the bottom. I was intrigued, so I did what any technologically-steeped child does: I snapped a photo of the recipe with my phone, and then promptly forgot about it for two months.
 When I came back to the recipe a few weeks ago, I saw immediately that I would make a few changes. Mom’s version instructed me to steam the cauliflower, but I’ve never been a fan of the cabbage-y mustiness that steaming or boiling this particular vegetable produces. No, if part of the point was to elicit a crunch, then we would go the extra mile and roast it first. Hers suggested mixing regular mayonnaise with wasabi paste, and you can certainly do that if you want to adjust the level of spiciness, but there are a number of brands of pre-mixed wasabi mayonnaise available, and I happen to like the balance and ease of Trader Joe’s version, so I’m using that (though I’ve provided quantities for the mix-it-yourself-option as well). Mom probably used a standard American style breadcrumb, and toasted it in butter. I went for panko instead, for even more shattering crispness, and increased the quantity considerably for my breadcrumb-loving dining partner.
 The first thing you notice when you eat this is the panko. It is toasty and deep with just enough salt, and just as you’re fully appreciating the texture, the wasabi hits with that perfumed, nostril-curling sharpness. You are taken aback at first, but you keep chewing, and then you get the tender/crisp roasted richness of the cauliflower underneath, and then you’re suddenly shoveling in another bite. We decimated our first tray in an embarrassingly short space of time, and I wanted to eat this again three days later. So we did.
 The first time I made this, we piled it next to fillets of salmon. The next time, it was a side for simple pan-browned bratwurst. It was perfect with both, and the hefty dosing of breadcrumbs means you likely won’t miss having a starch. You could dress things up a bit by adding a teaspoon or two of sesame oil to the olive oil you use to toast the panko or roast the cauliflower, and only after we were washing dishes after dinner did I consider the idea of combining the panko with some sesame seeds, or adding citrus zest for extra brightness, or pulverizing some dried seaweed sheets and tossing them in with the crumbs at the last minute. If you want to flirt with these possible additions, I’d suggest about 3 tablespoons of sesame seeds, or the zest of one lemon or lime, or 2 tablespoons of seaweed – it can be fairly strong.
* GUYS. IMPORTANT UPDATE ON THIS RECIPE. INSTEAD OF THE SESAME AND/OR SEAWEED SUGGESTED ABOVE, ADD ABOUT 2 TB FURIKAKE SEASONING TO YOUR PANKO. YOU’RE WELCOME.
Wasabi Roasted Cauliflower
Serves 2-4 as a side dish
35-40 minutes
1¼ cups panko bread crumbs
4 tablespoons olive oil, divided
(optional: zest from one lemon or one lime, or 3 tablespoons sesame seeds, or 2 tablespoons very finely chopped or pulverized dried seaweed, OR 2 TB furikake seasoning (sesame and seaweed lightly seasoned with salt and sugar)
½ teaspoon salt
1 large head of cauliflower, trimmed into medium florets (I went for large bite-size)
(optional: 1-2 teaspoons sesame oil)
1 tablespoon finely sliced chives or green onions
¼ cup + 1 tablespoon wasabi mayonnaise OR scant ¼ cup regular mayonnaise + 1 tablespoon wasabi sauce or paste, or to taste
- Preheat the oven to 450F and line a 9×13 inch baking tray with aluminum foil. While the oven warms, cut up the cauliflower and spread it out in a single layer on your prepared baking tray. Toss it with 1 tablespoon of the olive oil (and the sesame oil, if you are using it). This doesn’t seem like much oil for roasting, but we are adding more fat later with the mayonnaise, so we’re taking it easy here. Roast in the preheated oven for 15 minutes, then retrieve, flip over each piece (yes, I’m serious) to expose the other side, and roast a further 15 minutes.
- While the cauliflower is roasting, heat the remaining 3 tablespoons of olive oil in a skillet over medium heat. When it is shimmering, add the panko and the ½ teaspoon of salt (if you are using citrus zest or sesame seeds, now is the time to add that as well). Toast, stirring very often, until the panko crumbs are dark golden, probably 3-4 minutes at the outside. Set aside. (If you are using seaweed crumbs, stir them in once the panko has cooled.)
- After you’ve toasted the panko, combine the wasabi mayonnaise (or the regular mayonnaise with the wasabi sauce or paste) and the chives or green onion in a small bowl.
- When the cauliflower is roasted, take it out of the oven, scoop and dollop the wasabi mayo mixture onto it, and toss gently to coat. Add the toasted panko crumbs (it will seem like too much, but trust me), again toss gently to ensure even coverage, and serve immediately, scattering on any extra crumbs that are unwilling to adhere.


 This last week has been a lot. A new president, an elderly dog with suddenly severe mobility challenges, a new president, a state that seemed to offer a pointed meteorological response, particularly on inauguration day (and then clear, sun-swept skies for the women’s march the next morning – what up, universe!), oh, and that whole new president thing. I opted, as is my usual practice, to respond in part by shuffling into the kitchen. Cooking doesn’t do a great deal on a large scale, but it makes me feel safe and in control, and it is with those feelings that I gain a foundation of strength and confidence to undertake other, more consequential actions. So let’s talk foundations. The foundation – the basis – of soup is liquid. That’s not always the part you add first, and it often doesn’t feel like the most interesting part,* but it’s what separates soup from puree, or pasta, or pile-of-diced-vegetables-with-some-beans-and-meat-or-maybe-potatoes.
 Obviously you have a lot of choice when it comes to choosing this liquid. You could, of course, work with plain old water, and
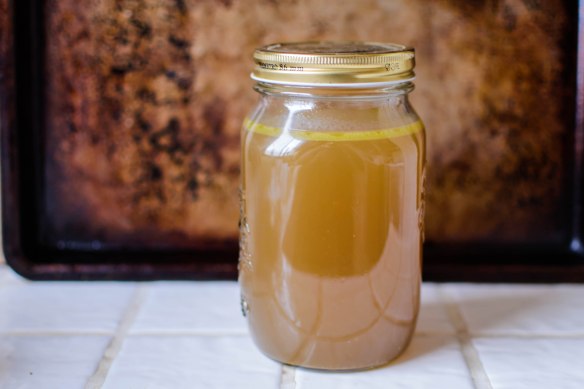
 The first hurdle to surmount is the question of broth vs. stock. These terms get used pretty interchangeably, but there is a difference.
  More recently, though, at least in American cooking parlance, stock vs. broth tends to be a question of bones vs. meat. A broth is a liquid made from meat that has been simmering, usually along with vegetables and herbs for flavor. Stocks are made from bones as well as connective tissue, along with vegetables and aromatics for flavor, and the collagen extracted from the bones during the simmer results in a product with more body – a heft or thickness absent from broth. As
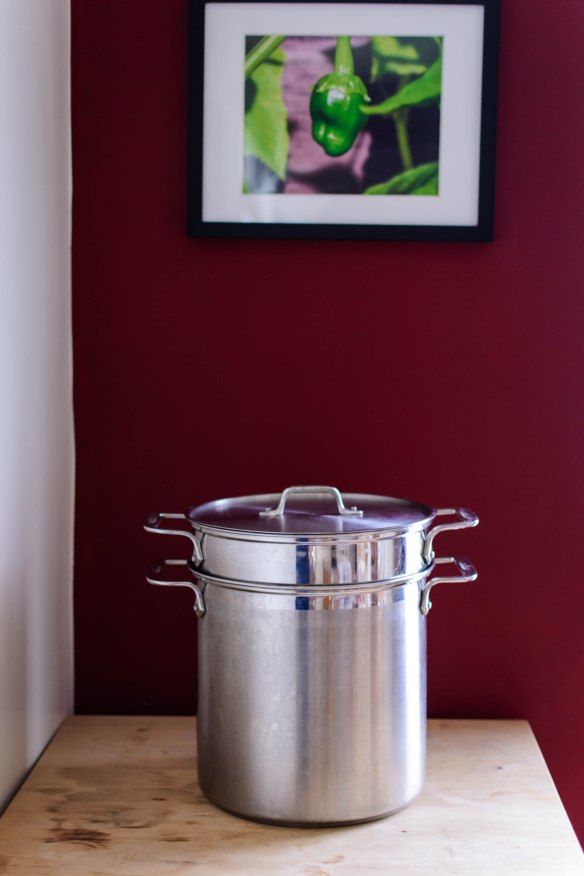

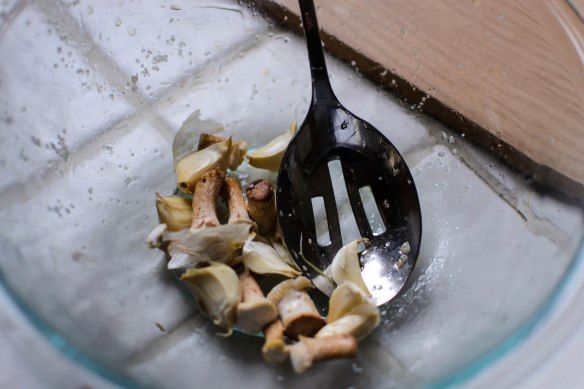
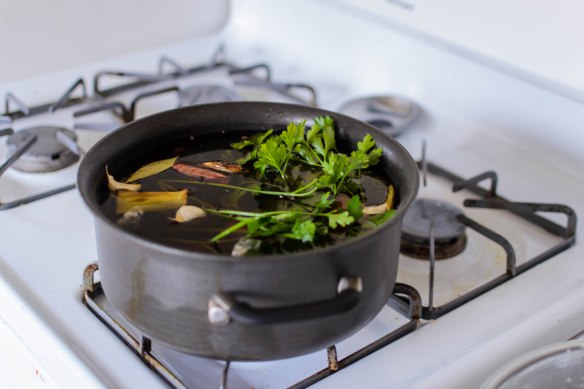
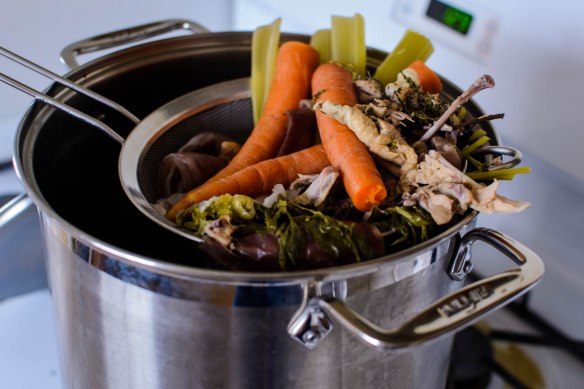 According to these defining principles, then, what we’re going to make here is one broth (no bones; all vegetables), and one stock (well, broth-stock. Brock? Stoth?). The ingredient lists are similar and the procedure is easy, if a little time-consuming: roast some veg or a chicken, pop the roasted veg or bones in a big pot, add flavoring agents, cover with water, simmer long enough to produce a bronzed, aromatic liquid. Strain, cool, and store. That’s it. Yes, it’s an additional step or two on your quest for soup, but it makes plenty, and then you’re set for a few months, depending on the frequency of your broth needs. Call it a project for a rainy day, which we seem to be having plenty of lately.
 I particularly like making the effort just after Thanksgiving, when the bones and trimmings of that turkey carcass make enough meaty, strengthening, belly-consoling stock to service my soup, stew, risotto, couscous, and arroz con pollo needs for at least a quarter of the year.**
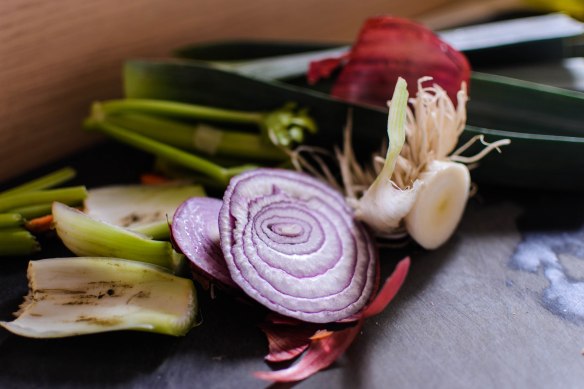
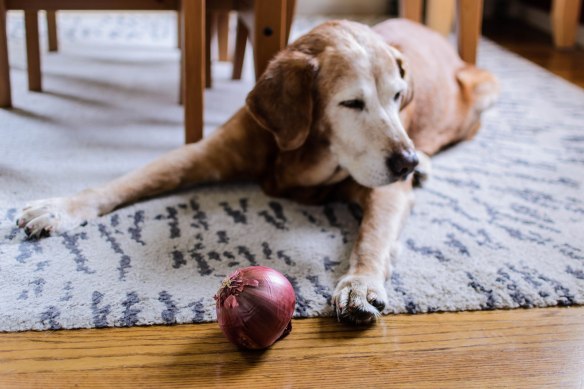
 * it’s also not the most interesting or sexy thing to take photos of, so I hope you appreciate Lucy’s willingness to help out by posing with various vegetables (she couldn’t be bothered with the celery, so we stuck with onion and carrots).
 ** with the Thanksgiving turkey carcass, I increase the amount of water in the mix, but tend to leave the other ingredient quantities about the same.