 Brie biscuits, using Ruhlman’s multi-fold biscuit method
Photo Friday
Reply

Brie biscuits, using Ruhlman’s multi-fold biscuit method
As I move on through my weird little life, I have come to realize that there are some rather shocking details in my relationship with food. Example: I just don’t like yellow curry. I’ve tried it. I’ve played with multiple applications. It just doesn’t work for me. Example two: Kraft Macaroni and Cheese is without a doubt my favorite hangover food. Well, that or biscuits and gravy with a side of hash browns. But only if those biscuits, gravy, and hash browns are from Brails Restaurant in Eugene, Oregon. Otherwise I’d take the boxed macaroni, complete with its powdered fluorescent orange box-mate, any day of the week.
 But a more pertinent example for us today is risotto. I like risotto. I like the creaminess, the cheesy finish, the number of vegetables you can load it with; I even like the endless stirring. It’s therapeutic in a lot of ways. The only thing, in fact, that I don’t like about risotto is the rice. I know; who AM I? But the rice too often gets sticky and gloppy, and if it’s not gloppy, it’s soupy but somehow still underdone, and frankly I’m over it. No, if I’m going to have something toasty and nutty but also somehow creamy and chewy, I’m going with barley.
The idea of risotto without the rice is something like ice cream without the cream: contradiction central. Here, though, the truth is in the technique: the slow, steady stirring that lets the grain release its starches and become a warm, comforting dish of welcome-to-fall-I’m-so-glad-you’re-here.
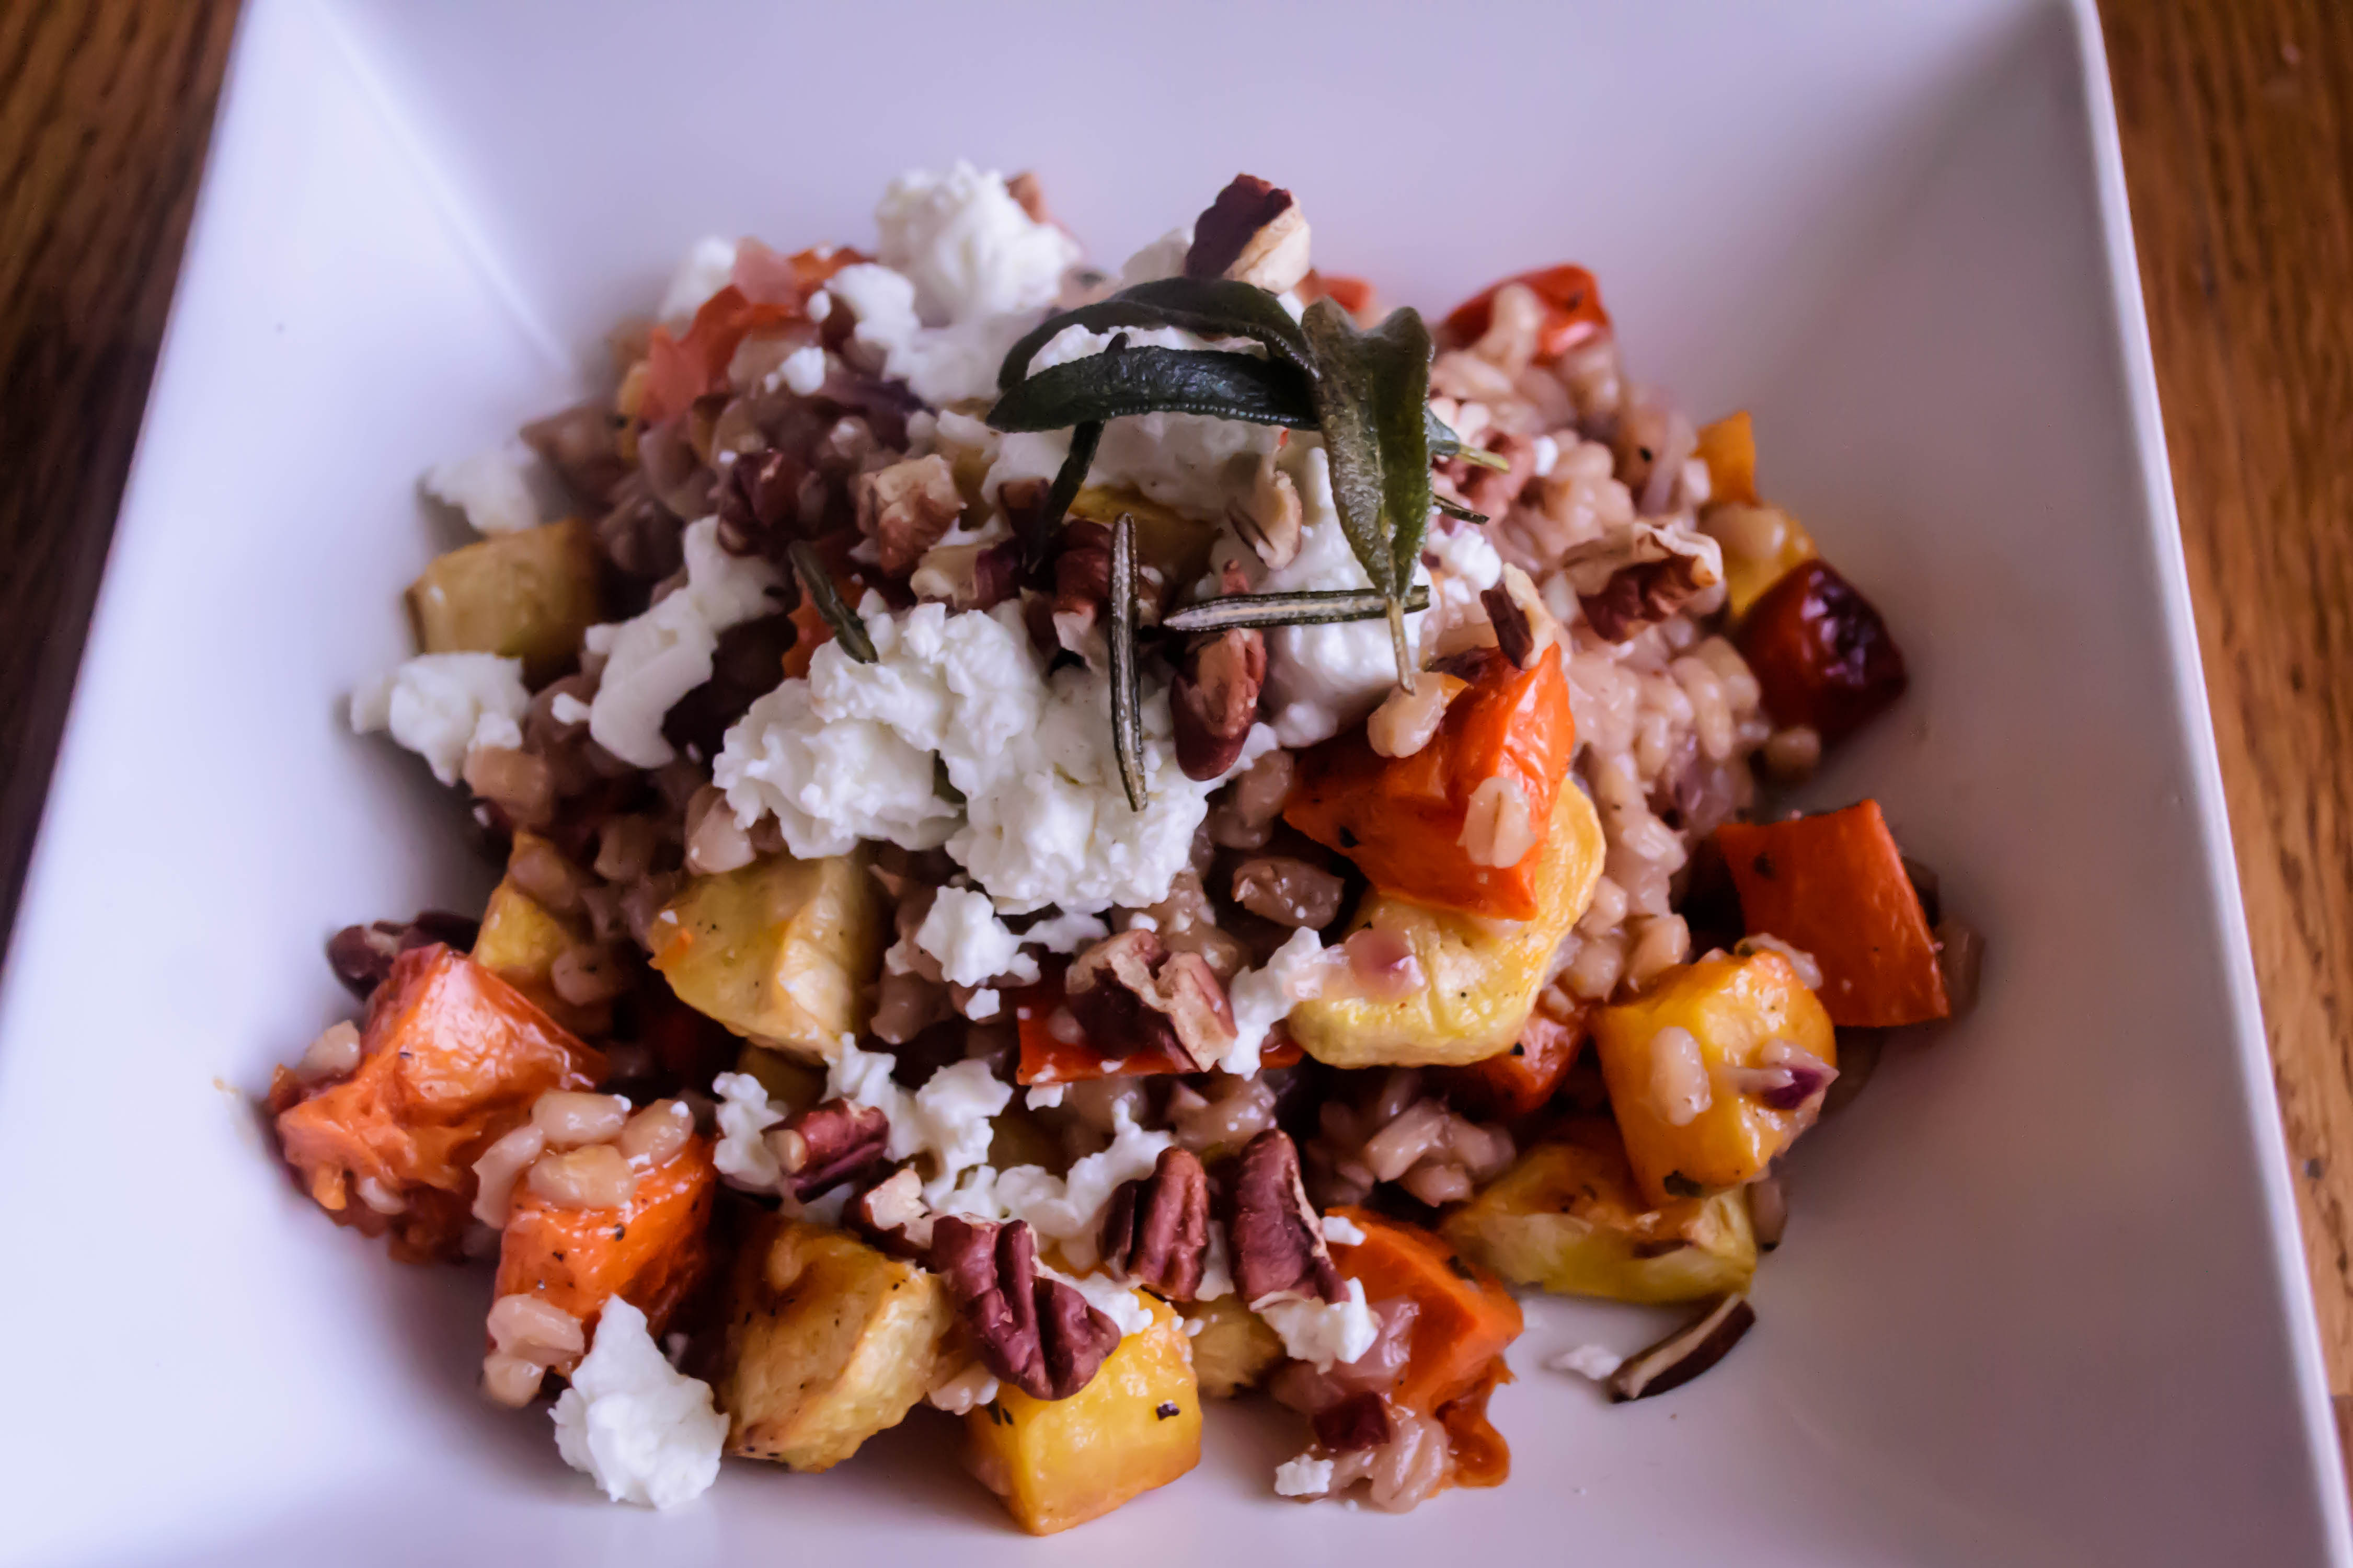
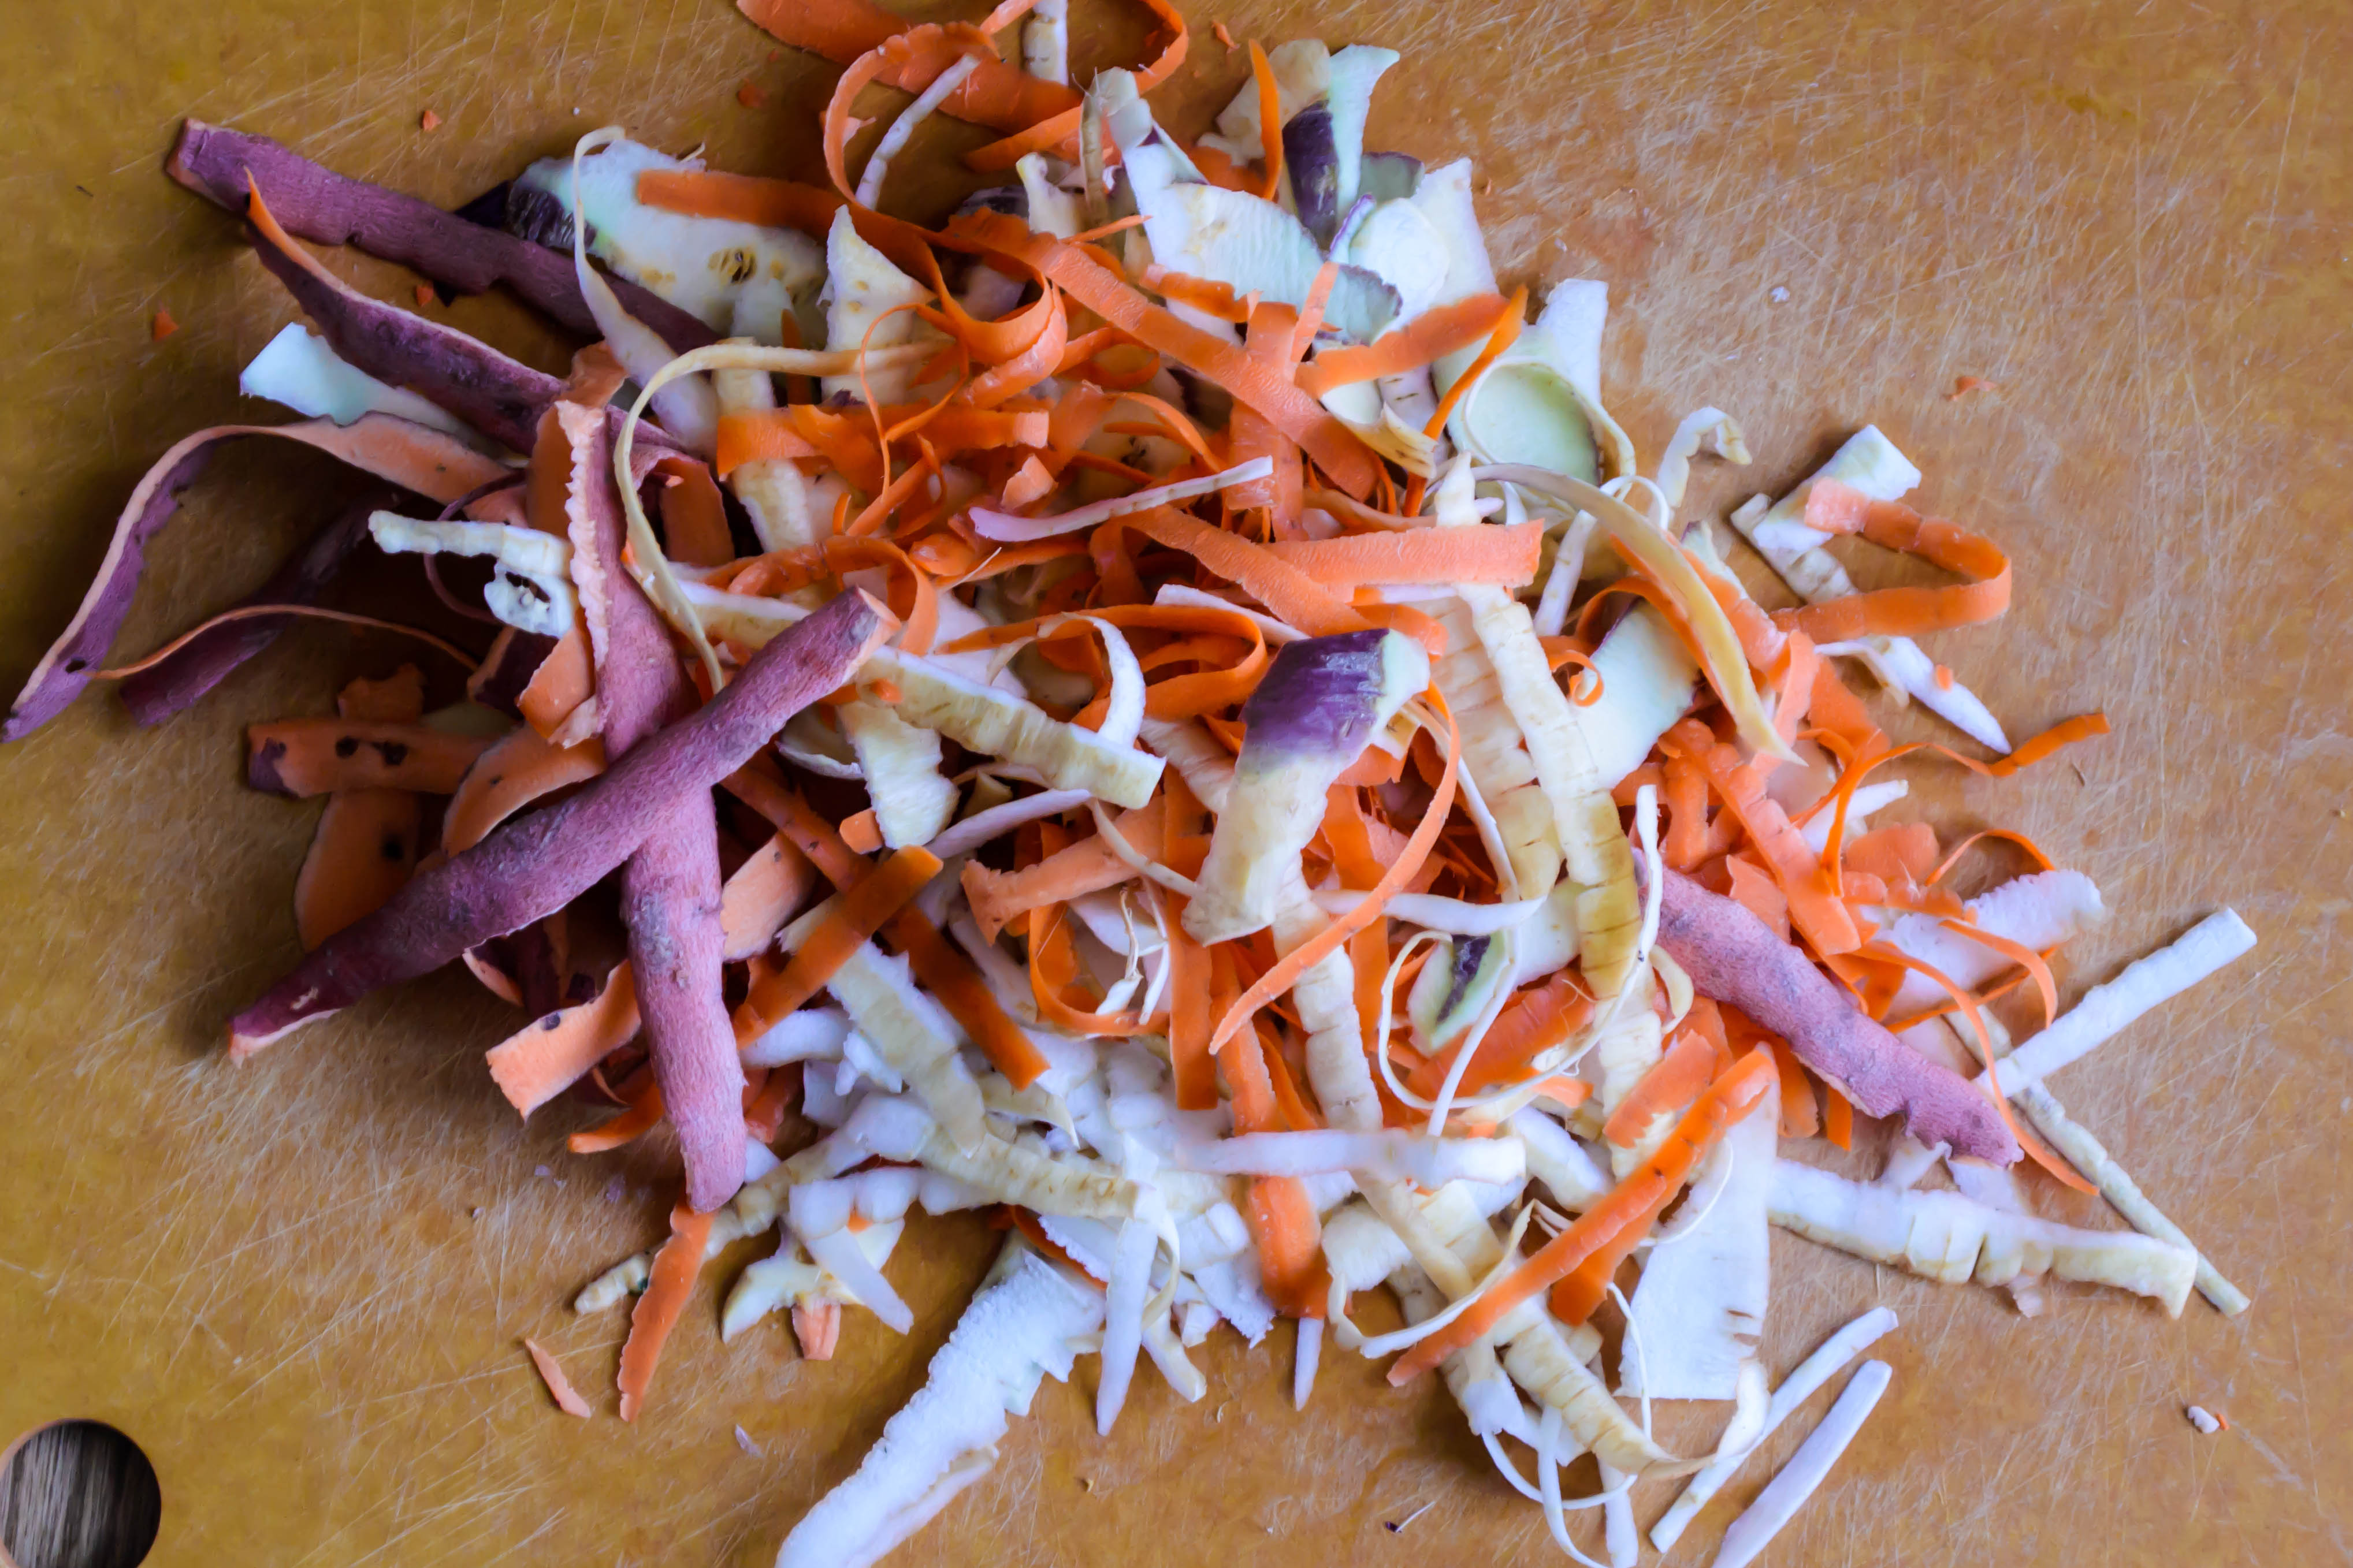
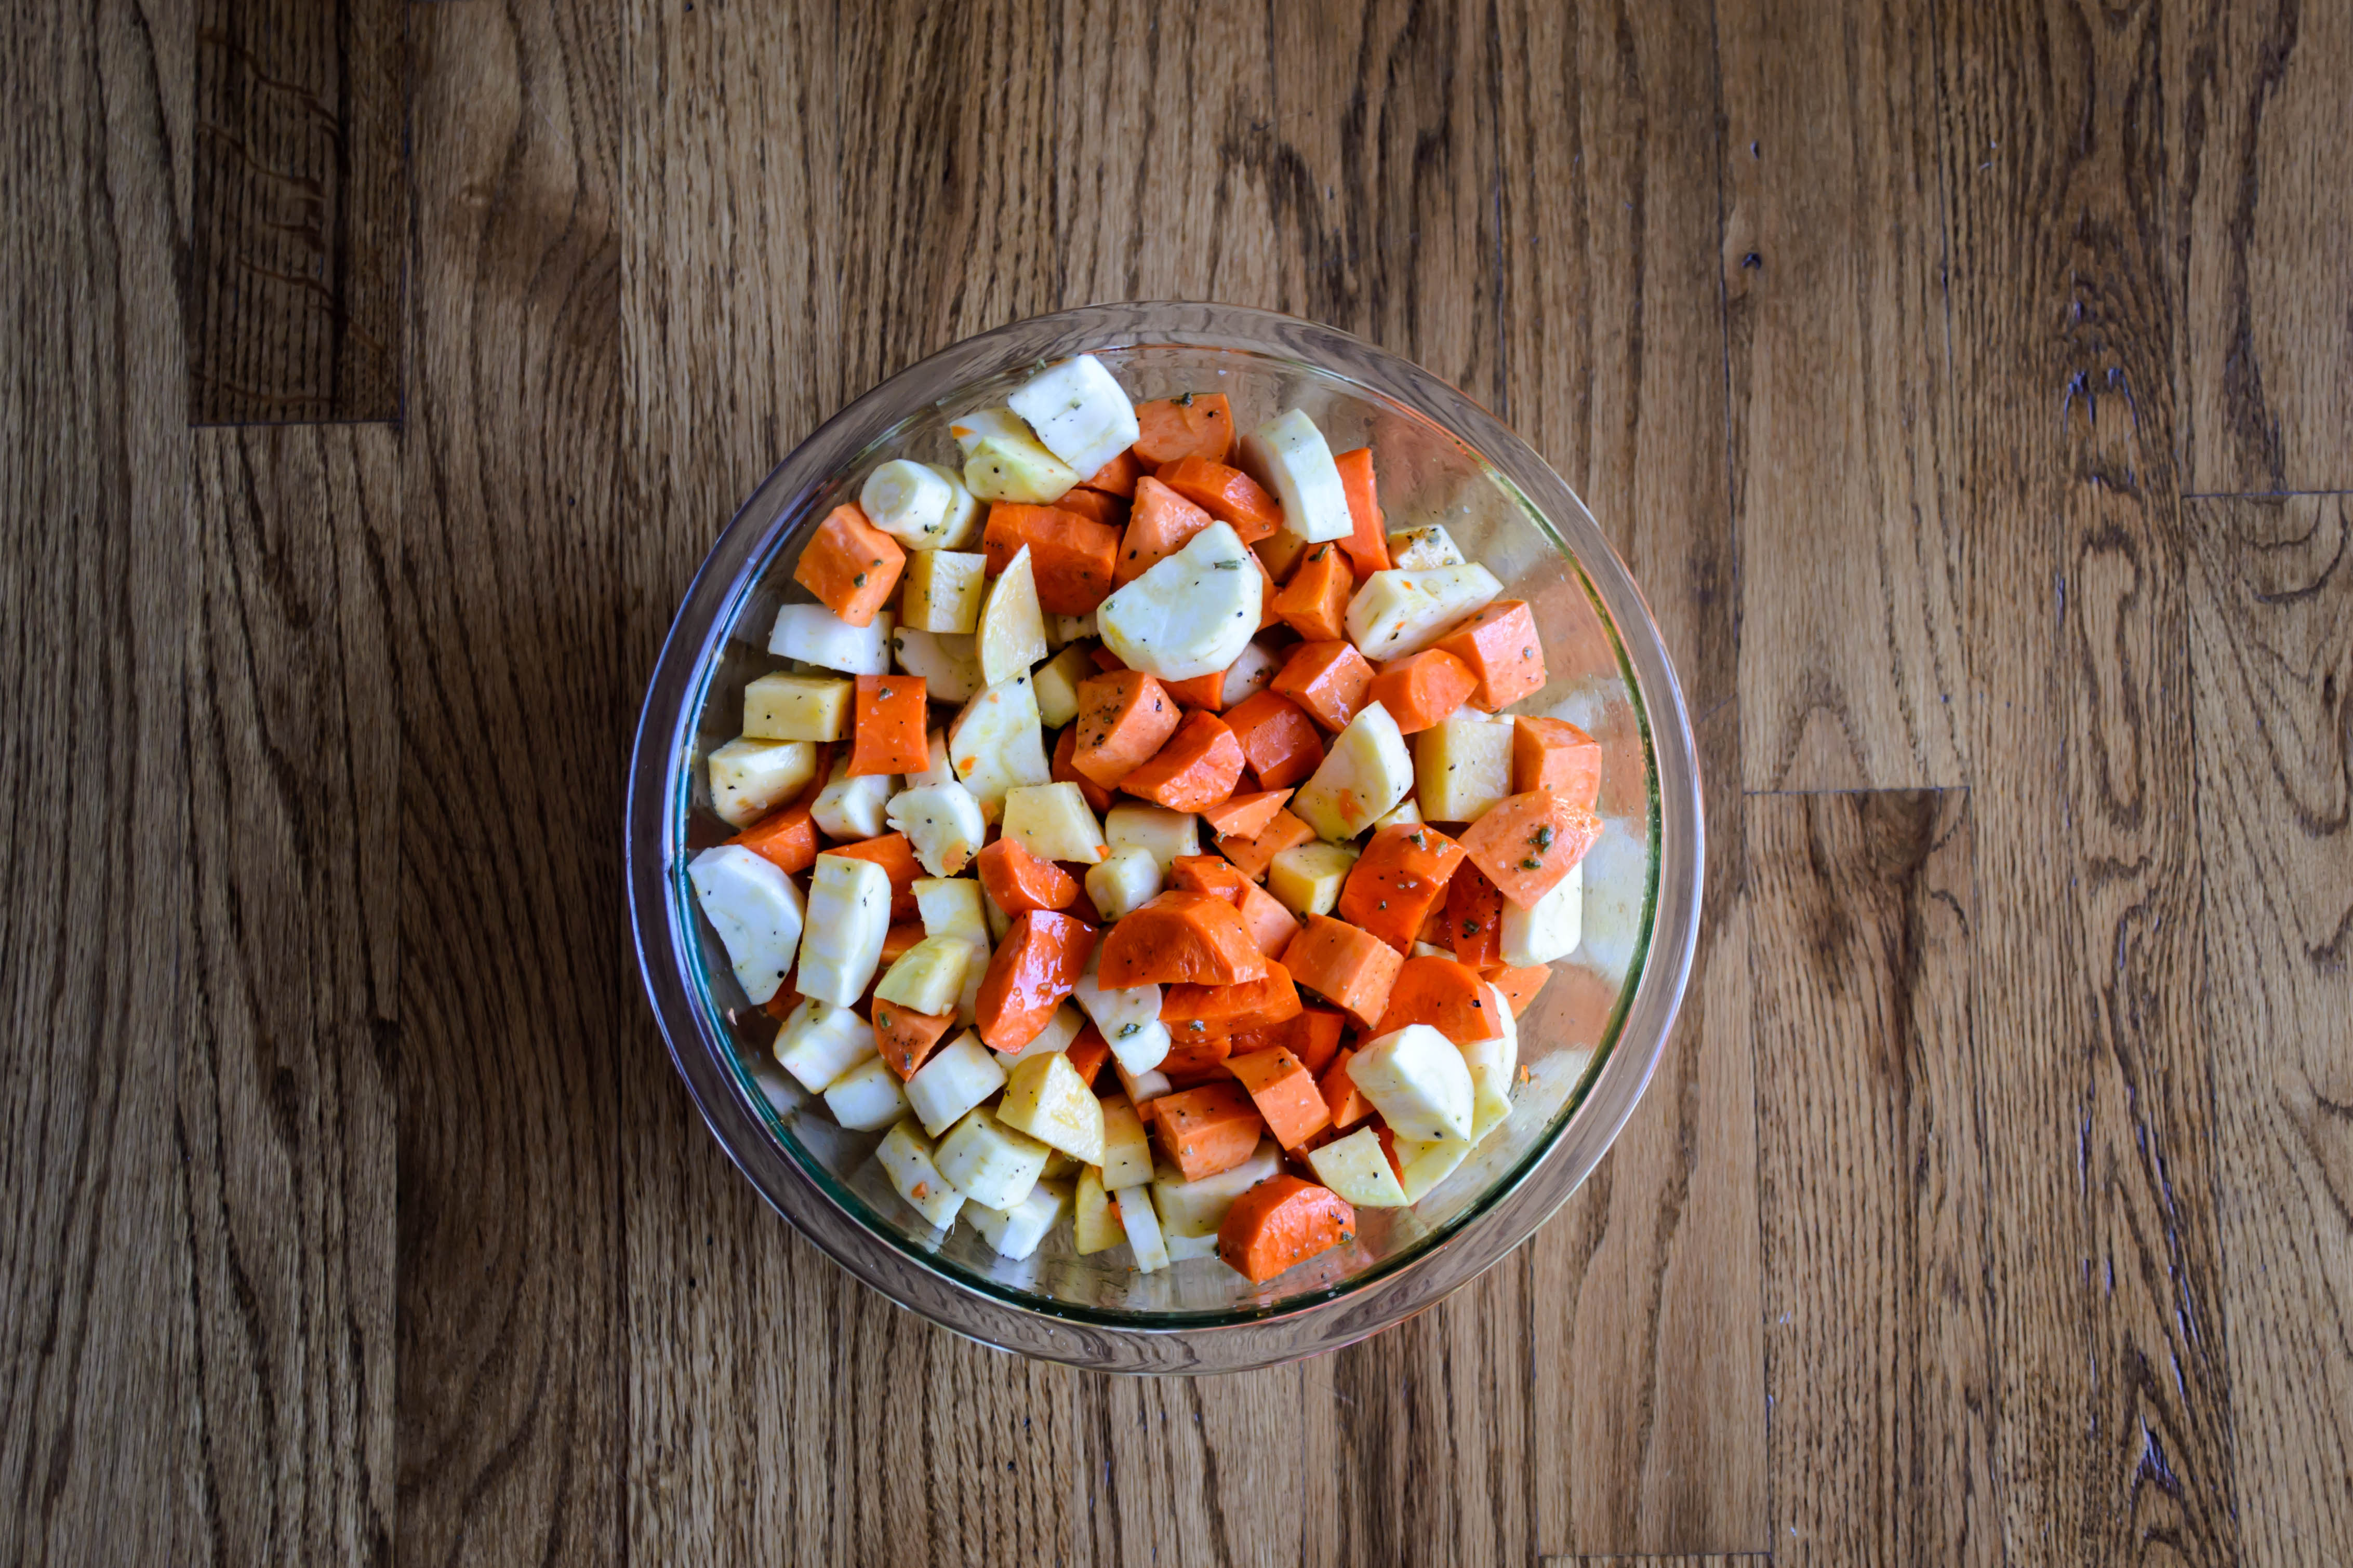 If we were going to have fall, I decided, we were going to need root vegetables. Discs and sticks and chunks of rutabagas, carrots, sweet potato, and parsnips, all gleaming with olive oil and garlic herb salt, roasted until caramelized and tender. I folded these into the barley just as it finished, then dolloped in sizable lumps of soft, creamy goat cheese, a scattering of toasted pecans, and, because if it’s worth doing it’s worth overdoing, some whole fried leaves of sage and rosemary.
 Alterations apropos of the season might entail swapping out the sweet potato or carrot for hunks of pumpkin or butternut squash, and you can certainly use walnuts or even pine nuts if you don’t like pecans. But I wouldn’t skip the goat cheese. Its insistent tang is a needed foil for the mellow autumnal combination of root veggies and barley.
We ate this so fast our forks had whiplash. It is warm and hearty, certainly, and the clamor of different flavors settles together so nicely that you can’t help but keep going back for another taste. The sage and rosemary mellow as they fry, producing a toasty earthiness rather than the overwhelming pine-forest flavor you might expect.

When I was a kid, my parents made me cassette tapes from several Disney albums to listen to in the car. I mean real albums: records. 45s and 78s, that spun, some wobbly and warping, on a turntable at a speed that, when I was much smaller, seemed unreal. But the cassette tapes were for long car trips, and we all learned every word in every song (this wasn’t so bad, according to my parents, with the Disney songs. One of the other tapes – a John Denver greatest hits album – wasn’t so lucky. I requested it so many times that the tenuous black strip of tape got tangled in the player, and even after attempts to repair it by winding it manually back into the plastic casing, one day it mysteriously disappeared. I’m still convinced that my dad, sick to death of hearing the plaintive desire for country roads to take us home, chucked it out the window).
Interestingly, one of my favorite songs from that collection was from a movie I’ve never seen: Disney’s The Happiest Millionaire. The song, “Fortuosity,” was a happy ditty about luck and opportunity, and “fortuitious little happy happenstances,” and I loved it. It’s an idea that I like, and the song itself comes back to me every once in a while at random moments, most often when I think about the word “fortuitous,” with which the song obviously plays, and when I remember road trips with my family.
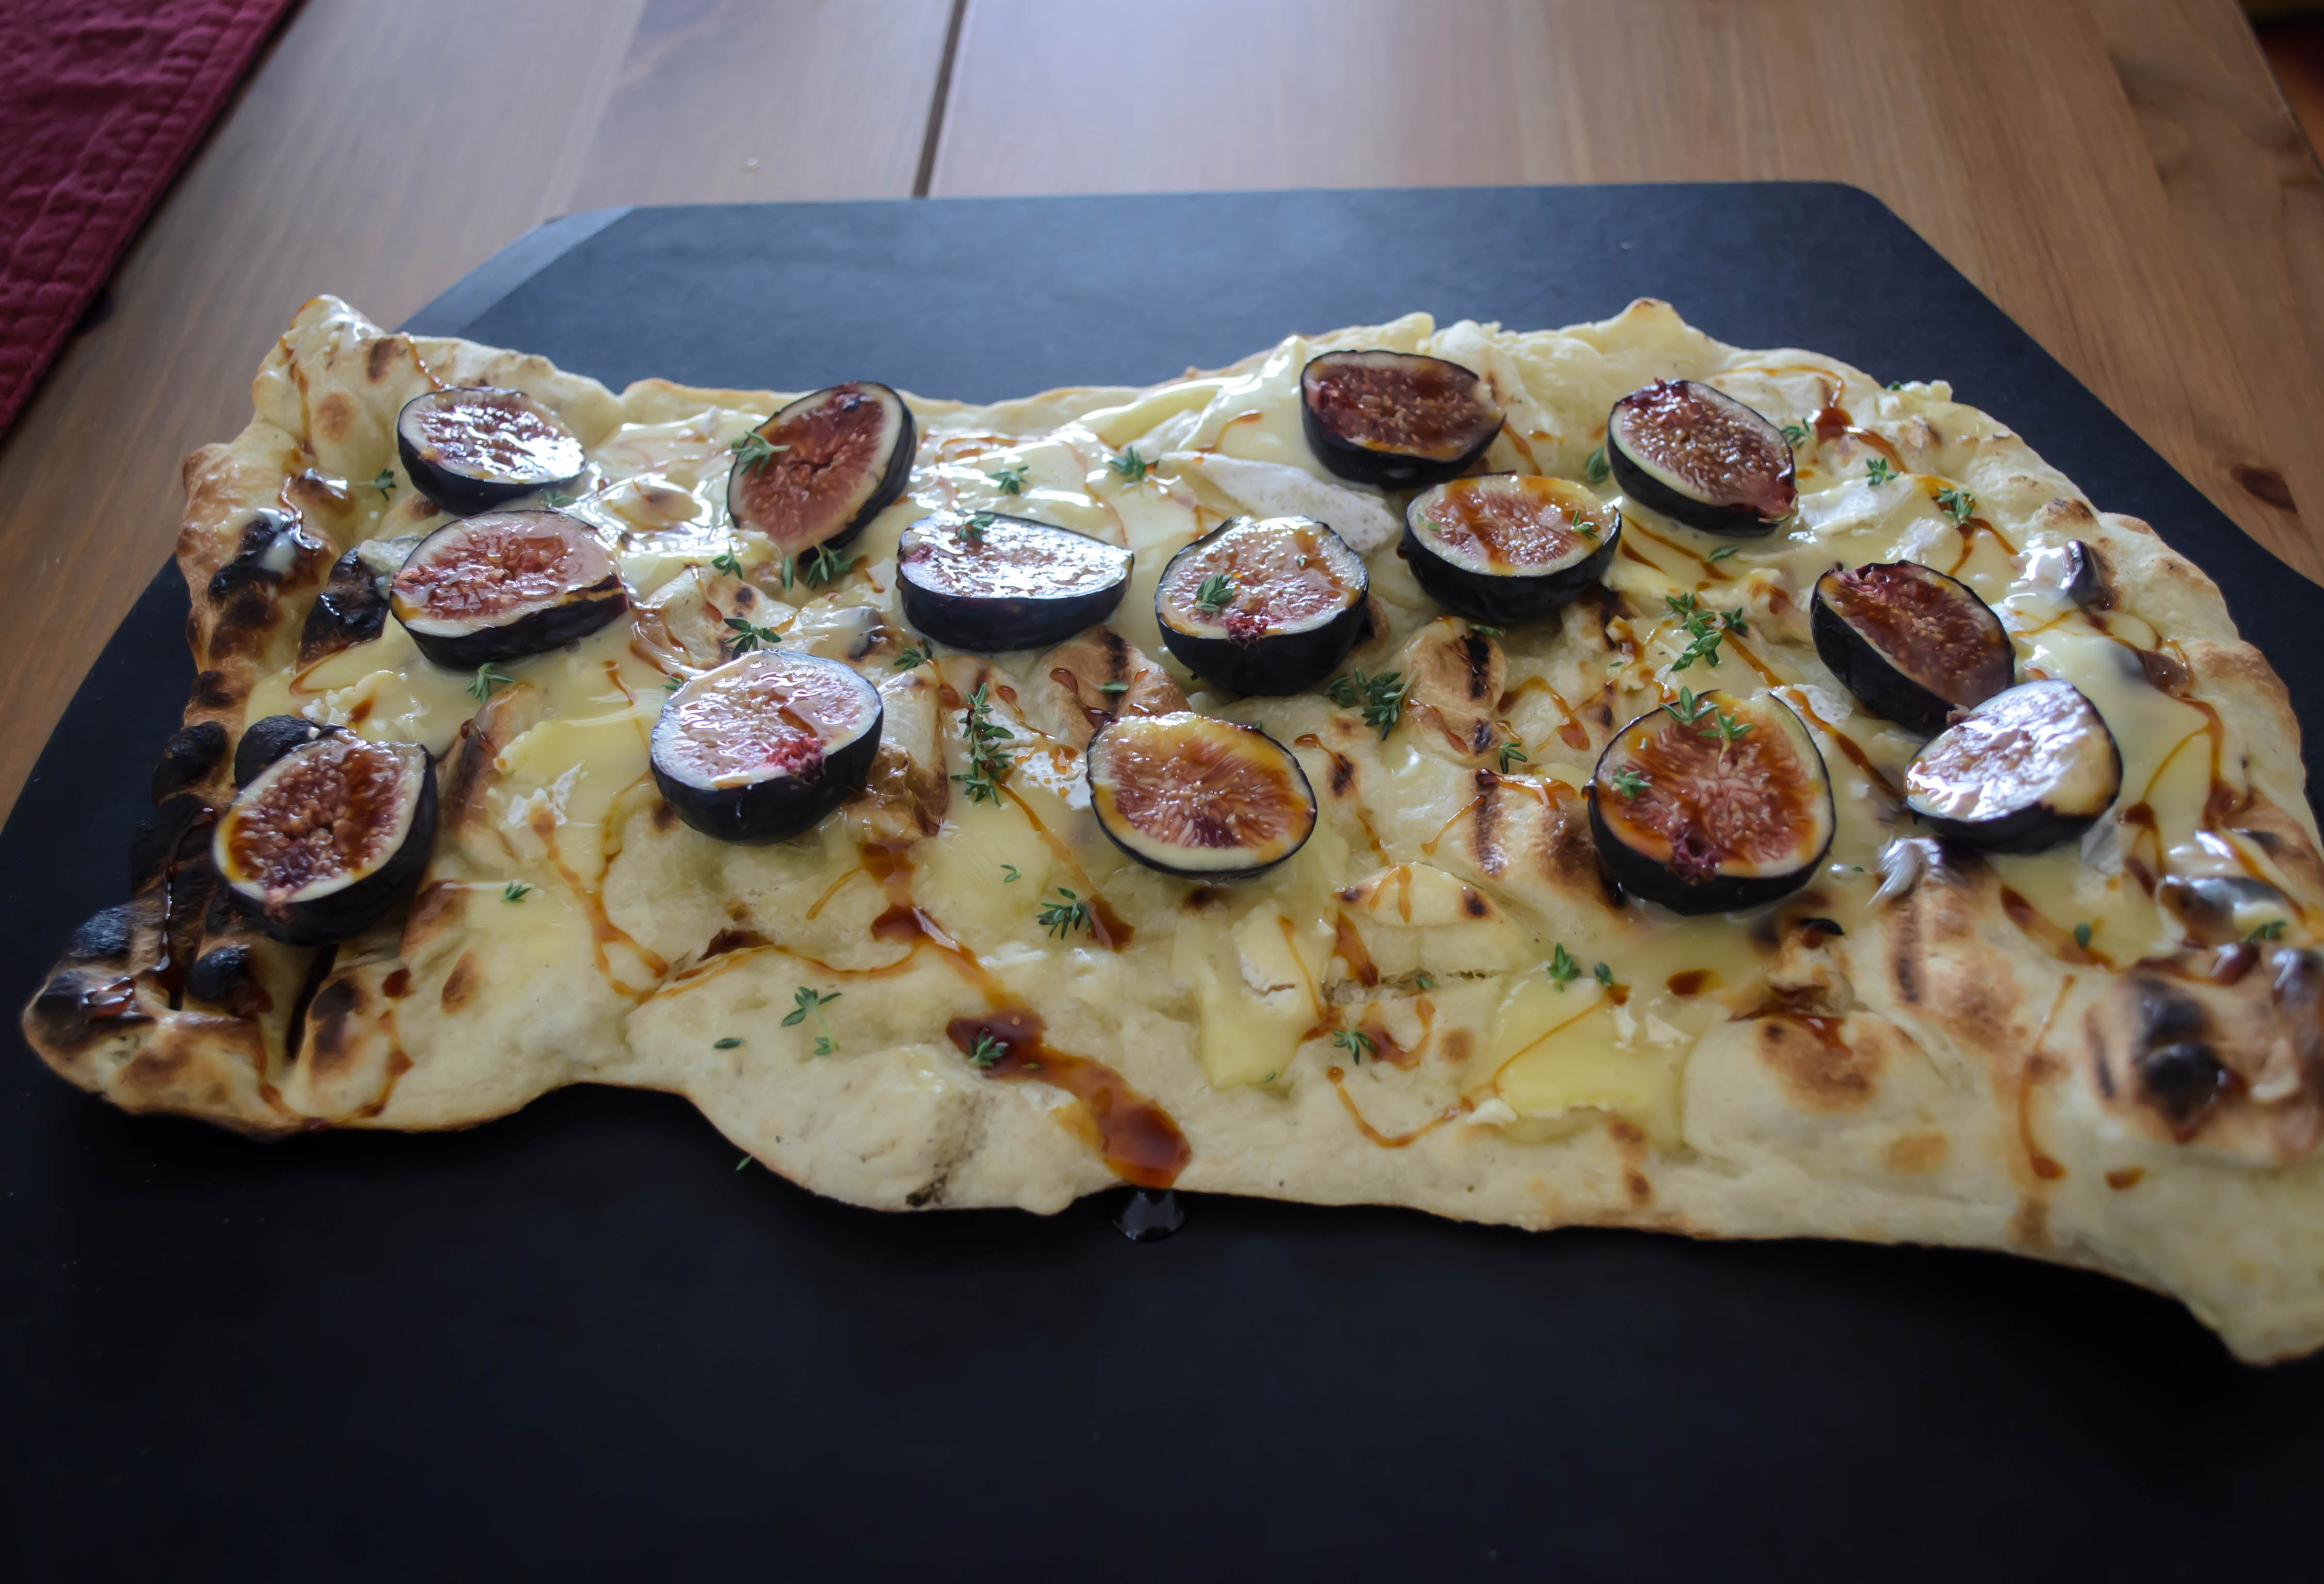 This is a long-winded way of introducing the idea that this week’s post, and this month’s Twelve Loaves challenge, aligned entirely by fortuitous coincidence. Last week I asked N. to grill up some leftover pizza dough, which I smeared with double cream brie, nestled in some halved figs straight from the farmers’ market, and drizzled with barley malt syrup and sprigs of fresh thyme. Then I checked the Twelve Loaves challenge only to see that September’s theme is Farmers’ Market food. Fortuosity indeed.
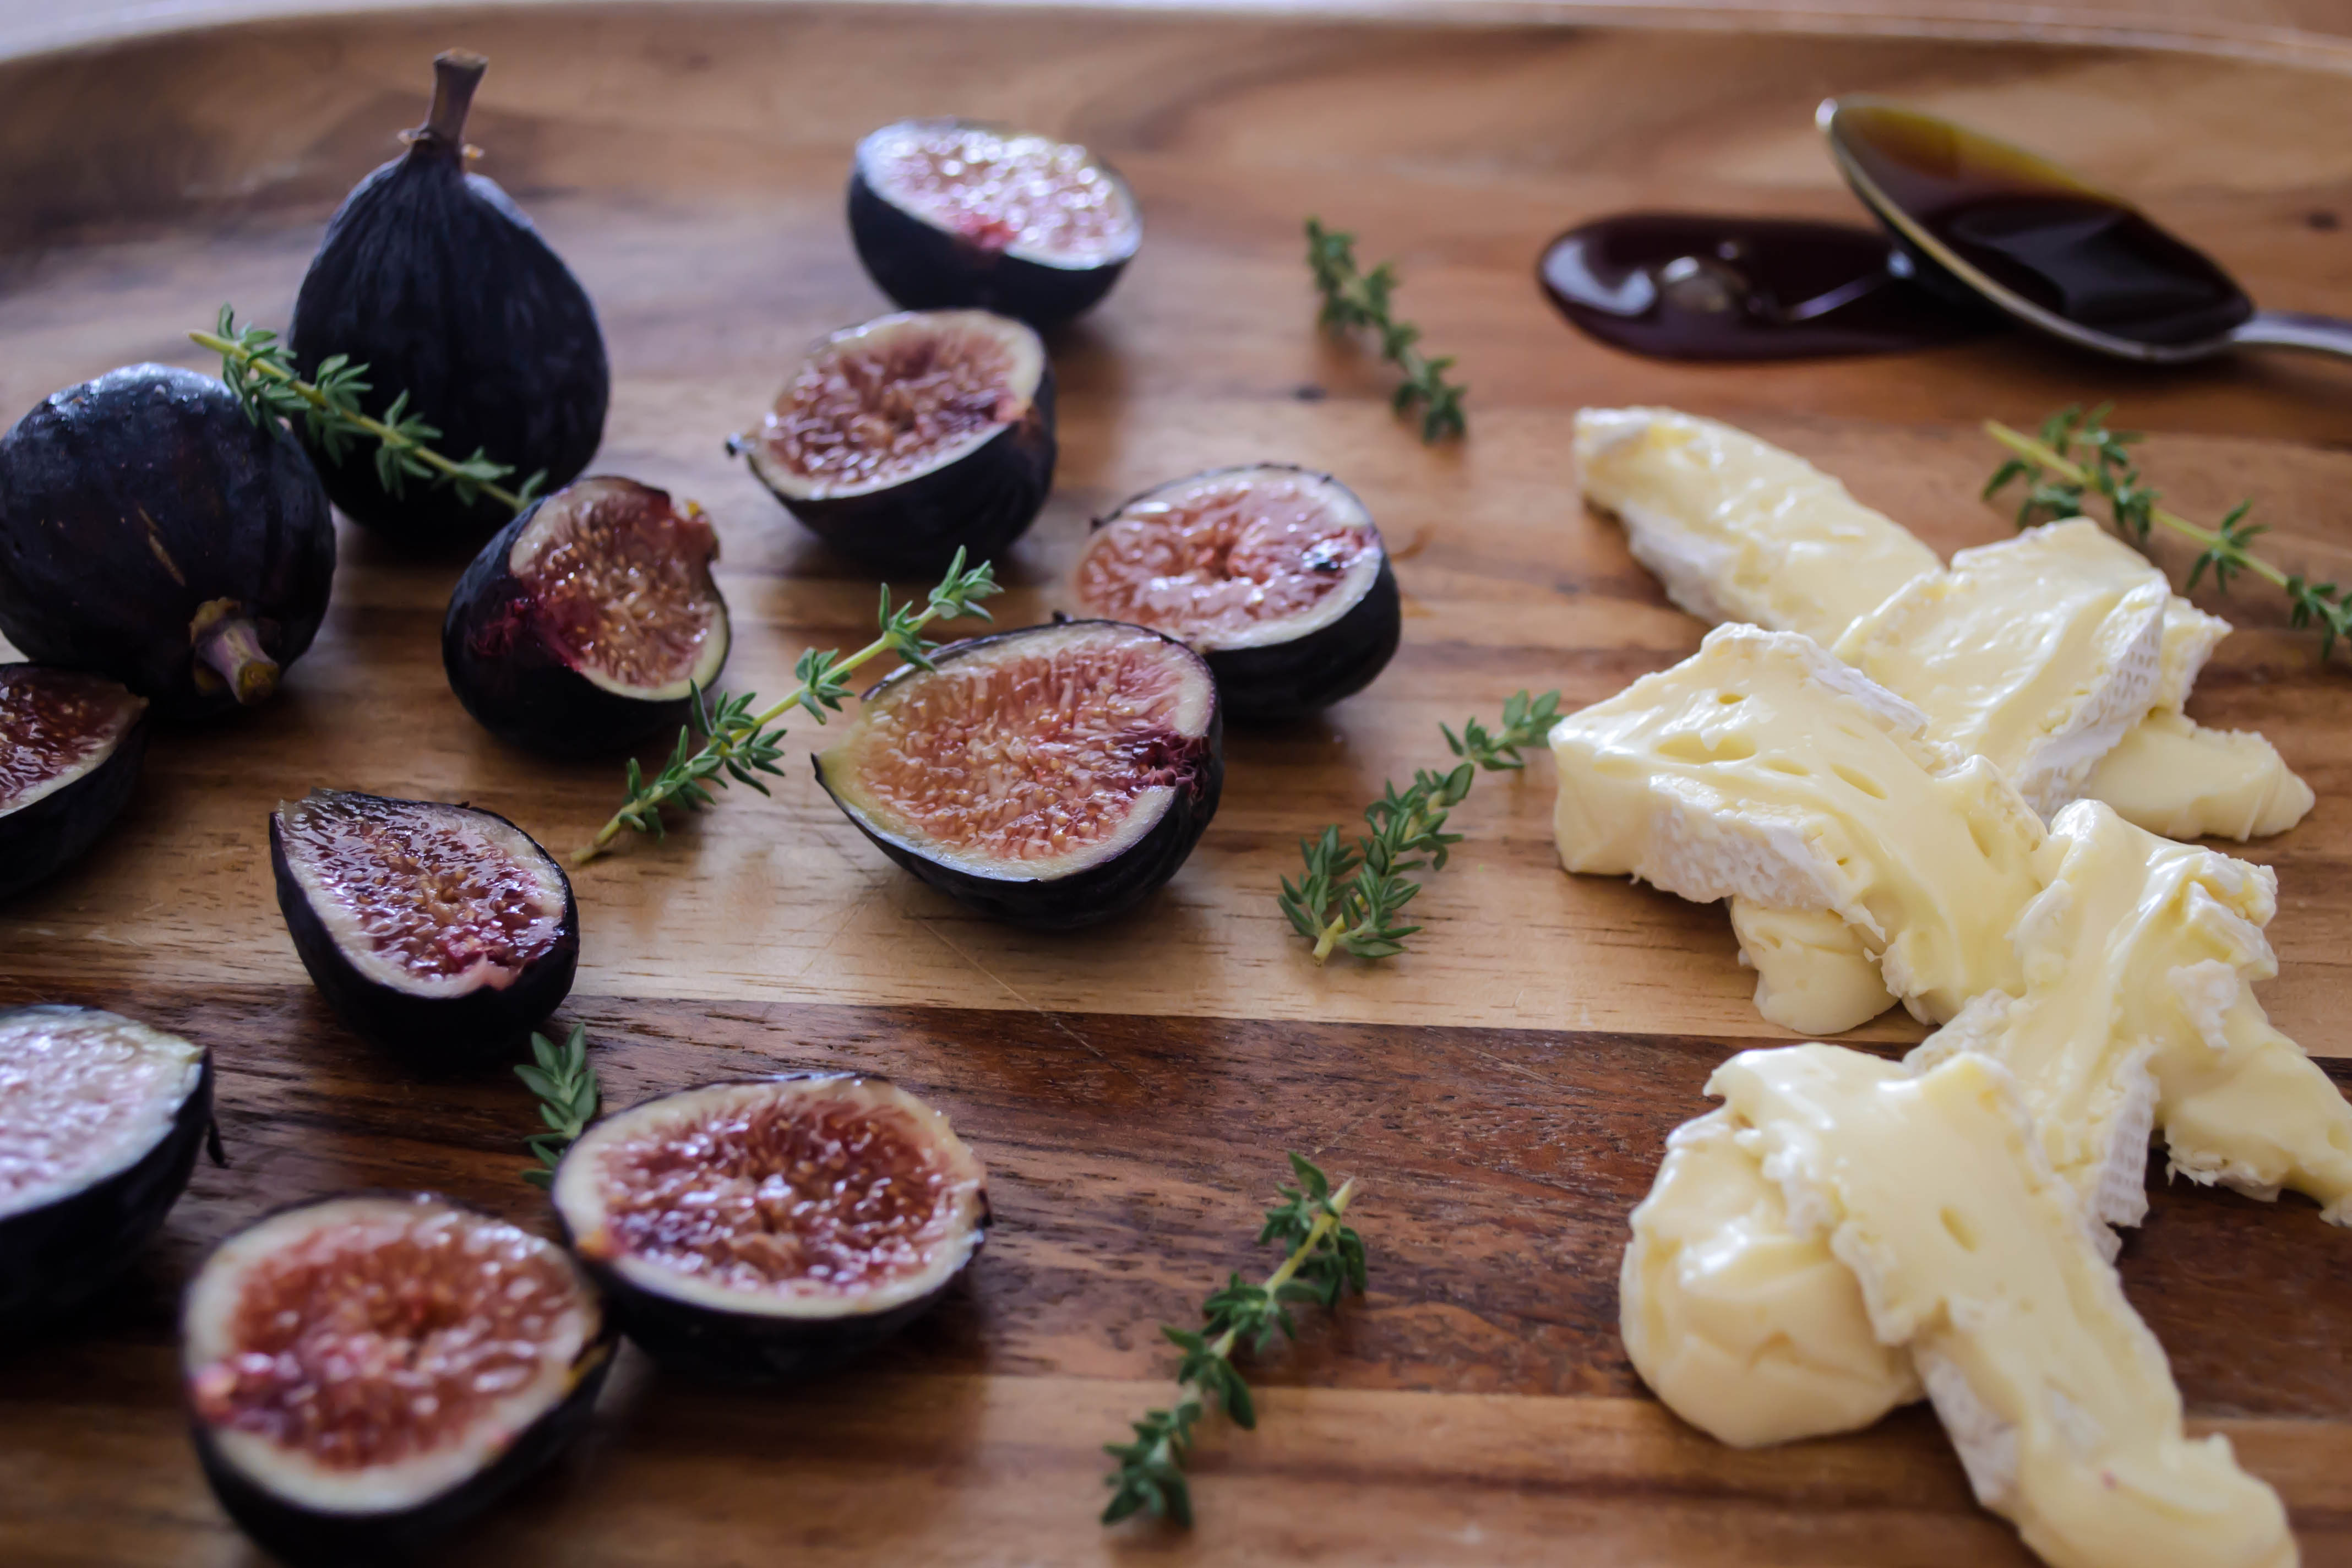 The idea for this combination – creamy cheese, soft, sweet figs, and a hit of herby freshness, came from a party N. and I attended recently. Our hostess, who works with N. (we should have them over soon, N., if you’re reading this…), had quartered some black mission figs, settled them in around a wedge of brie, and dosed both liberally with honey and thyme. My spin was based on the desire to use more of the barley malt syrup I bought for last month’s bagel experiment, and the obsessive love we have for homemade pizza, which means there is frequently a ball of dough either in the fridge or in the freezer, hoping to be put to tasty use.

Visitor to our thyme bush. I named him Algernon, because he looked like he might be impersonating someone.
We loved this combination. The barley malt syrup is a roastier contestant than, say, maple syrup, and was therefore a welcome balance. It is sweet, but there is an almost bitter edge to its flavor – no doubt the malt part. It is, in fact, just a lower grade extract than what brewers use for beer, so the darker component makes good sense. Drizzled judiciously across the blistered surface of our cheese and fruit studded flatbread, it enhanced both main players. Though Los Angeles played some mind games with me last week, cooling off just as I published a post asserting that autumn hadn’t arrived yet, it has warmed up again. Since this flatbread cooks on the grill, it’s perfect for a warm evening when you can’t bear the idea of firing up the oven. But if you don’t have a grill, and you’re willing to risk the house-heating power of indoor cooking, I’ve also included directions for the oven. 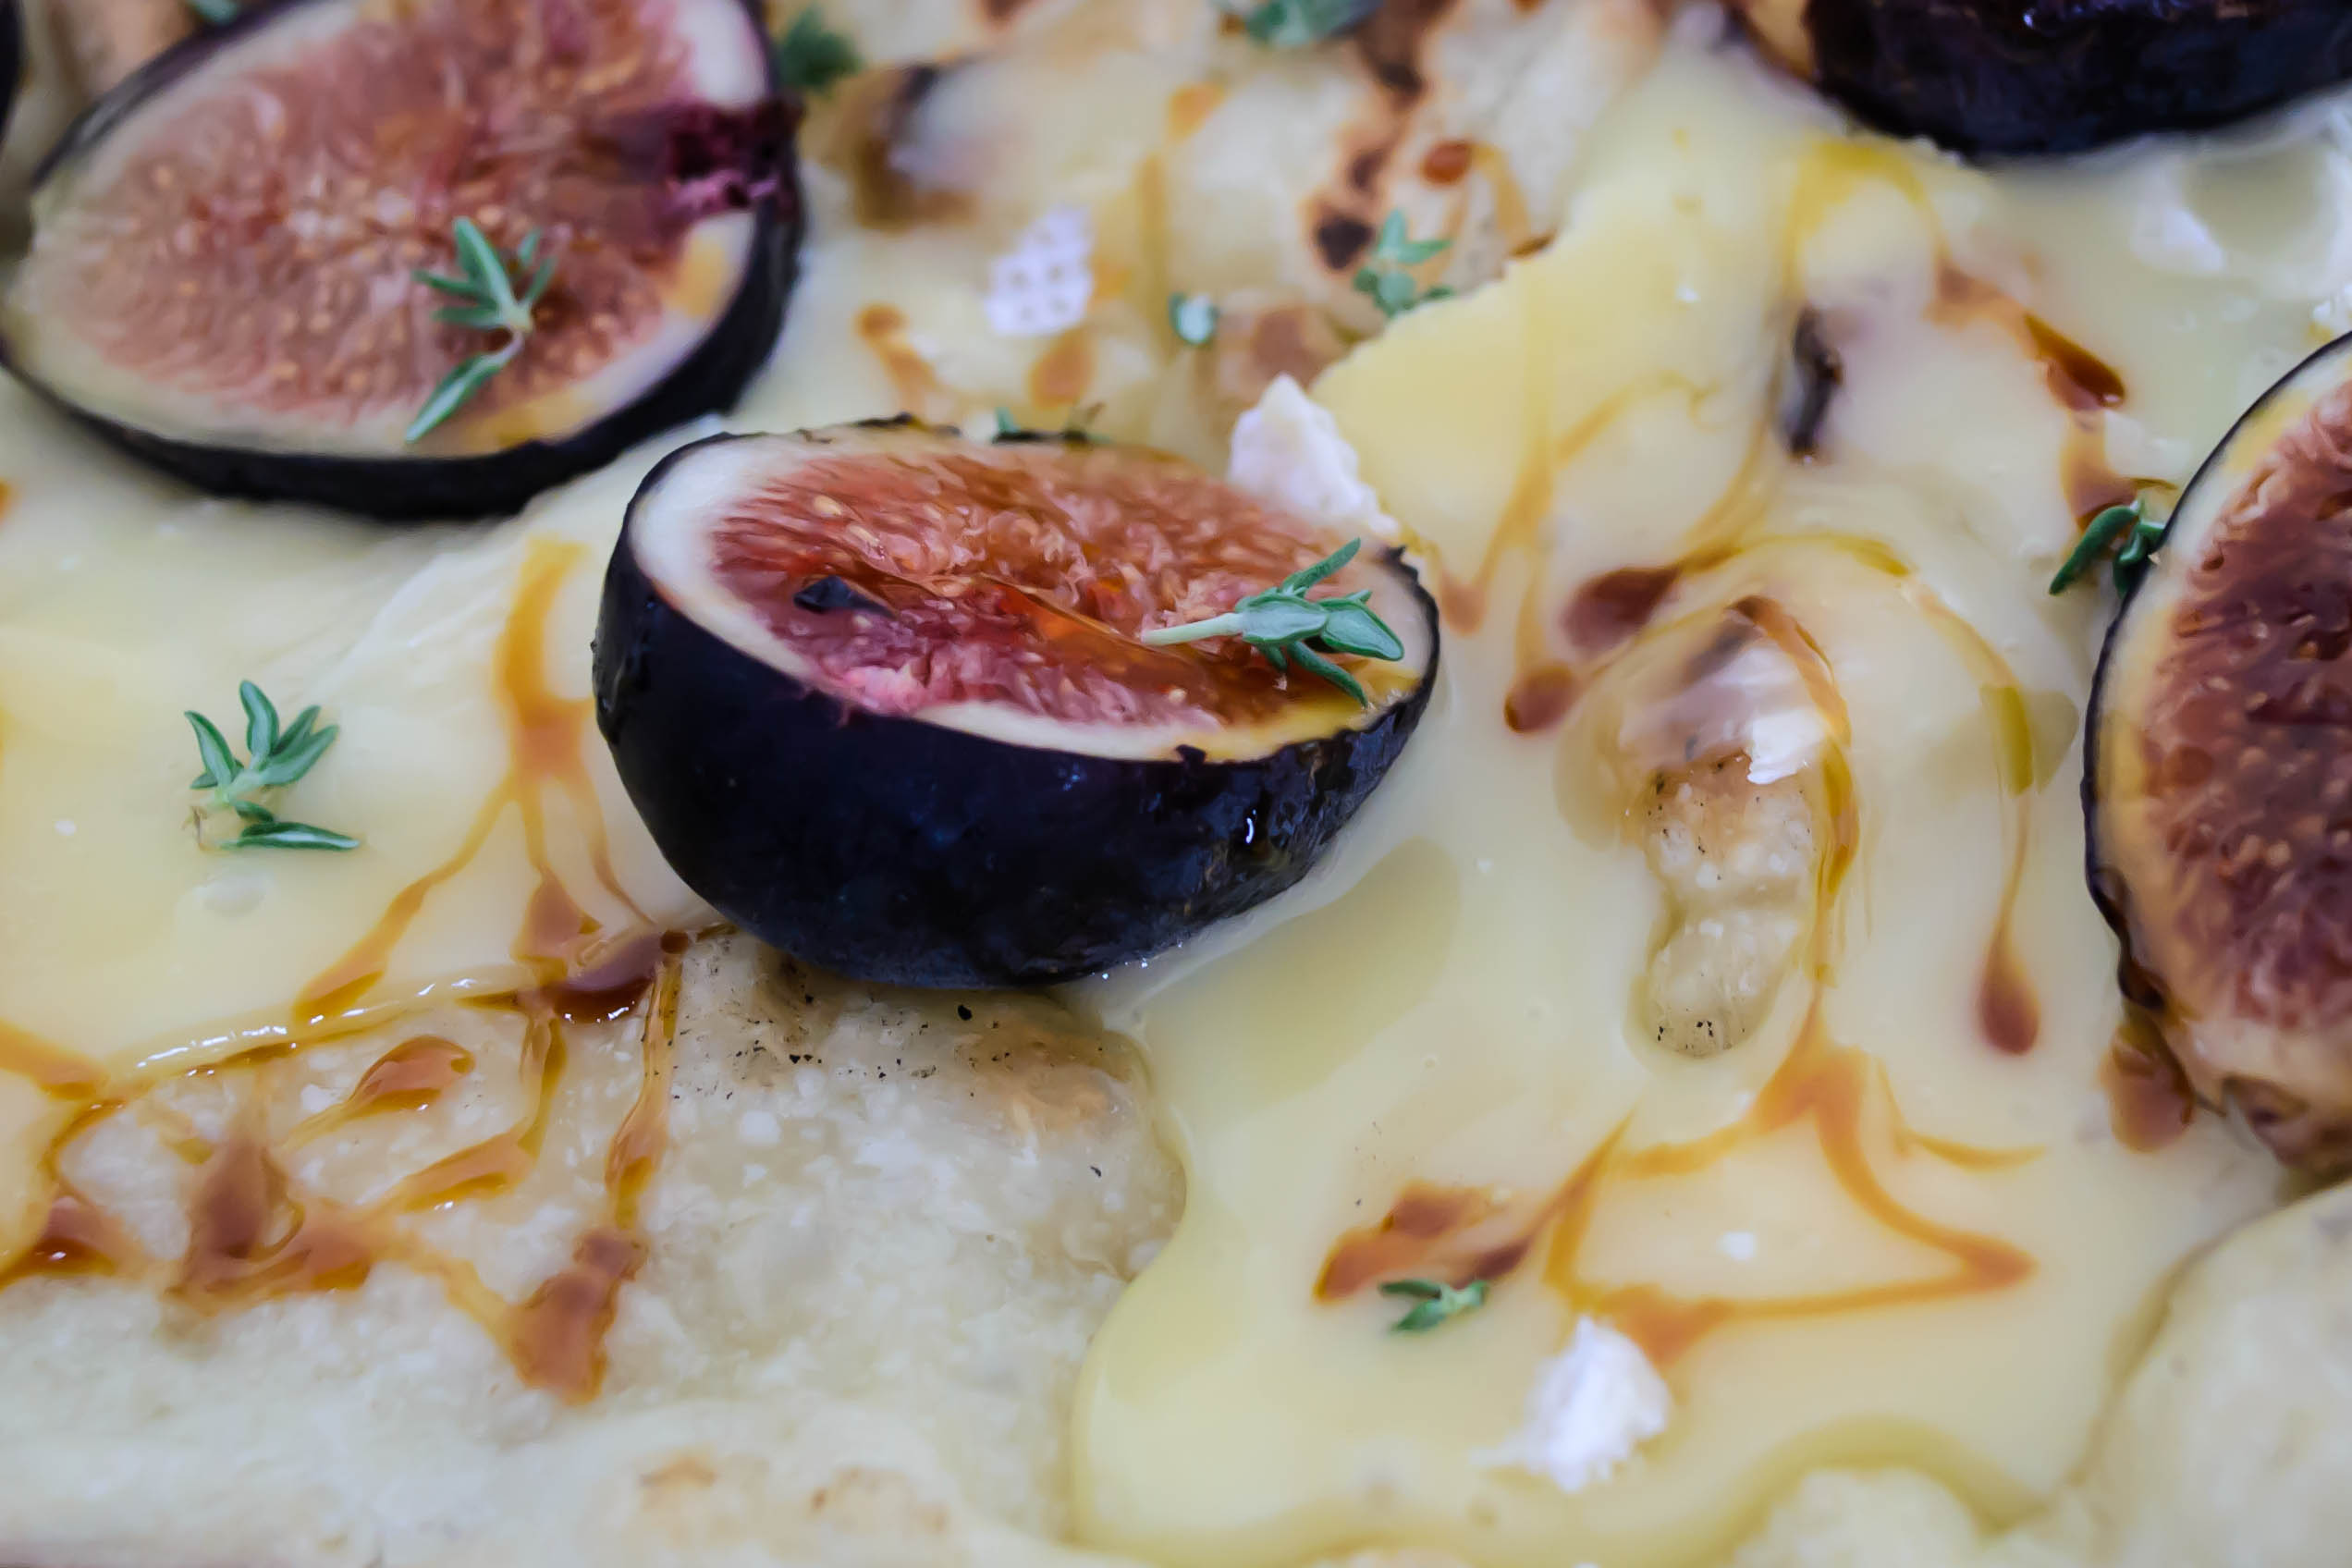

* You could, I suppose, top the dough either before cooking, if you are using the oven method, or immediately after flipping, if you are using the grill, and cook the toppings. I didn’t do this, because I wanted the freshness of the figs, and knew the heat of the bread itself would be enough to melt the cheese. If you choose to cook the toppings and you are using a grill, add the toppings after flipping, but turn off the burners on one side of the grill to create indirect heat, and cook your topped flatbread over the unlit burners for 7-10 minutes. This will allow the toppings to cook and the cheese to melt without burning the dough.
All over the food blog world, folks are declaring that fall is here. It’s the season for pumpkins and root vegetables and casseroles and braised meats. Except that I live in Los Angeles, where it has been close to or over 90 degrees Fahrenheit for the past week and a half. Where was this in June, Los Angeles? Where was it in July (when we were further north and would have missed it!)? Why now, now that school has started and I have to wear professional clothes all week and can’t be here to keep the windows open all morning, do we finally get the month or so of scorching temperatures when everyone else has packed up their popsicle molds weeks ago?
 Well I’m not convinced that it’s fall. I’m calling it late summer. And this is convenient, because the heirloom tomato bushes that have grown into a vast jungle in my backyard are still heavy with fruit. The Farmers’ Market we frequent is still bursting with bright bell peppers and corn and stone fruits, and hasn’t yet been taken over by cruciferous vegetables or potatoes.
 A few weeks ago, stunned by the number of gleaming tomatoes we’d managed to produce, in shades of deep crimson and flame yellow, I did what anyone trying to find inspiration would do. I asked Facebook. And my friend M. responded with an idea I’d never considered: tomato pie.
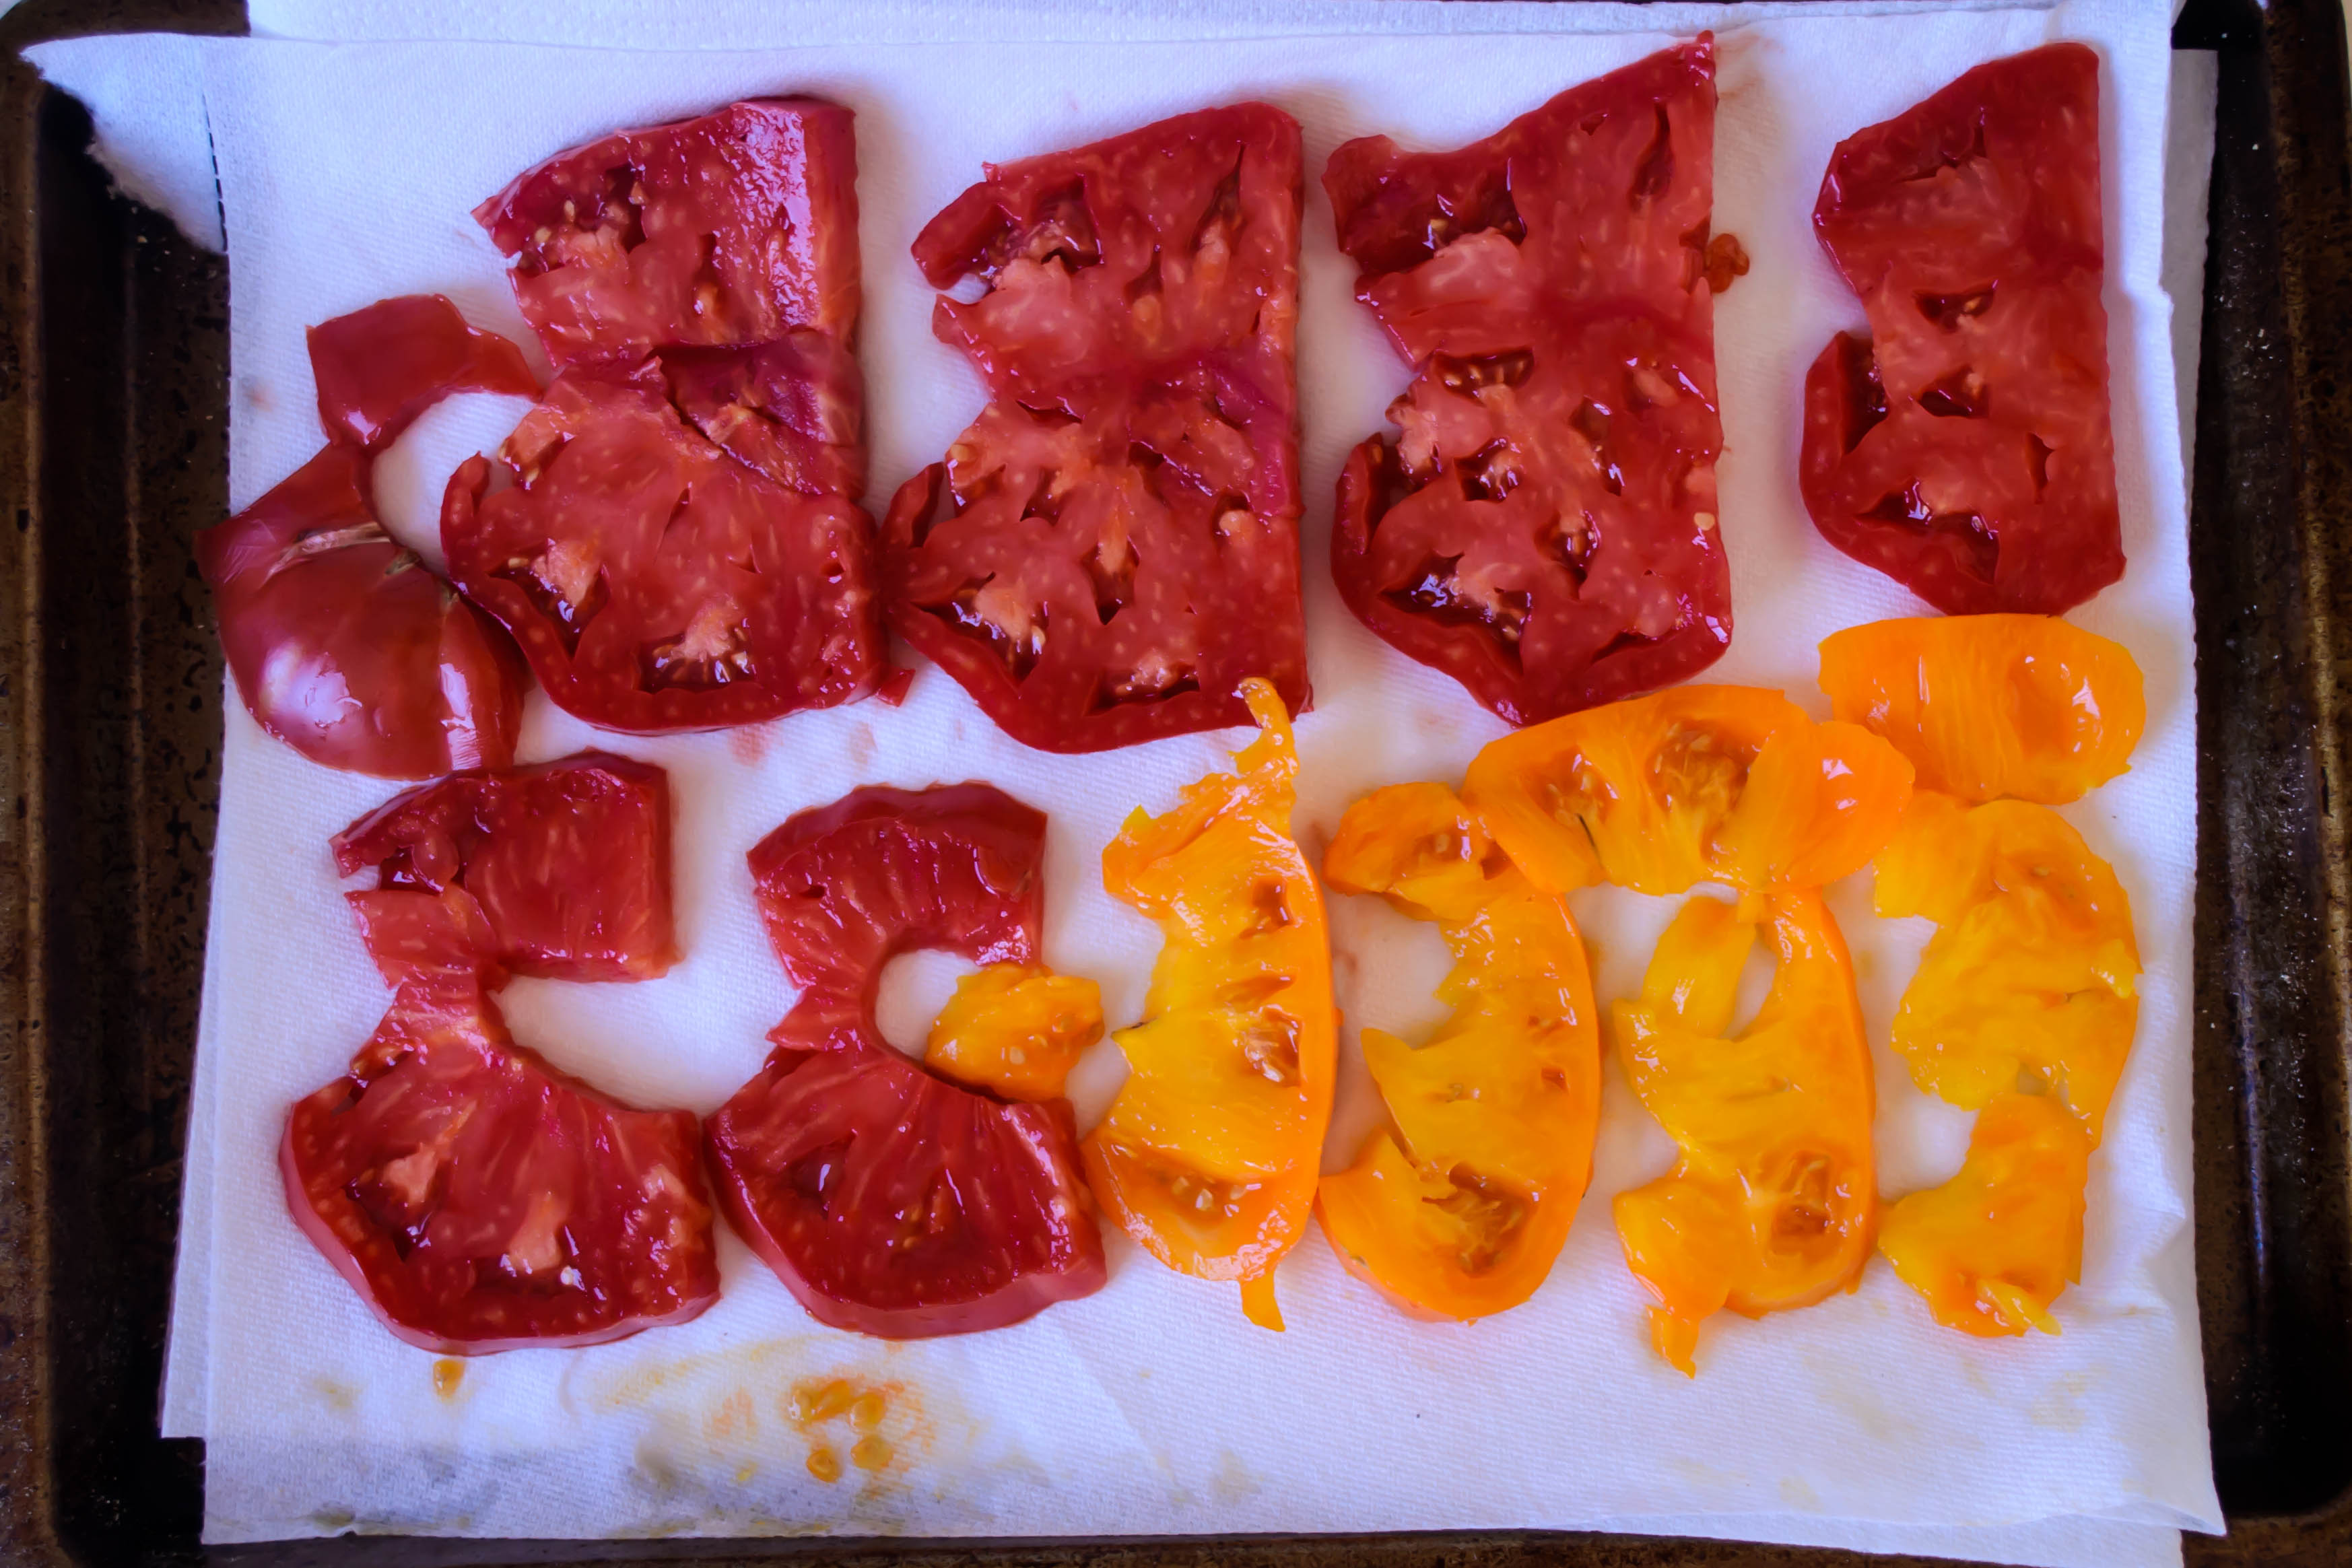
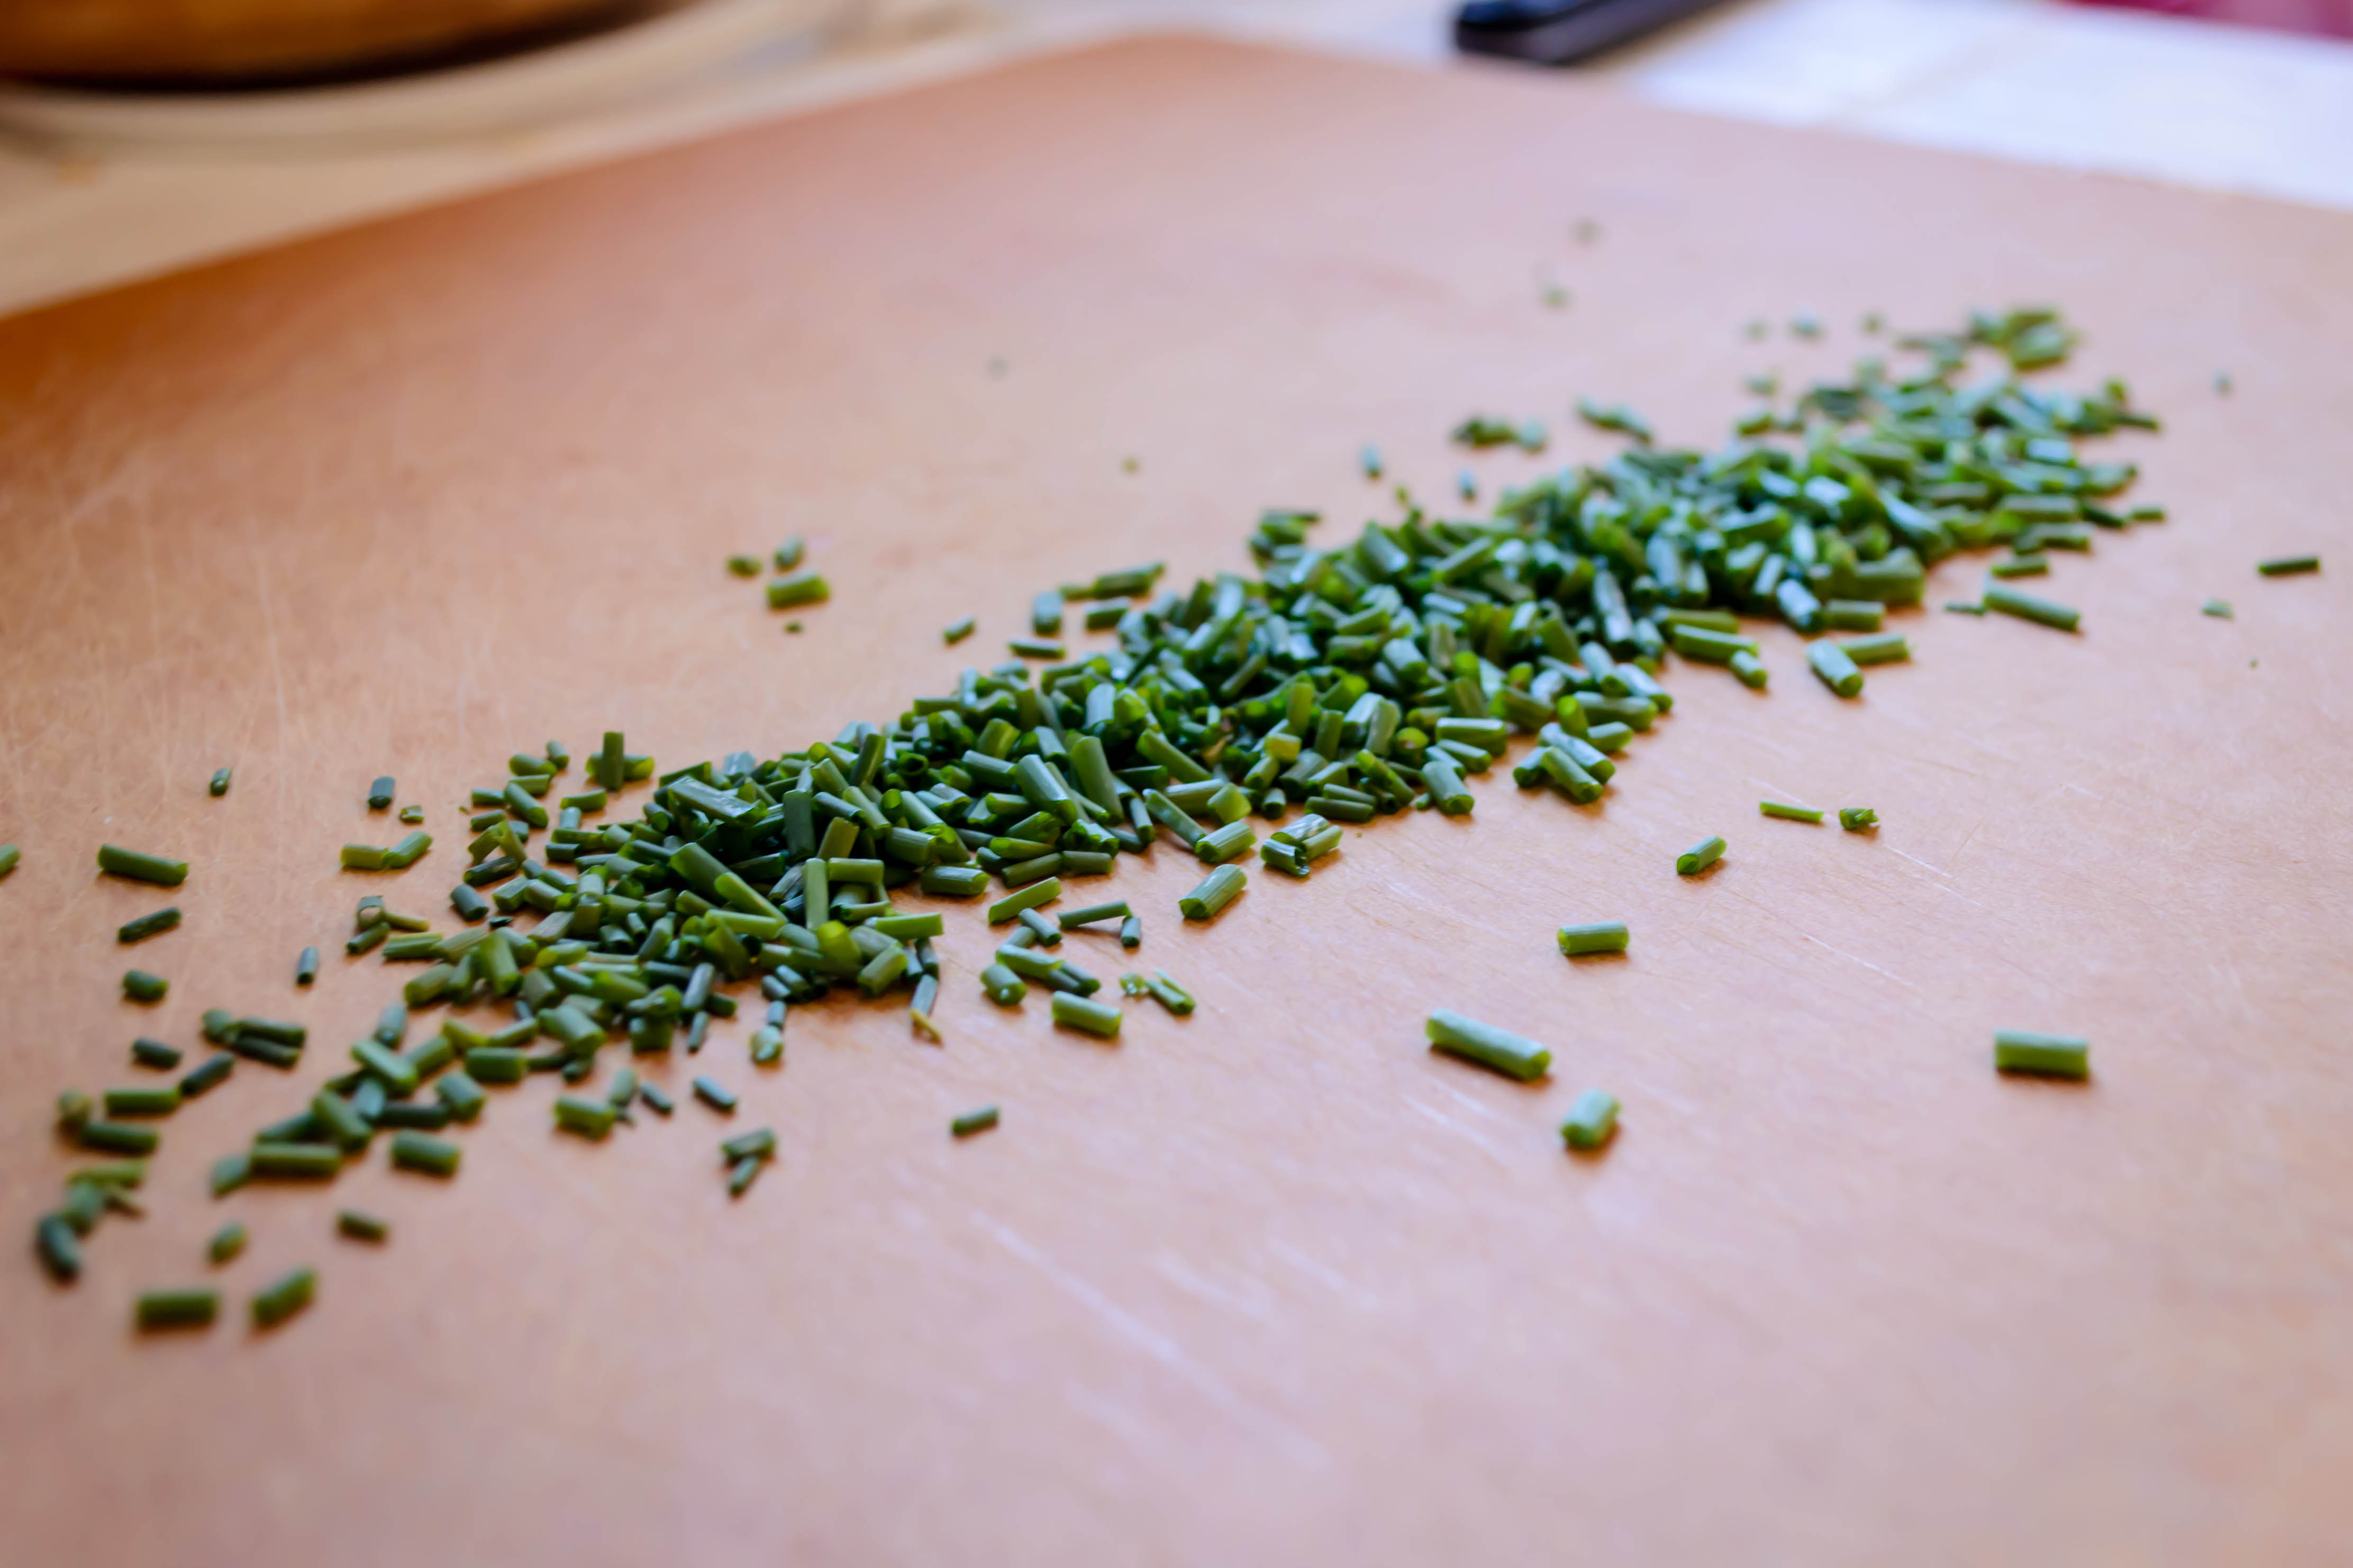
 Since tomatoes are a fruit, I suppose it shouldn’t seem so strange to put them in a pie. (Isn’t pizza, in fact, the ultimate incarnation of a tomato pie?) But I quickly determined that mine would be savory rather than sweet, and from there things fell together with little effort. Creamy, tangy goat cheese pairs so well with the acidic sweetness of tomatoes, and a handful of fresh herbs from the garden add a grassy complexity to the dish.
 Making a pie, of course, entails making a pie crust, and this remains one of my greatest nemeses in the cooking world (it’s all about the butter, I’m sure of it. The size and the temperature are almost impossible for me to get right, and given this and all the trouble I had with buttercream frosting I’m almost convinced I should just have gotten it out in the open from the beginning and renamed this blog Butter Problems). But I considered a few techniques I’d read about recently in Shirley O. Corriher’s genius book Bakewise, which takes a scientific approach to baking, not only providing stellar sounding recipes, but explaining carefully what each ingredient does for the final product, and offering options that will result in a subtly or staggeringly different end product. In her section on pie crust, Corriher explains that crust texture is a near catch-22 between flakiness and tenderness. Flakiness comes from leaving the butter in sizable chunks, so that during the baking process the crust puffs into layers before the butter has had a chance to melt fully. Tenderness, though, comes from being sure the flour has been fully hydrated, which can only happen with full incorporation of the liquid element. Yet overworking the dough makes it tough, and the flakiness quotient disintegrates as you break the butter into smaller and smaller bits. See why I don’t like making pie crust?

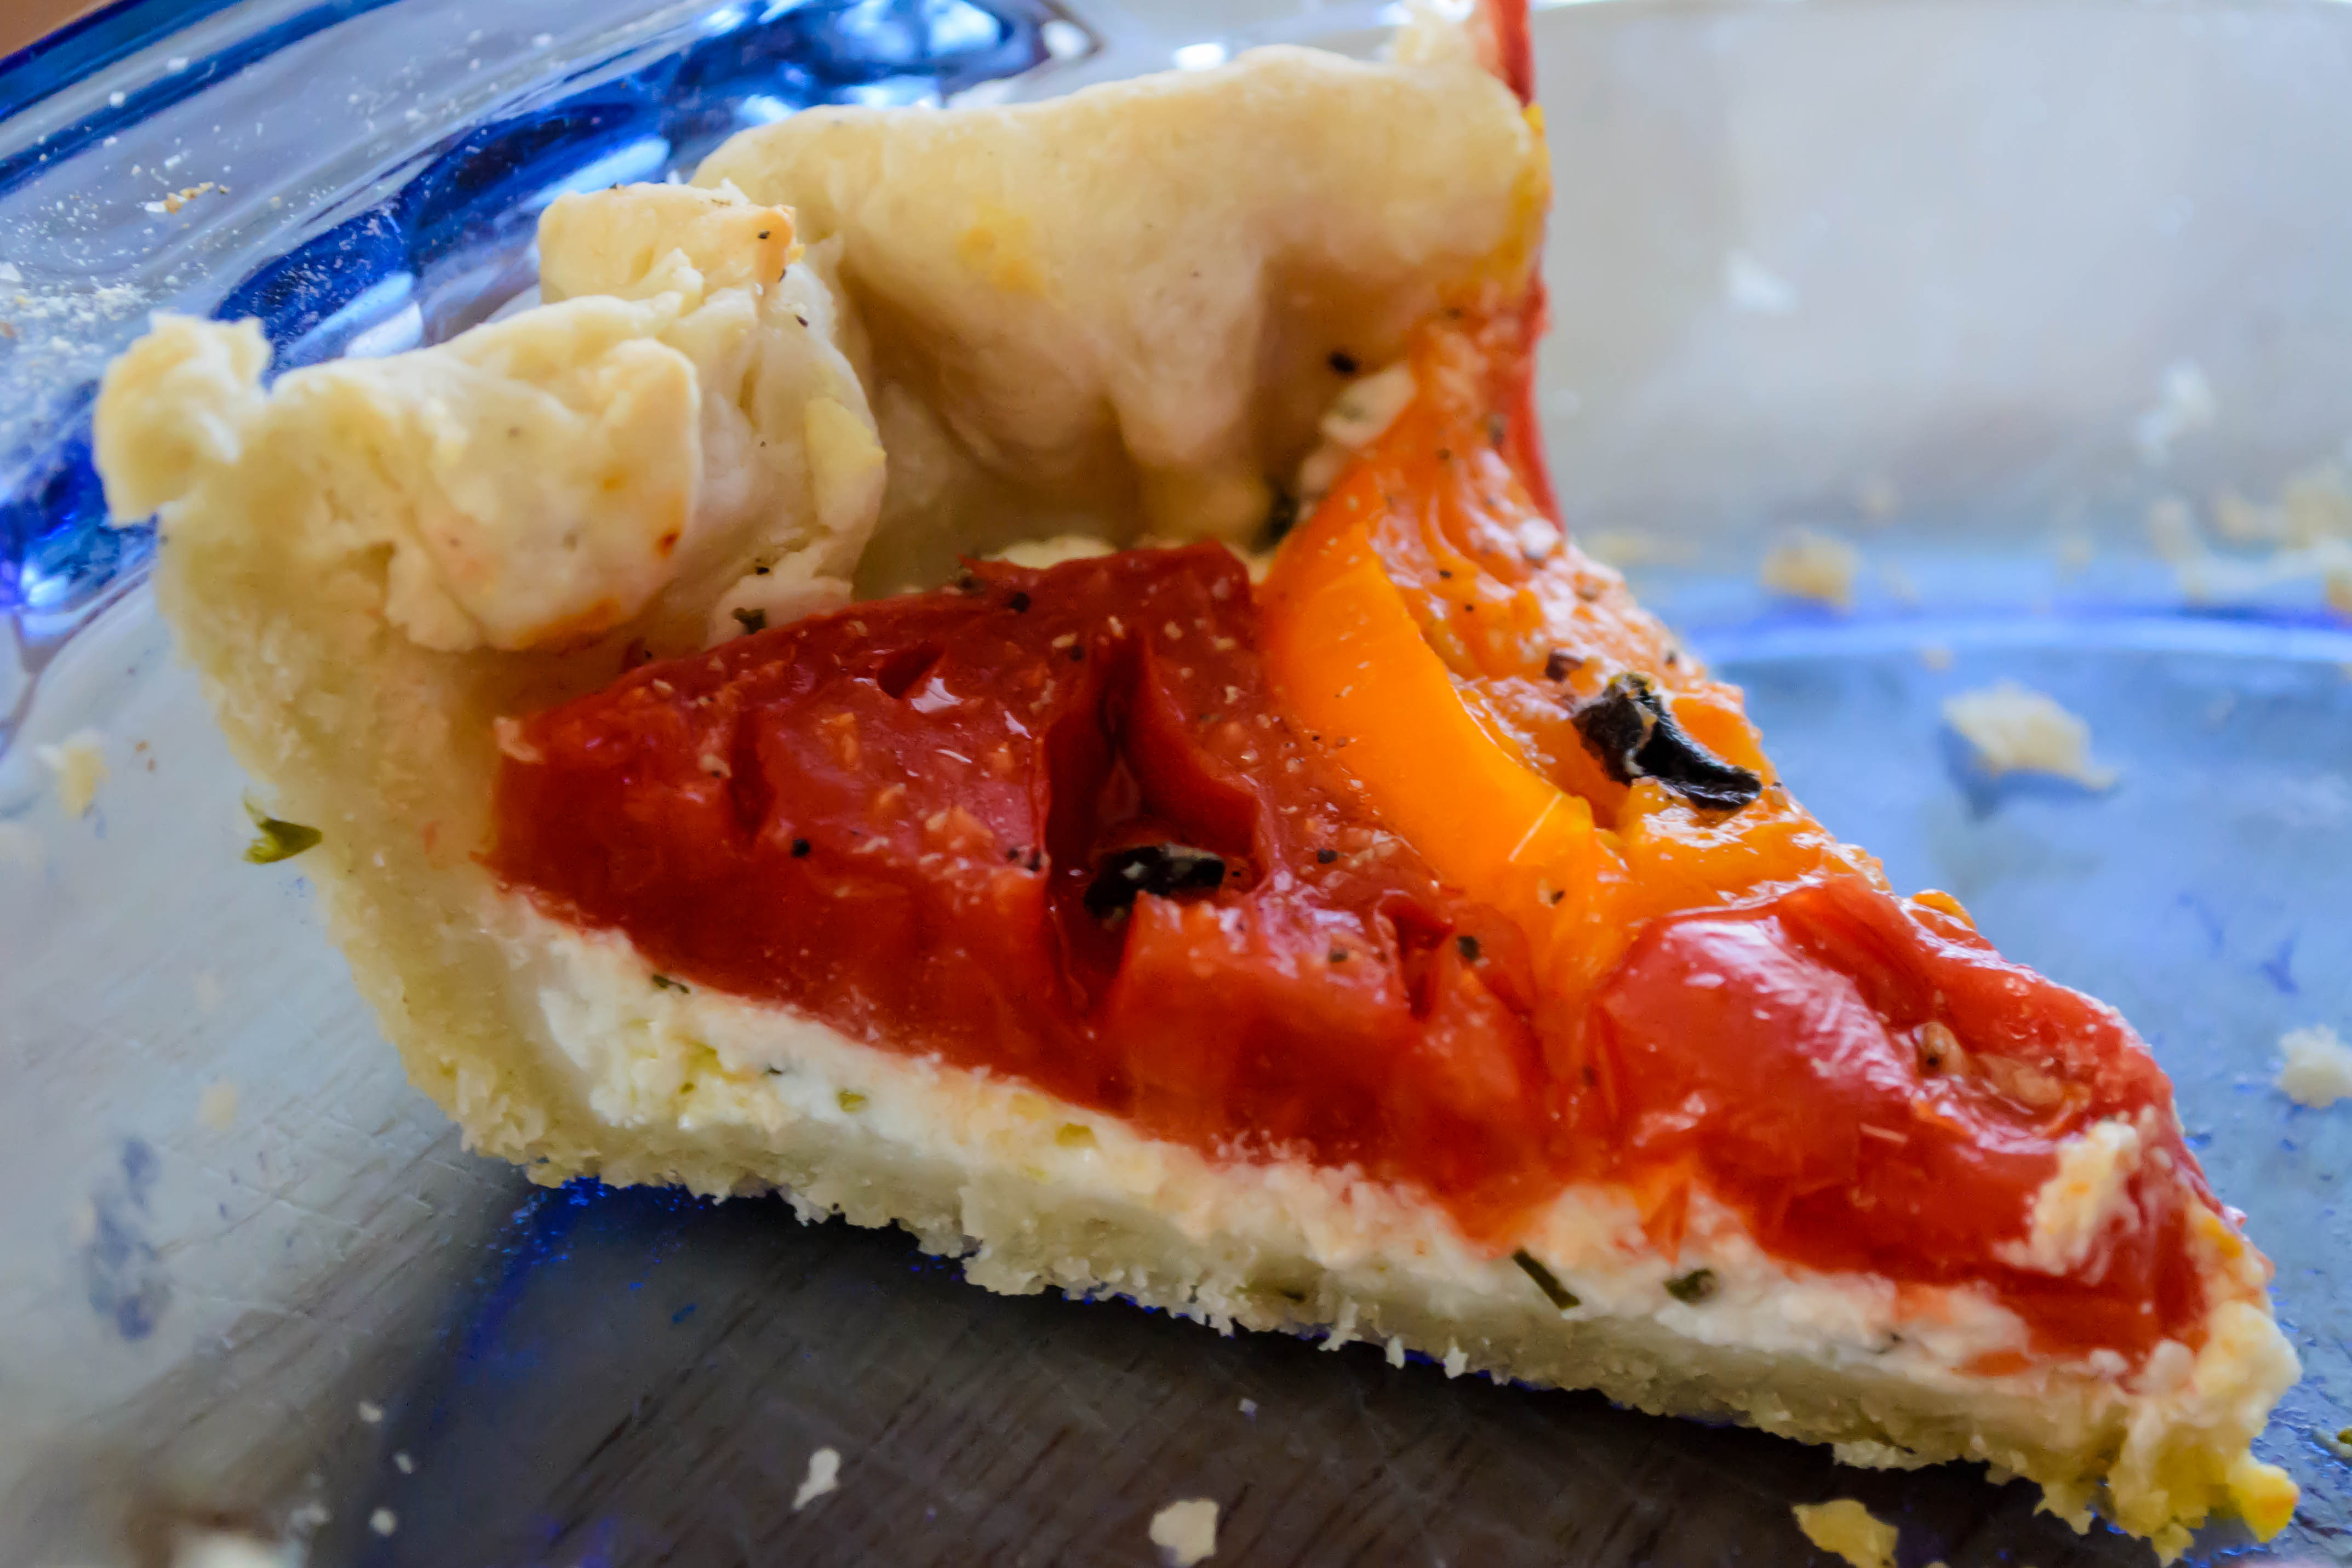
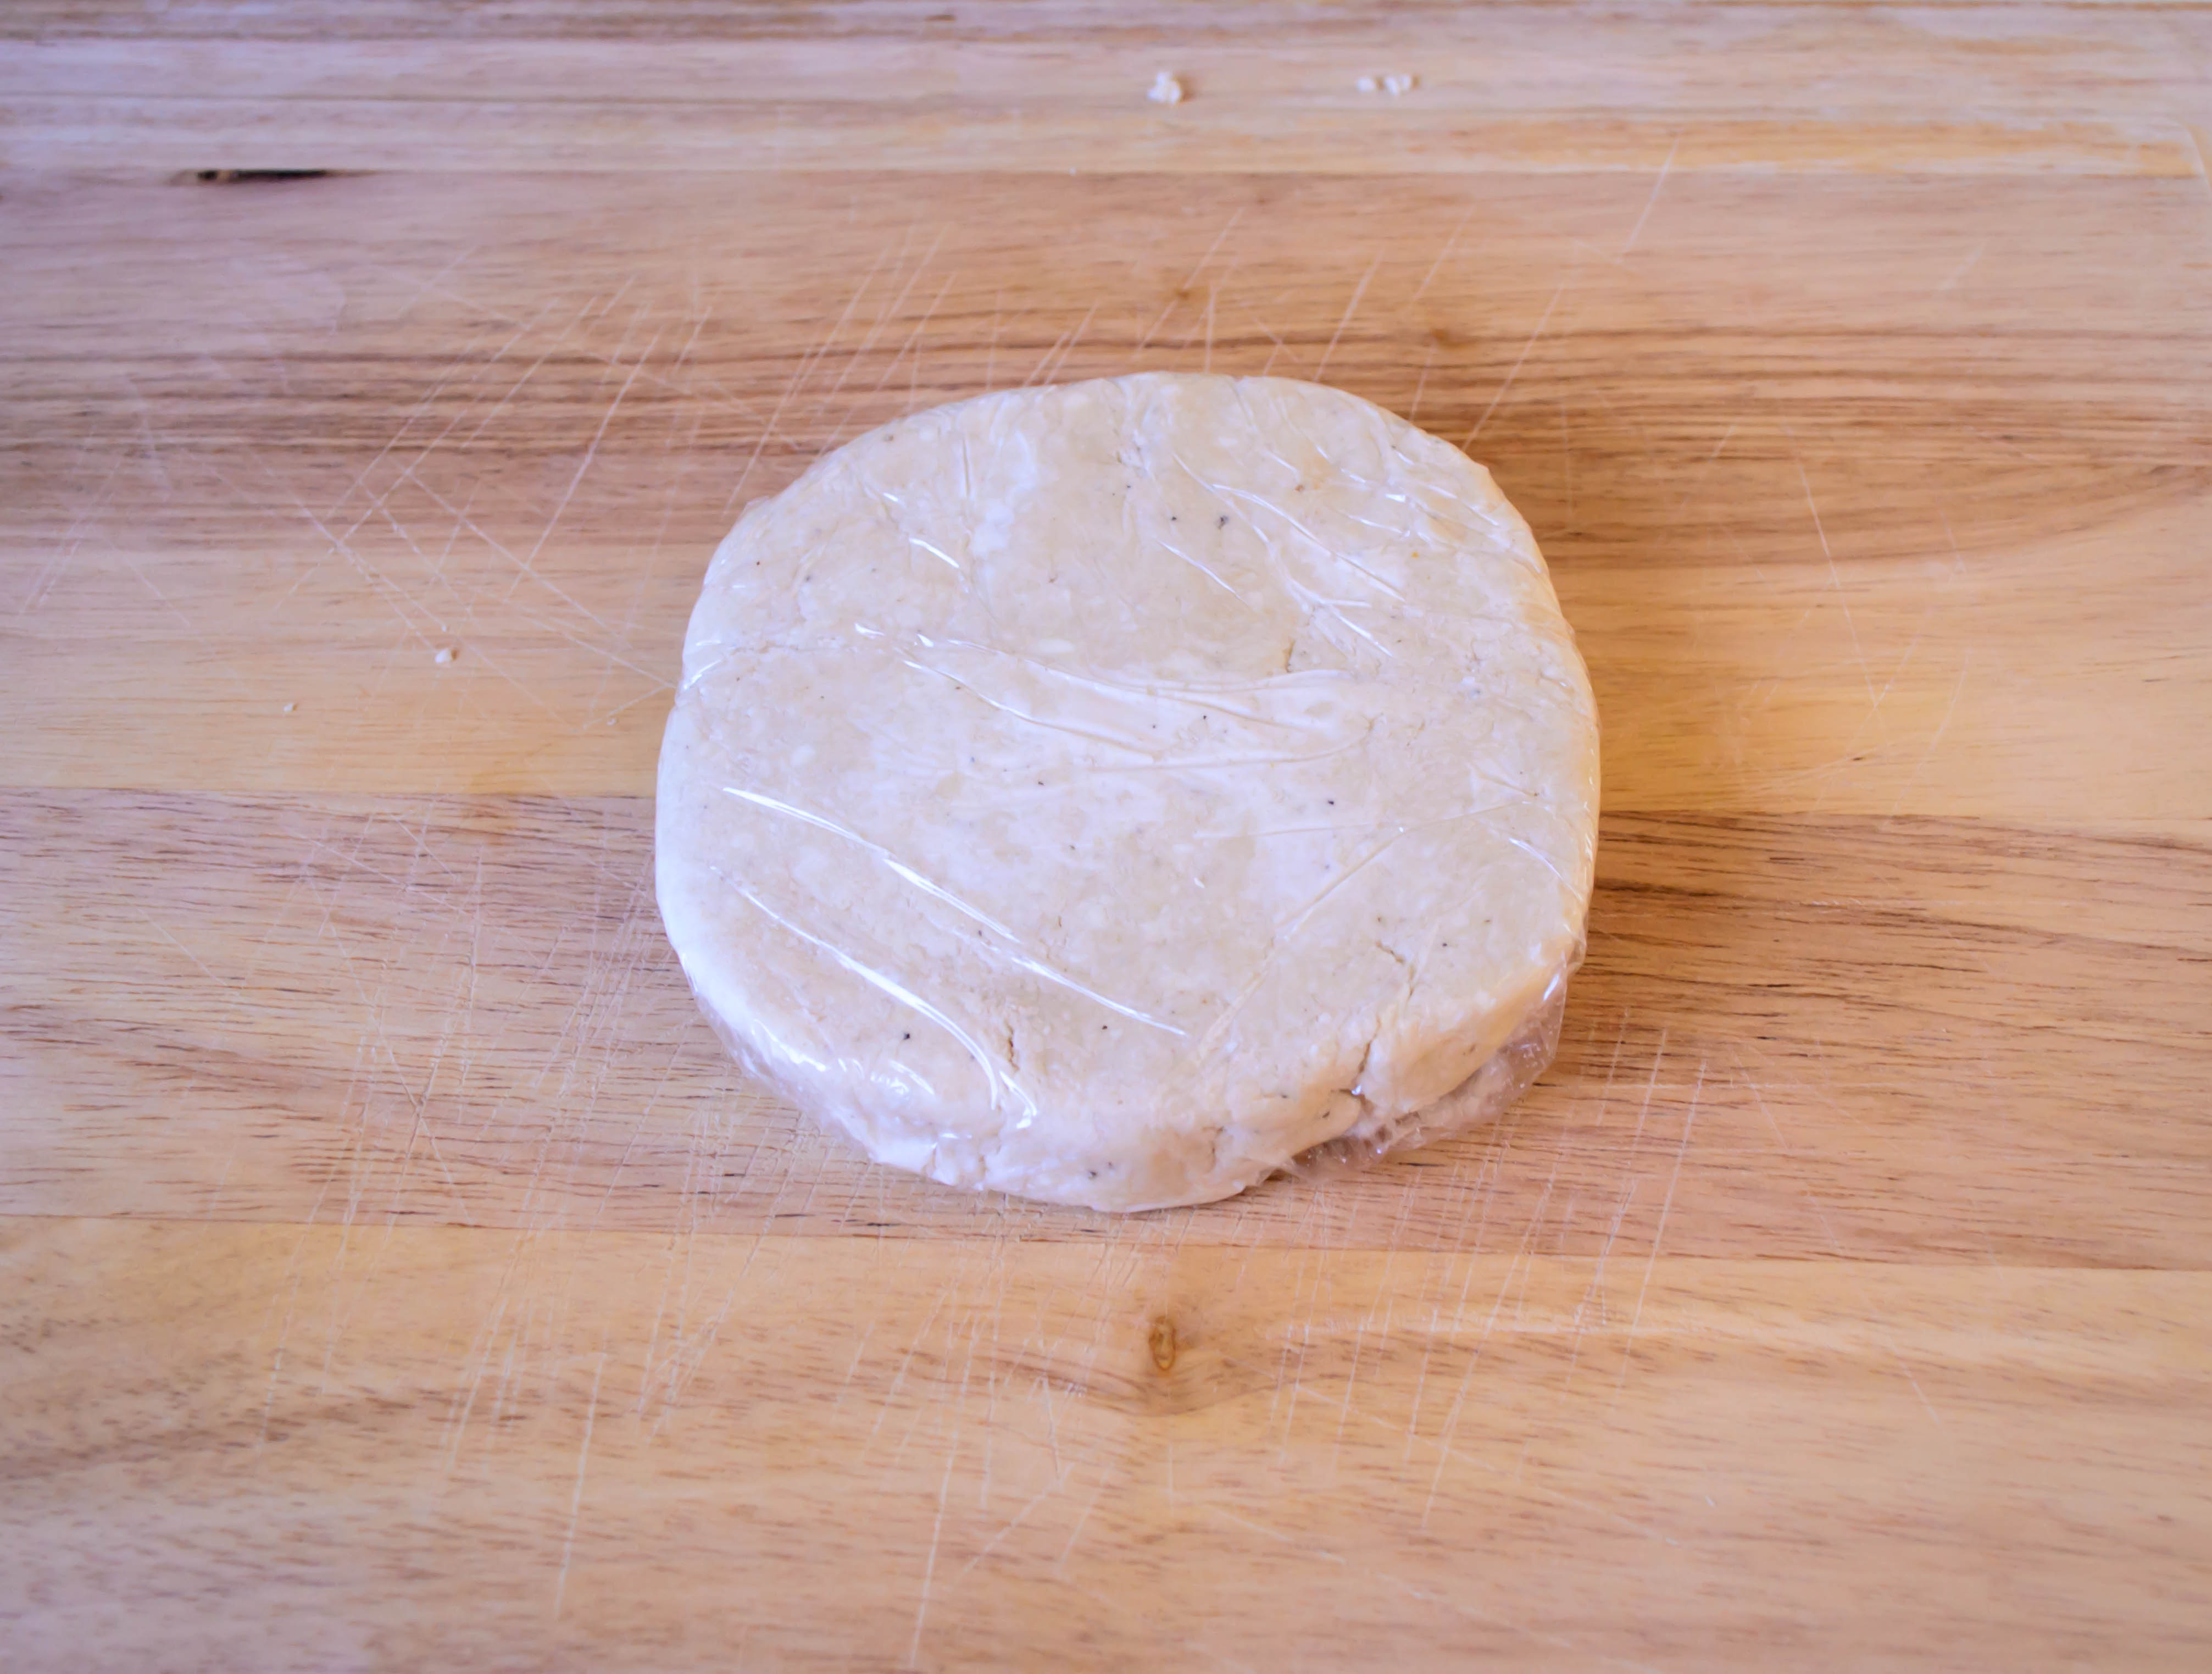 But this crust was magic. I decided that if what we really wanted was flakes and tenderness, and if fat helps along hydration and acidity contributes to a tender final product, then the little container of buttermilk that had been sitting quietly at the back of my refrigerator for weeks was the consummate answer. And it was. The crust came together quickly, rolled out like a dream, and was stable enough that I was actually able to give it some decorative edging before I packed it full of goat cheese and thick slices of tomato and shoved it into the oven.


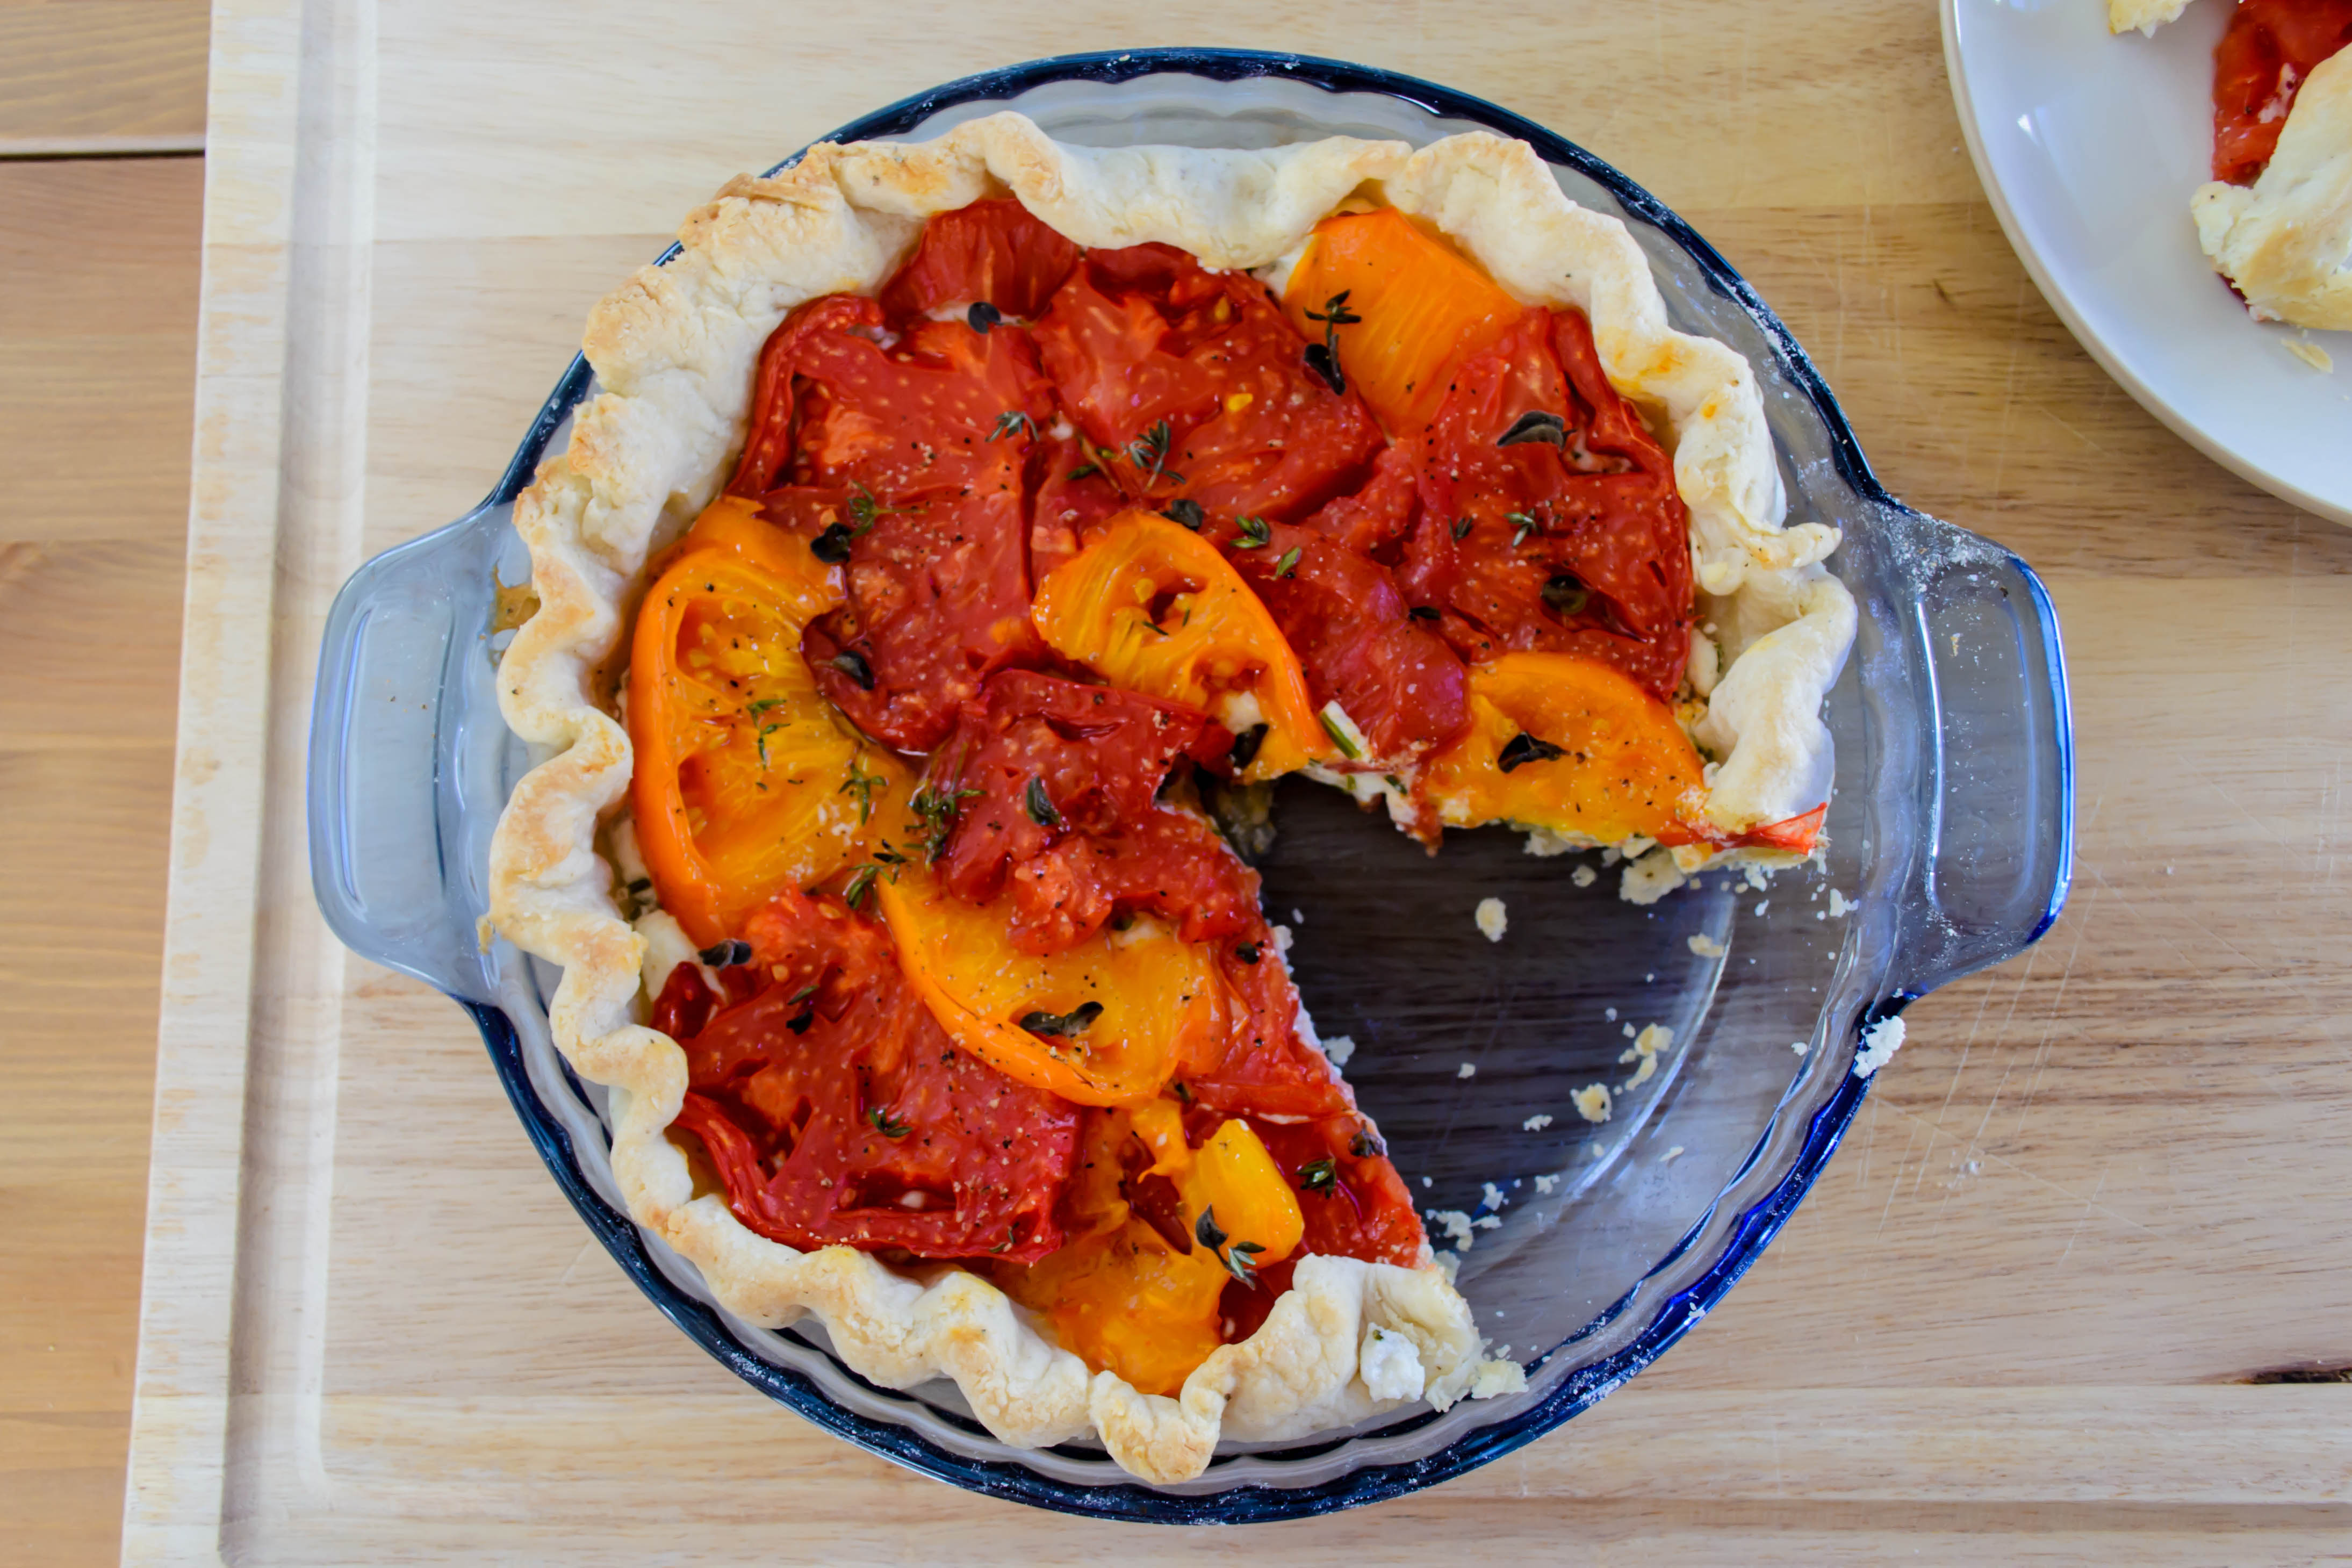 We weren’t exactly sure what to expect of this dish (in fact, when I said “tomato pie” to N., he made a very interesting face), but after we’d both gone back for a second slice, and then a sliver of a third, we decided that we must like it. It’s a really nice balance of flavors, with the sweet sharpness of tomatoes mellowed into something almost meaty, but still light in spite of the layer of tangy cheese. The perfect late summer supper. But it would also, I think, be a great brunch option, or a light lunch with a fresh salad, or, cut into very thin slices, a beautiful canapé for a bridal or baby shower.
 Goat cheese tomato pie
I am a list writer. I love lists. I live my life by them. I am addicted to my day-planner, where I write in even the most menial of tasks (eat lunch! unload the dishwasher!) just so I can have the satisfaction of crossing them off. I have a three page document on my laptop of “blog post ideas” – names and concepts of dishes I’ve never even tried that I’d like to develop and perfect to share with you.
 Thus it should come as no surprise that I can’t go grocery shopping without a list. Every week I make one, and every weekend before the big trip, I hand the list over to N. so he can add his requests. He writes funny little notes on random lines all out of order (doesn’t he know the list is arranged by where in the store the product is found?!) and tries whenever possible to convey his desires in puns or wordplay or goofy spelling. A few weeks ago, he wrote “chip-snack” near the bottom of the list. I knew this meant we’d be trying something new – a change-up from the standard yellow corn tortilla chips we usually have lurking about in our pantry.
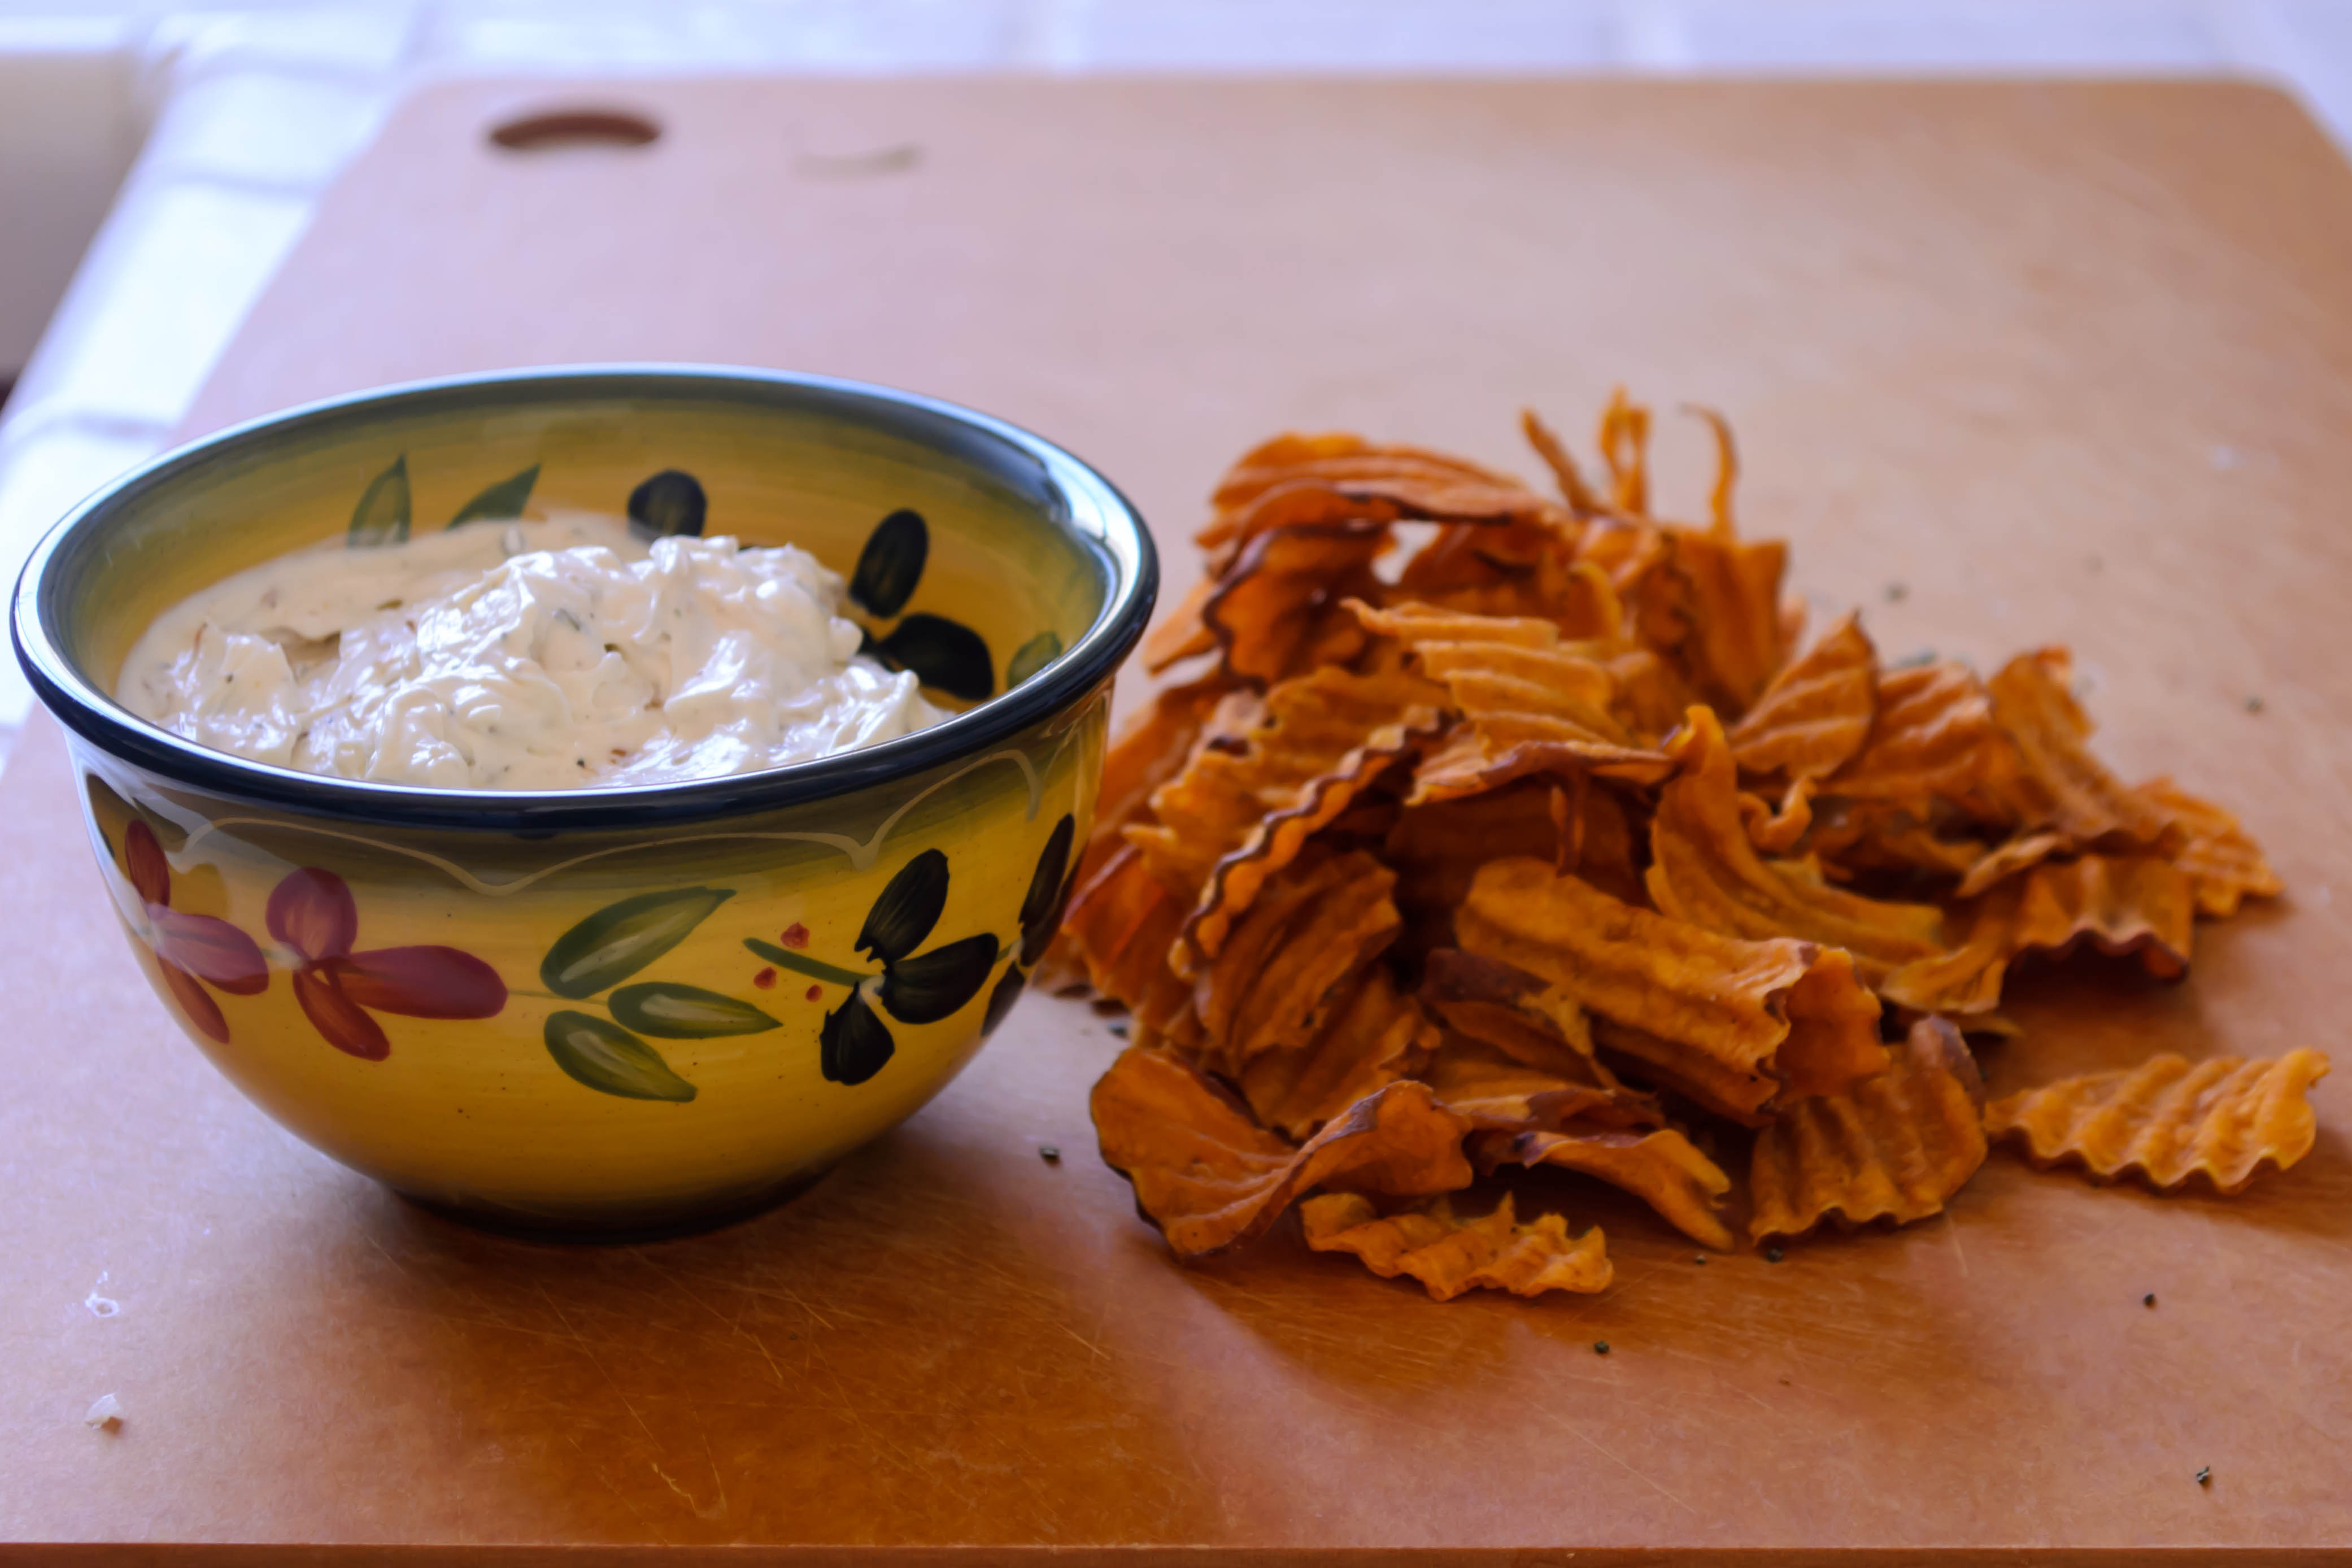
 We came home with thick ridge-cut sweet potato chips. And they were… okay. N. noted astutely that they were tasty, but after a few you felt like you’d eaten, well, a sweet potato. And I guess that’s a sign that they are what they advertise, but maybe they aren’t our ideal snack.
 As I was munching my way through a second helping one afternoon, trying to pinpoint what it was about these chips that I wasn’t crazy about (I know, I know, why would I eat more of them if I didn’t really love them?), I realized they just needed a little help. Without as much sodium as a standard potato or tortilla chip, I was missing some of the savory oomph that you really want from a chip. This meant they were going to need a friend to play with: a salty, creamy swirl of dip to plunge into.
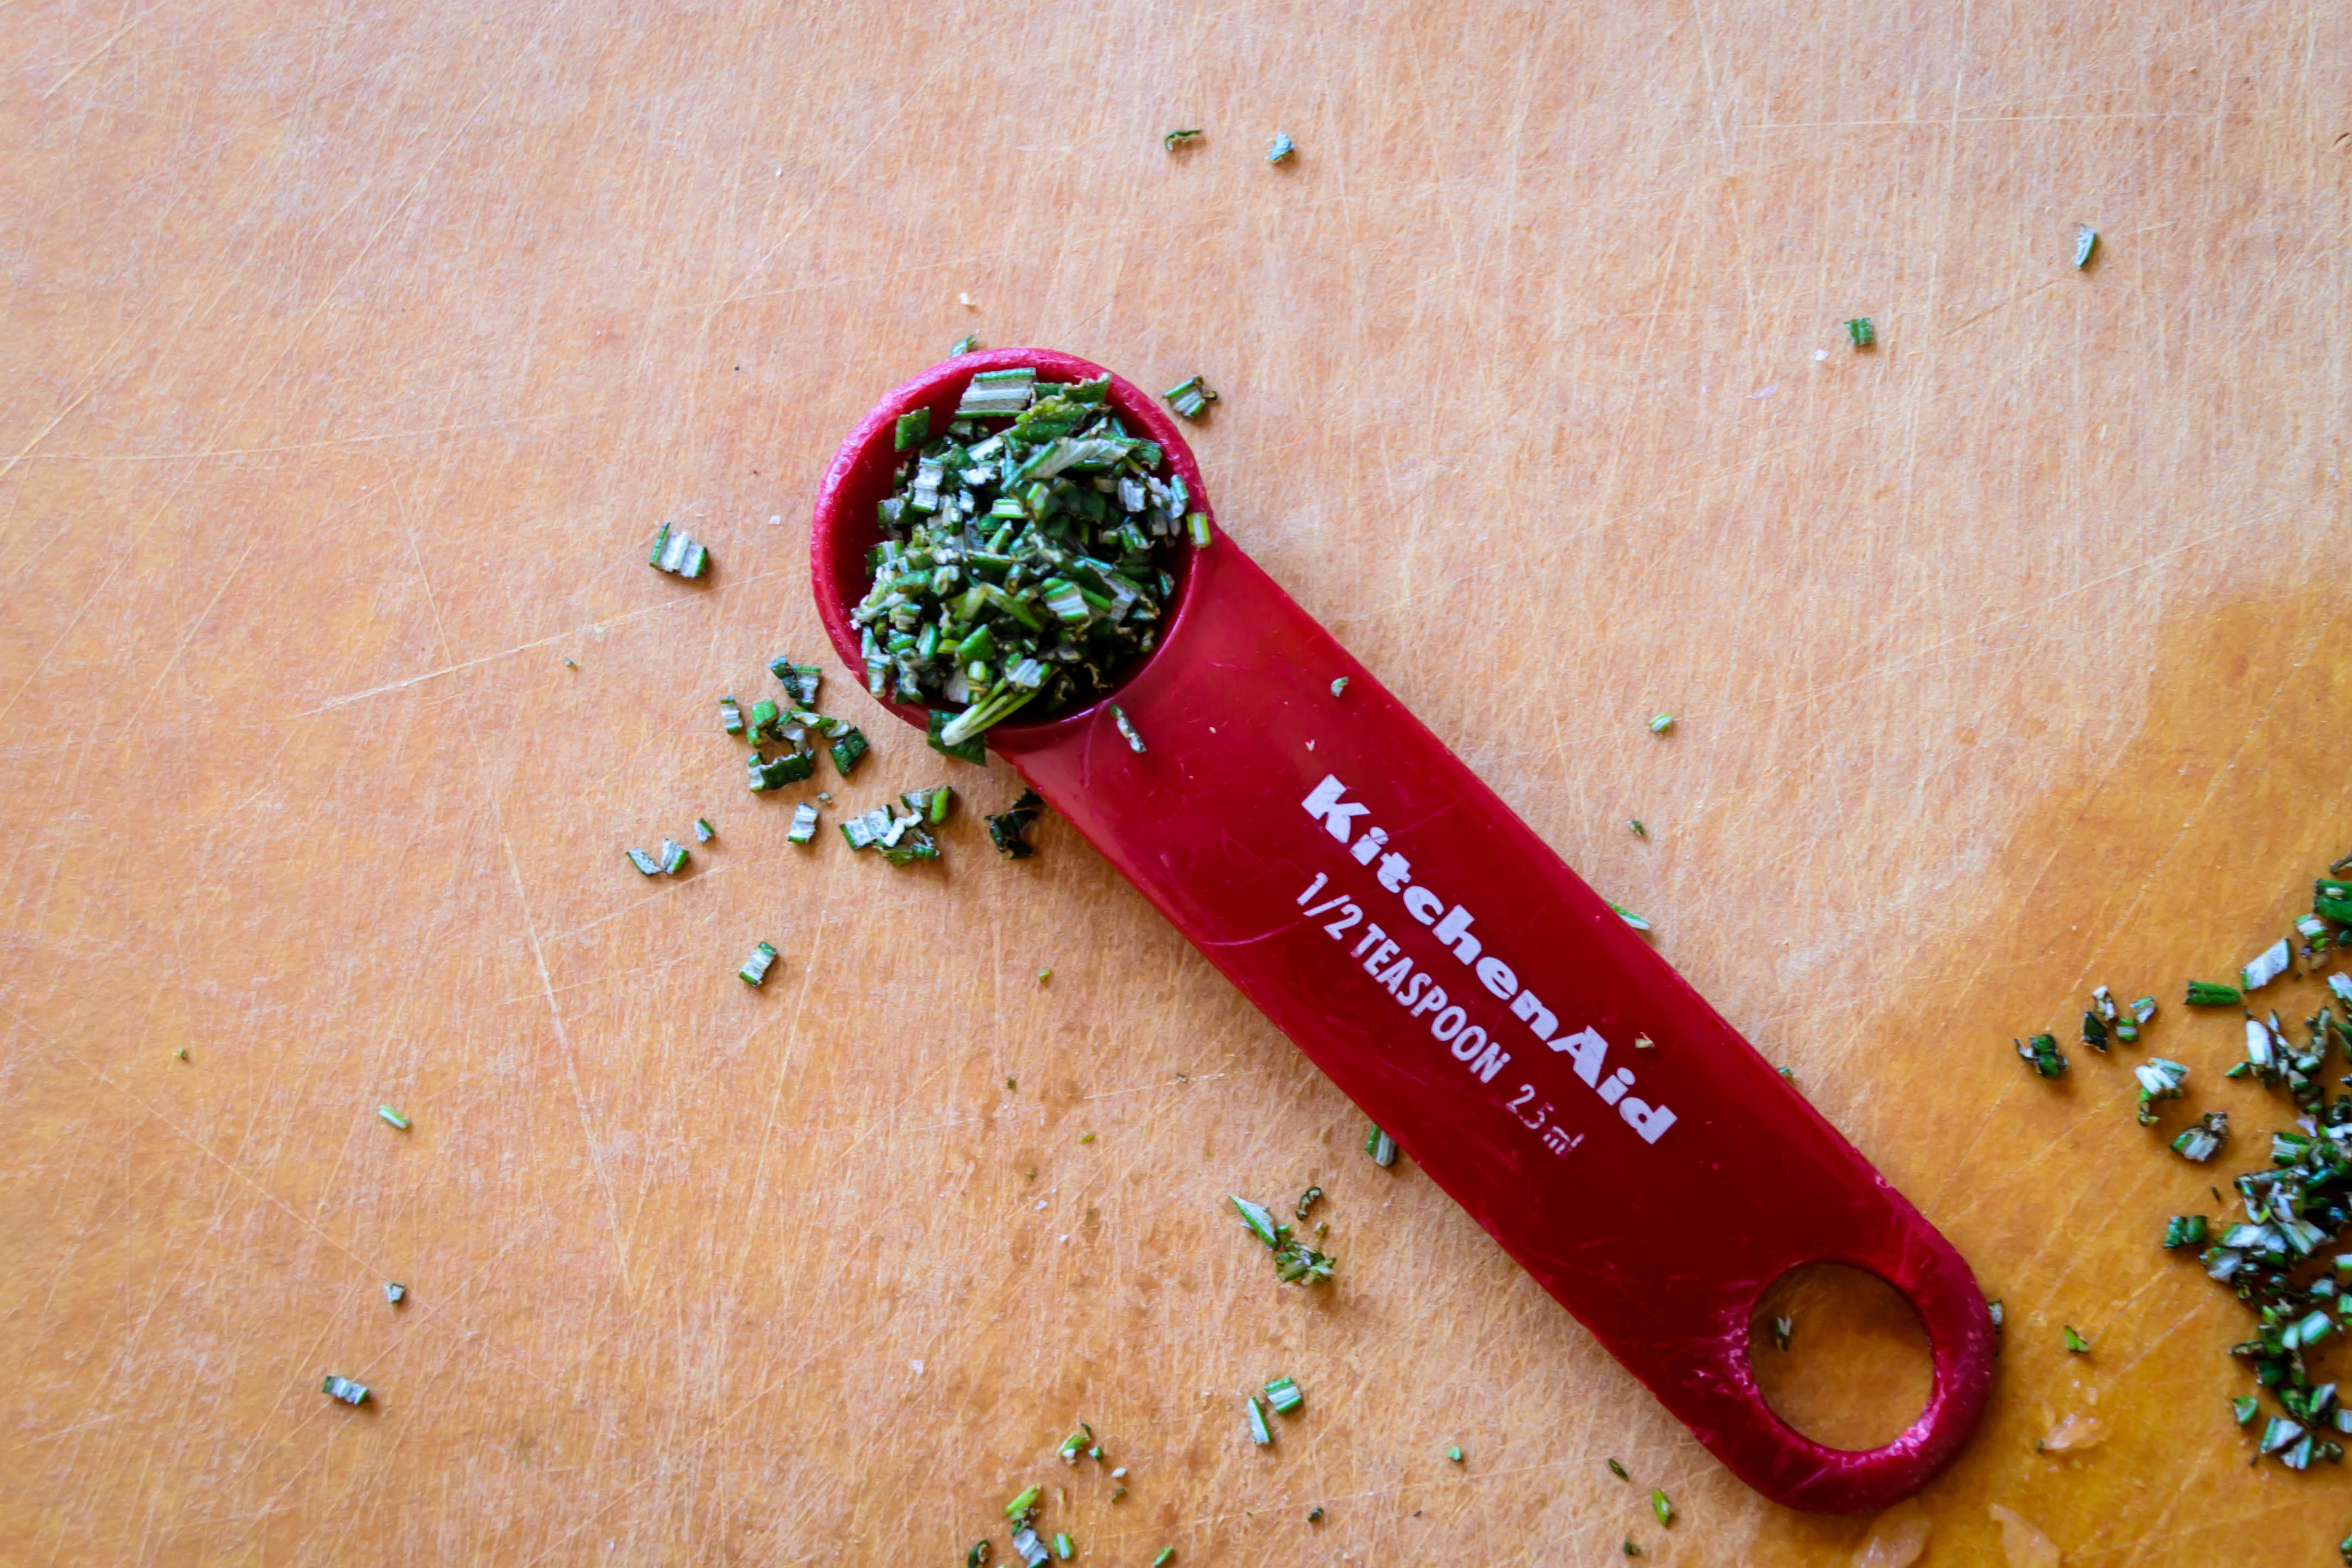
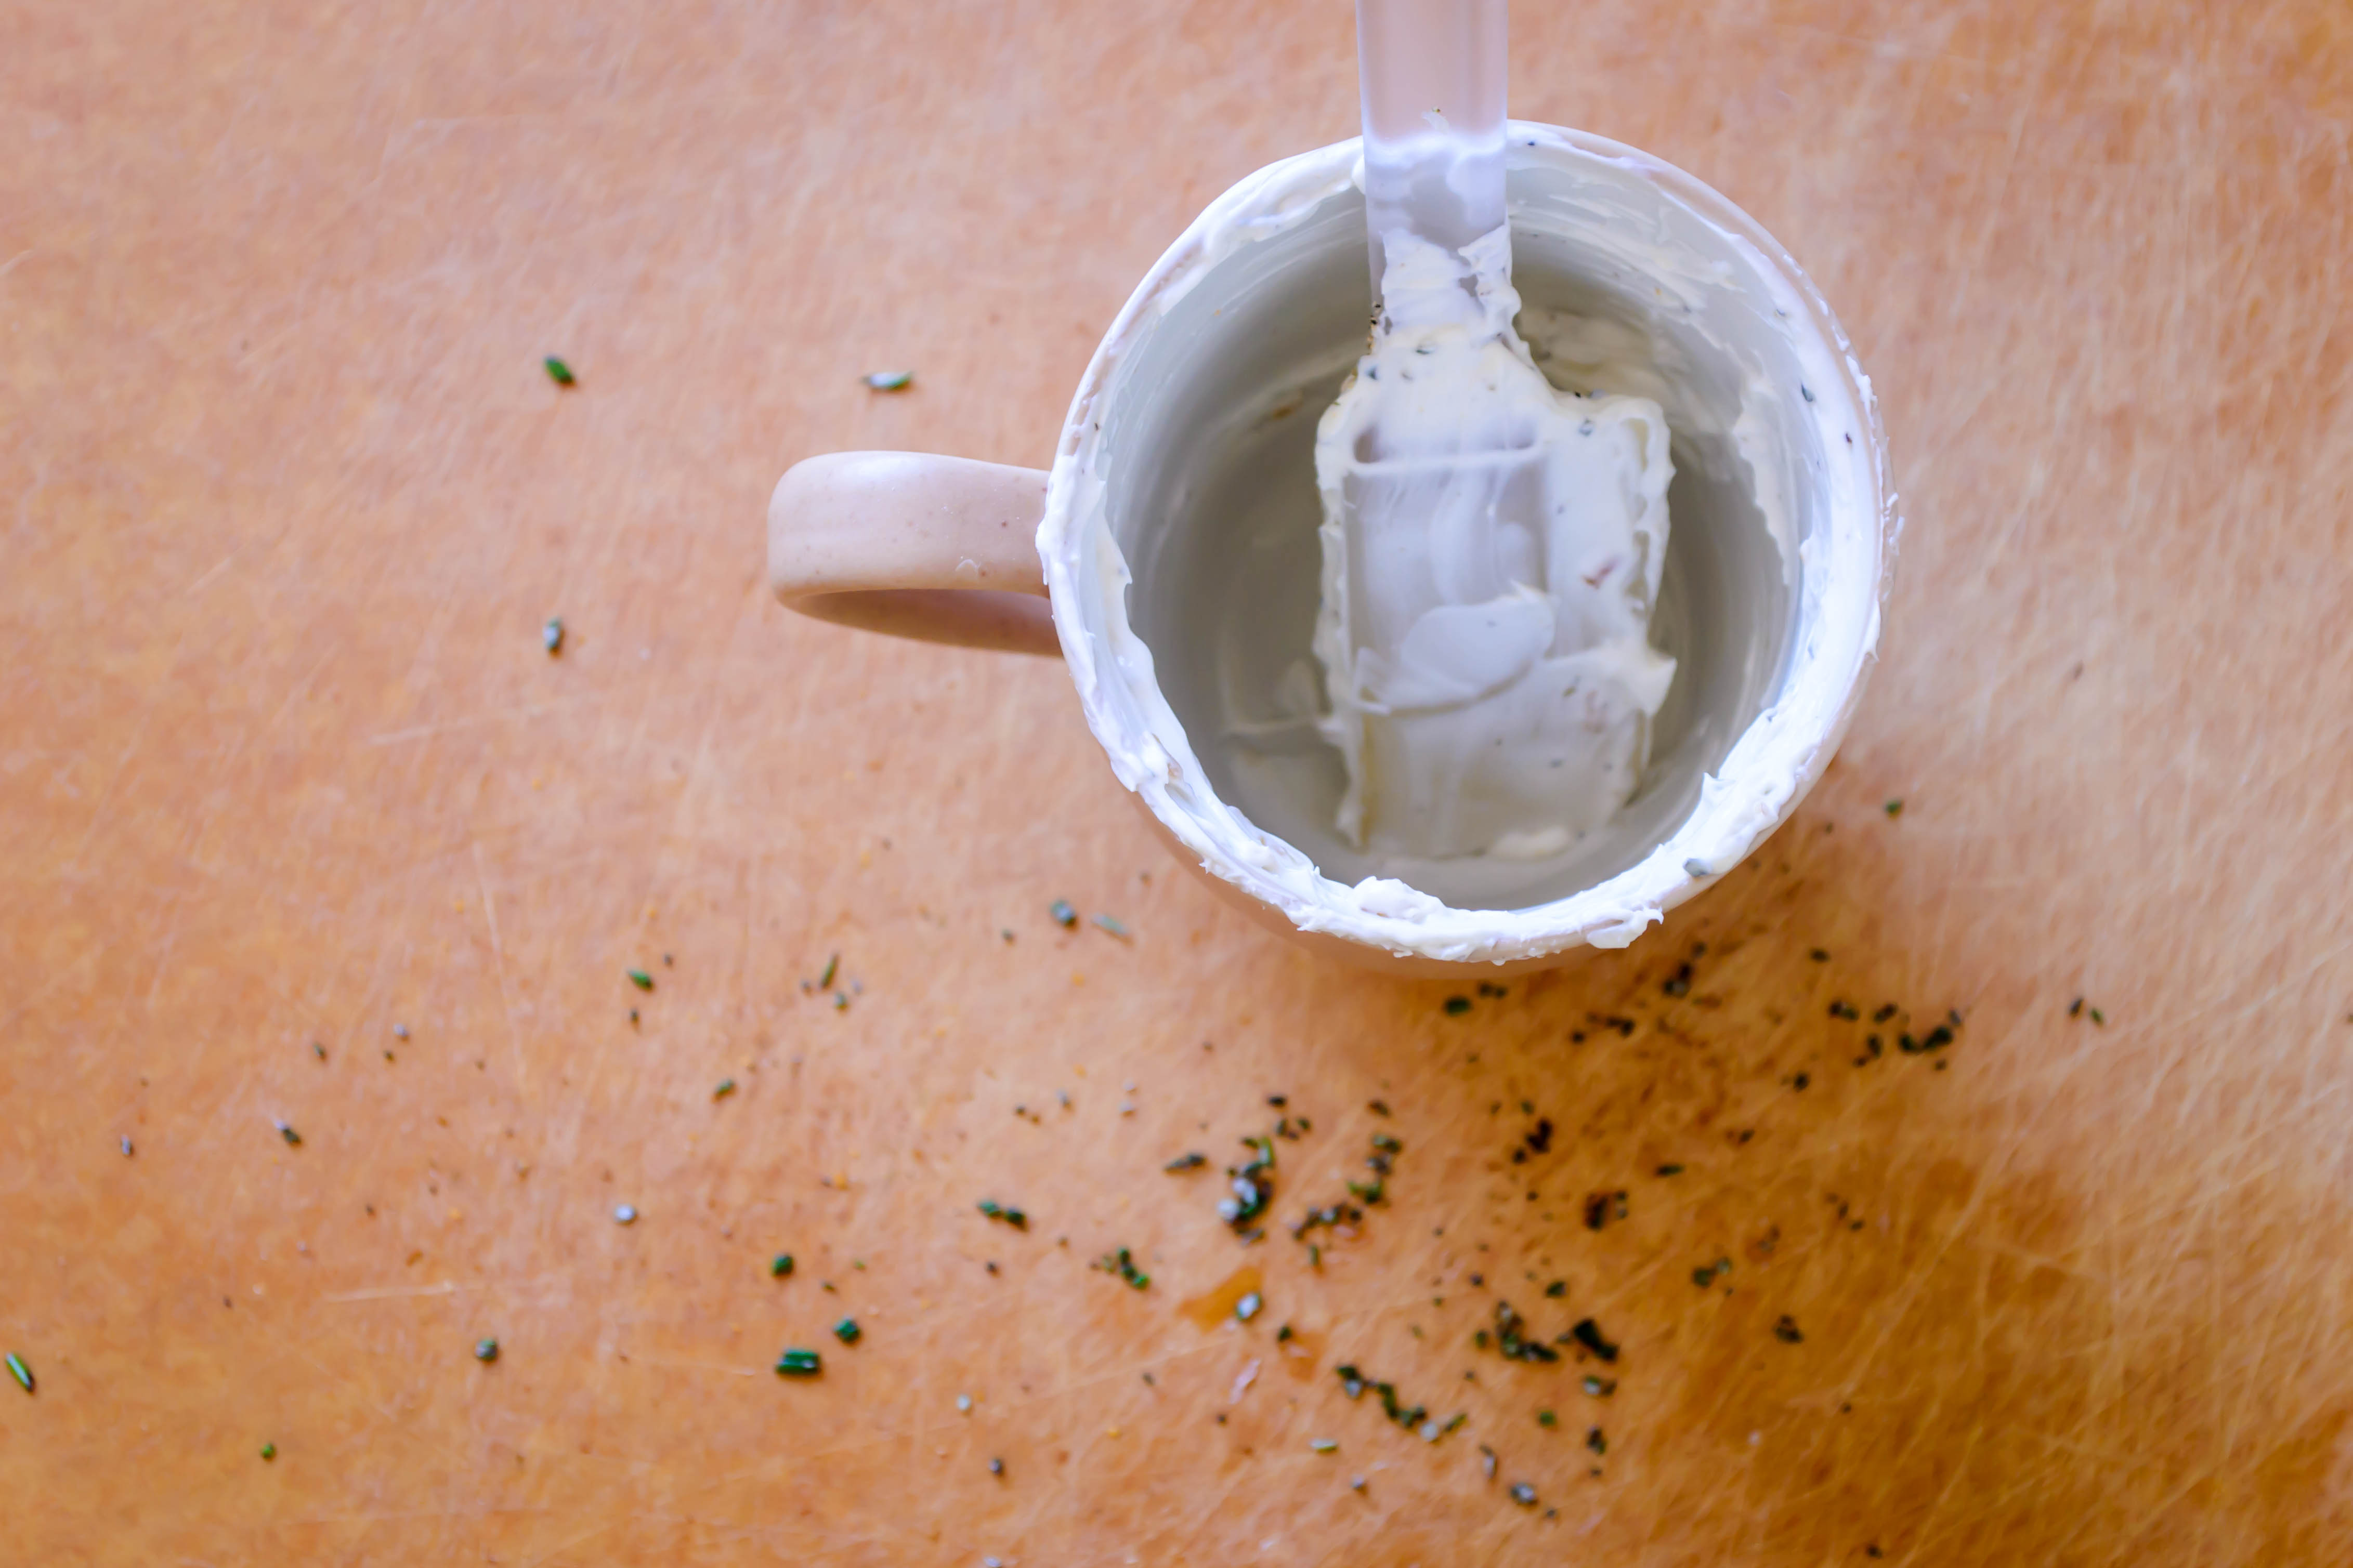 What came together, as I played, was the best possible version of a sour cream and onion dip. Whipped cream cheese with a dollop of sour cream for consistency and tang. A pile of well-caramelized onions, sweet and soft and deeply bronze, produced through considerable patience. Salt and pepper, of course, and I didn’t want to complicate things, but it needed something else to break up the richness. That something else turned out to be the earthy herby punch of finely chopped rosemary.
You want this for your next chip and dip party (do people have those? We should). You also want, I quickly determined, at least four people at the table when you serve this, because it will disappear, and you want to prevent any guilt that would result from eating the whole cupful, along with the whole bag of chips, all by yourself.
Other suggestions: double or triple this recipe, spread it evenly into a casserole dish, and bake at 400F for 20 minutes or so, until the whole thing is luscious and bubbly and mouth-searingly hot, then serve with crostini or pita chips. And call me. Because I want in on that action. Or you could roast thick slices of sweet potato with some olive oil, salt, and pepper, and pipe this on top with a piping bag in pretty little swirls. Arranged on a big square platter, that would make gorgeous passed appetizers.
Or you can just jam crackers or bits of toast into the dregs of the mixing bowl to get every last creamy bit. It is, after all, your party.

 Seeing as it’s now been more than half a year since I started this dough resolution, I think it’s high time for a check-in. When I began this project, I was afraid of pie crust. I found baking bread an intimidating procedure: proofing yeast was a touchy business; sticky dough made me wring my hands in despair. My first few loaves came out with black bottoms, and I didn’t have a real sense of the difference between bread flour and all-purpose.
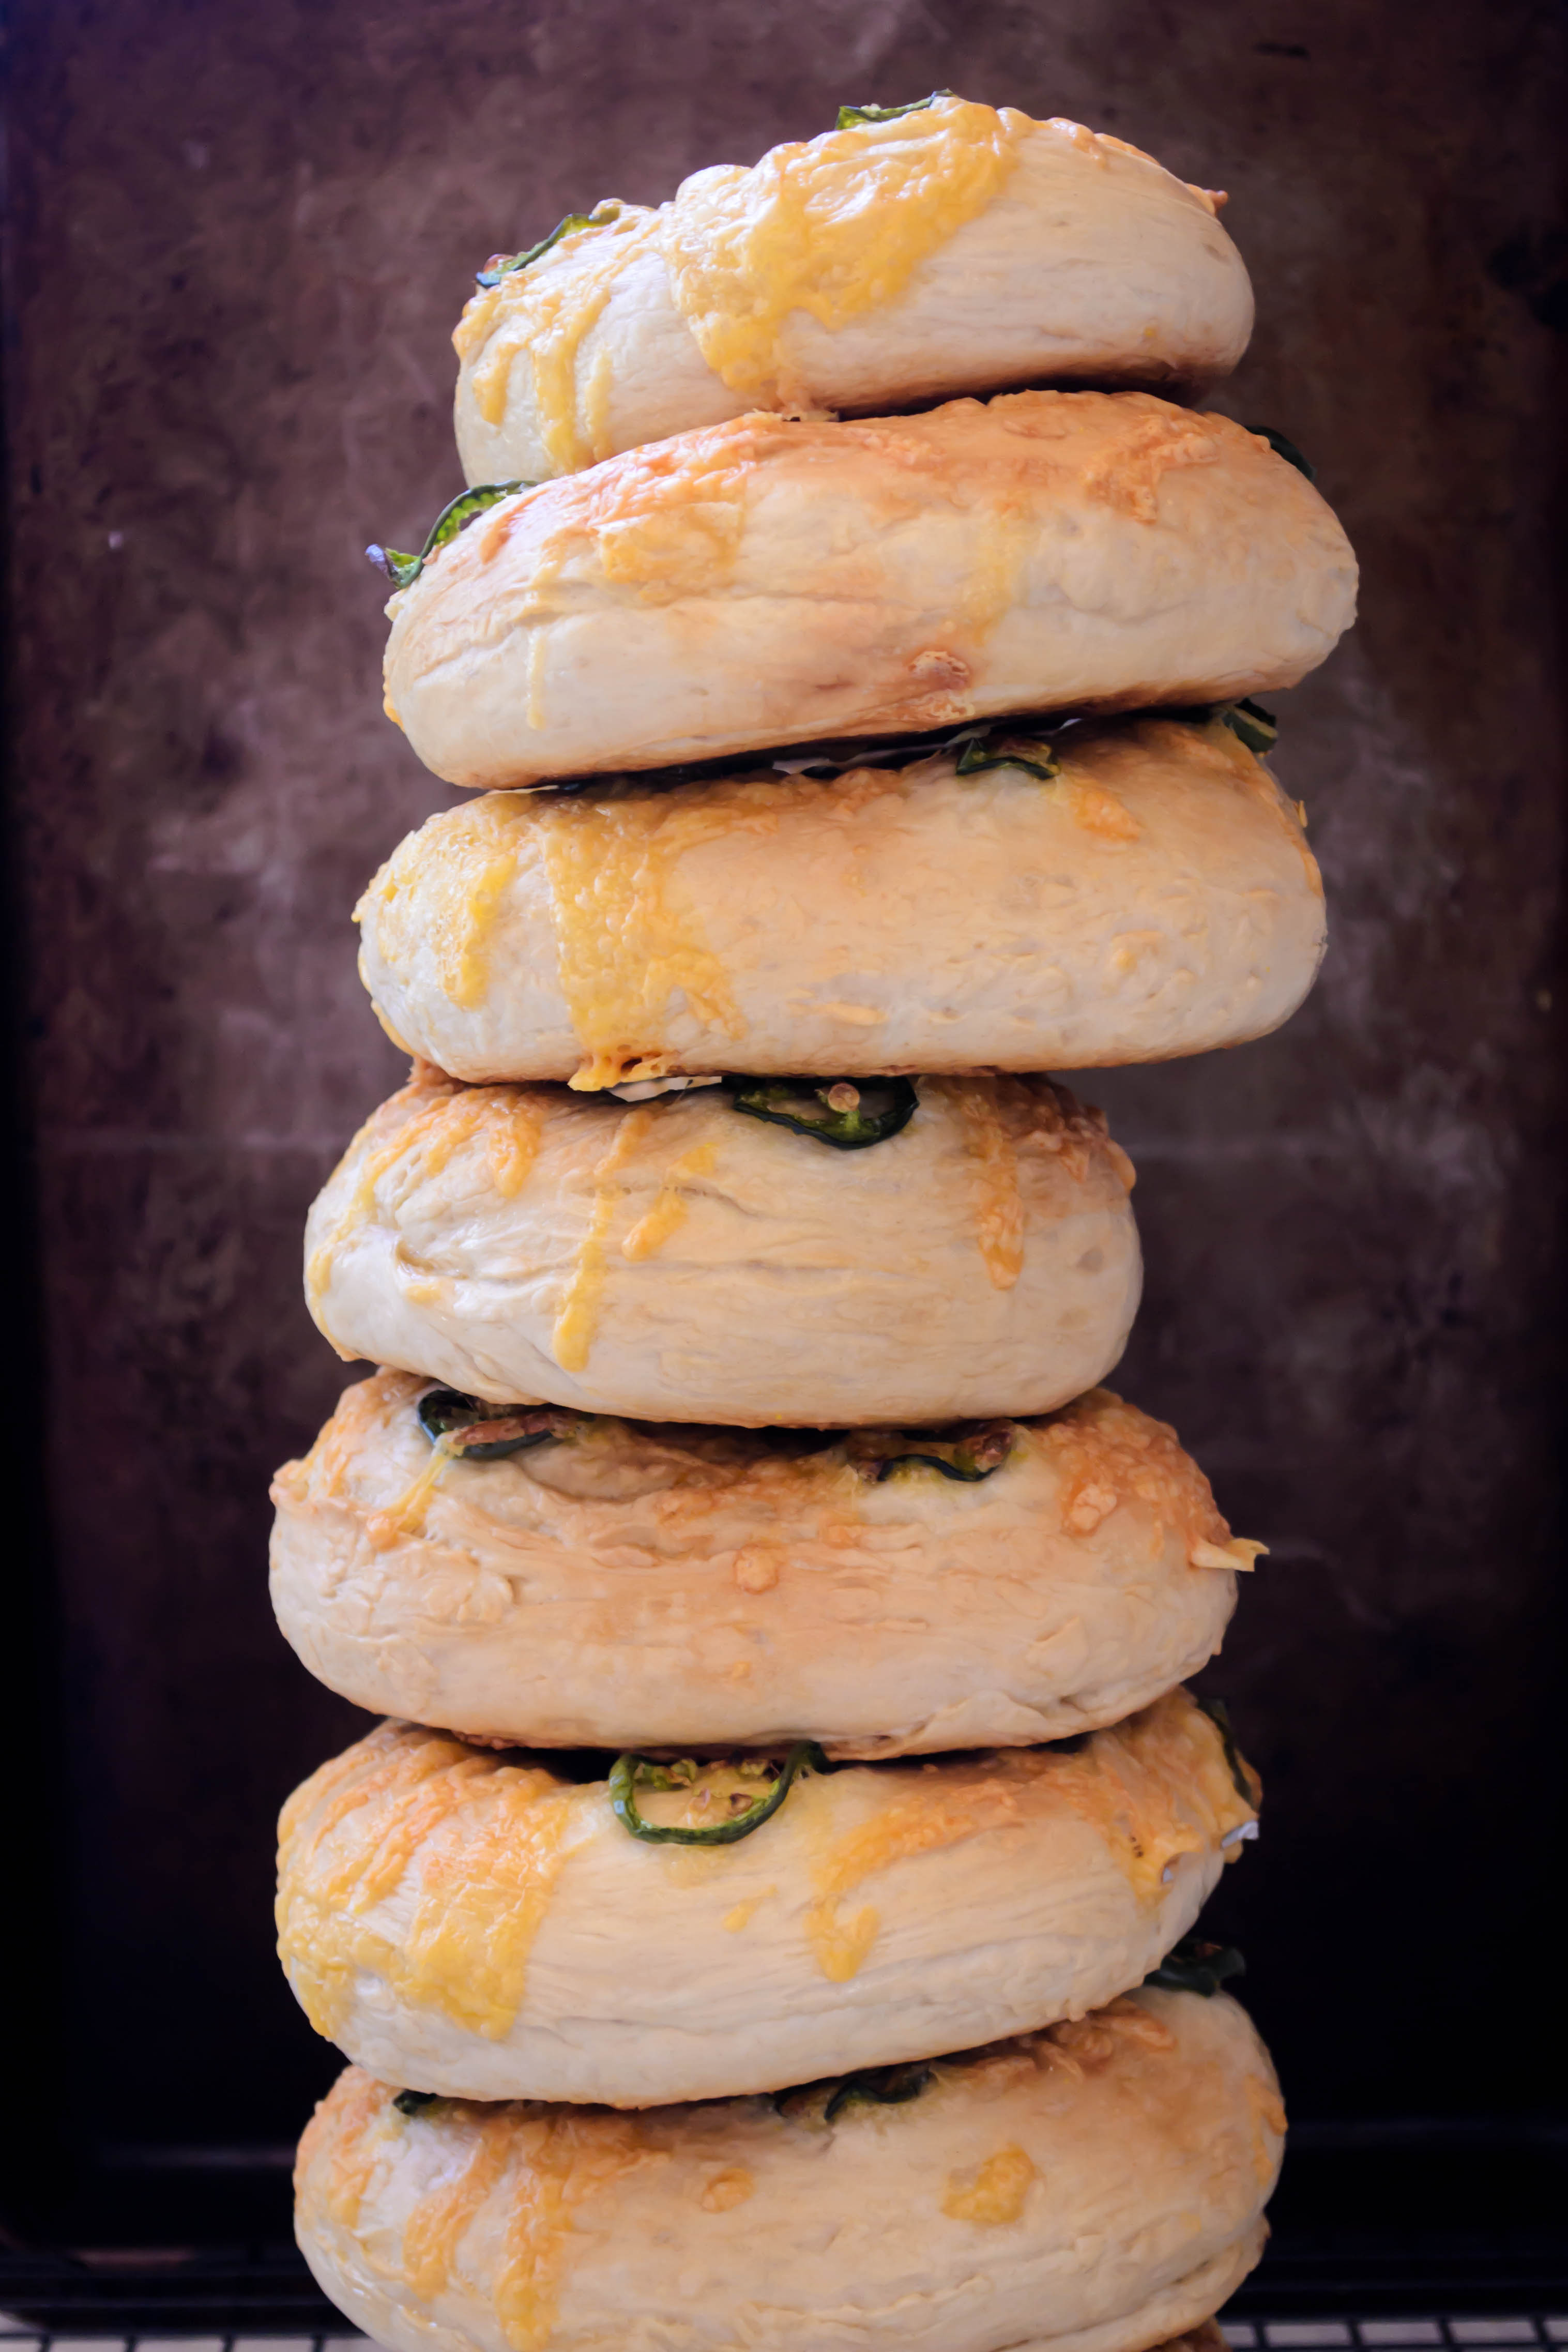
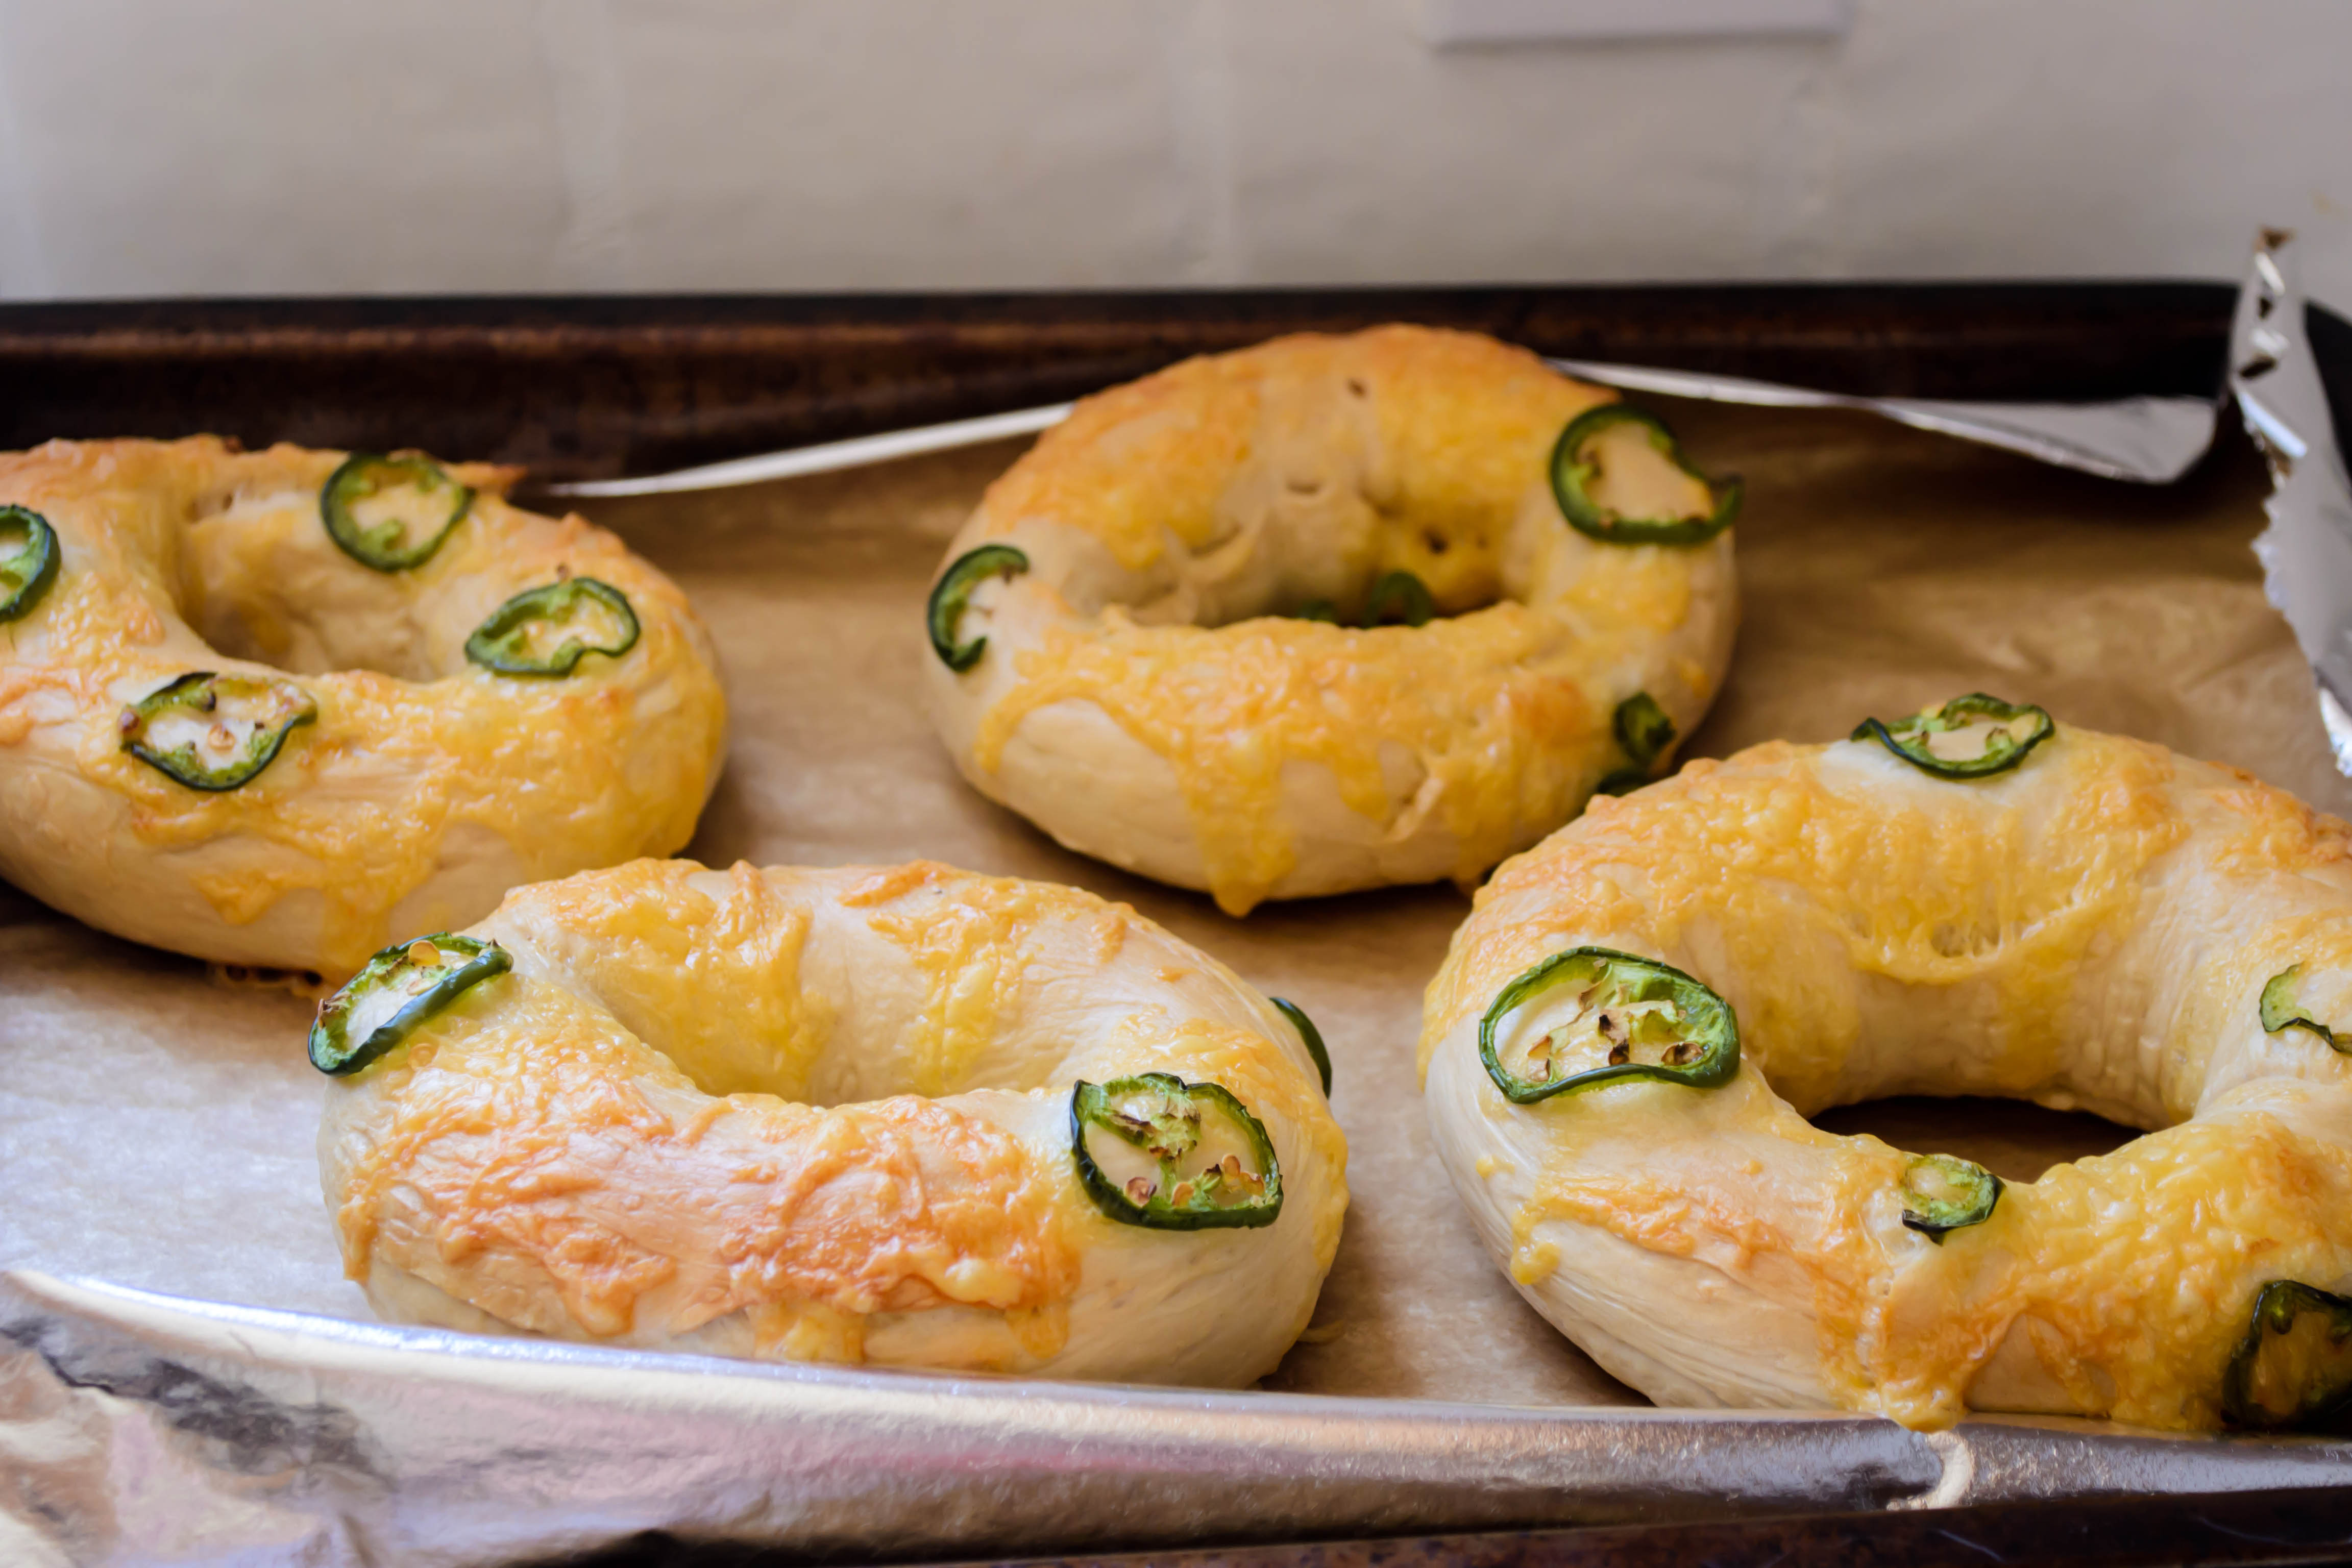
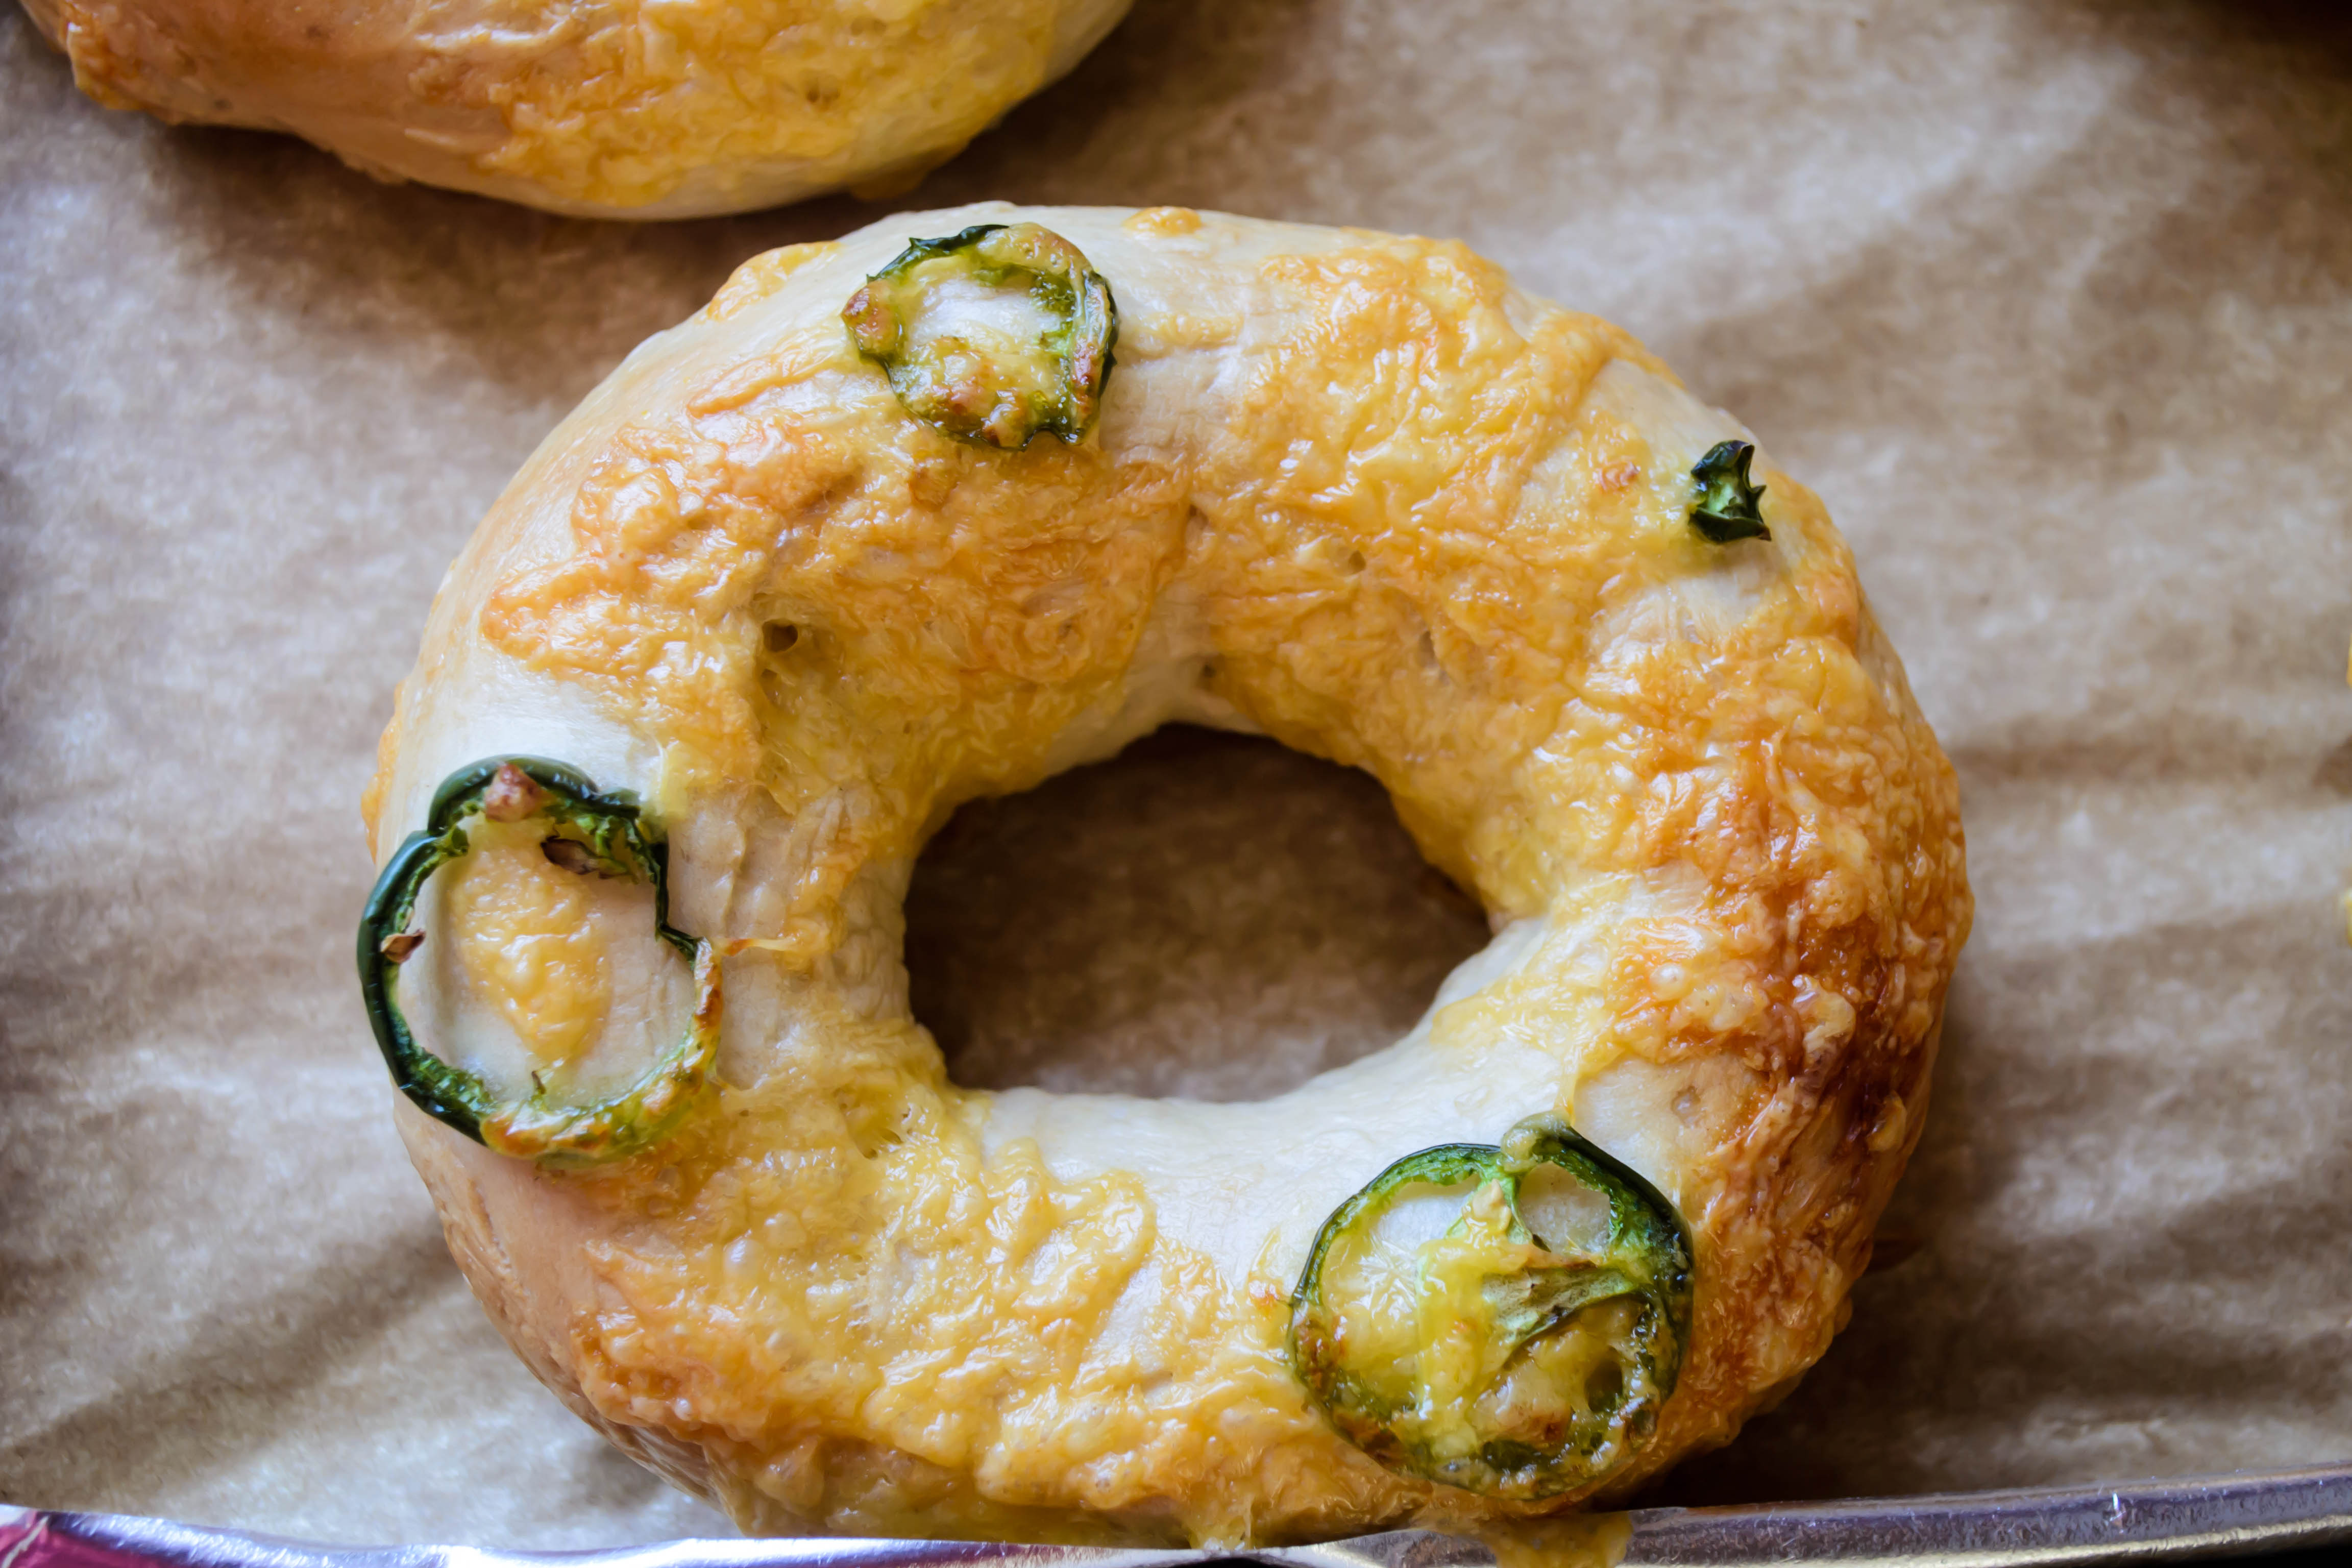
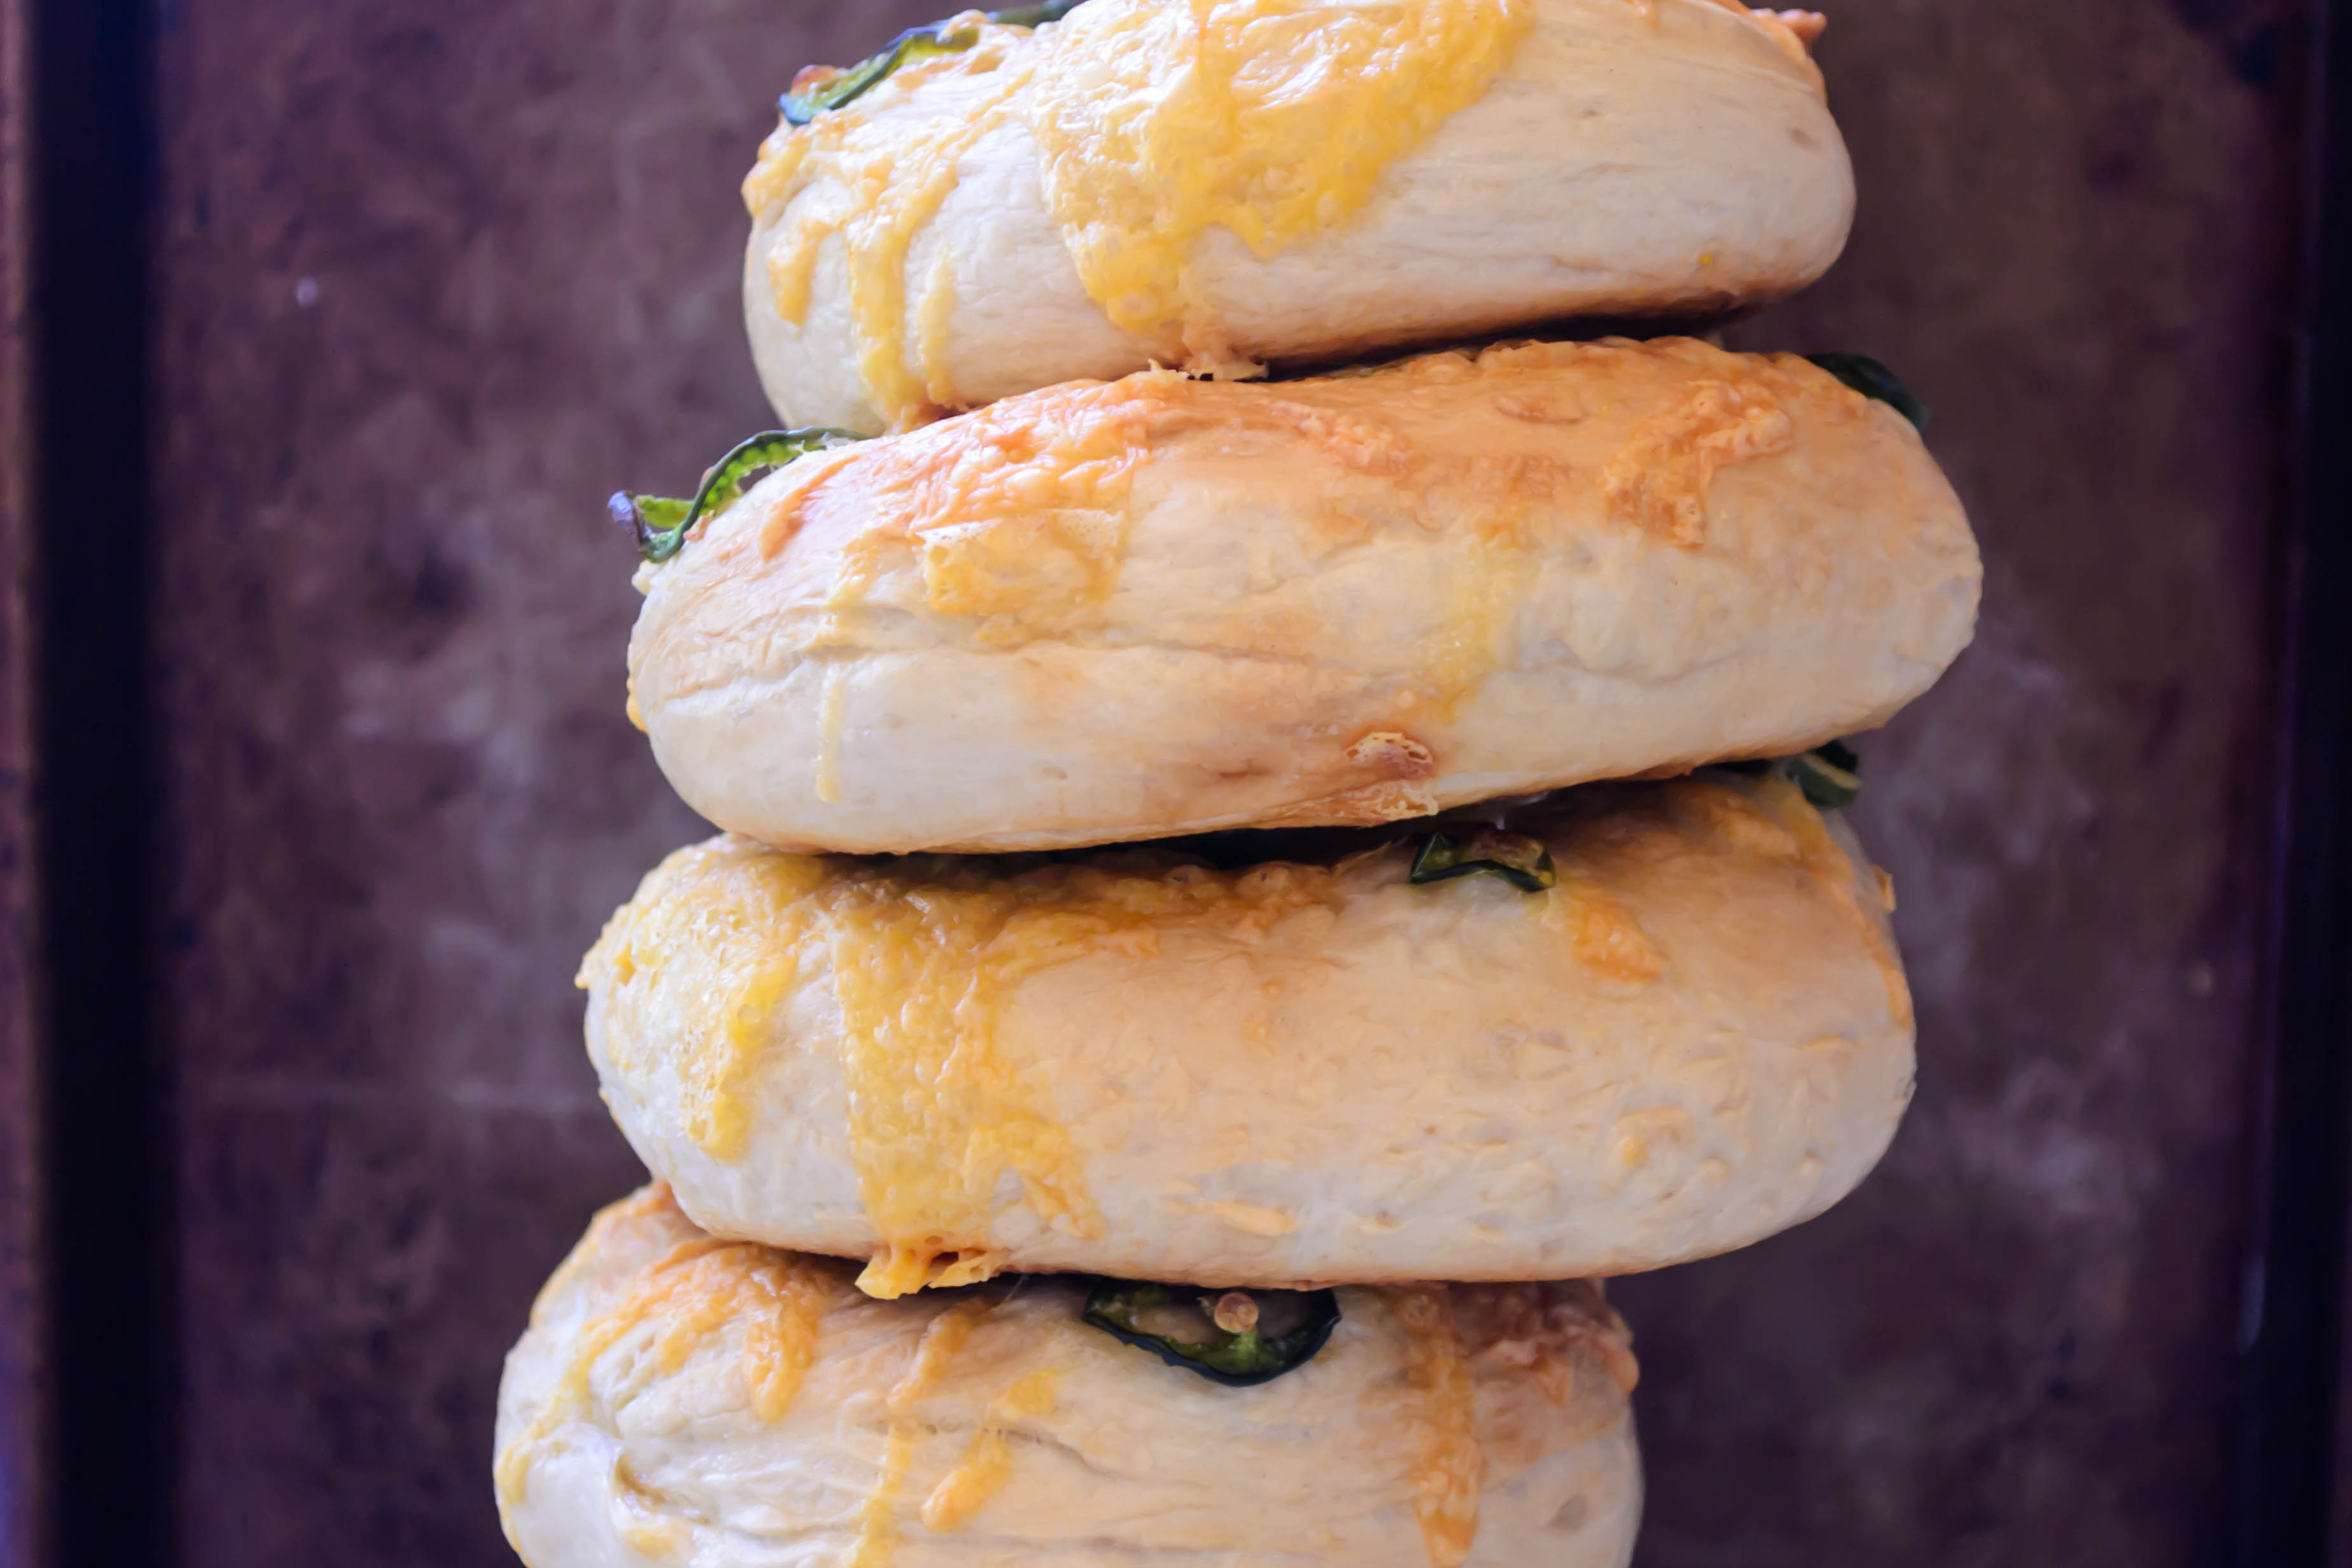
 Fast forward. This past weekend, I made bagels. Real, crisp crusted, chewy, bagel-y bagels, studded with jalapeño slices and dripping with sharp cheddar cheese. I’d been thinking of making them anyway, but when this month’s Twelve Loaves challenge came along with a demand for savory breads, it sealed the deal. I know, I’ve used this flavor combination before. In fact, I used it for another Twelve Loaves challenge. You could say I’m rather fond of it. Maybe I need a bit of an intervention. But… jalapeño and cheese! How can you resist? See, the cheese transforms into a delicate crackling lace encasing the top of the bagel, and the pepper slices roast and shrivel in the oven’s high heat, and the whole thing becomes just so savory and interesting, that I want to put it on everything.
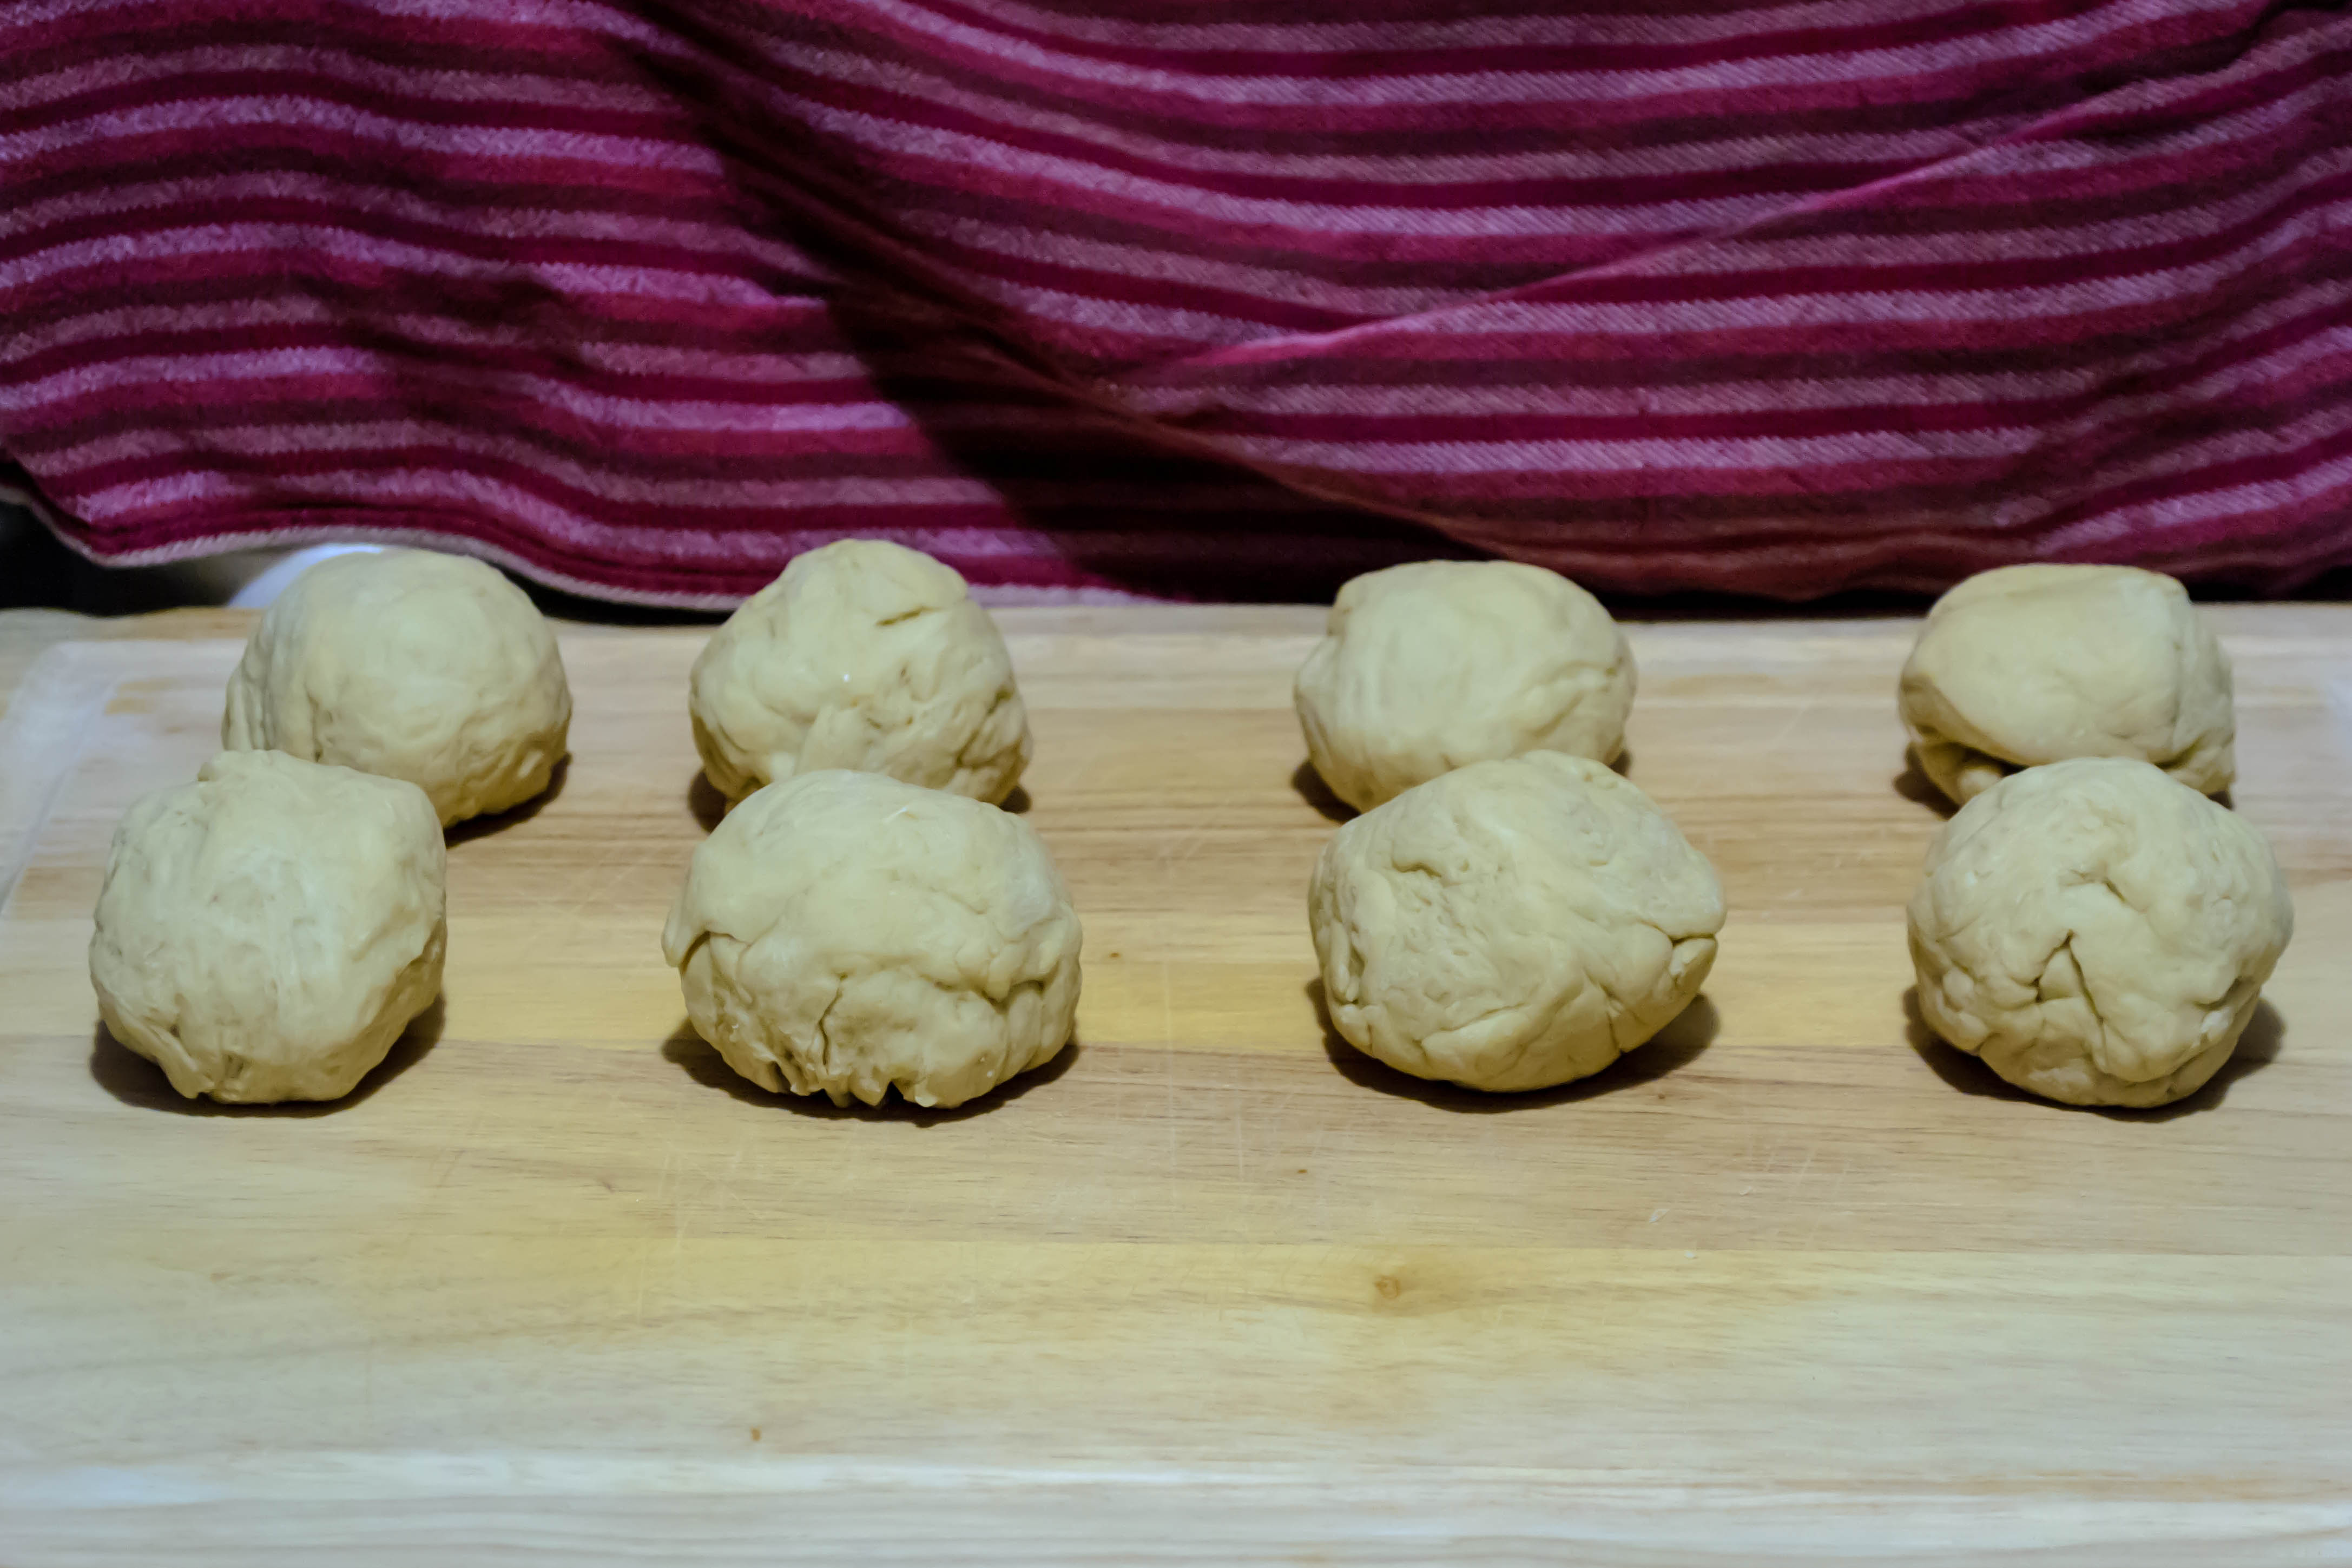
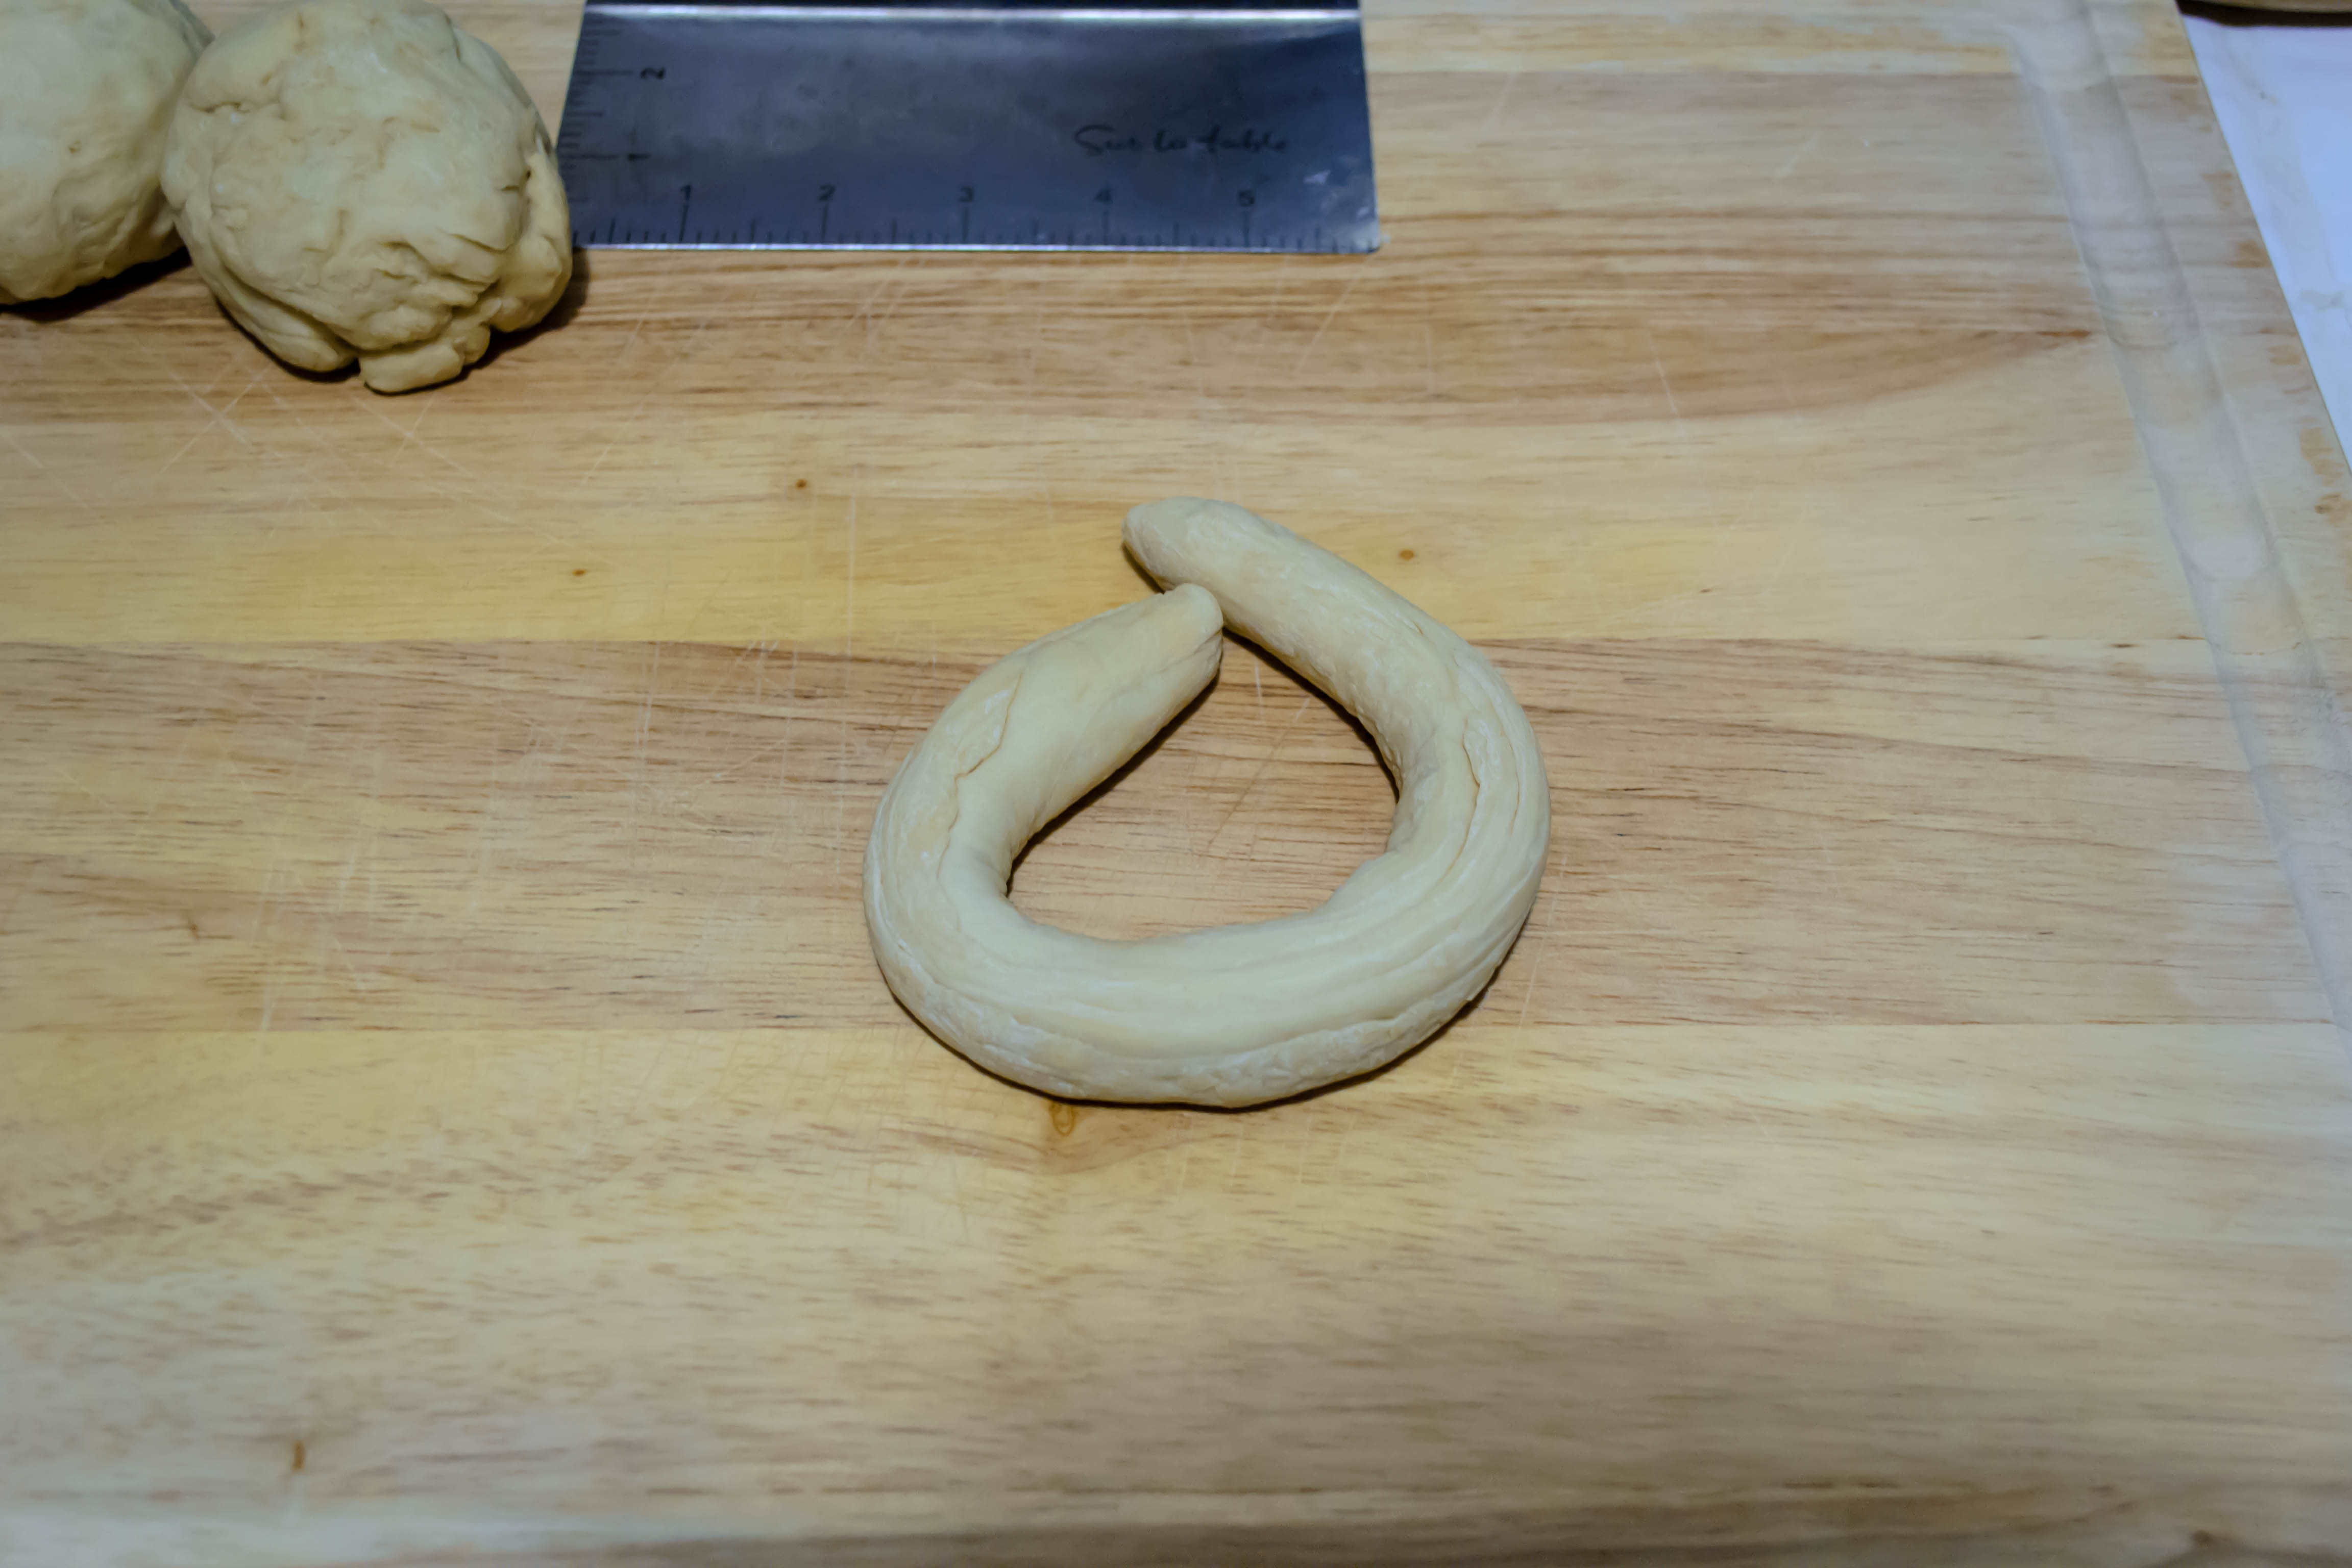
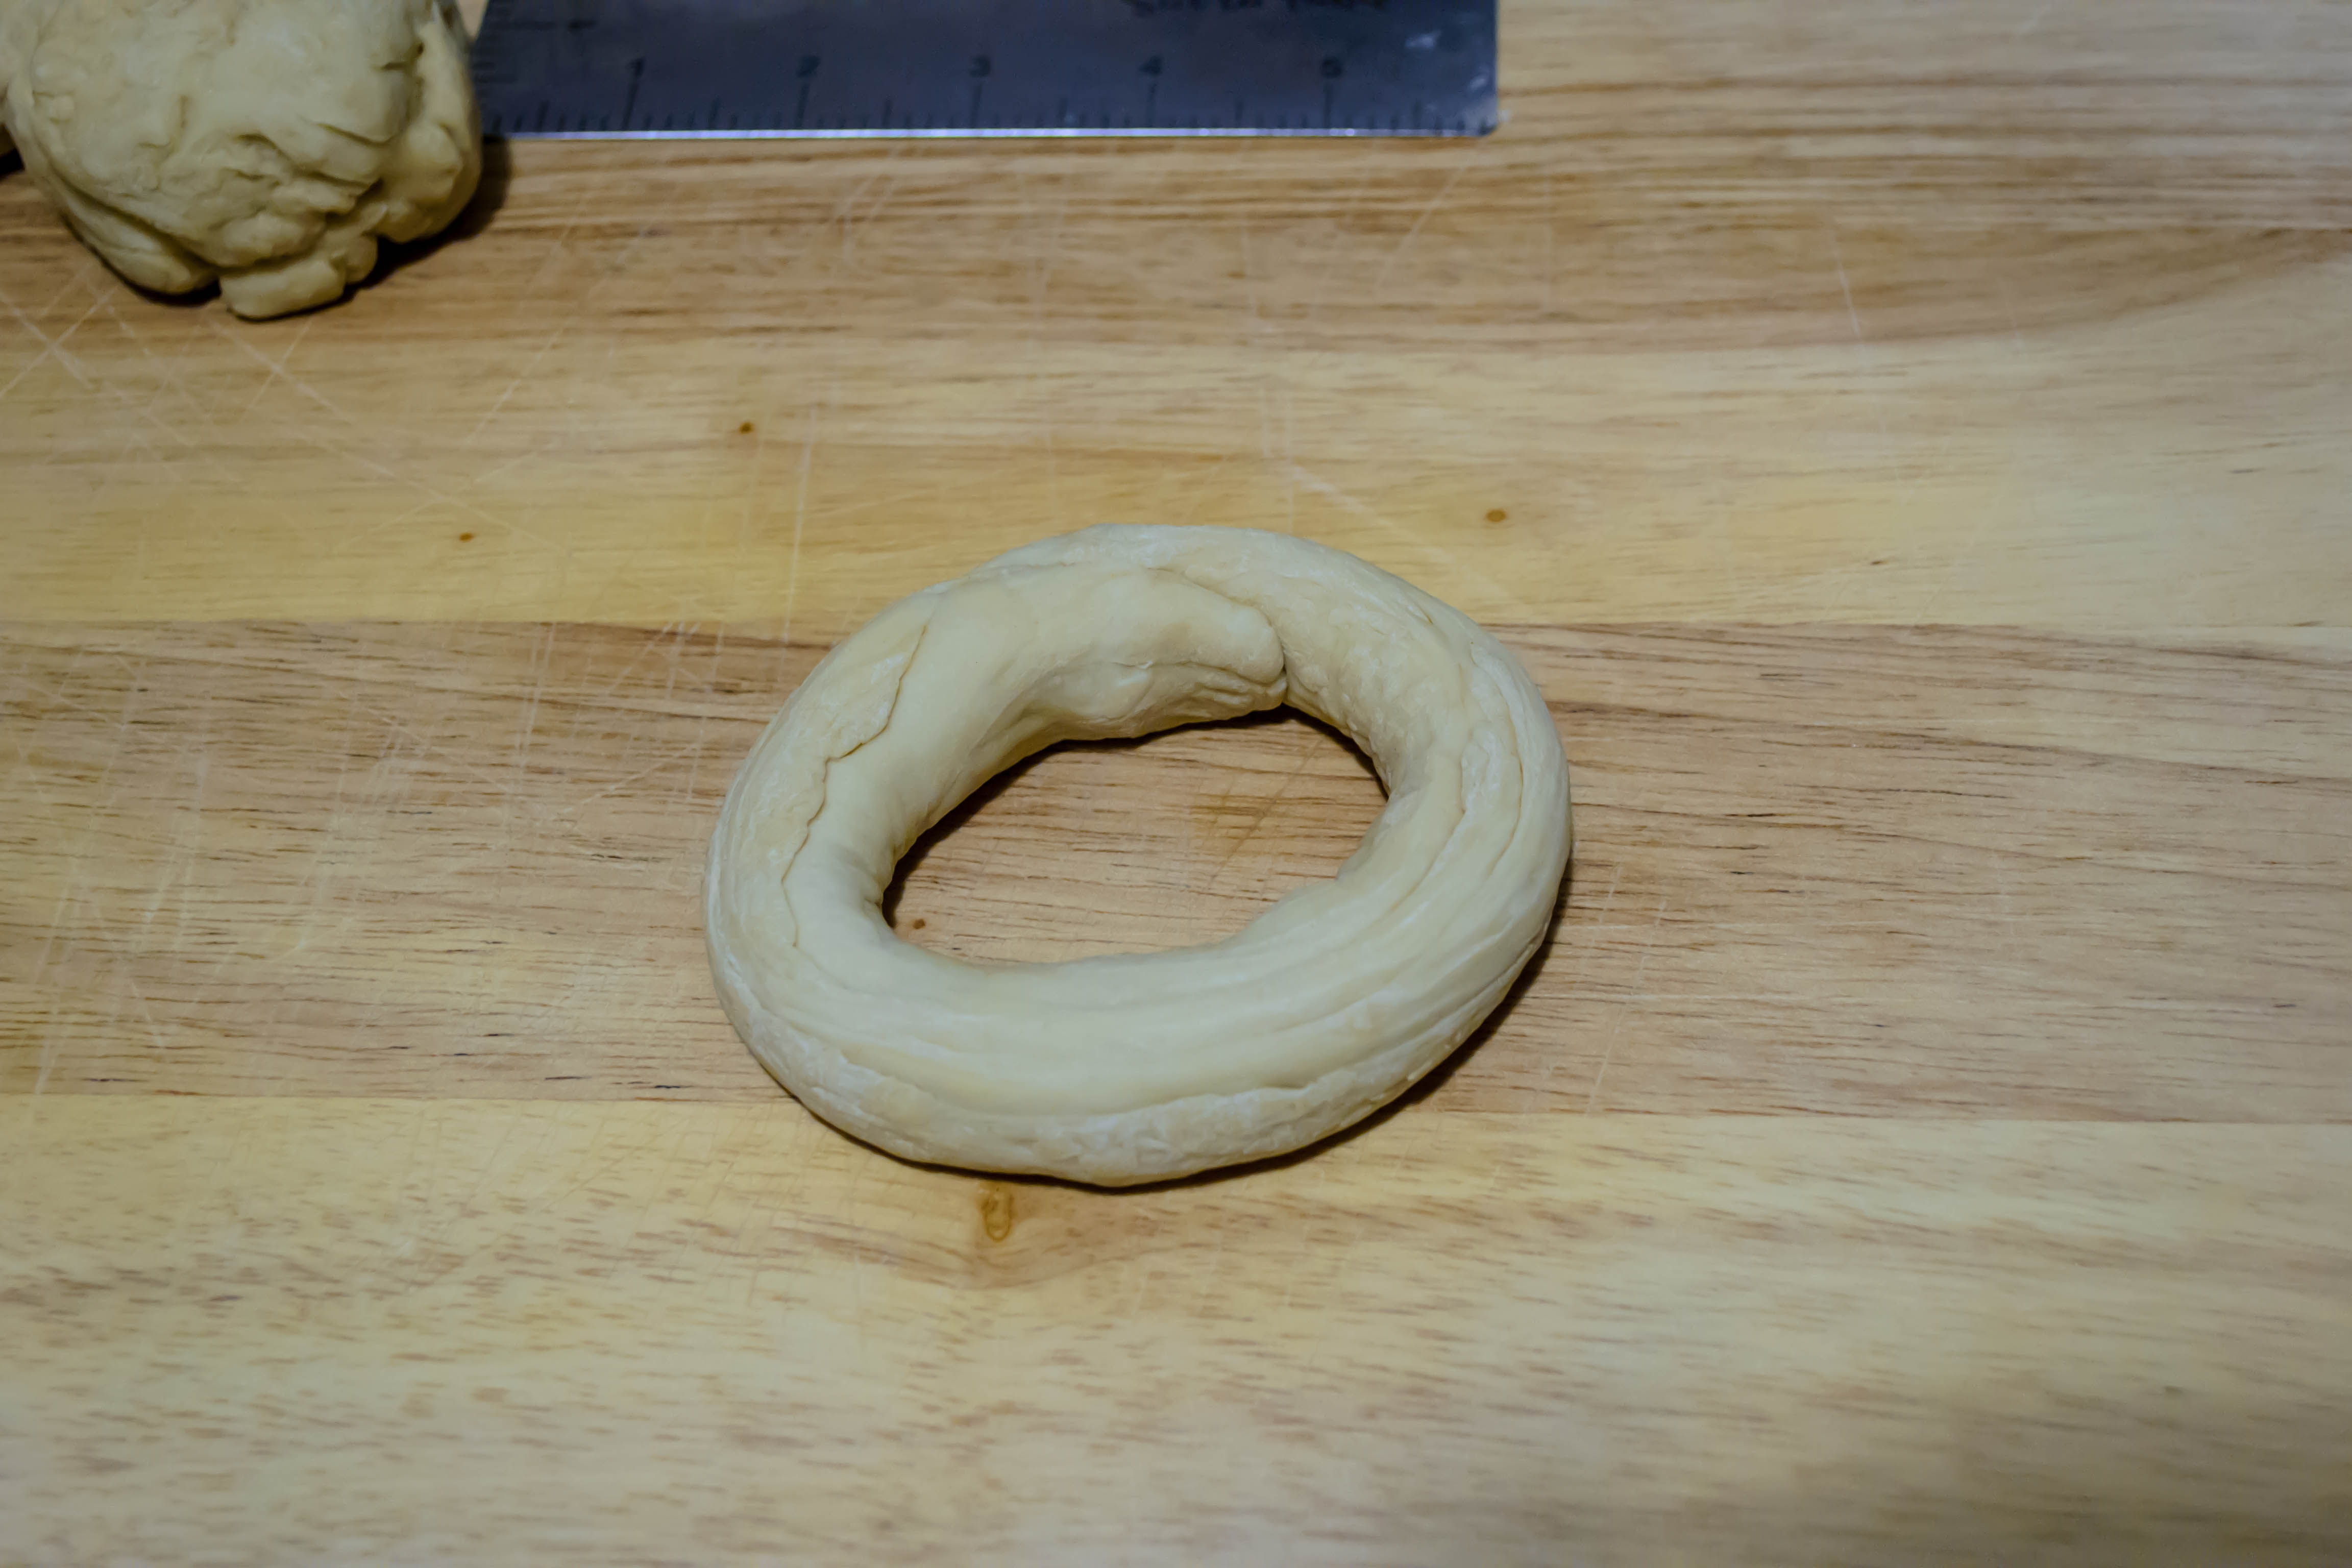
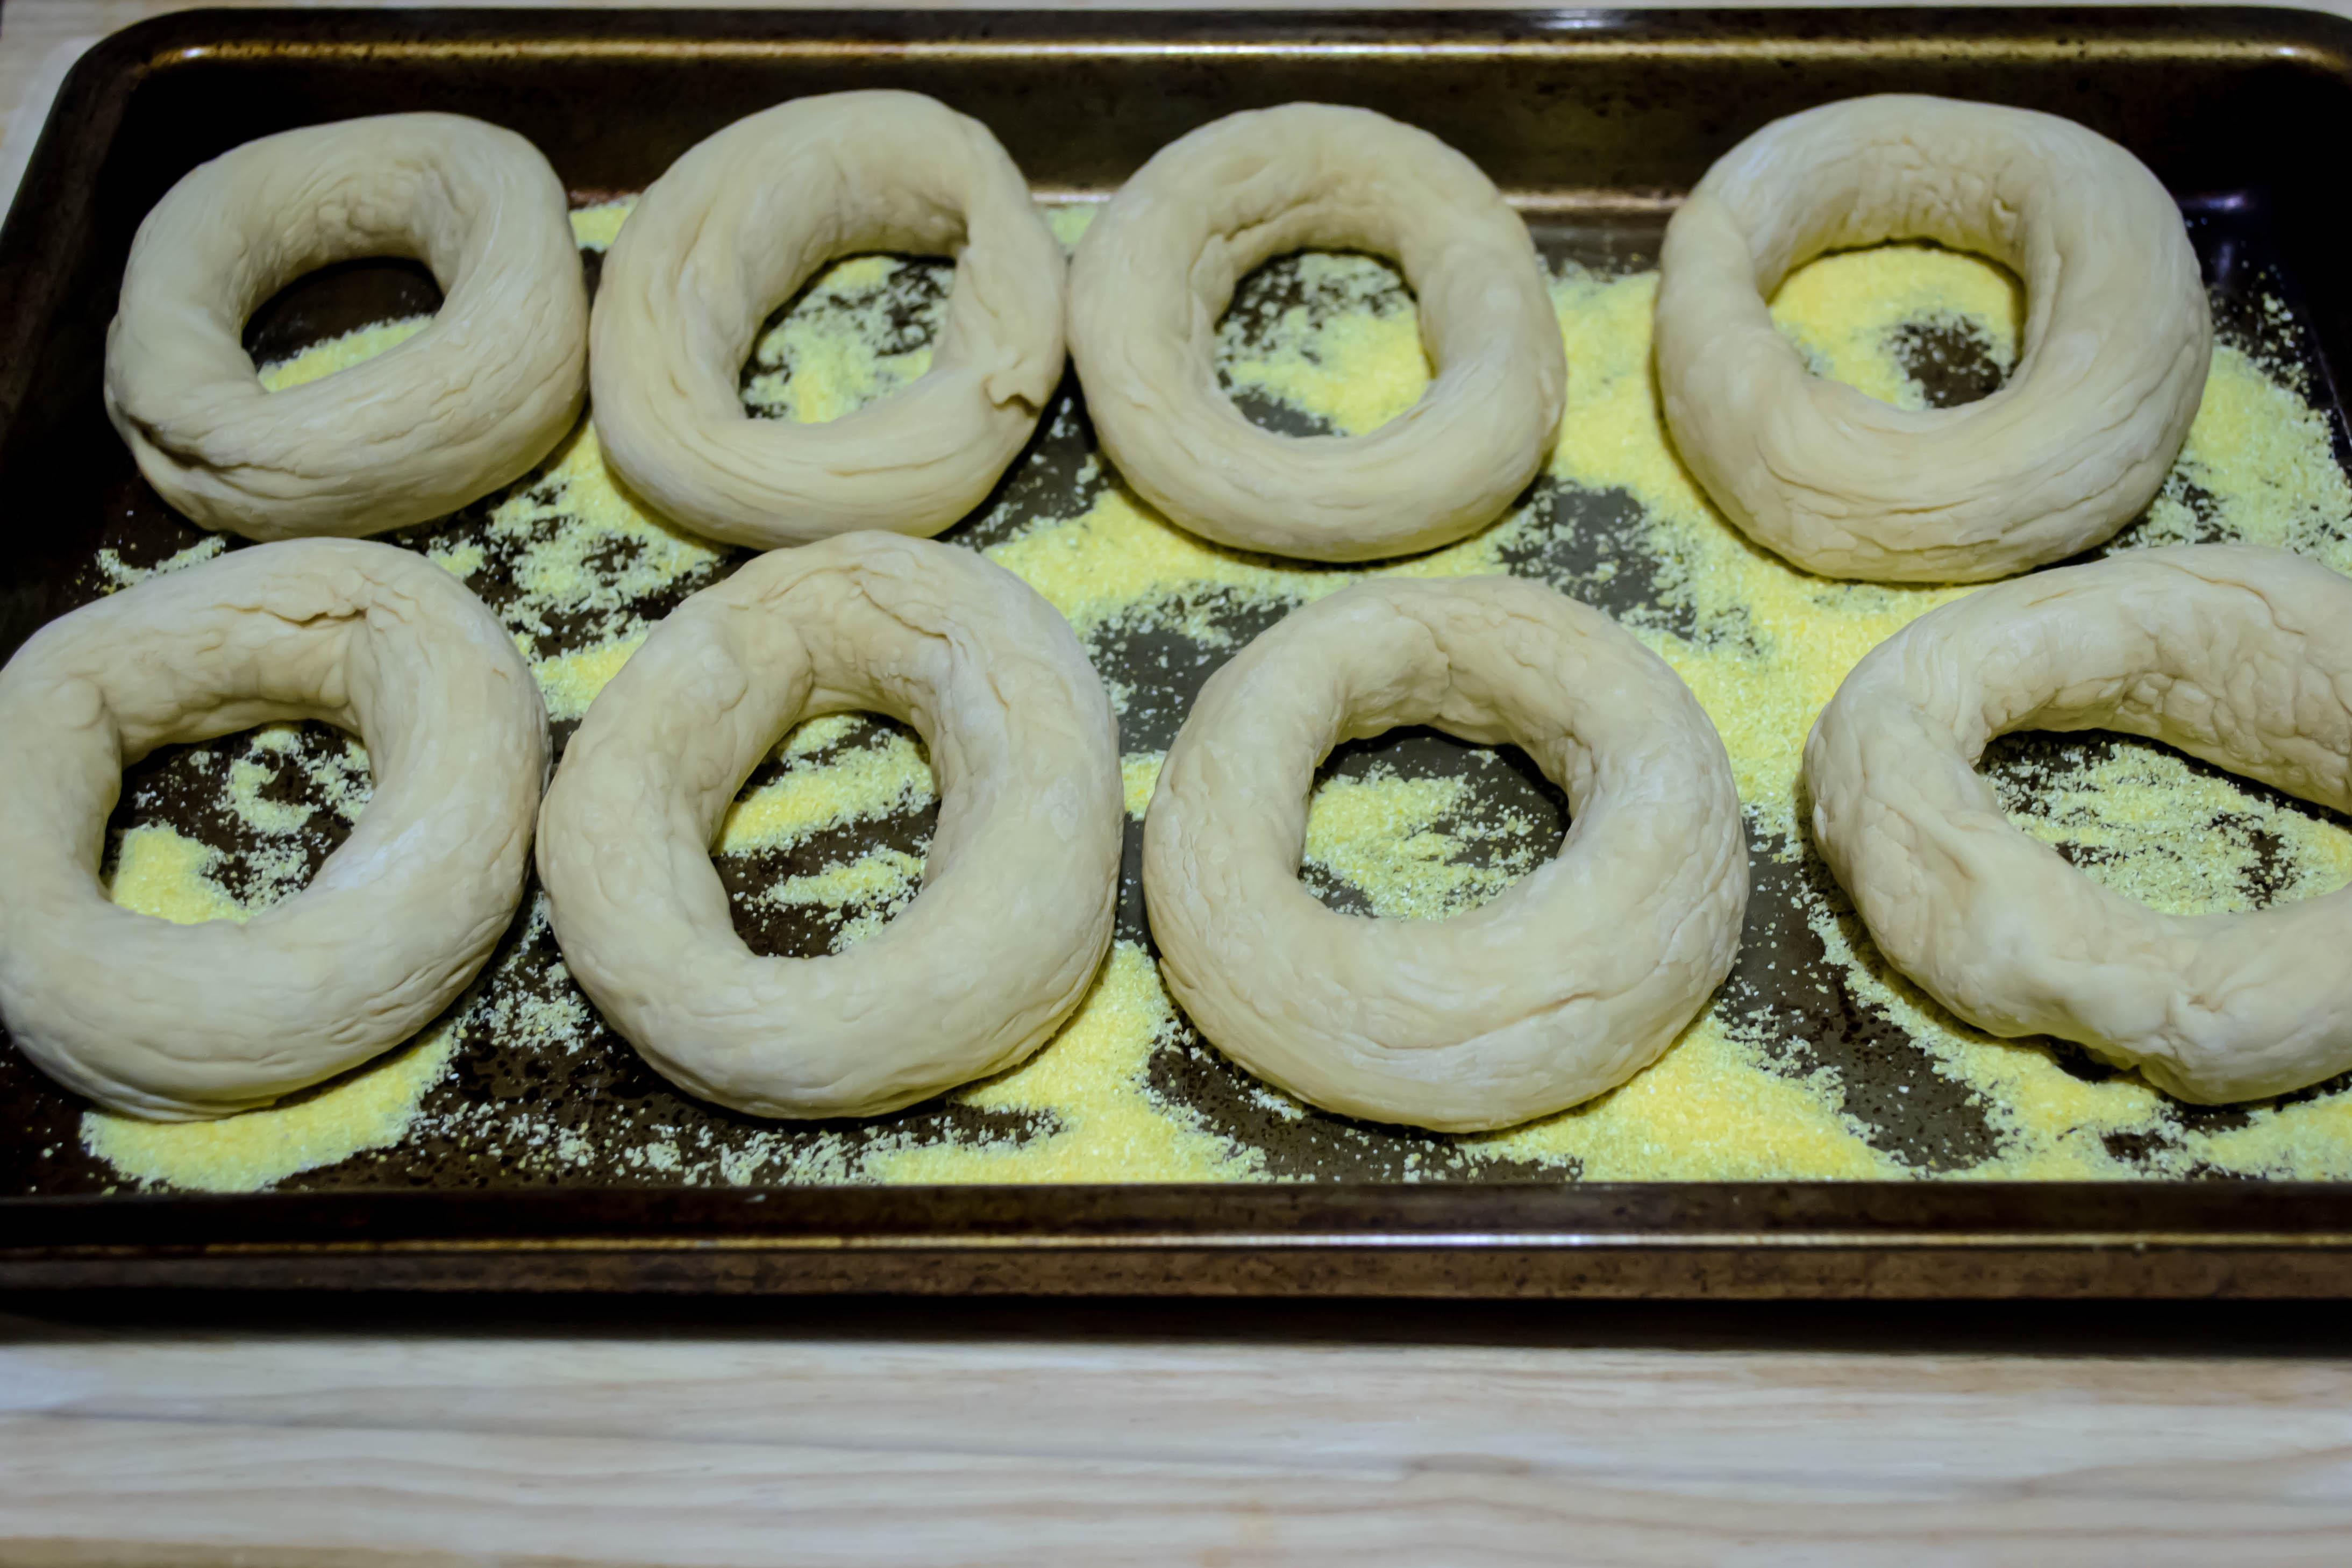
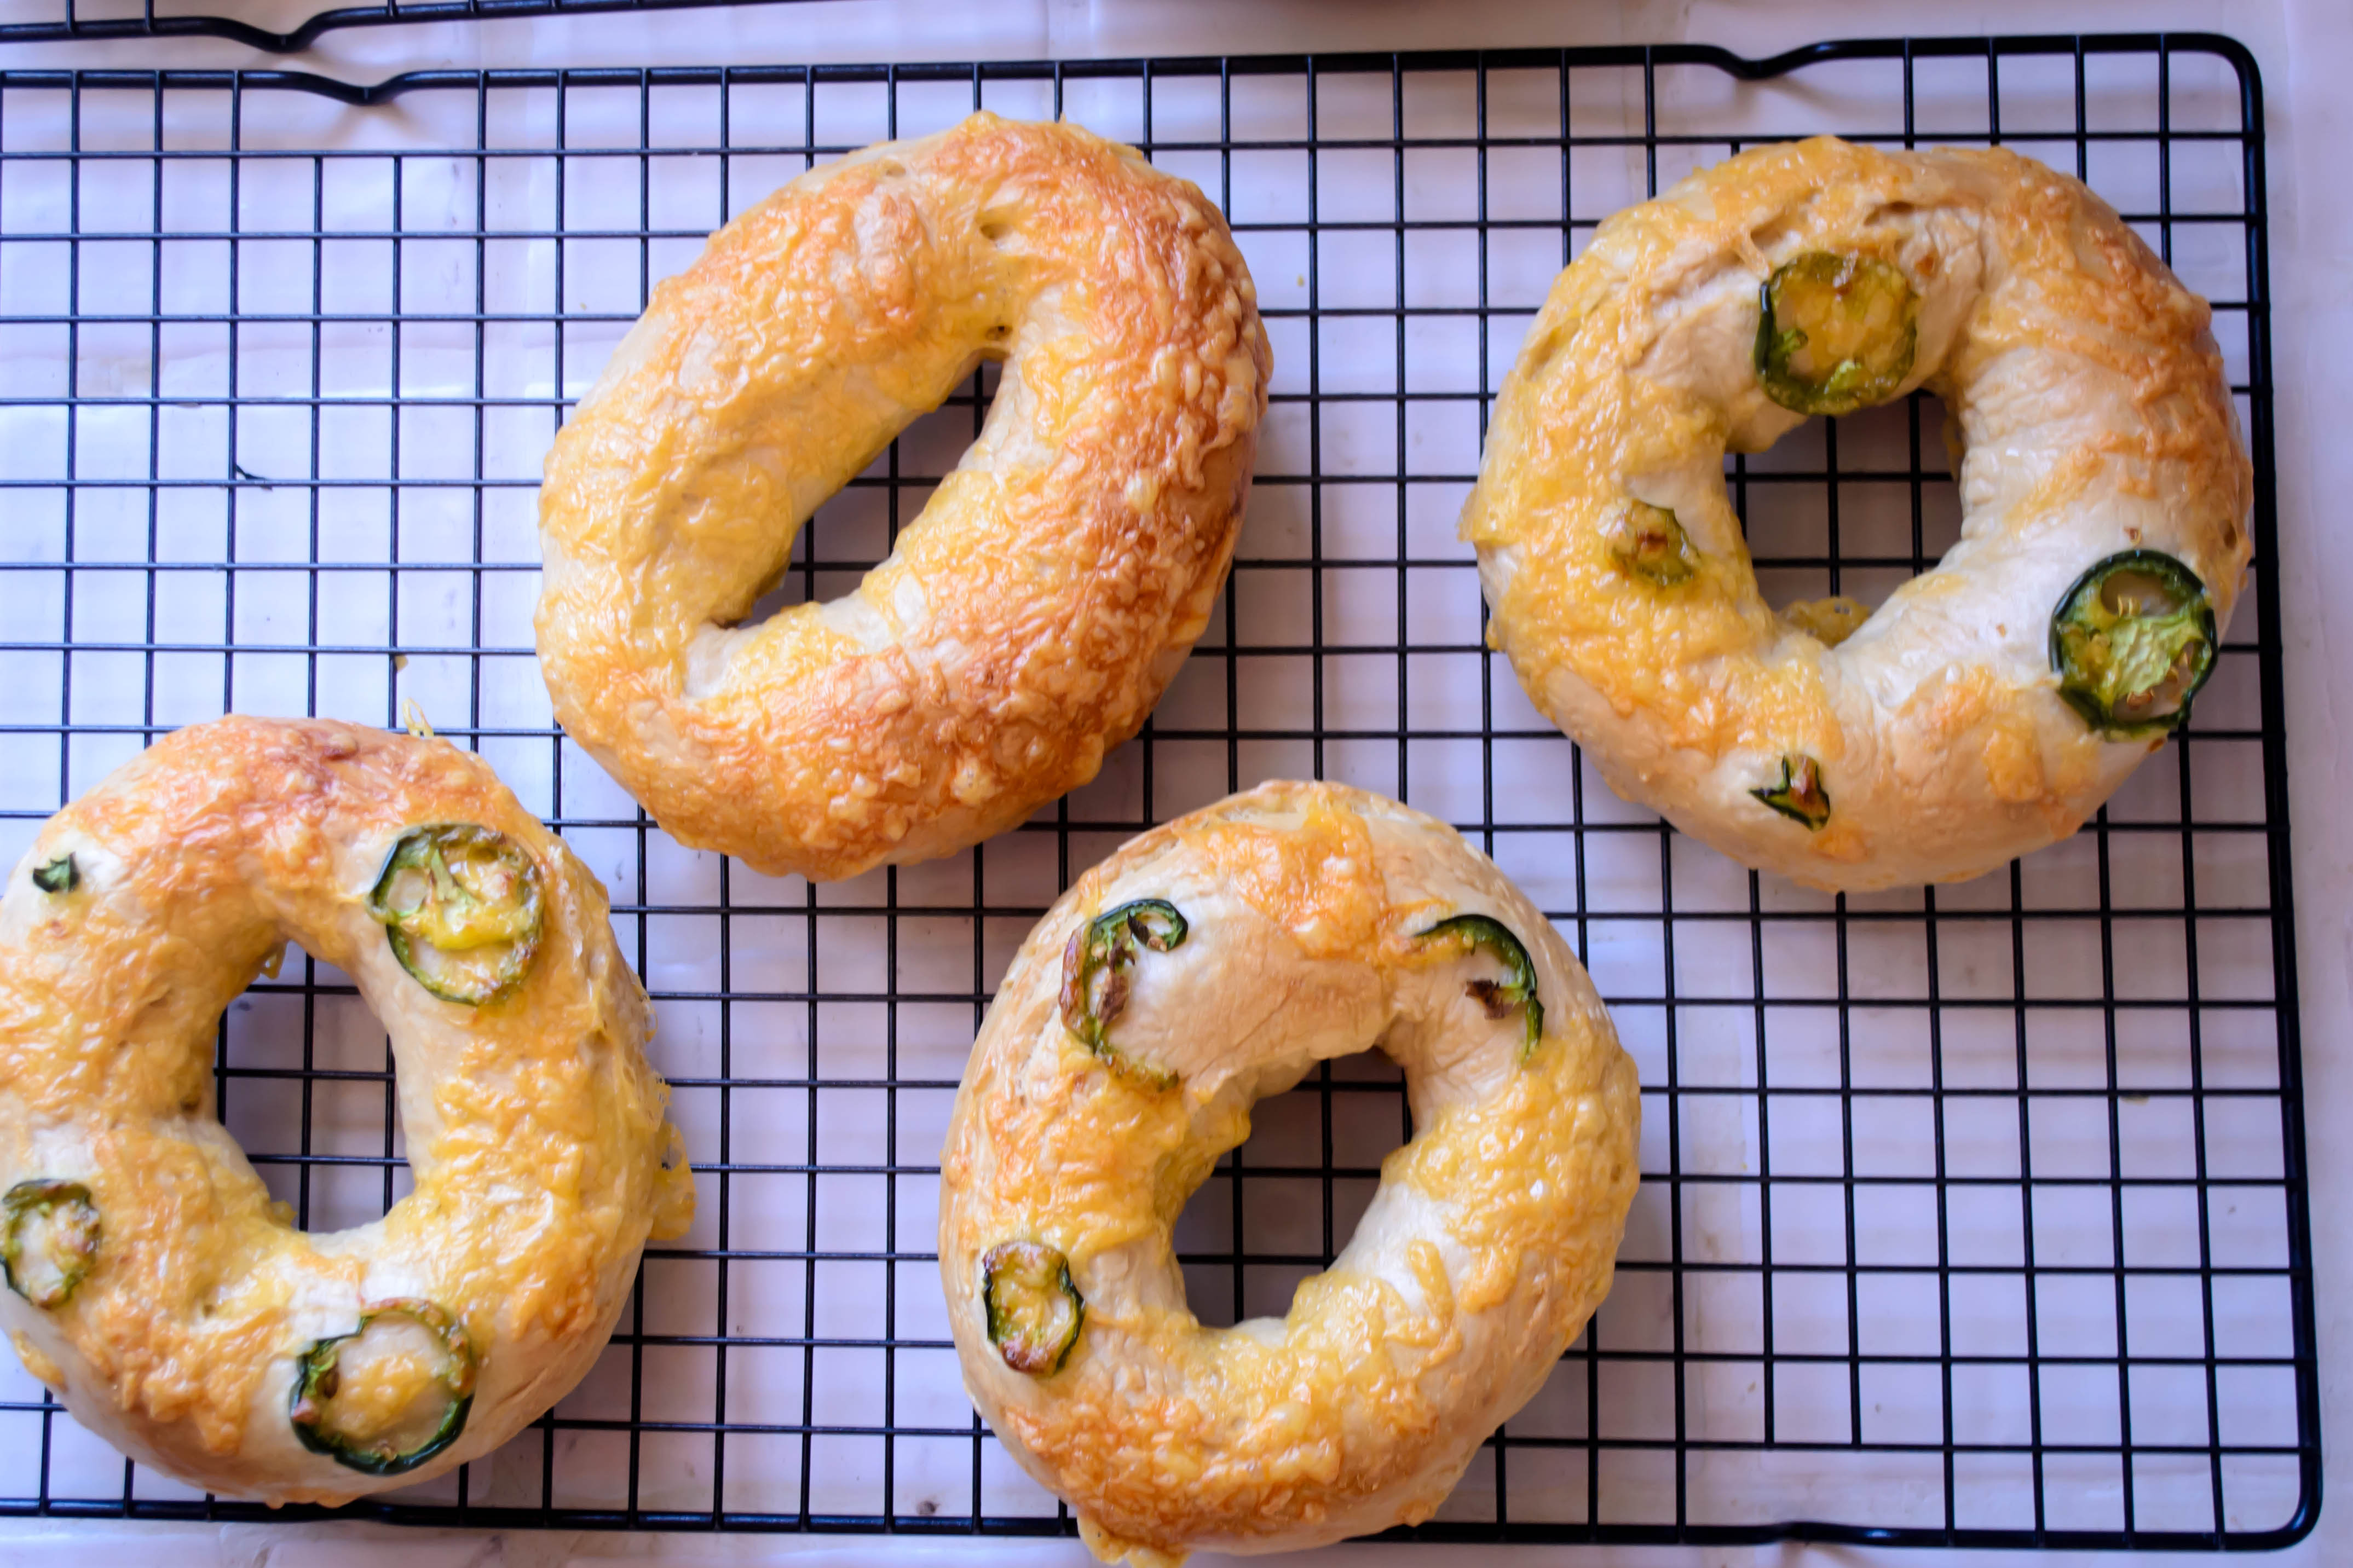 Bagels are an odd-ball bread. The additional protein of plain old bread flour is not enough for them – they require the even heavier duty high gluten flour, and sweetener in the form of barley malt syrup, both products I’d never heard of (see note on ingredients below). After a lengthy turn with a dough hook that I thought would break my stand mixer (the heaving strain of the machine was almost too much to take), the stiff, dense dough gets portioned out, rolled into wormy logs, curled and pressed and sealed into rings, and then refrigerated overnight to allow for a long, slow rise that enhances the flavor and texture of the finished product. Upon retrieval from the chill-chest, the rings are plunged into a vat of boiling water before being sprinkled with toppings and levered into a hot, hot oven to bake up shiny and crisp and chewy.
(Obligatory apology for the weird lighting in the pre-topped, pre-baked photos. That’s what happens when you bake at night…)


 These are not the easiest baked good I’ve tried. They involve odd ingredients, special equipment (I can’t imagine kneading this dough by hand. Baking Illustrated, my guide for this recipe, says you shouldn’t even try), and considerable time. They require not one, but two methods of cooking, and they make a lot of dishes for a willing but sometimes reluctant
 dishwasher sous chef helper to wash up.

 Yet I think, if you are up for the challenge, that you should take it on. Watching them transform from a scrappy, tough dough into firm rings, and then seeing the crust take on that glossy shine and texture surrounding a chewy, densely-spongy interior, is not far short of amazing. Several times during the process, astounded by how bagel-like they actually were, I said to N., “I can’t believe I’m making bagels! Actual real bagels!” The finished product is a far cry from the soft, fluffy offerings you’d find on a grocery store shelf. The extra labor and the strain they put on my stand mixer (seriously, guys, you should have heard the motor. I thought it was going to die on me right there) make these only a truly special occasion project, but one that was certainly worth doing.
 Note on ingredients: I couldn’t find high gluten flour, but Baking Illustrated told me it could be readily ordered from King Arthur flour, if you have that kind of time, and the sweet, helpful woman who swept in to help me navigate the rows of flour in our Whole Foods market said it was sometimes at “crunchy granola” sorts of markets. I used, at her recommendation, a combination of bread flour and a few tablespoons of vital wheat gluten instead.
Barley malt syrup is a sweetener made from sprouted barley with an intriguing, earthy taste, less saccharine than white sugar or honey, not nearly as intense as molasses. I found it at my Whole Foods, but again, if you can’t find it, you might try a natural foods store or the internet.
 Jalapeño Cheese Bagels
Day 1:
Day 2:
A fabled land of farmers, farm shares, fancy (and not so fancy) restaurants, family meals, food projects and more.
cooking my way through my dissertation, one egg at a time
Fearless cooking from a tiny NYC kitchen.
food, in so many words.
Recreating the famous dishes of famous writers. Part recipe blog, part historical discussion, entirely unabashed love of books.
Epicurean Adventures from Eugene, Oregon
Celebrating the Harvest
Modern Iranian aka Persian Food & Culture Blog - Cuisine, Recipes, Stories , Photos, Pictures, DIY tutorials
Exploring Culinary Traditions of Africa, African America and the African Diaspora
food, in so many words.
food, in so many words.
food, in so many words.
Food-Stories-Recipes-Love
WordPress.com is the best place for your personal blog or business site.
