Beer Braised Beans

Food Blog March 2015-0444There is little glamour in a pot of beans. Beans are humble, simple food. They are inexpensive, they fill you up, and most often they serve as a neutral backdrop for flashier plate-mates: pork, beef, cheese… When it comes to aesthetics, things don’t get much more exciting. Photographing a pot of beans is not particularly rewarding. The overwhelming, well, brownness of the whole deal makes any tremendous infusion of flavors discernible in descriptors only. In short, I suppose, beans are not Pinterest food.

Food Blog March 2015-0435More and more, though, I’m appreciating beans – not as an excuse to shovel away great spoonfuls of bacon and brown sugar (though really, that sounds far from terrible), but for their savory value. Beans are a vehicle for flavor. They are, as a friend once remarked while I was preparing dinner, “Nature’s little sponges.” Aside from the fact, as I pointed out, that sponges are in fact Nature’s little sponges, this tends to be quite true. Beans learn by osmosis.

Food Blog March 2015-0436Typically I take advantage of this tendency to suck up flavors in Latin American directions: cumin, garlic, various chiles. A few months ago, though, needing another few minutes before dinner and not wanting the beans that had been simmering away on the stove for who-know-how-long to dry up, I cast about the kitchen and emptied a bottle of beer into the pot. I’m not going to say angels sang or the clouds lifted (because let’s be honest; this weekend’s welcome rain aside, this is Southern California. What clouds?), but the revelation was substantial in its own way. Beans already have an earthiness that separates them from the rest of the fruit and vegetable kingdom. Theirs is not the leafy greenness or plump juice of their compatriots, but a creamy, grounded neutrality. Brown. Earth. How odd that they grow on bushes and vines rather than beneath the surface, like potatoes.

Food Blog March 2015-0440
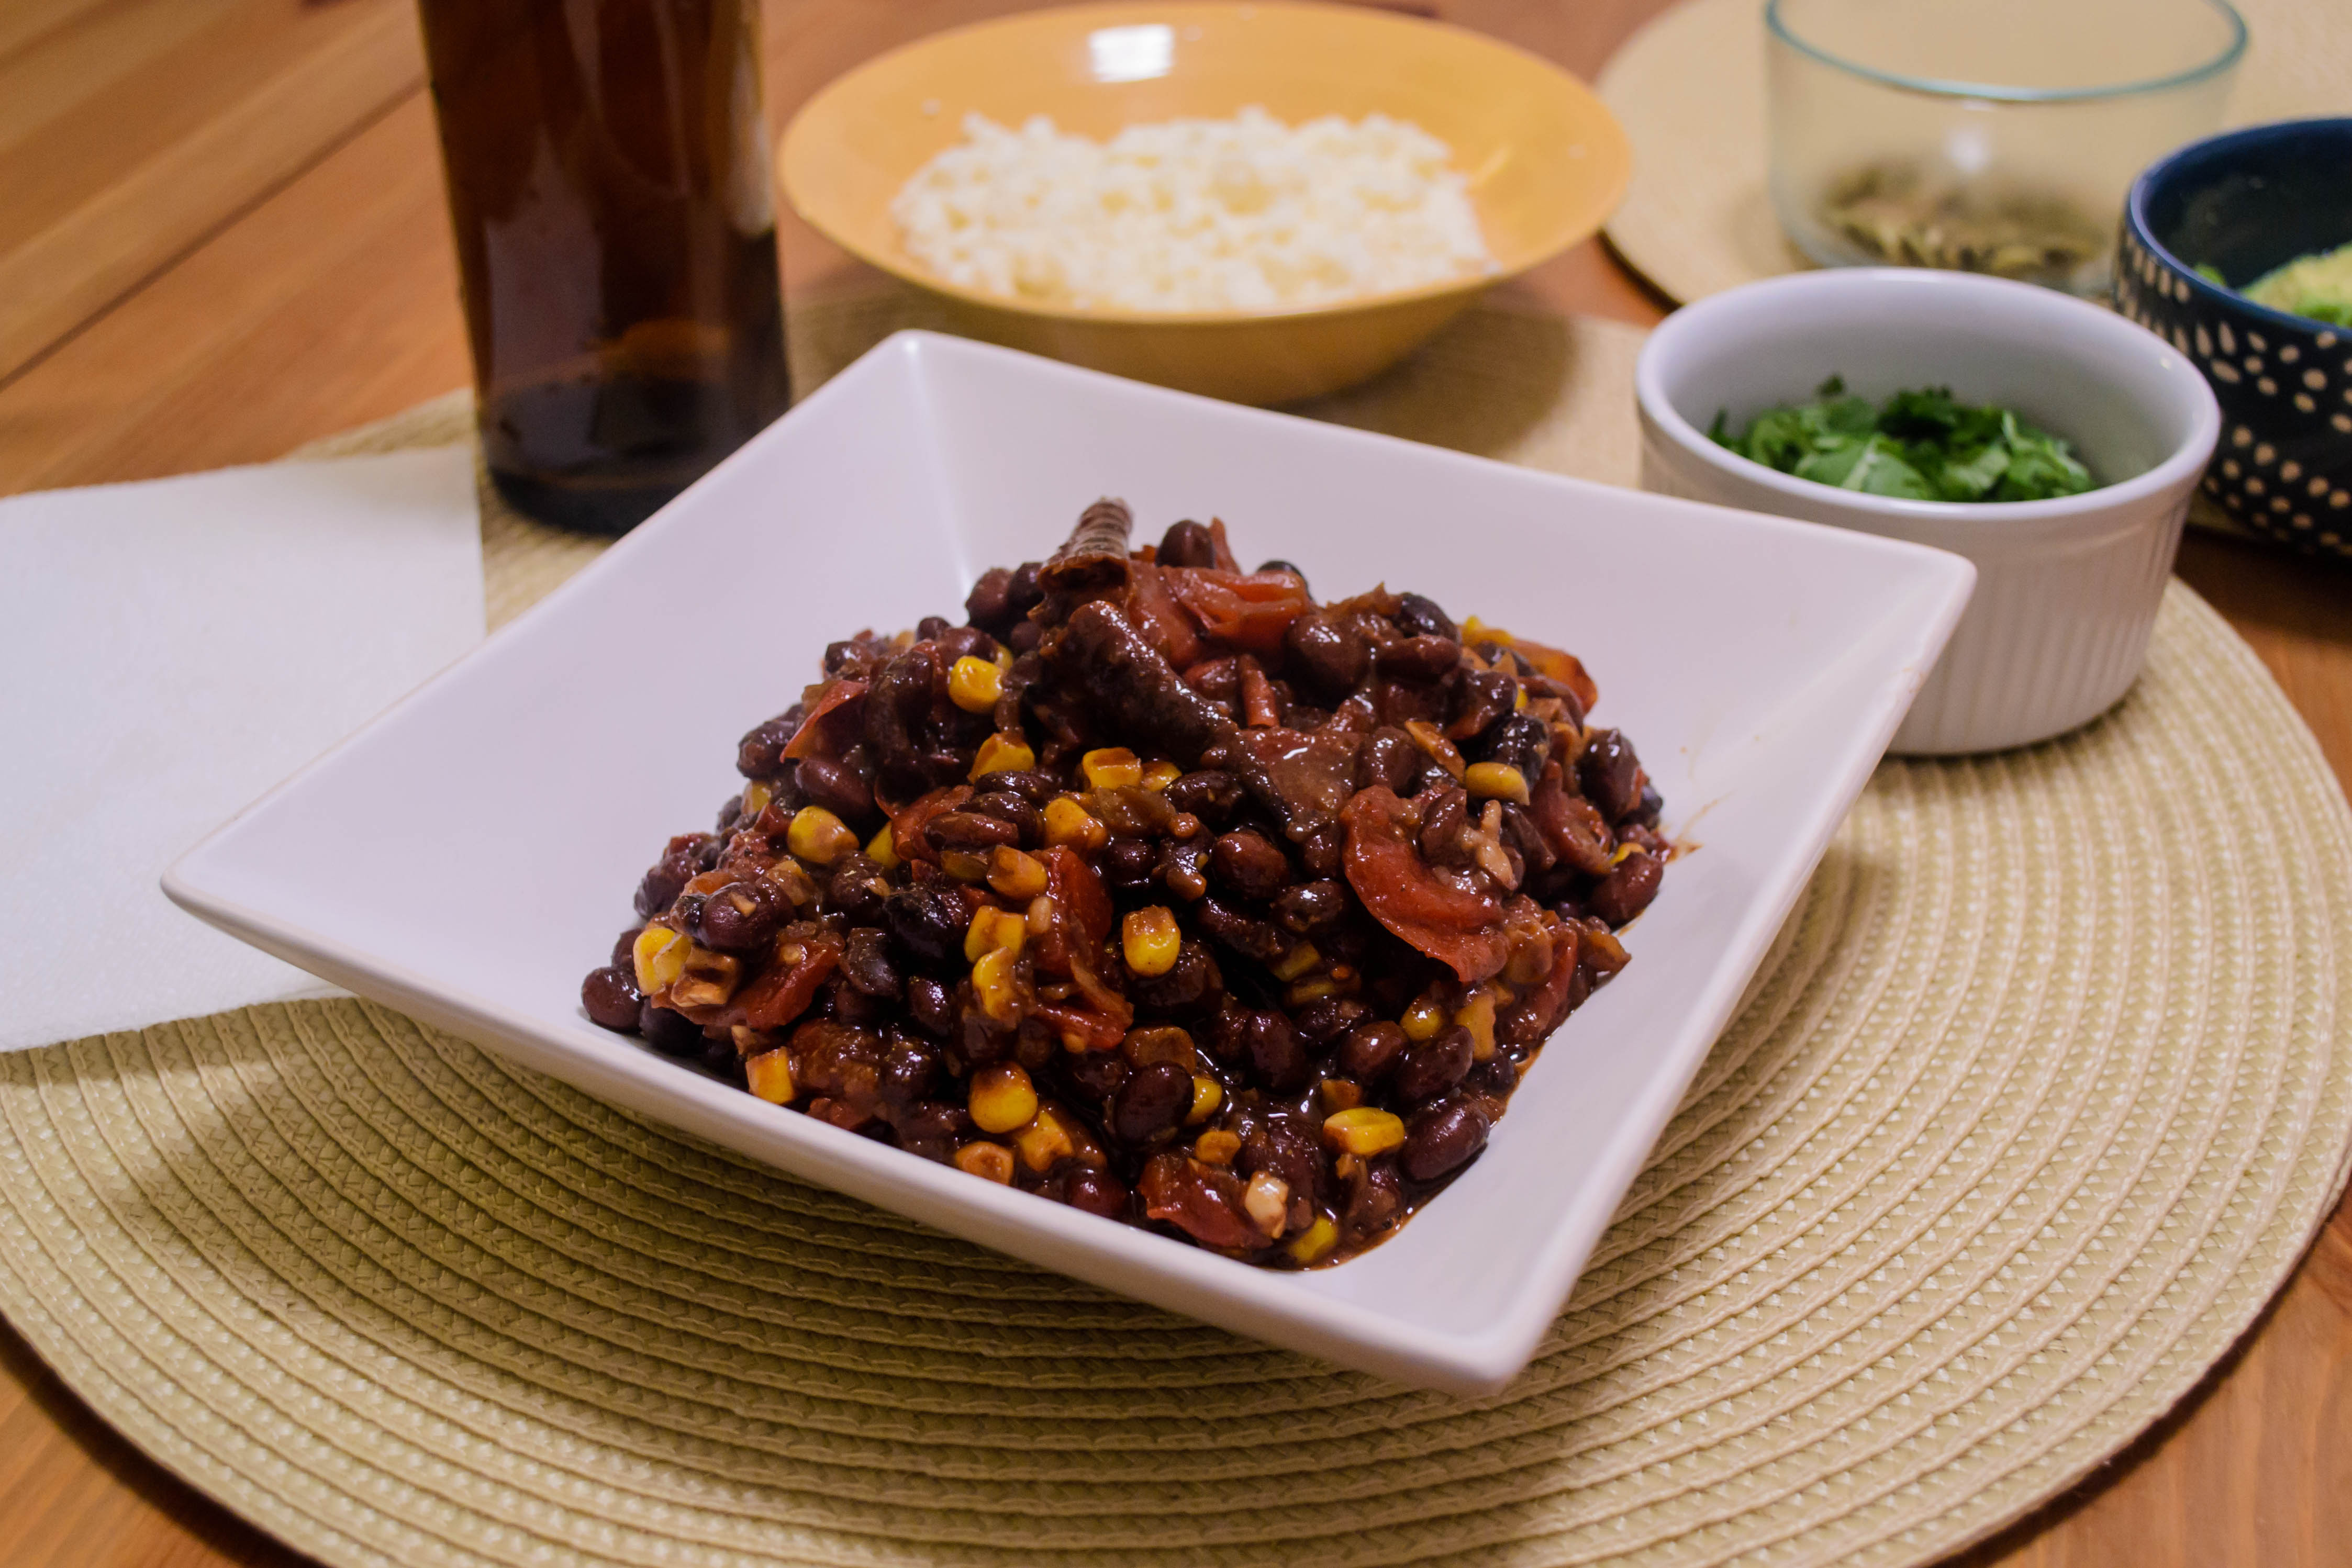
Beer, I found, enhances this earthiness perfectly, especially a dark beer like a porter or a stout. The bitterness of an ale or even a lager is tempered in a darker brew, giving way to toasted, bready flavors that mingle well with the earthy pleasantness of beans. Since this discovery, we’ve charged through a number of bean-and-beer concoctions, including a chile that also contained hunks of slow cooked bison stew meat and a barrage of spices – a triumph. But the one I want to come back to for you is the original, simple combination. Beer and beans. A few flavor enhancers by way of garlic, onion, some almost-burned corn kernels, and a scoop of fire-roasted tomatoes, and you’re looking at a side dish that I’d push away the mains for.

Food Blog March 2015-0439
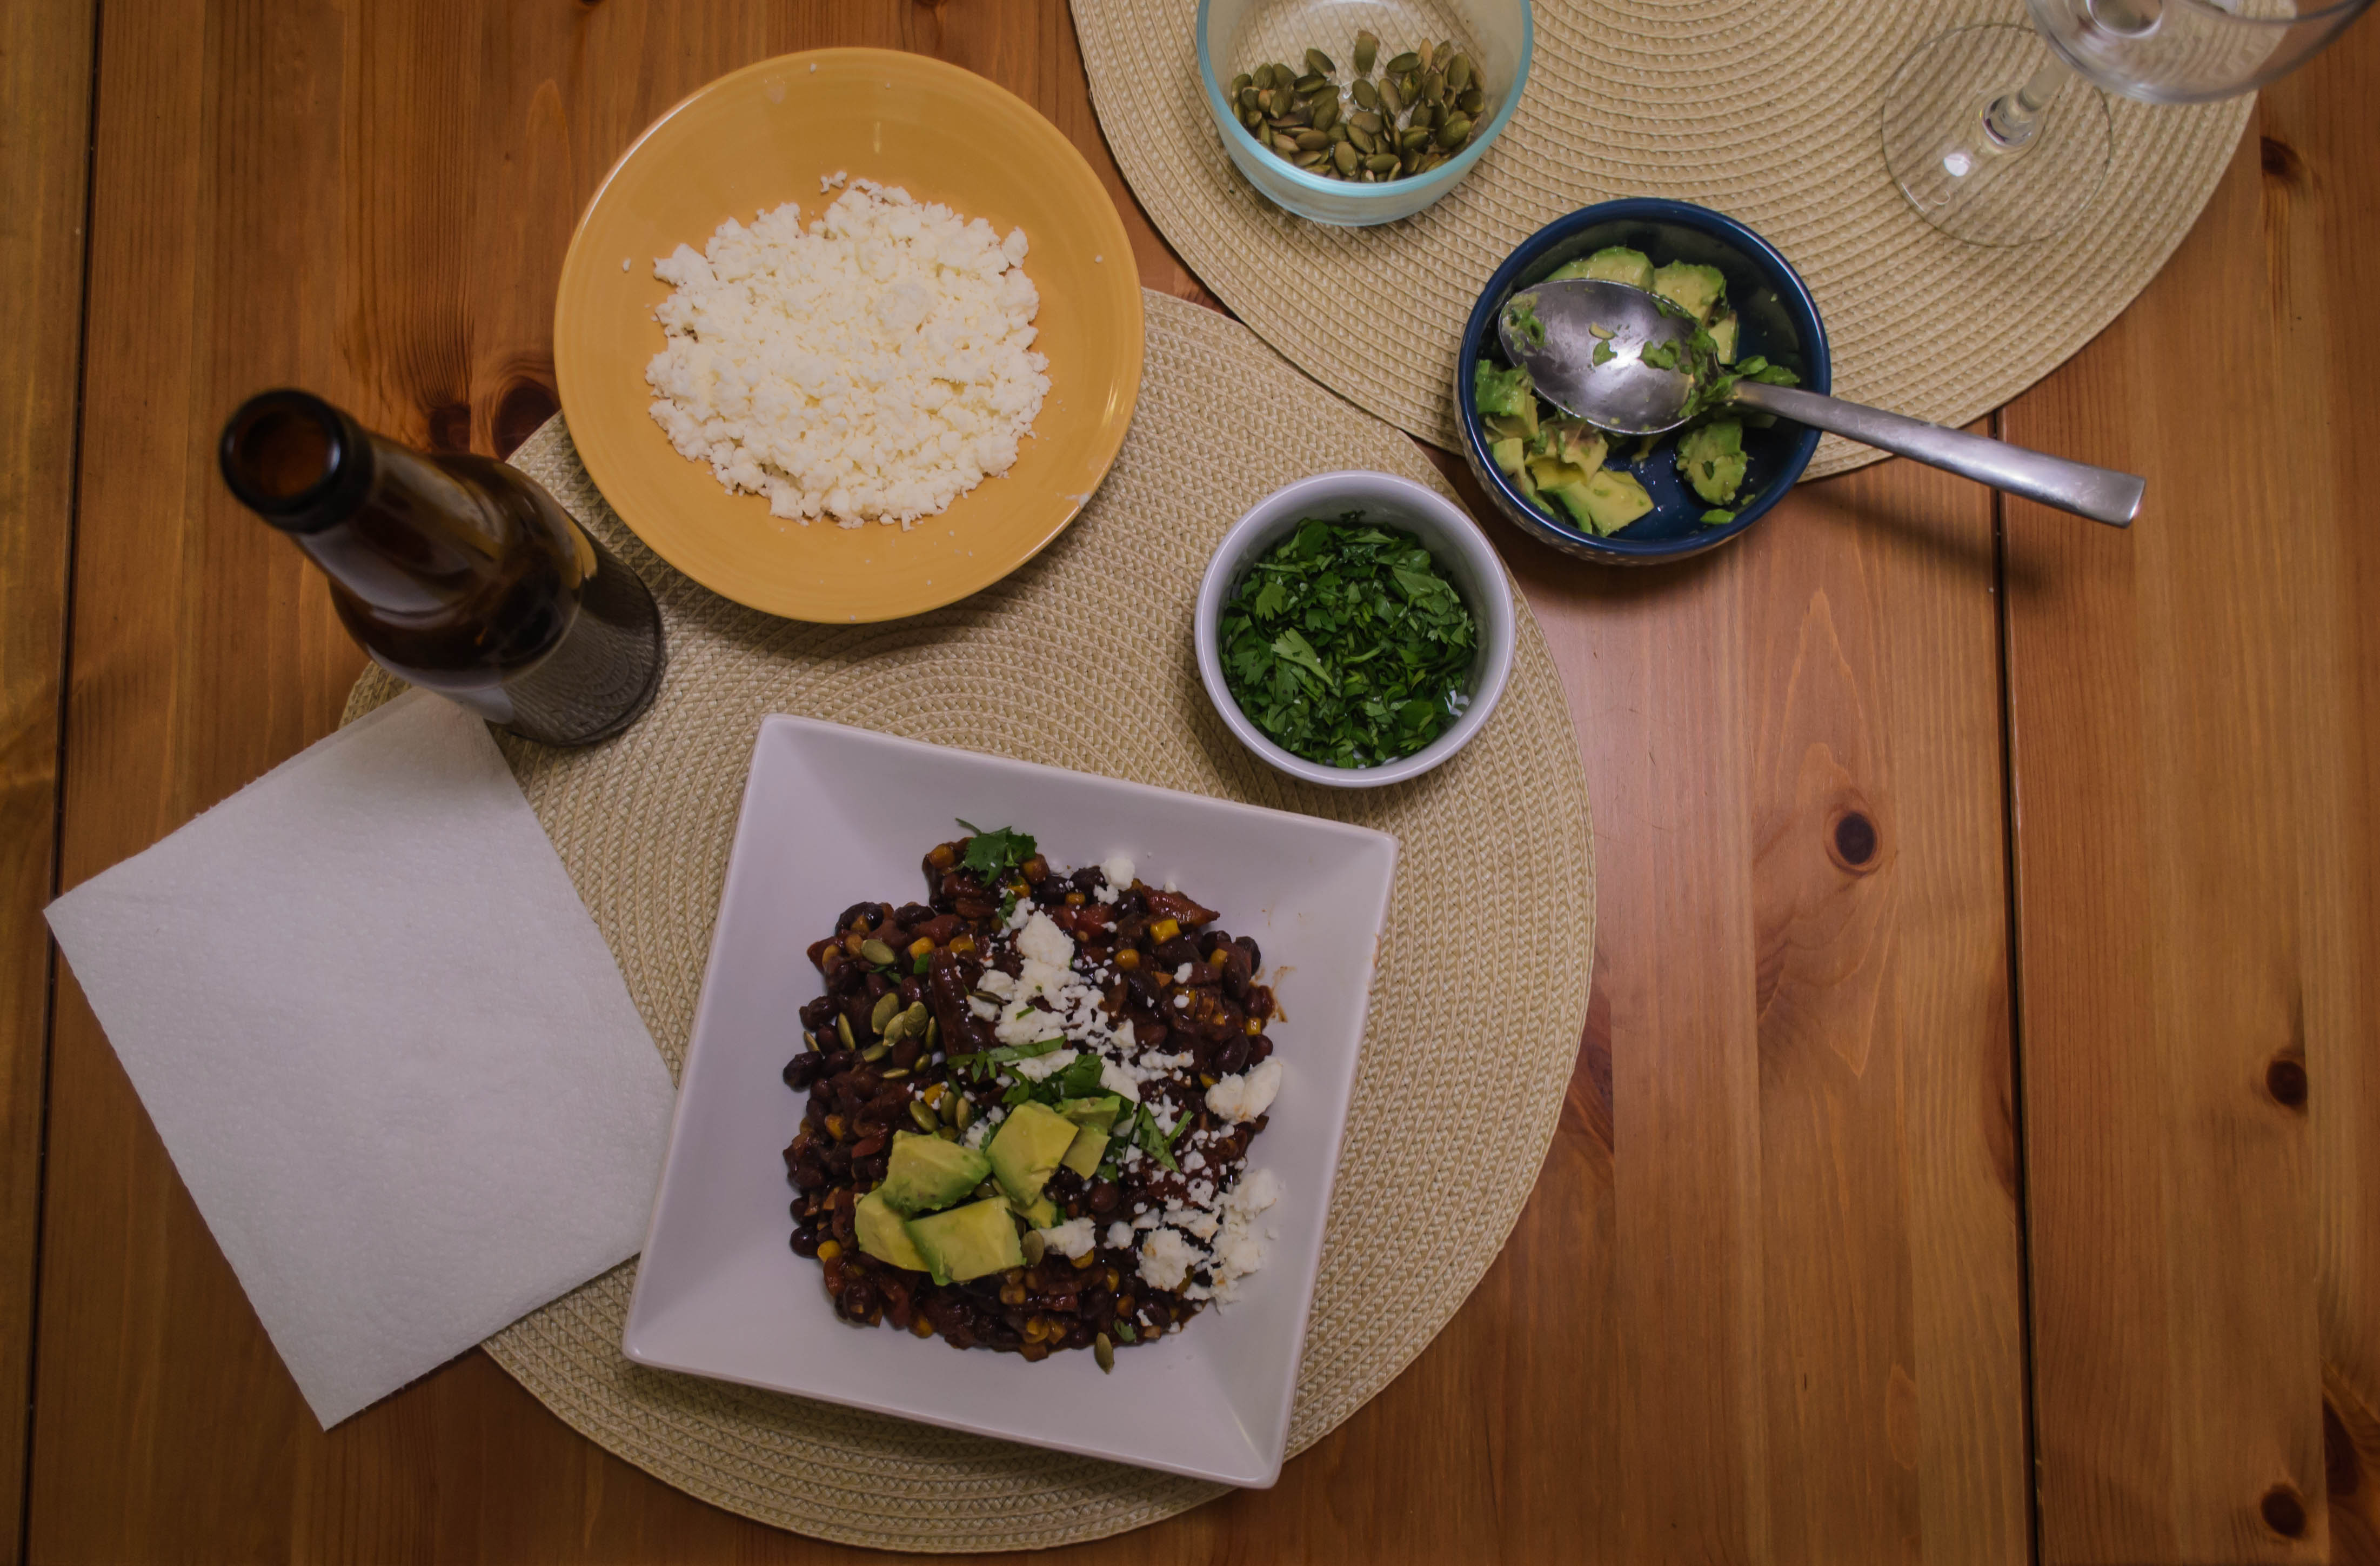
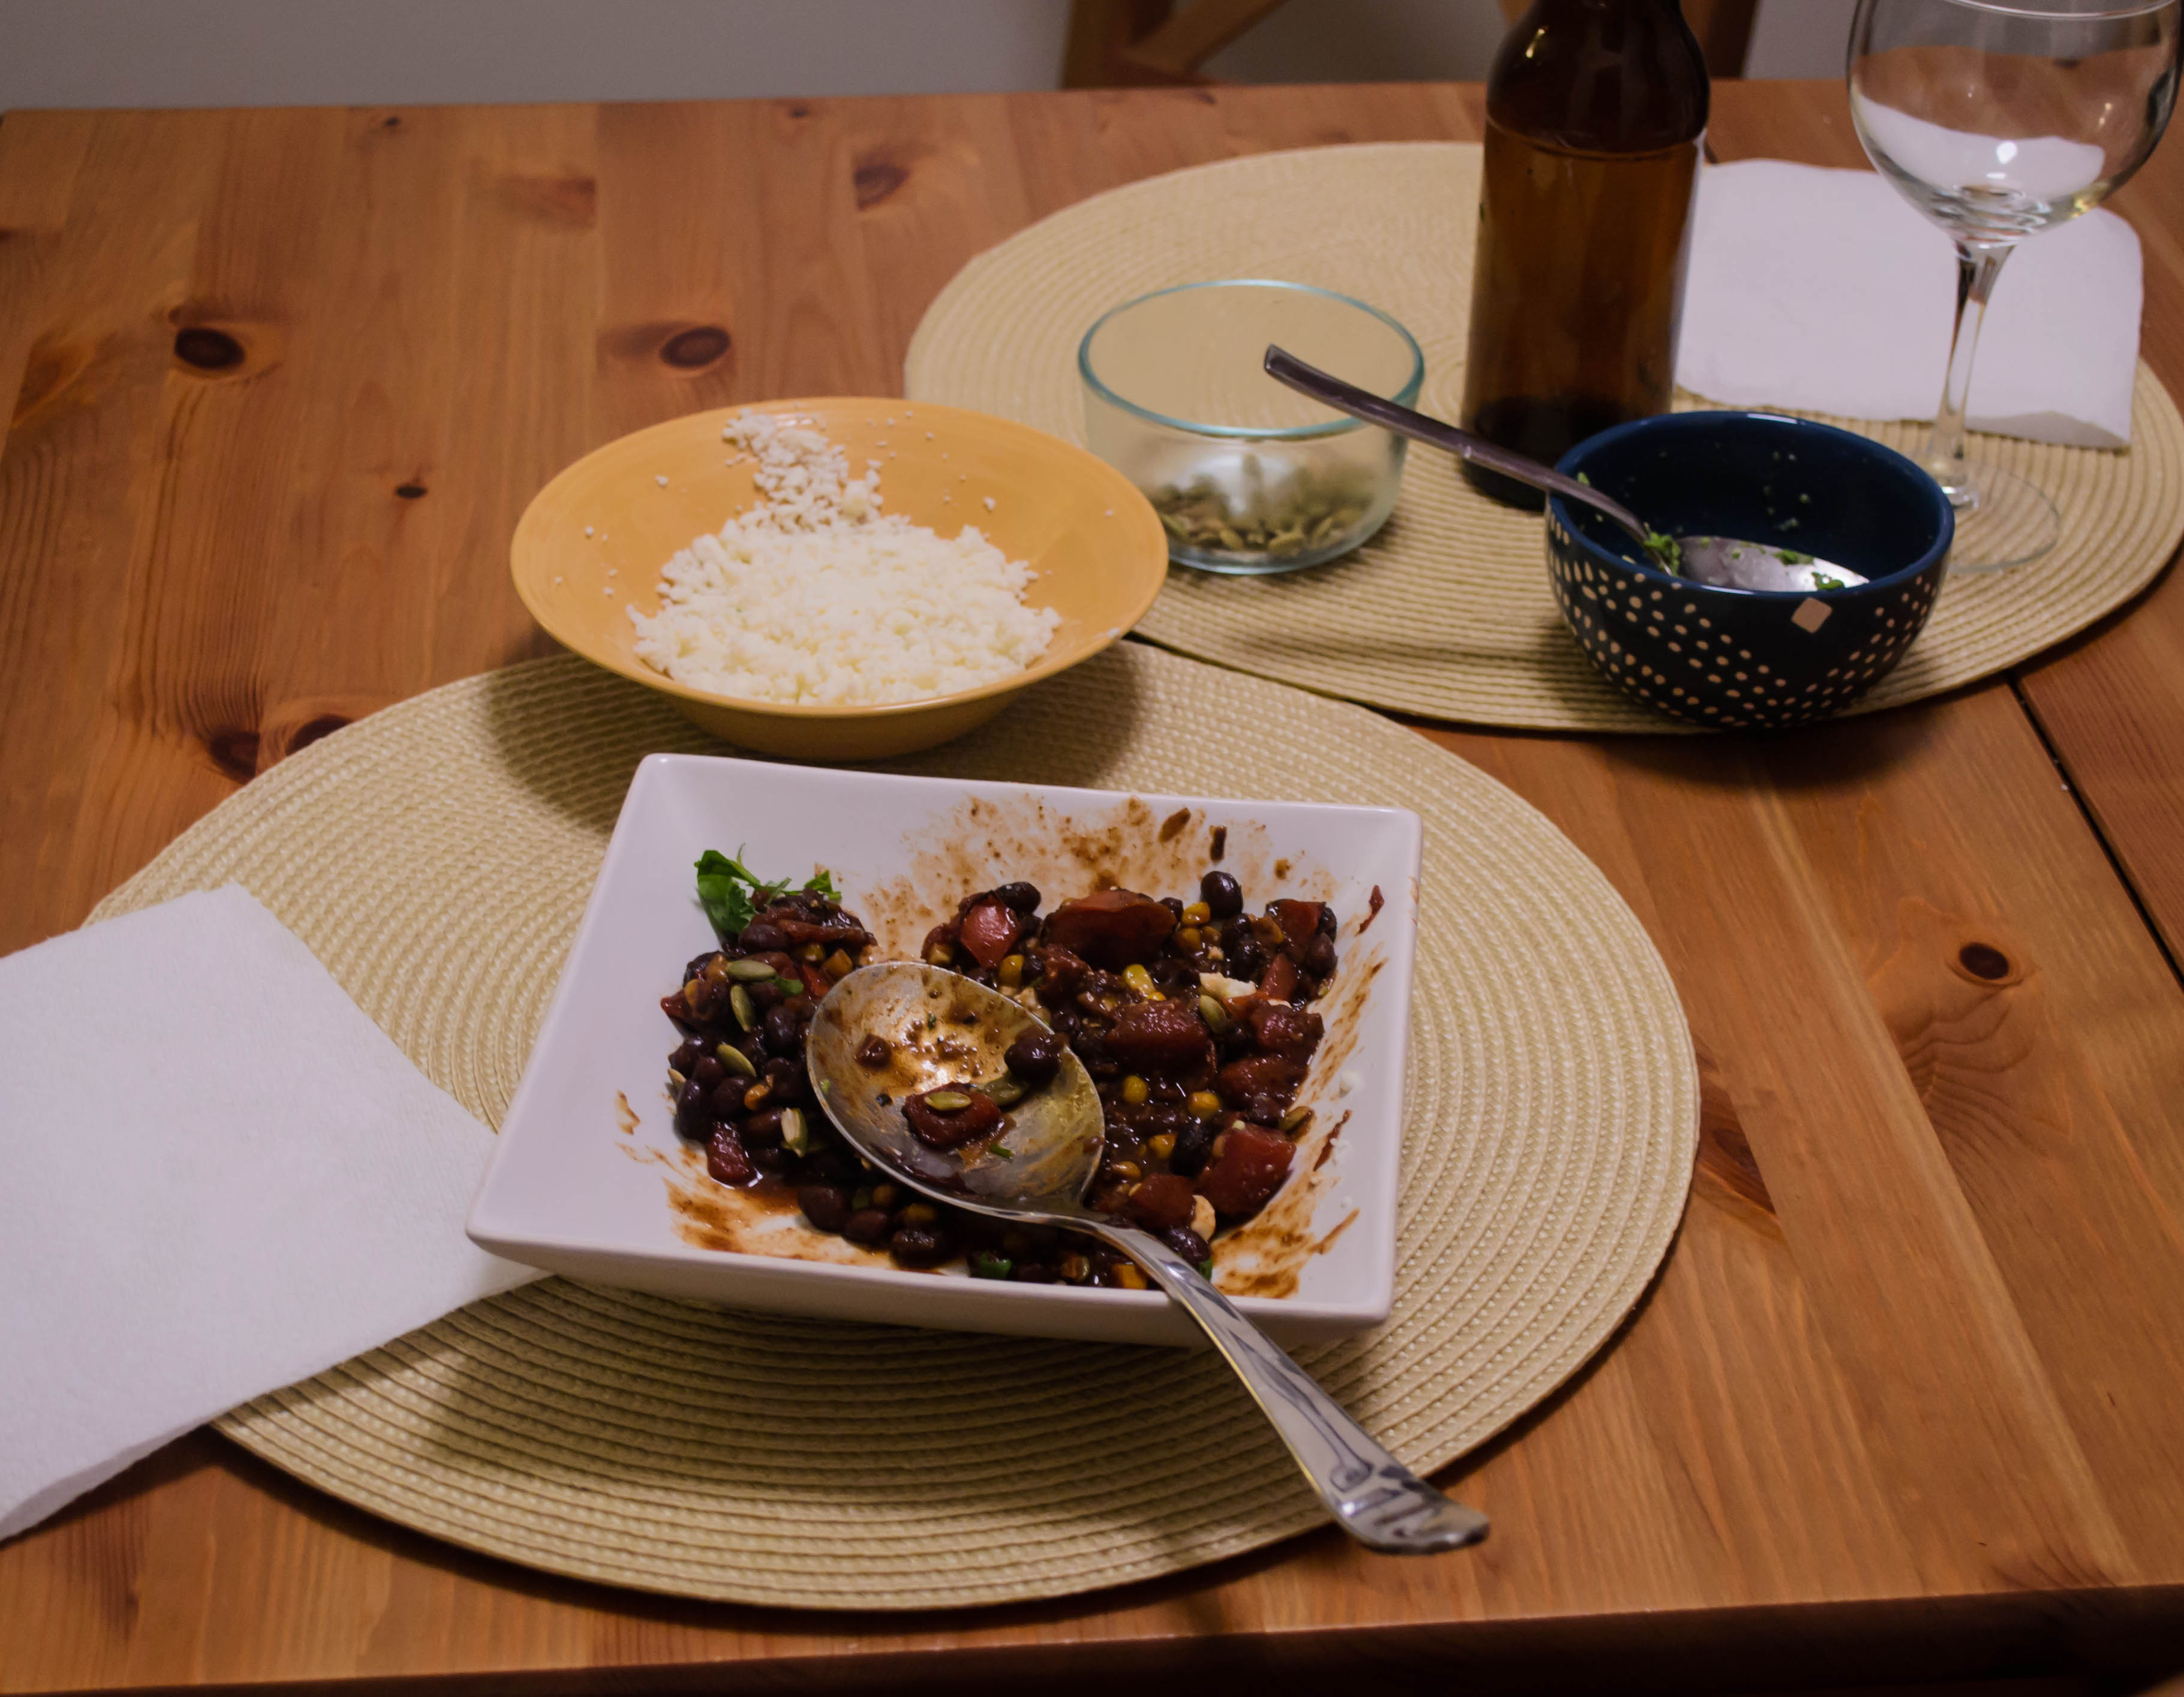
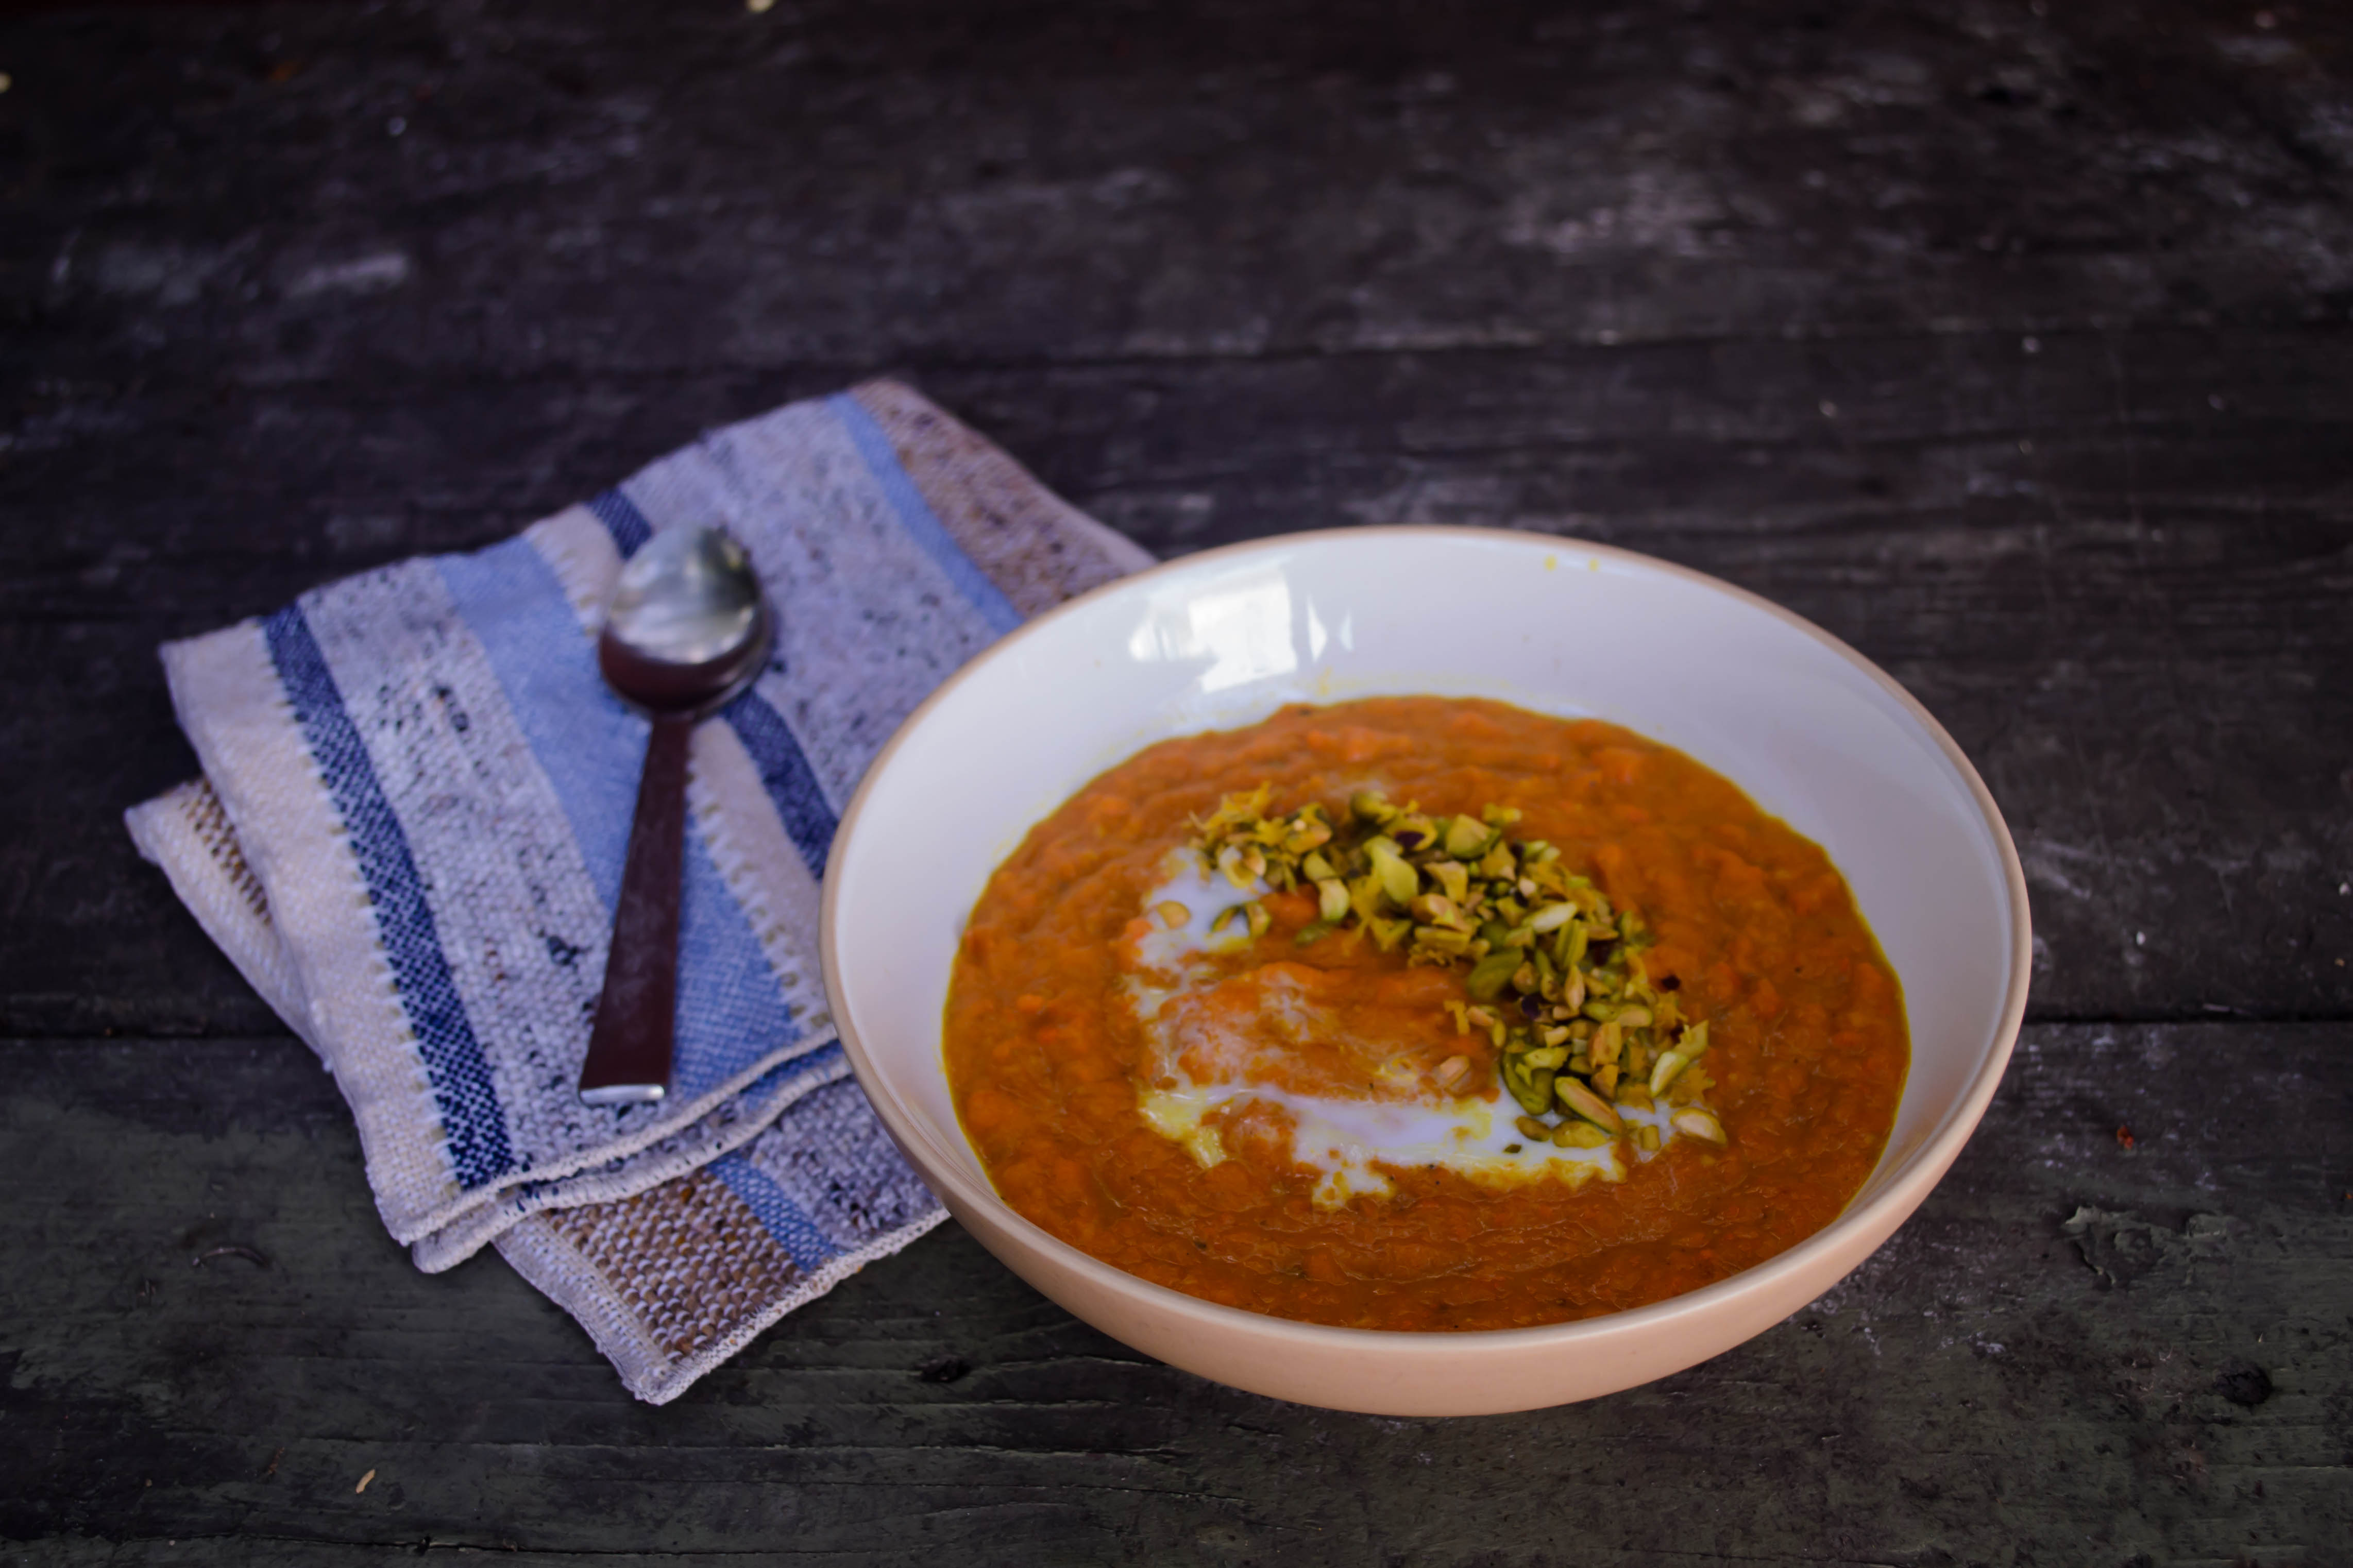
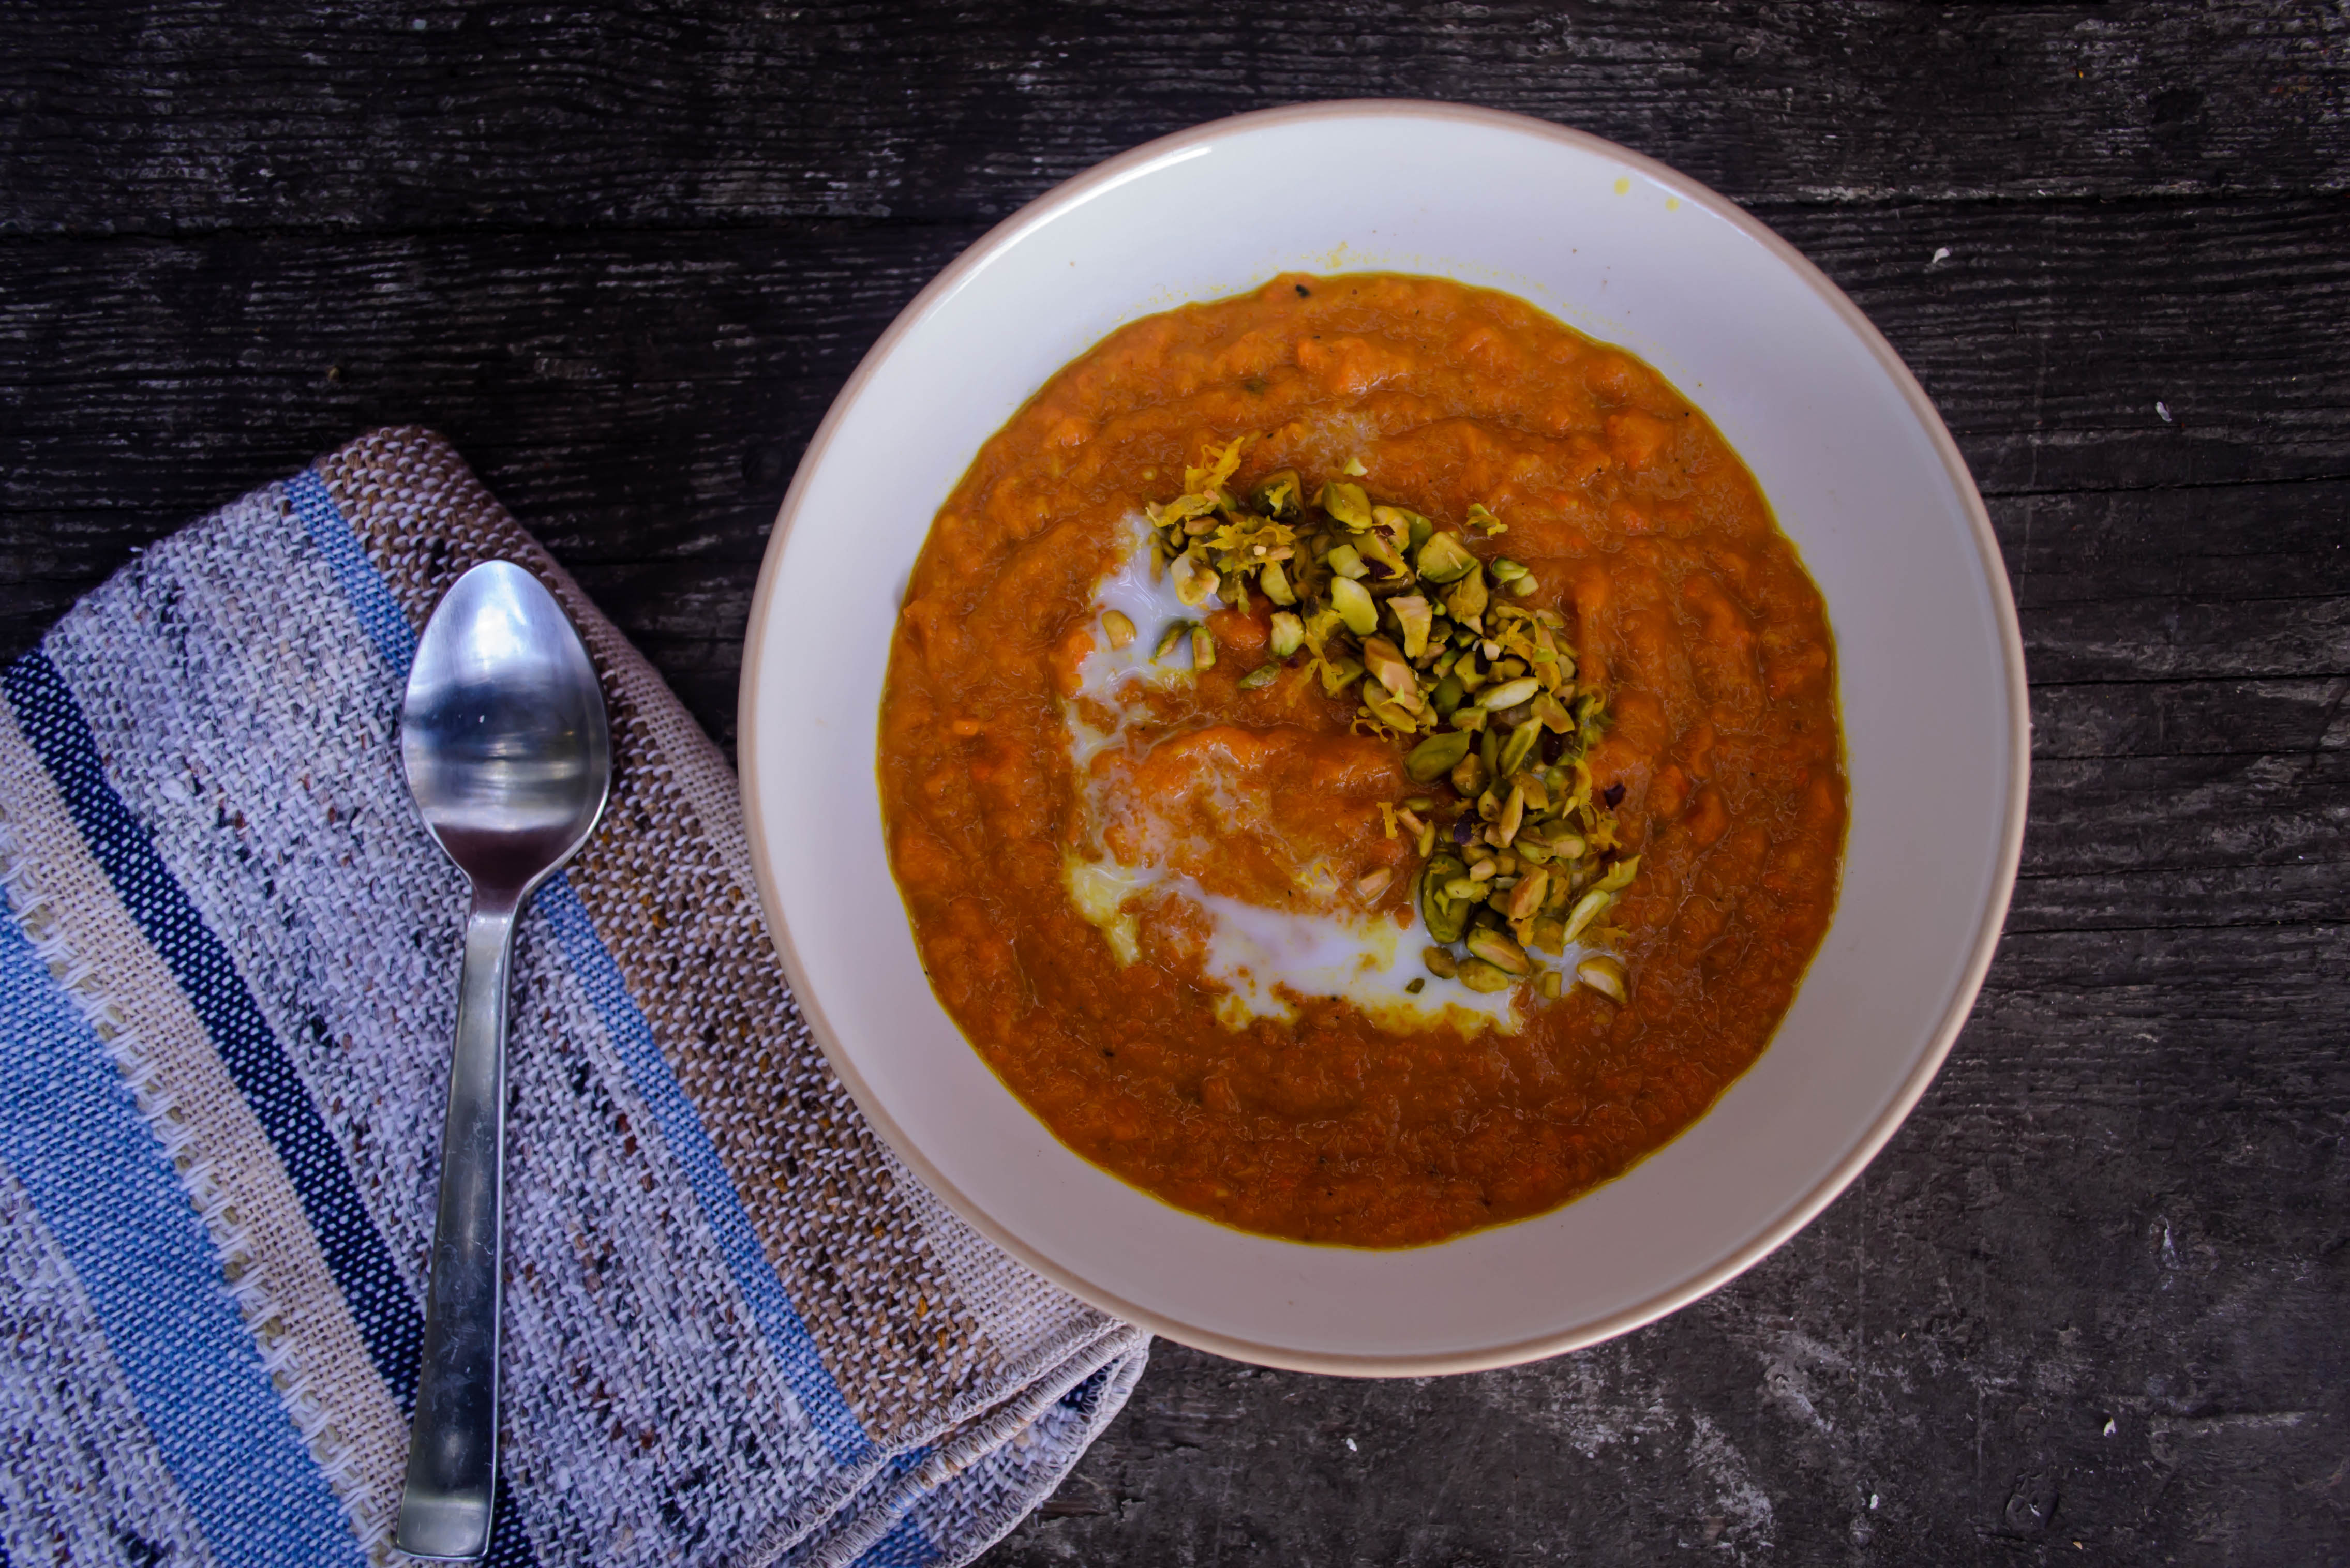
If you like a good garnish, I recommend the standards: crumbled queso fresco, cilantro, toasted pumpkin seeds, generous chunks of avocado, perhaps a dollop of sour cream or a few snippings of chives. But really, these beans don’t require much beyond a bowl, a spoon, and a belly in need of warming.
Food Blog March 2015-0442Food Blog March 2015-0445

Beer Braised Beans
Serves 2 as a main; 3-4 as a side dish
2 tablespoons olive oil
1 dried chile of your choice (I like ancho chiles for this)
½ cup diced red onion (about ½ a medium onion)
1 teaspoon ground cumin
1 teaspoon ground coriander
2 cloves garlic, minced
½ cup corn kernels (defrosted, if you’re using frozen corn)
14-16 ounce can of black beans
1 cup drained fire-roasted tomatoes, from a 14 ounce can
12 ounces of dark beer like a porter or a stout
salt to taste
garnishes of your choosing: crumbled queso fresco, avocado, cilantro, pumpkin seeds, etc.


  • Heat the olive oil over medium heat, then add the dried chile and the onions and sauté for 1-2 minutes. The chile may sputter a bit, and the onions will start to turn translucent.
  • Stir in the cumin and coriander and continue to cook for another 1-2 minutes, turning the heat down to medium-low if the onions threaten to burn.
  • Add the garlic and corn, turn the heat back up to medium if you previously lowered it, and sauté, stirring occasionally, until the corn picks up some roasty color; about 3-5 minutes.
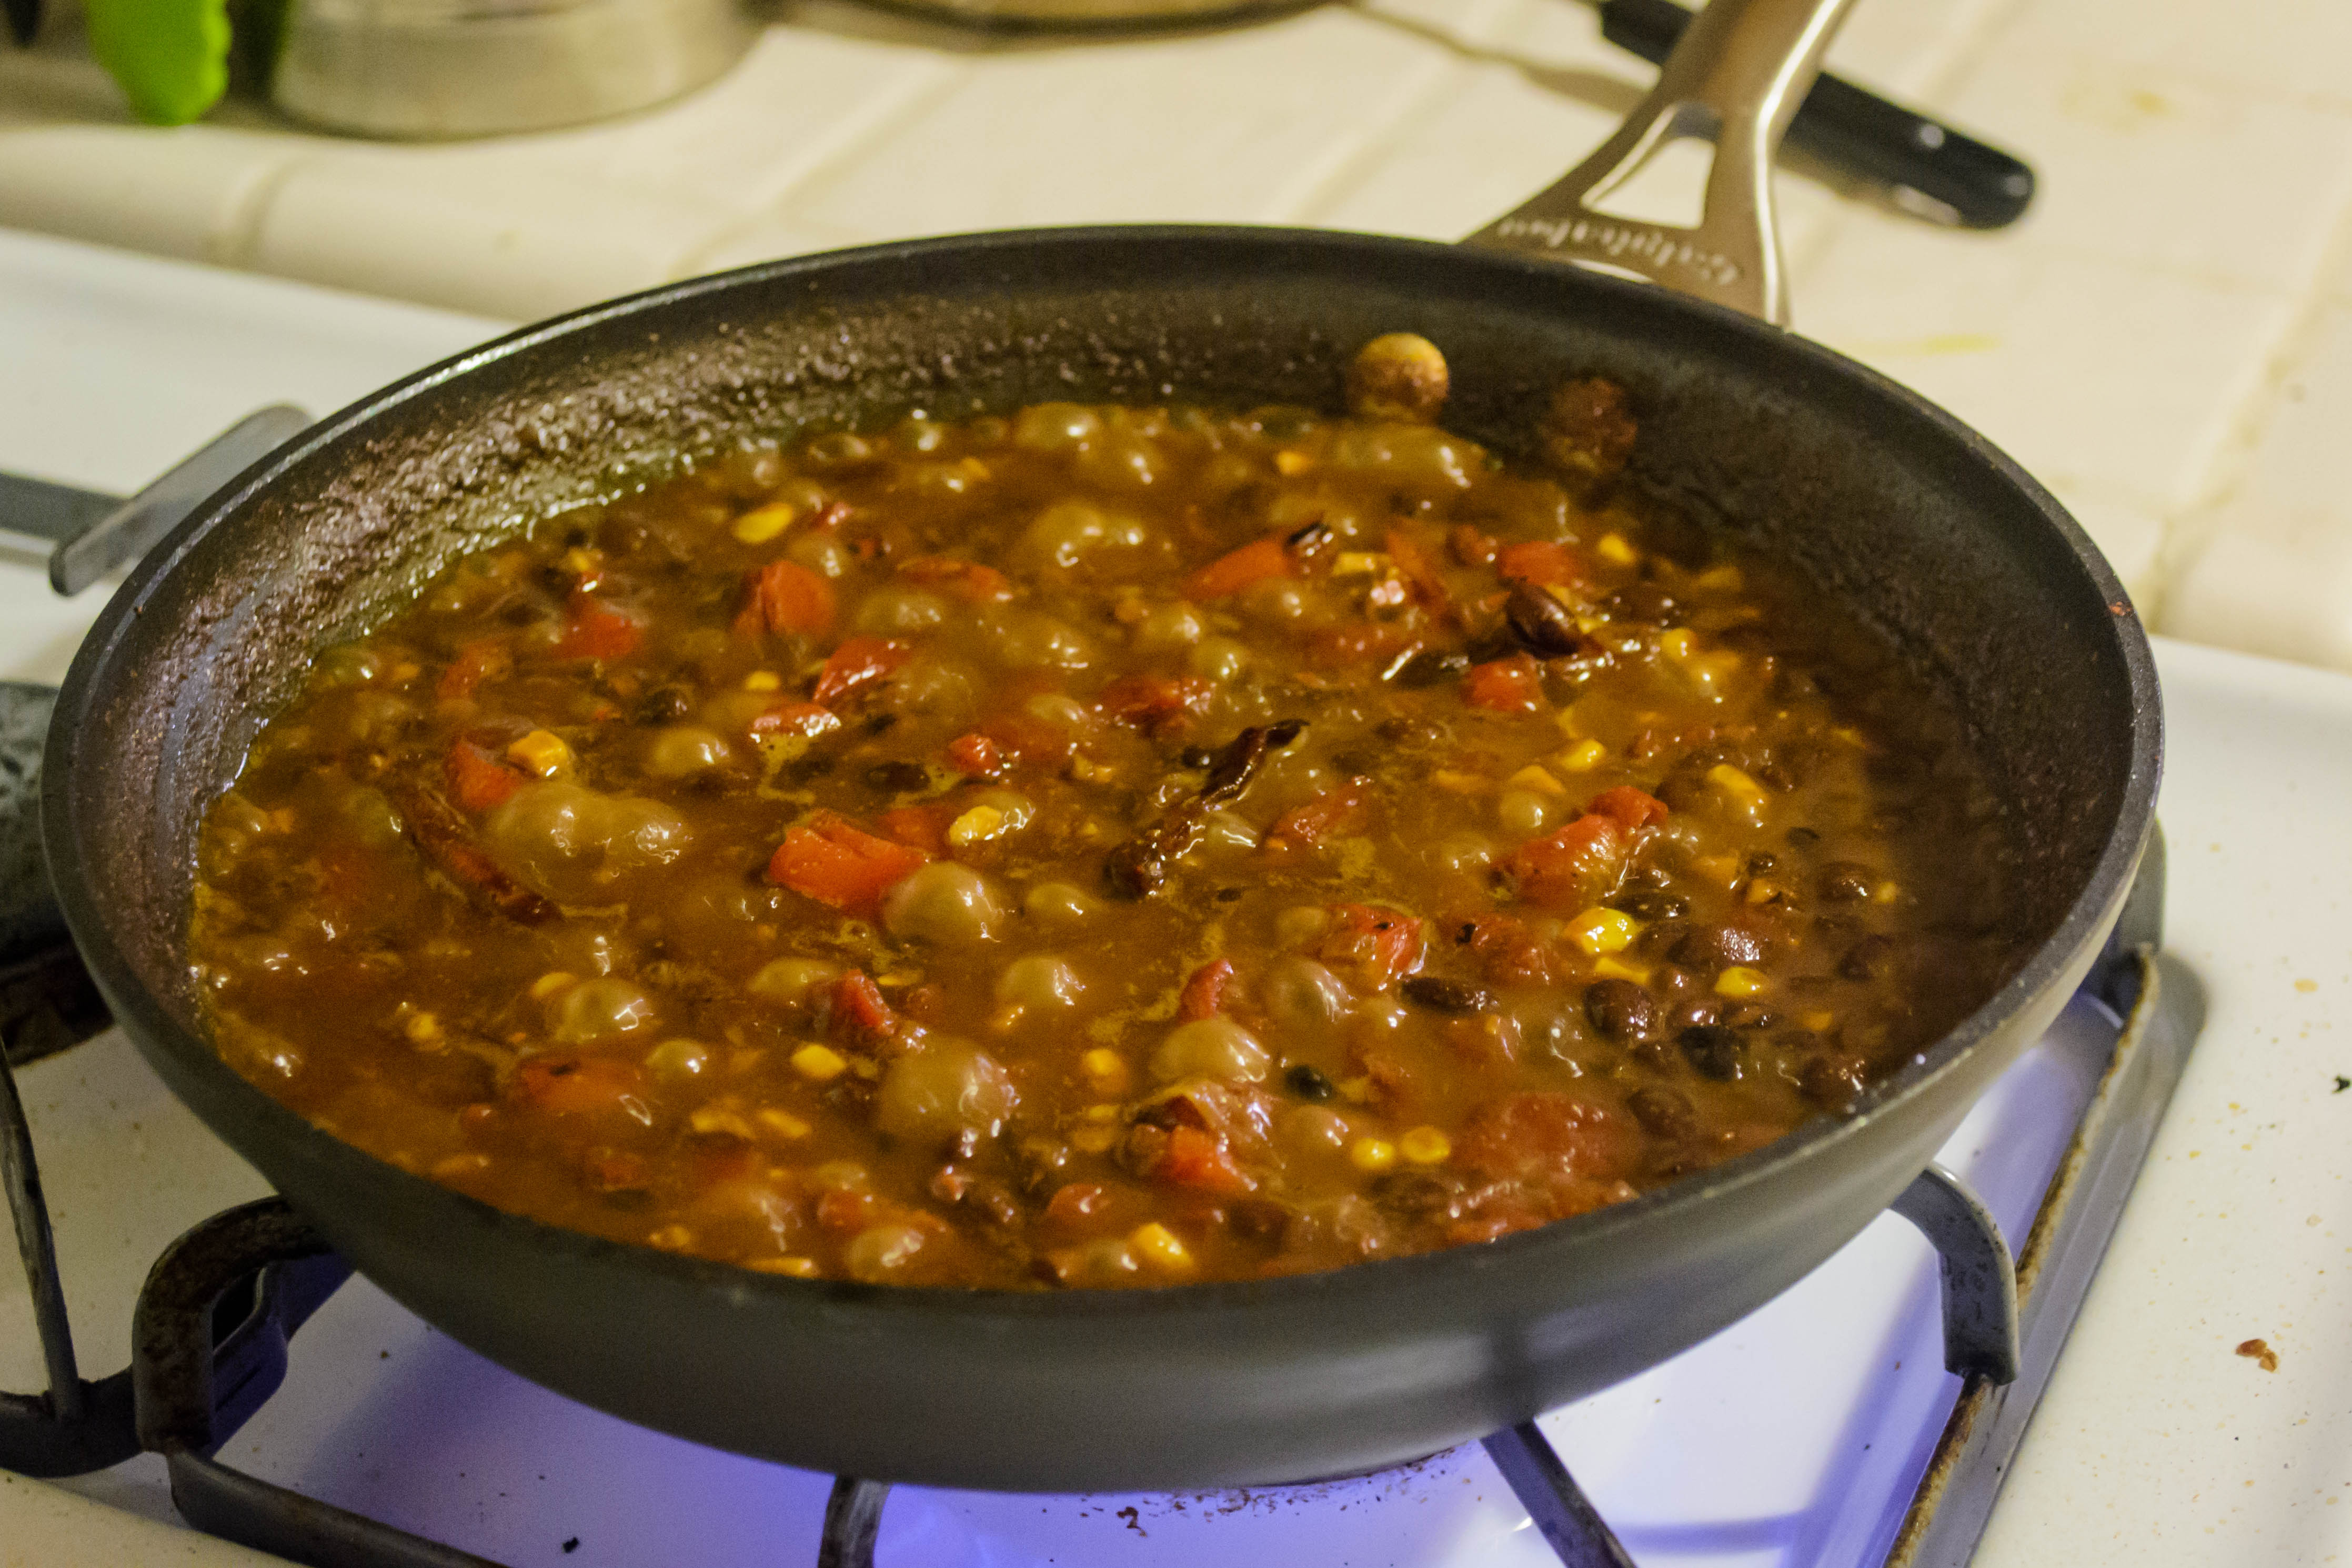
  • Now pour in the beans, canning liquid and all, along with the tomatoes and the beer. Turn the heat up to medium high, stir to ensure nothing is sticking to the bottom of the pan, and let it bubble away, stirring occasionally, until much of the liquid is absorbed. For me, they reached the consistency I wanted in 20 minutes – not totally dry, but not tremendously soupy either.
  • Taste for salt (canned beans can sometimes be quite salty, and reducing the liquid enhances the sodium content), pick out the dried chile, and serve hot with whatever garnishes you wish.

Carrot Ginger Soup with Coconut and Turmeric

I threw away my bathroom scale today. Before you applaud me, this isn’t some kind of new-year-new-me-self-acceptance resolution. No, it’s because unless we have had a 46 pound ghost living in our bathroom for the last month, the scale has stopped working. No amount of fiddling with the dial on the bottom has had any effect, aside from bulking up our imaginary squatter to 77 pounds.

Food Blog January 2015-0205Though I realize there are probably many videos, tutorials, and step-by-step Pinterest boards devoted to fixing this problem (how to evict your imaginary scale-ghost!), I decided it was easier to just throw it away. Then I went out and had chicken and waffles for lunch.

Food Blog January 2015-0210All that being said, it is the time of year when, if we’re invested in this sort of thing, we tend to pay a lot of attention to what our bodies look like and what we put into them. Usually that involves eating less and eating lighter, which is ironic and unfortunate, because so many places in the country this January are having such a harsh winter. We need comfort, we need warmth, we need rich food to sustain us through snow and low temperatures (well, perhaps not in Los Angeles).

Food Blog January 2015-0199The answer to both of these problems seems, to me, to be vegetable soup. I don’t mean a minestrone type concoction, with chunks of various veggies floating in broth, but a pureed soup, featuring a single vegetable star, with minimal back-up supporters and just a bit of spice to keep things interesting. After a recent episode of Top Chef on which one of the contestants made a deep, sunset inspired roasted carrot soup, I knew what my star would be.

Food Blog January 2015-0201Carrots work well with many flavors, but ginger is a particularly nice pairing; carrots are sweet and hearty, and ginger is a warm, spicy kick that keeps it bright. Rather than chicken stock, which I find can muddy flavors a bit, I opted for water as my liquid, with a generous splash of coconut milk to add some richness. Then, on a whim I’m pleased I followed, I sprinkled in a good teaspoon or two of turmeric, which bolstered both the orange glow of the carrots and their earthy flavor.

Food Blog January 2015-0213As I watched my pureed mixture burble in a pot, I started thinking about texture. I’d stopped short of pureeing the carrots to total velvet smoothness, but I still wanted something crunchy to break up the potential monotony of my soup. During the pumpkin madness of autumn, I experimented with some yet-to-be-perfected turmeric-spiced pumpkin bars that featured a pistachio and walnut crumble topping. Pistachios seemed like a good choice again here, and to play with the hint of citrus flavor they carry, as well as add a slight sourness the soup might benefit from, I tossed the nuts with lemon zest before sprinkling them over my vivid orange lunch.

Food Blog January 2015-0209Despite our less-than-wintery weather, this was a comforting, warming bowl. Roasting the carrots brings out their sweetness and concentrates their flavor, but the spices keep it dancing between decadent richness and brightly refreshing. I used some leftover naan to mop up the edges of my bowl, but a crusty piece of baguette or hot pita would, as you might expect, be just as nice.

Food Blog January 2015-0214This is a thick soup – almost passable as a vegetable puree, and you can play with it as you please. Add more or less liquid, replace the pistachio and lemon topping with another toasted nut, or lime zest rather than lemon, or maybe even fried sage and crumbled gingersnaps, to play with the fresh ginger in the soup. My quantities here produce an assertively gingery mix – reduce to just a teaspoon or two for a milder spice.

Food Blog January 2015-0207

Carrot Ginger Soup with Coconut and Turmeric
Serves 2-3
1 pound carrots, tips and tops removed, peeled if desired (I usually don’t – just scrub them off)
1 tablespoon olive oil
½ teaspoon salt
½ teaspoon pepper
1 tablespoon grated ginger (or less, to your taste)
2 teaspoons turmeric
1 cup light coconut milk
1 cup water
2 teaspoons sugar
additional salt and pepper to taste
¼ cup roughly chopped, toasted pistachios
2 teaspoons lemon zest


  • Preheat the oven to 425F while you prep your carrots. Remove their tops and tips, then split down the center for two long half cylinders. On an aluminum foil lined baking sheet, toss the carrot halves with the olive oil and the ½ teaspoon salt and ½ teaspoon pepper for a gleaming, even coat. Roast in the 425F oven for 40 minutes, until nicely browned and quite tender. Set aside to cool slightly.
  • For a standard blender: add the roasted carrots, coconut milk, water, grated ginger, and turmeric to a blender and blend until the mixture reaches your desired consistency. As noted above, I chose to leave mine with a little texture, but you can blend until completely smooth if desired. Pour the mixture into a medium pot.
  • For an immersion blender: add the roasted carrots, coconut milk, water, grated ginger, and turmeric to a medium pot with high sides (otherwise the soup spatters a bit during blending) and blend with an immersion blender until the mixture reaches your desired consistency. As noted above, I chose to leave mine with a little texture, but you can blend until completely smooth if desired.
  • For both methods: once the soup is your desired consistency in the medium pot, place it over medium-low heat until it is heated through. Be careful – because this mixture is thick, if it comes to a boil it will spit.
  • Season to taste with salt and pepper and serve topped with a scattering of chopped pistachios and lemon zest.

Baked Tofu Spring Rolls and Peanut Sauce

As I noted last week, I’ve been out of town. In fact, I’ve been off the continent (though not out of the country). Now that we’re back on the mainland, I suppose I owe you a few reflections.

July Food Blog 2014-4009Kauai is beautiful. But if you’ve ever seen Jurassic Park, or Raiders of the Lost Ark, or even the opening sequence of M*A*S*H, you already know that. It’s a tropical island dotted with beaches and rainforests. It couldn’t be anything but beautiful. But what struck me as we wandered, sandal-and-swimsuit-clad, through the little towns and massive resort complexes, was how friendly it was. I don’t just mean ordinary smiling helpful friendliness. That much is expected too, since so much of the island’s industry is built on tourism and the service jobs it requires. I mean food friendliness. Many, many businesses proudly assert themselves as GMO-free. The Kauai Coffee plantation, which we visited one afternoon (photos to follow, I’m sure), is basically off the grid. They are entirely water powered by rainfall and river flow from one of the island’s mountains, and create enough energy to power parts of nearby towns as well, sometimes. It is one of the most sustainable businesses I’ve come across, but they don’t shove it in your face, just pronounce it matter-of-factly and leave you feeling that yes, this is the right thing.

July Food Blog 2014-3993 July Food Blog 2014-3996 July Food Blog 2014-3997It’s not just that, though. It has become reasonably common practice in large restaurants or fine dining establishments, and even in some chains, for menus to include vegetarian, vegan, dairy-free, and gluten-free options. On Kauai, even many of the smallest, most local food stands are open and friendly to the idea. I guess maybe “food friendliness” translates to “willing accommodation.” There are menu codes indicating which foods are prepared without gluten, without dairy, and which can be quickly adjusted to include or remove allergens. And what was most friendly, to me, was that many of these adjustments did not involve an extra cost. Why should it, I thought, when sometimes this change is as simple as enshrouding perfectly grilled fish in a corn tortilla rather than flour?*

July Food Blog 2014-3998In that spirit, then (and because I promised my friend Ch I would post this recipe oh, a month ago…), today I want to bring you one of my favorite, most dependable and well-received party snacks that just happens to also be vegan and, if you make it with the right sort of soy sauce (even Kikkoman has a GF option now!), gluten-free as well. These pretty, tasty, surprisingly easy spring rolls involve shreds of bright carrot, bibb lettuce, fresh grassy mint, and rice noodles, a stick of tofu pressed, drizzled with soy sauce, and baked until meaty and firm, all lovingly wrapped in rice paper. Then, if you’re me, you whip up a quick batch of pantry-scavenged peanut sauce to dip them into, and you have something suitable for almost every meal. They aren’t totally allergen-free, because if you can’t have rice you can’t have the noodles or the wrappers these use, and if you have problems with peanuts, peanut sauce is of course out of the question. But they do manage to come close, accommodating the need to avoid animal products and that pesky gluten monster. Plus, they are fairly cheap to make, produce large quantities, and most importantly, are just plain delicious.

July Food Blog 2014-4000 July Food Blog 2014-4004July Food Blog 2014-4005July Food Blog 2014-4002July Food Blog 2014-4003Spring rolls are a good food to take to a party, but they are also a good food to produce party style, because they can easily incorporate an assembly-line style production method. Last month, I had a few friends from work over who wanted to learn to make them, and we sat around the little table in my little “dining room” and spent the afternoon rolling, and, as you might imagine, eating, spring rolls. They kindly acquiesced, probably thanks to the free snacks and wine I was plying them with, to let me snap a few photos of the process, so that’s what you’re seeing here. Thanks, ladies!

July Food Blog 2014-4006* This doesn’t, of course, guarantee 100% safe dining for people with celiac or other severe gluten intolerances, since kitchen cross-contamination is always a concern. But it is nice that for those avoiding gluten, even casually, there’s a cost-free option.

July Food Blog 2014-4013

Baked Tofu Spring Rolls
Makes 18-24, depending on the width of your tofu slices. Each one then gets halved, leaving you with 36-48 snackable pieces.
14 ounce block firm or extra firm tofu, sliced horizontally into three thin squares
¼ – ½ cup soy sauce or tamari (gluten-free soy sauce, but check labels carefully)
3-4 ounces dry rice noodles (sometimes called Maifun or Rice Sticks; I like Dynasty brand)
3 carrots, peeled and grated
1 head butter lettuce, leaves removed, halved, and crisp rib removed
30-40 leaves mint from one bunch
Round rice paper spring roll wrappers (I like the brand with the rose on the label)
Warm water

  • At least three hours before you want to serve your spring rolls, slice the tofu as described and press it by placing the thin squares between layers of paper towels and placing something heavy on top of them. I often use my cast iron pan for this. A baking dish weighted with cans or bottles works well too. Leave the tofu to press for at least 60 minutes to squeeze out some of the water.

  • During the last 15 minutes of pressing, preheat oven to 325F and line a baking tray with aluminum foil. Space out the tofu squares on the aluminum foil, being sure they don’t touch.

  • Dribble each square with soy sauce to coat and bake for 60 minutes. After the first 30 minutes, dribble the top of each square with more soy sauce, as the first application will have soaked in. When they are done, the edges of the squares are deep brown, solid, and feel a bit rubbery. Remove and let cool completely, then cut into ½ inch strips (roughly index-finger-width).

  • While tofu bakes and cools, prep the other ingredients – grating carrots, stemming mint leaves, separating lettuce leaves, etc. Submerge the rice noodles in hot water and let them steep for 8-10 minutes, until they feel flexible and are tender when bitten. Drain well and set aside to cool.

  • To roll, set up an assembly line – mint, then lettuce, then carrots, then tofu, then noodles. Be sure to have a plate or other vessel on which to place your finished rolls at the end of the line-up. Add warm water to a wide, shallow dish or bowl that the rice paper will fit into. You will address this step first.

  • Here we go: submerge one rice paper wrapper in the warm water and let it sit until it becomes completely pliable. I find this tends to take somewhere between 30 and 45 seconds.

  • When the rice paper is ready, remove and place on a flat surface. If you wish, you can briefly spread it on a paper towel to soak up some of the drips, but this isn’t strictly necessary.

  • Place 1-3 mint leaves around the rice paper wrapper, bottom surface facing up. This ensures the top, more attractive side of the leaf will be visible through the wrapper on the finished roll.

  • Next, place a piece of lettuce in the center of the wrapper so the longer edge of the lettuce (if there is one) faces you. Sprinkle this with grated carrots (a few teaspoons, though I always eyeball it).

  • Lay a piece of tofu in the cradle of lettuce and carrots you’ve created, positioning it with the long edge facing you (so, horizontally – see photos above for reference). Top the tofu with a small pile of noodles – no more than a few tablespoons, were we picky enough to measure them out – arranging them across the tofu.

  • Now we roll! As the wrapper faces you, fold in the left and right “edges” over the short sides of the tofu, so what you have looks like a long oval with two squared-off sides. Next, take the side of the wrapper closest to you and fold it completely over your fillings, then pull tight toward you. Roll up the wrapper, tucking each revolution tightly so the fillings are well contained. The tighter rolled, the better they will stay together.

  • Repeat until you run out of tofu slices! You will get a nice rhythm established. I find I can complete a roll in the time it takes a new rice paper wrapper to soften. Then you are all set to start the next.

  • Just before serving, halve each roll on the bias (with a diagonal cut) for attractive presentation.

  • These will keep, packaged in an air-tight container in the refrigerator, for 1-3 days. Let them come to room temperature before serving, as the rice paper is a little tough when cold.

Peanut Sauce
Makes a generous 1 cup
½ cup peanut butter
½ cup water
2-3 tablespoons soy sauce or tamari
1 tablespoon sriracha or other hot sauce
1 tablespoon grated ginger (if the fresh ginger is frozen, it grates really easily)
1 tablespoon rice vinegar or lime juice

  • In a small saucepan, combine all ingredients over medium low heat. Stir gently with a small spatula or a spoon.

  • As the ingredients melt together, at first the mixture will look watery and very grainy. Keep stirring gently, and it will smooth and thicken to an almost-pourable texture.

  • Taste for seasoning. If it is too salty, add an additional tablespoon each of peanut butter and water. If it is not spicy or salty enough, add more sriracha, soy, or ginger as needed.

  • Serve warm.

  • As it cools, the peanut sauce will separate slightly. Stir vigorously to re-combine.

Strawberry Lemonade Jam

If you’re like me, you’ve already been totally seduced by the complex sweet perfume of summer strawberries, lying there all innocent-like in their little baskets and boxes… maybe even twice. Okay three times. Seriously, that smell! I take home pints, pounds, flats. But here’s the embarrassing thing: once those little red gems have enticed me into slapping down dollars to take them home, I eat a few, nibbling around the hull, I cut up a handful and stir them through yogurt, I may even sprinkle on some sugar and dollop on some lightly sweetened whipped cream.

Food blog June 2014-3929But the remaining berries languish. They flirt with me, teasing me with that gorgeous aroma, but once they are safely home and in the fridge (fruit molds FAST in my Southern California kitchen), the affair is half over already. I – how could I ever? – forget about them. And when they are weak and softening and reluctant to be sliced without collapsing, I try frantically to think of ways to use them so I won’t waste their summery tartness.

Well then, let’s jam. Strawberry lemonade jam. It’s an easy prospect. It’s a perfect non-adventure for a lazy day when pajamas are the right wardrobe choice, that novel you’ve been longing to finish finds its way into your hand, and you aren’t ready for breakfast until almost afternoon. And if that breakfast is toast with still-warm jam, well, carry on.

Food Blog Photo Friday 2014-3357
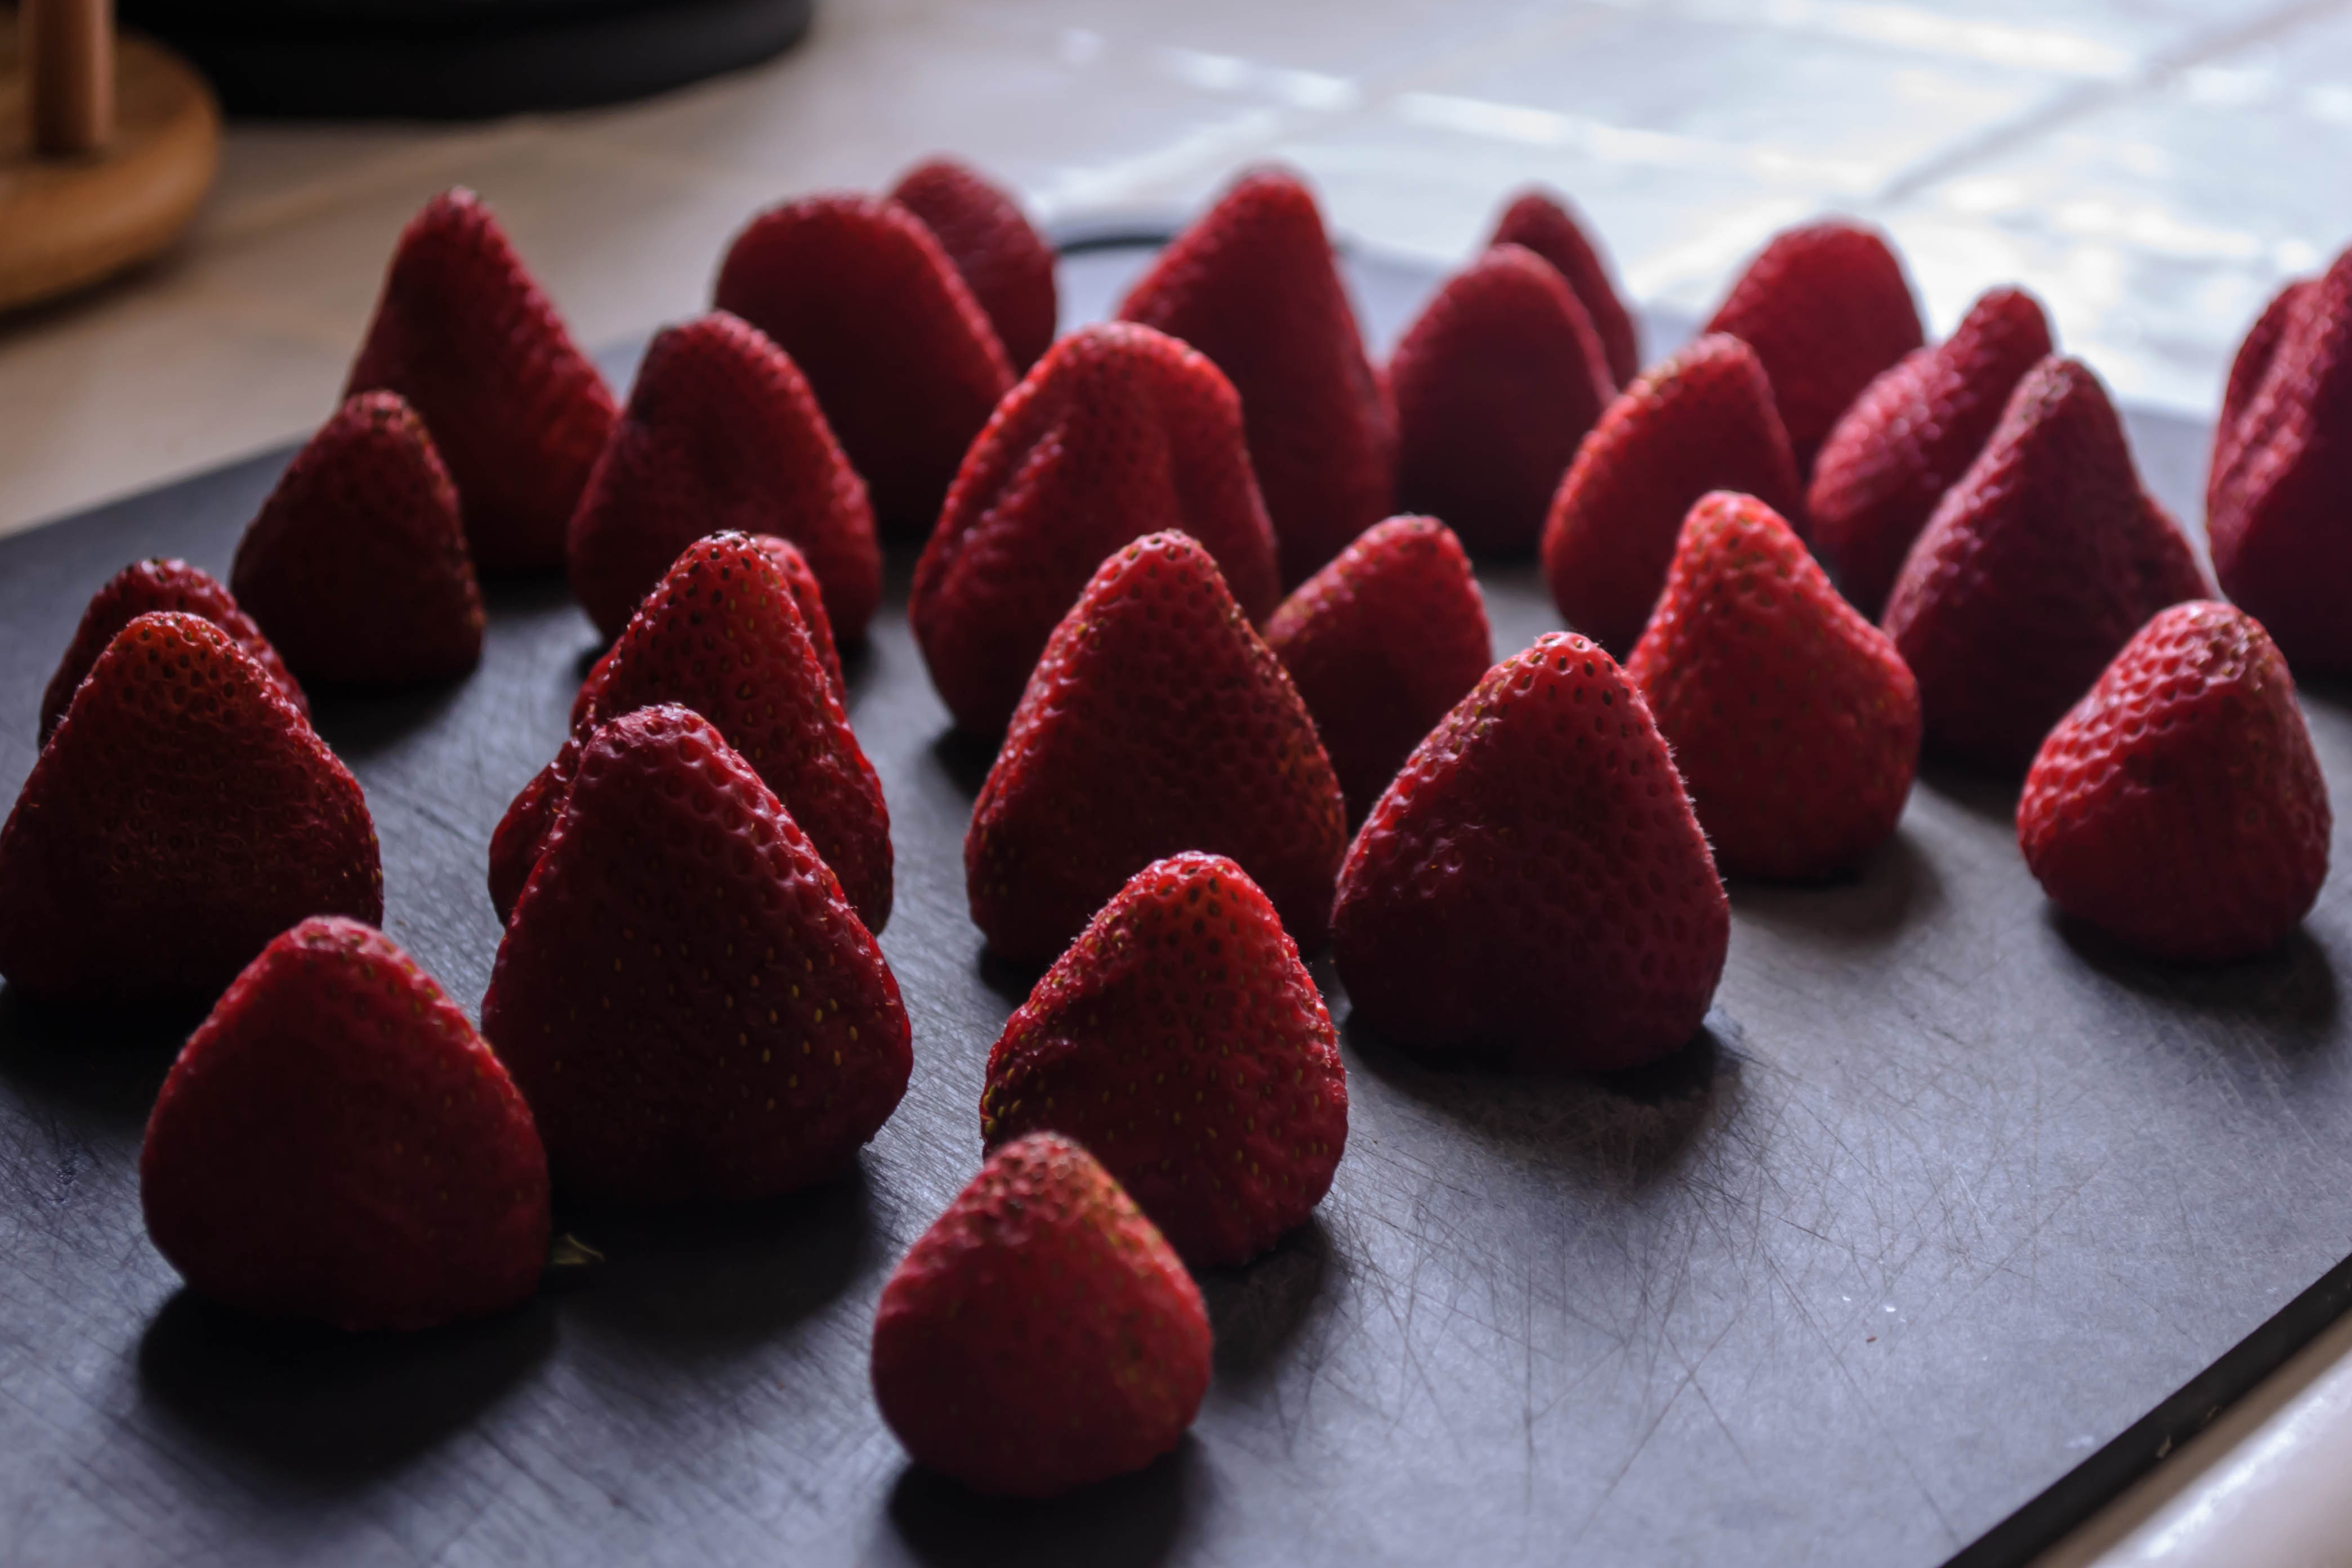
Strawberries, a few flurries of sugar, a generous squeeze of lemon (freshly squeezed, please), a pinch of salt for its indescribable magic (you won’t taste it, but it will heighten the flavors of the other ingredients), and if you’re feeling sassy, a drizzle of framboise or chambord for extra depth and tingle. I’m nearly always feeling sassy. Then a long, slow simmer, almost an hour, until the fruit breaks down and the bubbles get thick and sluggish. Strawberries don’t have huge quantities of pectin, so this isn’t a tremendously thick jam, but who needs that, in the summer?

Food blog June 2014-3934There’s little else to say, because really, a perfect summer beverage in jam form doesn’t need much advertisement, but I suppose we can linger over serving suggestions for a moment. A languid spoonful oozed over toast, or pancakes, or dribbled into the holes of a waffle, is perfectly acceptable. If the day has, as they say, “gotten away from you” in its summery glory, a soft ladle over vanilla ice cream could never be a bad thing. If you’re more of the cocktail type, a drizzle of jam topped with gin and soda would cool and sweeten a sweltering afternoon.

Food blog June 2014-3944I went as far as using this for the filling in a batch of cupcakes I took to a baby shower last month. A quick slather between layers of cake would do nicely as well. But really, since I’m a bit of a purist, I think my favorite application was slathered across the slightly over-toasted surface of an unapologetically thick slice of homemade sourdough bread.

Let’s do summer. Let’s jam.

Food blog June 2014-3943

Strawberry Lemonade Jam
Makes…. well, it was a summer afternoon… and I forgot to measure… but it certainly made enough to play with for several days.
1 ½ pounds strawberries, hulled and roughly chopped
⅔ cups granulated sugar
½ cup freshly squeezed lemon juice (I needed two lemons for this. You may need more or less depending on how juicy yours are)
pinch of salt
2 teaspoons fruity liqueur such as framboise or chambord, optional.
  • Dump all ingredients into a pot. Set your stove to medium heat and stir gently to combine and begin dissolving the sugar. Continue to stir occasionally as things heat up.
  • After ten minutes, the strawberries and sugar will be foaming up bright pink bubbles. Stir and reduce the heat to medium-low. We do want to evaporate some of the liquid the strawberries are exuding, but not burn the sugar.
  • Simmer for another 30-45 minutes for a loose but still spreadable jam. It will still look quite thin when you take it off the heat, but will thicken as it cools. If you are unsure about thickness, put a tablespoon or two on a plate and stick it in the freezer for five or ten minutes to see how thick the finished product will be.
  • Because strawberries don’t have a tremendous amount of pectin, this all-fruit concoction will never be as thick as a commercial jam. If that is what you are looking for, you will have to add thickener.
  • Serve warm or cool, in or on, or even under, your favorite bread product, or see serving suggestions above.

Grilled Potato and Radish Salad

In the last three years, I have had the incredible good luck of attending a wedding each summer. Two years ago, I had the great honor of making the cake. One year ago, I sobbed as I watched two women legally and joyfully exchange vows, then start perhaps the greatest dance party I’ve ever attended. And this past weekend my eyes welled as the bride – dressed in a frock she designed herself, alternating white and lemon yellow flounces – betrayed just a tiny quiver in her perfect, crimson lips as her sister read a toast: a poem she’d written herself.

Food blog June 2014-3913The poem was about the bride and groom, but it was also about older and younger sisters: the beautiful friend/family/learning relationship they have as they grow up together. It was, there is almost no need to assert, beautiful. Of course it was. It was about the things the girls had weathered, and how the groom had woven his way into their laughter and music, through music of his own. But it was also about what the bride had taught her sister.

Food blog June 2014-3907Sisters learn funny things from each other, and it is disarming and lovely to be allowed to see what things they consider most important. How to read, how to write, how to sing. And, somehow magically, “how to cook radishes.” Until five or six years ago, I’d never given much thought to cooking radishes. To be honest, I hadn’t given much thought to radishes at all. They were just there, all weird and pinkly peppery, flying saucers scattered through the occasional salad, or sharp and pungent and paired with butter and salt.

Food blog June 2014-3910But here’s a funny thing, about radishes, about weddings, about friends and family and learning: as you get older, you get to choose things. Weddings help us construct the families we choose. But so can friendships, and so can an experience like graduate school, and so, oddly enough, can radishes.

Food blog June 2014-3911When N. and I lived in Eugene, Oregon, we decided to grow a garden. It was easy, there. It was a matter of shoving seeds into a spare bit of dirt, and watching them grow. Until the height of summer, it rained so often you barely had to worry about watering. Peas were one of our first crops, and of course we were invested in our tomatoes. But I’d still never considered radishes. Until, at S.’s house, a friend who has now become family, I was handed a french breakfast radish, pulled from her own little vegetable plot minutes before, a pink and while icicle the neighborhood deer had left quite alone. “You can just eat the whole thing,” S. told me, and I did. And the mild crunch, and the crisp, juicy spiciness, all but made me a convert then and there.

Food blog June 2014-3912After that first year of gardening, I always bought a pack of radish seeds. And they will never not make me think of S: razor wit, funny and honest and lovely and brilliant. She’s a willing and gracious hostess, she’s a fantastic cook, and she’s the mom to my own dog-daughter’s canine BFF. She, like the bride and groom this past weekend, like J & HP whose wedding cake I made, the people I can barely wait to spend fourth of July weekend with, is one of that special and cautiously assembled group: the family I chose.

Food blog June 2014-3915And as the fourth of July approaches, and those lovely people you choose to surround yourself with, to learn from, to sing with and read with and cook with, begin to turn their thoughts to potato salad, let me offer a fresh take to consider. This is not your traditional mayonnaise-laden, pickle-and-onion-and-dusted-with-paprika barbecue offering. (If you are after one of those, may I humbly suggest this one?) But I like this different approach, because it is lighter and fresher, because it does not require stove or oven heat, and because it makes me think of S. Tiny fingerling potatoes and plump lipstick red radishes get quartered, salted and peppered and oiled, and grilled until tender and silky. And then a few green onions, just to get a gentle char. Meanwhile, an assertive vinaigrette gets overburdened with herbs and whisked within an inch of its life to be drizzled over a bed of greens. I like arugula. S. would tell you to use the radish greens (but wash them a few times first – they can be really sandy). Potatoes and radishes get tumbled in, and after a quick toss the greens are barely wilted and the dressing soaks into the grilled vegetables like sponges in a bath.

I don’t know if this is how my bride friend’s sister learned to cook radishes. I suspect not. But the point is, those lovely things we learn, and choose, and become, should be shared.

Food blog June 2014-3913

Grilled Radish and Potato Salad, for Sarah.
Adapted from Cuisine at Home
Serves 2 as a main, 4-6 as a side
1 pound radishes, rinsed well, tops and tails removed
1 pound baby potatoes – the smaller the better
4 tablespoons olive oil, divided
1 bunch green onions or scallions, root ends trimmed off
¼ cup white wine vinegar or lemon juice
2 teaspoons dijon mustard
2 teaspoons finely minced dill
2 teaspoons finely chopped parsley
salt and pepper to taste
2-4 cups loosely packed arugula, or a combination of arugula and well-rinsed radish greens


  • If you are using a gas grill, place a grill tray on the burners and preheat the grill to medium over direct heat. If you are using a charcoal grill, light the coals. As they begin to turn gray, add the grill tray to let it heat up. If you are using an oven, preheat it to 425F with a sheet tray inside.
  • Quarter the radishes and halve or quarter the baby potatoes. You want equal, bite-size pieces – they need about the same amount of time to cook.
  • In a large bowl, toss the potatoes and radishes with 1 tablespoon of the olive oil, and salt and pepper to taste. Transfer them to the preheated grill or sheet tray in a single layer.
  • Grill until tender, 10-15 minutes, agitating as required to prevent burning. If you are using an oven this may take more like 20-25 minutes.
  • Meanwhile, make the vinaigrette: in a large bowl (I use the same bowl as before), whisk the remaining 3 tablespoons olive oil with vinegar, mustard, and herbs.
  • When radishes and potatoes are tender, transfer them to the bowl with the vinaigrette. Add the arugula (and radish greens, if using) and toss to combine.
  • Grill the green onions for 3-5 minutes, until the white bulbs are slightly softened and the greens are nicely charred. Chop and add to the salad, again tossing to combine.
  • Season the salad to taste with additional salt and pepper, if needed, and serve warm or at room temperature.

Coconut and Cumin Fried Plantains

Food Blog June 2014-3874One of my great pleasures in the summer is the hot cooked lunch. I’m a big believer in leftovers, and during the school year it’s easy and delicious (and cheap, let’s be honest) to just pack some of last night’s dinner into a Tupperware and take it to school with me. But in summer, when I’m home and puttering, being able to sashay into the kitchen around lunchtime and cook something quick and tasty is a pleasure I always forget about until suddenly I get to do it again.

Food Blog June 2014-3856This year, I finished my semester a week or so before N., which meant an additional treat when it came to constructing these lunches. We’ve talked before about my bachelor meals. I like to cook for other people, but they don’t always like all the same things that I like, and it’s a sad thing to have to wait for restaurant meals to order some of my favorites. So when I’m eating alone, I try to take advantage of those items my dining partner just isn’t crazy about. Sometimes, Chopped-style, I try to fit as many of these ingredients into my solo meal as possible.

Food Blog June 2014-3858In addition to crustaceans, coconut tops the list of foods N. is just not interested in (this means we never have to squabble over coconut shrimp, the most perfect meal ever invented; I get to eat it ALL). Bananas, too, are an unacceptable item unless they are mashed beyond recognition and folded into quickbread, in which case he’s all over it. Plantains, those longer, starchier relations, look just too much like their cousins to be acceptable as a food product to him. This seemed, to me, a perfect opportunity.

Food Blog June 2014-3878I’m a big believer in the fried plantain. Whether it’s sliced thick, lightly sautéed, and then mashed flat and returned to the oil to become tostones, or just cut into chunks and fried until golden on all surfaces and mixed into fluffy, buttery rice, I would probably be happy eating plantains every day for lunch all summer long, provided the oil was hot, the edges were crisp, and the salt was liberal. They take a while to ripen – most often they are sold in the grocery store still green, and can languish in a fruit bowl for a full week or two before they soften and their skins get brown and stringy. But I think they are worth it.

Food Blog June 2014-3864For this lunch treat, I decided to take a cue from my delight in the green bean poriyal I made a few months ago and add a liberal showering of N.’s other fruit nemesis. This became all about texture. The cumin, sizzling and fragrant, offers a crunch of earthy perfume. The plantain slices themselves, crisp exteriors tearing effortlessly into creaminess, contrast well with the coconut, which stands up for itself in toasty, chewy-crunchy shards. Add a squeeze of lime, and maybe a few torn leaves of cilantro, and lunch is served. Oh sure, you could dress it up or make it a bit more substantial by adding a scoop of basmati rice, or serving this as a side for shrimp or barbecued chicken. It would also play well, I suspect, with a roasted pork loin dressed in tropical flavors like mango or jerk seasoning. It could be easily doubled, or tripled, and if you are serving it as a side, I’d suggest allowing for about half a plantain per diner. But I gave it a solo, starring role, and I ate every single bite.

Food Blog June 2014-3872It’s a simple lunch, when you come right down to it, but it tastes like summer. And that, delightfully enough, is exactly where I want to be. Food Blog June 2014-3867

Coconut and cumin fried plantain
Serves 1 as a main, 2 as a side
1 ripe plantain (the skin should be dark yellow, well mottled with black or dark brown, and the fruit inside should feel tender)
2 tablespoons vegetable oil
1 teaspoon whole cumin seeds
½ teaspoon salt
Black or cayenne pepper to taste, if you want a bit of heat
½ cup unsweetened shredded coconut (try an Asian or Indian market, or maybe Whole Foods)
Lime wedge, optional
A few sprigs of cilantro, optional


  • Heat the oil and cumin seeds together over medium high heat in a large skillet.
  • While the oil heats, peel and then slice the plantain on a bias into ½ inch slices.
  • When the cumin is sizzling and aromatic, add the plantains to the skillet in a single layer. Sprinkle with salt and pepper, if using.
  • Fry the plantains for 3 minutes, or until the bottoms of each slice are golden brown and have a crisp crust.
  • Flip each slice, turn the heat down to medium, and fry an additional 2 minutes.
  • Add the coconut and agitate the pan a bit to be sure all of the shreds find their way to the oil, then continue to cook for 1-2 minutes more, until the majority of the coconut is toasty-brown, with only a few white strands remaining.
  • Remove from heat and serve with a squeeze of lime and a few sprigs of cilantro, if desired.