Spinach and Goat Cheese Orchiette with Hazelnuts

One of the great things about the last house we lived in during our tenure in Eugene – the best house – the party house – was its location. Just over a mile from campus, it was also within walking distance of downtown (for the incredible produce and local craft market each weekend) and the fairgrounds.

Food Blog September 2014-0616The Lane County Fairgrounds played host to … well, let’s call it an interesting line-up of events. Among others, a gem and mineral show, a bridal show and wedding expo, a model train exhibit, and (I am not kidding) a wool festival. In the summers during the County Fair, we could smell the fried food and hear the cover bands from our backyard as the sun fell. Sometimes they were fun. But sometimes it was someone covering Huey Lewis and the News again. Now don’t get me wrong, I’m a believer in the power of love. After all, it don’t take credit cards to ride that train, and far be it from me to critique the theme song from Back to the Future! But several nights in a row, even if it’s only once a year, is pushing it.

Food Blog September 2014-0607Despite its foibles, the fairgrounds also hosted an annual event that N. and I went to every single year. The Friends of the Library Book Sale happened in the spring, and with most books priced at 50 cents or $1, the season was important, because we ended up having to establish rules. A household with two English literature PhD students may lack many things, but what it does not lack are books. By our third year in the program, we already had at least four bookshelves jammed so full we were piling books atop each other and committing the shelving equivalent of double parking with some of the smaller paperbacks. Every shelf sagged in the middle from the weight. Cheap books were a danger zone.

Food Blog September 2014-0611We ended up instituting a rule that we had to walk to the book sale. This required us to get some exercise and celebrate the season, but more importantly, it meant we were limited in what we could add to the collection by our own biceps. If you can’t carry it home, you can’t have it. It helped. A little.

Facing a room full of tables full of books, with more books in boxes underneath, is a daunting task. After I’d perused the “literature and fiction” area and the “classics” table, I would routinely wander to the cookbooks section. Selections here were usually hardback, which meant I’d be able to carry fewer of them, and (surprise, surprise) usually a bit pricier than the twelve ratty copies of Heart of Darkness with torn covers gracing the literature area. But for people with limited willpower, these kinds of hard and fast prohibitions are a good thing. They mean you have to really want what you’re getting, and that leads to better purchases.

Food Blog September 2014-0610Food Blog September 2014-0612
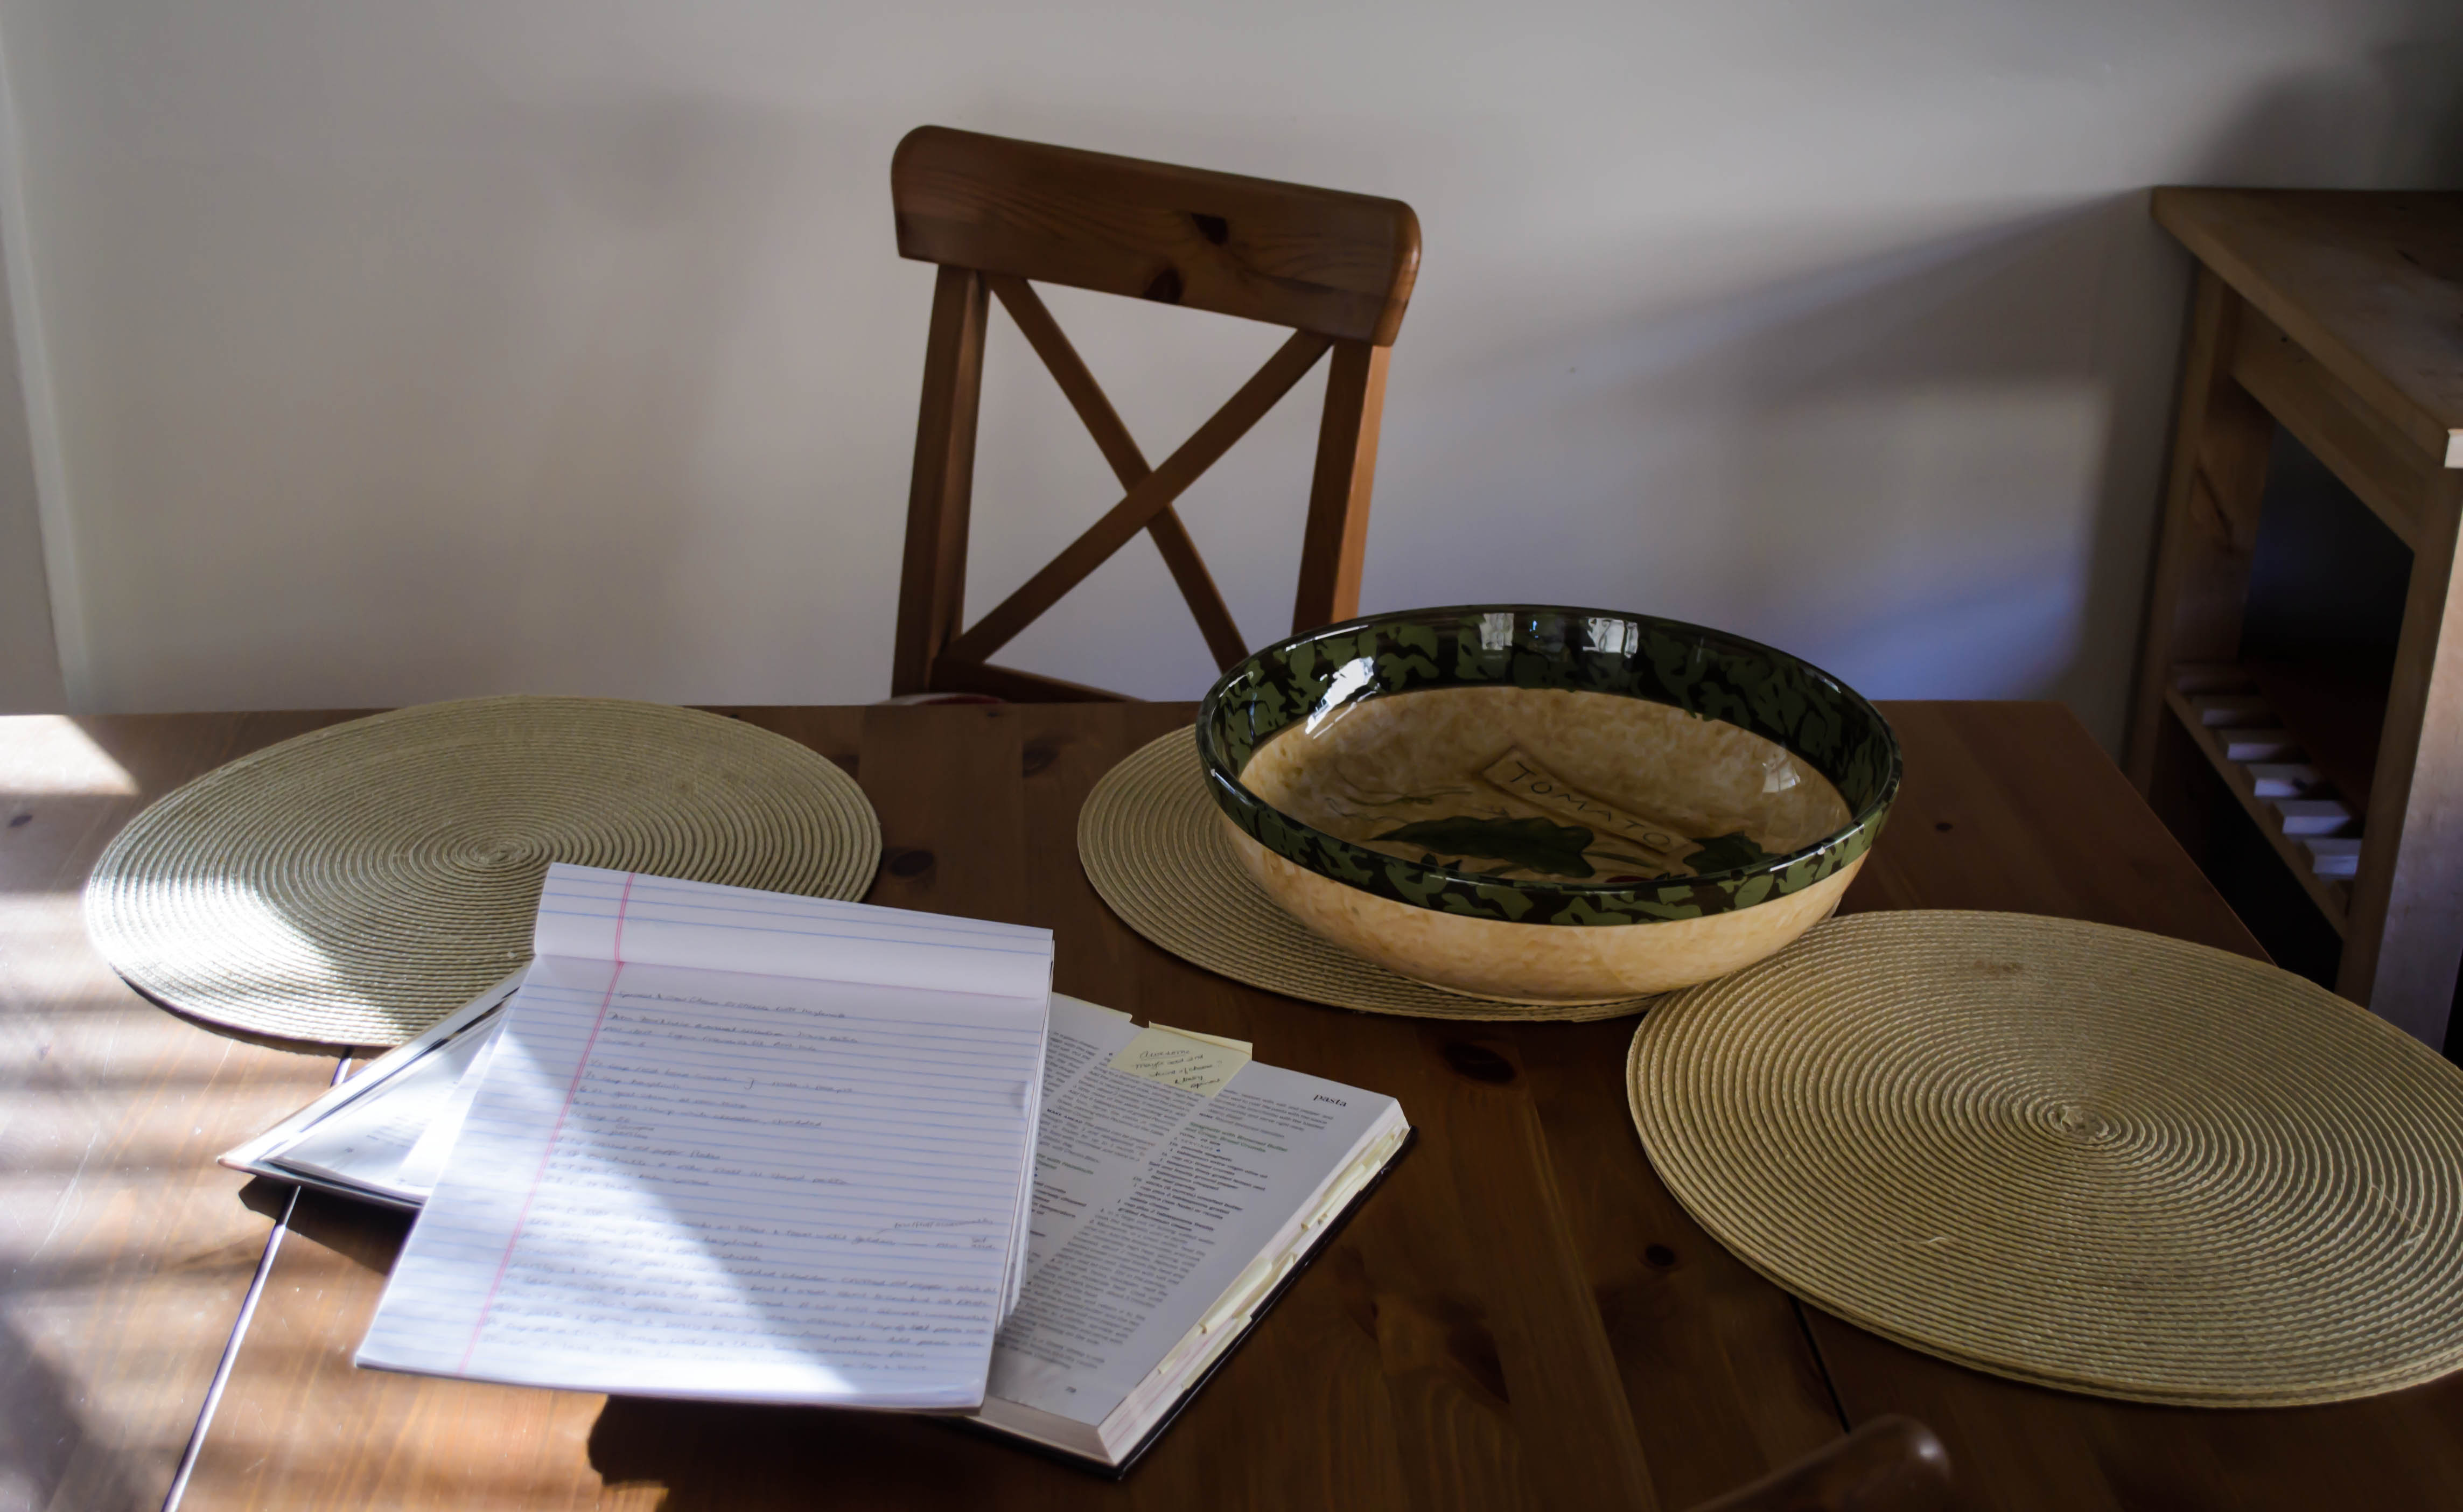
I acquired several good cookbooks via this method, including one containing the first yeast bread I ever made (and it was a success!). But by far, the star has been an old annual collection of Food and Wine Magazine recipes, and within that collection itself, the single page that receives the most attention contains a pasta dish by Mario Batali. It features goat cheese, hazelnuts, and red pepper flakes coaxed into a sauce to coat a pile of orchiette, those little domes of pasta named for their apparent resemblance to little ears (though to be honest they have always reminded me more of a lady’s cloche hat).

Food Blog September 2014-0614Batali’s recipe is delicious but basic. He blends the aforementioned ingredients with a smattering of chopped parsley, a glug or two of olive oil, and a healthy pour of starchy, steamy pasta water into a creamy sauce. After tossing the pasta in all this tangy, spicy, nutty glory, Batali adds a dusting of toasted bread crumbs for some needed crunch.

My version, though it maintains the procedure, plays to my own tendency for gluttony. Unsatisfied with just goat cheese, I add some shredded white cheddar for extra savory tang. N. is a fiend for bread crumbs, so I nearly triple the quantity called for in the original recipe. In an attempt to atone for these culinary sins, I also add a tremendous half pound of fresh baby spinach leaves, lightly wilted in the pasta water during the last minute of cooking. Further, it’s gluttonous in its allowances for laziness: the sauce, such as it is, is constructed in the serving bowl, the spinach cooks with the pasta, and though you do have to dirty up your food processor, you can process the bread crumbs and the hazelnuts in it one after the other with no need to do more than tamp it out a bit in between.

Food Blog September 2014-0617
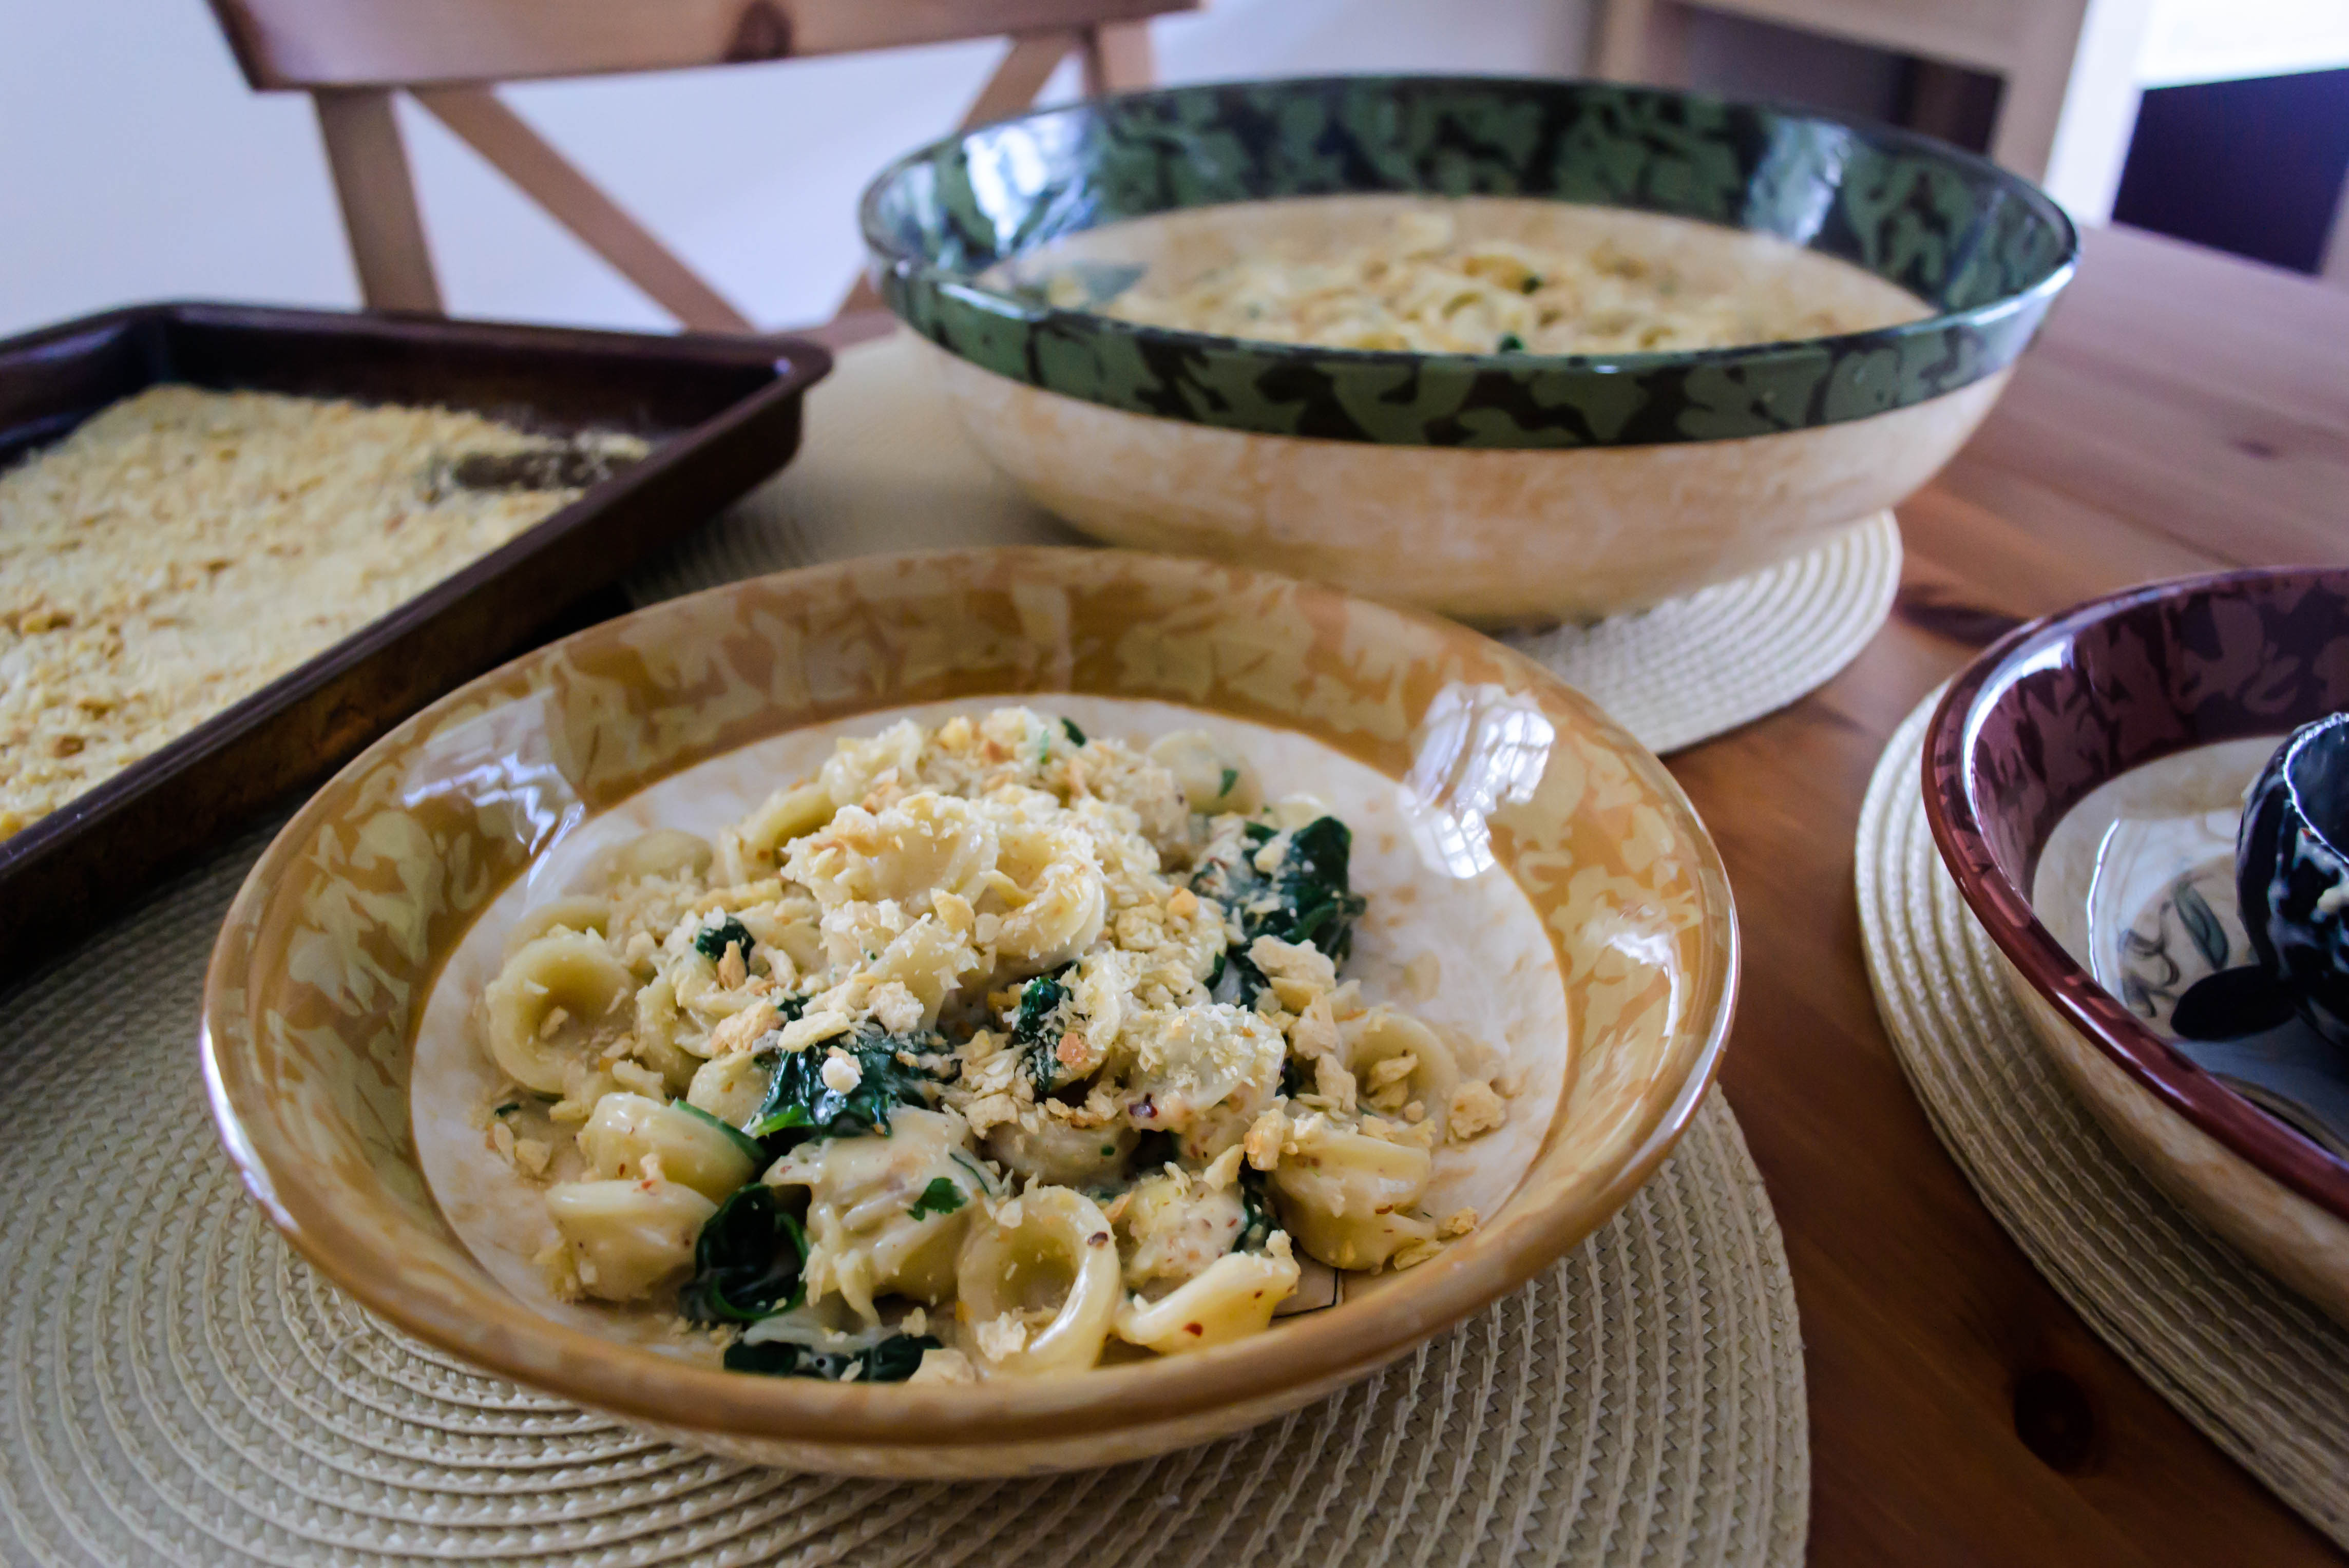
The finished dish is a mountain of pasta, caressed with sauce and threaded through with enough wilted spinach to eliminate the need for a side salad (though if you still want one, be my guest!). It’s a study in textures, with the orchiette themselves retaining a lovely chew, the spinach soft, the sauce silky but rumbling with pebbles of hazelnut resistance, and topped off with the perfect golden crunch of the toasty bread crumbs. Behind all this is the steady heat of the red pepper flakes, which I alternate quantities of – sometimes just enough to add a suggestion of spice, sometimes enough to clear the sinuses of the persistent fall allergies the LA basin is kind enough to grant me. Either way, it’s a dish that I forget about in between instances, but once I’ve tasted a fresh, steaming forkful, it becomes the only thing I want to eat ever again. Again.

Food Blog September 2014-0619

Spinach and Goat Cheese Orchiette with Hazelnuts
adapted from Mario Batali
Serves 8

1-1/2 cups fresh bread crumbs (whir 4-5 slices of sourdough in a food processor)
1/2 cup hazelnuts
6 ounces goat cheese, at room temperature
6 ounces extra sharp white cheddar, grated, at room temperature
1/4 cup extra virgin olive oil
1/4 cup minced fresh parsley
1 teaspoon crushed red pepper flakes (or to your taste; this quantity produces a moderately spicy flavor)
1 pound orchiette, preferable, or another vaguely shell-shaped pasta
8 ounces fresh baby spinach
salt and pepper to taste

  • Preheat the oven to 350F. Once you’ve processed your bread into 1-1/2 cups of fine crumbs, spread them out on a cookie sheet and toast them in the oven until golden, tossing and fluffing occasionally. Depending on the density and size of your crumbs, this will take 10-15 minutes. Once golden and crisp, remove from the oven and set aside.
  • Use the same food processor, shaken free of bread crumbs, to grind the hazelnuts into a gravel with individual pieces about the size of coriander or mustard seeds (i.e. we want them small, but not quite ground into a paste).
  • Heat well-salted water to boiling in a large pot and cook orchiette according to package directions.
  • Meanwhile, put the goat cheese, shredded cheddar cheese, crushed red pepper flakes, olive oil, parsley, and ground hazelnuts into a large serving bowl. Mash it about with a rubber spatula to combine into a thick, lovely, cheesy paste.
  • In the last minute of the pasta’s cooking time, add the 8 ounces of baby spinach leaves and push them down into the boiling water with a wooden spoon.
  • When the spinach is wilted but still bright green and the pasta is tender but still pleasantly chewy, drain both, reserving about 1 cup of the pasta water.
  • Add pasta and spinach to the serving bowl with the cheese and nut mixture. Begin to add the pasta water, 1/4 cup at a time, stirring, until a thick, sauce forms that coats the pasta evenly. This may not take the entire cup of water; thin the sauce just to your desired consistency.
  • Season to taste with salt and pepper, then scatter on the breadcrumbs immediately before serving.

Apple Cheddar Monte Cristo Sandwiches

Food Blog September 2014-0599When you tell people you live in Los Angeles, one of the first things they often say is something in the realm of “well you can’t beat the weather!” Well, okay, but you can get sick of it. As I drove home from work the day we had these sandwiches for dinner, one of the local radio DJs said something akin to “is it still summer? I won’t let it be fall yet.” Cue snarling and angry words from me. How could she?! I mean, I like the sun. I love summer. But here’s the thing: I miss my jeans. When I get home from work and evict myself from my teacher clothes, I miss sliding into the worn embrace of my soft, familiar denim. Not to mention spending a day without the hair plastered to the back of my neck. Appetizing, I know.

Food Blog September 2014-0584Food Blog September 2014-0586Food Blog September 2014-0590So maybe out of resentment at the season (or lack thereof, since it just slid from mid- to late September and we spent the last two weeks ping-ponging between mid-80s and near 100 degree temperatures), I came up with a dish that screams fall at the top of its lovely, melty little lungs. Apples. Cheddar cheese, as sharp as possible. Dense, moist sourdough. Sage, that most autumnal of herbs. Maple syrup. It’s a bit of a breakfast sandwich, but since when have I ever been opposed to that sort of thing as an evening meal?

Food Blog September 2014-0591Food Blog September 2014-0594In its preparation, this sandwich takes the Monte Cristo as its font of inspiration. Though I’m using cheddar instead of swiss, and replacing ham with apples that have been gently sautéed in brown butter with a liberal dosing of maple syrup (are you hungry yet?), the whole assembled sandwich gets dunked in an egg batter and then fried until delicately crisp on the outside and limp with melted goo on the inside.

Food Blog September 2014-0597Food Blog September 2014-0598In an effort to be responsible diners, we ate this with a wilted kale salad-ish concoction, but it honestly didn’t need any accompaniment. In fact, the second time I made it in as many weeks, I didn’t prepare any side dish at all, and that and the relatively petite slices of bread I used made me feel completely justified in demolishing two sandwiches all by my lonesome. Well, minus the apple slice or two that I shared with Miss Lucy. It’s tough to refuse those velvet brown eyes.

Food Blog September 2014-0587Food Blog September 2014-0588Your fingertips will get greasy as you eat this. But despite the richness of the cheese and the eggy coating and the caramelized, syrupy apples, the sage keeps the whole thing from being overwhelming. Its sharp, herbaceous note cuts through the cheese, and it somehow miraculously maintains a bit of crunch even buried between the layers of filling. For me, it’s sandwich nirvana.

Food Blog September 2014-0600

Apple Cheddar Monte Cristo sandwiches
Quantities for 2 sandwiches
1 tart apple, quartered, cored, and cut into thin slices – I like granny smith
6 tablespoons butter, divided
3-4 tablespoons maple syrup
¼ teaspoon salt
8 whole sage leaves
4 slices sourdough sandwich bread
⅔ cups extra sharp cheddar cheese
1 egg, lightly beaten
½ cup milk
2 tablespoons flour


  • Heat 4 tablespoons of the butter, the maple syrup, and the salt over medium heat in a 10-12 inch skillet. When the butter has melted and is bubbling with the syrup, add the apple slices in a single layer, and scatter the sage leaves on top.
  • Cook on medium heat until the underside of the apples is brown, about 5 minutes. Flip the slices over, and cook again to brown the other side, about 2-3 minutes more. Try to keep the sage leaves on top of the apples so they get crisp from the heat but don’t burn. The apples will show that they are almost ready by puffing up and looking swollen just before they begin to get golden, and the butter and maple syrup mixture will get deep, deep toffee colored and become a thick caramel.
  • Remove the pan from the heat and cool while you ready the other ingredients.
  • Shred the cheddar cheese and set it aside.
  • In a shallow bowl, combine the egg, milk, and flour, mixing well to eradicate flour lumps. The addition of the flour will help the exterior of the sandwiches stay crisp – I use the same trick with French toast.
  • To assemble the sandwiches, layer cheese, then half the apples and half the sage, then a bit more cheese onto one slice of bread. You should aim to use ⅓ cup of cheese per sandwich, but we want to have some on both sides of the apple slices to hold the whole thing together better. Top with the second slice of bread, and repeat for the second sandwich.
  • In a skillet, heat the remaining 2 tablespoons butter over medium-low heat. While it melts, set the first sandwich into the egg and milk mixture and leave it for 30 seconds or so to allow some of the batter to penetrate the bread. Then flip it over and let it sit another 30 seconds or so. Repeat with the second sandwich.
  • To cook, raise the heat on the skillet to medium and carefully add the sandwich (or sandwiches, if your skillet is large enough to accommodate both). Cook over medium heat, flipping halfway through, until both sides are golden and crisp and the cheese is melted. This should take about 5 minutes per side.
  • Slice as desired, and consume hot.

Burrata, cress, and balsamic crostini

Food Blog September 2014-0558The first week of school has come and gone and went to bed. That being the case, and with a wonderful friend in town, Friday afternoon happy hour was without question the right thing to do. N. and I frequently enjoy a weekend happy hour of some sort, whether that involves a decadent spread, or just a few nubs of cheese and some almost-not-stale-yet crackers with a handful of dried fruit. Either way, there’s something tasty, something to sip, and a breezy deck to sit on.

Food Blog September 2014-0556This week, though, called for something special. I had an alliterative crostini concoction in mind – a brash combination of burrata cheese, broccoli rabe, and a thick drizzle of balsamic vinegar all smeared atop a perfectly toasted slice of baguette. As these things usually turn out, however, ruled by what was on the shelves in the produce section, I had to make an adjustment or two. But I think what I ended up with was just as good – maybe even better.

Food Blog September 2014-0543Food Blog September 2014-0545Food Blog September 2014-0546Let’s talk ingredients. Have you had burrata cheese? Think fresh mozzarella, but then one-up the creaminess and milkiness and melt-in-your-mouthiness, and you’ve got something like burrata. It’s a globe of fresh mozzarella cheese, filled with a mixture of curds and cream. When you cut into one of these fragile little blobs, what emerges looks something like ricotta in texture, but it’s all mozzarella freshness on the tongue. It’s a very sexy cheese, and a smear (don’t even think in terms of slices) atop some well-oiled, well-toasted bread sounded dreamy. I found some in my Trader Joe’s, but I think most specialty or upscale grocery stores – or maybe even your usual haunt with a well-stocked cheese counter – would have it.

Food Blog September 2014-0563Though I wanted broccoli rabe for its bitterness, I settled instead on some upland cress, which I assumed was another name for watercress. A shamefully lazy internet search (read: Wikipedia) has taught me that though they look similar, upland cress is part of the landcress, rather than the watercress, family. I didn’t know there was such a thing. Regardless, either one has the necessary peppery bite to offset the creamy sweetness of the cheese. In a pinch, I bet arugula would work too.

Food Blog September 2014-0560Food Blog September 2014-0549To put it all together, I decided I wanted a play of temperatures. After a liberal bath of olive oil, I toasted thin slices of bread – mine was in the ciabatta family, with its floury crust and moist, springy interior. A gentle smear of burrata on this warm toast, followed by a few sprigs of cress wilted into a resistless pile, all topped with a definitive drizzle of balsamic vinegar. Done. The cheese melts a bit into the bread; the cress and the balsamic and the residual olive oil flavors melding together create a kind of salad component. They are, I hardly need to say, delicious. I couldn’t stop sampling. It’s not just a nice play of flavors, but a good study in textures. I am criminal at over-toasting my bread, and this batch was just on the edge of being servable. But against the softness of the cheese and the pleasingly stringy feel of the wilted greens, the aggressive crunch of extra toasty toast was right.

Food Blog September 2014-0553I’d recommend a light, crisp wine to pair with this; something sparkling would be extra nice. I’d recommend a sun hat and sandals, if you have the option, and a few friends to laugh with. And I’d recommend making a bit more than you think you want, because you’re going to eat it all.

Food Blog September 2014-0557

Burrata, cress, and balsamic crostini
Ingredient quantities are a bit fast and loose here, because your demands for how much cheese, how many greens, and how liberal a drizzle of balsamic may be different from mine. And depending on how many people are clamoring for a taste and what size loaf you’ve bought, you may need more or less bread than I used. What seems most important is that one bunch of cress was enough to top 8 or so slices of crostini.
8-10 thin slices ciabatta or other fresh, artisanal bread
Olive oil, to drizzle and to cook the greens
1 bunch upland cress or watercress (or, as noted above, arugula)
Salt to taste
8 ounces burrata cheese
* Balsamic vinegar, for drizzling


  • Preheat your broiler. While it warms, arrange bread slices on a sheet tray and drizzle with olive oil on both sides. Broil until deeply golden. Depending on your broiler, this could take anywhere from 2-5 minutes. Keep a close eye on it. When it is well bronzed and crisp, remove and set aside.
  • While your bread toasts (if you’re a successful multi-tasker), prepare your greens by slicing off the bottom inch or two of stem (there may be an attached root bundle at the bottom too). Warm a teaspoon or two of olive oil over medium heat in a skillet and add the cress with a pinch of salt. Cook, stirring often with a wooden spoon or tongs, until the cress has wilted down but is still bright green. It will have lost much of its crunch, but that’s okay. We are looking for tenderness here.
  • Just like that, we’re ready to assemble. For each piece of toast, cut a wedge of burrata and scoop onto the bread. Be sure you get the outside coating of mozzarella and the creamy curds inside. Top the cheese layer with a few sprigs of cress, then drizzle some balsamic vinegar over the whole thing and serve immediately.

* Note: if your balsamic vinegar is thin, or is more tart in flavor than you enjoy, try this – heat about ¼ cup of balsamic with 2 teaspoons brown sugar in a small saucepan until it simmers. Stir to dissolve the sugar, and allow it to reduce almost by half, so you have barely more than 2 tablespoons. This will thicken and sweeten the liquid, making it more of a glaze. It will still be plenty strong, though, so you’ll only need a little bit for each crostini.

Pesto Parmesan Pull-Apart Bread #TwelveLoaves

Food Blog August 2014-0476I’ve put off writing this post. I wasn’t sure how to begin. Every time I sit down to think about it, I end up surfing the net, scrolling through Facebook, seeing more and more headlines, reading more and more articles about the terrible things our world has been going through recently. As one of my friends and former colleagues put it recently, “the entire internet needs a trigger warning.”

Food Blog August 2014-0450I don’t often offer political or moral commentary on this site. That’s not its job. And I don’t often try to convince you that seeing things my way is the way you should see. My truths are mine, and yours are yours. But when terrible things happen, and when death and tragedy are instigated and framed through questionable motives – sometimes on both sides of the event – I question my own job here.

Food Blog August 2014-0451Food Blog August 2014-0454I’m not going to espouse to you what I think. Not today, and probably not ever, unless it’s something frivolous and food-related. I’m just going to say, with caution, that unless you have cut off access to emotions, to moral codes, or to the internet itself (I know, gasp!), over the past week or two – certainly over the past month – the world has been pretty depressing.

Food Blog August 2014-0457So that makes a food blogger wonder where she stands. When people are suffering, when people are angry and dying and struggling, for me, there is uncertainty: is it disrespectful or willfully unaware to coo over the cuteness of a cupcake or speckle my posts with just the right adjectives to describe the lusciousness of a sauce? I’ve considered this before, written about it before, and I always come back to the same conclusion: no. Food is important. Food means things, not just about nurturing our bellies but nurturing our hearts and our minds and, depending on what you believe, our souls. I talked to N. about this the other day, thinking again of how to write this post, and he said “we have to have some things to be happy about.” Food seems like one of those things.

Food Blog August 2014-0458Finally, what helped me figure out what to write so as to be aware of, respectful of, but not overwhelmed by these events I’ve found troubling, was the introduction to Yotam Ottolenghi and Sami Tamimi’s cookbook Jerusalem. Looking back through this lovely book, I was struck by a short section they have titled “A comment about ownership.” In a place – whether that is a city, or a nation, or the world itself – where we feel a need for the power that ownership and control bring us, it is hard to share. We pull ourselves apart from one another in an effort to feel safe, or right, or justified. Ottolenghi and Tamimi argue that searching out the true “owner” of a dish through its national or personal origin is not only difficult, but futile. Either it has been made before, or there exists another, or three, or a dozen, similar dishes claiming different origins: a “variation on a theme” (16).

Food Blog August 2014-0459Though Ottolenghi and Tamimi are commenting on dish origination – which makes sense, as they like to provide a little background about the meals they offer – what struck me was not just where a dish comes from, but where it goes. For a long, long time, sitting down at a table, or a fire, or a bowl, has meant something more than filling your stomach. It means trust, or love, or a forging of bonds. You eat together and you end up sharing more than a meal. I’m not sure that’s still true, but I think it should be.

Food Blog August 2014-0461So weirdly, when it came time to sample this month’s loaf for the Twelve Loaves project, I had chosen something divisive in its very name: pull-apart bread. When you tear into it, this loaf peels into separate bits, as I see happening so often in our world. Yet its richness, its docile tendency to give up layers and hunks and edges, suggests it is meant to be shared. We pull it into soft fragrant pieces, but we’re doing that together, and the act of sharing brings us comfort and happiness.

Food Blog August 2014-0464I’ve wanted to try a pull-apart bread for a long time, particularly after seeing Deb’s nod to Welsh Rarebit on Smitten Kitchen. To answer the call of summer herbs for Twelve Loaves, I settled on pesto, blending the sharp-sweet, fresh licorice scent of basil with the usual garlic, pine nuts, and lemon juice. I amped up the parmesan quotient and included it not in the spread itself, but as a separate layer to melt and cling.

Food Blog August 2014-0468There seem to be two schools on pull-apart bread. One involves rolling little spheres of dough and jamming them into a pan together, so when they cook they swell into one another and form tenuous ties. This is also commonly called Monkey Bread, especially when it is sweet. The other, which I haven’t seen as frequently but which I chose to work with after seeing Deb’s offering, results in something more like a Pillsbury Grands biscuit or puff pastry stood on end. It involves rolling the dough thin, slicing it in long strips, layering those strips and slicing them into squares, then levering those stacked squares – like servings of lasagna or birthday cake – sideways into a loaf pan like a deck of cards to rise into one another and smash together during baking. As you peel the warm layers apart, you get the bite of pesto and the salty richness of parmesan.

Food Blog August 2014-0473I want you to make this. It’s a bit of a project, but it’s so, so delicious. And when you make it, I want you to share it. Pull it apart, by all means. But let that action by extension pull you together.

Food Blog August 2014-0480

Pesto Parmesan Pull-Apart Bread
Makes a single 9×5 inch loaf
Adapted heavily from Smitten Kitchen
For dough:
2 teaspoons yeast
2 teaspoons sugar
½ cup milk, warm but not hot
2 ½ – 3 cups bread flour, divided
1 teaspoon salt
4 tablespoons soft butter
2 eggs
For filling:
3 garlic cloves, skins removed
¼ cup pine nuts
2 tablespoons lemon juice, or to your taste
4-5 cups packed basil leaves
½ cup (approximately) olive oil
salt and pepper to taste
2 cups parmesan cheese (I know, but it’s so fluffy!  2 cups is practically nothing… besides, you’re sharing…)


  • In a glass measuring cup, warm the milk. I like to pop it into the microwave for 20-30 seconds. When it is just warmer than body temperature (poke your fingertip in – it should feel just warm to the touch), add the sugar and the yeast and stir it up. Let this sit for 5 minutes or so while the yeast wakes up and begins to bubble.
  • Meanwhile, combine the salt and 2 cups of the flour in the bowl of a stand mixer and stir to combine. When the yeast and milk mixture is bubbly and smells like bread, add it to the flour and salt and mix on low speed using the paddle attachment until damply crumbly. Add the butter and the eggs and mix on low speed again.
  • Add an additional ½ cup flour and mix to combine. As soon as the dough starts to come together and there are no longer dry swaths of flour, switch from the paddle attachment to the dough hook.
  • Knead for 3-4 minutes until a soft dough the consistency of play-dough forms. If it looks really sticky or is not coming together or pulling away from the sides of the bowl at all, begin adding the additional flour 2 tablespoons at a time, kneading for a bit in between each addition. You may not need all of the additional flour – I only used 2 ½ cups total.
  • Lightly grease the inside of the bowl (or switch to a clean, lightly oiled one), flip the dough over a few times to ensure it is lightly greased as well, then cover the bowl with plastic wrap and set it aside for 50-60 minutes to rise. We are looking for the ball of dough to double in size.
  • While the dough rises, make the filling. Drop the garlic and the pine nuts into the belly of your food processor and let it run for a few seconds, until the garlic and pine nuts become a fragrant crumble. There is still some blending to go, so they don’t have to be a smooth paste yet.
  • Add the lemon juice and as many of the basil leaves as will comfortably fit, and turn on the processor. Most of the basil will almost instantly be shredded into tiny bits. If it isn’t, or if nothing seems to be happening, take out the lid from the food chute and begin pouring in the olive oil through this chute in a slow, steady stream.
  • Once there is room in the food processor bowl again, add the remaining basil leaves, if there are any. Repeat the olive oil streaming process until you have a thick paste. I usually end up adding my basil in two or three batches. You may use more or less olive oil – this is somewhat according to preference, but you do want a fairly thick pesto that you can spread, not pour.
  • Taste for seasoning; add salt and pepper and pulse to combine. Set aside until dough is finished rising.
  • When the dough has doubled in size, punch it down by gently depressing your fist into the center. Let it rest for a minute or two, then turn it out onto a well-floured board and, using a floured rolling pin, roll it out to a rectangle of about 12×20 inches.
  • Spread pesto over the entire rectangle of dough, right up to the edges. We don’t need a bare margin for this loaf.
  • Cut the rectangle crosswise into 5 strips of 12×4 inches (so the short edge of the initial big rectangle becomes the long edge of each of the 5 strips). Sprinkle one with about ½ cup parmesan cheese – this will be the bottom of the stack.
  • Carefully, using a spatula with a long blade or a dough scraper to help you, top your parmesan covered base with another strip of dough. Sprinkle another ½ cup parmesan atop this new layer.
  • Repeat until you have a stack of five layers, though the final layer will not have cheese on top, which is fine.
  • Gently, exceedingly gently, use a serrated knife to cut the dough layers into 6 segments of about 2 inches each. Turn each segment layer-side up (showing off its stratigraphy) and snug it into a greased 9×5 inch loaf pan. You can turn the pan up on its short end to make this a bit easier – take a peek at Deb’s images (link above) for a visual. Follow this with another segment, and so on, to create a stack of layers. When you finish and set the loaf pan back on its base, Deb says this looks a bit like a full card catalog drawer, and I think this is a good assessment.
  • Cover your strange, layered loaf with plastic wrap and set it aside to rise again for 30-45 minutes. Preheat the oven to 350F so it is ready when you are.
  • Once the dough has risen again, which will squash the layers together a bit, remove the plastic wrap and stow your loaf it in the 350F oven for 25-35 minutes until it is puffy and nicely bronzed on top.
  • Cool a minimum of 10 minutes in the pan (though 15 or even 20 is probably safer; mine collapsed upon removal), then carefully flip it out and serve warm for best flavor and “pull-apart” effect.

Baked Tofu Spring Rolls and Peanut Sauce

As I noted last week, I’ve been out of town. In fact, I’ve been off the continent (though not out of the country). Now that we’re back on the mainland, I suppose I owe you a few reflections.

July Food Blog 2014-4009Kauai is beautiful. But if you’ve ever seen Jurassic Park, or Raiders of the Lost Ark, or even the opening sequence of M*A*S*H, you already know that. It’s a tropical island dotted with beaches and rainforests. It couldn’t be anything but beautiful. But what struck me as we wandered, sandal-and-swimsuit-clad, through the little towns and massive resort complexes, was how friendly it was. I don’t just mean ordinary smiling helpful friendliness. That much is expected too, since so much of the island’s industry is built on tourism and the service jobs it requires. I mean food friendliness. Many, many businesses proudly assert themselves as GMO-free. The Kauai Coffee plantation, which we visited one afternoon (photos to follow, I’m sure), is basically off the grid. They are entirely water powered by rainfall and river flow from one of the island’s mountains, and create enough energy to power parts of nearby towns as well, sometimes. It is one of the most sustainable businesses I’ve come across, but they don’t shove it in your face, just pronounce it matter-of-factly and leave you feeling that yes, this is the right thing.

July Food Blog 2014-3993 July Food Blog 2014-3996 July Food Blog 2014-3997It’s not just that, though. It has become reasonably common practice in large restaurants or fine dining establishments, and even in some chains, for menus to include vegetarian, vegan, dairy-free, and gluten-free options. On Kauai, even many of the smallest, most local food stands are open and friendly to the idea. I guess maybe “food friendliness” translates to “willing accommodation.” There are menu codes indicating which foods are prepared without gluten, without dairy, and which can be quickly adjusted to include or remove allergens. And what was most friendly, to me, was that many of these adjustments did not involve an extra cost. Why should it, I thought, when sometimes this change is as simple as enshrouding perfectly grilled fish in a corn tortilla rather than flour?*

July Food Blog 2014-3998In that spirit, then (and because I promised my friend Ch I would post this recipe oh, a month ago…), today I want to bring you one of my favorite, most dependable and well-received party snacks that just happens to also be vegan and, if you make it with the right sort of soy sauce (even Kikkoman has a GF option now!), gluten-free as well. These pretty, tasty, surprisingly easy spring rolls involve shreds of bright carrot, bibb lettuce, fresh grassy mint, and rice noodles, a stick of tofu pressed, drizzled with soy sauce, and baked until meaty and firm, all lovingly wrapped in rice paper. Then, if you’re me, you whip up a quick batch of pantry-scavenged peanut sauce to dip them into, and you have something suitable for almost every meal. They aren’t totally allergen-free, because if you can’t have rice you can’t have the noodles or the wrappers these use, and if you have problems with peanuts, peanut sauce is of course out of the question. But they do manage to come close, accommodating the need to avoid animal products and that pesky gluten monster. Plus, they are fairly cheap to make, produce large quantities, and most importantly, are just plain delicious.

July Food Blog 2014-4000 July Food Blog 2014-4004July Food Blog 2014-4005July Food Blog 2014-4002July Food Blog 2014-4003Spring rolls are a good food to take to a party, but they are also a good food to produce party style, because they can easily incorporate an assembly-line style production method. Last month, I had a few friends from work over who wanted to learn to make them, and we sat around the little table in my little “dining room” and spent the afternoon rolling, and, as you might imagine, eating, spring rolls. They kindly acquiesced, probably thanks to the free snacks and wine I was plying them with, to let me snap a few photos of the process, so that’s what you’re seeing here. Thanks, ladies!

July Food Blog 2014-4006* This doesn’t, of course, guarantee 100% safe dining for people with celiac or other severe gluten intolerances, since kitchen cross-contamination is always a concern. But it is nice that for those avoiding gluten, even casually, there’s a cost-free option.

July Food Blog 2014-4013

Baked Tofu Spring Rolls
Makes 18-24, depending on the width of your tofu slices. Each one then gets halved, leaving you with 36-48 snackable pieces.
14 ounce block firm or extra firm tofu, sliced horizontally into three thin squares
¼ – ½ cup soy sauce or tamari (gluten-free soy sauce, but check labels carefully)
3-4 ounces dry rice noodles (sometimes called Maifun or Rice Sticks; I like Dynasty brand)
3 carrots, peeled and grated
1 head butter lettuce, leaves removed, halved, and crisp rib removed
30-40 leaves mint from one bunch
Round rice paper spring roll wrappers (I like the brand with the rose on the label)
Warm water

  • At least three hours before you want to serve your spring rolls, slice the tofu as described and press it by placing the thin squares between layers of paper towels and placing something heavy on top of them. I often use my cast iron pan for this. A baking dish weighted with cans or bottles works well too. Leave the tofu to press for at least 60 minutes to squeeze out some of the water.

  • During the last 15 minutes of pressing, preheat oven to 325F and line a baking tray with aluminum foil. Space out the tofu squares on the aluminum foil, being sure they don’t touch.

  • Dribble each square with soy sauce to coat and bake for 60 minutes. After the first 30 minutes, dribble the top of each square with more soy sauce, as the first application will have soaked in. When they are done, the edges of the squares are deep brown, solid, and feel a bit rubbery. Remove and let cool completely, then cut into ½ inch strips (roughly index-finger-width).

  • While tofu bakes and cools, prep the other ingredients – grating carrots, stemming mint leaves, separating lettuce leaves, etc. Submerge the rice noodles in hot water and let them steep for 8-10 minutes, until they feel flexible and are tender when bitten. Drain well and set aside to cool.

  • To roll, set up an assembly line – mint, then lettuce, then carrots, then tofu, then noodles. Be sure to have a plate or other vessel on which to place your finished rolls at the end of the line-up. Add warm water to a wide, shallow dish or bowl that the rice paper will fit into. You will address this step first.

  • Here we go: submerge one rice paper wrapper in the warm water and let it sit until it becomes completely pliable. I find this tends to take somewhere between 30 and 45 seconds.

  • When the rice paper is ready, remove and place on a flat surface. If you wish, you can briefly spread it on a paper towel to soak up some of the drips, but this isn’t strictly necessary.

  • Place 1-3 mint leaves around the rice paper wrapper, bottom surface facing up. This ensures the top, more attractive side of the leaf will be visible through the wrapper on the finished roll.

  • Next, place a piece of lettuce in the center of the wrapper so the longer edge of the lettuce (if there is one) faces you. Sprinkle this with grated carrots (a few teaspoons, though I always eyeball it).

  • Lay a piece of tofu in the cradle of lettuce and carrots you’ve created, positioning it with the long edge facing you (so, horizontally – see photos above for reference). Top the tofu with a small pile of noodles – no more than a few tablespoons, were we picky enough to measure them out – arranging them across the tofu.

  • Now we roll! As the wrapper faces you, fold in the left and right “edges” over the short sides of the tofu, so what you have looks like a long oval with two squared-off sides. Next, take the side of the wrapper closest to you and fold it completely over your fillings, then pull tight toward you. Roll up the wrapper, tucking each revolution tightly so the fillings are well contained. The tighter rolled, the better they will stay together.

  • Repeat until you run out of tofu slices! You will get a nice rhythm established. I find I can complete a roll in the time it takes a new rice paper wrapper to soften. Then you are all set to start the next.

  • Just before serving, halve each roll on the bias (with a diagonal cut) for attractive presentation.

  • These will keep, packaged in an air-tight container in the refrigerator, for 1-3 days. Let them come to room temperature before serving, as the rice paper is a little tough when cold.

Peanut Sauce
Makes a generous 1 cup
½ cup peanut butter
½ cup water
2-3 tablespoons soy sauce or tamari
1 tablespoon sriracha or other hot sauce
1 tablespoon grated ginger (if the fresh ginger is frozen, it grates really easily)
1 tablespoon rice vinegar or lime juice

  • In a small saucepan, combine all ingredients over medium low heat. Stir gently with a small spatula or a spoon.

  • As the ingredients melt together, at first the mixture will look watery and very grainy. Keep stirring gently, and it will smooth and thicken to an almost-pourable texture.

  • Taste for seasoning. If it is too salty, add an additional tablespoon each of peanut butter and water. If it is not spicy or salty enough, add more sriracha, soy, or ginger as needed.

  • Serve warm.

  • As it cools, the peanut sauce will separate slightly. Stir vigorously to re-combine.

Strawberry Lemonade Jam

If you’re like me, you’ve already been totally seduced by the complex sweet perfume of summer strawberries, lying there all innocent-like in their little baskets and boxes… maybe even twice. Okay three times. Seriously, that smell! I take home pints, pounds, flats. But here’s the embarrassing thing: once those little red gems have enticed me into slapping down dollars to take them home, I eat a few, nibbling around the hull, I cut up a handful and stir them through yogurt, I may even sprinkle on some sugar and dollop on some lightly sweetened whipped cream.

Food blog June 2014-3929But the remaining berries languish. They flirt with me, teasing me with that gorgeous aroma, but once they are safely home and in the fridge (fruit molds FAST in my Southern California kitchen), the affair is half over already. I – how could I ever? – forget about them. And when they are weak and softening and reluctant to be sliced without collapsing, I try frantically to think of ways to use them so I won’t waste their summery tartness.

Well then, let’s jam. Strawberry lemonade jam. It’s an easy prospect. It’s a perfect non-adventure for a lazy day when pajamas are the right wardrobe choice, that novel you’ve been longing to finish finds its way into your hand, and you aren’t ready for breakfast until almost afternoon. And if that breakfast is toast with still-warm jam, well, carry on.

Food Blog Photo Friday 2014-3357
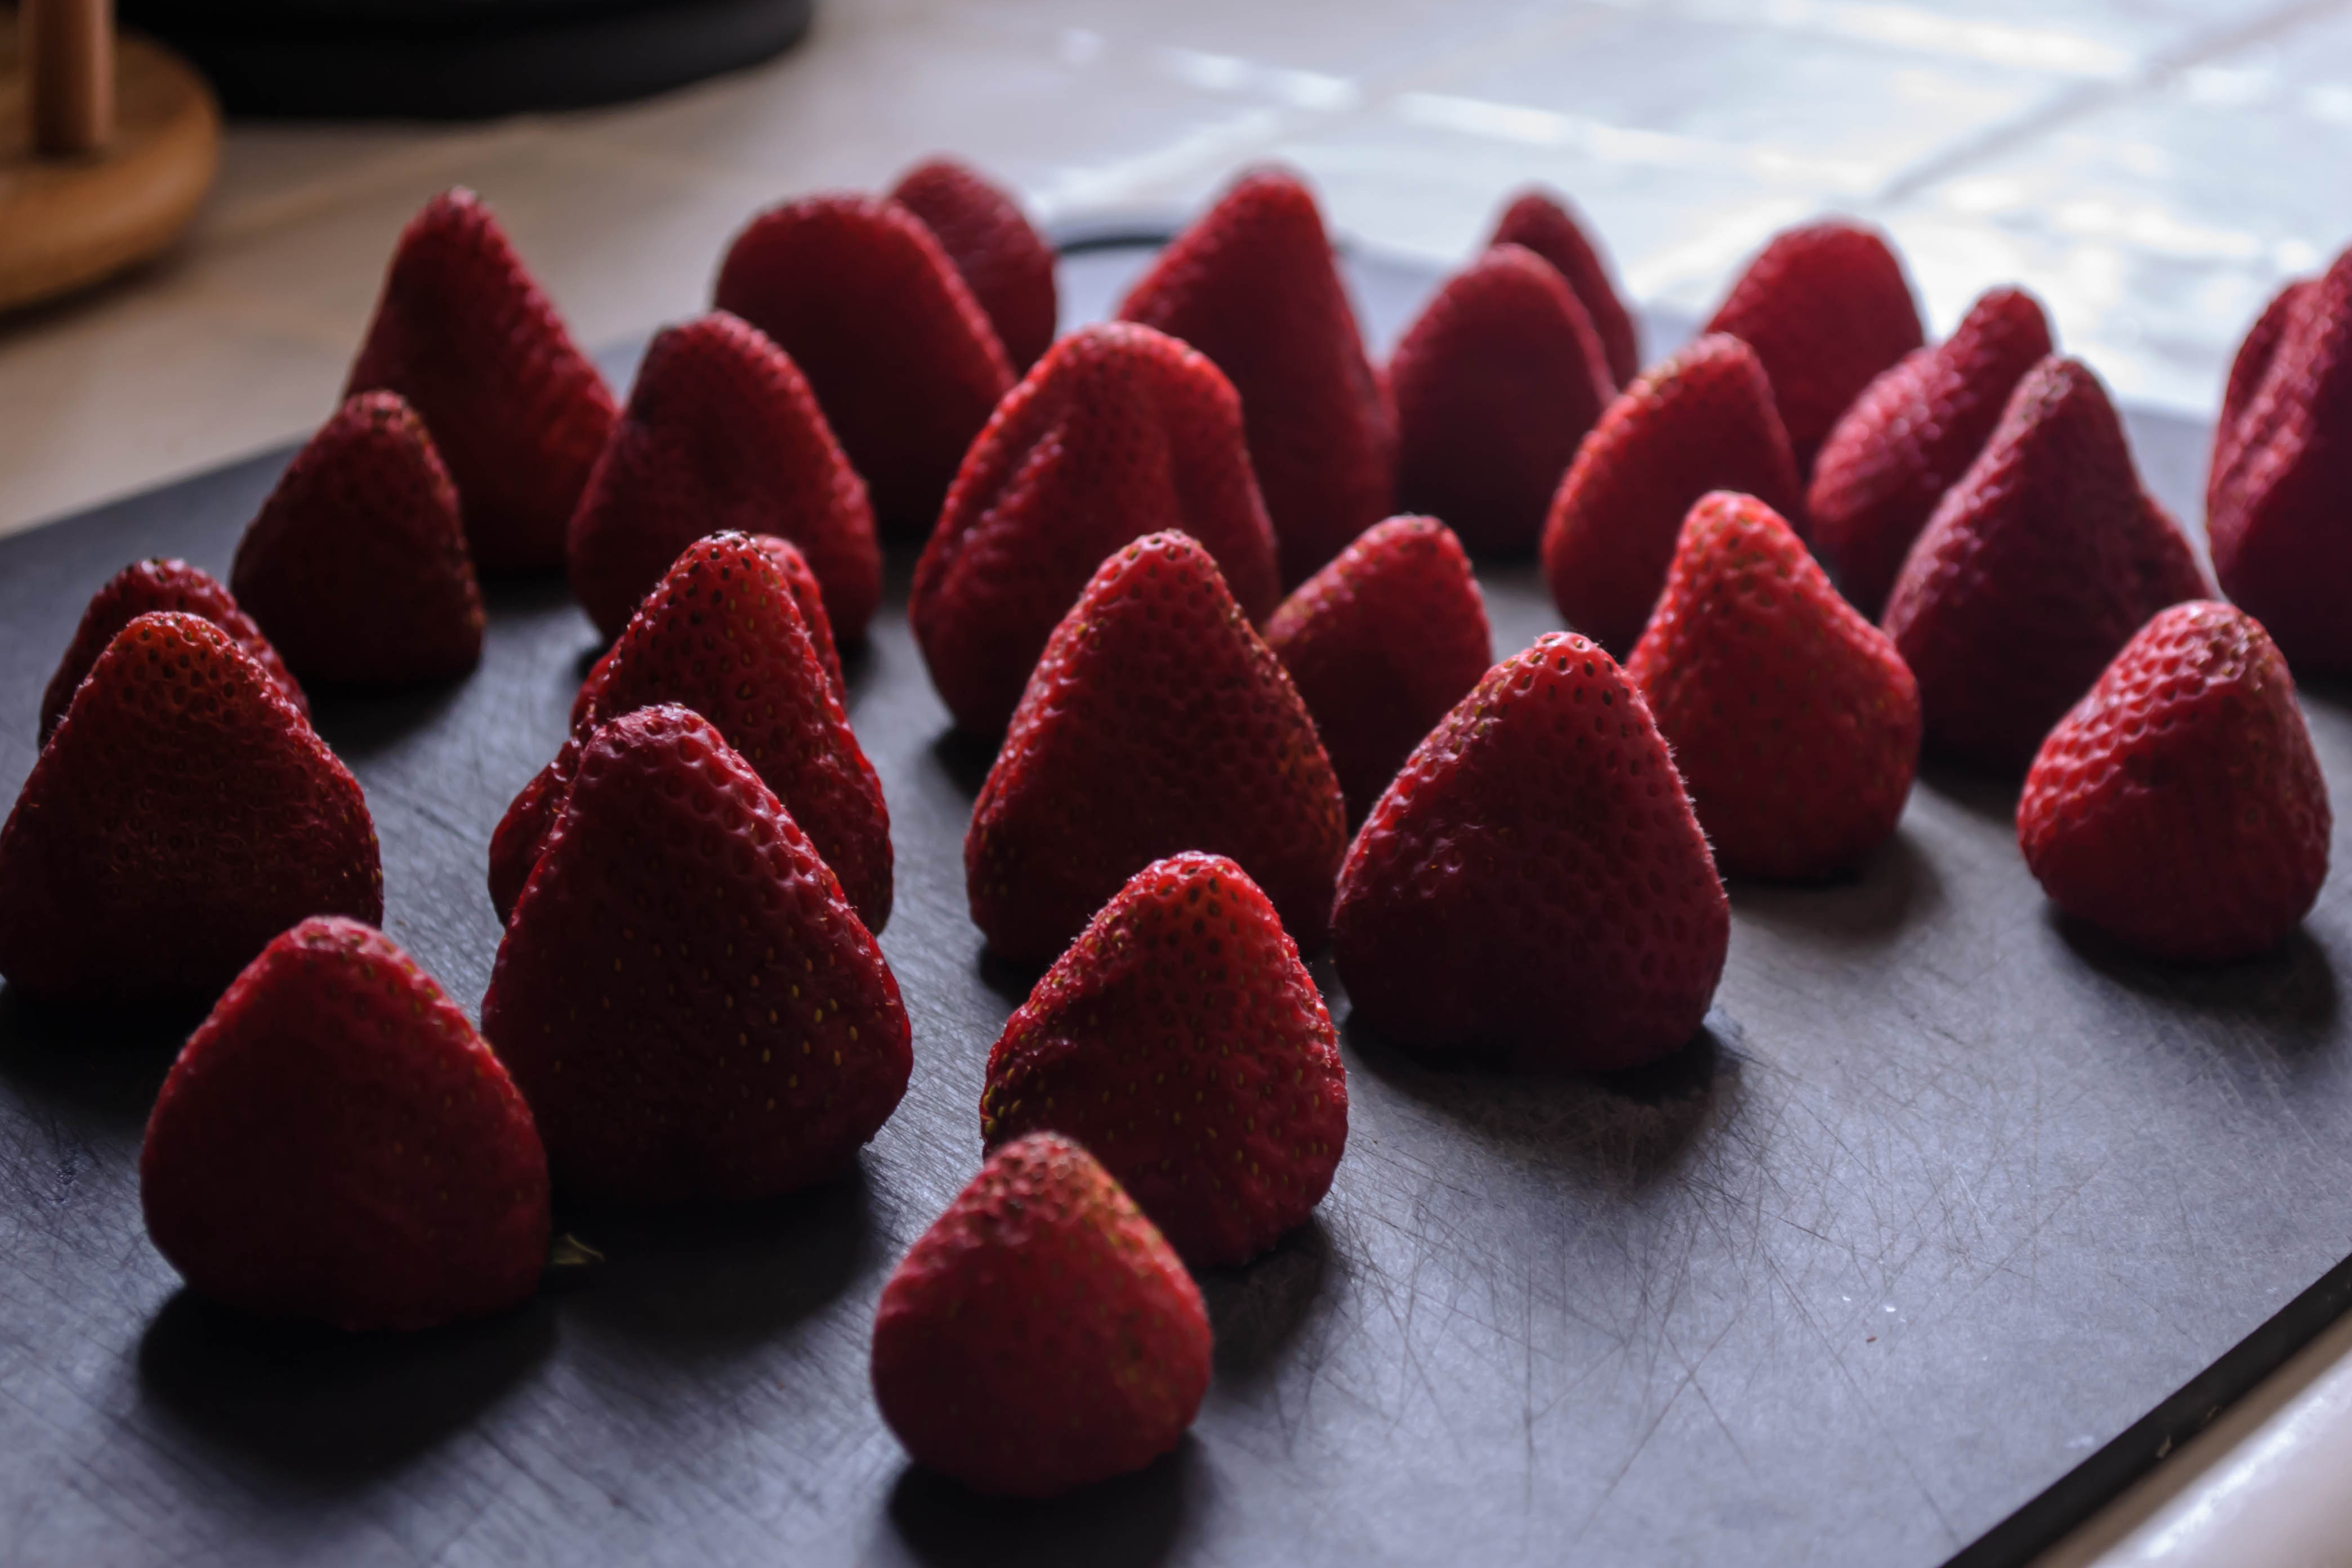
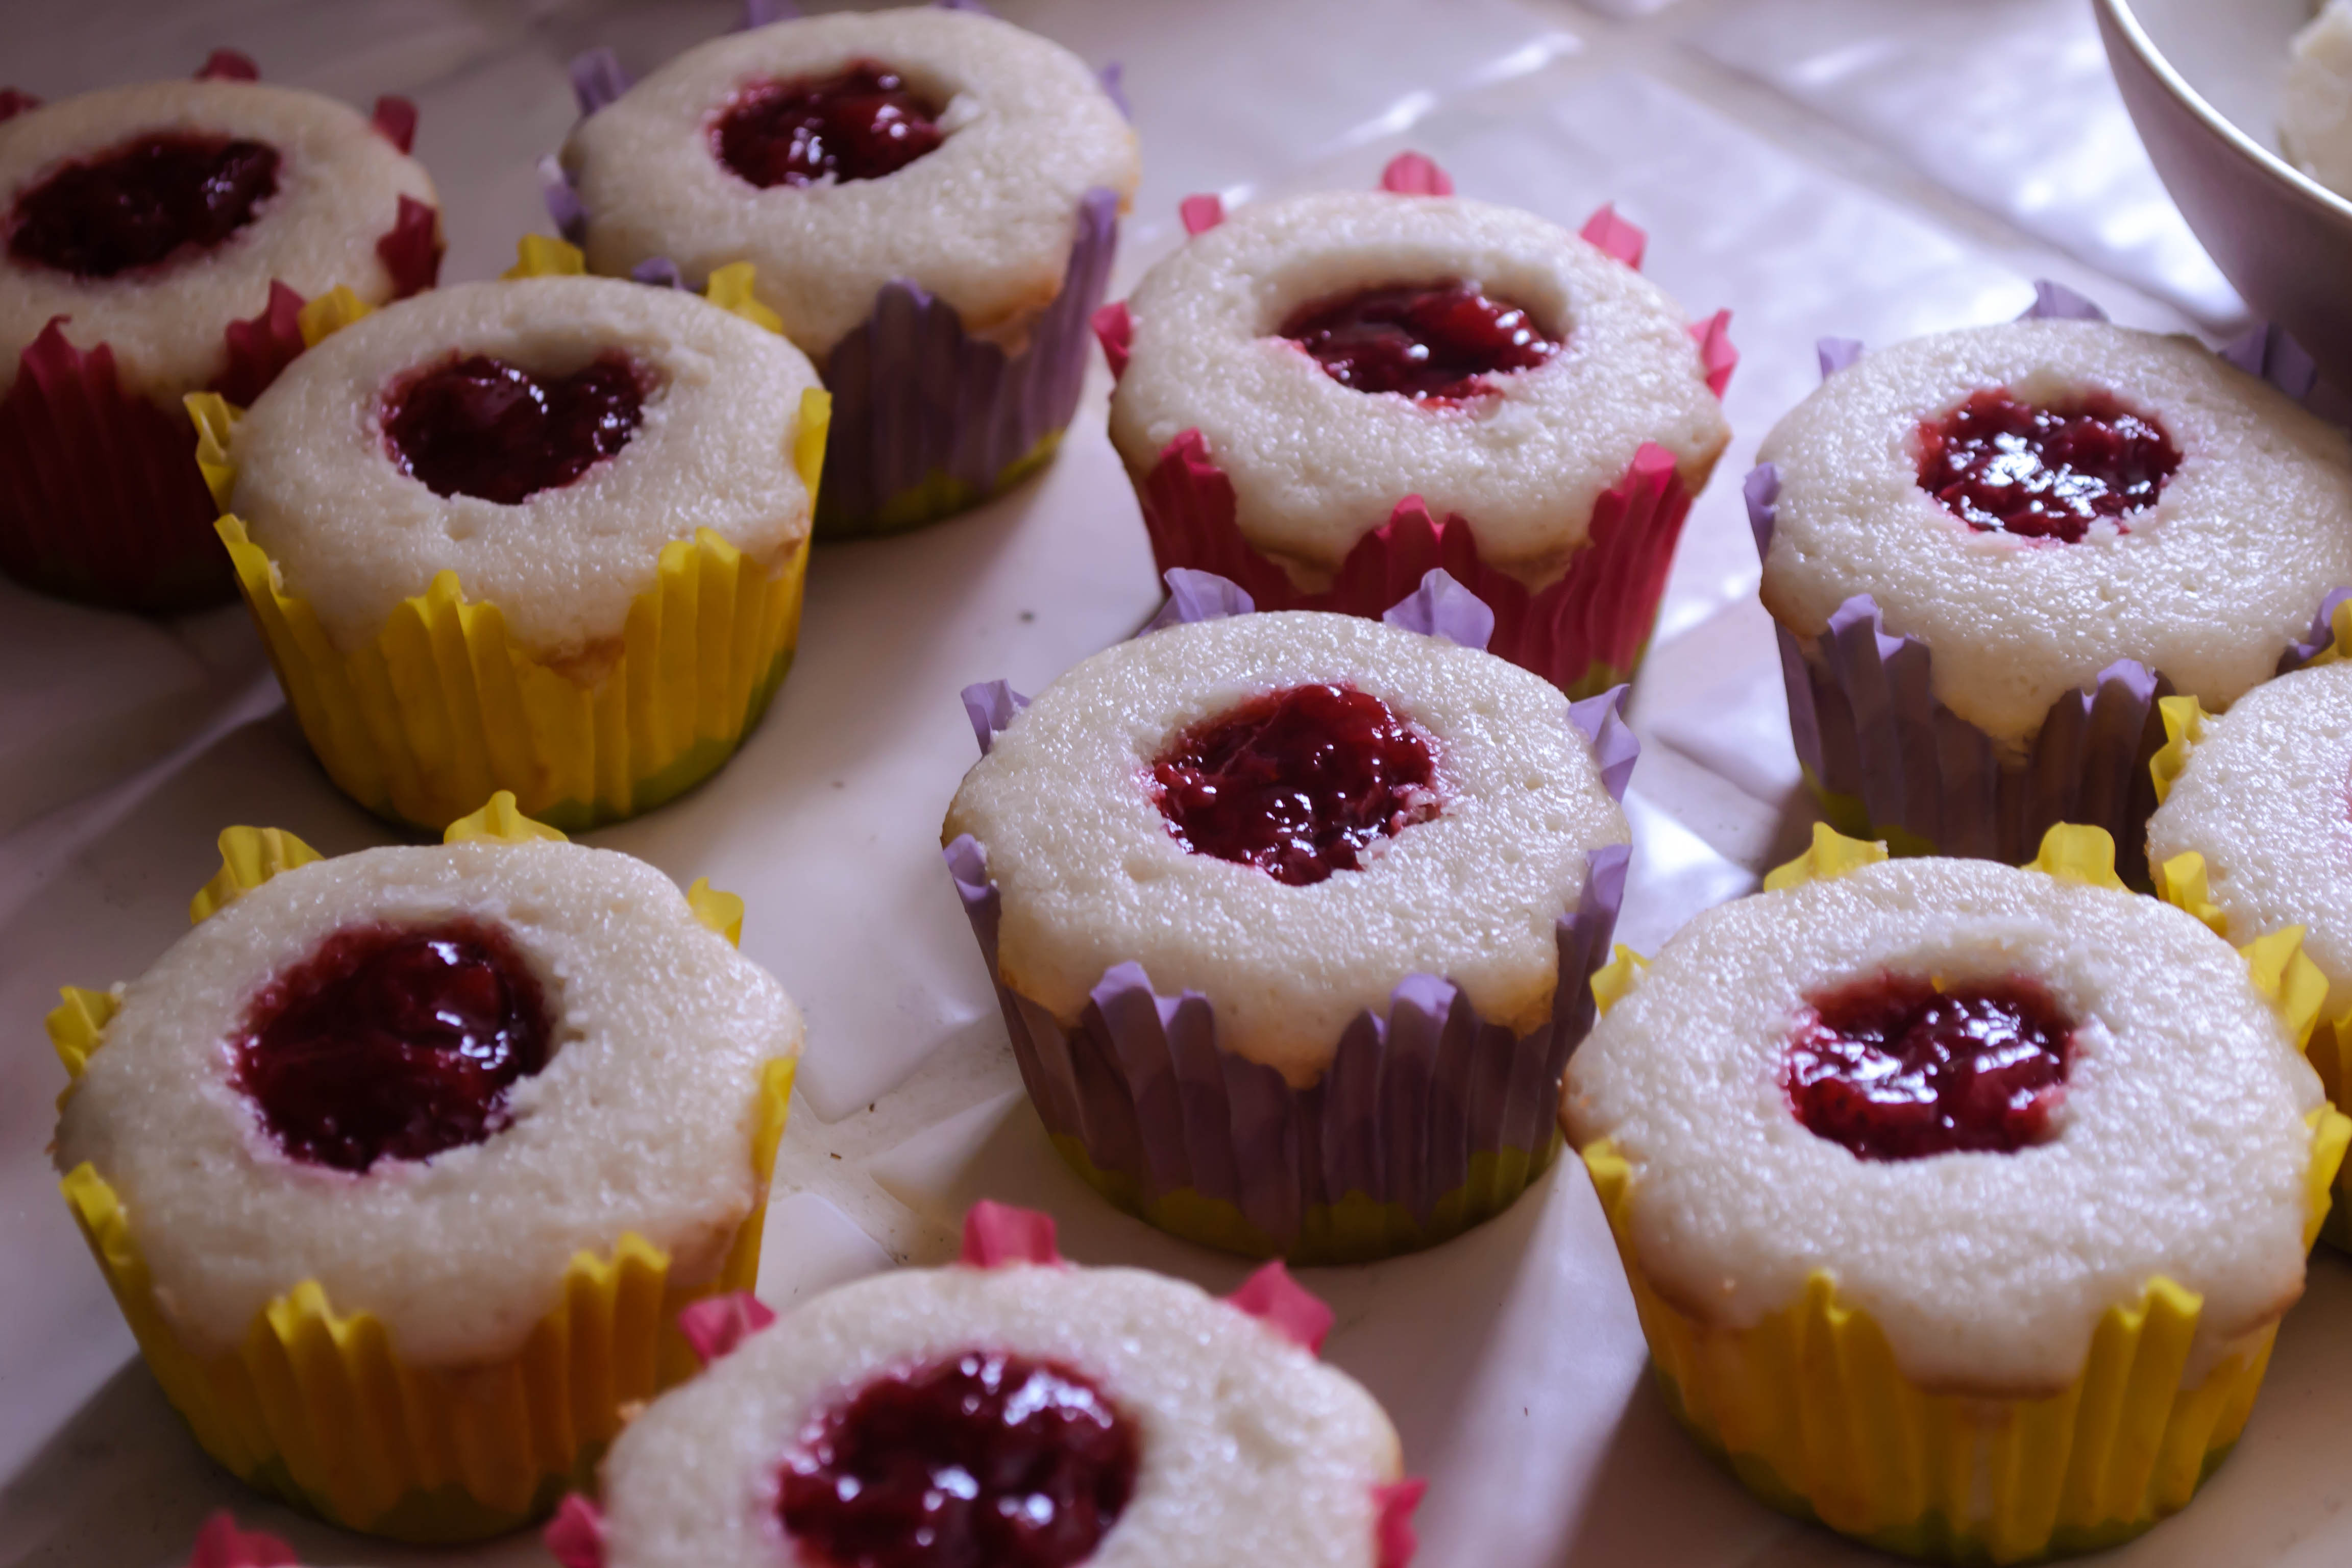
Strawberries, a few flurries of sugar, a generous squeeze of lemon (freshly squeezed, please), a pinch of salt for its indescribable magic (you won’t taste it, but it will heighten the flavors of the other ingredients), and if you’re feeling sassy, a drizzle of framboise or chambord for extra depth and tingle. I’m nearly always feeling sassy. Then a long, slow simmer, almost an hour, until the fruit breaks down and the bubbles get thick and sluggish. Strawberries don’t have huge quantities of pectin, so this isn’t a tremendously thick jam, but who needs that, in the summer?

Food blog June 2014-3934There’s little else to say, because really, a perfect summer beverage in jam form doesn’t need much advertisement, but I suppose we can linger over serving suggestions for a moment. A languid spoonful oozed over toast, or pancakes, or dribbled into the holes of a waffle, is perfectly acceptable. If the day has, as they say, “gotten away from you” in its summery glory, a soft ladle over vanilla ice cream could never be a bad thing. If you’re more of the cocktail type, a drizzle of jam topped with gin and soda would cool and sweeten a sweltering afternoon.

Food blog June 2014-3944I went as far as using this for the filling in a batch of cupcakes I took to a baby shower last month. A quick slather between layers of cake would do nicely as well. But really, since I’m a bit of a purist, I think my favorite application was slathered across the slightly over-toasted surface of an unapologetically thick slice of homemade sourdough bread.

Let’s do summer. Let’s jam.

Food blog June 2014-3943

Strawberry Lemonade Jam
Makes…. well, it was a summer afternoon… and I forgot to measure… but it certainly made enough to play with for several days.
1 ½ pounds strawberries, hulled and roughly chopped
⅔ cups granulated sugar
½ cup freshly squeezed lemon juice (I needed two lemons for this. You may need more or less depending on how juicy yours are)
pinch of salt
2 teaspoons fruity liqueur such as framboise or chambord, optional.
  • Dump all ingredients into a pot. Set your stove to medium heat and stir gently to combine and begin dissolving the sugar. Continue to stir occasionally as things heat up.
  • After ten minutes, the strawberries and sugar will be foaming up bright pink bubbles. Stir and reduce the heat to medium-low. We do want to evaporate some of the liquid the strawberries are exuding, but not burn the sugar.
  • Simmer for another 30-45 minutes for a loose but still spreadable jam. It will still look quite thin when you take it off the heat, but will thicken as it cools. If you are unsure about thickness, put a tablespoon or two on a plate and stick it in the freezer for five or ten minutes to see how thick the finished product will be.
  • Because strawberries don’t have a tremendous amount of pectin, this all-fruit concoction will never be as thick as a commercial jam. If that is what you are looking for, you will have to add thickener.
  • Serve warm or cool, in or on, or even under, your favorite bread product, or see serving suggestions above.