 Plum cheek.
Photo Friday
Reply

Plum cheek.
 Seeing as it’s now been more than half a year since I started this dough resolution, I think it’s high time for a check-in. When I began this project, I was afraid of pie crust. I found baking bread an intimidating procedure: proofing yeast was a touchy business; sticky dough made me wring my hands in despair. My first few loaves came out with black bottoms, and I didn’t have a real sense of the difference between bread flour and all-purpose.
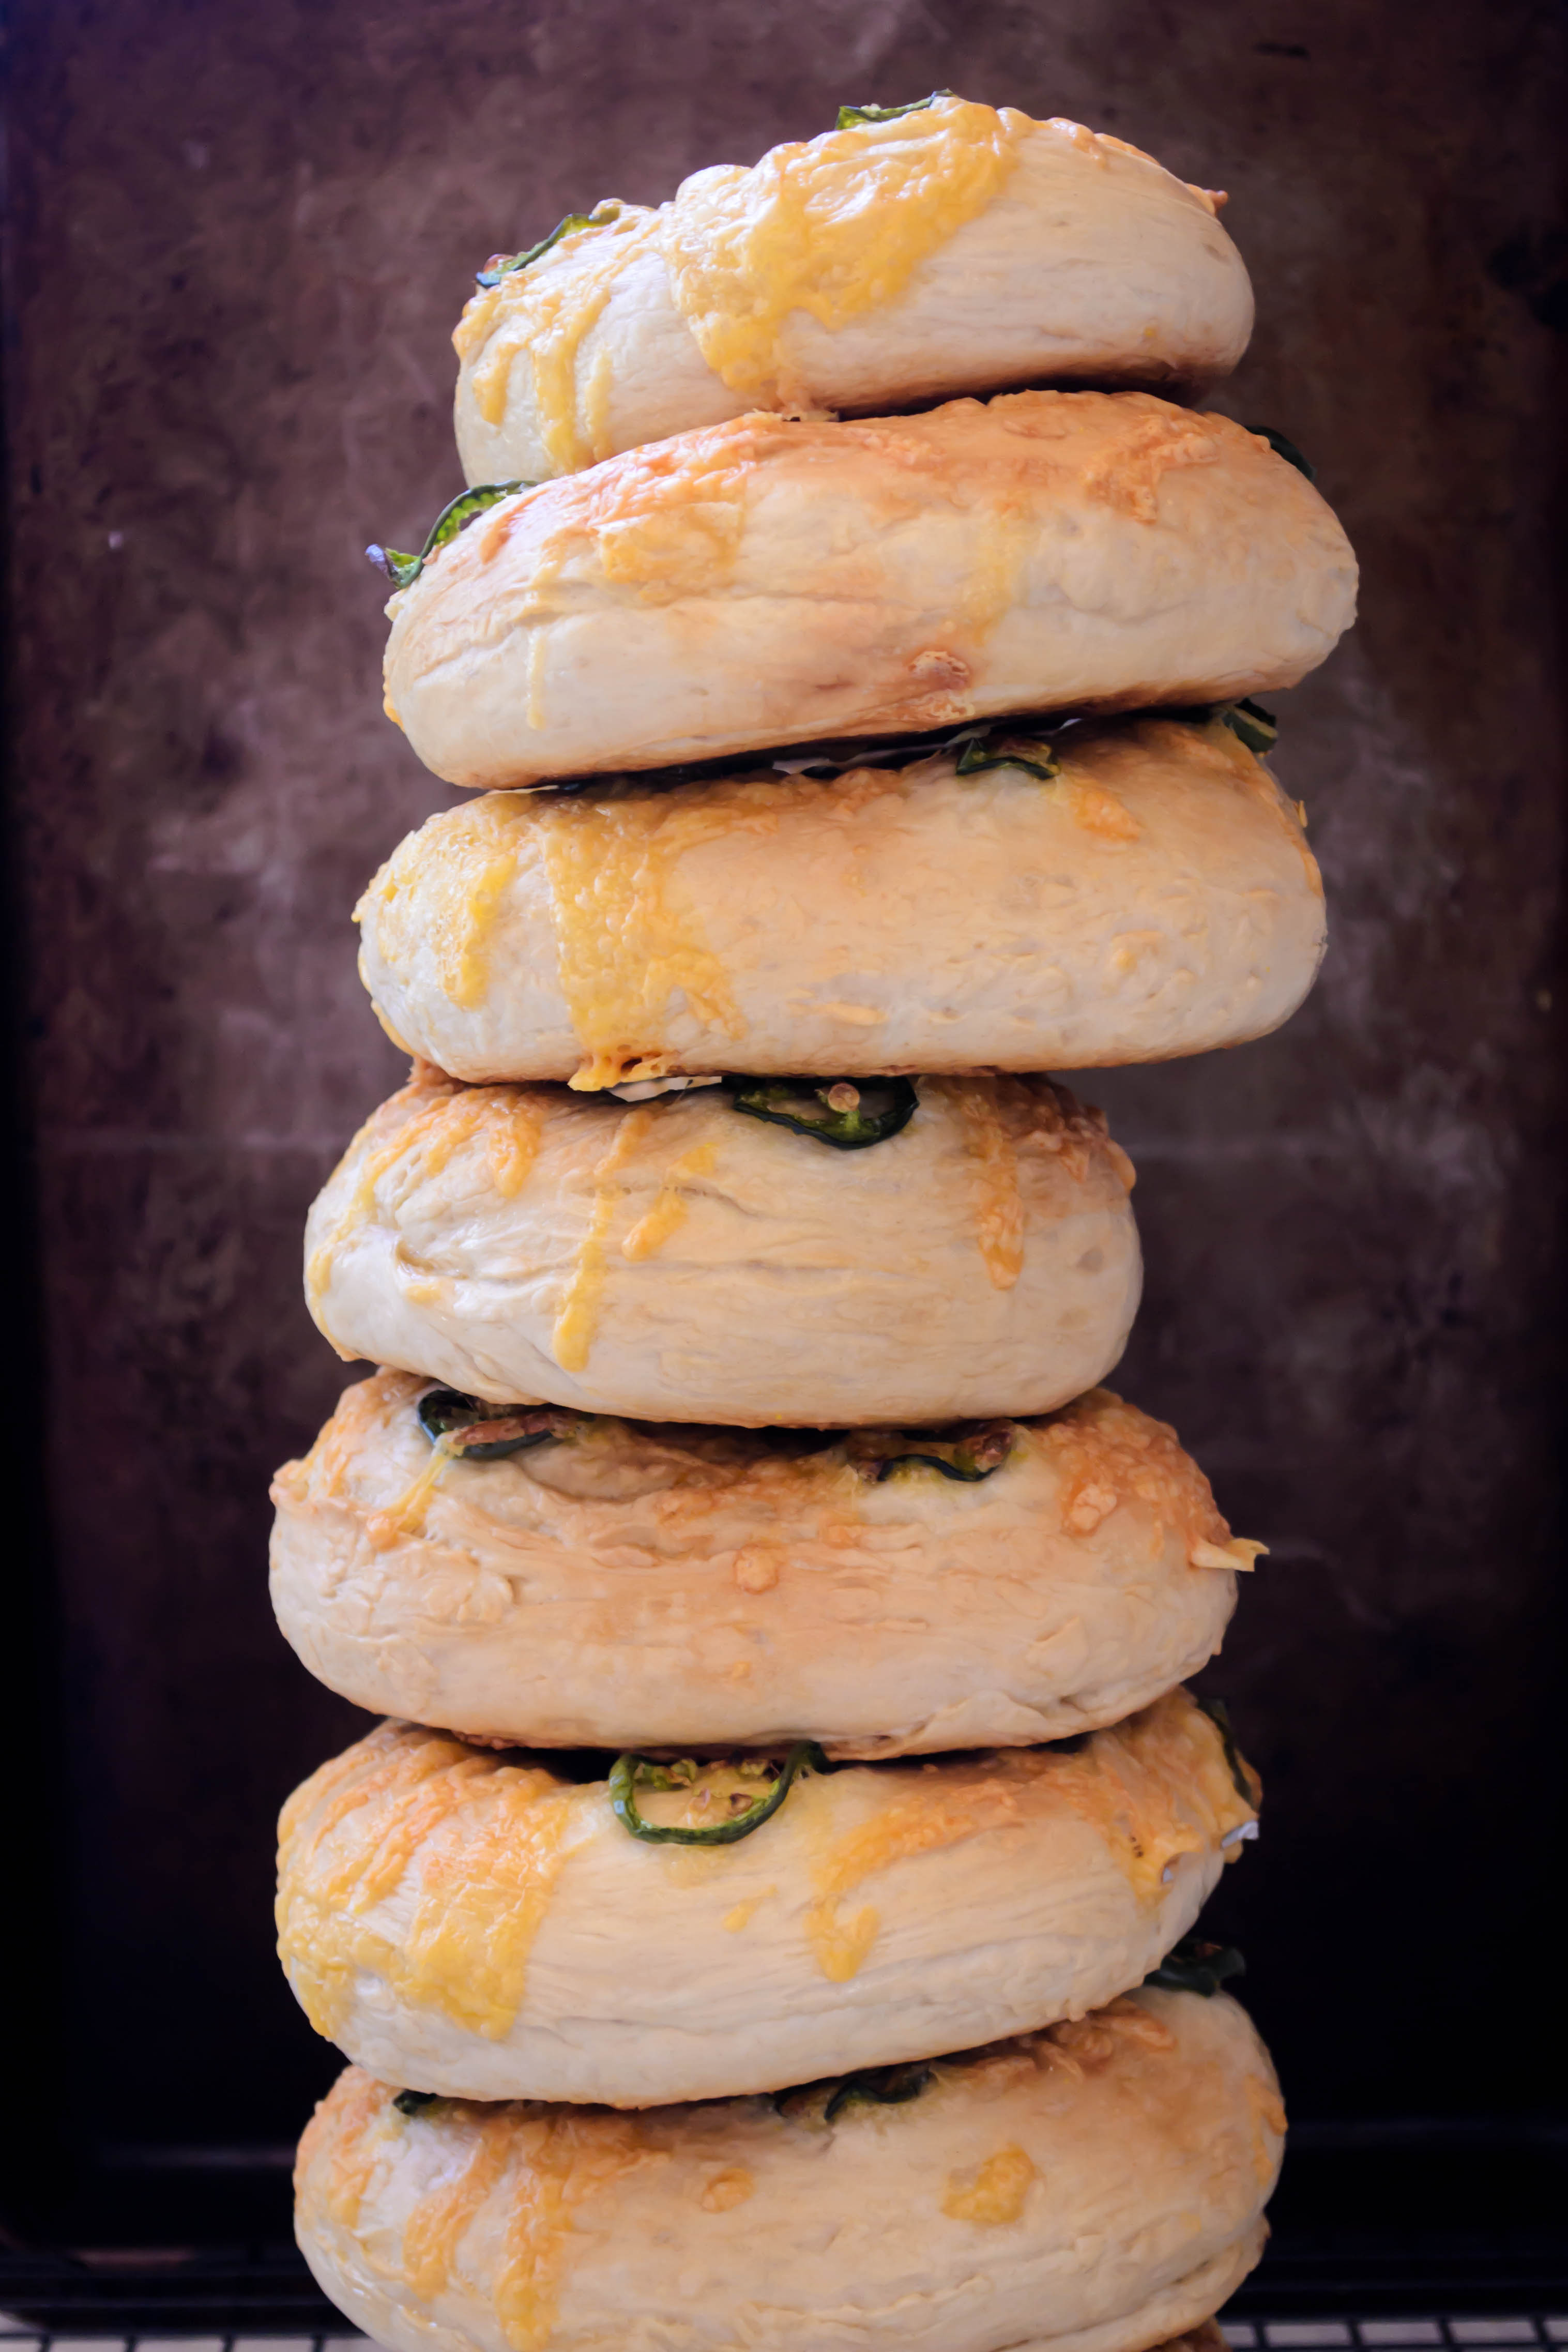
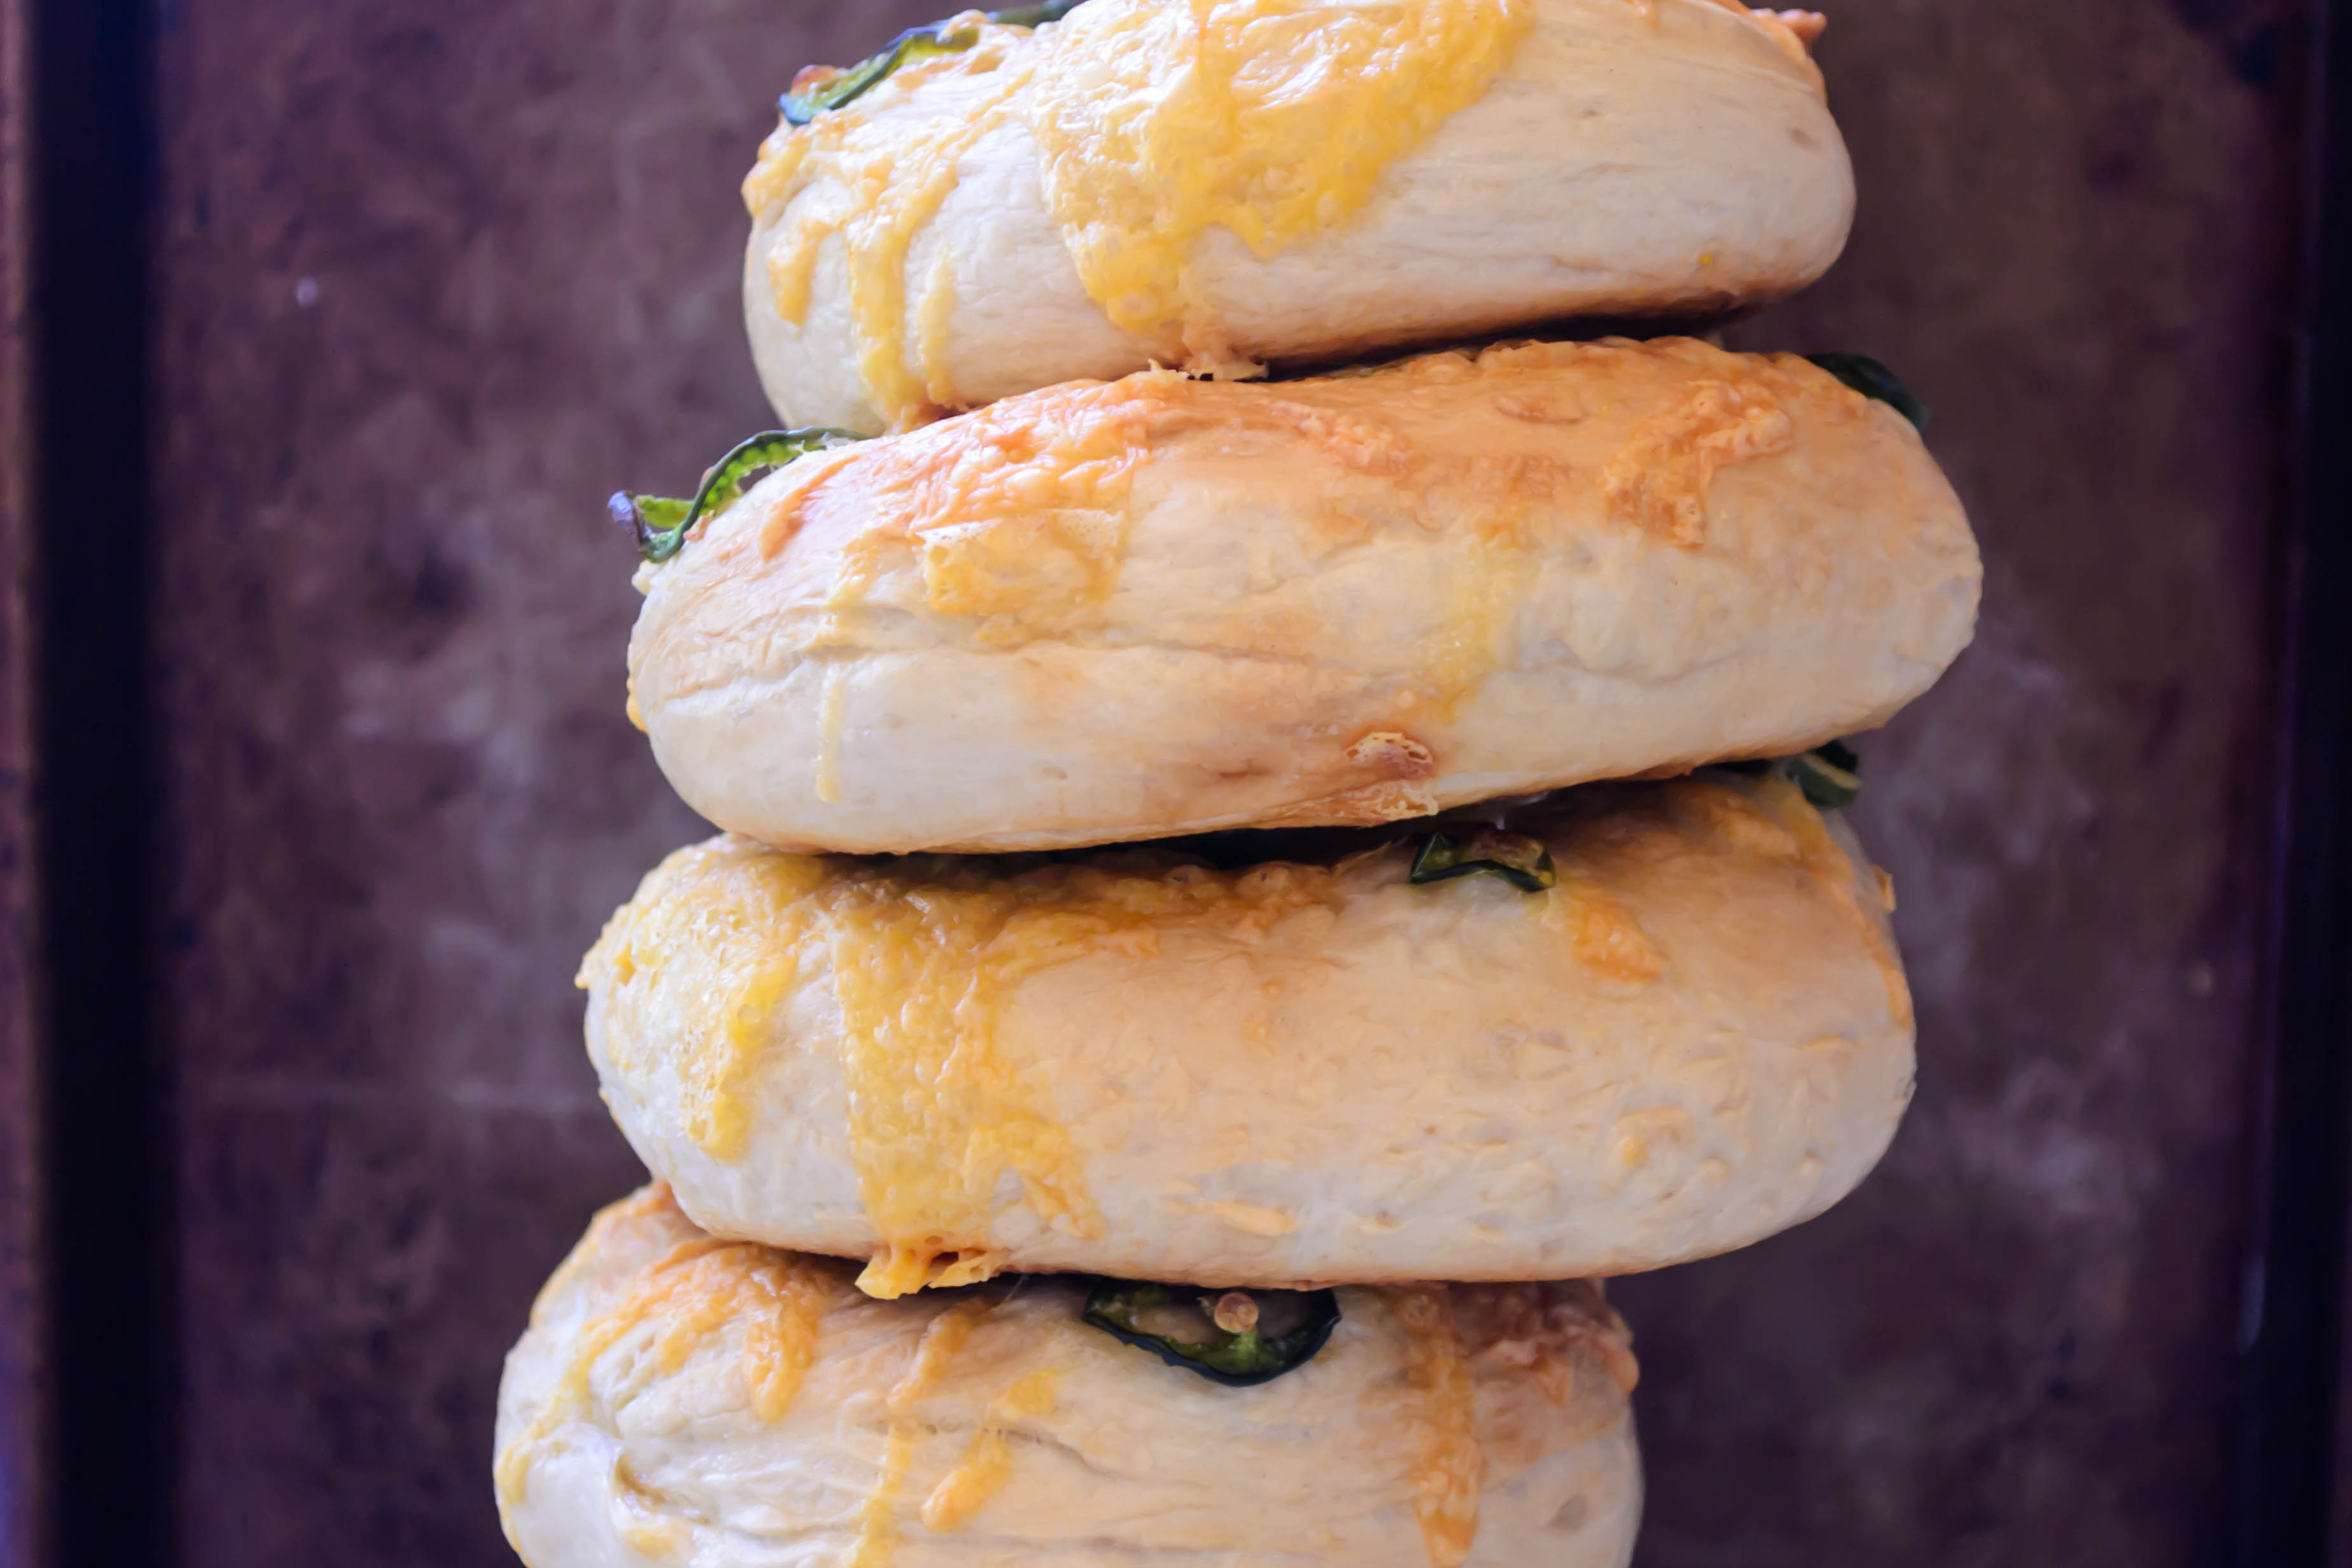
 Fast forward. This past weekend, I made bagels. Real, crisp crusted, chewy, bagel-y bagels, studded with jalapeño slices and dripping with sharp cheddar cheese. I’d been thinking of making them anyway, but when this month’s Twelve Loaves challenge came along with a demand for savory breads, it sealed the deal. I know, I’ve used this flavor combination before. In fact, I used it for another Twelve Loaves challenge. You could say I’m rather fond of it. Maybe I need a bit of an intervention. But… jalapeño and cheese! How can you resist? See, the cheese transforms into a delicate crackling lace encasing the top of the bagel, and the pepper slices roast and shrivel in the oven’s high heat, and the whole thing becomes just so savory and interesting, that I want to put it on everything.
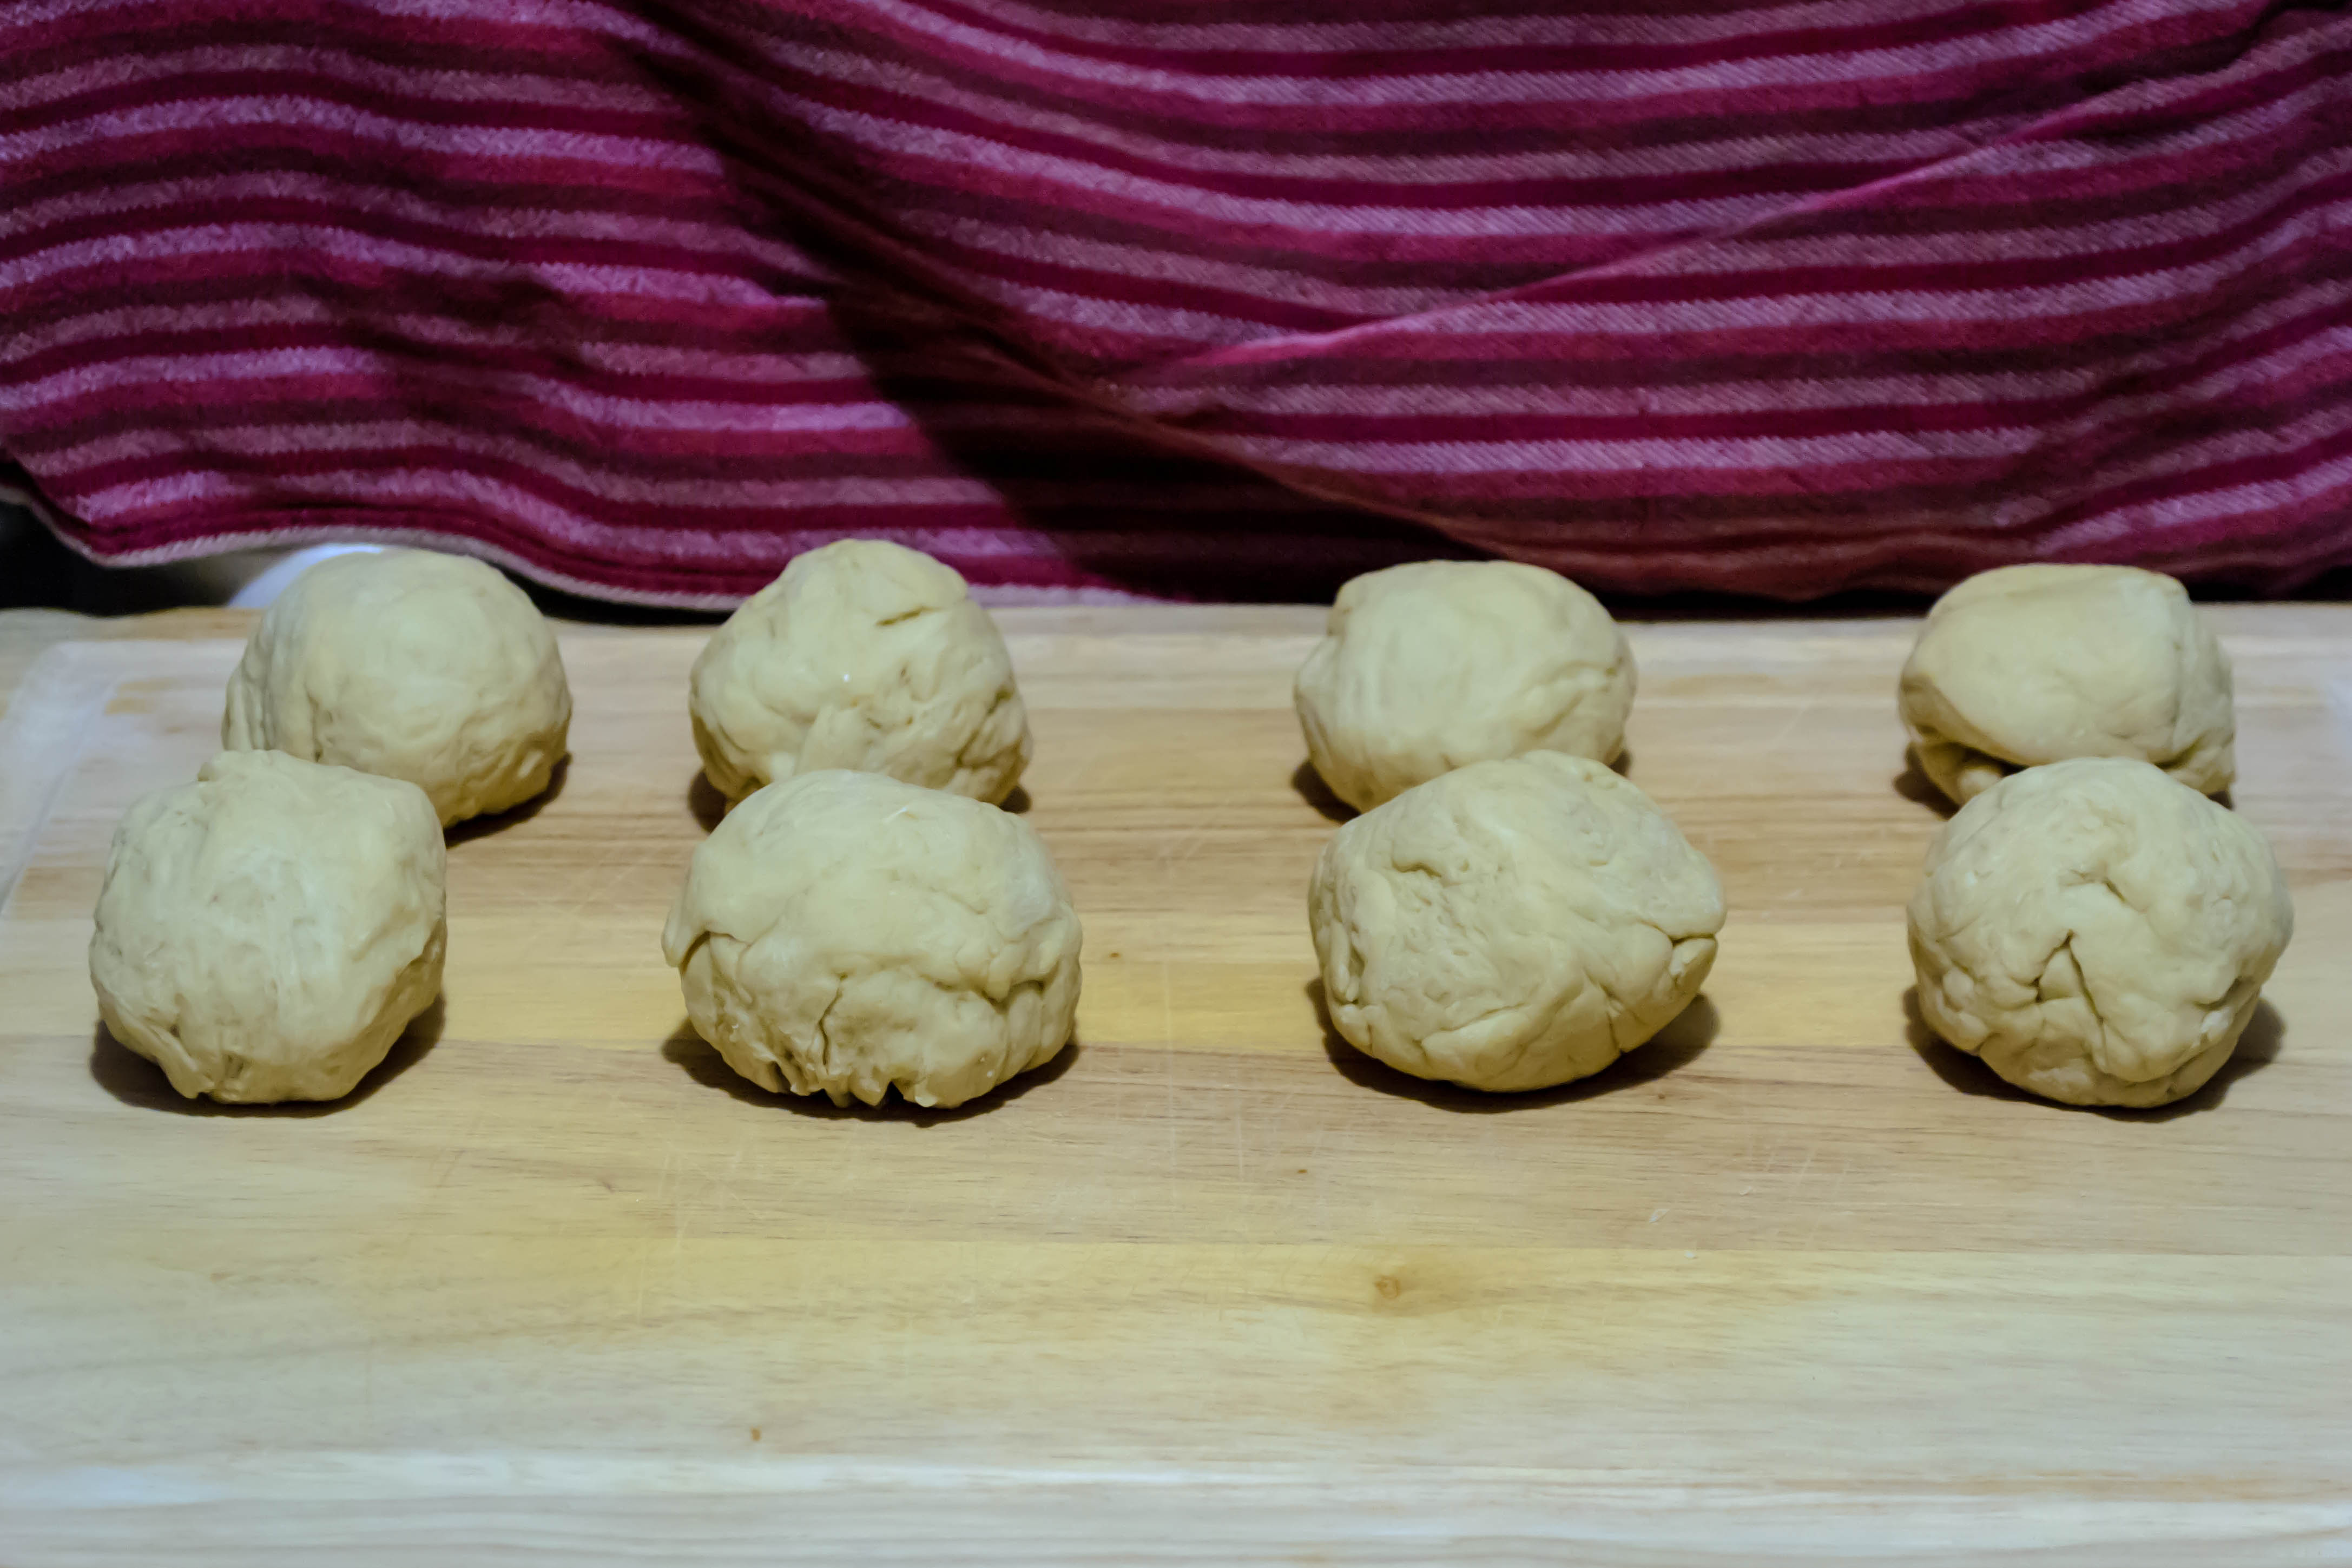
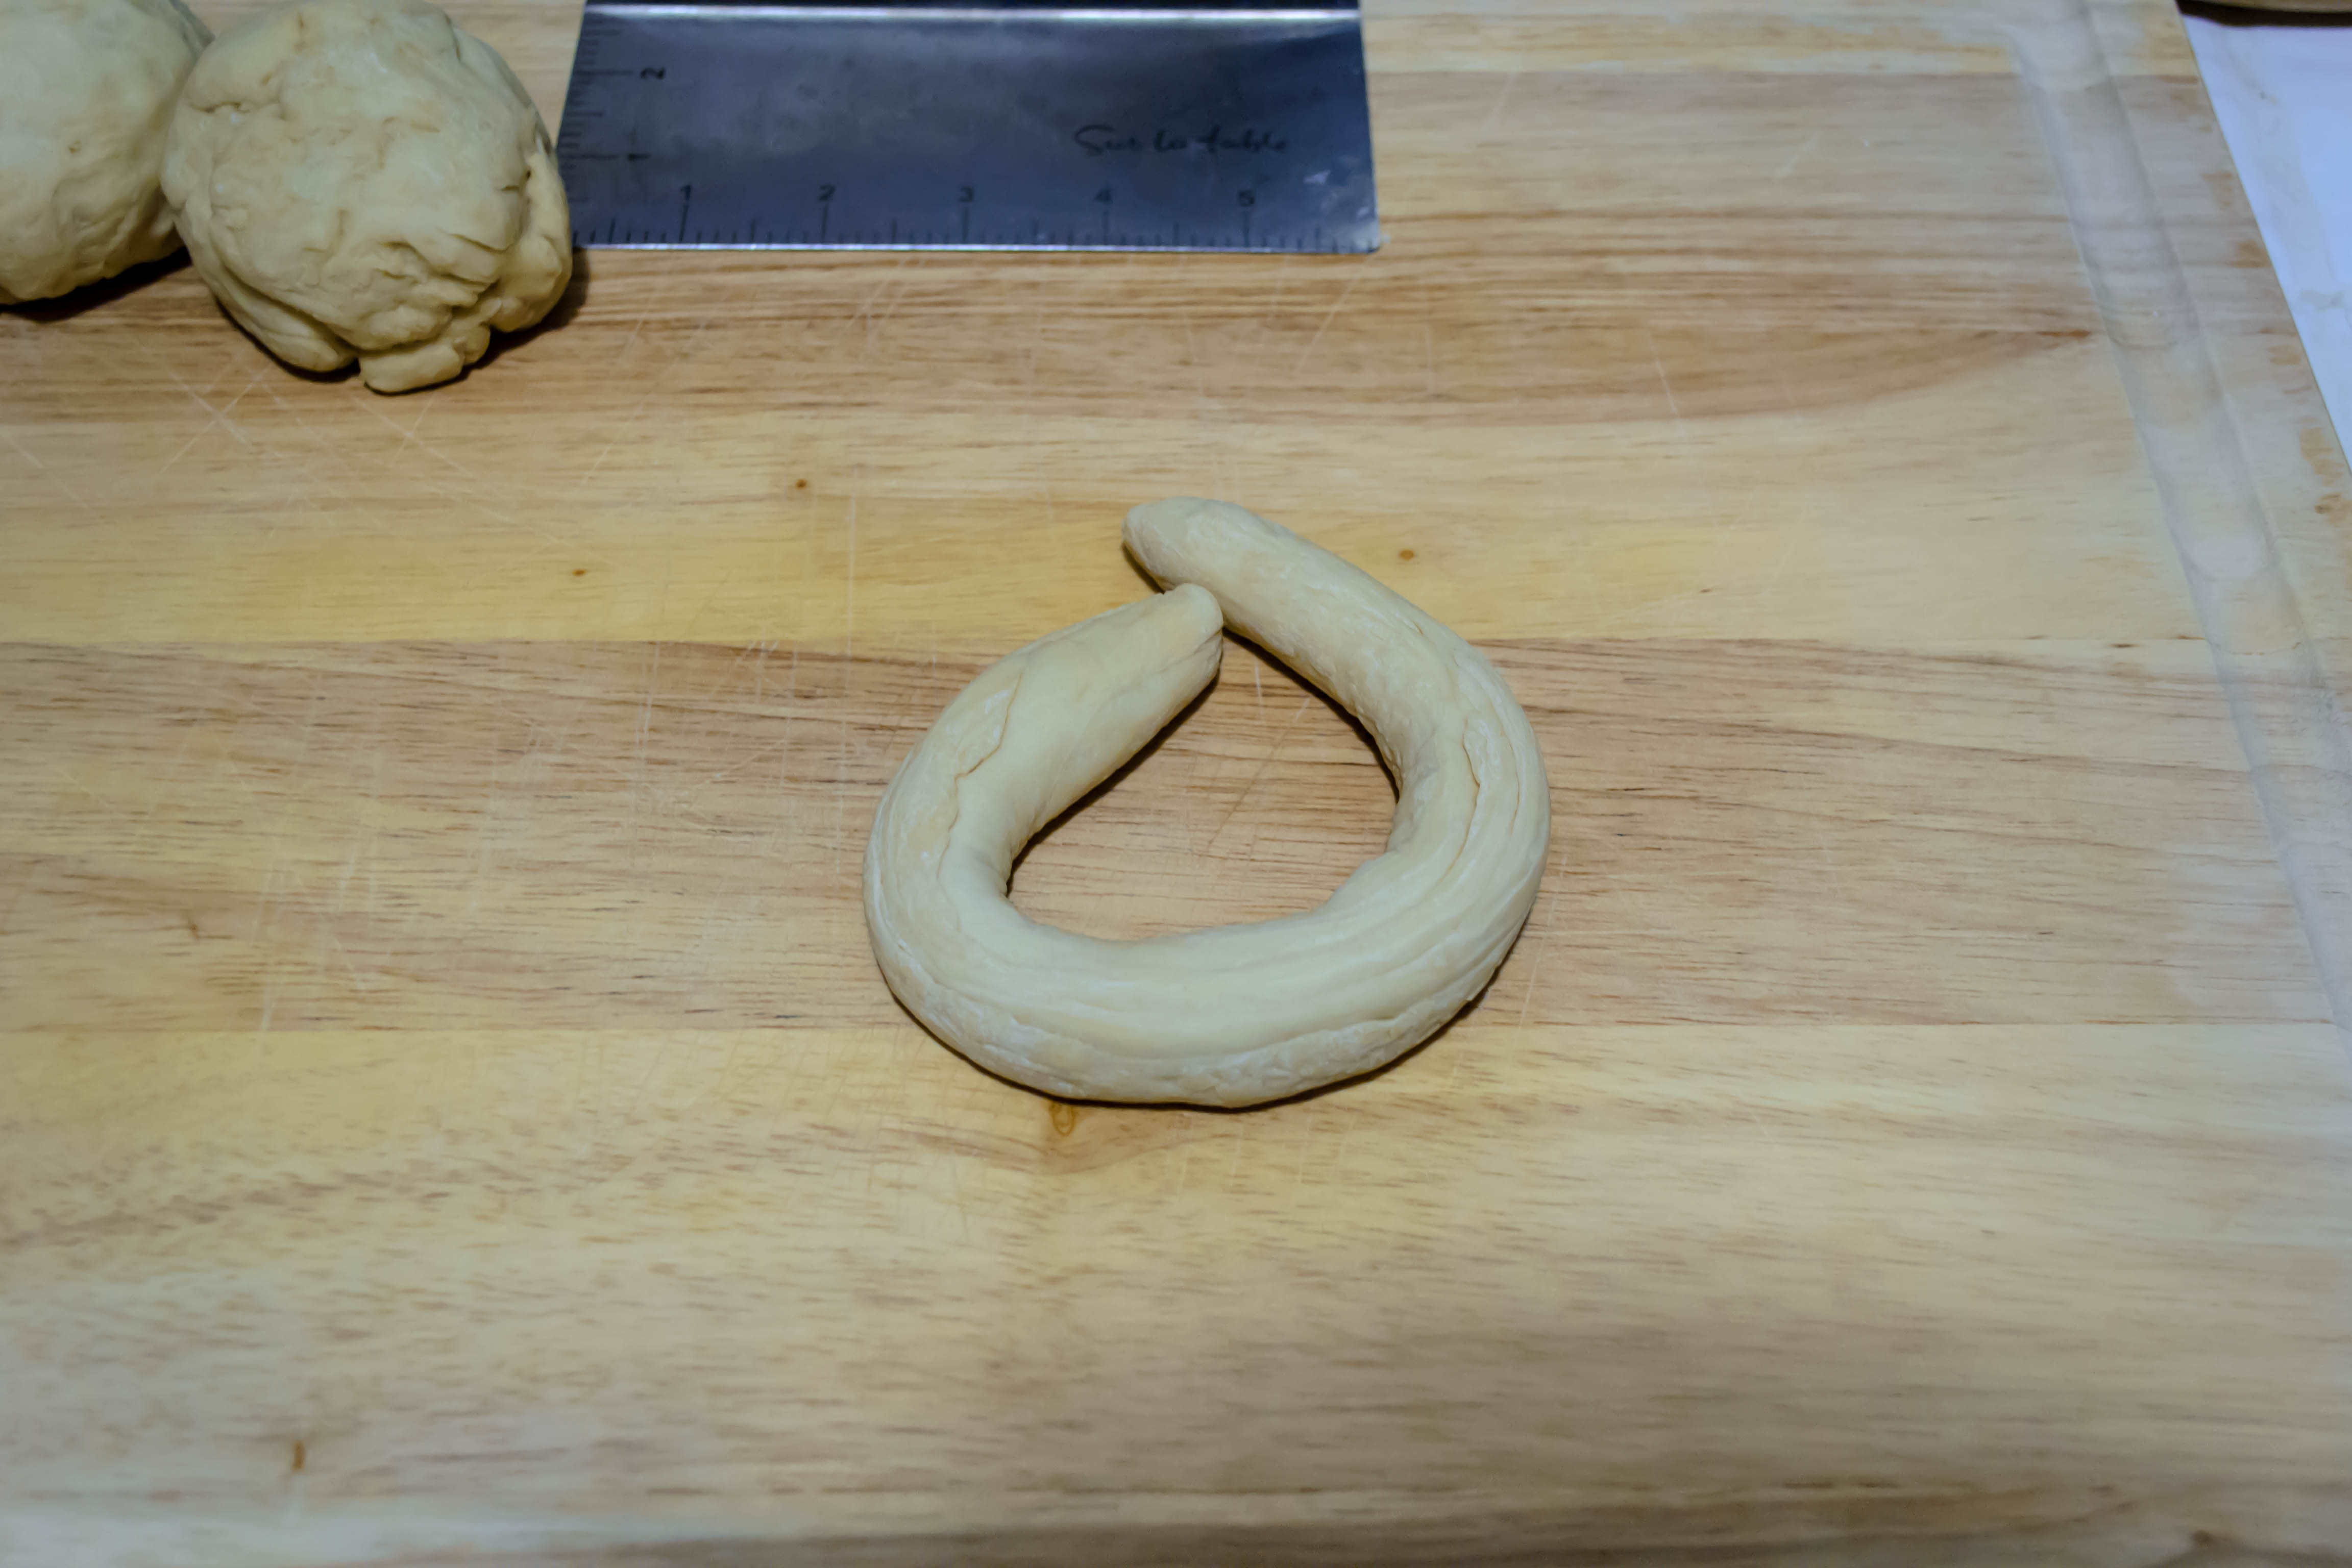
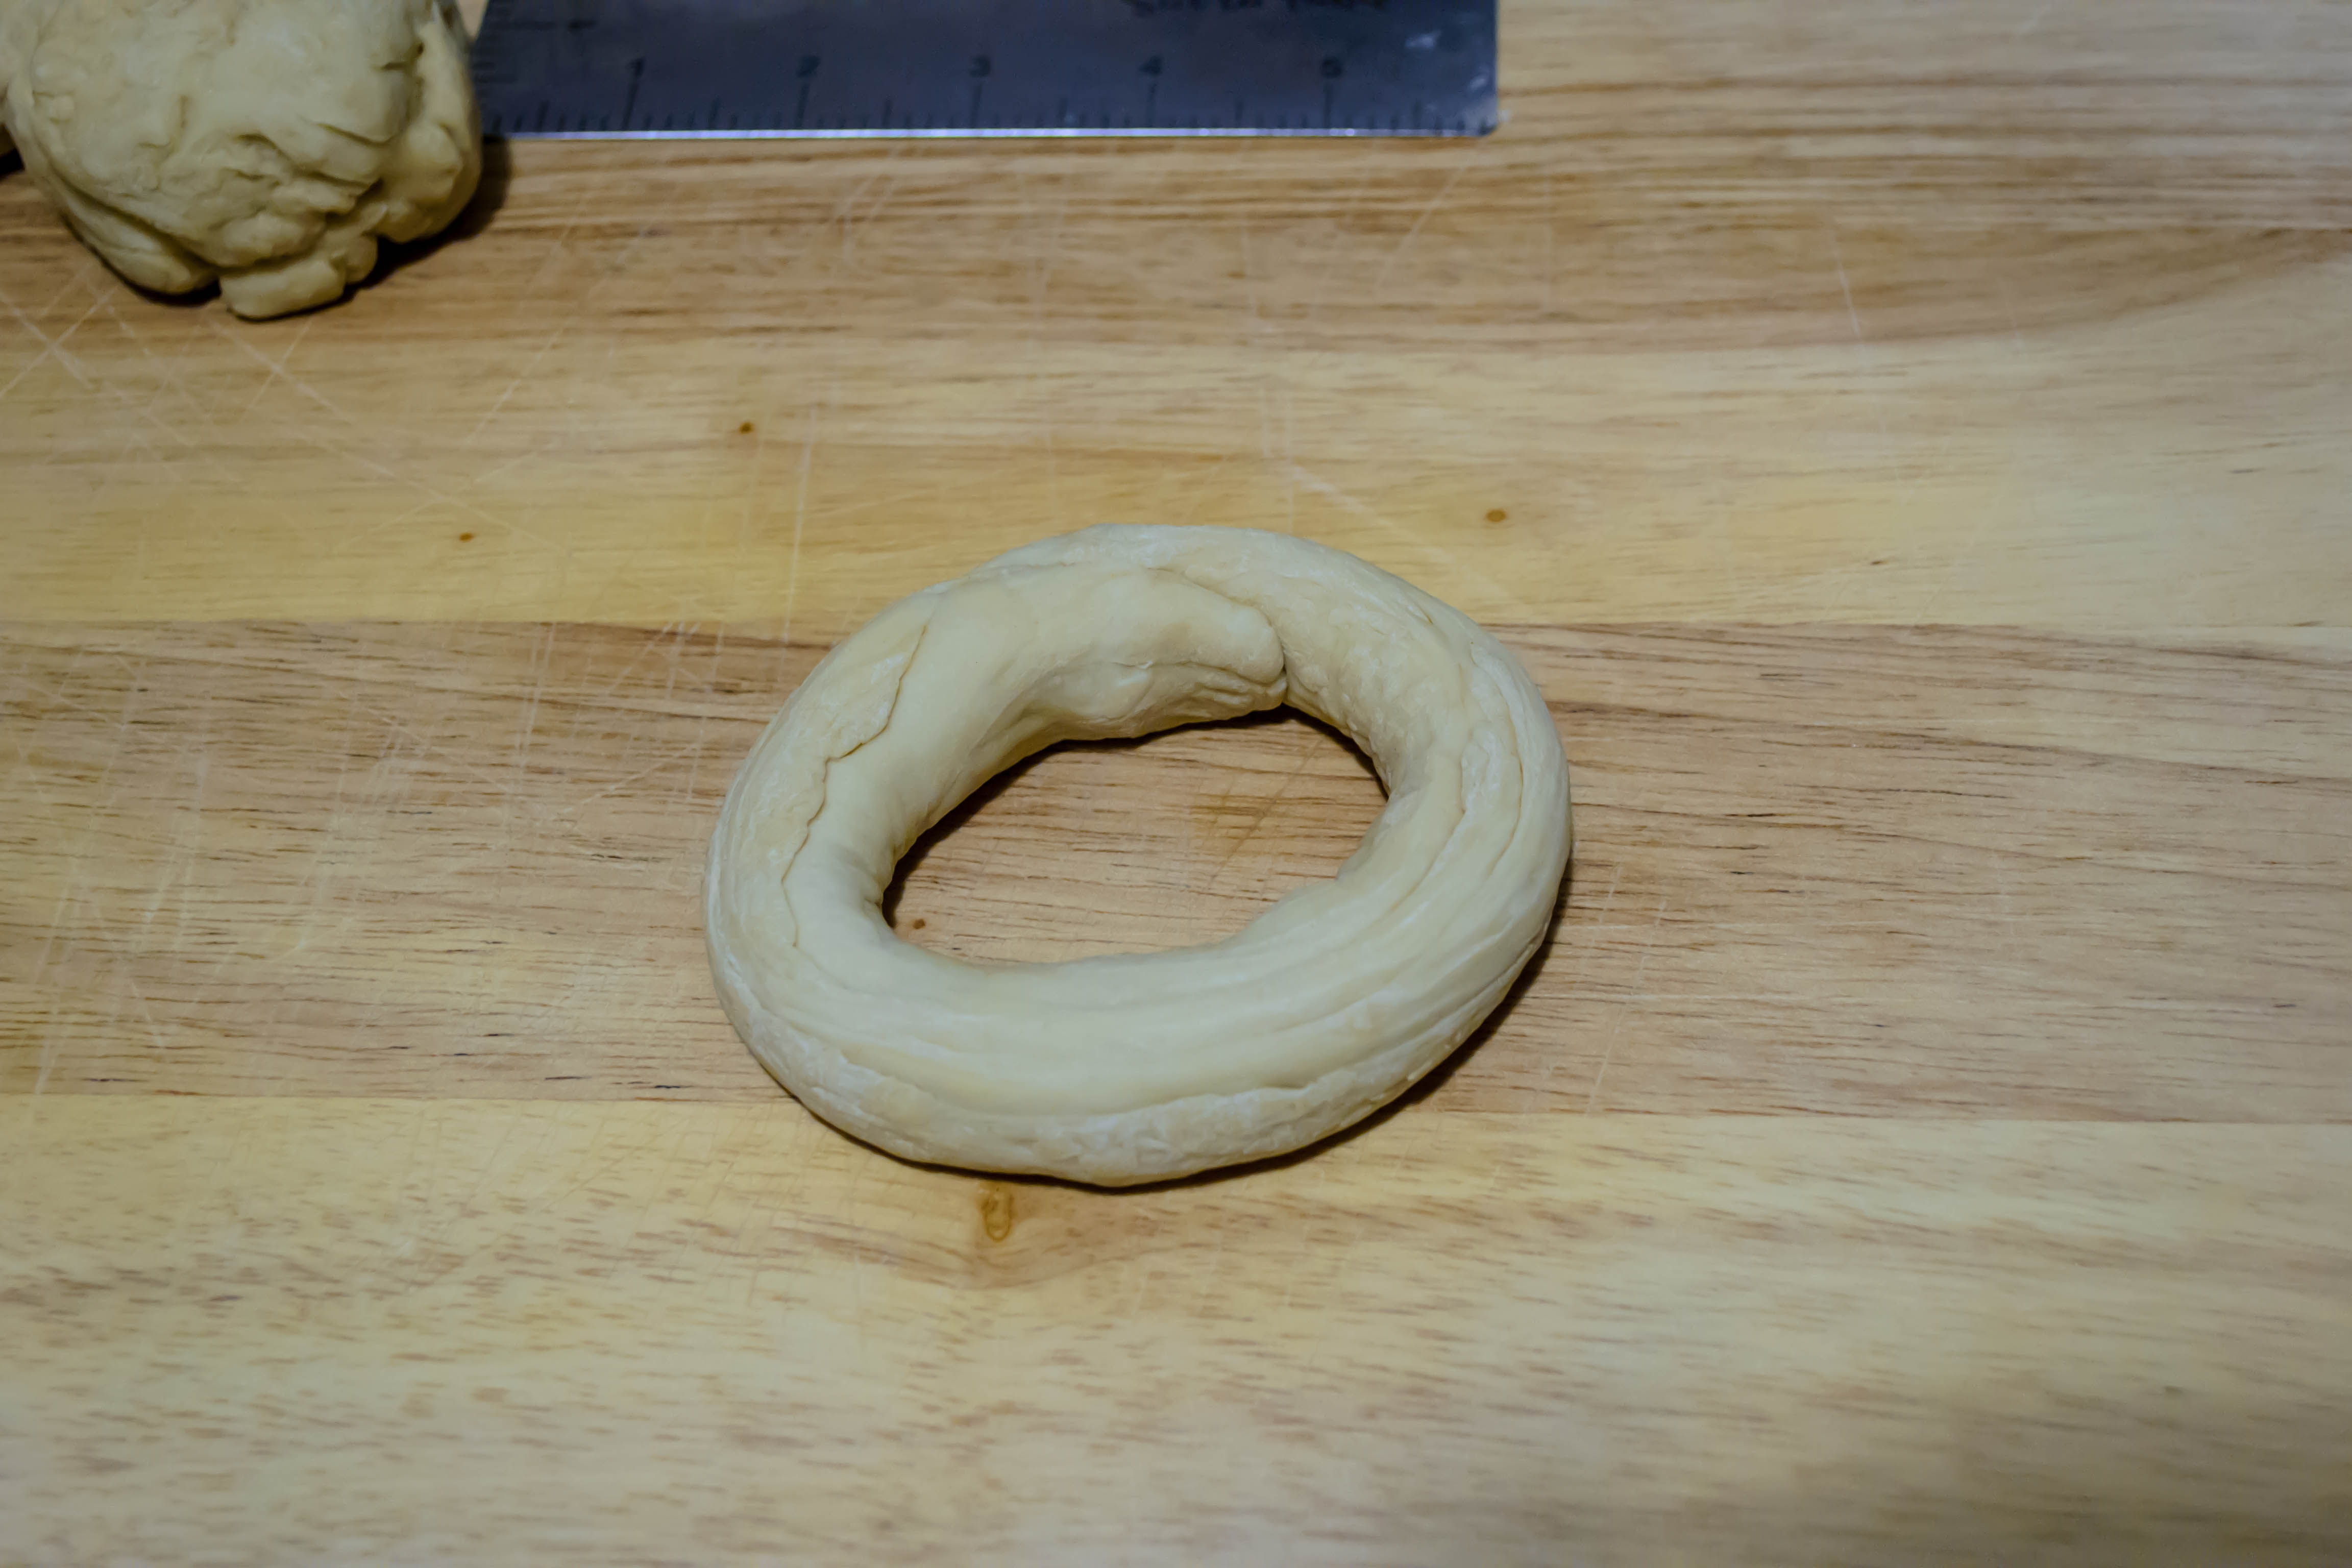
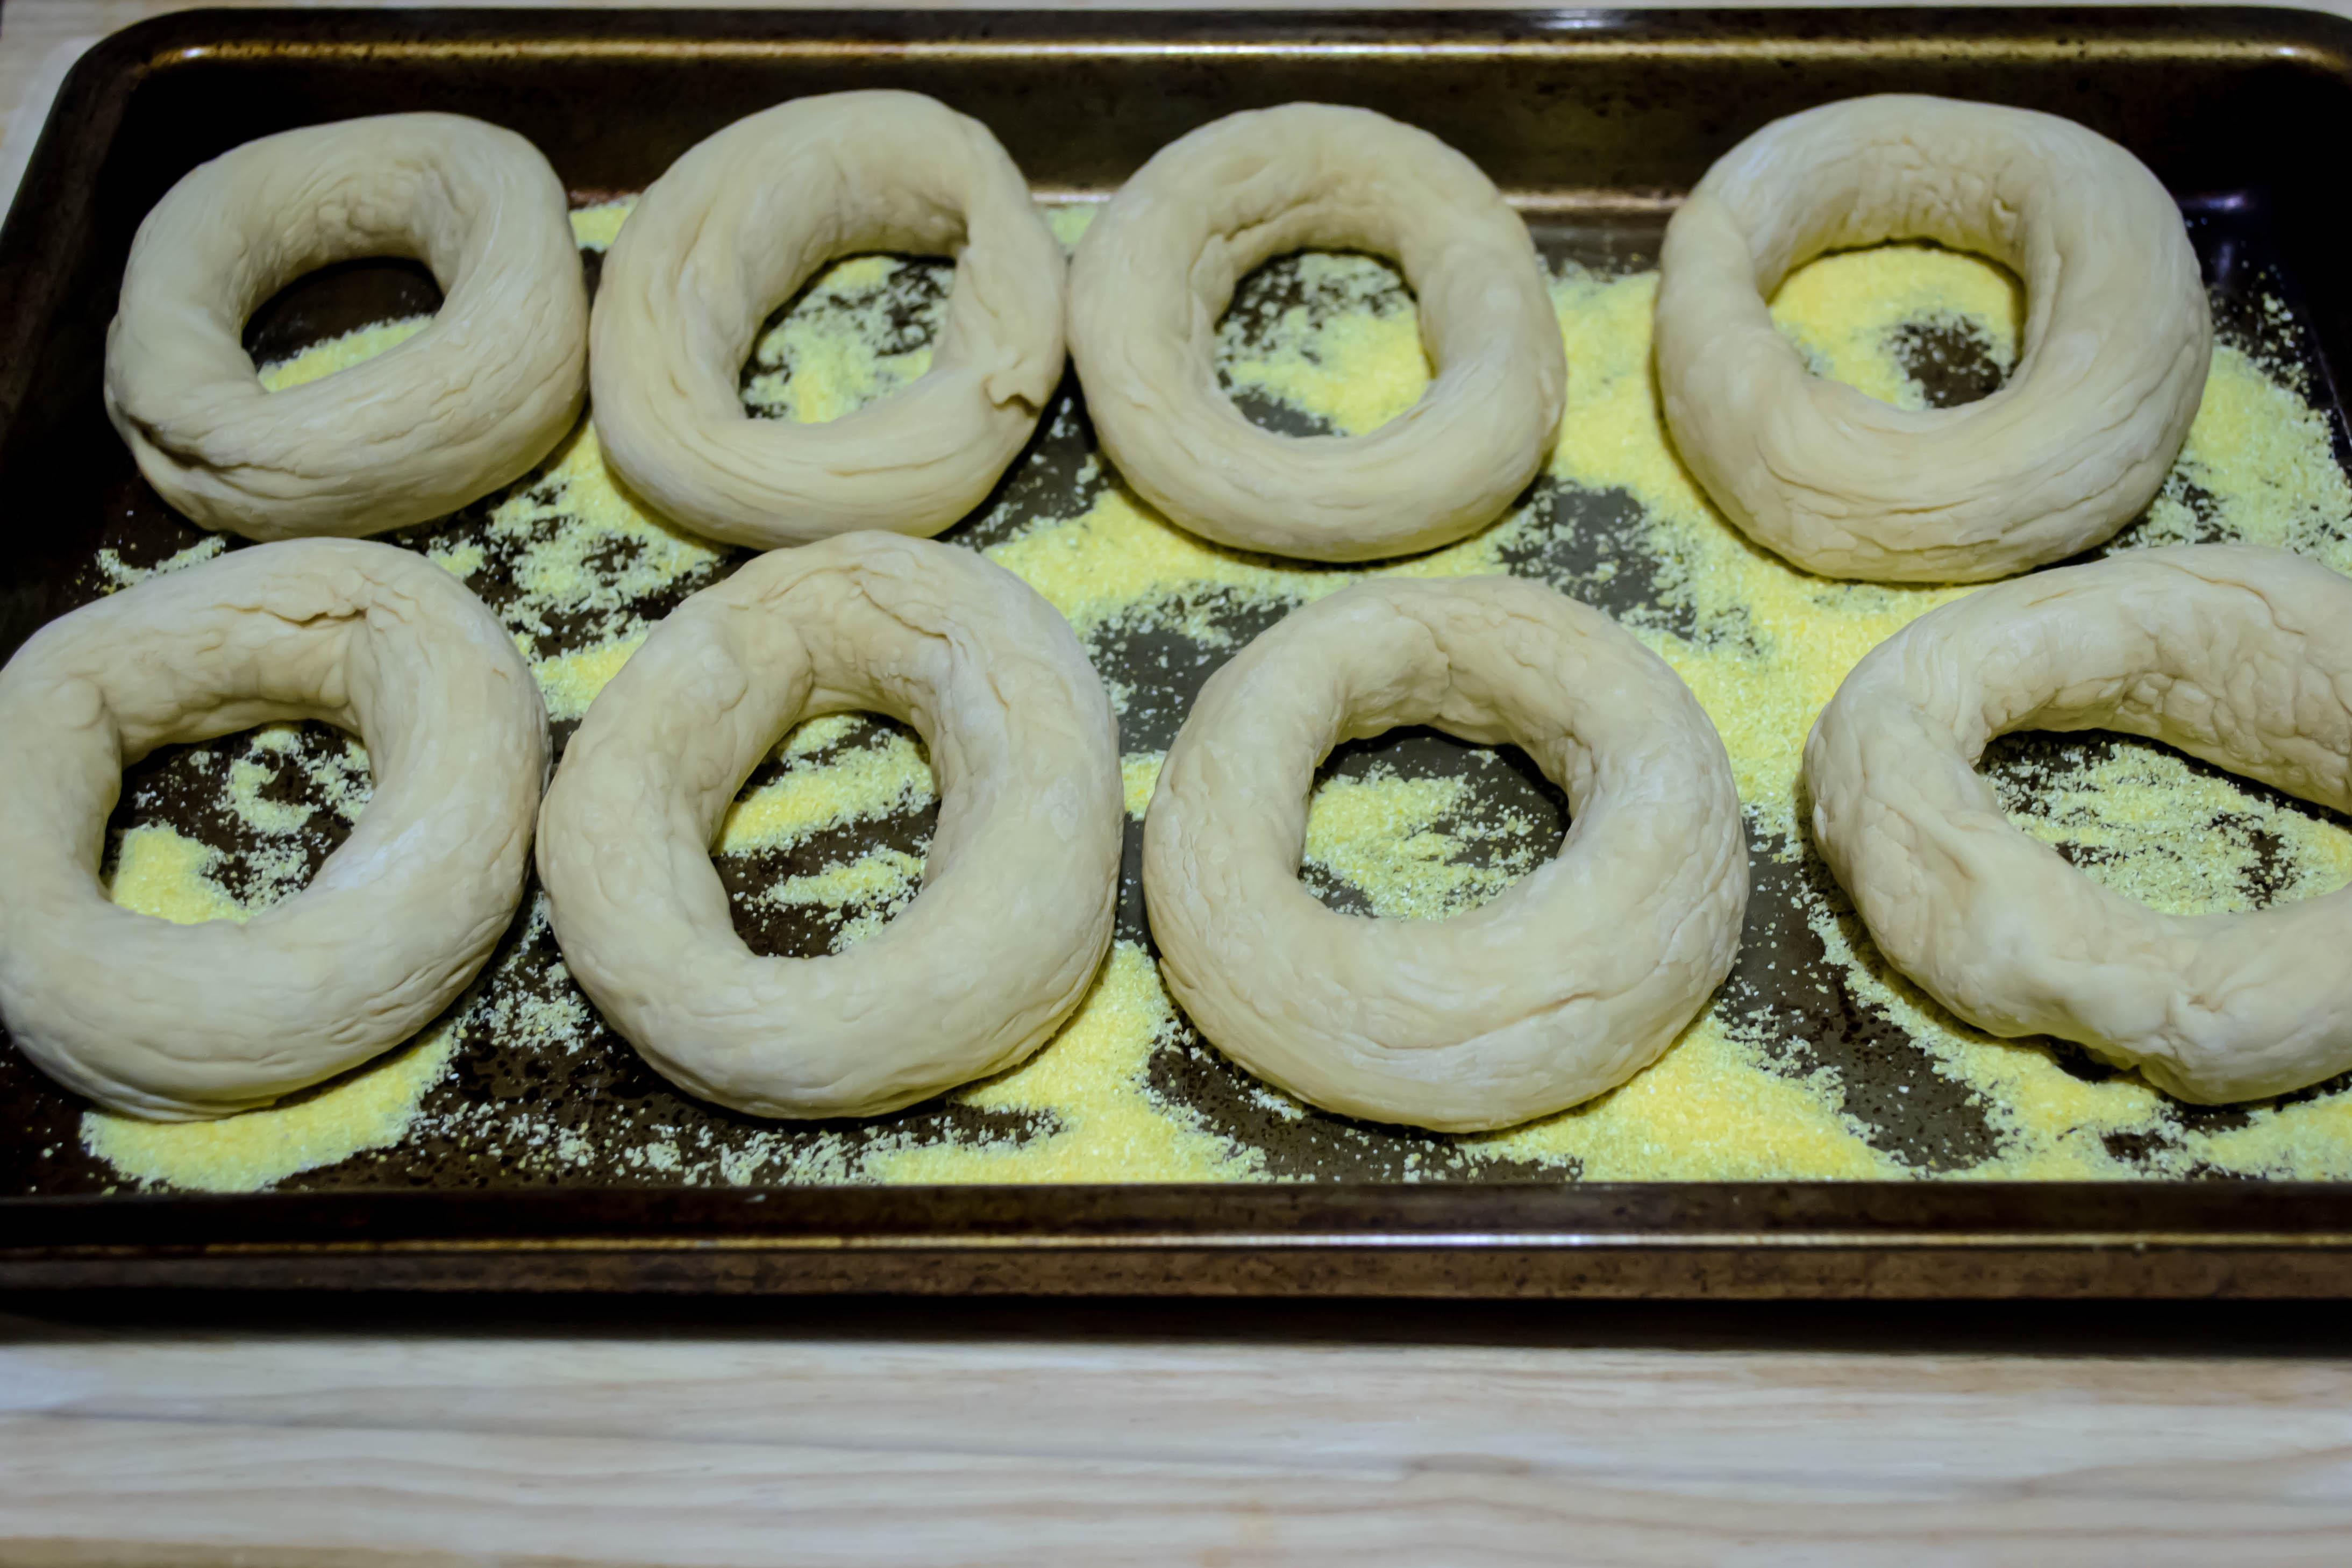
 Bagels are an odd-ball bread. The additional protein of plain old bread flour is not enough for them – they require the even heavier duty high gluten flour, and sweetener in the form of barley malt syrup, both products I’d never heard of (see note on ingredients below). After a lengthy turn with a dough hook that I thought would break my stand mixer (the heaving strain of the machine was almost too much to take), the stiff, dense dough gets portioned out, rolled into wormy logs, curled and pressed and sealed into rings, and then refrigerated overnight to allow for a long, slow rise that enhances the flavor and texture of the finished product. Upon retrieval from the chill-chest, the rings are plunged into a vat of boiling water before being sprinkled with toppings and levered into a hot, hot oven to bake up shiny and crisp and chewy.
(Obligatory apology for the weird lighting in the pre-topped, pre-baked photos. That’s what happens when you bake at night…)


 These are not the easiest baked good I’ve tried. They involve odd ingredients, special equipment (I can’t imagine kneading this dough by hand. Baking Illustrated, my guide for this recipe, says you shouldn’t even try), and considerable time. They require not one, but two methods of cooking, and they make a lot of dishes for a willing but sometimes reluctant
 dishwasher sous chef helper to wash up.

 Yet I think, if you are up for the challenge, that you should take it on. Watching them transform from a scrappy, tough dough into firm rings, and then seeing the crust take on that glossy shine and texture surrounding a chewy, densely-spongy interior, is not far short of amazing. Several times during the process, astounded by how bagel-like they actually were, I said to N., “I can’t believe I’m making bagels! Actual real bagels!” The finished product is a far cry from the soft, fluffy offerings you’d find on a grocery store shelf. The extra labor and the strain they put on my stand mixer (seriously, guys, you should have heard the motor. I thought it was going to die on me right there) make these only a truly special occasion project, but one that was certainly worth doing.

 Note on ingredients: I couldn’t find high gluten flour, but Baking Illustrated told me it could be readily ordered from King Arthur flour, if you have that kind of time, and the sweet, helpful woman who swept in to help me navigate the rows of flour in our Whole Foods market said it was sometimes at “crunchy granola” sorts of markets. I used, at her recommendation, a combination of bread flour and a few tablespoons of vital wheat gluten instead.
Barley malt syrup is a sweetener made from sprouted barley with an intriguing, earthy taste, less saccharine than white sugar or honey, not nearly as intense as molasses. I found it at my Whole Foods, but again, if you can’t find it, you might try a natural foods store or the internet.
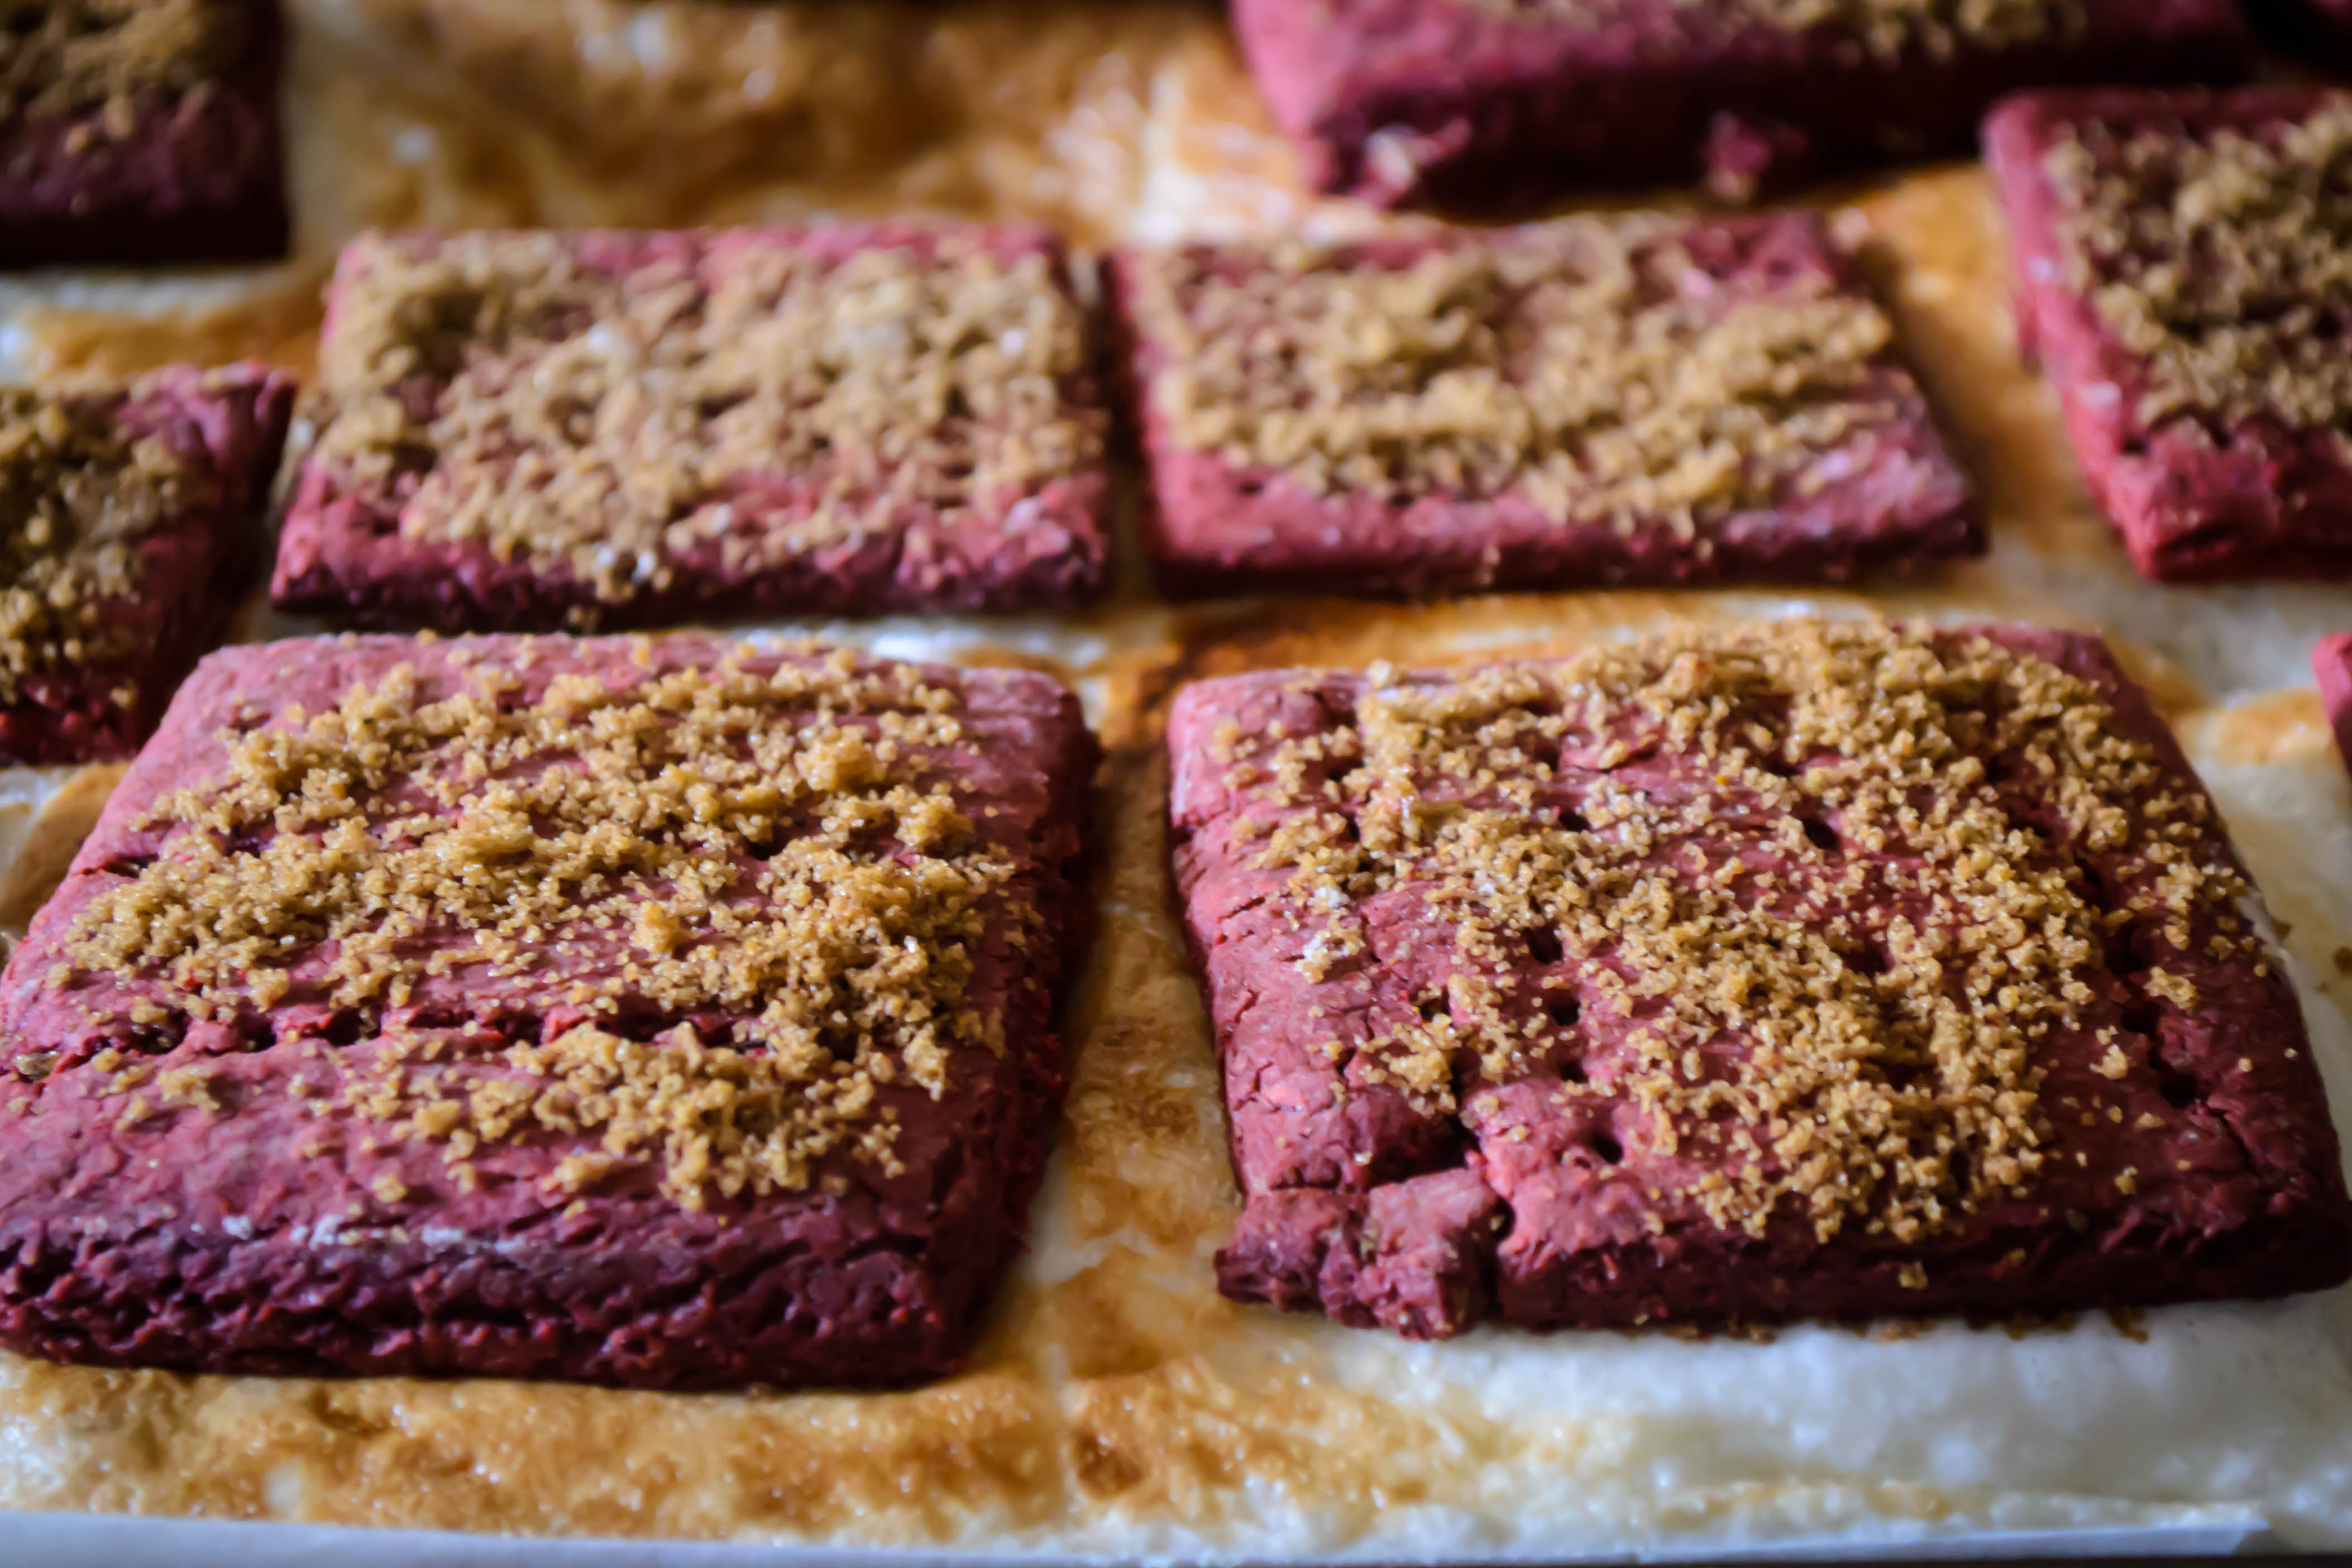
 Jalapeño Cheese Bagels
Day 1:
Day 2:
I don’t know about you, but when I get home from vacation I feel at once heavier and lighter. Lighter, because the toil of dragging overnight bags jammed with clothes, a laptop, a camera bag, two backpacks, a cooler, a sun hat, hiking boots, a satchel bristling with electronics, a grocery sack full of road snacks, a suit bag of dress clothes for a wedding, another satchel, this one loaded with supplies spanning the randomness quotient from shampoo to a day-planner (seriously, how can we have this much stuff???), and the leash of a dog intent on smelling every single thing she’s never smelled before from parking lot to hotel room to parking lot every other night is finally over.
 Heavier, because even though I didn’t cook much, I sure ate a lot. Plus, there’s that whole emotional withdrawal from the glory of vacation, but mostly I’m just shallow enough to be talking about my waistline.
In any case, upon our return from a trip we typically plan out a few particularly virtuous meals to combat the quantity of food we consumed, and the dubious quality of some of those choices – road food is always, alas, simultaneously necessary and a bit specious (take, for example, the Milky Way I bought at a gas station in Coos Bay to help myself stay away for the remainder of the drive to Brookings, which turned out to be open on one side. I threw it away. And then I almost cried). Simple rice and steamed broccoli is one of our go-to homecoming meals. Whatever can be scraped together from the garden and eaten with a light dressing and curls of Parmesan cheese is another.
But now we have a third, which might also become a side for roast chicken, a working lunch, or a base for seared tuna or poached salmon: a warm salad of lentils, tossed with lightly blanched kale, briny kalamata olives, and the tang of feta cheese.
 A few days after our return, with pantry and fridge freshly stocked, I considered my starch choices. We eat a good bit of pasta and a fair amount of rice, but our consumption of legumes and pulses is way below par. This had to change. I picked out a bag of green lentils that had slowly been pushed to the back of the shelf as new and more exciting boxes were set in front of it.
Lentils are great for us. They are packed with fiber and protein and folate, which all make them filling as well as nutritious. But like most dried beans, on their own they just aren’t very exciting. They call for additional flavors and textures: chilies or acid or salt, crunch or freshness. Herby sharpness. Crumbly cheese. A dance of textures. You see where this is going.
 To give them as much of a fighting chance at flavor as possible, I sautéed some onions and garlic before tumbling in lentils, water, a lone bay leaf, and a bracing hit of red wine vinegar. “And salt,” you’re surely crying, but no! Salt should be added to lentils only near the end of cooking. It can toughen them if you add it right away. I’ve also read that acidic ingredients – like the red wine vinegar I used – can contribute to this toughness, but I didn’t notice any particularly virulent refusal to soften, so I wouldn’t worry too much about it.
You want your lentils to be fully cooked – that is, not crunchy – but to still retain a bit of texture. They should soften but not fall apart into mush – taste a few to be sure they have achieved the level of tenderness you like, but be sure to do a good sampling – five or six – as isolated beans can cook at different rates.
 Once done, add salt to taste, let them cool a bit, and then the magic happens, and it’s such easy magic, it’s worth doing any night of the week. Torn pieces of blanched kale, cubes of feta, and halved kalamata olives. A drizzle of olive oil if you think it’s on the dry side. Faced with this combination – salty, chewy, crisp and fresh and soft – we scooped spoonful after spoonful, and ended up eating most of the pot. So much for virtue.

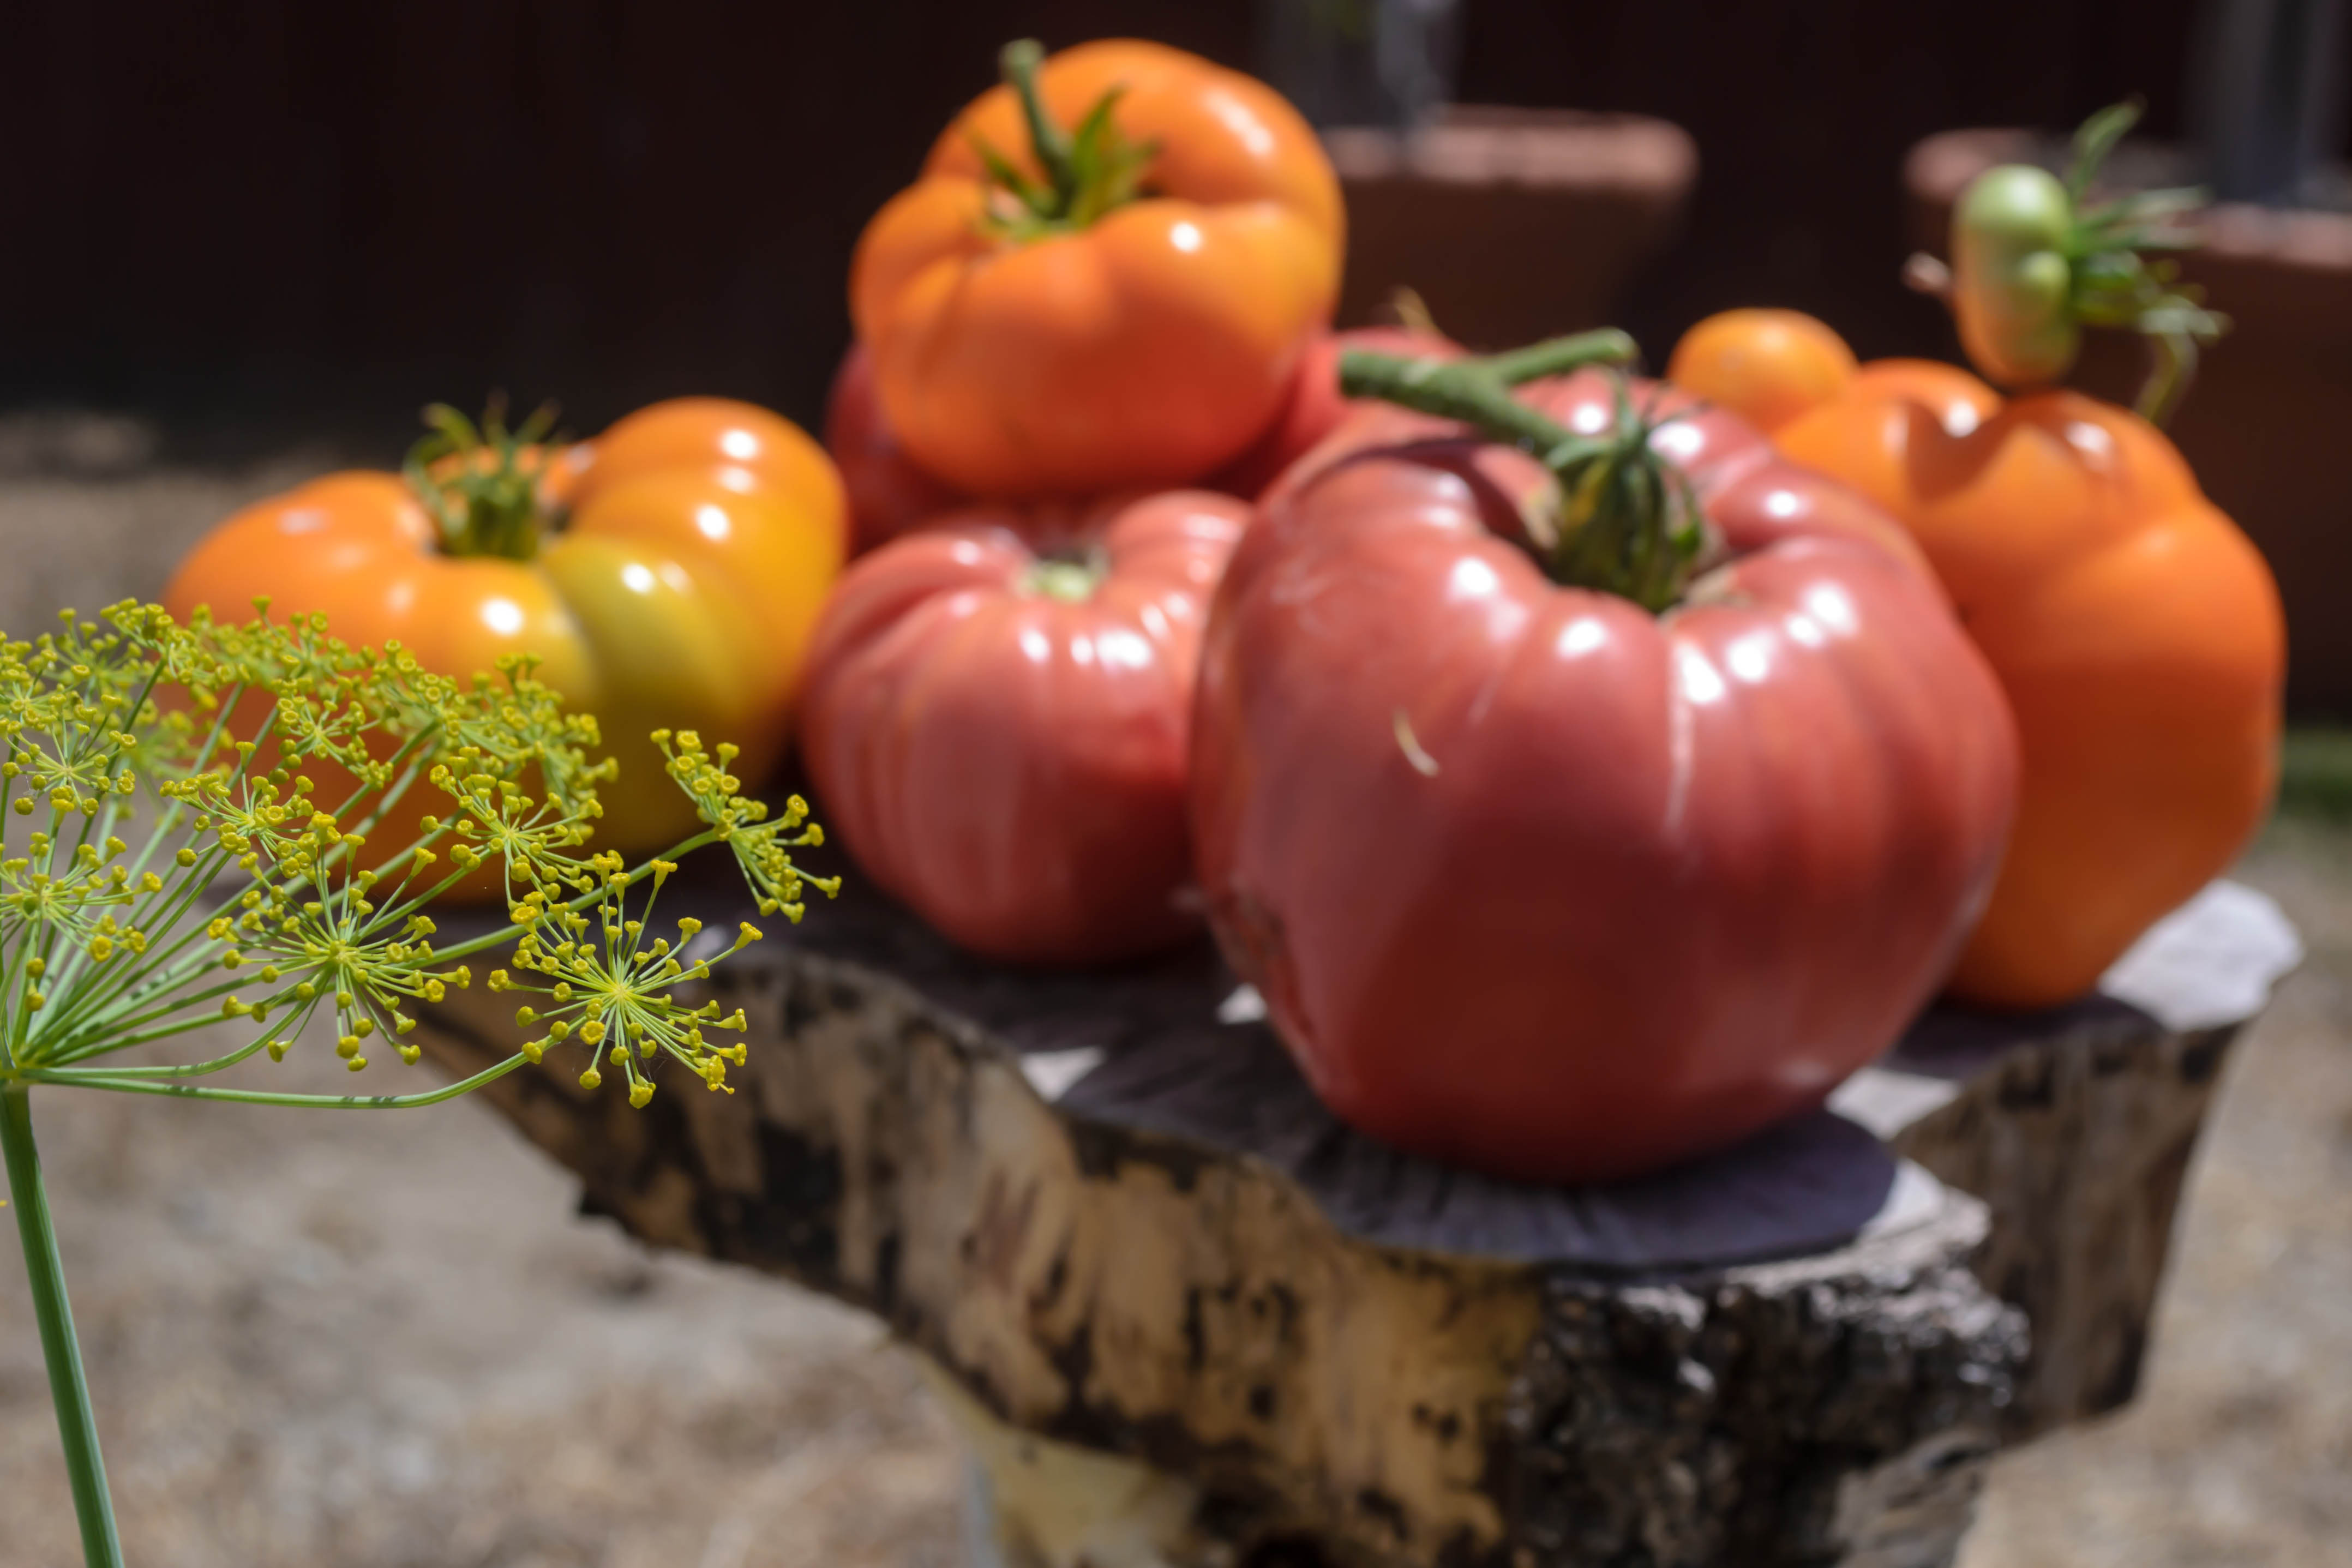
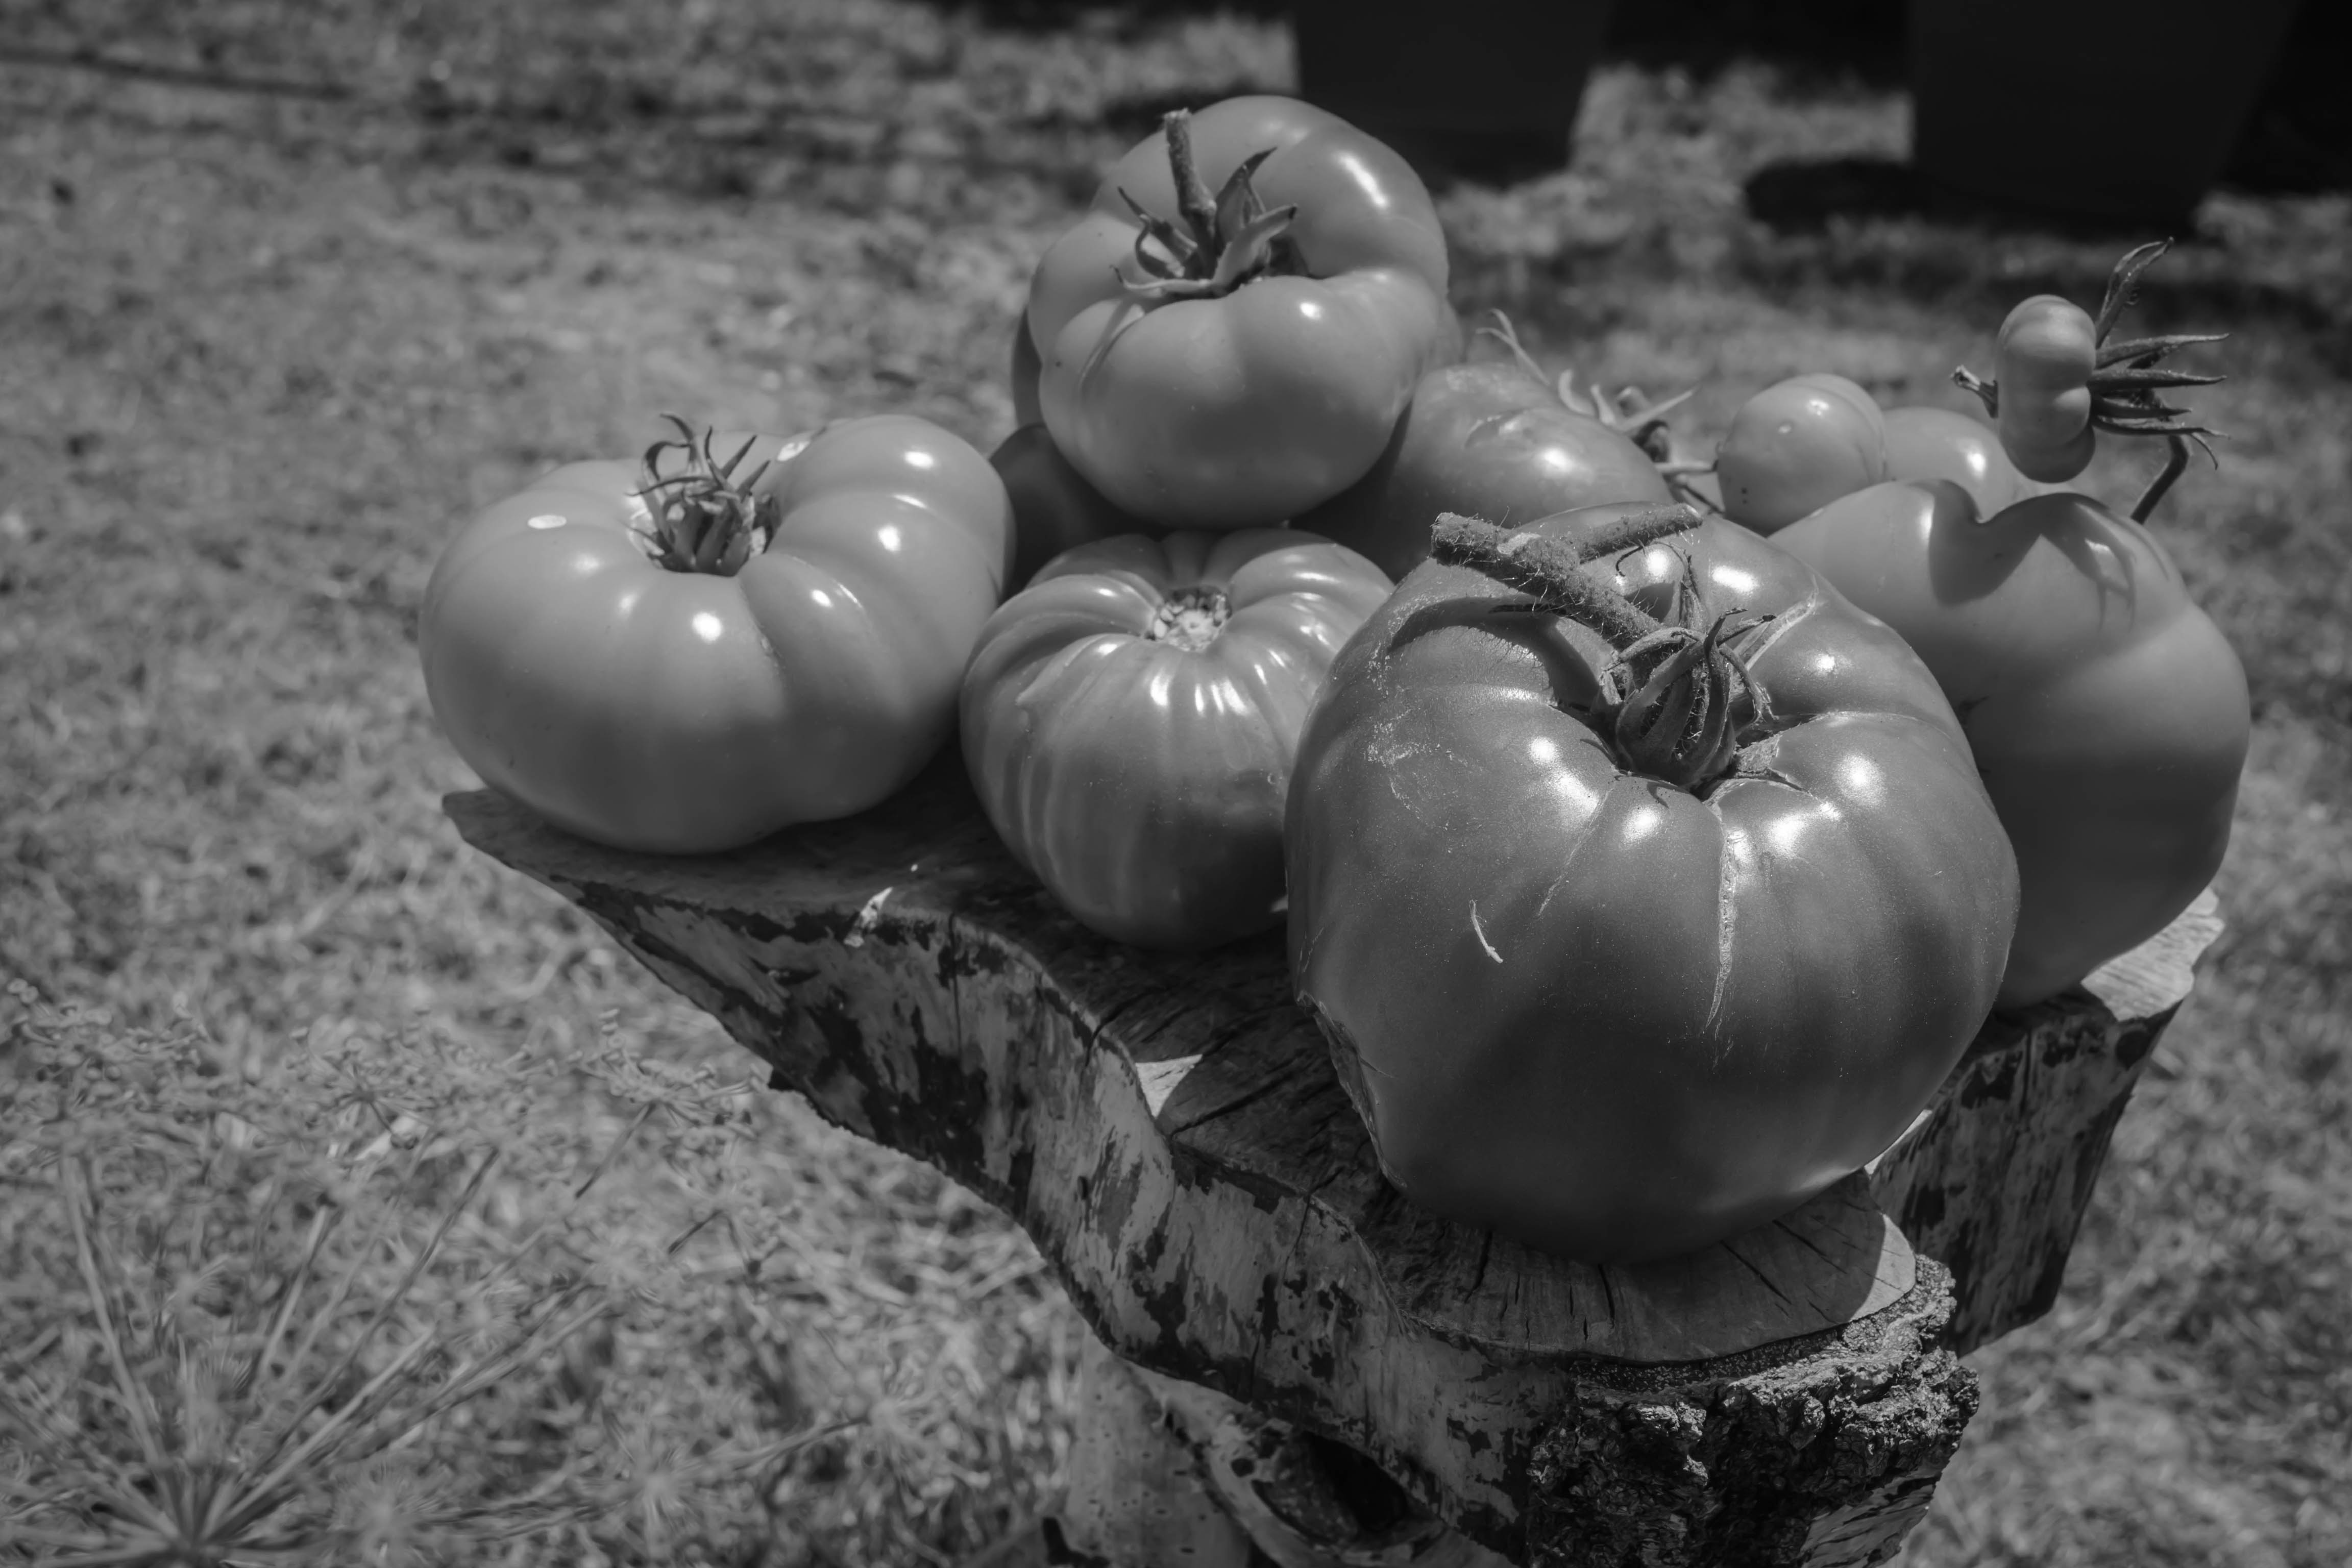
Tomato motherlode from the garden:

Sometimes, when you are on a two-and-a-half-week-vacation-road-trip, you don’t cook anything. Go figure. And then when you get home, and you want to get something up onto your own little space on the internet for your own little community of new friends and virtual friends and “hey, I even know some of you in real life!” friends, you don’t have a new recipe to share with them. So because I bummed around the Pacific Northwest last week, digging my toes in the beach and trying not to sob with joy at the most beautiful wedding I’ve ever attended and gorging myself on everything I’ve missed from the restaurants and bars I used to frequent during graduate school, I considered what food might sum up my vacation activities, and hit upon salt. The Pacific and the Puget Sound, my brimming tears, savory car snacks, and a visit with one of my most devoted salt fiend friends (more on that in a few…), and plain old sodium seems like the right choice to talk about today.
 That’s right; I’m going to talk about salt. This might seem like the plainest of the plain, the ever so banal, and maybe it is. But aside from being a perfect food item to represent my vacation, salt is really important. Before refrigeration, salt was one of the surest bets for preserving food. Salt, vinegar, and sugar could keep your food from spoiling for some time, and though sugar is a recent and expensive addition to this preservation party, salt and vinegar are ancient methods, often used together, as we see in the case of pickles and sauerkraut, among others. Salt has been used as a burial offering, it has been taxed, it has been smuggled and ground and flaked and sprinkled and immortalized in verse. Its history is interwoven with crime and slavery and back-breaking work and colonization and maybe even heart disease. It has killed, it can kill, but it also keeps us alive. Michael Ruhlman has written a much more impassioned defense of this funny little crystal than I could, but just trust me when I say that we really shouldn’t, and even couldn’t, do without it.
(And, on a much less serious note: if you get home from a party… like, say, a moving and beautiful wedding during which you danced so hard you might have destroyed your shoes, and smiled so much your face hurt for two days afterwards, and you realize that you might have drunk enough that you’re going to be sorry about it in the morning, take a teaspoon or so of salt with a glass or two of water and a couple of Ibuprofen, and you’re all but guaranteed to feel pretty dandy the next morning. My friend A. calls it the Salt Lick, and it totally works.)
But as essential as salt is, and as ubiquitous, it’s far from singular. As it turns out, I have four different kinds of salt in my kitchen right now. And unlike the depths of the poultry seasoning collection, I use them all.
 First, let’s talk Maldon sea salt, my favorite finishing salt of all time. That’s the top right corner, if you’re following along with the visual. It’s flaky and crunchy and crusty, and tastes like the ocean dried on your lips. It is beautiful with caramel, or on top of biscuits, or sprinkled over a still warm chocolate chip cookie (this might sound weird, if you’re not a sweet-and-salty devotee, but just try it. You’ll be glad you did).
Top left is coarse sea salt, which I mainly funnel sloppily into my salt grinder, to use when a dish needs some last minute seasoning, or when we have guests and I want to look all fancy by putting salt and pepper on the table.
Of course I’ve got good old table salt, in that pile in the bottom left. You know, with the little metal spout that squeals when you open and close it? I use this mainly when I’m following recipes. Since salt comes it a lot of different sized crystals, measurements actually will be different depending on what kind you are using. Most call for the simple, relatively fine grind of table salt.
Finally, there’s my newest love, here in the bottom right: gray sea salt. This is in larger, chunkier crystals than the Maldon, and is a harder crunch because it’s less flaky. It clings together almost like damp sand, which I like because it reminds me of the ocean it came from. The gray color is from mineral content, which I like because it makes me feel like it’s somehow really good for me. I use this in bread dough and pizza dough – it seems less salty than regular table salt (it’s not, though – they are just unrefined crystals that, when processed a bit, become plain old Morton), and though most of it breaks down during the rising and cooking, some tenacious crystals do hold up, which means the occasional treat of a crunchy, salty bite.
 There are many more that I don’t stock or have never even tried – pink Himalayan salt, black lava salt, rock salt, good old Kosher salt, the strange and possibly blasphemous popcorn and butter flavored salts, the odd herbed salts, garlic salt and celery salt and smoked salt. And in lieu of a real recipe, I’d like to offer you a little bit of awesome that you will be hardpressed to believe is really a coincidence.
 Let me explain. When we arrived in Seaside, OR, the final leg of our massive road trip, I already had this post drafted. Promise. I had known for almost a week that I was going to talk about salt. I even had a bit of something in lieu of a recipe to present. But upon our arrival, our friend Taylor (the aforementioned salt fiend, who is also a guest contributor on the smart, feminist media and pop culture blog Girls Like Giants and co-writer of a Project Runway review column on Simply Showbiz, masquerading under the pseudonym Andy Others) blew all that out of the water when she presented us with a little hostess gift: a jar of garlic herb salt. What could be more perfect? So I asked her to do a little guest post here to share how she made this sweet little jar that smells at once like the ocean and the best garlic bread you’ve ever tasted.
 “I was driving home from grocery shopping and listening to the ever-genteel ‘Splendid Table‘ on the car radio. Lynn was talking to a woman named Sally Schneider, and together they told me that I have been wasting my money for years. You see, I am a sucker for flavored salts. Truffle salt and tomato salt are my all-time favorites, but anyone can make me happy by giving me salt combined with something, especially if part of that something is garlic. But Lynn and Sally showed me the truth! You don’t have to spend your own money on this. Salt is actually so amazing that it does the work for you. Let me say that again: the salt does the work for you. Salt! Is there nothing it cannot improve?
A mini-vacation with old friends was fast approaching, so I thought, what better way to welcome and thank them than with a homemade salt of my own? Plus I could show off how competently I grow herbs, which is always a bonus. I love appearing competent.
 Sally Schneider told Lynn about the simple pleasure of making this salt by hand, but I chose to let competence merge with laziness instead. It could not have been easier. I peeled about 8 cloves of garlic (more than the recipe called for, but garlic is one of my great loves). I put them in the belly of my food processor with about 2 tablespoons of kosher salt. I pulsed until the garlic was mostly chopped. Then I added a tablespoon of culinary lavender flowers, about a cup of sage leaves, and about a cup of rosemary, stripped from its stem. (I thought about adding lemon zest, but I decided not to overdose on too many flavors… this time.) I pulsed and pulsed until the mixture became a coarse, slightly damp sand. Next I dumped that “sand” onto a baking sheet and mixed it up with about another ¾ cup of salt. I measured by color more than by quantity; I know how much herb I like in an herb salt, so I aimed for an even green distribution. Finally, I set the baking sheet on the filing cabinet by my kitchen window and just let it sit for two days. The salt dehydrates the garlic and herbs for you, while filling your kitchen with the smell of totally effortless deliciousness. Some people think it will be good on roast chicken; I say popcorn. Now what will people get me for my birthday?”
To good friends! To vacation! To salt.
A fabled land of farmers, farm shares, fancy (and not so fancy) restaurants, family meals, food projects and more.
cooking my way through my dissertation, one egg at a time
Fearless cooking from a tiny NYC kitchen.
food, in so many words.
Recreating the famous dishes of famous writers. Part recipe blog, part historical discussion, entirely unabashed love of books.
Epicurean Adventures from Eugene, Oregon
Celebrating the Harvest
Modern Iranian aka Persian Food & Culture Blog - Cuisine, Recipes, Stories , Photos, Pictures, DIY tutorials
Exploring Culinary Traditions of Africa, African America and the African Diaspora
food, in so many words.
food, in so many words.
food, in so many words.
Food-Stories-Recipes-Love
WordPress.com is the best place for your personal blog or business site.