 afternoon light…
Photo Friday
Reply

afternoon light…

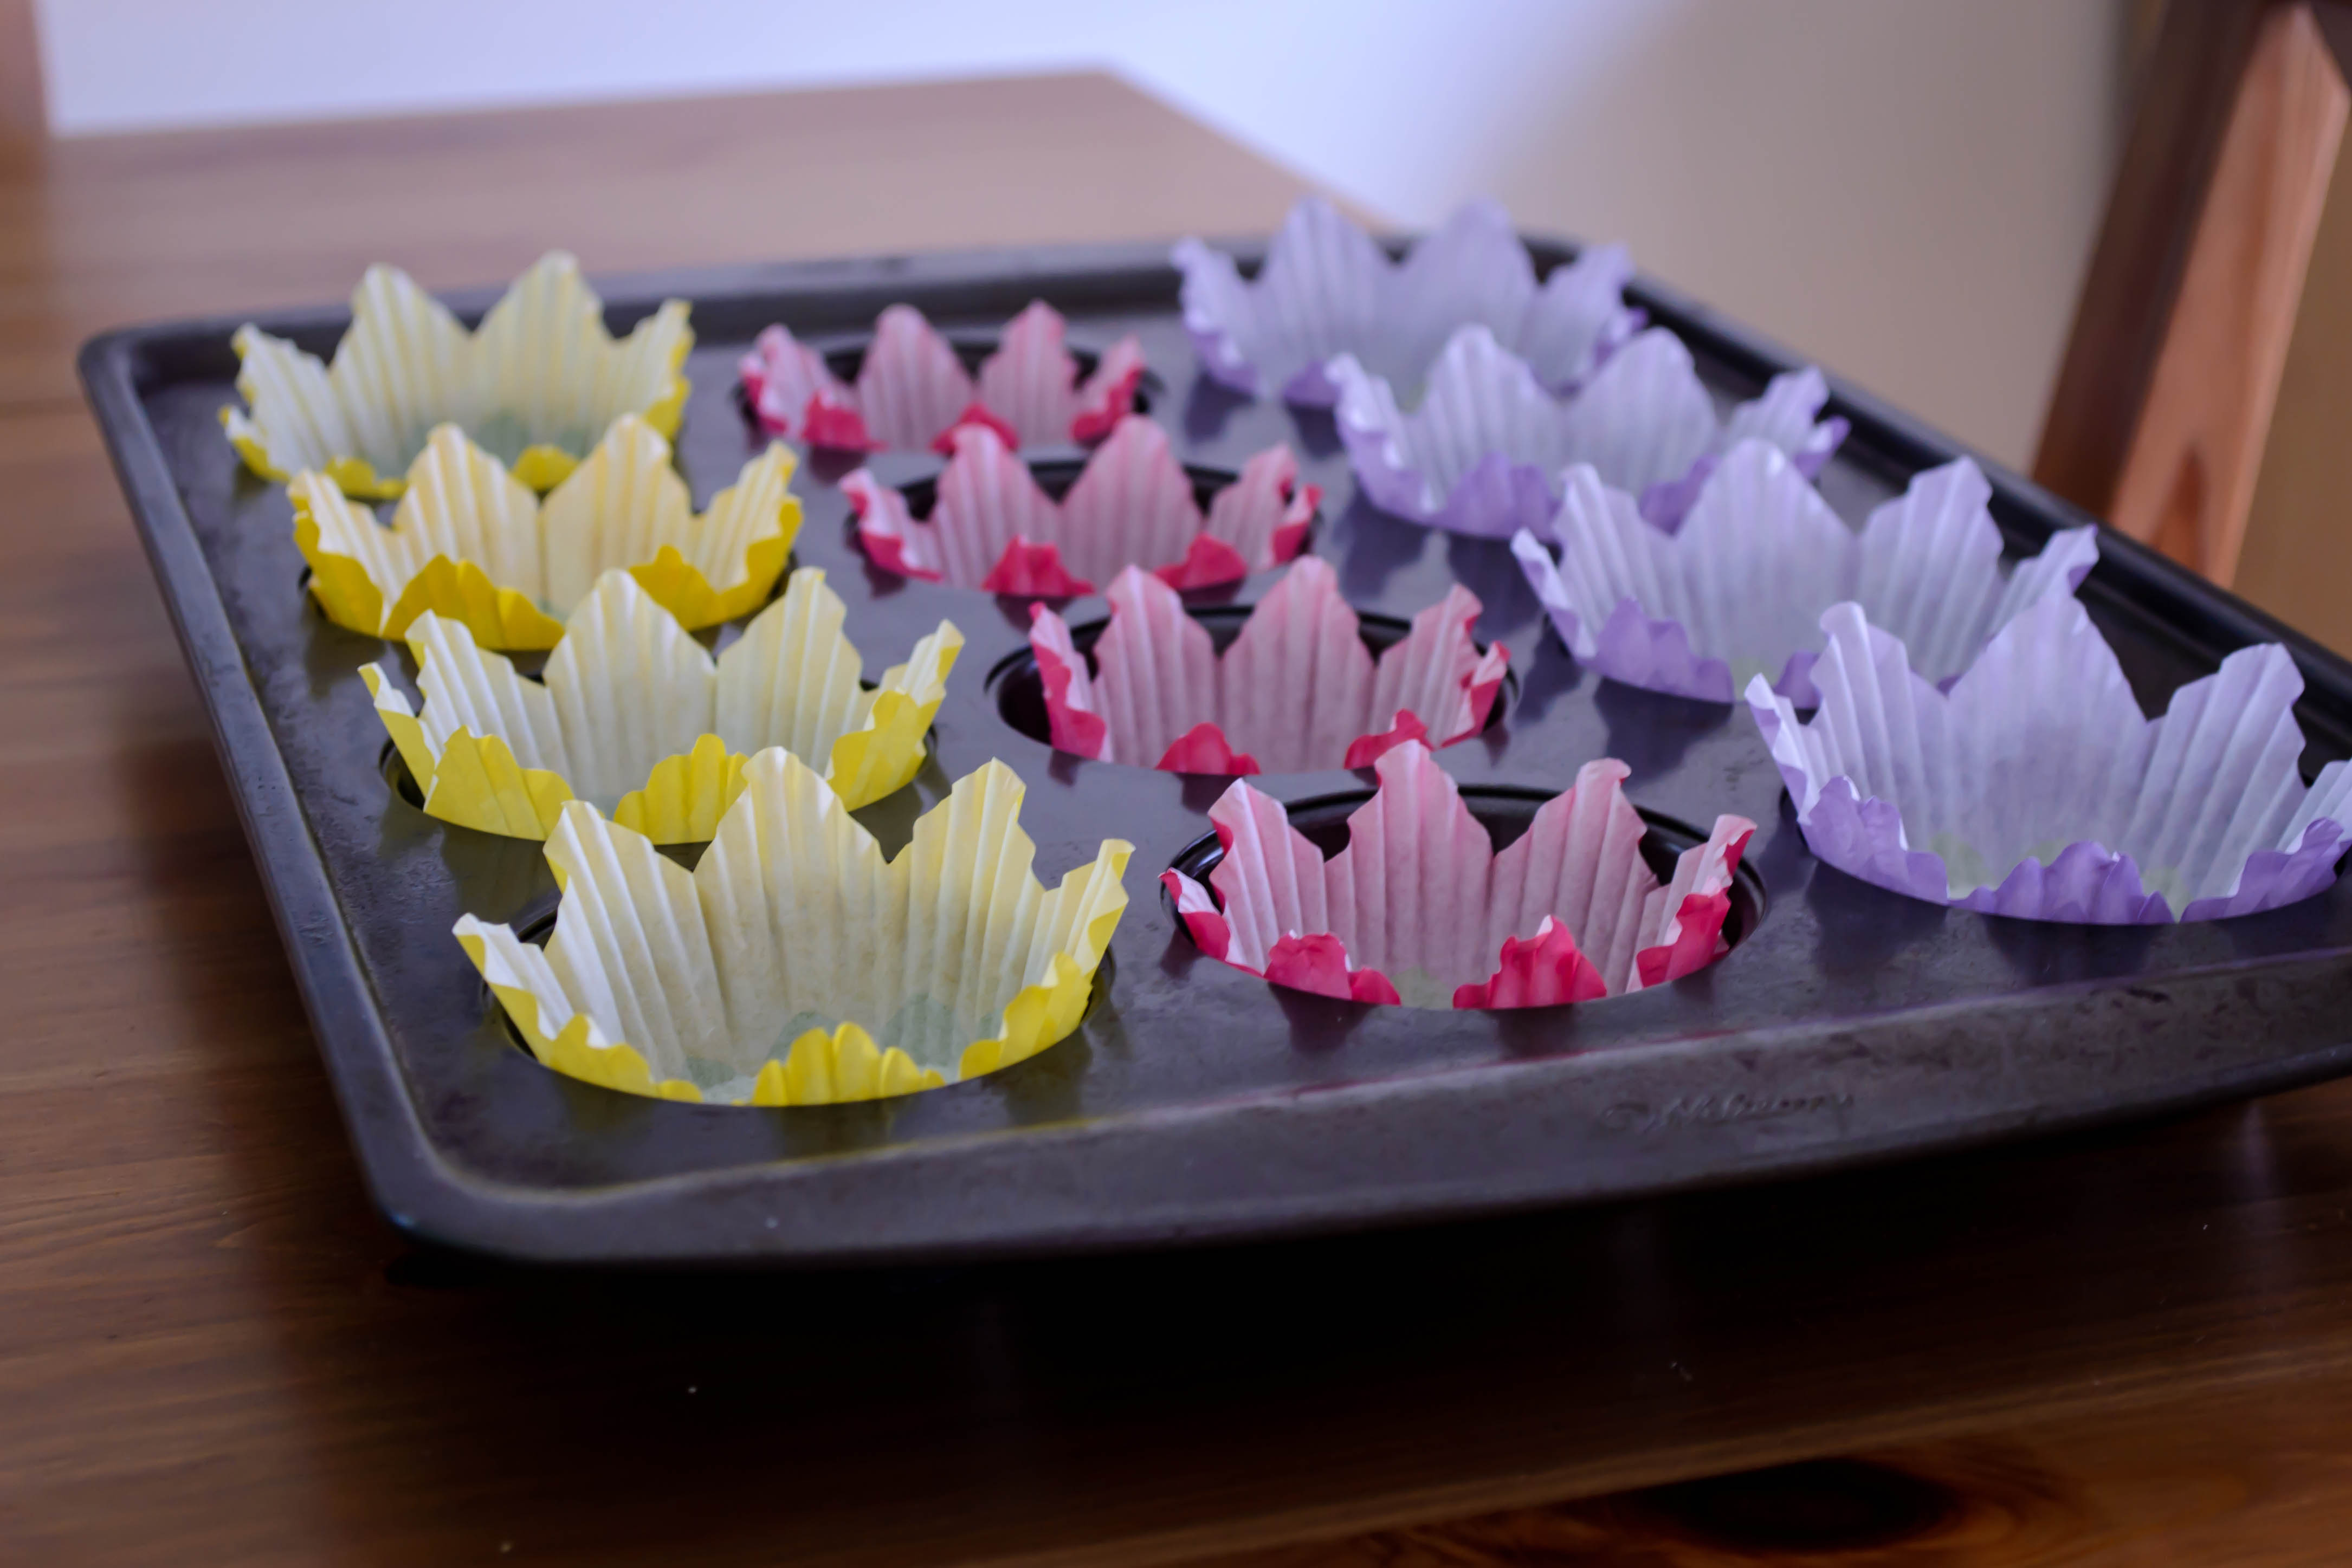
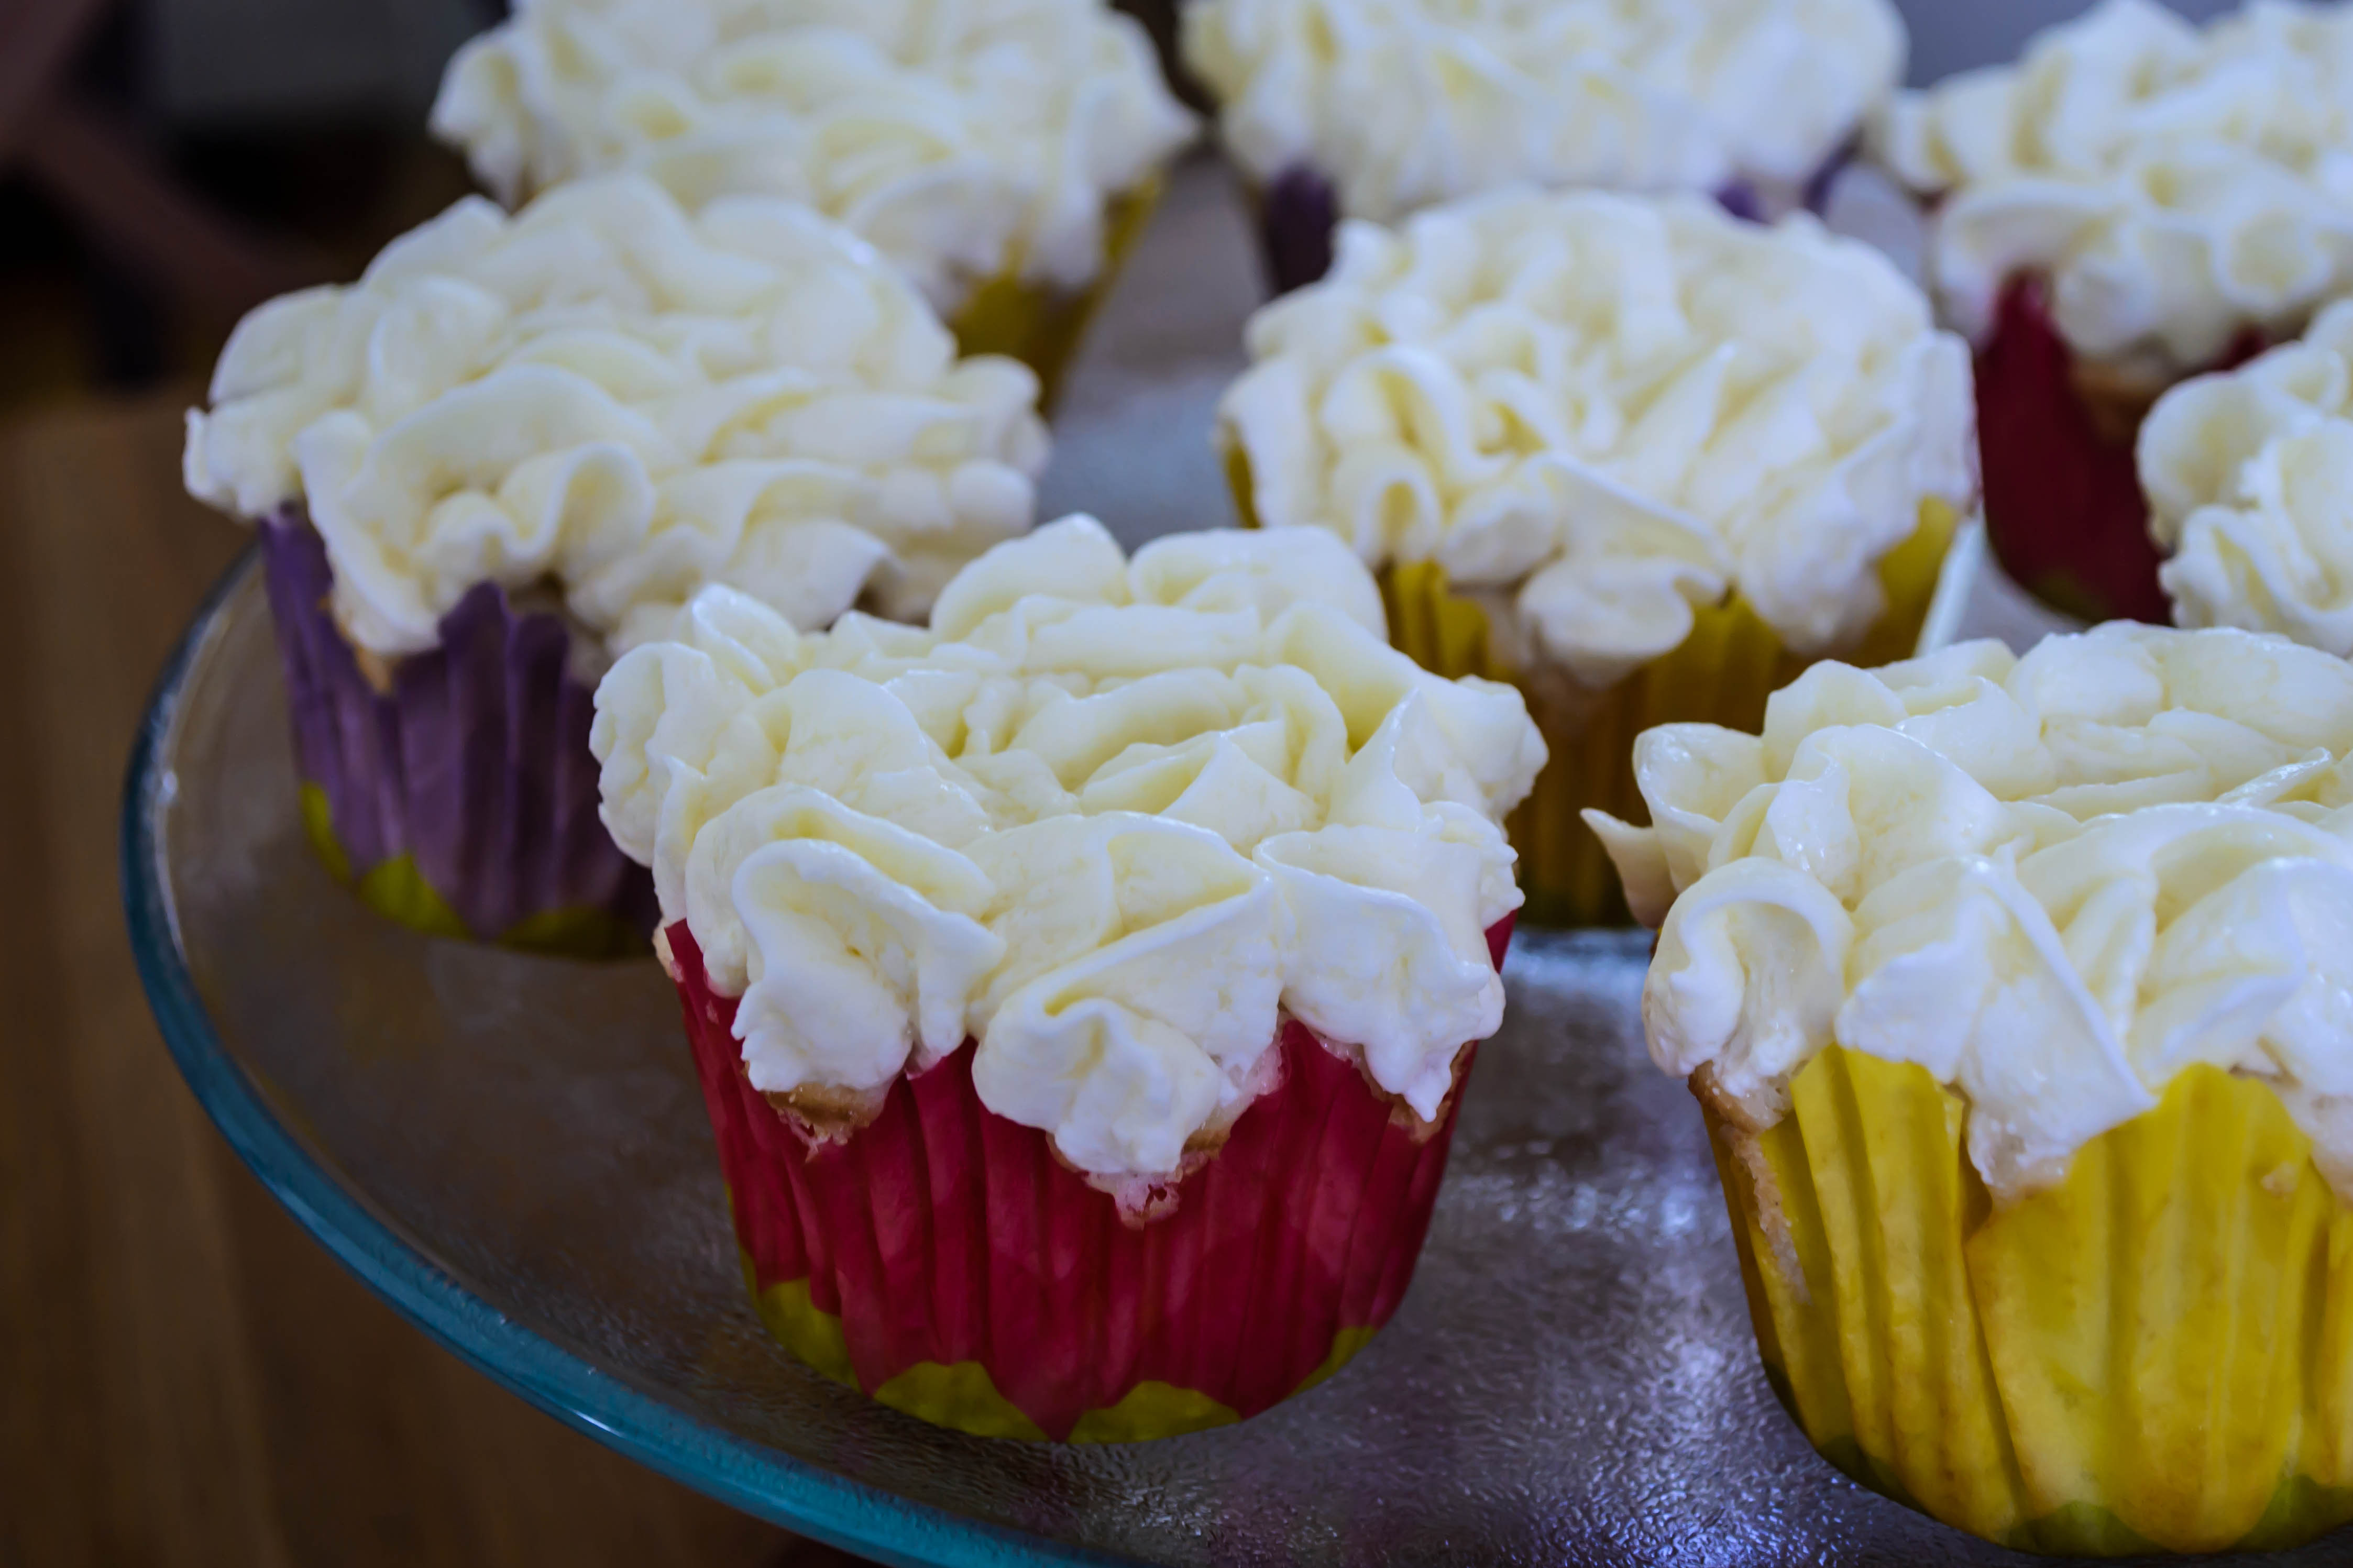
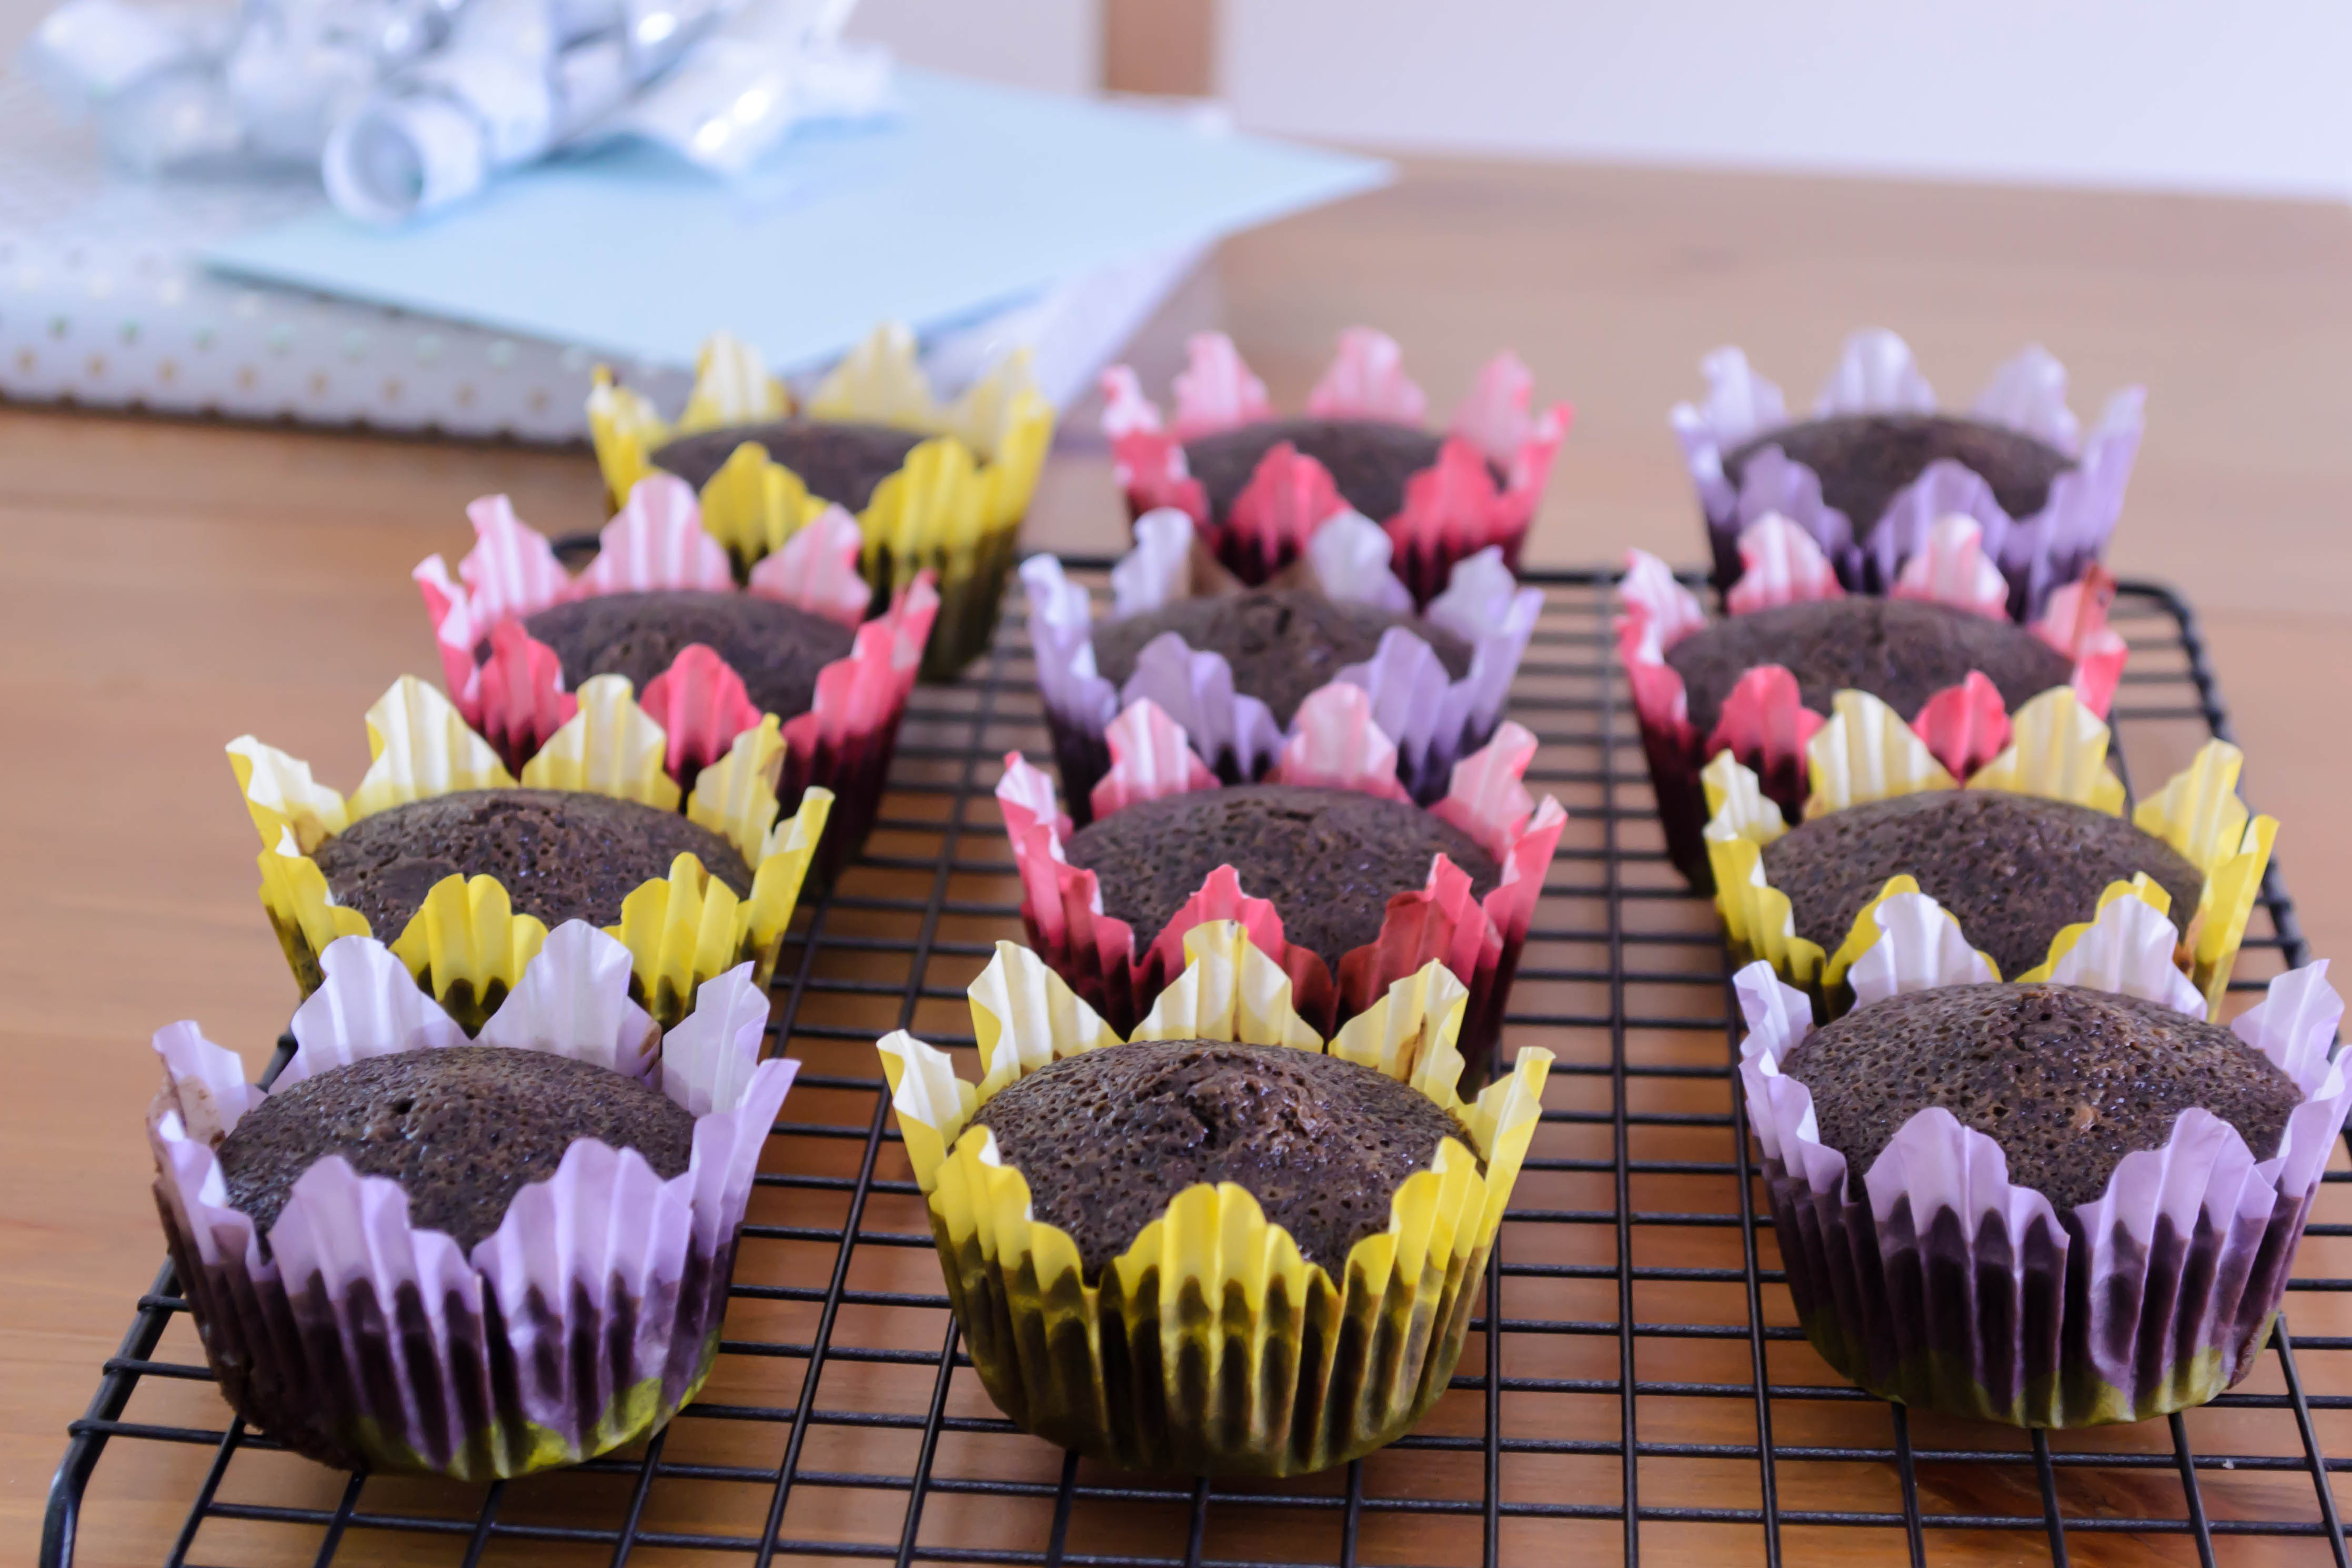 Last week I made cupcakes for a baby shower, and tried out this petal piping tutorial from Savory Sweet Life.
 I’d say they came out pretty well!
 Let’s see that from another angle.
 And a close-up?

 I didn’t learn to drive until I was 17, an oddity at my high school where brand new cars to fit their brand new drivers started showing up during junior year. When I did learn, however, my dad took me on biweekly drives through Orange County, making a wide circle that climbed a gradual hill and then descended steeply toward, much to my dismay, a stoplight that was always red. One week I vividly remember Smash Mouth’s “Walkin’ on the Sun” playing as I coasted down the hill, hoping to hit the brakes soon enough to show I was paying attention, but not wanting the downhill glide to end. Another week, I remember stopping at a bagel shop just before getting to that glorious hill, and then, poised nervously at the parking lot exit, fumbling for the gas pedal instead of the brake. You only make that mistake once.
 But really, the bagel shop is the important part here. My parents moved a lot when I was a kid, and one of the most important components about making a new city “home” was finding a good bagel place. This meant they were always hole-in-the-wall, never big names. This one in particular, though it was a bit of a drive from our house, was special in that it carried a treat I’d never had before: a bialy.
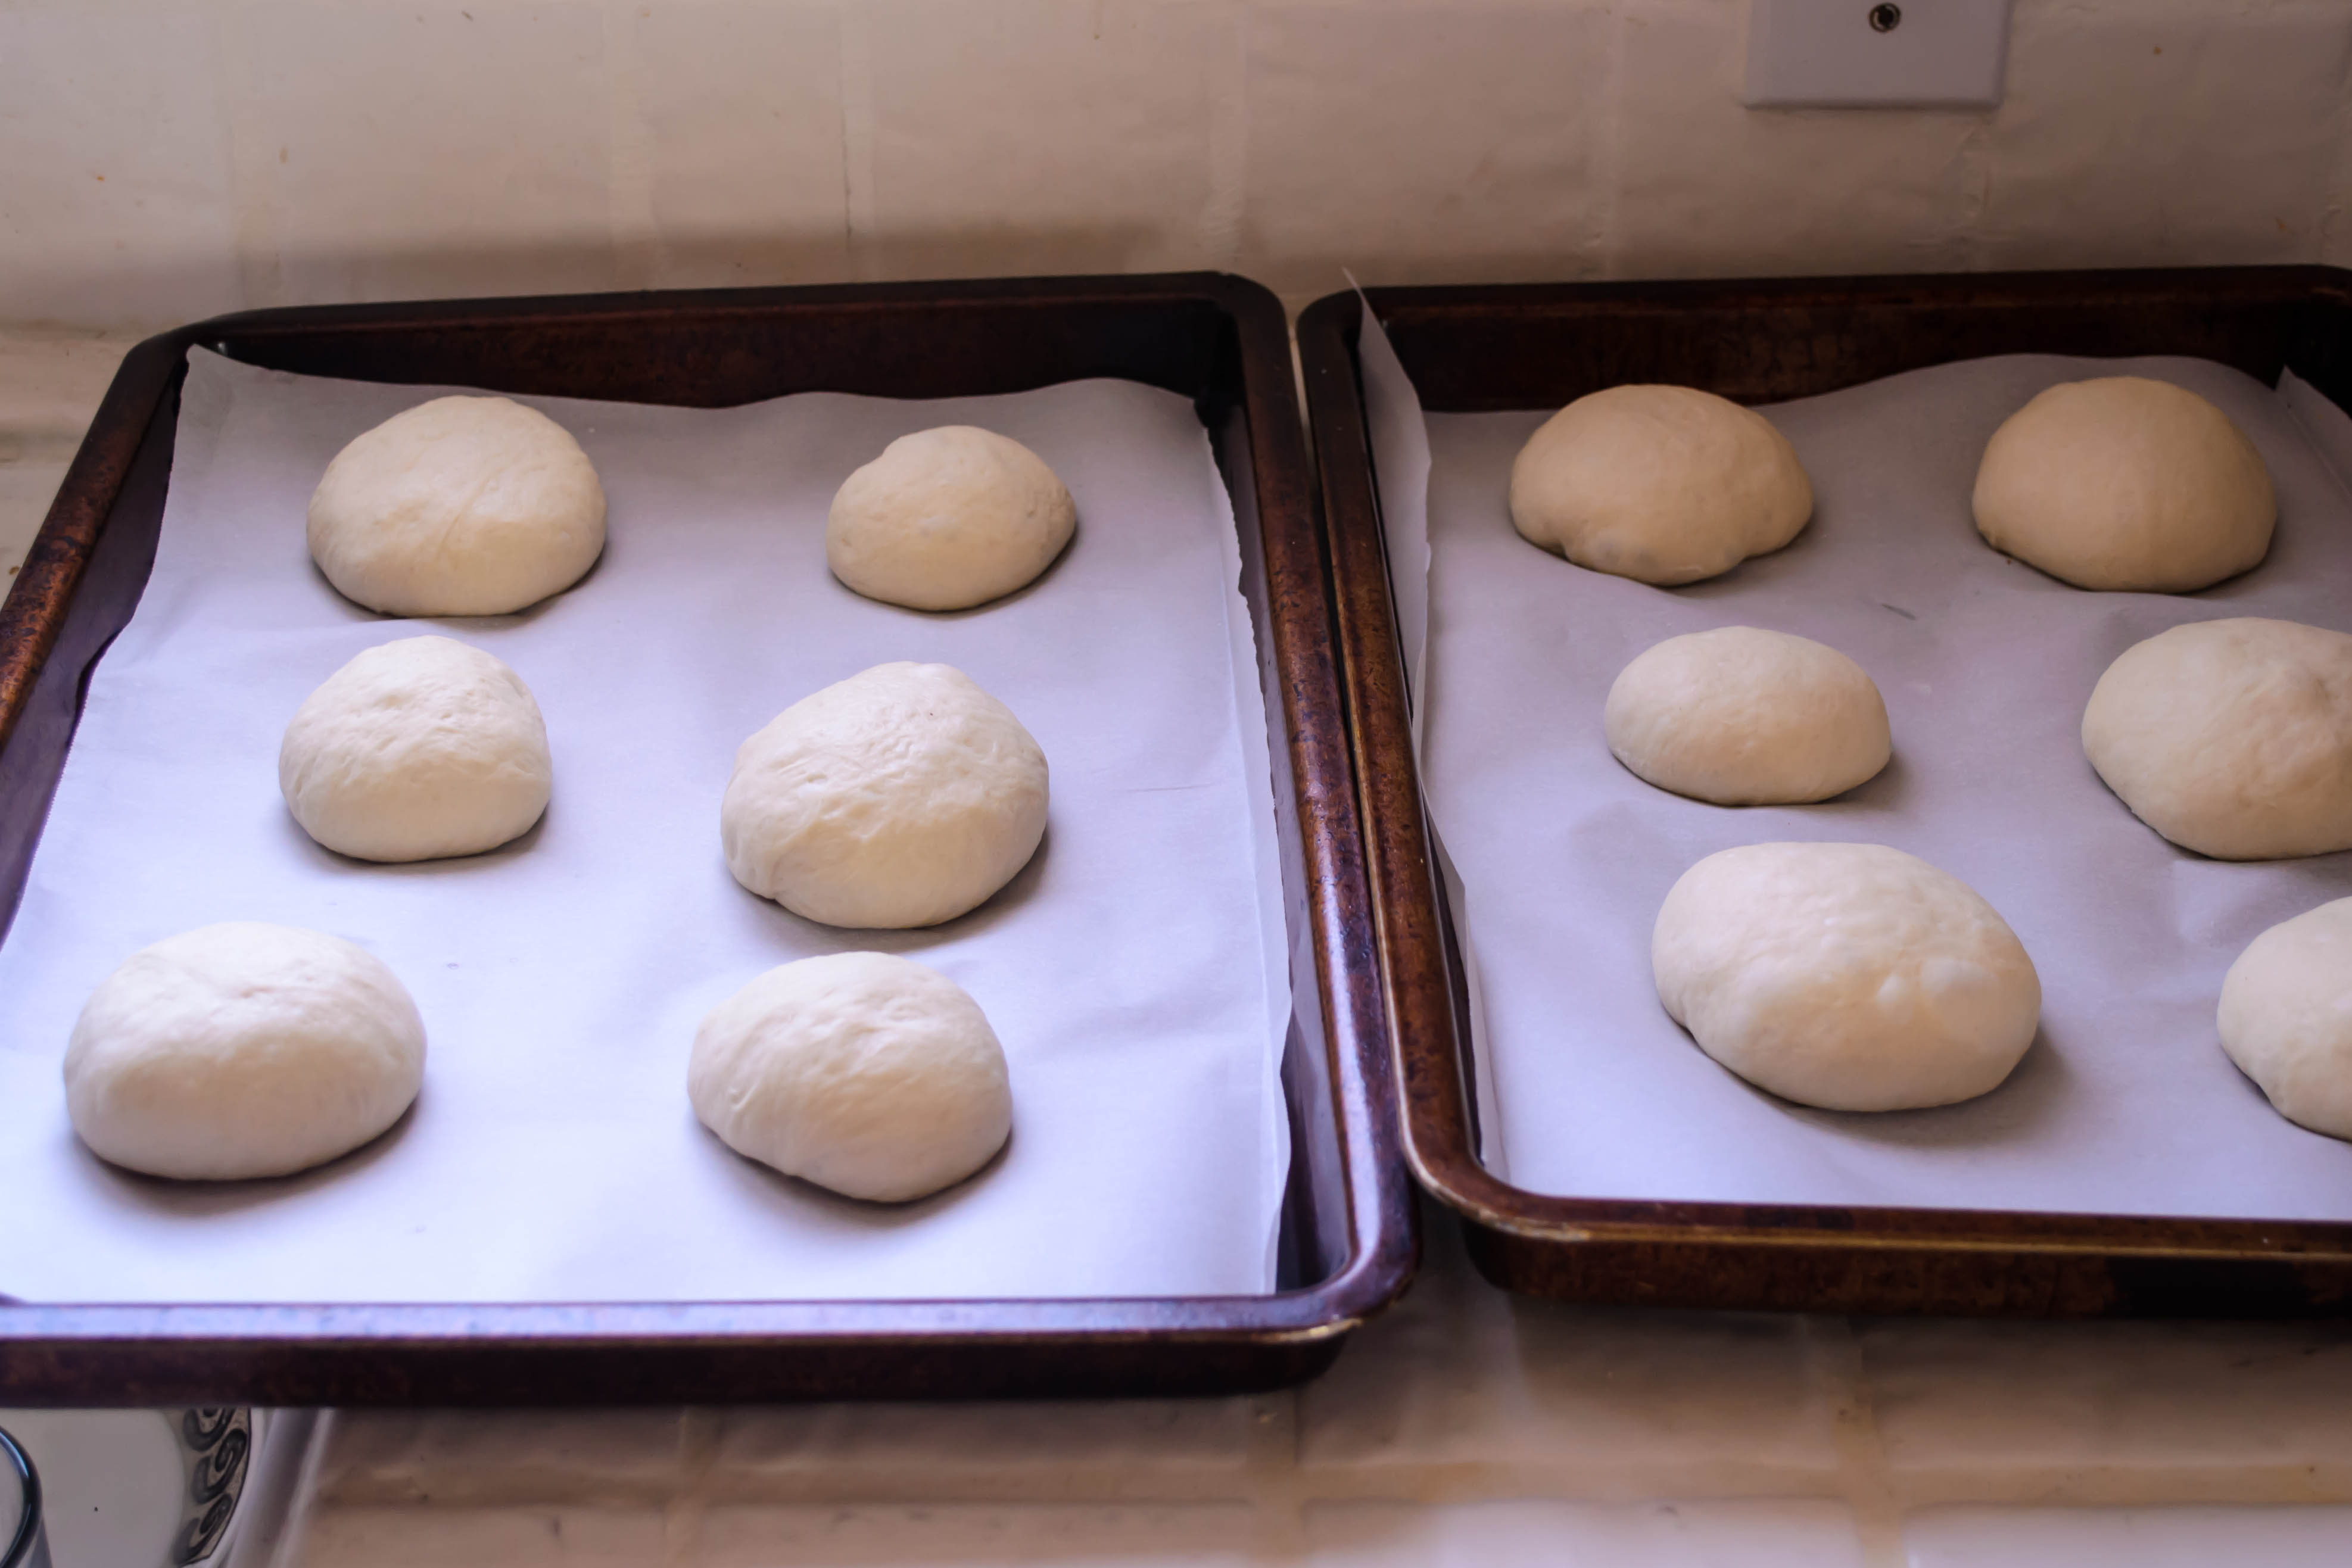
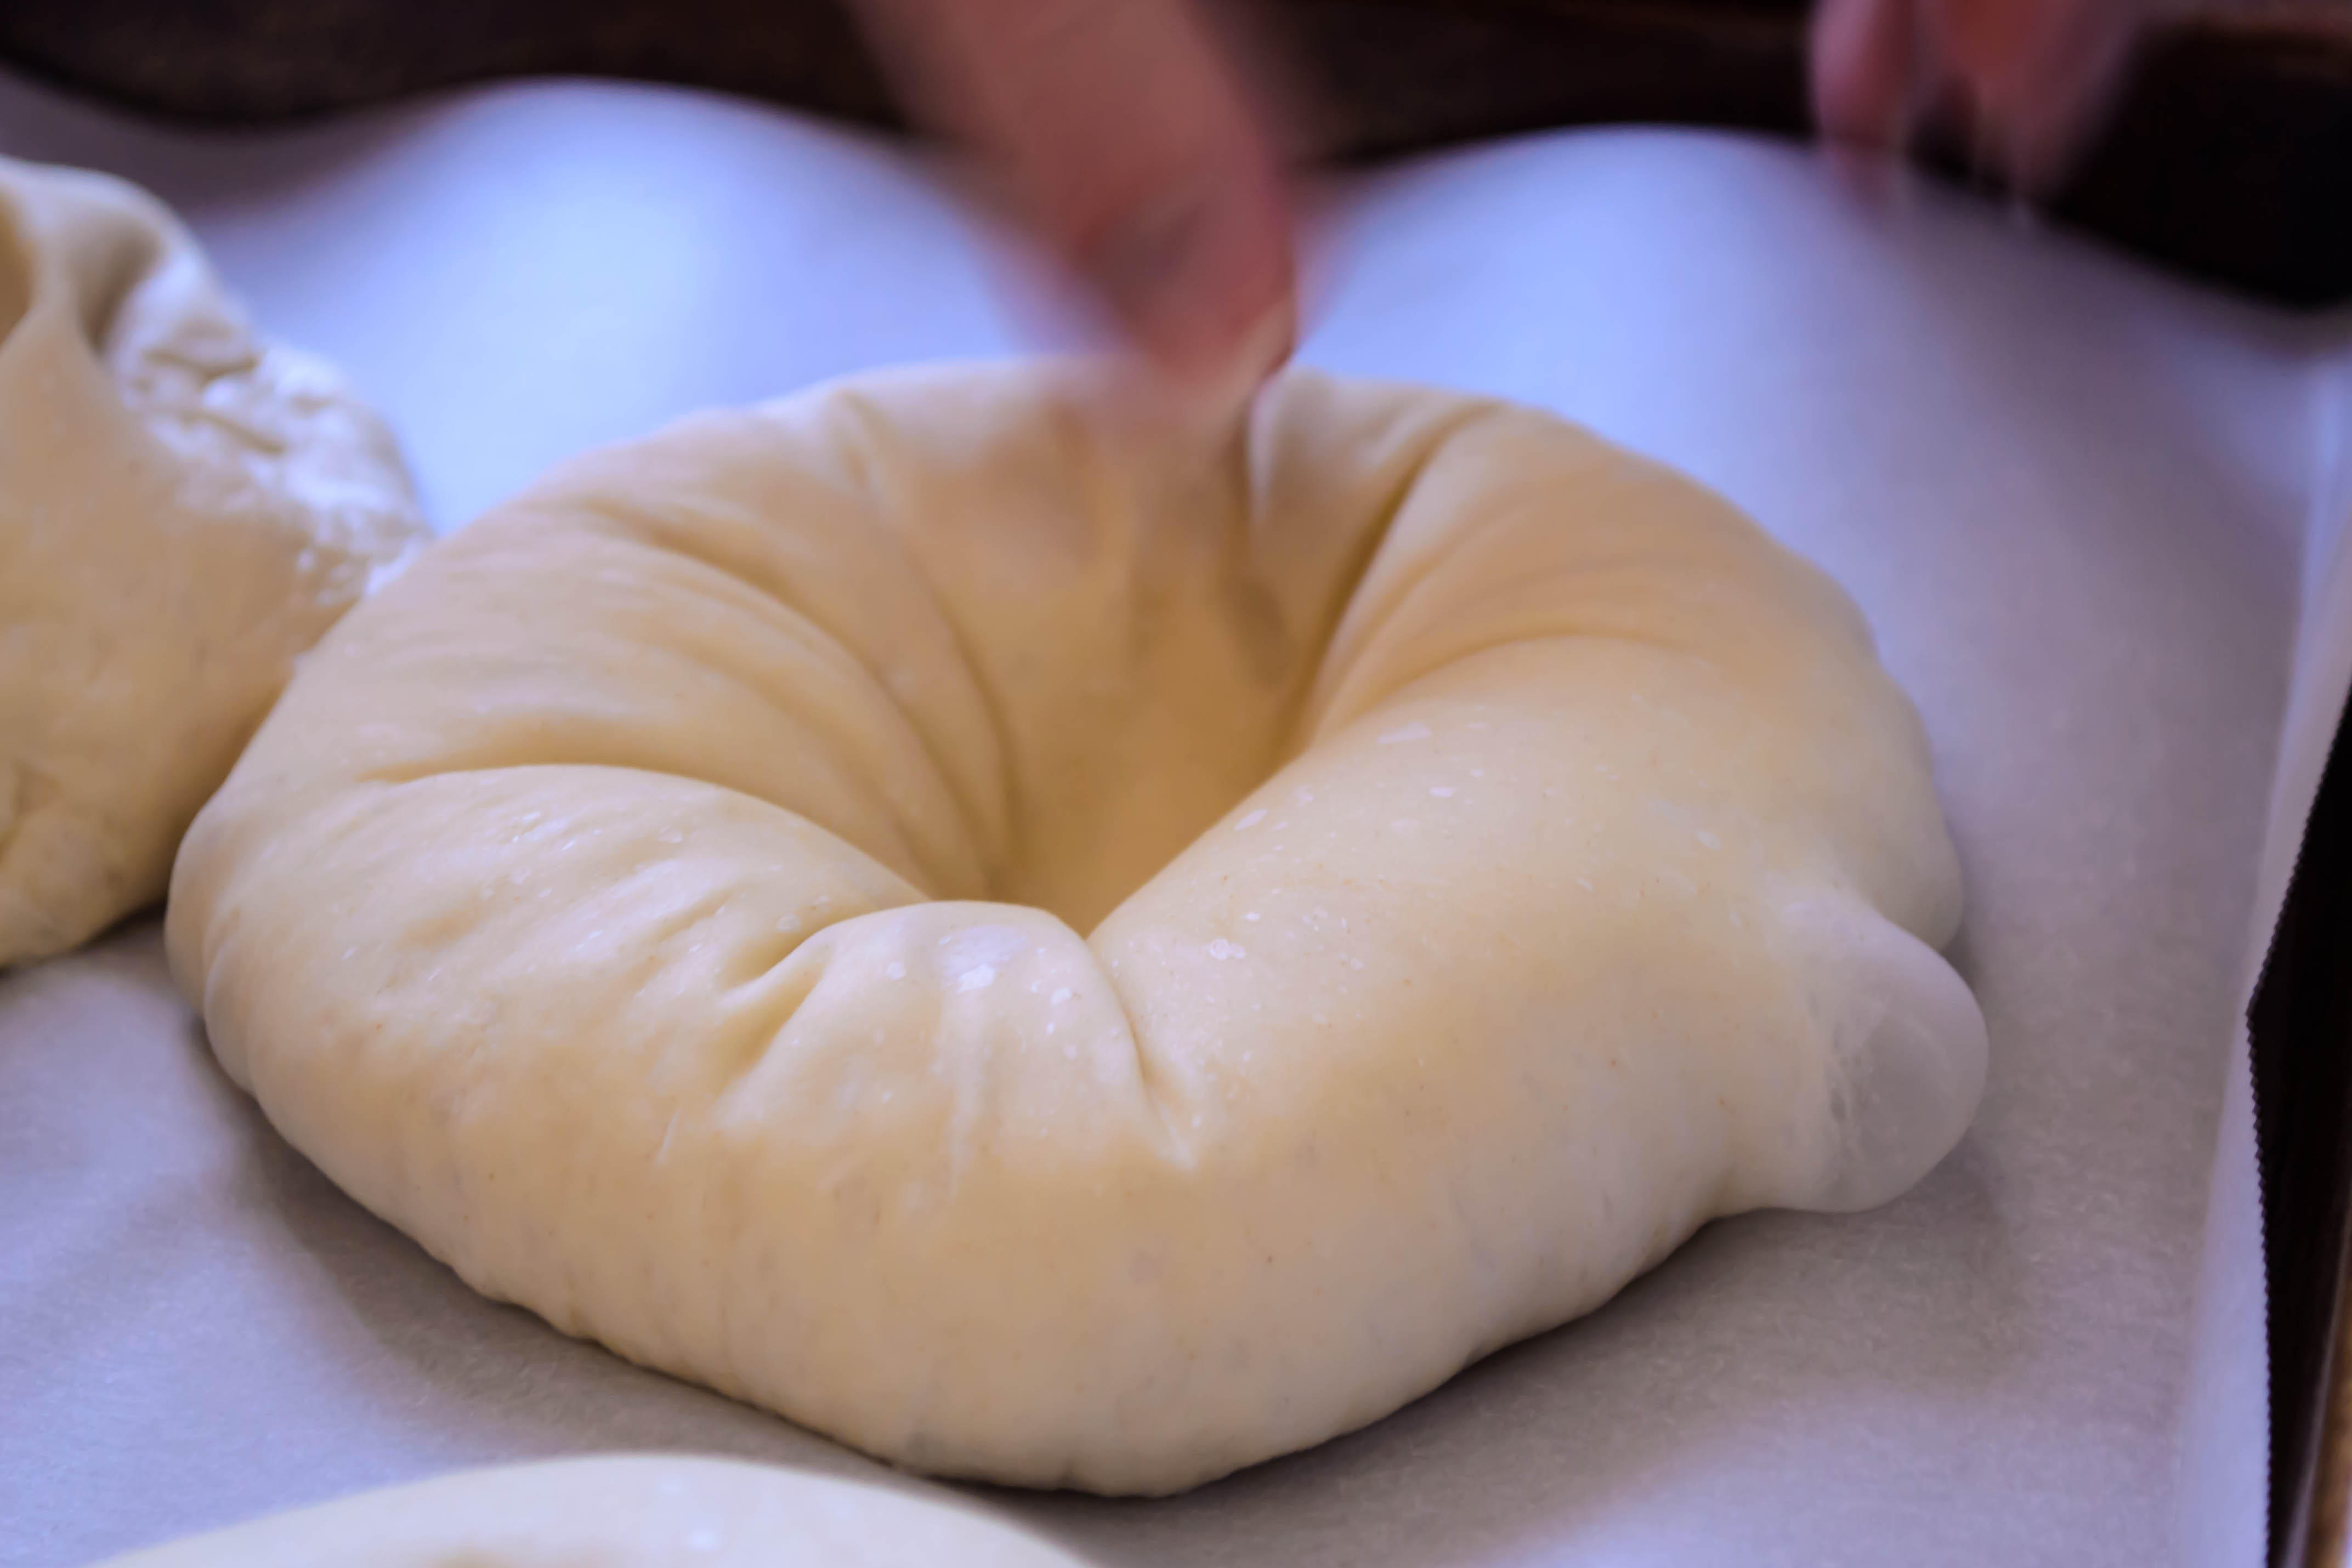
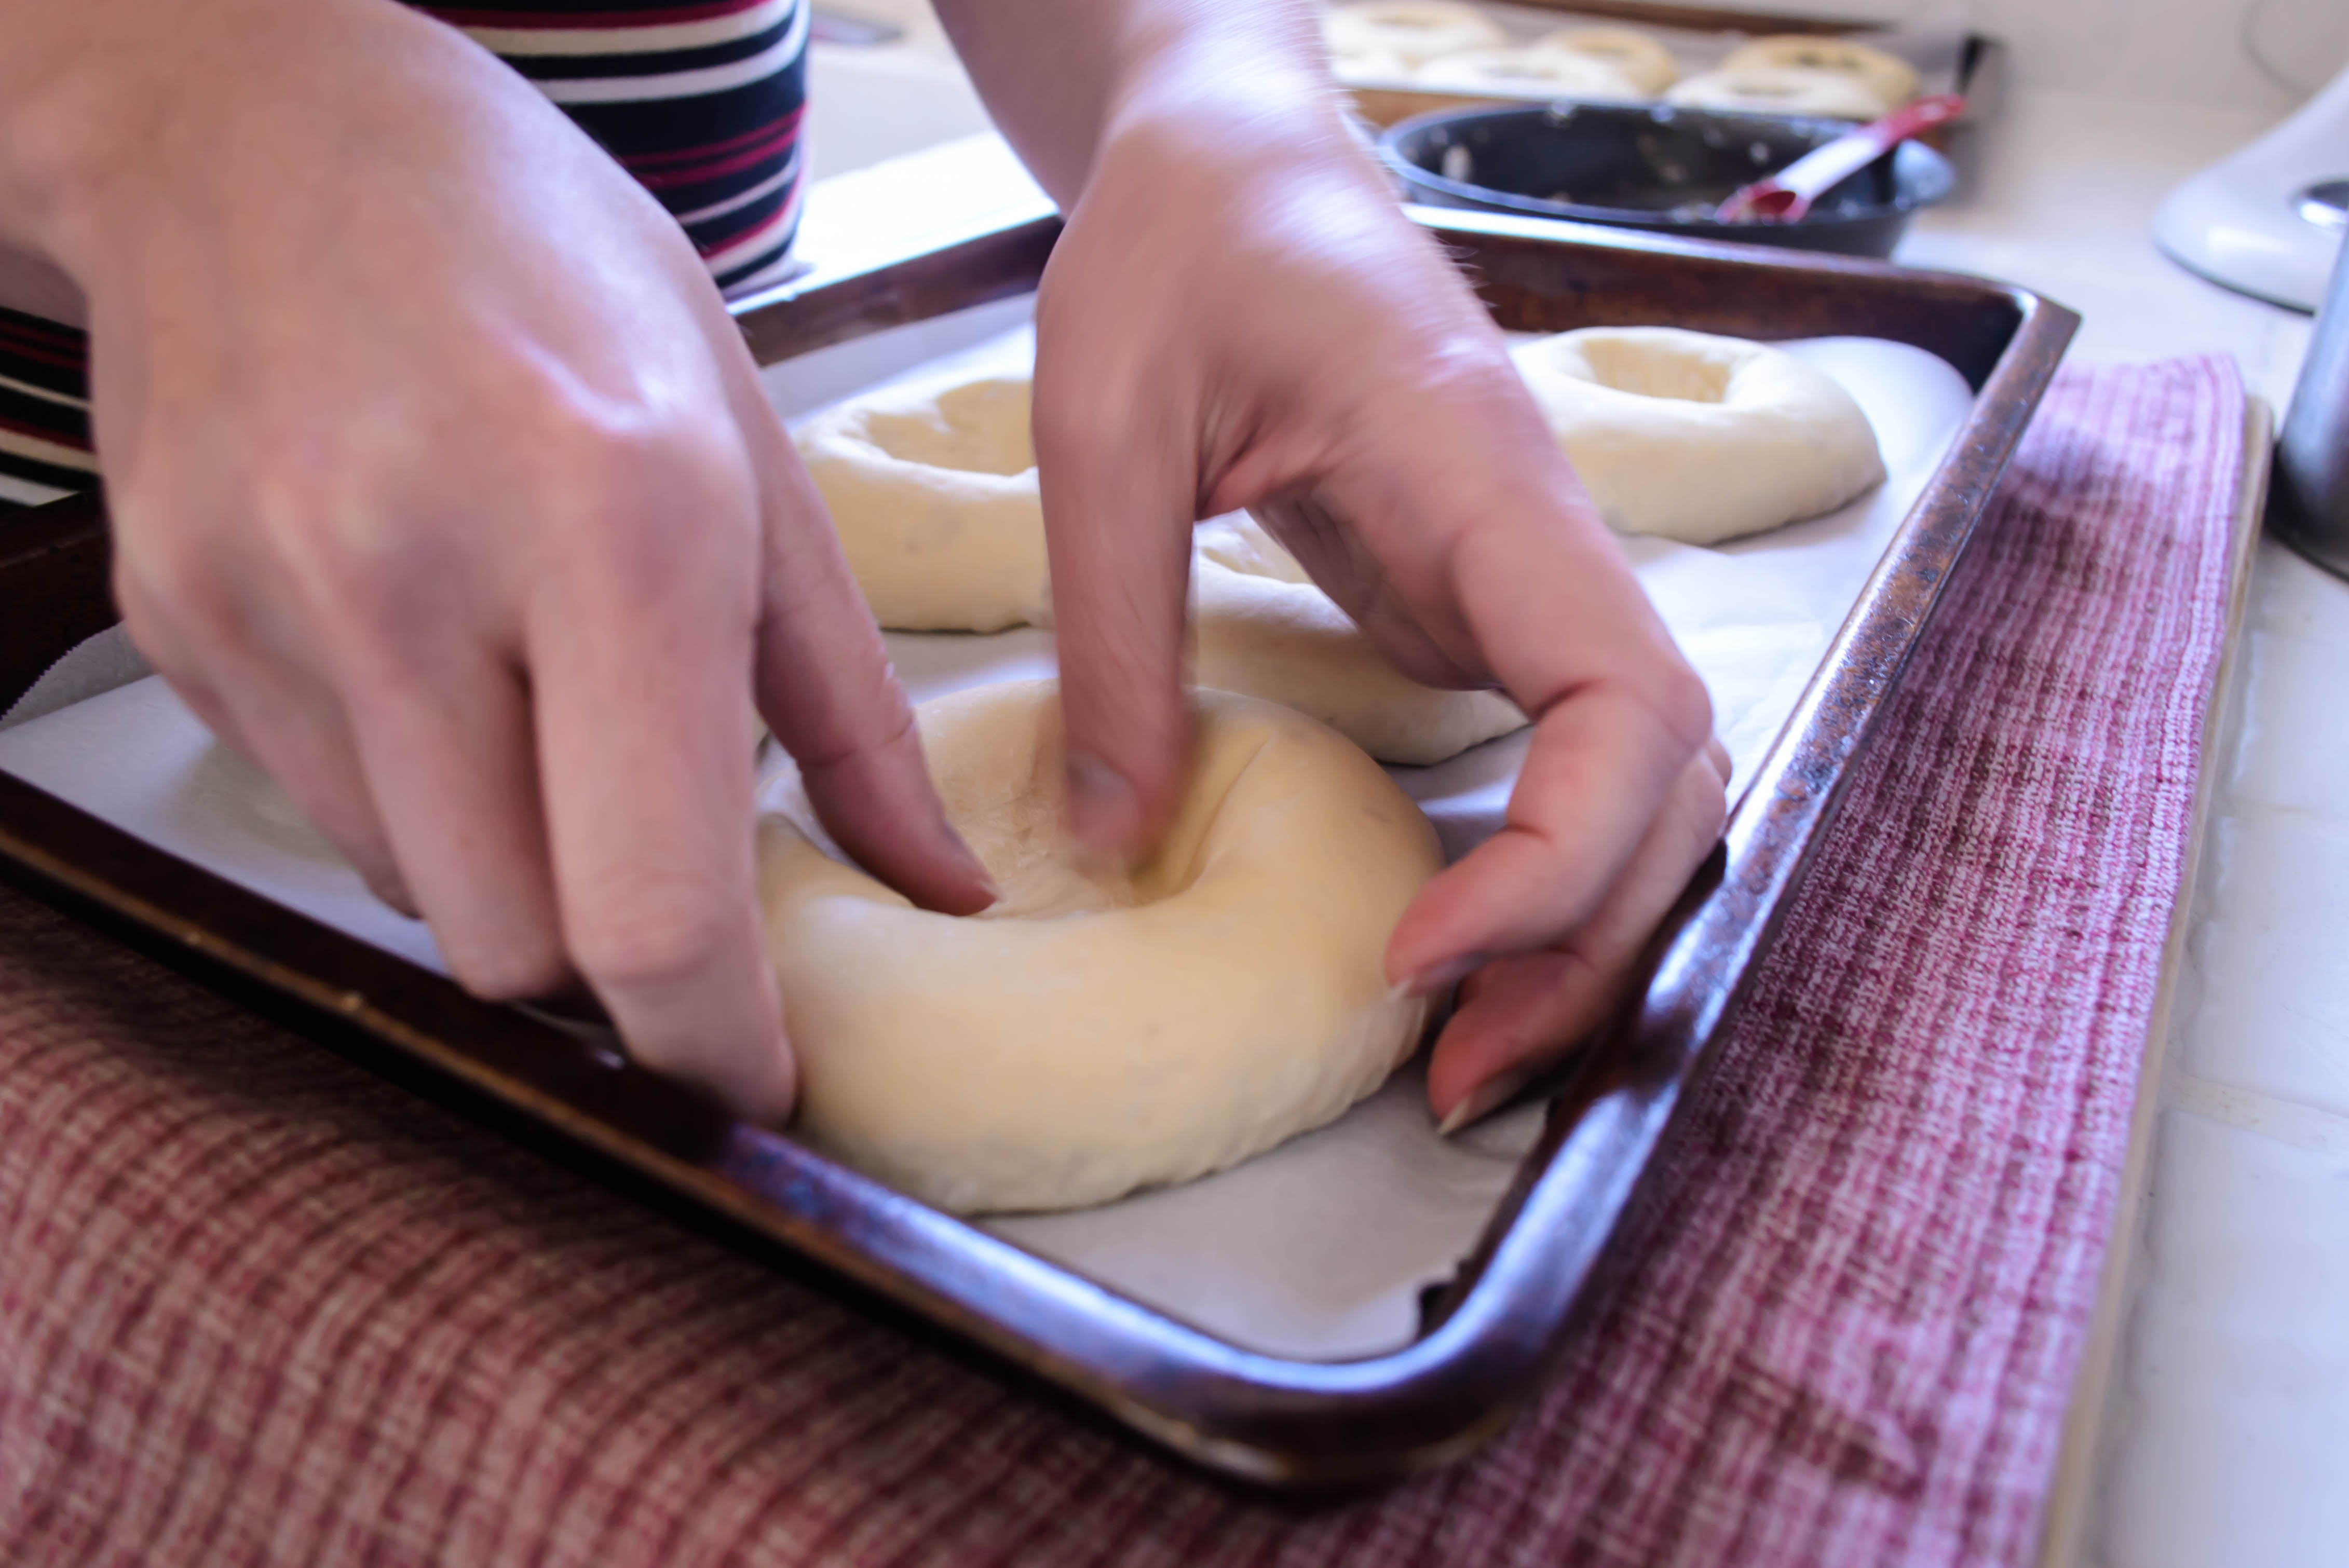
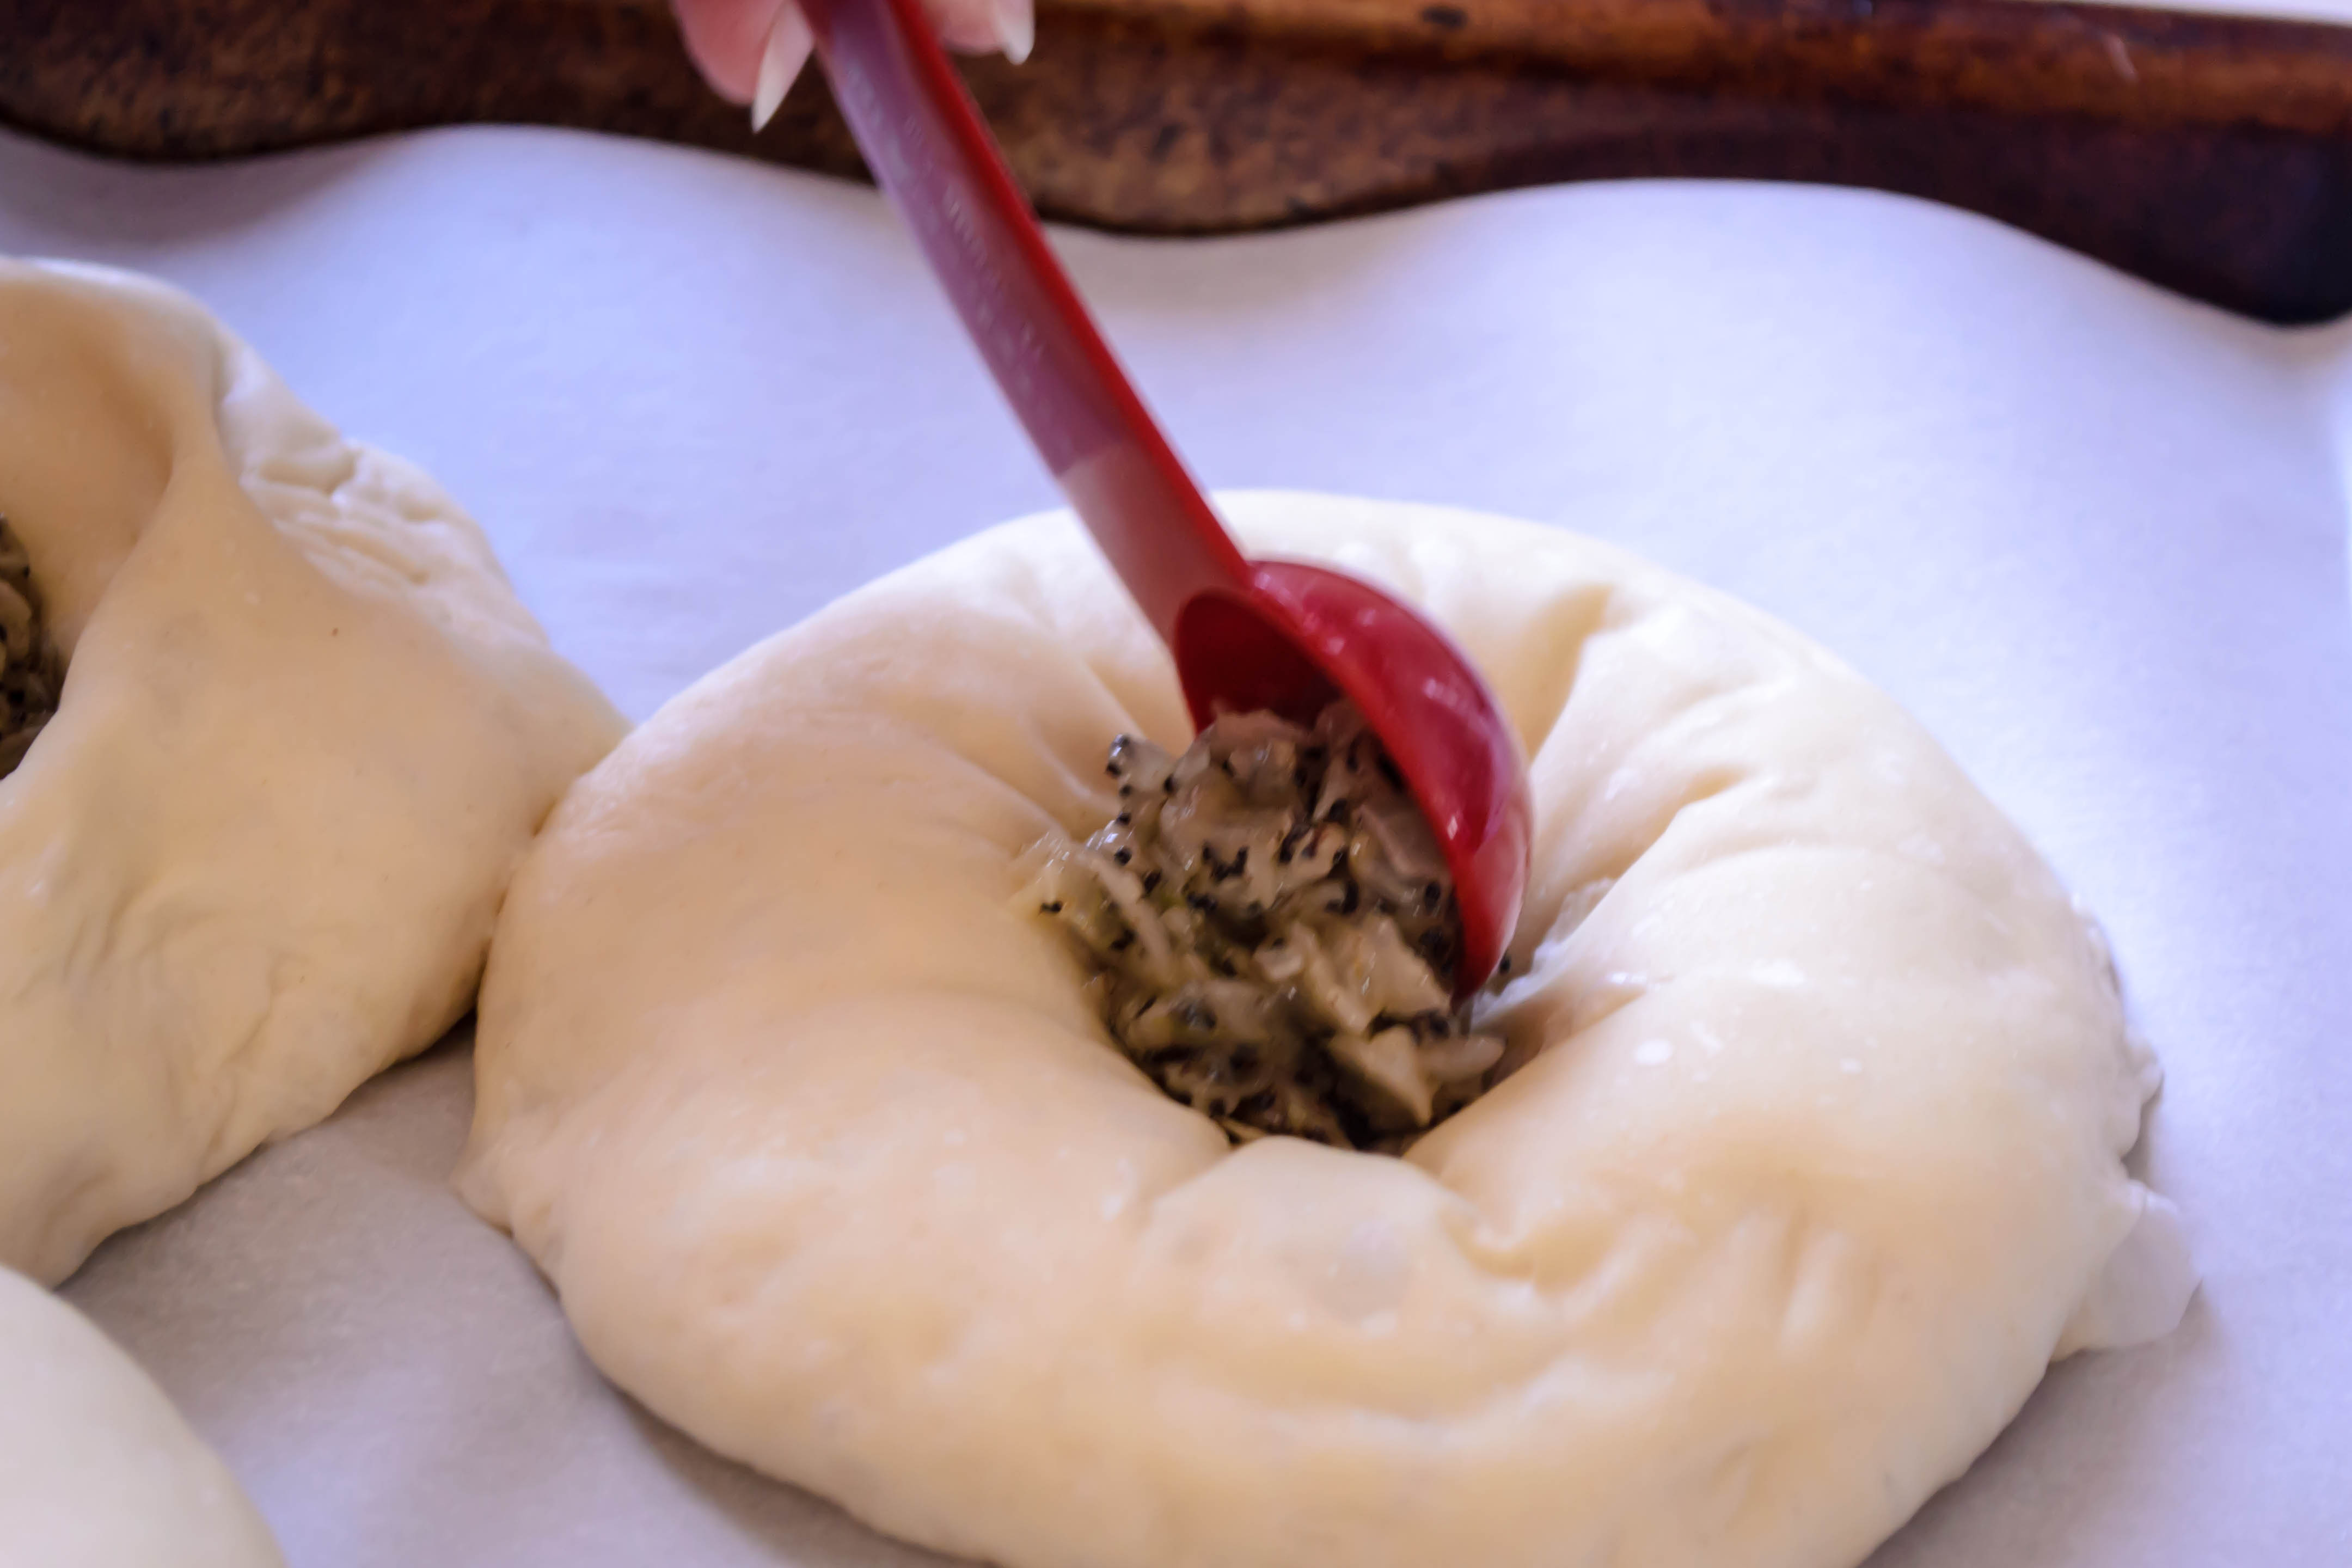
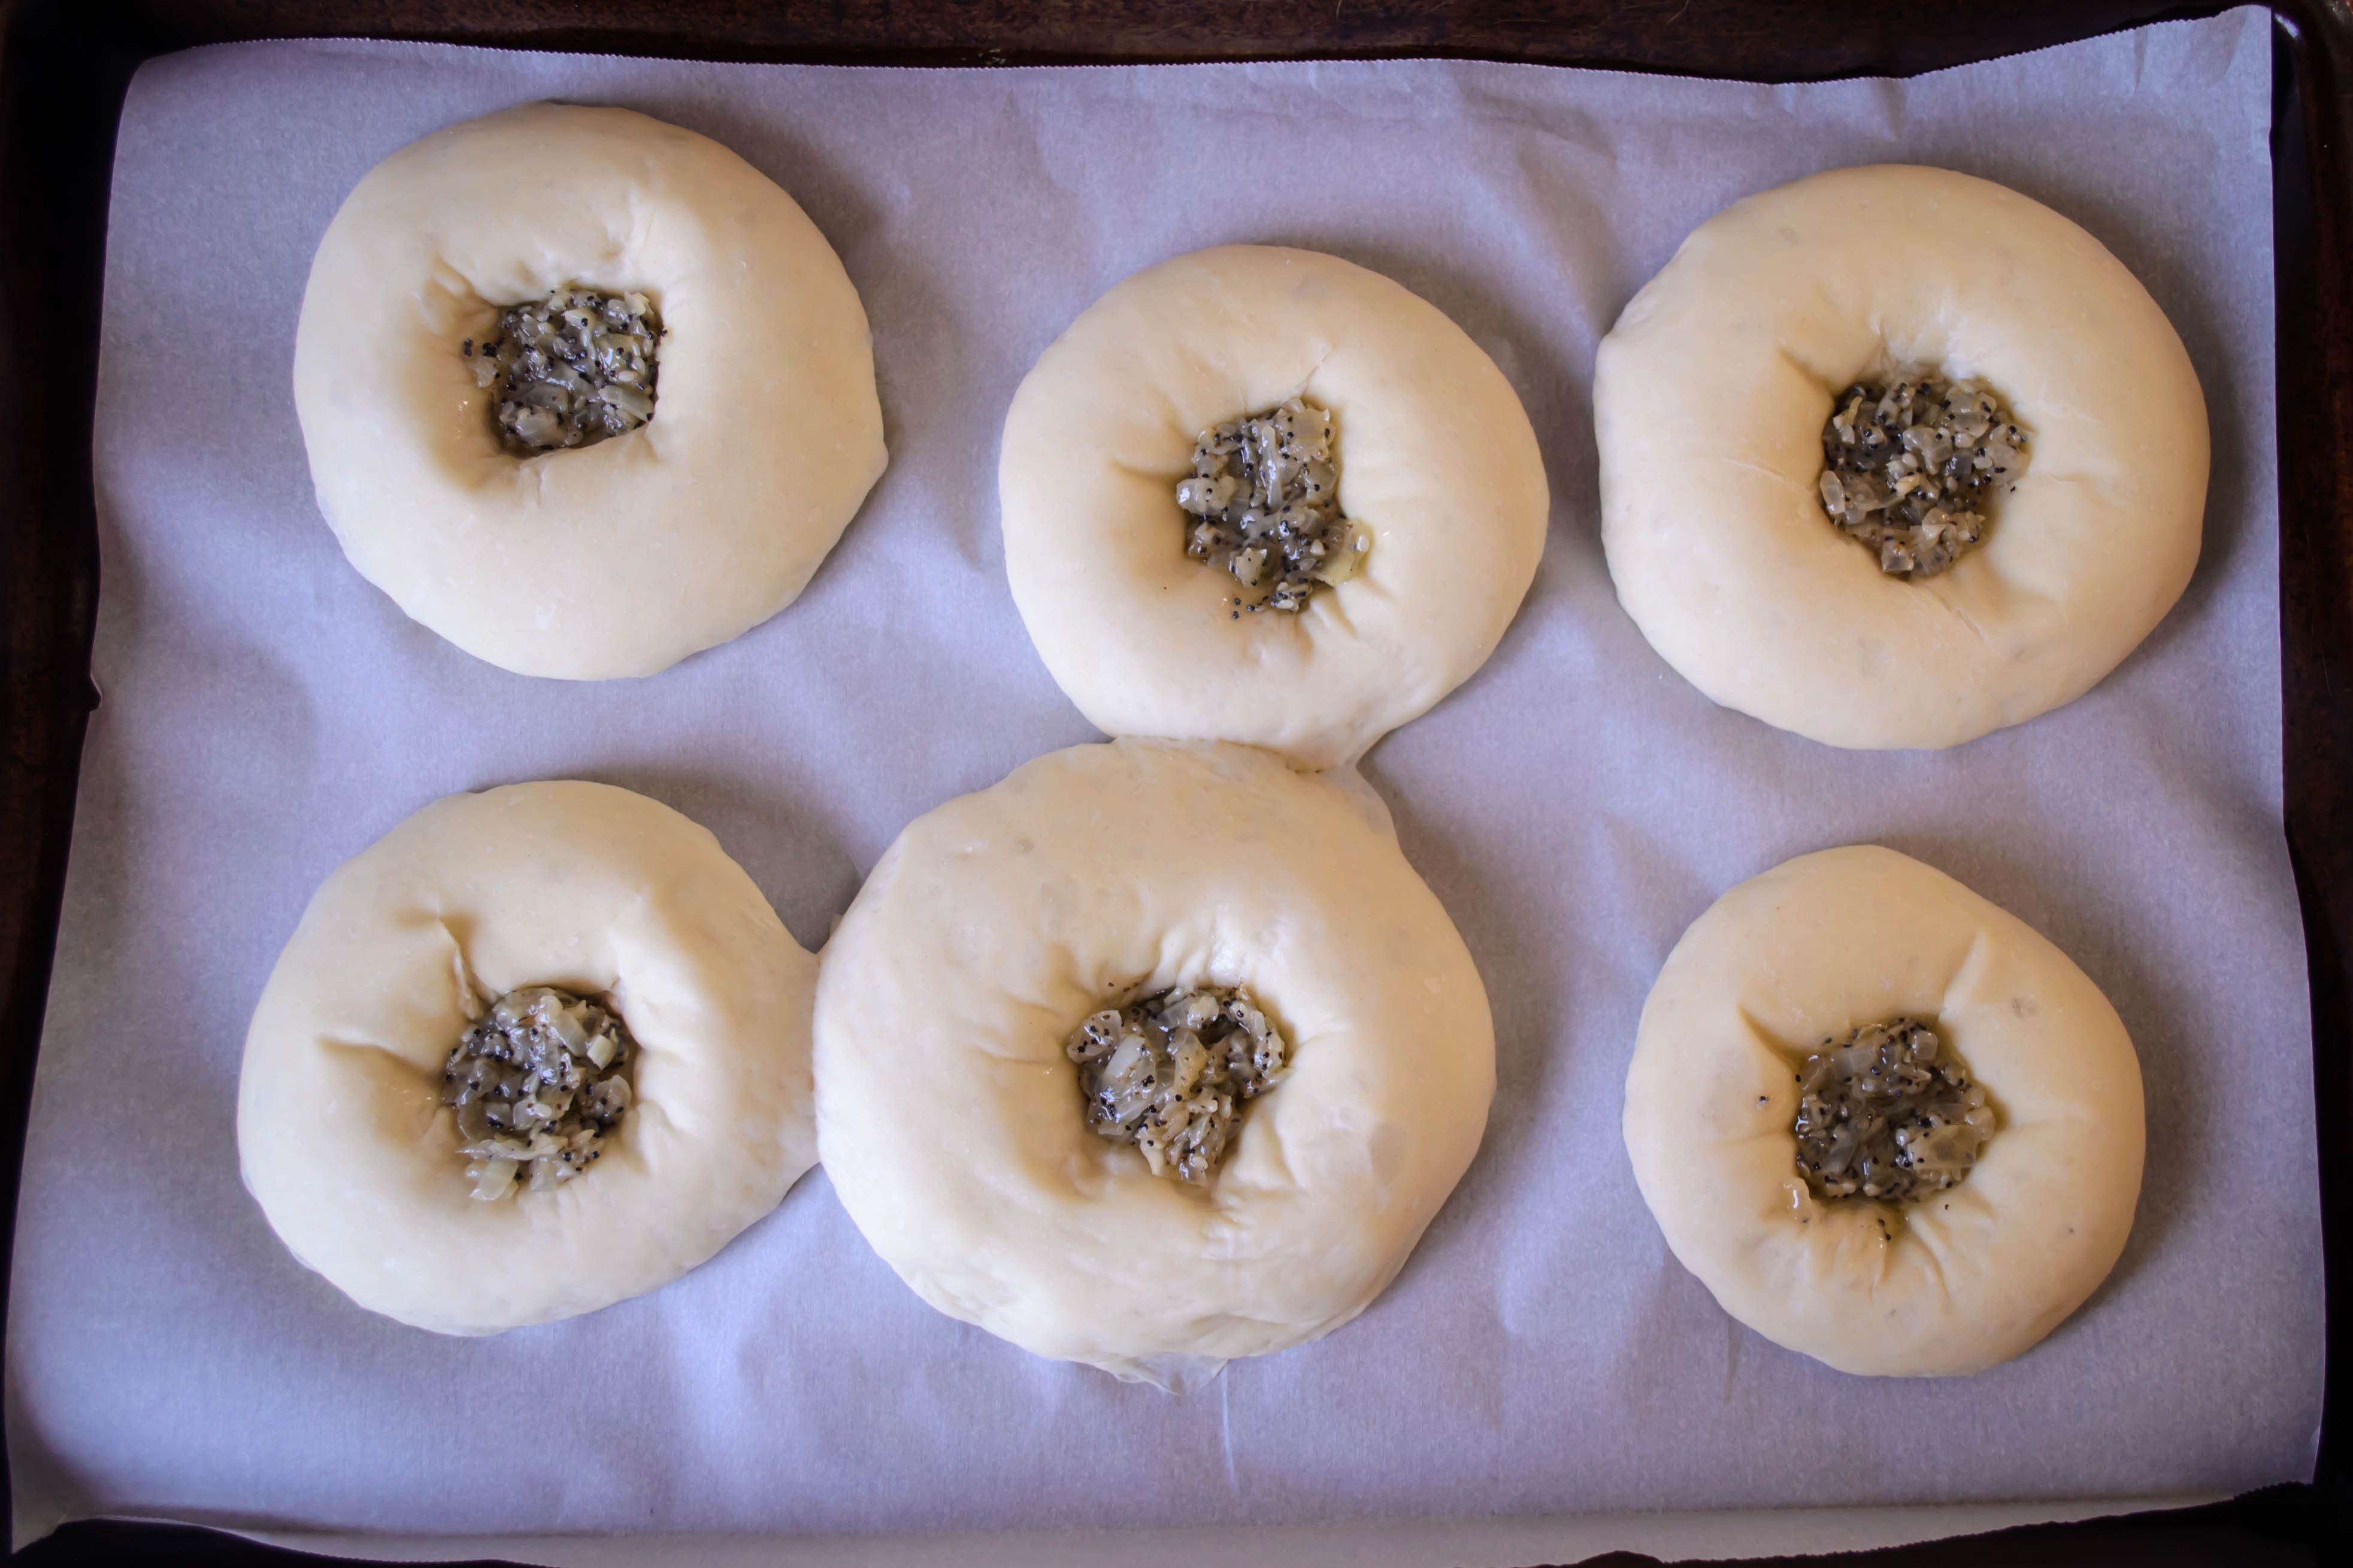
 Bialys, if you’re not in the know (which more than likely means not from the East Coast ), are a bagel relative. A cousin, perhaps. Bagels are special because they are a chewy yeast dough that is boiled before it is baked, and they have that signature hole in the middle. Bialys, though their dough is similar in composition, have a depression rather than a hole in their centers, and that depression is filled with sautéed onions, poppyseeds, and sometimes garlic. Because they contain this little gold mine of flavor, they aren’t boiled, but go straight into the oven for a hot, short bake.
 It is their filling – that little pocket of gooey caramelized onion goodness – that makes them right for this week. The Twelve Loaves challenge for May was baking with onions. I was stumped at first, but when N. suggested onion bagels, this chewy crusty treat flooded back at me with all the power of Proust’s madeleine.
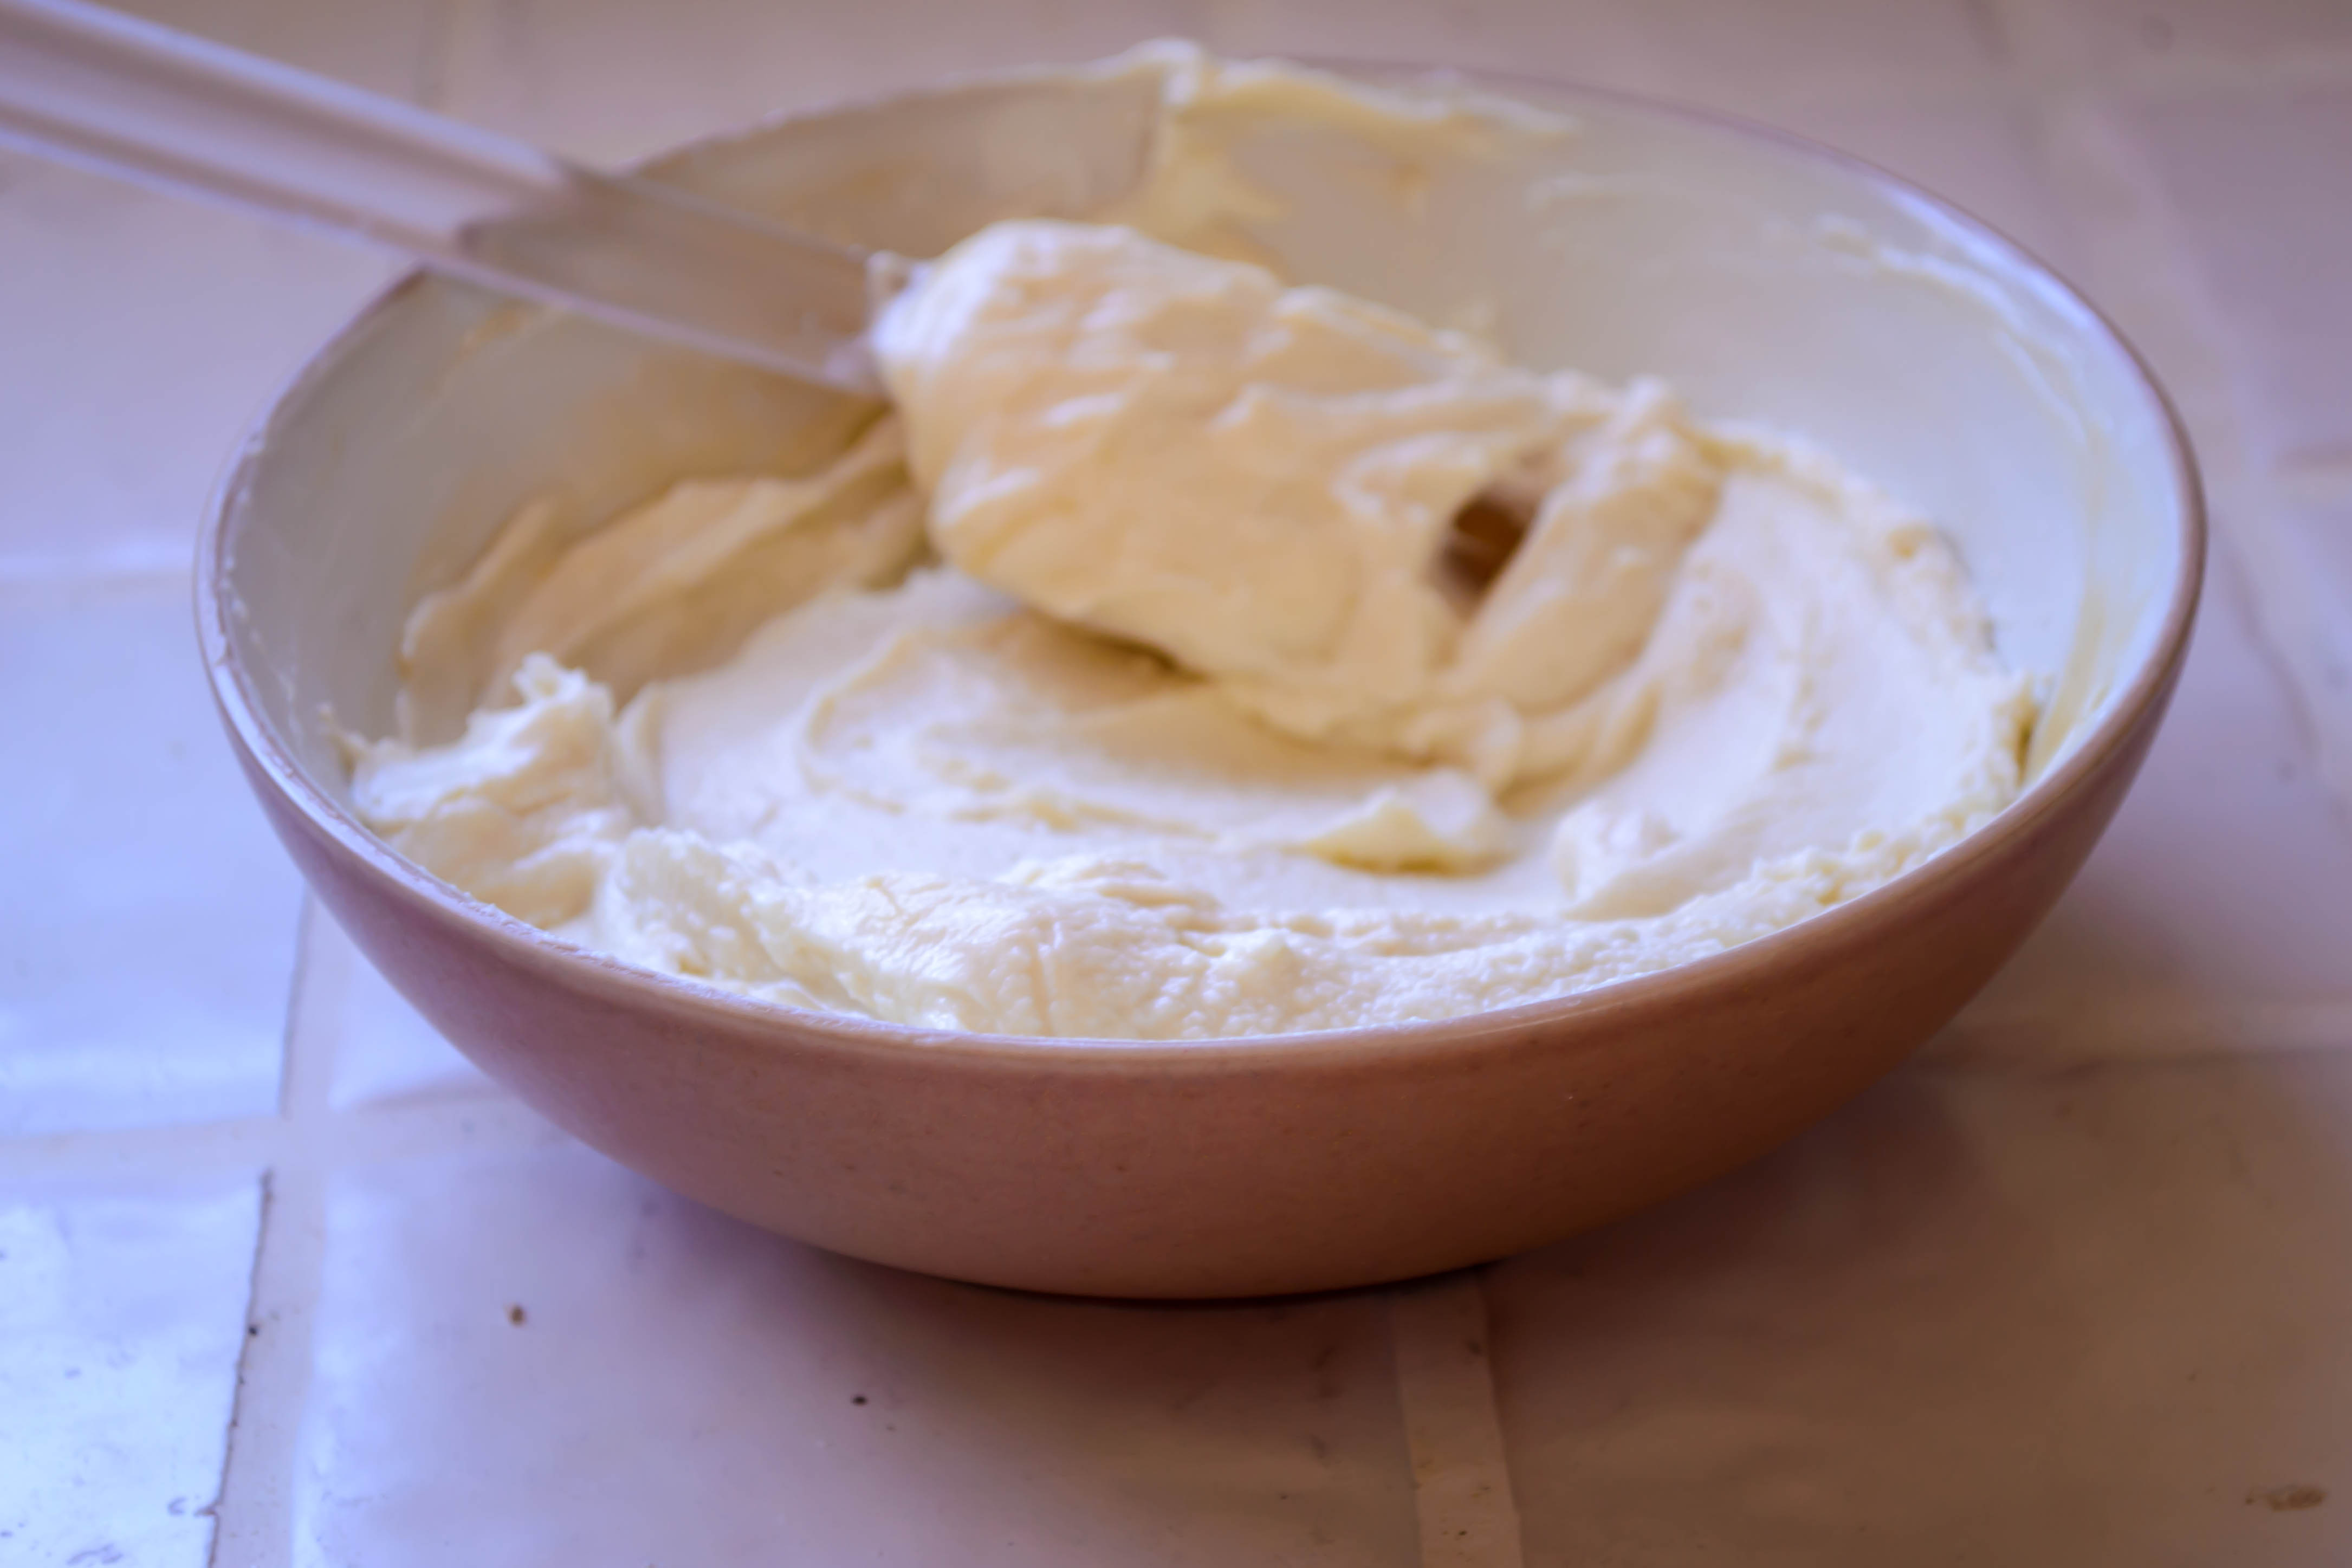
 The recipe I’m using here is a minor adaptation of Deb’s. I’ve added a few twists, incorporating garlic and sesame seeds in with the onion and poppyseed filling, sautéing the aromatics in butter rather than oil because I love the added richness, and combining a few tablespoons of vital wheat gluten with my bread flour to replace the high gluten flour I don’t have in my pantry. Plain bread flour will likely work as well, but the extra hit of gluten adds a chewiness I wouldn’t forgo.
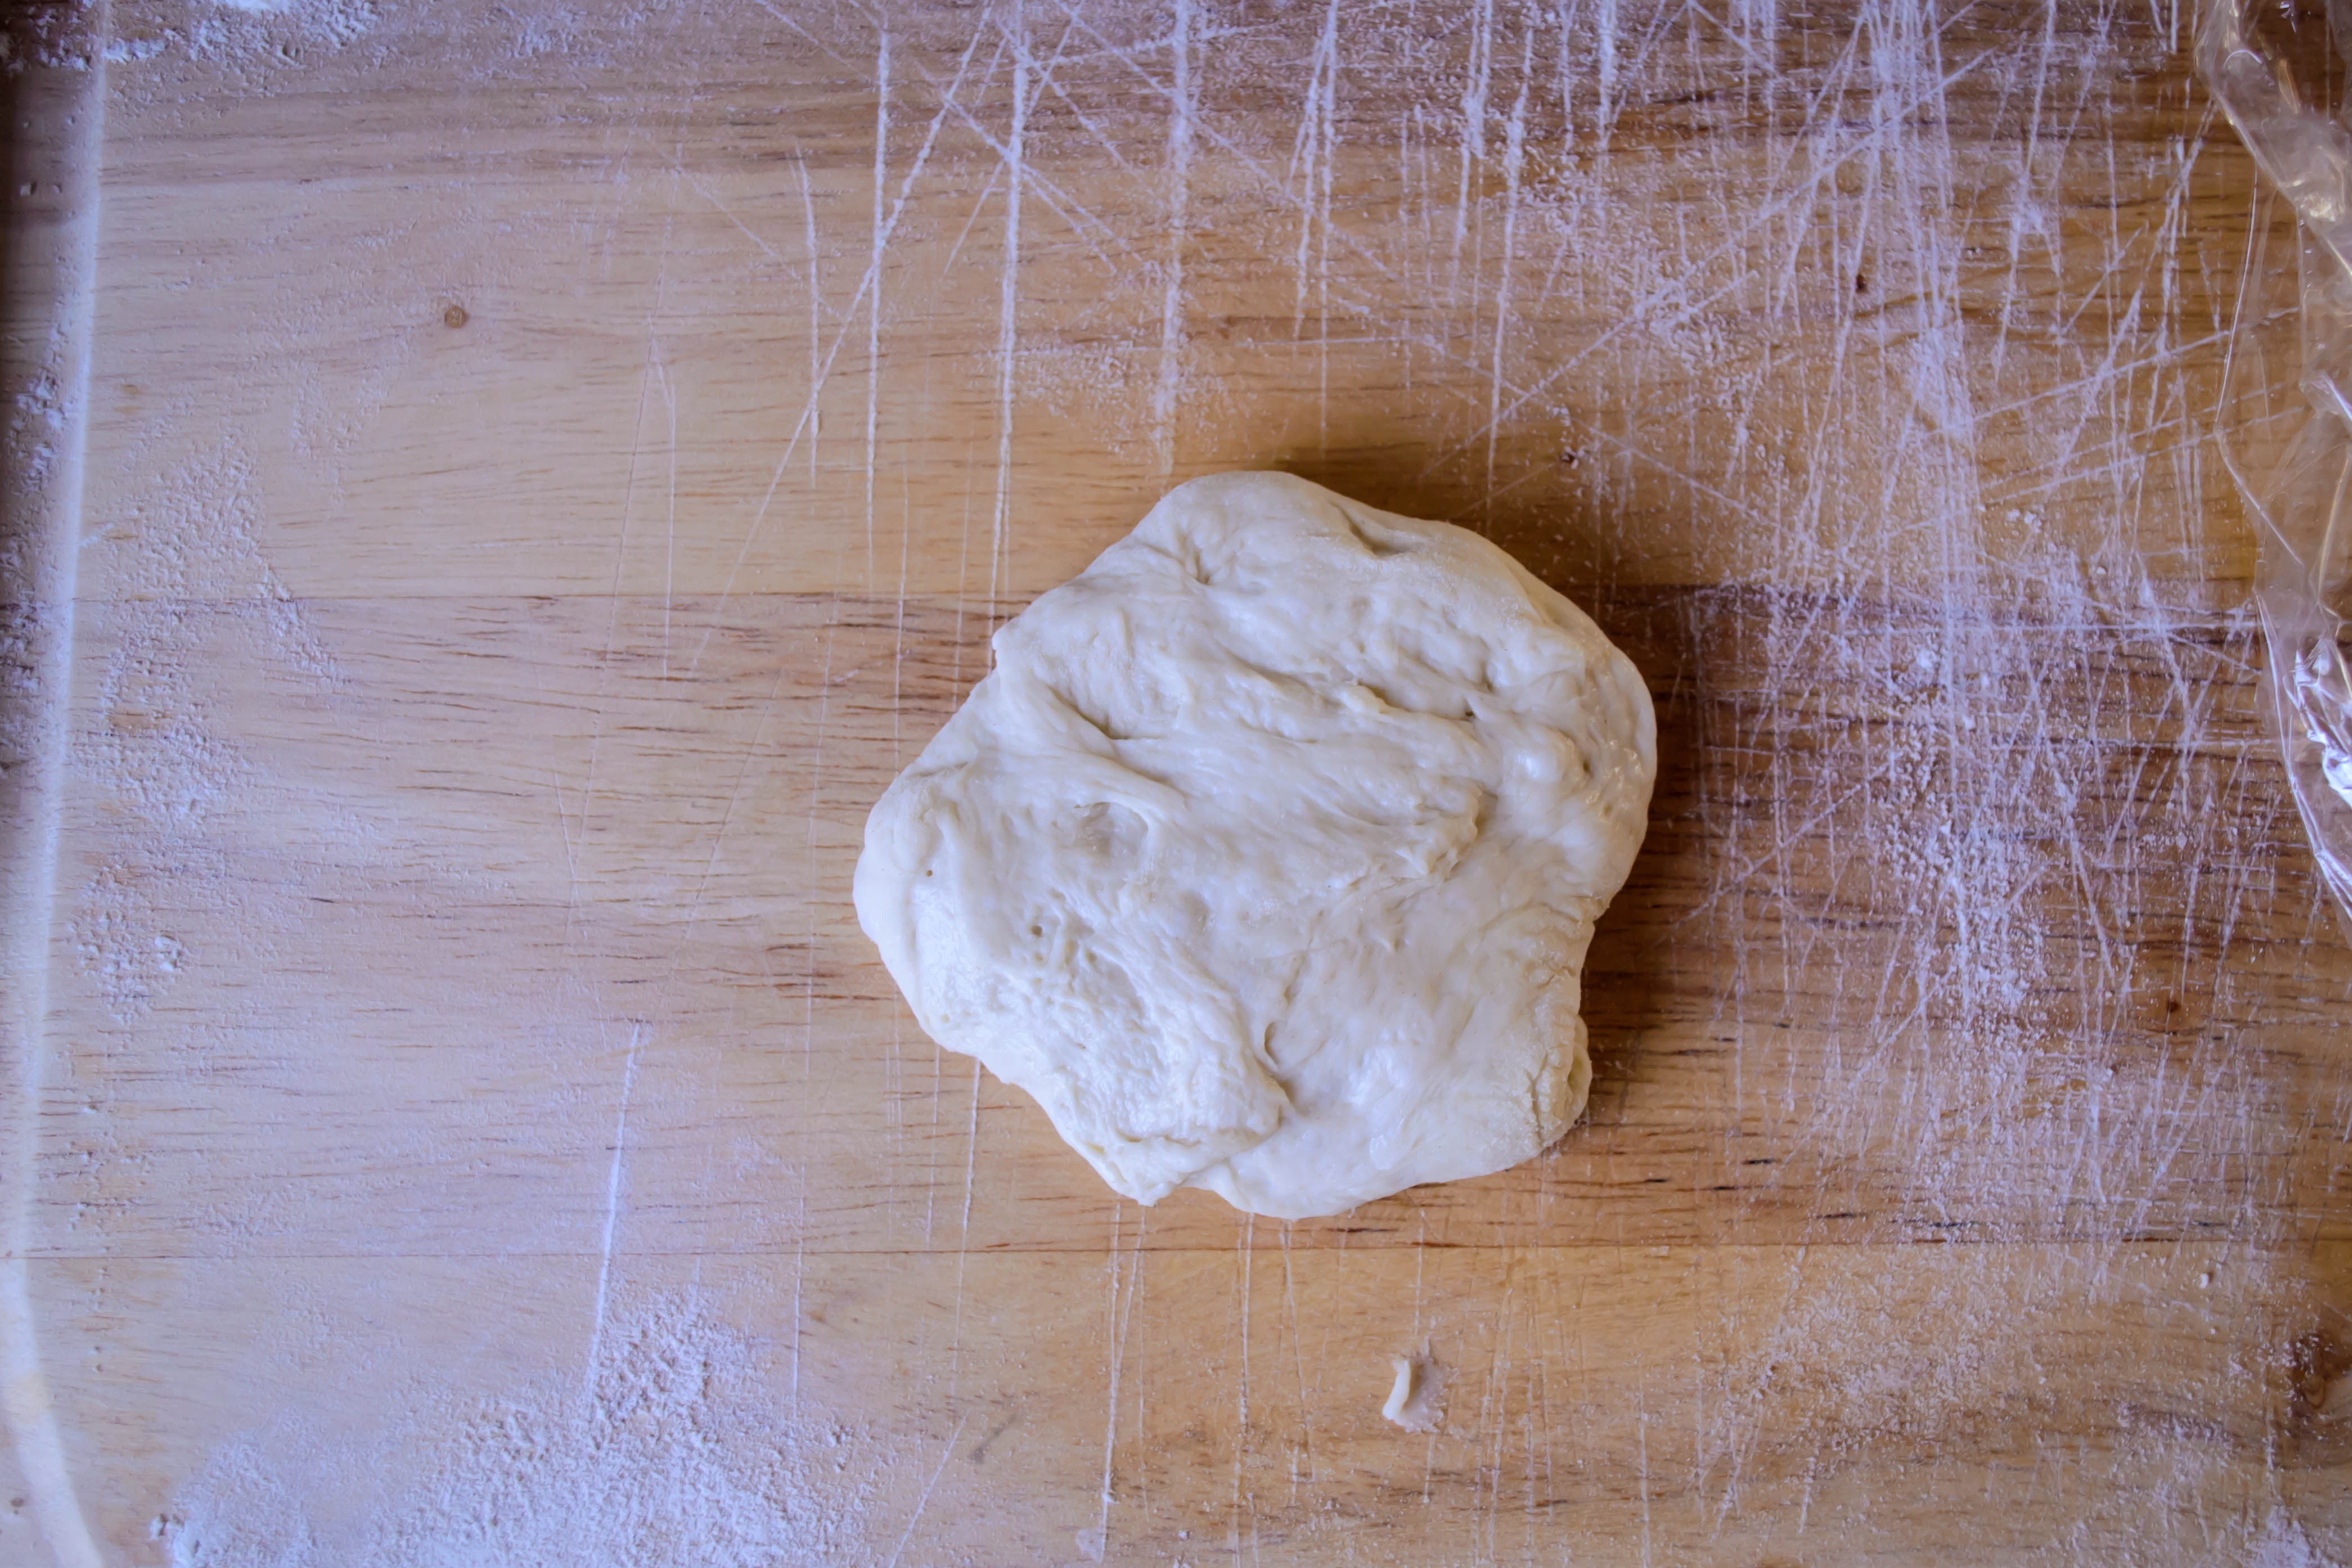
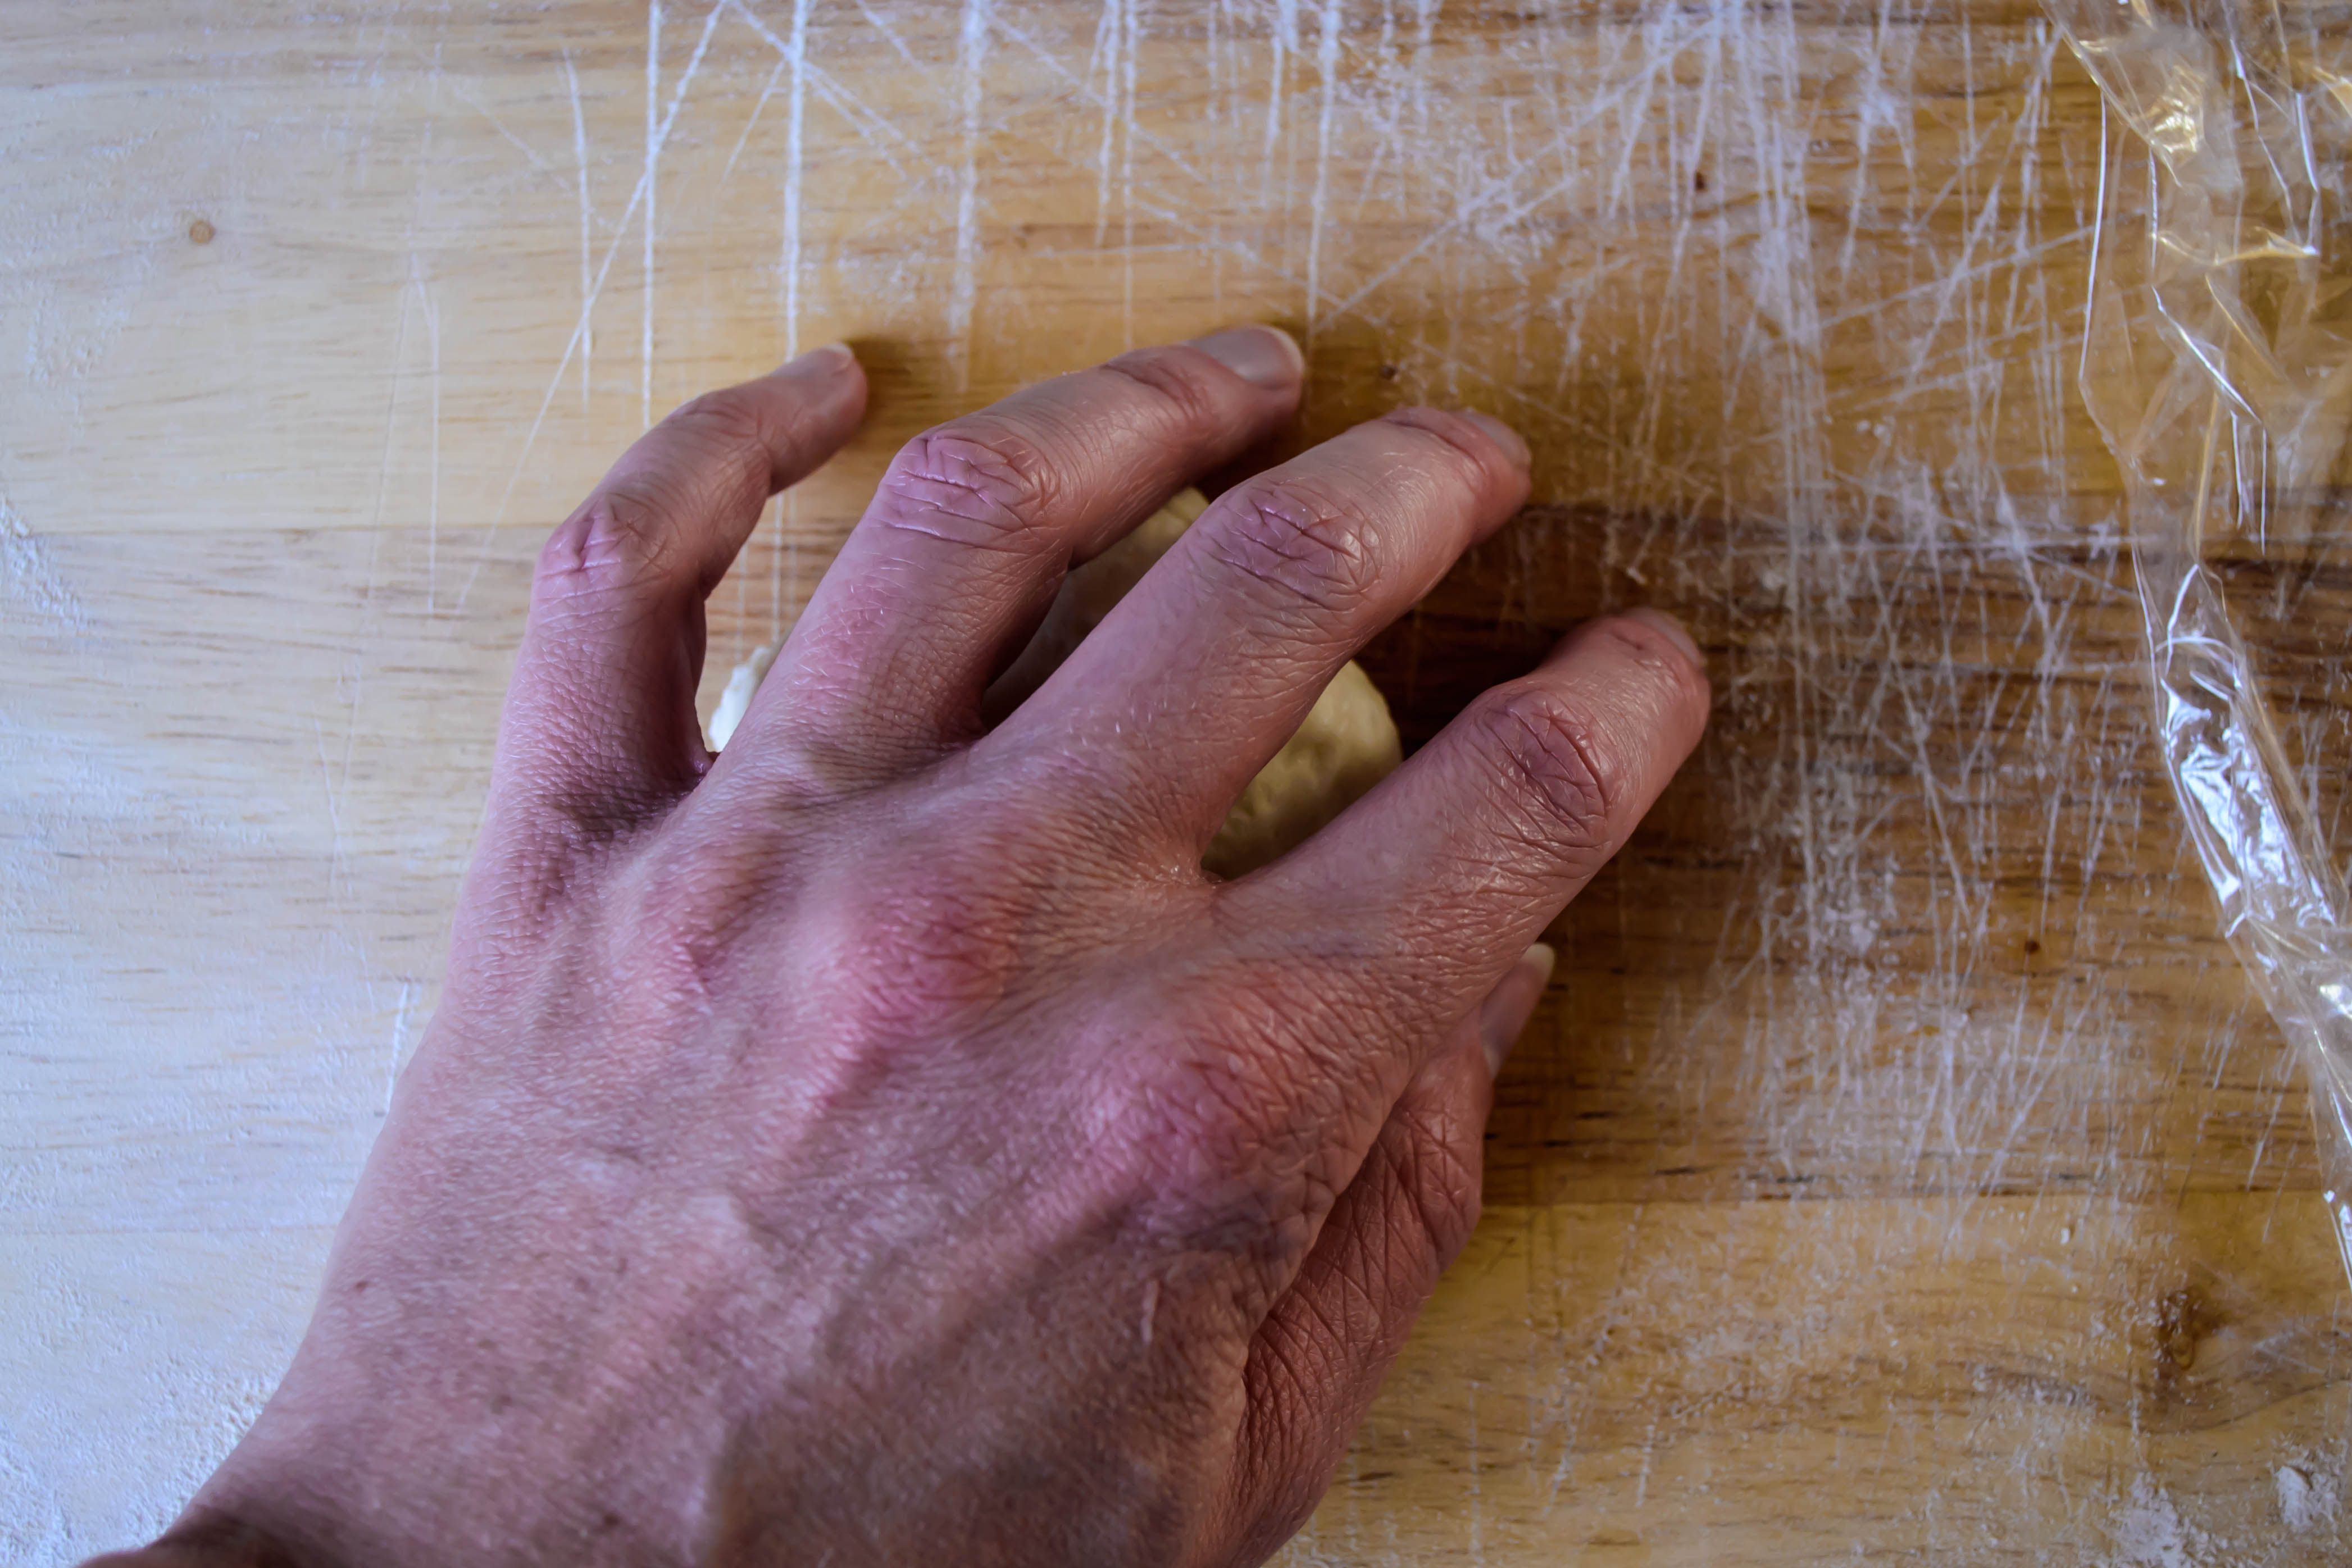
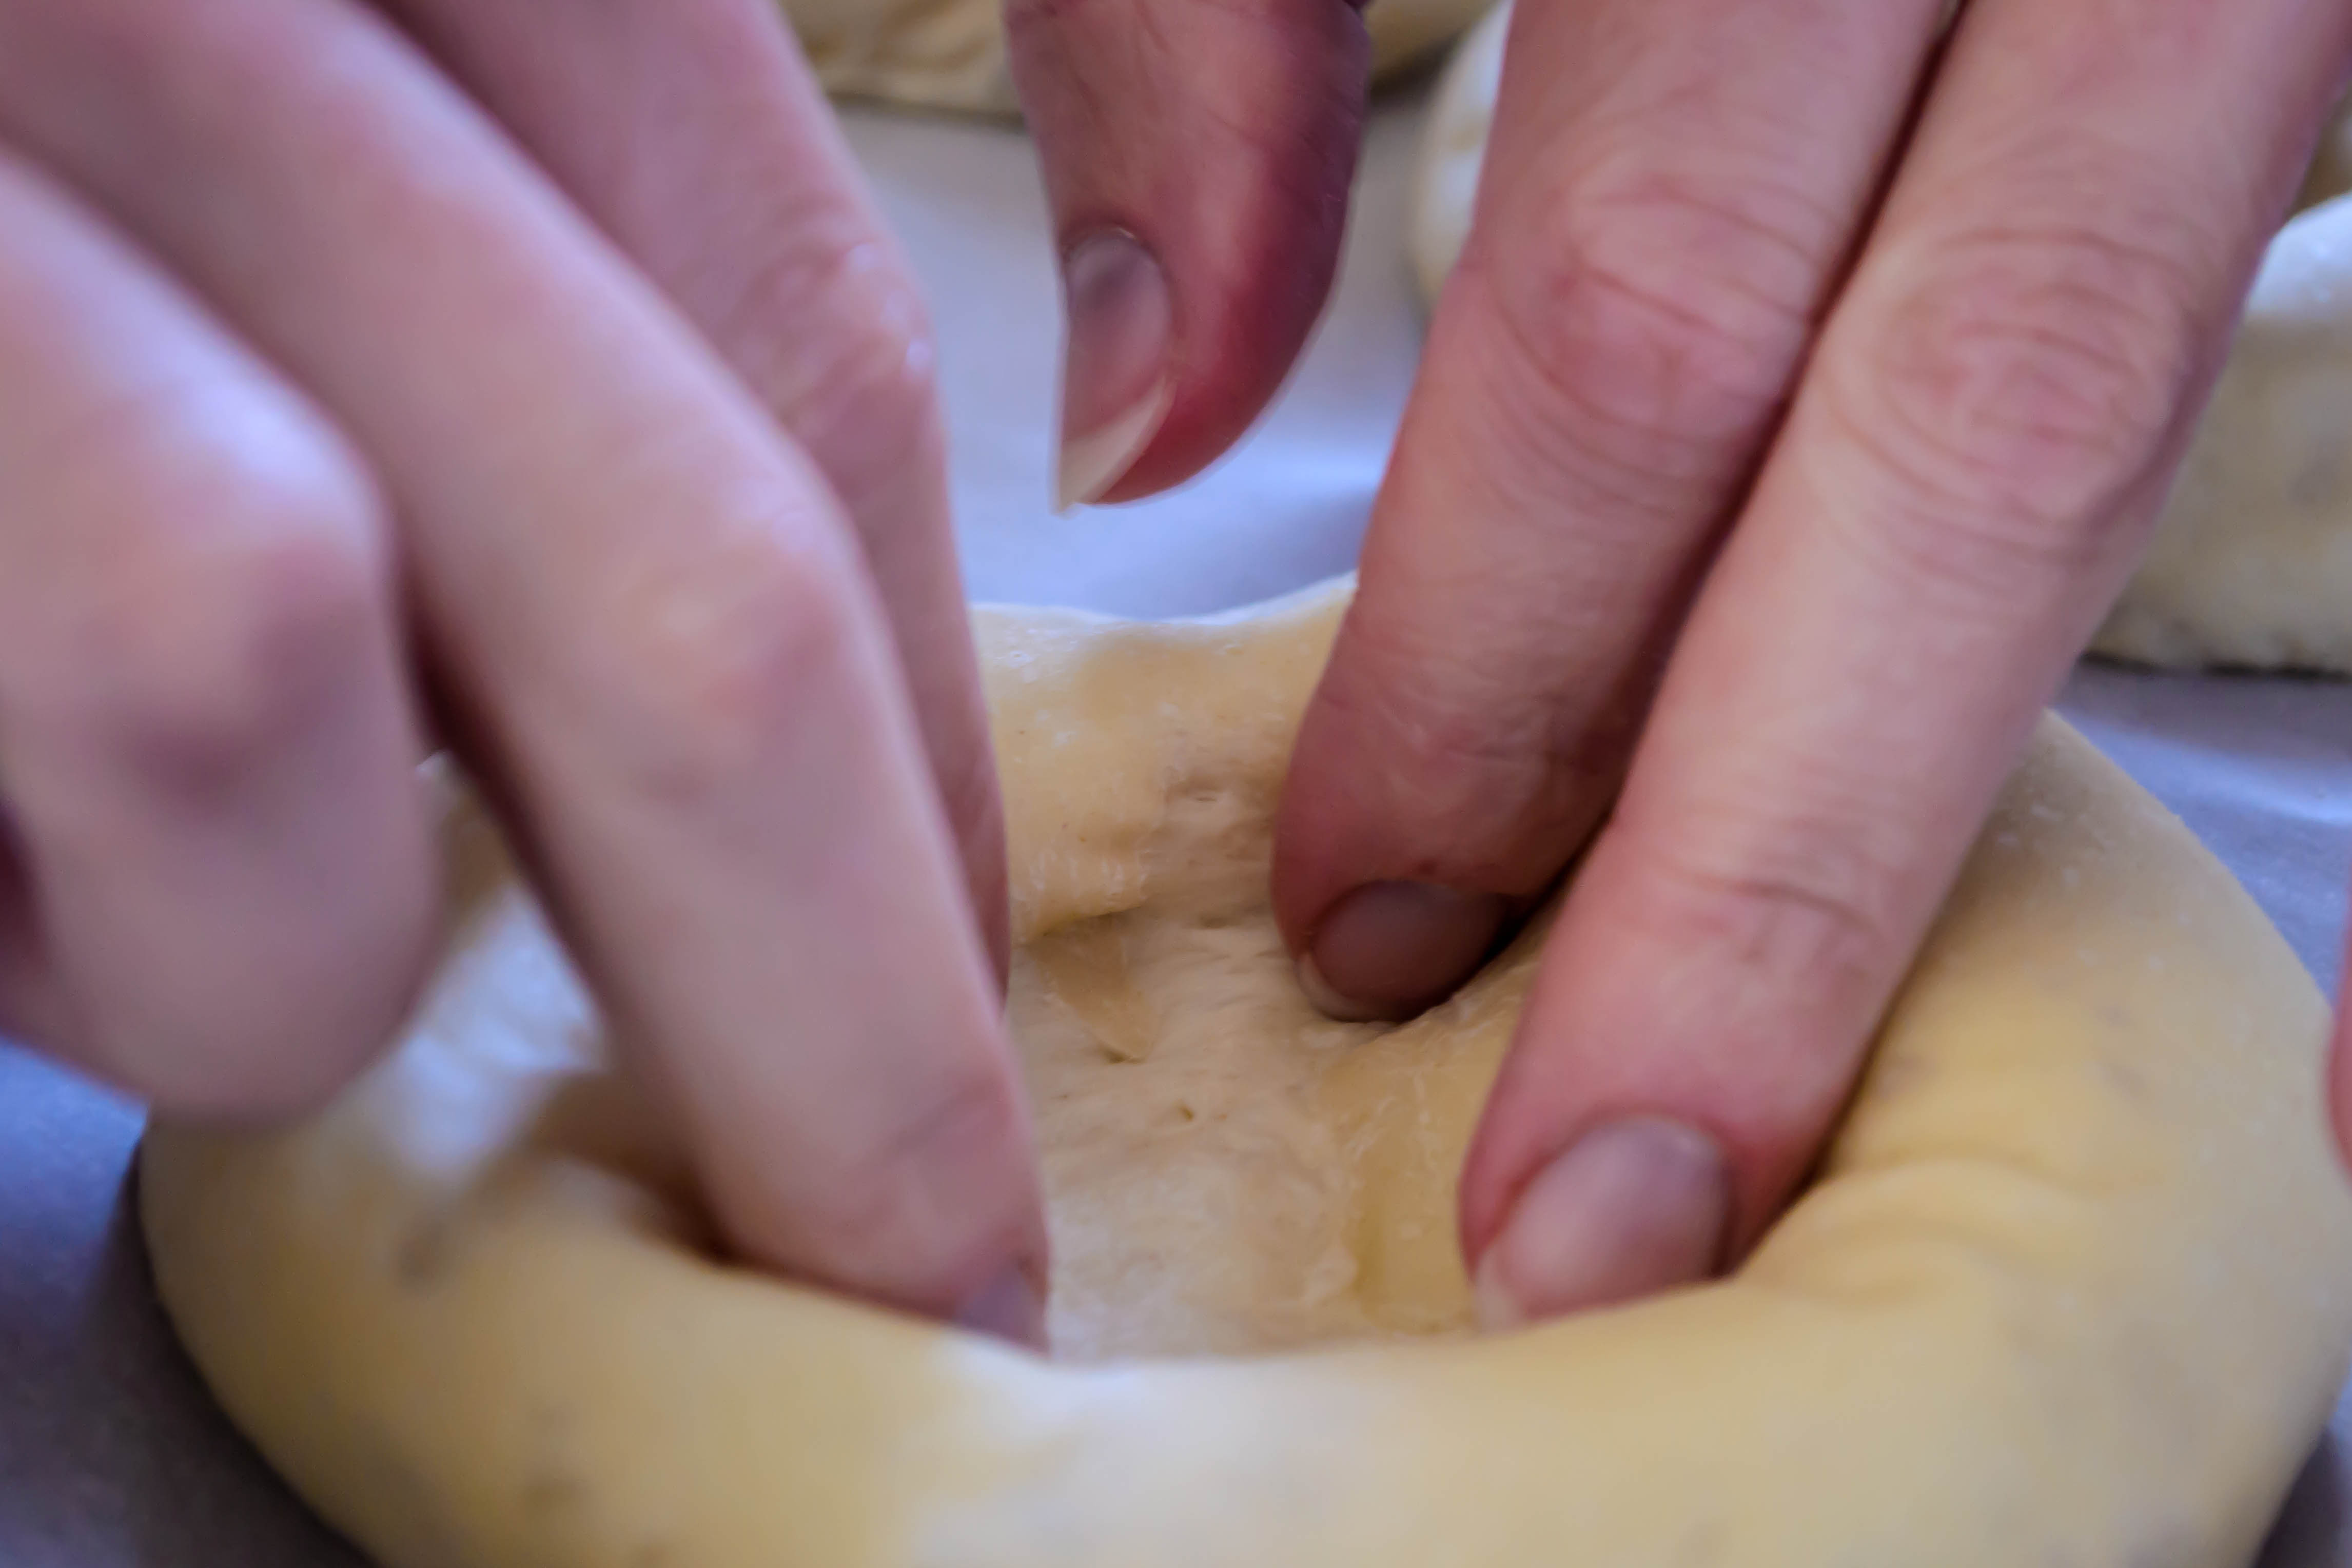
 I asked N. to take some photos for me while I rolled, pinched, and prodded the dough, so much of what follows is his work. Some of mine, though, include the rolling pictorials that follow. I’m using my own version of Joe Pastry’s technique, which I’m finding I like quite well. Rather than just slicing off hunks of dough and rolling them, I flatten out a piece, fold up and pinch the edges into a weird starfish, and then follow Joe’s suggestion of lightly rolling the dough in circles around the board inside my lightly curled hand. My system – in pictures – follows, but you can see Joe’s technique here.


Rosemary and black pepper sourdough, before and after…


Head above water. That pretty much describes where I’m at these days. I’m about a month out from completing my first year as a full-time faculty member at my college: my first real professorship! This means my desk is somewhere underneath a pile of research proposals from one class, reading responses from two more, and the weight of Edmund Spenser’s Faerie Queene providing a ballast (read: another thing I have to work through) in one corner. My world is scattered with attendance sheets, evaluation materials, paperclips, and an amazing image of the shield from Sir Gawain and the Green Knight that a student drew for me in February and I still haven’t gotten around to hanging on my wall.
 This means that every week when it comes time to sit down and write a post, I scramble. At least it’s getting lighter outside every night, which means the moment when I can photograph the intricacies of one of our dinners – perhaps even on a week night – is coming. But for now it usually means making and photographing something on a Saturday, editing the photos (I do a little fiddling with white balance and noise reduction) and cobbling together a few things to say about it on Sunday, and scheduling it to go live as usual Monday morning.
 It’s only a very few things, I find, that I have to say this time around. The Twelve Loaves challenge for April was oranges. Bake a bread, any bread, whether it be yeast, quick, muffins, biscuits, savory or sweet, and incorporate orange in some way. This one stumped me for a while until I read a post from my new blog obsession, Joe Pastry. Do you guys know Joe? He runs a delightful site in which he pulls inspiration for post topics from questions his readers ask, and along with some really interesting recipes, he explains the science behind baking.

 Recently, Joe posted a procedure and recipe for Pan di Ramerino, a Tuscan take on the hot cross bun that incorporates rosemary and raisins. It’s a not-quite-savory-not-quite-sweet bun as welcome in a breakfast basket as on the dinner table. Joe provides a bit more history about it, but I’ll let him tell you that if you’re interested.

 Remembering how much I like the combination of orange with rosemary from one of the first loaves I baked during my dough project, I decided to add a hefty scattering of orange zest to the dough, and replace the apricot glaze Joe advocates for an orange one instead to tie things together. Though I let mine rise a little too long (the room was quite warm and I was distracted by lesson planning) and thus the final product was a bit less puffy than I’d hoped, we scarfed our way through the first bun, and then bun-and-a-half, and then two, in little time. They are a soft, moist offering, not as eggy as challah but reminiscent of it in the sticky elasticity of the dough, with an intriguing herbal note that keeps them from turning resolutely into dessert.

 The recipe to follow is adapted very slightly from Joe’s. I ended up with eleven buns, but that was just carelessness and poor counting on my part (thankfully I’m not a math professor…); you will easily be able to make twelve. Easter is over now, I know (head above water, people), but these are a lovely expression of spring for your kitchen, and would make really nice offerings for a bridal or a baby shower. Or, you know, roast a chicken stuffed with a sprig of rosemary and half an orange, and serve these up on the side.

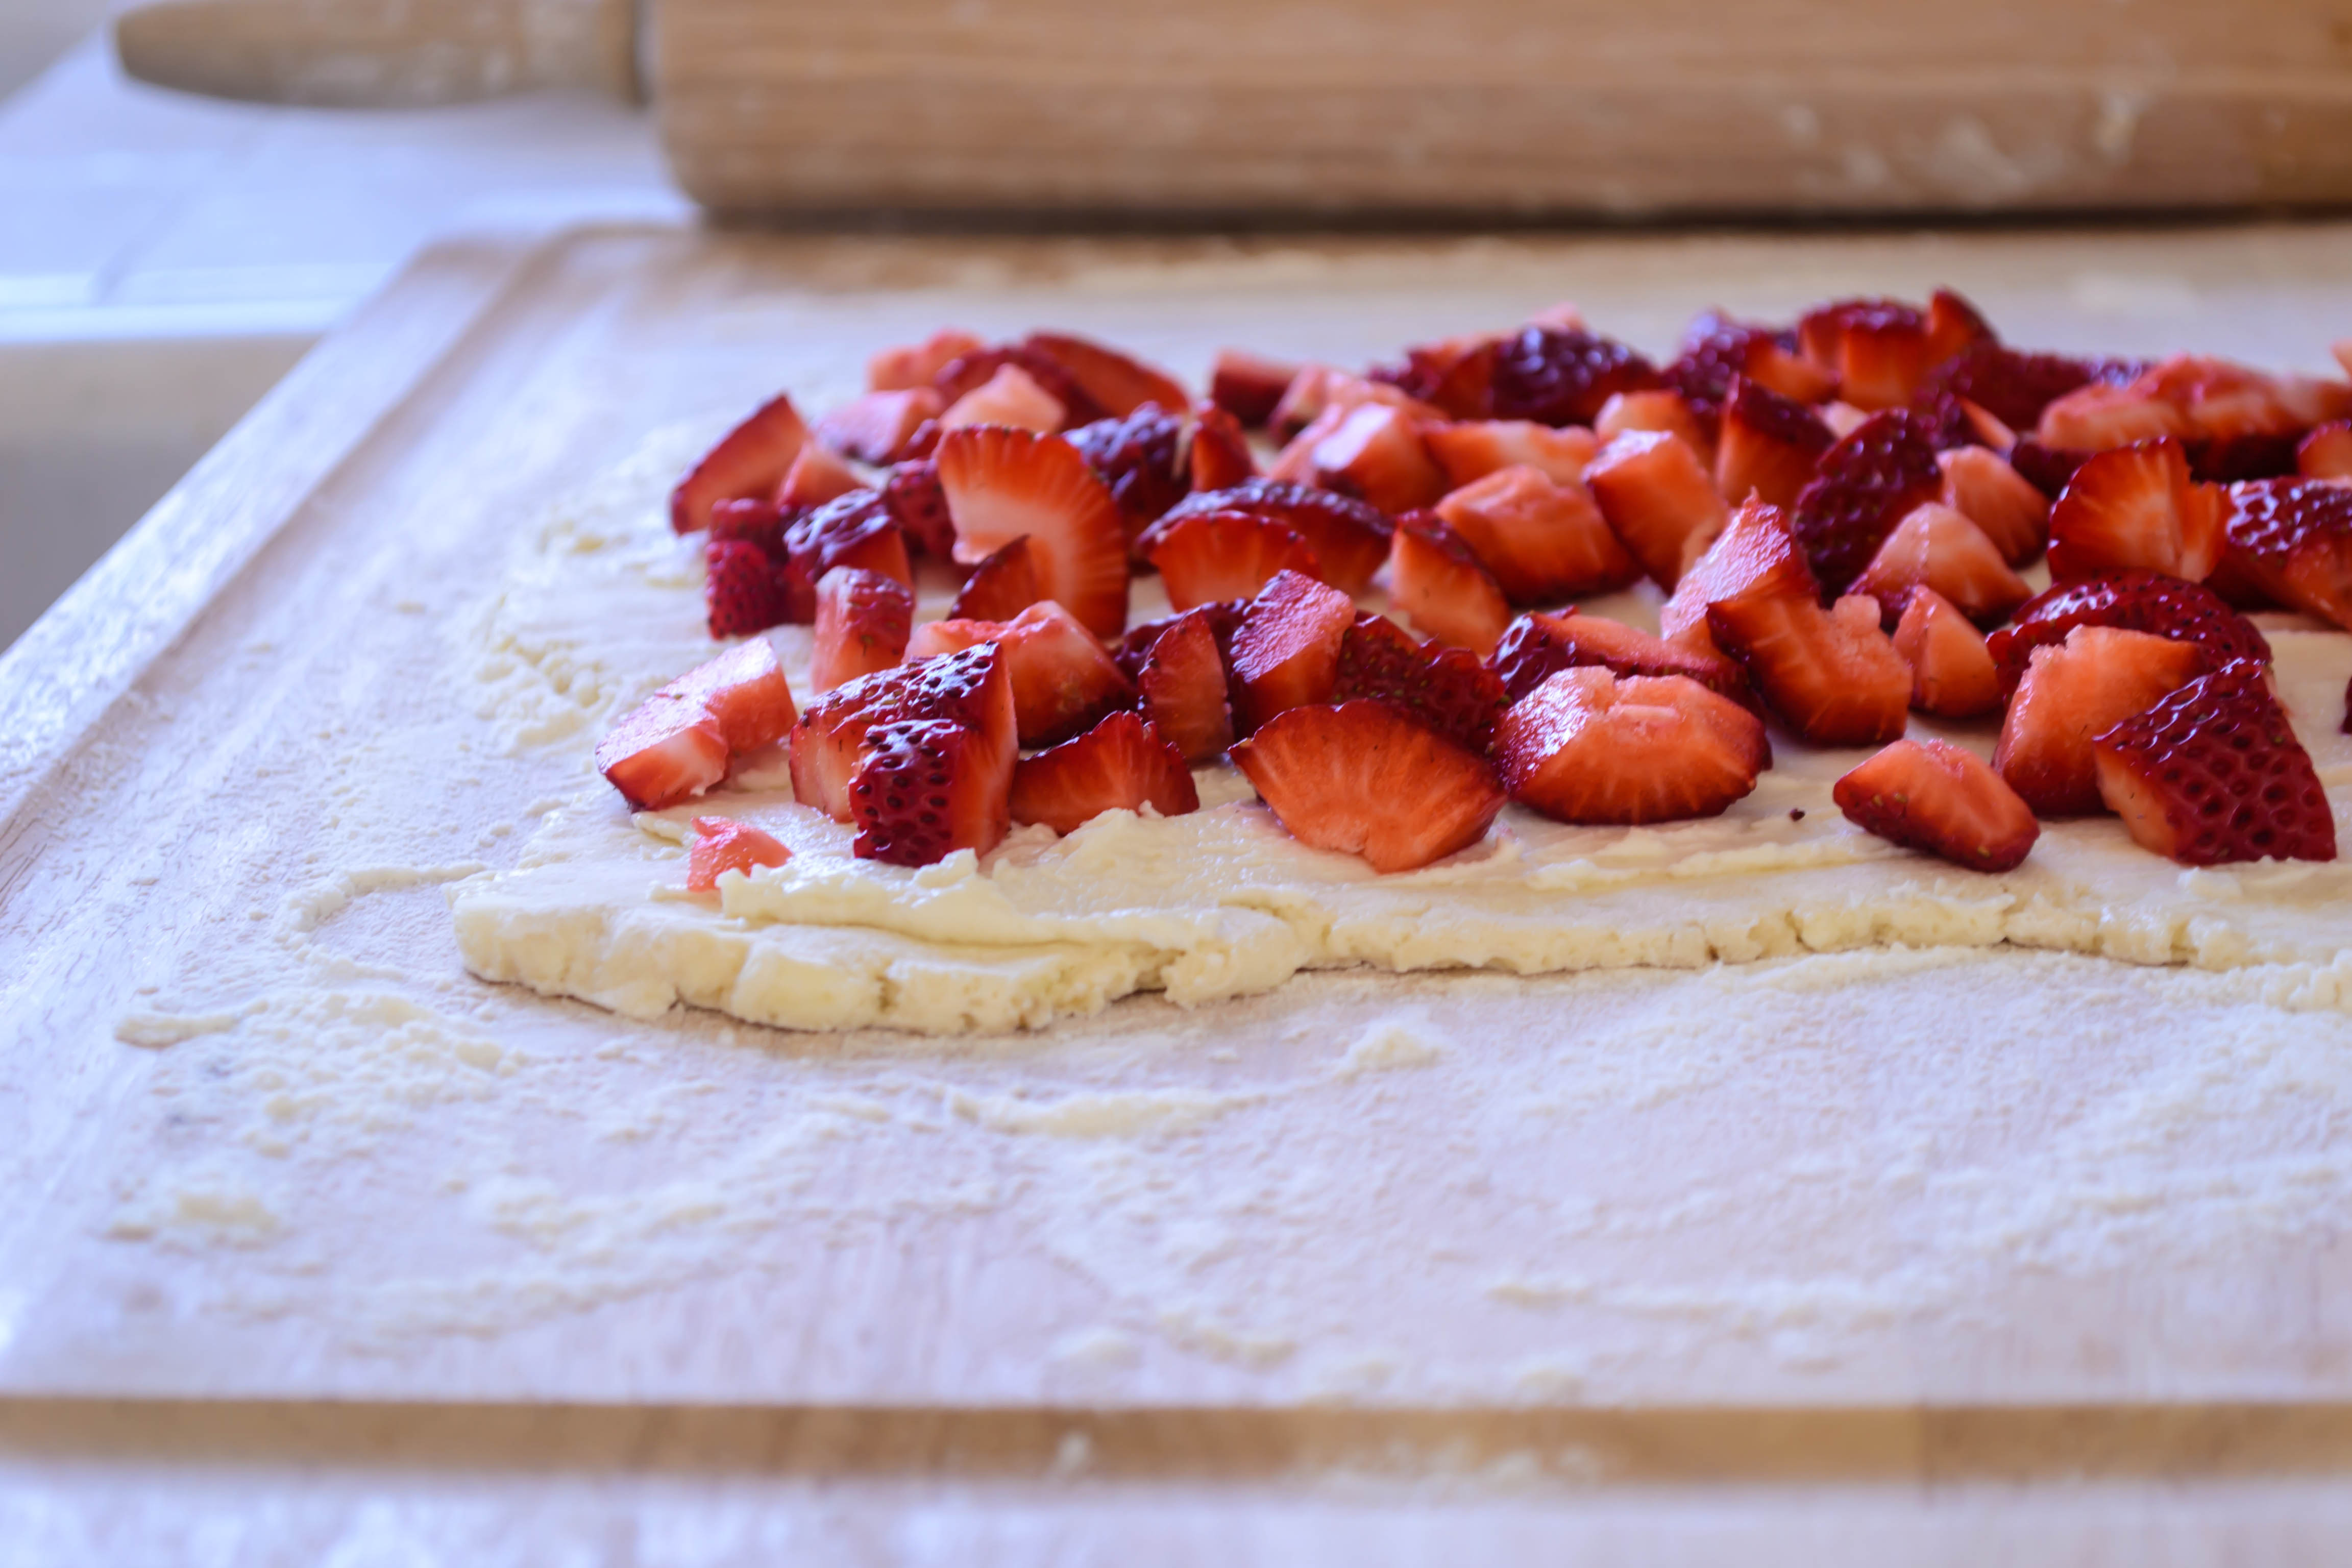
I’m now feeling secure enough about myself, almost a month later, to share a few shots from my strawberries-and-goat-cheese biscuit disaster… They were pretty, and I love how ethereal the kitchen lighting is, but they were just so. damn. flat. Lesson learned. Jamming a full pint of strawberries into an innocent batch of dough does not fluffy biscuits make.


A fabled land of farmers, farm shares, fancy (and not so fancy) restaurants, family meals, food projects and more.
cooking my way through my dissertation, one egg at a time
Fearless cooking from a tiny NYC kitchen.
food, in so many words.
Recreating the famous dishes of famous writers. Part recipe blog, part historical discussion, entirely unabashed love of books.
Epicurean Adventures from Eugene, Oregon
Celebrating the Harvest
Modern Iranian aka Persian Food & Culture Blog - Cuisine, Recipes, Stories , Photos, Pictures, DIY tutorials
Exploring Culinary Traditions of Africa, African America and the African Diaspora
food, in so many words.
food, in so many words.
food, in so many words.
Food-Stories-Recipes-Love
WordPress.com is the best place for your personal blog or business site.
